

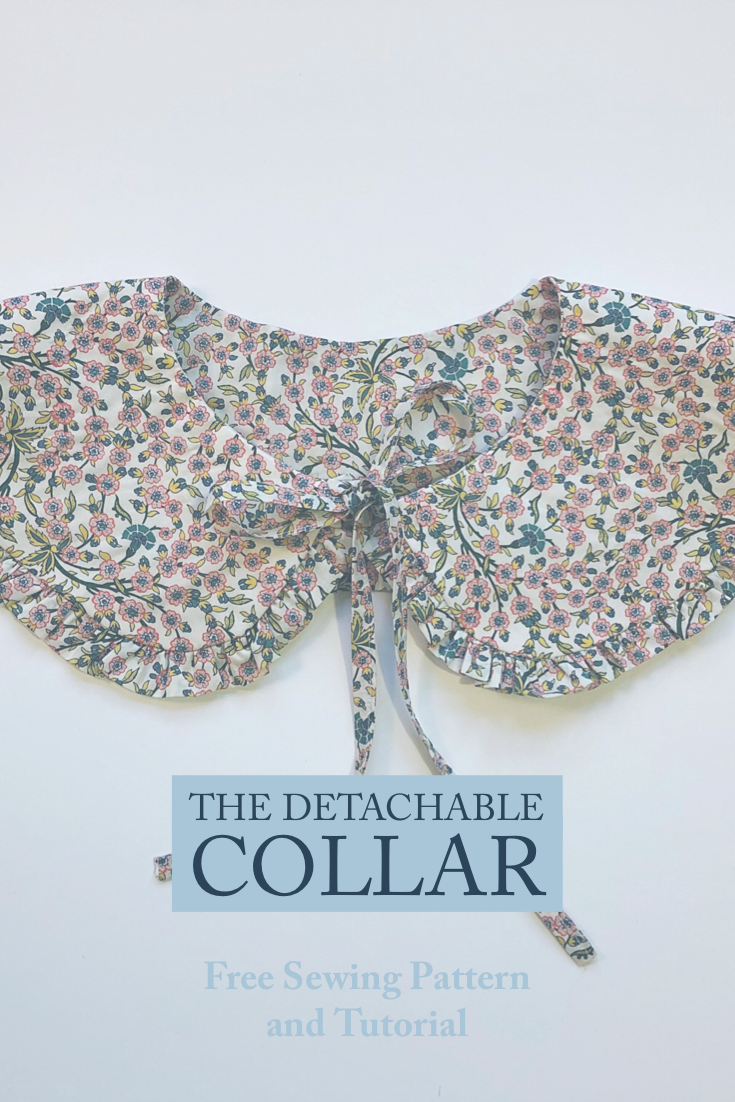
The Detachable Statement Collar Free Sewing Pattern and Tutorial
Statement collars are everywhere right now- and with good reason. They can be easily tied on over tees, coats, sweaters and even dresses for an instant outfit upgrade. The collars are really easy to make and to give as gifts too!
Detachable Statement Collar Free PDF Sewing Pattern and Tutorial
Statement collars are everywhere right now- and with good reason. They can be easily tied on over tees, coats, sweaters and even dresses for an instant outfit upgrade. The collars are really easy to make and to give as gifts too!
From pristine white collars with lace trim to knitted capelets and quilted denim, there are collars for every occasion and outfit. Beaded collars, fur collars, collars with plumes, collars with lace, collars with piping, and tiers of ruffles. For someone who loves fashion and sewing, these collars offer a sewist a chance to pull out all of the stops and finally try an embellishing technique that perhaps has seemed too daunting for a larger project.
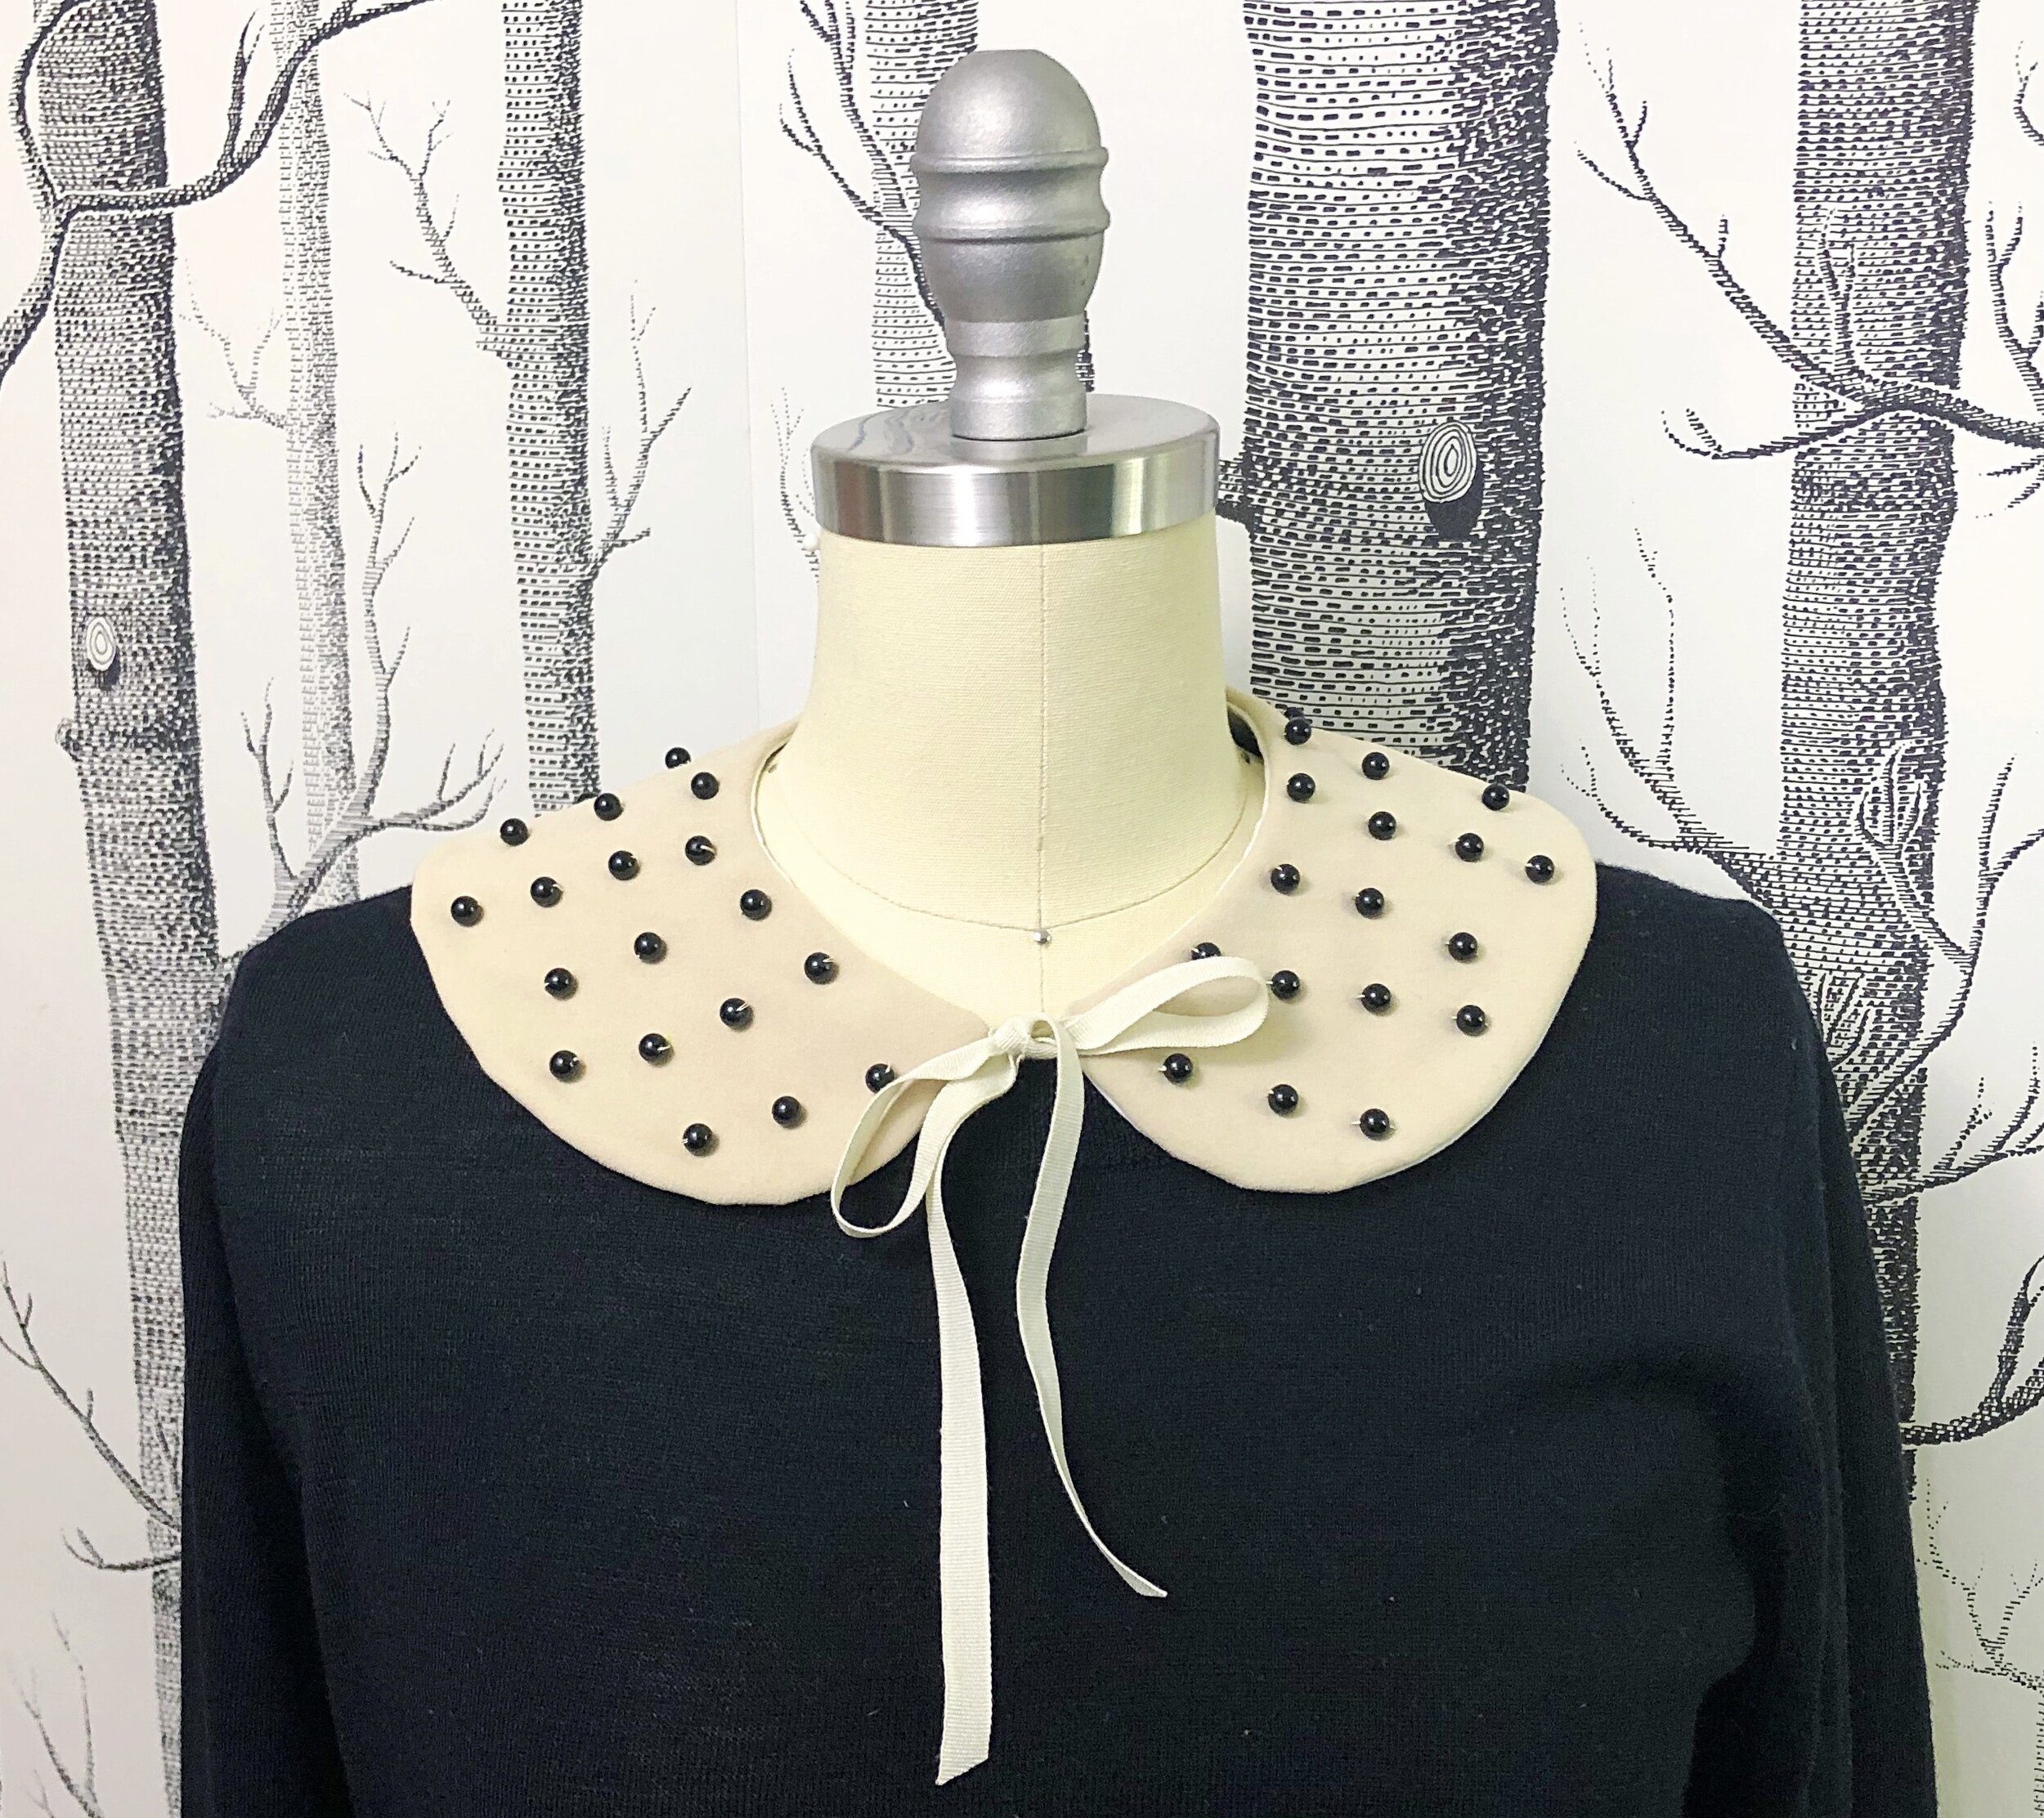
Detachable statement collars are really easy to make- the hard part is choosing a style as there are so many new and fun options. Mini, maxi, round and pointed. Lace, ruffles, trimmed and beaded- the variations are endless. I thought you might enjoy learning all about collars in general and how to make and customize them. To that end, I have designed a group of patterns that I will share with you over the coming lessons. To that end, you can think of this as a sort of mini-course in collars.
The pattern is available for download here and also at weallsew where you will find the step by step tutorial. I can’t wait to see what you make!
New to using PDF sewing patterns? Check out this link for tips on assembly.
Head over to weallsew to download and get the tutorial.
Happy Sewing!
XOXO, Hilarie

Felt Lovebirds Pattern and Tutorial
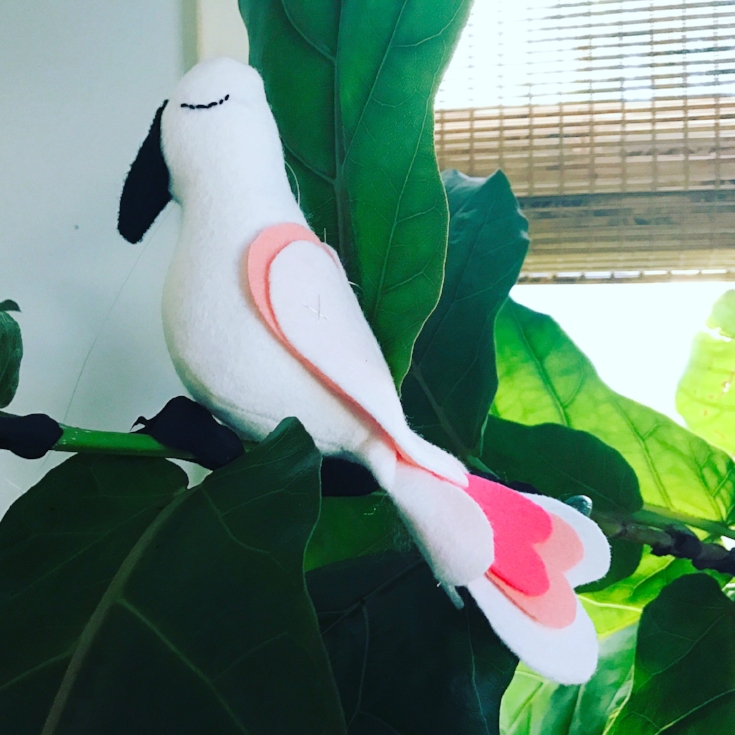
Make these pretty felt love birds for Valentine's Day. With these sweet love birds you can show the one you love how much you care.

Make these pretty felt love birds for Valentine's Day. With these sweet love birds you can show the one you love how much you care.
MATERIALS FOR LOVEBIRD
White Felt
Pink Felt in two shades for feathers and wings
Small piece of Black Felt for beak
Handsewing needle
Thread
Black embroidery floss
Metallic thread (optional)
Poly-fil
A free Lovebird Template, printed and cut out (This pattern has a 1"/ 4CM test square. Measure the test square, and if it does not measure correctly, check your print scaling options.)

SIZE
8 1/2"x 4 1/2"
MAKE THE LOVEBIRD
CUT
Using the Lovebird Template, cut 2 bird body pieces, 1 gusset, and 1 wing out of white felt. Cut the beak out of black felt and tail feathers from each of the pink. Cut one more set of wings from pink.
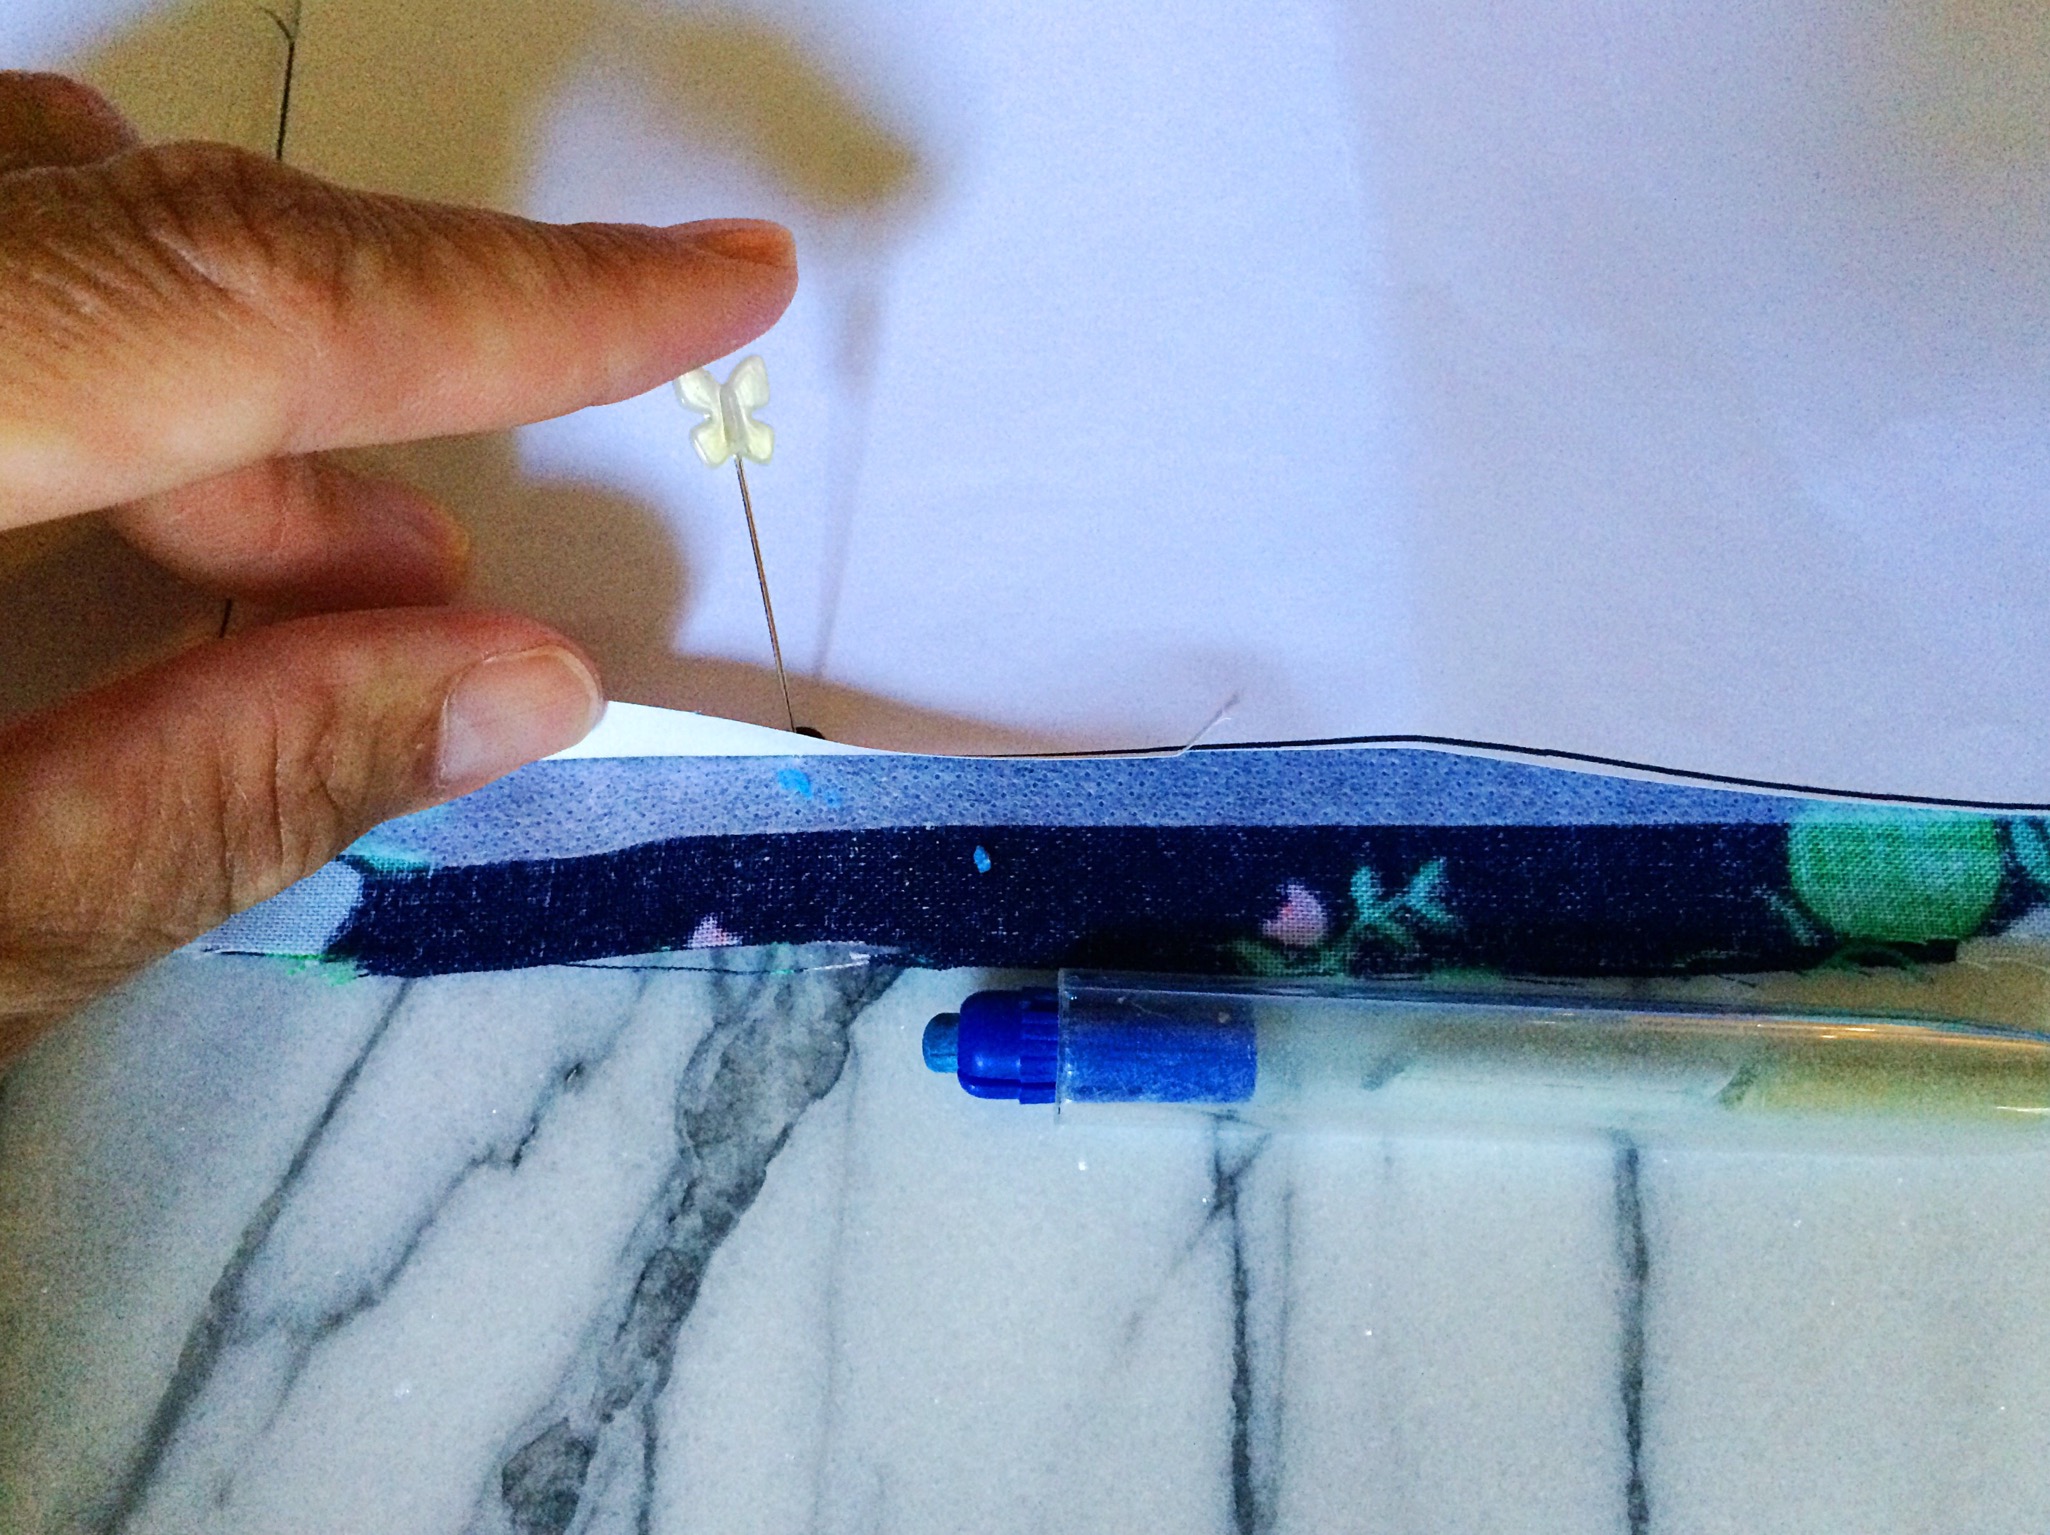
MARK
Using a water-soluble marking pen, Begin marking the fabric with the pattern piece still pinned to it. When you mark a pattern, you always want to begin at the pattern pieces outside edges and work toward the center. Easy, right? Let’s do it! Using a straight pin, pierce the pattern piece and fabric right through the center of the first dot. Carefully lift the pattern paper (while still holding the pinned fabric in place) and mark the fabric with the pen. Repeat on the underside of the next piece of felt so that the sides are mirror images of each other.

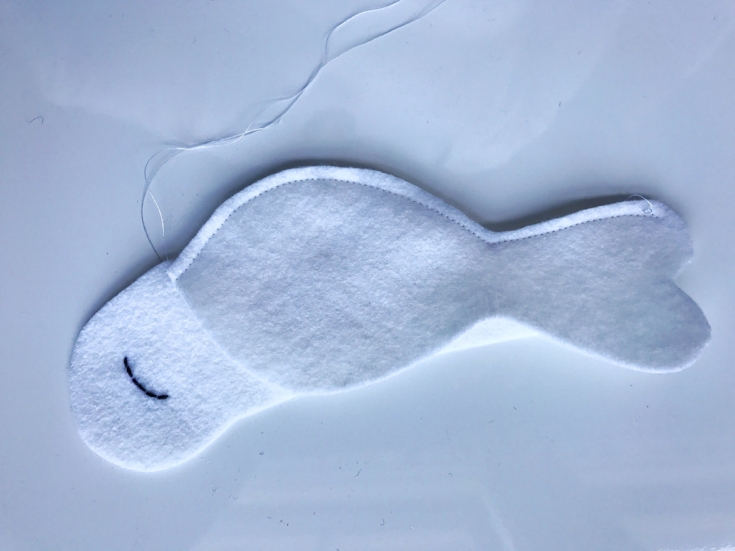
STITCH THE EYES
To sew the eyes, we are going to use a basic running stitch. It's beautiful in its simplicity, utility and function. Vary it with size and color and it adds such vitality and expression your projects.
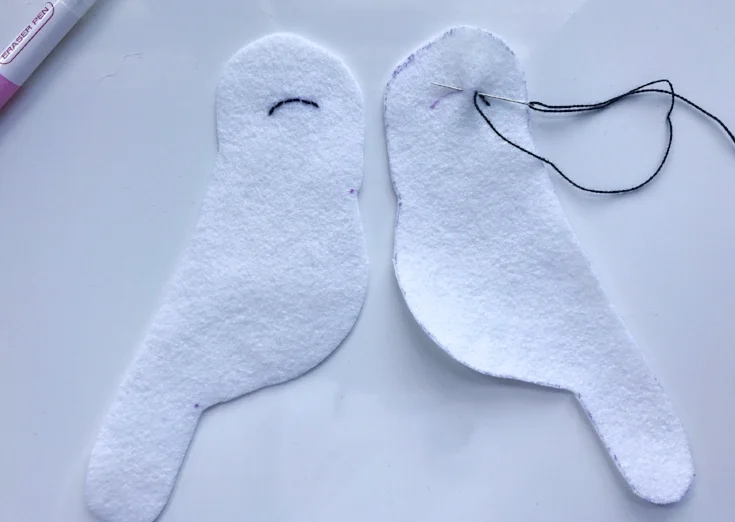
The pieces should be marked as to be mirror images.
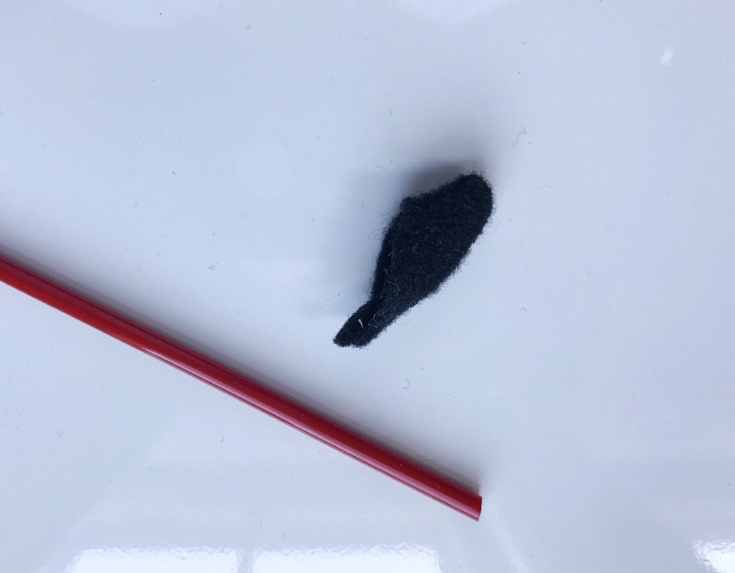
BEAK
Fold the beak along the center line and stitch along the long side using a 1/8" seam.

Turn right side out. It helps to use a tool to push the tiny end through. A chopstick or eraser end of a pencil work well for this.
MAKE THE LOVEBIRD
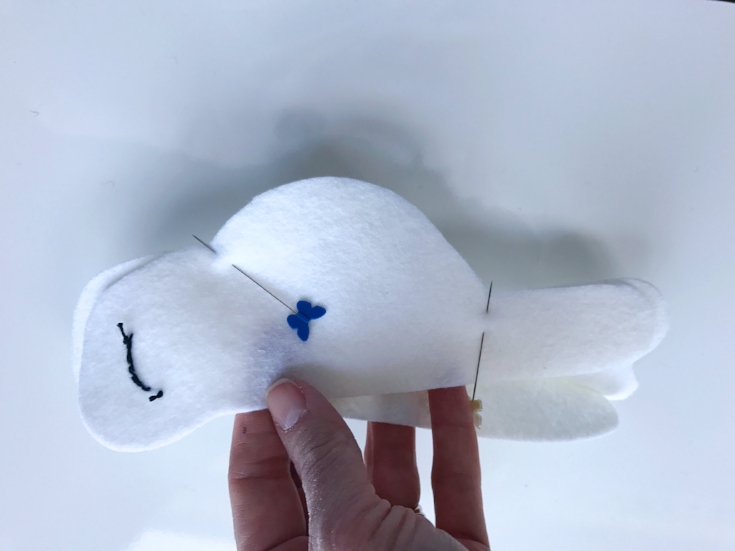
Take a bird body piece and the gusset, place them with the Right Sides Facing Together and match the markings. Pin and stitch around the outside edges of one side from tip to tail, using a 1/4" seam allowance.
Pin the other bird body to the opposite side of the gusset and stitch.
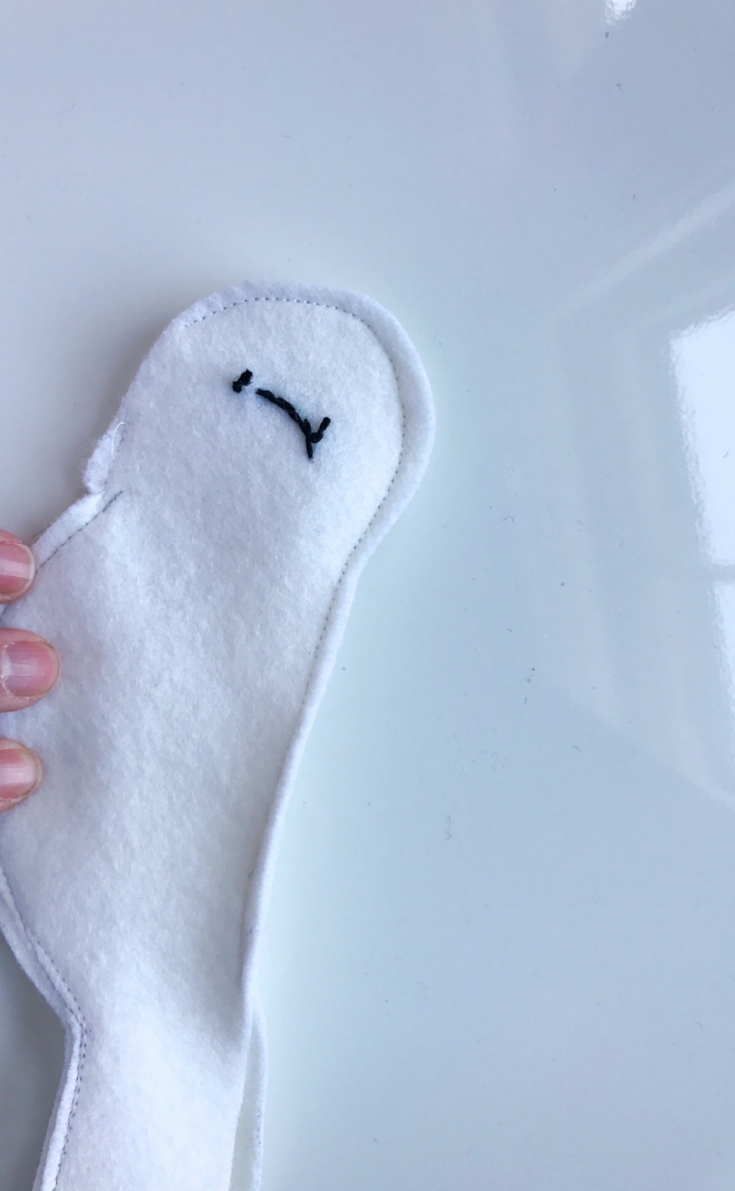
Pin and sew the bird body together at the center back seam beginning at the dot level to the eye around the head and to the top of the tail. Leave the area where the beak will be attached open.
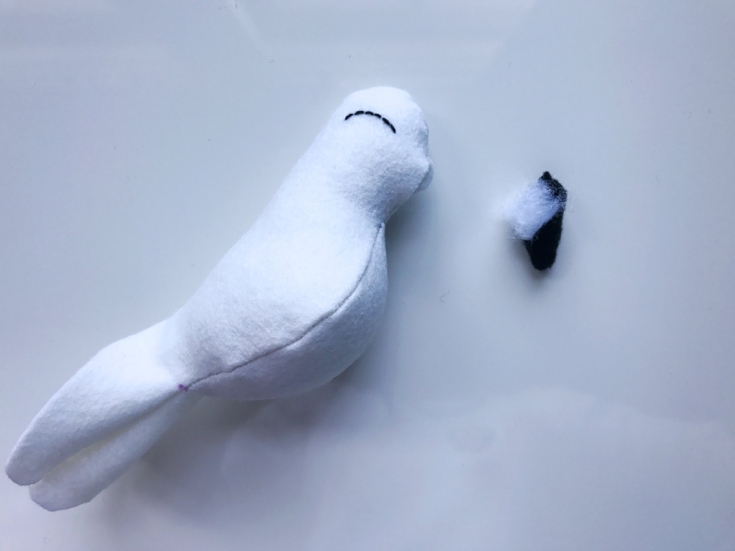
TURN AND STUFF
Turn the bird body right side out and stuff nice and firm with polyfil.
ATTACH THE BEAK
Add a tiny bit of stuffing to the beak. Pin the beak to the bird and whipstitch around the beak to attach it to the bird body.

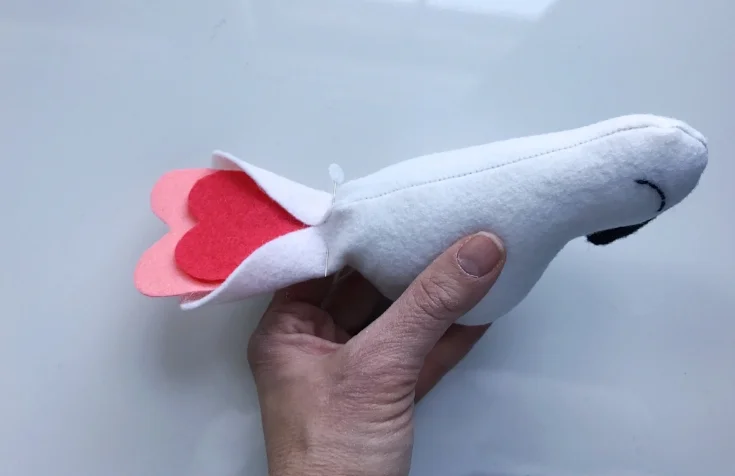
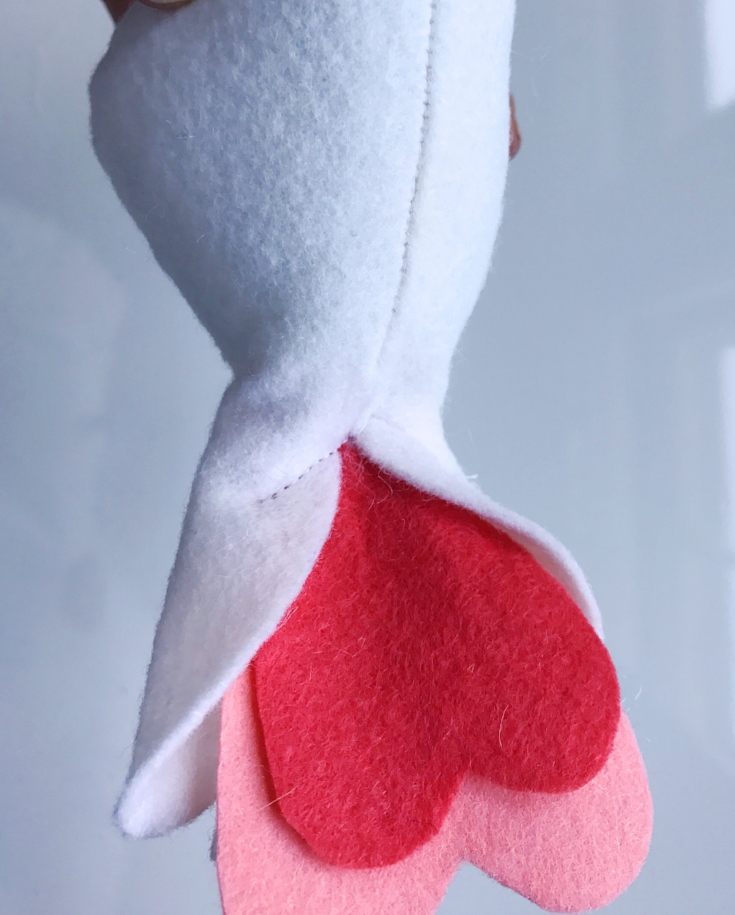
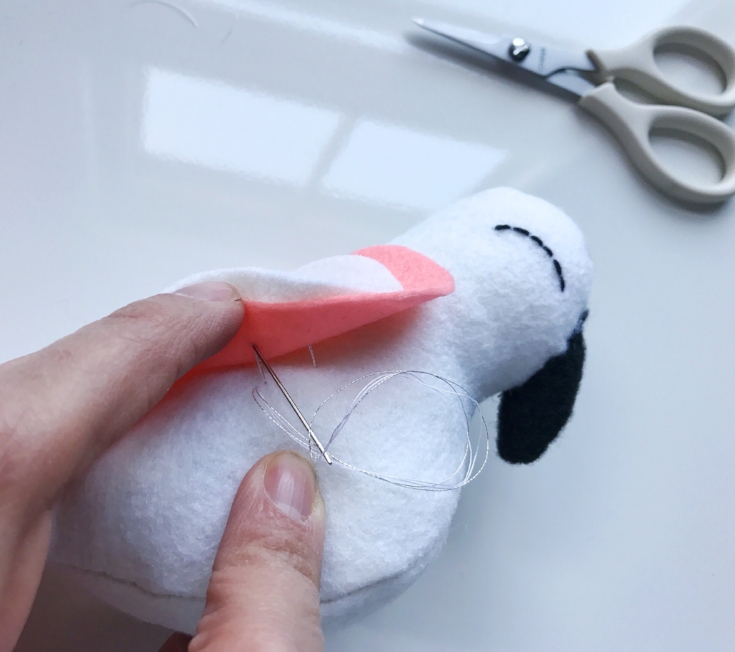
TAILFEATHERS
Insert the tail feathers into the body of the bird. I shifted the layers of feathers a bit to create some visual interest. Pin in place and stitch in an inverted V shape to secure.
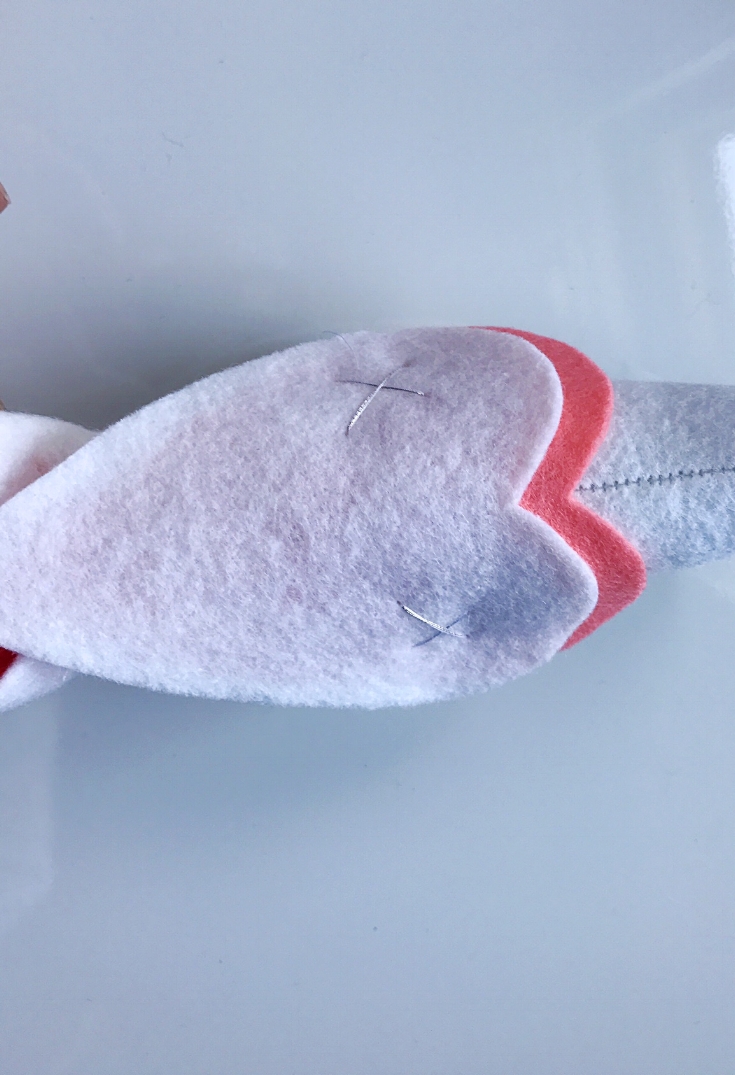
WINGS
Arrange the wings and pin to the bird. Again, I shifted the placement of the wings to overlap just a bit.
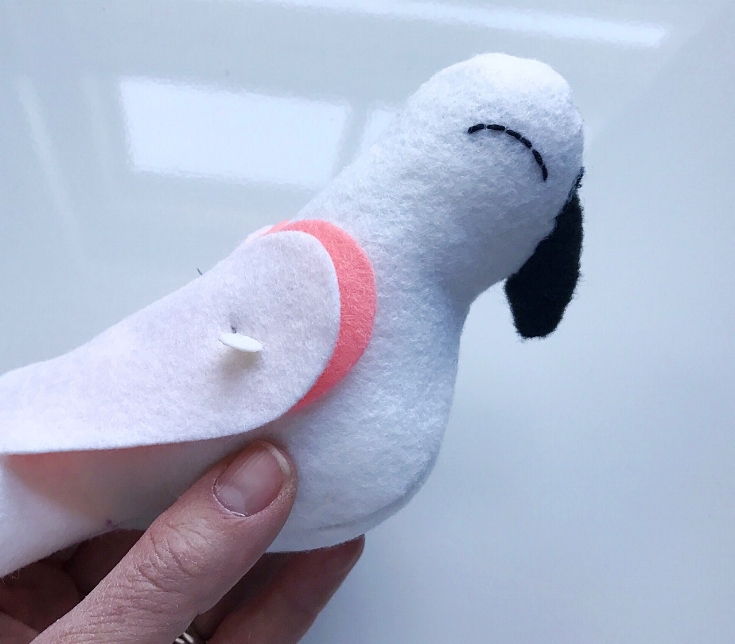
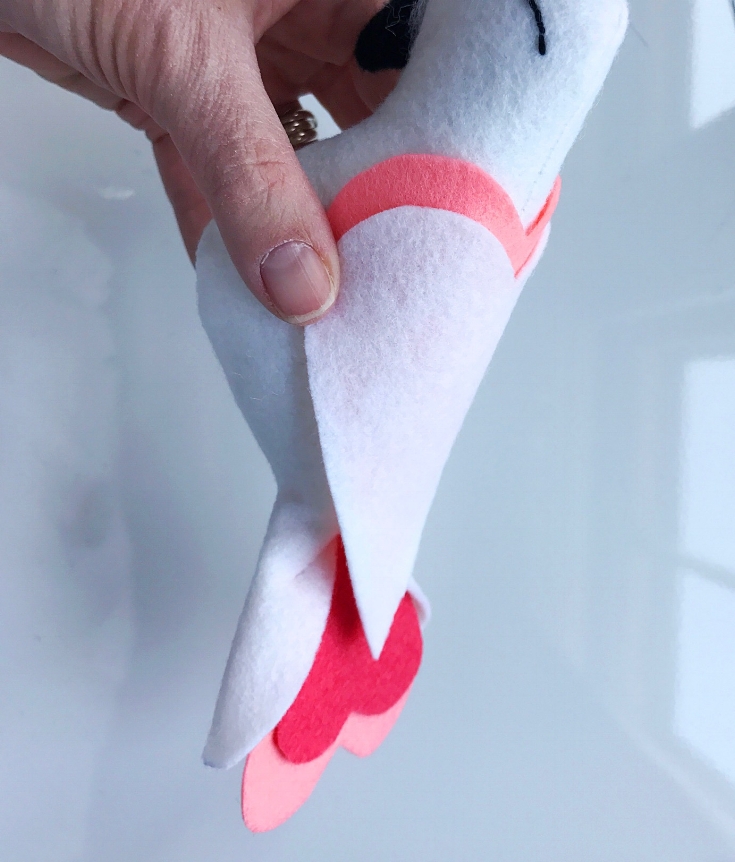
Stitch in place. I used some silver metallic thread to attach the wings and give them a bit of glam. Feel free to add your own touch!
Trim threads and use a quick bit of steam from the iron to get rid of your markings.

Would you like to learn how to make the perch? Come back tomorrow!
XO, Hilarie

How to print and assemble a PDF sewing pattern
There are many benefits to buying and downloading a digital, or PDF sewing pattern. Instant gratification is one, and also storage. If you buy a lot of patterns, you will have to put them somewhere! The ability to endlessly print instead of tracing off a pattern or even worse- mistakingly cutting out the wrong size on a tissue pattern that you will have to repurchase and start over, whereas with a digital pattern, you can just re-print specific pages. Like with so many things, the internet has provided a way for independent designers offer their patterns without having huge overhead and a financial backing from a large pattern company.

There are many benefits to buying and downloading a digital, or PDF sewing pattern. Instant gratification is one, and also storage. If you buy a lot of patterns, you will have to put them somewhere! The ability to endlessly print instead of tracing off a pattern or even worse- mistakingly cutting out the wrong size on a tissue pattern that you will have to repurchase and start over, whereas with a digital pattern, you can just re-print specific pages. Like with so many things, the internet has provided a way for independent designers offer their patterns without having huge overhead and a financial backing from a large pattern company.
PDF sewing patterns are designed to be printed on a home printer using A4 or US Letter sized paper. To begin, you will need:
A printer
A4/US letter paper
Paper Scissors
Tape (scotch tape or washi work great)
Download your pattern and save it to your computer files. Open it in a PDF reader such as Adobe Reader, which you can download for free. There are other PDF readers available, but you may find that some scale the pattern to the wrong size. I offer my patterns through Etsy. To further assist, Etsy has provided a handy guide to downloading digital items.
Depending on the size of the pattern, you will likely be printing several pages that may look a little crazy. I promise that they will assemble with a little effort and look similar to a traditional tissue paper pattern- but much sturdier. And you will not suffer the added challenge of refolding the pattern and trying to stuff in back in the envelope.
Before you print, read through the pattern's printing instructions. In your Print Dialogue Box, set print scale at 100%. Do not check, "scale to fit". Identify the test square. If you don't see it, check your pattern printing instructions again. You will want to print the page with that scale square first. Measure the square to be sure that the scale is correct. If it is not, check your print settings. Additionally, you can change the print quality, opting for draft or fast printing to use less ink. Also, printing in black and white (even though all of those colors are so pretty!) It saves ink.


It is not necessary to print every page. Just print the pattern and view the instructions on your screen. It will save ink, time and paper. READ through the instructions first, they will guide you to which pages to print.
The pattern pages will need to be trimmed before being taped together. It can be a bit tedious to assemble the pattern and tape the entire thing together, but once you have done it a time or two, they come together pretty quickly.

Trim around the border of each page.

I find it easiest to work one row at a time. I begin by laying out each row, then trimming each page. Then I align the quarter circles and tape.
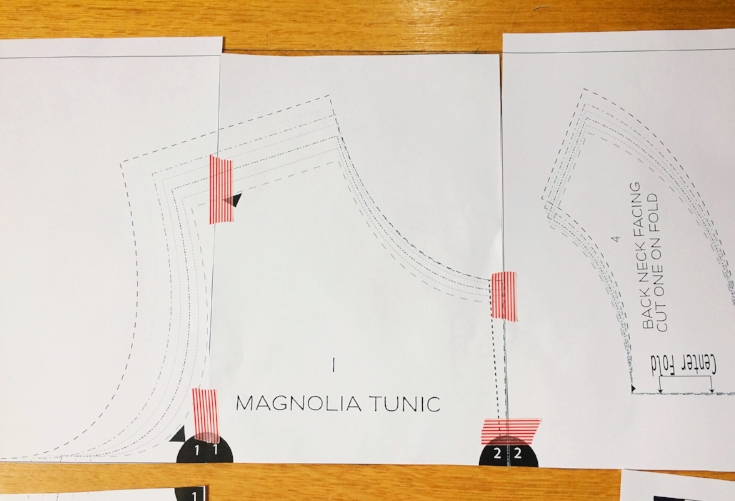
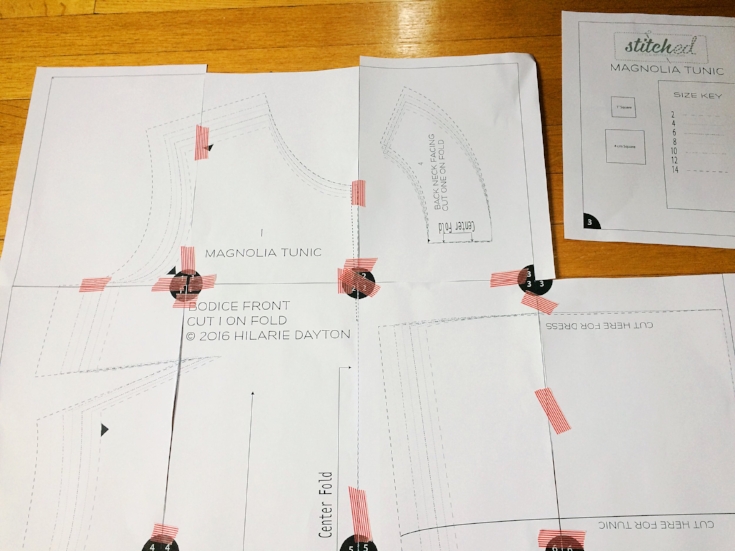
Continue to tape. It's starting to look like a real pattern!

Once I have the entire pattern assembled, I rough cut around each piece to separate.
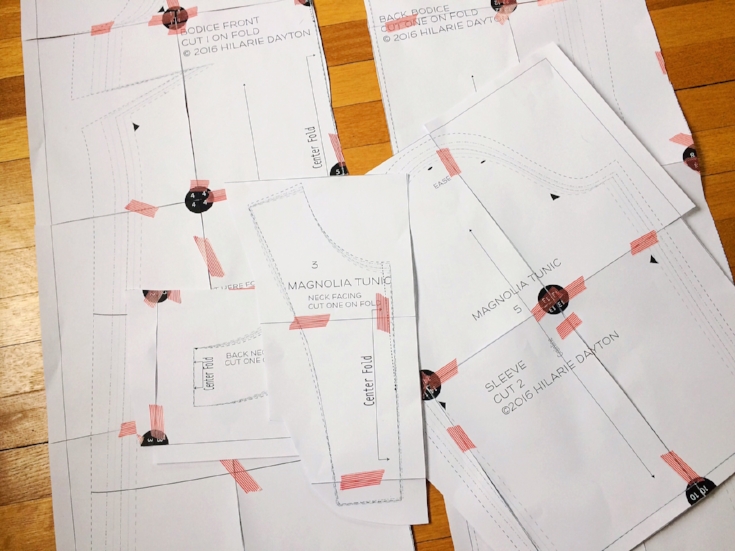
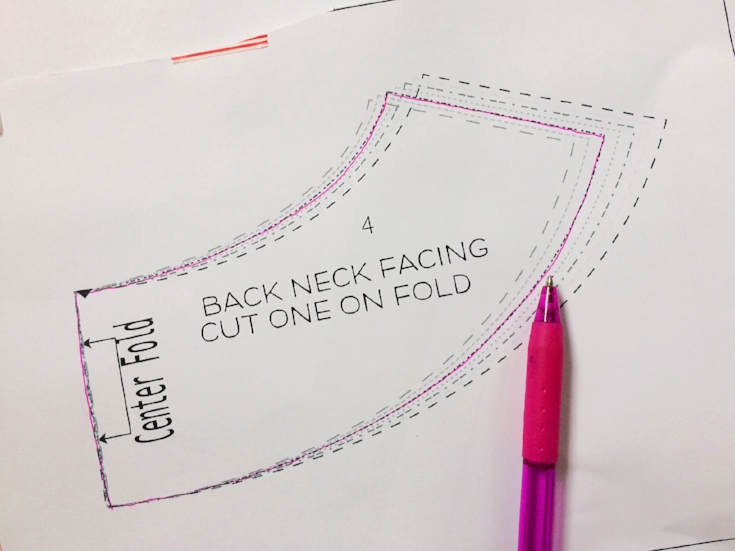
Since the patterns are multi-sized and you may not have printed in color, it may help to take a pen or marker and highlight your correct size. Do you see how each size has a coordinating line (stroke) design? Look at the pattern's size chart to determine your size then refer to the size key to find your size.
Cut out each piece and get your fabric ready! At this point you can lay the pieces directly on your fabric and following the layout and cutting instructions, begin pinning, tracing, transferring and cutting. I think that you will find this paper much easier and more durable than standard tissue paper.

Do you have any tips or tricks to add? Have you used a PDF sewing pattern yet?

Obi sash Pattern and Tutorial
I was asked to make an Obi sash belt for Annabel Wrigley's debut fabric line, Maribel for Windham Fabrics. Pretty awesome, right?! I love how she styled it for the Lookbook. A pretty floral, Breton stripes, some faded denim? What's not to love!
I was asked to make an Obi sash belt for Annabel Wrigley's debut fabric line, Maribel for Windham Fabrics. Pretty awesome, right?! I love how she styled it for the Lookbook. A pretty floral, Breton stripes, some faded denim? What's not to love!

NOTE: I am also making an alternate version in a beautiful raw silk for you to more clearly understand my instructions. For the silk version, I have omitted interfacing.
Ready to make it?

Supplies:
2 yards of lightweight woven fabric (always wash and dry your fabric before cutting to allow for shrinkage)
Coordinating thread
Tailor's Chalk
Lightweight fusible interfacing (I like Pellon Shape Flex, SF101.)
Download Pattern (One size fits most)
Cut the pattern out and tape together aligning notches and page numbers. Each pattern page includes shaded circles with guide numbers to show how the pattern pieces should be organized. Be sure to match up all 4 quarter circles along the edges of the tile.
Fold your fabric lengthwise.
Lay the pattern on the fold line.
Pin the pattern to the fabric and cut.
Cut interfacing 1/4 inch smaller all around (this will help prevent bulky seams)
Mark the dots and notches with a chalk pencil.
Seam allowance for construction is 1/2".

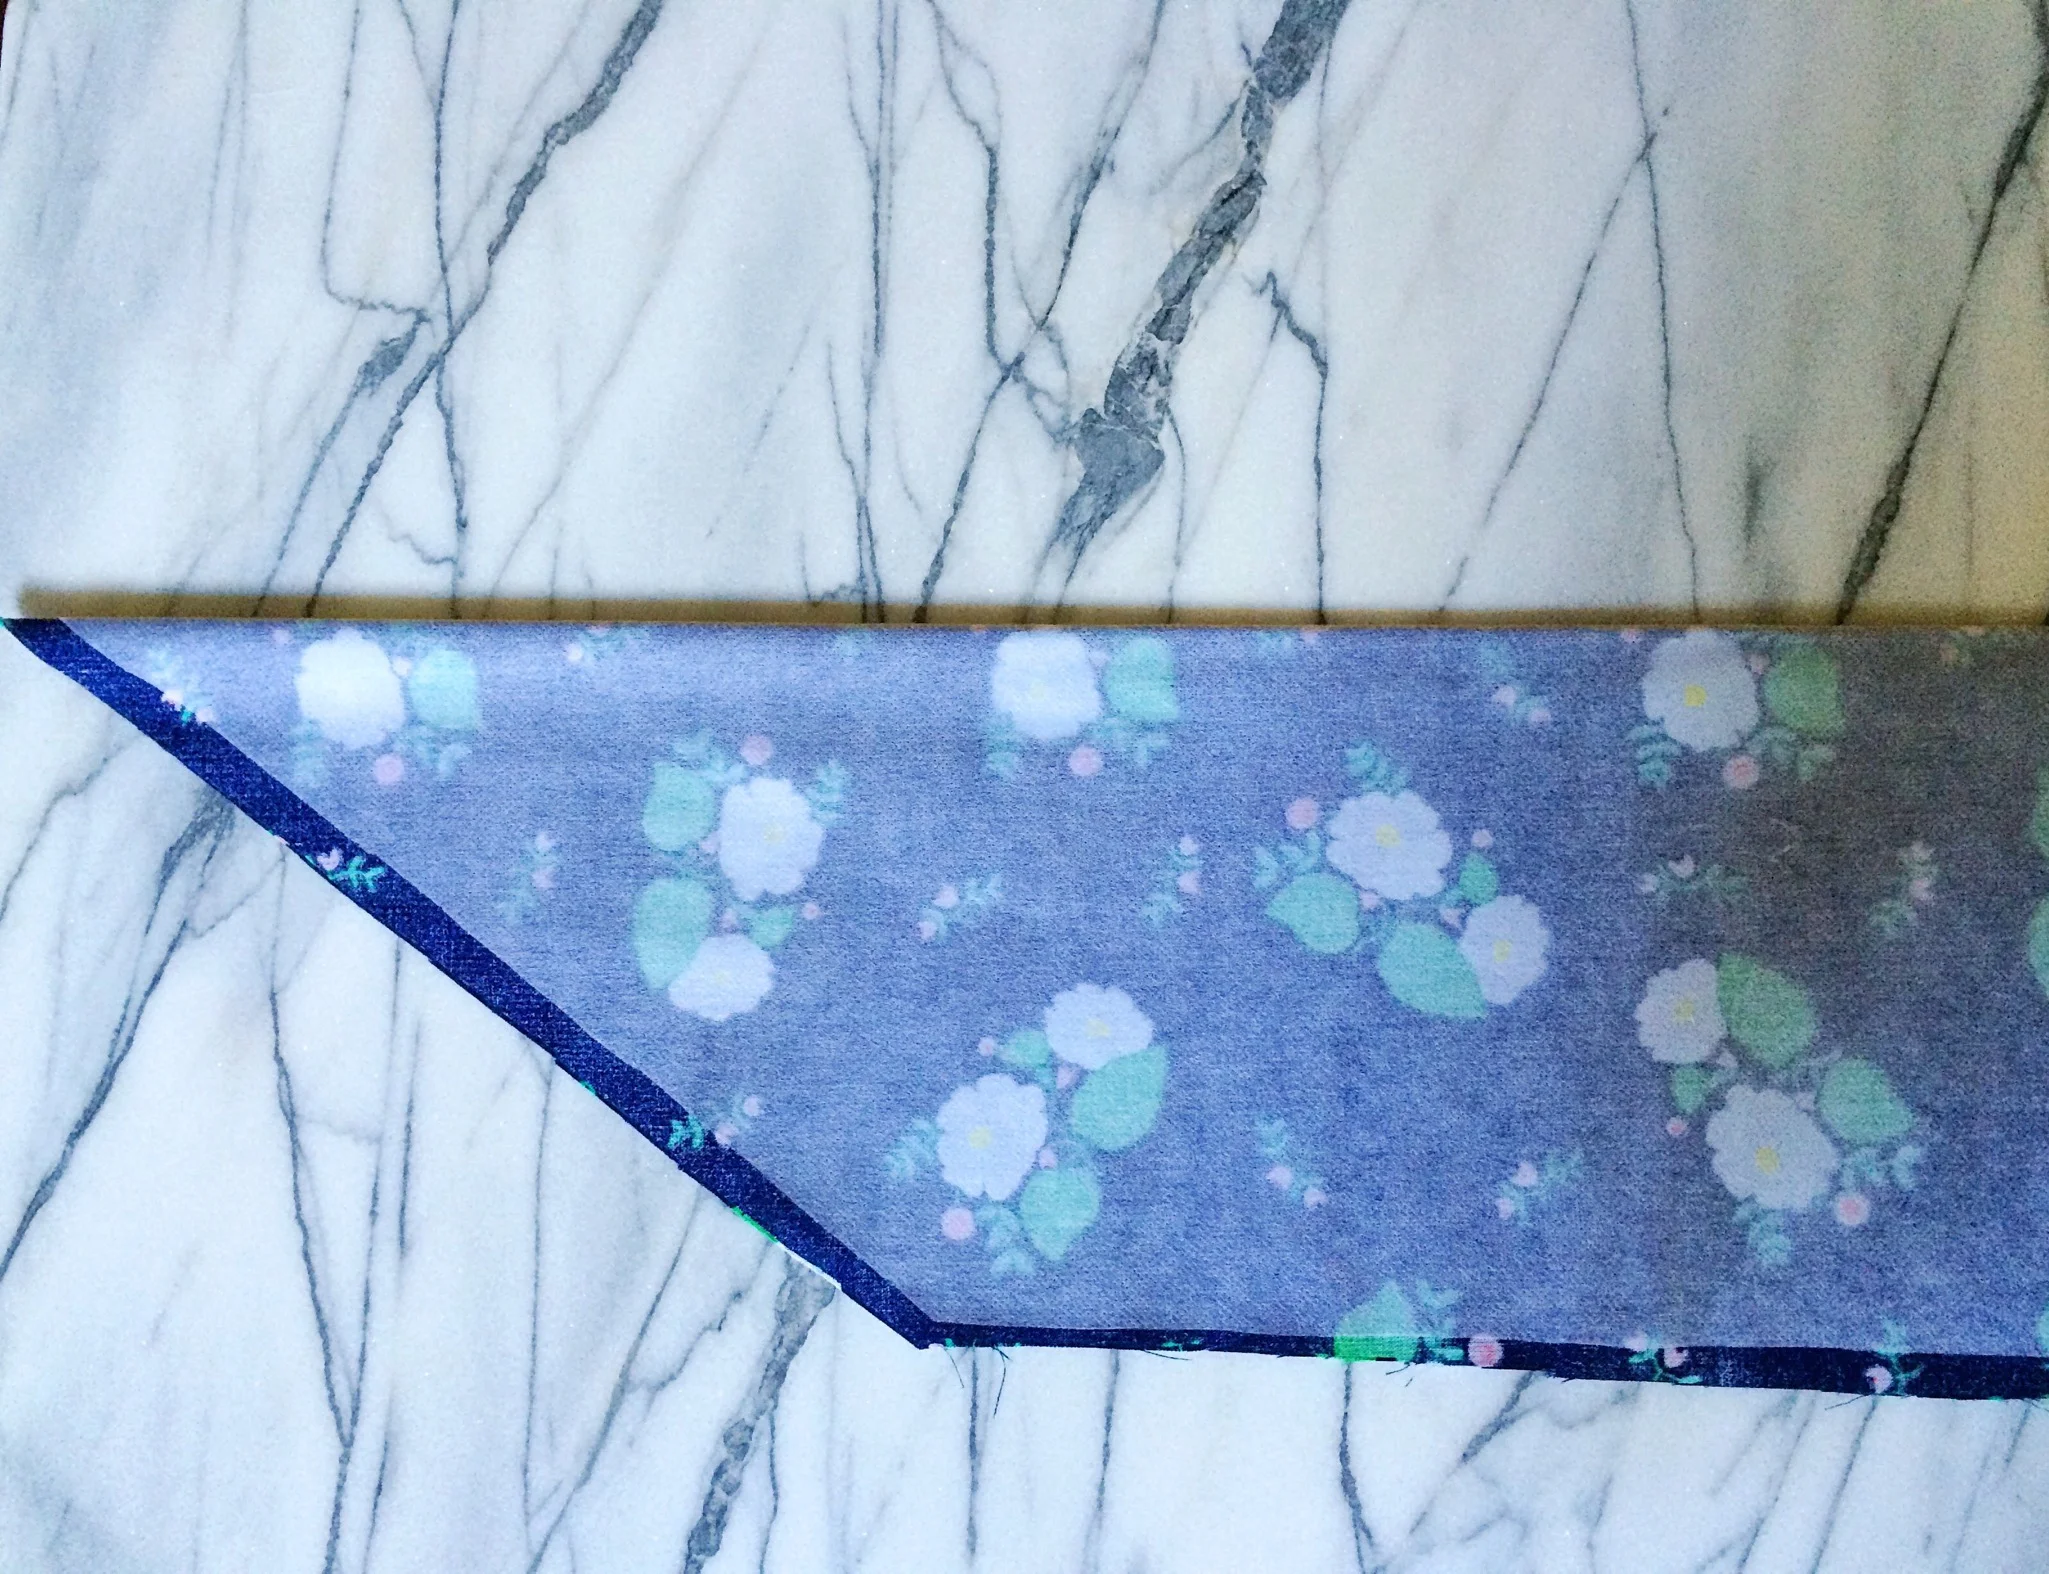
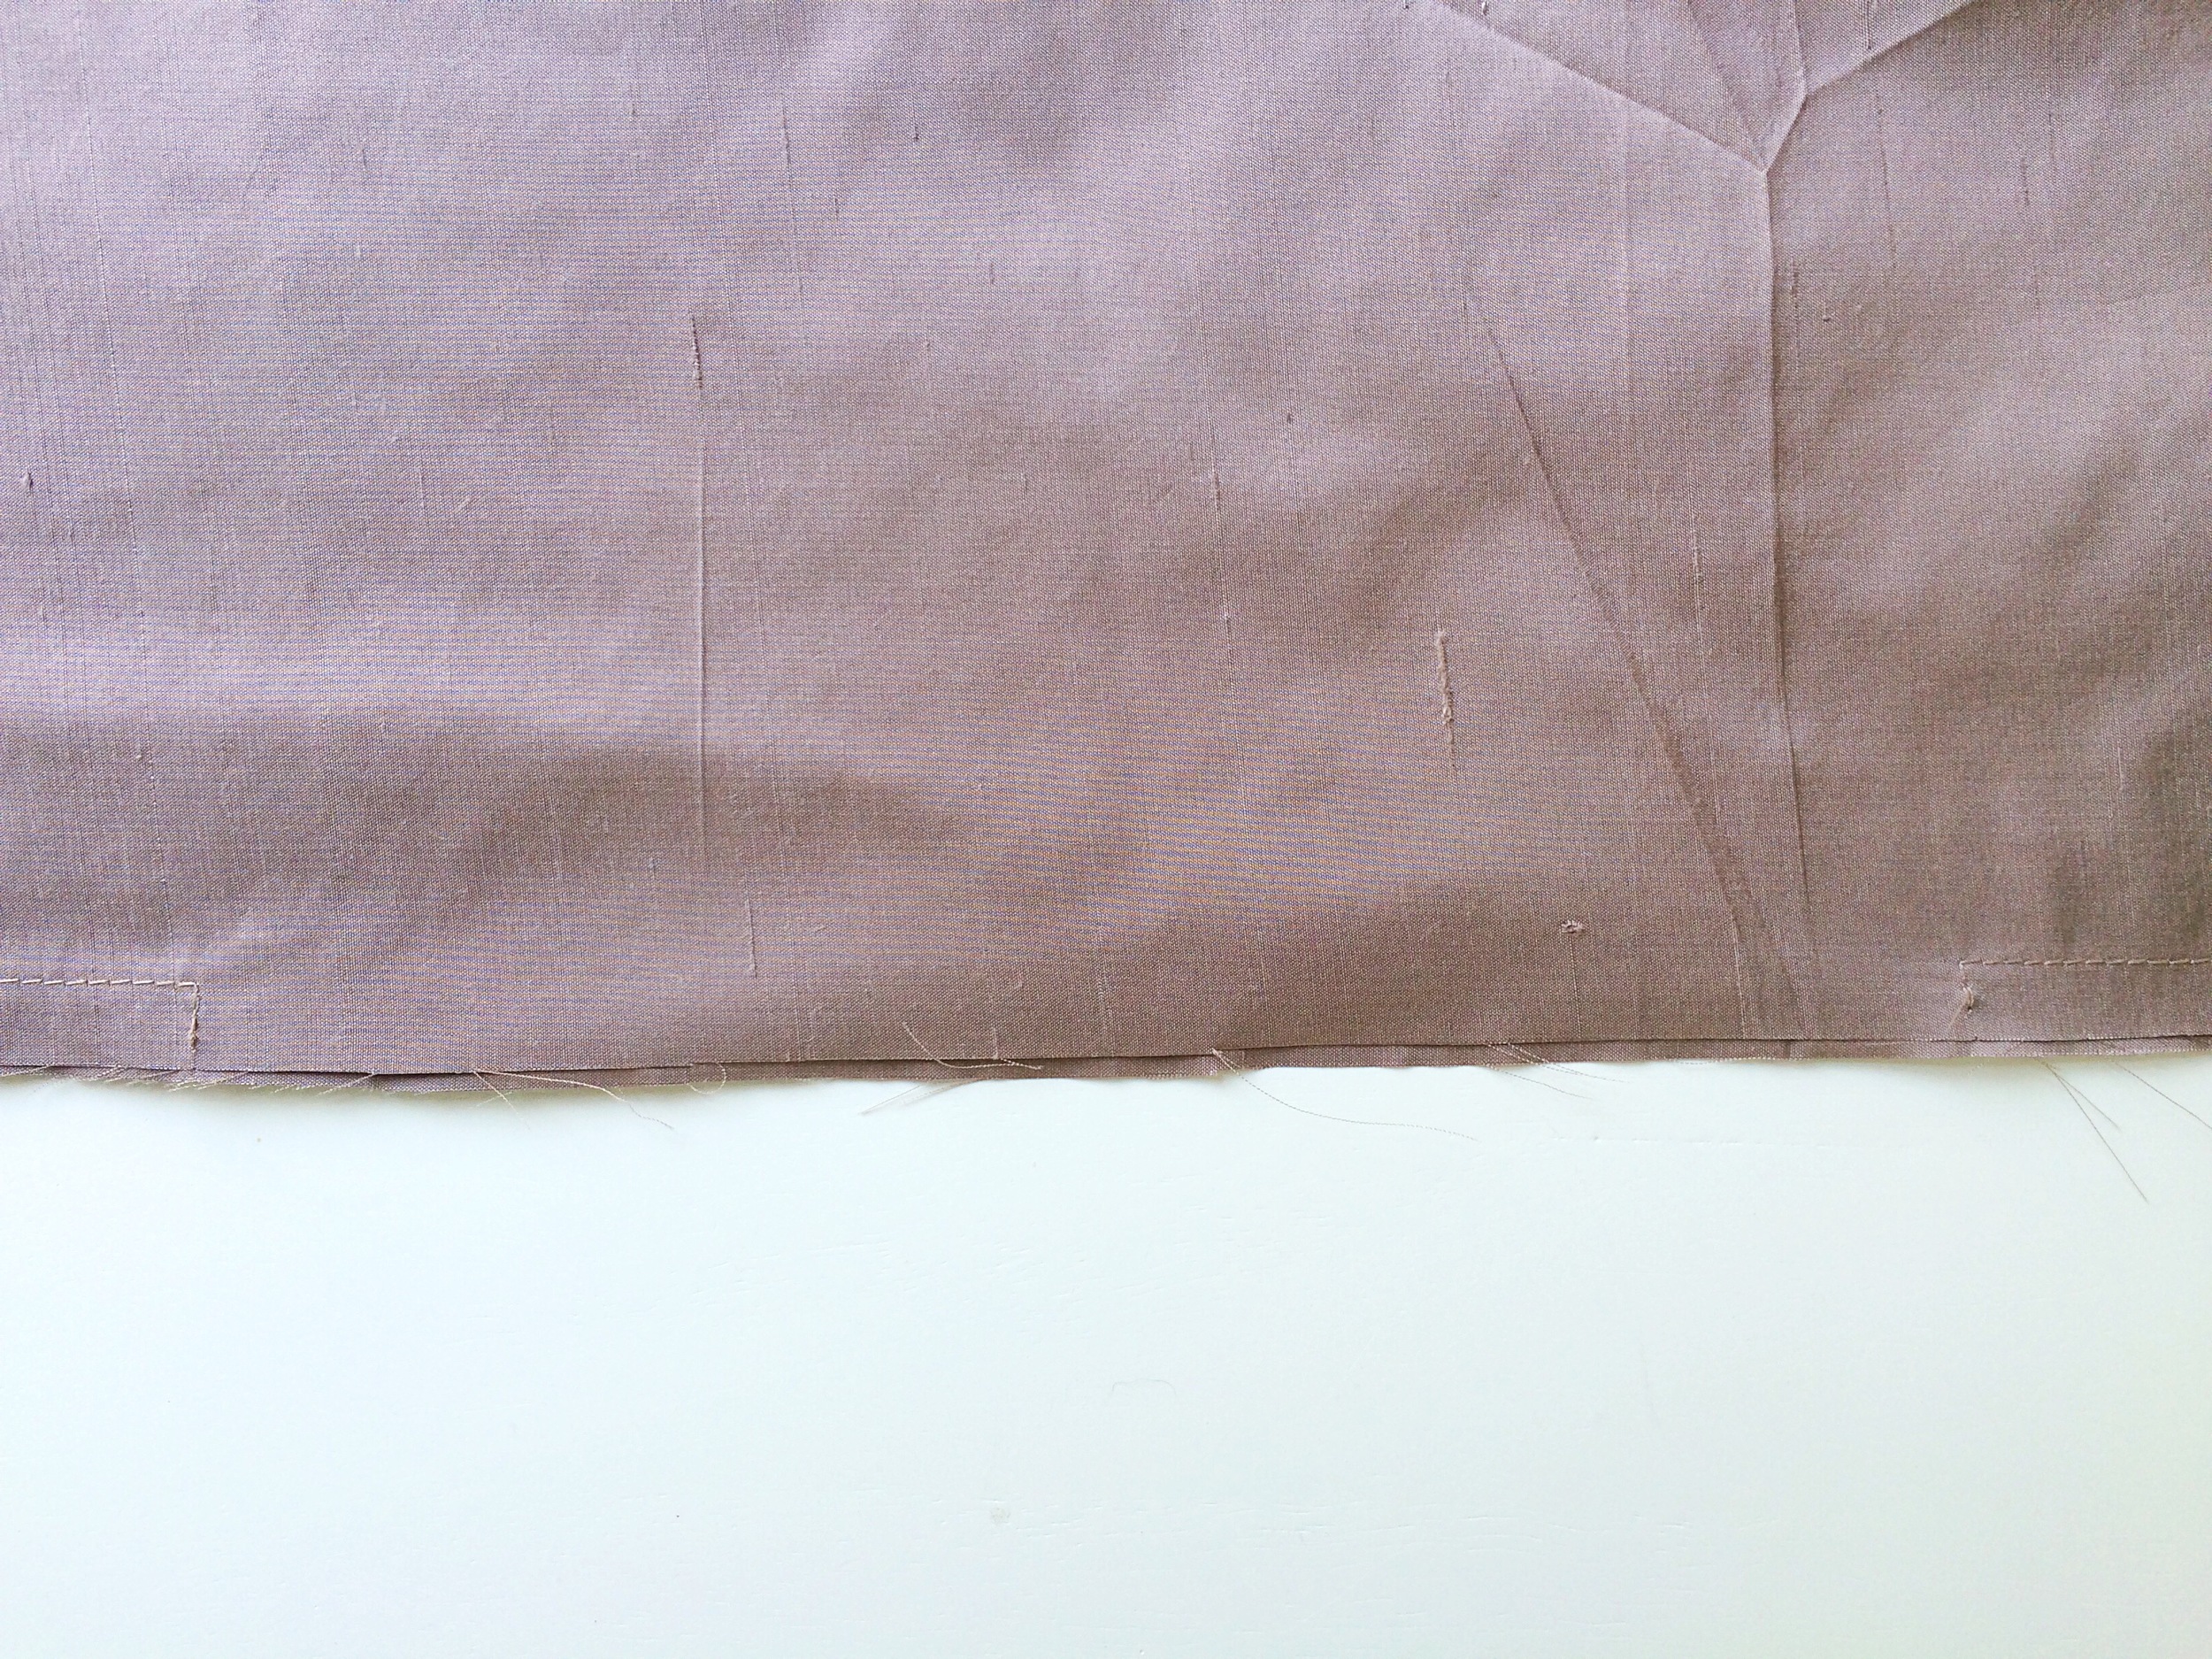
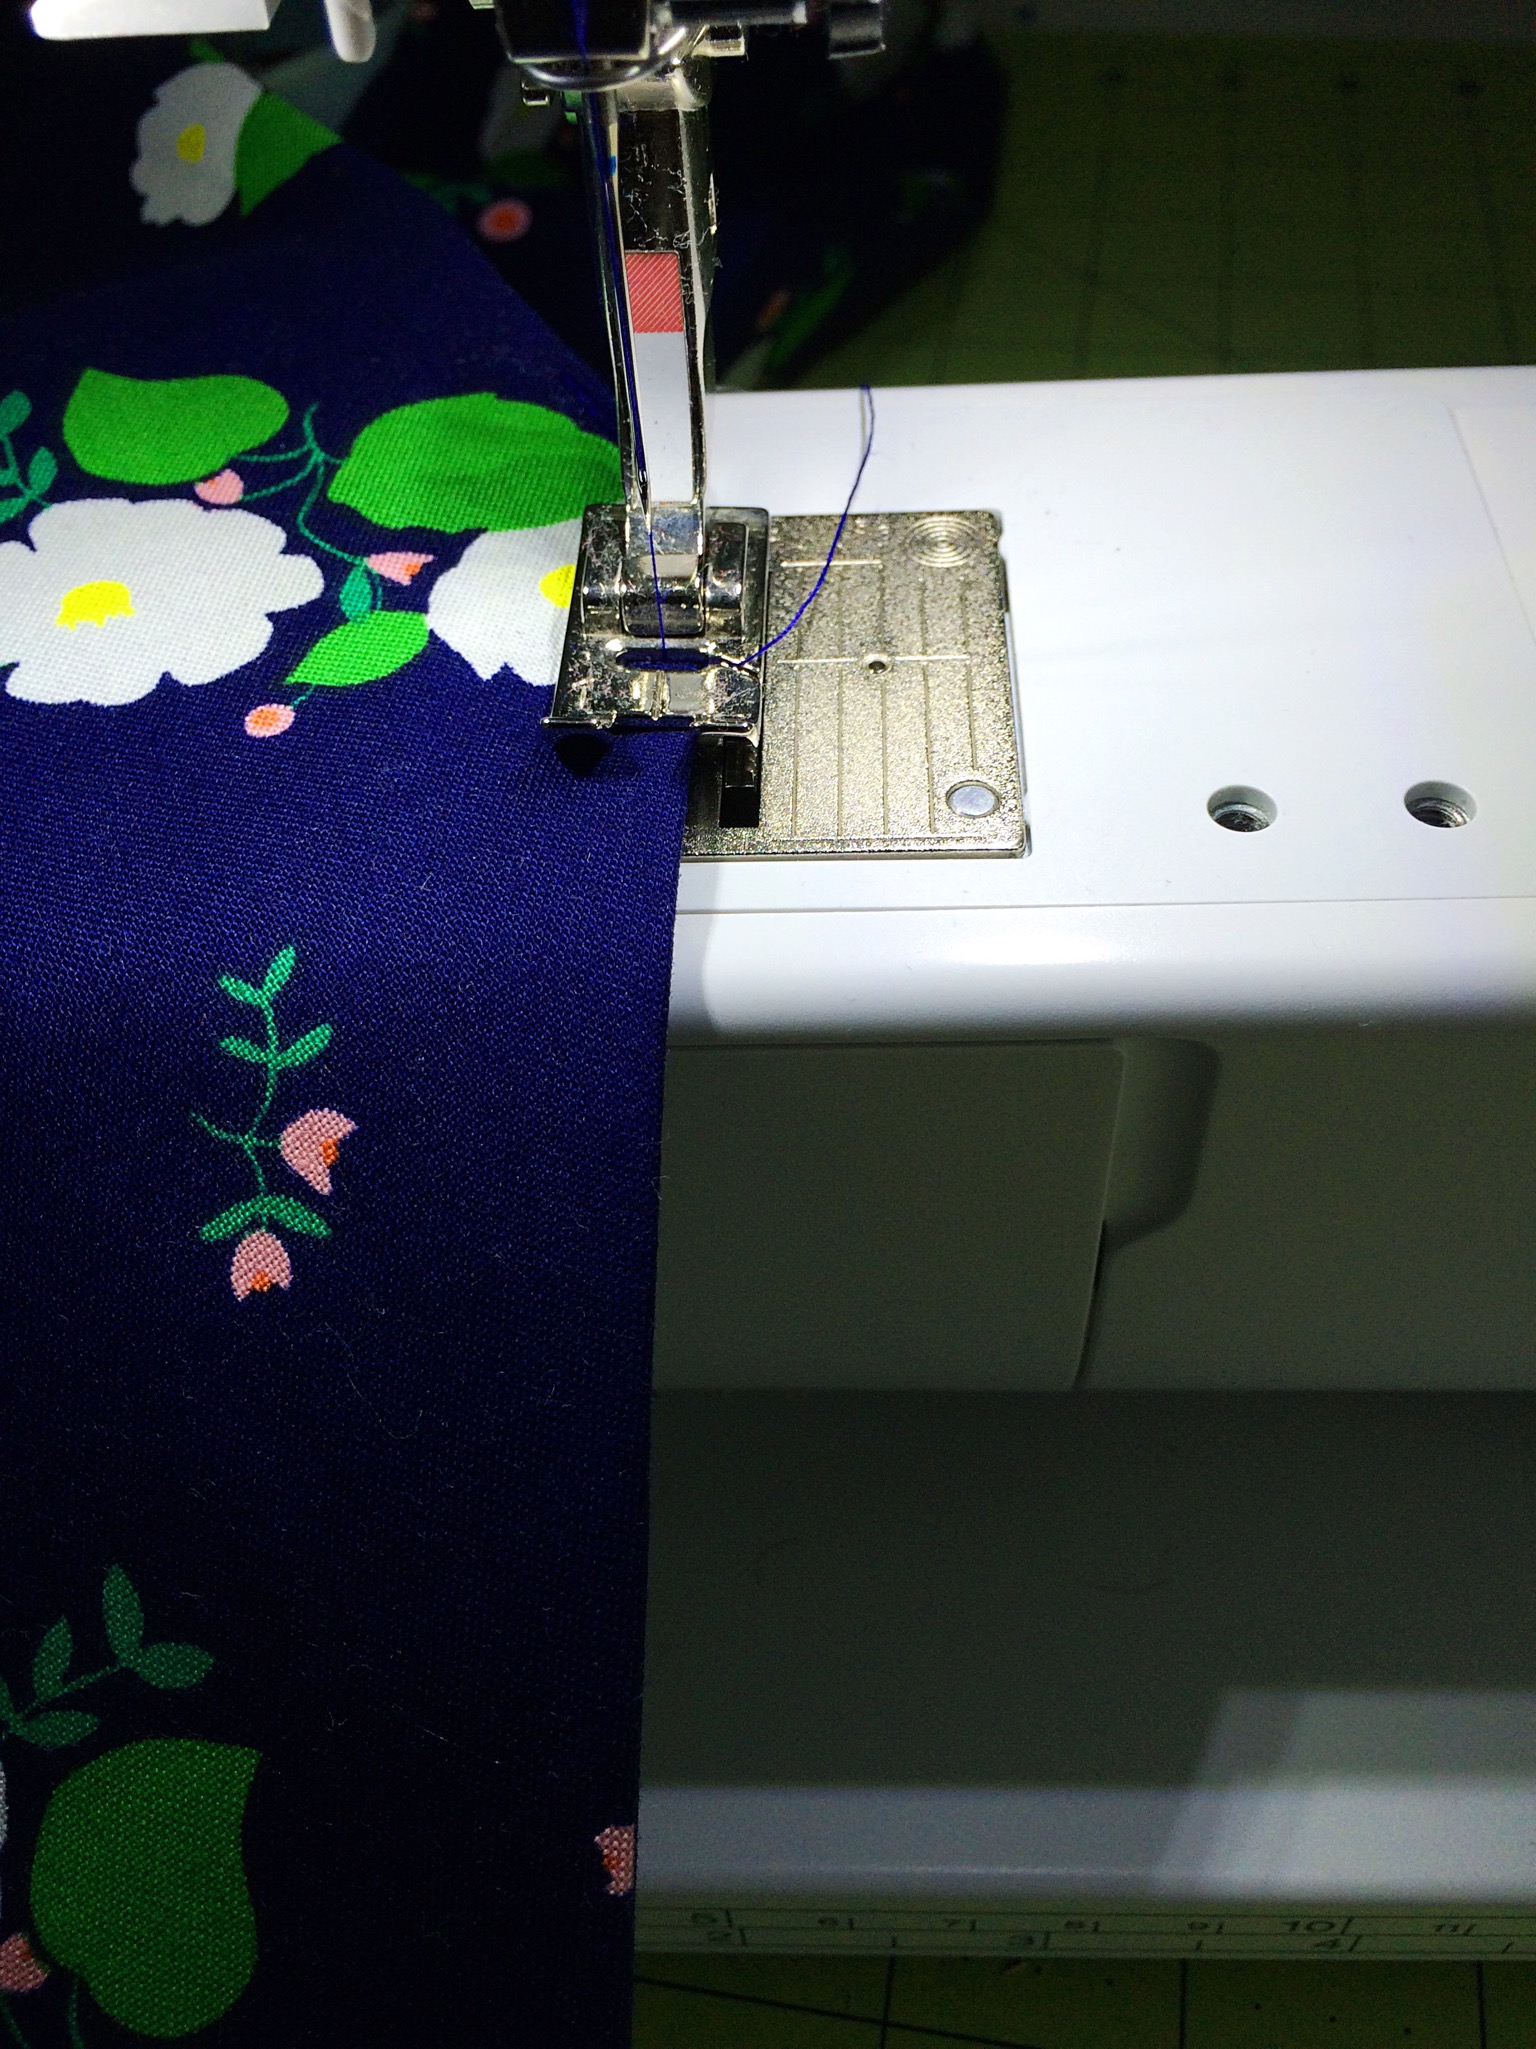
Fold the fabric with the right sides facing together and matching the notches, and pin. Begin stitching around the belt beginning at the point. Stitch the perimeter of the belt with a 1/2" seam, leaving an opening between the dots you marked for the pattern piece for turning the belt right side out. When you begin and end stitching at each dot, begin stitching at the selvage, stitch 1/2" and pivot. Stitch along the long side. By extending the stitch line, just a bit, it will help the fabric turn inside when it is time to finish.
Be sure not to stretch the fabric as you work toward the points on each end.
Trim the seam allowances (except for those in the opening) to about 1/8"; then turn the belt right side out. Finger press the edges to smooth the stitching, tuck the seam allowances inside the opening, and press with an iron to meld the seams.

Topstitch 1/4" from the edge around the perimeter of the belt in one continuous seam, pivoting at the points and catching the folded inside edges that we used for turning. Be sure to backstitch to prevent all of those pretty stitches from unraveling! Press.
Your sash is done and ready to wear!
Hand smocking tutorial
I love tutorials. The simple, image-driven instructions really appeal to me in a way that video doesn't. I have been asked for years to create a blog and post sewing and crafting tutorials, but I always seem to procrastinate when it comes to writing. The time has come, my friends. Here is my first tutorial! (drumroll, please...)

I love tutorials. The simple, image-driven instructions really appeal to me in a way that video doesn't. I have been asked for years to create a blog and post sewing and crafting tutorials, but I always seem to procrastinate when it comes to writing. The time has come, my friends. Here is my first tutorial! (drumroll, please...)
How to Make a Hand Smocked Scarf
Smocking. To a southerner, its as essential as a monogram, sweet tea and humidity. As beautiful as smocking is, it's generally reserved for young children. (or for kids that might be a bit older, but their moms' can't bare to pack away the bishop dresses.) This smocking project isn't for kids though, its for grown-ups. It's very easy and I'll walk you through the entire project!
Materials Needed

2 yards of lightweight cotton (I used a gingham with a 1/4"-inch check from Annabel Wrigley's debut line Maribel with Windham Fabrics) Coming to finer fabric stores soon!
1 skein of embroidery floss (I used DMC 893)
Cotton thread
An embroidery needle (I really like Clover Gold Eye Embroidery needles)
A ruler and marking pen if you are not using gingham fabric ( I really like the Frixion pens)
Tweezers are really helpful too!
Cutting
To begin, fold the fabric in half vertically. Cut out two lengths of fabric 72" x 10". Take the first piece and we will begin to fray the ends to make fringe.
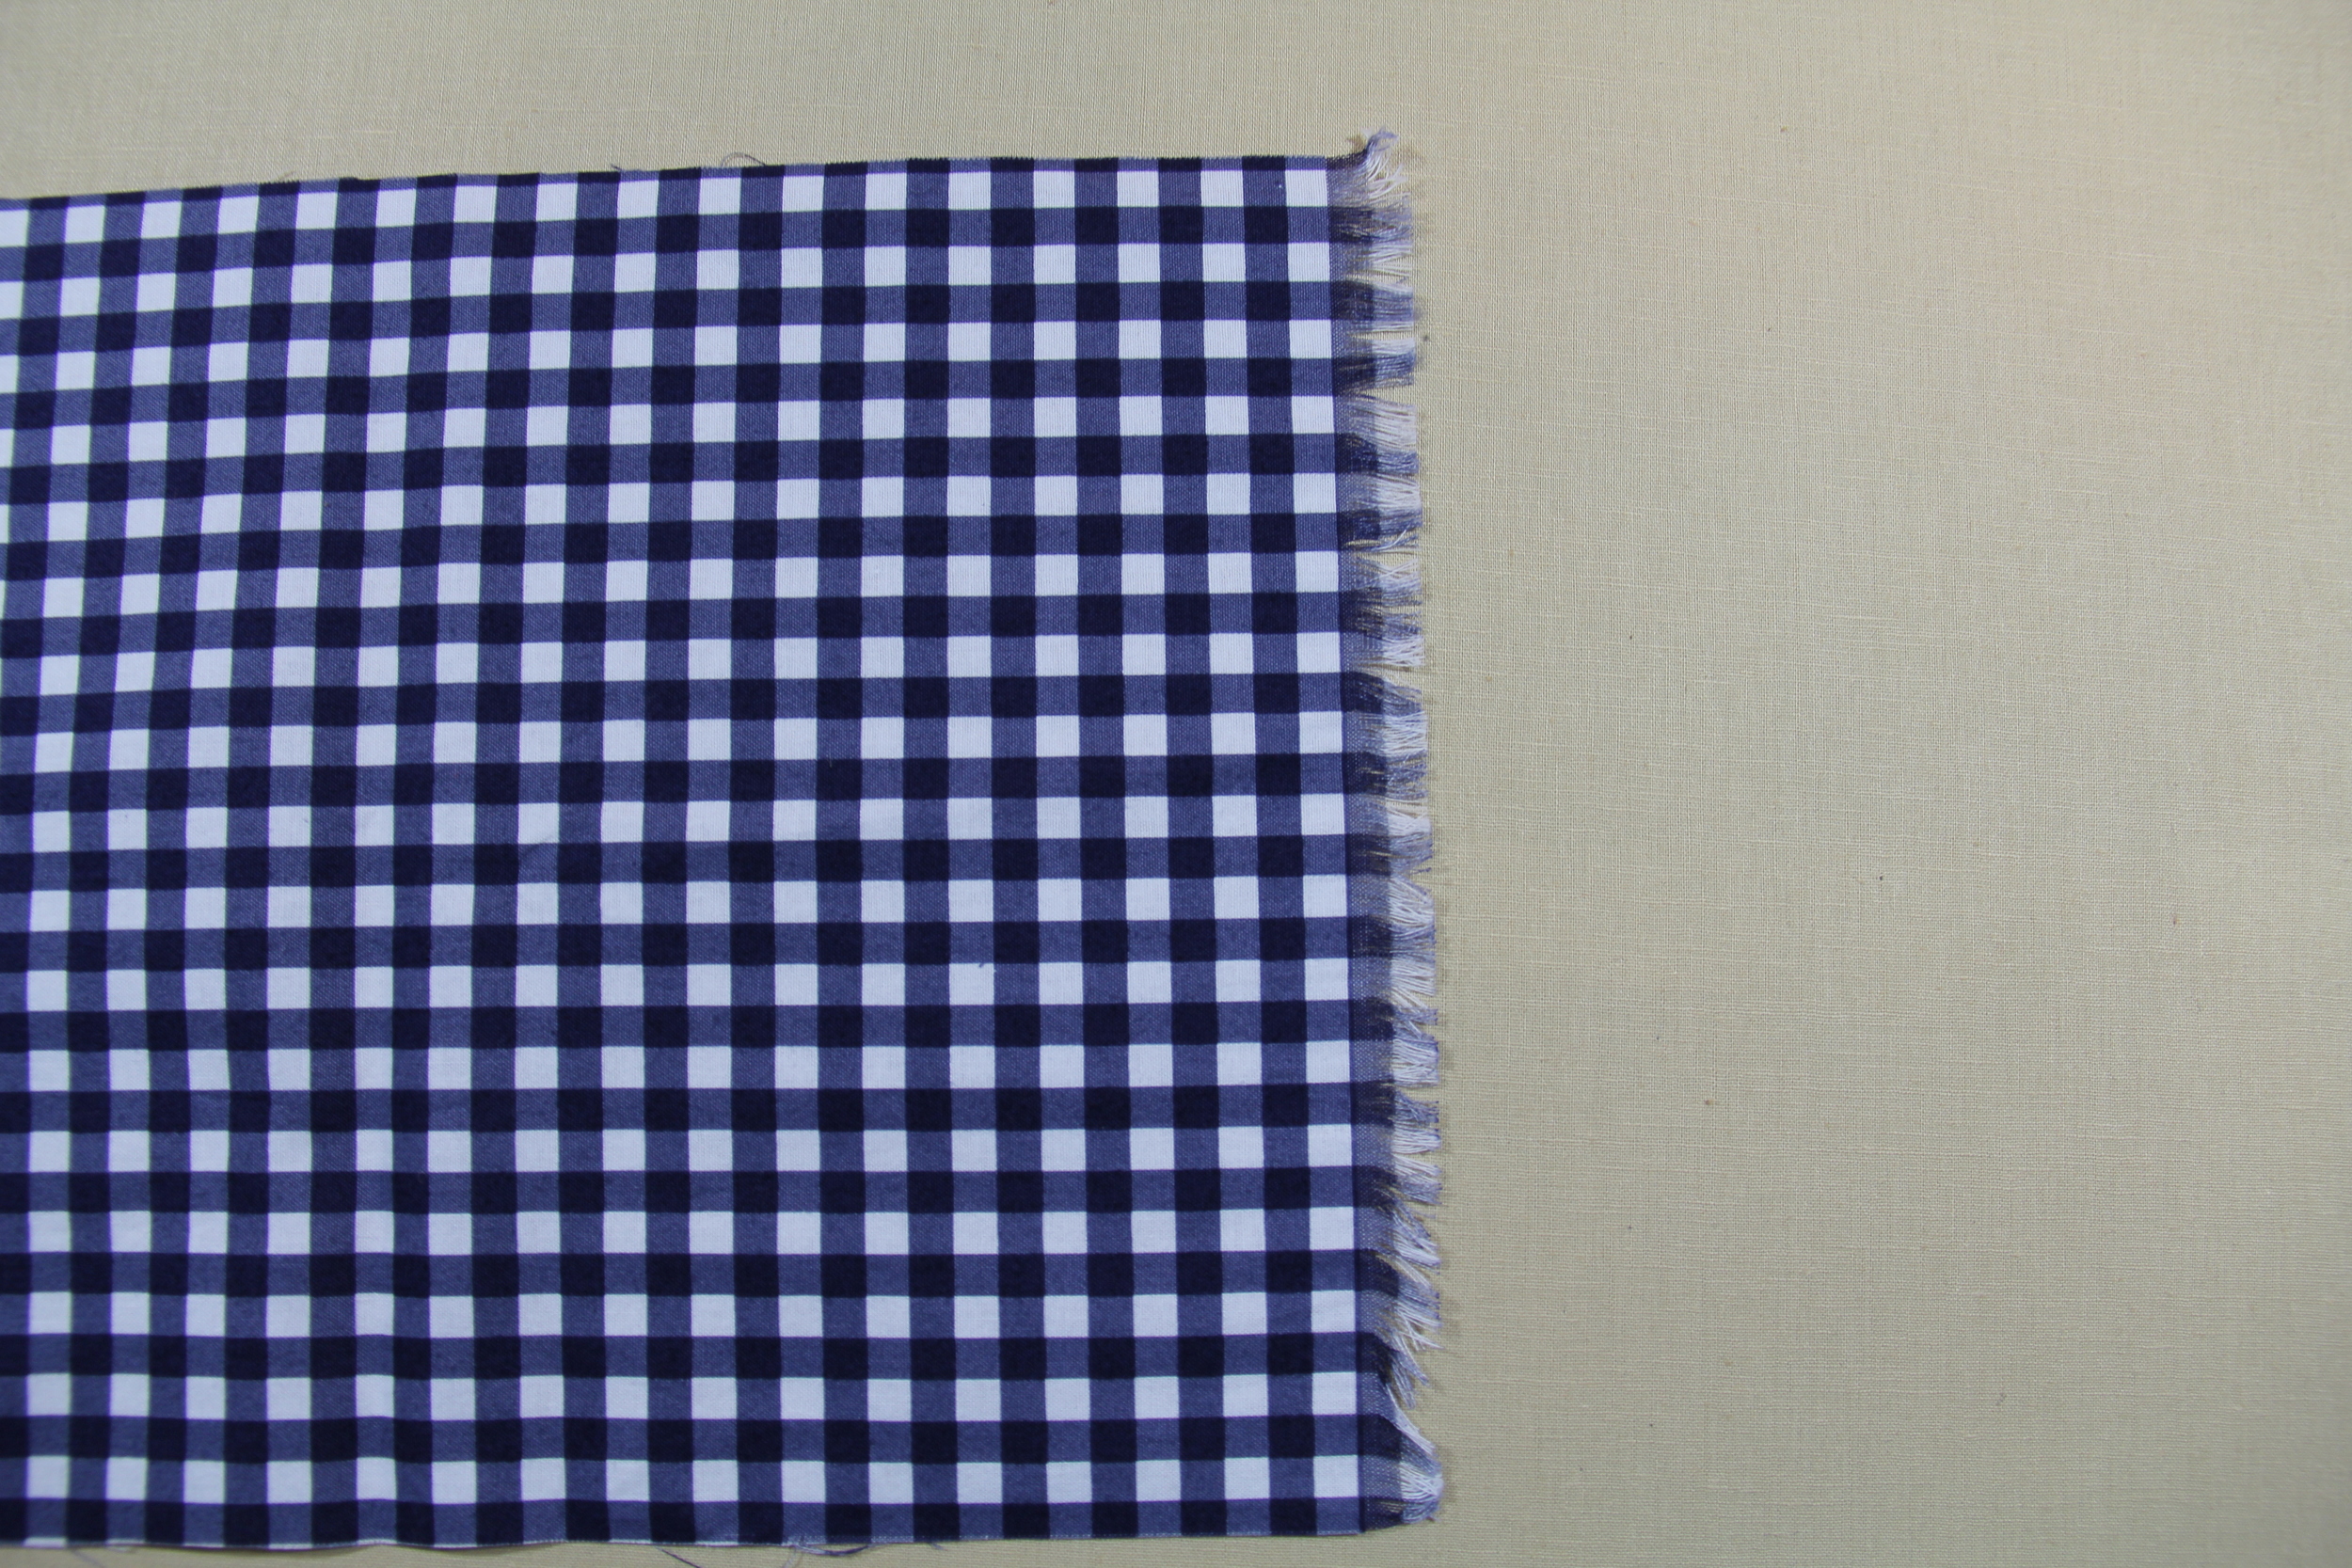
Fringe
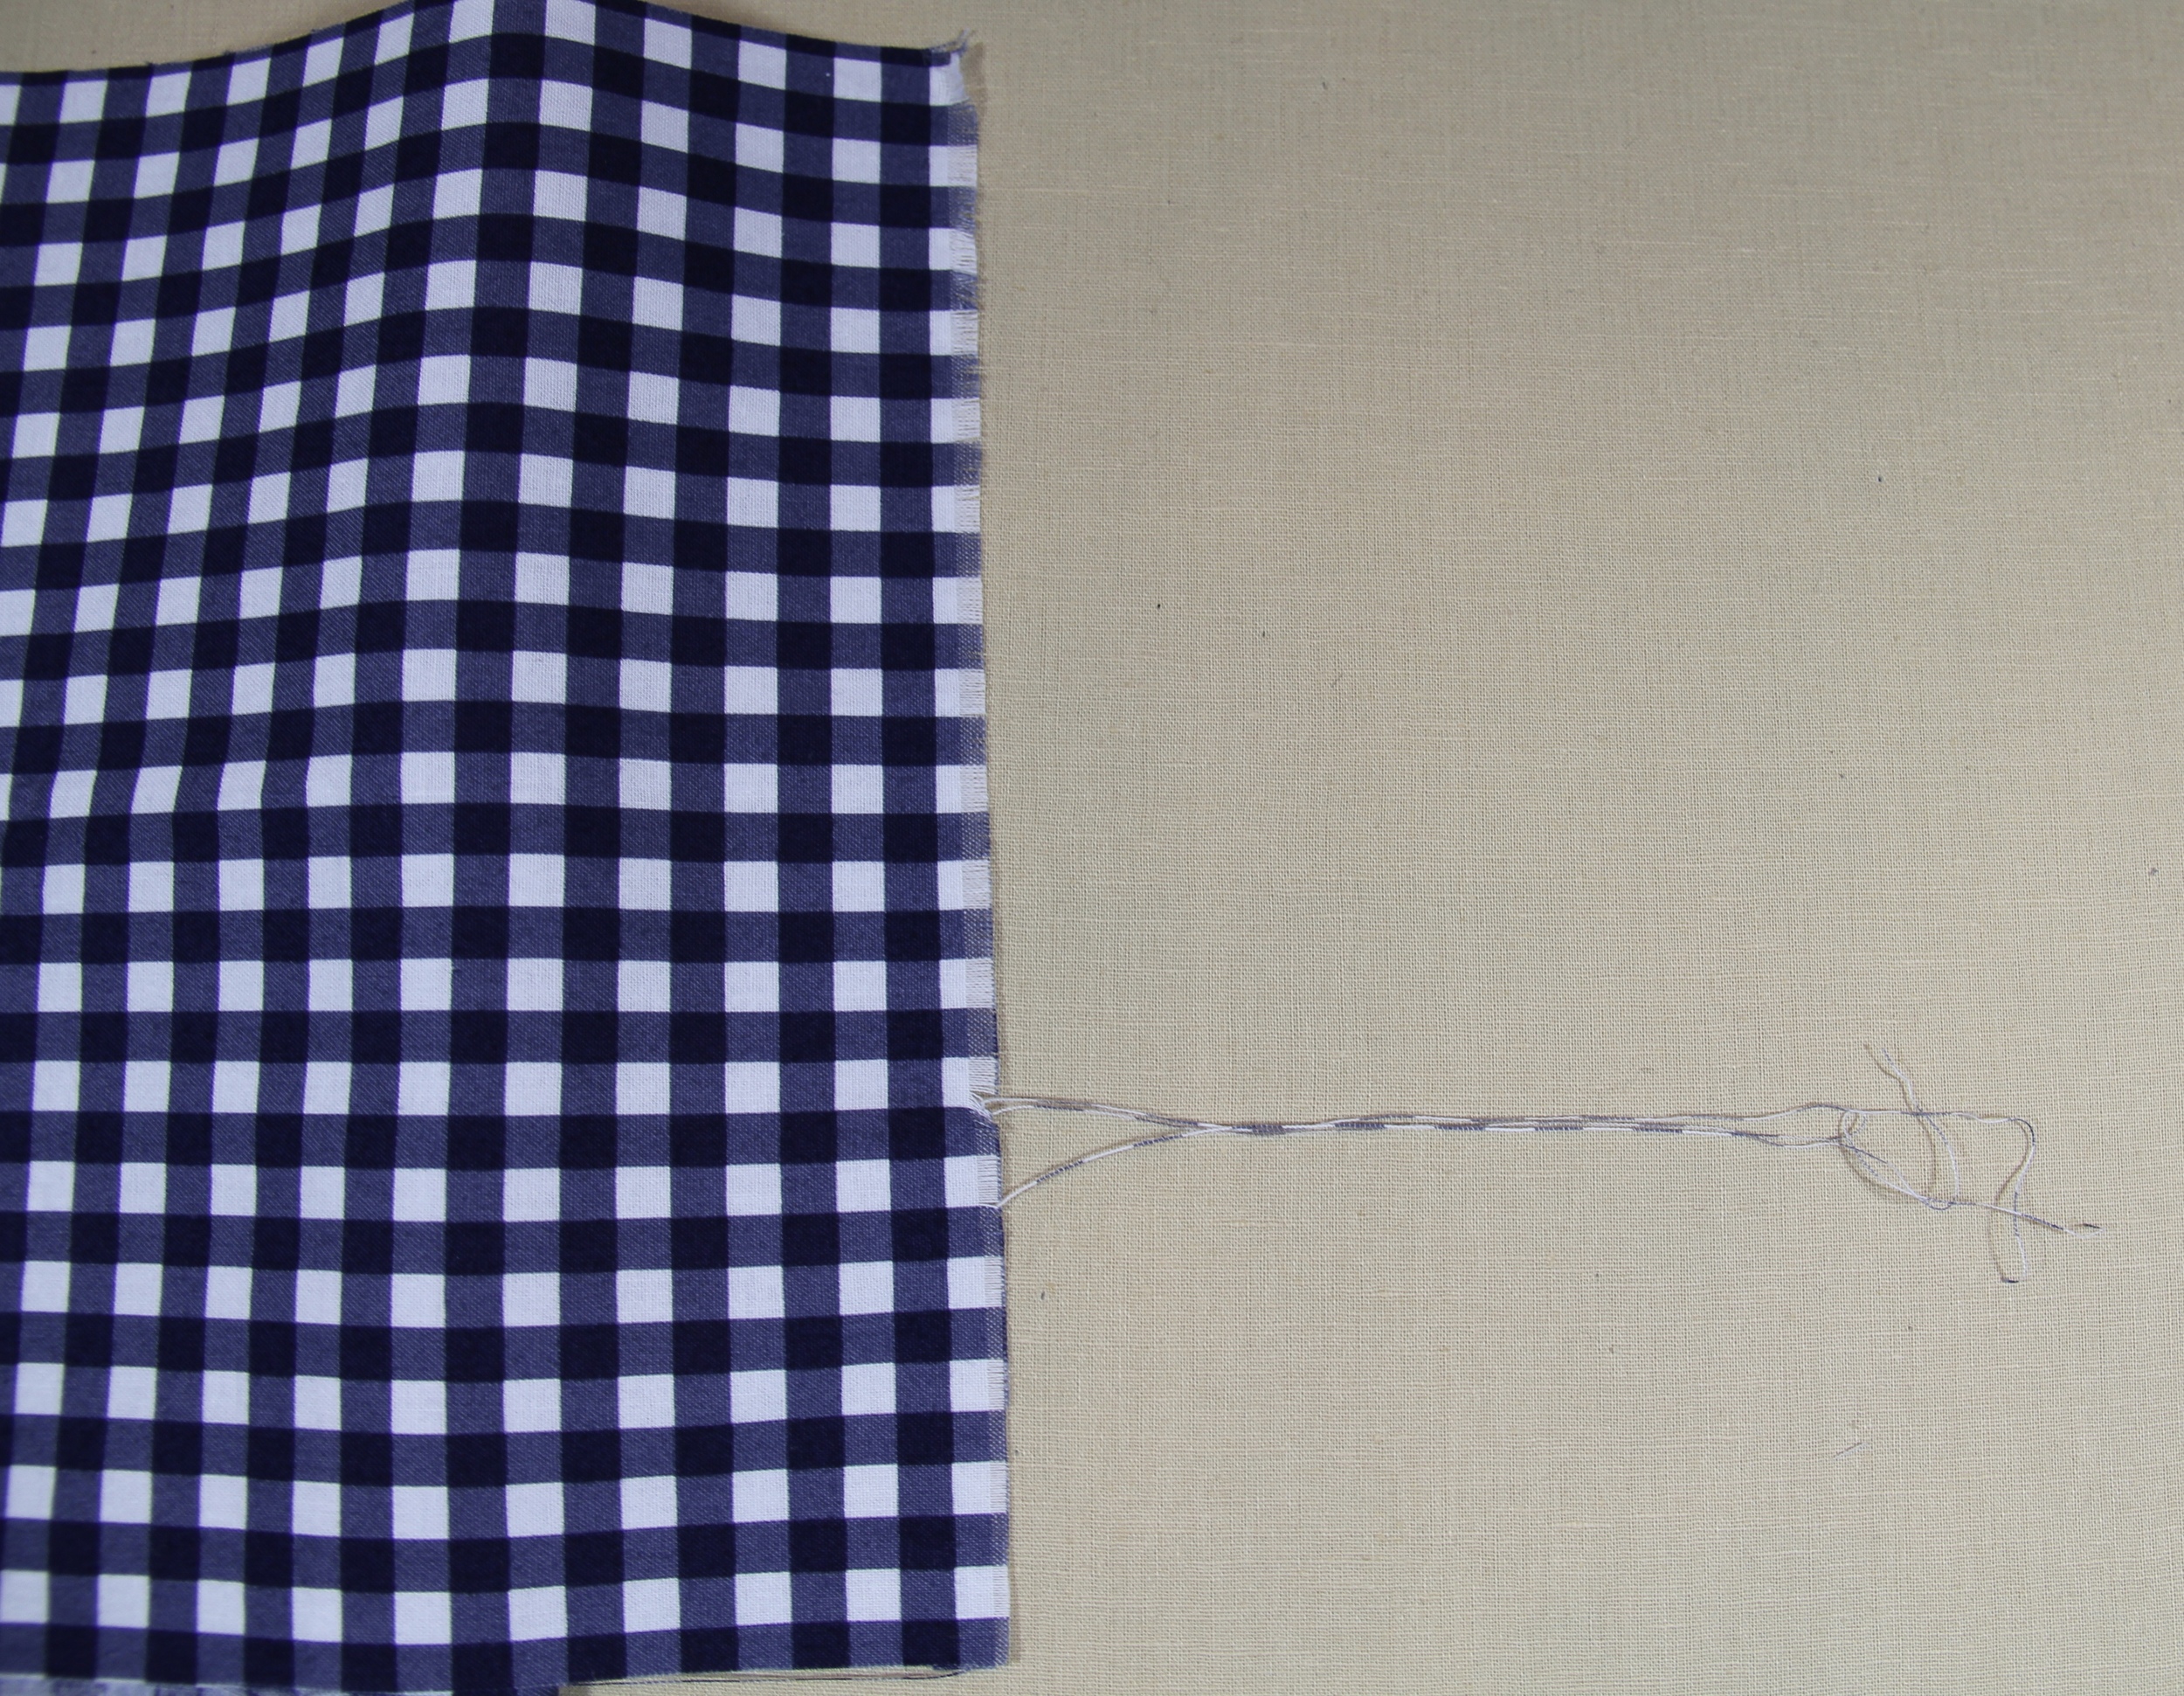
A good way to start, is by cutting the ends very straight. Begin by pulling the first weft thread (the threads that go side to side) in the weave. Sometimes I use tweezers to help pull the thread. Try to pull just one thread at a time or it will bunch up and create a mess. As you pull the thread, the fabric will begin to gather. Keep pulling until the thread snaps or won't pull any further. Snip it, tease the other side to loosen a thread and continue. Keep at this until the fringe is 1/2". Turn the fabric over and do it again.

Honeycomb Smocking
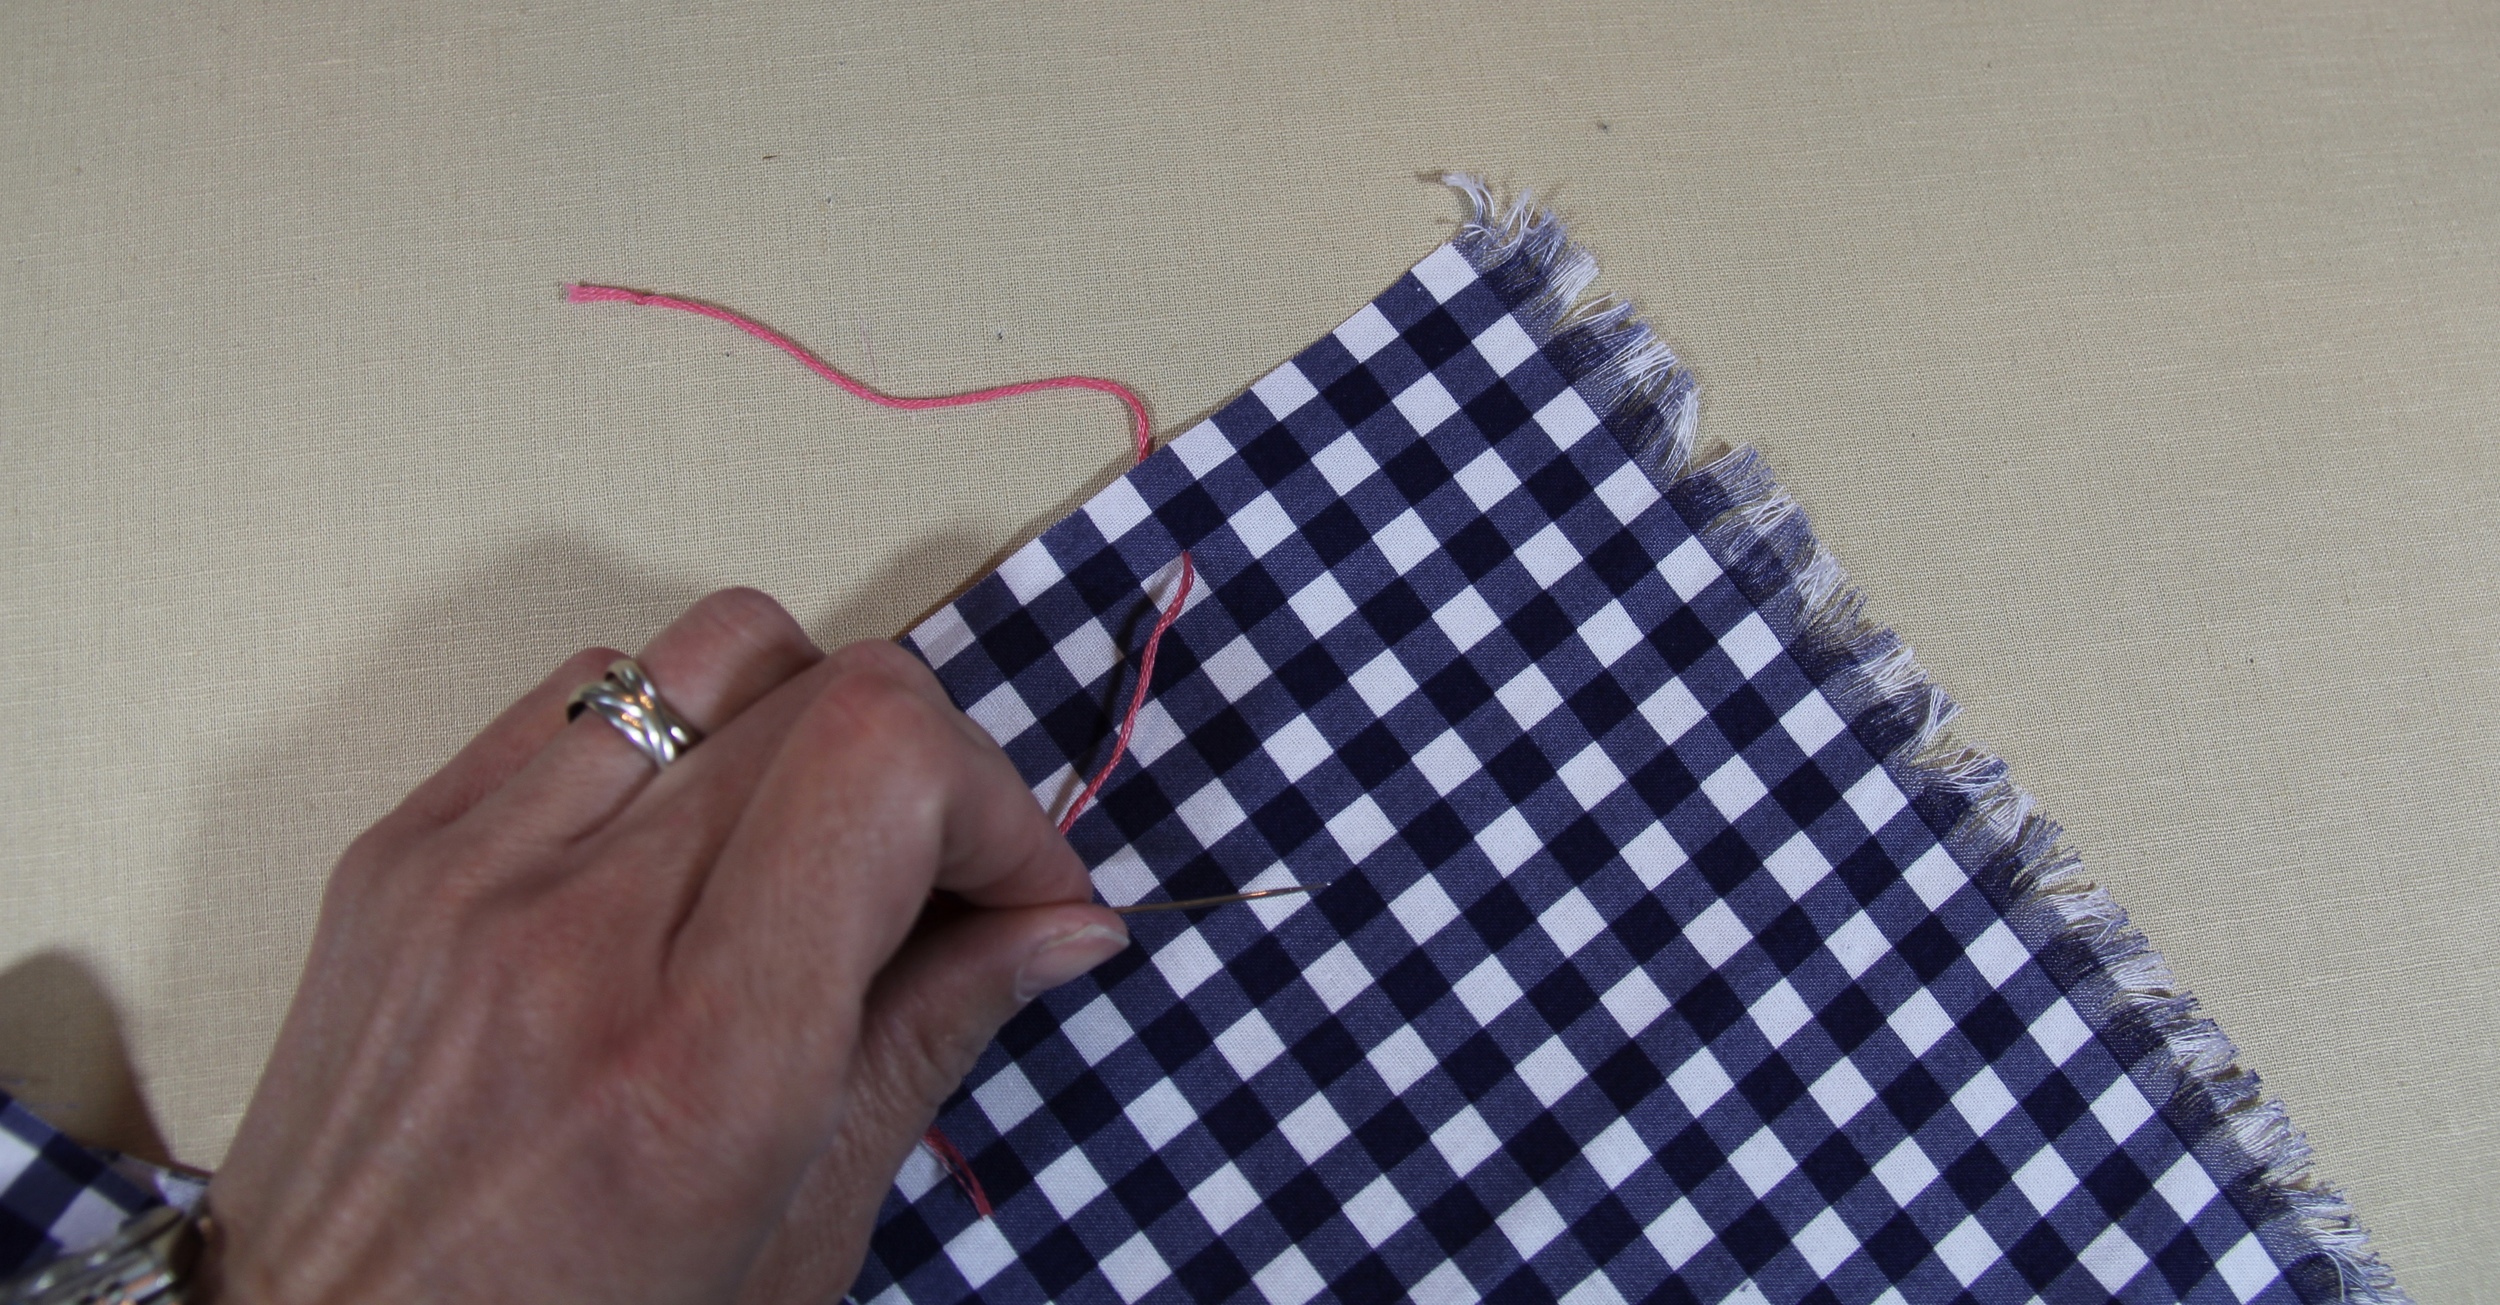
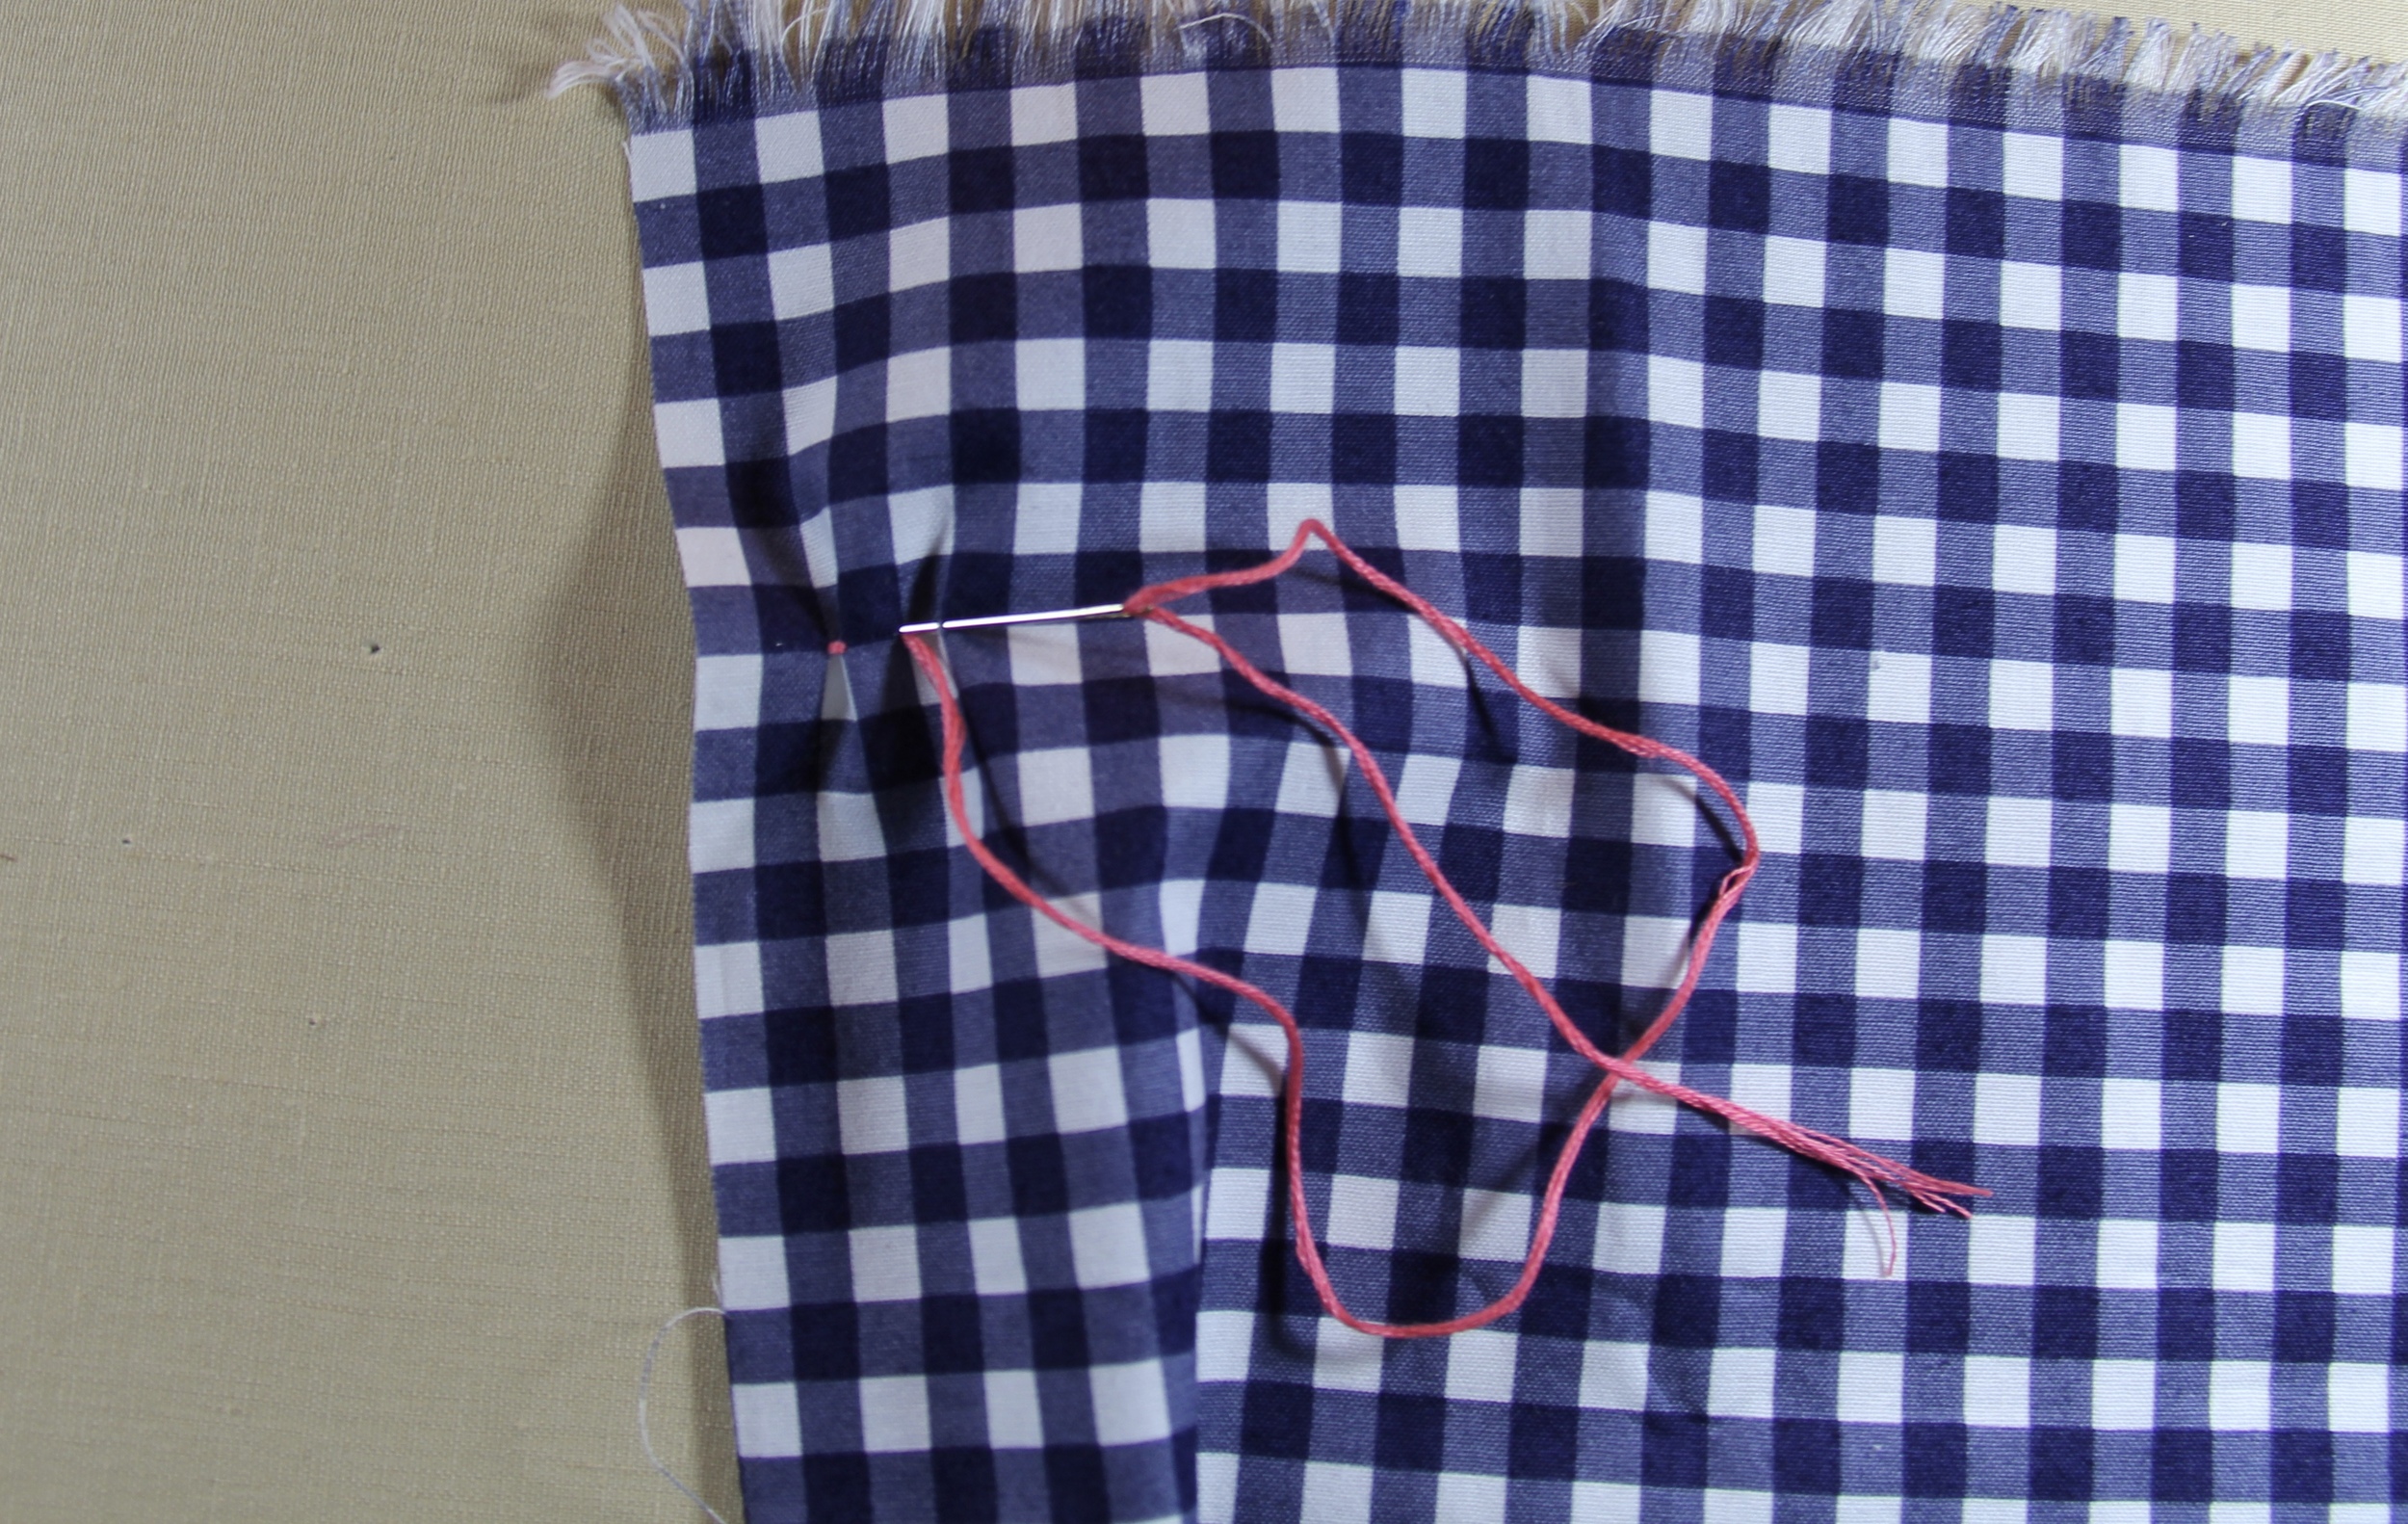
How to Hand Sew a Diamond Smocking Stitch
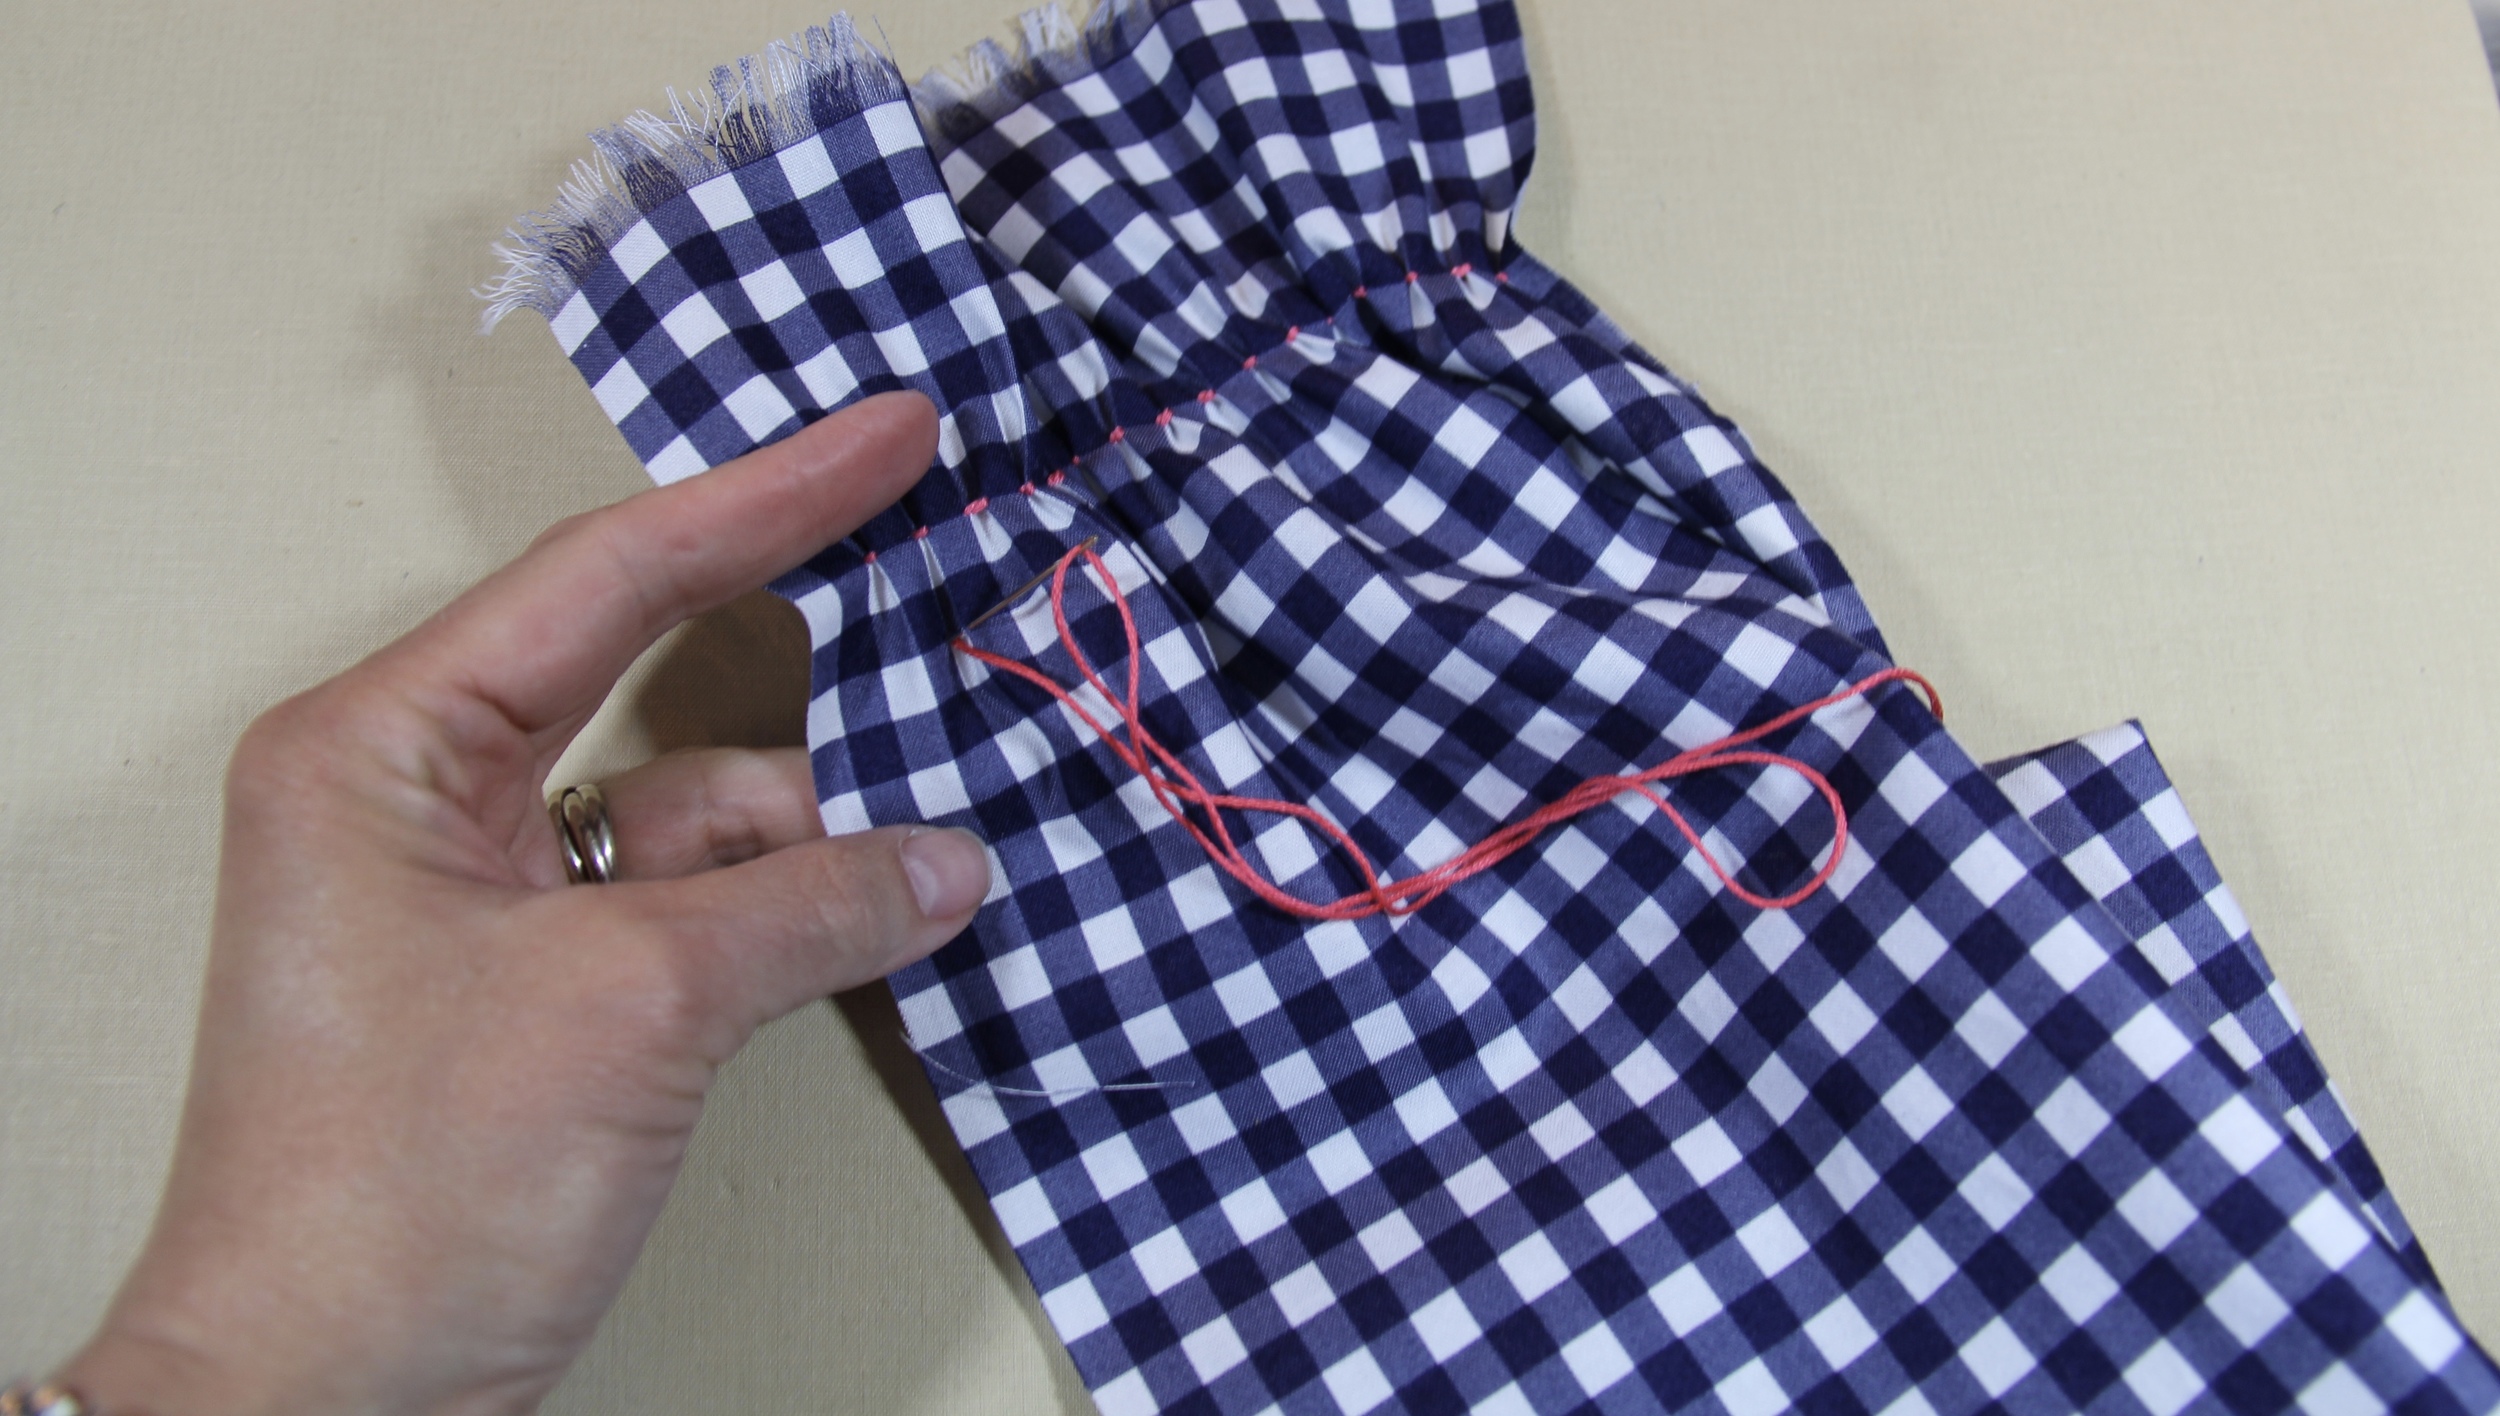
We are going to use a modified Diamond Smocking Stitch. This stitch is worked in a honeycomb pattern over several rows. To begin, cut a length of floss about 18" long, thread the needle and knot one end. If you are using gingham, bring the needle through the back of the fabric 8 squares down and 2 squares from the edge. ( If you choose to use another fabric, begin 2" down and 1/2" in. and make a mark every 1/2"in. across the row.) Pull through the front, stopping when you feel the knot. Move the needle over one square to the right (or 1/4"), picking up two small stitches 1/4" apart. Pull the needle and thread all the way through to make the first pleat. Push the needle from front to back through the right side of the stitch. Stitch one complete. Easy, right? Now skip the next square (or 1/4" inch) and bring the needle through the back of the following top left corner. We will continue this stitch across the width of the scarf.
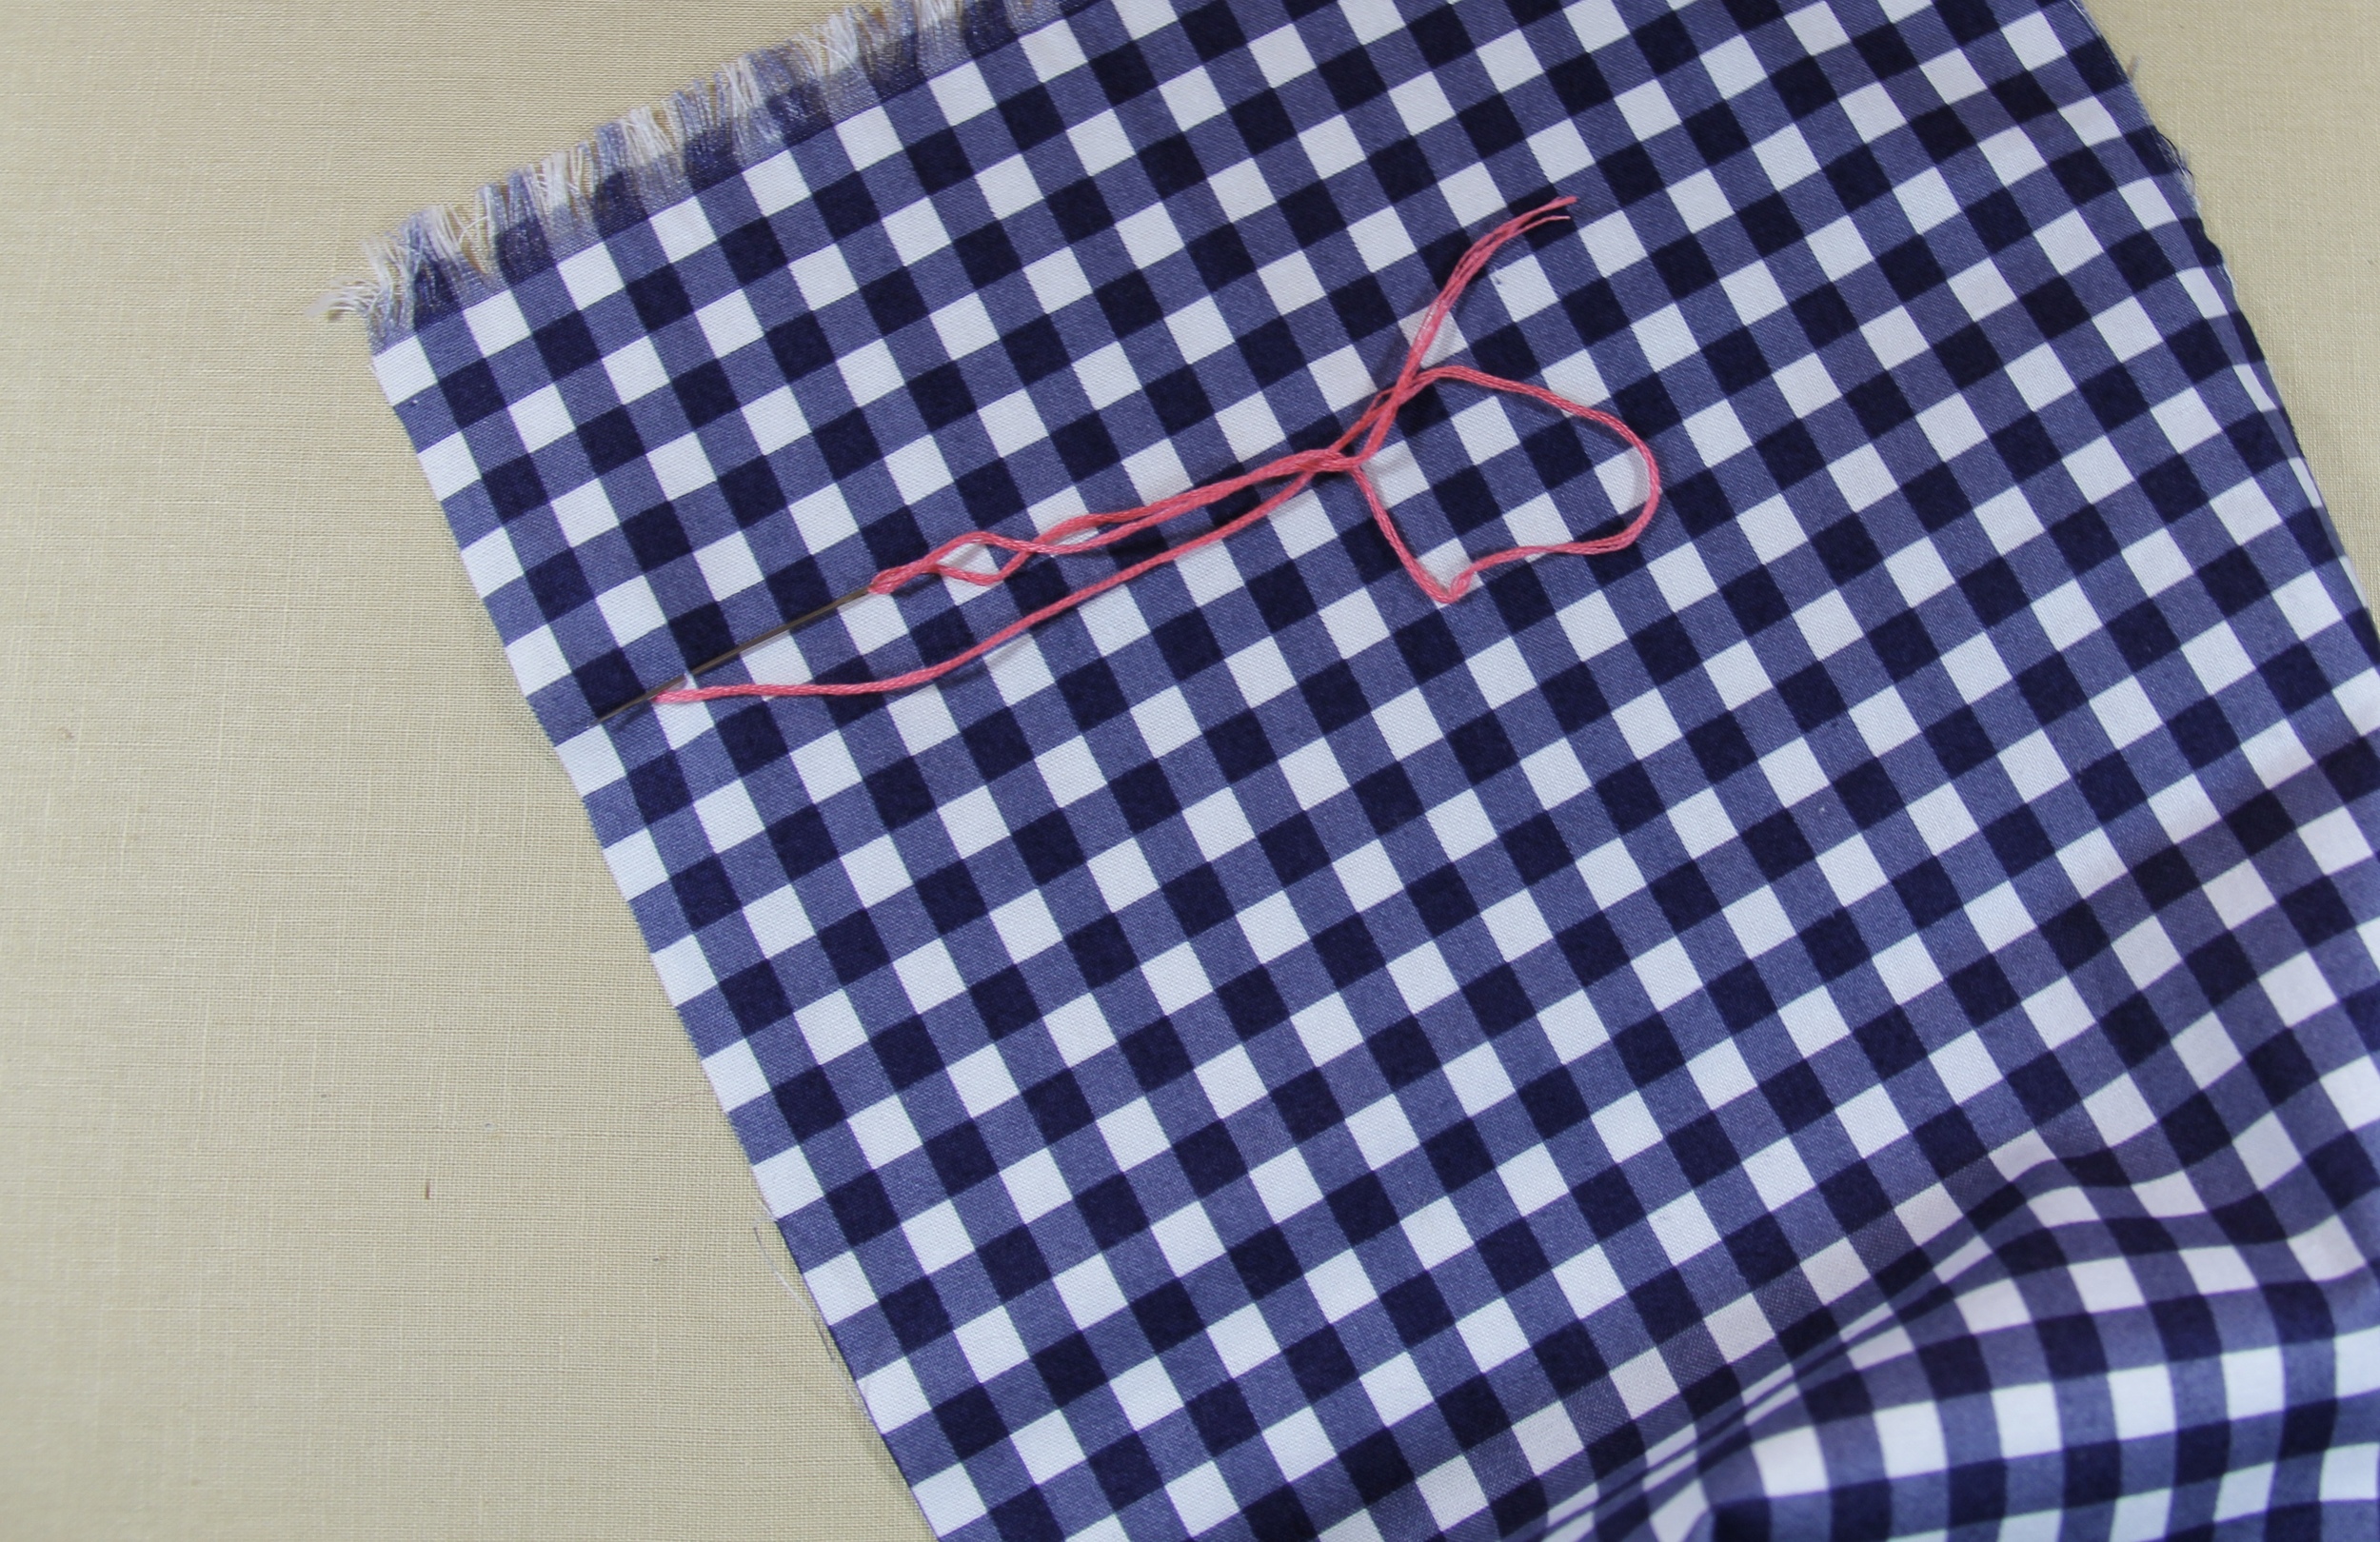
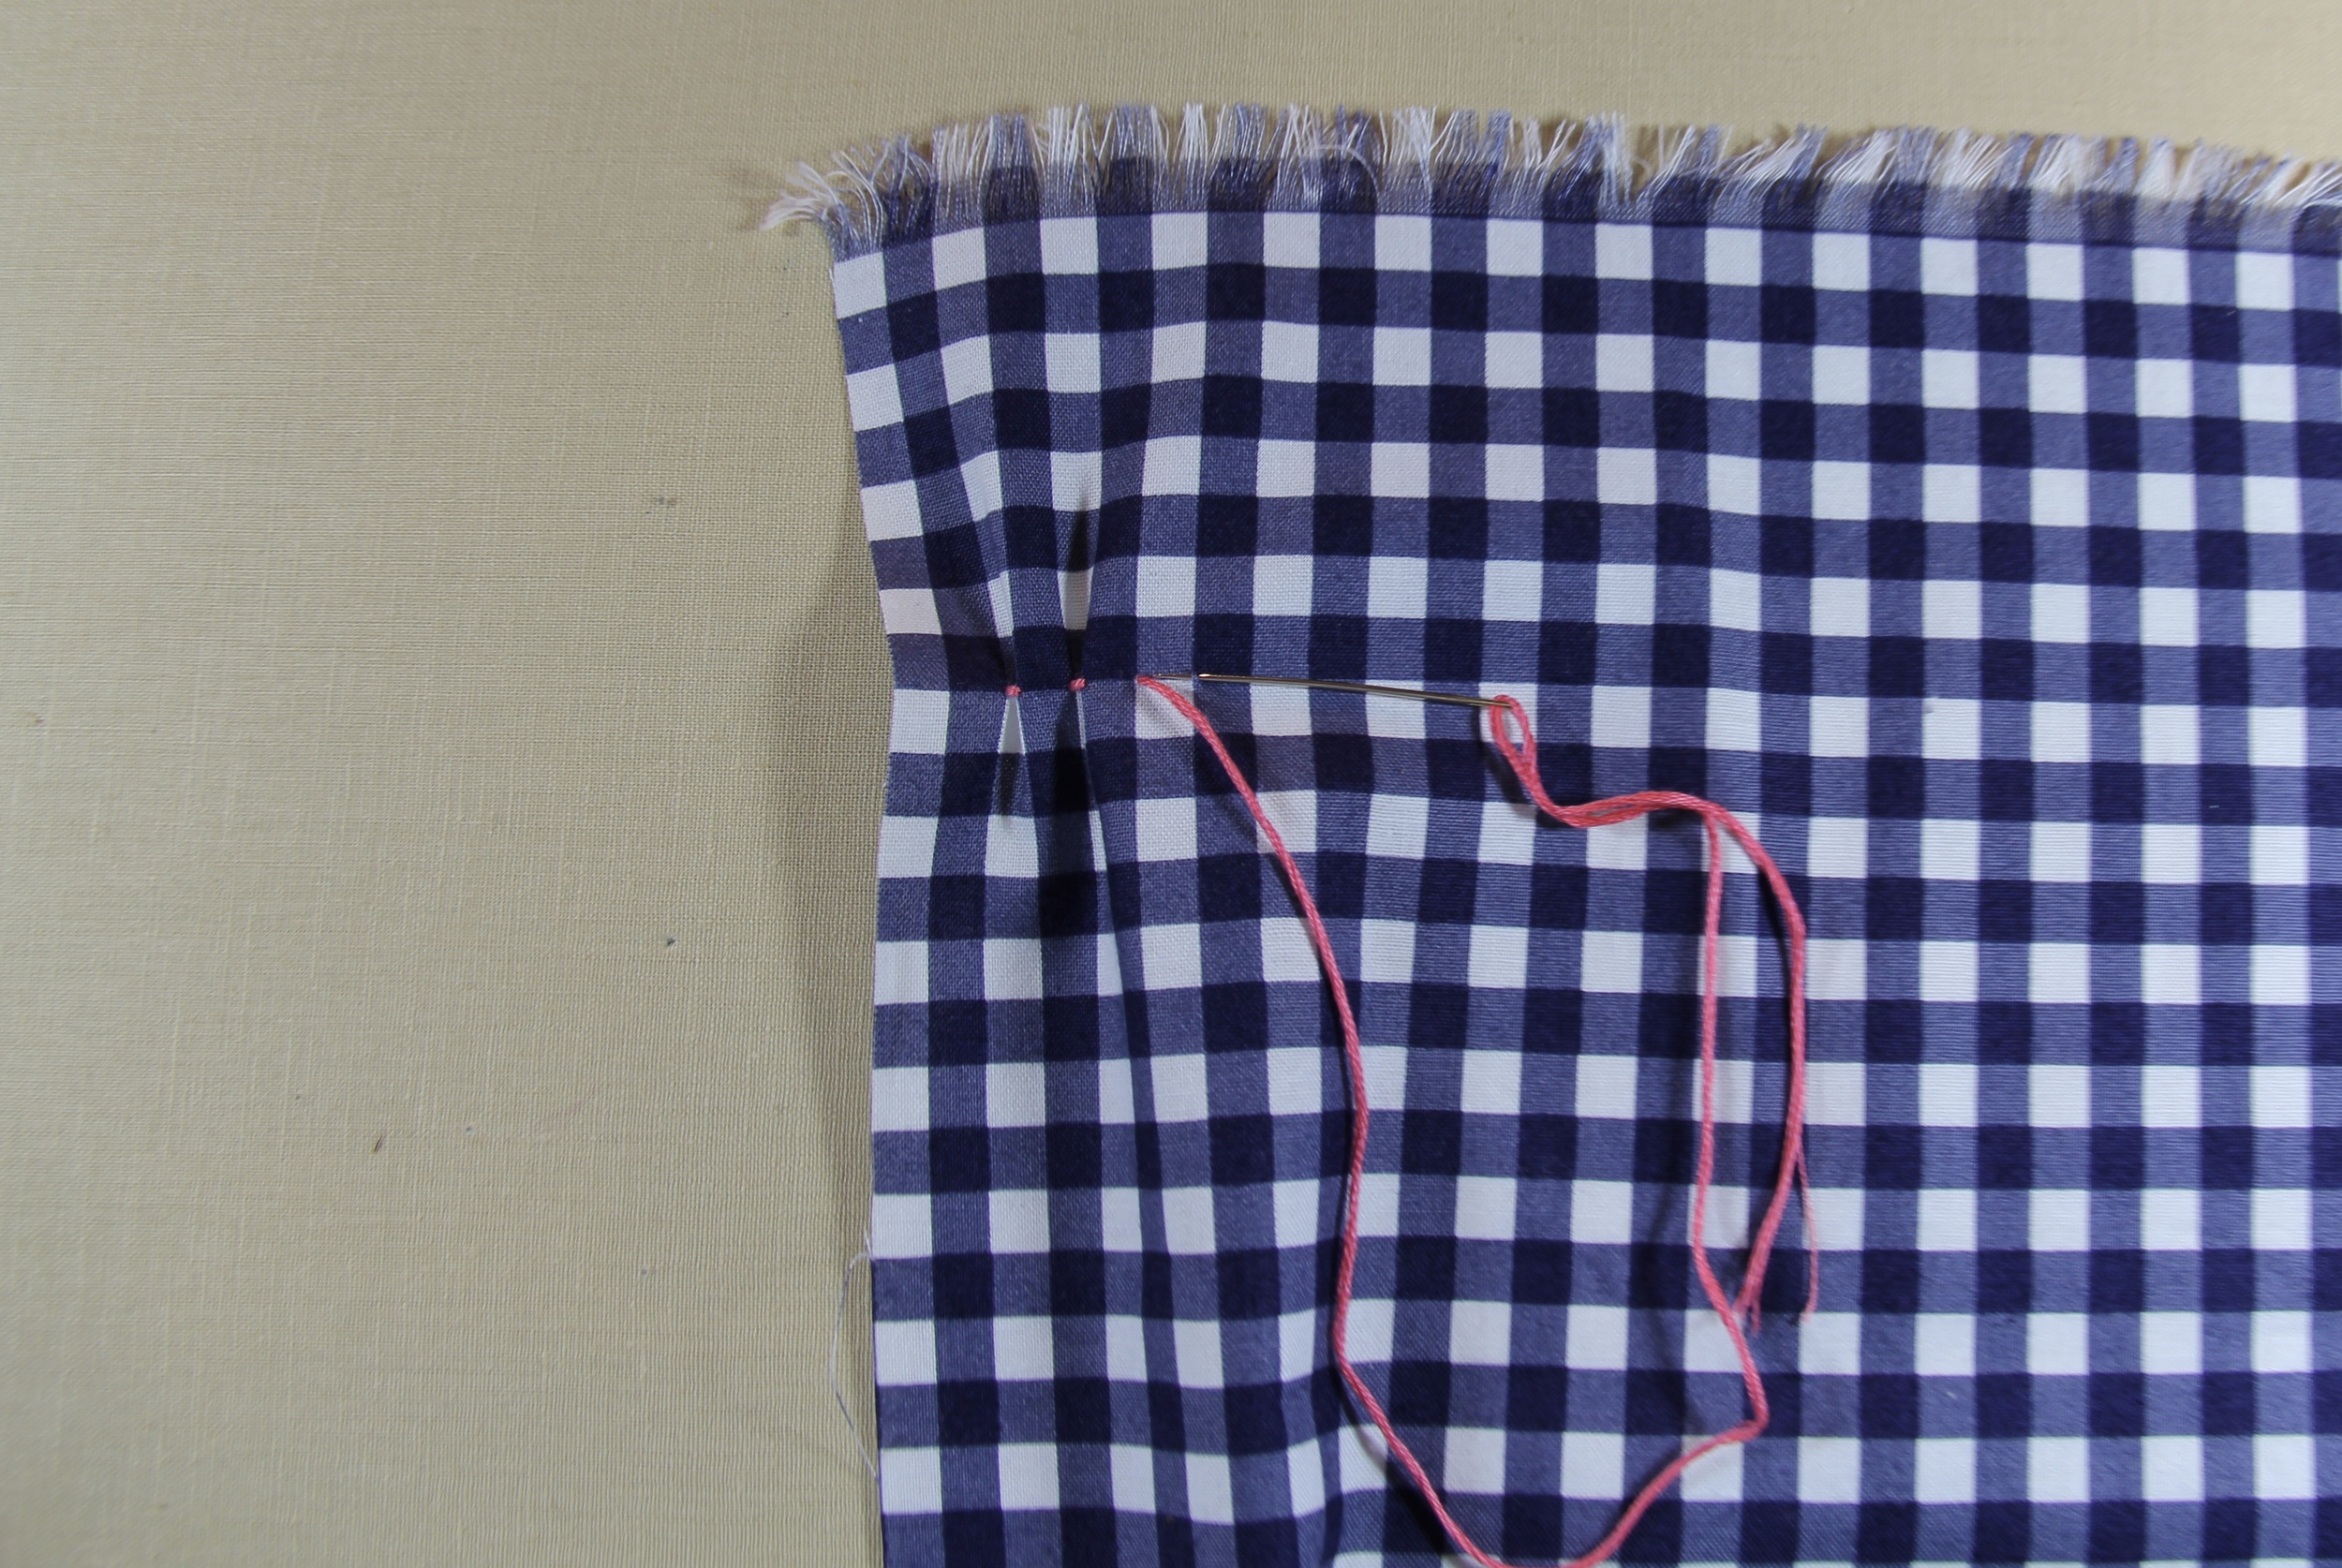
Second Row and every even remaining row
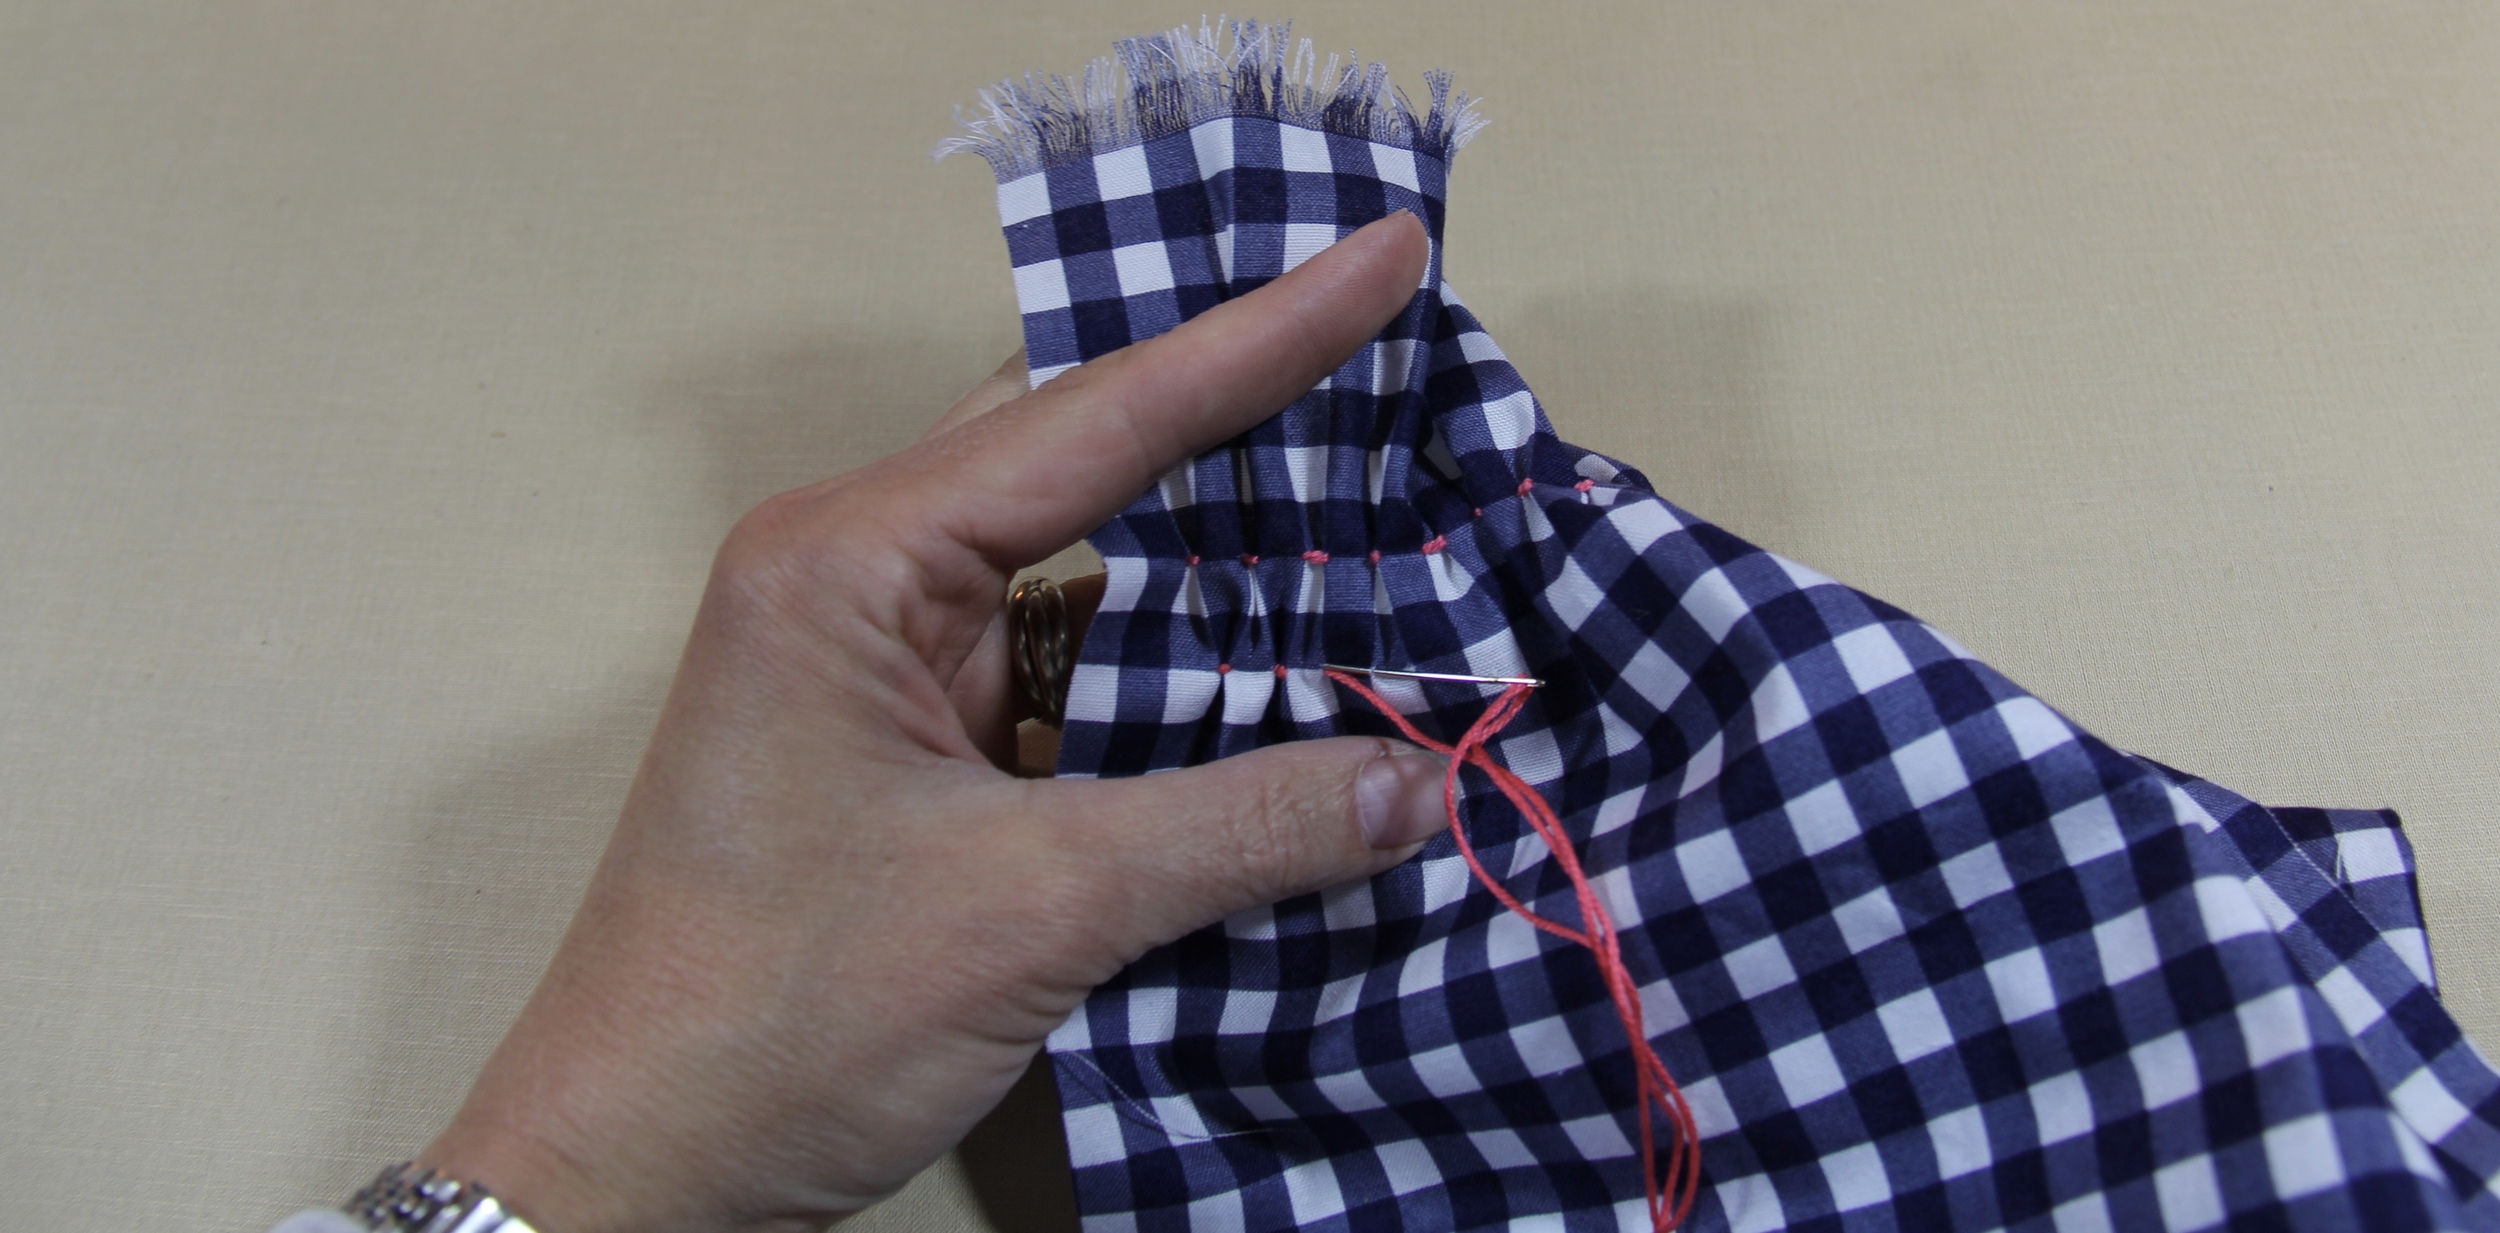
Skip two full squares or 1/2" inch and begin at the top left corner of the 3rd full square down and 3rd square (3/4 inch) in from the first row of stitches and repeat the stitch . (If you aren't using gingham, mark your fabric every 1/2" across the row) End this row of stitches with one less stitch than on the row above.
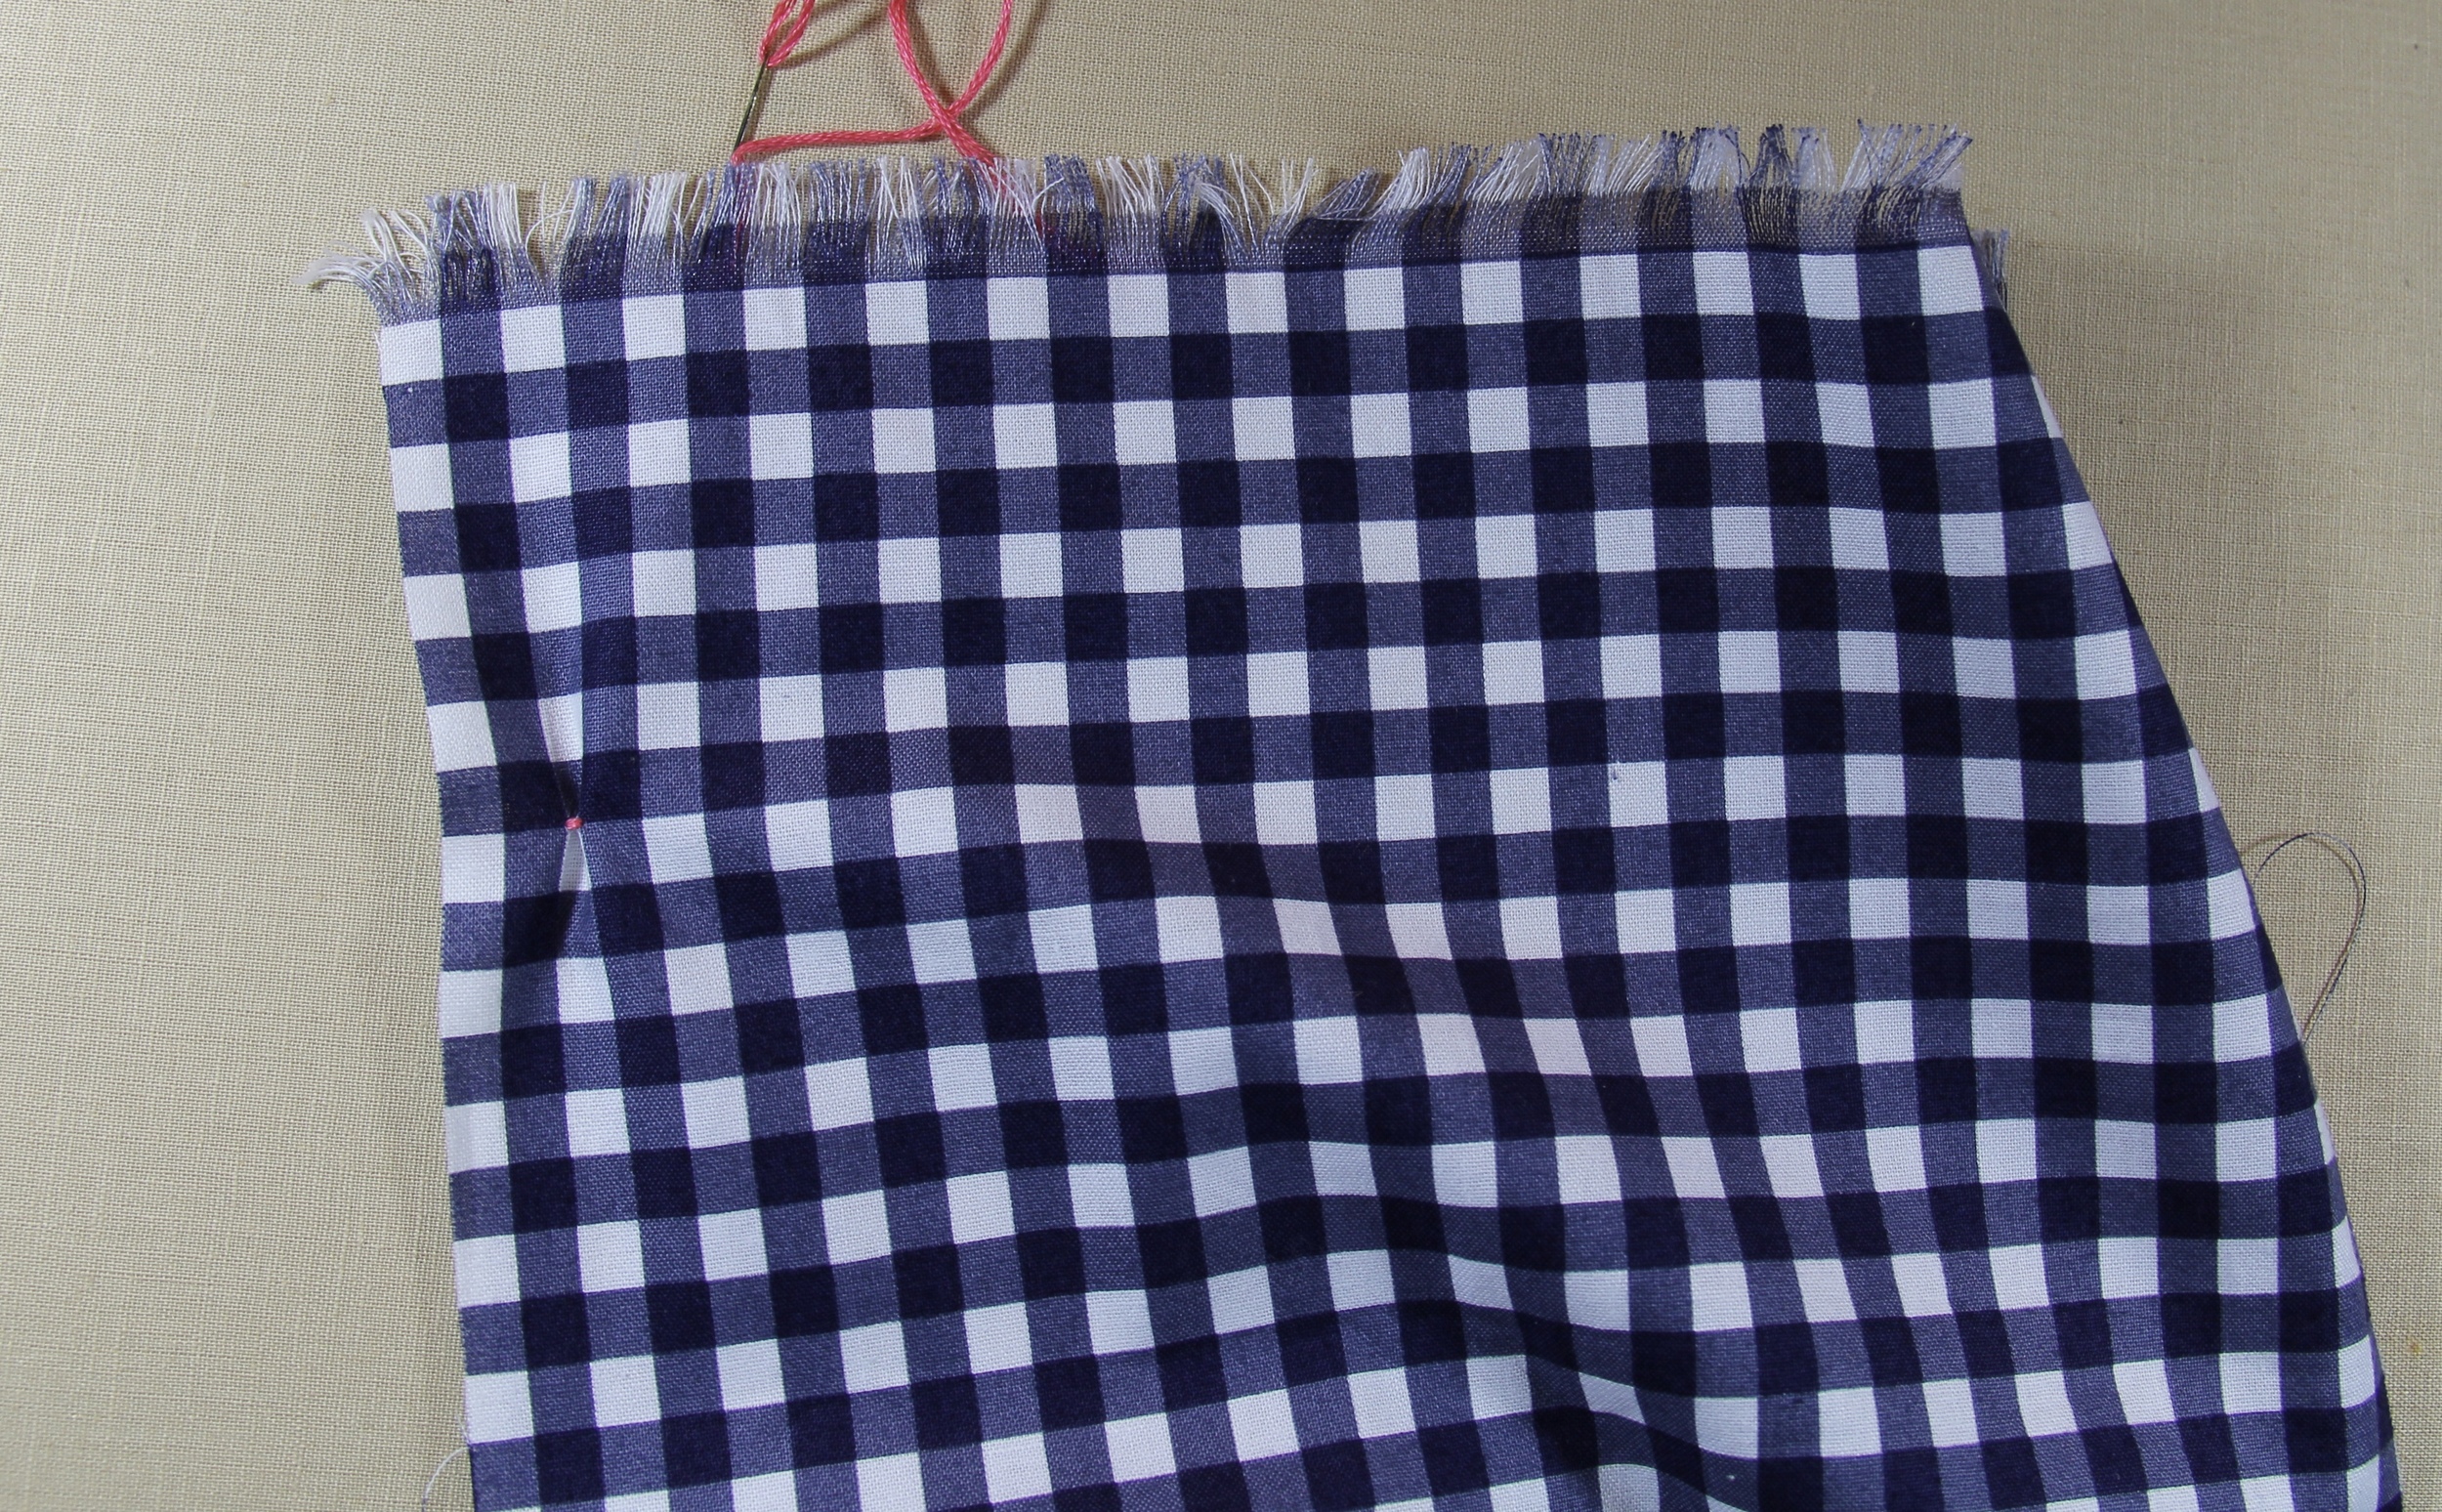
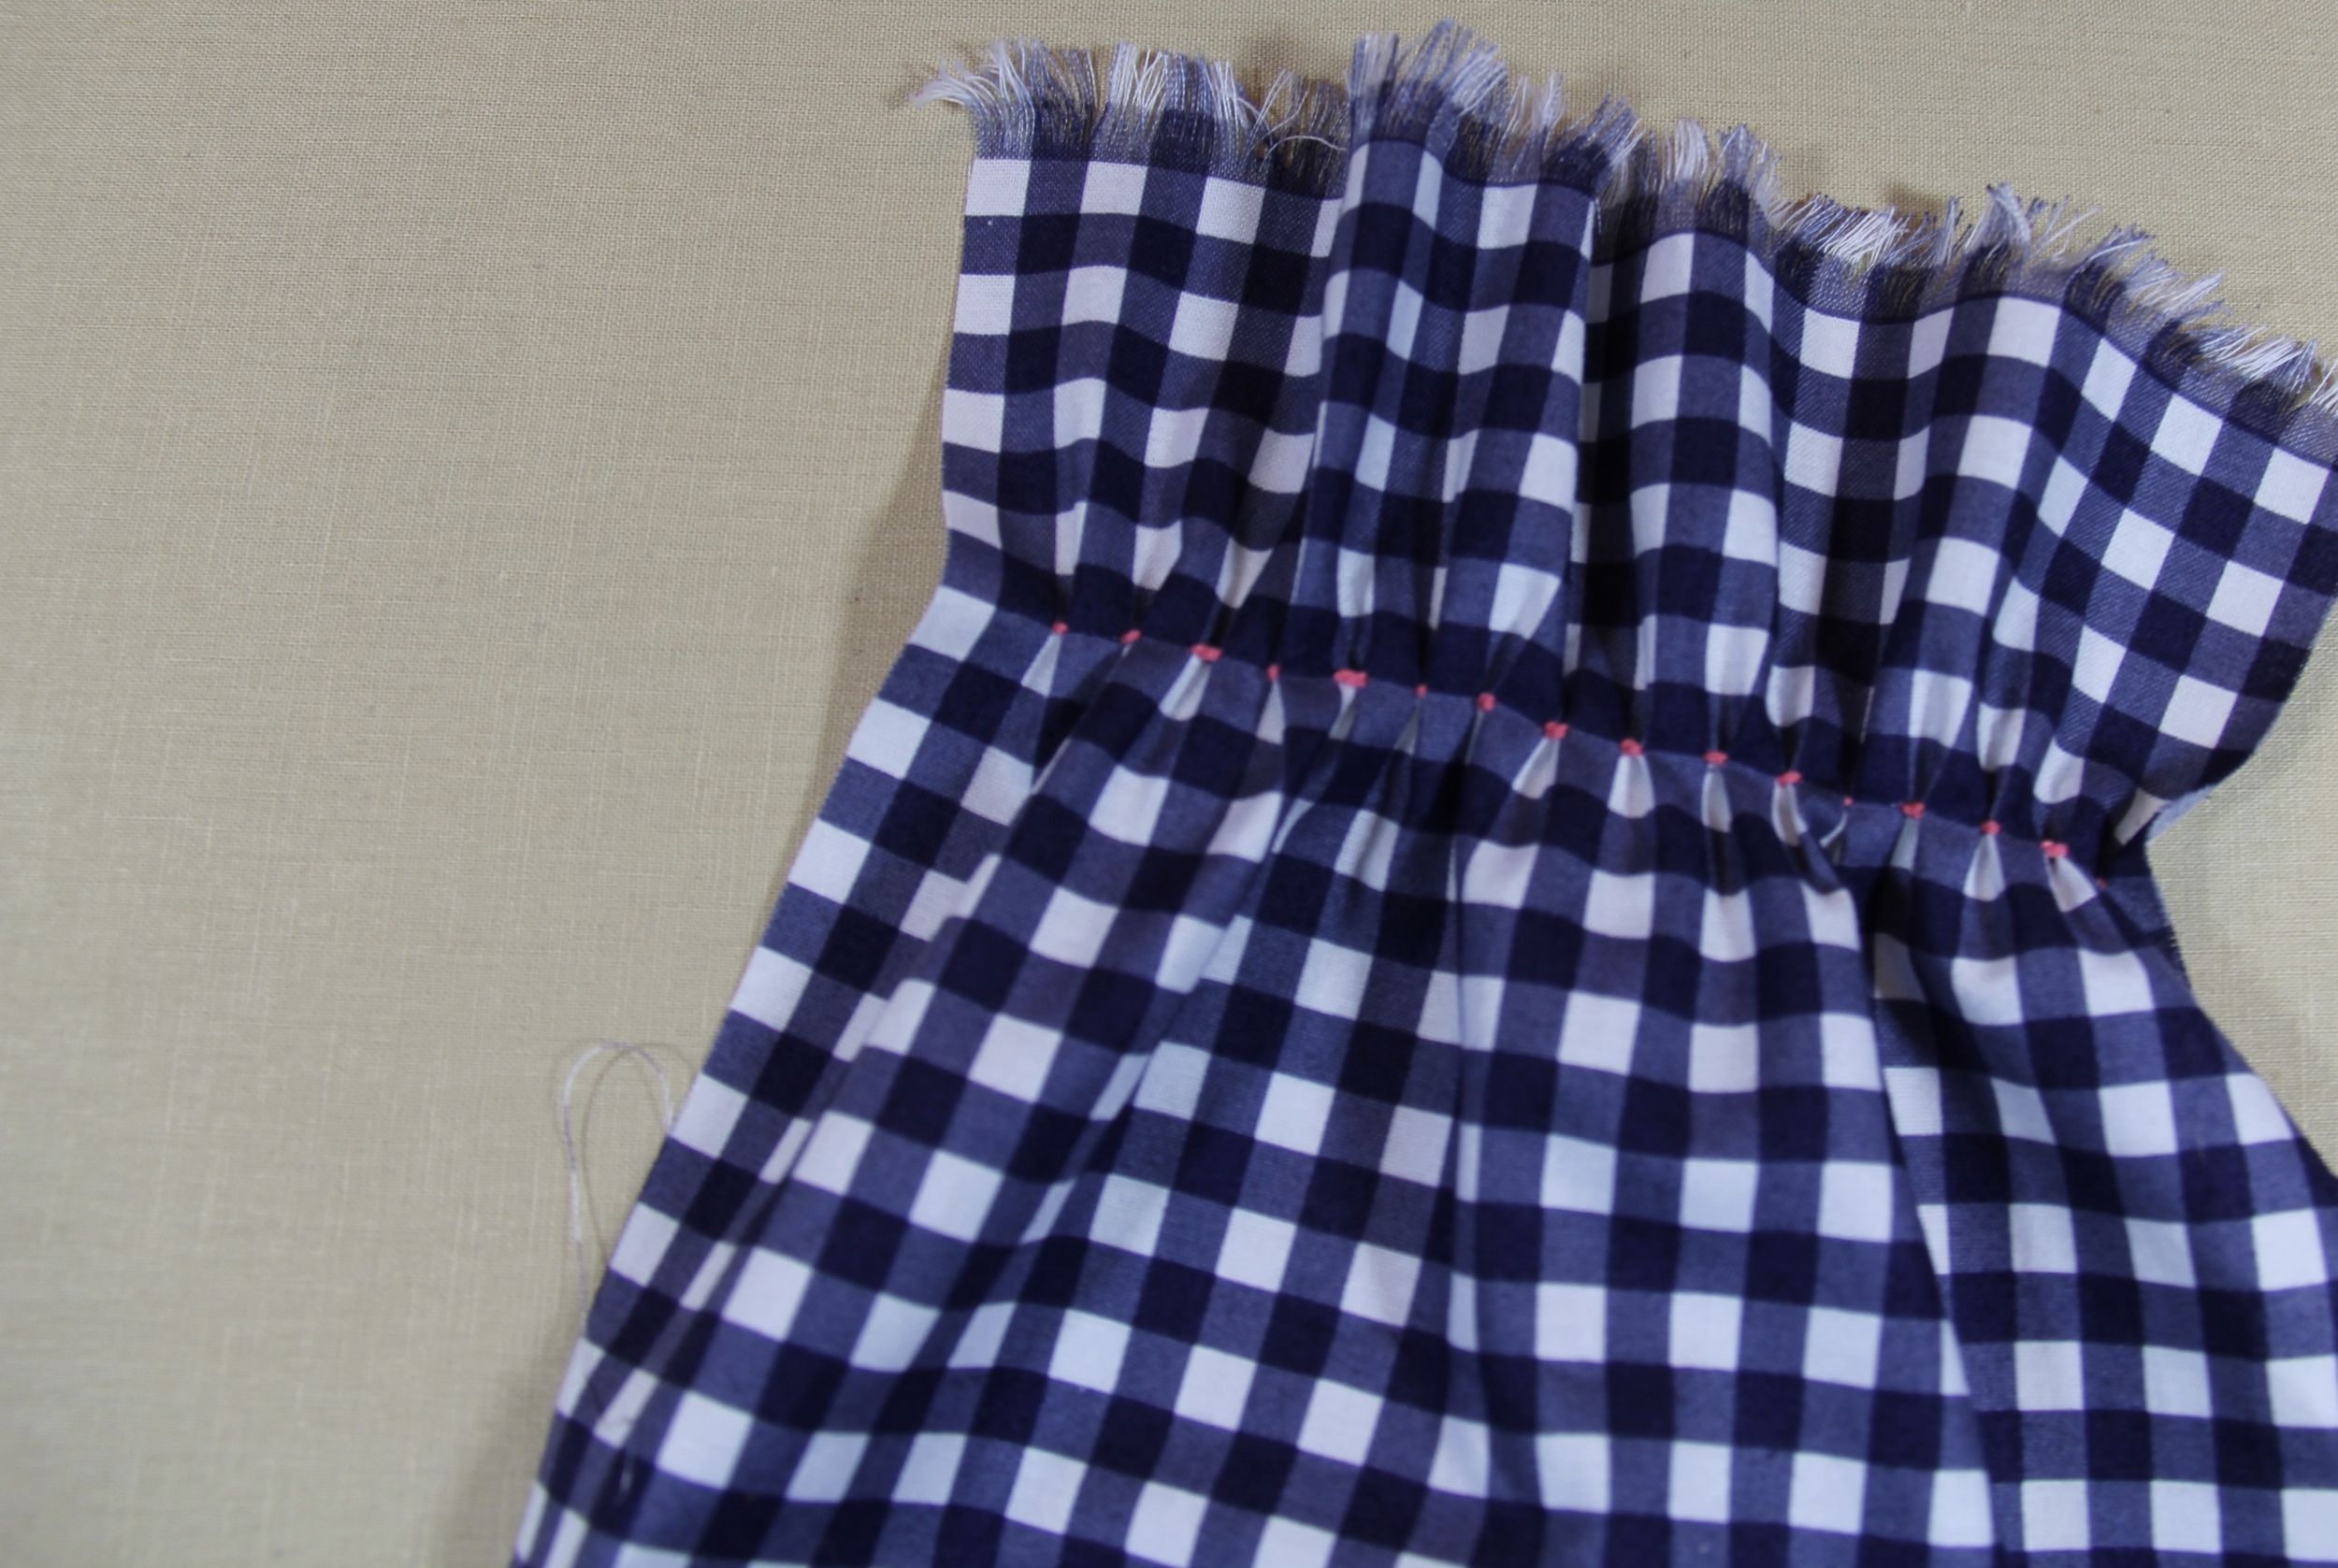
Third Row and every odd remaining row
Insert the needle from behind 2 squares under the previous row and 2 squares from the edge. Make sure that it lines up with first row. (Again, if you are using another fabric, begin marking 1/2" across) Isn't this a pretty pattern?
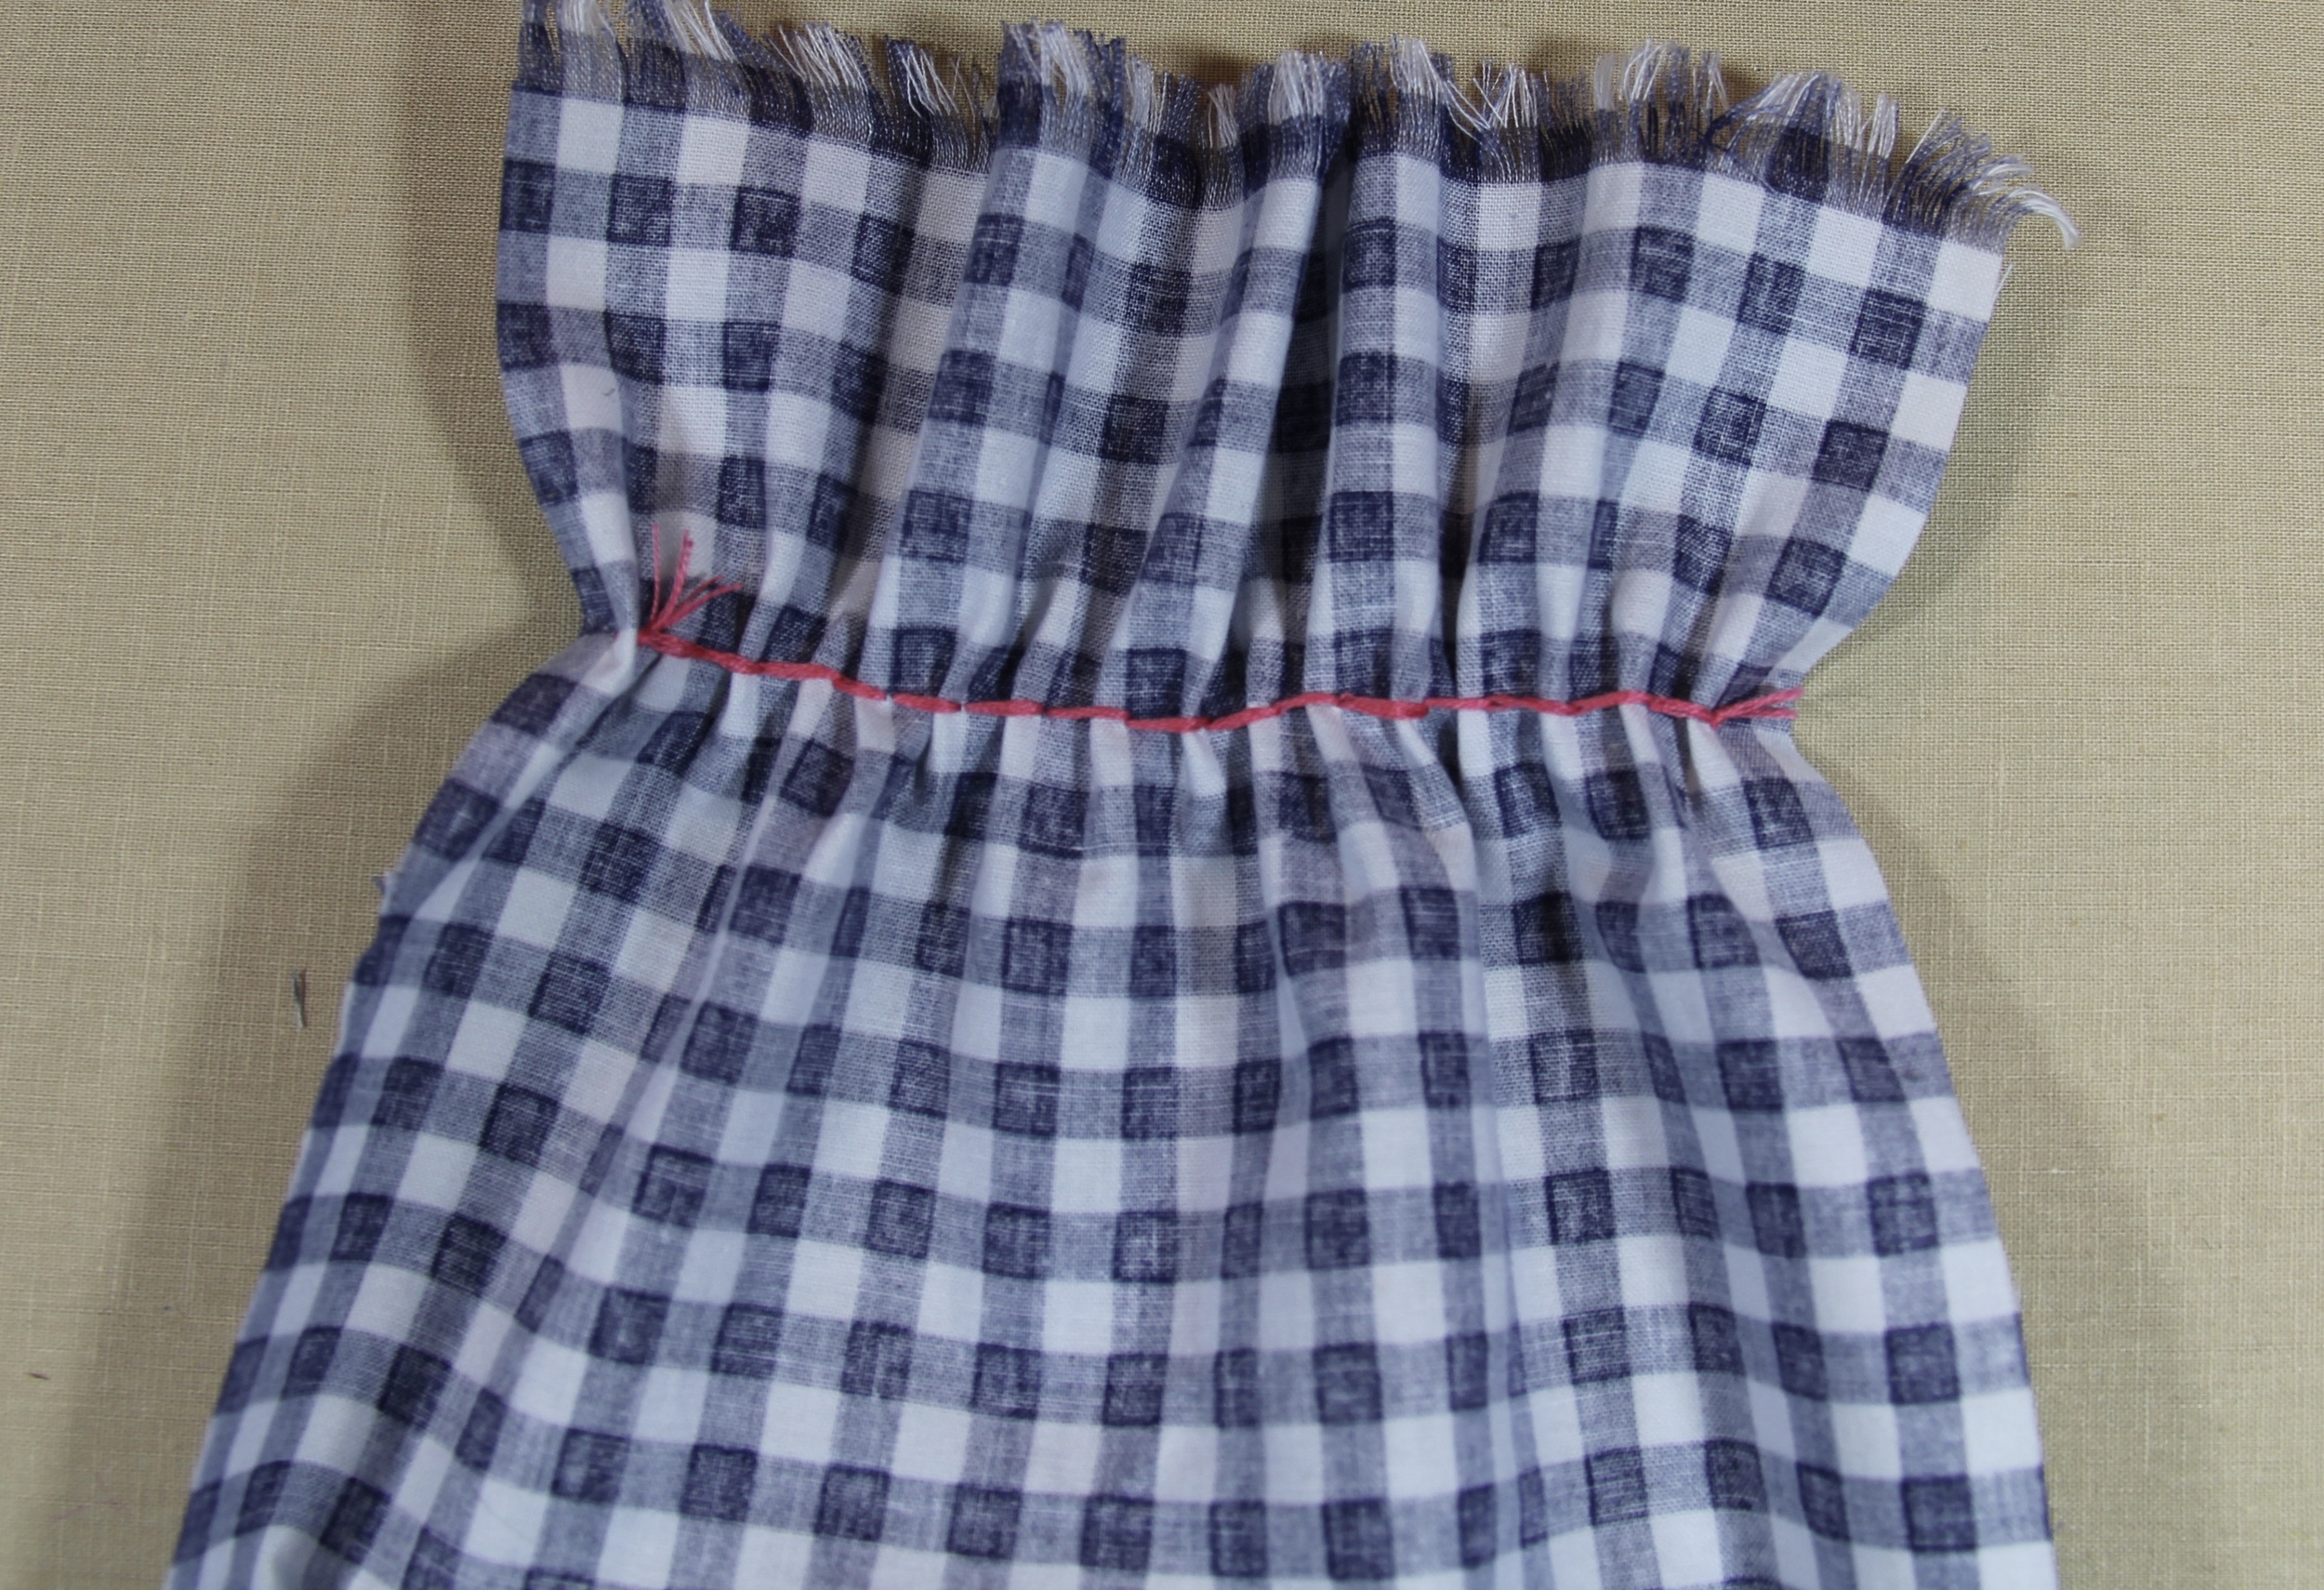
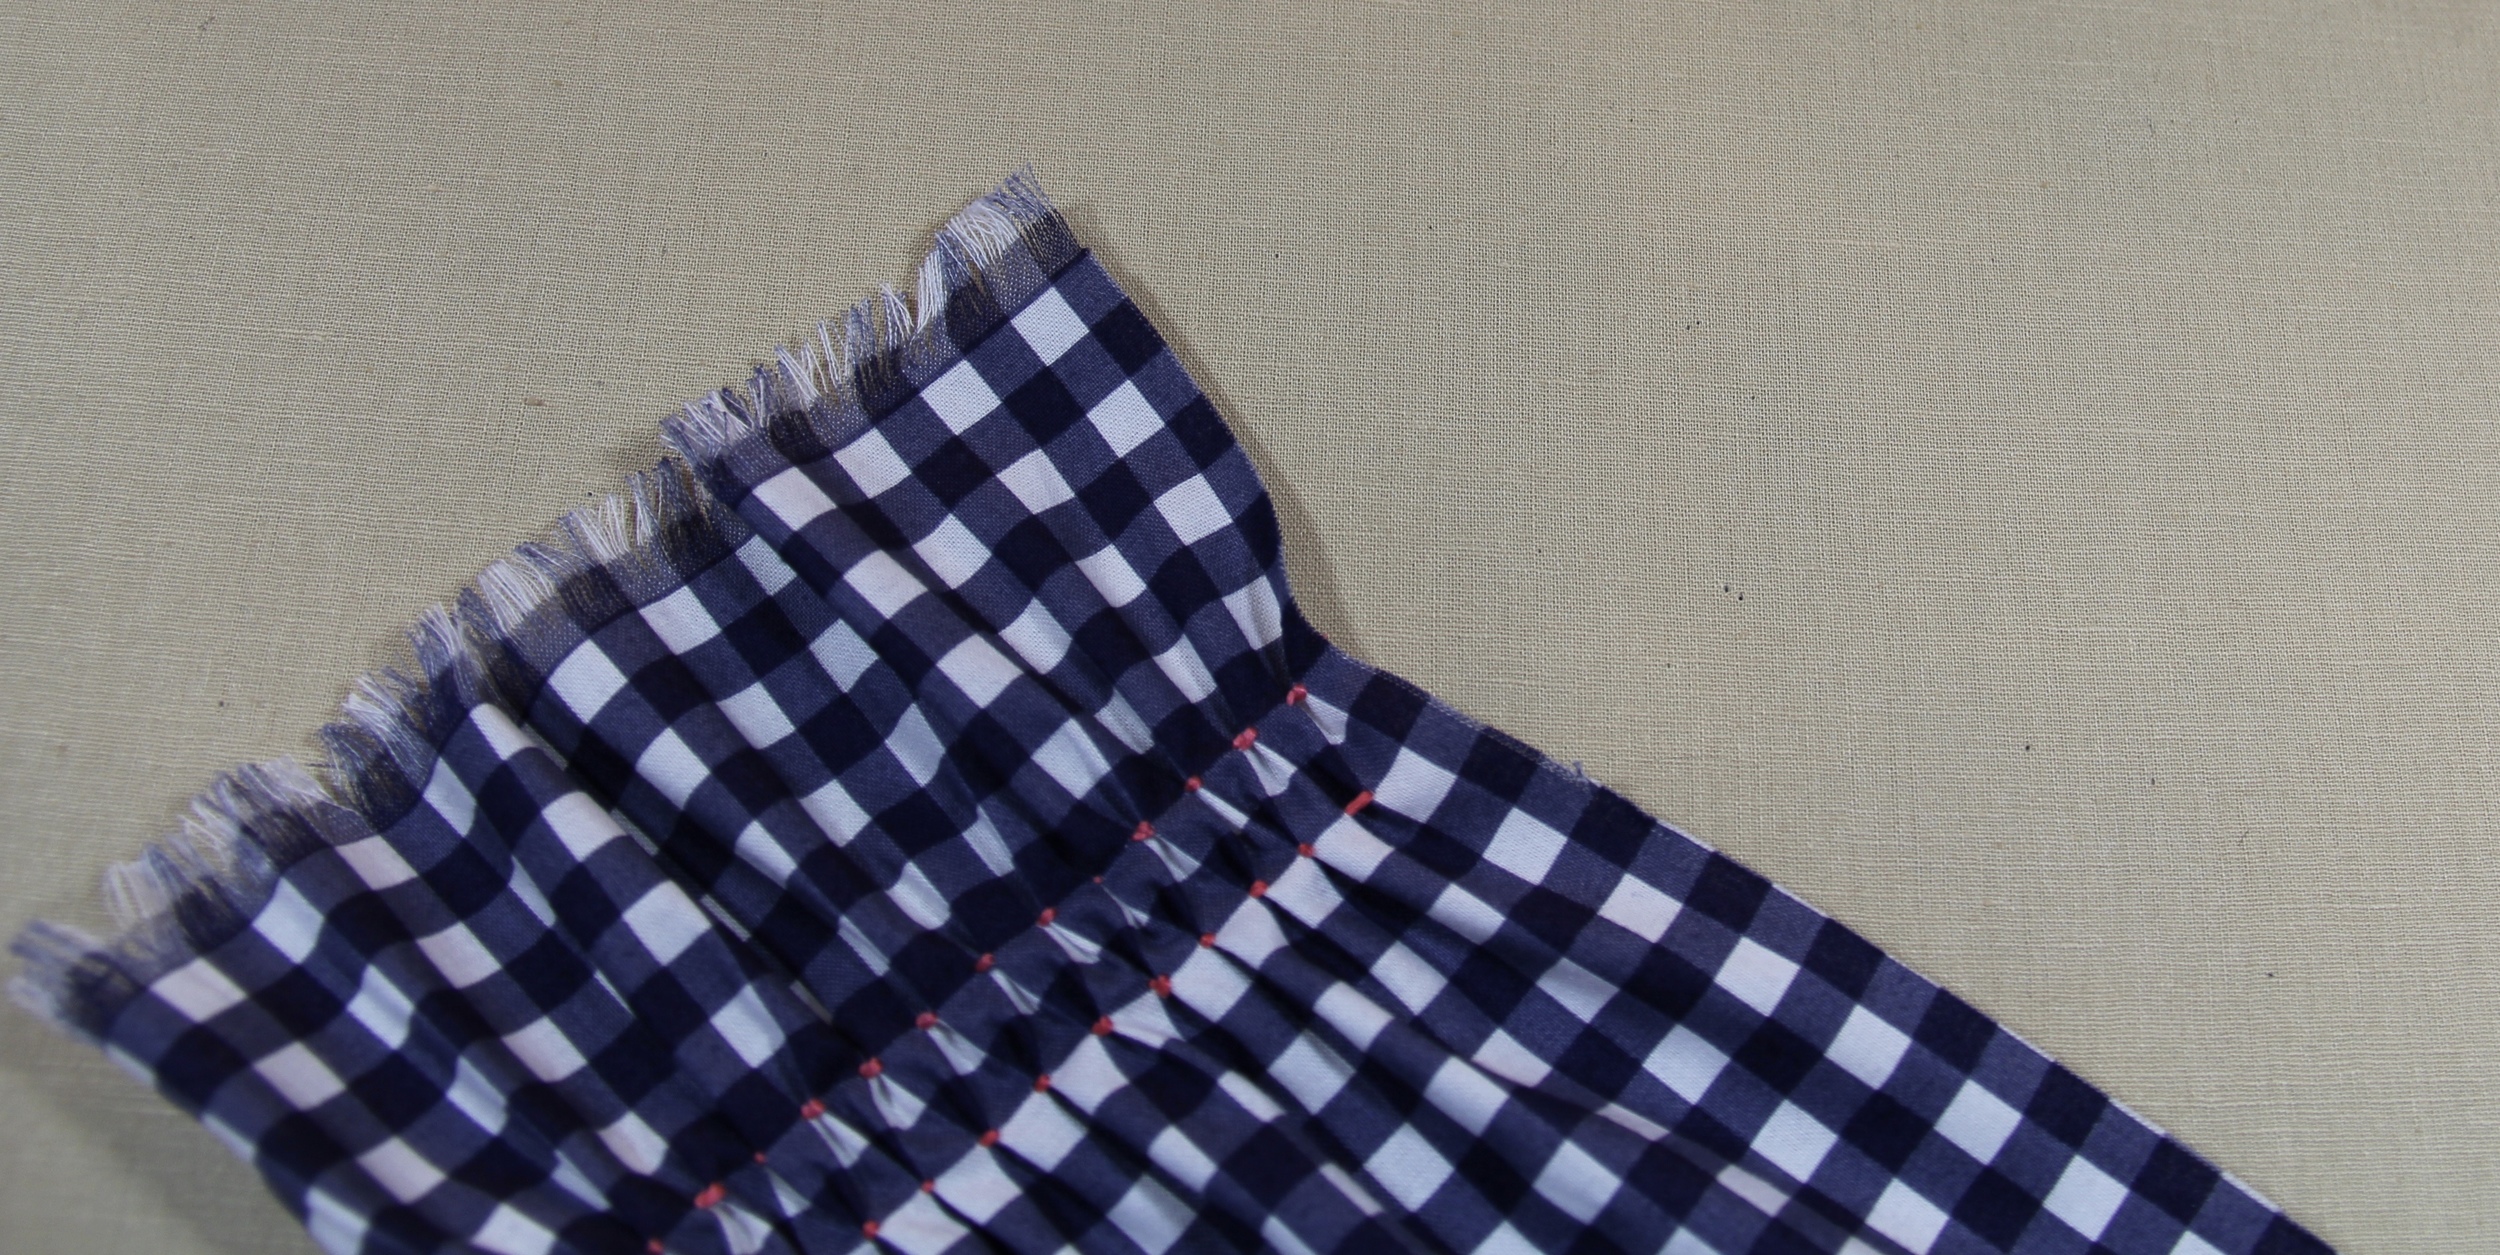
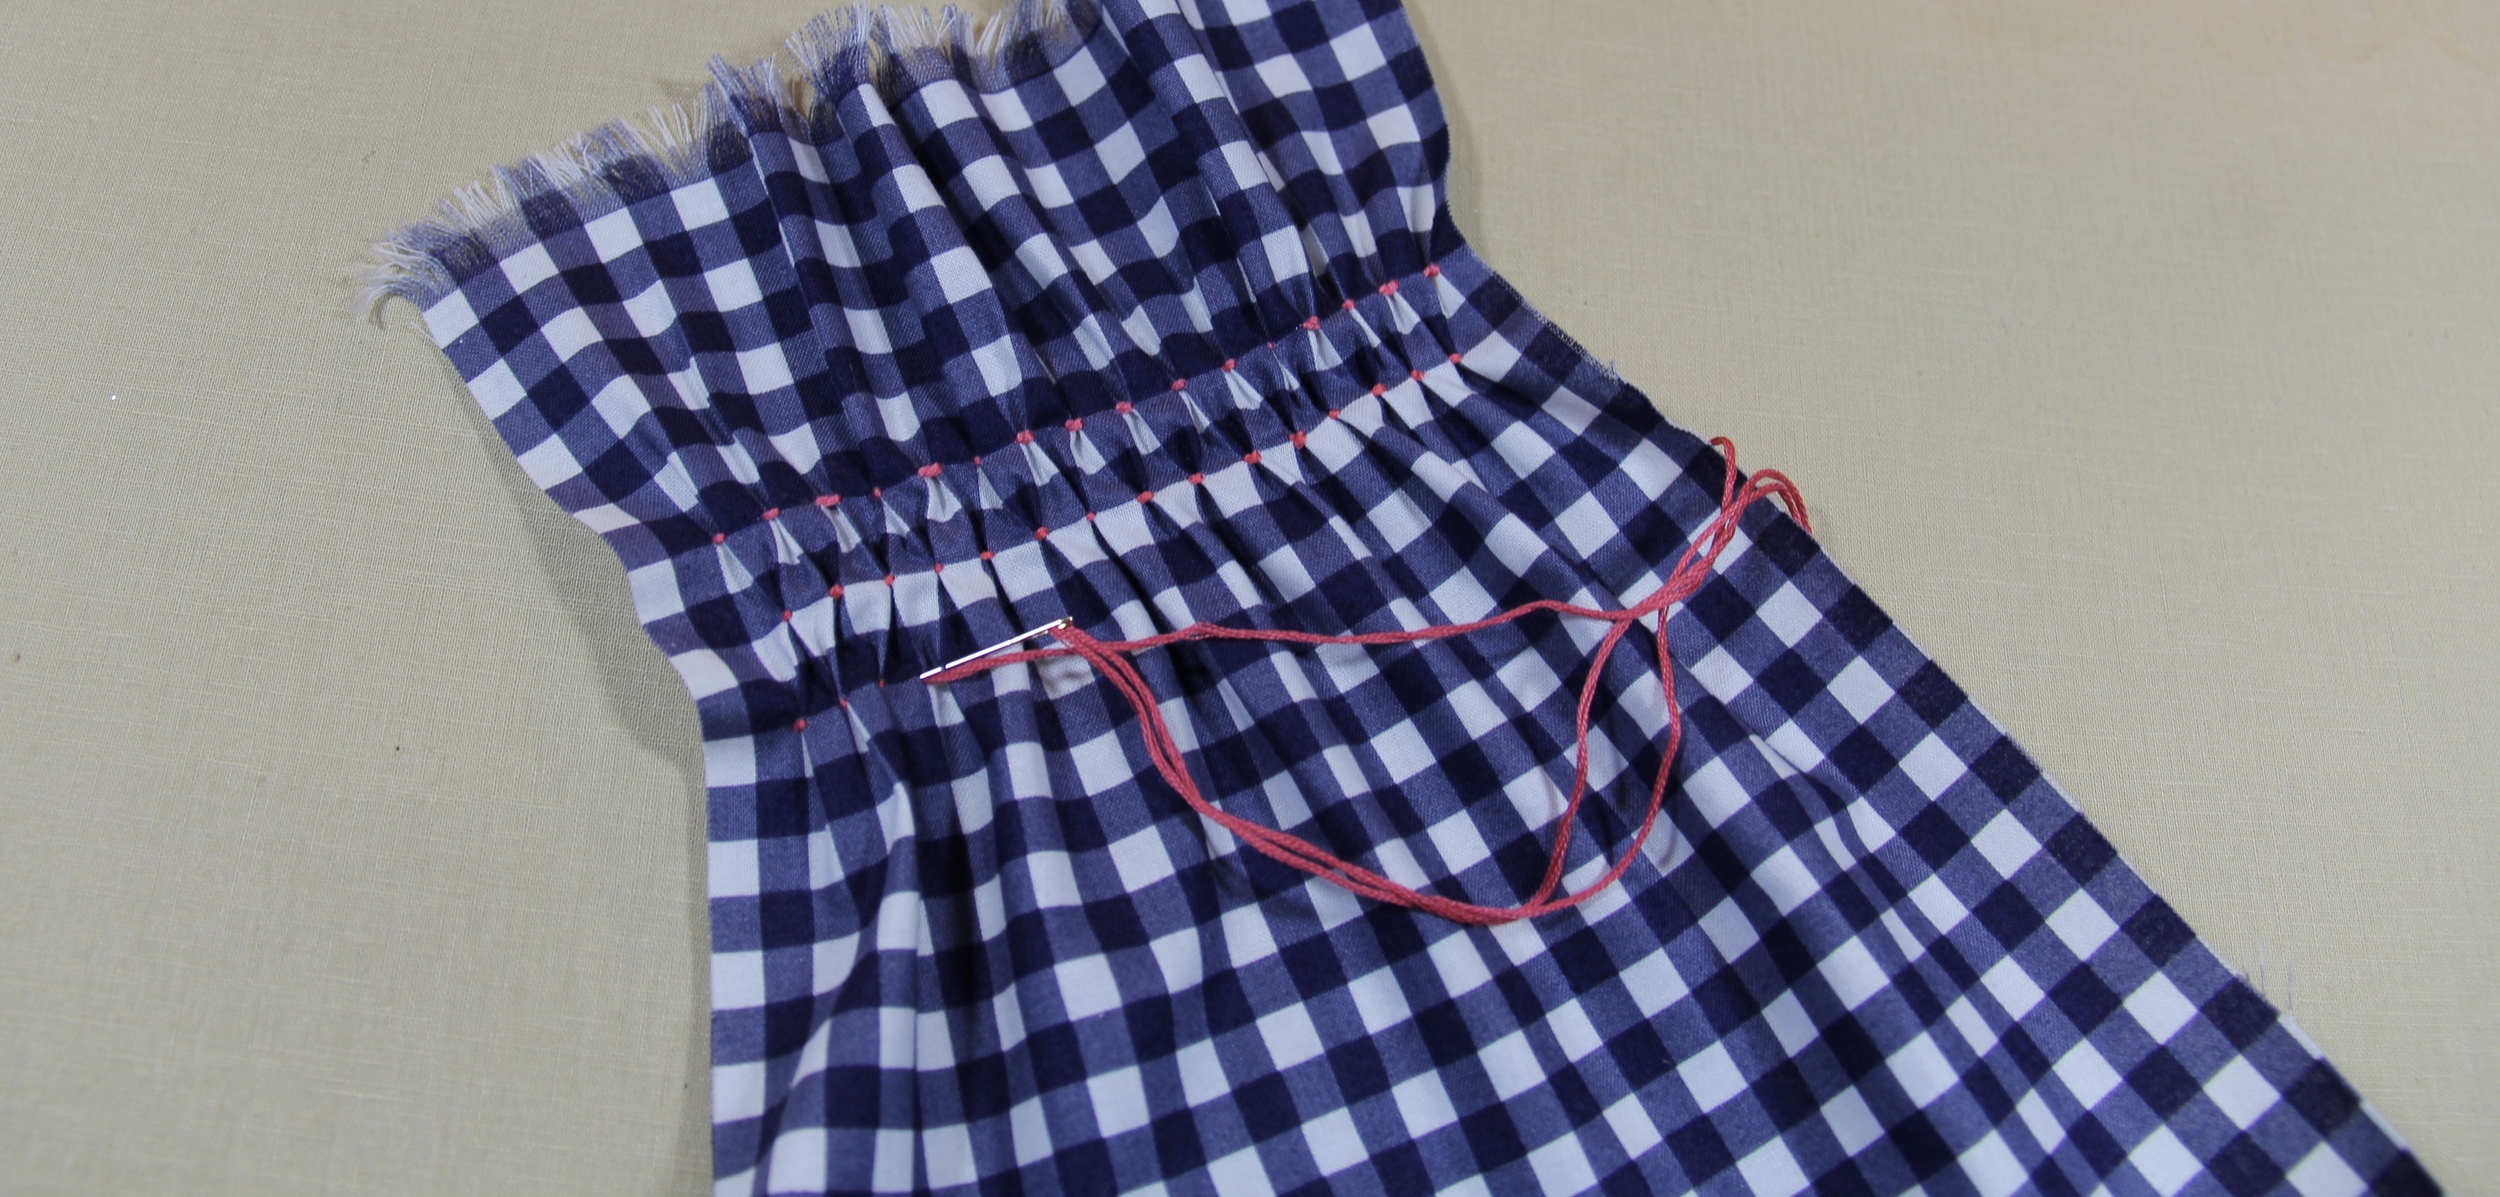
Continue stitching pattern until you have completed 10 rows. Then repeat this on the opposite end of the scarf and then again on both sides of the other scarf piece.
Sewing the Side Seams
Take both lengths of the scarf and line them up, making sure the right sides (the pretty sides) are facing each other. We are going to pin the long sides and sew straight down each side with a 1/2-inch seam allowance. Leave the fringes edges open. (We won't be sewing those).

Finishing
Give the scarf a good pressing, concentrating on flattening the side seams. Reach your hand through one fringed end and grab the opposite side, pulling it right-side out. Ta-da! Finished! What do you think?
This tutorial was featured in the Windham Fabrics Lookbook for Annabel Wrigley's Maribel Line
Please email me with any questions. Also, I'm happy to make a chart to further explain how to do this without a gingham "grid".