
Pleated Face Mask Sewing Pattern and Tutorial Update
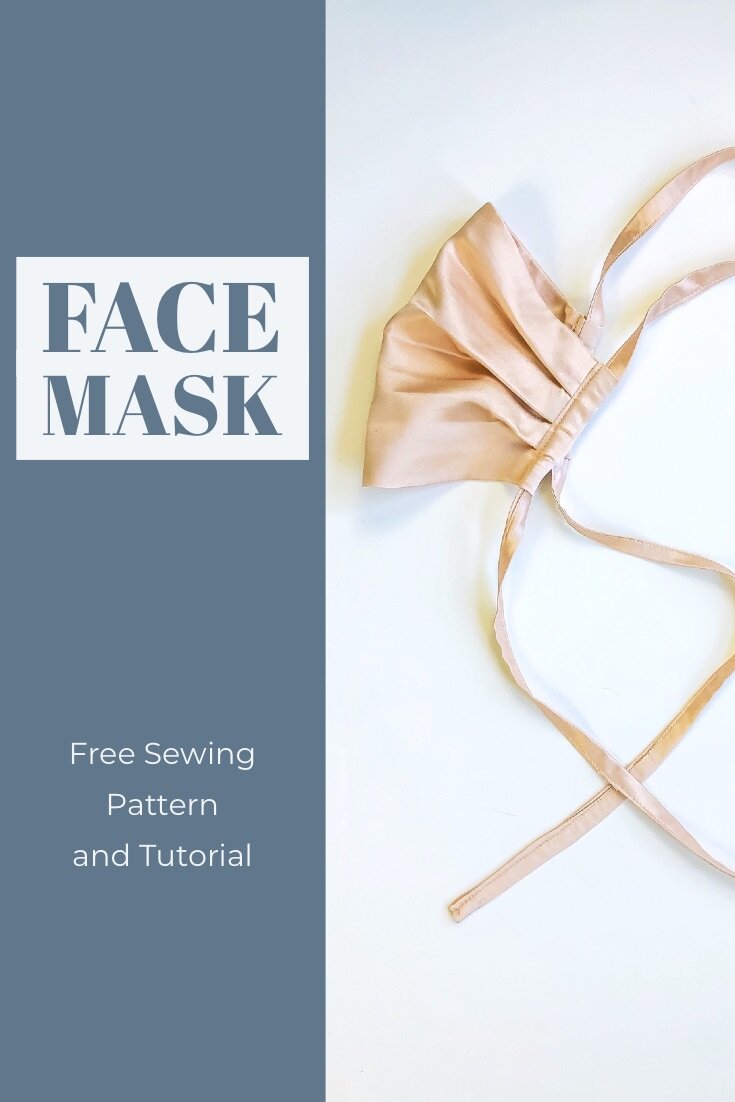
Since cloth face masks look like there are going to be the feature accessory for yet another season, I’ve updated my very popular, Pleated Face Mask Tutorial to add a PDF of the Pleated Face Mask Sewing pattern in three sizes: Adult, Older Child/Tween, and young child.
When I first wrote the tutorial last year, I had no experience in wearing a face mask. Like you,I have learned a lot in the past year and a half. Not just how to make a great looking, safe and durable mask, but also that in order to wear them, they have to be comfortable and they need to completely cover your nose and mouth.
Since cloth face masks look like there are going to be the feature accessory for yet another season, I’ve updated my very popular, Pleated Face Mask Tutorial to add a PDF of the Pleated Face Mask Sewing pattern in three sizes: Adult, Older Child/Tween, and young child.
When I first wrote the tutorial last year, I had no experience in wearing a face mask. Like you, I have learned a lot in the past year and a half. Not just how to make a great looking, safe and durable mask, but also that in order to wear them, they have to be comfortable and they need to completely cover your nose and mouth.
The fitting part can be tricky though. Just as we all have fit preferences in our clothes, masks are no exception. Some people like them snug, others want them to be a bit looser. Some like elastic, others ties- or both. The shape and style of a mask is important too as some prefer the pleated mask and others the shaped mask.
All sizes of the Pleated Face Mask are constructed in the same manner and feature a side casing that can be secured with elastic or a drawstring cord. (The addition of a drawstring cord acts as a neck strap so that the wearer can easily take it on and off when walking around.)
The small size fits a child around 5-11 years old. The older child/tween size is a bit larger and fits a child 12- a small adult. The adult size is the largest and should fit most grownups.
You can download the pattern here.
Mask, Vax, wash your hands and be safe out there y’all!
XO, Hilarie


How to Sew A Detachable Statement Collar- Part Two
Learn to sew a detachable statement collar with perfect collar points.
Welcome to part two of the series, How to Sew a Detachable Collar. Detachable Statement Collars are such quick and satisfying sewing projects. There is so much mix and match potential in the variations that you might find yourself amassing quite a collection. Throughout this series, we will begin with a basic collar pattern and learn how to change the design to create a look that is uniquely you.
In my introductory post, I showed you how to make a Peter Pan-style rounded collar with additional tips for sewing curves. For this installment, we are going to learn a bit about the structure of woven fabric and how it relates to creating sharp points to sew a Pilgrim-Esque maxi collar.
If you missed the first post, catch up here: How to Sew a Detachable Statement Collar, Part One

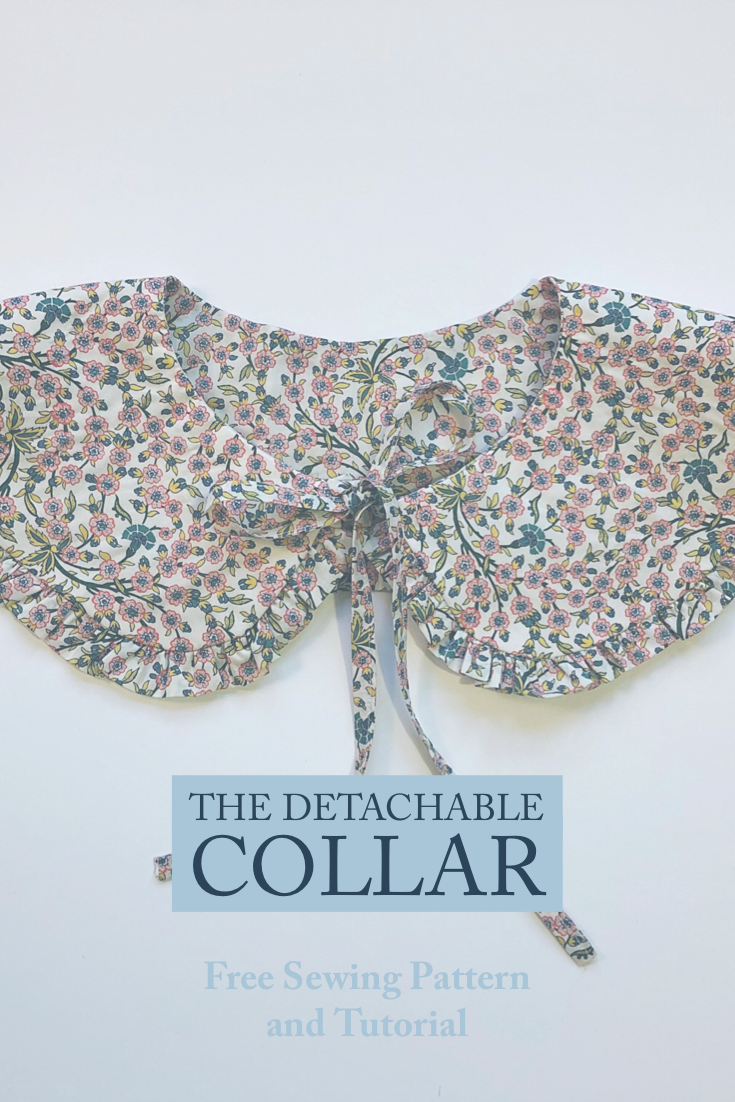
These are two of the many variations that you can create with this pattern. The chambray collar looks great with a mock-neck top worn with a stack of chains and pearls. The plaid taffeta collar has a bit of a softened point and I added a self fabric gathered ruffle to amp up the fun. The possibilities to add your own touch are only limited by your imagination. Have some fun with it!

The pattern is available for download here and also at weallsew where you will find the step by step tutorial. I can’t wait to see what you make!
New to using PDF sewing patterns? Check out this link for tips on assembly.
Head over to weallsew to download and get the tutorial.
Happy Sewing!
XOXO, Hilarie


The Detachable Statement Collar Free Sewing Pattern and Tutorial
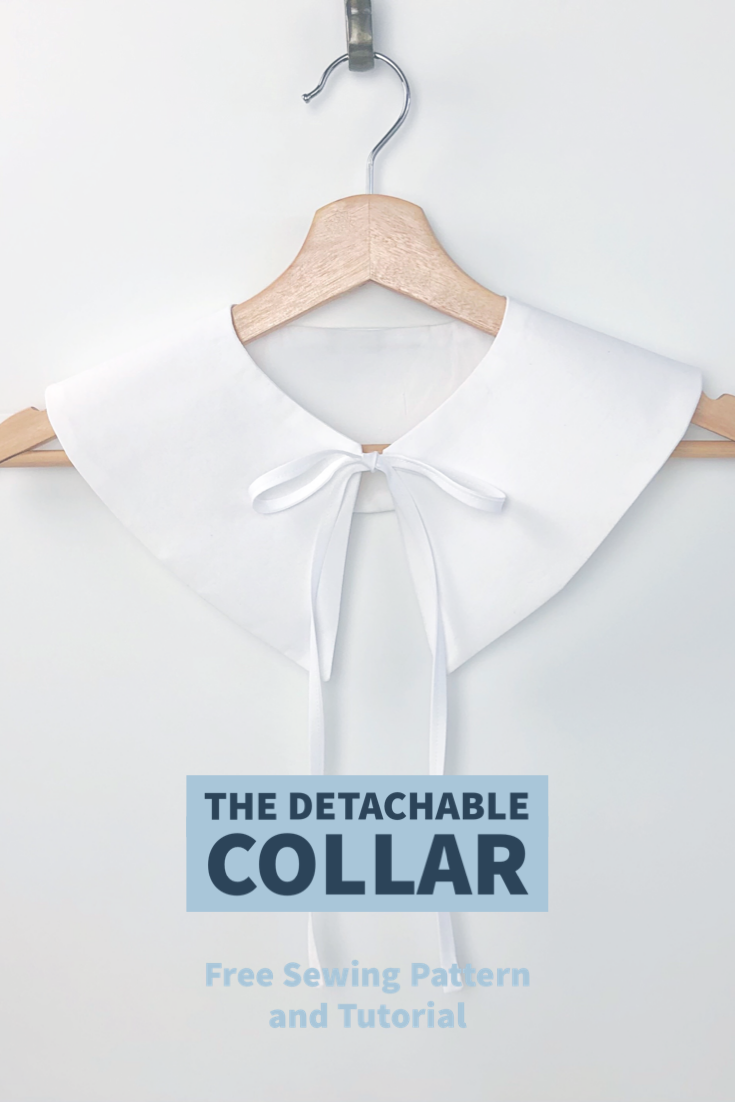
Statement collars are everywhere right now- and with good reason. They can be easily tied on over tees, coats, sweaters and even dresses for an instant outfit upgrade. The collars are really easy to make and to give as gifts too!
Detachable Statement Collar Free PDF Sewing Pattern and Tutorial
Statement collars are everywhere right now- and with good reason. They can be easily tied on over tees, coats, sweaters and even dresses for an instant outfit upgrade. The collars are really easy to make and to give as gifts too!
From pristine white collars with lace trim to knitted capelets and quilted denim, there are collars for every occasion and outfit. Beaded collars, fur collars, collars with plumes, collars with lace, collars with piping, and tiers of ruffles. For someone who loves fashion and sewing, these collars offer a sewist a chance to pull out all of the stops and finally try an embellishing technique that perhaps has seemed too daunting for a larger project.
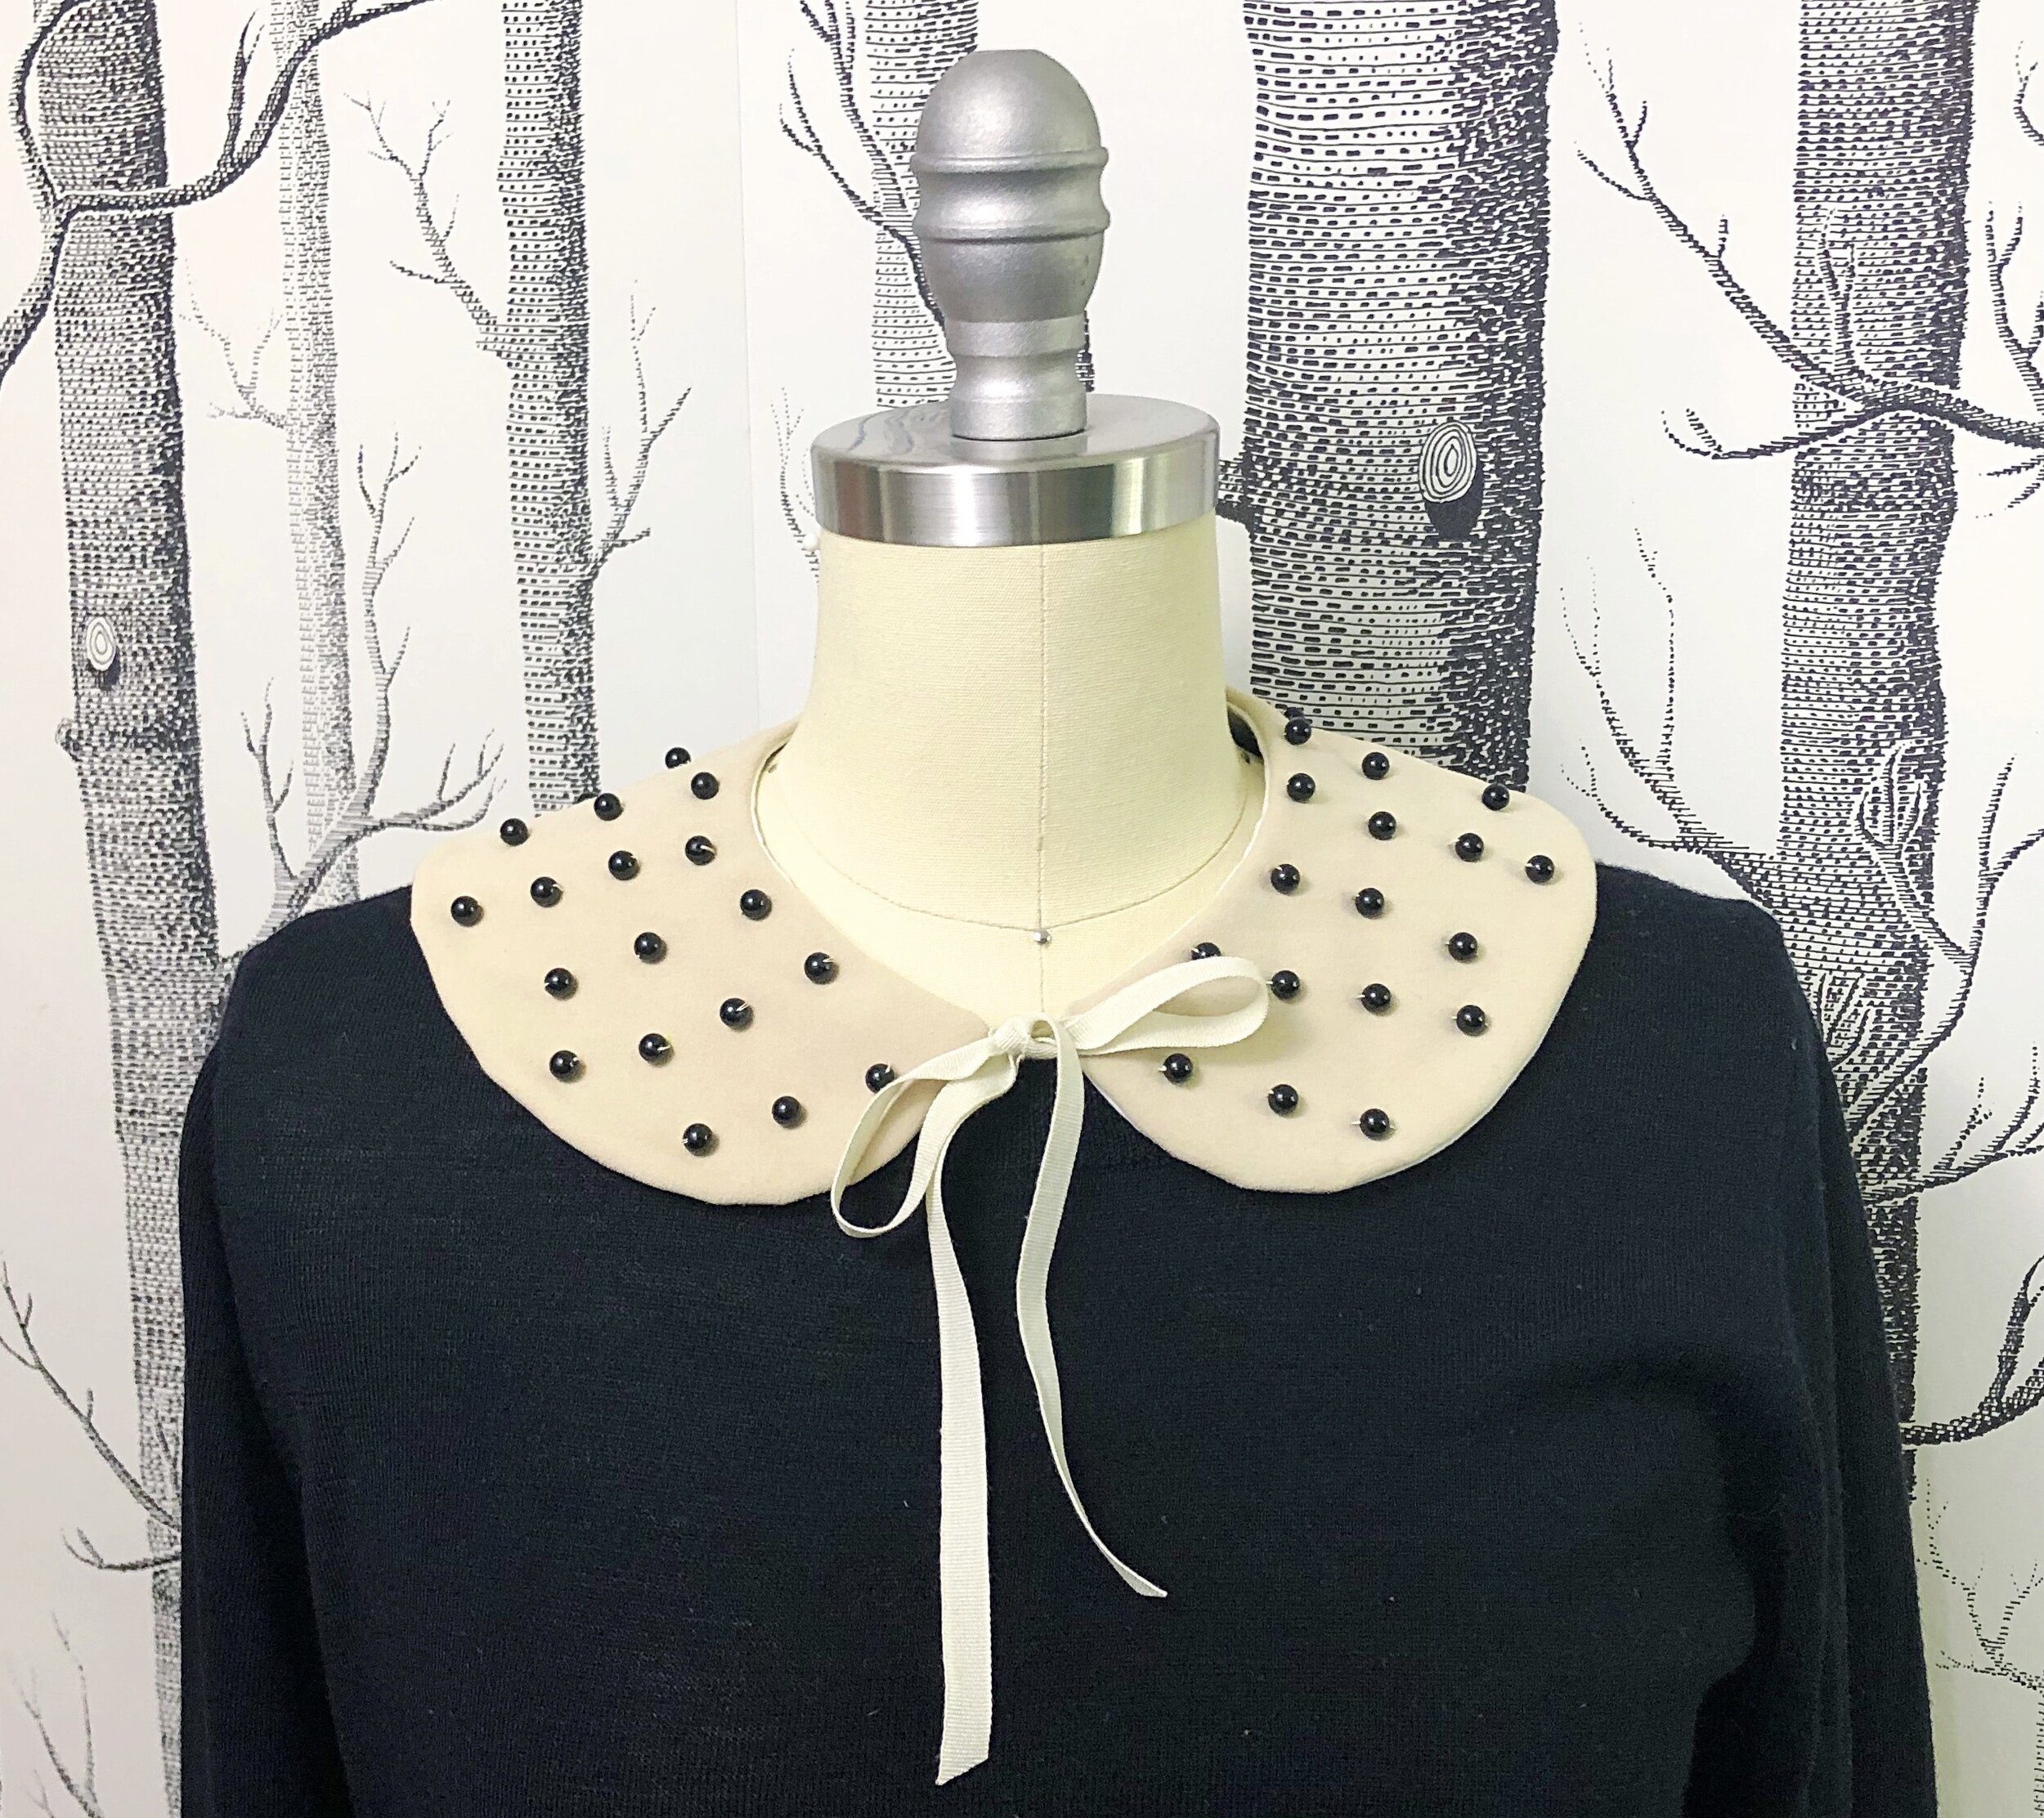
Detachable statement collars are really easy to make- the hard part is choosing a style as there are so many new and fun options. Mini, maxi, round and pointed. Lace, ruffles, trimmed and beaded- the variations are endless. I thought you might enjoy learning all about collars in general and how to make and customize them. To that end, I have designed a group of patterns that I will share with you over the coming lessons. To that end, you can think of this as a sort of mini-course in collars.
The pattern is available for download here and also at weallsew where you will find the step by step tutorial. I can’t wait to see what you make!
New to using PDF sewing patterns? Check out this link for tips on assembly.
Head over to weallsew to download and get the tutorial.
Happy Sewing!
XOXO, Hilarie

DIY Easy Mini Felt Bunny Ornaments
Easter is on Sunday! Since quarantine began, I am never really quite sure what day it is anymore. Somehow in all of this uncertainty, I hadn’t gotten around to putting out any type of seasonal decoration. With a daughter called Bunny, we generally take Easter decorating pretty seriously around here. So, in an effort to jump start on all things Bunny, here is a quick hand-sewing project for you to make and enjoy.
DIY Easy Mini Felt Bunny Ornaments

Easter is on Sunday! Since quarantine began, I am never really quite sure what day it is anymore. Somehow in all of this uncertainty, I hadn’t gotten around to putting out any type of seasonal decoration. With a daughter called Bunny, we generally take Easter decorating pretty seriously around here. So, in an effort to jump start on all things Bunny, here is a quick hand-sewing project for you to make and enjoy.
DIY Easy Mini Felt Bunny Ornaments Free Pattern and Tutorial

MATERIALS

These mini felt bunnies sew together pretty quickly and it is likely that you already have the supplies on hand.
To make an assortment 2 1/2-inch bunny place ornaments:
9 X 12-inch sheets of felt in assorted colors; each sheet will make one bunny plus a little felt left over.
Embroidery Floss or Pearle Cotton (if you don’t have either, thread is fine.)
A Felt Mini Bunny Ornament template available for free download here, printed and cut out.
Craft glue
Embroidery needle
Scissors
PATTERN
FINISHED SIZE
About 2.5” inches high, plus ears
CUTTING

Cut eight circles from the felt and two ears

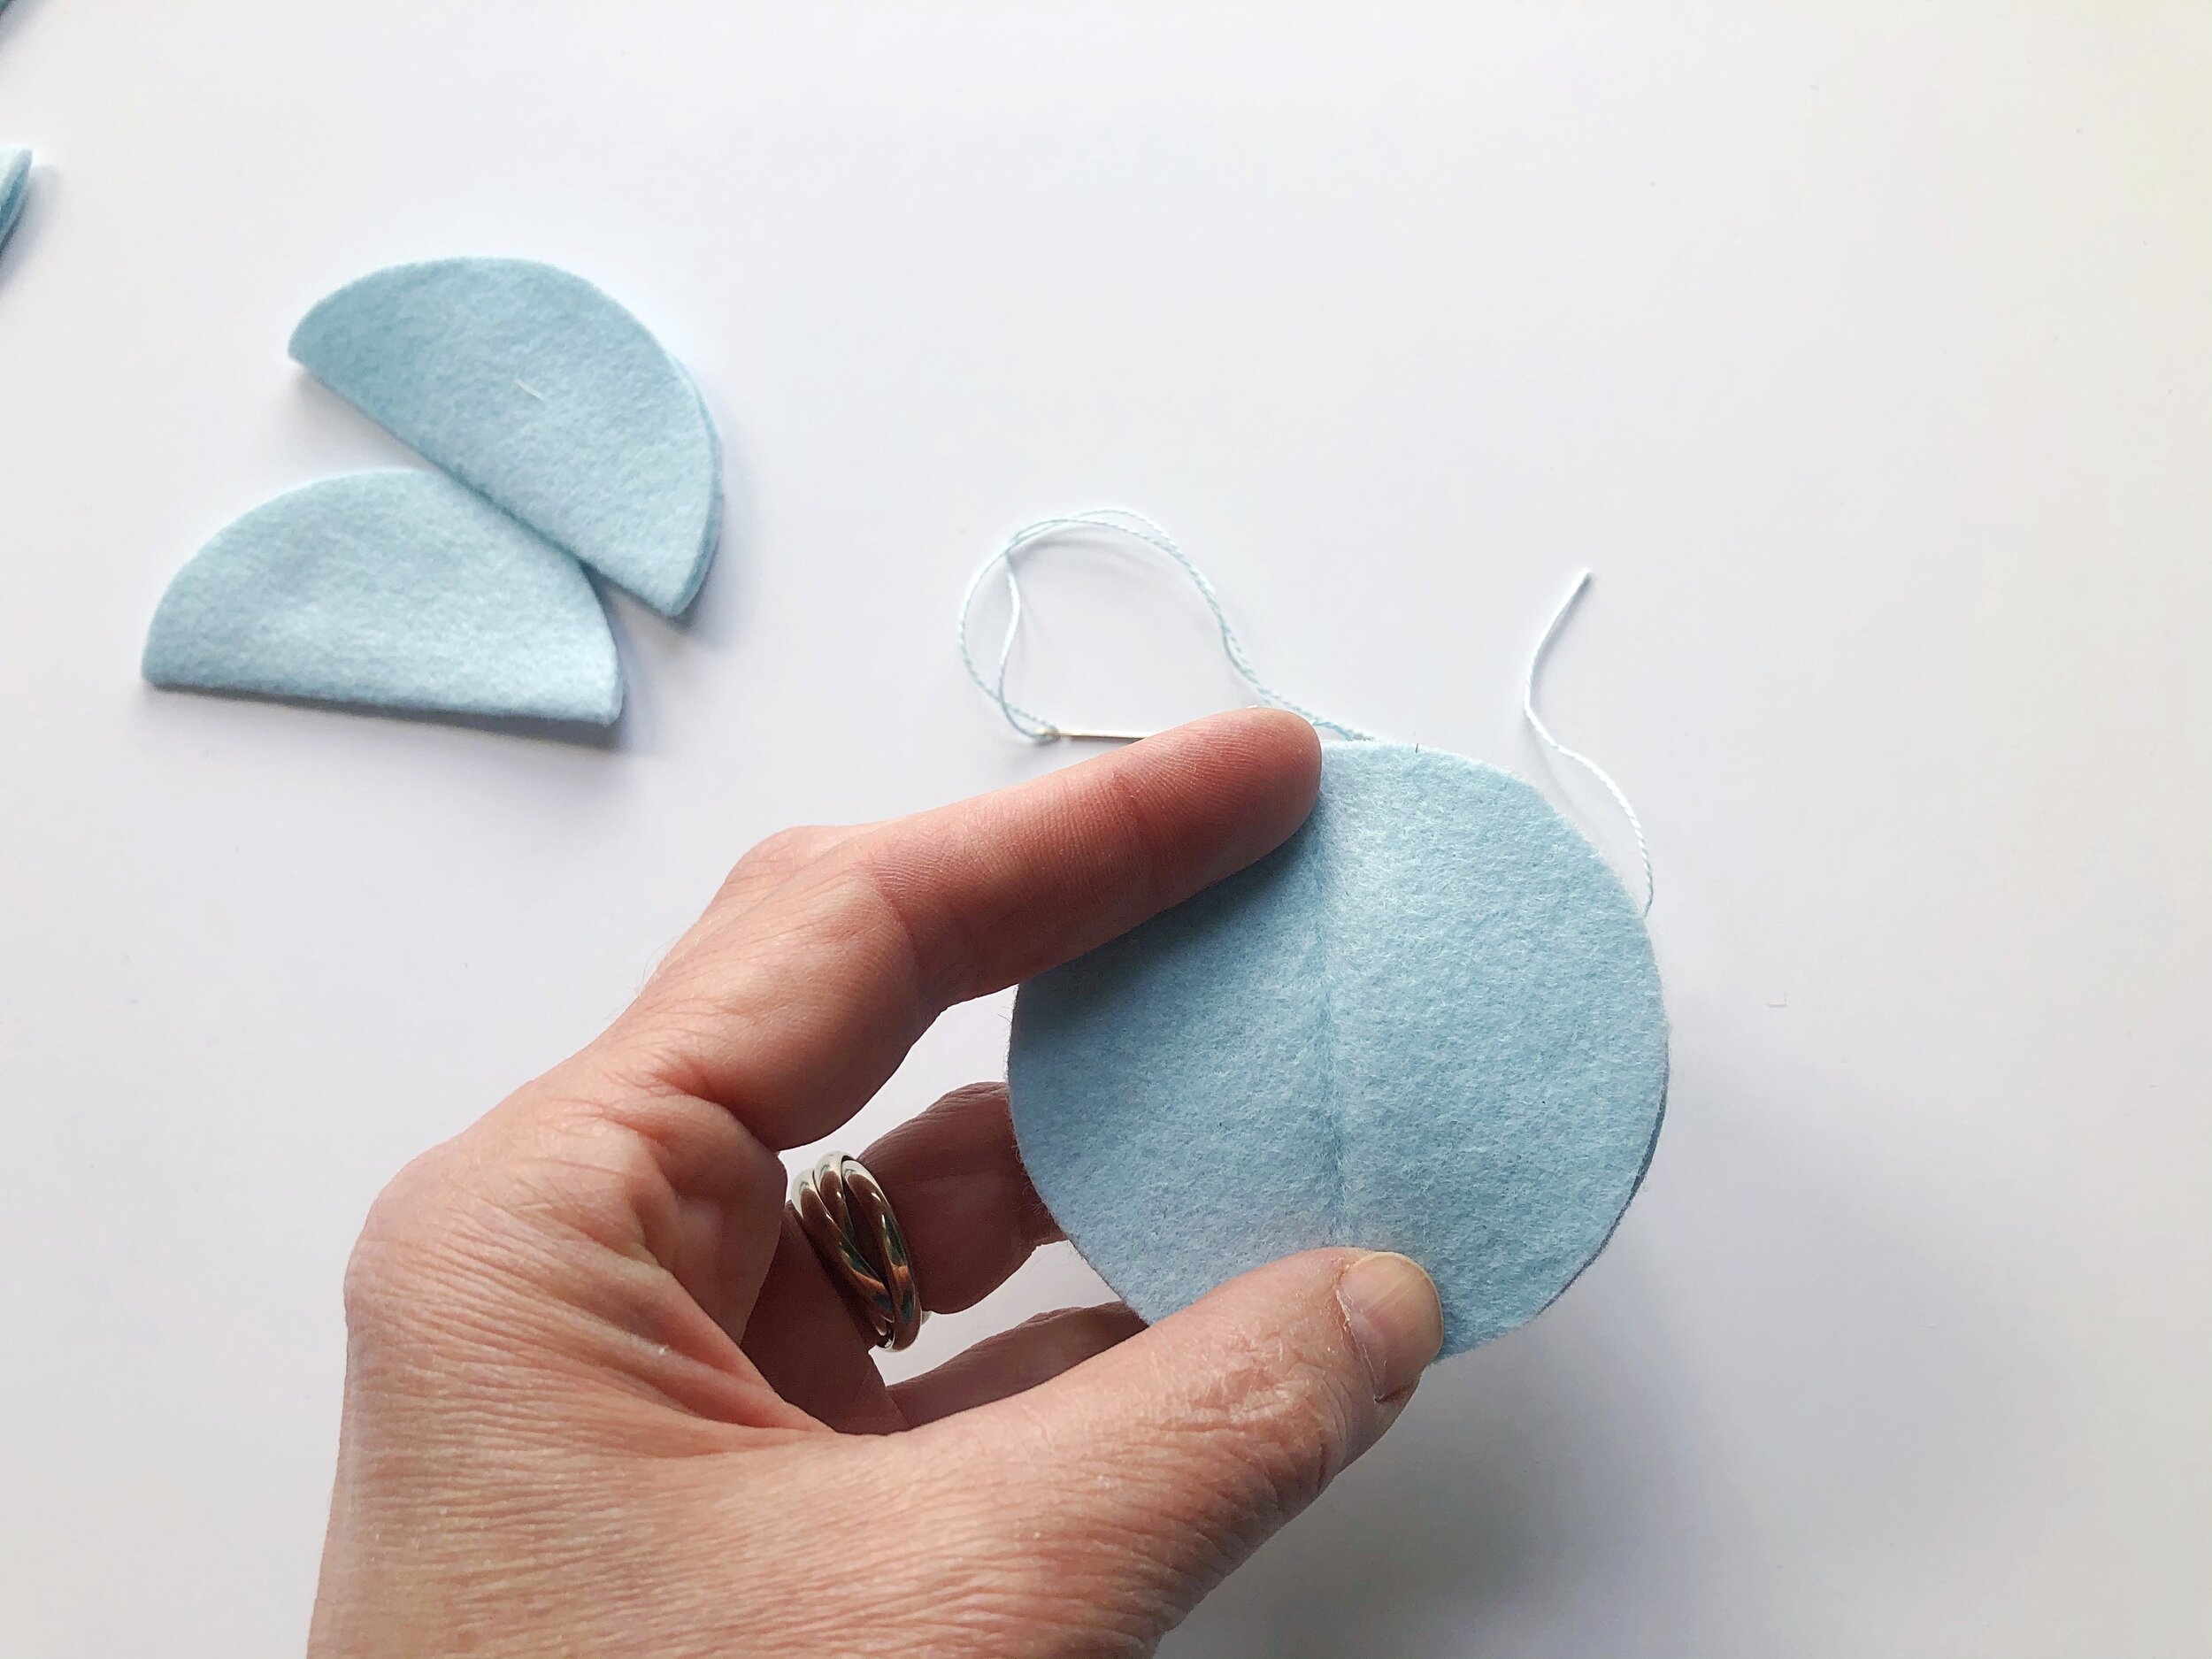
Press each of the cut circles in half, making a crease along the center. Place the ears aside for now.
SEWING

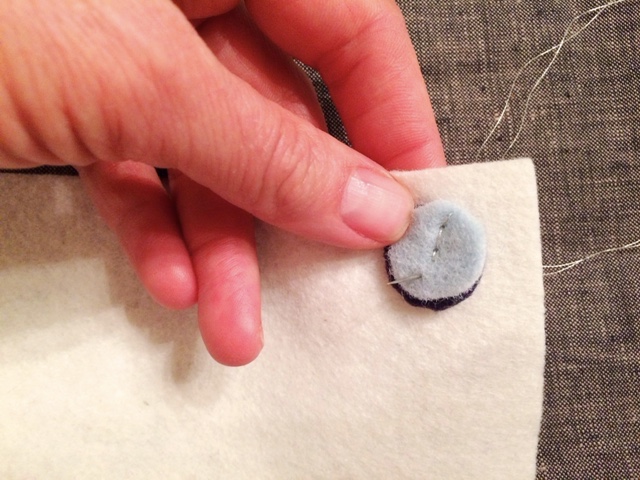
Cut a piece of thread about 20” long. Thread a needle and knot the end to tie. Insert the needle from the back of one of the circles and make a small stitch to secure.
*This thread should be long enough to complete one bunny. The idea is to keep sewing with the same strand of thread between all layers. If you run out- no worries. Just tie off the end and rethread another strand.

Fold the circle in half. Grab a second circle, keeping it folded in half as well, and align both so that the straight fold of each piece mirrors the fold of the other.
You might find it helpful to think of each piece as a folded tortilla.


Stitch the two pieces together along their crease lines with a small hand stitch.

Try to keep your stitches even and be sure that both circles are aligned. Sew across the entire fold and stop. Keep your working thread- do not cut.

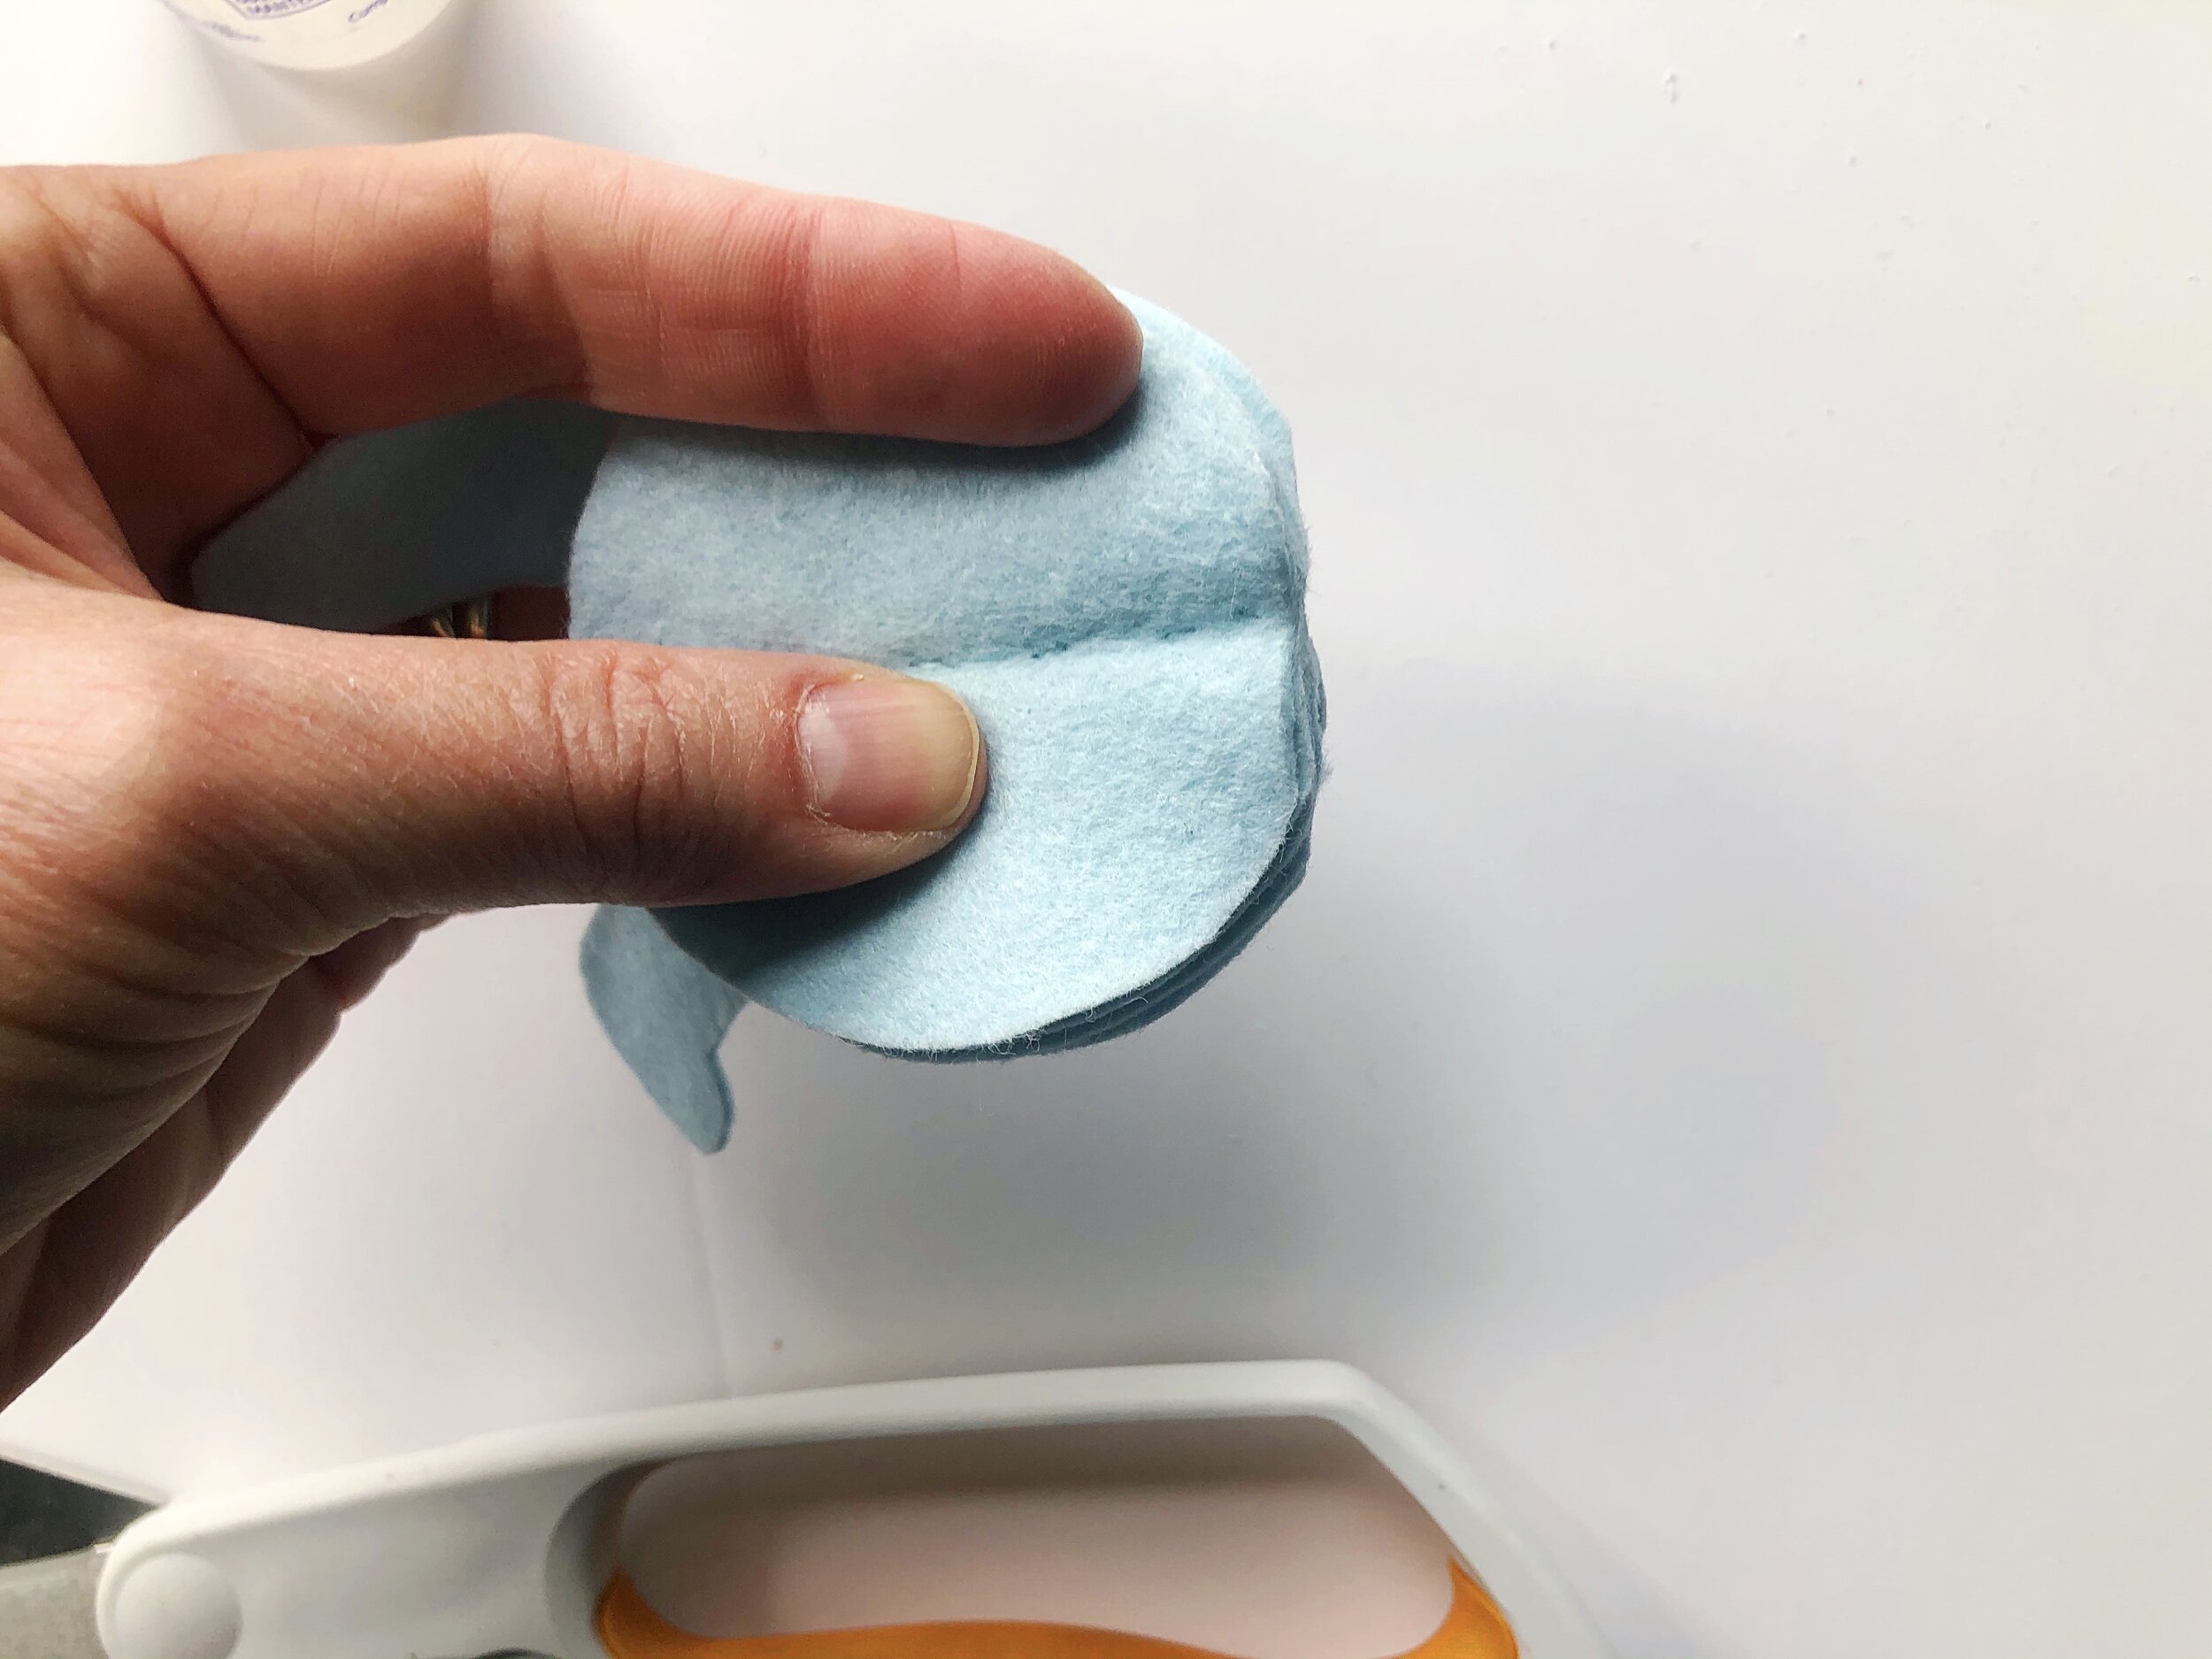
Fold the pieces that have just been sewn in half, like two tortillas.
Grab two more felt circles and layer them with the just sewn pieces in between.

Doesn’t it look like a tortilla sandwich? Make sure that the center fold creases remain aligned with the center seam of the inner layer


With the working thread, sew these two new pieces together along their center fold lines in the same manner as before.
Sew to the end of the folded crease. Remember-don’t cut your thread.

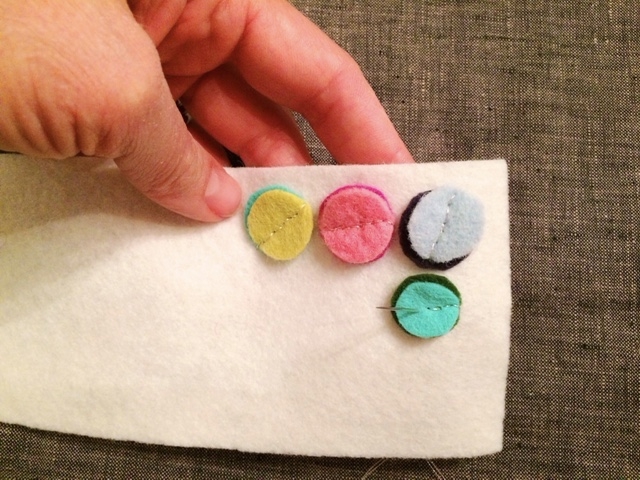
Now we are going to repeat that same step again, by folding all of the circles closed and placing the two more felt circles on the top and bottom. Be sure to align the creases.
Sew these two pieces together through the center as before. At this point the felt is getting a bit bulky to sew through. Just be patient- you are almost finished.


Repeat this process for the final two creased circles, layering them opposite to one another through the center and stitch.

Sewing is complete!
FINISHING

Give each section a little tug to straighten, then divide the circle in half to place the ears.

For the ears, I dabbed a bit of glue on each side and placed the ear. You may need to pinch it for a minute or two to set.
If you plan to have your bunny sit, you may need to flatten the bottom just a bit. To do this, I pinched the circle in half and gave it a bit of a trim. Just watch your stitching. If you happen to cut through- add a bit of glue and pretend it never happened.
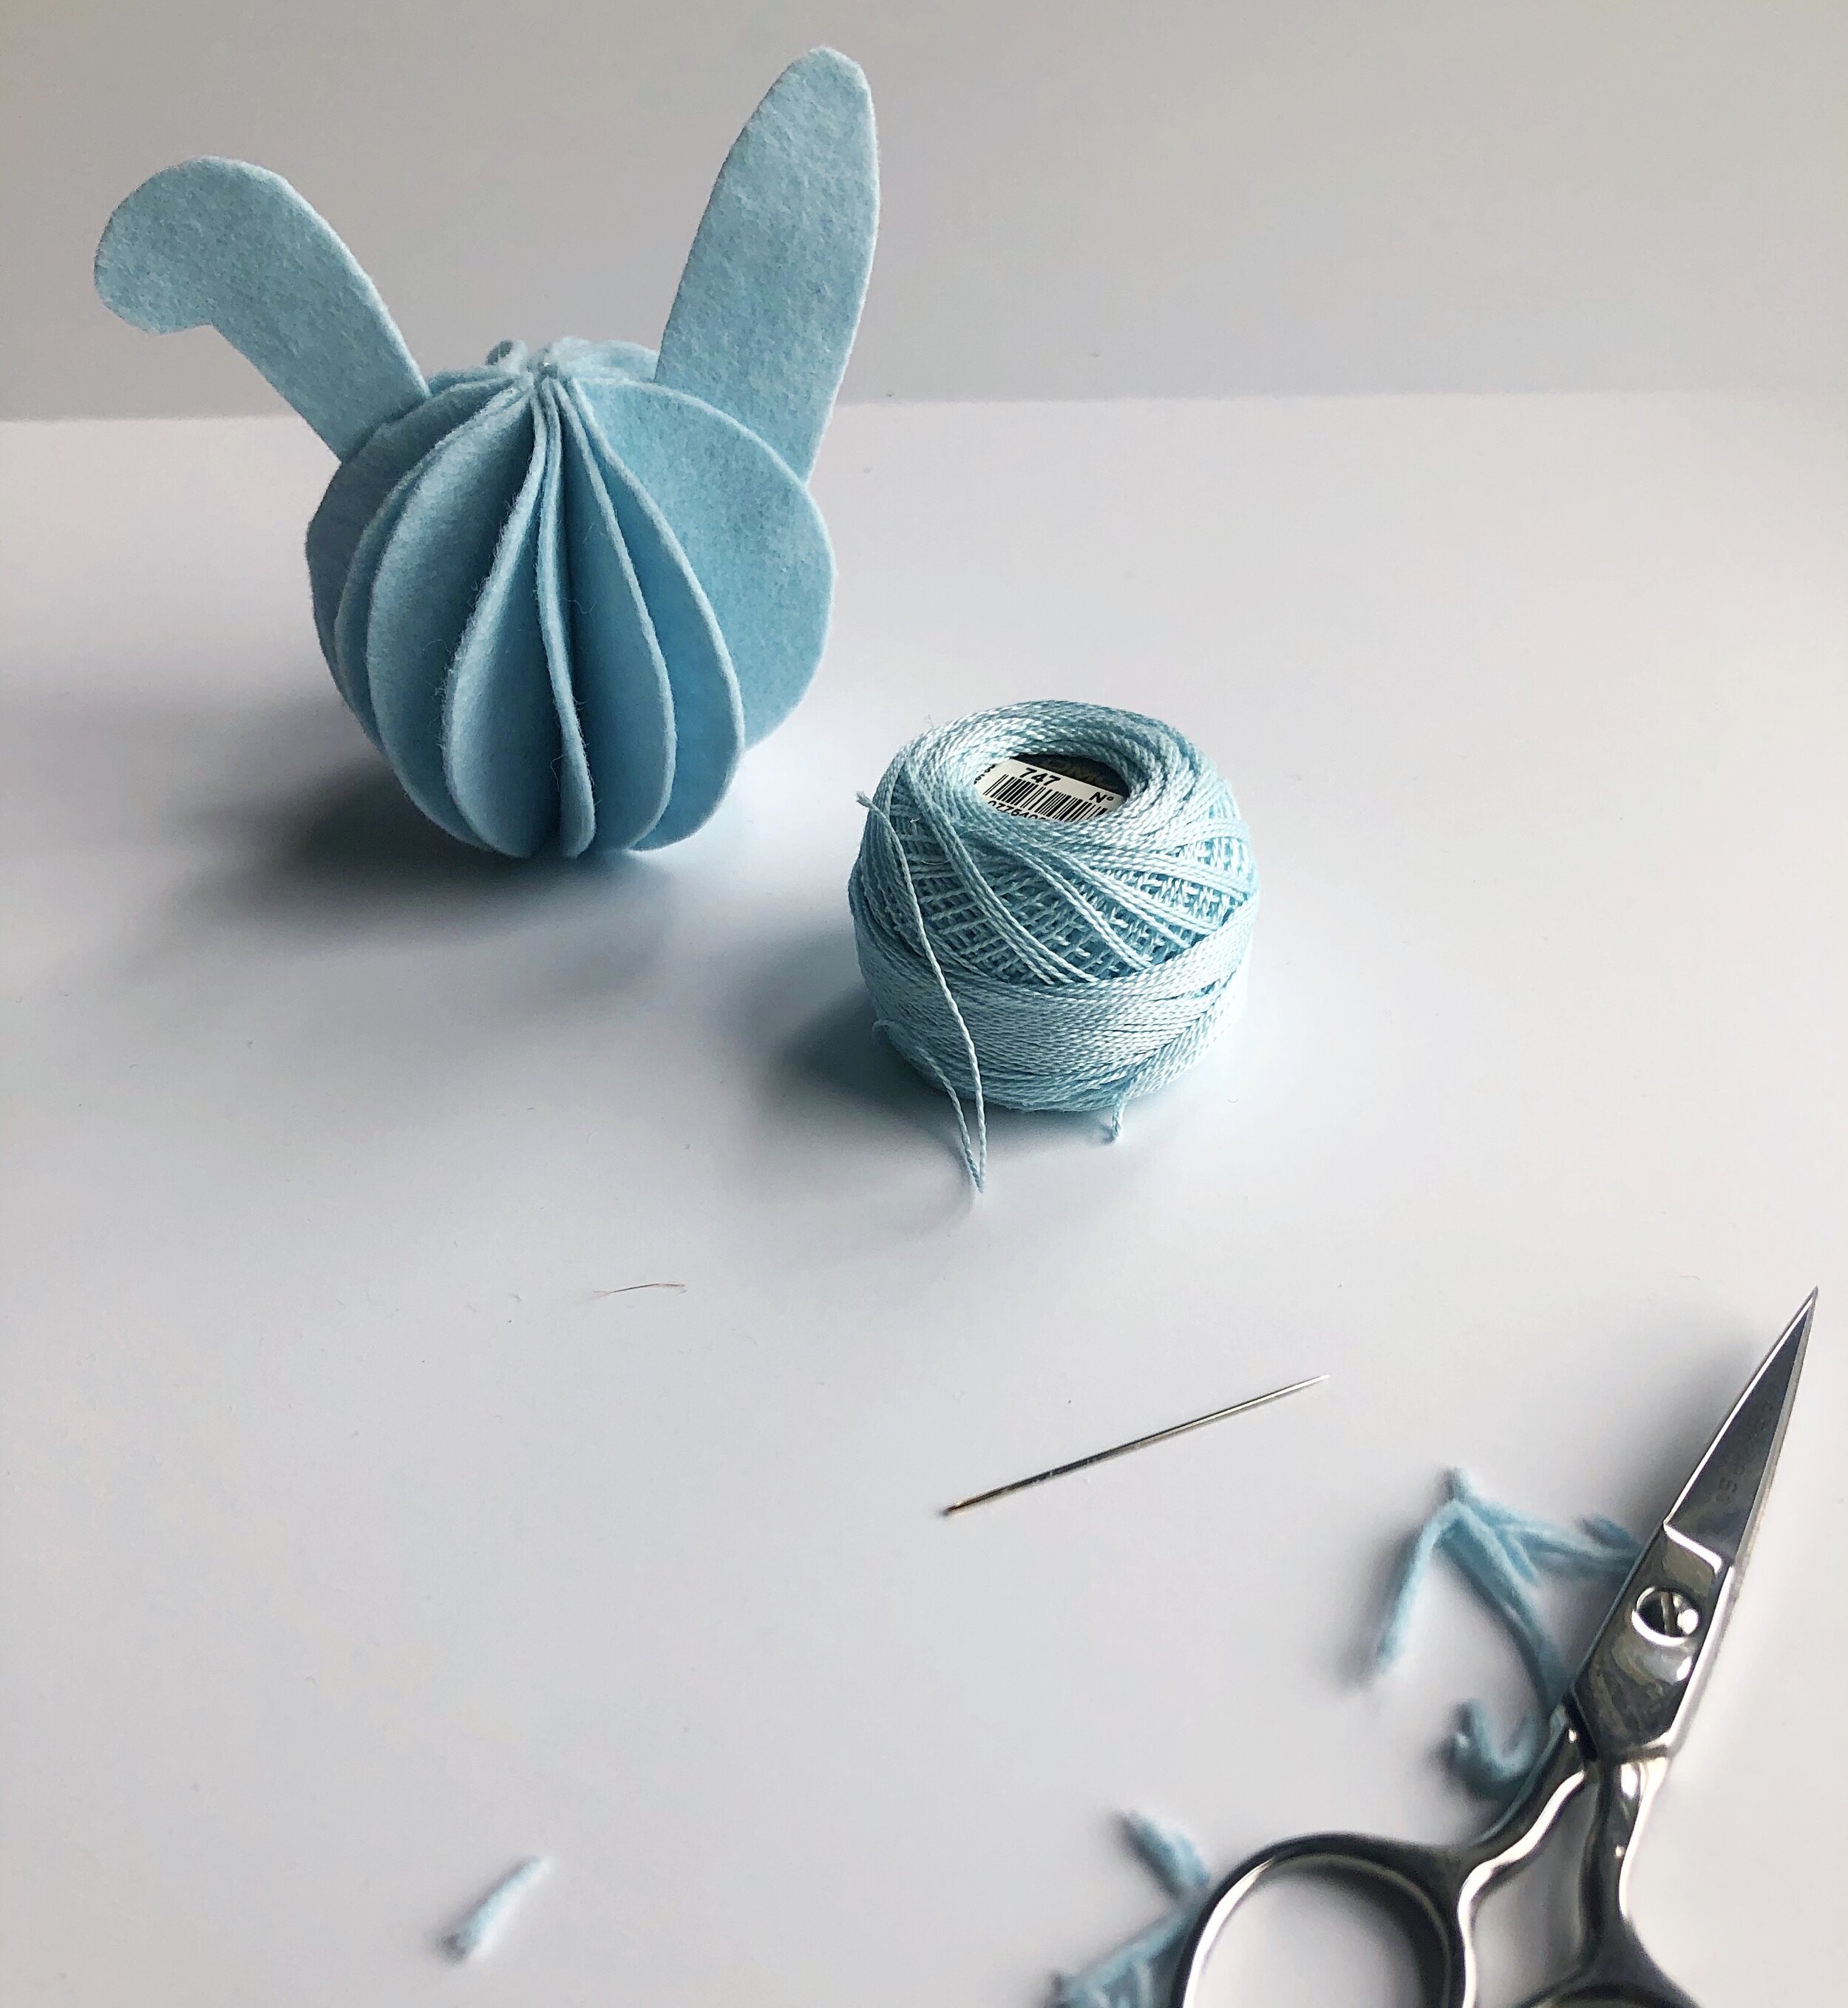
All done! Doesn’t it remind you a bit of a weeble?

Wouldn’t these look adorable strung as an Easter bunny garland?


I made one into a chick by cutting two hearts for wings and one tiny heart for a beak.
This Easter may be the perfect opportunity to focus on renewal. Let it serve as a reminder that life goes on and that love is greater than fear. With that sentimant in mind, I wish you all a lovely Easter holiday.
XO, Hilarie

How to Maximize Your Time Sewing Cloth Face Masks With These Tips and Tricks
Learn how to save time and maximize the number of face masks that you can sew. How to sew a double-layer face mask with wire and pocket for filter or shield. Step by step cloth face mask tutorial and free pattern. Face masks are hard to come by and it seems that hospitals will be facing a shortage.
Thank you all so much for your lovely comments and kind word about my cloth face mask sewing pattern and tutorial. Like many of you, I am making masks daily and have discovered a couple of tricks to speed up the process a bit. Here is a video I made to share my tips with you. Enjoy!

THIS WEBSITE IS NOT INTENDED FOR THE PURPOSE OF PROVIDING MEDICAL ADVICE
All information, content, and material of this website is for informational purposes only and is not intended to serve as a substitute of a qualified physician or healthcare provider.
“In settings where facemasks are not available, HCP might use homemade masks (e.g., bandana, scarf) for care of patients with COVID-19 as a last resort. However, homemade masks are not considered PPE, since their capability to protect HCP is unknown. Caution should be exercised when considering this option. Homemade masks should ideally be used in combination with a face shield that covers the entire front (that extends to the chin or below) and sides of the face.”
Article from Courier & Press, Evansville, IND “Citing shortages, Deaconess Health System, including Henderson's Methodist Health, has asked the public to sew face masks for staff fighting coronavirus”.
How to make a detachable shoulder strap for your bag
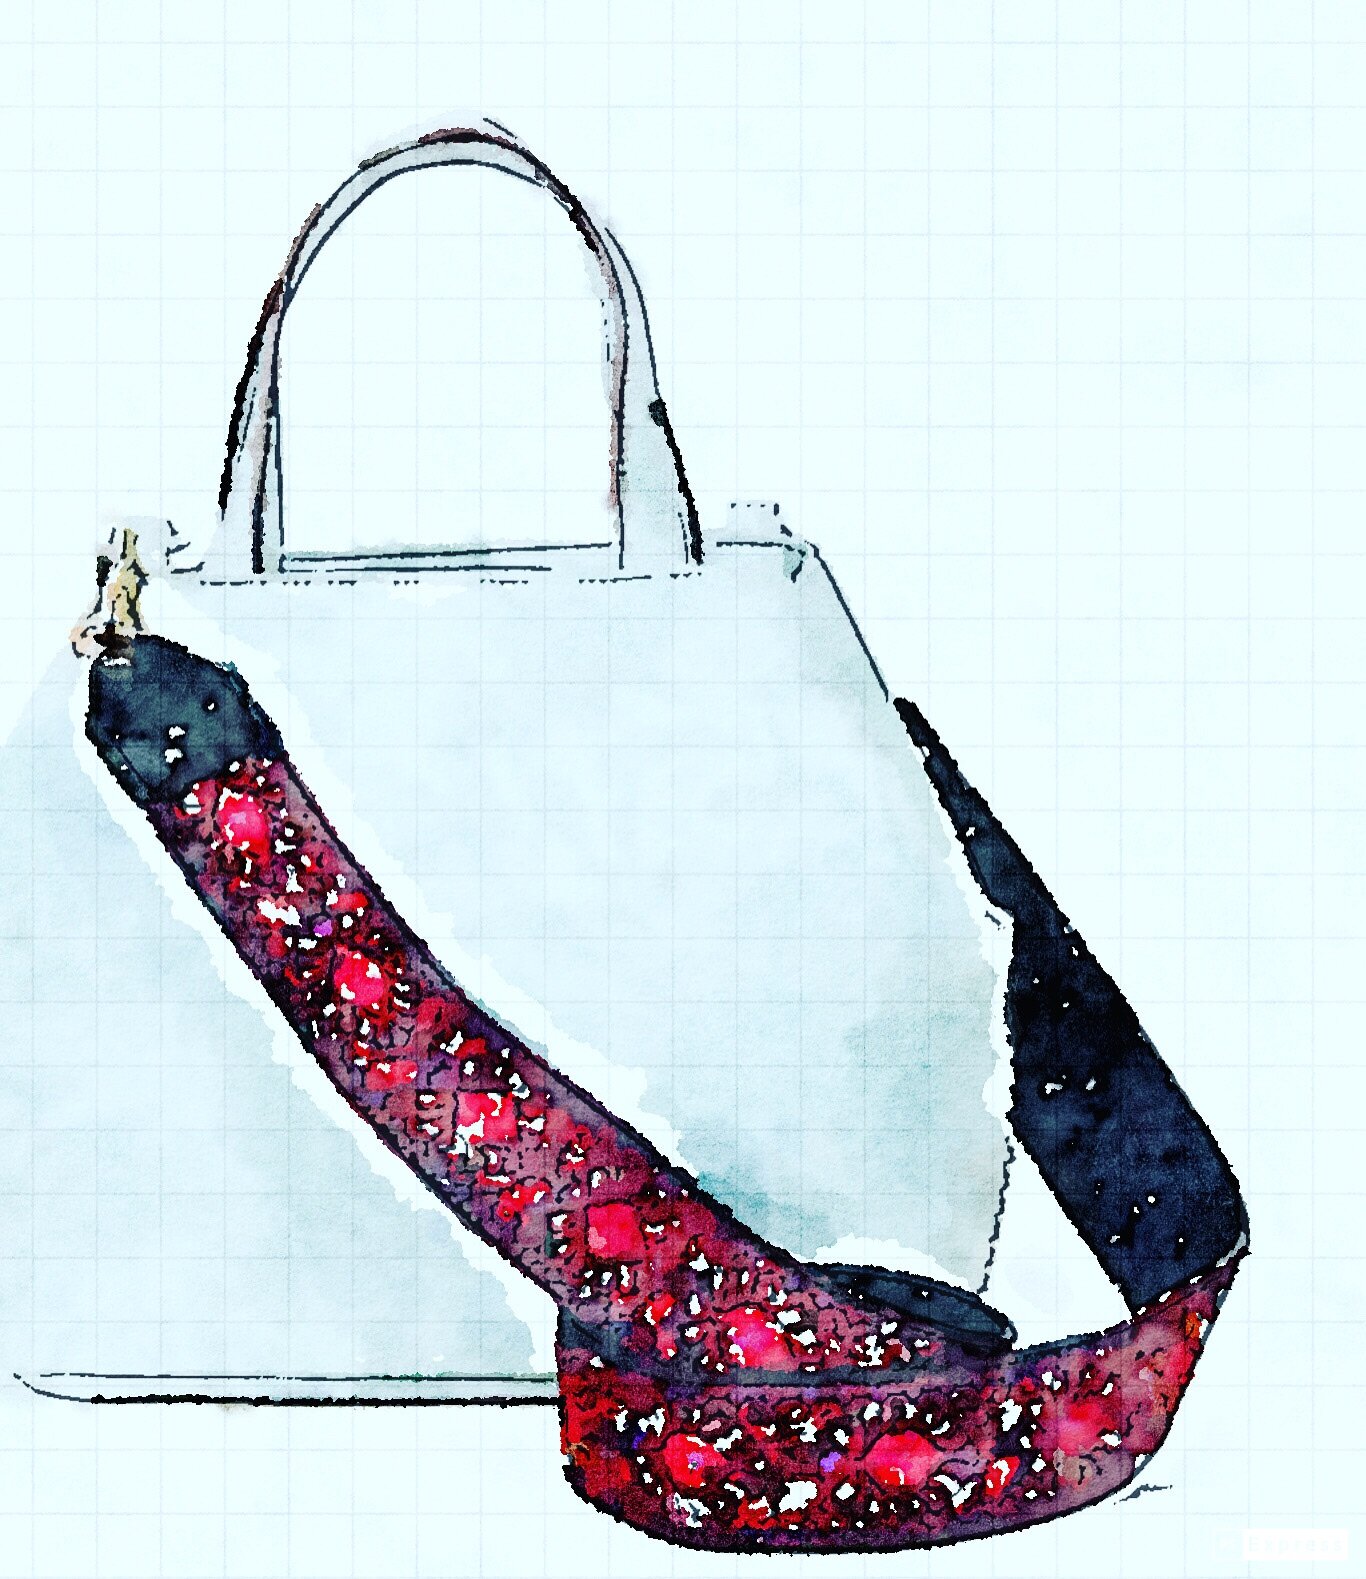
You have seen the new guitar type purse straps, right? While they weren’t really on my radar until early this year when I read an article in the NY Times. Since then, I haven’t been able to get this detachable strap out of my mind. I began to imagine the countless options and reinterpretations. Suddenly it seemed as if each bag I own needed to have its own wardrobe. And now, they do.
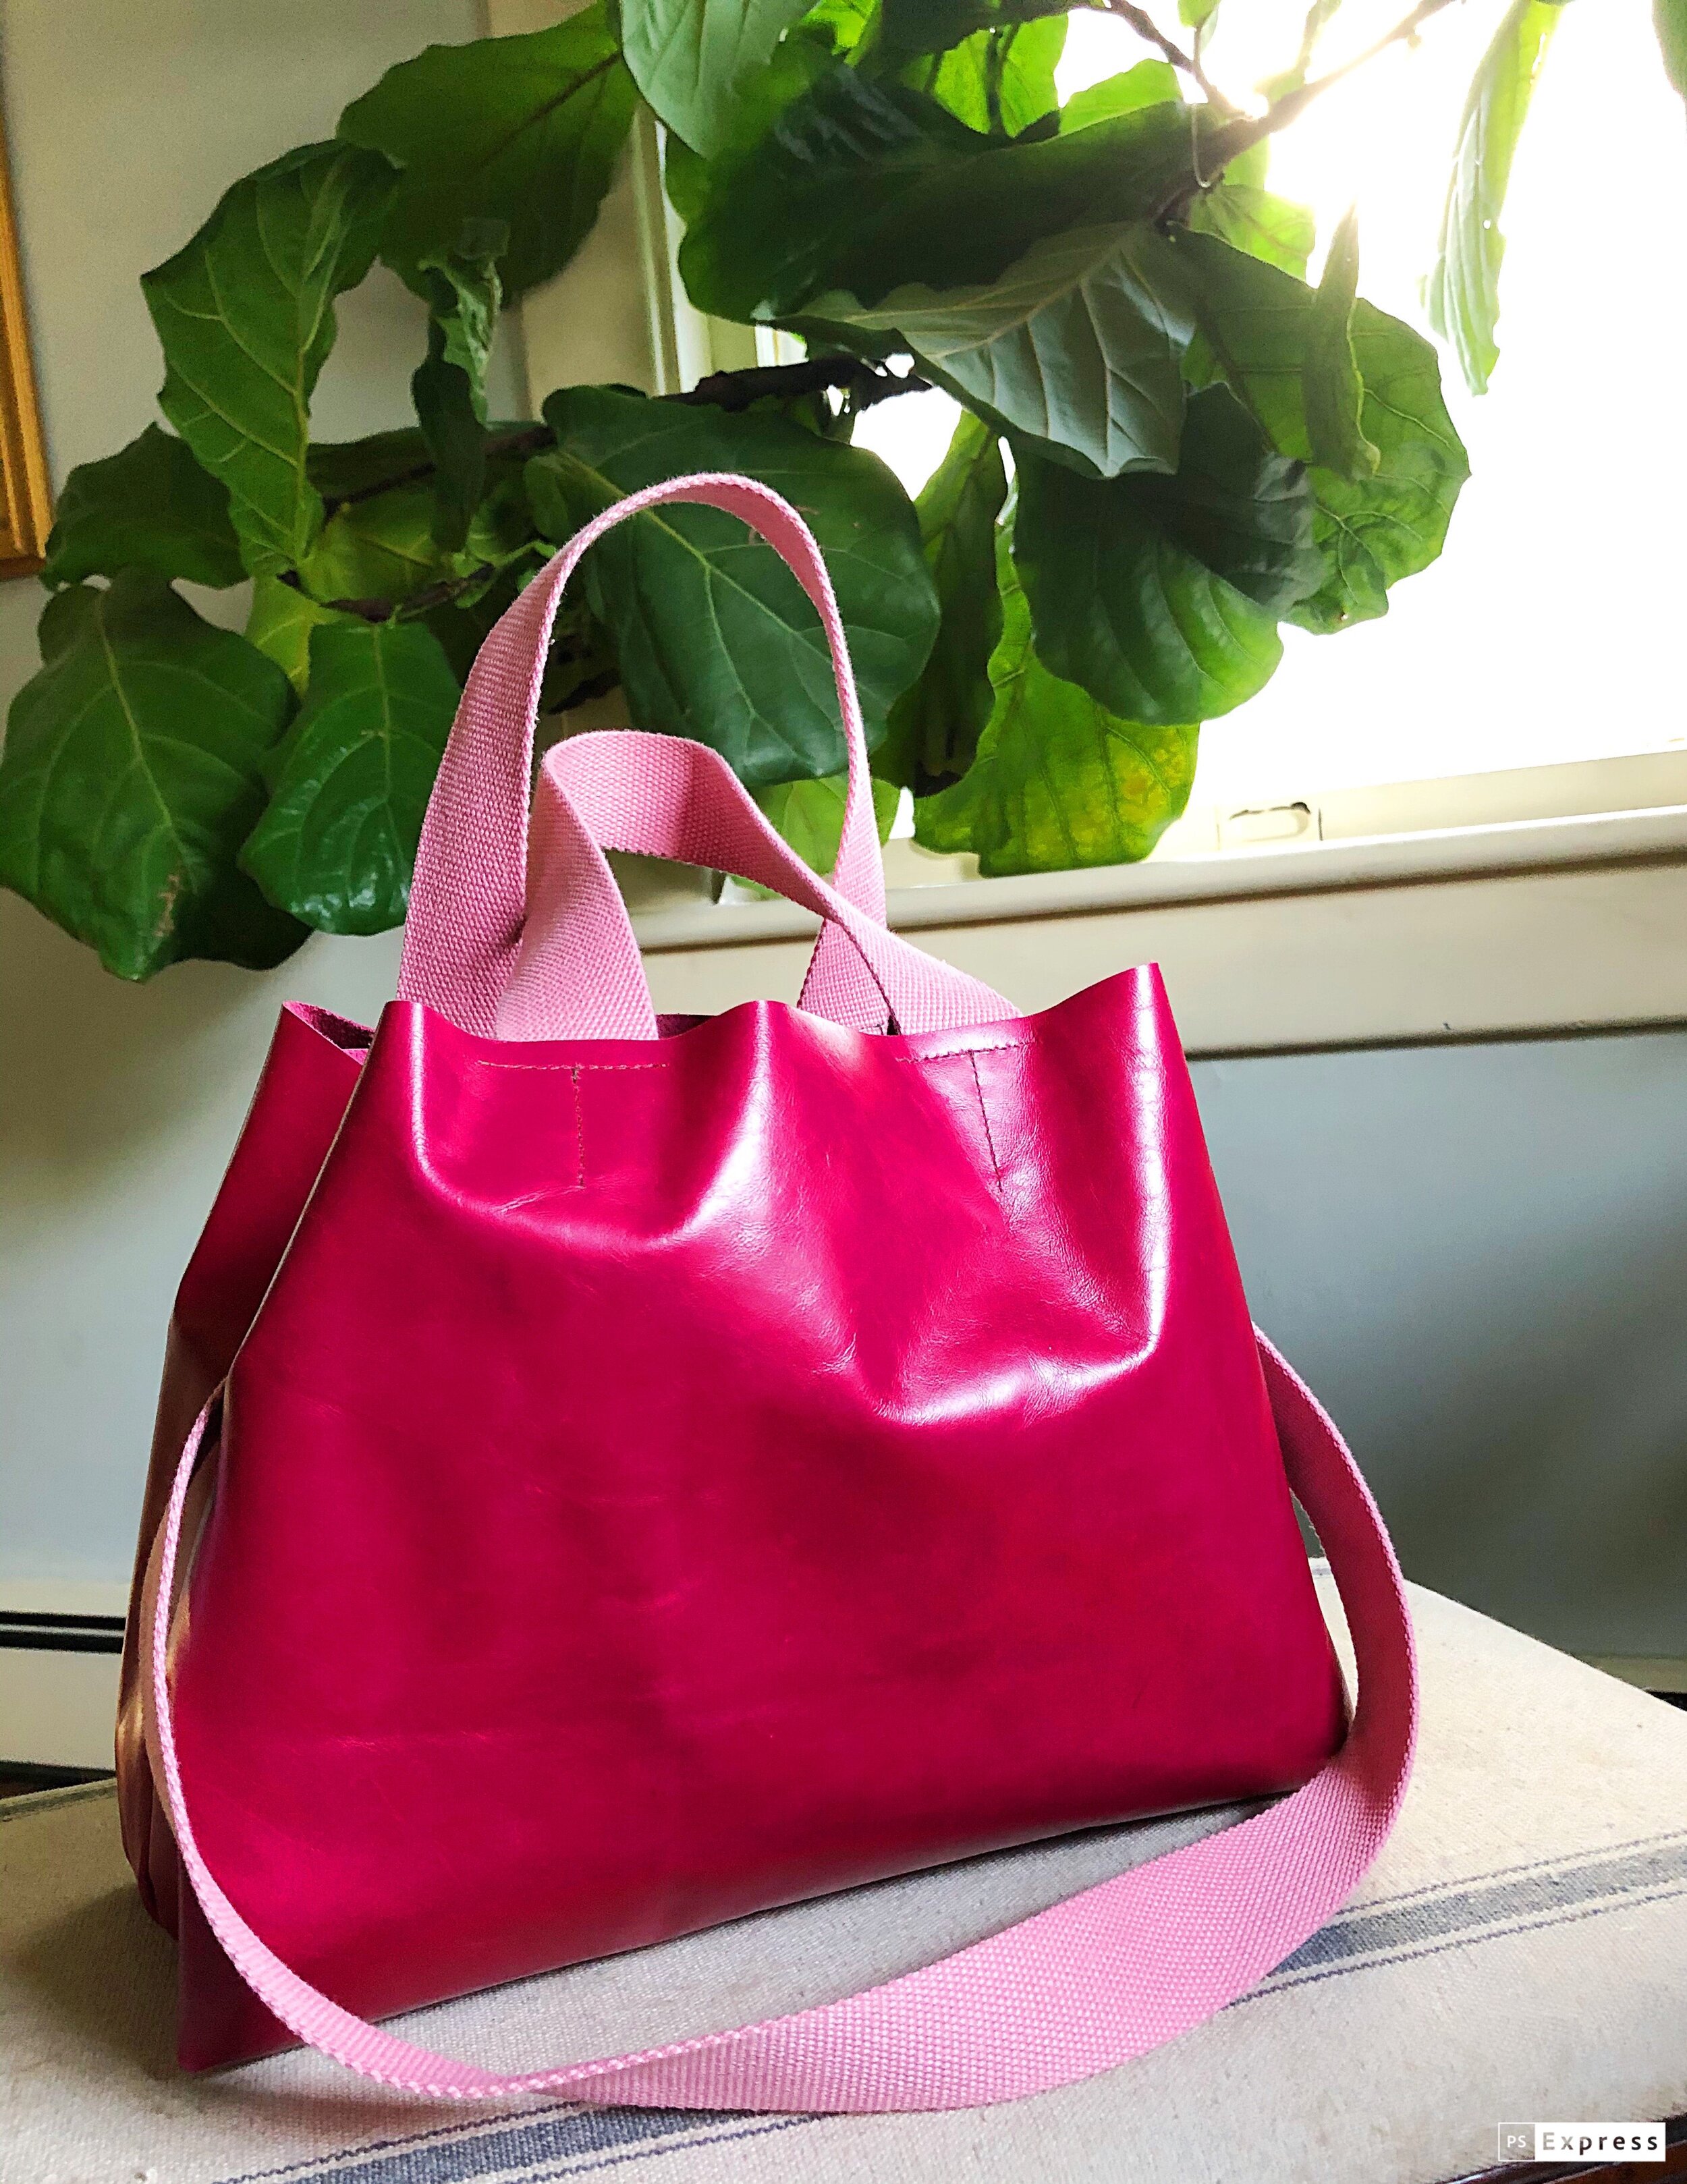
By now you have surely seen the new guitar type purse straps, right? They weren’t really on my radar until early this year when I read an article in the NY Times. Since then, I haven’t been able to get this detachable strap out of my mind. Suddenly it seemed as if each bag I own needed to have its own wardrobe. ( And now, they do. ) I began to imagine the countless options and reinterpretations.
I love the fun of dressing up a bag with a different strap, and watching the transformation. These shoulder straps allows you to instantly add a personal touch to your bag. The first bag that I tried to pair it with was a crossbody style. The new contrasting strap made it so much more fun and interesting. Then I tried it with a belt bag- now that “belt” bag has three different options. It can be worn on the belt, with a crossbody strap and now, it has a new leather top handle. Same bag, three carrying options. Friends, isn’t that reason enough to pull out your sewing machine?
Today I am going to share with you at a shoulder strap tutorial so that you too can make a detachable shoulder strap that speaks to you, fits you and stands apart from the rest of your bag.
The Ultimate Hook-up: Make a detachable shoulder strap for your bag

HOW TO SEW A DETACHABLE PURSE STRAP
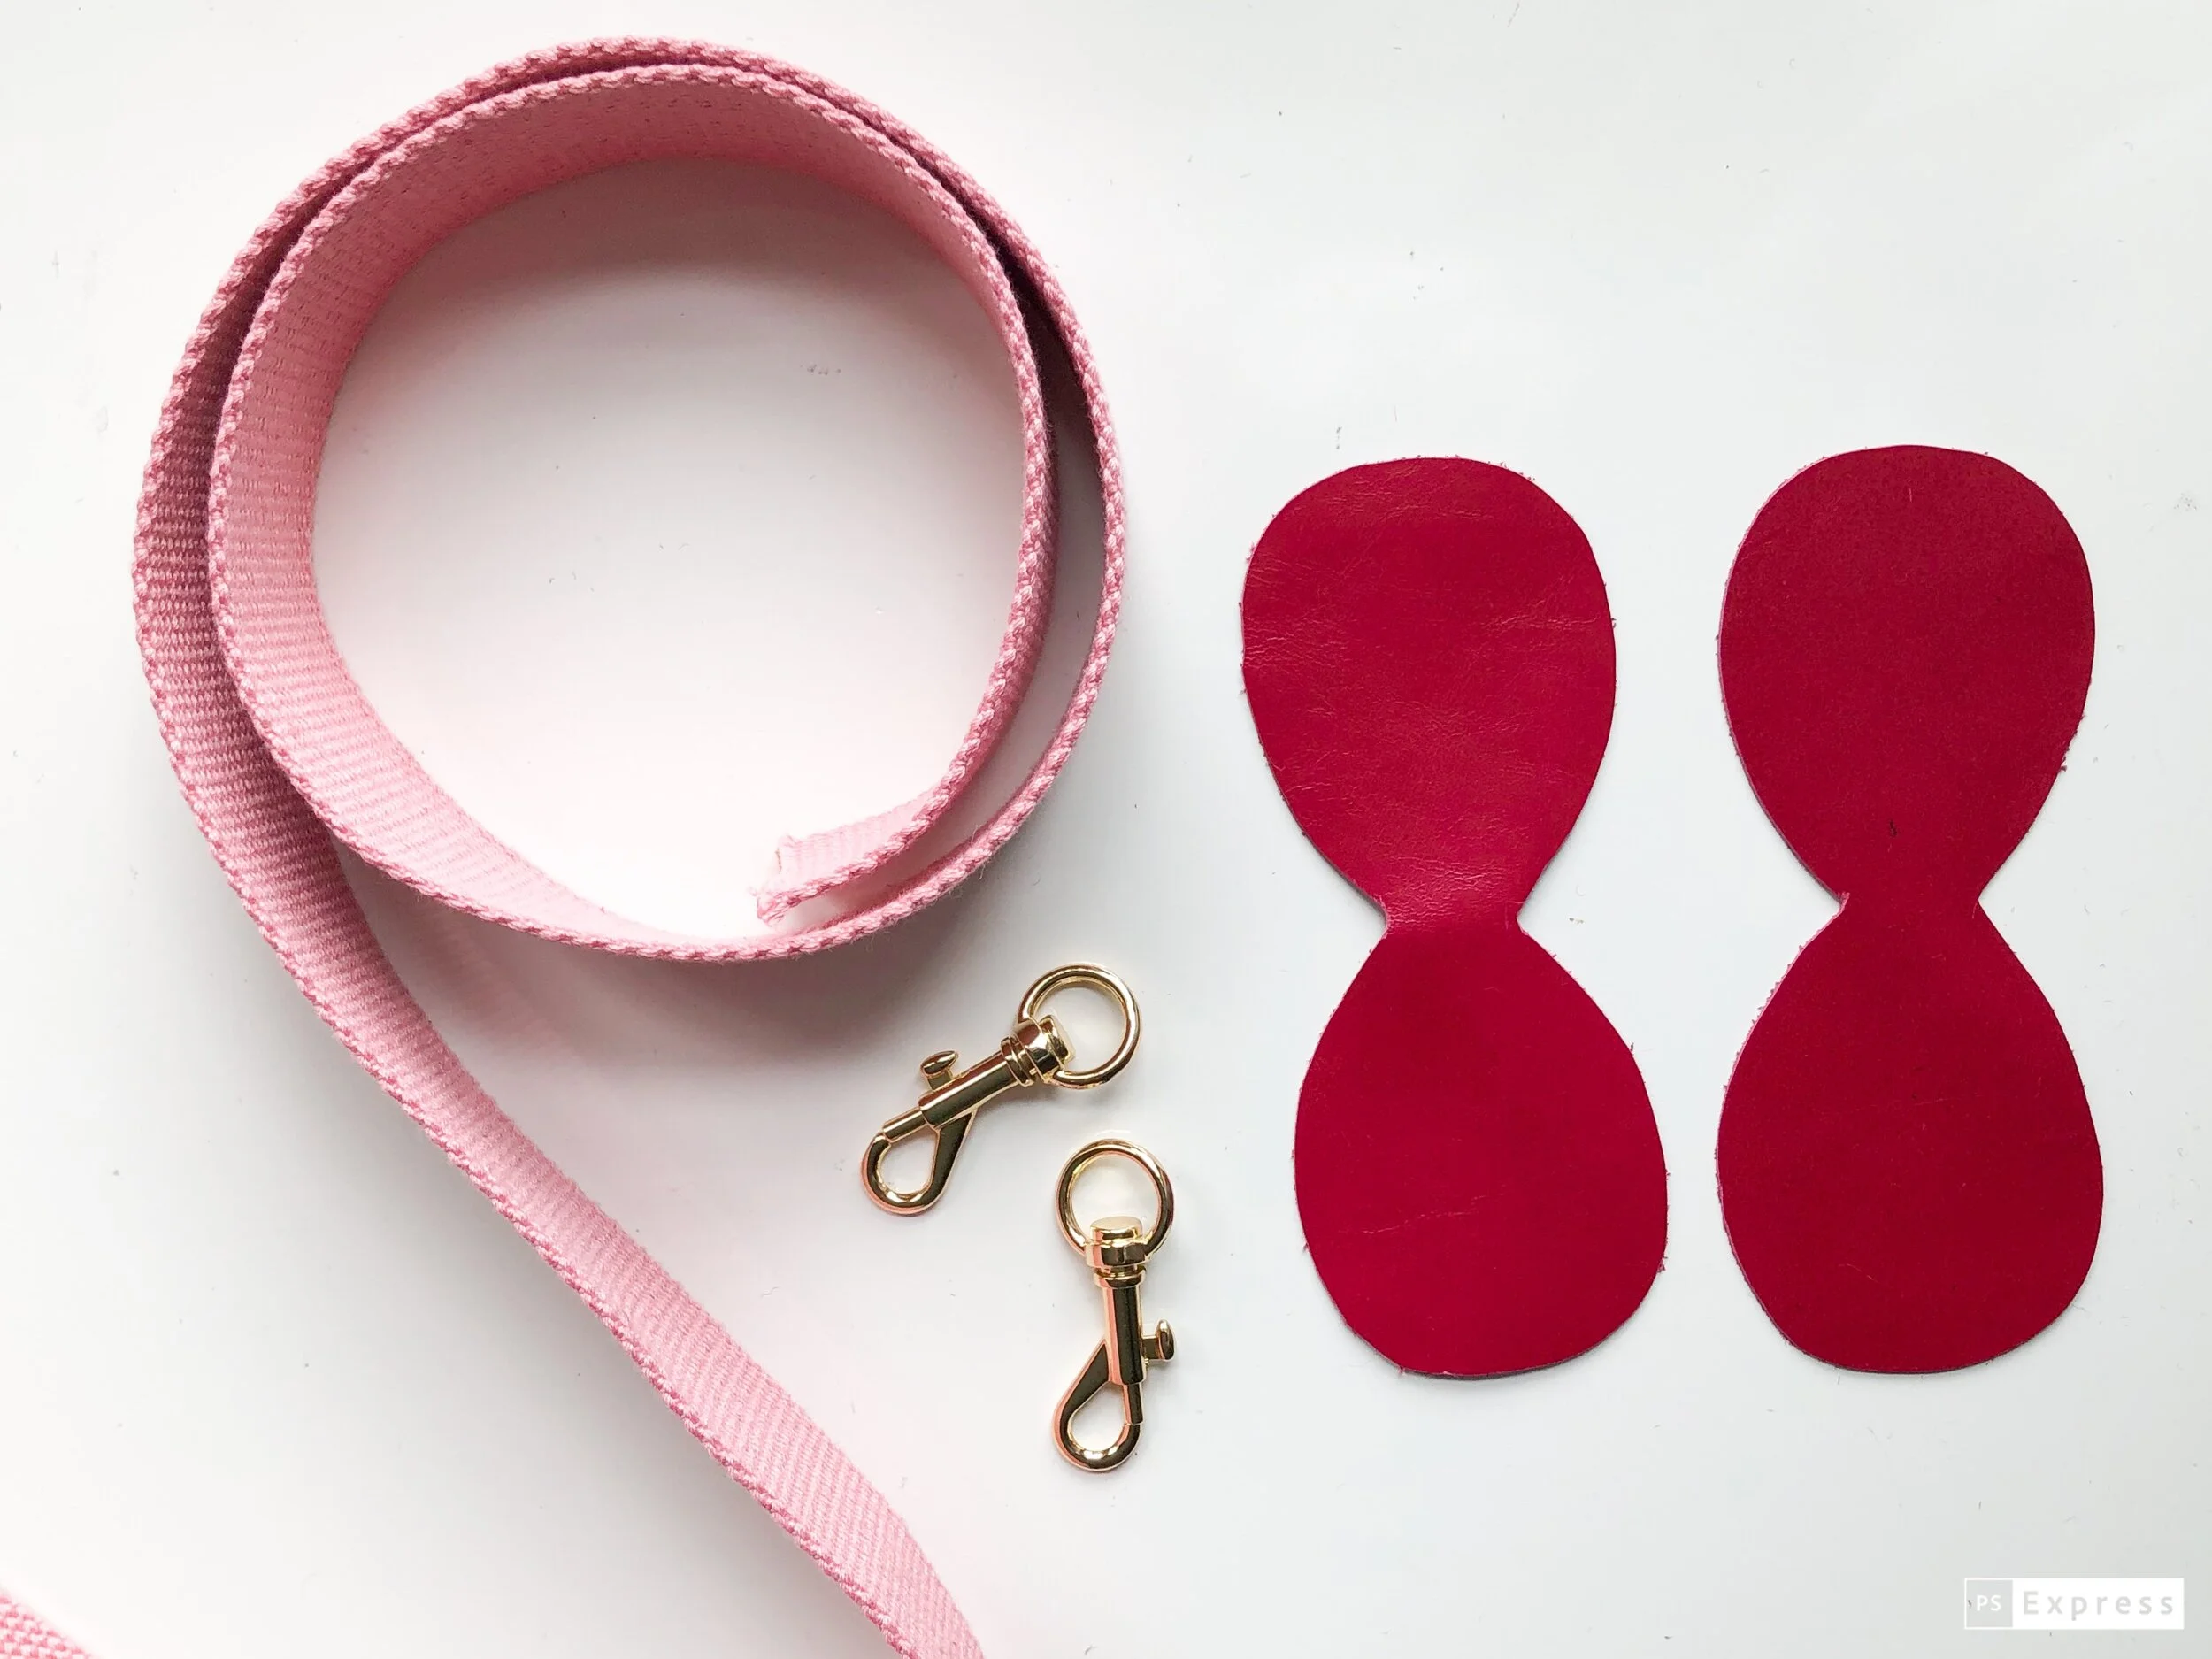
MATERIALS AND SUPPLIES
Sewing Machine with a walking foot
Leather scraps, (8 inch square should be enough)
Two 3/8” x 1 1/2” Swivel Snap Hook for the rounded cap; Two 1 1/2” x 1 3/4” for the squared off version.
1 1/4 Yards of Cotton Webbing Mine is 38mm (roughly 1.5”) wide and 44” long
Mid-weight polyester thread to match leather
Scissors or Rotary cutter
Rubber Cement
Chalk or water soluble fabric marking pen
SIZE
Finished dimensions are approximately: 2”x 47”
NOTES
See previous blog posts on sewing with leather, determining the best strap length and using an adjustable slider .
The leather used in this tutorial is from Leather, Suede, Skins, Inc. in NYC
For best results when sewing with leather, the stitch length should be set to about 7-10 stitches per inch depending on the thickness of the leather. Stitches that are too short make too many holes in the leather which decreases stability.
You can adjust the length of the stitch by testing on a scrap of leather. Does the leather feed evenly? Are there any skipped stitches? How is the tension? Are both the top and bottom threads flat and even?

PATTERN INSTRUCTIONS
Please read through the entire pattern before beginning your bag.
THE PATTERN
If you haven’t used a PDF Pattern before, here is a quick tutorial on printing and assembly: PDF Pattern
For more information on working with patterns, see pages 14-18 in my book, Sew Bags: The Practical
Guide to Making Purses, Totes, Clutches & More; 13 Skill-Building Projects C&T Publishing, 2019
PREPARE
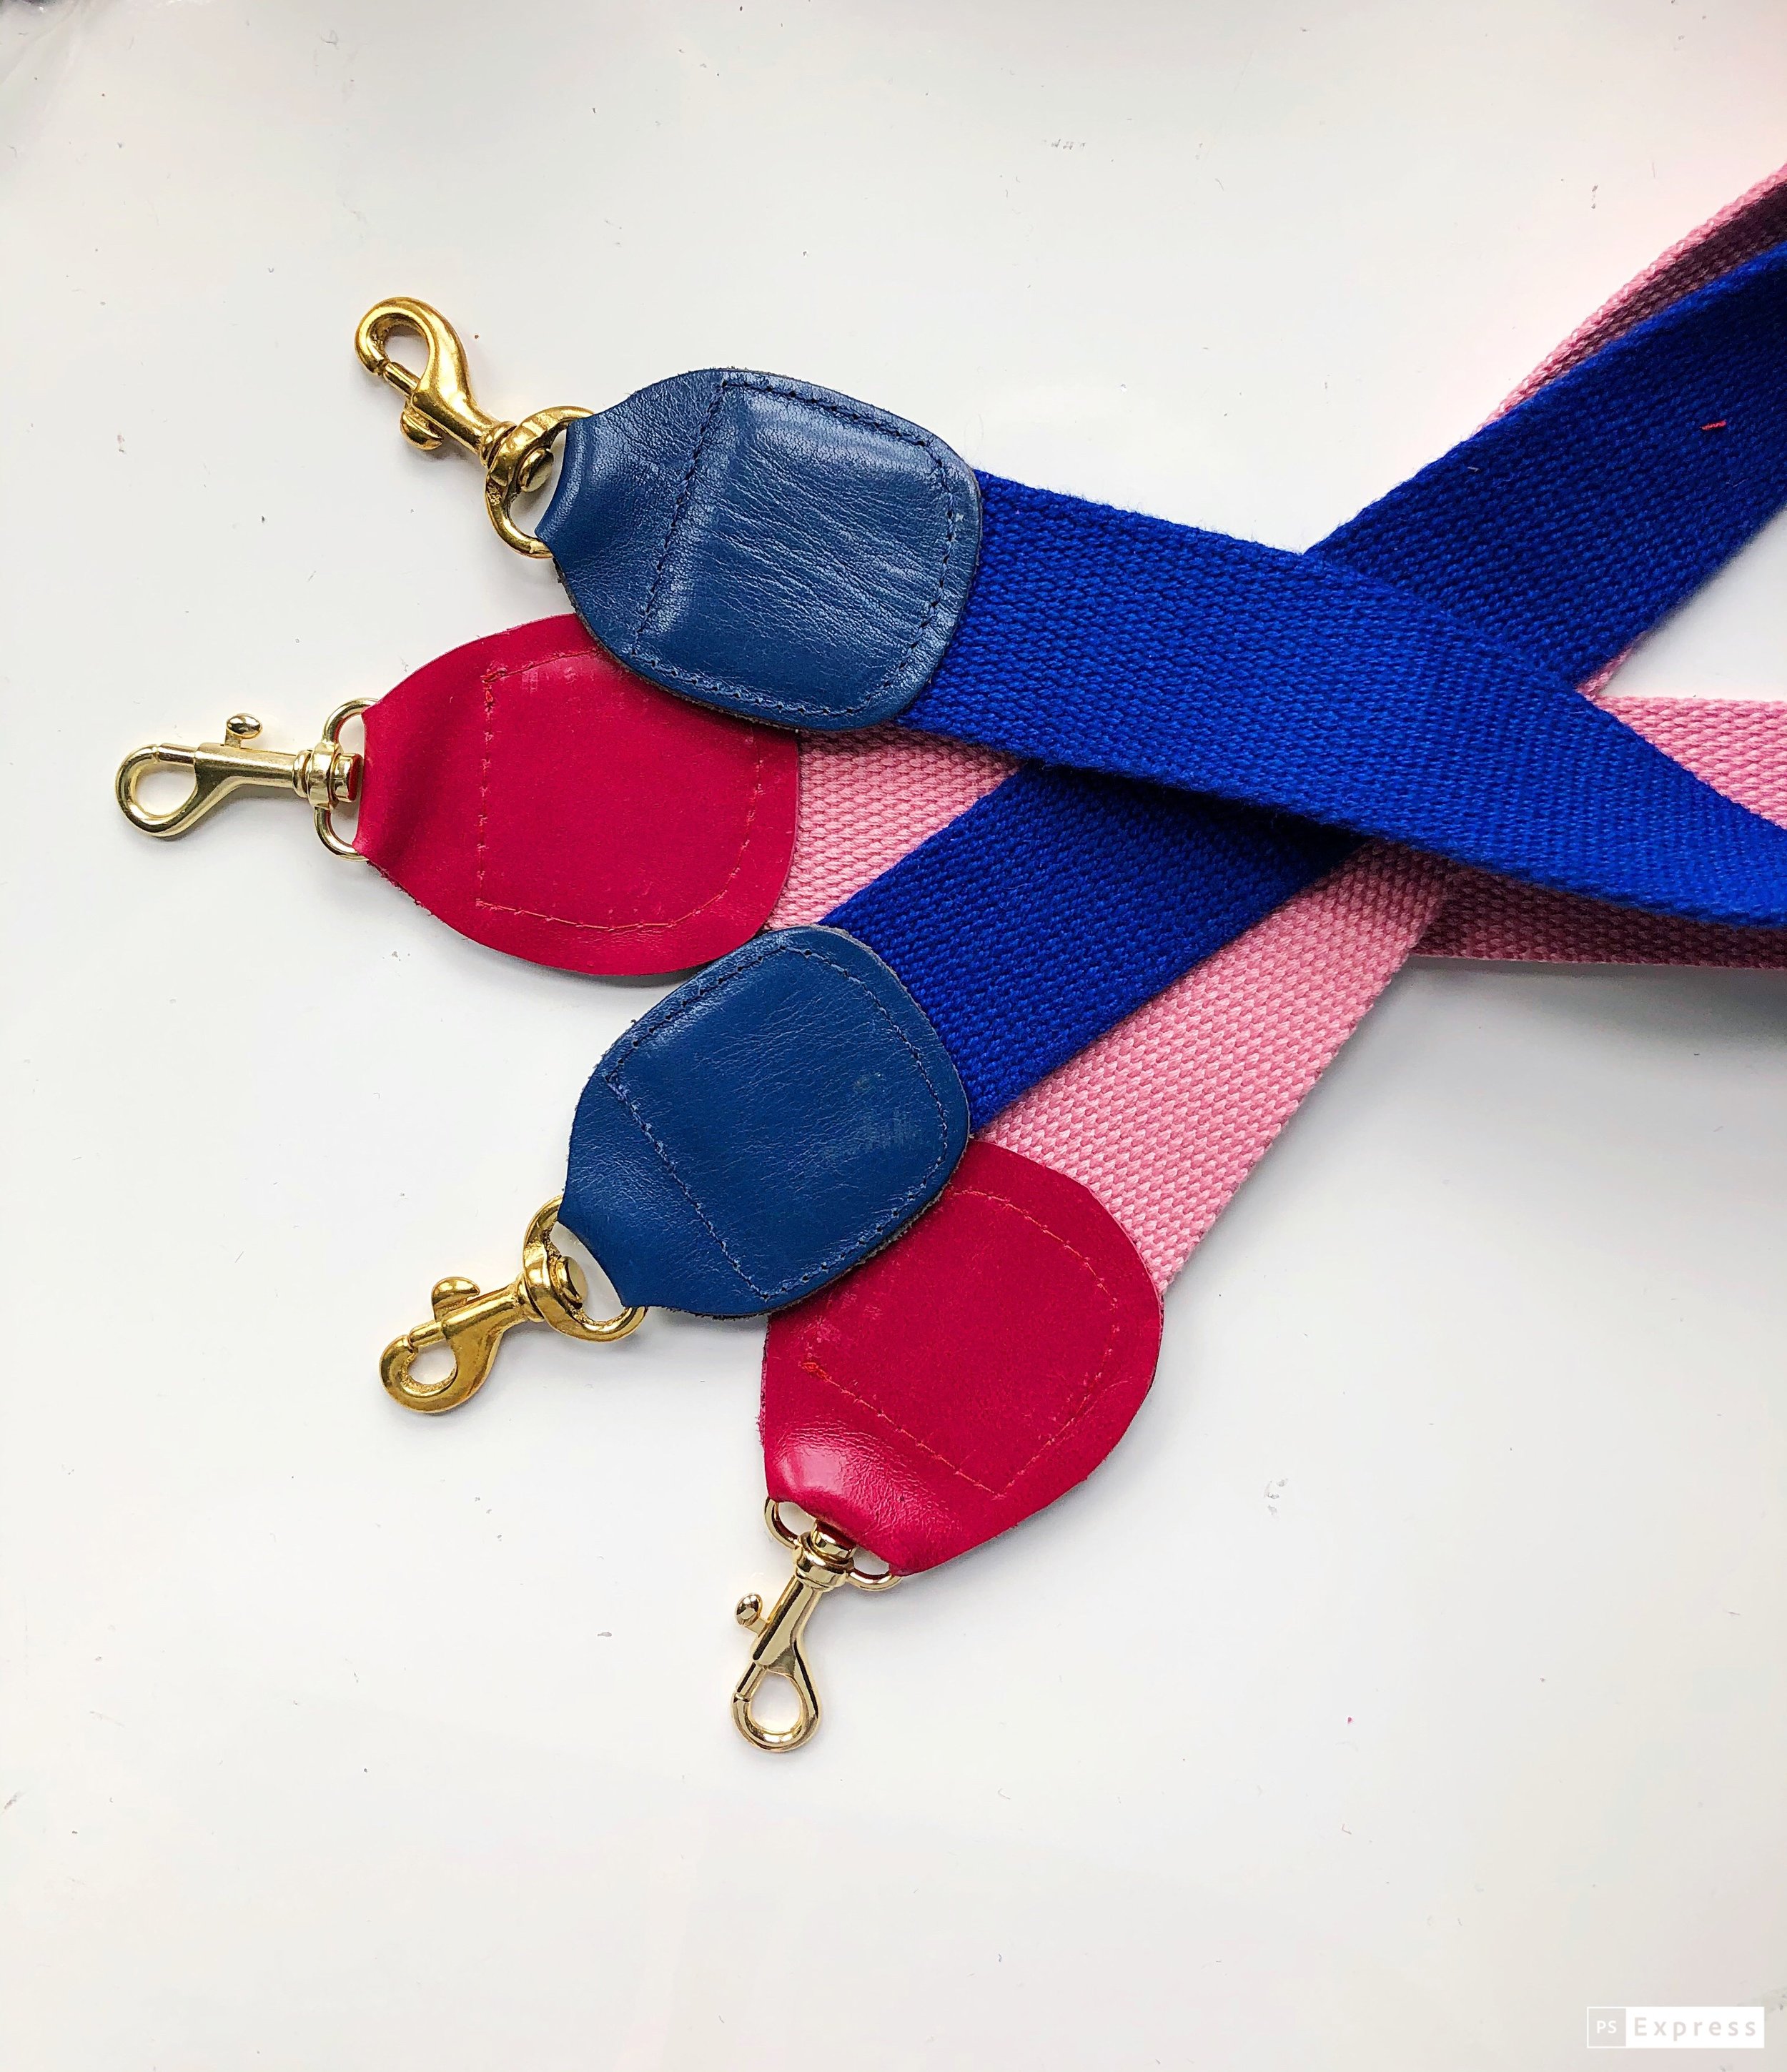
There are two end cap styles to choose from. Please be sure that you select the appropriate sized hardware and webbing to fit. For this tutorial, I am using the more rounded off shape to cap my strap.
Trace the End Cap pattern onto the back side of the leather piece. Repeat for the second piece.

CUT
Carefully cut around the traced line.
Measure and cut the webbing to your desired length. Here is a recent article that may help guide you- or you can just measure a strap that you already own and that fits comfortably.
HARDWARE
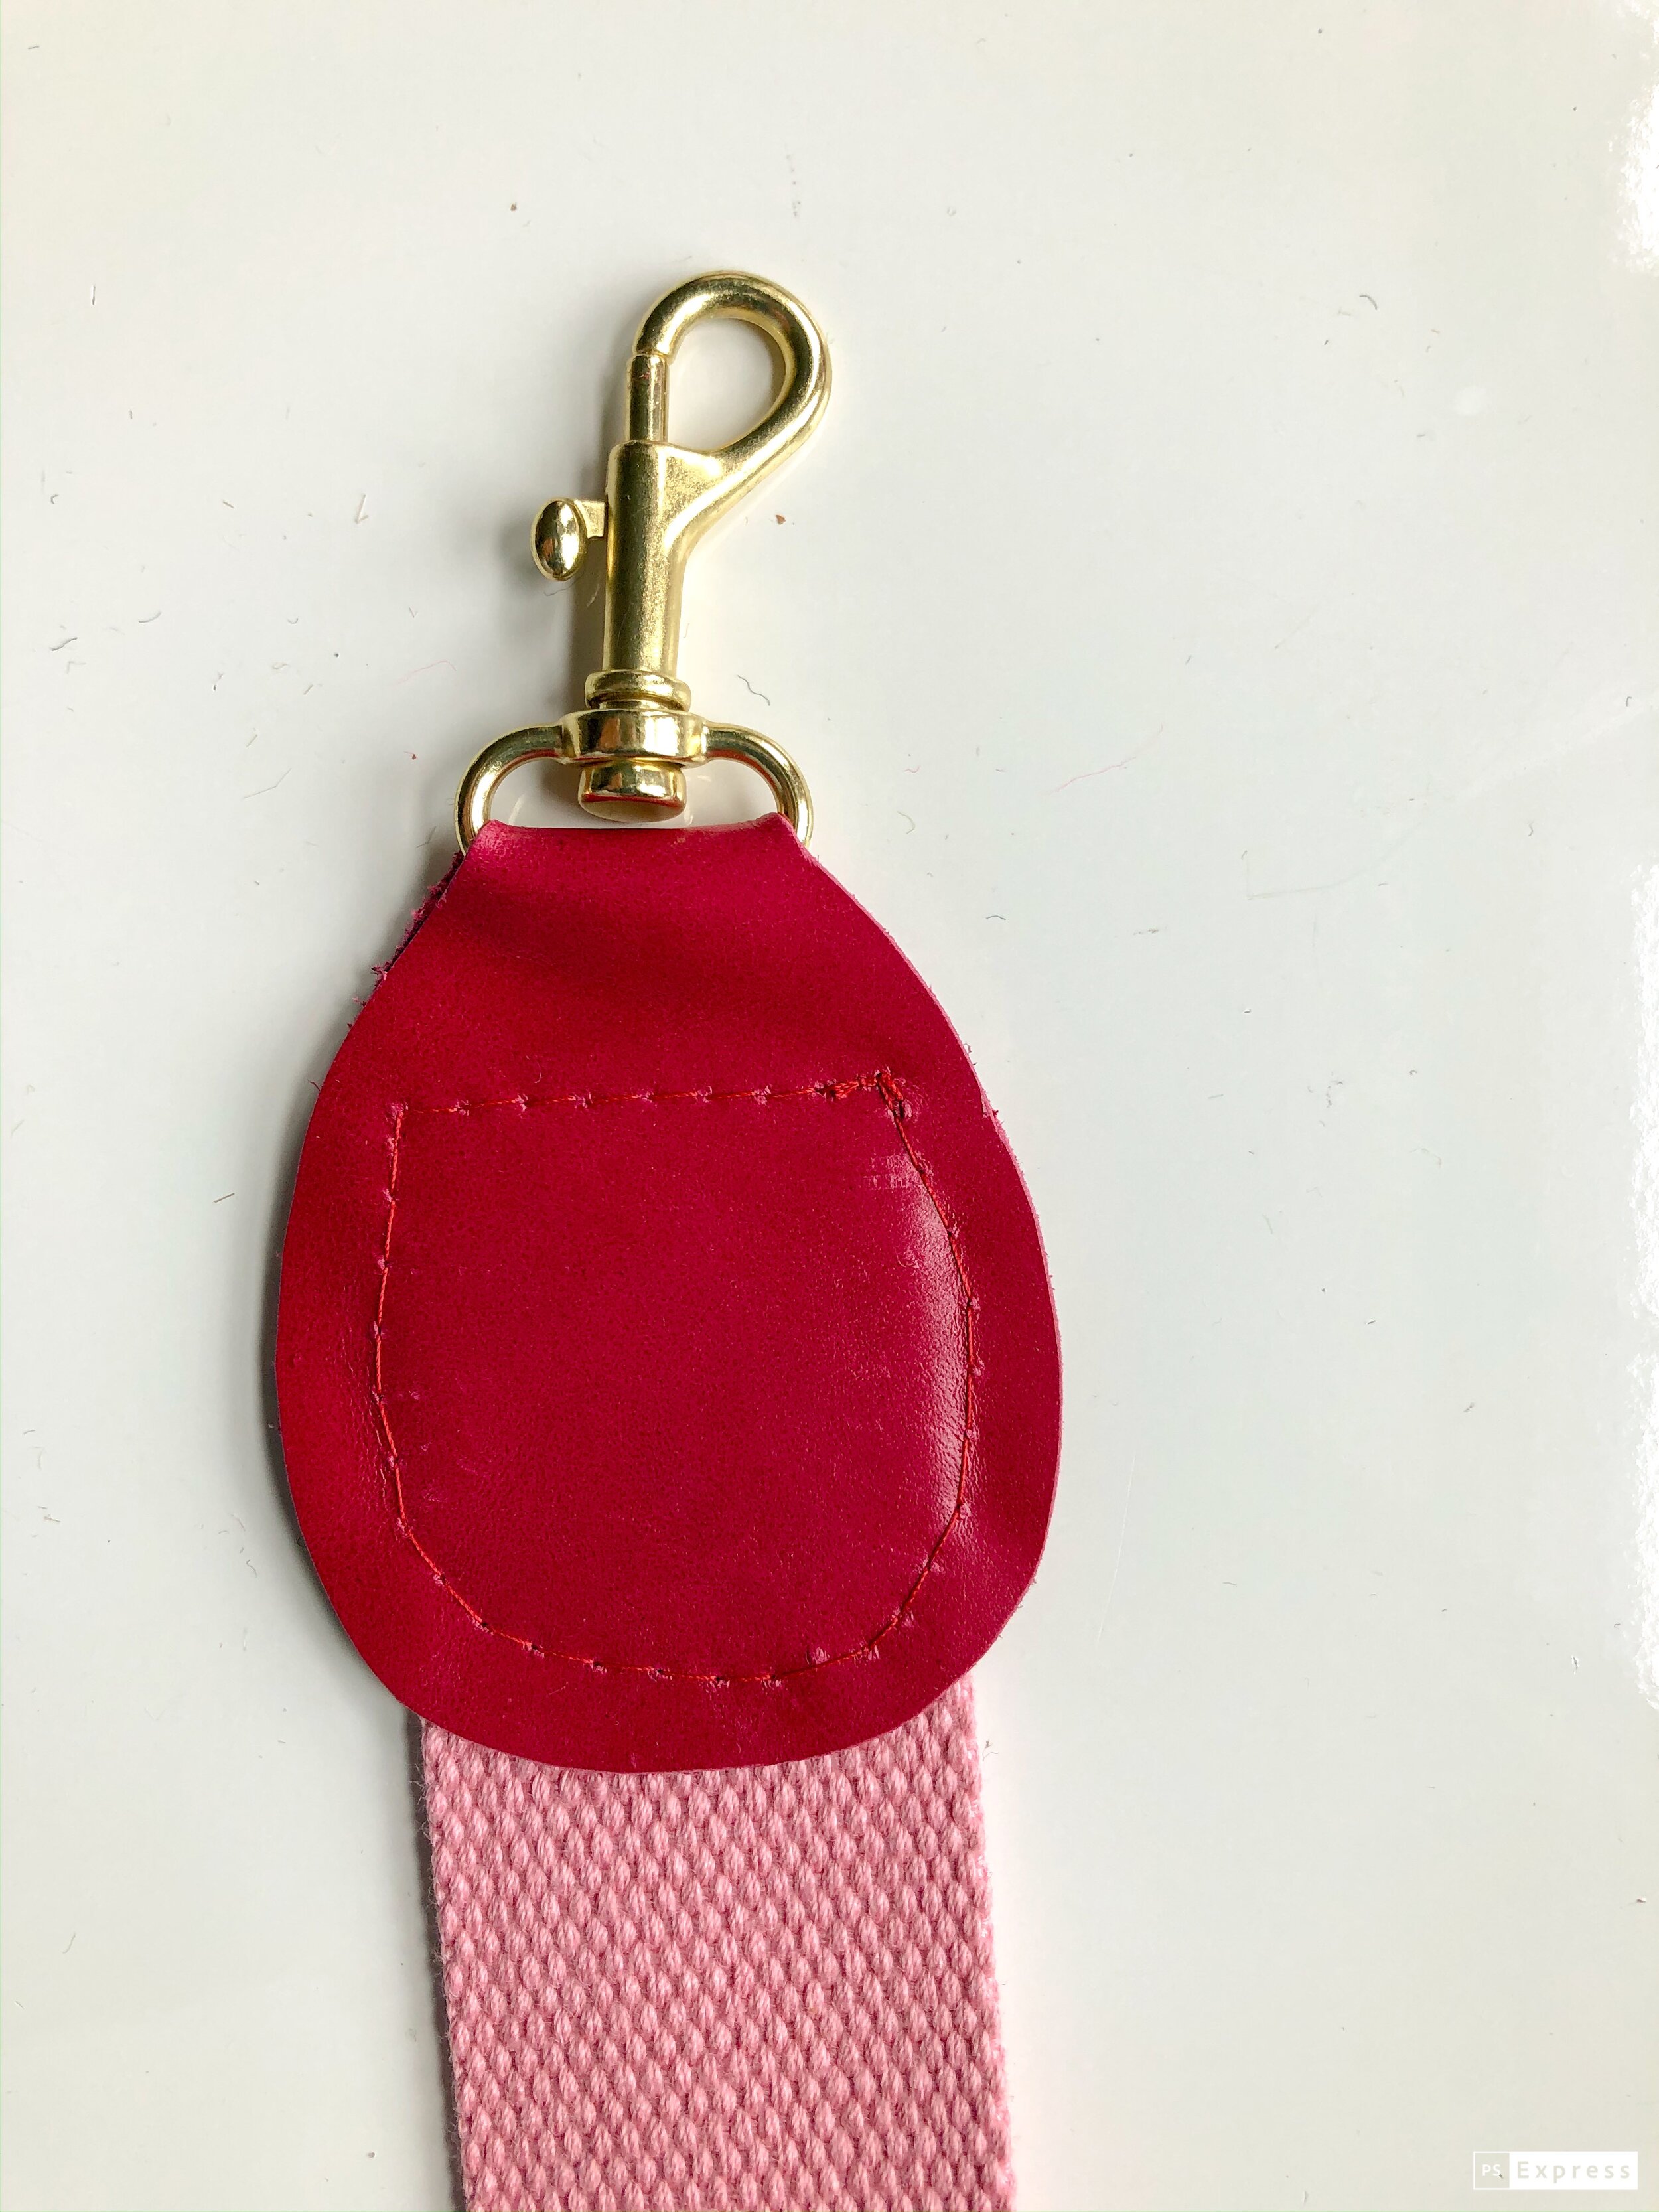
Slide the leather piece into the bottom ring of the snap hook. I find it is easier to fold the leather in half, lengthwise (like a hotdog) and thread it through the ring. Once it is centered, unfold and flatten.

In a well- ventilated area, apply a generous glop of rubber cement to the center of the inside of the leather. Let it sit a moment to get tacky. Place the end of the webbed strap centered on the leather- making sure that the webbing is completely inside the leather. Press to help the rubber cement to adhere.

Add another bit of rubber cement to the top of the strap and press the leather to seal. Allow to dry for a few minutes.

Repeat for the opposite side of the strap end.
MARK
Take a piece of chalk or a water soluble pen and mark the stitching line on the outside of the leather.
SEW
Edgestitch around the end cap. You will be sewing a box that is about one and a half inches square. If you would prefer, feel free to round out your stitching instead (like I did) by just sewing 1/4” from the edge of the leather. It is easier to sew a box shape and get it right the first time. Whichever shape you choose, just try to sew slowly. You can even “walk” your machine if you need to.
TRIM THREADS
Instead of back stitching, I generally recommend leaving long tails and hand knotting the ends, as backstitching can cut the leather. To hide the tails, tie in a double knot as close to the stitch as possible. Thread both ends of the thread onto a hand sewing needle. Insert the needle into the back of the strap of the underside of the seam. Pull through. Tie once again and snip.
Pictures of this method and more details are available here.
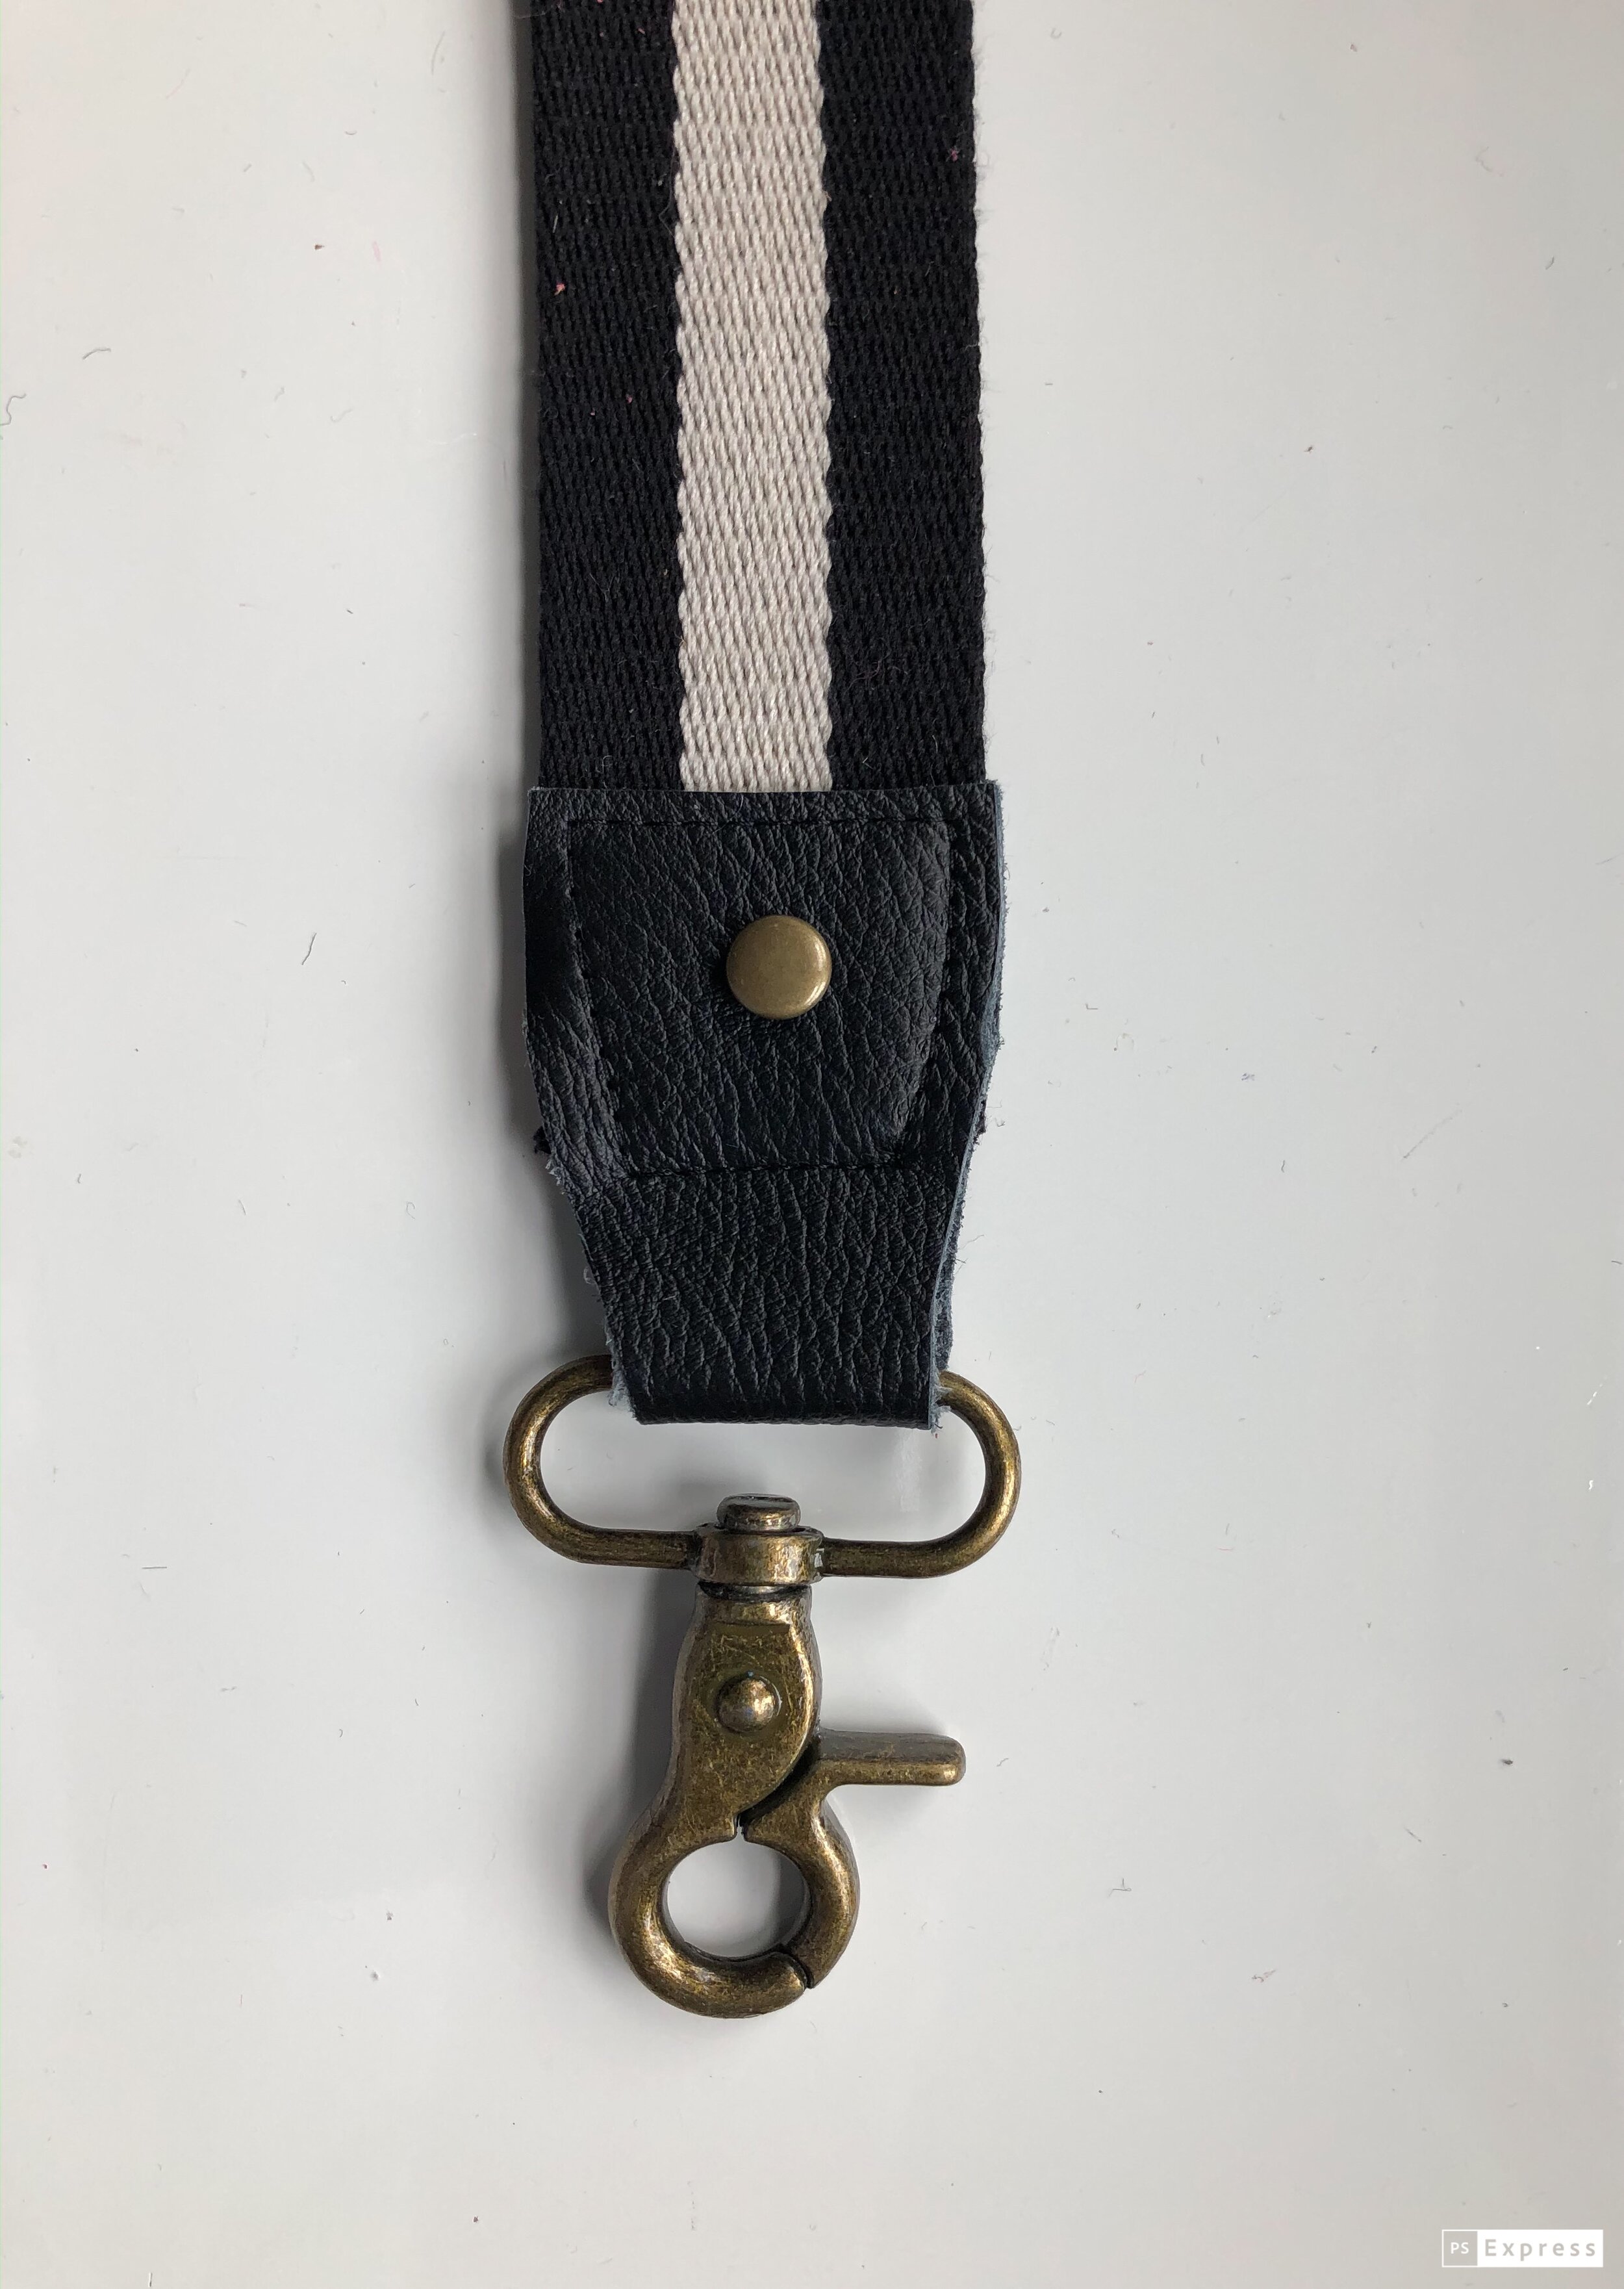
I added a rivet to this strap to both dress it up and to provide some additional reinforcement.

My next strap is all laid out and ready to go!
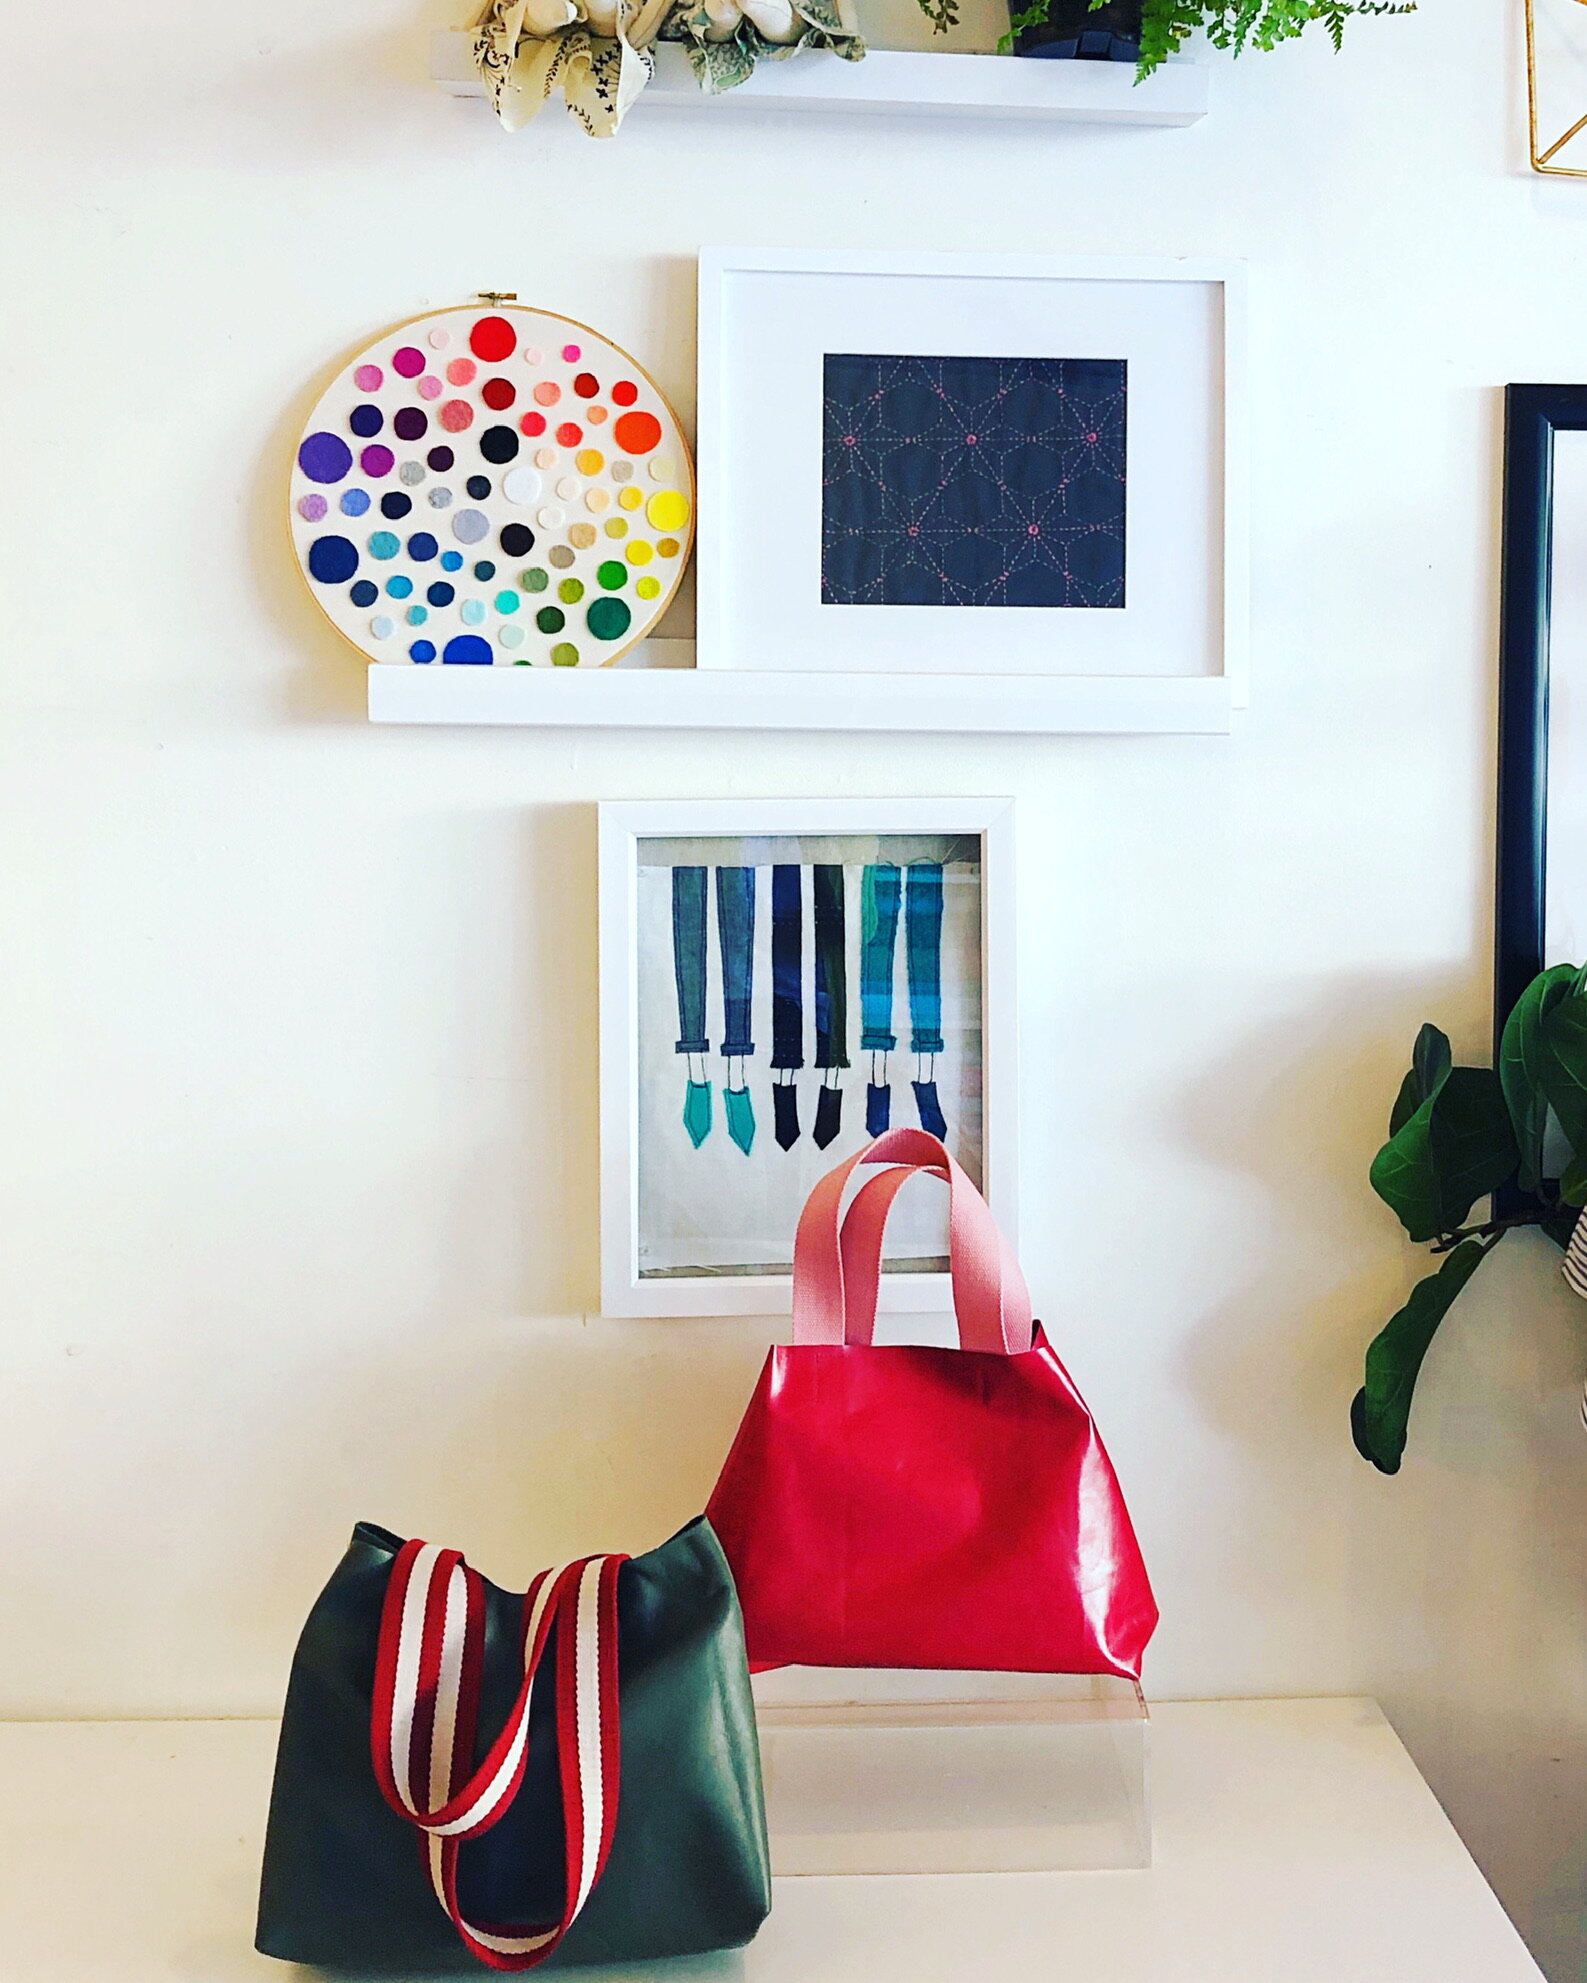
This accessory strap can be used with any bag that has a removable strap. Simply unhook the original, and swap it out for the new and improved.
With this fully customized option, you can breathe new life into old bags. Whether you wear it messenger or standard shoulder style, it is sure to give each outfit some unique style appeal. How will you wear yours? Please share using the hashtags #sewbags #sewbagsthebook #littlestitchstudio
For more bag patterns and sewing techniques, be sure to check out my new book! Sew Bags: The Practical Guide to Making Purses, Totes, Clutches & More; 13 Skill-Building Projects
XOXO, Hilarie

Tips and Tricks for Sewing with leather
There is just nothing like sewing or crafting with beautiful materials. Chief among them for me is leather.
One of the reasons that I was late to release a pattern that requires leather is that for many people, it is tricky to acquire. It is not like you can stop by your local fabric shop and pick up a yard or two. Additionally, while leather is not difficult to sew, you do have to have a few extras available to make it turn out looking fantastic.
There is just nothing like sewing or crafting with beautiful materials. Chief among them for me is leather.
One of the reasons that I was late to release a pattern that requires leather is that for many people, it is tricky to acquire. It is not like you can stop by your local fabric shop and pick up a yard or two. Additionally, while leather is not difficult to sew, you do have to have a few extras available to make it turn out looking fantastic. When I wrote my book, one thing that I really wanted to stress was to not feel the urge to go out and purchase everything that you think you “might” need. As it never really ends- I promise! 45 years in and each time I learn a new technique or take interest in some new esoteric path, the cash flow woes begin! Which brings me back to the point, “Do as I say, not as I do” :)
Life is funny sometimes! Through complete serendipity, and the power of Instagram, I have made a new friend, Faina, who happens to own a leather shop! Leather, Suede, Skins, Inc. in NYC. She so generously shared some of her gorgeous leather with me to make the Poppy Convertible Tote and tutorial. But more than that, you now have a place to shop for leather and an expert to consult! Our hope is that together, we can show you how easy and fun it is to sew with leather.
There are a few supplies that you will need to get started. While some are truly necessary to achieve the correct finished look and make the process so much more enjoyable! There are a few others that are more in the “nice to have” category. I’ll share both with you.
MY FAVORITE LEATHER SEWING TOOLS
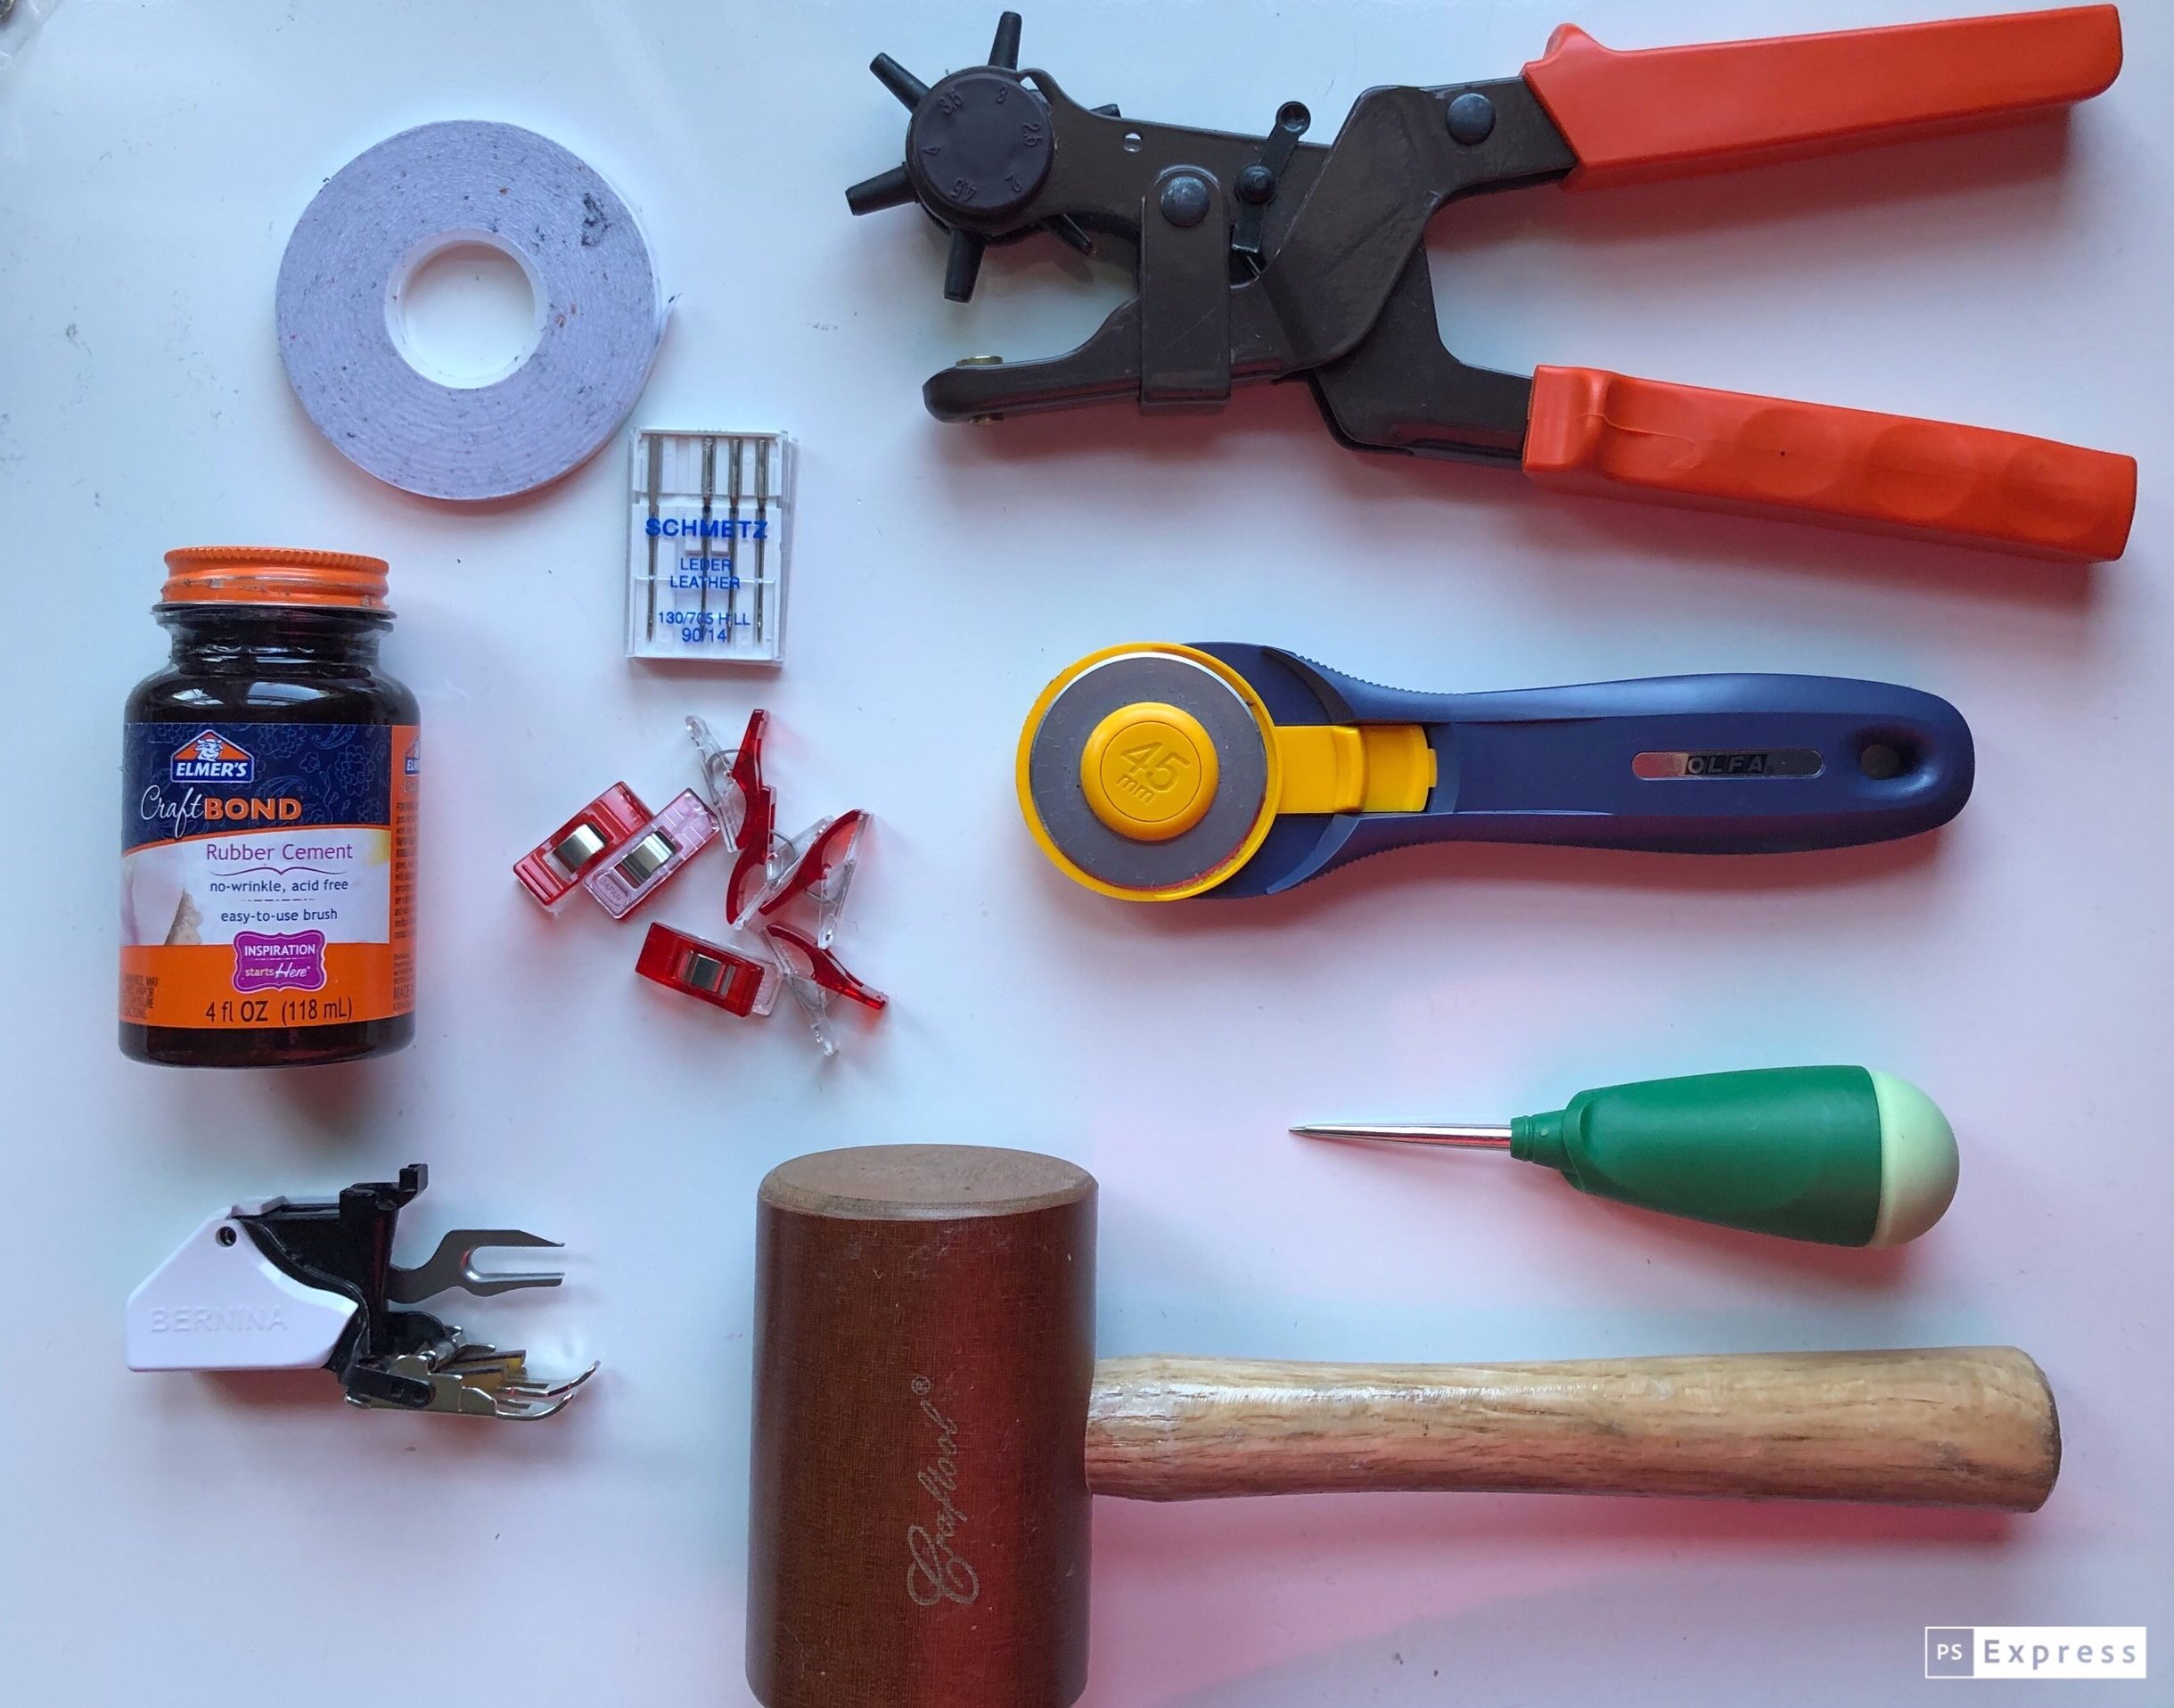
Walking Foot, or Even-Feed Foot Don’t be intimidated- the walking foot is your friend! This genius device will evenly feed multiple layers of fabric or leather through your machine. No shifting, dragging or puckering.
Silk or Polyester Thread- this is my favorite Additonally, topstitching thread or denim thread works too. Be sure that it is medium weight and made of silk or polyester. Cotton thread will fray and deteriorate over time due to the chemical reaction to the tannins in the leather.
Double Sided Tape Double-sided leather tape comes can hold layers of leather together for stitching and can also be used to hold seams flat. Please remember to test on scrap leather before trying on your project.
Wonder Clips (Medium sized binder clips work too.) Unlike fabric, pinning leather will leave holes. Instead try using clips.
Microtex or leather Sewing Machine Needles These needles have a special shape and point which is designed to pierce leather with little resistance.
Mallet A rubber or bakelite mallet is used to lightly tap seams in order to flatten them.
Rubber Cement Rubber cement works well for gluing seams flat.
Straight Awl My go-to tool to punch holes or enlarge existing holes in canvas and leather.
Rotary Cutter- This smaller one is great for detail work and the larger size can go through leather so easily.
Leather Hole Punch Punch neat and clean holes in leather and canvas. An essential for preparing straps for hardware.
While each of these tools is really helpful, the ones that you truly “need” to begin sewing with leather are the correct needle, thread, walking foot and clips or tape. The rest can be acquired over time. You do not have to have every notion, attachment and gadget. Instead, I encourage you to start small and build your supply stash as you build your skills.
Download your free PDF sewing pattern to make the Poppy Convertible Tote
When learning to sew- or to sew with a new techniques, please take your time and concentrate on accuracy. Unlike sewing with regular fabric, sewing with leather, the threads can't just be pulled out without leaving holes from the previous stitching. By slowing down and concentrating on learning a new skill, you're much more likely to achieve a result you're really proud of.
I hope these tips help you feel more confident about sewing with leather. If you have any questions please feel free to get in touch. And if you’re looking for a fun project to practice your leather sewing skills, the Poppy Convertible Tote is a great first project. It only requires sewing straight lines- no curves, and the pattern gives you detailed, fully photographed instructions to guide you step by step as you make your first leather bag.
XOXO, Hilarie
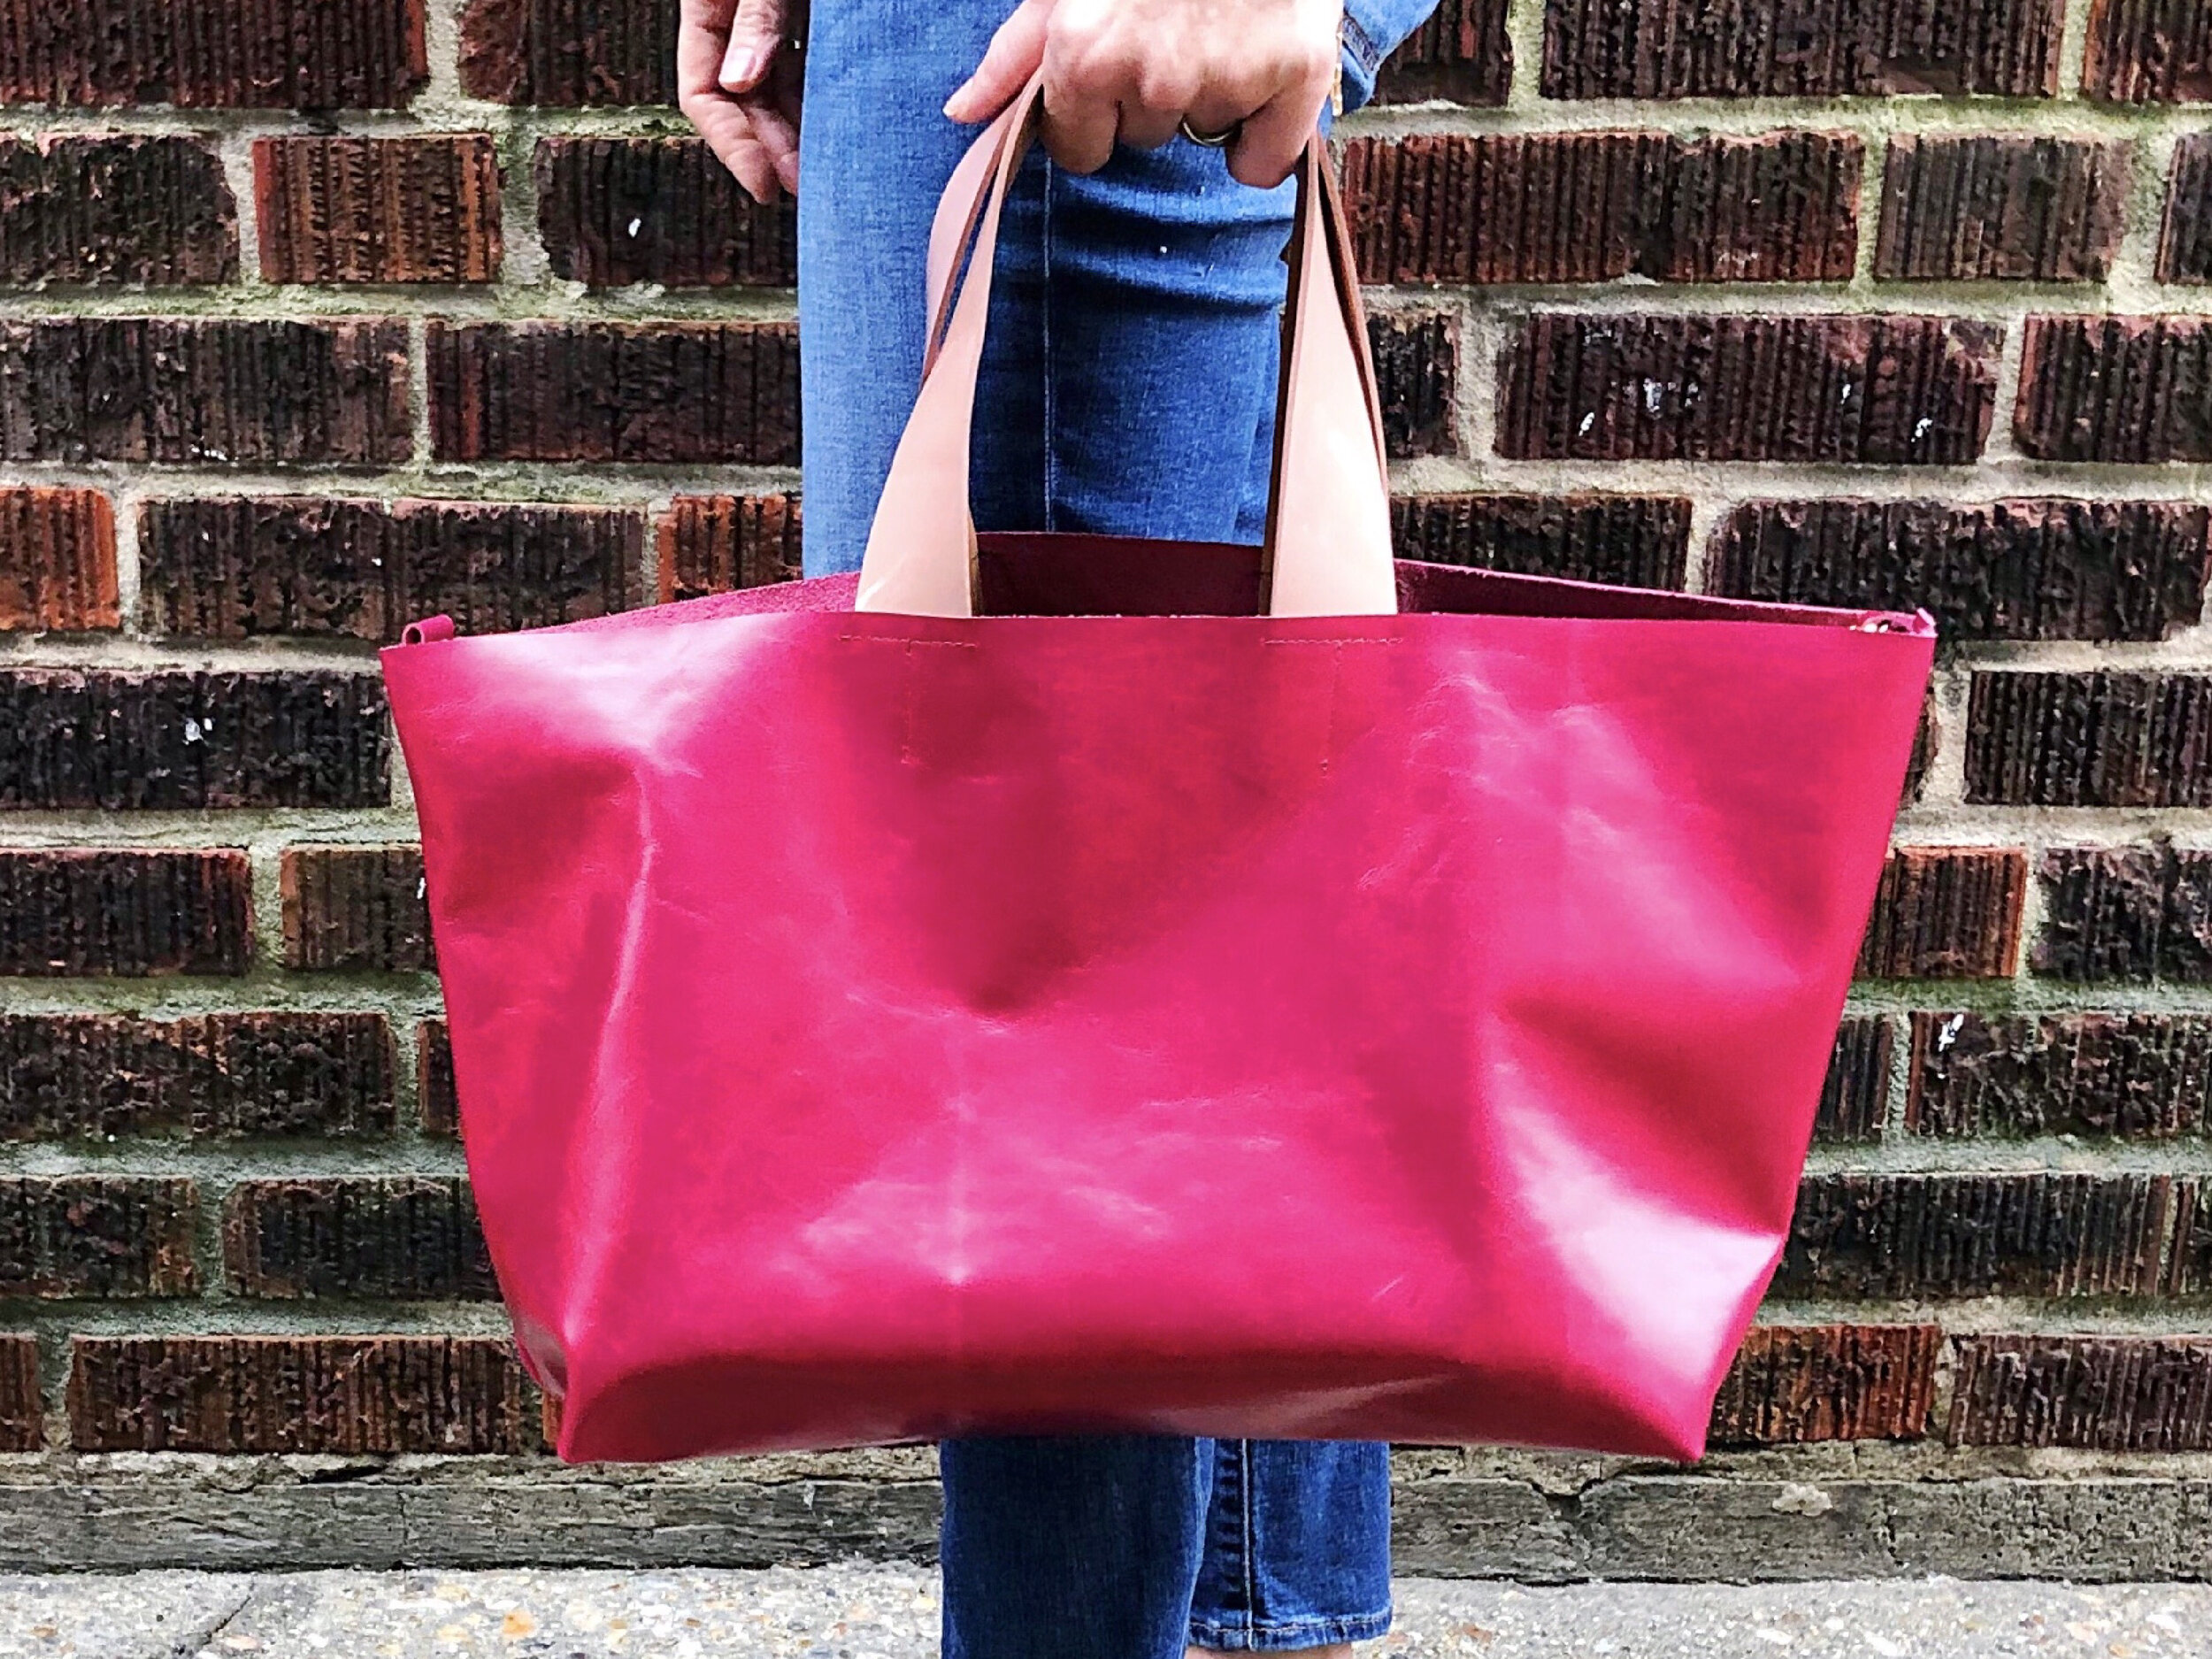


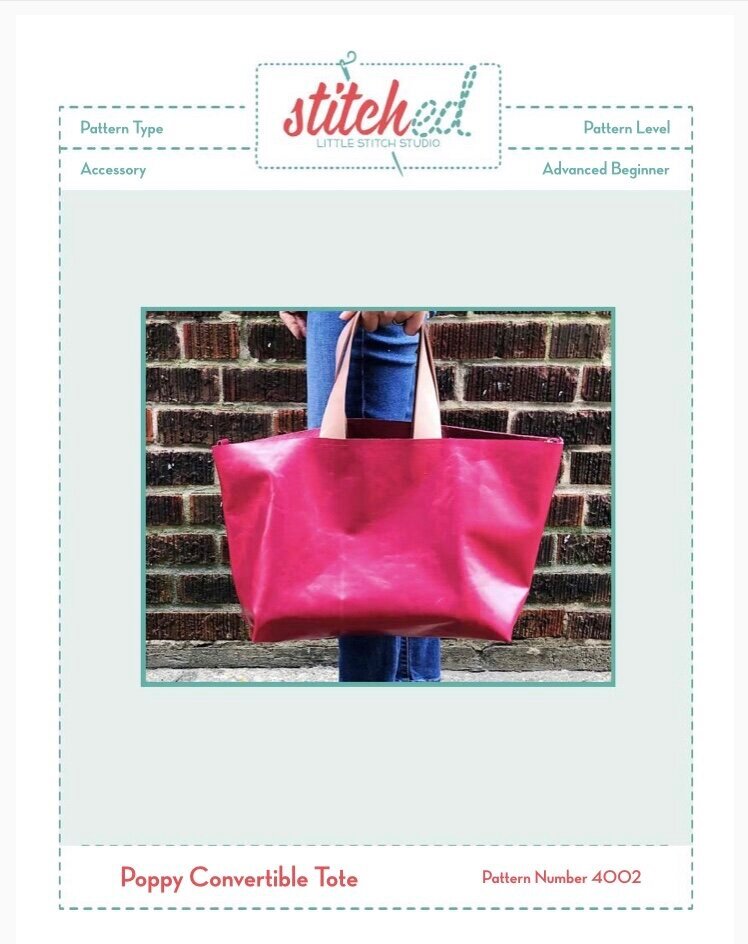
The Poppy Convertible Tote PDF Pattern and Tutorial
Welcome to my newest pattern, The Poppy Convertible Tote. Poppy is at once classic and modern. A beautiful leather tote that easily cinches to a classic shoulder bag. Featuring comfortable cotton webbing straps, an interior pocket plus hardware that functions as both clasp and optional cross-body strap holder.
Poppy is the perfect bag for learning to sew with leather. It has few seams and best of all- it doesn’t require fitting!

Introducing Poppy!
Welcome to my newest pattern, The Poppy Convertible Tote. Poppy is at once classic and modern. A beautiful leather tote that easily cinches to a classic shoulder bag. Featuring comfortable cotton webbing straps, an interior pocket plus hardware that functions as both clasp and optional cross-body strap holder.
LEARN TO SEW A LEATHER BAG
Poppy is the perfect bag for learning to sew with leather. It has few seams and best of all- it doesn’t require fitting! Speaking of leather, it is time that you start shopping so that you can get started on your bag. You will need about 7.5 square feet (0.7 m2) of cow hide with an approximate weight of 2-3 ounces for this bag. Cow hide is much stiffer than some other skins such as lamb or goat. That stiffness is needed to hold the shape. The leather for my bags is from Leather Suede Skins, Inc. in NYC. Call and ask for Faina. She will help you select the ideal leather for your bag. Alternately, you can find leather online or a local specialty store.
FREE PDF PATTERN DOWNLOAD AND TUTORIAL
The PDF Version of the Poppy Convertible Tote is available now for instant downloading. It is formatted for printing at home on standard 8.5 x 11” or A5 paper. The PDF is 31 pages, 9 of which include the pattern. The rest is all instruction, tips and techniques. This pattern was designed to be made along with my book, Sew Bags: The Practical Guide to Making Purses, Totes, Clutches & More; 13 Skill-Building Projects.

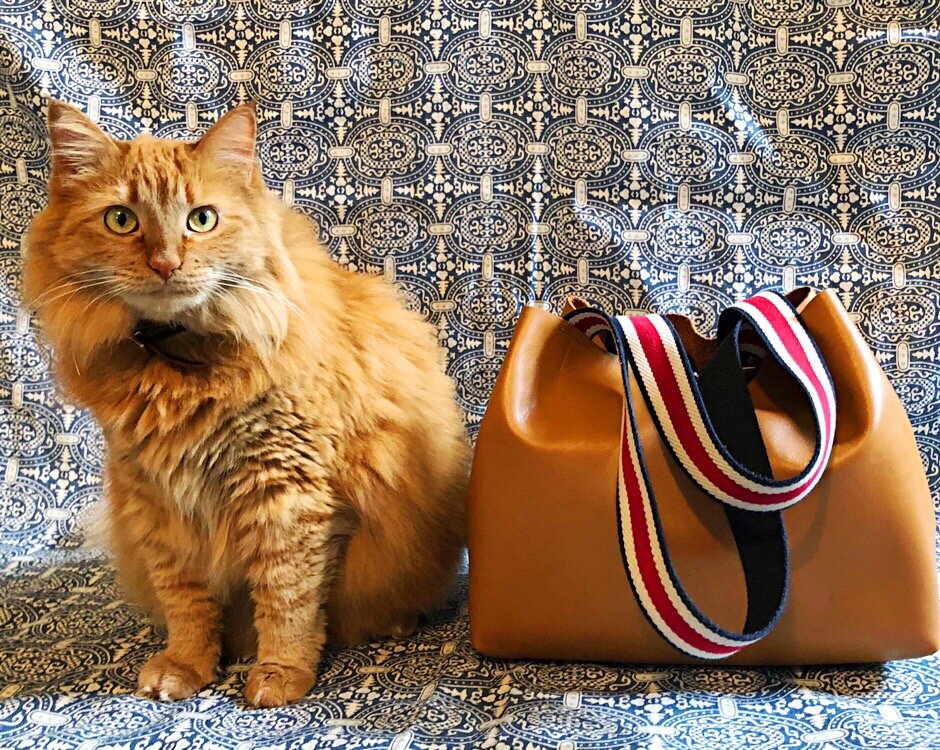
Poppy, my sweet kitty with her bag.
This pattern is a long time coming, and I am so happy to finally be launching it. You can look forward to a sew along in the coming weeks.
I hope that you enjoy this pattern and learn a new skill or two. Please share your pictures- I can’t wait to see your finished bag.
XOXO, Hilarie
#poppyconvertibletote #sewbags

Felt Lovebirds Pattern and Tutorial
Make these pretty felt love birds for Valentine's Day. With these sweet love birds you can show the one you love how much you care.

Make these pretty felt love birds for Valentine's Day. With these sweet love birds you can show the one you love how much you care.
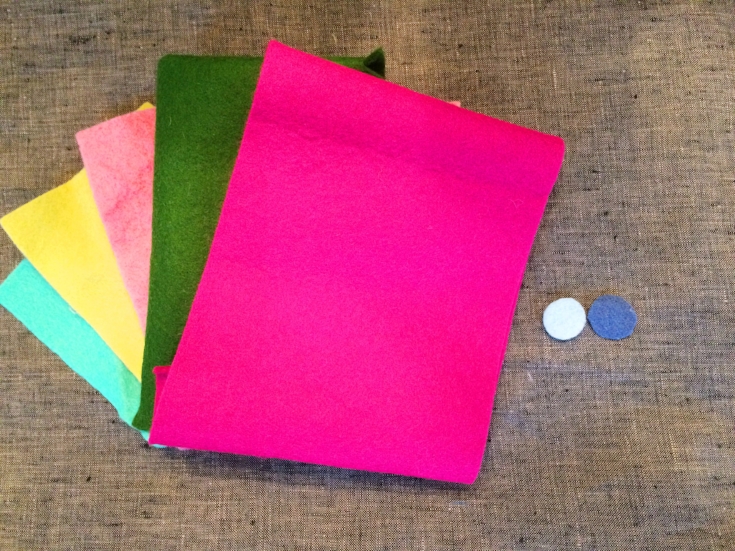
MATERIALS FOR LOVEBIRD
White Felt
Pink Felt in two shades for feathers and wings
Small piece of Black Felt for beak
Handsewing needle
Thread
Black embroidery floss
Metallic thread (optional)
Poly-fil
A free Lovebird Template, printed and cut out (This pattern has a 1"/ 4CM test square. Measure the test square, and if it does not measure correctly, check your print scaling options.)

SIZE
8 1/2"x 4 1/2"
MAKE THE LOVEBIRD
CUT
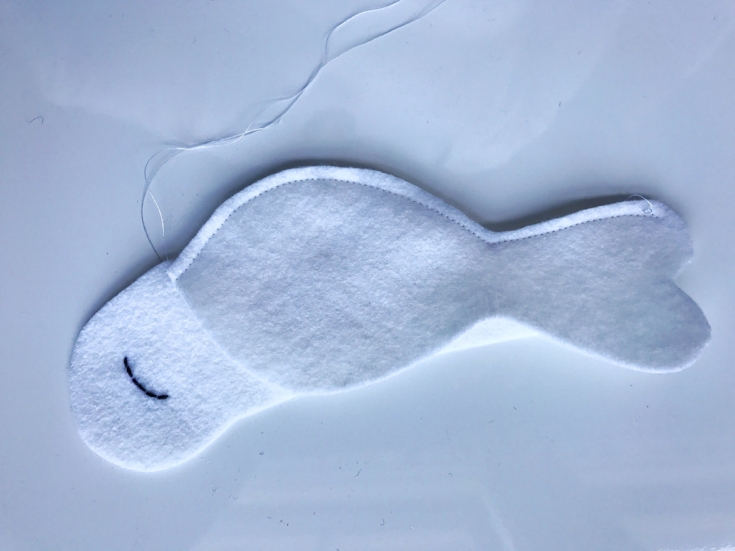
Using the Lovebird Template, cut 2 bird body pieces, 1 gusset, and 1 wing out of white felt. Cut the beak out of black felt and tail feathers from each of the pink. Cut one more set of wings from pink.
MARK
Using a water-soluble marking pen, Begin marking the fabric with the pattern piece still pinned to it. When you mark a pattern, you always want to begin at the pattern pieces outside edges and work toward the center. Easy, right? Let’s do it! Using a straight pin, pierce the pattern piece and fabric right through the center of the first dot. Carefully lift the pattern paper (while still holding the pinned fabric in place) and mark the fabric with the pen. Repeat on the underside of the next piece of felt so that the sides are mirror images of each other.

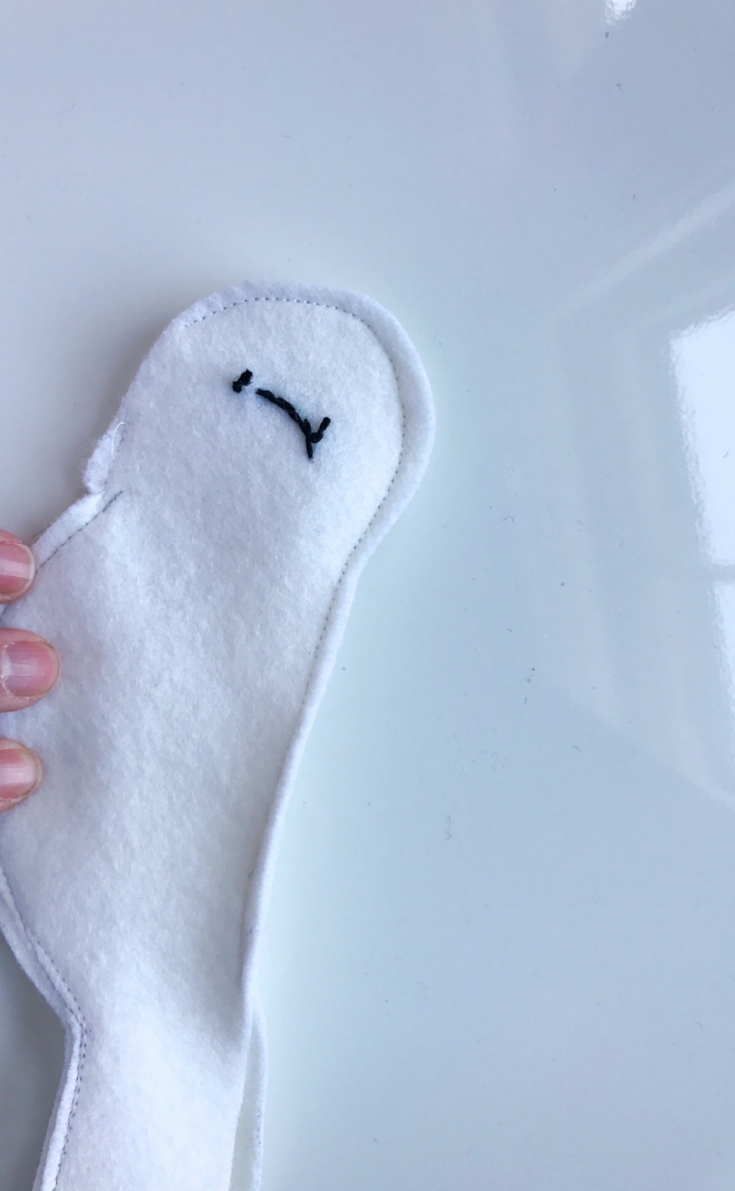
STITCH THE EYES
To sew the eyes, we are going to use a basic running stitch. It's beautiful in its simplicity, utility and function. Vary it with size and color and it adds such vitality and expression your projects.
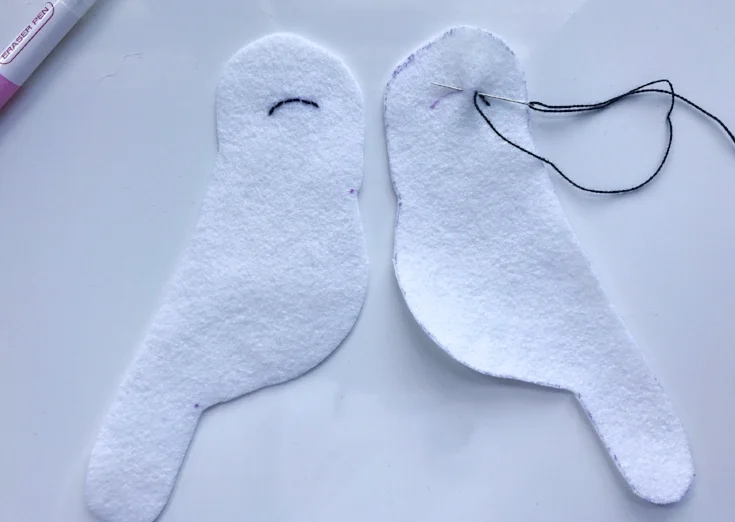
The pieces should be marked as to be mirror images.
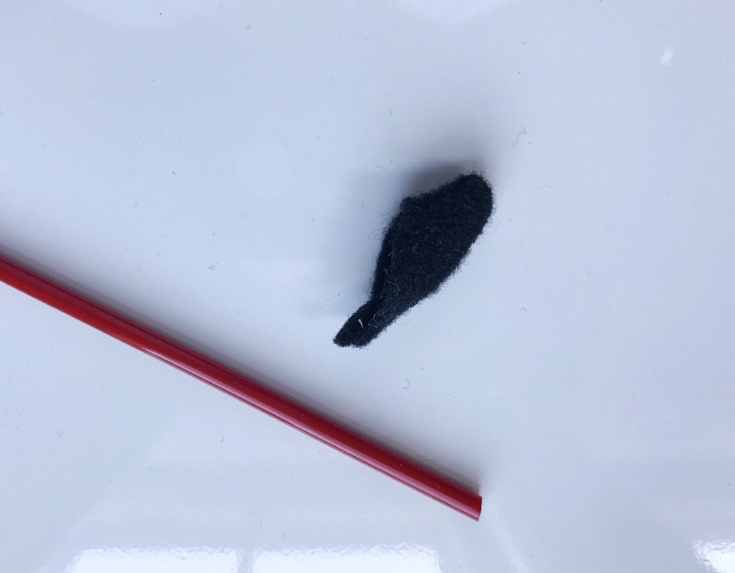
BEAK
Fold the beak along the center line and stitch along the long side using a 1/8" seam.

Turn right side out. It helps to use a tool to push the tiny end through. A chopstick or eraser end of a pencil work well for this.
MAKE THE LOVEBIRD
Take a bird body piece and the gusset, place them with the Right Sides Facing Together and match the markings. Pin and stitch around the outside edges of one side from tip to tail, using a 1/4" seam allowance.
Pin the other bird body to the opposite side of the gusset and stitch.
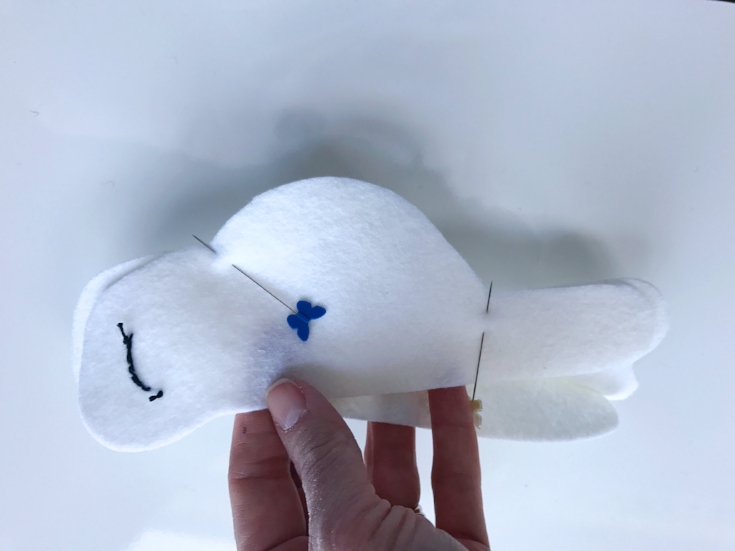
Pin and sew the bird body together at the center back seam beginning at the dot level to the eye around the head and to the top of the tail. Leave the area where the beak will be attached open.
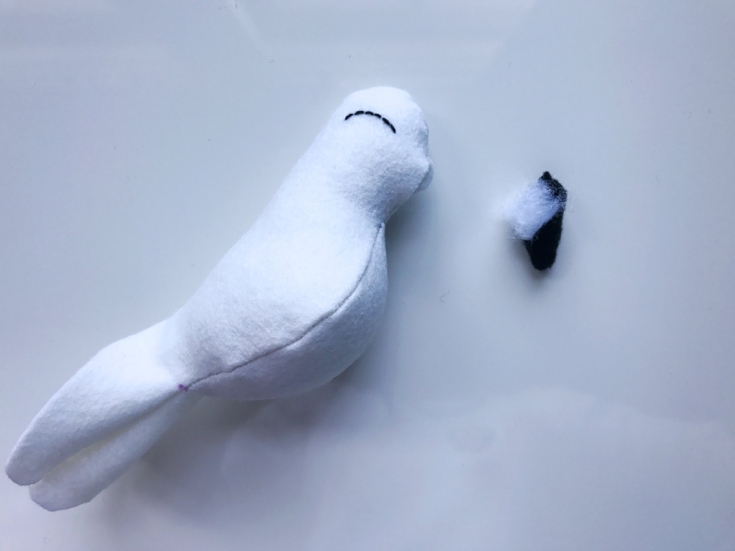
TURN AND STUFF
Turn the bird body right side out and stuff nice and firm with polyfil.
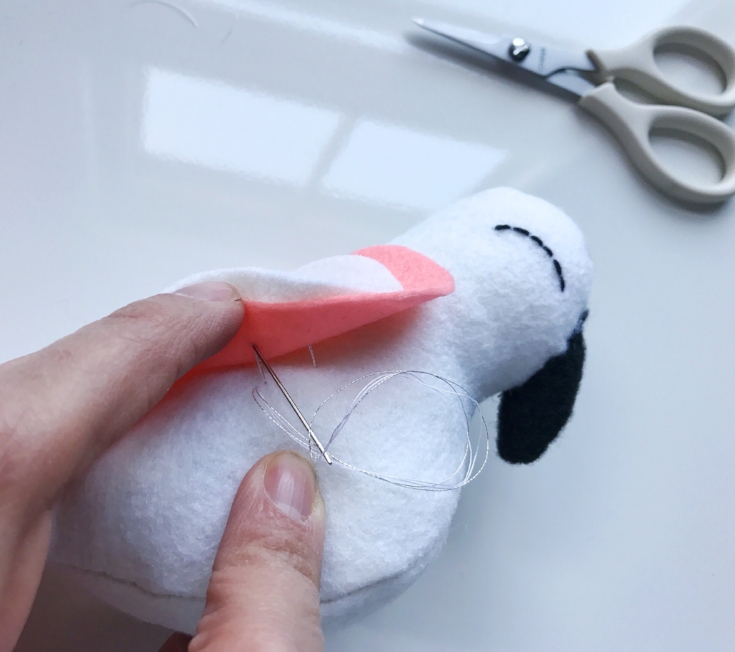
ATTACH THE BEAK
Add a tiny bit of stuffing to the beak. Pin the beak to the bird and whipstitch around the beak to attach it to the bird body.

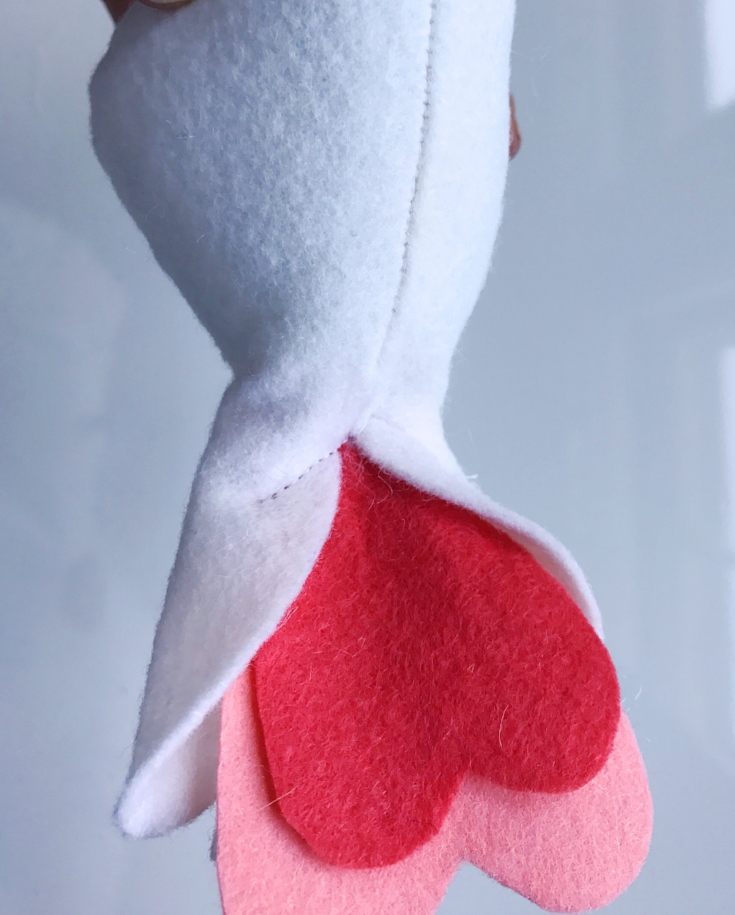
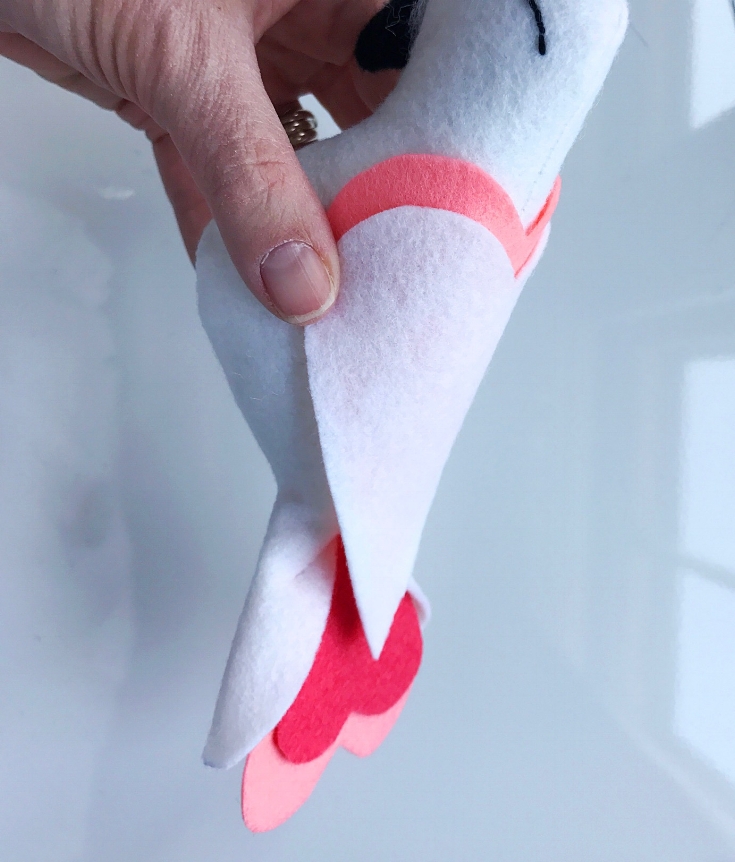
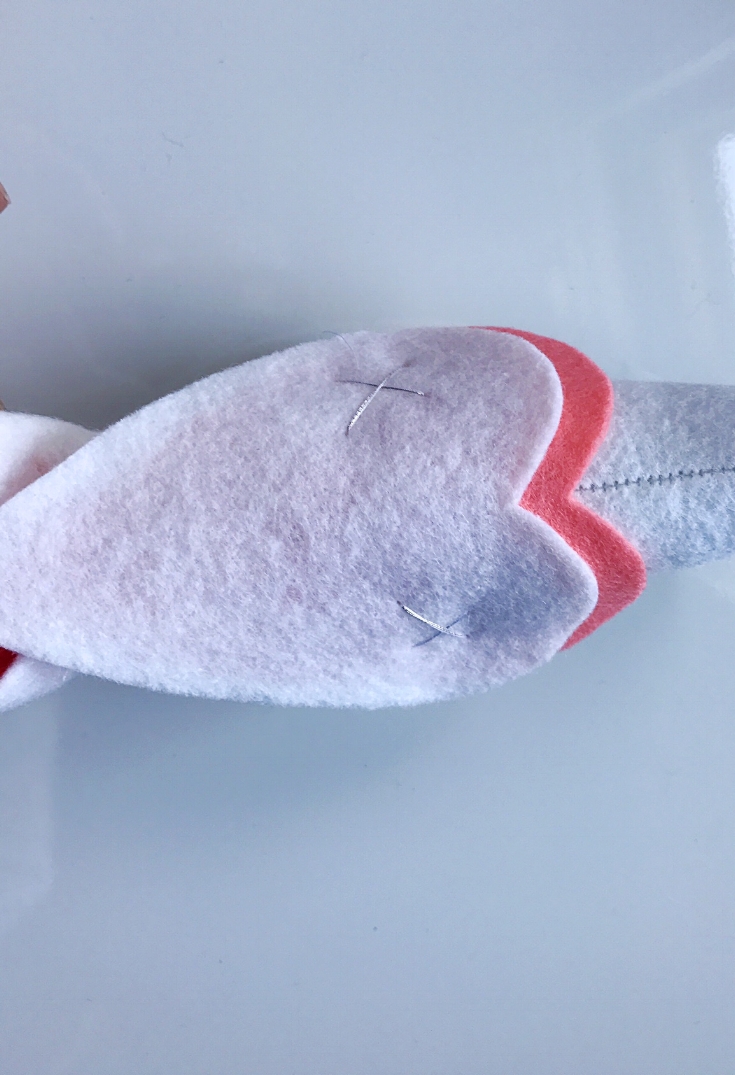
TAILFEATHERS
Insert the tail feathers into the body of the bird. I shifted the layers of feathers a bit to create some visual interest. Pin in place and stitch in an inverted V shape to secure.
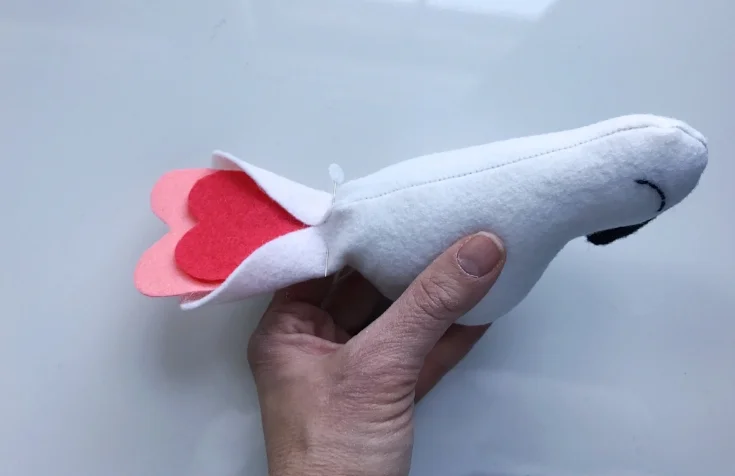
WINGS
Arrange the wings and pin to the bird. Again, I shifted the placement of the wings to overlap just a bit.
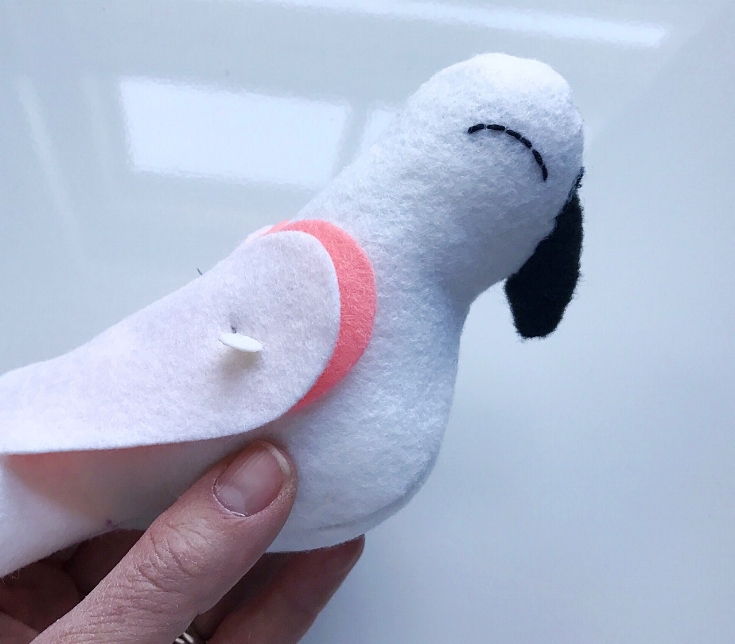
Stitch in place. I used some silver metallic thread to attach the wings and give them a bit of glam. Feel free to add your own touch!
Trim threads and use a quick bit of steam from the iron to get rid of your markings.
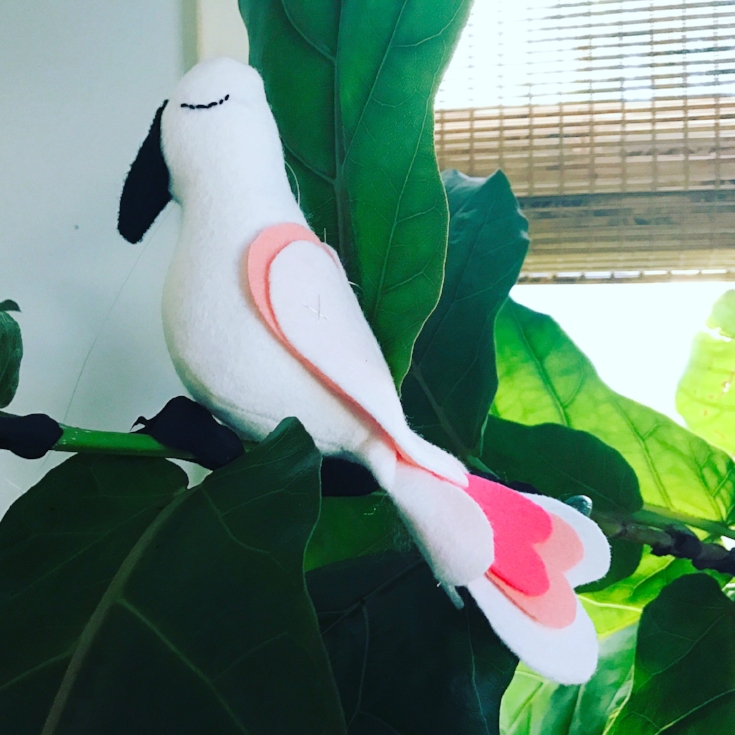

Would you like to learn how to make the perch? Come back tomorrow!
XO, Hilarie

On the Twelfth Day of Christmas.....Festive Stocking Holders
One of my favorite Christmas traditions is handmade gifts. For me, making something for a friend, sister or child, is what makes the holidays so special.
These mini stockings are sure to be a hit at your table. Their small size make them perfect to hold a treat, a gift card, or flatware. Additionally they can double as Christmas ornaments next year!
MATERIALS

White felt
Scrap felt in a variety of fun colors
Handsewing needle
White thread
Metallic Embroidery Floss in White Gold
A free Mini Christmas Stocking Template, printed and cut out
SIZE
3 x 5 3/4
MAKE THE STOCKING
CUT
Using the Mini Stocking Template, cut 2 foot pieces, one cuff piece, one loop, and 18 felt circles.
EMBELLISH
Following the pictures as a guide, stitch two circles at a time to the stocking cuff using a straight stitch and some metallic thread. For added interest, I offset the direction that I stitched the felt circles to the cuff.
MAKE THE STOCKING
Fold the embellished stocking cuff inward with Right Sides Facing Together. Stitch the short side using a 1/4" seam allowance.
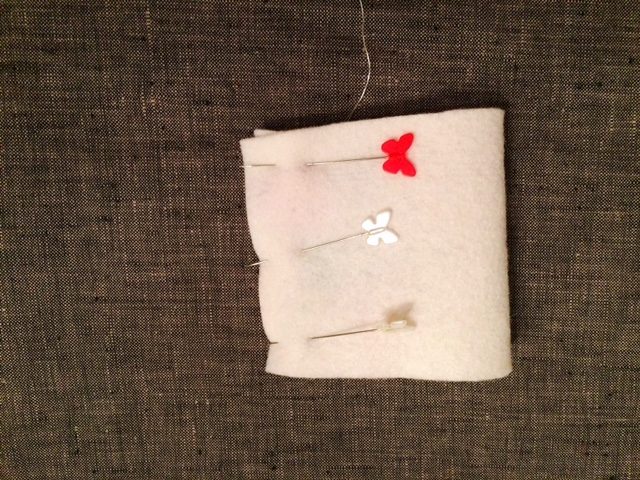
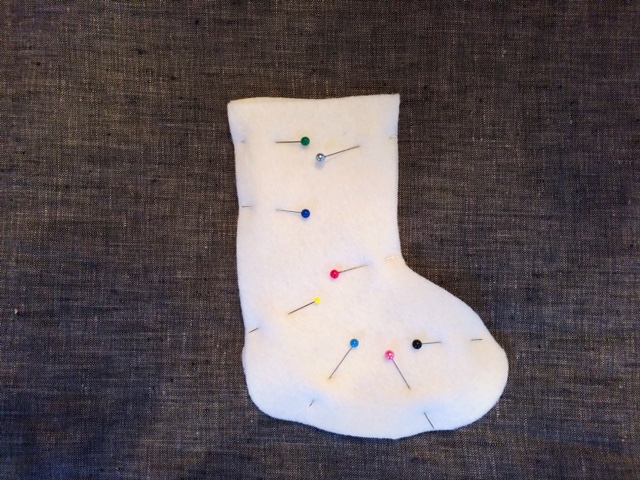
Place the stocking front and back on top of each other. Pin together along the outside edges (leave the top of the stocking open). Stitch around the foot of the stocking using a 1/4" seam allowance. Be sure to backstich at the beginning and end of each seam.
ASSEMBLE
With both the stocking and the cuff turned Right Side Out, slide the cuff over the stocking. Push it all the way onto the stocking body so that it fits snuggly.

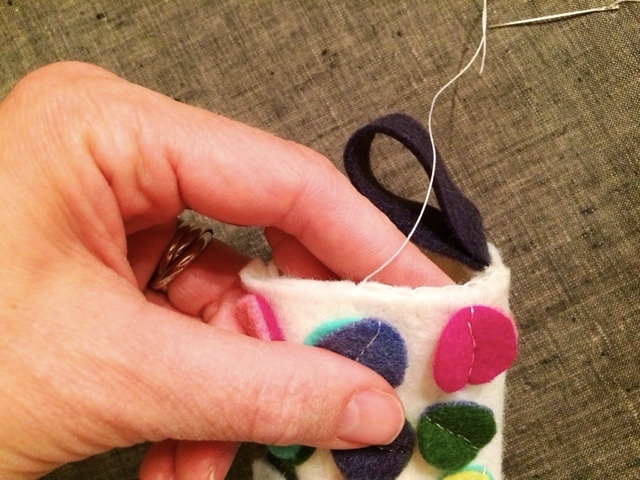
Pin the top pieces together around the inside of the opening, making sure that the side seams meet. Tuck the raw ends of the loop into the back right side of the cuff. Pin.
HEMMING THE TOP
Using the white thread, stitch the top together using a straight stitch or a blanket stitch. Make sure to reinforce the loop by sewing over it twice.
You are all done and ready for treats!