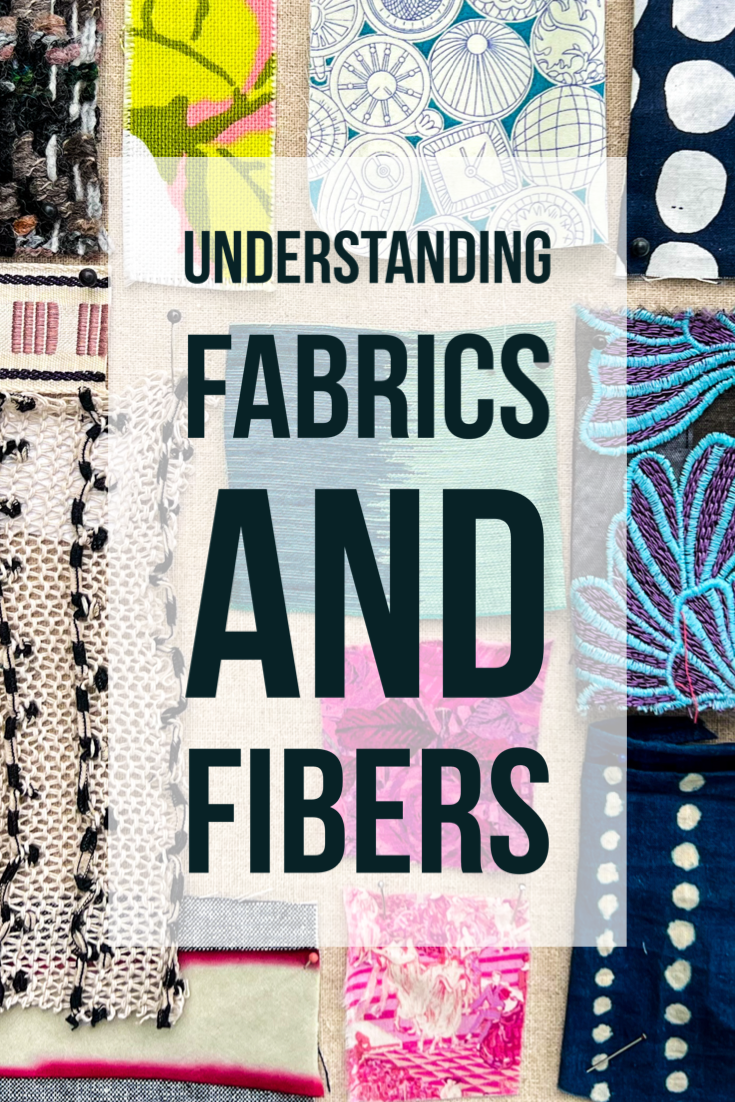
A Guide to Fabrics and Fibers for Sewing
Have you ever stood in a fabric store, feeling overwhelmed by the myriad of fabric types, textures, weaves, and finishes, unsure of what to choose for your next project? Or perhaps you've purchased a fabric but have no idea what to make with it?
I am thrilled to share my latest project, Glossary of Fabrics and Fibers, A Guide to Textiles for Sewing.
I wrote this guide to help you to better understand the behavioral attributes of fabrics and fibers. To deepen your understanding of the foundational characteristics and essential vocabulary of textiles. Additionally, I share some general guidelines and advice for needle selection, thread, stitch type and length, seam finish, pressing, handling and care.

Free Fabric and Fibers Guide
Have you ever stood in a fabric store, feeling overwhelmed by the myriad of fabric types, textures, weaves, and finishes, unsure of what to choose for your next project? Or perhaps you've purchased a fabric but have no idea what to make with it?
I am thrilled to share my latest project, Glossary of Fabrics and Fibers, A Guide to Textiles for Sewing.
I wrote this guide to help you to better understand the behavioral attributes of fabrics and fibers. To deepen your understanding of the foundational characteristics and essential vocabulary of textiles. Additionally, I share some general guidelines and advice for needle selection, thread, stitch type and length, seam finish, pressing, handling and care.
With each page, you will gain insight into how different fibers react to wear and care, how weave affects drape, and why a particular finish might be used for some fabrics but not others.
This compilation is far more than a simple list of fabrics; it's a woven narrative that illuminates the world of textiles. Whether you're searching for the meaning of a specific term or casually browsing, you'll uncover the breadth and depth of textiles in all their forms—be they aesthetic, historic, geographic, scientific, economic, or technological.
This project began as a handout to give to the students that took my Fabric and Fibers class. Each time I sat down to write, I found that there was more to include. How can you describe fabric without knowing fiber, structure, and finish- and that’s before discussing even a single type of fabric! Now, it is more than a hundred pages!
I like to know why I’m doing something. It helps me to feel empowered and to make choices for myself . This is true in life, but also to my core values as a teacher. I want to honor where each student is and to provide them with the necessary context and connection to the purpose of the lesson. That’s a big part of this guide.
A Sneak Peek into the Guide
Are you curious about the intricacies of textile selection and the suitability for a given project? For instance, do you know which needle size and thread type are perfect for sewing with cotton jersey? Can you distinguish between plisse and seersucker, and do you understand how their differences might impact your project? Have you ever wondered about the ideal fabric and fiber choices for crisp, lasting pleats?
All this and more to share with you! From Acetate to Zibeline, over 100 pages of information about fabrics and fibers is yours to weave a new layer of knowledge into your sewing.

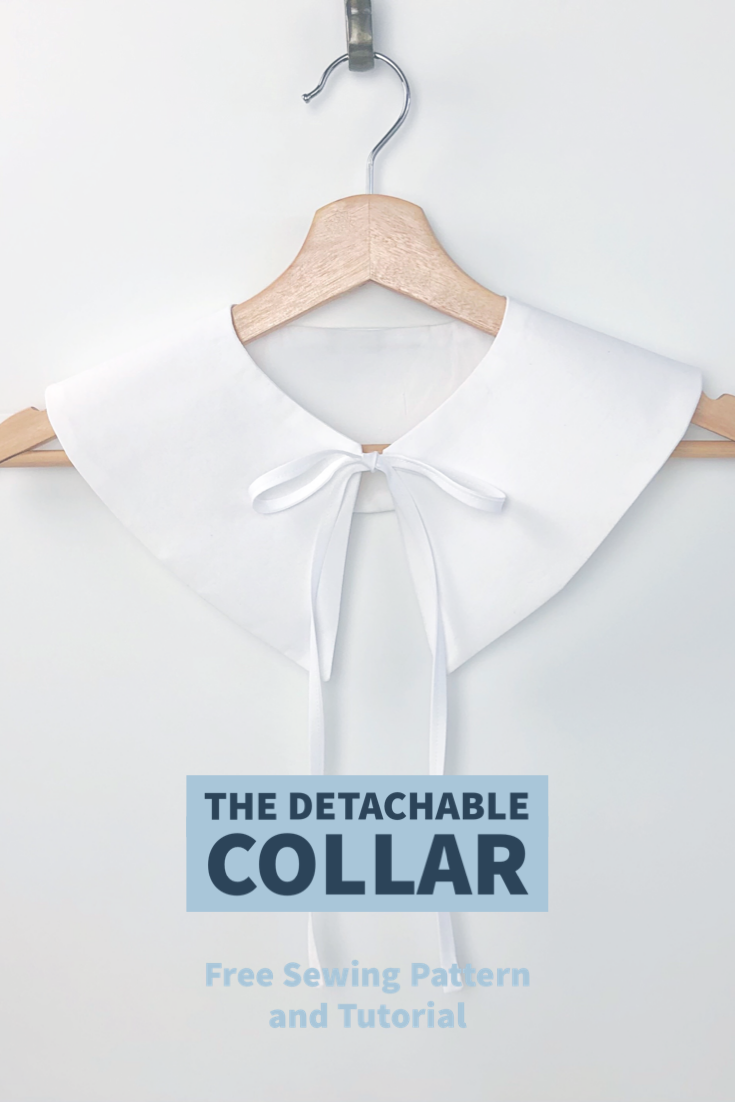
How to Sew A Detachable Statement Collar- Part Two
Learn to sew a detachable statement collar with perfect collar points.
Welcome to part two of the series, How to Sew a Detachable Collar. Detachable Statement Collars are such quick and satisfying sewing projects. There is so much mix and match potential in the variations that you might find yourself amassing quite a collection. Throughout this series, we will begin with a basic collar pattern and learn how to change the design to create a look that is uniquely you.
In my introductory post, I showed you how to make a Peter Pan-style rounded collar with additional tips for sewing curves. For this installment, we are going to learn a bit about the structure of woven fabric and how it relates to creating sharp points to sew a Pilgrim-Esque maxi collar.
If you missed the first post, catch up here: How to Sew a Detachable Statement Collar, Part One

These are two of the many variations that you can create with this pattern. The chambray collar looks great with a mock-neck top worn with a stack of chains and pearls. The plaid taffeta collar has a bit of a softened point and I added a self fabric gathered ruffle to amp up the fun. The possibilities to add your own touch are only limited by your imagination. Have some fun with it!

The pattern is available for download here and also at weallsew where you will find the step by step tutorial. I can’t wait to see what you make!
New to using PDF sewing patterns? Check out this link for tips on assembly.
Head over to weallsew to download and get the tutorial.
Happy Sewing!
XOXO, Hilarie


Top 10 Favorite Sewing Tools
The right sewing tools make sewing easier and so much more enjoyable. Often time I am asked about what tools someone needs to begin sewing. That can be a tricky question as it really depends on what types of things you are sewing. Garment sewing? Bags? Home decor? While all of these categories have some overlap, many require specialty notions. So as not to get overwhelmed, I suggest that you get what you need for the project you are working on and build from there.
To that end, there are some tools you may find helpful no matter what type of sewing you plan to do.
Hello friends! It’s a full week for many of us, with Christmas next Friday. I am certain that you are busy making plans and crossing off that gift list. For those like me, who maybe haven’t finished shopping yet, here is a list of some of my favorite sewing tools. Perhaps you know someone who would love to wake up Christmas morning with a stocking full of sewing fun!
The right sewing tools make sewing easier and so much more enjoyable. Often time I am asked about what tools someone needs to begin sewing. That can be a tricky question as it really depends on what types of things you are sewing. Garment sewing? Bags? Home decor? While all of these categories have some overlap, many require specialty notions. So as not to get overwhelmed, I suggest that you get what you need for the project you are working on and build from there.
To that end, there are some tools you may find helpful no matter what type of sewing you plan to do.
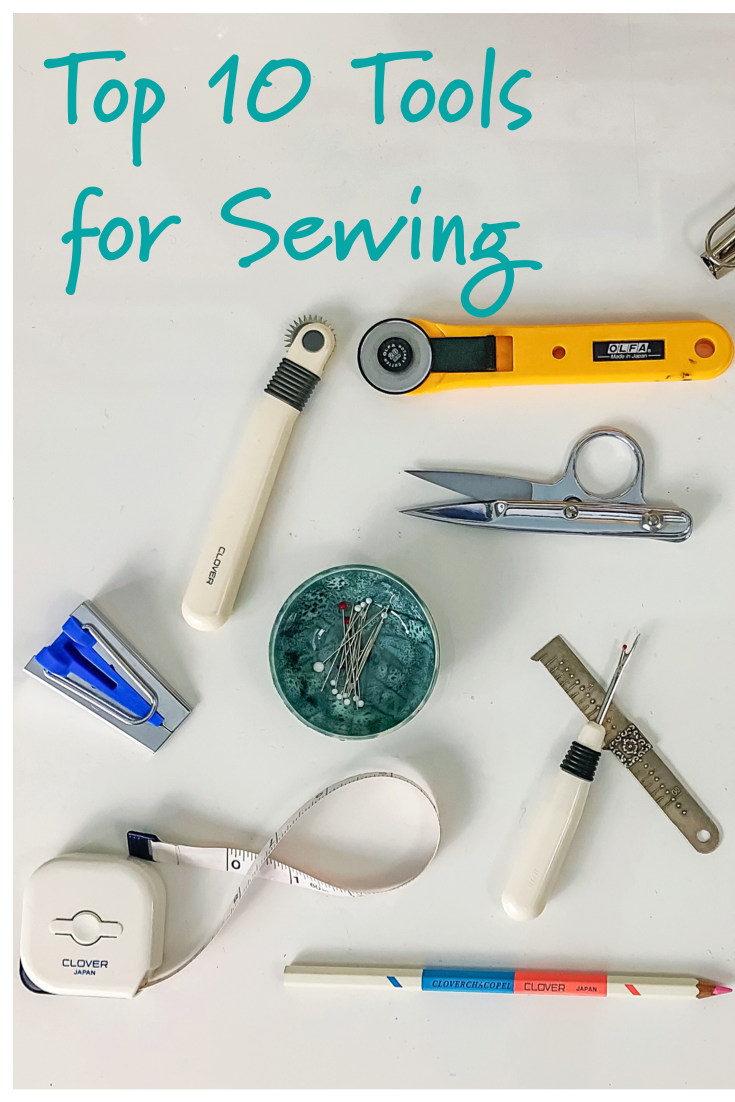
These needles come in an assortment of sizes that suit the lightest to more heavier weight thread- and the gold eye makes them that much easier to thread.
Lots of cutting can lead to tired hands. The spring in these scissors make cutting a breeze.
For a truly straight cut, there is noting like a rotary cutter.
This ruler has a bit of depth to it and works well as a guide for the rotary cutter. It also makes an ideal marker for making bag straps and bias cuts.
These chalk pencils are great for transferring small pattern details.
Idea for tracing seam lines and darts. The blunt edge is great for transferring markings onto paper or fabric; and it won’t damage the materials themselves.
Indispensable. Clover makes the sharpest and the best around. If you find a 3 pack- buy it. You will thank yourself later.
Among my collection of rulers, this small one seems to be used most often. It helps with pattern grading, tracing lines and darts and measuring hems.
Perfect for a quick sharp cut to thread a needle. Keep a pair right next to your sewing machine and one in your sewing box.
Essential for making yards of nice crisp bias tape.
What are your favorite sewing essentials? You can look forward to an upcoming post on some more specialized tools for pattern making, marking, pressing as well as tools for making bags. Perhaps it is time for a new bag pattern too?
XO, Hilarie

Face Mask Making FAQ's
So many of the questions that I receive through comments, emails and phone calls, tend to focus around a few topics. In the presence of that, I present to you a Face Mask Making FAQ.
Thank you all for your comments, I am trying to keep up with as many as I can. My screen time is very limited as I have significant light sensitivity caused by migraines. As such, there are days when I cannot tolerate being in front of a screen.
So many of the questions that I receive through comments, emails and phone calls, tend to focus around a few topics. In the presence of that, I present to you a Face Mask Making FAQ.
Face Mask Making FAQ
What are the best filter options?
Since my degree is in Art and not medicine, I do not feel qualified to recommend filters. However, I am using kleenex, unbleached coffee filters and sew-in interfacing. Please refer to the CDC or a medical professional though.
Recommendations for washing masks.
I have had great success washing and drying masks by putting them in a lingerie bag and washing in hot water. If the sun is out, I hang them to dry, if not, I put them in the dryer set to high heat. After, it just takes a quick press and a small adjustment to realign the nose wire.
What can I use for elastic and wire?
The pattern calls for thin elastic, however, wider elastic can be trimmed and still be effective. For instance, you might have a 2” strip of elastic. That can be cut into several smaller strips and used.
Cotton jersey is an excellent option as well. Among the many properties of jersey that I find attractive is that when cut, it rolls toward the right side. Why not use that to your advantage next time you plan a hem- instant design detail!

To create jersey “rope” cut one-inch strips across the width of the grain. Pull gently to encourage it to roll.

Grossgrain ribbon.
For the masks that I am making for the Children’s Hospital of the King’s Daughters, we are using grossgrain ribbon and elastic. The picture below, is the Children’s Hospital Sample that I was given. On the right there is a piece of 6.5” elastic and on the left, a 36” piece of 3/8” grosgrain ribbon. Placing ribbon on both sides will work just as well. (For those of you who are very observant, you will notice that this mask is a bit different than my pattern and that the pleats are facing downward in this picture. This is a picture of the mask that I make for the Children’s Hospital of the King’s Daughters and is a different pattern from mine. Additionally, this is a picture of the “inside” of the mask. The pleats face up on the reverse.)

As for wire, twisty ties, paper clips, pipe cleaners, floral wire and even the metal inserts in file folders will all work. Now that I am writing this, I am looking at the stack of my kids school work scattered across the kitchen table- perhaps the wire from a spiral notebook could be clipped and pulled straight with pliers? (I will assign that task to my children today!)
What are some other (easier, quicker) mask options?
While I saw a gorgeous one made from a silk prada shoe bag here:, bandanas, t-shirts and scarves work too.
Again, I will refer you to the CDC.
How do I apply binding?
Binding can be tricky, but is so useful and beautiful. Here is another tutorial that I have written that might help you- and give you another project to work on.
The bias is applied to each side of the mask in the following manner:
Unfold the bias tape. With right sides together, pin the bias tape to the fabric aligning the raw edges of both the tape and the fabric. Stitch together with a 1/4" seam allowance.
Trim the seam allowance.
Fold the bias tape over the raw edge of the fabric to fully encase the seam allowance. Pin and press.
Recommendations for sizing for children?
The mask is based on an average adult sized face. To make a child’s size, I would recommend cutting one inch smaller. Instead of cutting 7.5” square, make it 6.5” and adjust the fit with ties or elastic.
It really comes down to the vertical measurement from the bridge of the nose to just under the chin and then the horizontal measument from ear to ear, adding enough volume to ease over the nose. Take those measurements, add seam allowance to all four sides of the pattern and you have a custom template.
Orientation of the pleats.
Pleats seem to be the biggest question of all. I was going to list this one first, but since it ties into volume as described in sizing, I think it fits better here. First of all, a bit about flat pattern making and volume.
A pattern is made of paper. It is flat. A pleat is one of many tools that turn that flat pattern (and later cloth) into a three-dimensional form which will fit the contours of the body. Within the body there are a series of curves and bulges, in this case we are discussing a human face, so we have a nose and mouth, and secondary curves (cheeks and breathing expansion). The mask needs to accommodate these shapes.
Darts (a pleat is a form of a dart) are shaping devices which allow enough fabric to cover the body where it is fullest while at the same time providing a means of taking in the excess fullness in a adjoining smaller area. You will find darts in your clothing where you need to allow for a curve or bulge. For example, at the bust, waist and hip of a garment.
Darts are not the only way to control shaping. Shaped seams, pleats, shirring, tucks, smocking and gathers accomplish the same purpose.
To be effective, the dart must be located in the area where the high point of any curve occurs. In the case of a mask, it is the nose. The dart is then controlled at each side with the bias encased pleats. Since the pleats are quite shallow and the mask is designed to be pulled from the bridge of the nose to under the chin, it really does not matter which way you orient the pleats, as the only place that you will see the pleat is just along the side casing.
There seems to be much debate about the orientation of the pleat. So many of you have written to me telling me that you understand the pleats need to be turned down so as not to catch particles. While I do understand that thought process, if that were the case, we need to rethink the side casings too as particles are just as likely to settle there too.
This pattern was created from a mask that was given to me at a recent doctor’s appointment. Since the pleats were facing in an upward manner on the front of that mask, that is how I created the pattern. When the mask is turned the opposite way, the pleats turn down.
This pattern was written to guide you through the face mask construction process. My goal as a sewing educator, is to explain to you, the reader how to cut and handle the fabric and to begin to understand the reasoning behind the methods used. Interest, motivation and enthusiasm are all essential to sewing. I hope that once this current pandemic is behind all of us, (and that we recover!) that many of you will continue to advance your sewing journey. It gets a whole lot more fun- I promise!

How to Maximize Your Time Sewing Cloth Face Masks With These Tips and Tricks
Learn how to save time and maximize the number of face masks that you can sew. How to sew a double-layer face mask with wire and pocket for filter or shield. Step by step cloth face mask tutorial and free pattern. Face masks are hard to come by and it seems that hospitals will be facing a shortage.
Thank you all so much for your lovely comments and kind word about my cloth face mask sewing pattern and tutorial. Like many of you, I am making masks daily and have discovered a couple of tricks to speed up the process a bit. Here is a video I made to share my tips with you. Enjoy!

THIS WEBSITE IS NOT INTENDED FOR THE PURPOSE OF PROVIDING MEDICAL ADVICE
All information, content, and material of this website is for informational purposes only and is not intended to serve as a substitute of a qualified physician or healthcare provider.
“In settings where facemasks are not available, HCP might use homemade masks (e.g., bandana, scarf) for care of patients with COVID-19 as a last resort. However, homemade masks are not considered PPE, since their capability to protect HCP is unknown. Caution should be exercised when considering this option. Homemade masks should ideally be used in combination with a face shield that covers the entire front (that extends to the chin or below) and sides of the face.”
Article from Courier & Press, Evansville, IND “Citing shortages, Deaconess Health System, including Henderson's Methodist Health, has asked the public to sew face masks for staff fighting coronavirus”.

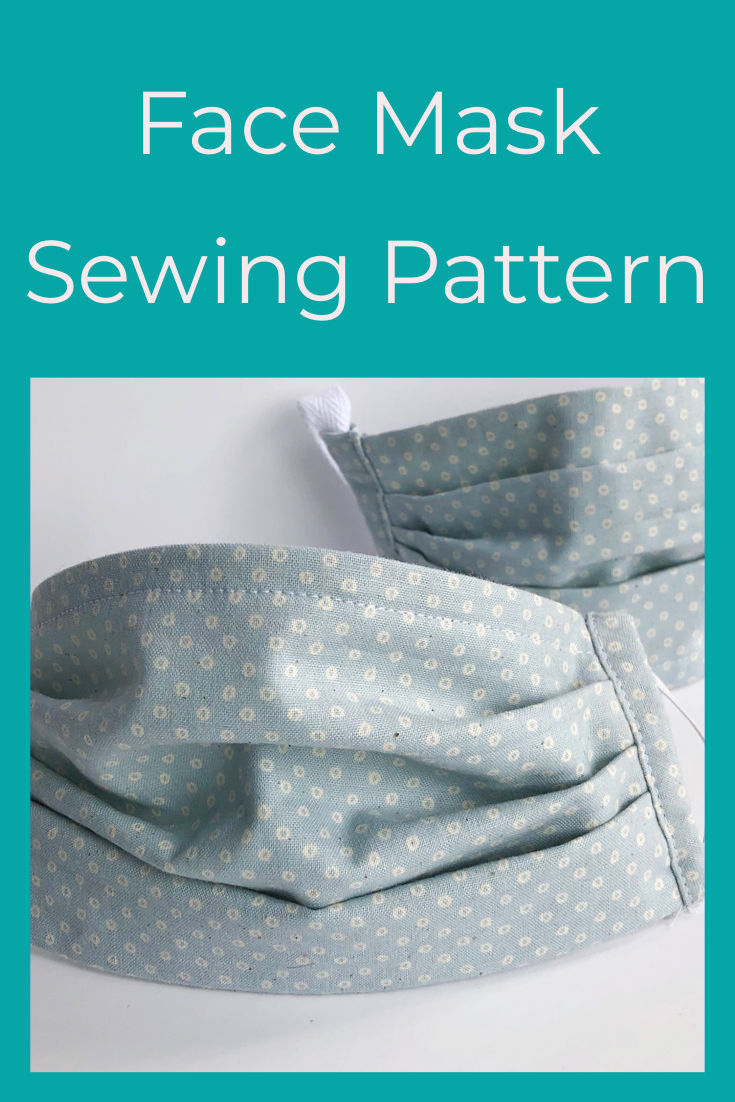
Face Mask Sewing Pattern and Tutorial
Across the world, we are all discovering just how unprepared we are for the COVID-19 situation. Face masks are hard to come by and it seems that hospitals will be facing a shortage in the near future. After reading this article I decided that I needed to put my skills to use make a mask pattern.
Across the world, we are all discovering just how unprepared we are for the COVID-19 situation. Face masks are hard to come by and it seems that hospitals will be facing a shortage in the near future. After reading this article I decided that I needed to put my skills to use make a mask pattern.
THIS WEBSITE IS NOT INTENDED FOR THE PURPOSE OF PROVIDING MEDICAL ADVICE
All information, content, and material of this website is for informational purposes only and is not intended to serve as a substitute of a qualified physician or healthcare provider.
“In settings where facemasks are not available, HCP might use homemade masks (e.g., bandana, scarf) for care of patients with COVID-19 as a last resort. However, homemade masks are not considered PPE, since their capability to protect HCP is unknown. Caution should be exercised when considering this option. Homemade masks should ideally be used in combination with a face shield that covers the entire front (that extends to the chin or below) and sides of the face.”
Article from Courier & Press, Evansville, IND “Citing shortages, Deaconess Health System, including Henderson's Methodist Health, has asked the public to sew face masks for staff fighting coronavirus”.
EDIT 9/2/2021: PDF Face Mask Sewing Pattern Free Download
Download Free PDF Pattern Here
EDIT 4/9/2020: I have written a Mask Making FAQ to address some of the more frequent questions. I hope you find it helpful.
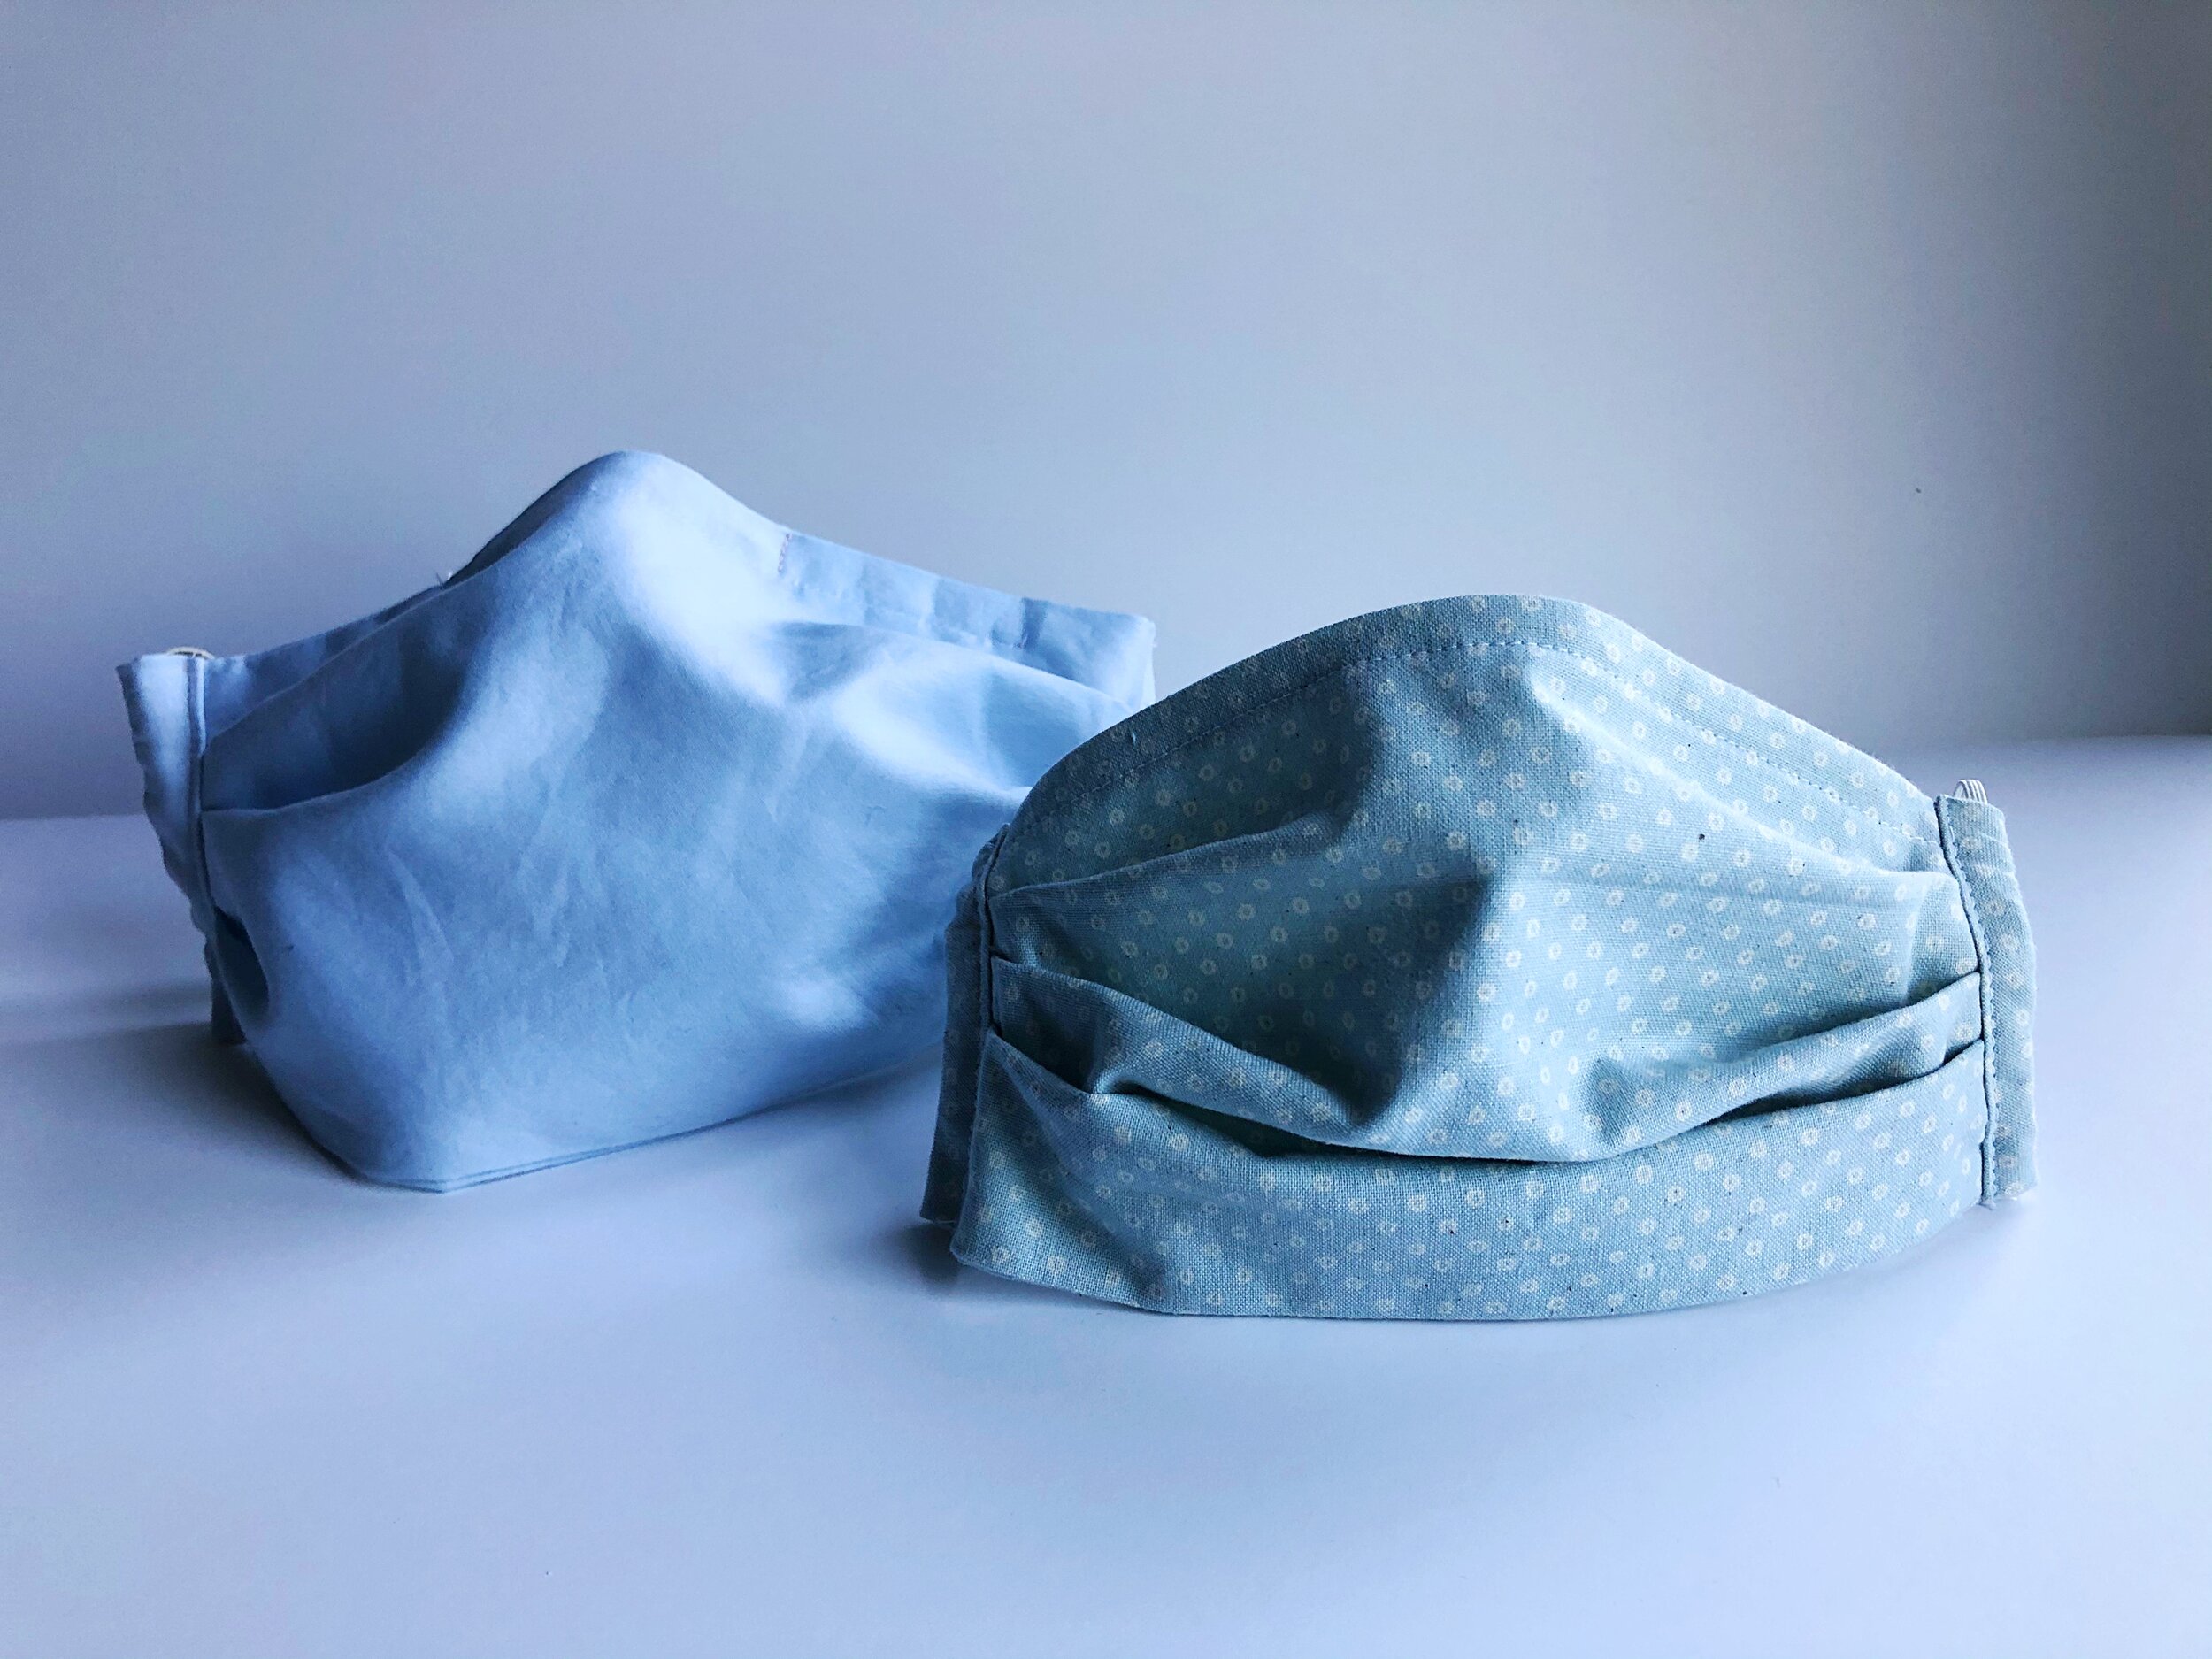
HOW TO SEW A FACE MASK
This mask is made of two layers of cotton and can be fastened with elastic or ribbon and tied around your head. After wearing it around for a bit, it is surprisingly breathable.
Instead of recommending fabric to you, I have linked to a couple of articles above. Please read and decide for yourself which fabric you feel is best to use.
This mask pattern and tutorial has three variations. The first is a standard two layer mask with elastic to fit around your ears.
The second variation is to add ties to the mask so that it loops and ties around the head.
The final variation is to adapt the mask to allow it to hold a shield or filter.
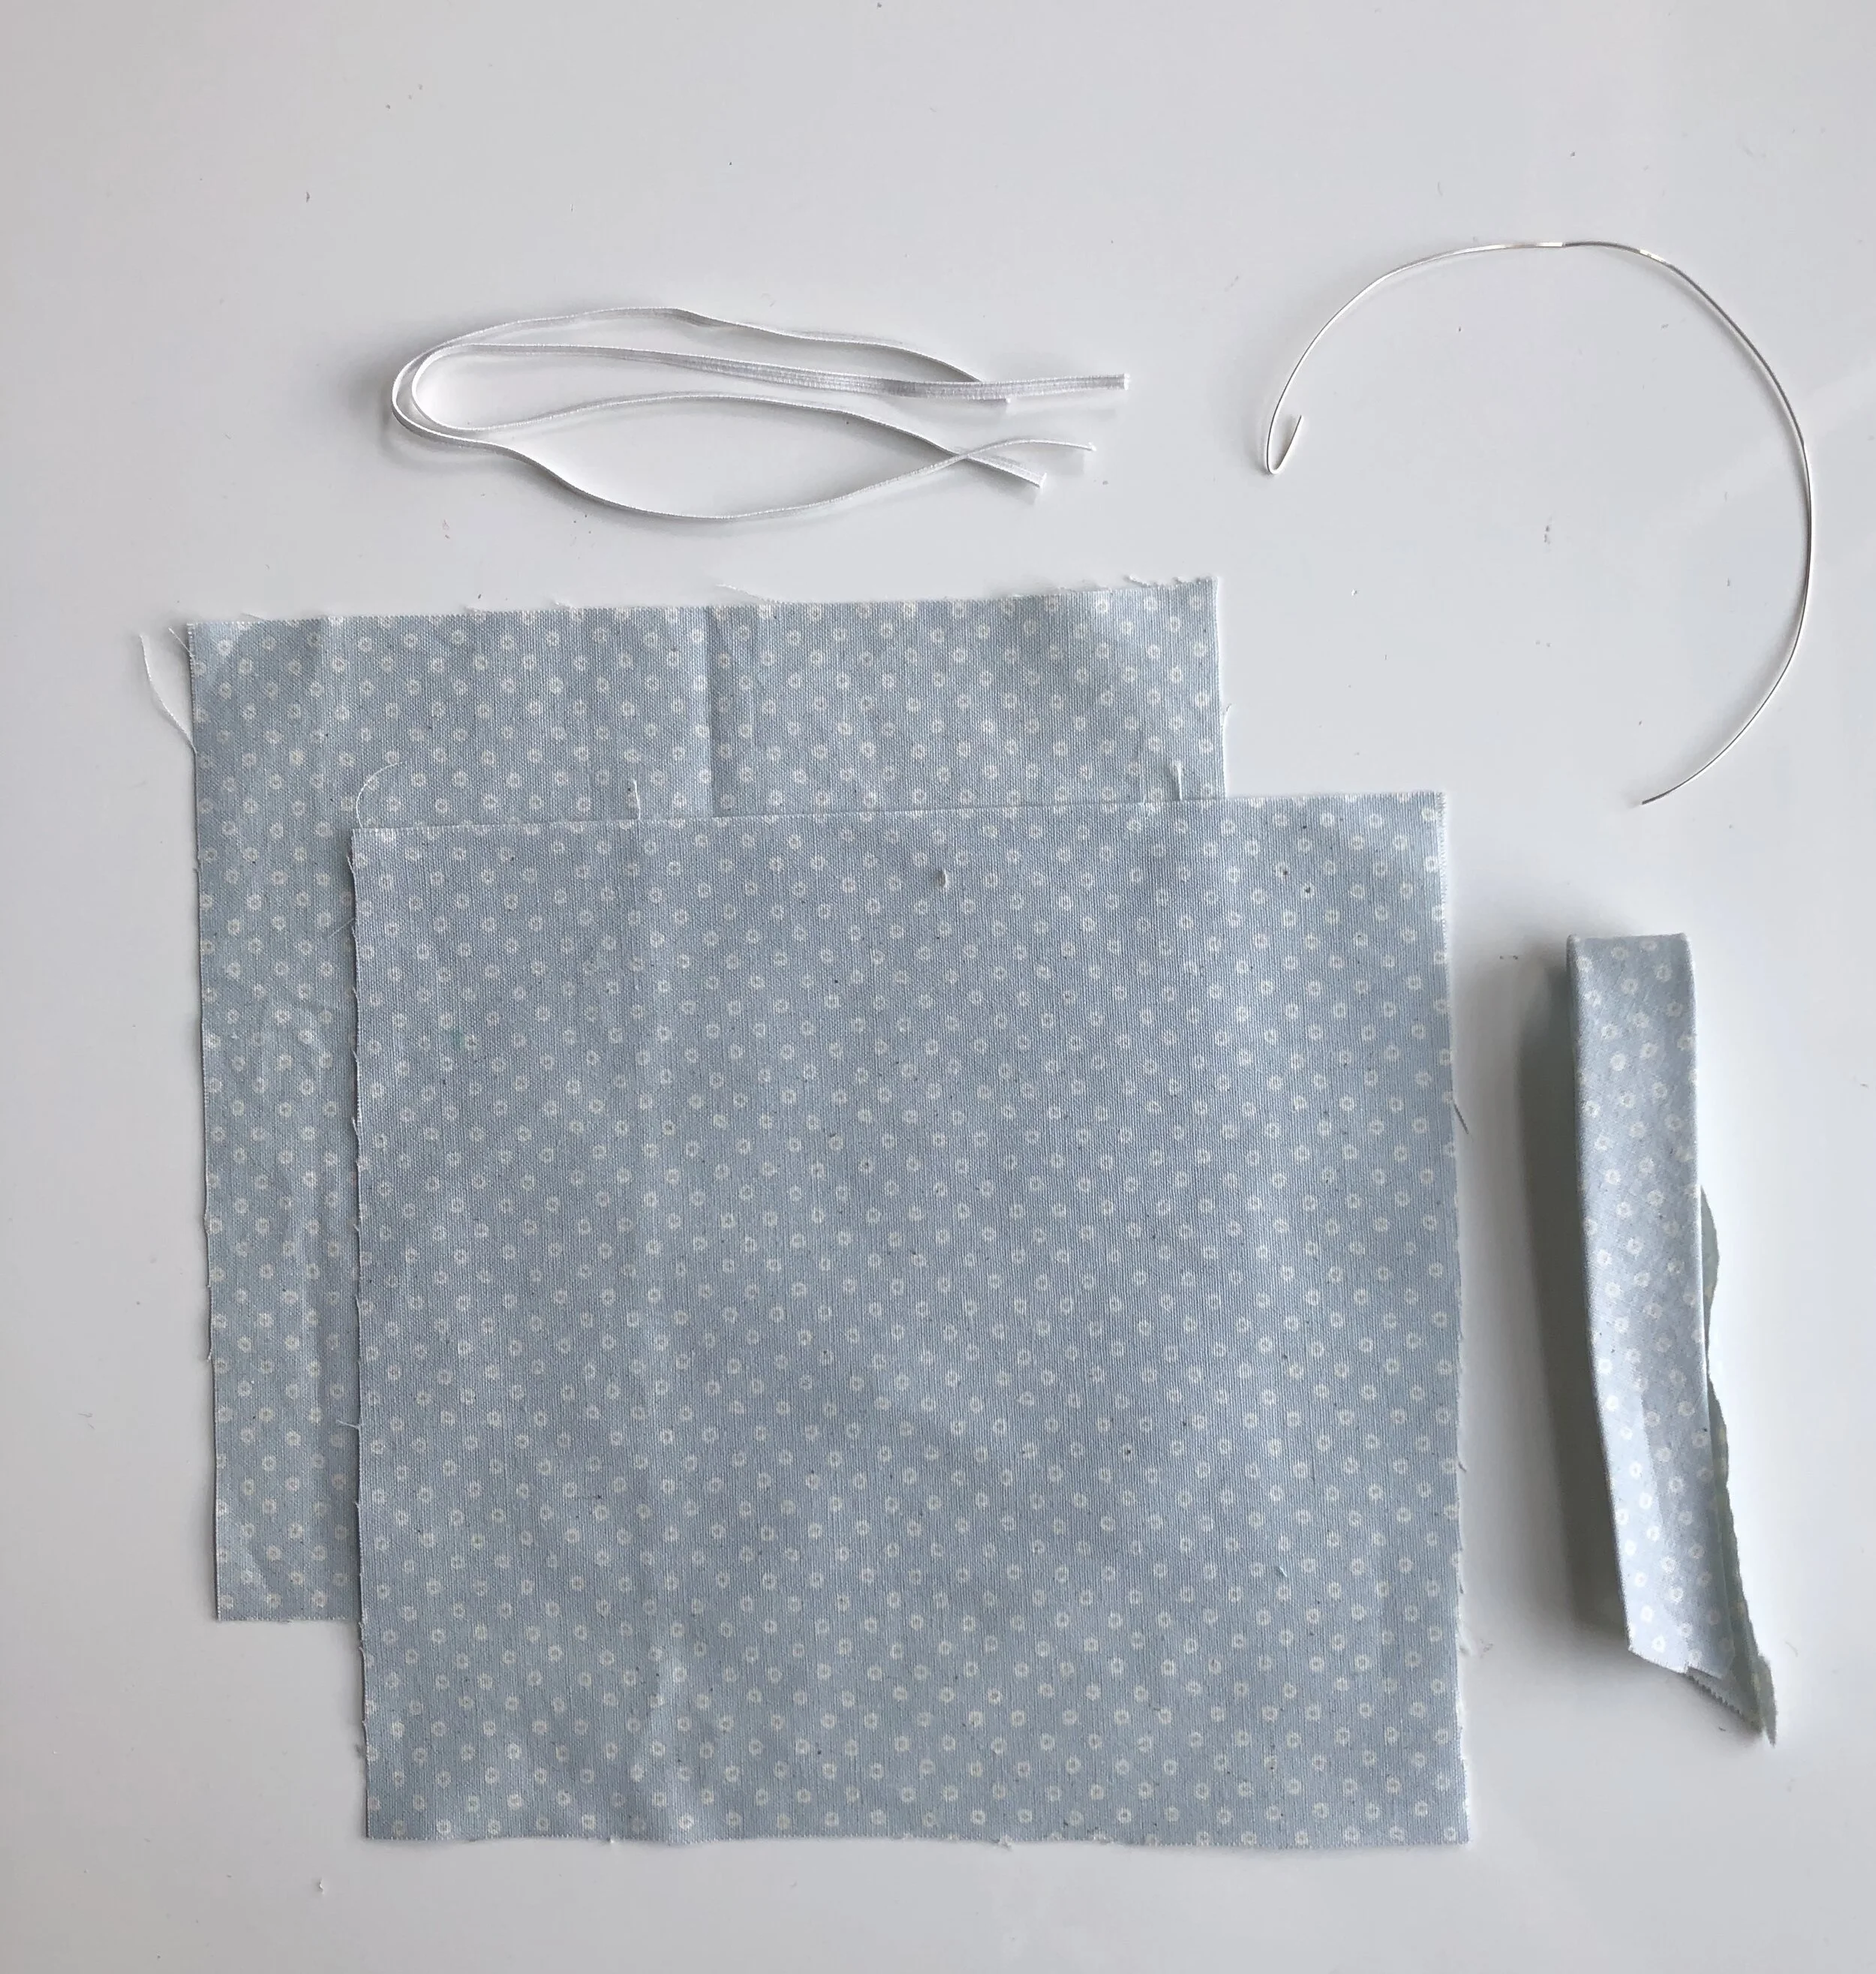
SUPPLIES
Fabric, Refer to CDC Guidelines *Instead of recommending fabric to you, please read this article and decide for yourself which fabric you feel is best to use.
2 - 10” pieces of 1/4” -1/2” flat elastic or 2 yards of 1/2” ribbon
7.5” of metal wire , I used 16 gauge wire, but would image that a straightened out paper clip would likely work in a pinch.
8” of Bias tape OR 2 rectangles of fabric 3 x 4.5”
Filter for pocket option
SIZE
Finished Dimensions: Approximately 3.5” x 7”
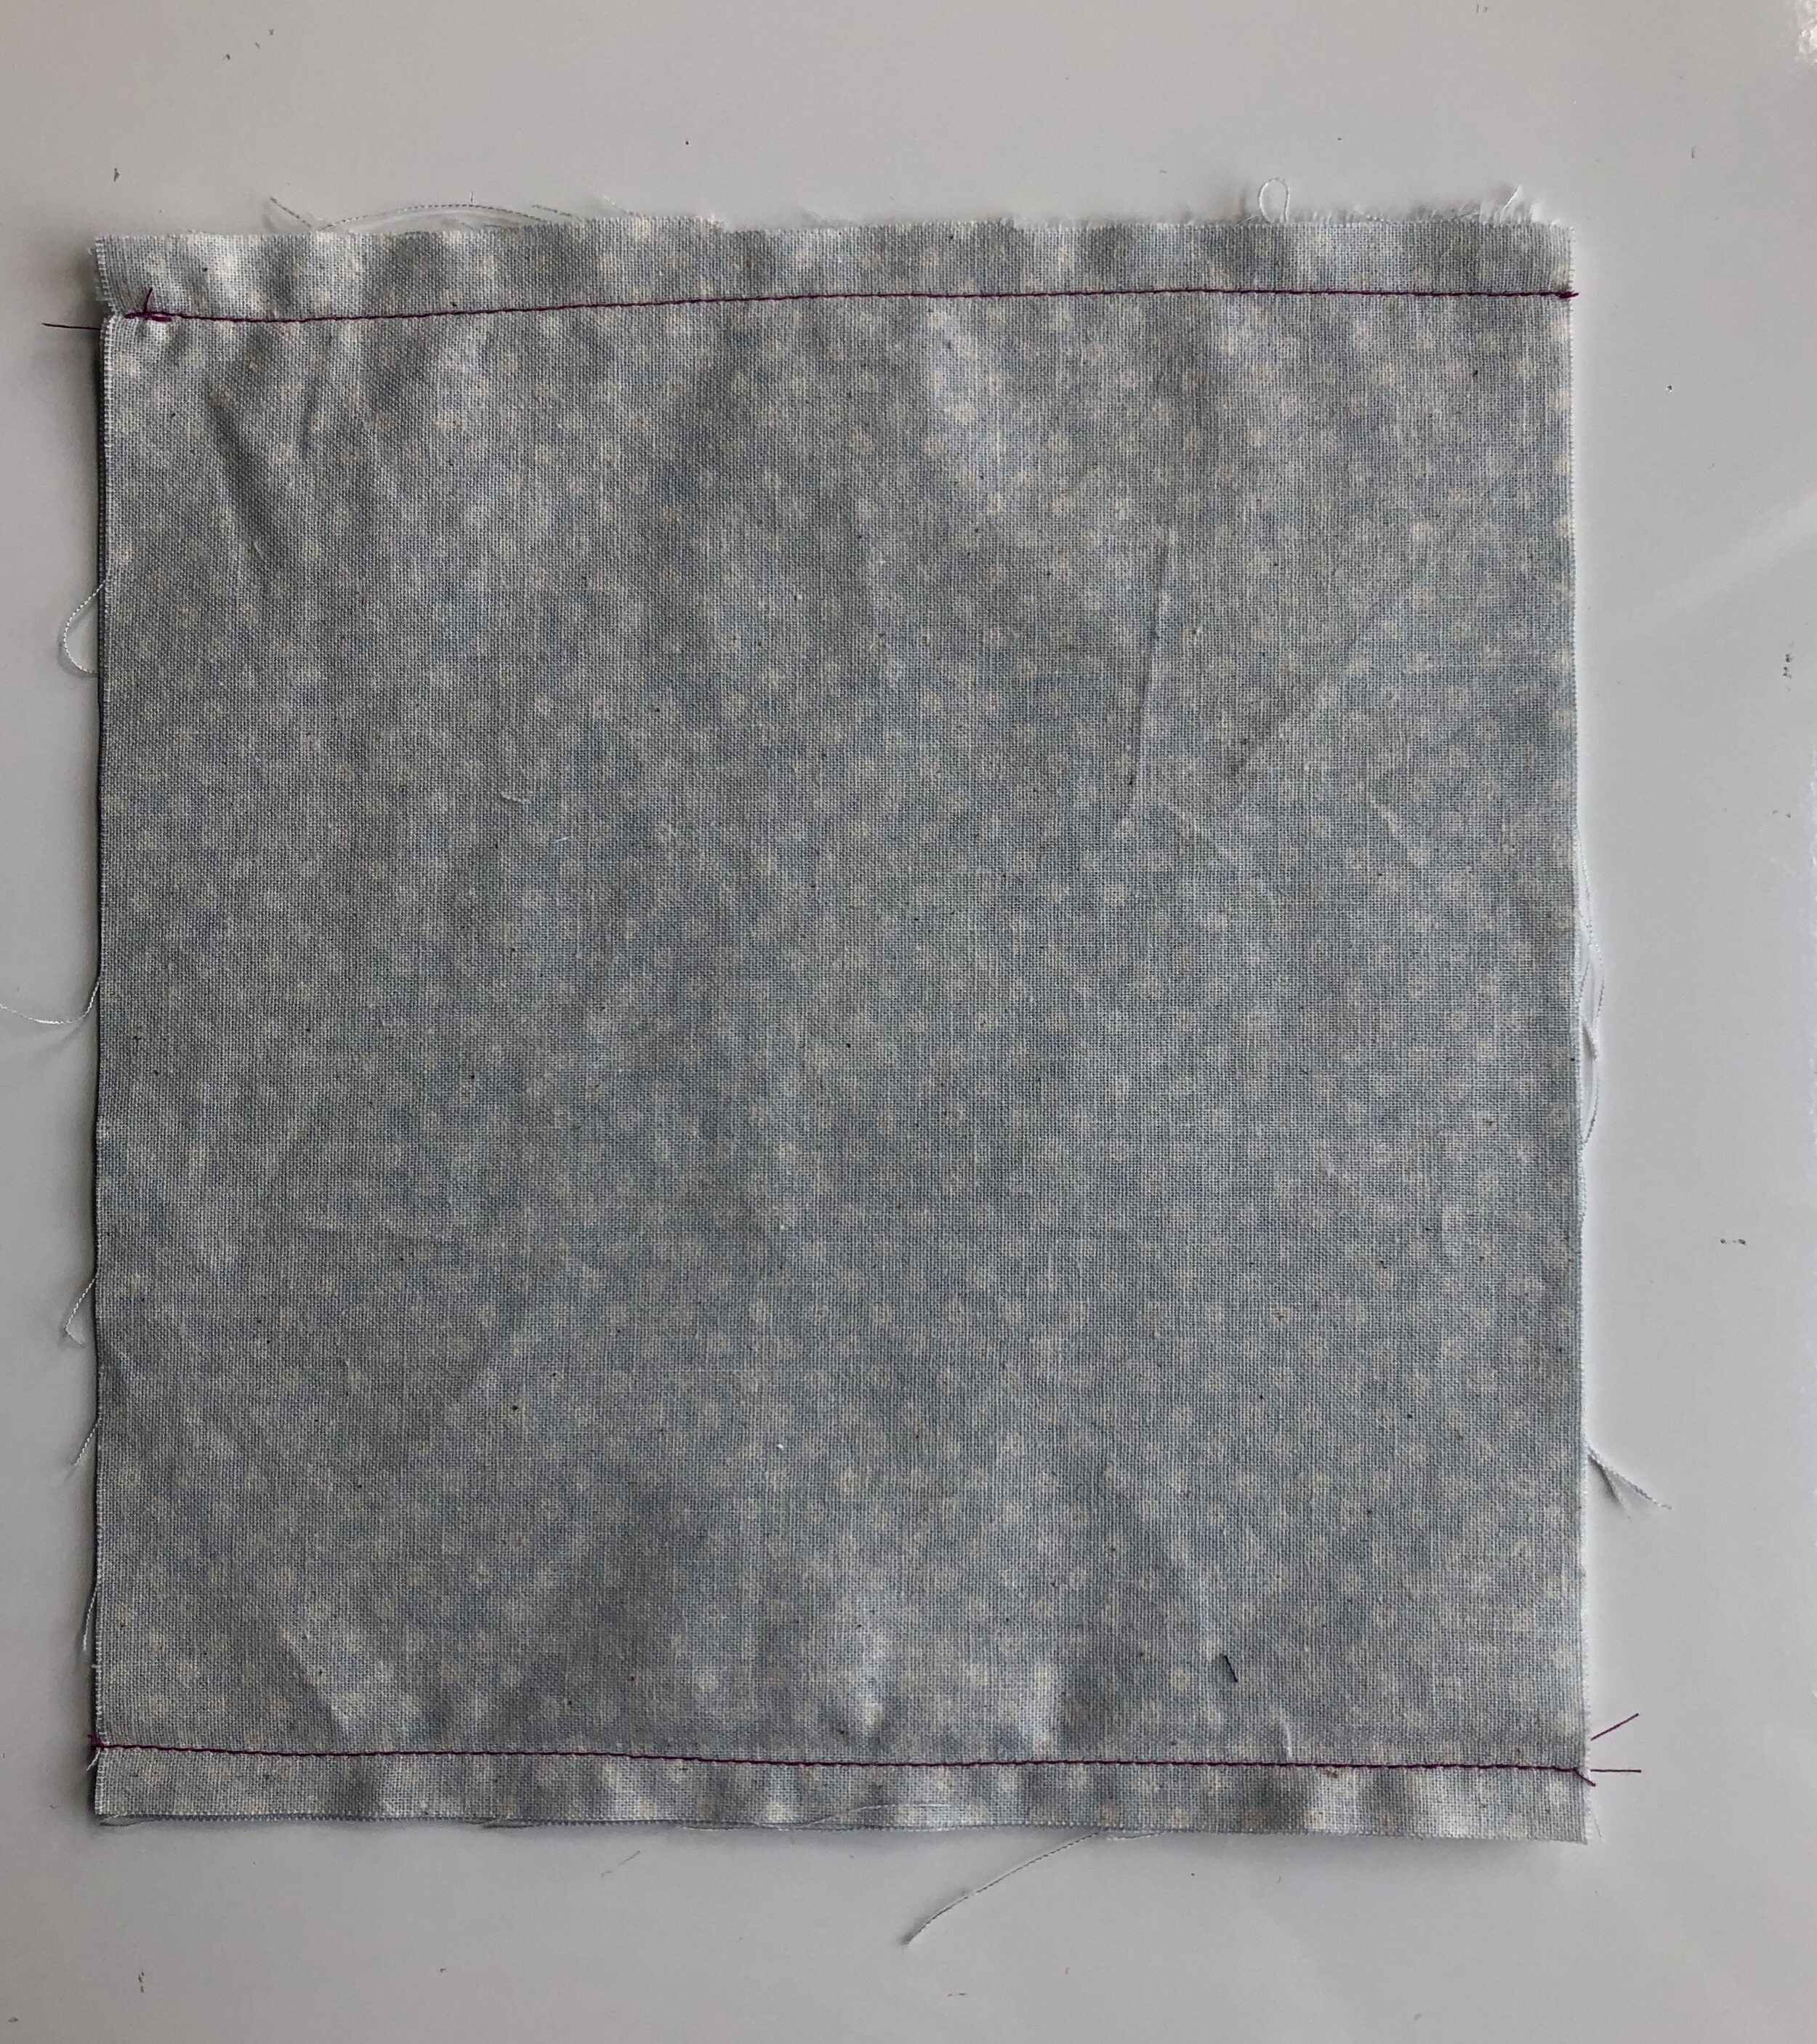
PREPARE
Cut 2 pieces of fabric in a 7.5” square. Pin and sew across the top and the bottom using a 1/2” seam allowance.
How to Sew a double layered face mask with elastic
Trim the seam allowance, turn to the right side and press.
CASING
To form a casing, stitch through both layers along the top edge, again with a 1/2” seam allowance.

Fold the leading edge of the wire in just a bit so the it doesn’t poke through the fabric. Insert into the casing. Bend the opposite side.


PLEATING THE MASK
To form the pleats, mark your mask at the 1 3/4”, 3 1/2” and 5 1/4” points from the top. This will be your guide to fold the pleats. If you aren’t the exacting type of person, just wing it. The mask needs to be pleated so that it is 3.5” tall.
The image below is not sewn, however, it is cut to the same dimensions as if it were sewn with a 1/2” seam allowance at top and bottom.
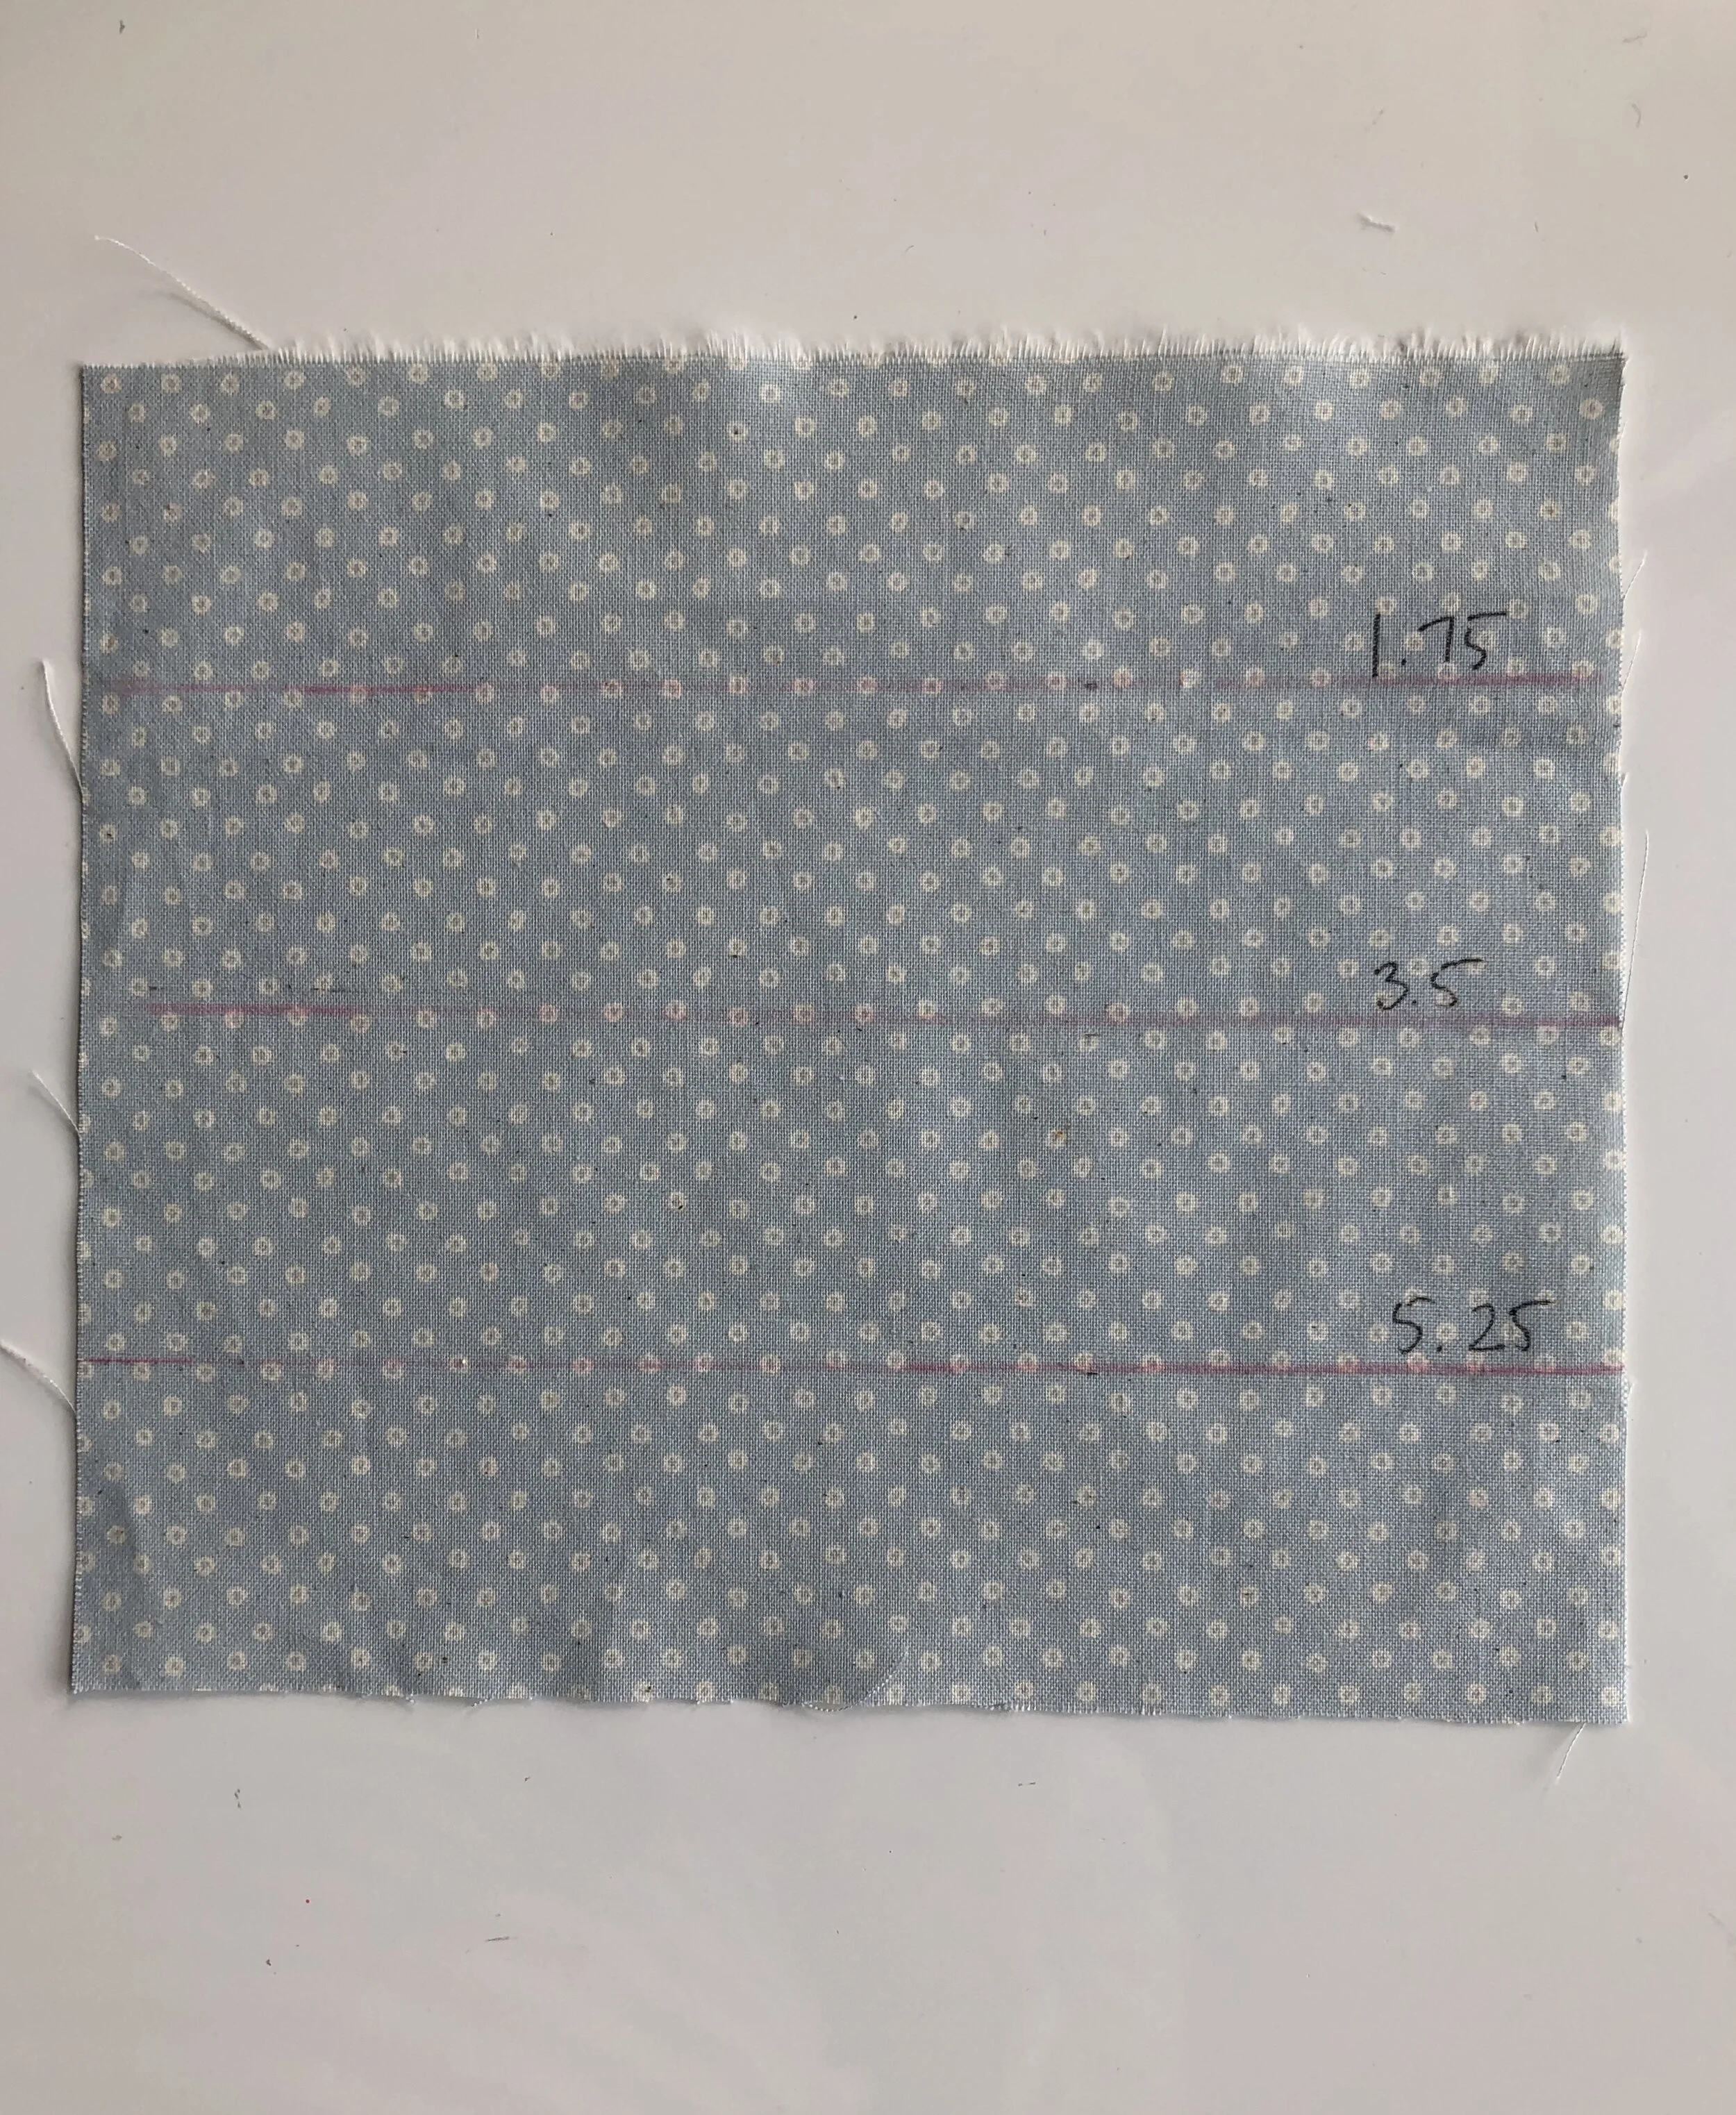
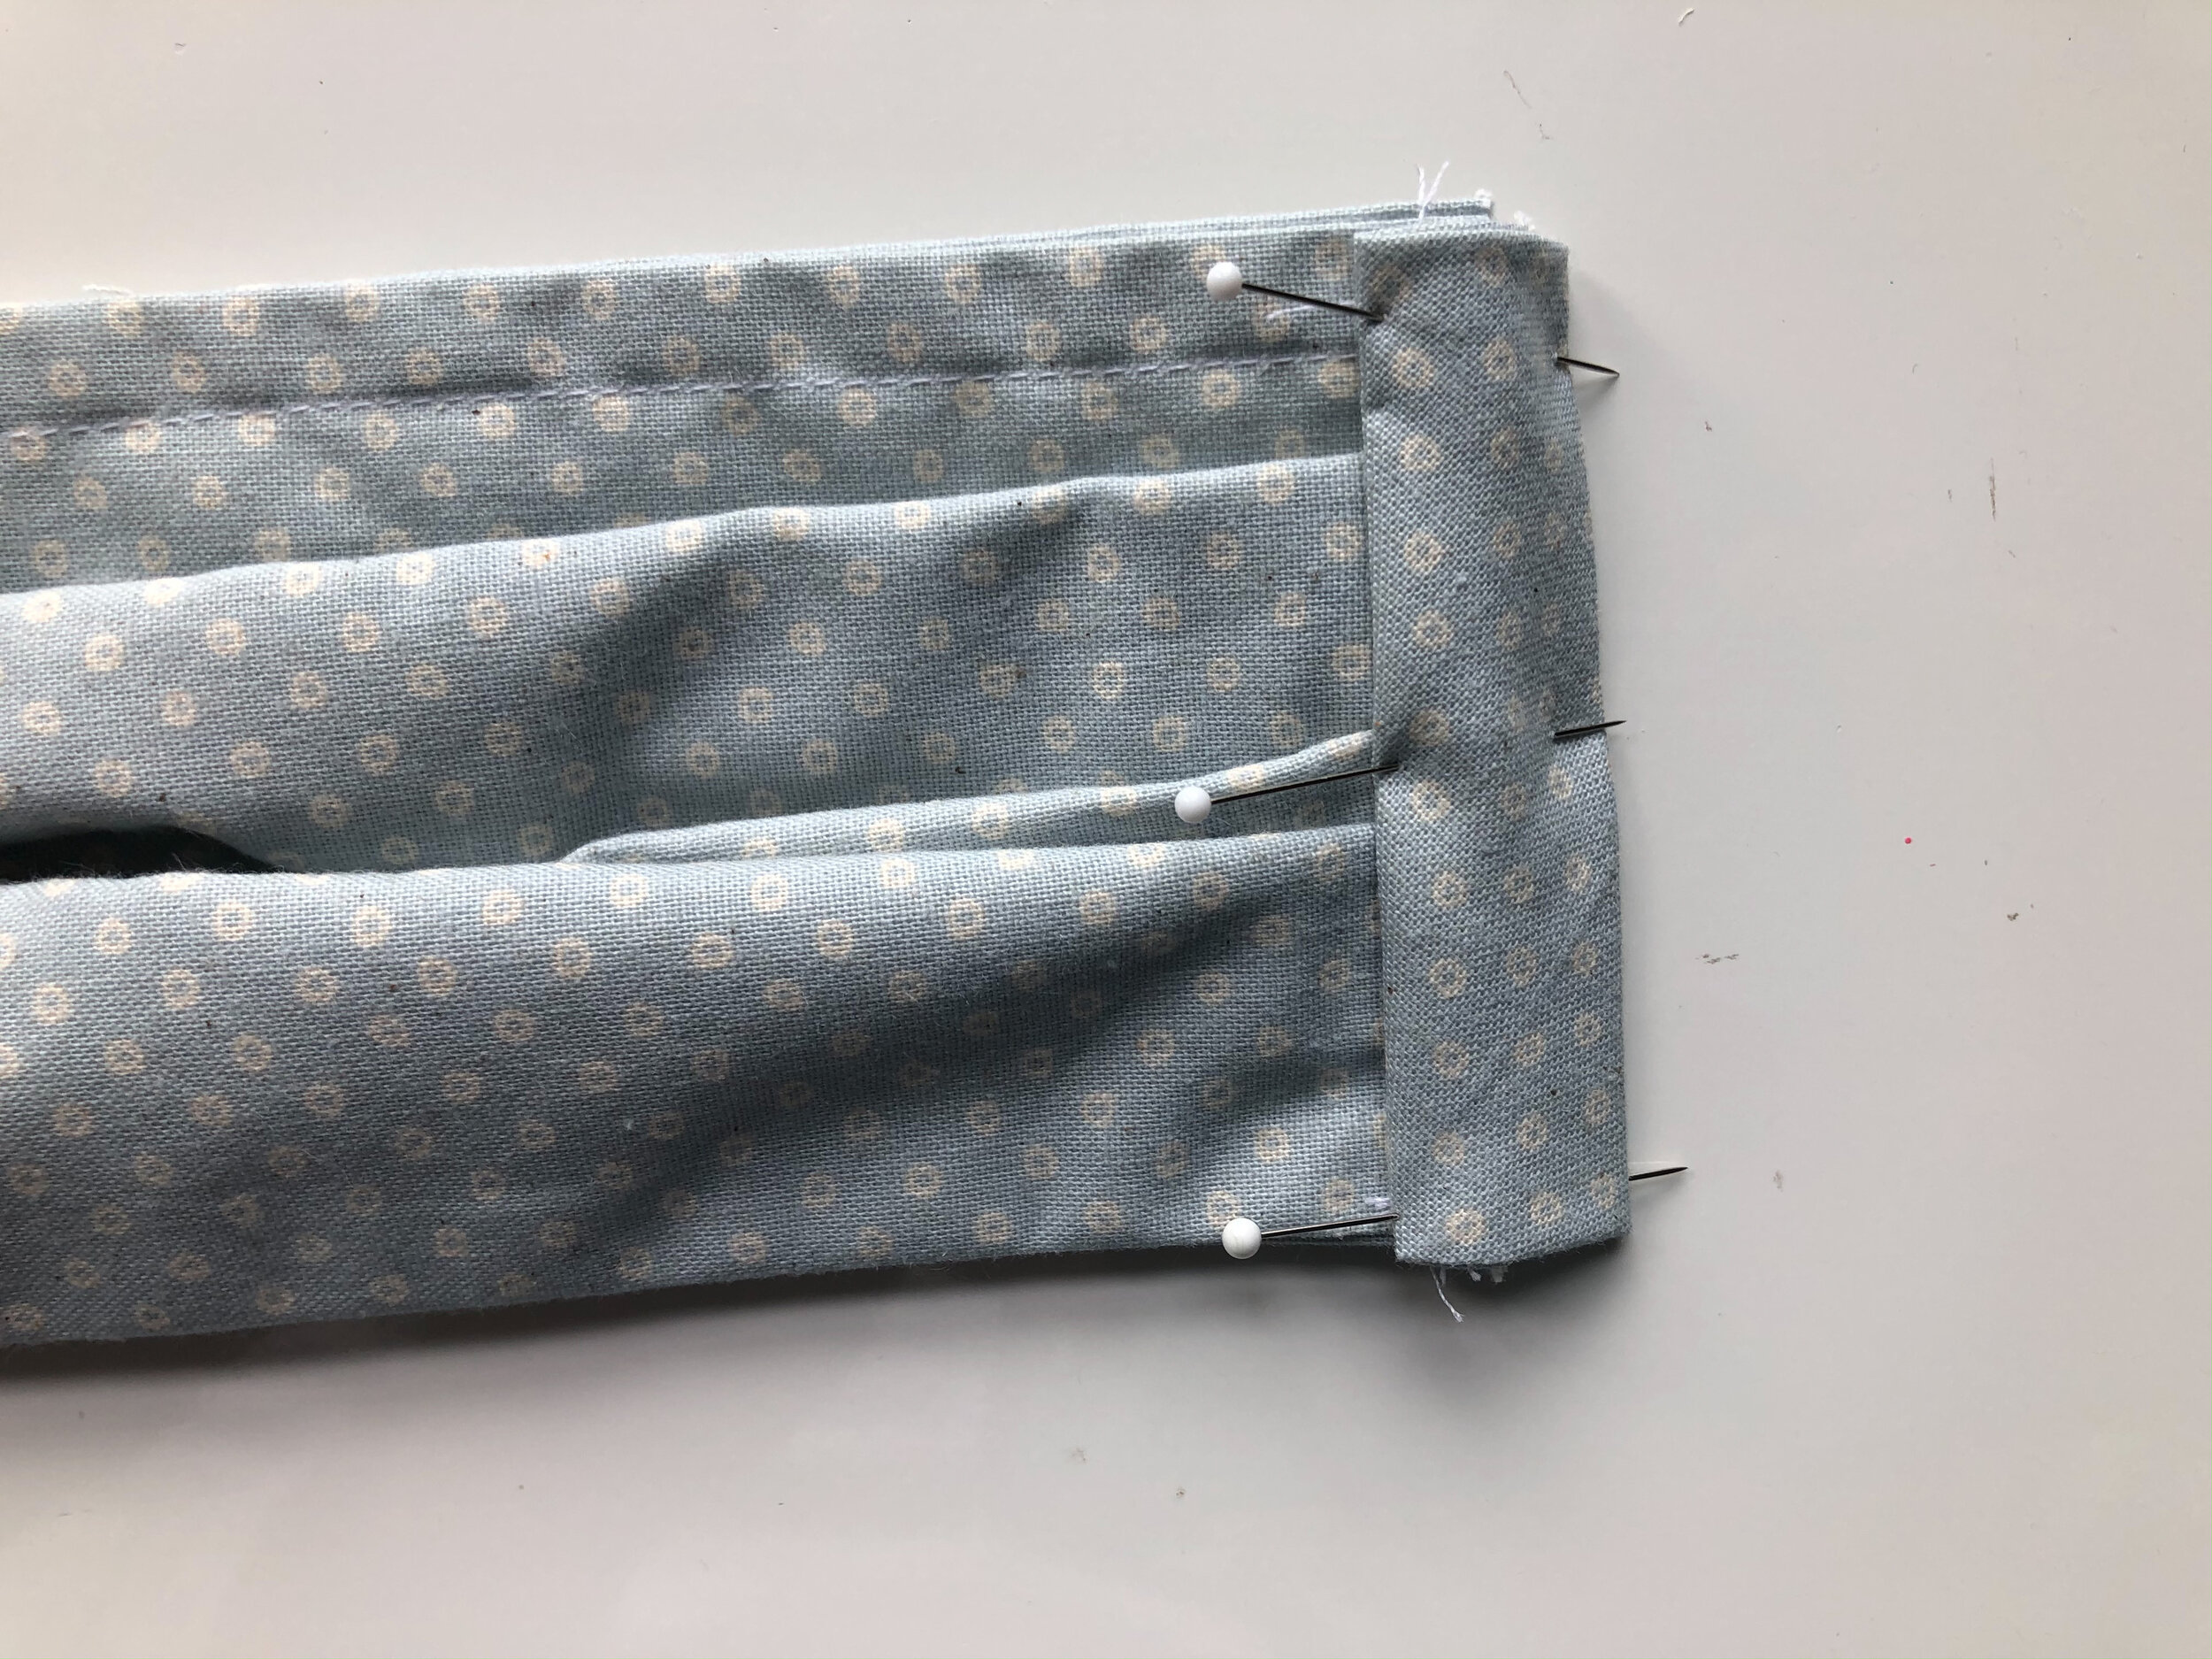
Each pleat is 1/2” deep. Fold pleats up, toward the top of the mask and pin.

Stitch along pleats using a 1/2” seam allowance. Repeat for opposite side.


APPLYING BIAS
Align folded edge of bias tape along the line of stitching. Trim tape to 1” longer than the side of your mask. Fold and press edge of top and bottom of bias 1/2” toward the inside. Repeat for opposite side.

Pin and stitch right over the previous row of stitching. (If you do not want to make bias tape, keep reading. I have another option for you.)

Fold bias inward along the fold line. Pin in place. Topstitch the edge of the bias.

FINISHING
Take one piece of elastic and using a safety pin, draw it through the mask side casing. Tie in a slip knot. Repeat for the opposite side.

Trim knot ends and pull through the casing to conceal. Repeat for the opposite side.
Your mask is complete! Try it on and bend the wire for a comfortable fit.
HOW TO SEW A FACE MASK WITH TIES
This pattern has a lot of flexibility as far as supplies and technique go.
The second variation involves just making the side edge casing a little wider to allow for ribbon to be drawn through.

SUPPLIES
Fabric, Refer to CDC Guidelines *Instead of recommending fabric to you, please read this article and decide for yourself which fabric you feel is best to use.
2 yards of 1/2” ribbon
7.5” of metal wire , I used 16 gauge wire, but would image that a straightened out paper clip would likely work in a pinch.
2 rectangles of fabric 3 x 4.5”
Filter for pocket option
SIZE
Finished Dimensions: Approximately 3.5” x 7”
Follow directions up until the bias tape application. Instead of bias tape, cut 2 rectangles of fabric 3” x 4.5”. Press the long sides in 1/2”. Press shorter sides in 1/2”.

Align the folded edge of the fabric along the line of stitching in the same manner as the bias tape application. Folding and press the edges of the top and bottom 1/2” toward the inside to conceal raw edges. Repeat for opposite side.
See section Applying Bias for step by step pictures. The fabric squares are applied exactly like the bias tape- just wider and a bit easier to handle for beginners.
Topstitch along the edge of the casing.
This casing is nice and wide and should easily accommodate a 1/2” wide ribbon or twill tape.

Pin the edge of a 36” long piece of ribbon or twill tape to a safety pin and pull through casing. Repeat for opposite side.
Try on and tie for fit. Feel free to use a longer or shorter length of ribbon.


UPDATE- HOW TO MAKE A FACE MASK WITH A POCKET FOR A FILTER OR SHIELD
For those of you who would like to make a mask with a pocket for a filter, here are the steps to create that variation.
Cut one square 7 1/2”
Cut 2 rectangles 7 1/2 x 4 1/4
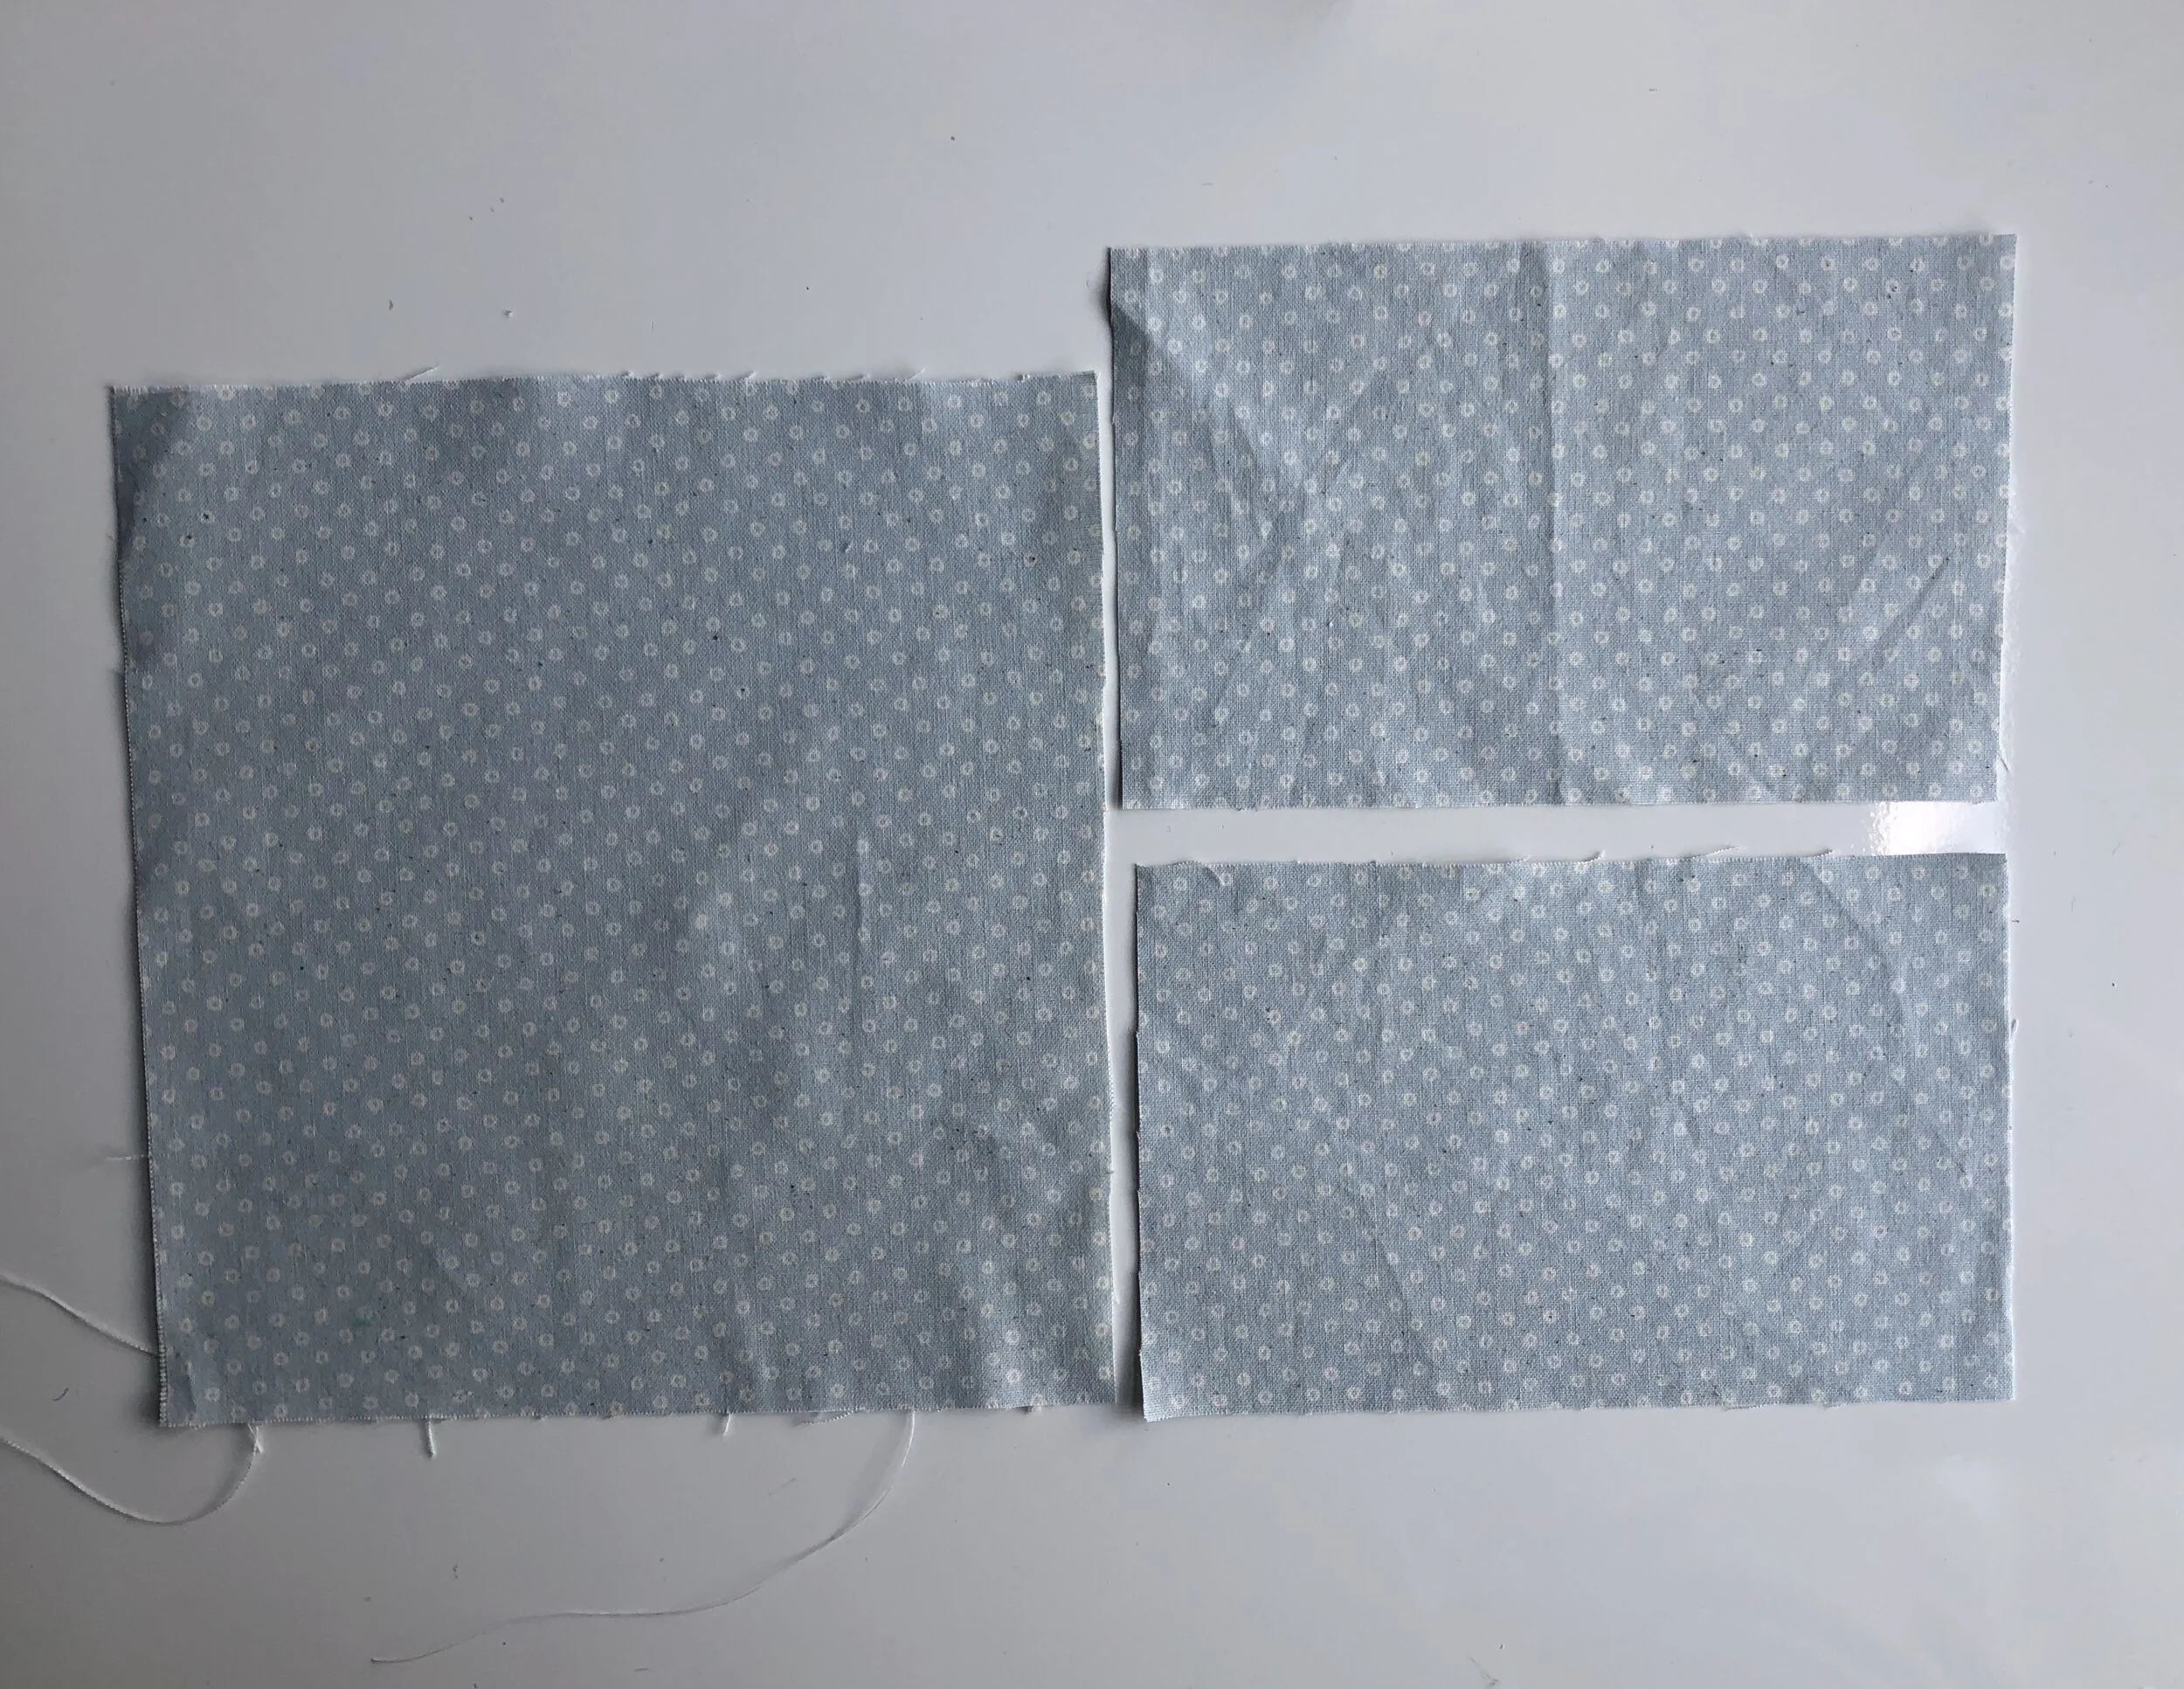
Take the two smaller rectangles and place them with their RIGHT sides facingtogether. Pin inward 1.5” in from each outside edge.

Stitch with a 1/2” seam allowance, leaving the center open.

Press the seams flat.
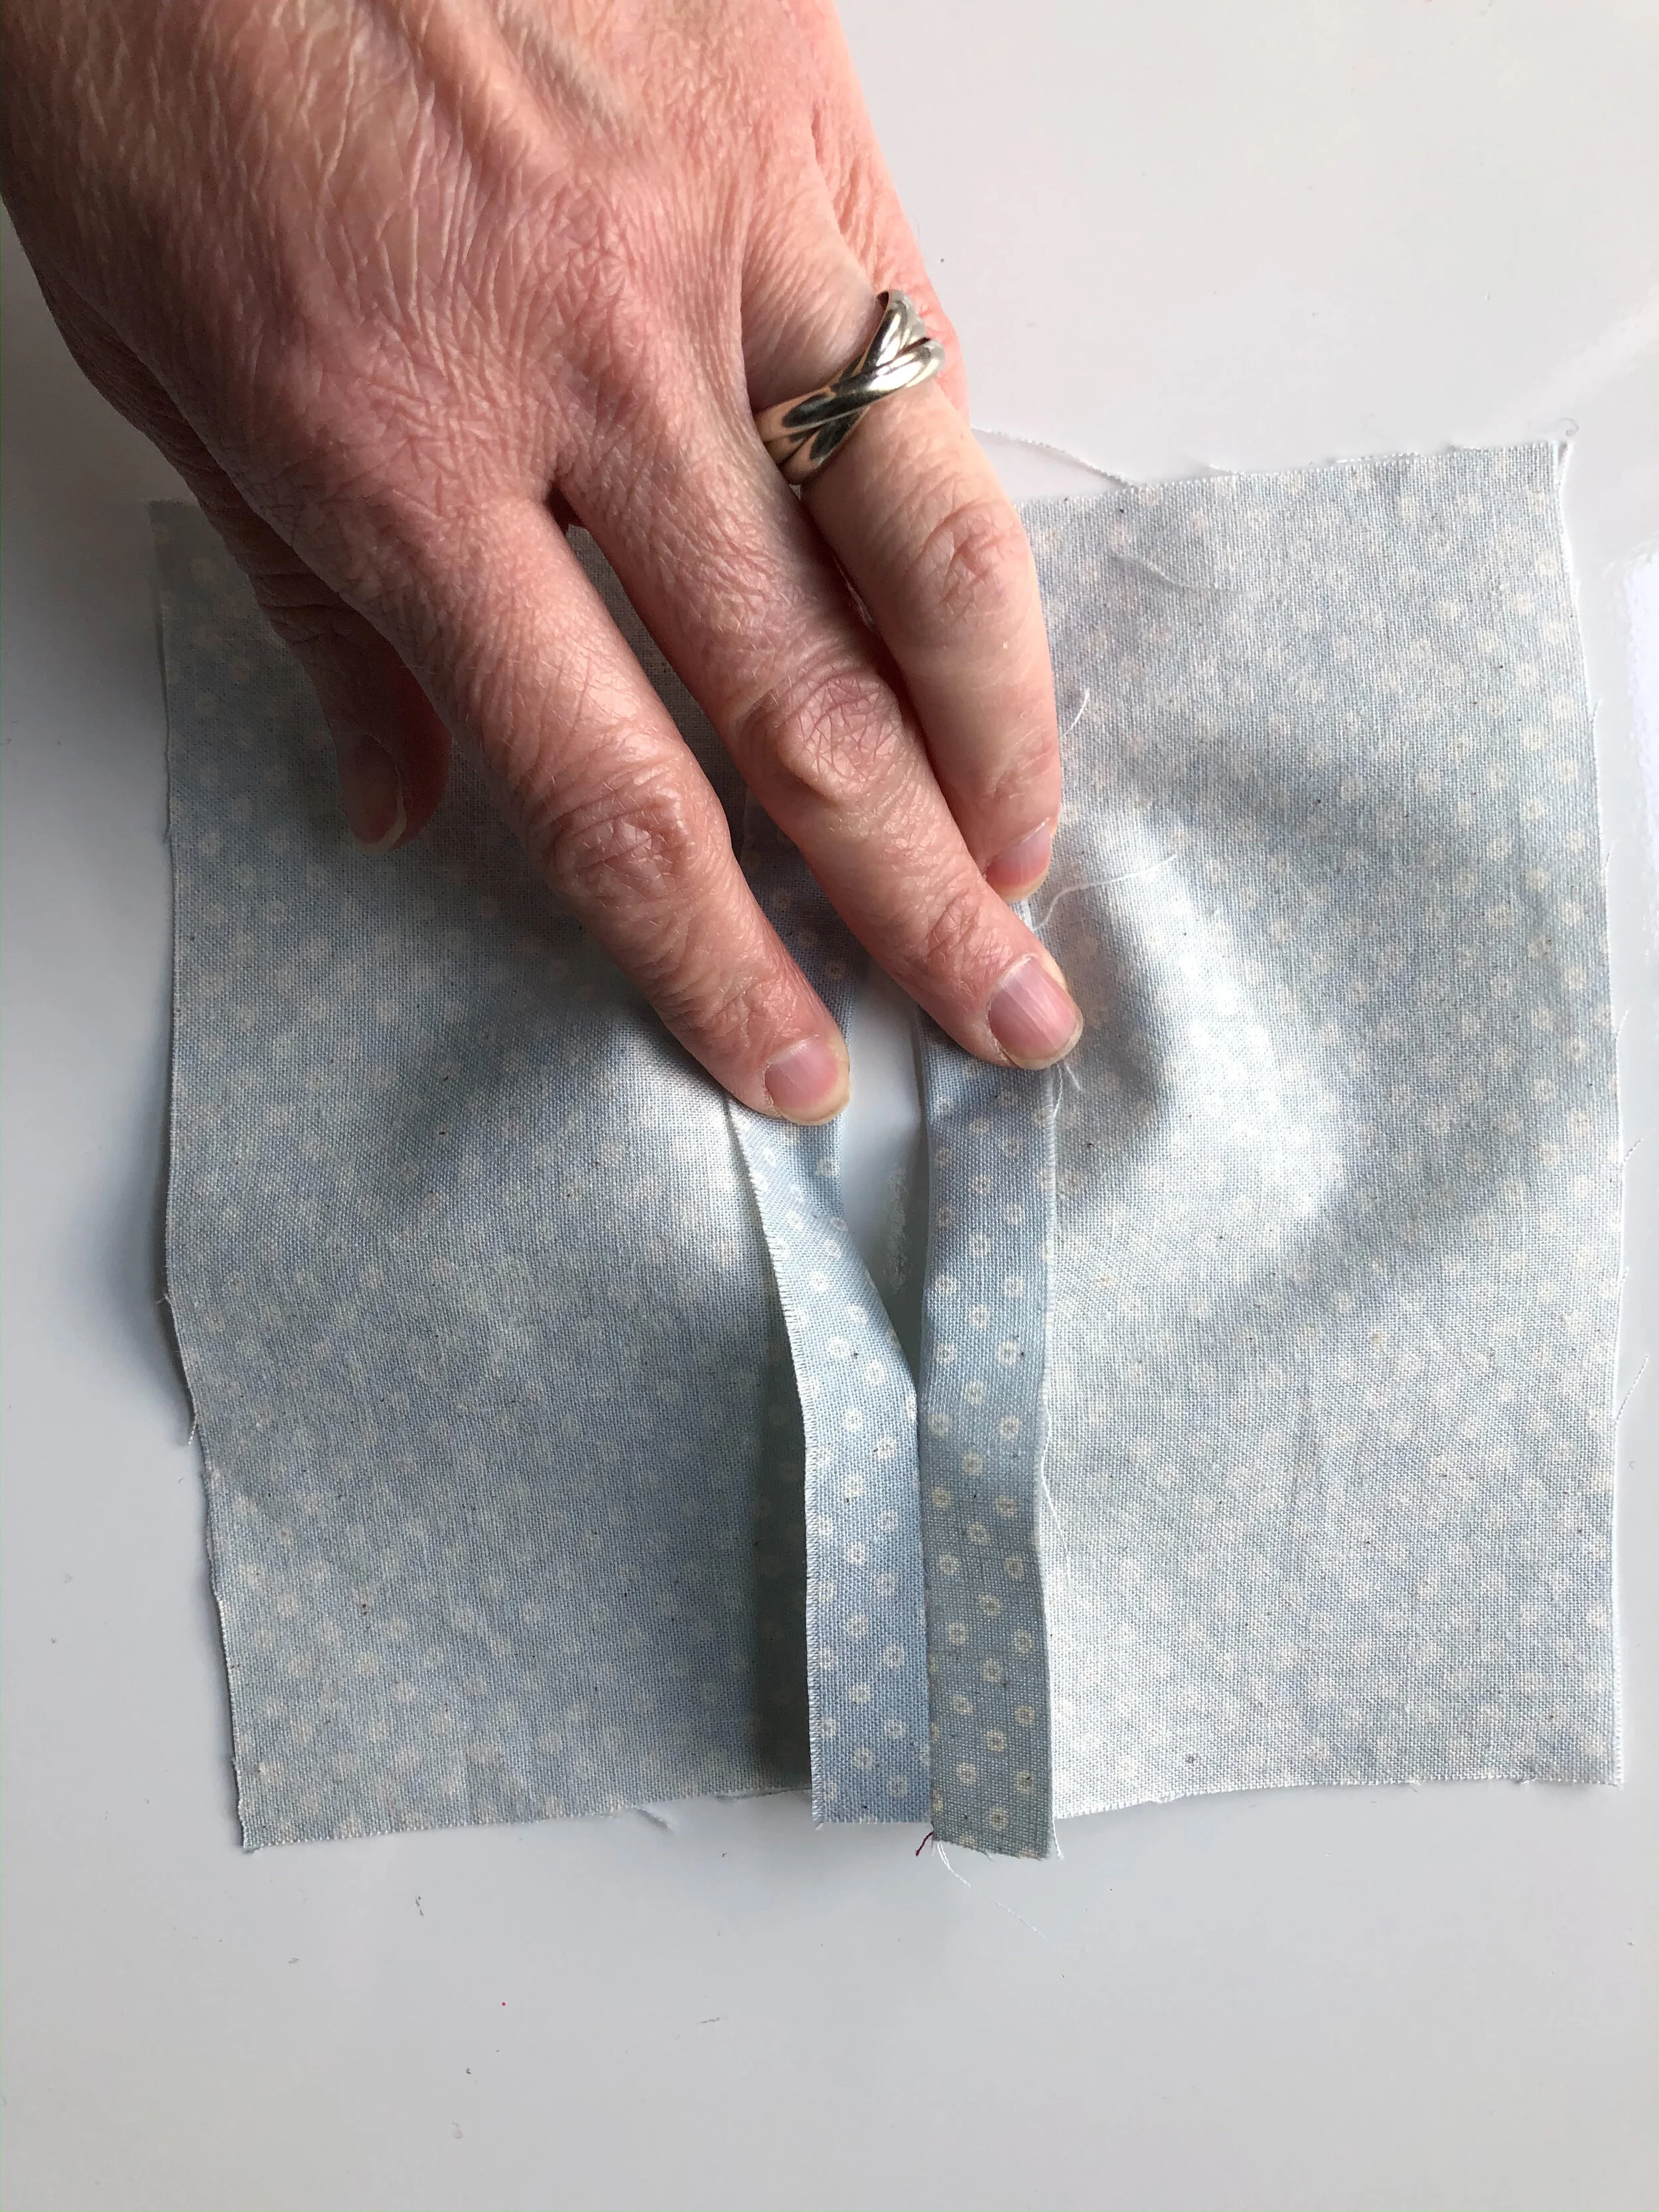
Top stitch along the seam line. This will help the fabric to lay flat.
Once you have pieced the fabric to make the pocket opening, if it is larger than 7 1/2”, trim to size.

Place the stitched piece with the split opening and the 7 1/2” square with their RIGHT sides facing together and continue as explained in step one of first tutorial.
The following picture is what it will look like after the casing is stitched.
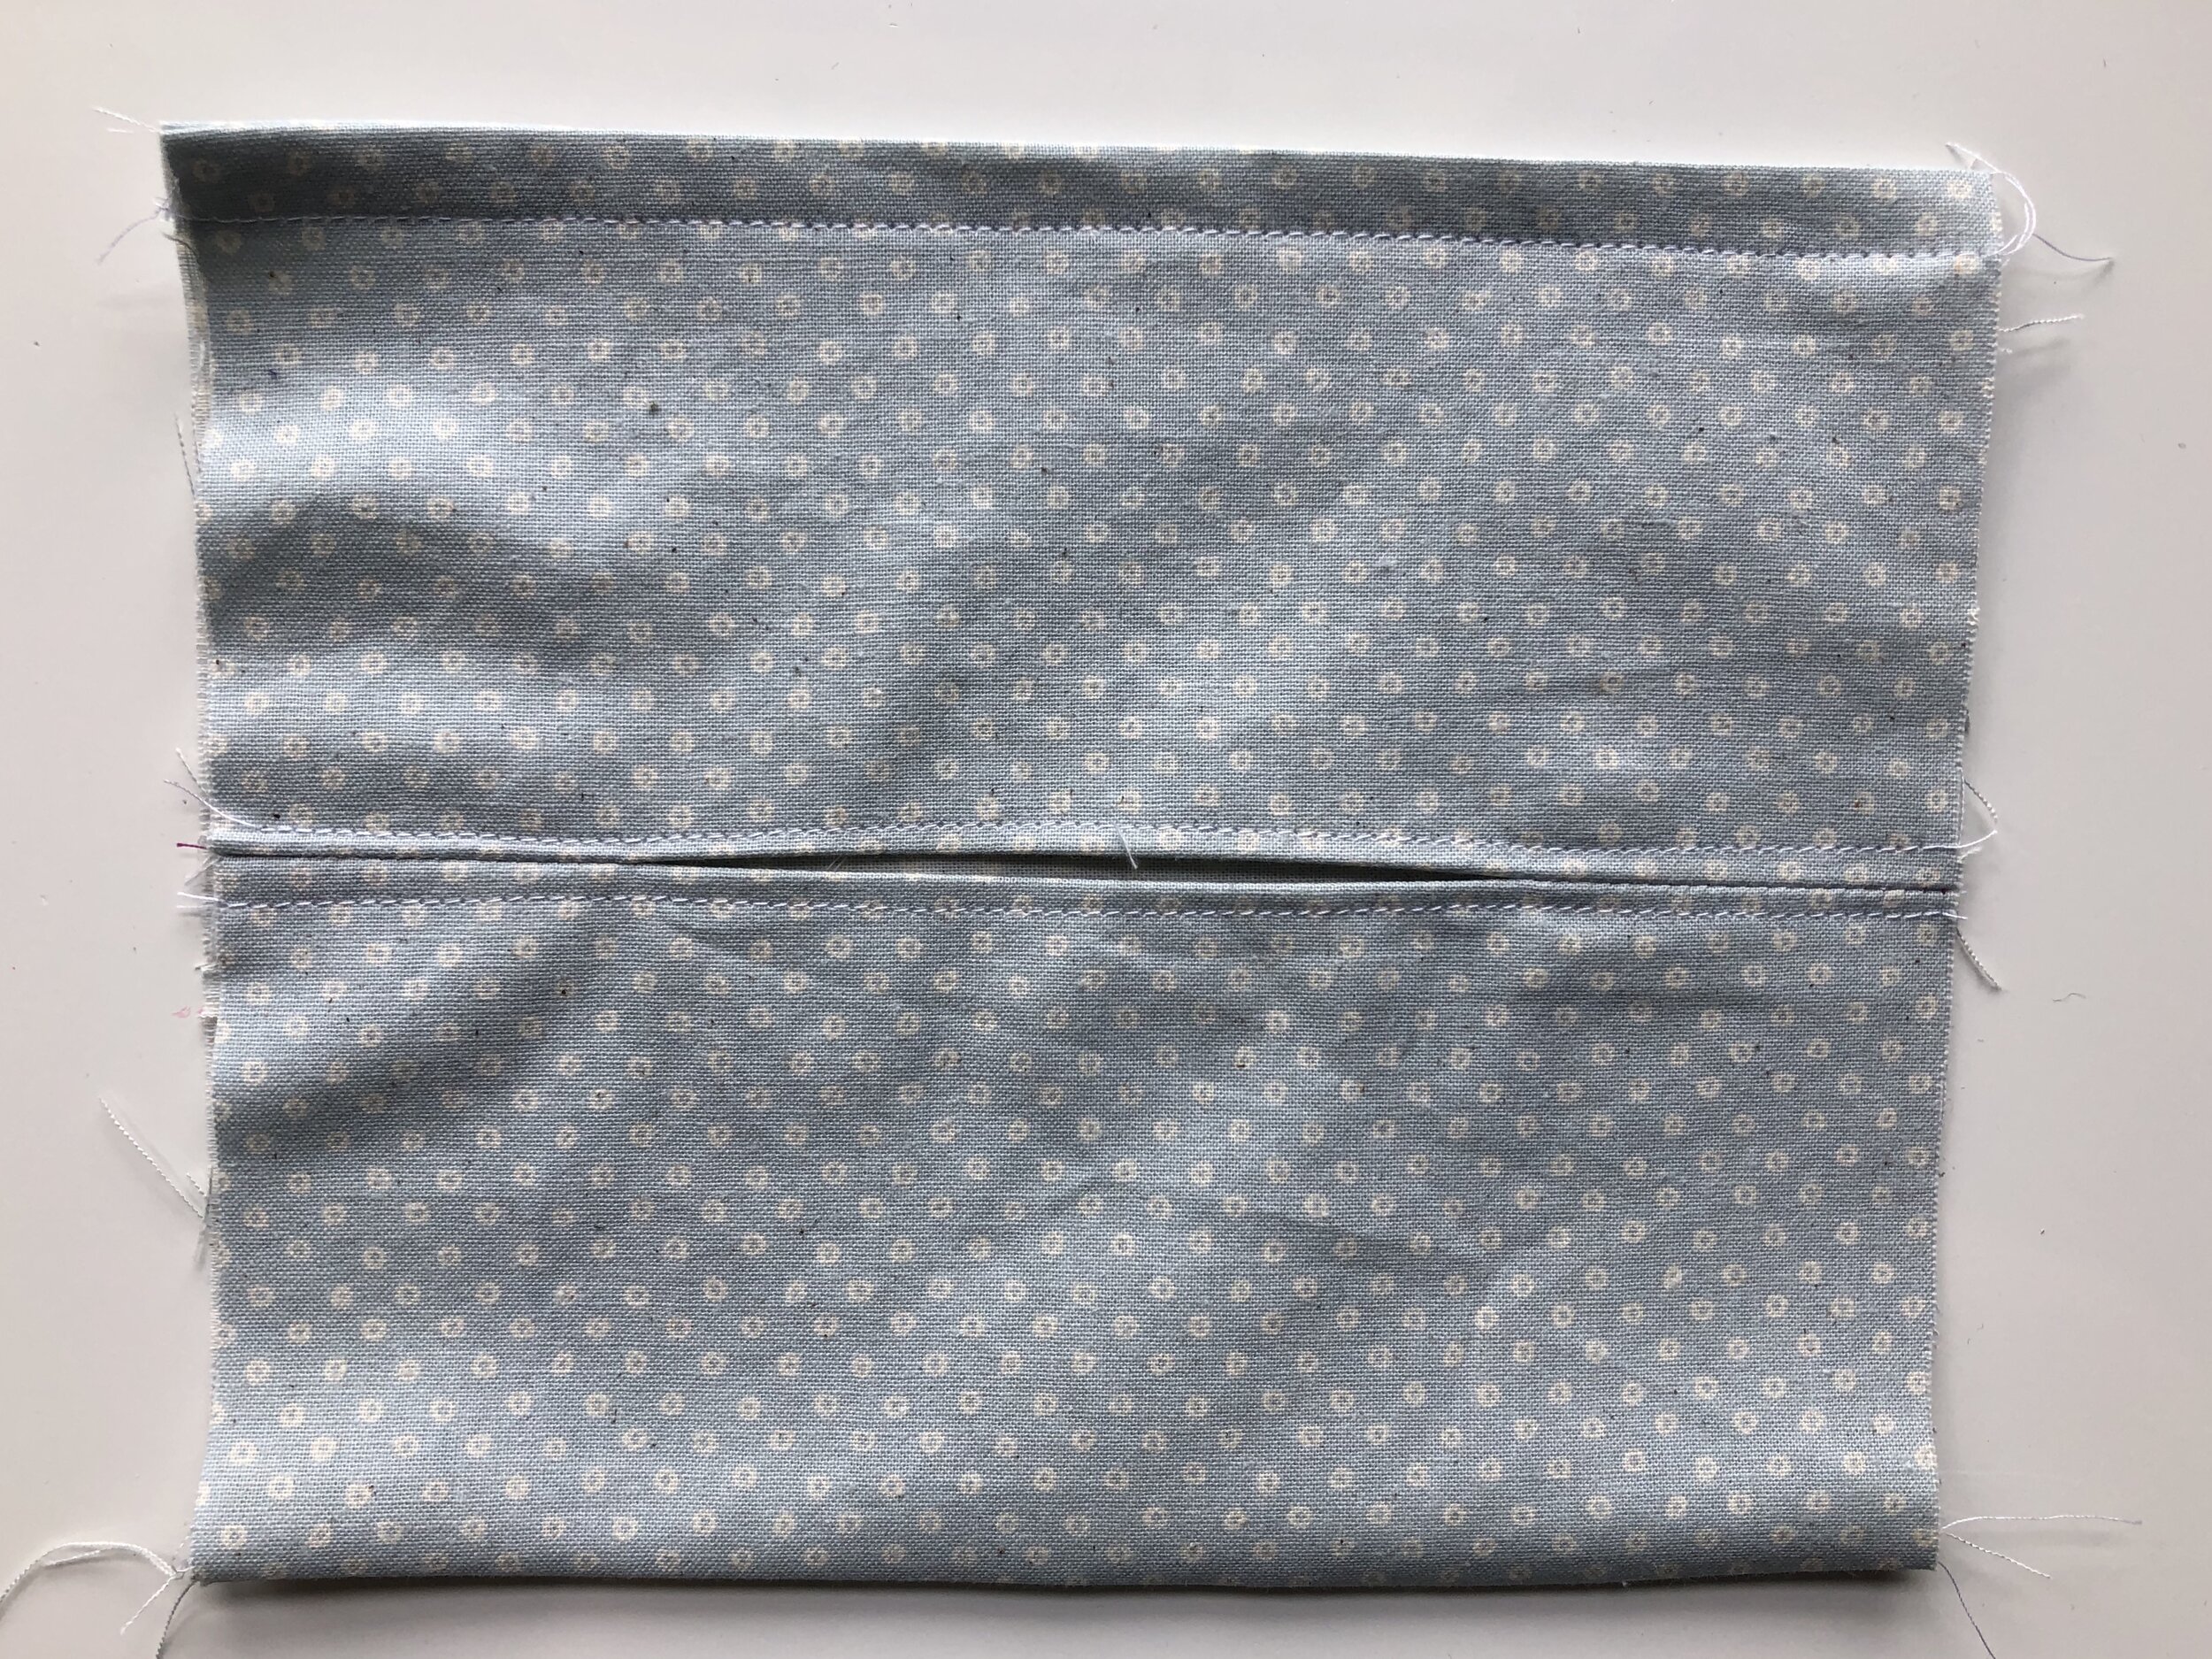
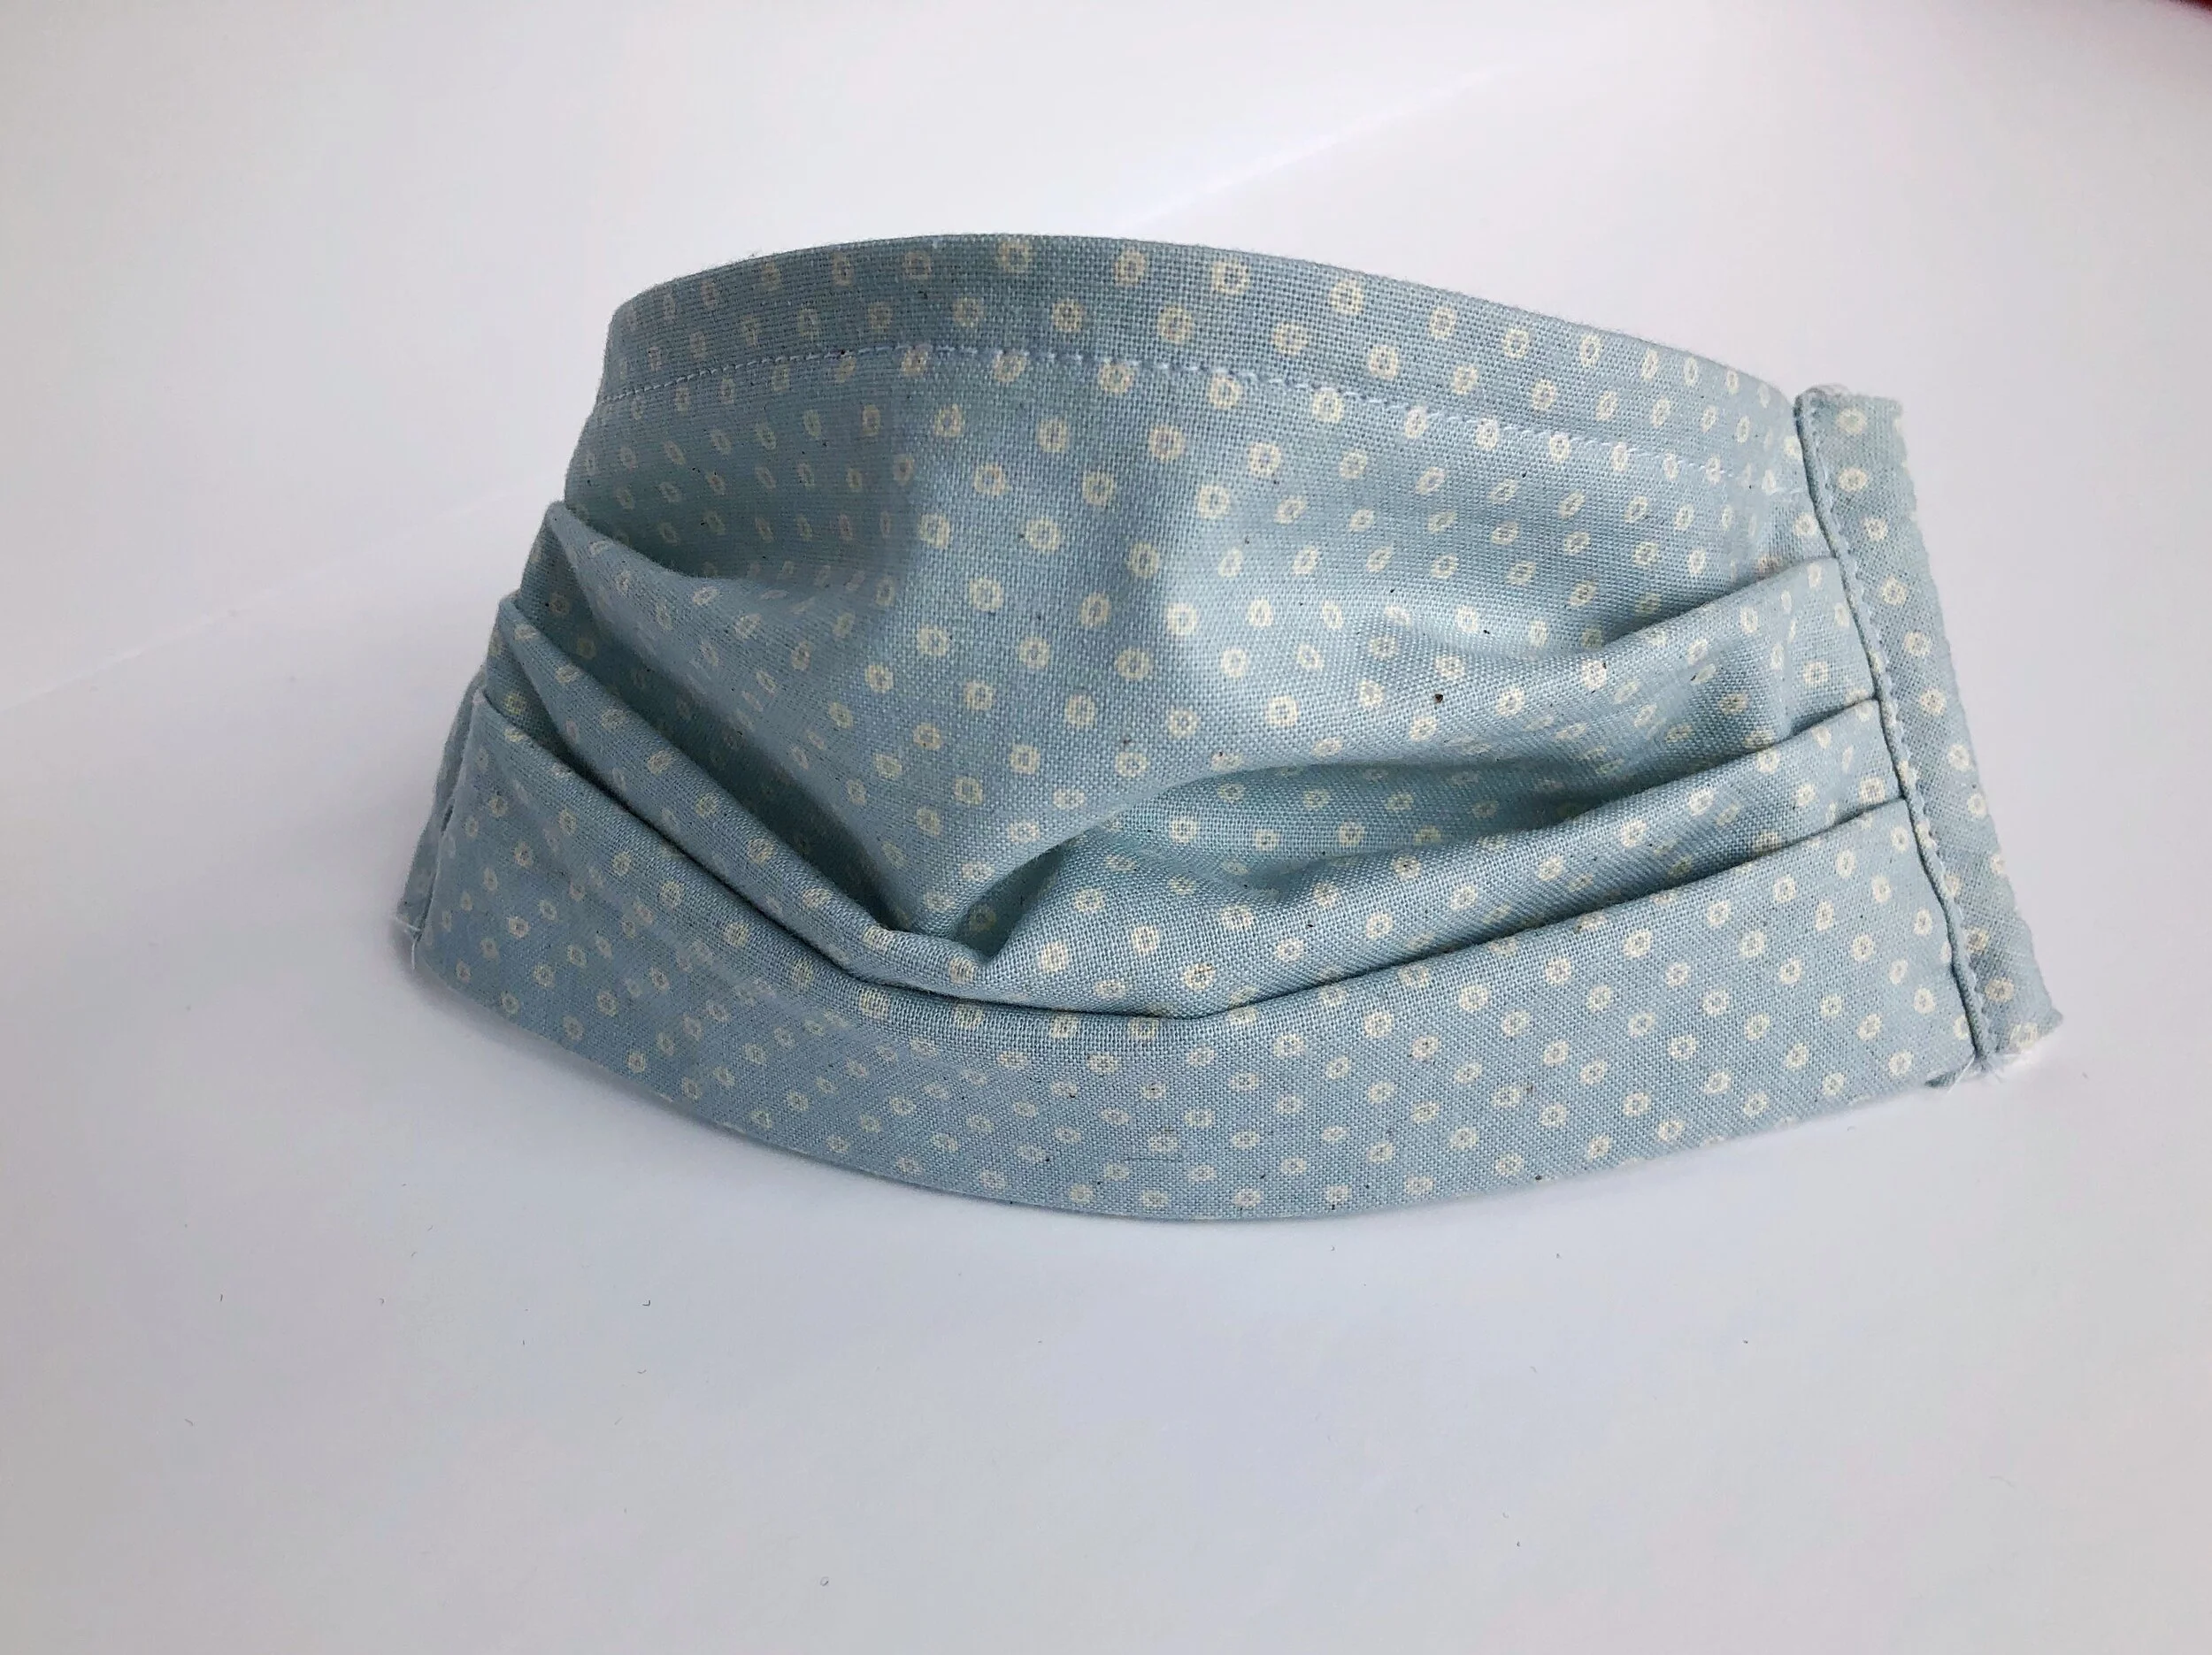
Once complete, the opening should allow for a filter to be place inside. The split opening should fold nicely between the pleats.
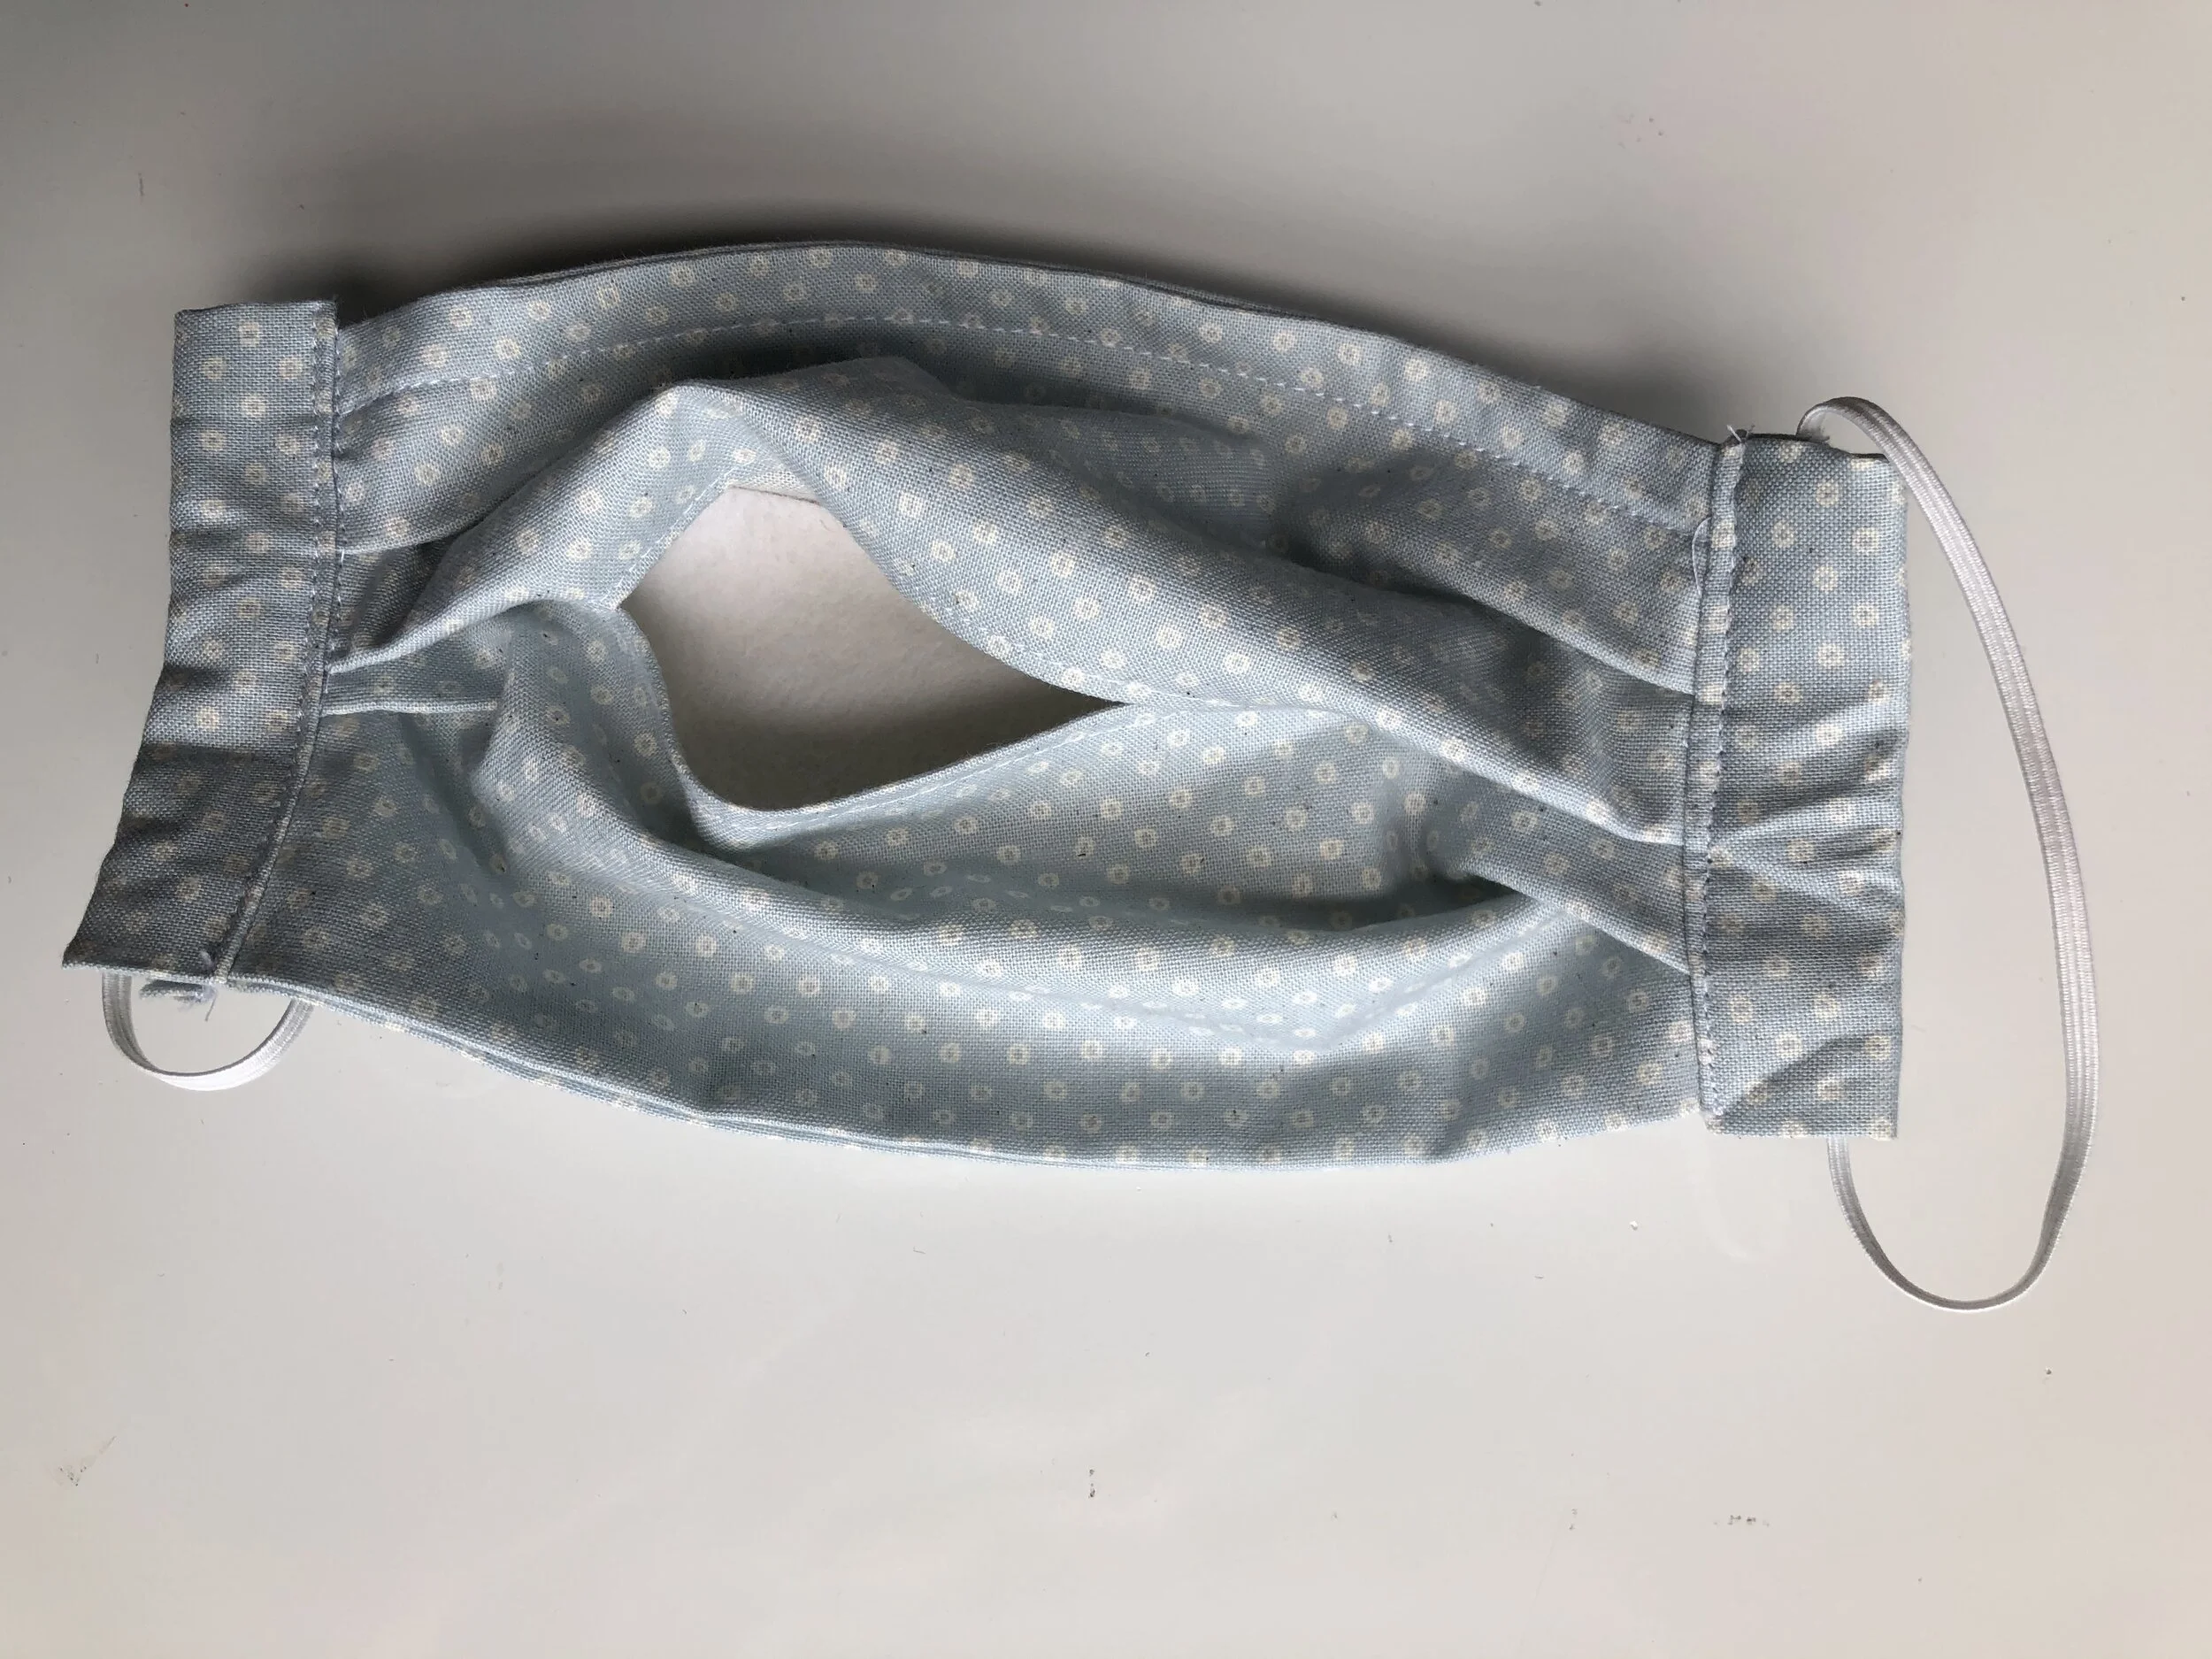
If you look closely, this mask has a filter inside. Once the sides are pulled, the center pleat pulls tight so that the wearer does not feel the filter.
I hope that this tutorial is helpful. Please feel free to email with any questions.
Wash your hands, hug your kids and stay home and sew.
XOXO, Hilarie

Form, Function and Culture
In Pattern Making, there are three types of sleeves; set-in, raglan and kimono. All other sleeve styles are developed from one of these three blocks.
However, in this era of globalization, it no longer feels correct to refer to this as a “kimono sleeve”. What then, is an appropriate name for a bodice where the sleeve is integrated into the design instead of a separate piece? “T-shape? Extended sleeve? Robe?

In Pattern Making, there are three basic types of sleeves; set-in, raglan and kimono. All other sleeve styles are developed from one of these three blocks.
However, in this era of globalization, it no longer feels correct to refer to a style as a “kimono sleeve”. What then, is an appropriate name for a bodice where the sleeve is integrated into the design instead of a separate piece? “T-shape? Extended sleeve? Robe?
I have been giving a lot of thought to the intersection of cultural appropriation, pattern making and fashion. Currently, I am working on a new pattern, one that is loose fitting and has a kimono-style sleeve. But I am at a loss of how to describe it. This simple shape, once cut and constructed, no longer looks like the rectangle that is was essentially developed from. The straight grain of the fabric will run up and down the body, and the cross grain across the shoulders. Different than batwing, not dolman, not tunic.
A respectful interpretation of the world’s cultures can allow all cultures to mutually enrich themselves and bring about genuine benefits to society. A diversity of cultural influences is what makes fashion, like art and music evolve and thrive. Additionally, as a sewing and fashion educator, I have a classroom of kids that come from all manner of background and identity. They look to me to guide them and to set an example. To foster a truly global society, it is imperative to teach inclusivity, appreciation and respect. If these students leave my class, and future fashion studies unversed, then we as educators are part of the problem.
Traditional clothing is not simply functional or ornamental. It is infused with meaning and is woven into the very identity of a people, geographic area or a period in history. That is why designing clothing without consideration for the underlying cultural significance can lead to ignorance of the history of entire communities For a much more eloquent and thoughtful explanation, read this post, My Kimono is Not Your Couture, by Emi Oto.
So what is appropriate and respectful? Is it enough to describe the top as having a “kimono sleeve”, but then include a sentence that invites conversation and states that that is the technical name of the sleeve type? Could it be described as having a kimono style influence- even though it bears little resemblance to an actual kimono? If we go forward and “ignore” traditional influences, we lose the opportunity to learn and appreciate. The preservation of culture and cultural diversity gives voice to each and every person in this global community and can affect real and lasting change.
With that sentiment, I am asking you, my readers and friends, to please share your thoughts with me. How do you recognize and appreciate global fashion while still being intentional and sensitive? What do you make of “technical” terms that have no clear replacement? I do look forward to your comments.

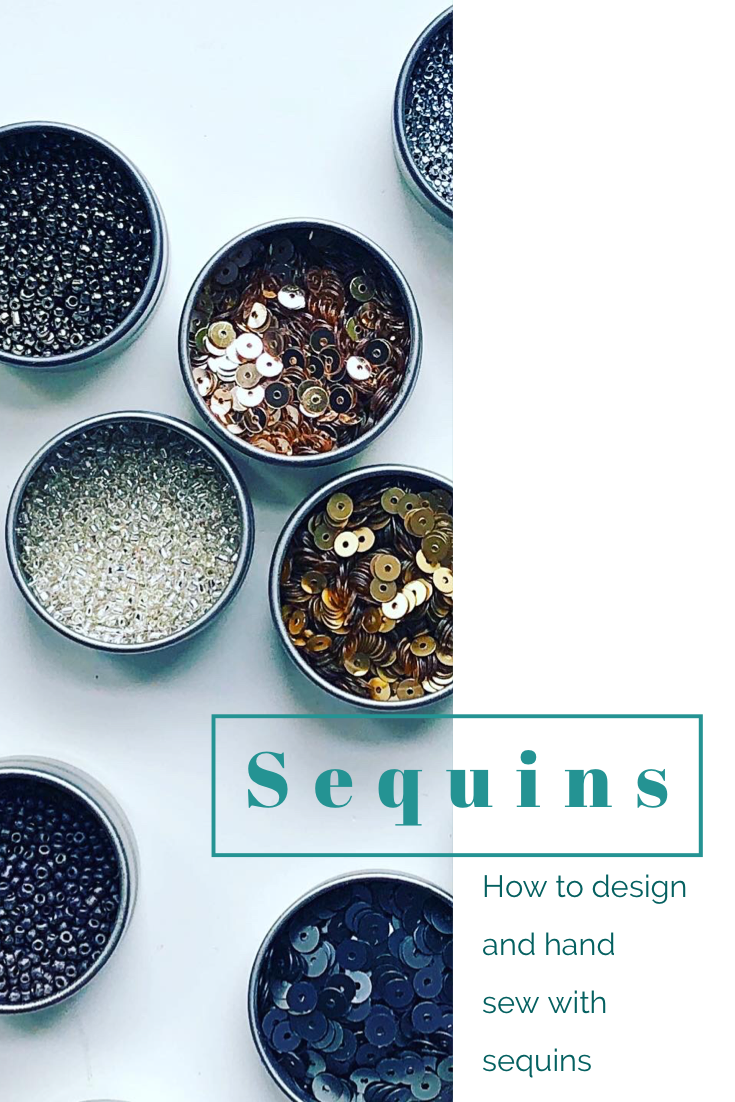
HOW TO HAND SEW SEQUINS: A Course in Creating Custom Embellishments with Sequins
Recently I have been seeing a host of embellishments of all manner in fashion magazines and on the runways. Perhaps since clothing shapes and silhouettes are holding steady, embellishment is a way to make clothing new and enticing. Whether it’s just a sprinkling here and there or an all-over design, embellishment is a fun way to both personalize and dress up your wardrobe.
This winter I discovered that one of my favorite sweaters had been enjoyed by some moths. Uggh! However, instead of being upset, I decided that this presented the perfect opportunity to create a design that I had been playing around with in my mind and repair my beloved sweater.

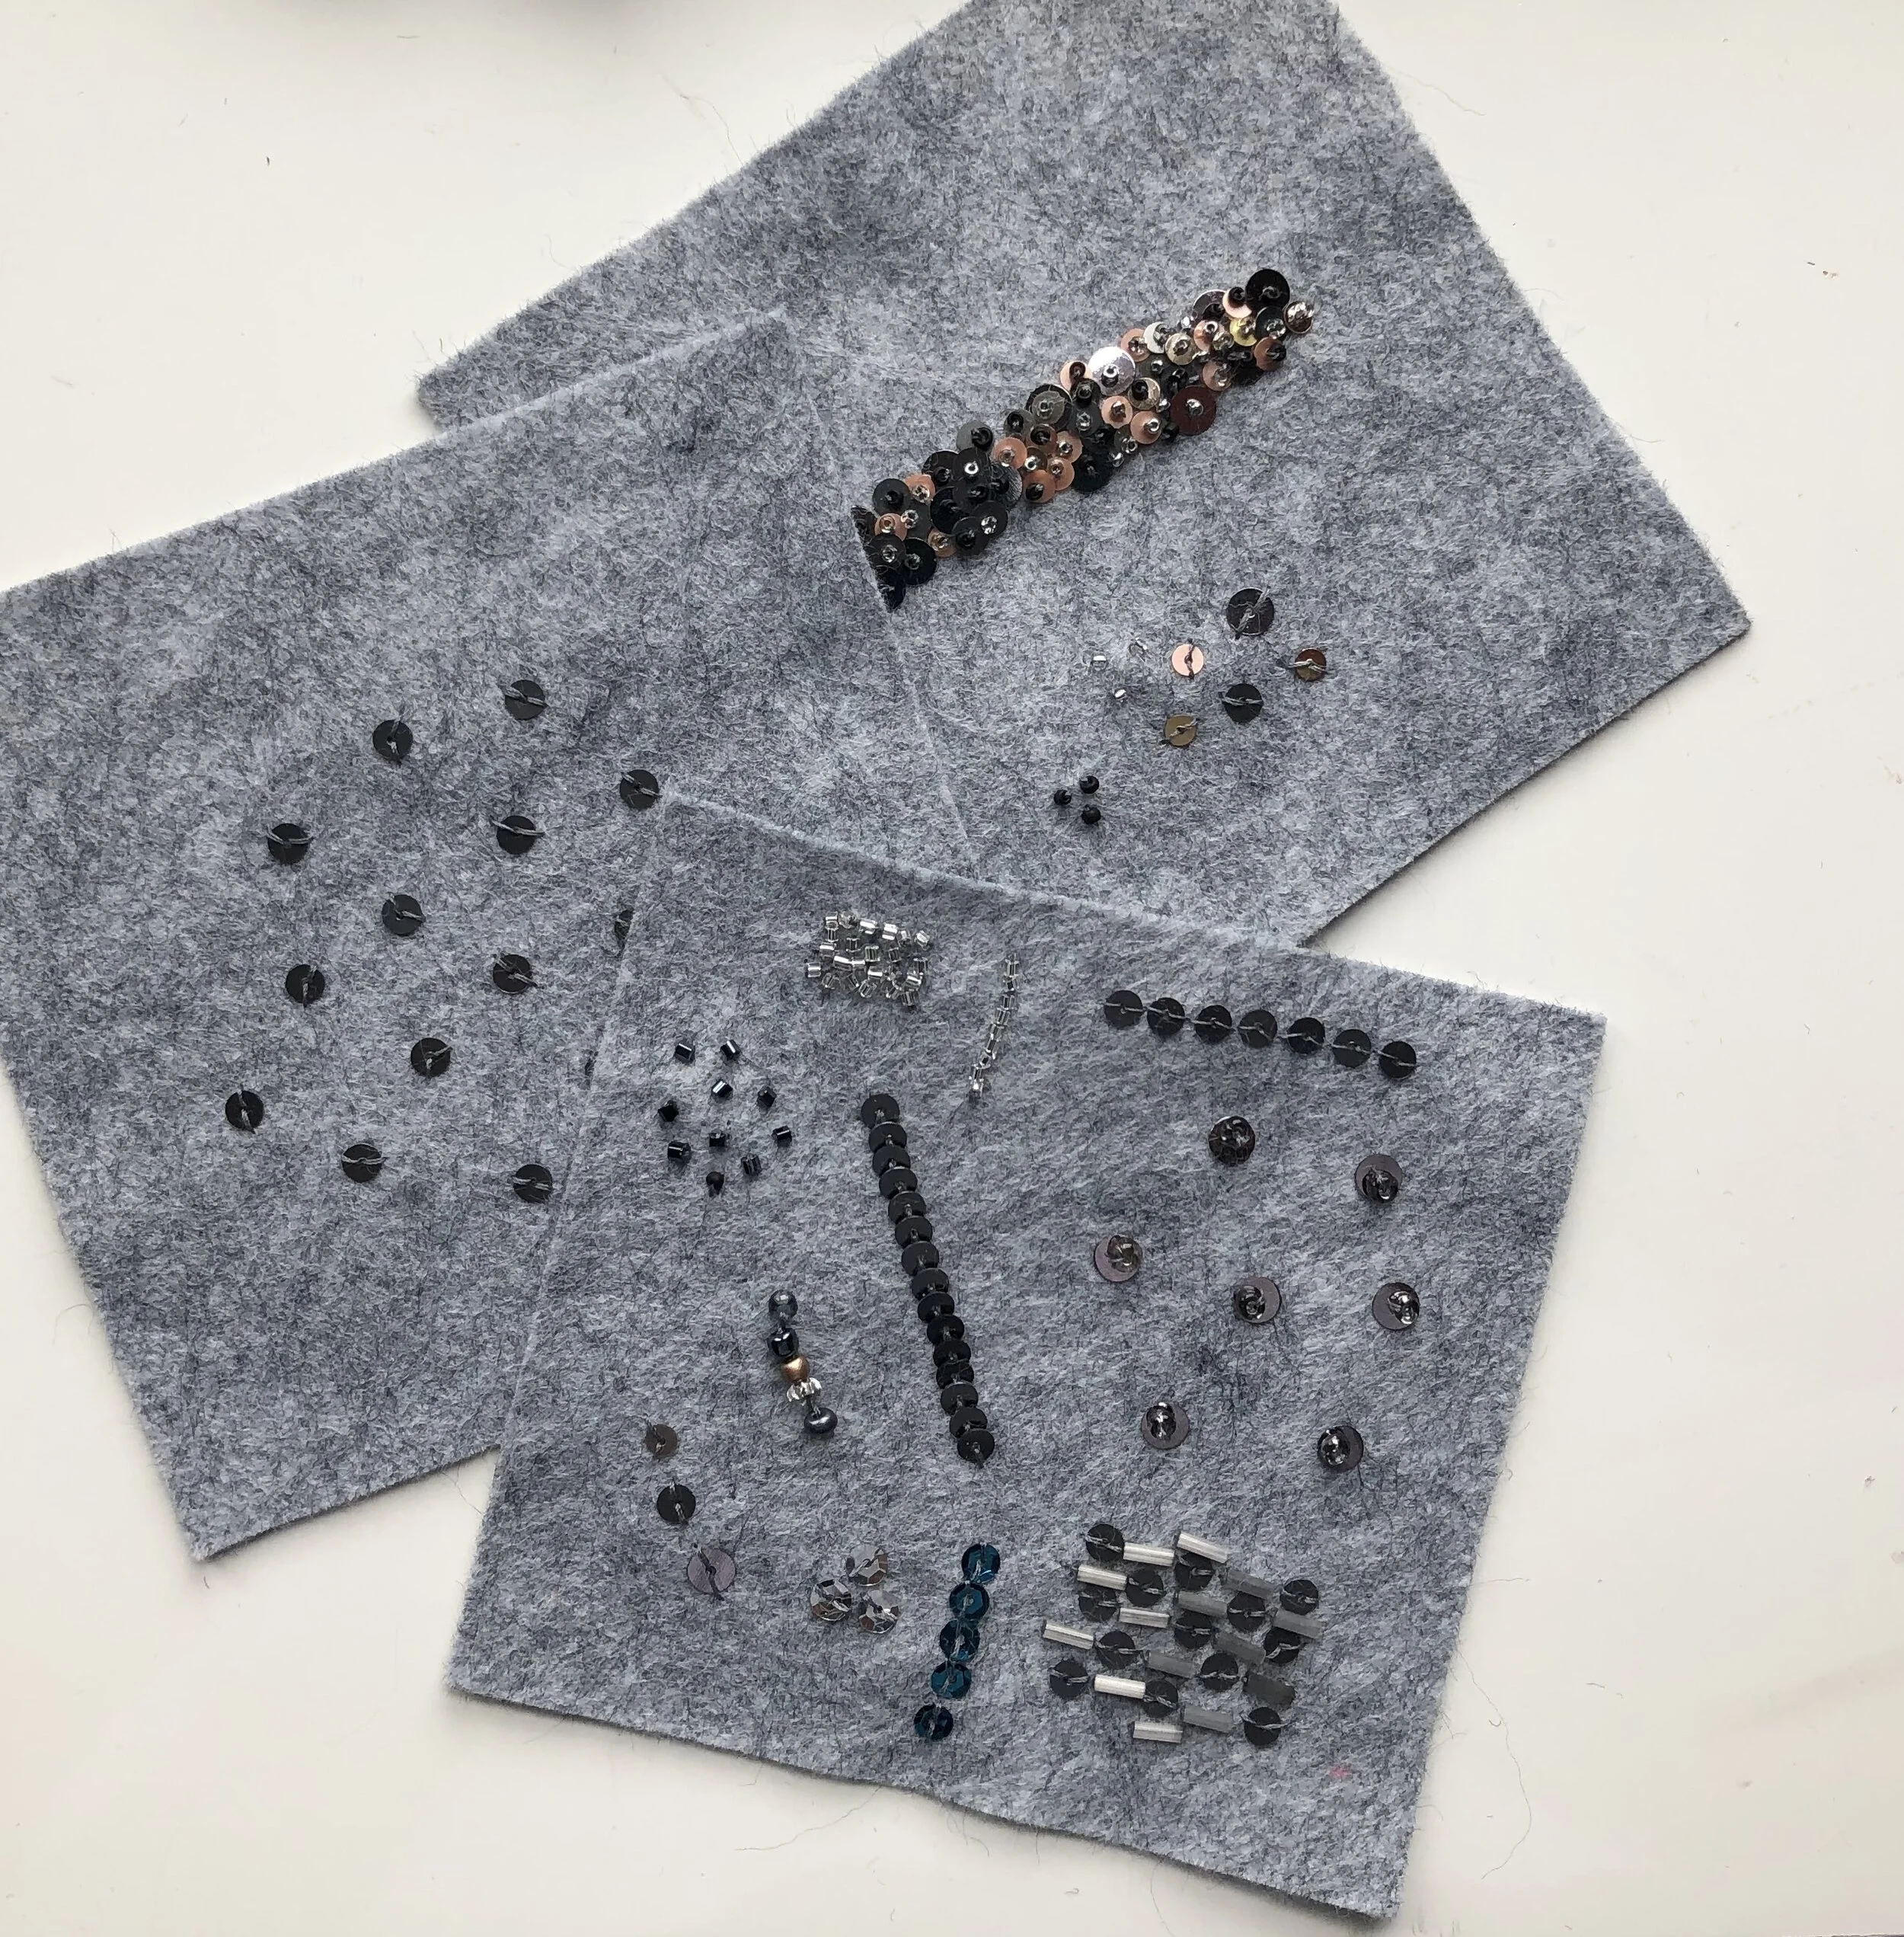
The design that I had in mind was something between a leopard print and a paisley. Initially I wanted it to be more leopard, but the scale of the paisley seemed more fitting. Also, I really wanted the design to only be on the front of the sweater as beads and sequins- especially when sewn to a knit have the tendency to rub. Then there is the issue of of placement. A leopard or paisley print with unfortunate motif placement could look ridiculous very quickly. I did not want to draw any undue attention to my bustline.
In order to clear this hurdle, I made a few shapes to pin on the sweater to determine the best placement and repeat. Once I was pleased with the placement, I began to sew. It took probably 10-12 hours to complete, but I am quite happy with the result and even more pleased knowing that my once loved sweater may now last me another 15 years.
Want to try your hand at embellishing a sweater? The steps below outline how I did it, but they can be adapted to any sequins pattern you create.
You’ll Need:
Sequins, I used one ounce of 5mm
Thread, Ideally, fil a gant, or gloving thread.
Contrast or Basting Thread (all purpose is fine. Good time to use the odd ones:)
Pins and scissors
A sweater
HOW TO SEW SEQUINS BY HAND
Step 1. Create the design. You can follow mine or map out your own. Paper and pencil is a great place to begin. If you are in need of inspiration, look in your own wardrobe. Which motif’s do you seem to be drawn to? Polka dots? animal prints? stripes? Start there.
Step 2. Determine placement and design repeat. Do you want the design just on a specific part of your sweater? Or would you prefer an all-over design?
HOW TO HAND SEW OVERLAPPING SEQUINS
Sequins come in a variety of shapes and sizes. The ones that I chose are flat and matte rather than the sparkly cupped shaped ones. Sequins size range from 2mm all the way to 30mm. I tend to like the 3-15mm, as I can use an embroidery needle and thread to apply. While sequins can be applied by machine, I do enjoy hand sewing them. Though it does take some time, for speedier work, you can purchase pre-strung beads and sequins.
To hand sew sequins, the thread should be doubled and kept short to prevent twisting and knotting. Be sure to use a light hand as pulling stitches too tight, will create puckers in the fabric. Run your thread through the beeswax or thread magic.
Before adding the first sequin or bead in my pattern, I do like to make one small stitch in the fabric to secure.
To sew a line of overlapping sequin, begin by inserting your needle from underneath the fabric and pushing up.

Place a sequin on the needle and pull toward the fabric to place.

Bring the needle to the side of the sequin to stitch over the edge and coming back up through the center. Pick up a second sequin, place it so that it just overlaps the first and stitch over the edge to secure. When you pull the thread, it should pull the sequin in its place.


Another view with all of the steps together. Once you get the hang of it, it really does begin to go rather quickly.
HOW TO HAND SEWN SCATTERED SEQUINS

For an all-over effect, this scattered design really packs a punch. I have a skirt that I made years ago that is embellished with an all-over pattern of sequins with a seed bead secured in the center.
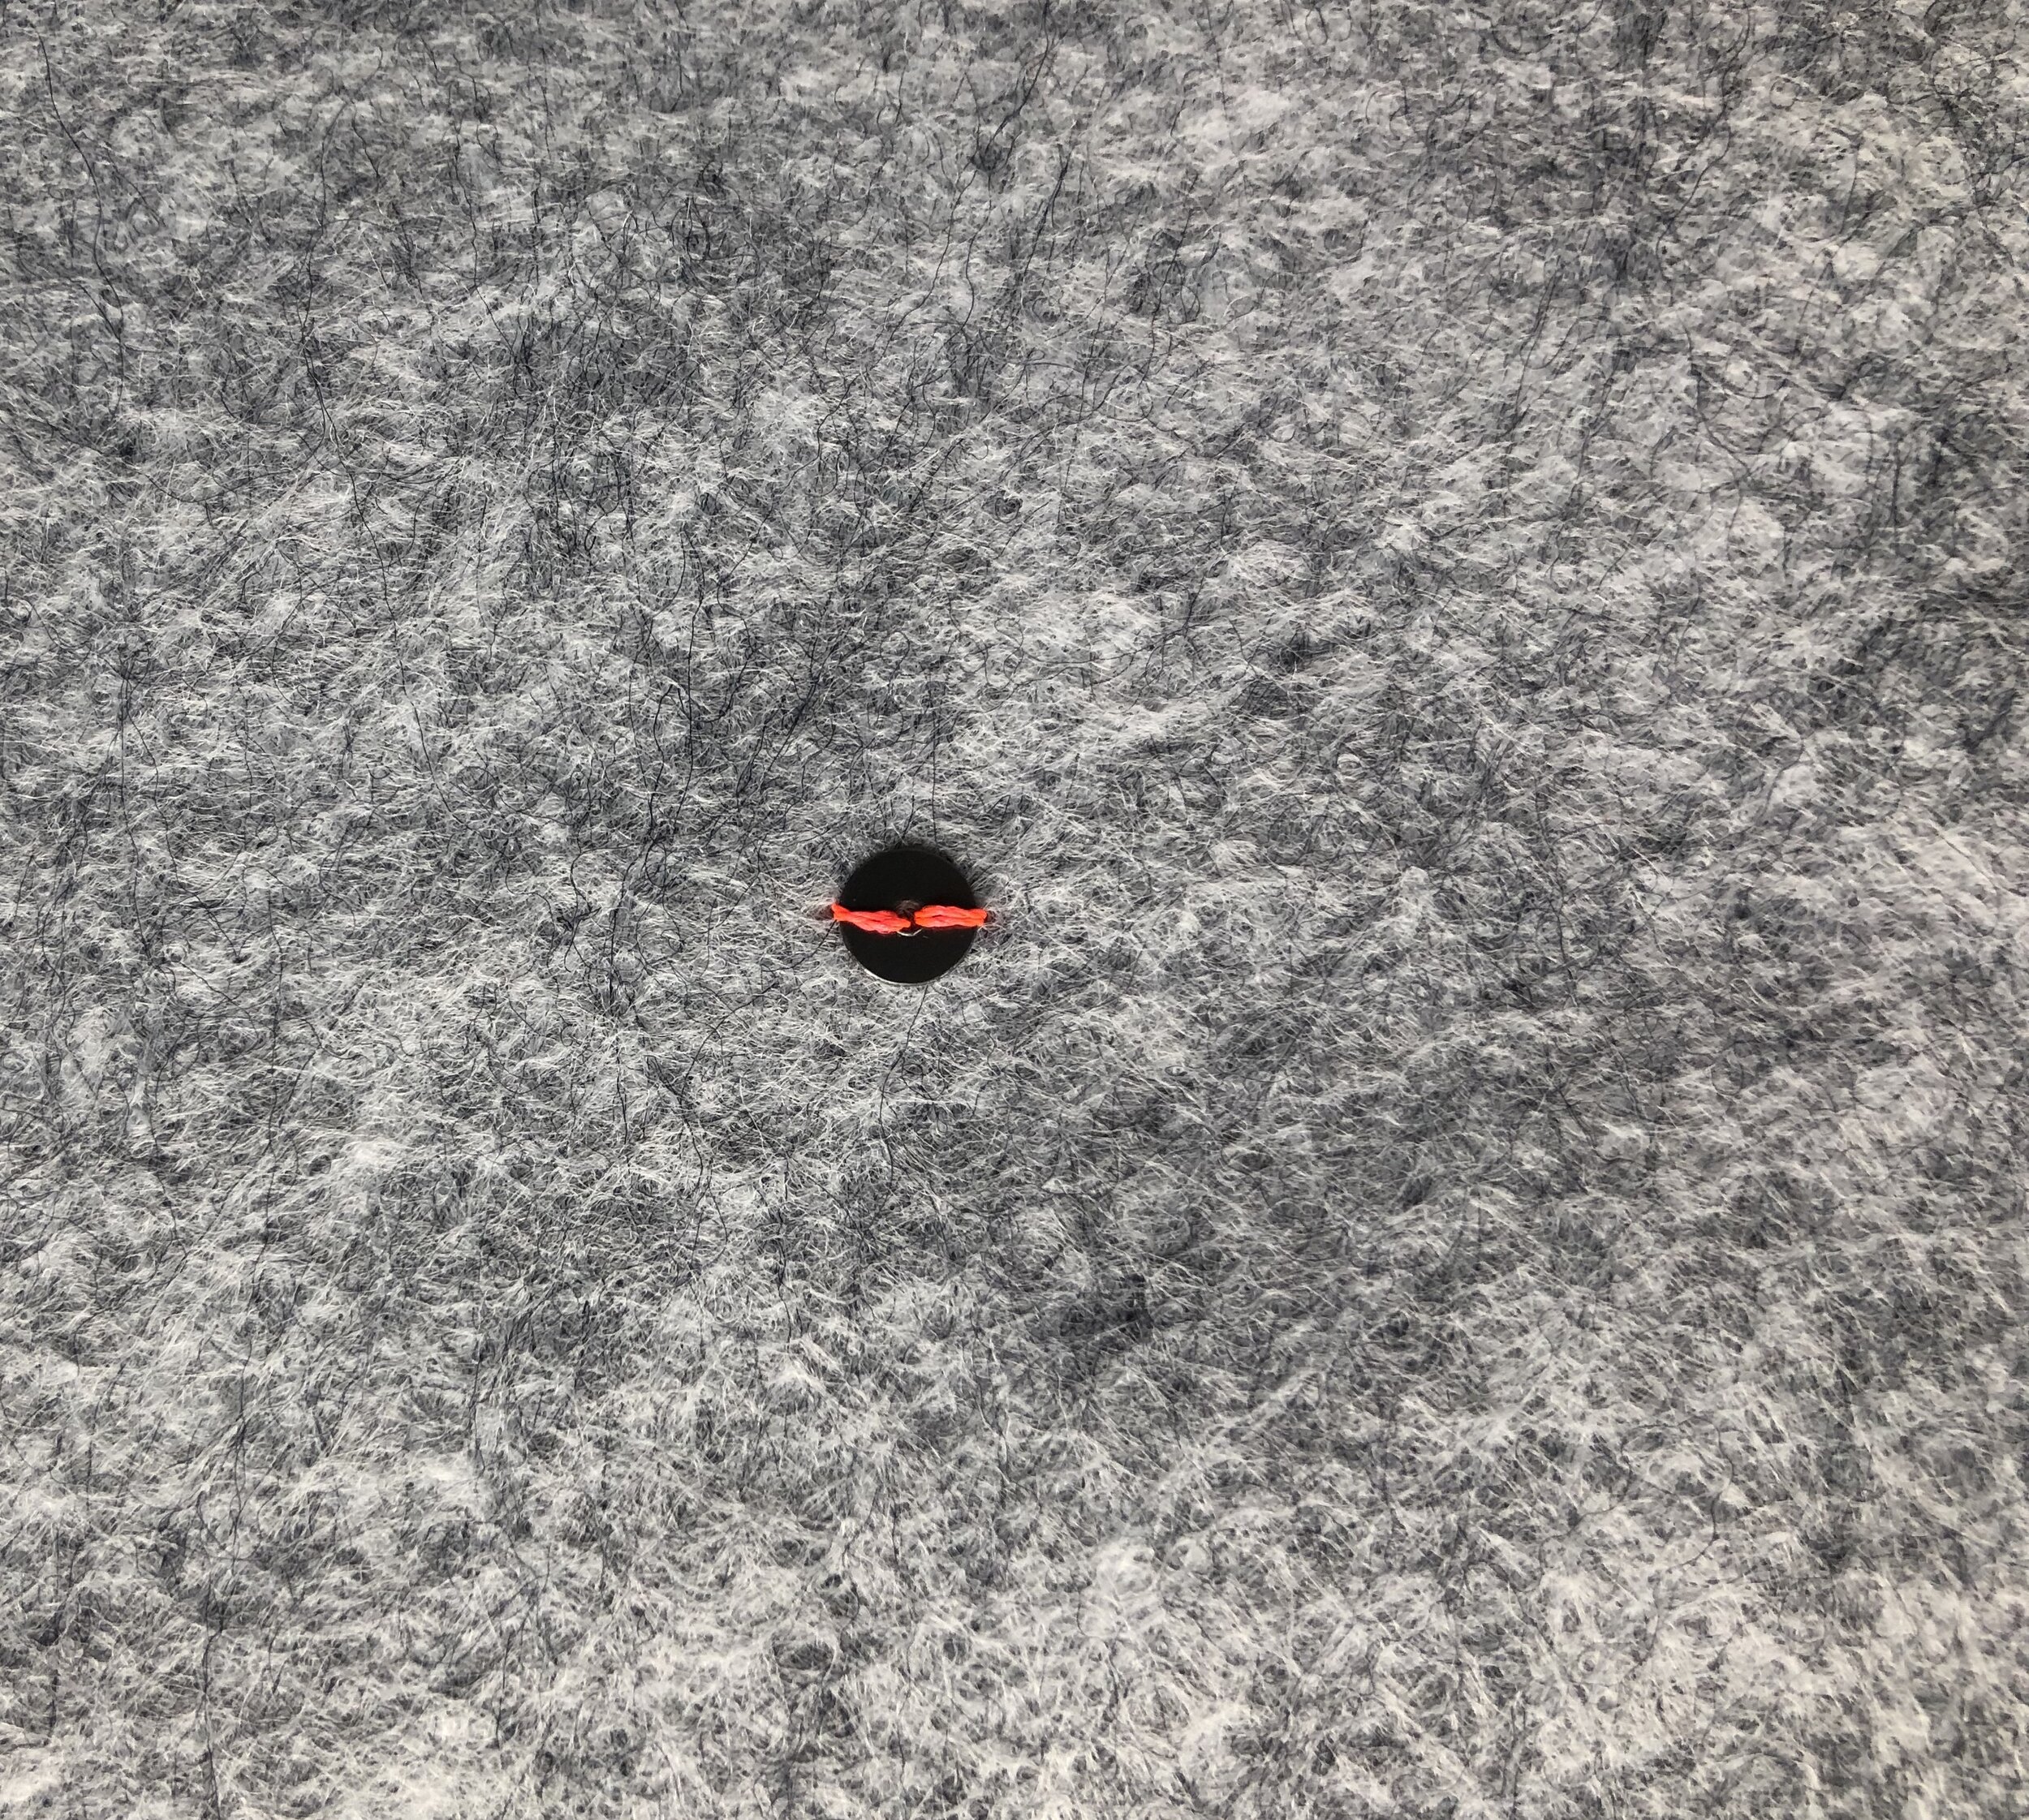
HOW TO HAND SEW INDIVIDUAL SEQUINS

Begin in the same manner as before, with a small hand stitch to secure the thread to the fabric.
insert your needle from underneath the fabric and gently pull up. Thread the sequin to your needle and down the thread to place.

Insert your needle just over the edge of the sequin, through the back and try to come out just to the opposite side.

Push the needle back into the center of the sequin and pull toward the back.

Here are all of the steps again, in order.
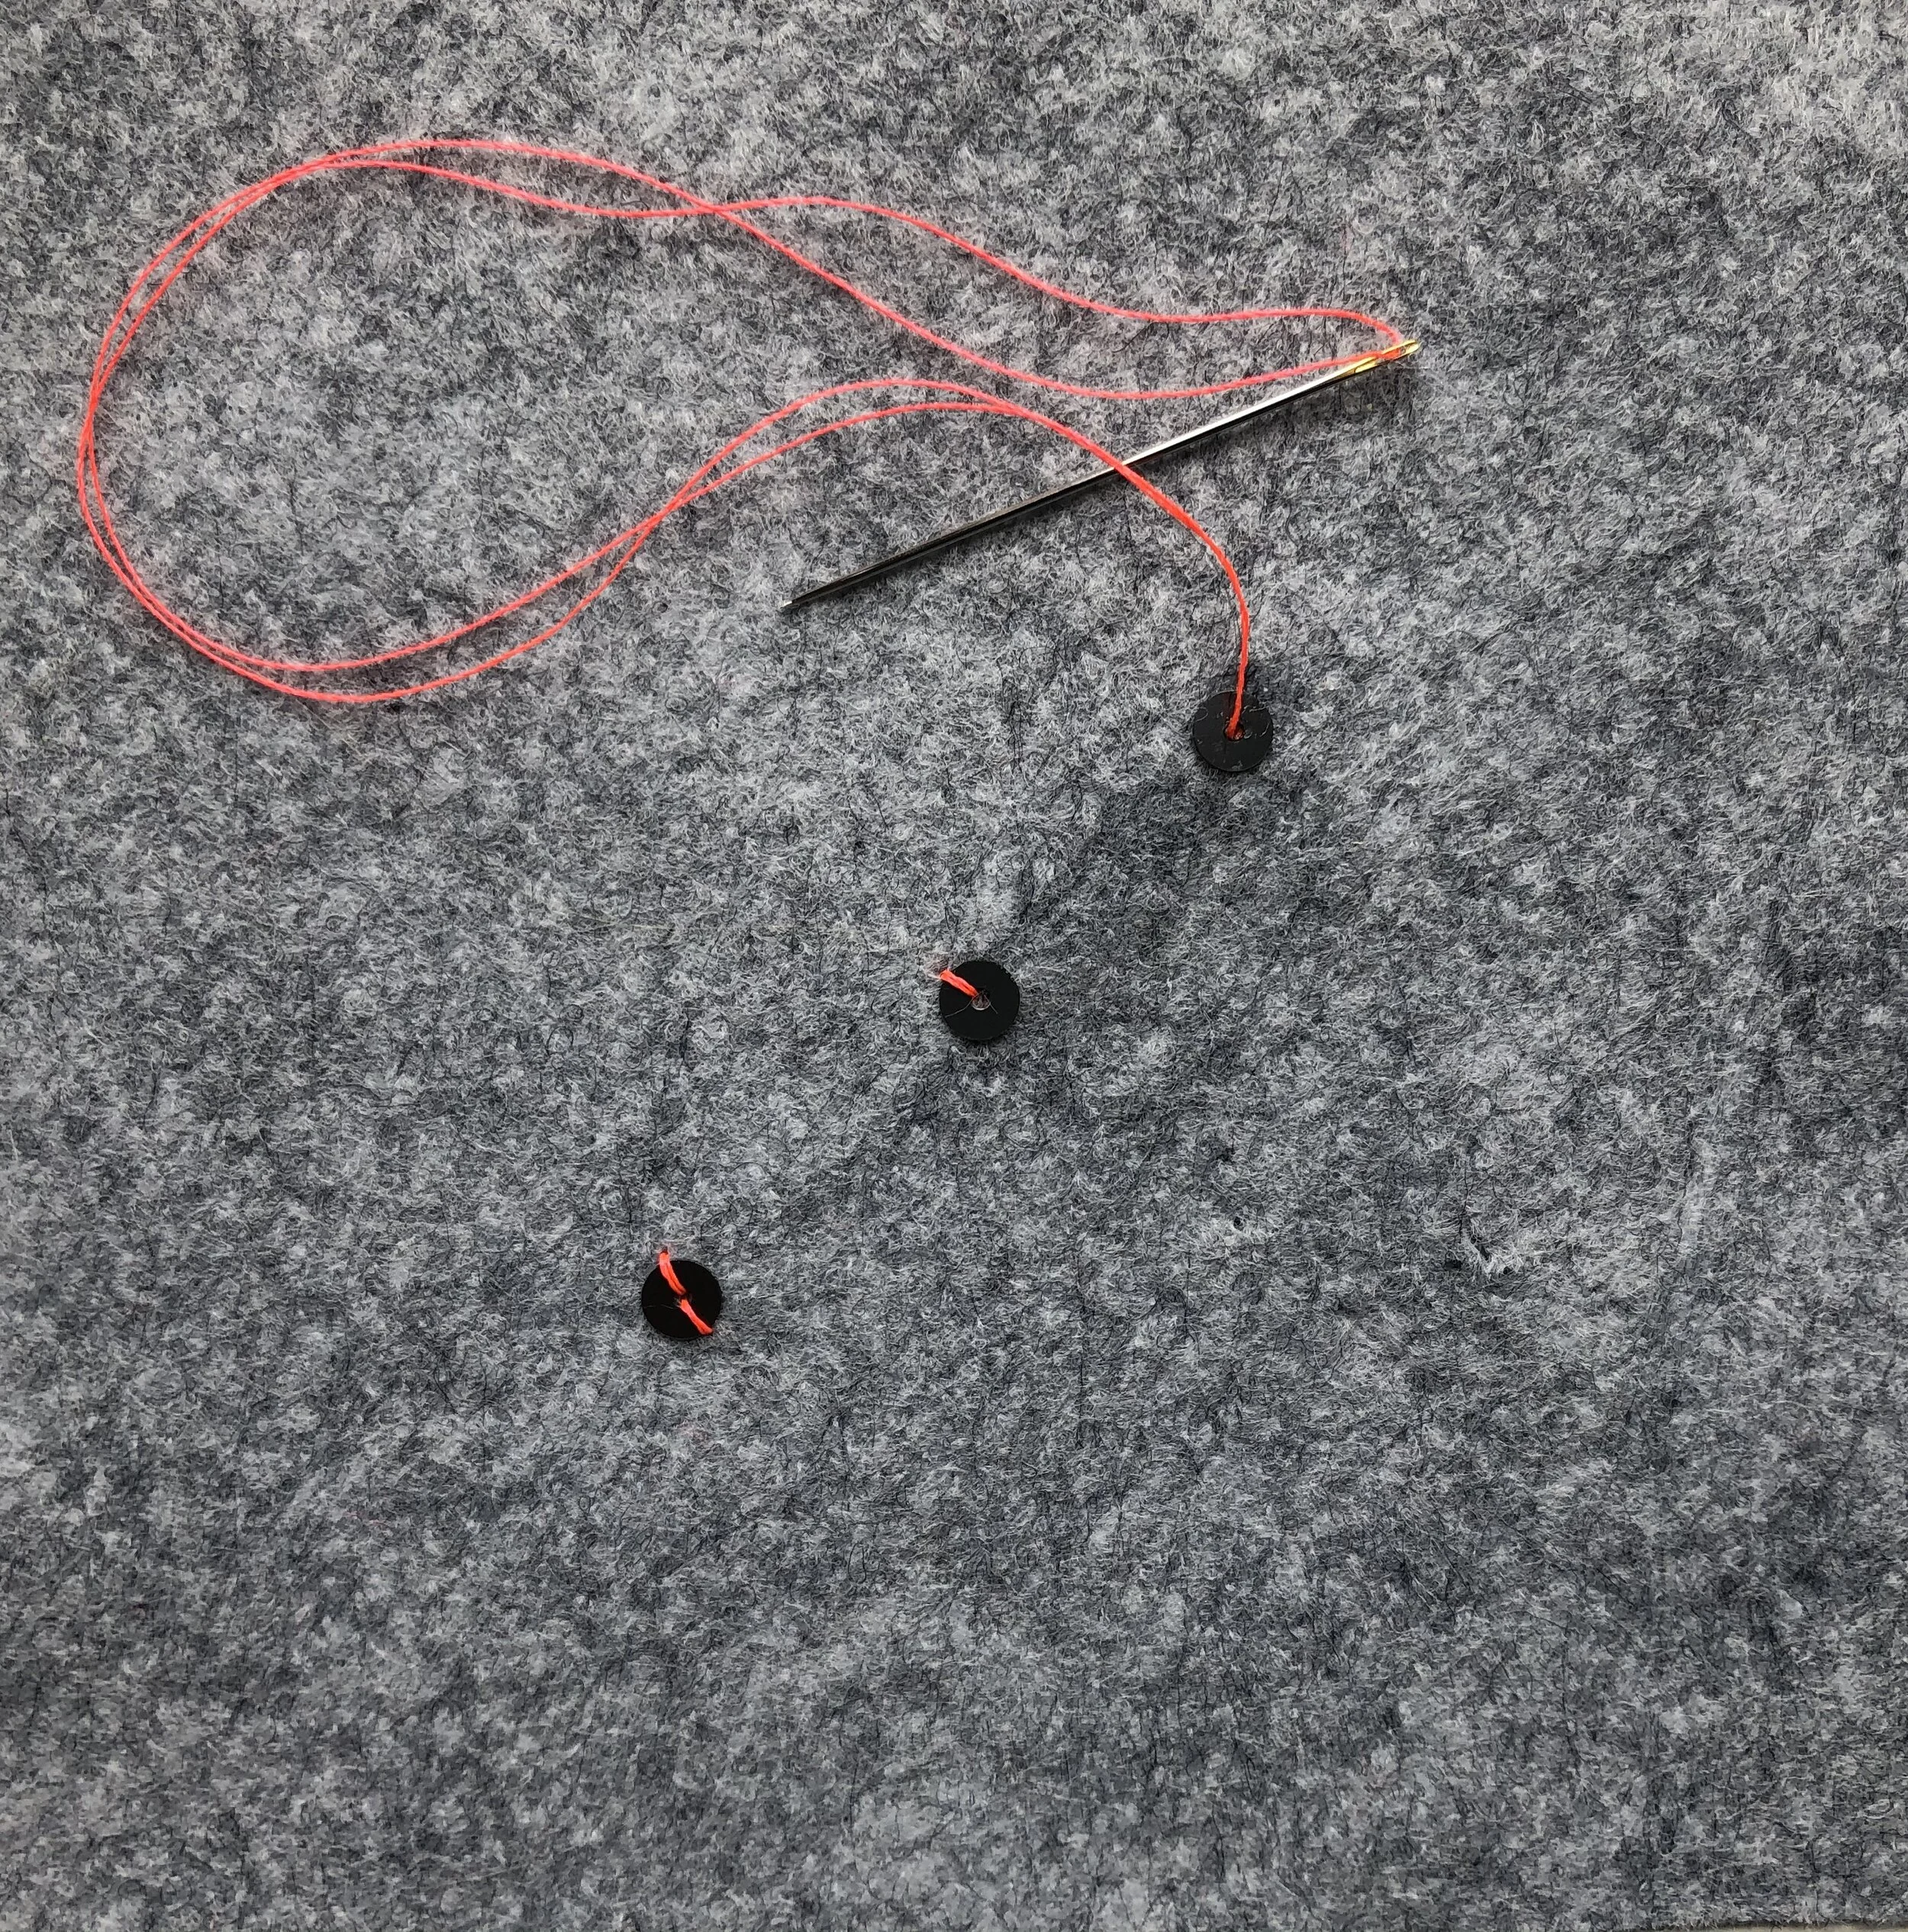
As you complete each sequin, you can knot the thread off at the back of your work or just carry it over to the next sequin.
PUTTING IT ALL TOGETHER

My new/old sweater!
Before applying the sequins to my sweater, I outlined each shape with contrasting thread. Then I began to apply the sequins in an overlapping manner following the outline and filling in as I went along.

Remove basting thread and move onto second row of outlining.

Third row of following the outline.

A few more sequins to fill in the center and it is done!

This repair was to an old sweater and one that I have hand-washed many times. However, if you plan to embellish a garment that you might need to dry clean or that you would like to more easily remove the sequins, you could sew each motif separately onto a pieces of organza or tulle as individual appliqués and then stitch them onto your garment.
I have worn the sweater several times since this repair and I have to say, I do love the sparkly casual feel. While it is a bit dressier than many of my other sweaters, it is now a weekly favorite.
If you enjoyed this tutorial, I do have a Pinterest Board where I frequently pin ideas for refashioning and embroidery. Check them out!
XO, Hilarie
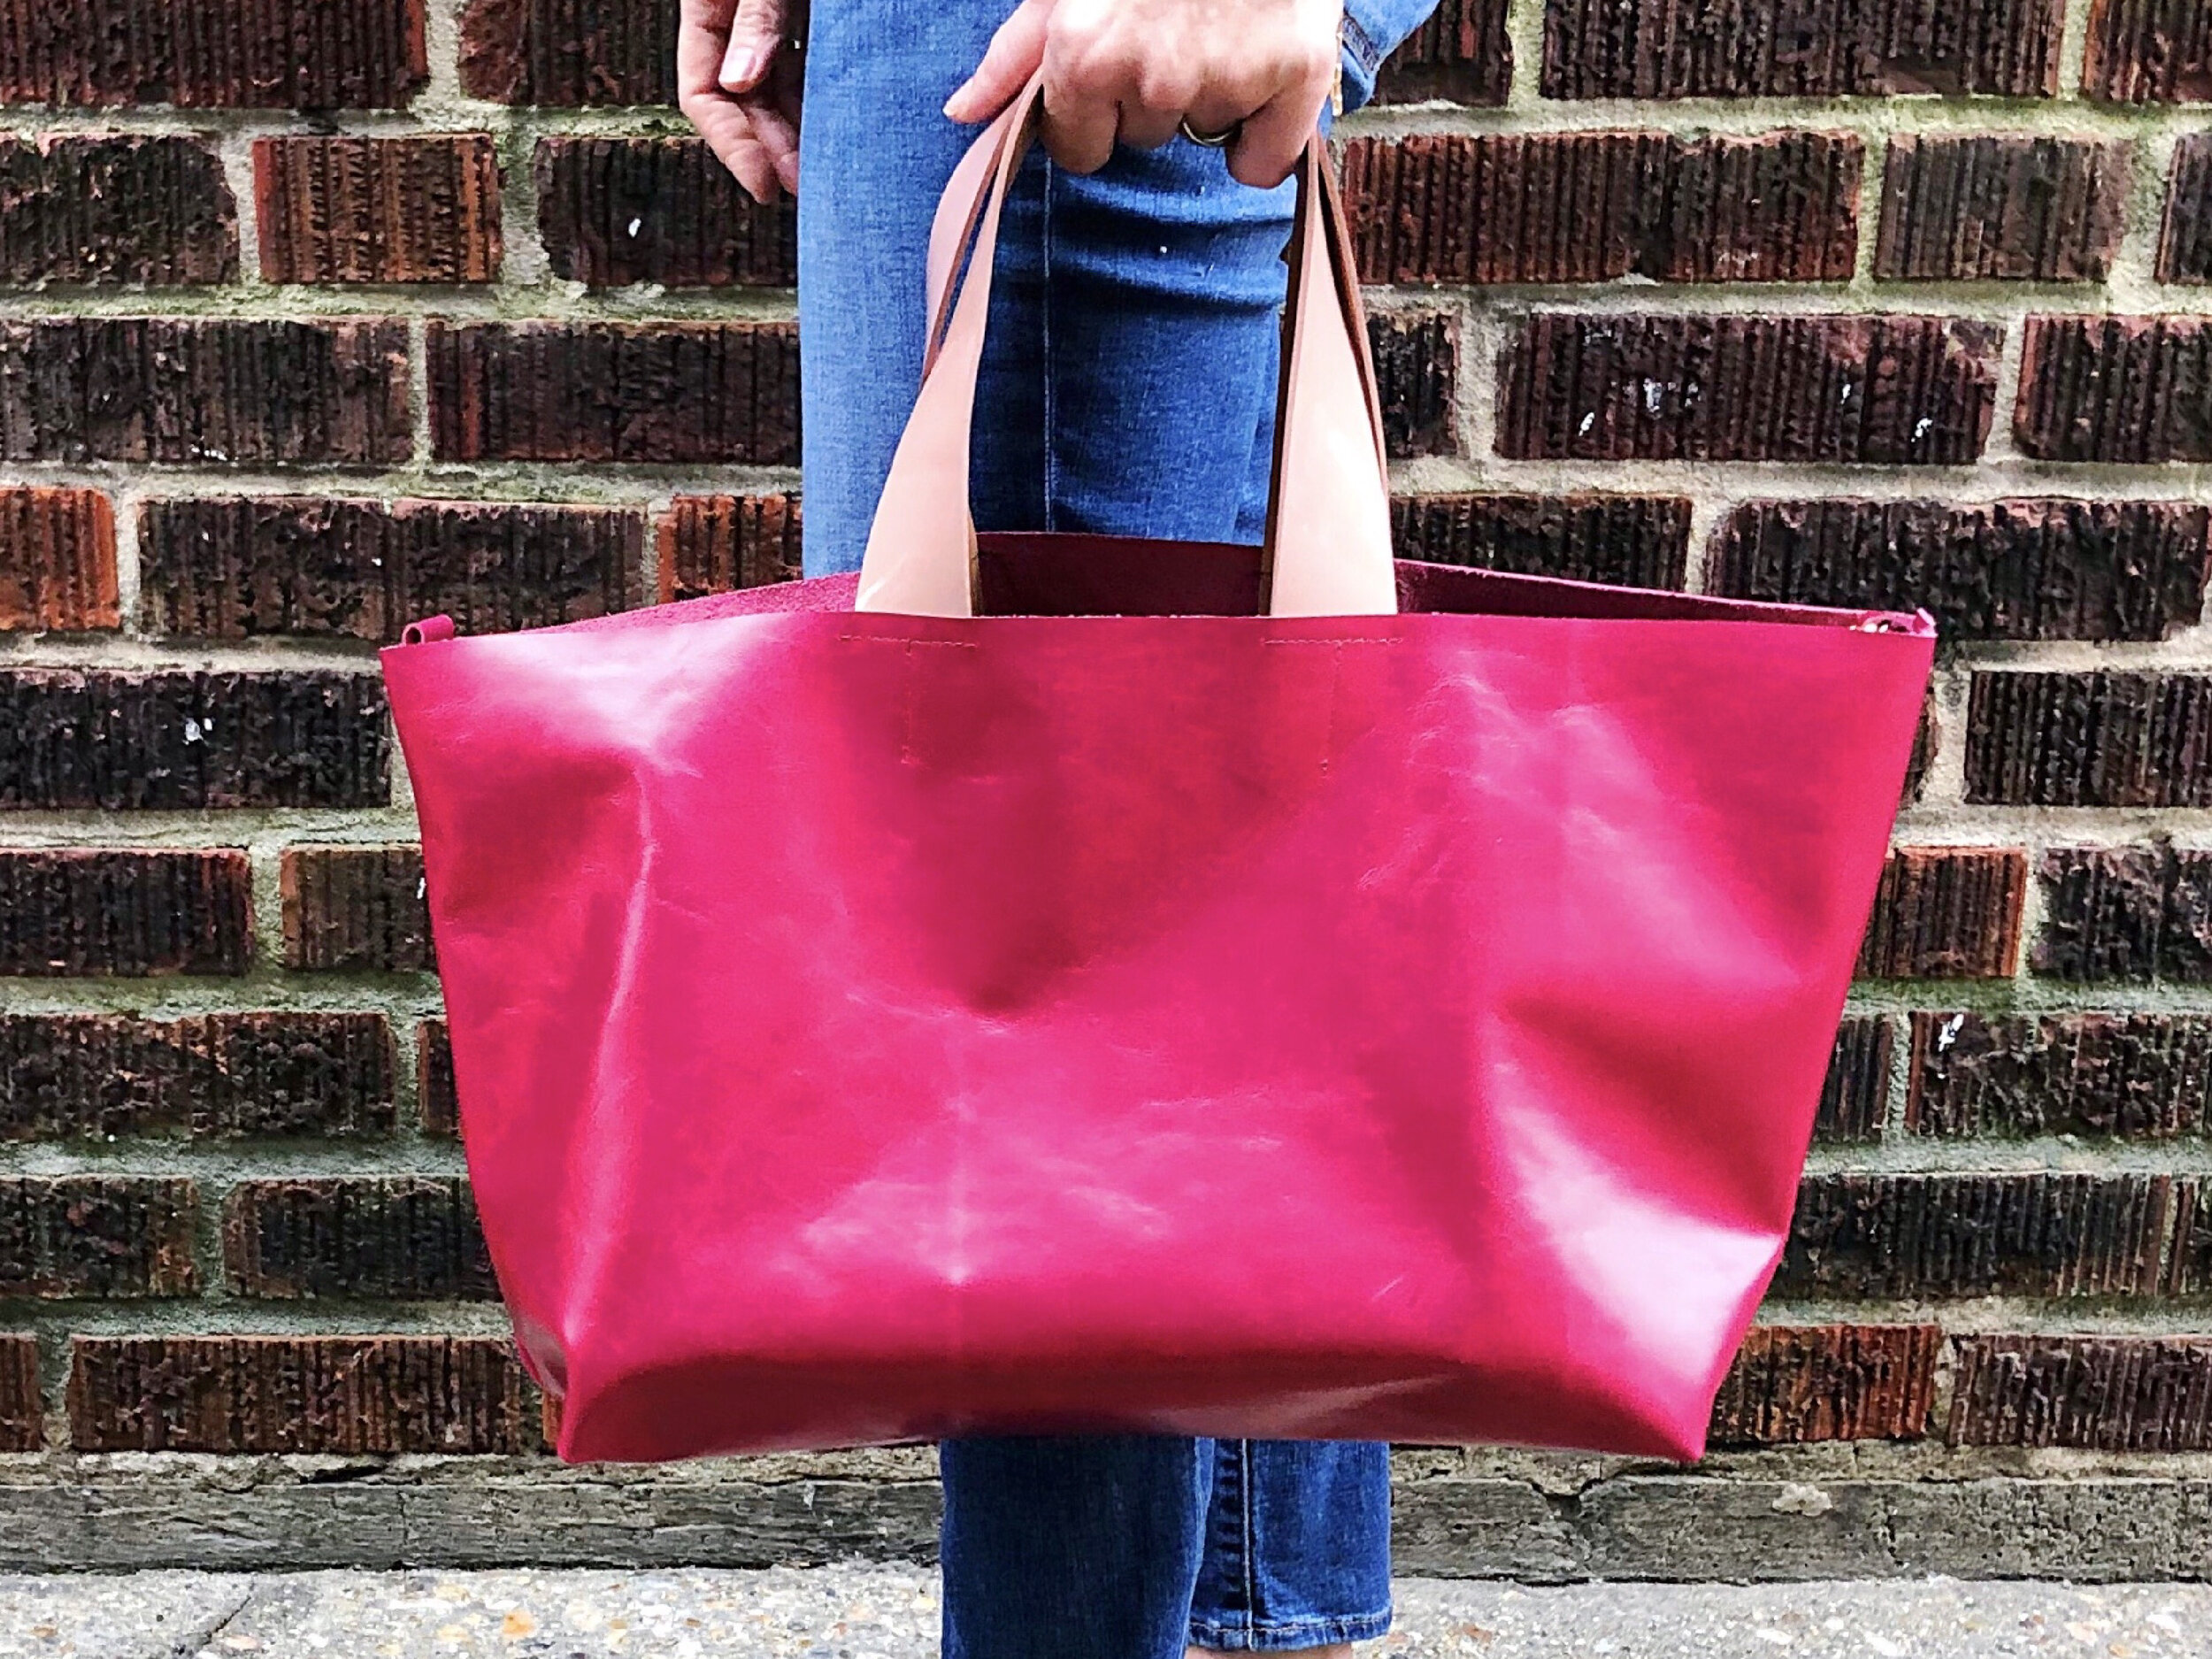
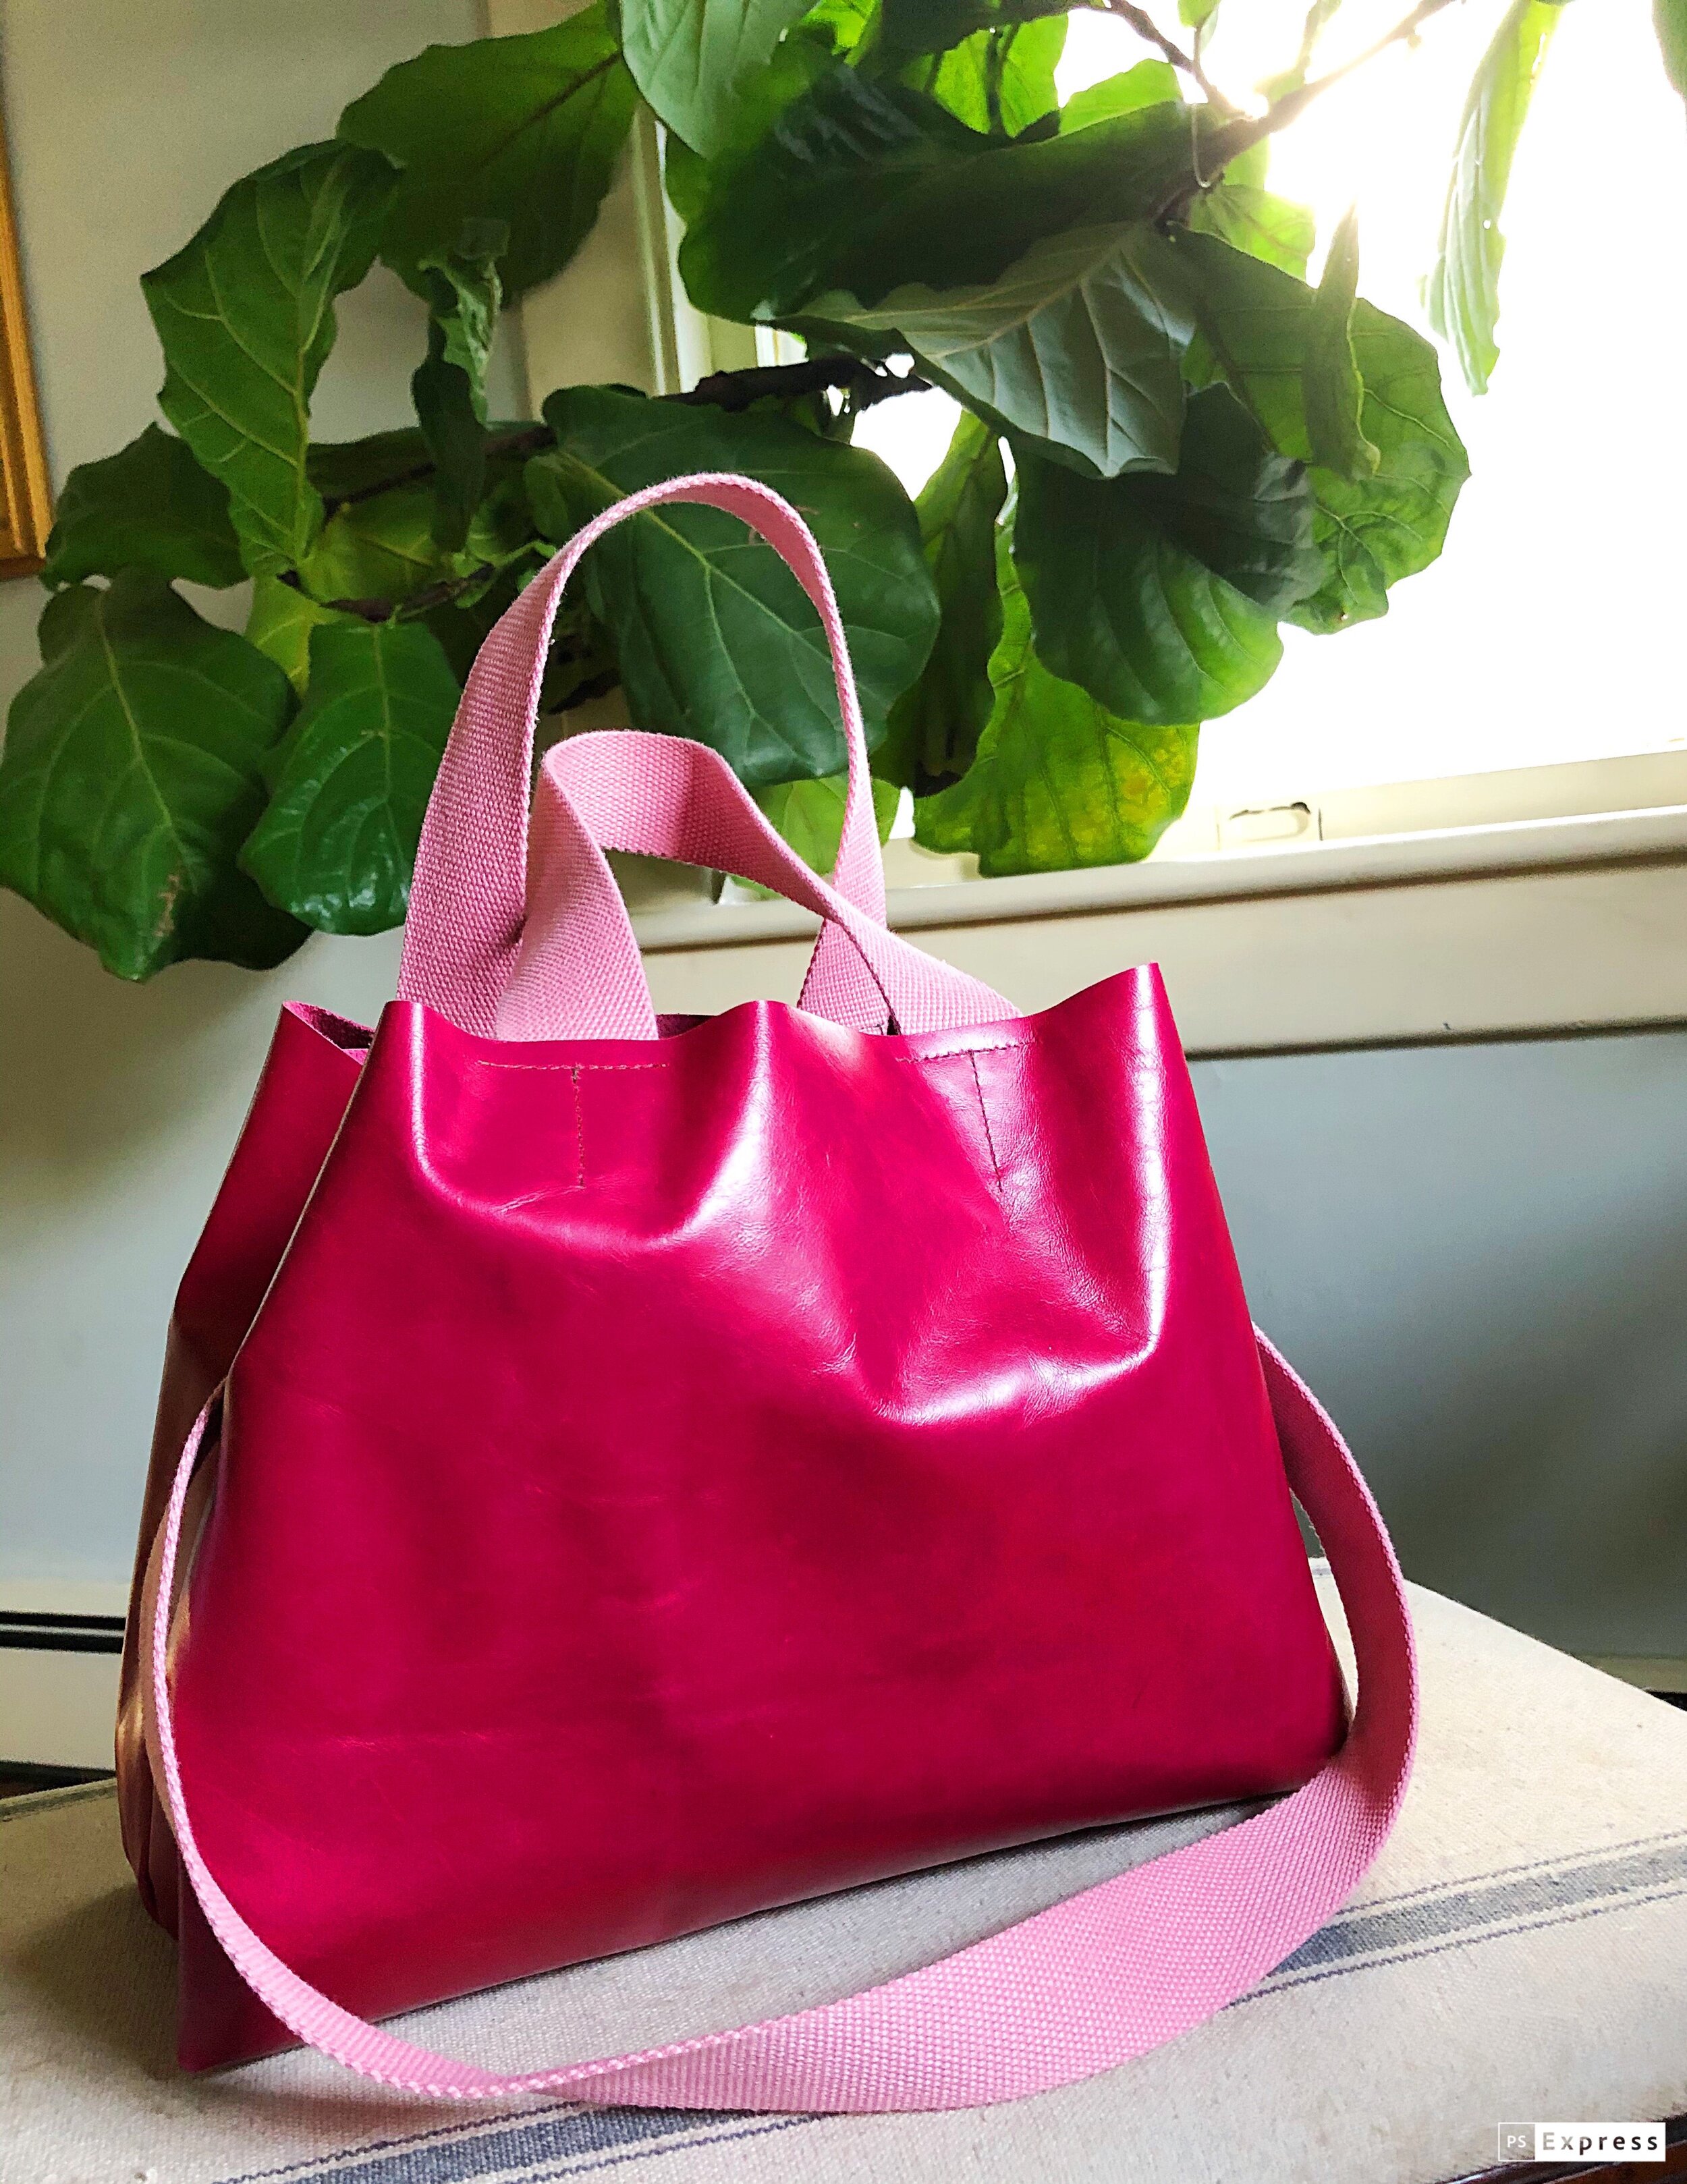
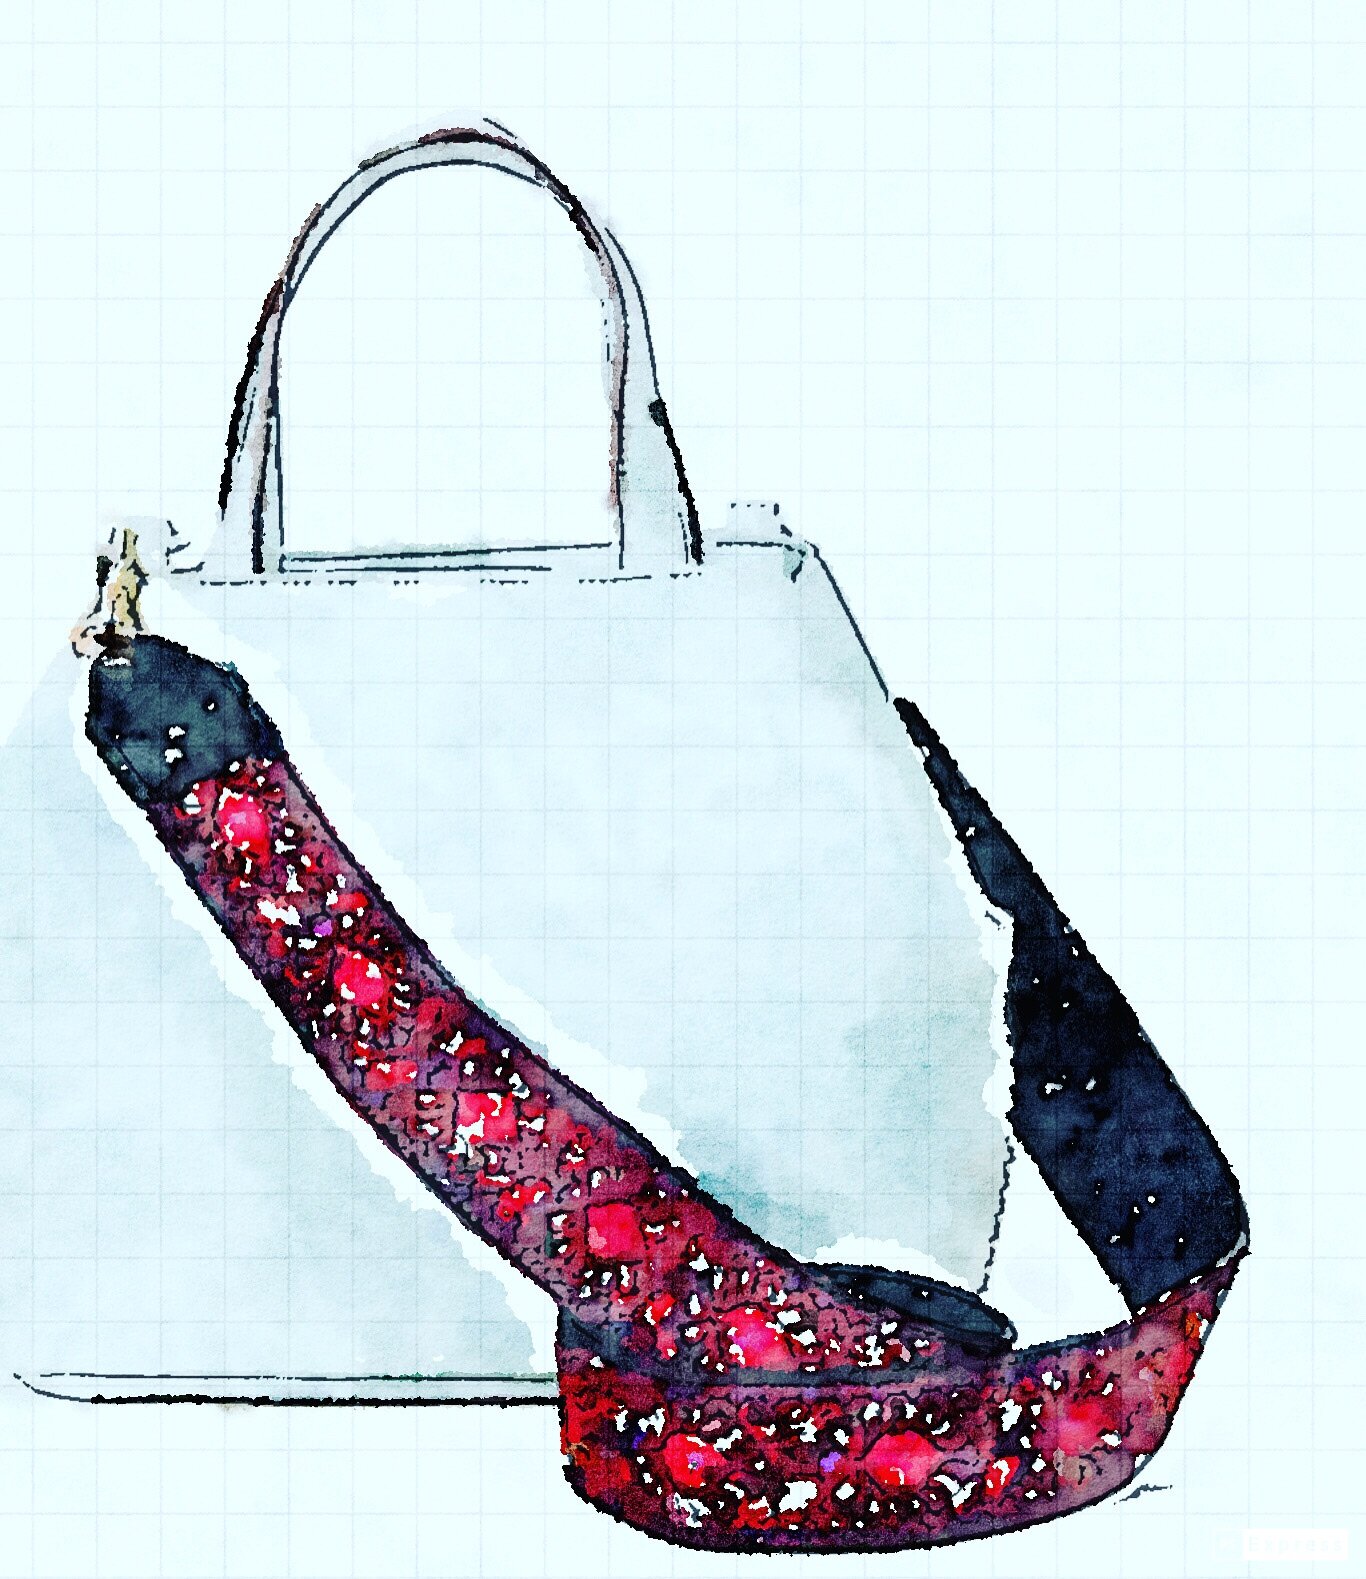
How to make a detachable shoulder strap for your bag
You have seen the new guitar type purse straps, right? While they weren’t really on my radar until early this year when I read an article in the NY Times. Since then, I haven’t been able to get this detachable strap out of my mind. I began to imagine the countless options and reinterpretations. Suddenly it seemed as if each bag I own needed to have its own wardrobe. And now, they do.
By now you have surely seen the new guitar type purse straps, right? They weren’t really on my radar until early this year when I read an article in the NY Times. Since then, I haven’t been able to get this detachable strap out of my mind. Suddenly it seemed as if each bag I own needed to have its own wardrobe. ( And now, they do. ) I began to imagine the countless options and reinterpretations.
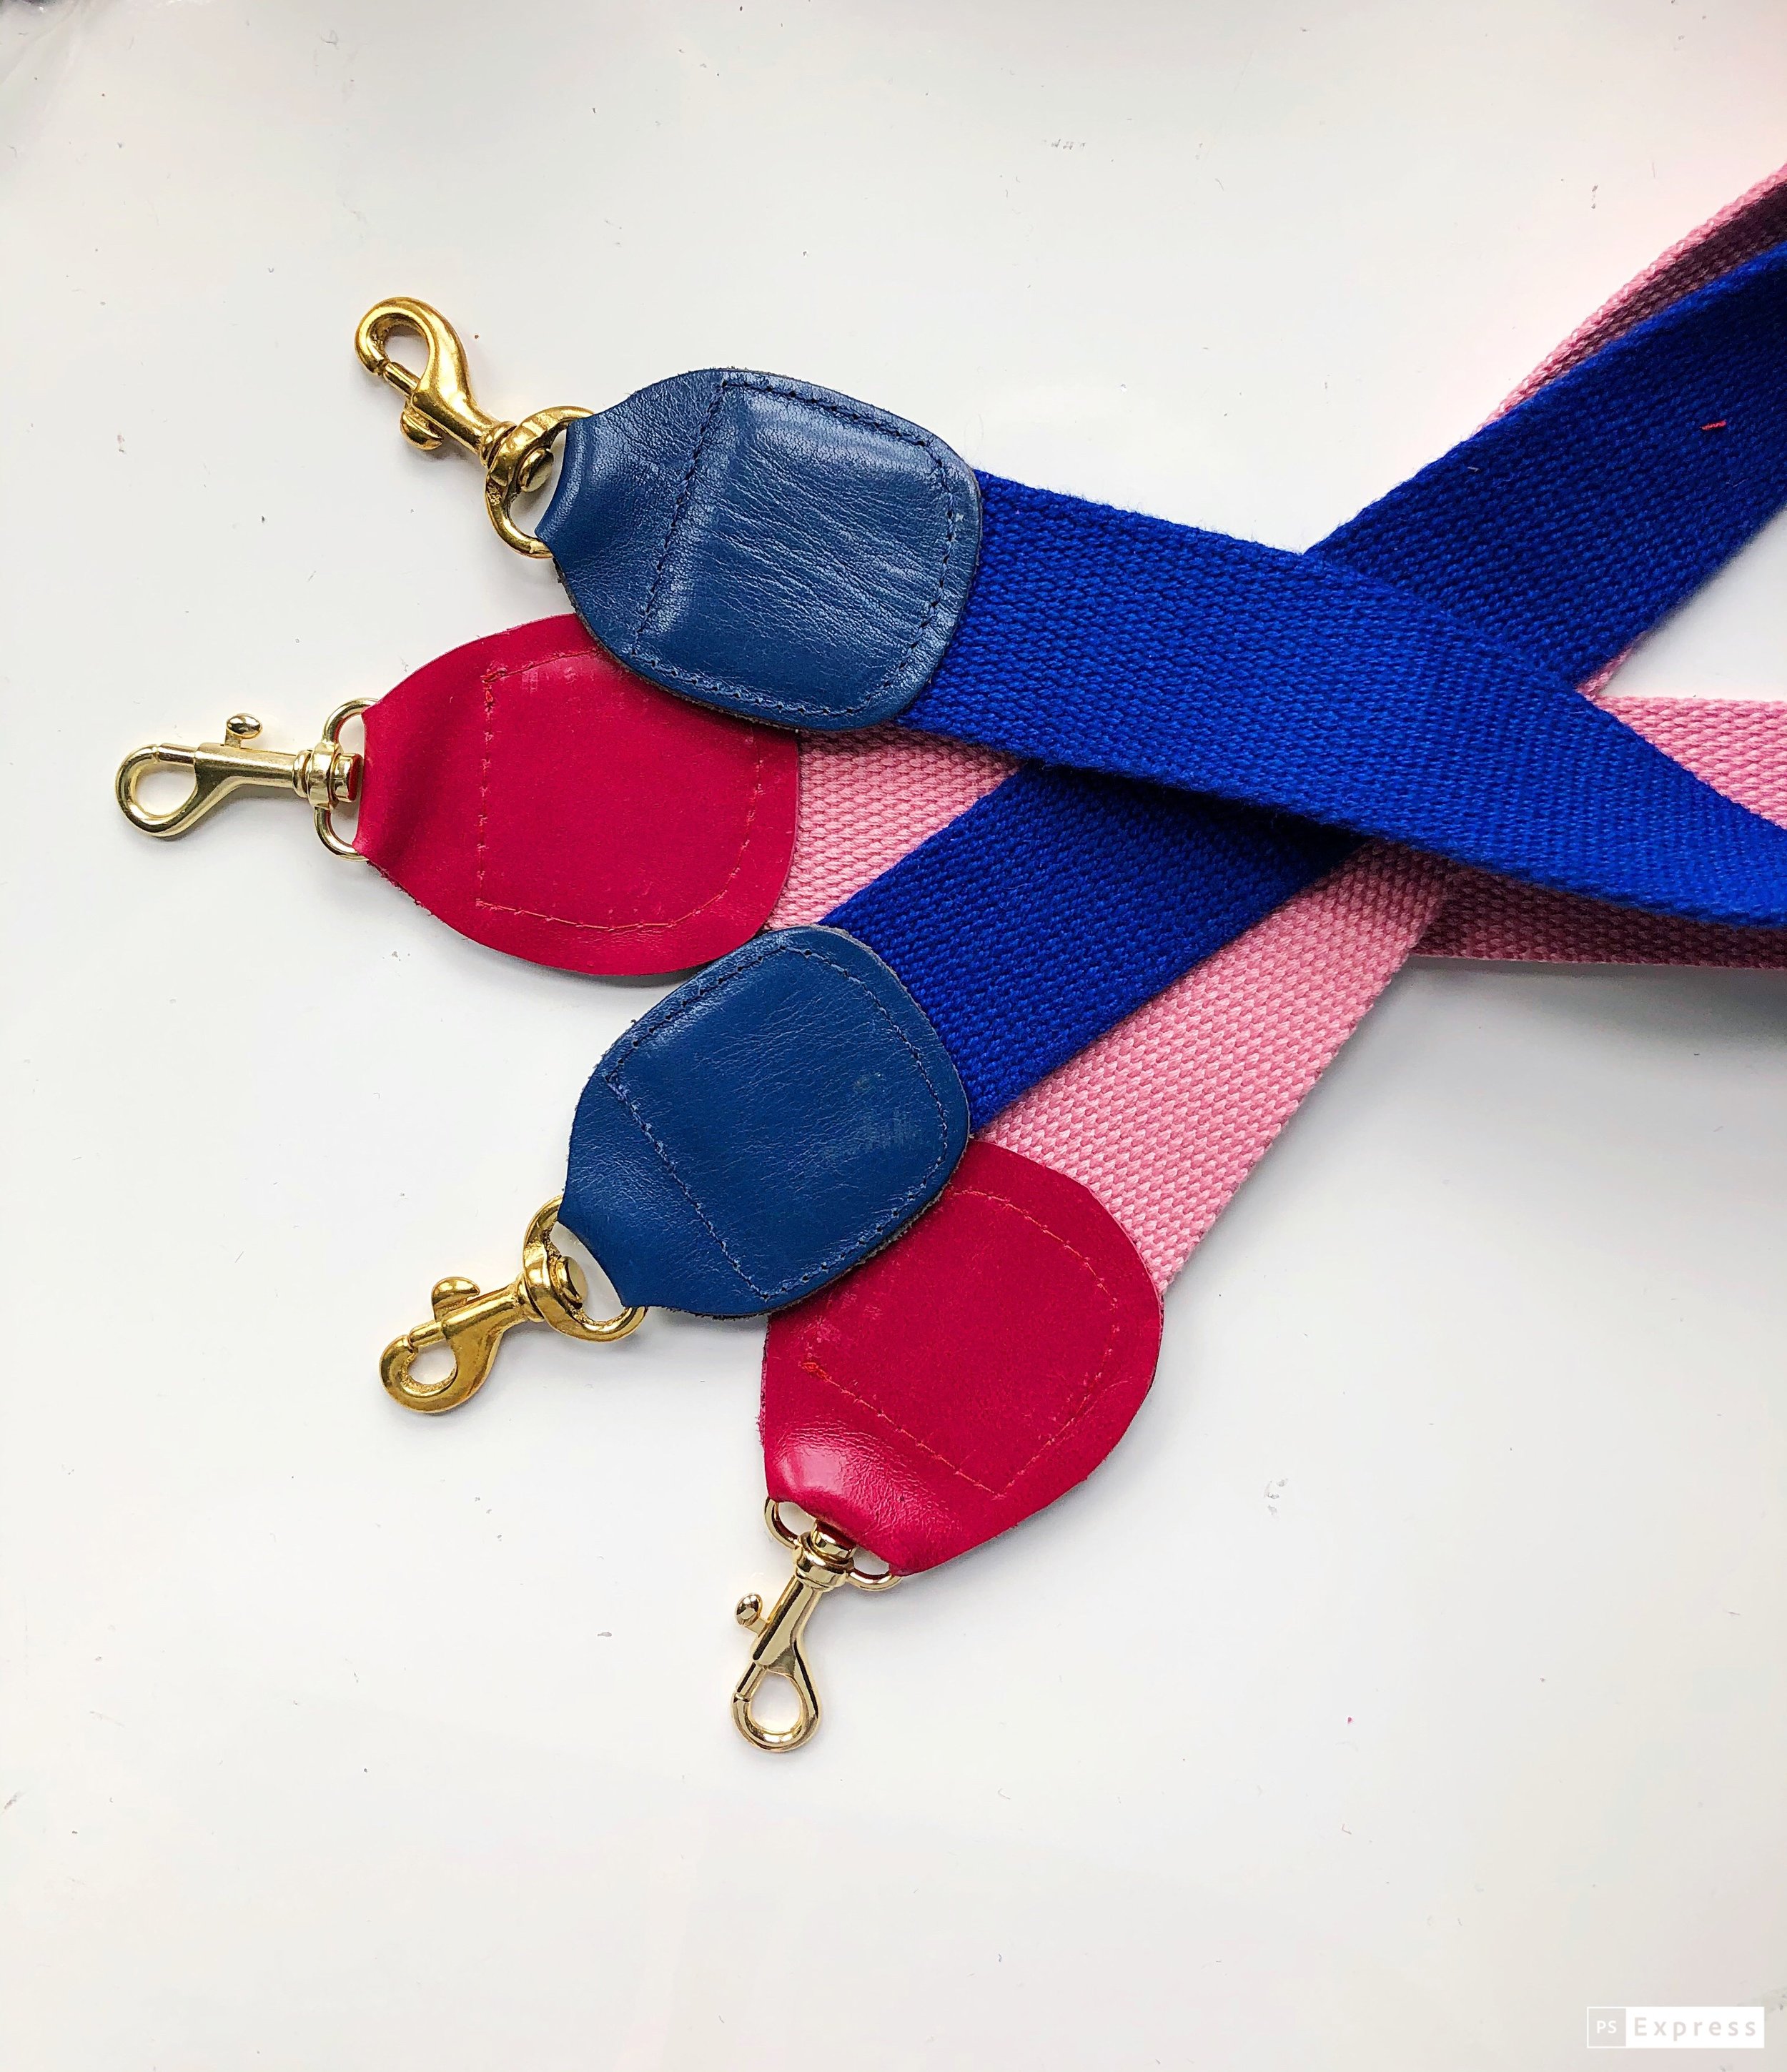
I love the fun of dressing up a bag with a different strap, and watching the transformation. These shoulder straps allows you to instantly add a personal touch to your bag. The first bag that I tried to pair it with was a crossbody style. The new contrasting strap made it so much more fun and interesting. Then I tried it with a belt bag- now that “belt” bag has three different options. It can be worn on the belt, with a crossbody strap and now, it has a new leather top handle. Same bag, three carrying options. Friends, isn’t that reason enough to pull out your sewing machine?
Today I am going to share with you at a shoulder strap tutorial so that you too can make a detachable shoulder strap that speaks to you, fits you and stands apart from the rest of your bag.
The Ultimate Hook-up: Make a detachable shoulder strap for your bag

HOW TO SEW A DETACHABLE PURSE STRAP
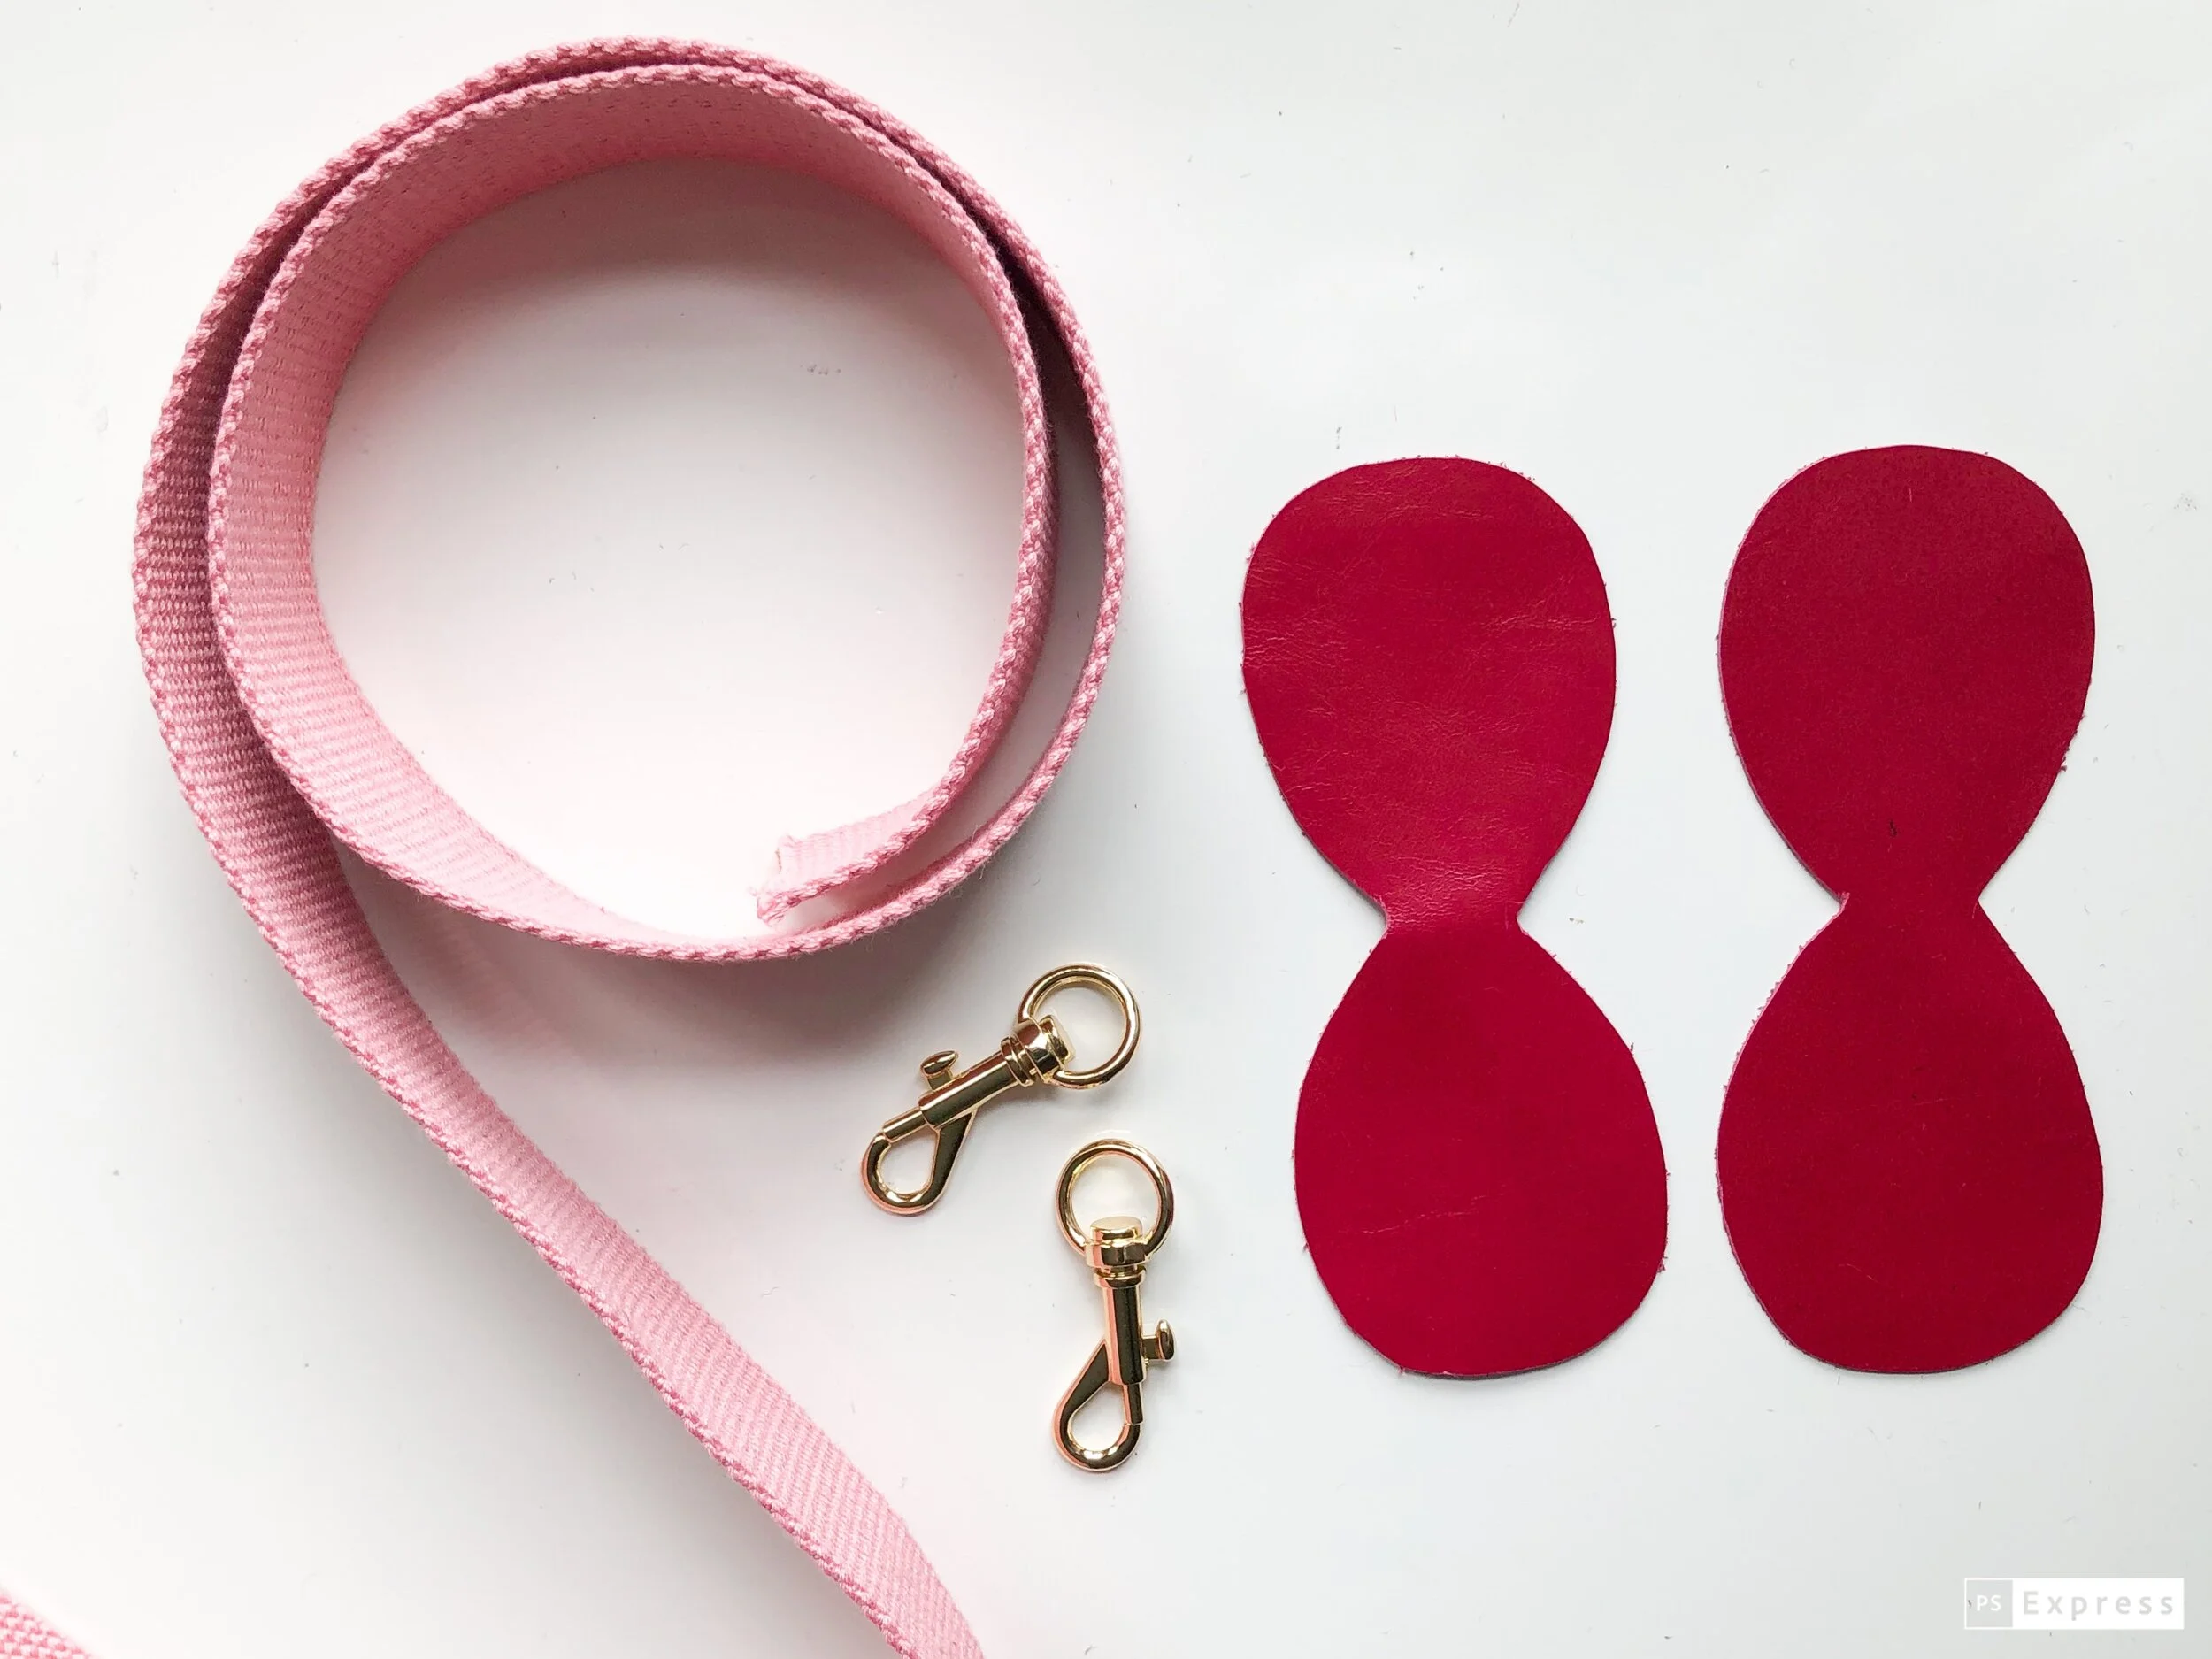
MATERIALS AND SUPPLIES
Sewing Machine with a walking foot
Leather scraps, (8 inch square should be enough)
Two 3/8” x 1 1/2” Swivel Snap Hook for the rounded cap; Two 1 1/2” x 1 3/4” for the squared off version.
1 1/4 Yards of Cotton Webbing Mine is 38mm (roughly 1.5”) wide and 44” long
Mid-weight polyester thread to match leather
Scissors or Rotary cutter
Rubber Cement
Chalk or water soluble fabric marking pen
SIZE
Finished dimensions are approximately: 2”x 47”
NOTES
See previous blog posts on sewing with leather, determining the best strap length and using an adjustable slider .
The leather used in this tutorial is from Leather, Suede, Skins, Inc. in NYC
For best results when sewing with leather, the stitch length should be set to about 7-10 stitches per inch depending on the thickness of the leather. Stitches that are too short make too many holes in the leather which decreases stability.
You can adjust the length of the stitch by testing on a scrap of leather. Does the leather feed evenly? Are there any skipped stitches? How is the tension? Are both the top and bottom threads flat and even?

PATTERN INSTRUCTIONS
Please read through the entire pattern before beginning your bag.
THE PATTERN
If you haven’t used a PDF Pattern before, here is a quick tutorial on printing and assembly: PDF Pattern
For more information on working with patterns, see pages 14-18 in my book, Sew Bags: The Practical
Guide to Making Purses, Totes, Clutches & More; 13 Skill-Building Projects C&T Publishing, 2019
PREPARE
There are two end cap styles to choose from. Please be sure that you select the appropriate sized hardware and webbing to fit. For this tutorial, I am using the more rounded off shape to cap my strap.
Trace the End Cap pattern onto the back side of the leather piece. Repeat for the second piece.

CUT
Carefully cut around the traced line.
Measure and cut the webbing to your desired length. Here is a recent article that may help guide you- or you can just measure a strap that you already own and that fits comfortably.
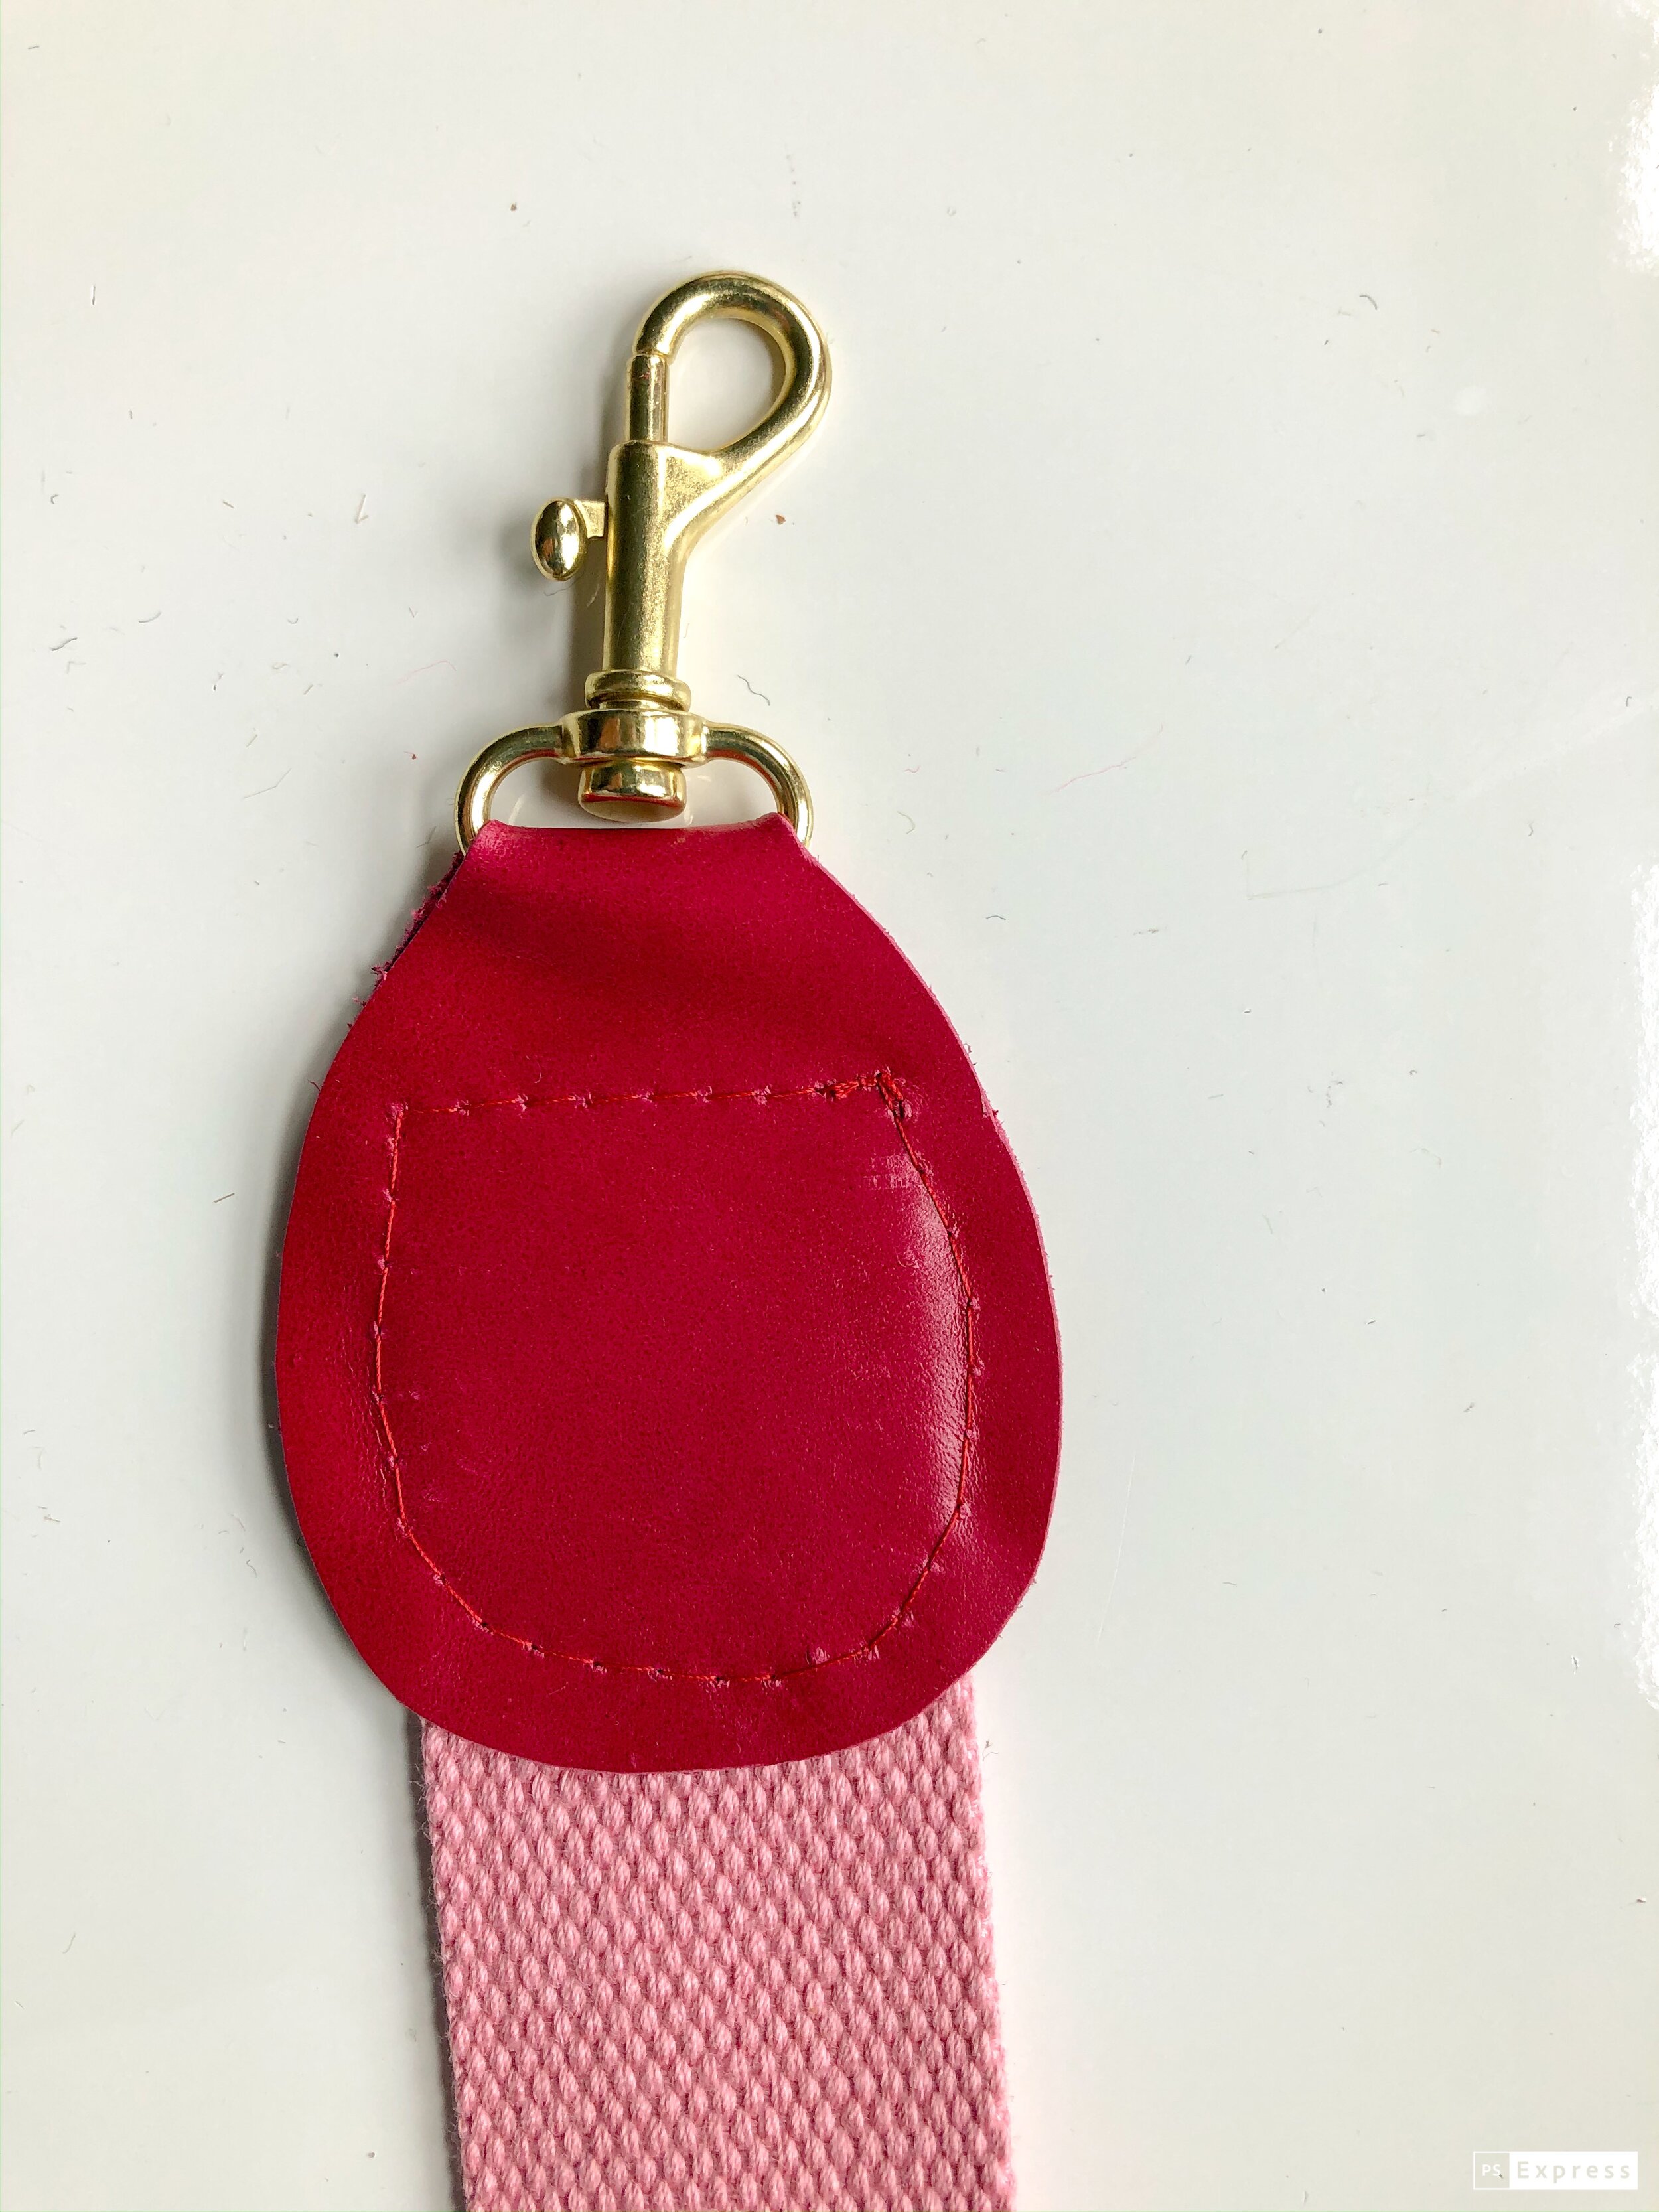
HARDWARE
Slide the leather piece into the bottom ring of the snap hook. I find it is easier to fold the leather in half, lengthwise (like a hotdog) and thread it through the ring. Once it is centered, unfold and flatten.

In a well- ventilated area, apply a generous glop of rubber cement to the center of the inside of the leather. Let it sit a moment to get tacky. Place the end of the webbed strap centered on the leather- making sure that the webbing is completely inside the leather. Press to help the rubber cement to adhere.

Add another bit of rubber cement to the top of the strap and press the leather to seal. Allow to dry for a few minutes.

Repeat for the opposite side of the strap end.
MARK
Take a piece of chalk or a water soluble pen and mark the stitching line on the outside of the leather.
SEW
Edgestitch around the end cap. You will be sewing a box that is about one and a half inches square. If you would prefer, feel free to round out your stitching instead (like I did) by just sewing 1/4” from the edge of the leather. It is easier to sew a box shape and get it right the first time. Whichever shape you choose, just try to sew slowly. You can even “walk” your machine if you need to.
TRIM THREADS
Instead of back stitching, I generally recommend leaving long tails and hand knotting the ends, as backstitching can cut the leather. To hide the tails, tie in a double knot as close to the stitch as possible. Thread both ends of the thread onto a hand sewing needle. Insert the needle into the back of the strap of the underside of the seam. Pull through. Tie once again and snip.
Pictures of this method and more details are available here.
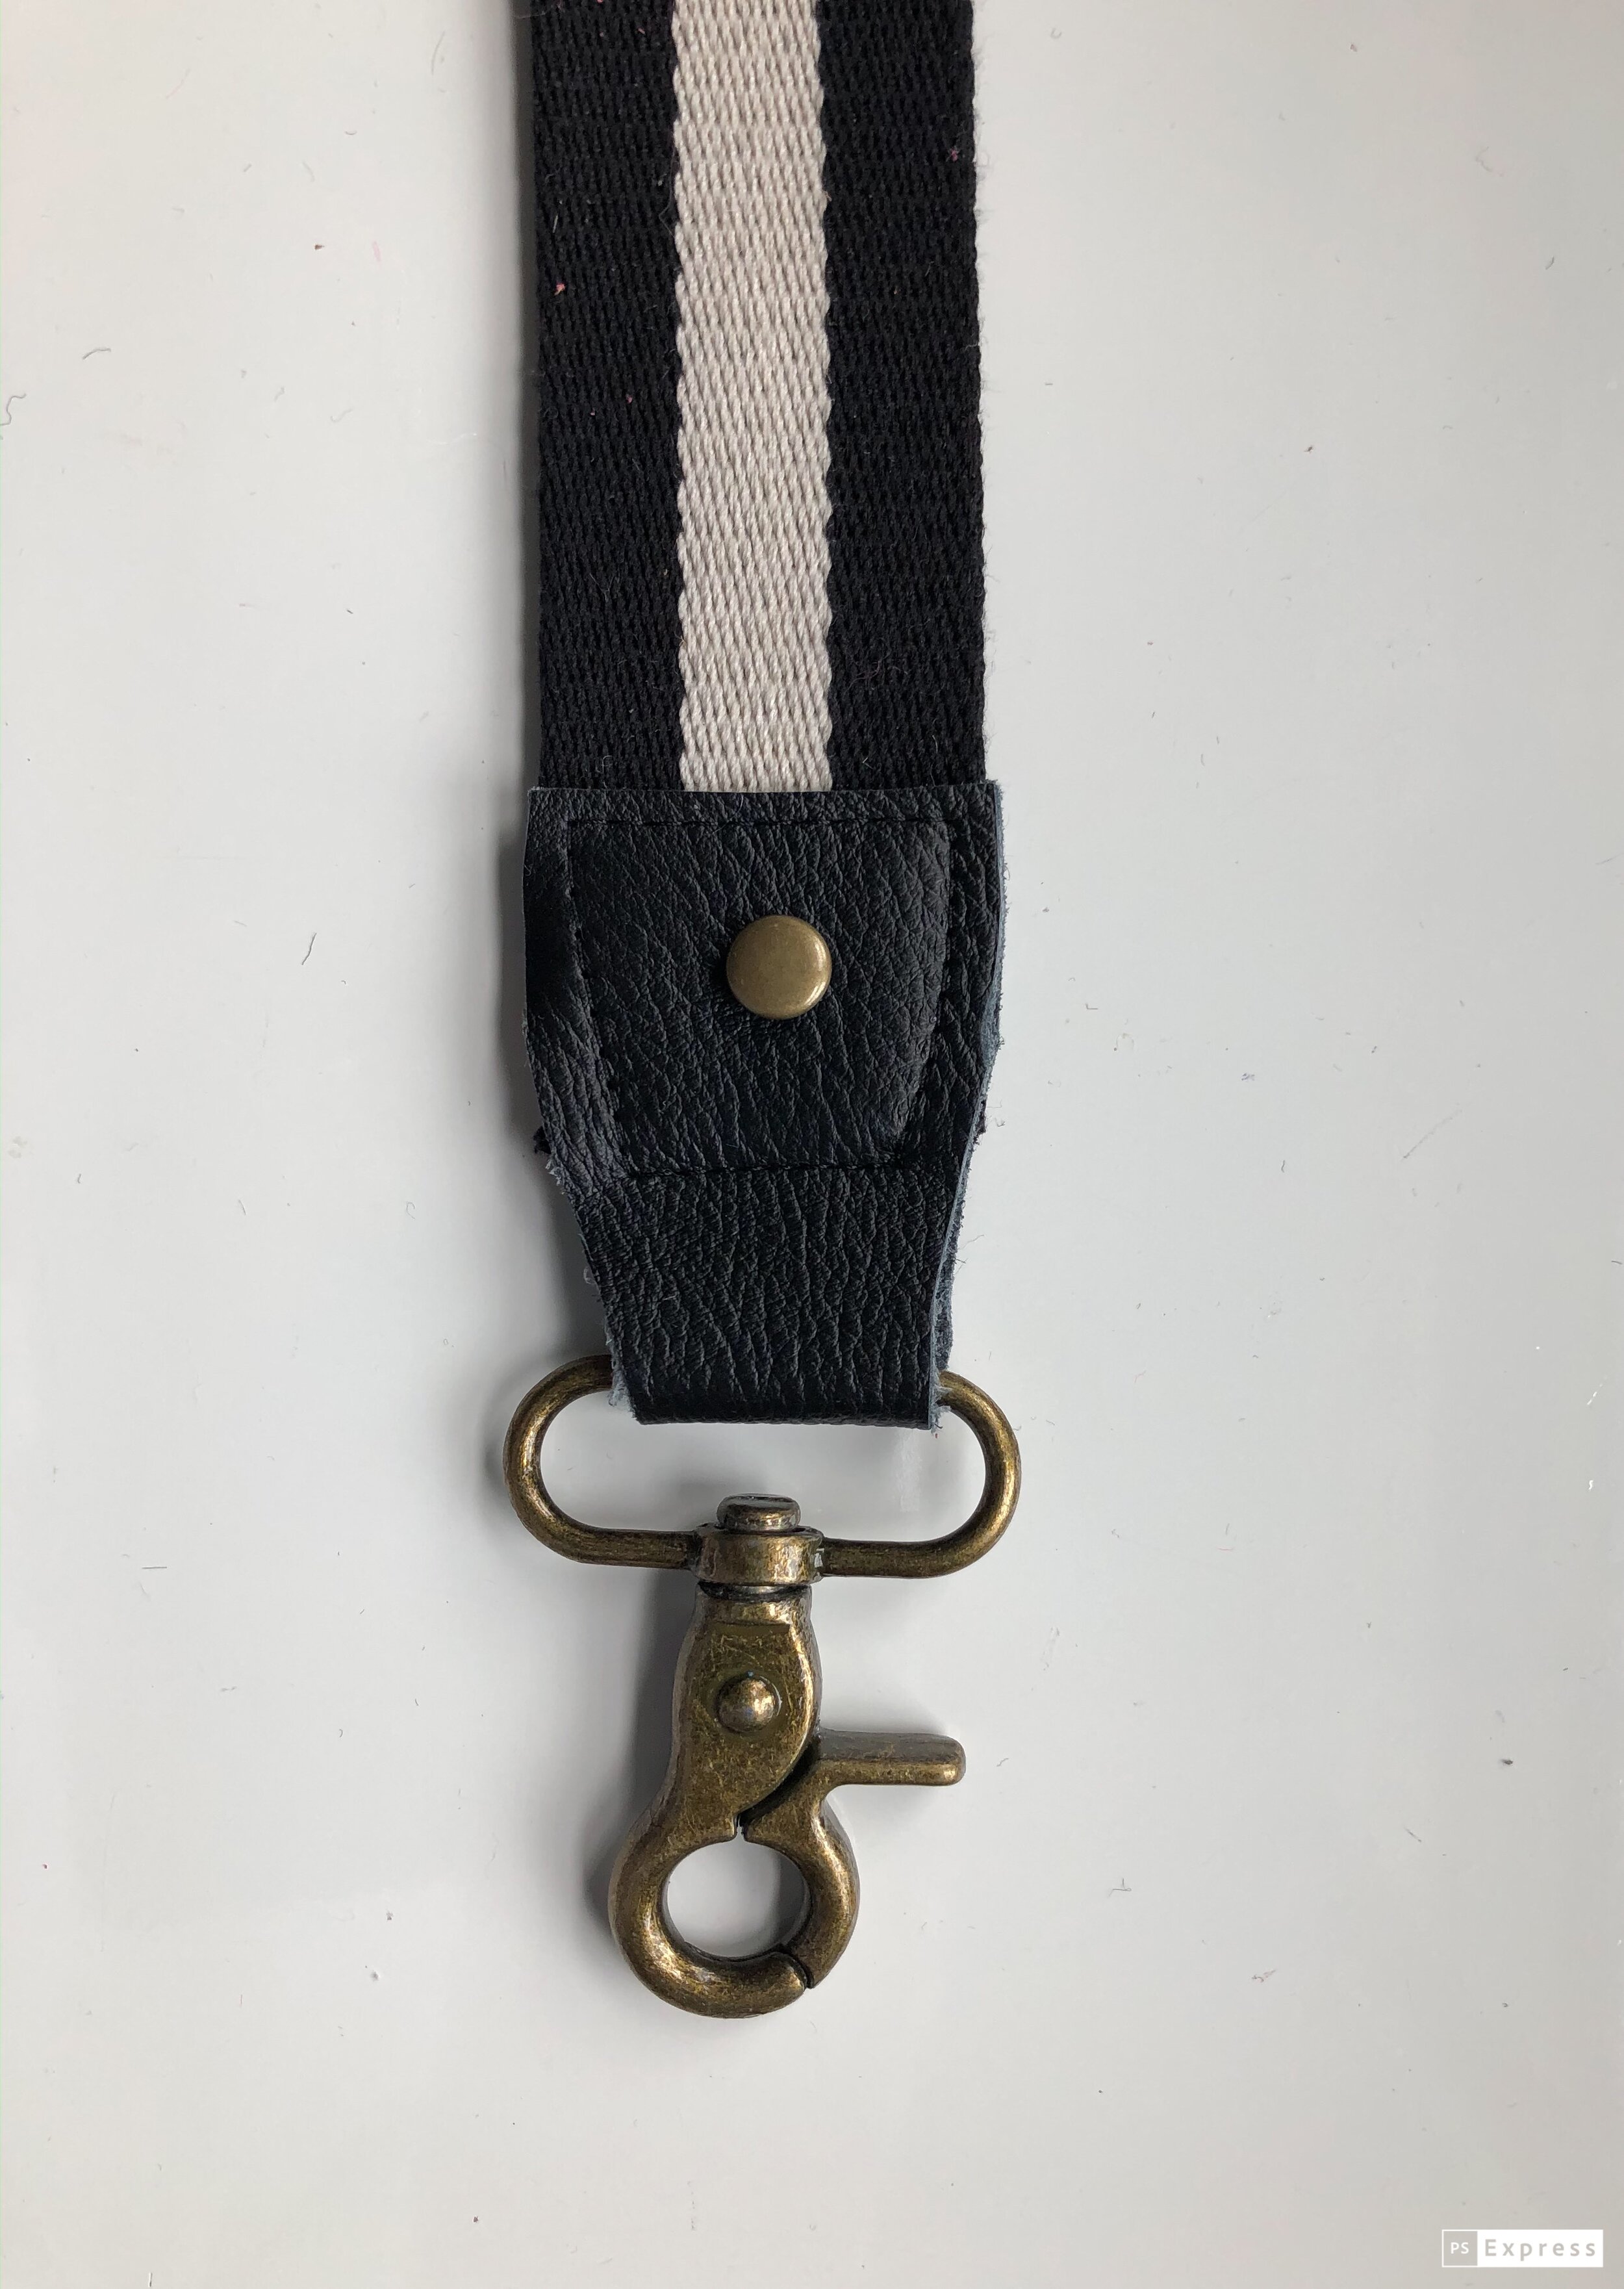
I added a rivet to this strap to both dress it up and to provide some additional reinforcement.

My next strap is all laid out and ready to go!
This accessory strap can be used with any bag that has a removable strap. Simply unhook the original, and swap it out for the new and improved.
With this fully customized option, you can breathe new life into old bags. Whether you wear it messenger or standard shoulder style, it is sure to give each outfit some unique style appeal. How will you wear yours? Please share using the hashtags #sewbags #sewbagsthebook #littlestitchstudio
For more bag patterns and sewing techniques, be sure to check out my new book! Sew Bags: The Practical Guide to Making Purses, Totes, Clutches & More; 13 Skill-Building Projects
XOXO, Hilarie

Tips and Tricks for Sewing with leather
There is just nothing like sewing or crafting with beautiful materials. Chief among them for me is leather.
One of the reasons that I was late to release a pattern that requires leather is that for many people, it is tricky to acquire. It is not like you can stop by your local fabric shop and pick up a yard or two. Additionally, while leather is not difficult to sew, you do have to have a few extras available to make it turn out looking fantastic.
There is just nothing like sewing or crafting with beautiful materials. Chief among them for me is leather.
One of the reasons that I was late to release a pattern that requires leather is that for many people, it is tricky to acquire. It is not like you can stop by your local fabric shop and pick up a yard or two. Additionally, while leather is not difficult to sew, you do have to have a few extras available to make it turn out looking fantastic. When I wrote my book, one thing that I really wanted to stress was to not feel the urge to go out and purchase everything that you think you “might” need. As it never really ends- I promise! 45 years in and each time I learn a new technique or take interest in some new esoteric path, the cash flow woes begin! Which brings me back to the point, “Do as I say, not as I do” :)
Life is funny sometimes! Through complete serendipity, and the power of Instagram, I have made a new friend, Faina, who happens to own a leather shop! Leather, Suede, Skins, Inc. in NYC. She so generously shared some of her gorgeous leather with me to make the Poppy Convertible Tote and tutorial. But more than that, you now have a place to shop for leather and an expert to consult! Our hope is that together, we can show you how easy and fun it is to sew with leather.
There are a few supplies that you will need to get started. While some are truly necessary to achieve the correct finished look and make the process so much more enjoyable! There are a few others that are more in the “nice to have” category. I’ll share both with you.
MY FAVORITE LEATHER SEWING TOOLS
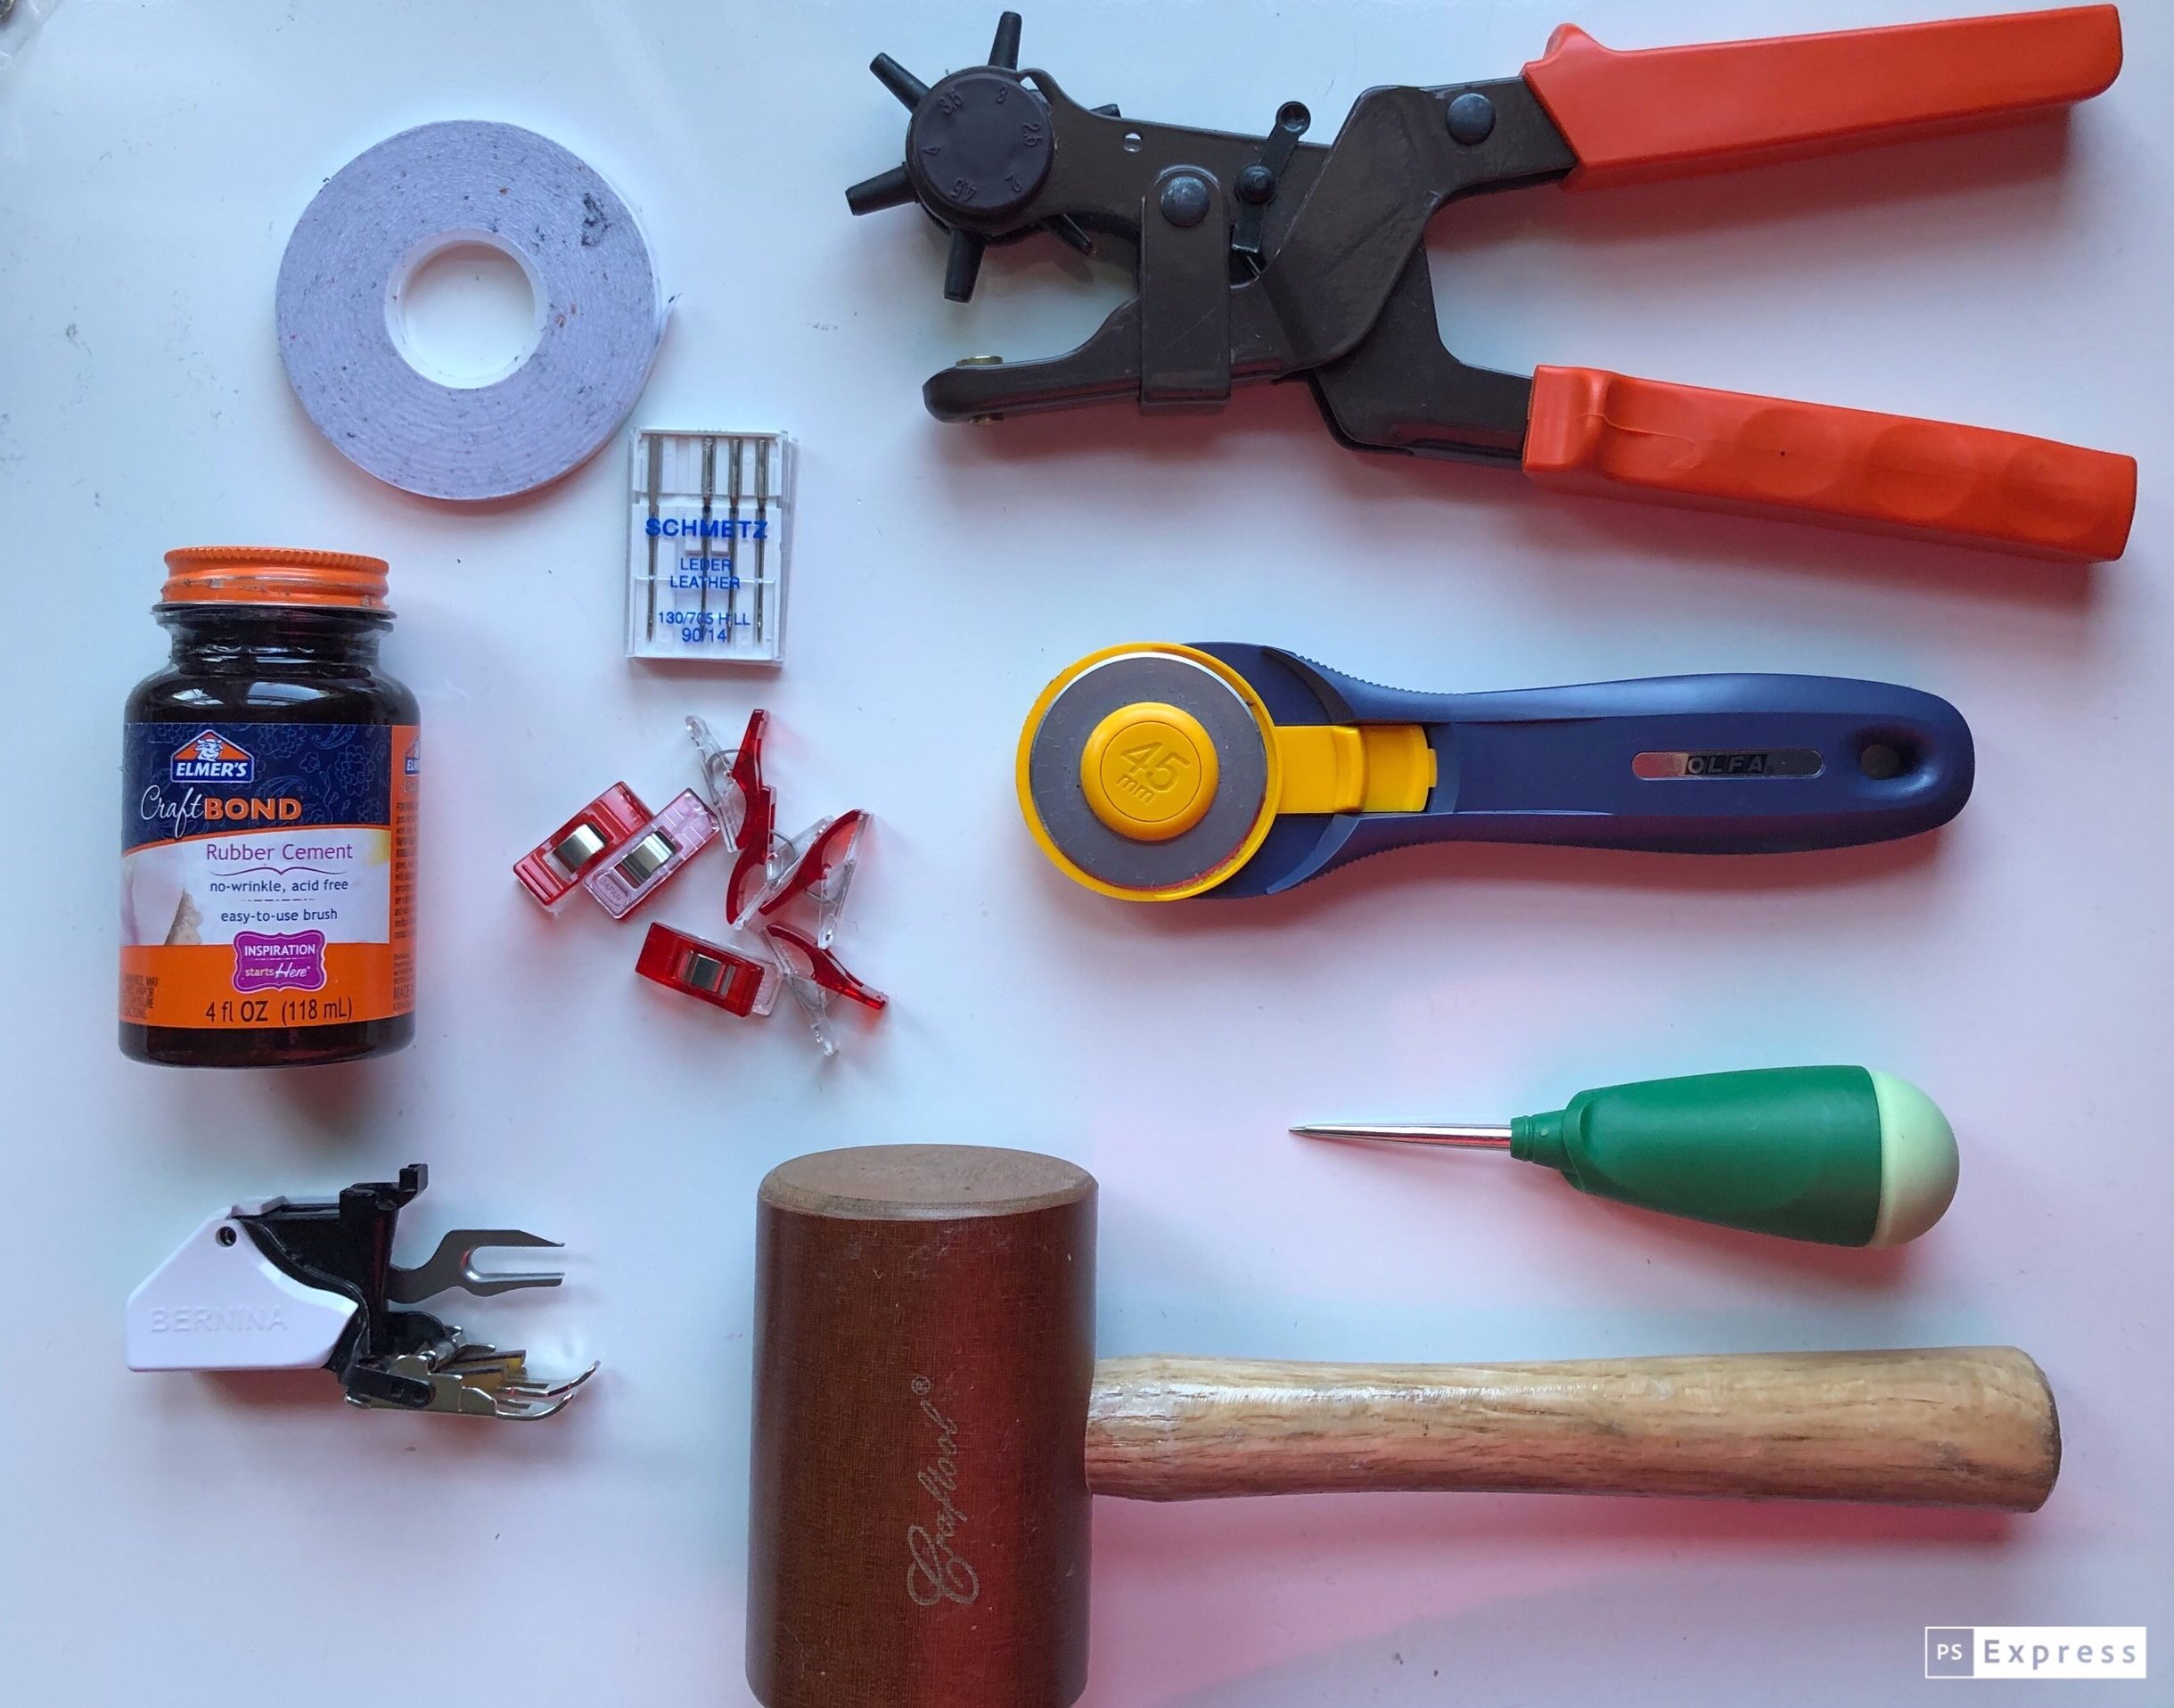
Walking Foot, or Even-Feed Foot Don’t be intimidated- the walking foot is your friend! This genius device will evenly feed multiple layers of fabric or leather through your machine. No shifting, dragging or puckering.
Silk or Polyester Thread- this is my favorite Additonally, topstitching thread or denim thread works too. Be sure that it is medium weight and made of silk or polyester. Cotton thread will fray and deteriorate over time due to the chemical reaction to the tannins in the leather.
Double Sided Tape Double-sided leather tape comes can hold layers of leather together for stitching and can also be used to hold seams flat. Please remember to test on scrap leather before trying on your project.
Wonder Clips (Medium sized binder clips work too.) Unlike fabric, pinning leather will leave holes. Instead try using clips.
Microtex or leather Sewing Machine Needles These needles have a special shape and point which is designed to pierce leather with little resistance.
Mallet A rubber or bakelite mallet is used to lightly tap seams in order to flatten them.
Rubber Cement Rubber cement works well for gluing seams flat.
Straight Awl My go-to tool to punch holes or enlarge existing holes in canvas and leather.
Rotary Cutter- This smaller one is great for detail work and the larger size can go through leather so easily.
Leather Hole Punch Punch neat and clean holes in leather and canvas. An essential for preparing straps for hardware.
While each of these tools is really helpful, the ones that you truly “need” to begin sewing with leather are the correct needle, thread, walking foot and clips or tape. The rest can be acquired over time. You do not have to have every notion, attachment and gadget. Instead, I encourage you to start small and build your supply stash as you build your skills.
Download your free PDF sewing pattern to make the Poppy Convertible Tote
When learning to sew- or to sew with a new techniques, please take your time and concentrate on accuracy. Unlike sewing with regular fabric, sewing with leather, the threads can't just be pulled out without leaving holes from the previous stitching. By slowing down and concentrating on learning a new skill, you're much more likely to achieve a result you're really proud of.
I hope these tips help you feel more confident about sewing with leather. If you have any questions please feel free to get in touch. And if you’re looking for a fun project to practice your leather sewing skills, the Poppy Convertible Tote is a great first project. It only requires sewing straight lines- no curves, and the pattern gives you detailed, fully photographed instructions to guide you step by step as you make your first leather bag.
XOXO, Hilarie