

A Guide to Fabrics and Fibers for Sewing
Have you ever stood in a fabric store, feeling overwhelmed by the myriad of fabric types, textures, weaves, and finishes, unsure of what to choose for your next project? Or perhaps you've purchased a fabric but have no idea what to make with it?
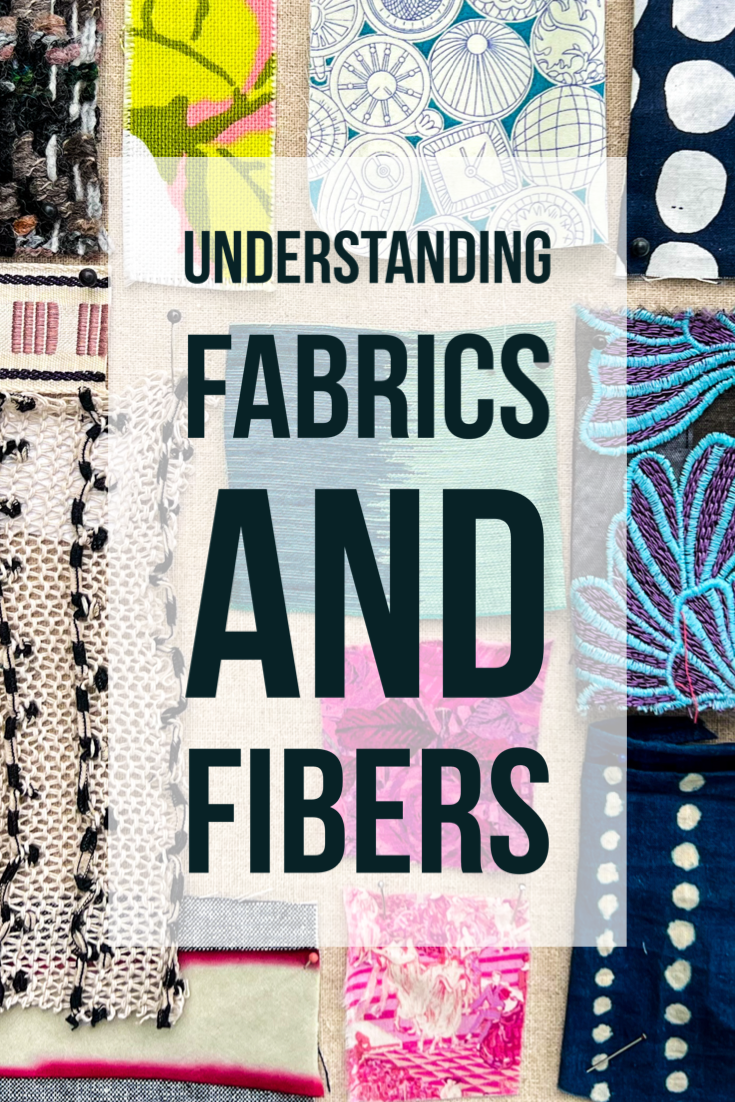
I am thrilled to share my latest project, Glossary of Fabrics and Fibers, A Guide to Textiles for Sewing.
I wrote this guide to help you to better understand the behavioral attributes of fabrics and fibers. To deepen your understanding of the foundational characteristics and essential vocabulary of textiles. Additionally, I share some general guidelines and advice for needle selection, thread, stitch type and length, seam finish, pressing, handling and care.

Free Fabric and Fibers Guide
Have you ever stood in a fabric store, feeling overwhelmed by the myriad of fabric types, textures, weaves, and finishes, unsure of what to choose for your next project? Or perhaps you've purchased a fabric but have no idea what to make with it?
I am thrilled to share my latest project, Glossary of Fabrics and Fibers, A Guide to Textiles for Sewing.
I wrote this guide to help you to better understand the behavioral attributes of fabrics and fibers. To deepen your understanding of the foundational characteristics and essential vocabulary of textiles. Additionally, I share some general guidelines and advice for needle selection, thread, stitch type and length, seam finish, pressing, handling and care.
With each page, you will gain insight into how different fibers react to wear and care, how weave affects drape, and why a particular finish might be used for some fabrics but not others.
This compilation is far more than a simple list of fabrics; it's a woven narrative that illuminates the world of textiles. Whether you're searching for the meaning of a specific term or casually browsing, you'll uncover the breadth and depth of textiles in all their forms—be they aesthetic, historic, geographic, scientific, economic, or technological.
This project began as a handout to give to the students that took my Fabric and Fibers class. Each time I sat down to write, I found that there was more to include. How can you describe fabric without knowing fiber, structure, and finish- and that’s before discussing even a single type of fabric! Now, it is more than a hundred pages!
I like to know why I’m doing something. It helps me to feel empowered and to make choices for myself . This is true in life, but also to my core values as a teacher. I want to honor where each student is and to provide them with the necessary context and connection to the purpose of the lesson. That’s a big part of this guide.
A Sneak Peek into the Guide
Are you curious about the intricacies of textile selection and the suitability for a given project? For instance, do you know which needle size and thread type are perfect for sewing with cotton jersey? Can you distinguish between plisse and seersucker, and do you understand how their differences might impact your project? Have you ever wondered about the ideal fabric and fiber choices for crisp, lasting pleats?
All this and more to share with you! From Acetate to Zibeline, over 100 pages of information about fabrics and fibers is yours to weave a new layer of knowledge into your sewing.

Little Stitch Studio Now Has A Retail Fabric Shop
Yes, you read that correctly! Little Stitch Studio is now offering an online fabric shopping opportunity. All of the fabric that I have in stock will also be available to purchase and take home to sew your own clothing and accessories.
When I moved Little Stitch Studio into its current location in 2017, my plan was to have a small retail section. Teaching kids, the retail proved to be tricky. First of all, they want to play with everything! Or they might get confused between supplies meant for sale and those that are for them to use. (Hint- if it’s in a package- it’s not for class use:) Also, staffing was an issue, it wasn’t easy to help a customer select fabric, while teaching a roomful of kids. So, the retail idea was set aside. That is, until now!
Little Stitch Studio Fine Fashion Fabrics

Yes, you read that correctly! Little Stitch Studio is now offering an online fabric shopping opportunity. All of the fabric that I have in stock will also be available to purchase and take home to sew your own clothing and accessories.
When I moved Little Stitch Studio into its current location in 2017, my plan was to have a small retail section. Teaching kids, the retail proved to be tricky. First of all, they want to play with everything! Or they might get confused between supplies meant for sale and those that are for them to use. (Hint- if it’s in a package- it’s not for class use:) Also, staffing was an issue, it wasn’t easy to help a customer select fabric, while teaching a roomful of kids. So, the retail idea was set aside. That is, until now!
It should come as no surprise to anyone that the pandemic has been tough on small businesses. By flexibility and sheer luck, I was able to survive the 5 month shutdown in 2020. Operations since then, with reduced class sizes, and a few week long closures due to Covid exposure, it is clear that I need to diversify.
The adventure in retailing is now online. The physical studio space can stay set up for teaching and I can diversify by offering a collection of beautiful fabrics, notions, trims, books + patterns and gifts. And you, my friends, can shop from anywhere in the world!
The shop site is still very much a work in progress. It will take some time to “perfect”, but I am pleased so far. Better graphics and photography are coming, thanks to my very talented sister, Morganne. You can look forward to lots of new additions and some fun patterns and kits coming just in time for the holidays too!

Want to hear about the fabric? I have longstanding accounts with some major fabric manufacturers like Robert Kaufman, Windham Fabrics, RJR, Brewer and Moda. These companies offer fabric for garment sewing as well as fun quilting cotton. Additionally, I have been able to find some deadstock fabric too. (For those of you who might not know what” deadstock” means, Deadstock Fabrics are essentially fabric leftovers- not scraps, but actual yardage that companies or designers didn’t use).
You will find cotton solids and prints as well as linen, wool and silk in a variety of weights and substrates: Knits, jerseys, canvas, twills and flannels. Fabric that is perfectly suited for sewing garments, accessories, kids clothing and even holiday items. (Holiday fabric is listed too!)
Please take a look at the new shop- I’d love to hear your thoughts and welcome suggestions. If you are local, I’m happy to arrange pickup and in-person personal shopping opportunities.
Best,
Hilarie
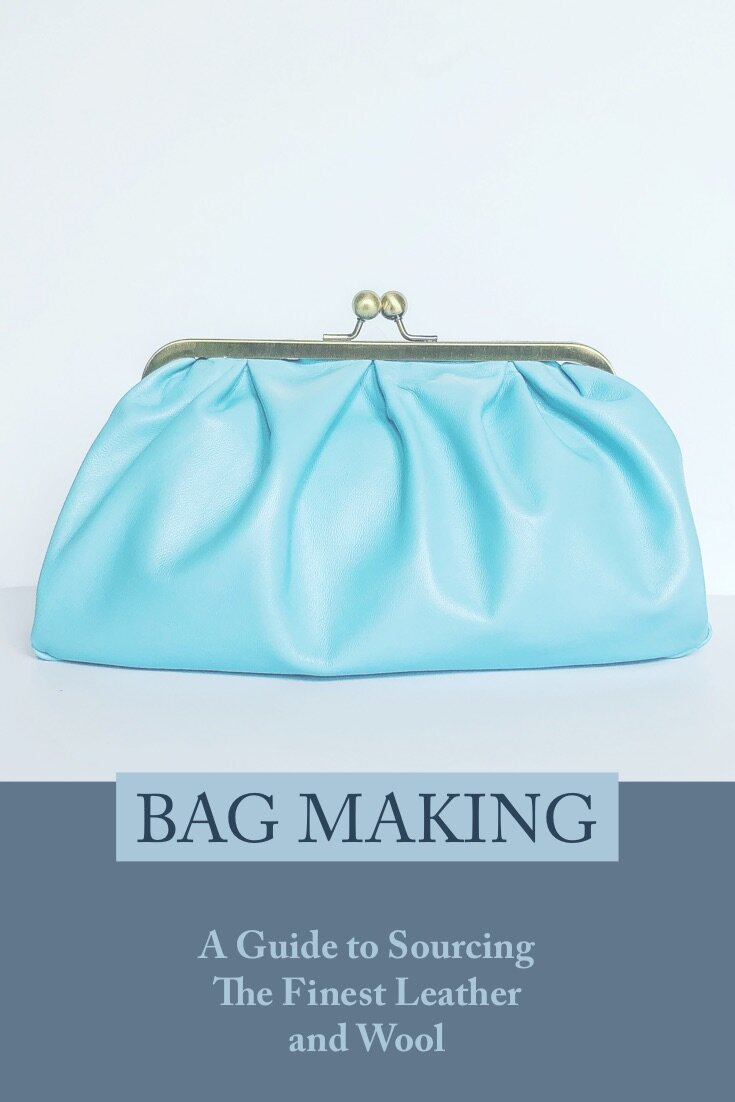
A Guide to Sourcing the Finest Bag Making Materials: Leather and Wool Felt
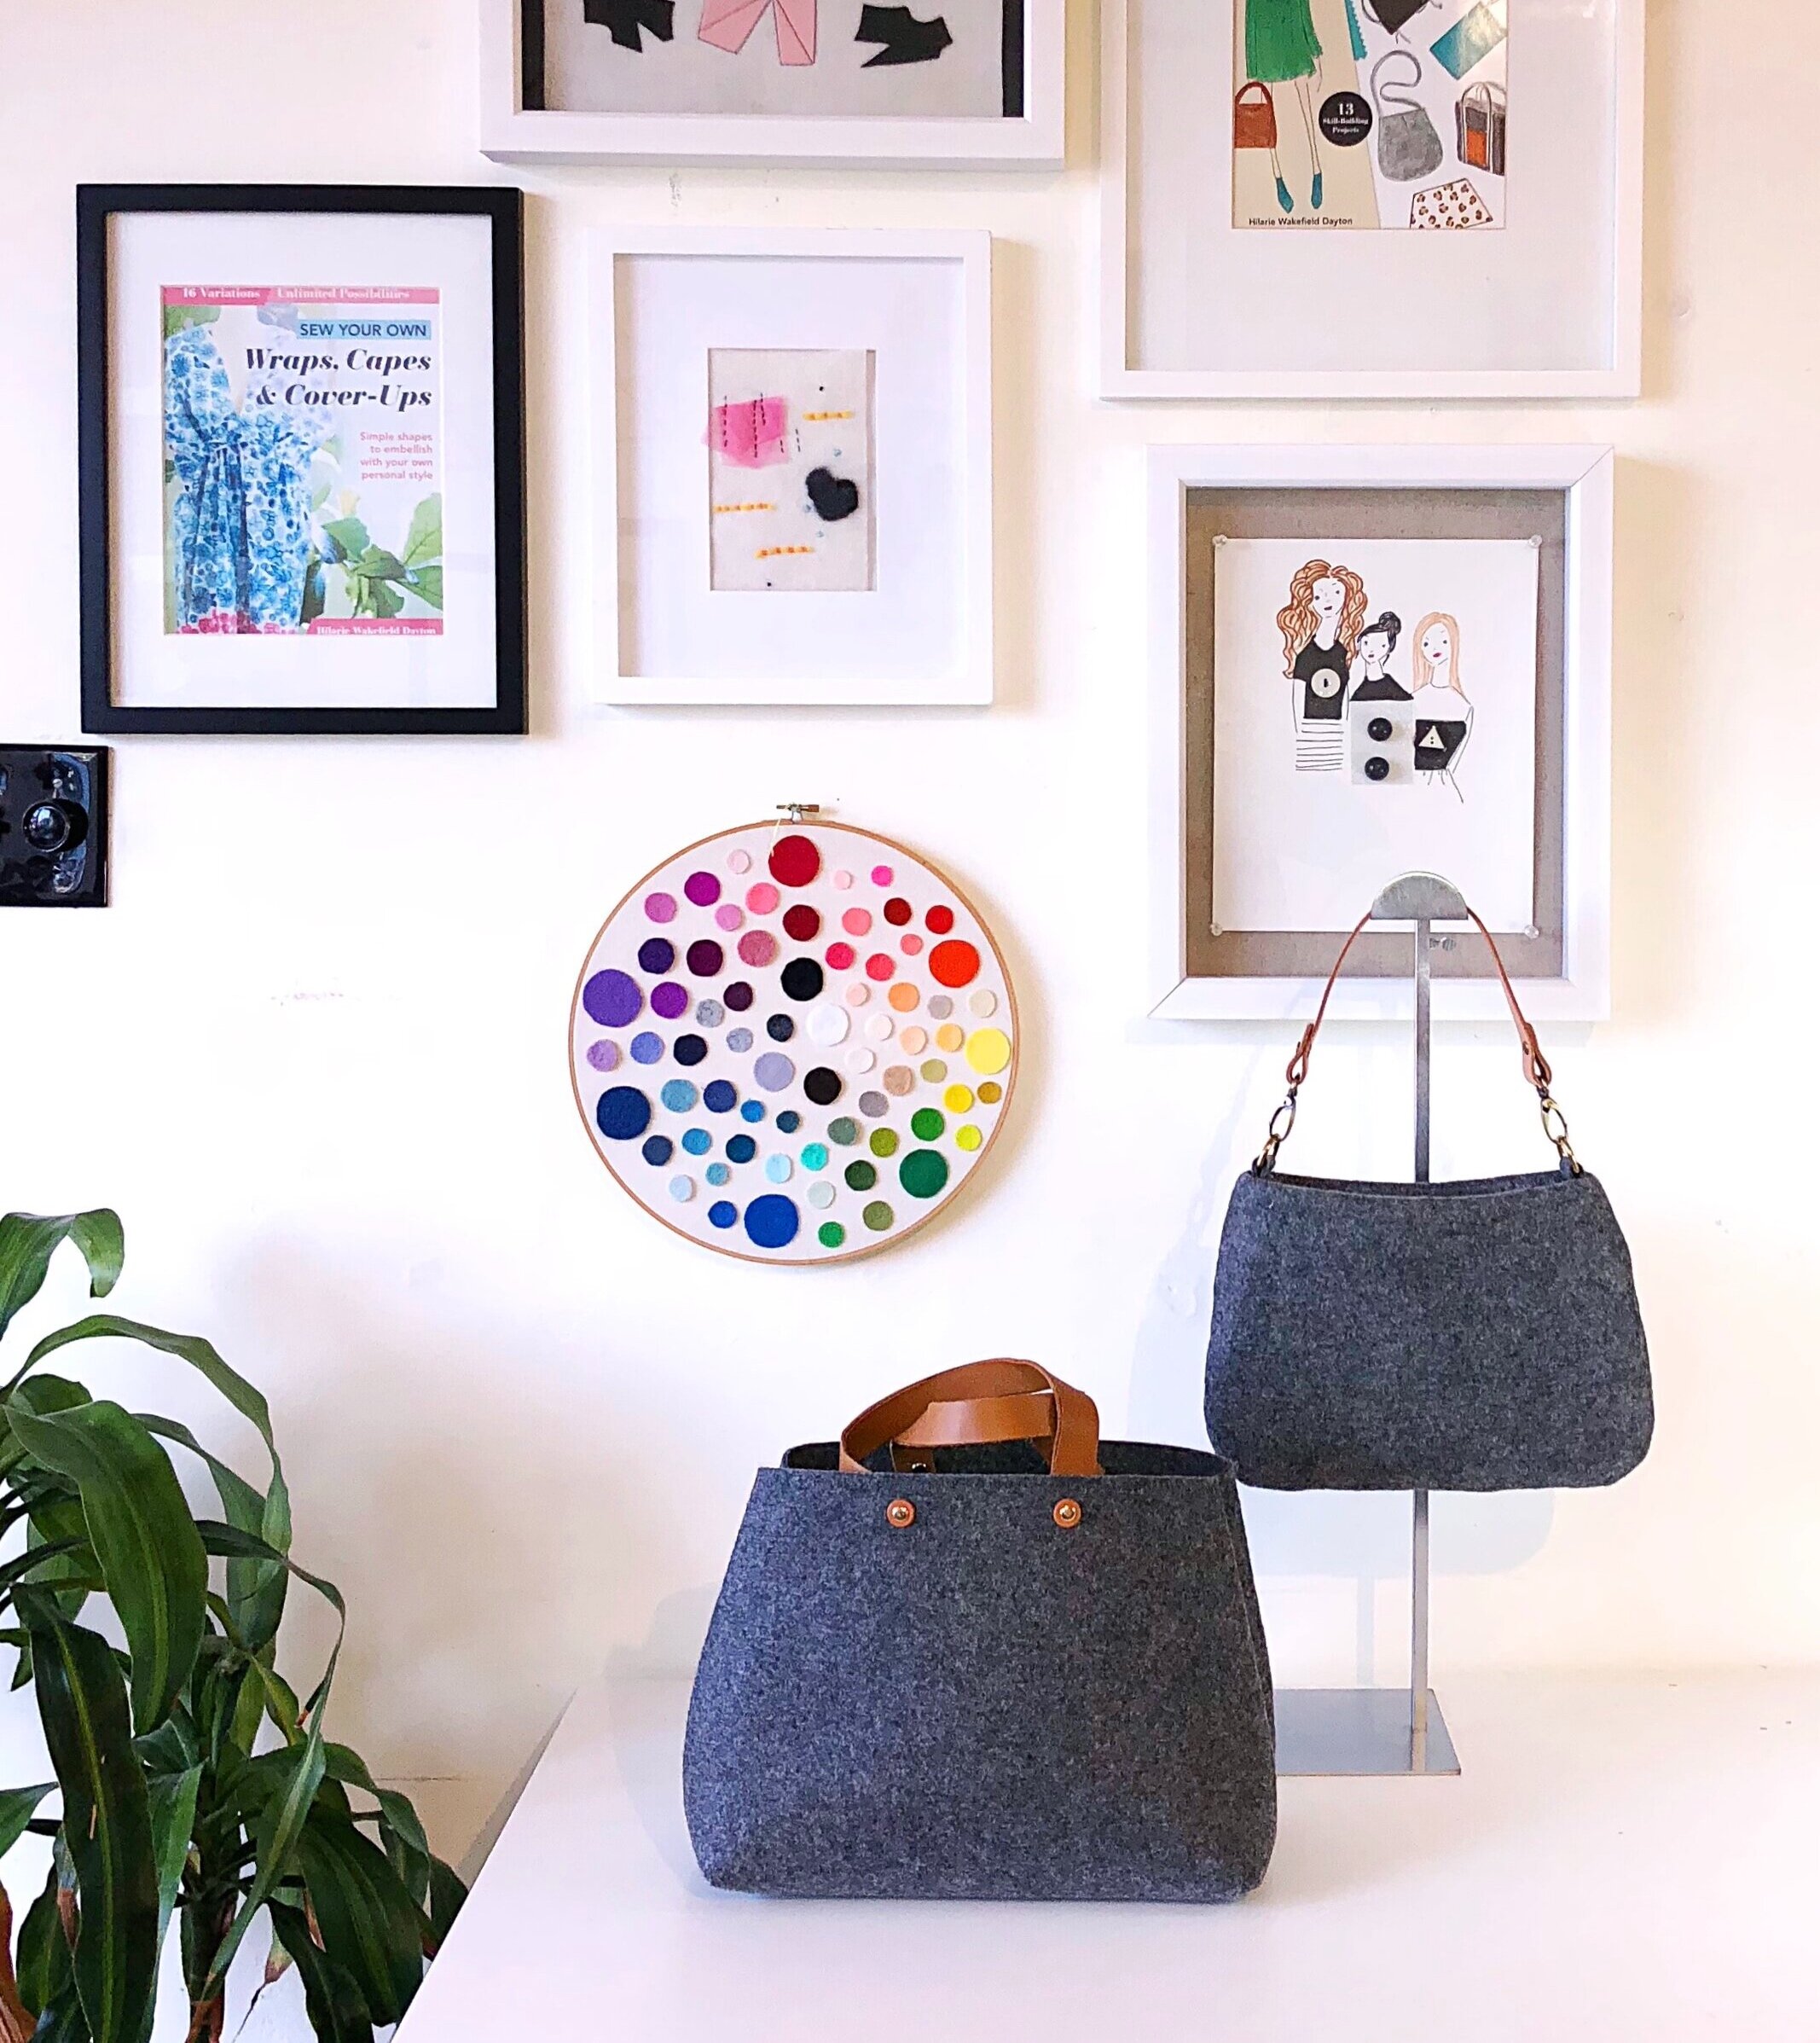
It’s hard for me to think about designing bags and not consider fabric as one of their defining features. There is color, shape, pattern and hardware, of course, but then, it’s the fabric. I am using the term fabric loosely as some of the textiles used to make the finest bags aren’t actually fabric at all. Leather and Wool Felt are two that come to mind. Both are natural resources, of course and offer exceptional durability, color fastness and a sculptural quality that fabric can’t really match.

It’s hard for me to think about designing bags and not consider fabric as one of their defining features. There is color, shape, pattern and hardware, of course, but then, it’s the fabric. I am using the term fabric loosely as some of the textiles used to make the finest bags aren’t actually fabric at all. Leather and Wool Felt are two that come to mind. Both are natural resources, of course and offer exceptional durability, color fastness and a sculptural quality that fabric can’t really match.
These materials are sumptuous on their own but in combination, they are a tactile delight. If you want to take your bags up a notch, you will want to try sewing with leather and wool felt.
Shopping for Bag Making Materials: Leather and Wool Felt
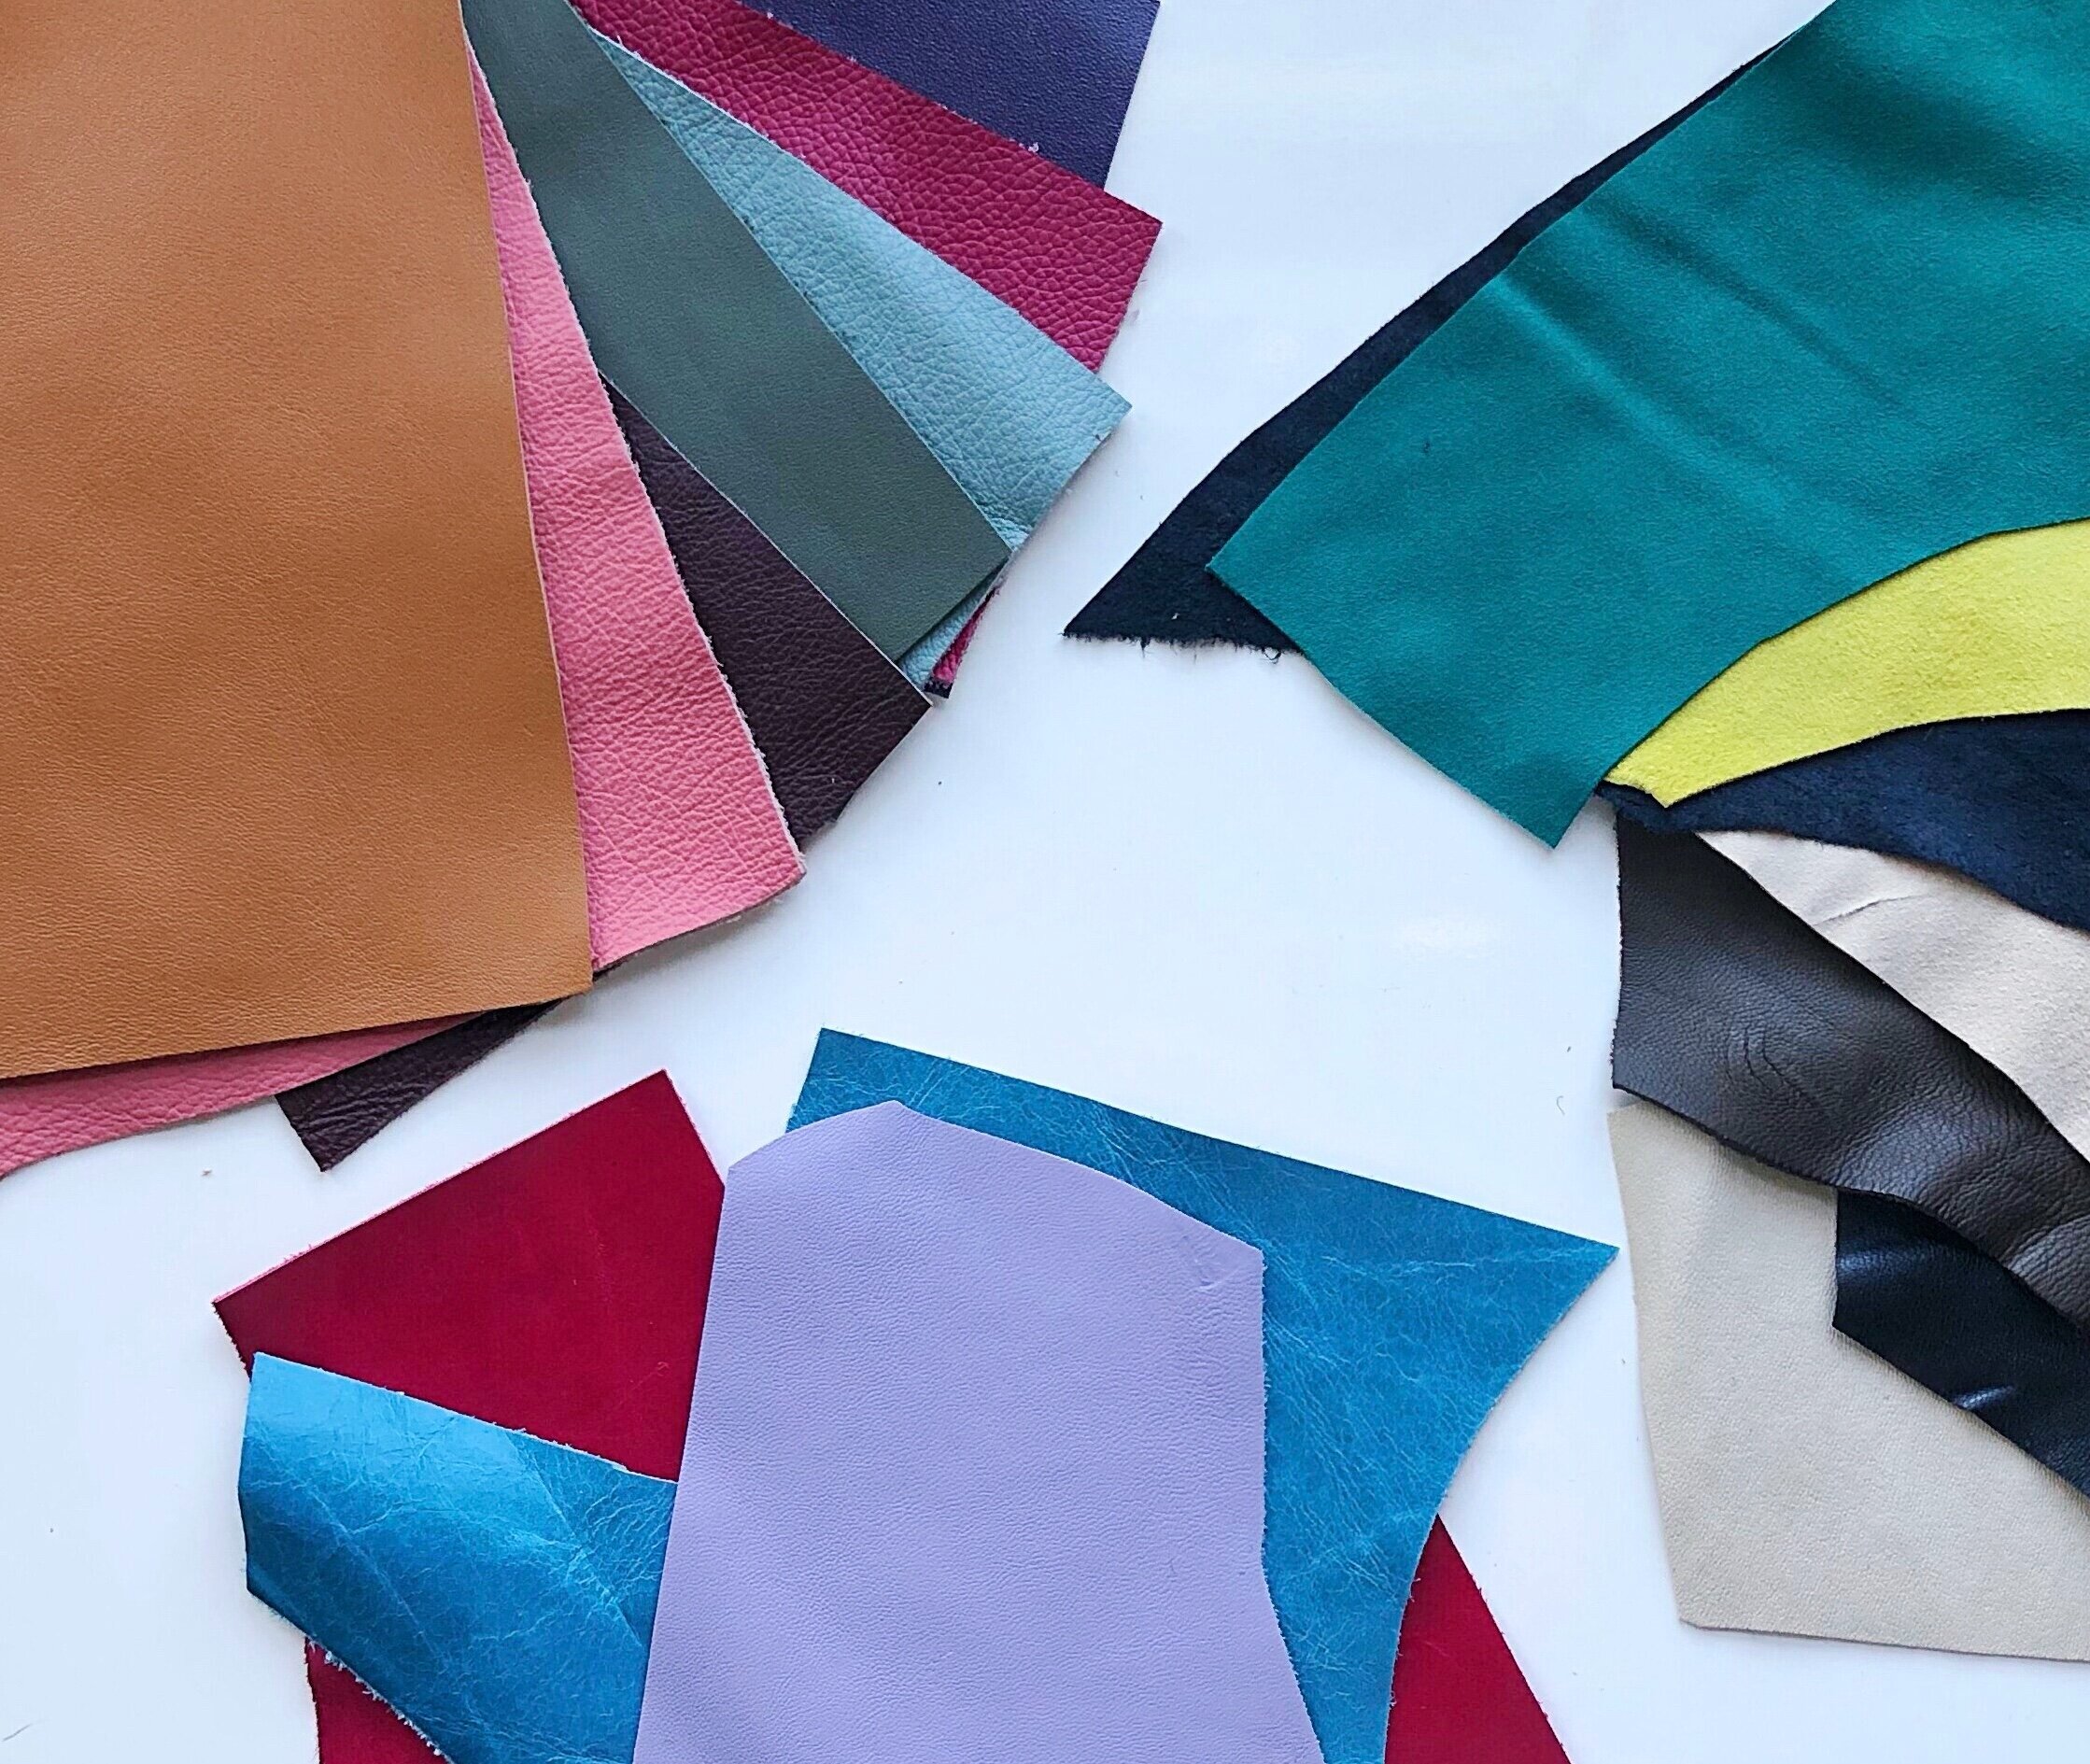
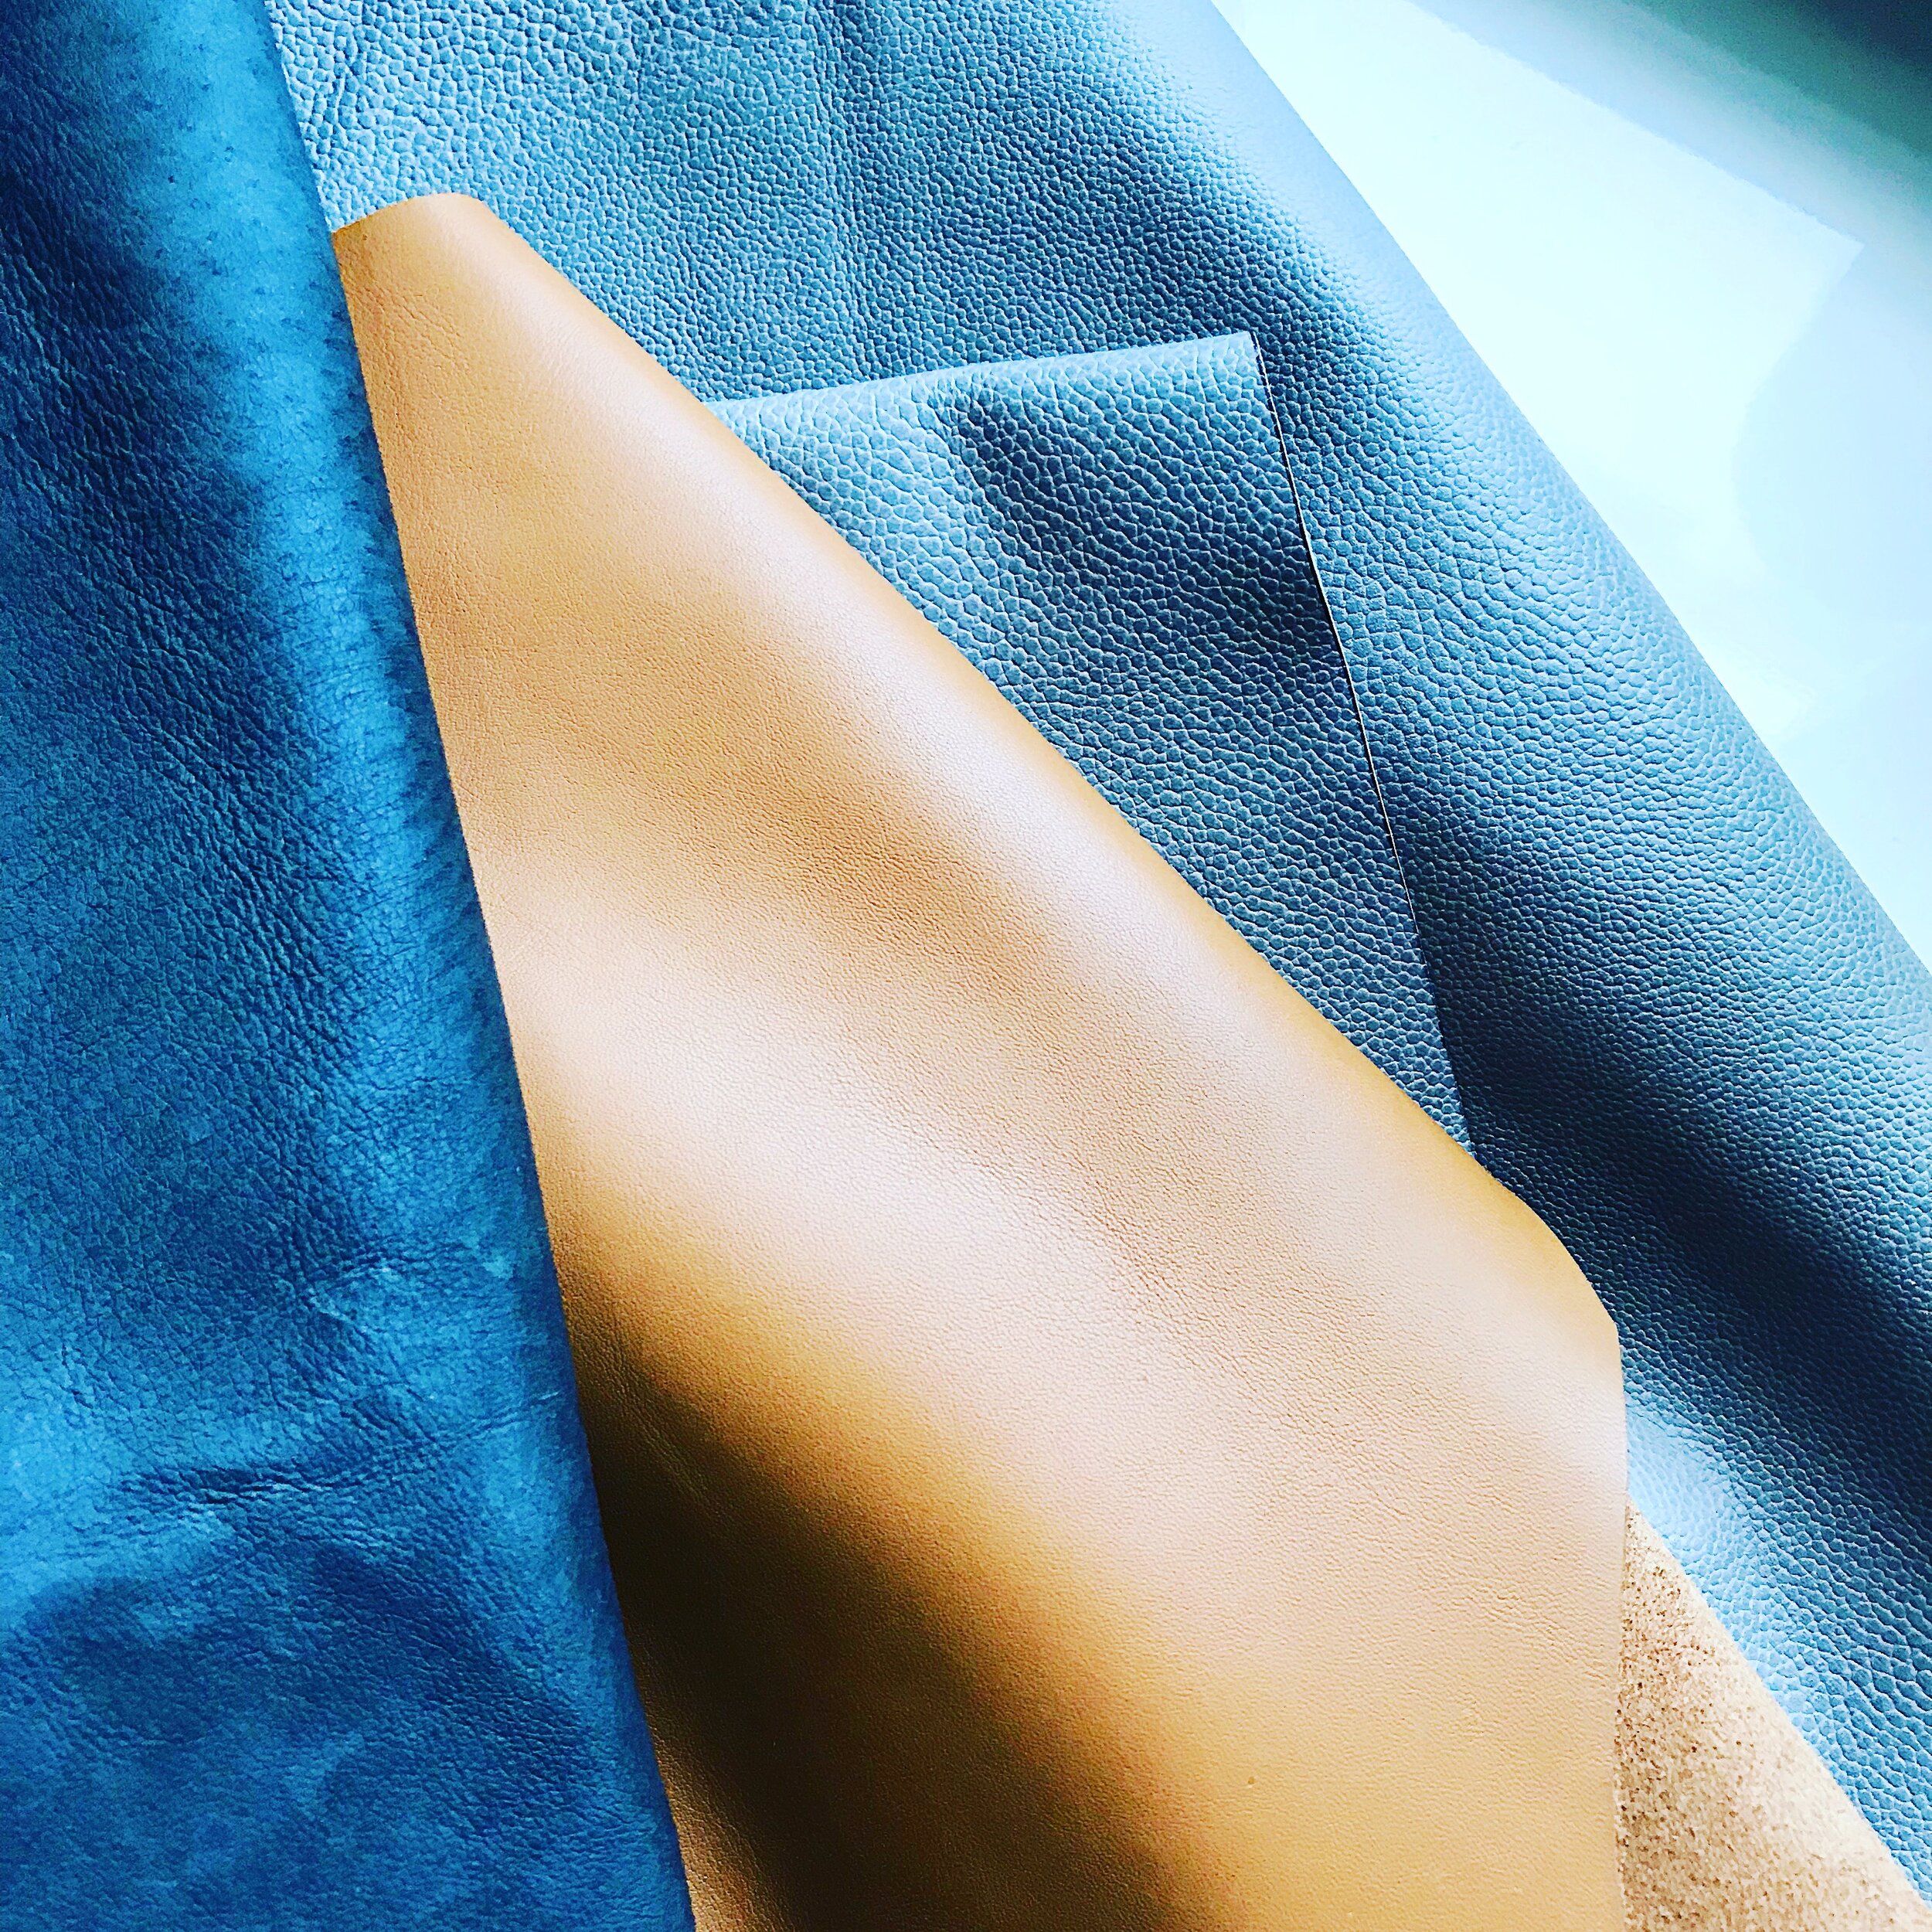
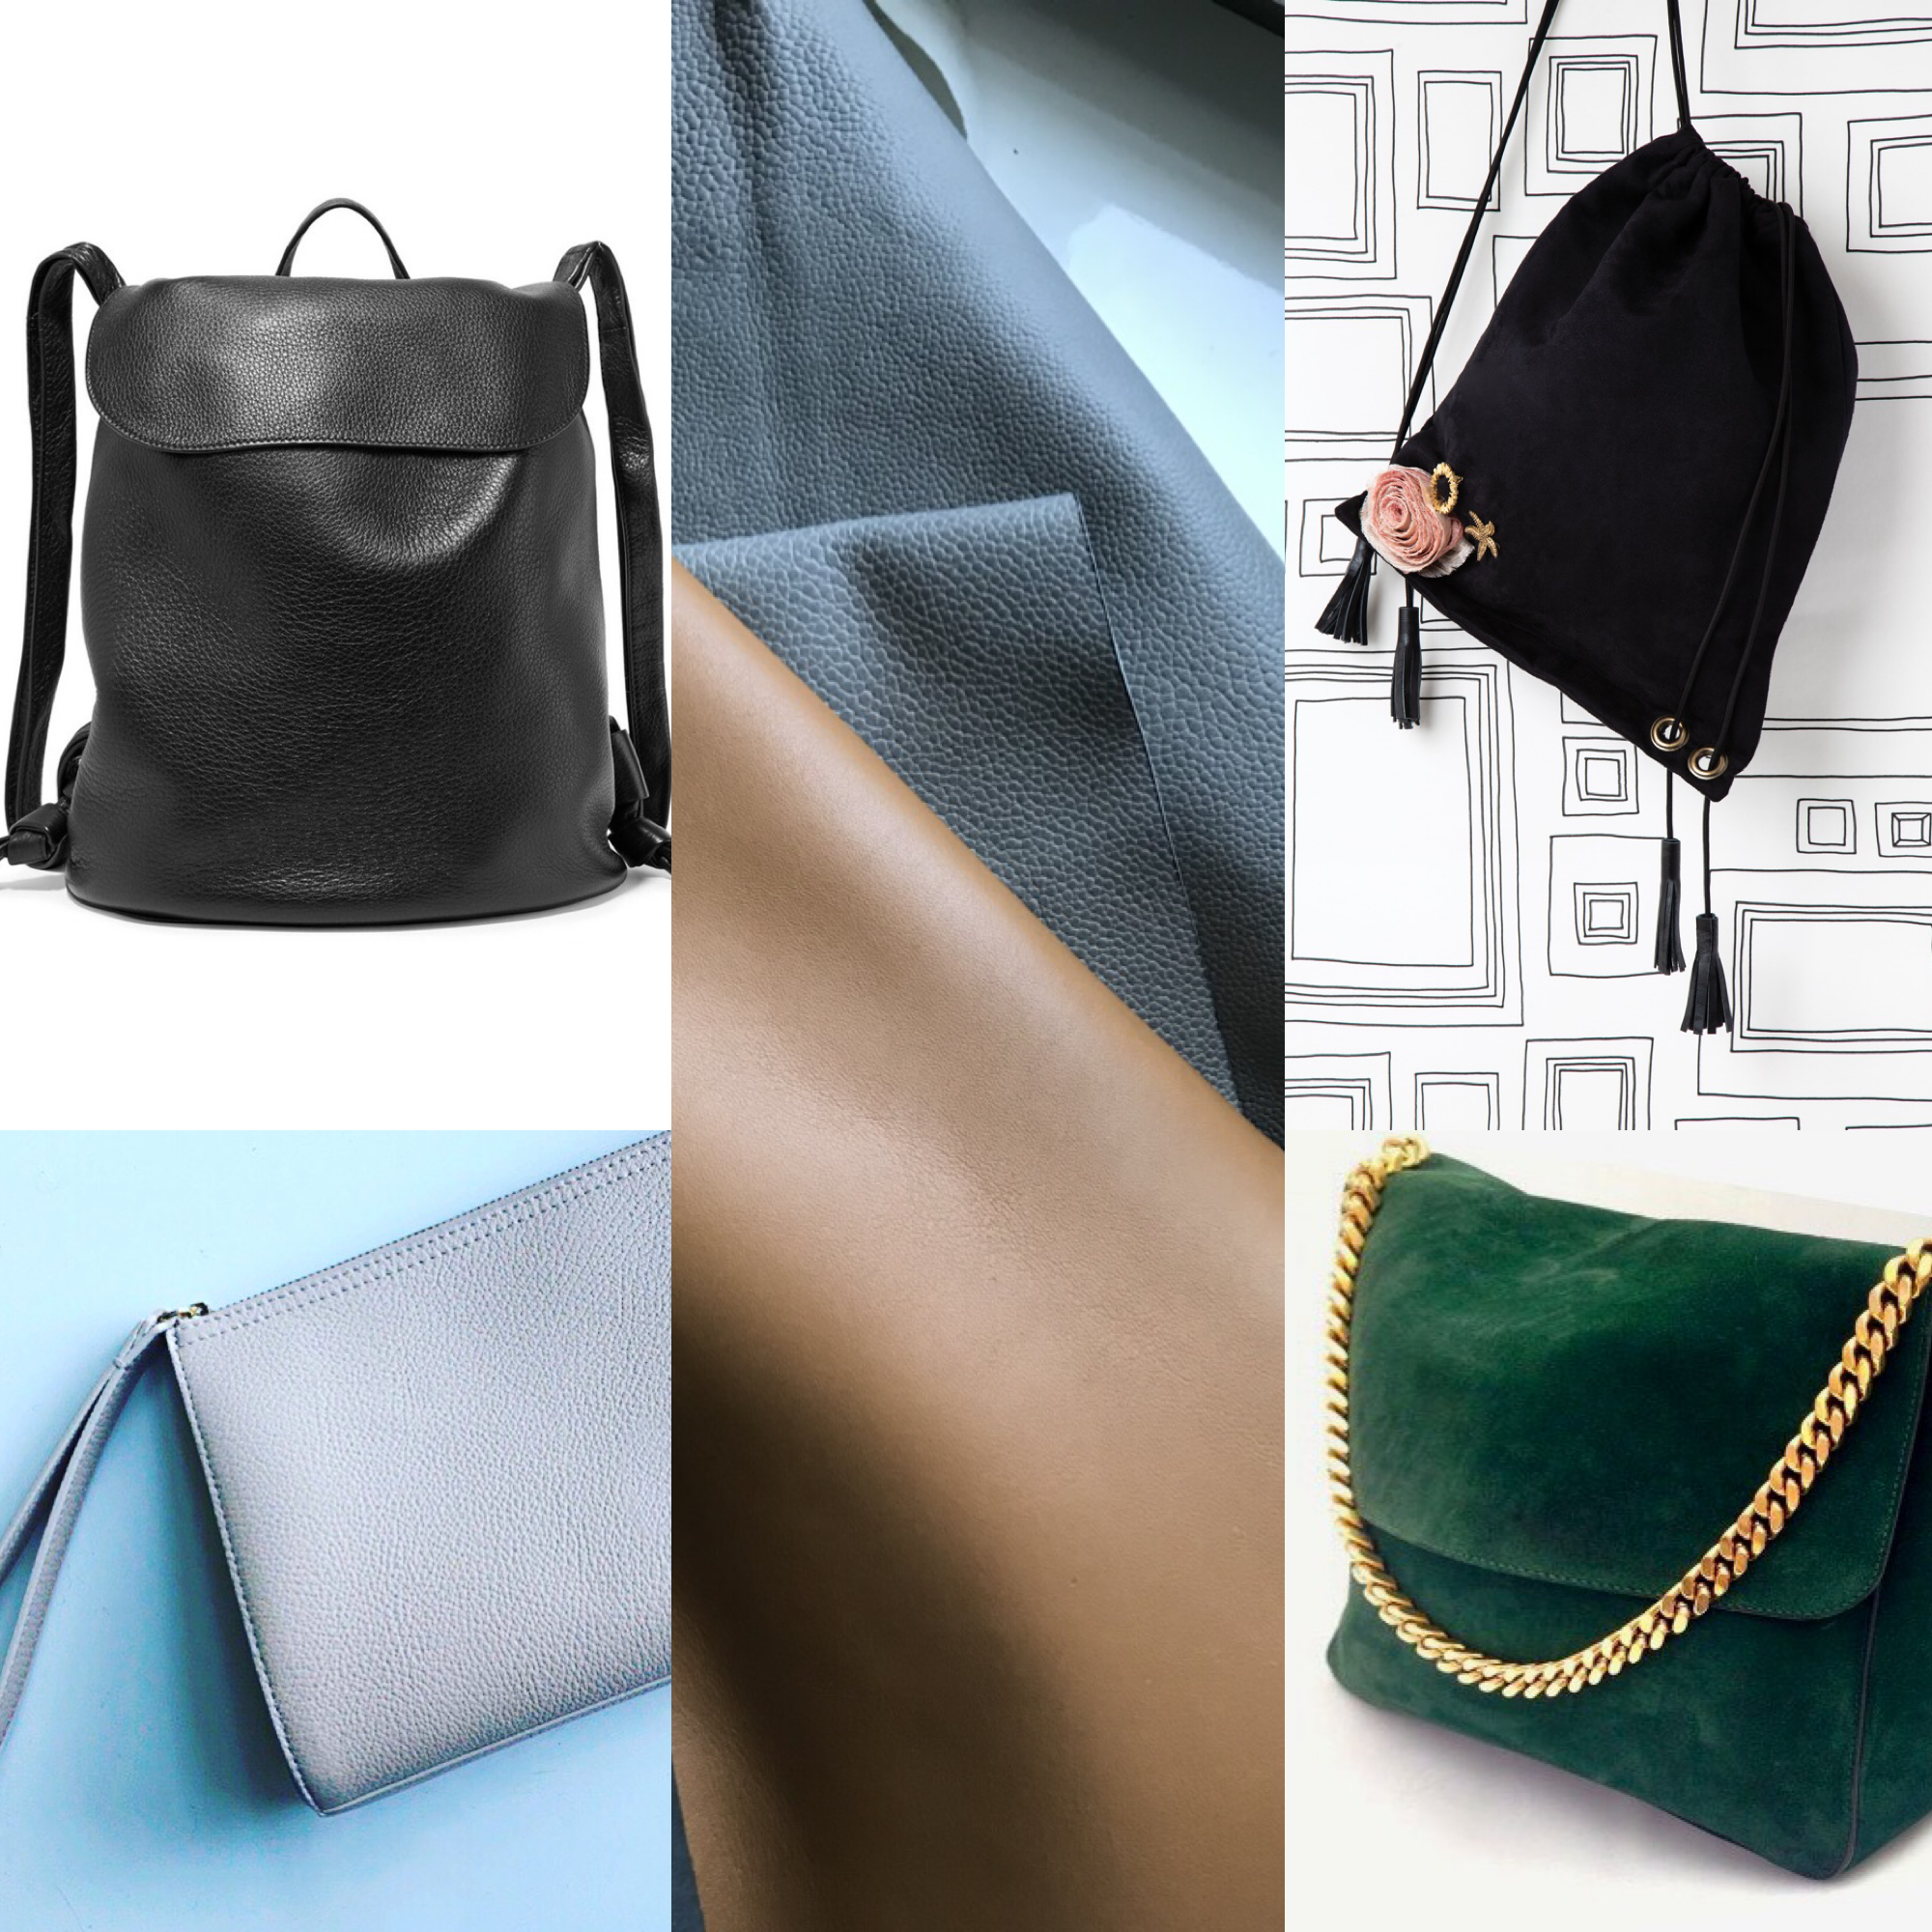
Leather
Before purchasing leather for sewing a bag or garment, it is always good to know a bit about how it is sold. This will help you to better select a leather that will work with you and your sewing machine.
Leather is measured in terms of ounces which refers to liner thickness rather than weight. One- ounce of leather, equals 1/64 of an inch thickness. This means with a weight of 7 to 8 ounces, the leather is about 7/64 to 8/64 of an inch thick.
1 oz. is about .4 mm thick
2 oz. is about .8 mm thick
3 oz. is about 1.2 mm thick, etc.
Leather comes from animals and like humans, each one is unique. So is our skin. Some have beautiful flawless skin, while others have lived life to its fullest and have the scars to prove it. During the splitting and tanning process, the variations in the thickness and character of the individual hide are revealed. To account for the variation, leathers are generally sold in a range of thickness, such as 2 to 3 ounces or 4 to 5 ounces.
Lighter weight leathers, up to about 4 ounces can be sewn on a domestic sewing machine. Anything heavier it is really best to use an industrial machine or even punch and hand stitch. More Tips and Tricks for Sewing with Leather here:
This chart by Tandy Leather can help guide you to selecting the ideal type and weight of leather for your next project.

These are some of my favorite sources for purchasing leather.
Leather, Suede, Skins is my go-to source for leather. Call and ask for Faina. She is exceptionally knowledgeable and will guide you to finding the ideal leather for your project.
Mood Fabrics Mood has a small but very fashionable selection of garment weight leather and trim.
Tandy Leather The granddaddy of all things leather. The website is full of great educational links and tutorials as well as a dizzying selection of hardware, paint, tools and accessories.
Don’t forget all of the leather that is readily available in thrift stores, ebay and in your own closet.
Wool Felt for Bag Making
Merino Wool Felt
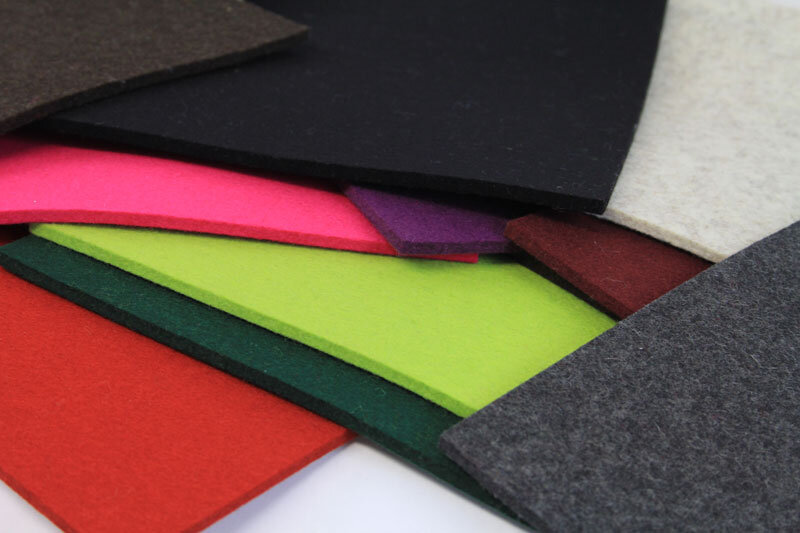
Wool felt is gorgeous for making bags and other small accessories. Merino wool felt has a beautiful and soft feel, it is available in nearly any color imaginable, is naturally water repellant, renewable and sustainable. Merino wool felt is a non-woven textile that is produced by densely matting fine wool fibers. As such, it does not fray or unravel and has no wrong side and doesn’t pill. Bags made of felt are able to withstand weight without losing their shape due to the inherent tensile strength or the fiber.
Wool felt is not always easy to find at your local fabric shop, but is readily available online. When shopping, look for a felt that is more of an industrial weight (2-4mm about 1/8”) and mostly wool.
When making bags, you will be working with multiple layers of felt. To help keep your seams smooth, a Walking Foot and clips are essential. Also, you will want to increase the length of your stitch. You may need to cut a test swatch and practice to determine the ideal machine settings.
Synthetic Industrial Felt
These are fairly inexpensive options that are ideal for small accessories, making bag bases, adding structure and to create bag organizers.
Are you curious to read more about The Best Fabrics for Bag Making? In this article I discuss sewing with leather, wool, decorators weight fabric and canvas.

The perfect handbag is elusive- I hope to change that by giving you the tools you need to design and make the bag of your dreams. For more about bag making, check out my blog posts under the tag “Bags” and of course, my book; Sew Bags: The Practical Guide to Making Purses, Totes, Clutches & More
XO, Hilarie

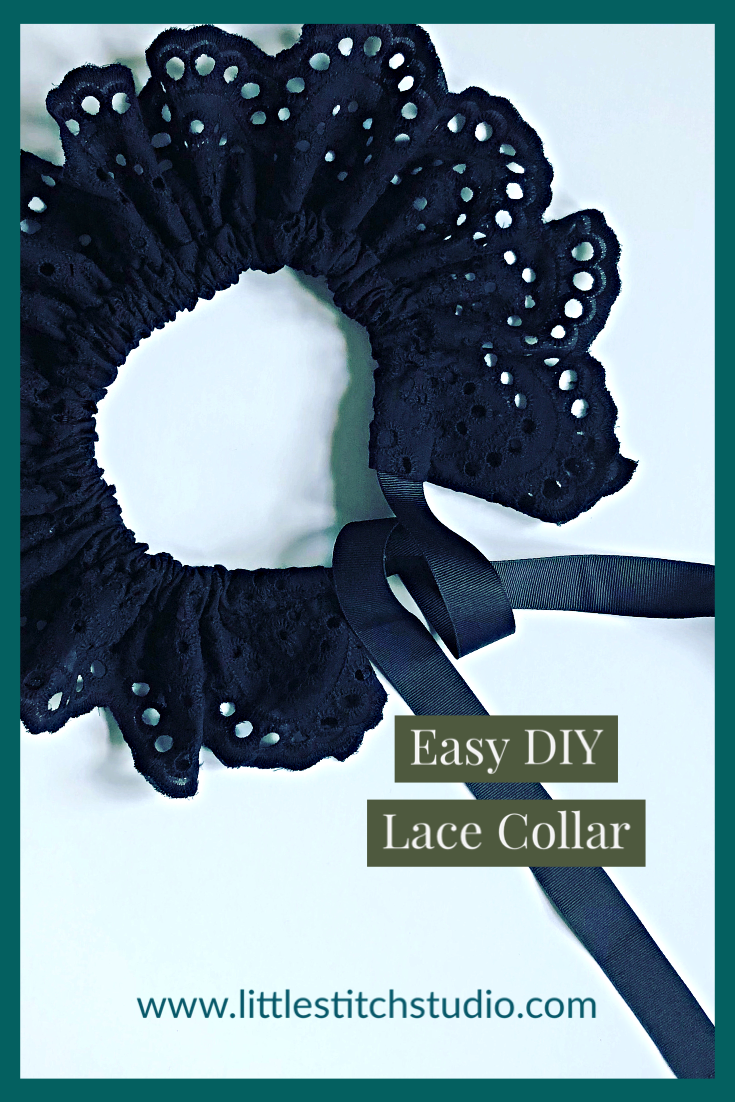
Easy DIY Lace Collar Necklace
Have you gotten used to dressing too comfortable while working from home? Like many of you, I have been looking forward to the change of season wardrobe and some fun experimentation with color and layering. This DIY lace collar necklace is an easy update that can instantly elevate an everyday cardigan or sweater top. The idea is reminiscent of lace detachable collars of the 80’s but so much less stuffy. Gone are the Laura Ashley floral prints and fussy ruffles. These collars are designed to make a statement and bring a bit of contrast to up your look. Ready to sew?
I voted today!
This is the eighth presidential election that I have had the privilege to exercise my right to vote- but it feels like it might be one of the most significant. After getting my kids fed, dressed and started on their virtual school day, I went to get myself ready.
To mark the occasion, I wanted to dress up a bit- to show respect for the women who have come before me and to all of the young girls coming up. Our voice counts- we matter. Looking down at my T-shirt, I saw the illustration of Ruth Bader Ginsburg in her dissent collar. Her “notorious” dissent collar. I need a lace collar! This occasion calls for a lace collar.
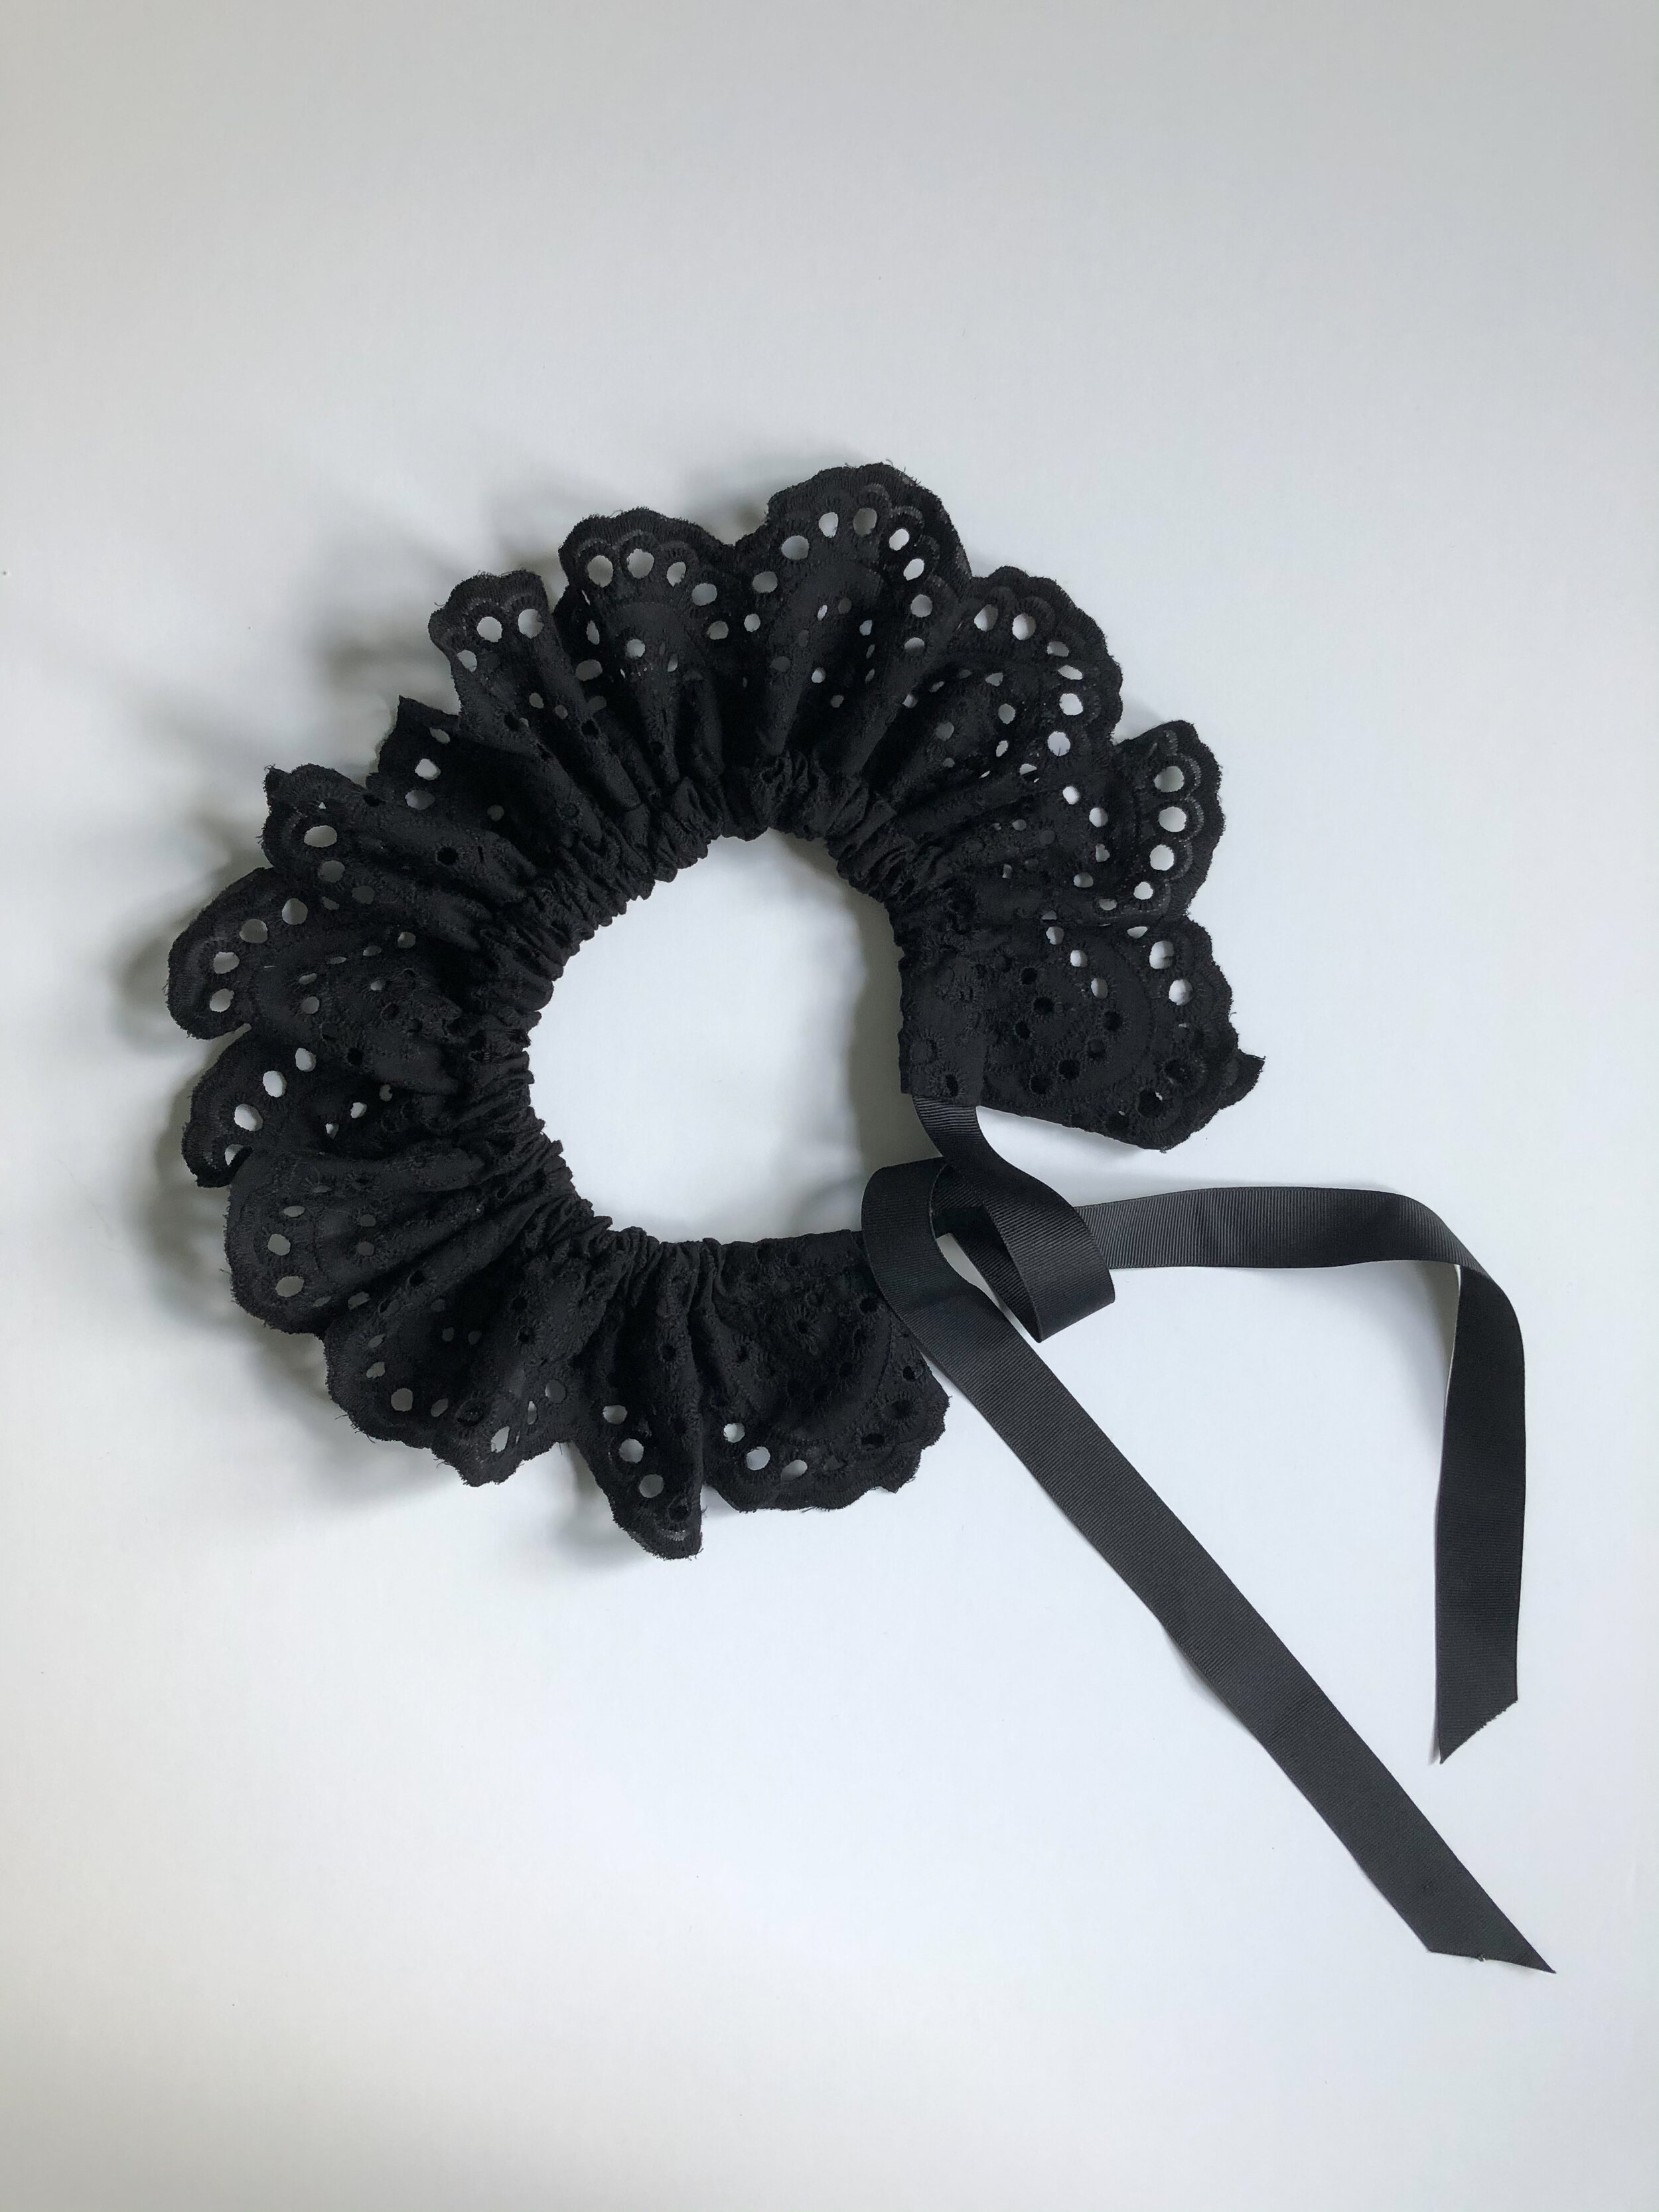
I ran upstairs to survey my lace options and decided to use some black cotton eyelet. Since I only had a small window of time to both vote and sew- this had to be quick.
Part collar, part necklace. It turned out perfect!
Scroll down to create your own lace collar necklace.

Sewing with Eyelet Fabric and Lace
Have you sewn with cotton eyelet before?
Eyelet is a fabric with an embroidered, open-work pattern. Though generally made of woven cotton, modern interpretations can be found in wool, leather, jersey, silk and even neoprene.
Like other types of lace, whether delicate or sturdy, special handling is required to ensure the beauty of the finished garment.
Successfully sewing with lace depends in large part on the placement of the motifs of the fabric in relationship to the garment design. This is more easily accomplished than you might think! It just takes a little more time and thought.
Thread:
The ideal weight of the thread is fully dependent on the content of the fiber and type of weave rather than the “lace” design. If you are sewing with cotton or linen eyelet, use cotton or polyester thread, size 50.
Needle:
For lightweight cotton, linen or wool eyelet: Universal-H Point, jeans (HJ) 70/10
More about needle sizes and application.
Seam Finish:
There are as many types of seam finishes as there are functions, fabrics and preferences. Like other laces, eyelet has little holes incorporated throughout the design. Construction methods are determined by the sheerness or opacity of the lace. This should be kept in mind as you consider seam finishes and lining options, as they will be somewhat visible on the right side of the finished garment. Seam finishes such as a bound seam (using a strip of silk organza), French seam, whipped French seam and serged edges look best- and don’t add bulk.
Pressing:
You should press eyelet fabrics face down on a soft pad- a terry cloth towel is good, to avoid flattening the embroidery. Generally, the thread used to embroider most eyelet fabrics is synthetic, and could flatten, burn or pick up some unwanted shine when ironed. Use a pressing cloth and test a small swatch to see how it reacts.
Hem:
When finishing a garment made of lace, there are several important construction details that you will need to keep in mind. The ideal type of hem will allow the fabric to drape and hang in a flattering manner. To achieve this, you will need to consider the overall weight of the fabric as well as the garment design to select an appropriate hem technique. Some garments and fabrics will require a much deeper hem than others.
Generally, the hem is formed by folding under and pressing the raw edge twice before stitching the inside the fold. Depending on the design of your eyelet, the fabric’s selvage might have a beautiful lace border which you can cut to use as the hem of your garment.
Opaque, backed, or underlined laces may have hem edges finished in any of the traditional ways; rolled hems, turned-up bound hems and facings. I do suggest looking at high end garments for ideas at finishing techniques as well as practicing a few for yourself and see what you think works best.
Fabric Preparation:
Lace can be used for an entire garment, or for only a bodice or skirt or even just as trim. Let the weight, density, width and cost of the fabric assist you in determining the look you create.
Lace motifs should be advantageously placed whenever possible, to serve as decorative edges or trim your garment. If your lace is one which has a scalloped edge, pattern pieces can be positioned so that this forms a decorative finish alone a straight neck edge or hemline.
Lace should be laid out flat, in a single layer on a table or other flat surface. Cutting should be taken with care.

Scalloped lace borders.
The Lace Collar Necklace
Free Pattern and Tutorial
The Lace Collar Necklace
Free Pattern and Tutorial
Finished Size: 42” x 4”
One size fits all
Supplies:
1 yard of Black Cotton Eyelet Lace (similar to this)
1 1/3 Yards of 7/8” Grosgrain Ribbon

Prepare:
Layout the entire piece of fabric, in a single layer on a table or other flat surface. Scallops along the edge of a hem need planning. Check the scalloped border to determine the ideal place to begin and end cutting your collar.
For this project, there is a turned casing at the neckline.. The bottom of the collar was cut to feature the beautiful selvedge border.
If you look closely at mine, I began and ended my cut in the center of a lace motif. This way, when I go to turn the opening for the casing, the lace will fold back in and mirror the shape of the motif next to it. This will help to make a pretty opening.
Cut:
Measure and cut lace 44” X 5.5”.

Press:
To prepare the center front casing, layout the cut lace and fold one short end of the lace in the center of a scallop inward matching the scallop shape along the edge. Press. Repeat for the opposite side.

Sew:
Finish the raw edge of the lace. (I used a serger for mine.)

Fold cut edge of fabric 2” toward the inside of the collar.
Pin through both layers of lace across the collar.
Since my ribbon was 7/8” of an inch wide, I made my seam opening, 1 1/8” wide to allow for the ribbon to draw through plus a bit of ease for gathering.
Stitch. Clip threads.
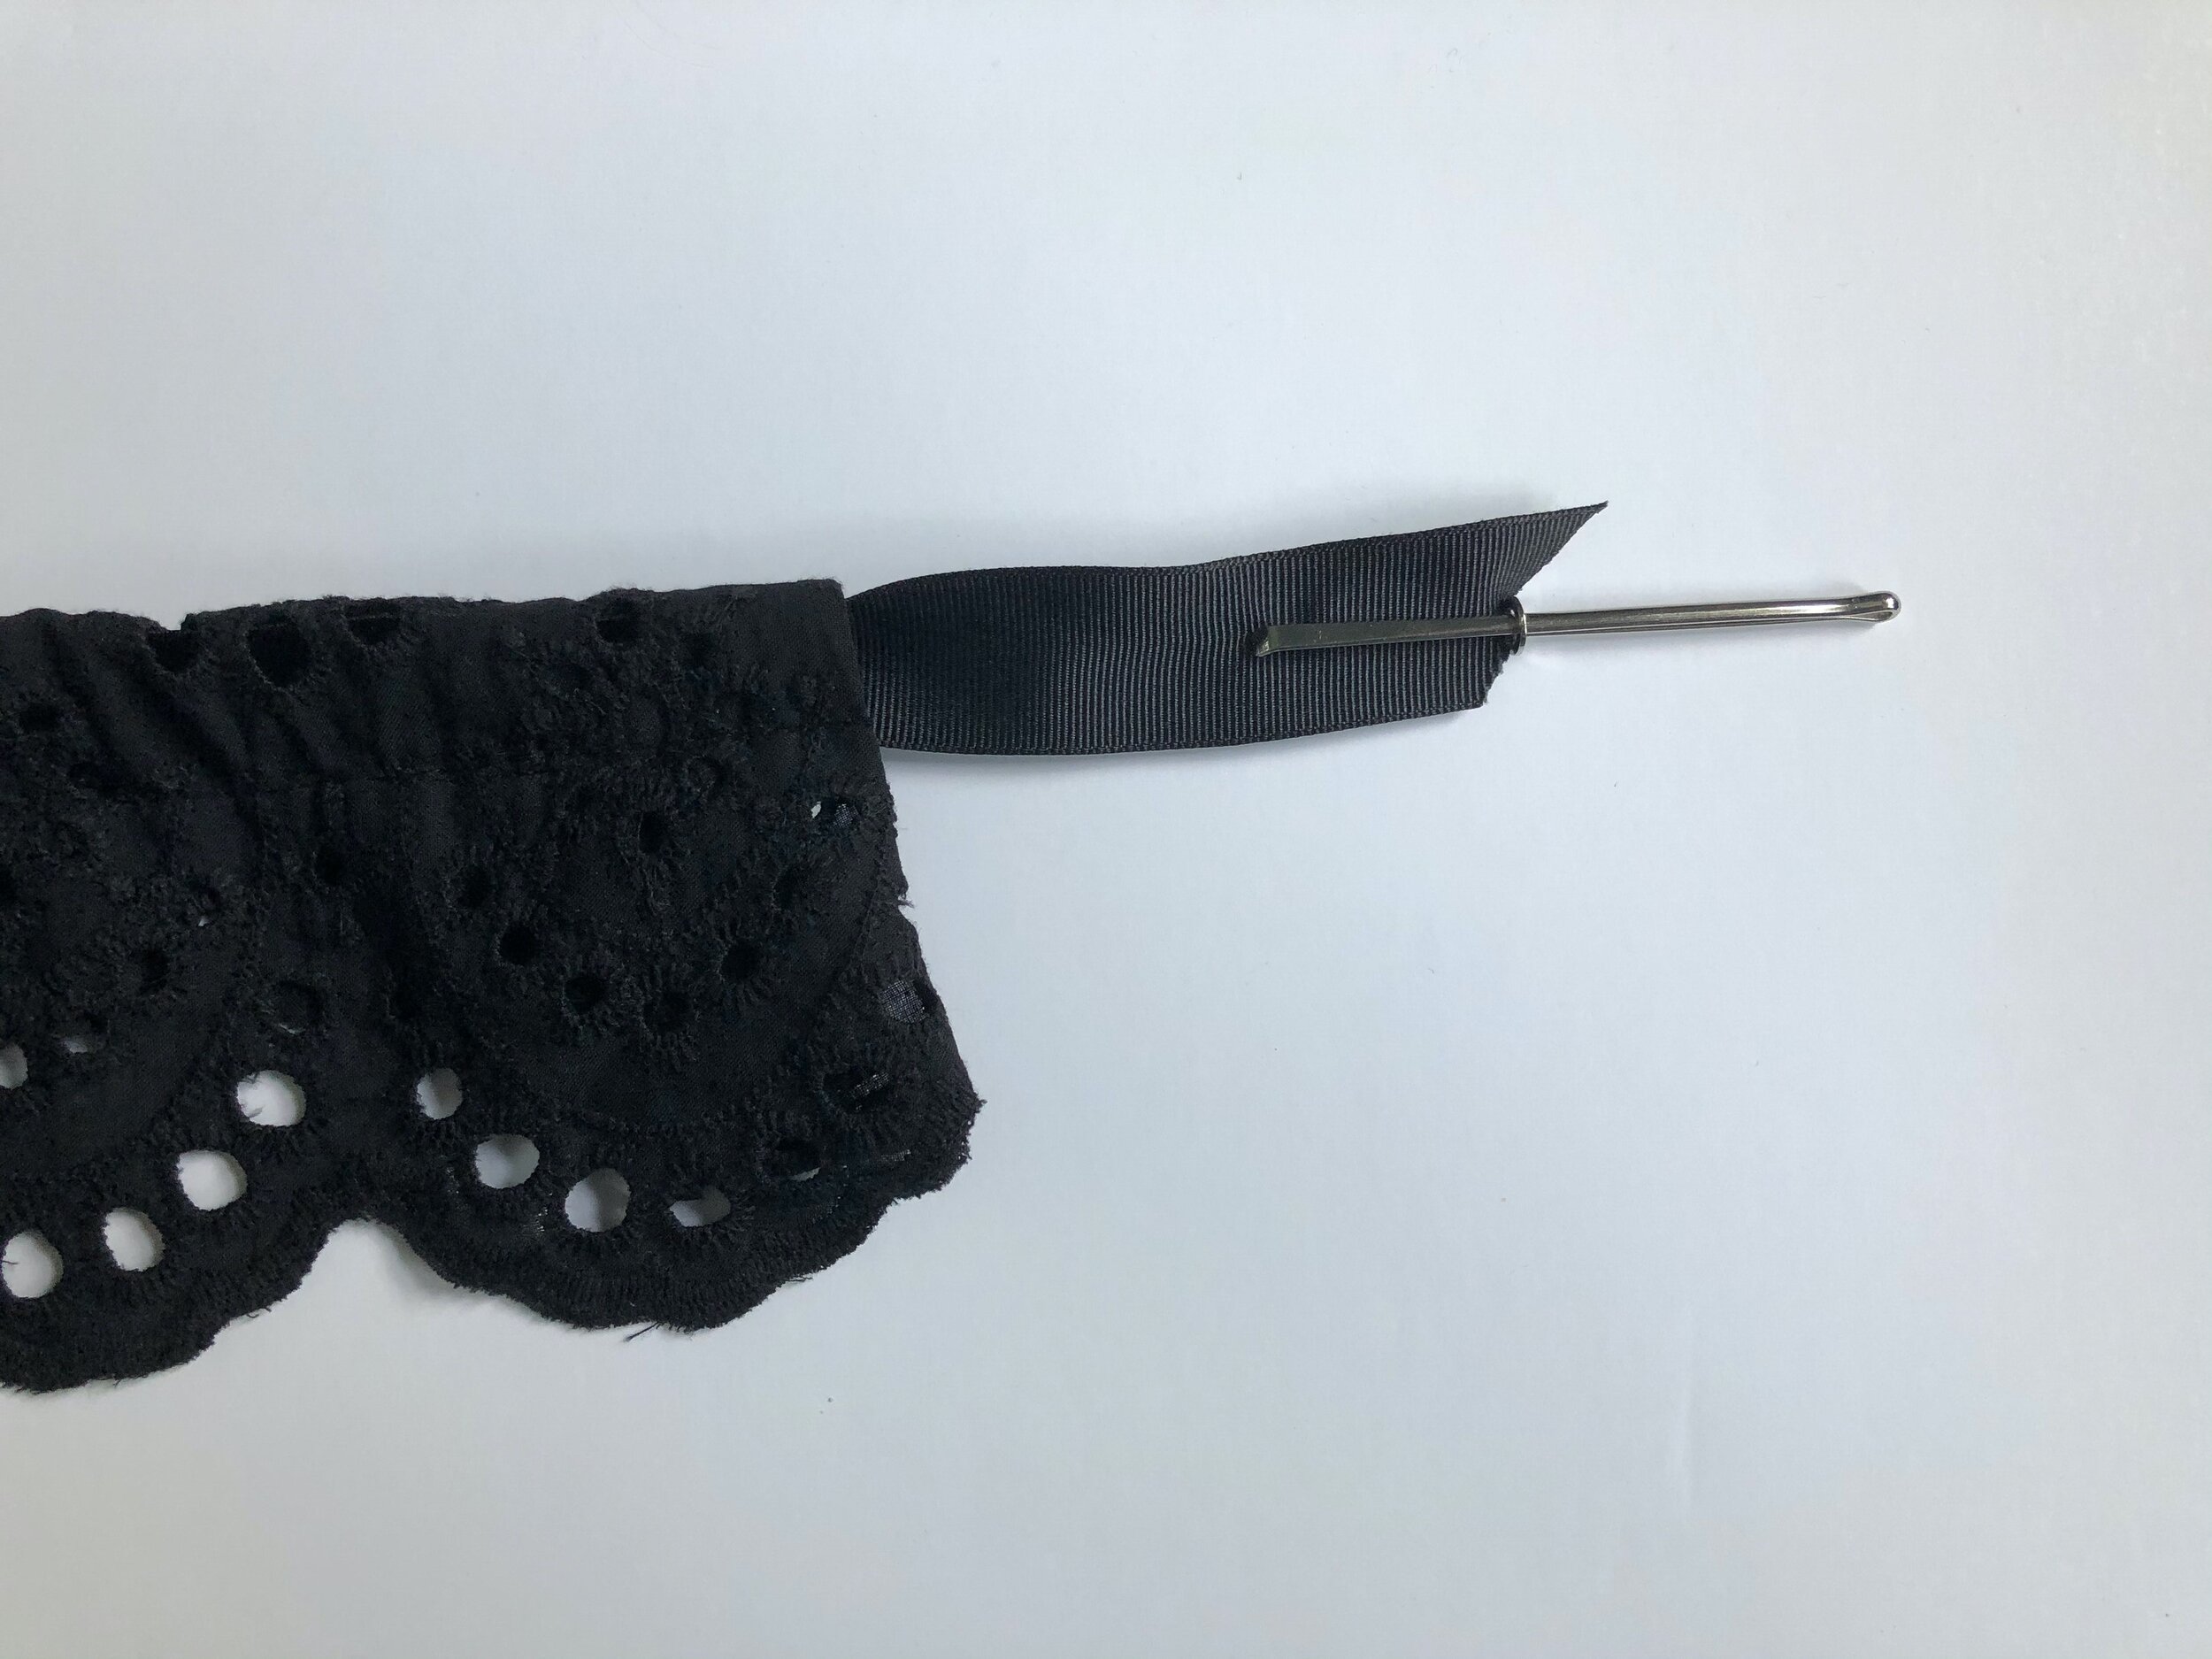
Take the ribbon and thread it through a safety pin or bodkin and draw through the casing. Once the ribbon is pulled through, cinch the collar to encourage it to ruffle a bit.
The ribbon should be just a few inches longer than the entire length of the collar before cinching.
Try it on and adjust the gathers and ruffle so that they form an attractive collar.
Clip each loose ribbon end at an angle to prevent fraying.

The collar can be tied at the center front for a rounded, ruffled collar.

Try playing with the length and width of the collar. This would be really flattering on a v-neck sweater or cardigan. It reminds me of the dainty Eileen West and Laura Ashley collars from the 80’s- but so much bolder and way more stylish!

The collar would be equally as lovely tied in the back. I could see wearing this out one evening with a halter cut sweater top, jeans and heels- and a great bag of course, too.

XO, Hilarie
Remember to Vote! For more information on voting in the US Election, go to vote.org
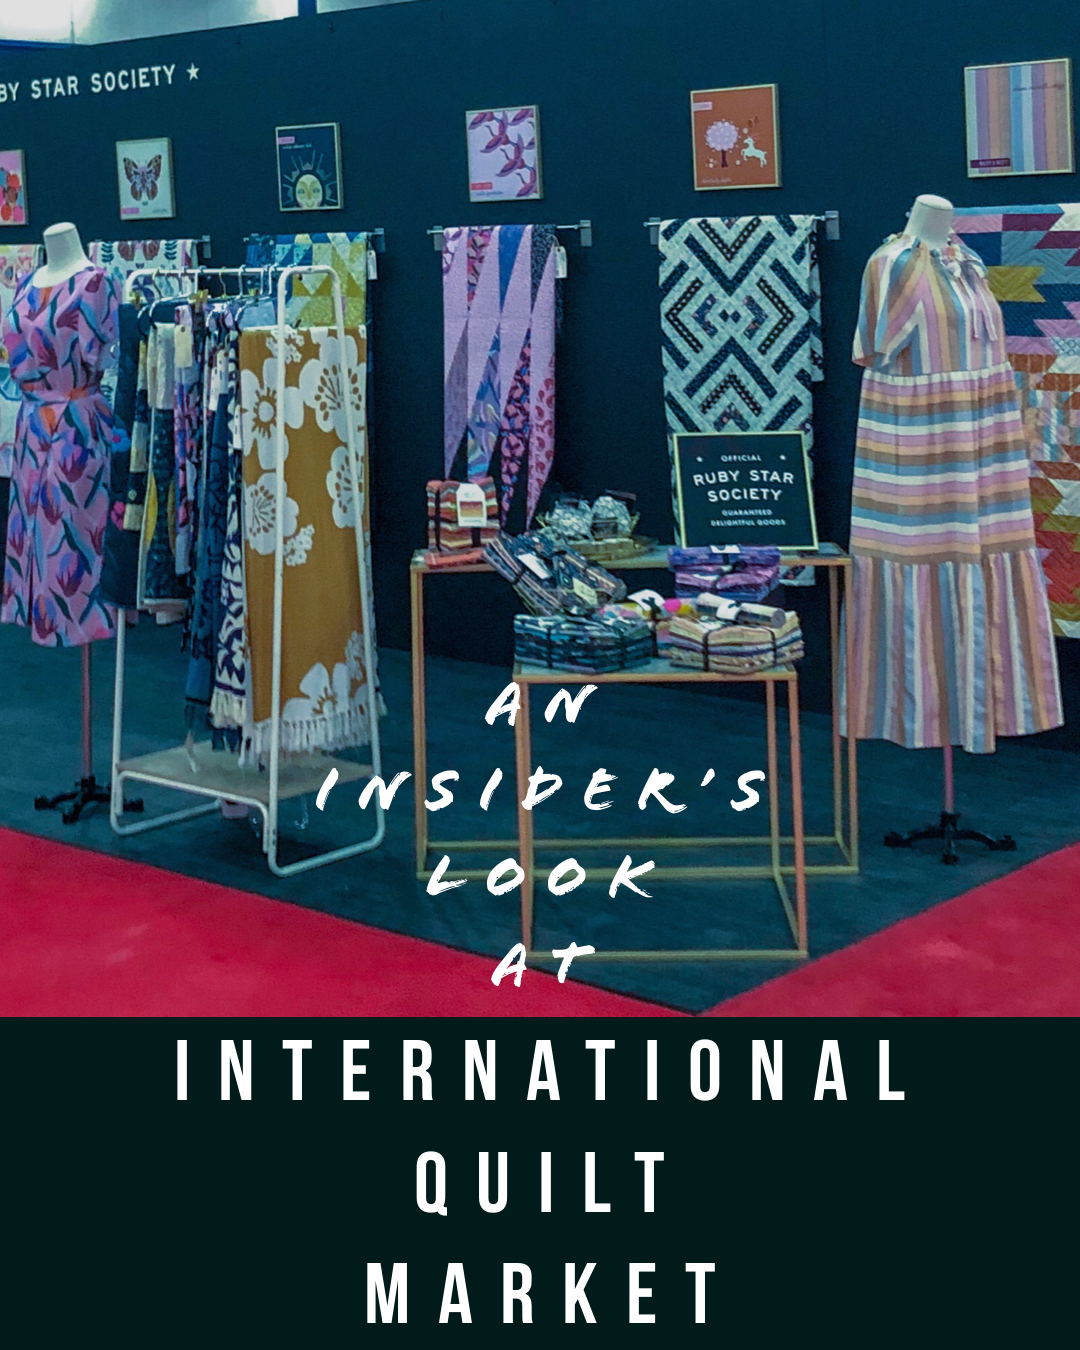
An Insider’s Look at International Quilt Market
I was so fortunate to be able to attend the Fall International Quilt Market. Why Quilt Market, you may ask? A reasonable question. It is a curious name, but don’t let that fool you. The International Quilt Market is the premiere trade show for the sewing industry. All manner of fabric, patterns, notions, sewing machines, tools, books and accessories are represented.

I was so fortunate to be able to attend the Fall International Quilt Market. Why Quilt Market, you may ask? A reasonable question. It is a curious name, but don’t let that fool you. The International Quilt Market is the premiere trade show for the sewing industry. All manner of fabric, patterns, notions, sewing machines, tools, books and accessories are represented.
It is held each year in the George R. Brown Convention Center in Houston, Texas.

The show, which is held twice each year, is a gathering place for store owners, buyers, representatives, authors, editors, magazines, designers and a few sewing studio owners too. It really encompasses the entire spectrum of industry insiders. My perspective as a first-time attendee was rather unique, as I was there with a badge as an author with a well-established and respected publishing company and as a small business owner. This outsider disguised with an “insider’s badge” gave me the ability to both stand out and fade into the background at once.

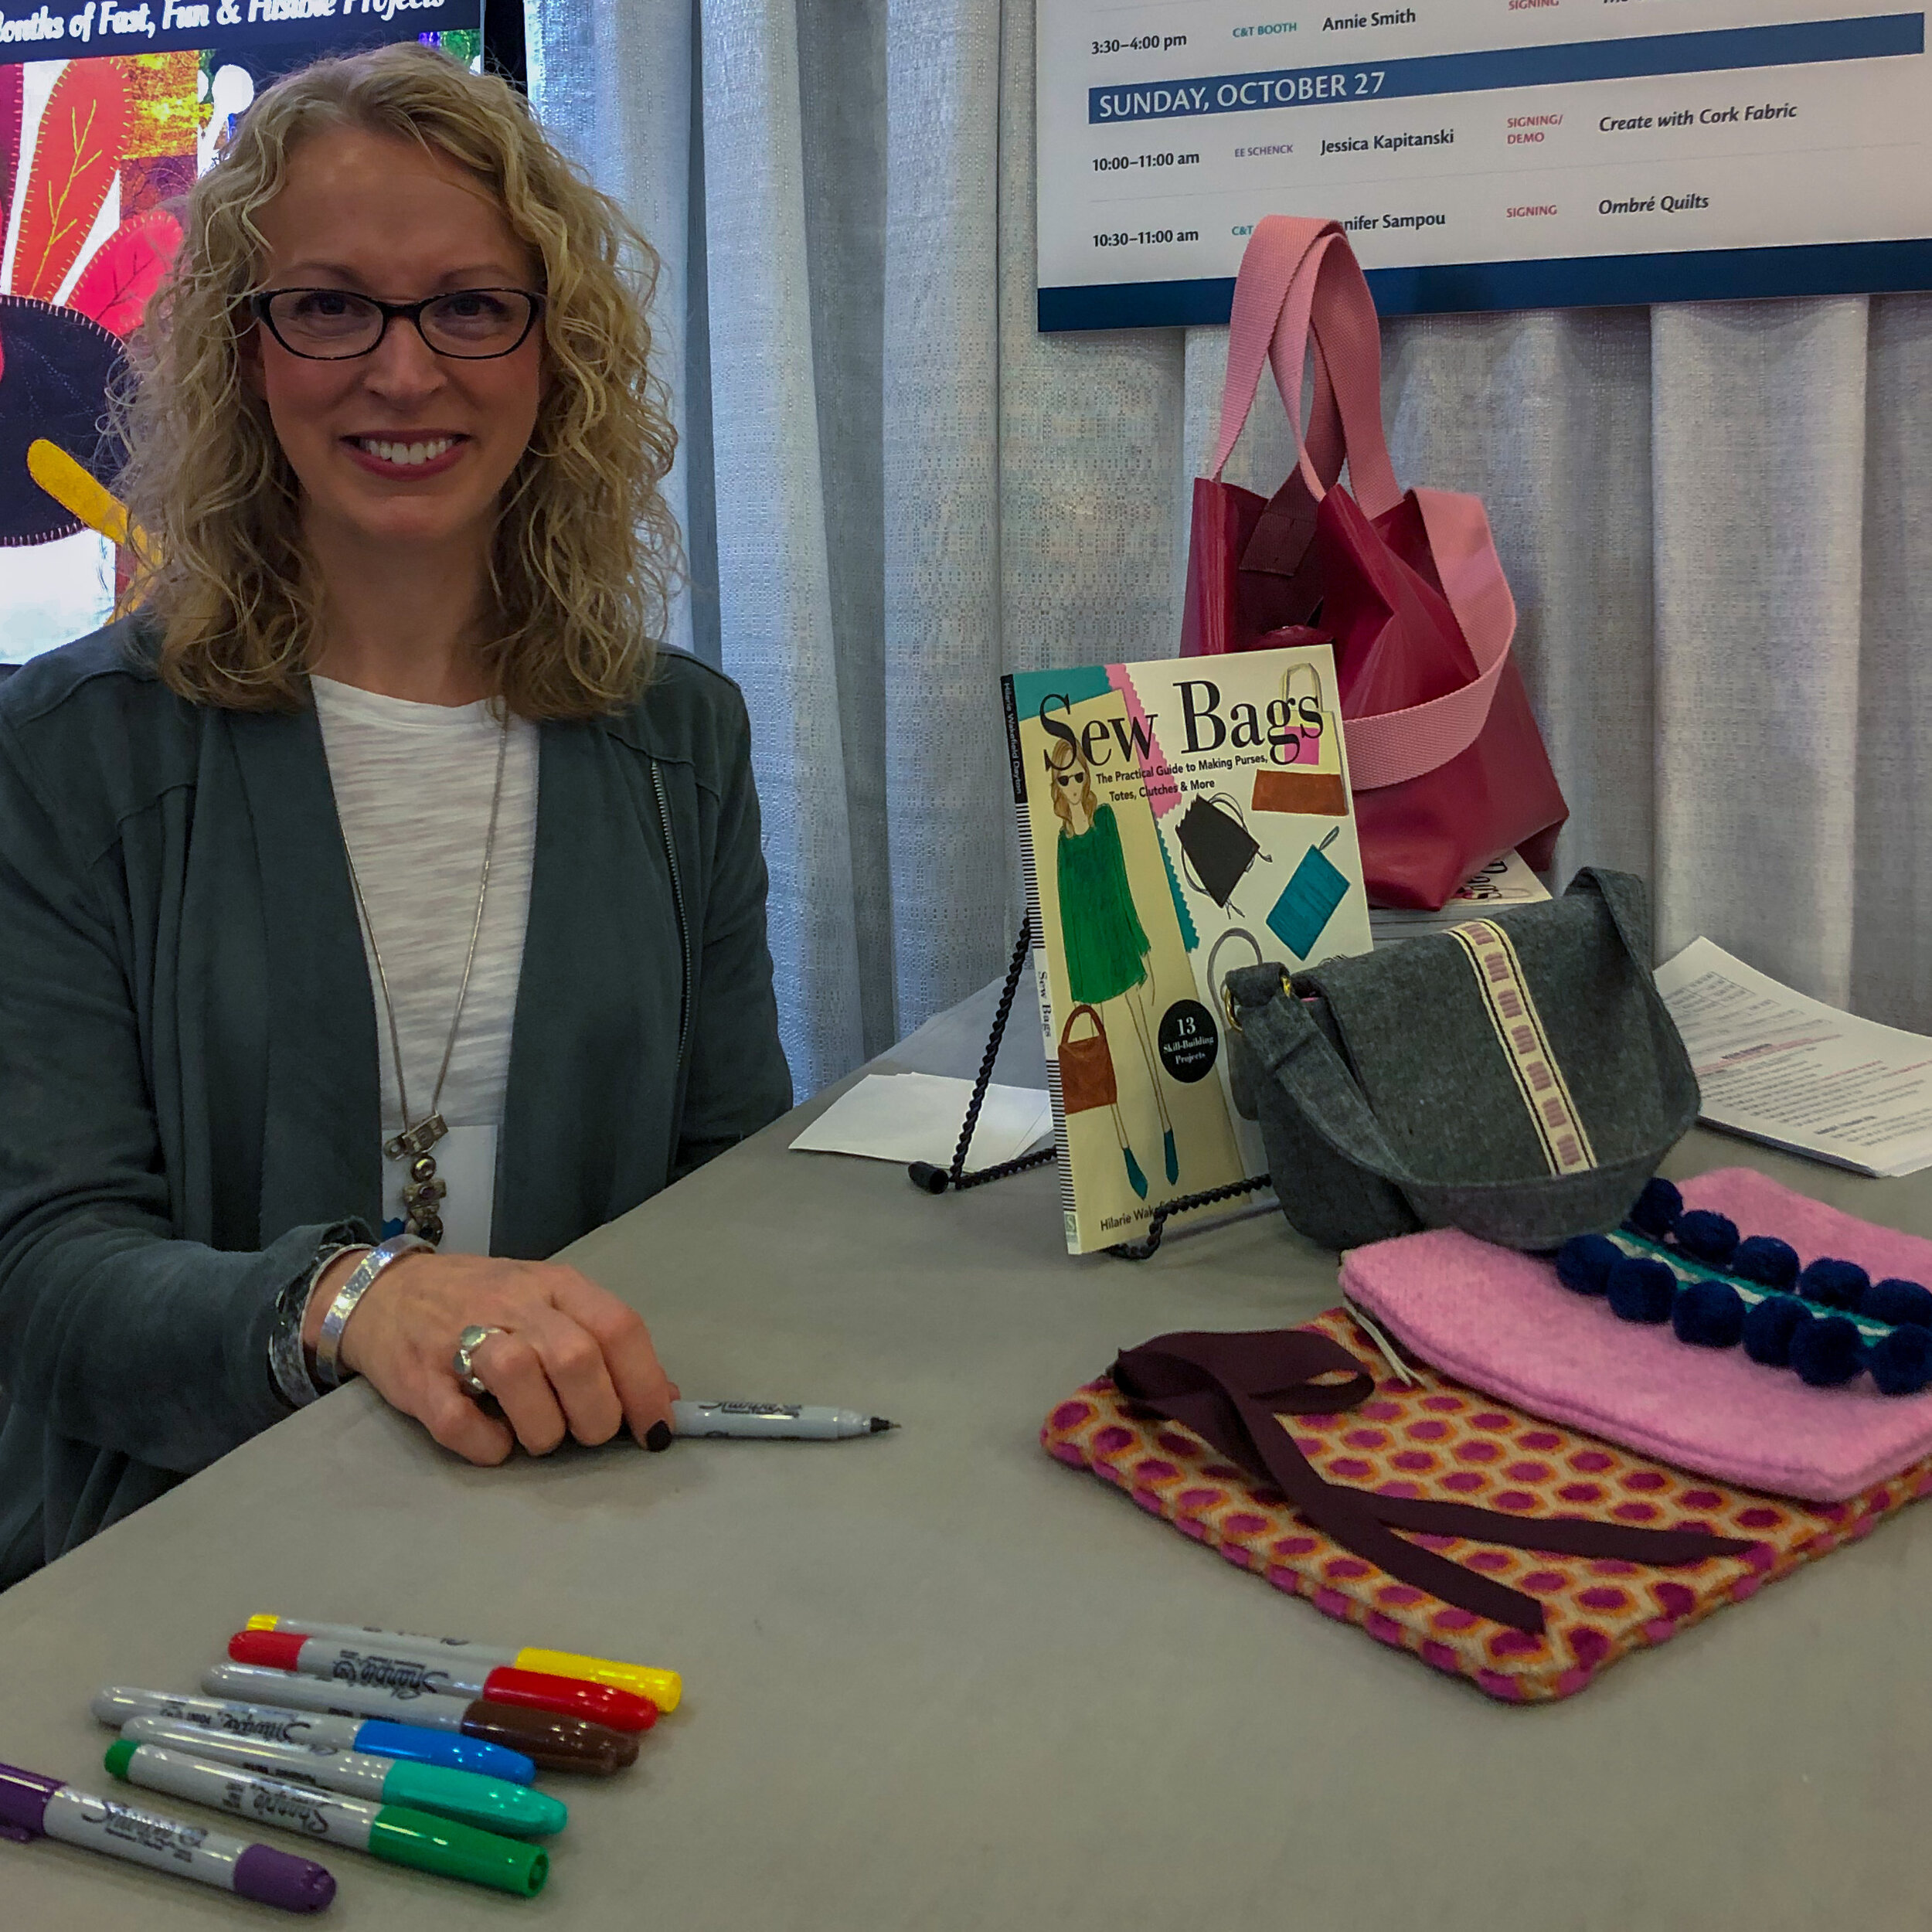
As an author, I was given some time at my publisher, C&T’s booth to have a book signing. Shop owners and representatives stopped by my table at the C&T booth to chat and have their book signed. This was such a fantastic opportunity to meet them and to hear about their work, their customers and what projects they are interested in making.
After the book signing wrapped up, I had a few minutes to change and refuel on coffee before filming a how-to tutorial. The tutorial, which will be coming soon, will be used as a promotional video for my book.
Once that was complete, I was free to explore the Quilt Market.

It truly was a fantastic experience for me to meet with representatives of magazines, sewing machines and fabric companies, distributors and suppliers. I learned a lot and made some valuable new contacts.
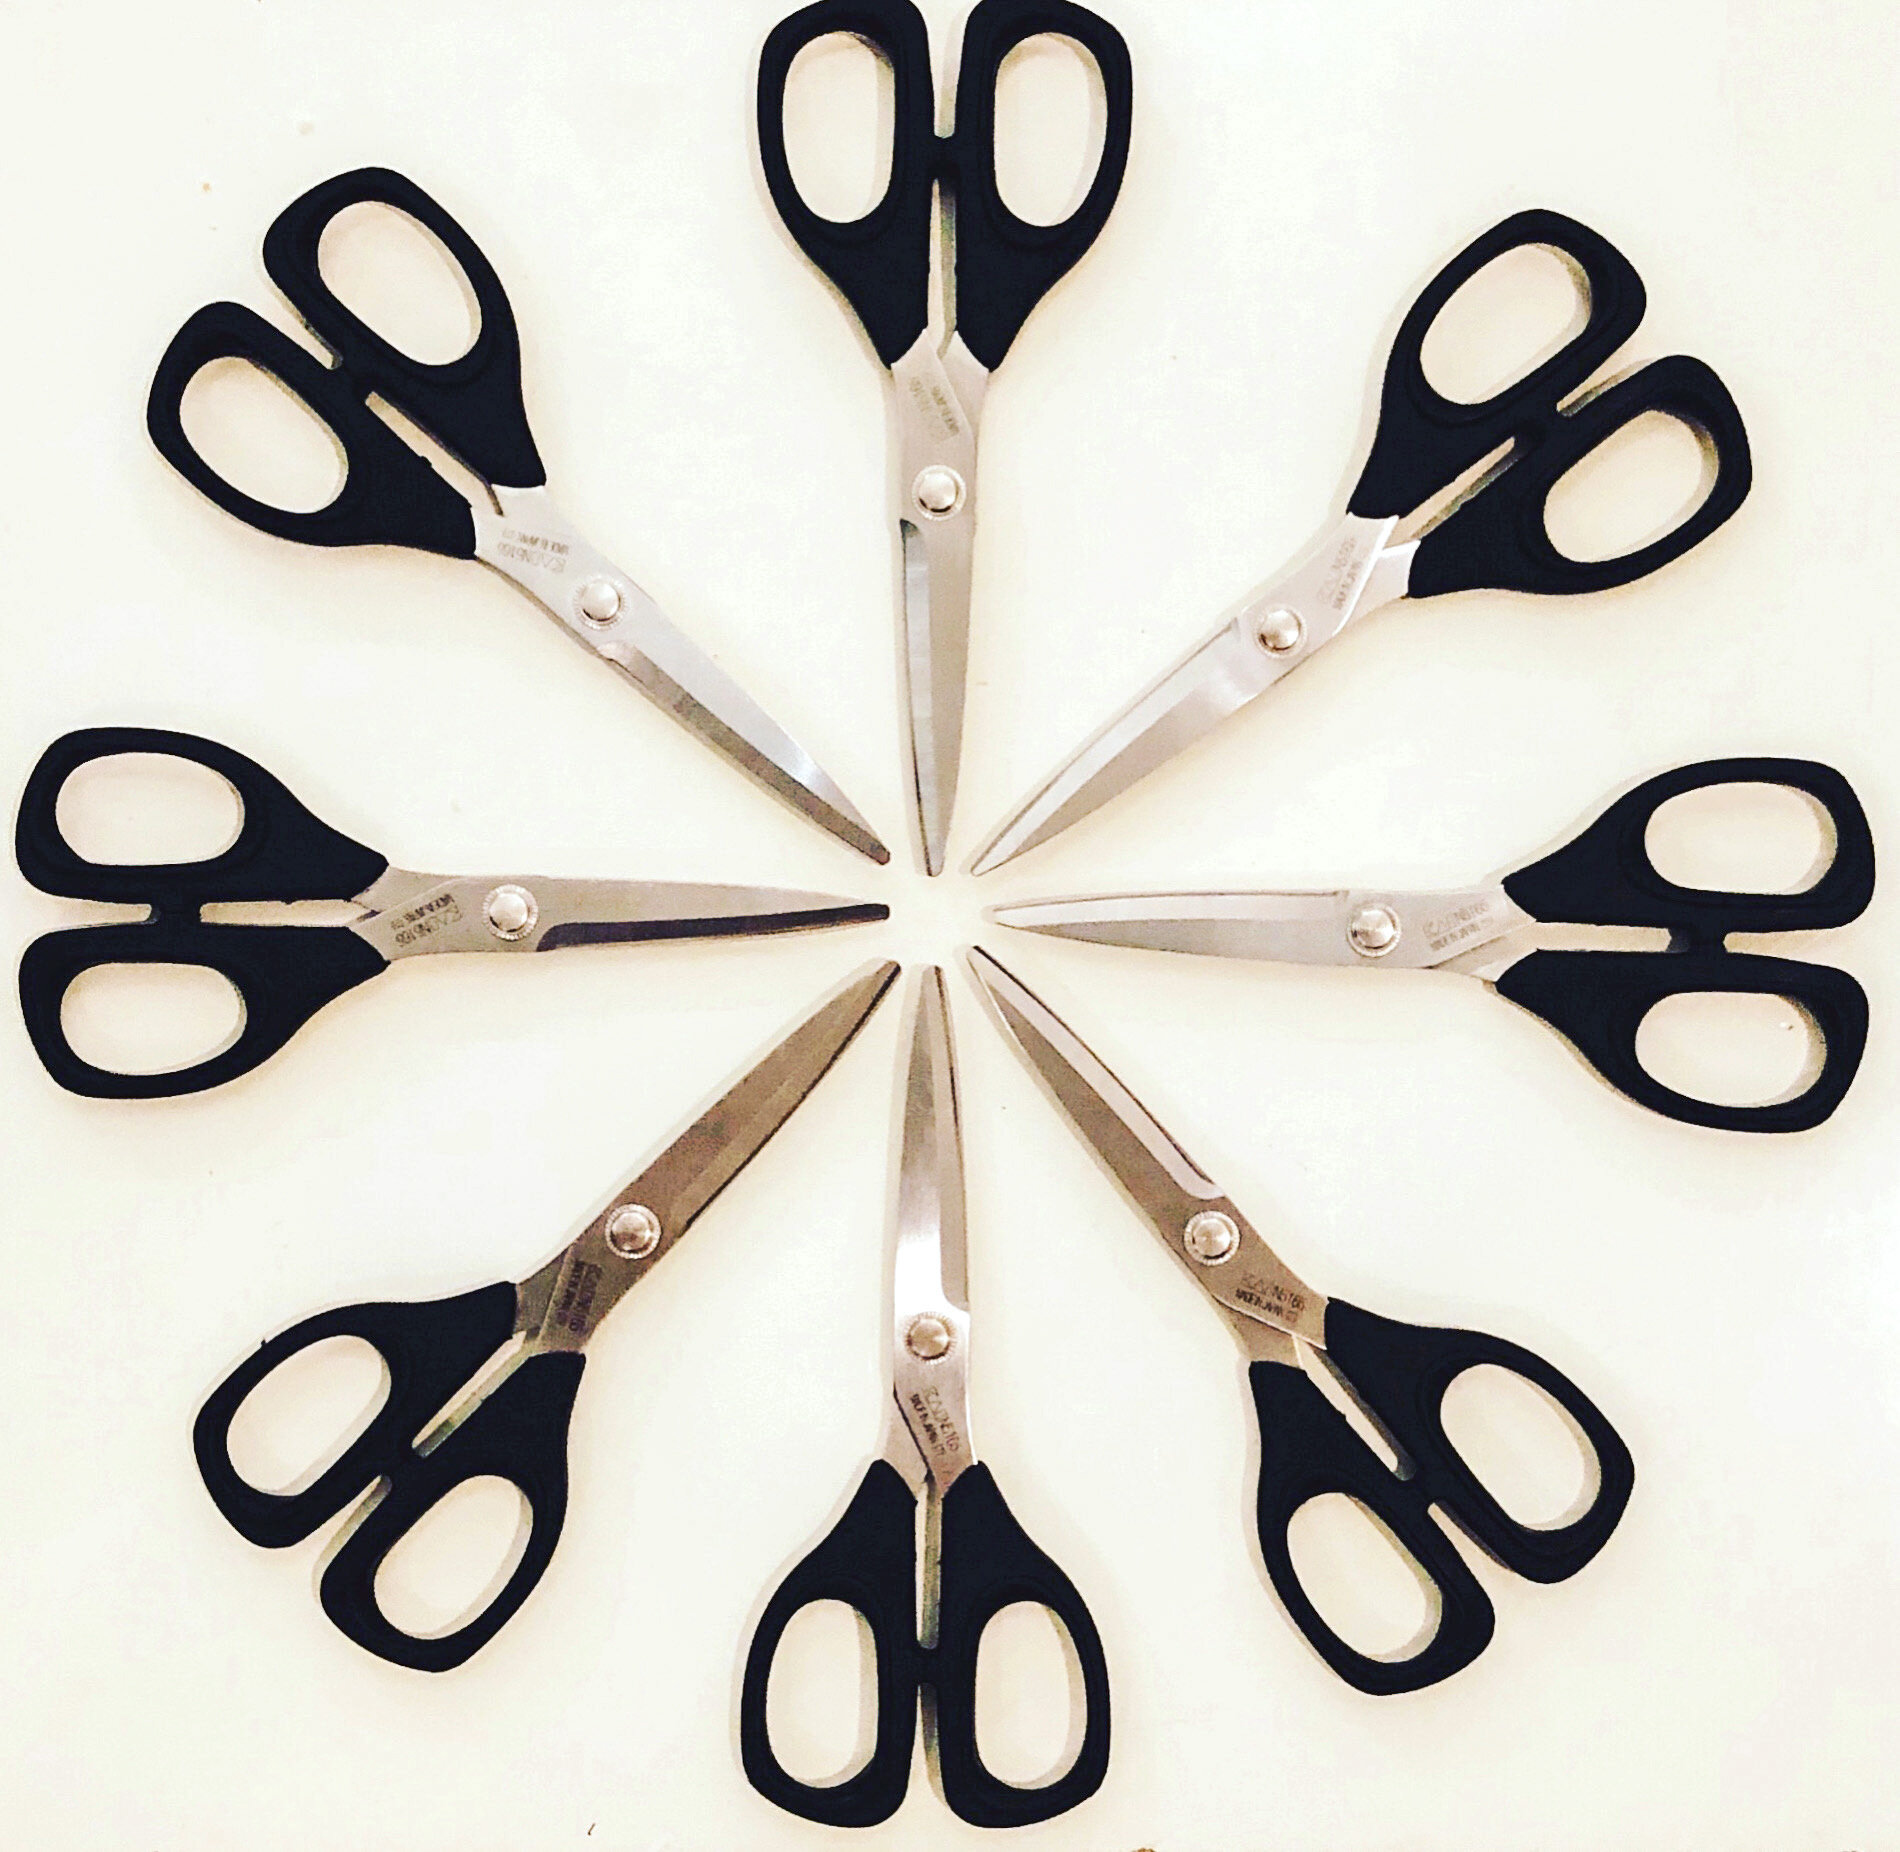
For example, while visiting the Kai Scissors booth, I mentioned that I personally love their scissors but don’t use them in my shop because I teach kids and the scissors are so sharp they could be a safety hazard. The representative informed me that they would be happy to blunt the tips of the scissors for me as a precautionary measure. Well, let’s just say that order was a no-brainer. Now the kids use beautiful and very sharp- but very safe scissors in class.

I spy my book on the shelf!

Testing new Eversewn sewing machines.

Each booth was an explosion of color, pattern and inspiration. The designers and team did an extraordinary job of not only designing the patterns for their fabric collections but in planning and designing their booths.
It did take a bit of restraint, but I managed not to go all fan-girl on some of the designers and authors I had the pleasure of meeting.


By closing, I was exhausted but exhilarated. Fortunately, my hotel was connected to the Convention Center, so it was just a short walk back. The hotel was gorgeous and lucky for me had some exceptional restaurants inside.


Check out the edible gold leaf. This dessert at Xochi was worth the price of the flight and hotel combined.
The fabric and supplies that I ordered just a few months ago are beginning to ship. Each time I pull a bolt off of the shelf, I will be reminded of my first time at Quilt Market.
XO, Hilarie

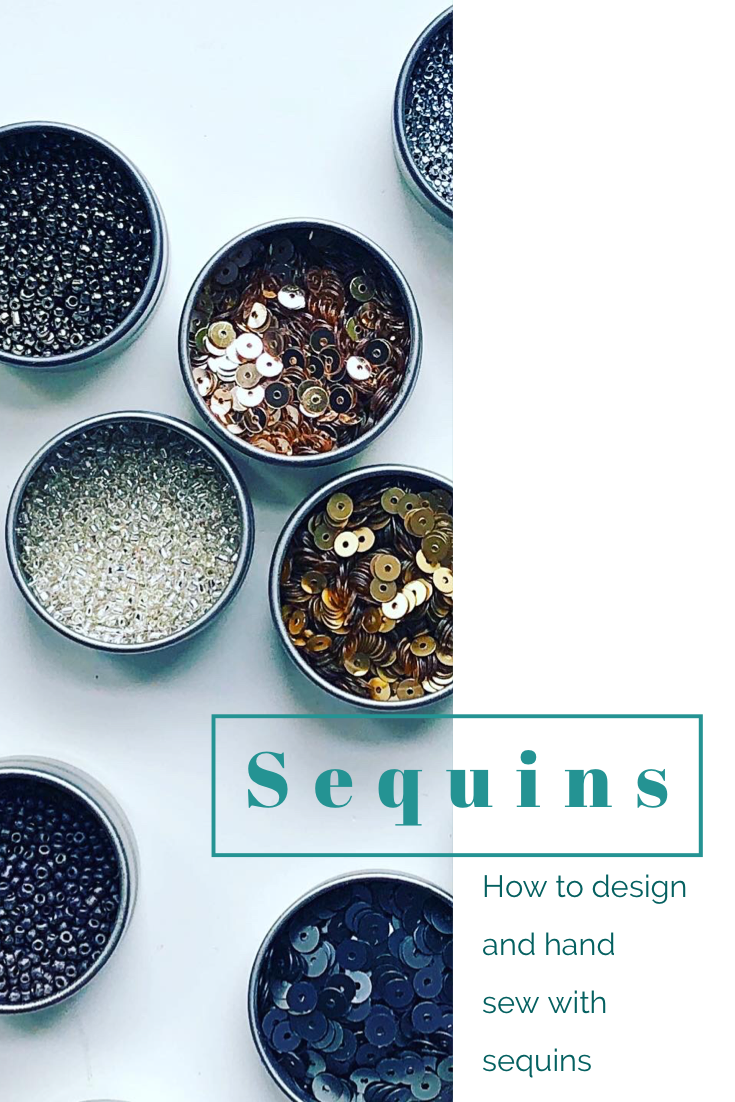
HOW TO HAND SEW SEQUINS: A Course in Creating Custom Embellishments with Sequins
Recently I have been seeing a host of embellishments of all manner in fashion magazines and on the runways. Perhaps since clothing shapes and silhouettes are holding steady, embellishment is a way to make clothing new and enticing. Whether it’s just a sprinkling here and there or an all-over design, embellishment is a fun way to both personalize and dress up your wardrobe.
This winter I discovered that one of my favorite sweaters had been enjoyed by some moths. Uggh! However, instead of being upset, I decided that this presented the perfect opportunity to create a design that I had been playing around with in my mind and repair my beloved sweater.

The design that I had in mind was something between a leopard print and a paisley. Initially I wanted it to be more leopard, but the scale of the paisley seemed more fitting. Also, I really wanted the design to only be on the front of the sweater as beads and sequins- especially when sewn to a knit have the tendency to rub. Then there is the issue of of placement. A leopard or paisley print with unfortunate motif placement could look ridiculous very quickly. I did not want to draw any undue attention to my bustline.
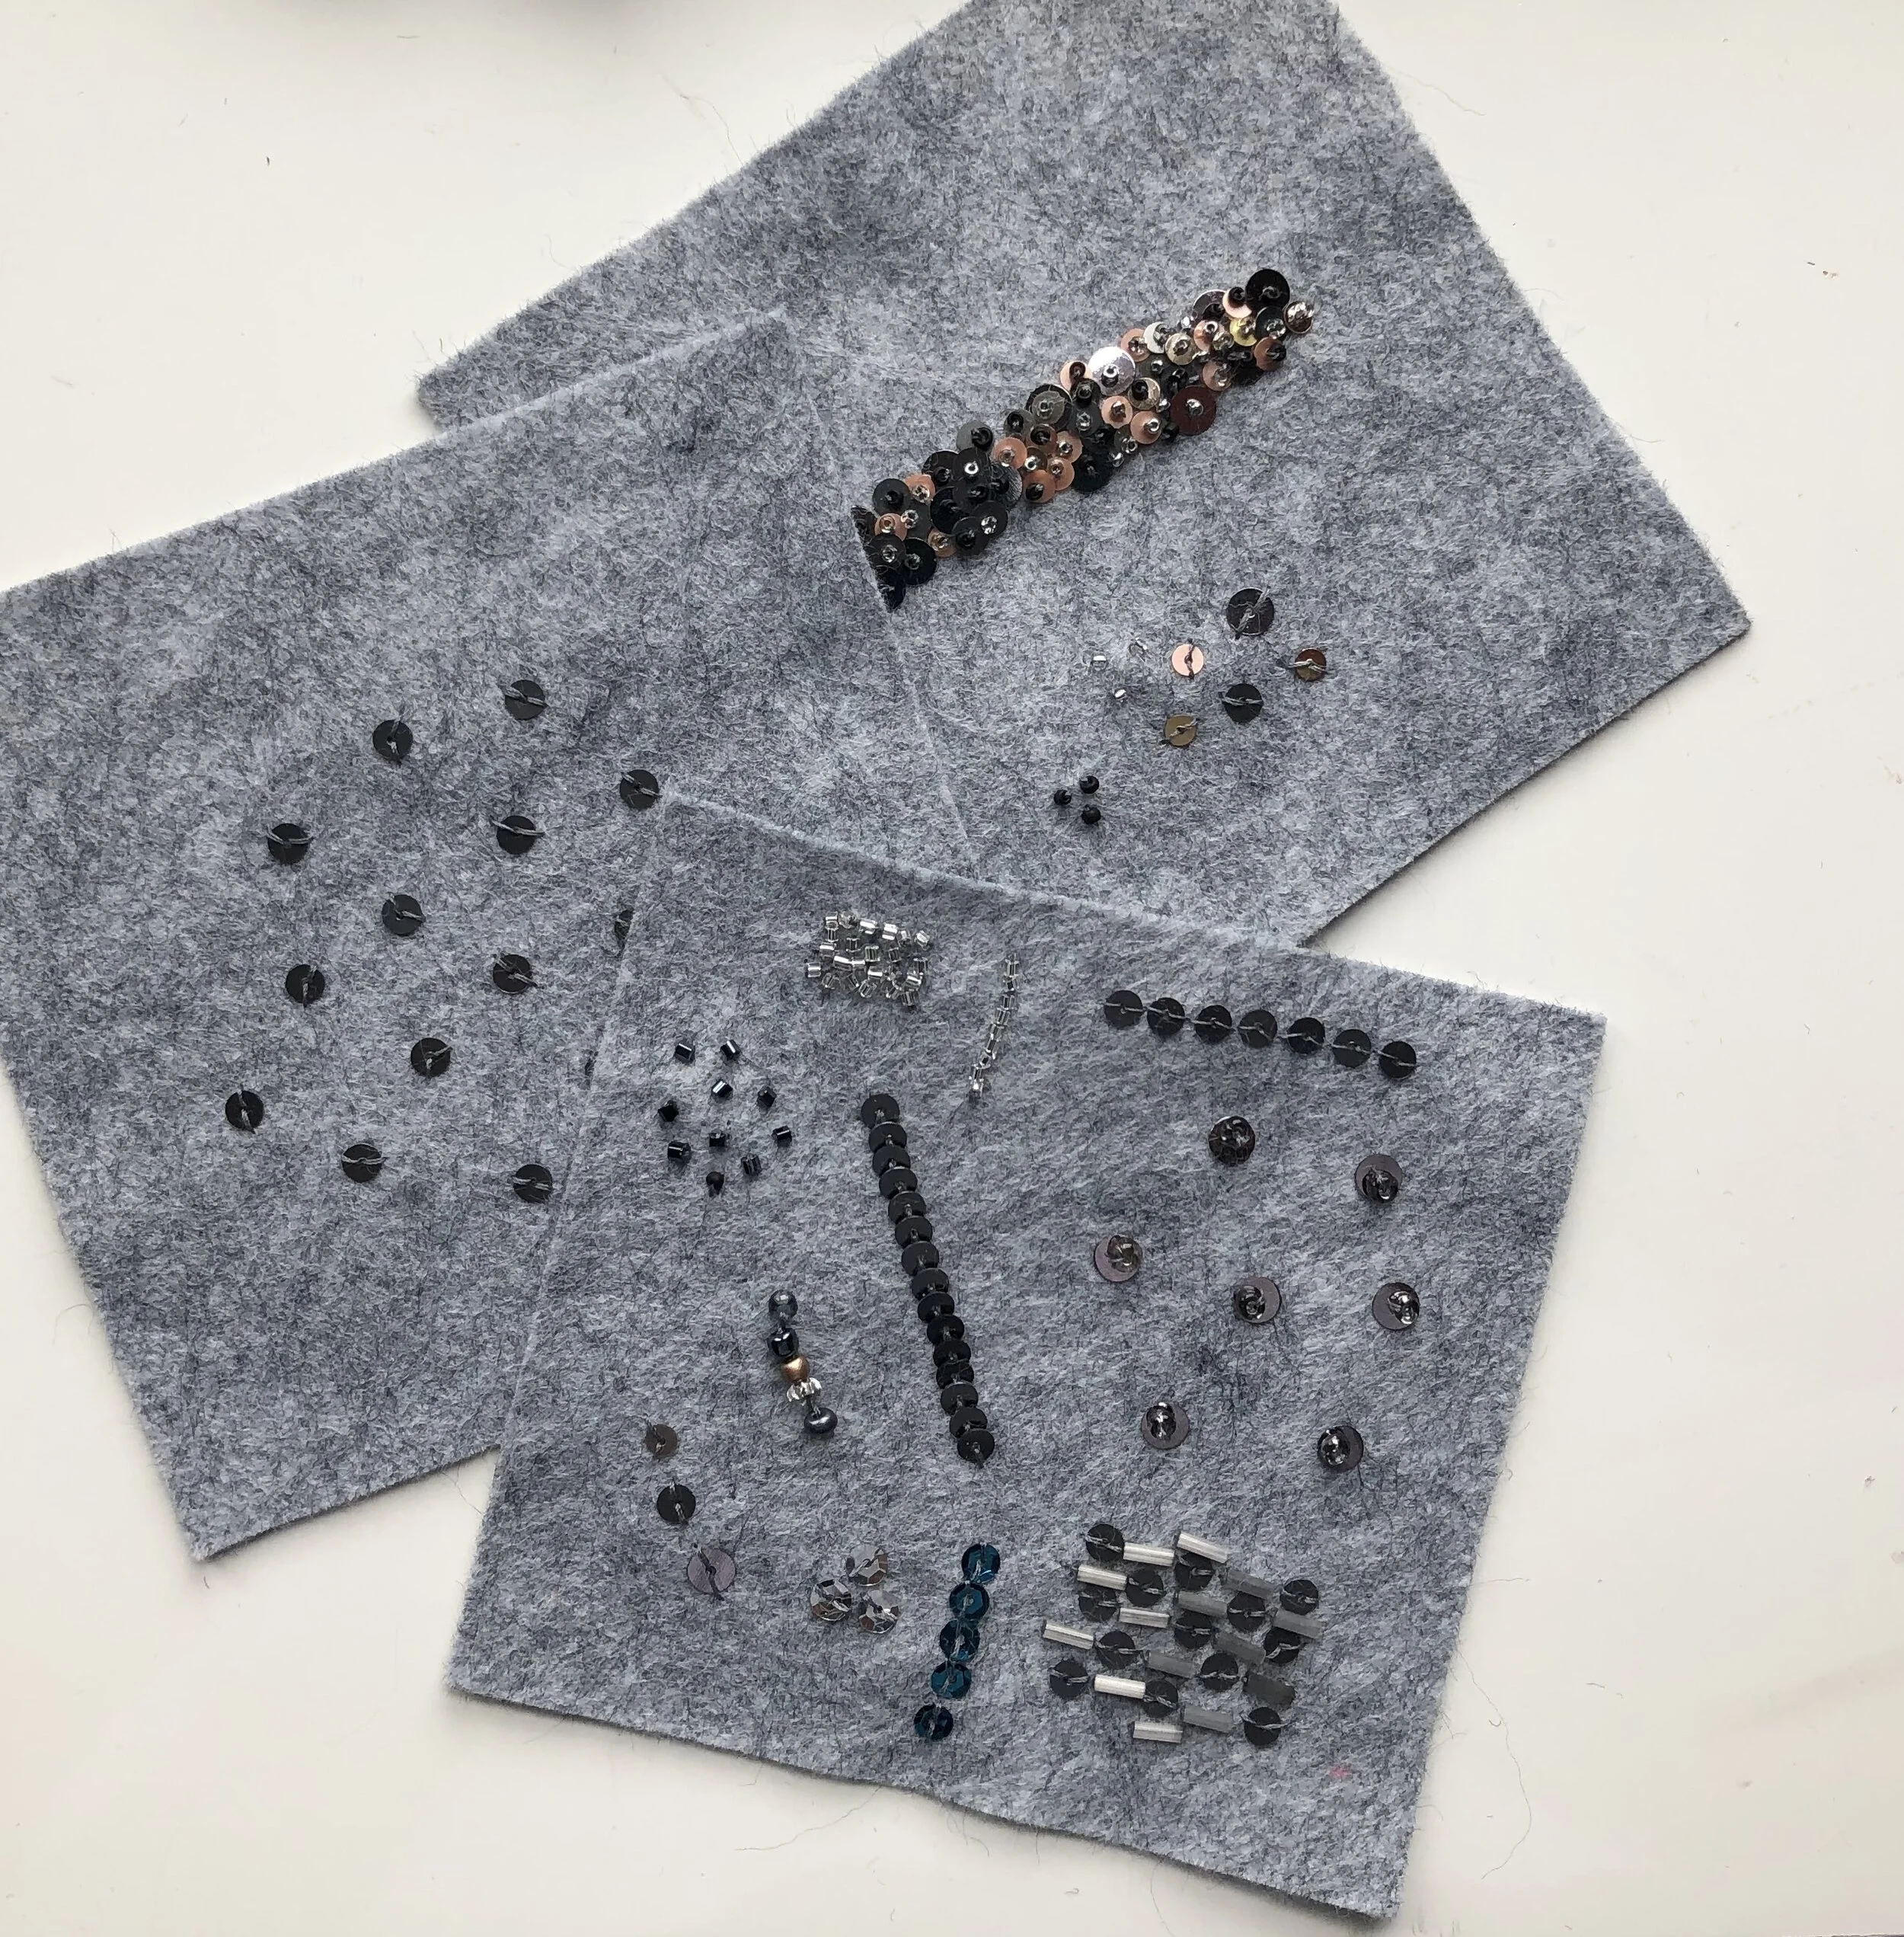
In order to clear this hurdle, I made a few shapes to pin on the sweater to determine the best placement and repeat. Once I was pleased with the placement, I began to sew. It took probably 10-12 hours to complete, but I am quite happy with the result and even more pleased knowing that my once loved sweater may now last me another 15 years.
Want to try your hand at embellishing a sweater? The steps below outline how I did it, but they can be adapted to any sequins pattern you create.
You’ll Need:
Sequins, I used one ounce of 5mm
Thread, Ideally, fil a gant, or gloving thread.
Contrast or Basting Thread (all purpose is fine. Good time to use the odd ones:)
Pins and scissors
A sweater
HOW TO SEW SEQUINS BY HAND
Step 1. Create the design. You can follow mine or map out your own. Paper and pencil is a great place to begin. If you are in need of inspiration, look in your own wardrobe. Which motif’s do you seem to be drawn to? Polka dots? animal prints? stripes? Start there.
Step 2. Determine placement and design repeat. Do you want the design just on a specific part of your sweater? Or would you prefer an all-over design?
HOW TO HAND SEW OVERLAPPING SEQUINS
Sequins come in a variety of shapes and sizes. The ones that I chose are flat and matte rather than the sparkly cupped shaped ones. Sequins size range from 2mm all the way to 30mm. I tend to like the 3-15mm, as I can use an embroidery needle and thread to apply. While sequins can be applied by machine, I do enjoy hand sewing them. Though it does take some time, for speedier work, you can purchase pre-strung beads and sequins.
To hand sew sequins, the thread should be doubled and kept short to prevent twisting and knotting. Be sure to use a light hand as pulling stitches too tight, will create puckers in the fabric. Run your thread through the beeswax or thread magic.
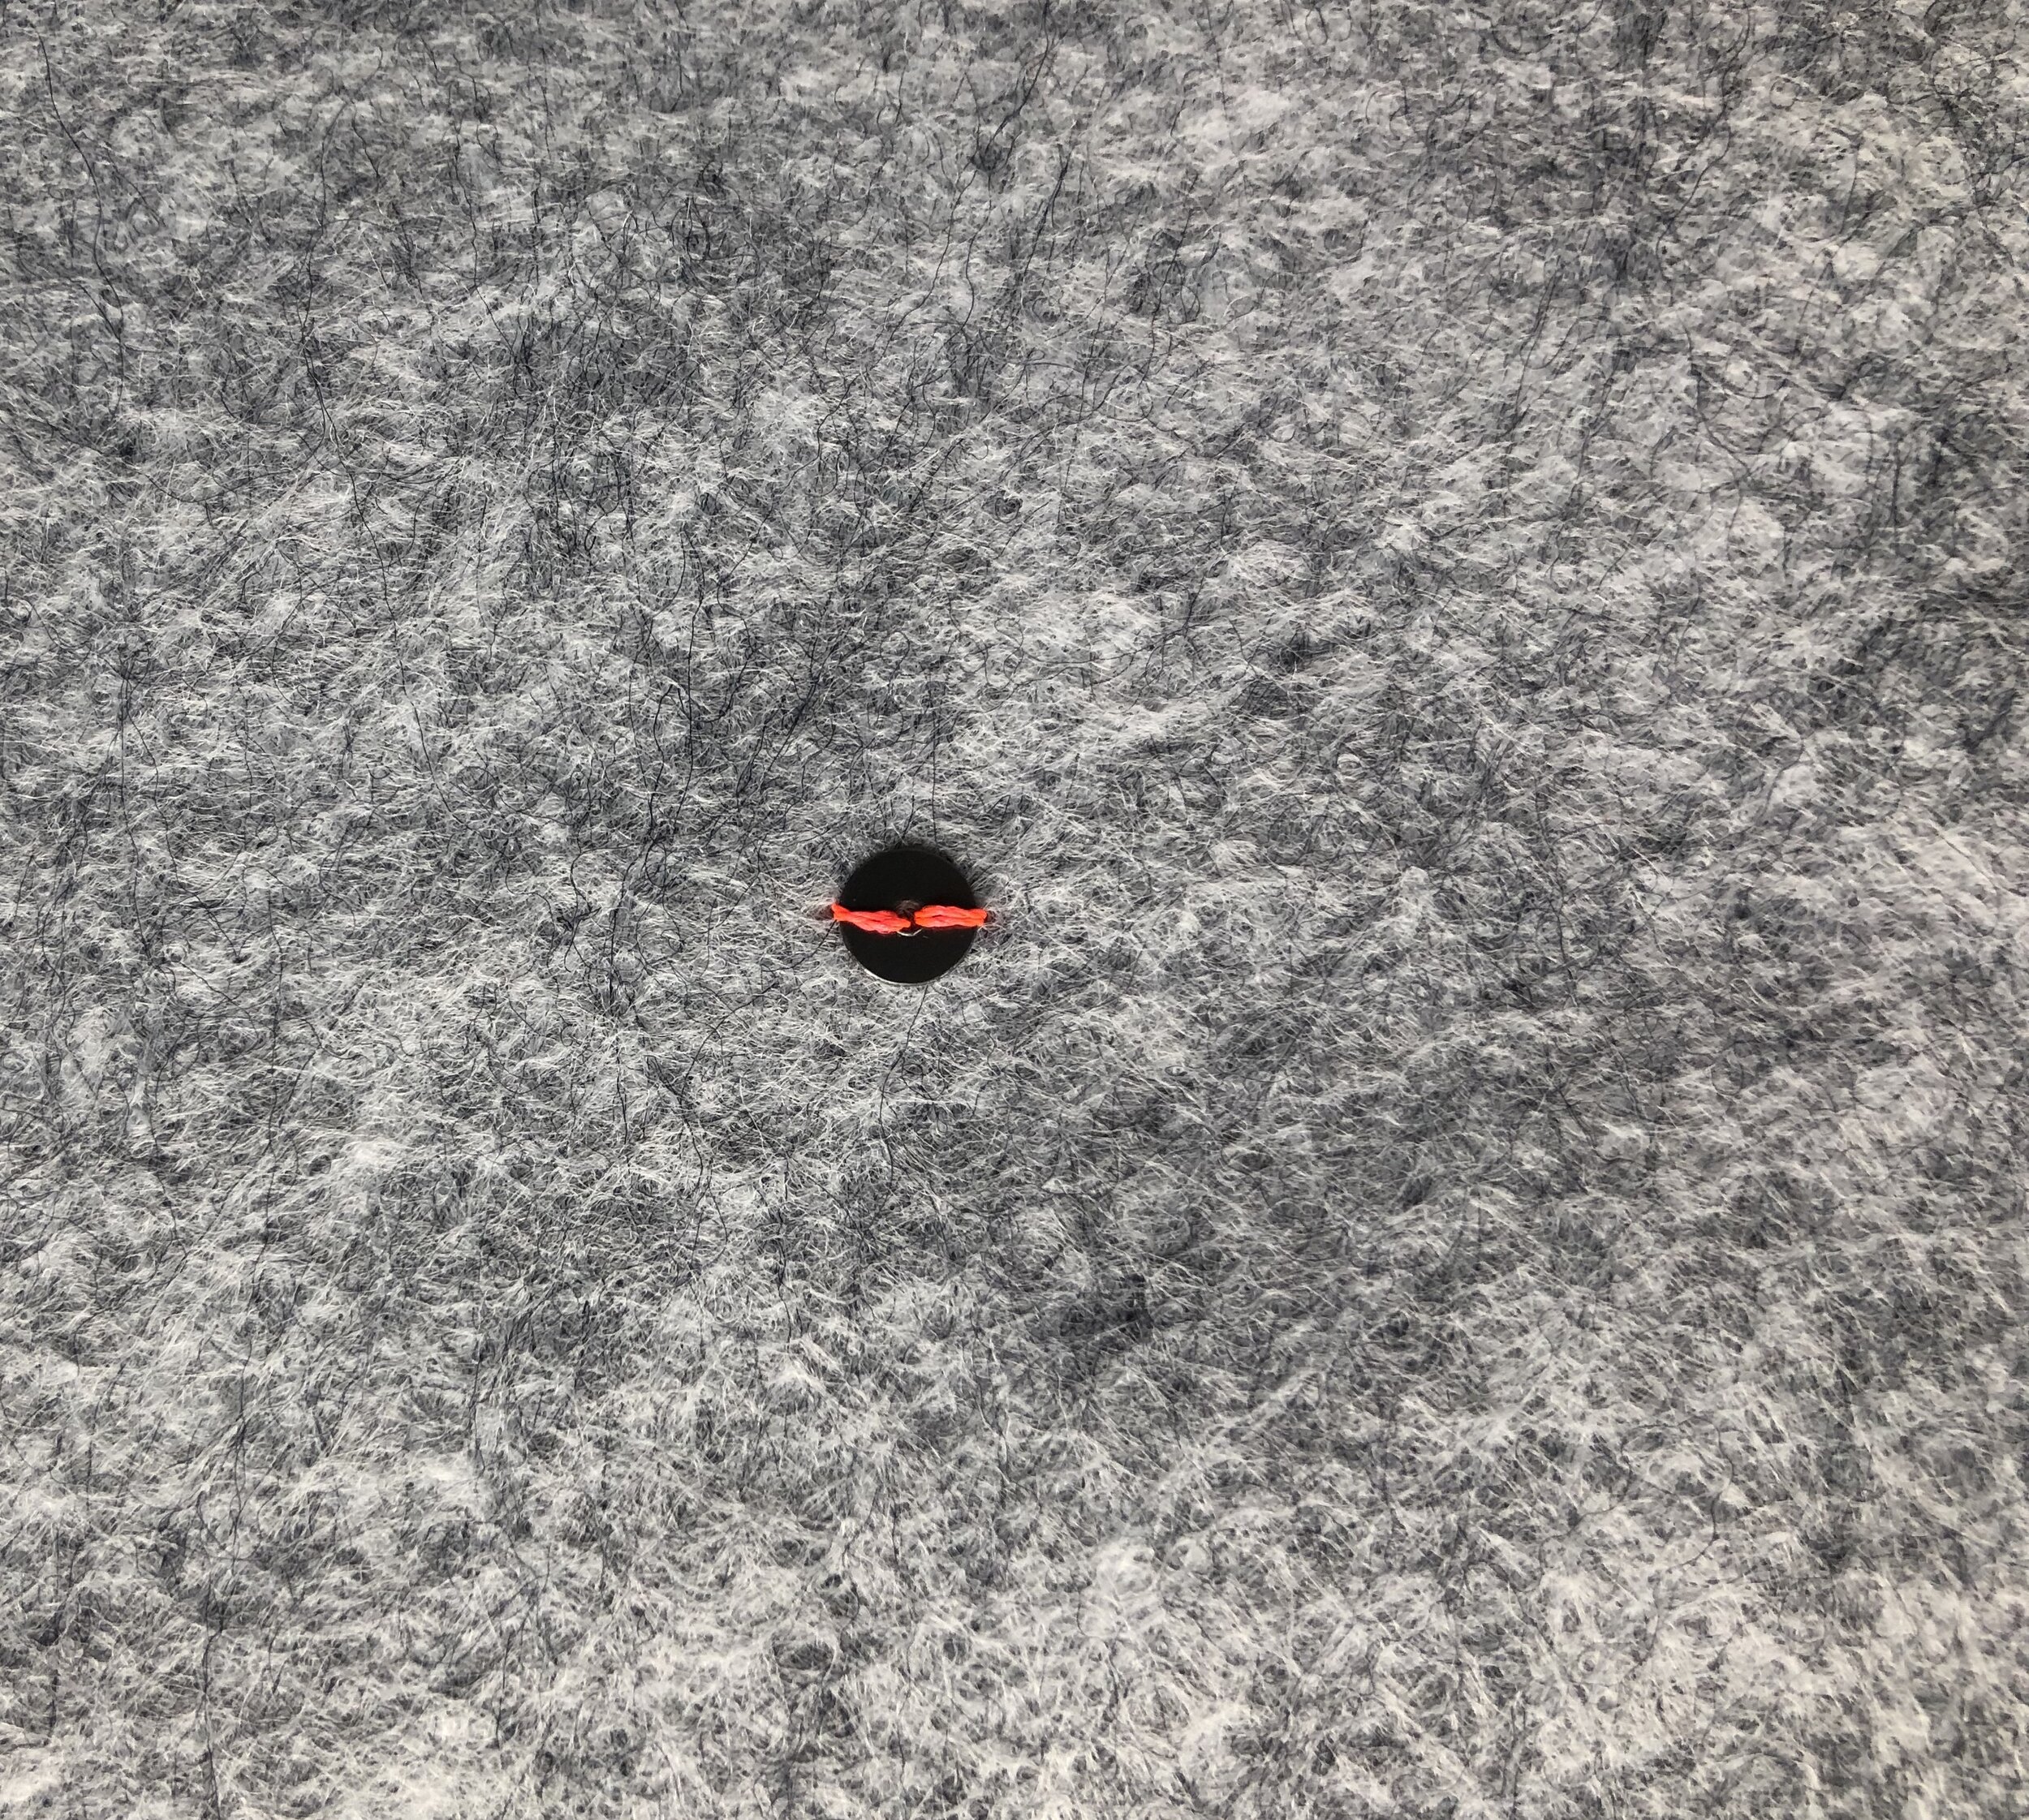
Before adding the first sequin or bead in my pattern, I do like to make one small stitch in the fabric to secure.
To sew a line of overlapping sequin, begin by inserting your needle from underneath the fabric and pushing up.

Place a sequin on the needle and pull toward the fabric to place.

Bring the needle to the side of the sequin to stitch over the edge and coming back up through the center. Pick up a second sequin, place it so that it just overlaps the first and stitch over the edge to secure. When you pull the thread, it should pull the sequin in its place.


Another view with all of the steps together. Once you get the hang of it, it really does begin to go rather quickly.
HOW TO HAND SEWN SCATTERED SEQUINS

For an all-over effect, this scattered design really packs a punch. I have a skirt that I made years ago that is embellished with an all-over pattern of sequins with a seed bead secured in the center.
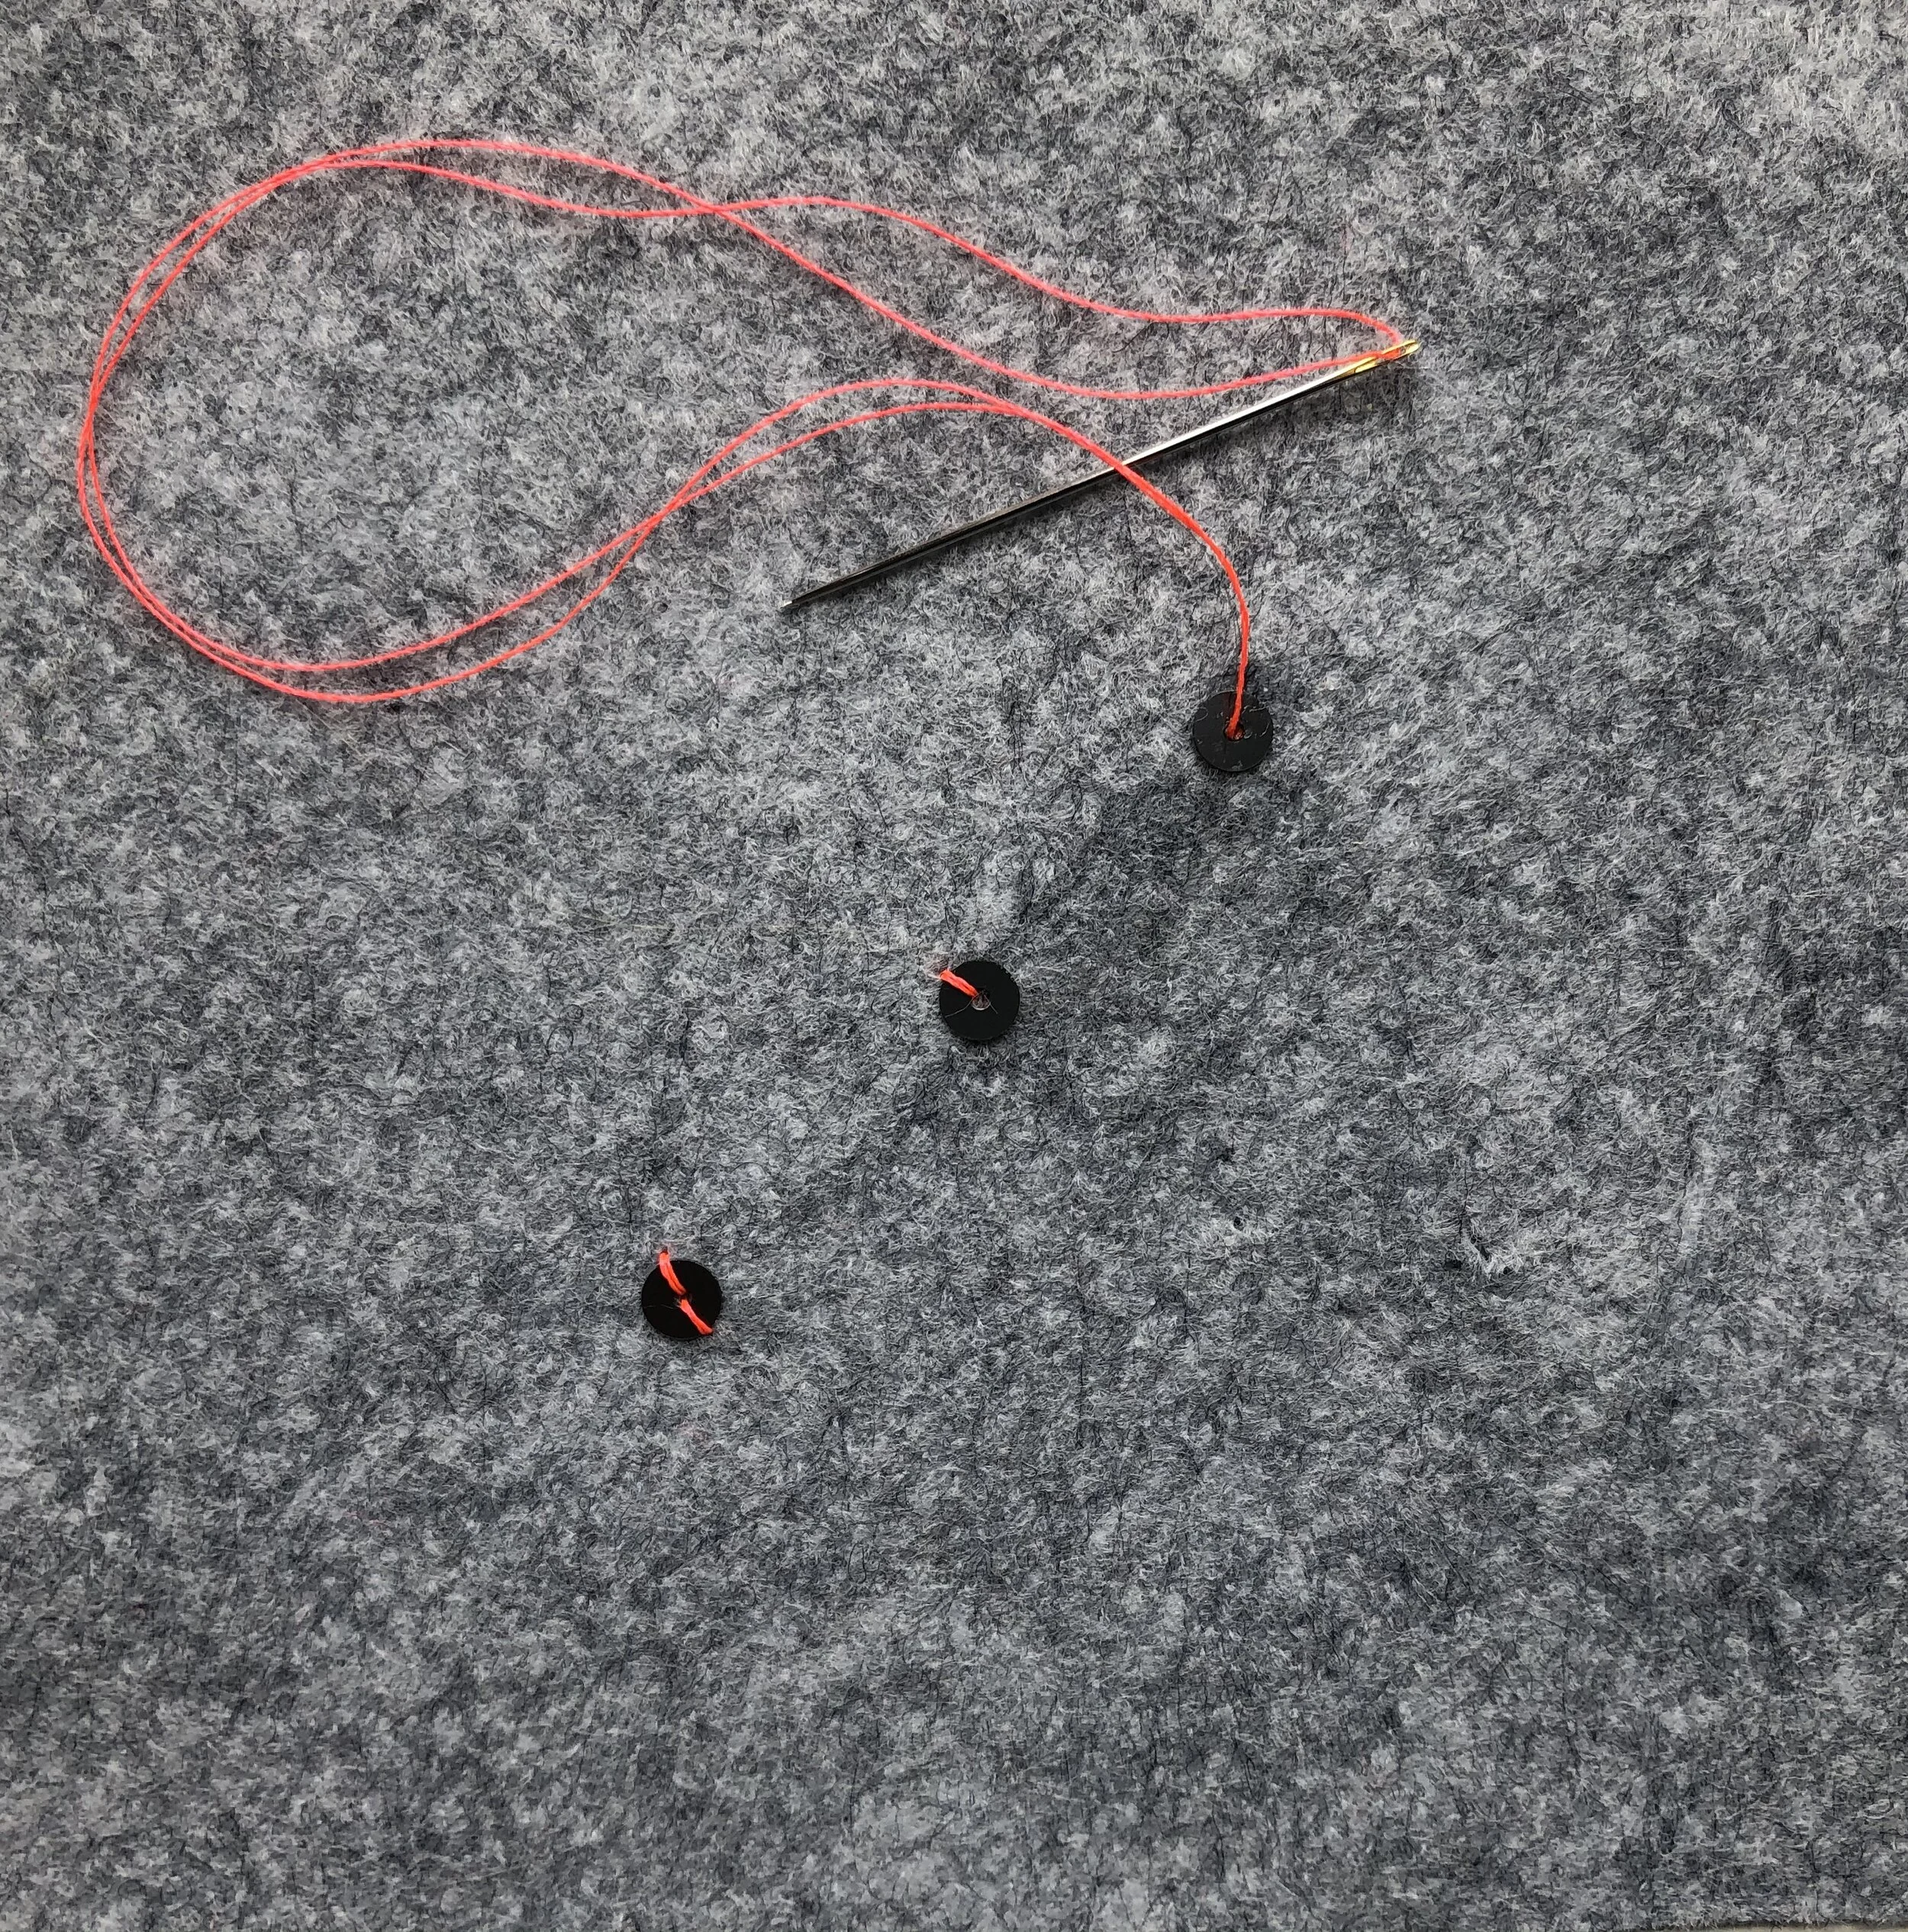
HOW TO HAND SEW INDIVIDUAL SEQUINS

Begin in the same manner as before, with a small hand stitch to secure the thread to the fabric.
insert your needle from underneath the fabric and gently pull up. Thread the sequin to your needle and down the thread to place.

Insert your needle just over the edge of the sequin, through the back and try to come out just to the opposite side.

Push the needle back into the center of the sequin and pull toward the back.

Here are all of the steps again, in order.
As you complete each sequin, you can knot the thread off at the back of your work or just carry it over to the next sequin.
PUTTING IT ALL TOGETHER

My new/old sweater!
Before applying the sequins to my sweater, I outlined each shape with contrasting thread. Then I began to apply the sequins in an overlapping manner following the outline and filling in as I went along.

Remove basting thread and move onto second row of outlining.

Third row of following the outline.

A few more sequins to fill in the center and it is done!

This repair was to an old sweater and one that I have hand-washed many times. However, if you plan to embellish a garment that you might need to dry clean or that you would like to more easily remove the sequins, you could sew each motif separately onto a pieces of organza or tulle as individual appliqués and then stitch them onto your garment.
I have worn the sweater several times since this repair and I have to say, I do love the sparkly casual feel. While it is a bit dressier than many of my other sweaters, it is now a weekly favorite.
If you enjoyed this tutorial, I do have a Pinterest Board where I frequently pin ideas for refashioning and embroidery. Check them out!
XO, Hilarie
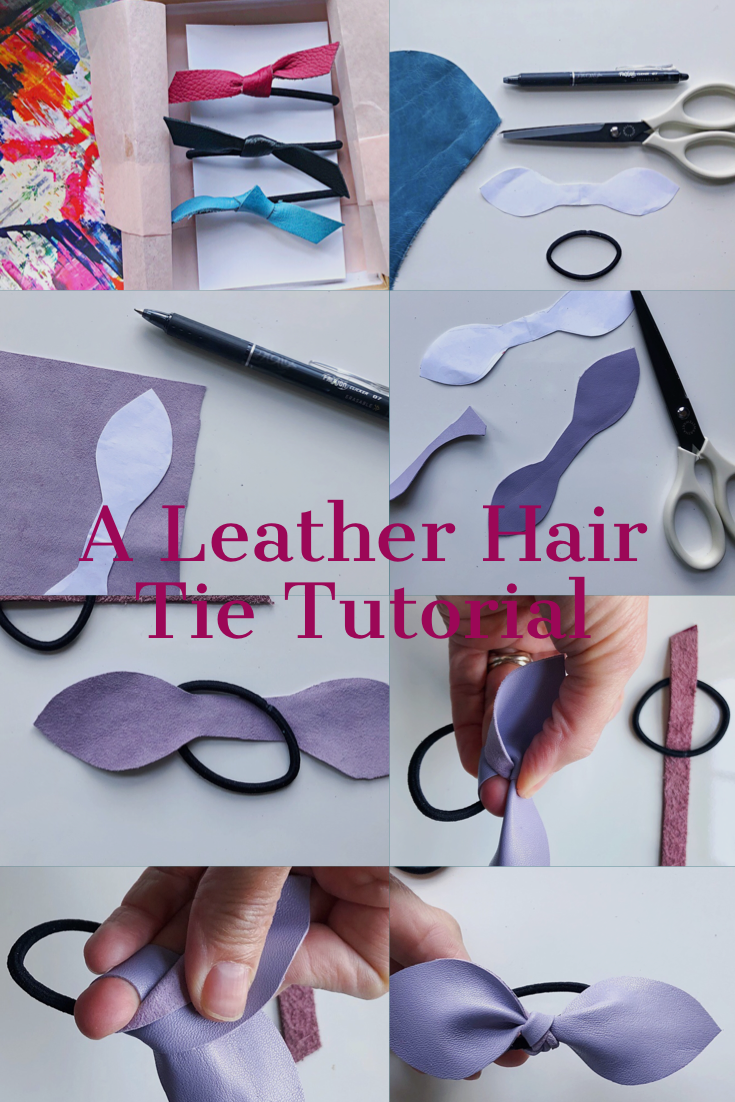
DIY Leather Hair Tie Tutorial
Have you ever tried sewing with leather? It isn’t nearly as tricky as it sounds. Later this month I will be releasing a free pattern for making a leather bag. Before that, I thought it might be fun to give you a small- and instantly gratifying project to get your mind thinking about all things leather.

Sewing With Leather, A Primer Series and Leather Hair Tie Tutorial
Have you ever tried sewing with leather? It isn’t nearly as tricky as it sounds. Later this month I will be releasing a free pattern for making a leather bag. Before that, I thought it might be fun to give you a small- and instantly gratifying project to get your mind thinking about all things leather.
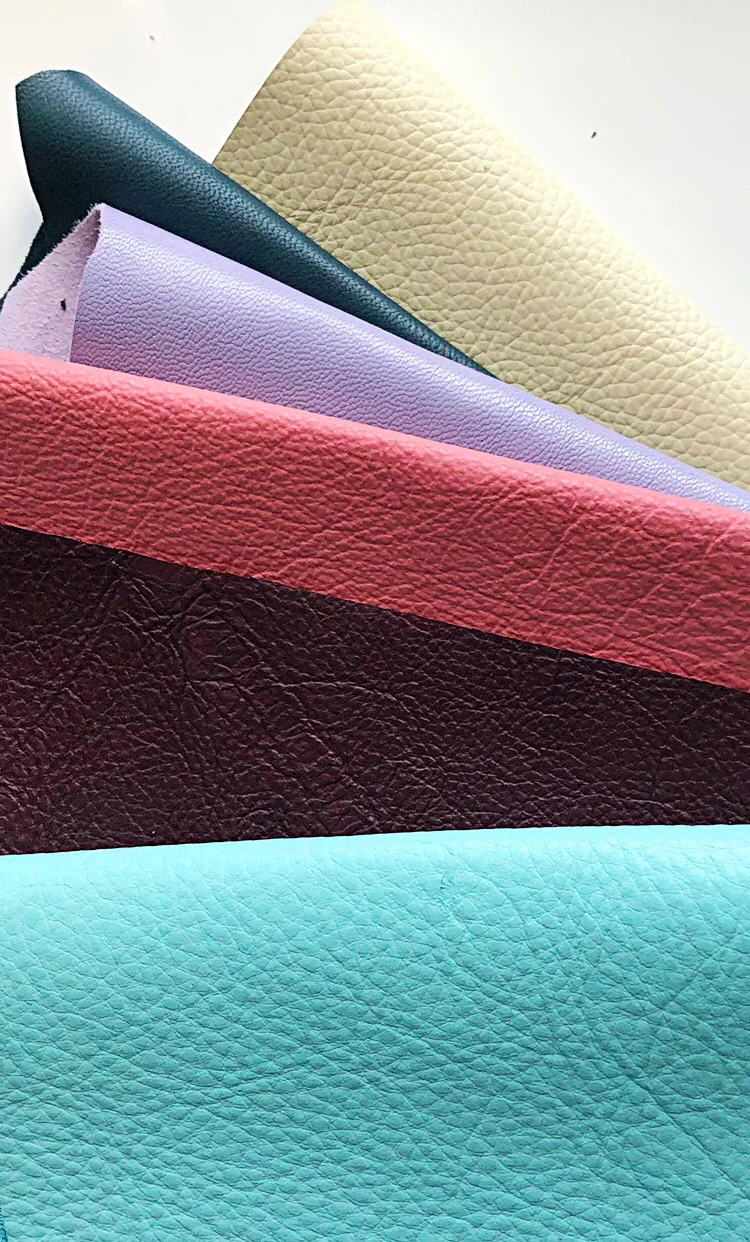
Leather comes in many varieties, weights, textures and colors. It can be a bit intimidating to purchase and to cut into the first time. However, once you understand it- there is no turning back! Unlike fabric that is comes on a bolt, leather is sold in hides and pieces- and by weight. The weight though doesn’t refer to it’s actual weight. Instead it is a gauge of the leather’s thickness. Generally, each ounce of leather equals 1/64th of an inch or 0.4mm thickness.
Since leather comes from an animal, there will be some variation. As such, leather is generally listed for sale in a range of weight. For example 2-3 oz, 3-4 oz. Most home sewing machines will easily stitch leather up to about 3-3.5 ounces.
For the most part, the leather that I use is purchased from Abe’s Leather in Brooklyn, eBay, Etsy and Mood Fabrics. There is a new to me resource that I am excited to share, Leather Suede Skins, in NYC. Also- I tend to love to take apart old clothes and bags too. So keep the thrift store and your closet in mind as an alternative.
Price is based on quality, type of skin, country of origin, size and finish. It doesn’t have to be too expensive so shop around.
Once you have selected your leather, lay it out on a flat surface and examine the hide for imperfections, holes and variations in thickness. Leather does have a grain, but for bags and small accessories, it really isn’t necessary to place patterns along the grain line. Instead, arrange the pattern pieces to fit and to maximize the available leather.

When you have determined the optimal layout, you will want to place a pattern weight (or some close object that will function as a pattern weight and allow you to trace the pattern piece onto the leather. In working with leather, you do not want to use pins as they will leave permanent holes and marks.
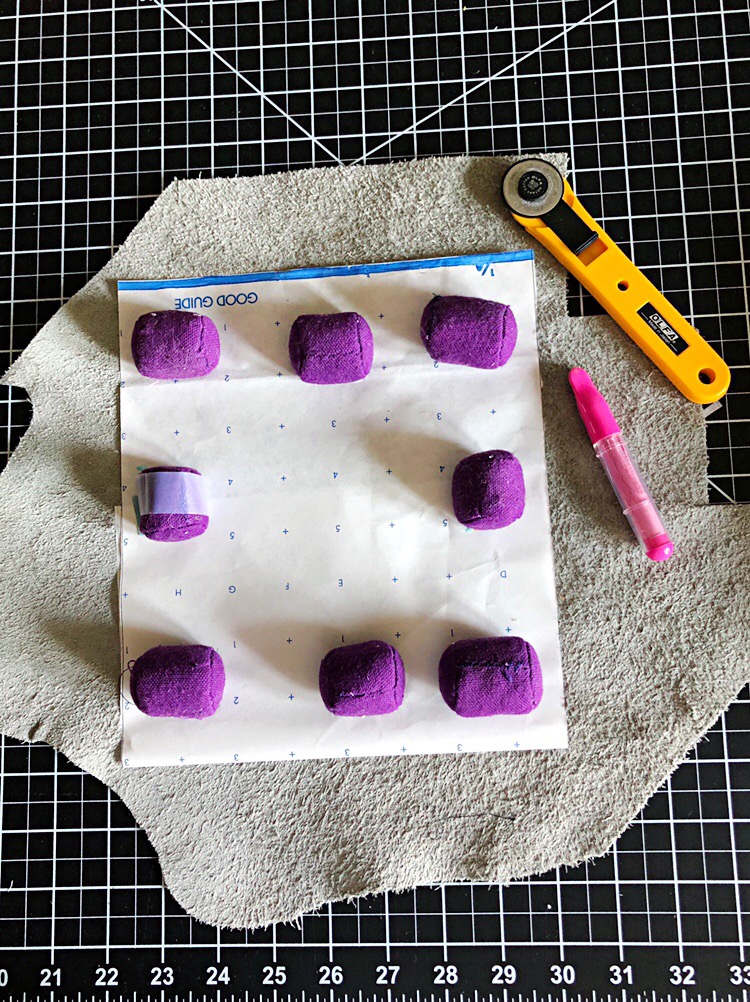
Pattern weights holding pattern piece in place.

Non-standard pattern weights work well too!
Tracing a pattern on leather doesn’t really require anything special- a ruler and some kind of pencil. I tend to use a pen, pencil, chalk, marker or even a tracing wheel. It really depends on the color of the leather, how smooth or rough the hide is, and what is on my table at the time.

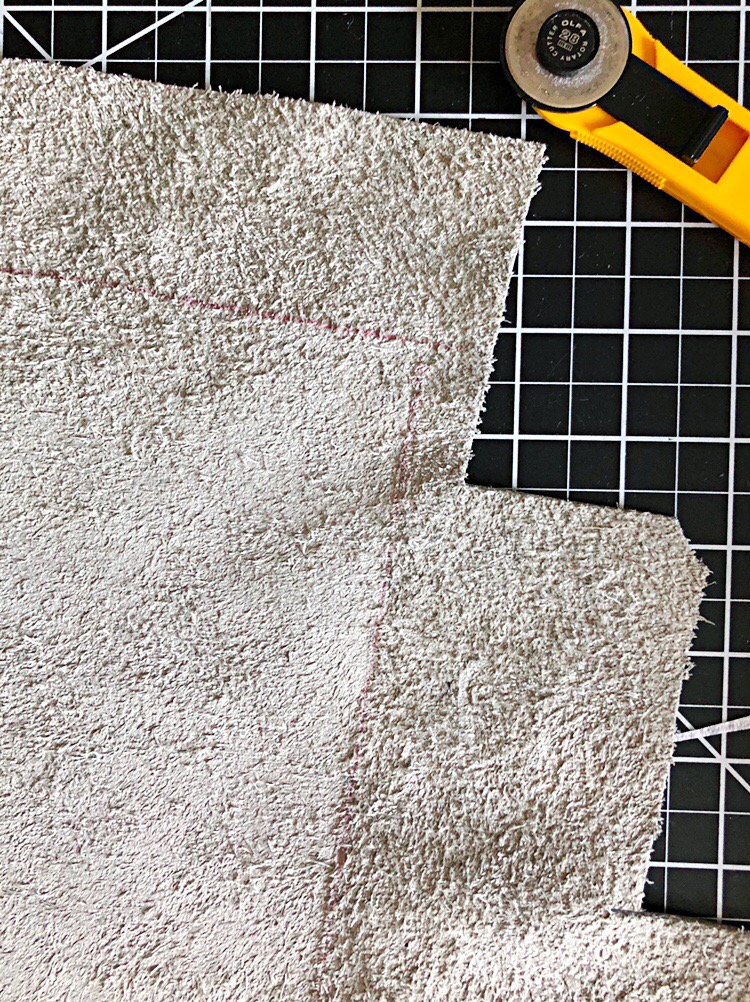
Leather is easily cut with sharp scissors or a rotary cutter. I generally use a rotary cutter for most things- but for this hair tie project, scissors work just fine.
Here are some of my favorite tools that I use for cutting leather:
Olfa Rotary Cutter I like both the 45 and the 28MM sizes.
Self-Healing Cutting Mat You will want a large mat to comfortably lay out your pieces to cut
Omnigrid Quilting Rulers These come in a variety of useful sizes. Because of their relative thickness, I prefer these rulers over others for guiding my rotary cutter. Fingers can get cut way too easily without the ruler.
In my next post I will share some tips on getting you started sewing with leather on the machine. Needles, feet, thread, interfacing and adhesives.
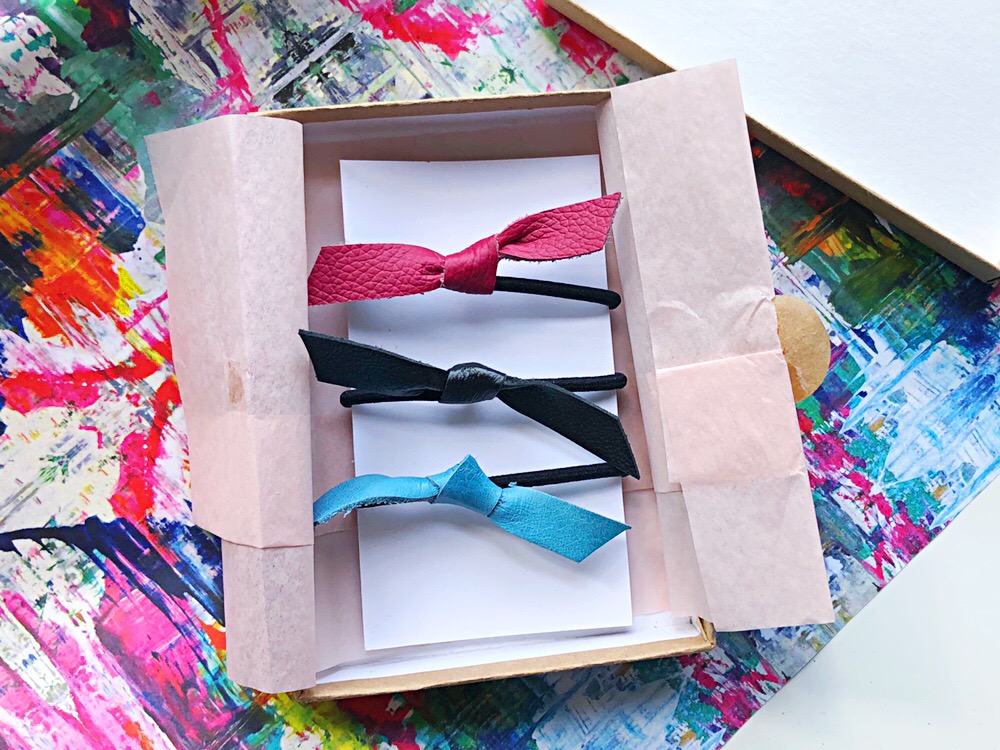
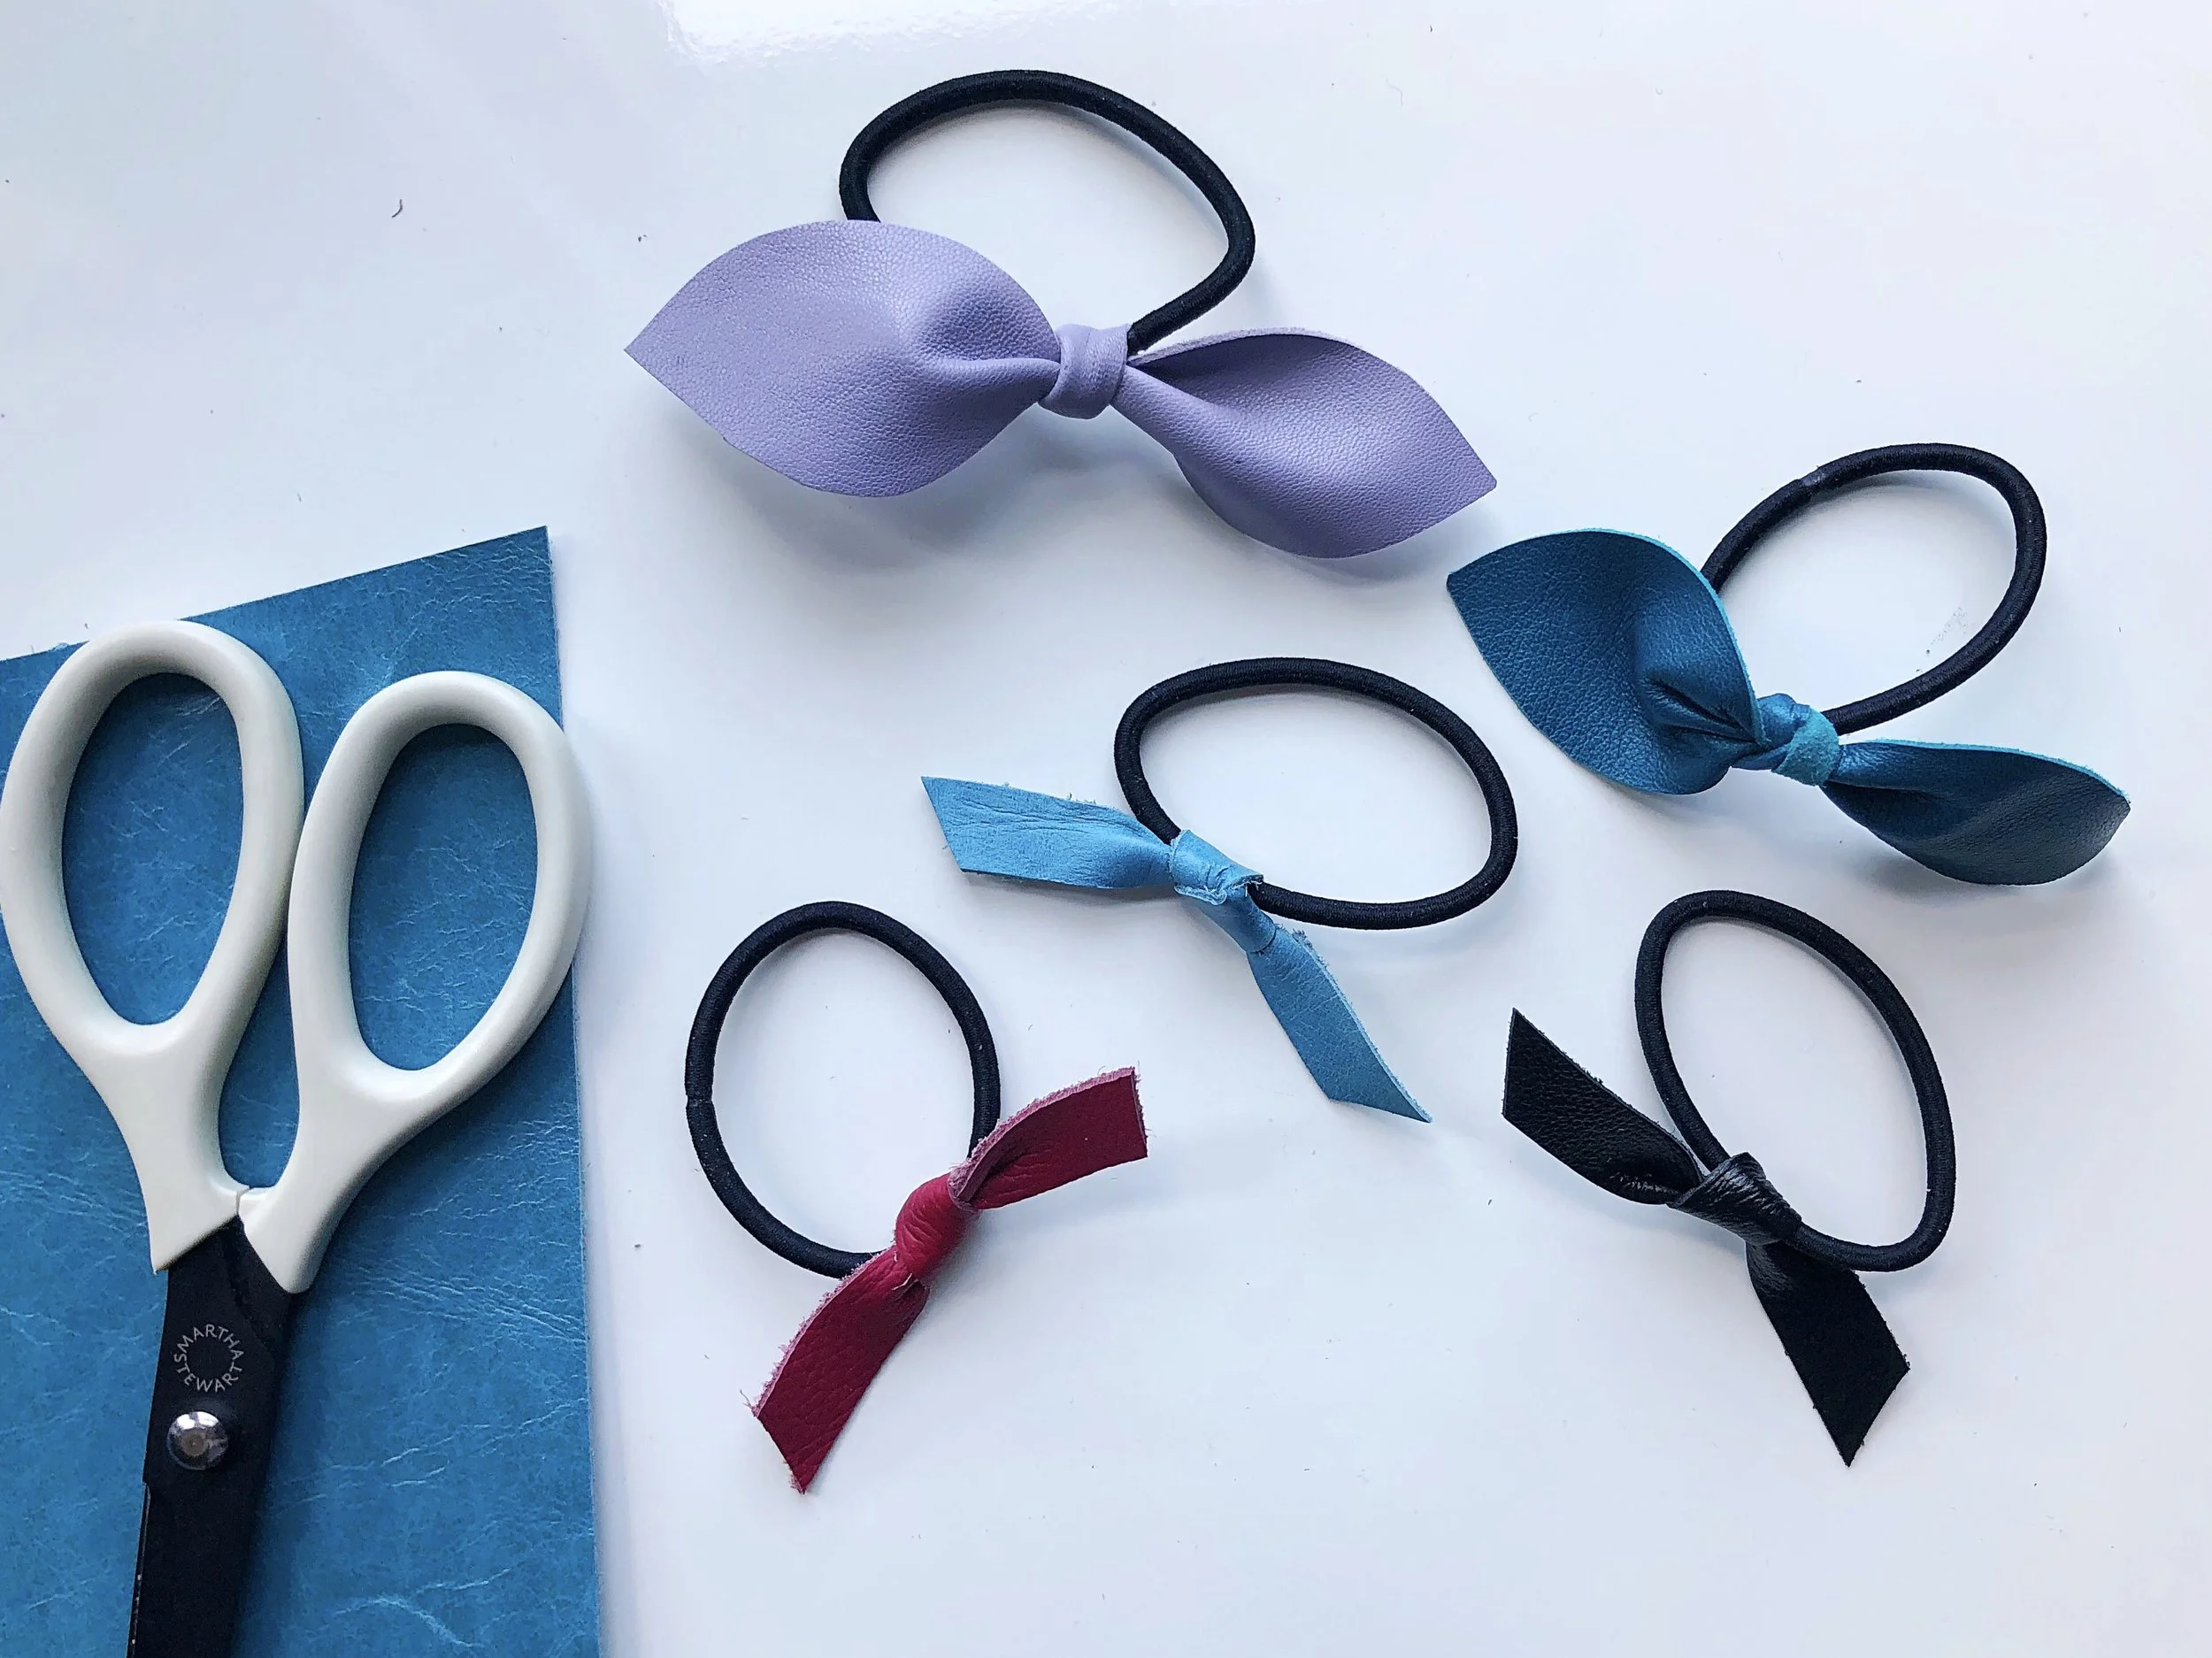
LEATHER HAIR TIE TUTORIAL
MATERIALS

Thin leather (vegan leather, Felt and Kraft-tex work great too!)
Scissors (or rotary cutter)
Pen, pencil or chalk
SIZE
Finished size for the bow is approximately 4 3/4” x 1.5”
Finished size for the tie is approximately 3”x 1/2”
PATTERN

TRACE
Trace the pattern onto the back side of the leather piece.
CUT
Cut along the traced line.

TIE
Place the leather tie right side facing down and slip into the elastic hair band.


Tie the leather into a knot around the elastic band. The object is to end up with the right side (pretty side) of the leather on the outside of each side of the bow and the center knot.

Before pulling the knot tight, twist the sides around a bit to make sure you are happy with the way the leather faces.

All done!

For this version, tie in the same manner as above making sure that the pretty side of the leather is facing up.

The pattern for the hair tie is just a rectangle. To give you a bit of wiggle room to make it symmetrical, I didn’t add the angled ends. Once your are satisfied with the way your leather is knotted, just cut the ends at an angle.
Aren’t they pretty? I would love to see what you make. Please tag me @littlestichstudio when you show off your fancy work.


5 Best Fabrics for Sewing Bags and Purses
Choosing fabric for a bag is always a balance between form and function. Functionality is key! Assessing the level of use the bag will endure over its lifetime is critical in determining the right type of fabric. You can begin by asking yourself, when will the bag be used? What will it carry? Is it for day or evening? Is it for a child? Once the functionality question is answered, then it is time to consider weight.
5 Best Fabrics for Sewing Bags and Purses
Choosing fabric for a bag is always a careful balance between form and function. With functionality being key! Assessing the level of use the bag will endure over its lifetime is critical in determining the right type of fabric. You can begin to determine this by asking yourself, when will the bag be used? What will it carry? Is it for day or evening? Is it for a grownup, teenager or child? Once the functionality question is answered, then it is time to consider weight.
Generally speaking, fabric falls into a couple of main categories, apparel weight, quilt weight and home décor or upholstery weight. Bags are unlike clothes though, and as such, you can mix and match weights from various categories, keeping in mind of course overall function.
Most of the bags that I make are for day and evening use. As such, I do layer interfacing and linings for structure and try to find a mid-weight fabric that will support all that I am carrying around. To that end, it is time for the fun stuff: color, texture and pattern!
Pattern or solid? Bold color or neutral? Fabric or leather? What about mixing it up and combining leather with fabric or a print and solid with a neon strap? Just consider the possibilities……..
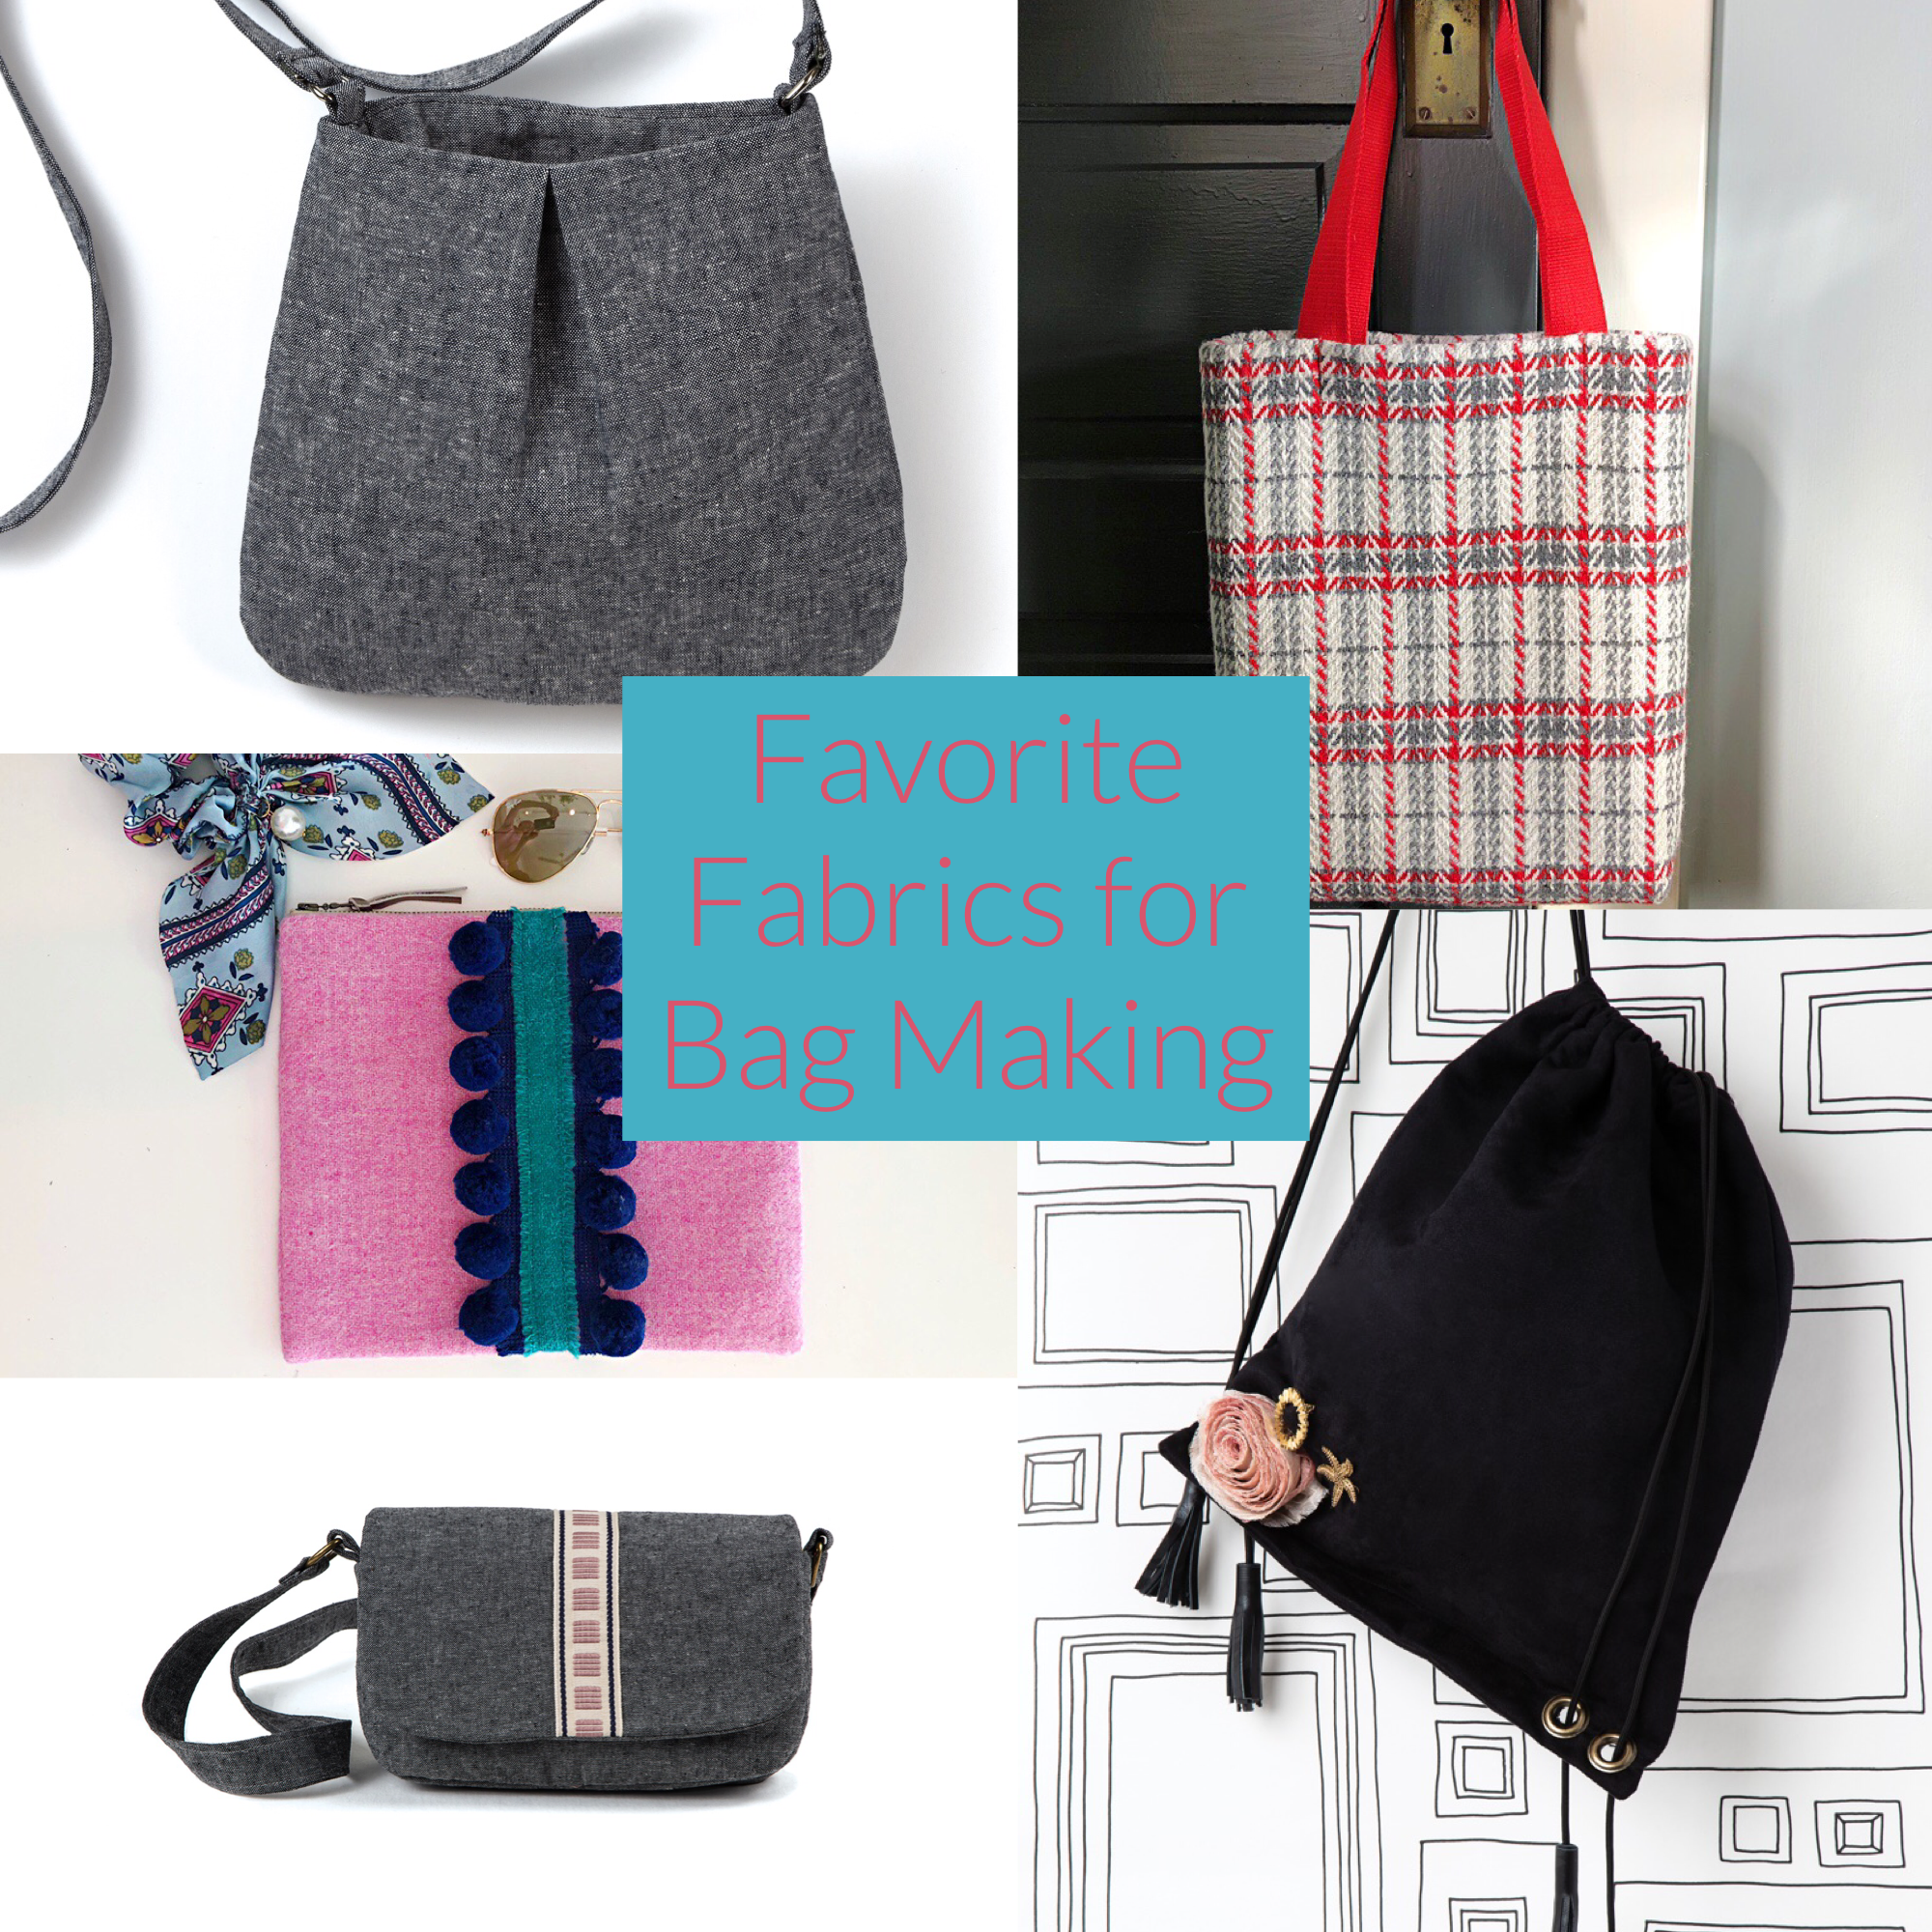
MY FAVORITE BAG-MAKING FABRICS
LEATHER
Nothing beats the durability of a genuine leather bag. The leather doesn’t even have to be new. Thrift stores, eBay, even your own closet likely offer a plethora of options. Most conventional home sewing machines, fitted with a leather needle and a teflon foot can handle leather up to about 3-ounce weight. Thrift stores and eBay are my go-to sources for purchasing leather.
DECORATOR WEIGHT
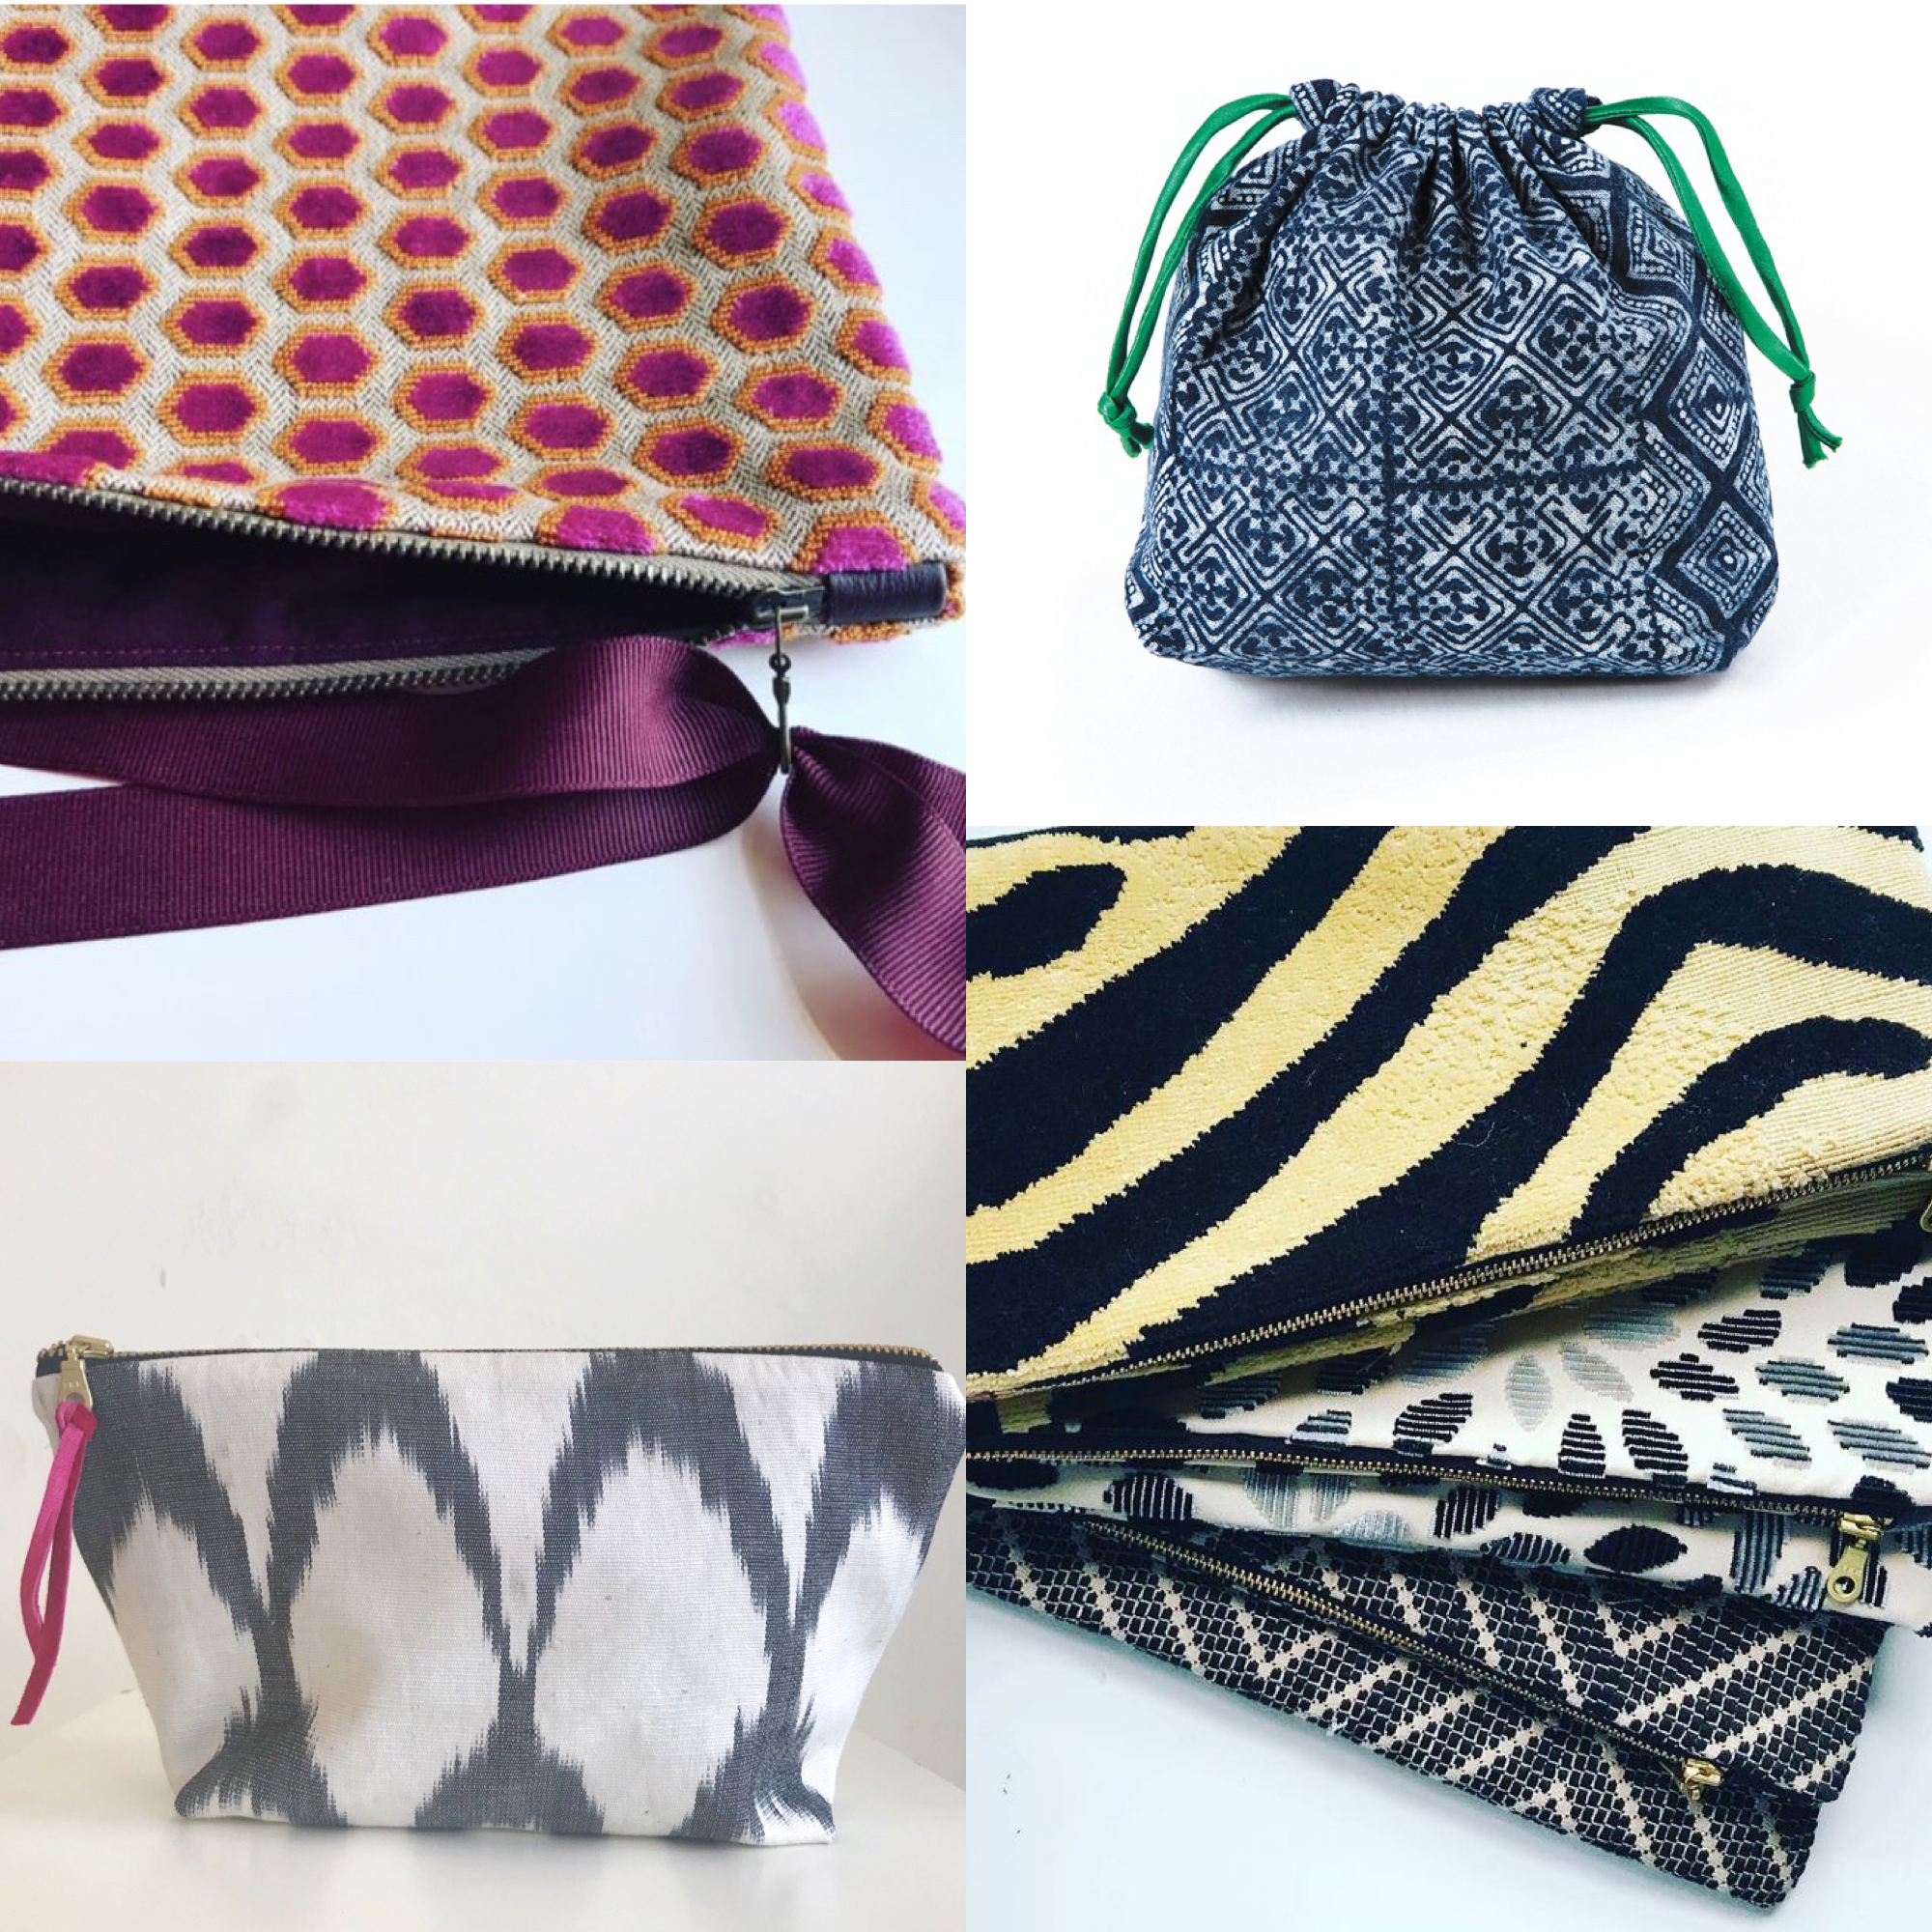
Decorator Weight, or home decor fabric is a bit of a deceptive term as it encompasses fabric that is suitable for upholstery as well as drapery and pillow weight fabric. So, there are as many options here as there are fabrics. Somewhere in the mid-weight is likely best. What can your machine handle? The bags above were created from a variety of weights. The heavier weight fabric would be great for bags that have fewer seam lines and therefore fewer bulky layers to stitch through.
TWEED
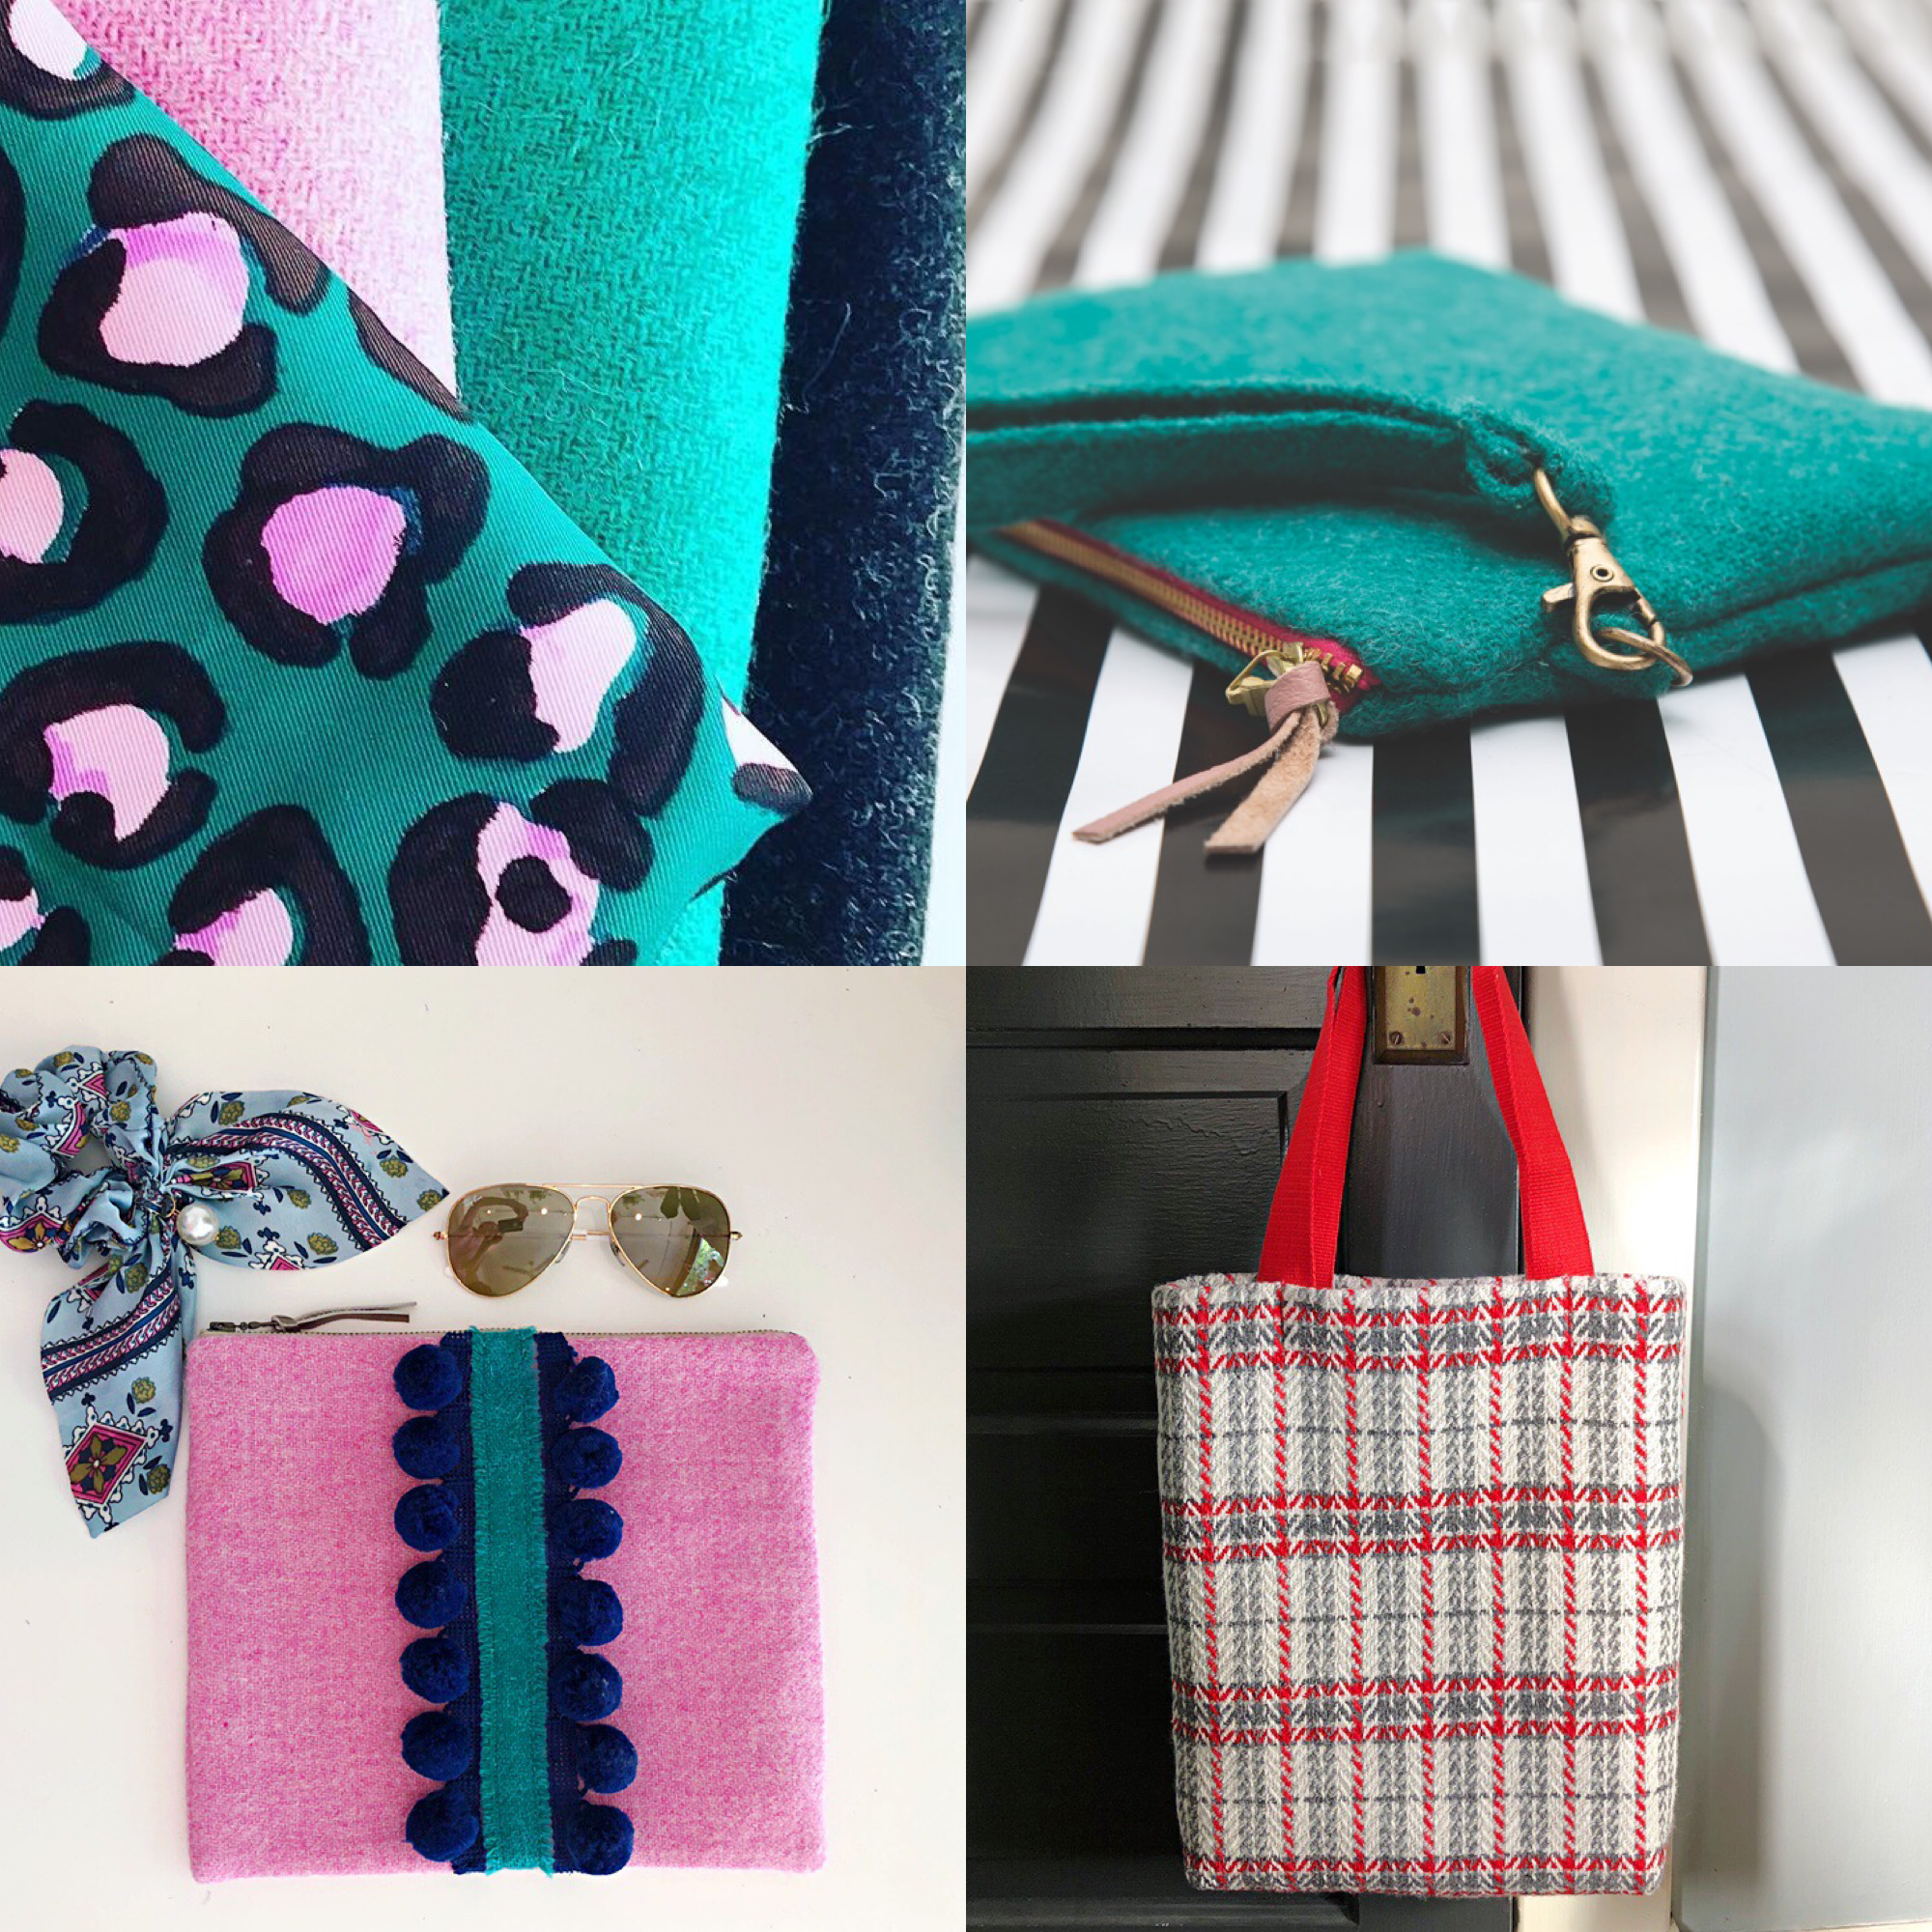
To me, Harris Tweed is the standard of bag making fabric. It is gorgeous, drapes beautifully, feels sumptuous and the depth of color is unparralled. However, true Harris Tweed is expensive- and if that isn’t enough, the shipping (from the UK) adds even more. So, a conventional tweed looks pretty great in comparison. Fortunately, tweed is found in all sorts of fabric stores at any price point and in old clothes too. (Carbon footprint reminder!)
CANVAS
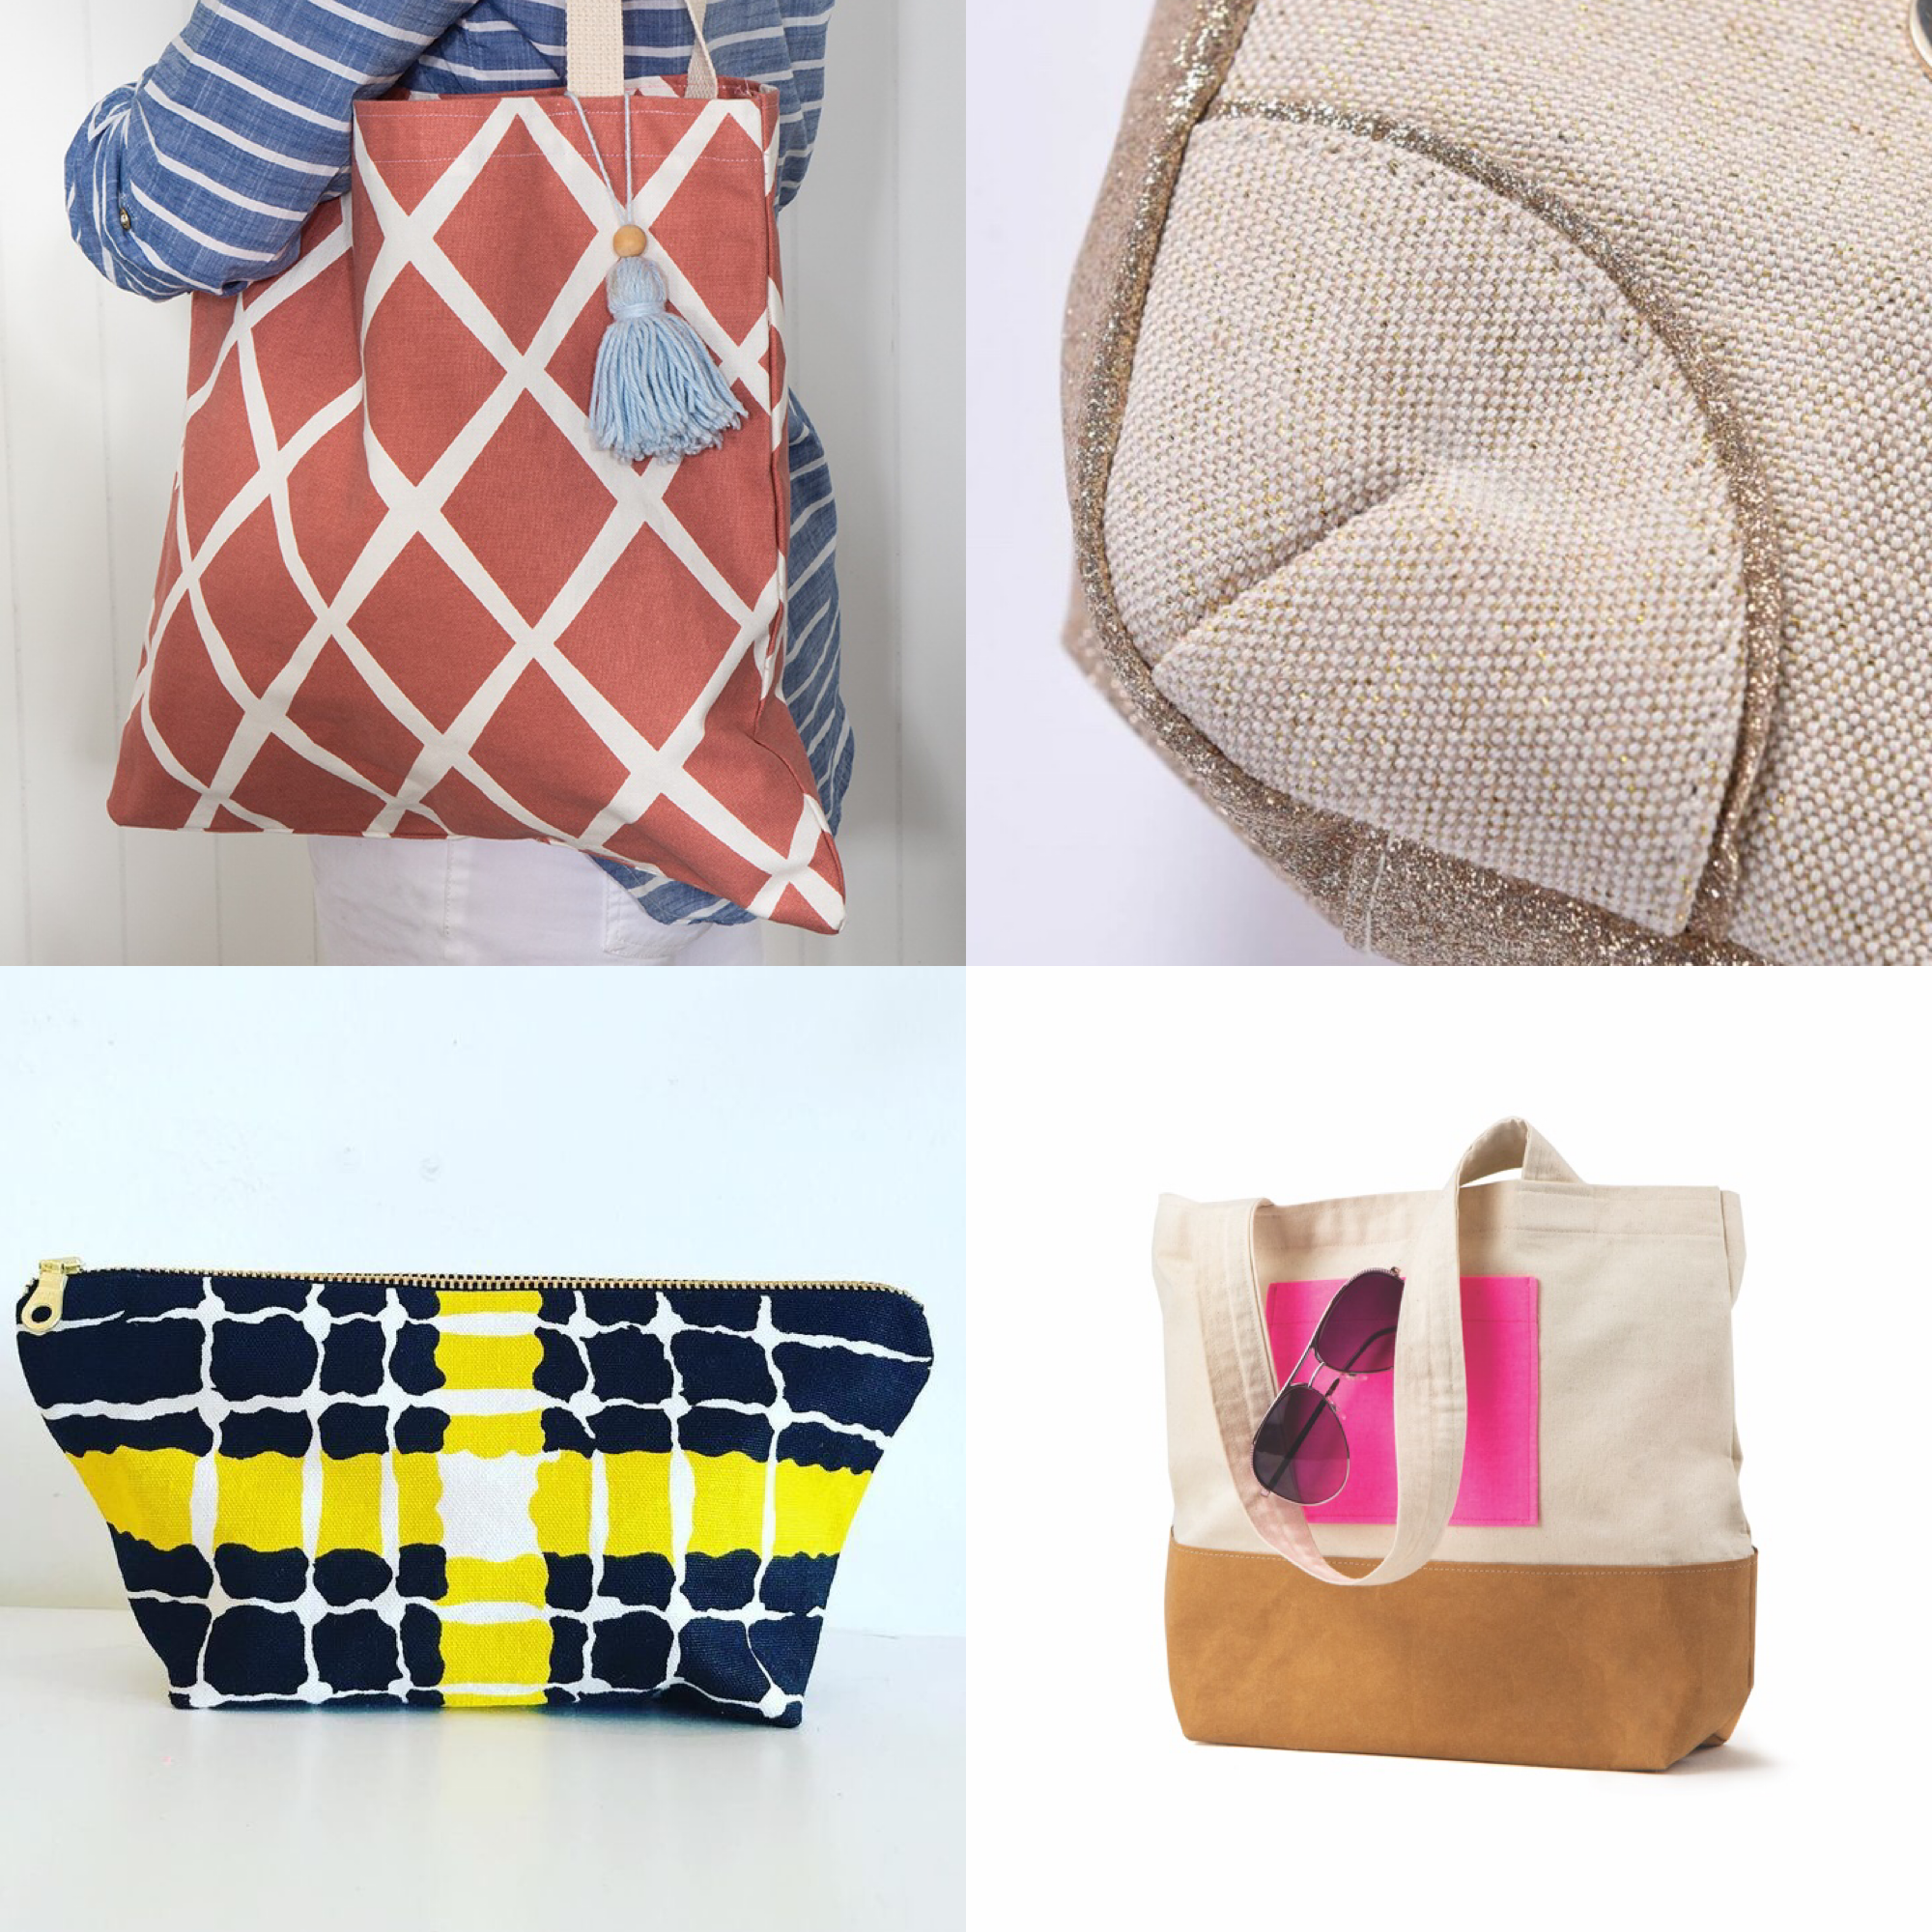
Canvas Fabric is generally inexpensive, sturdy, easy to find and available in color and pattern. It is truly ideal and such a great substrate with which to create a durable and stylish bag. Like with so many other fabrics, there is a range of weights available. You will want to look for a medium weight canvas, in the range of 5-10 ounces per yard.
Here are a few cotton canvas fabric that I like to use when making bags.
Rifle Paper Co makes some really dreamy floral patterns.
MID-WEIGHT WOVEN
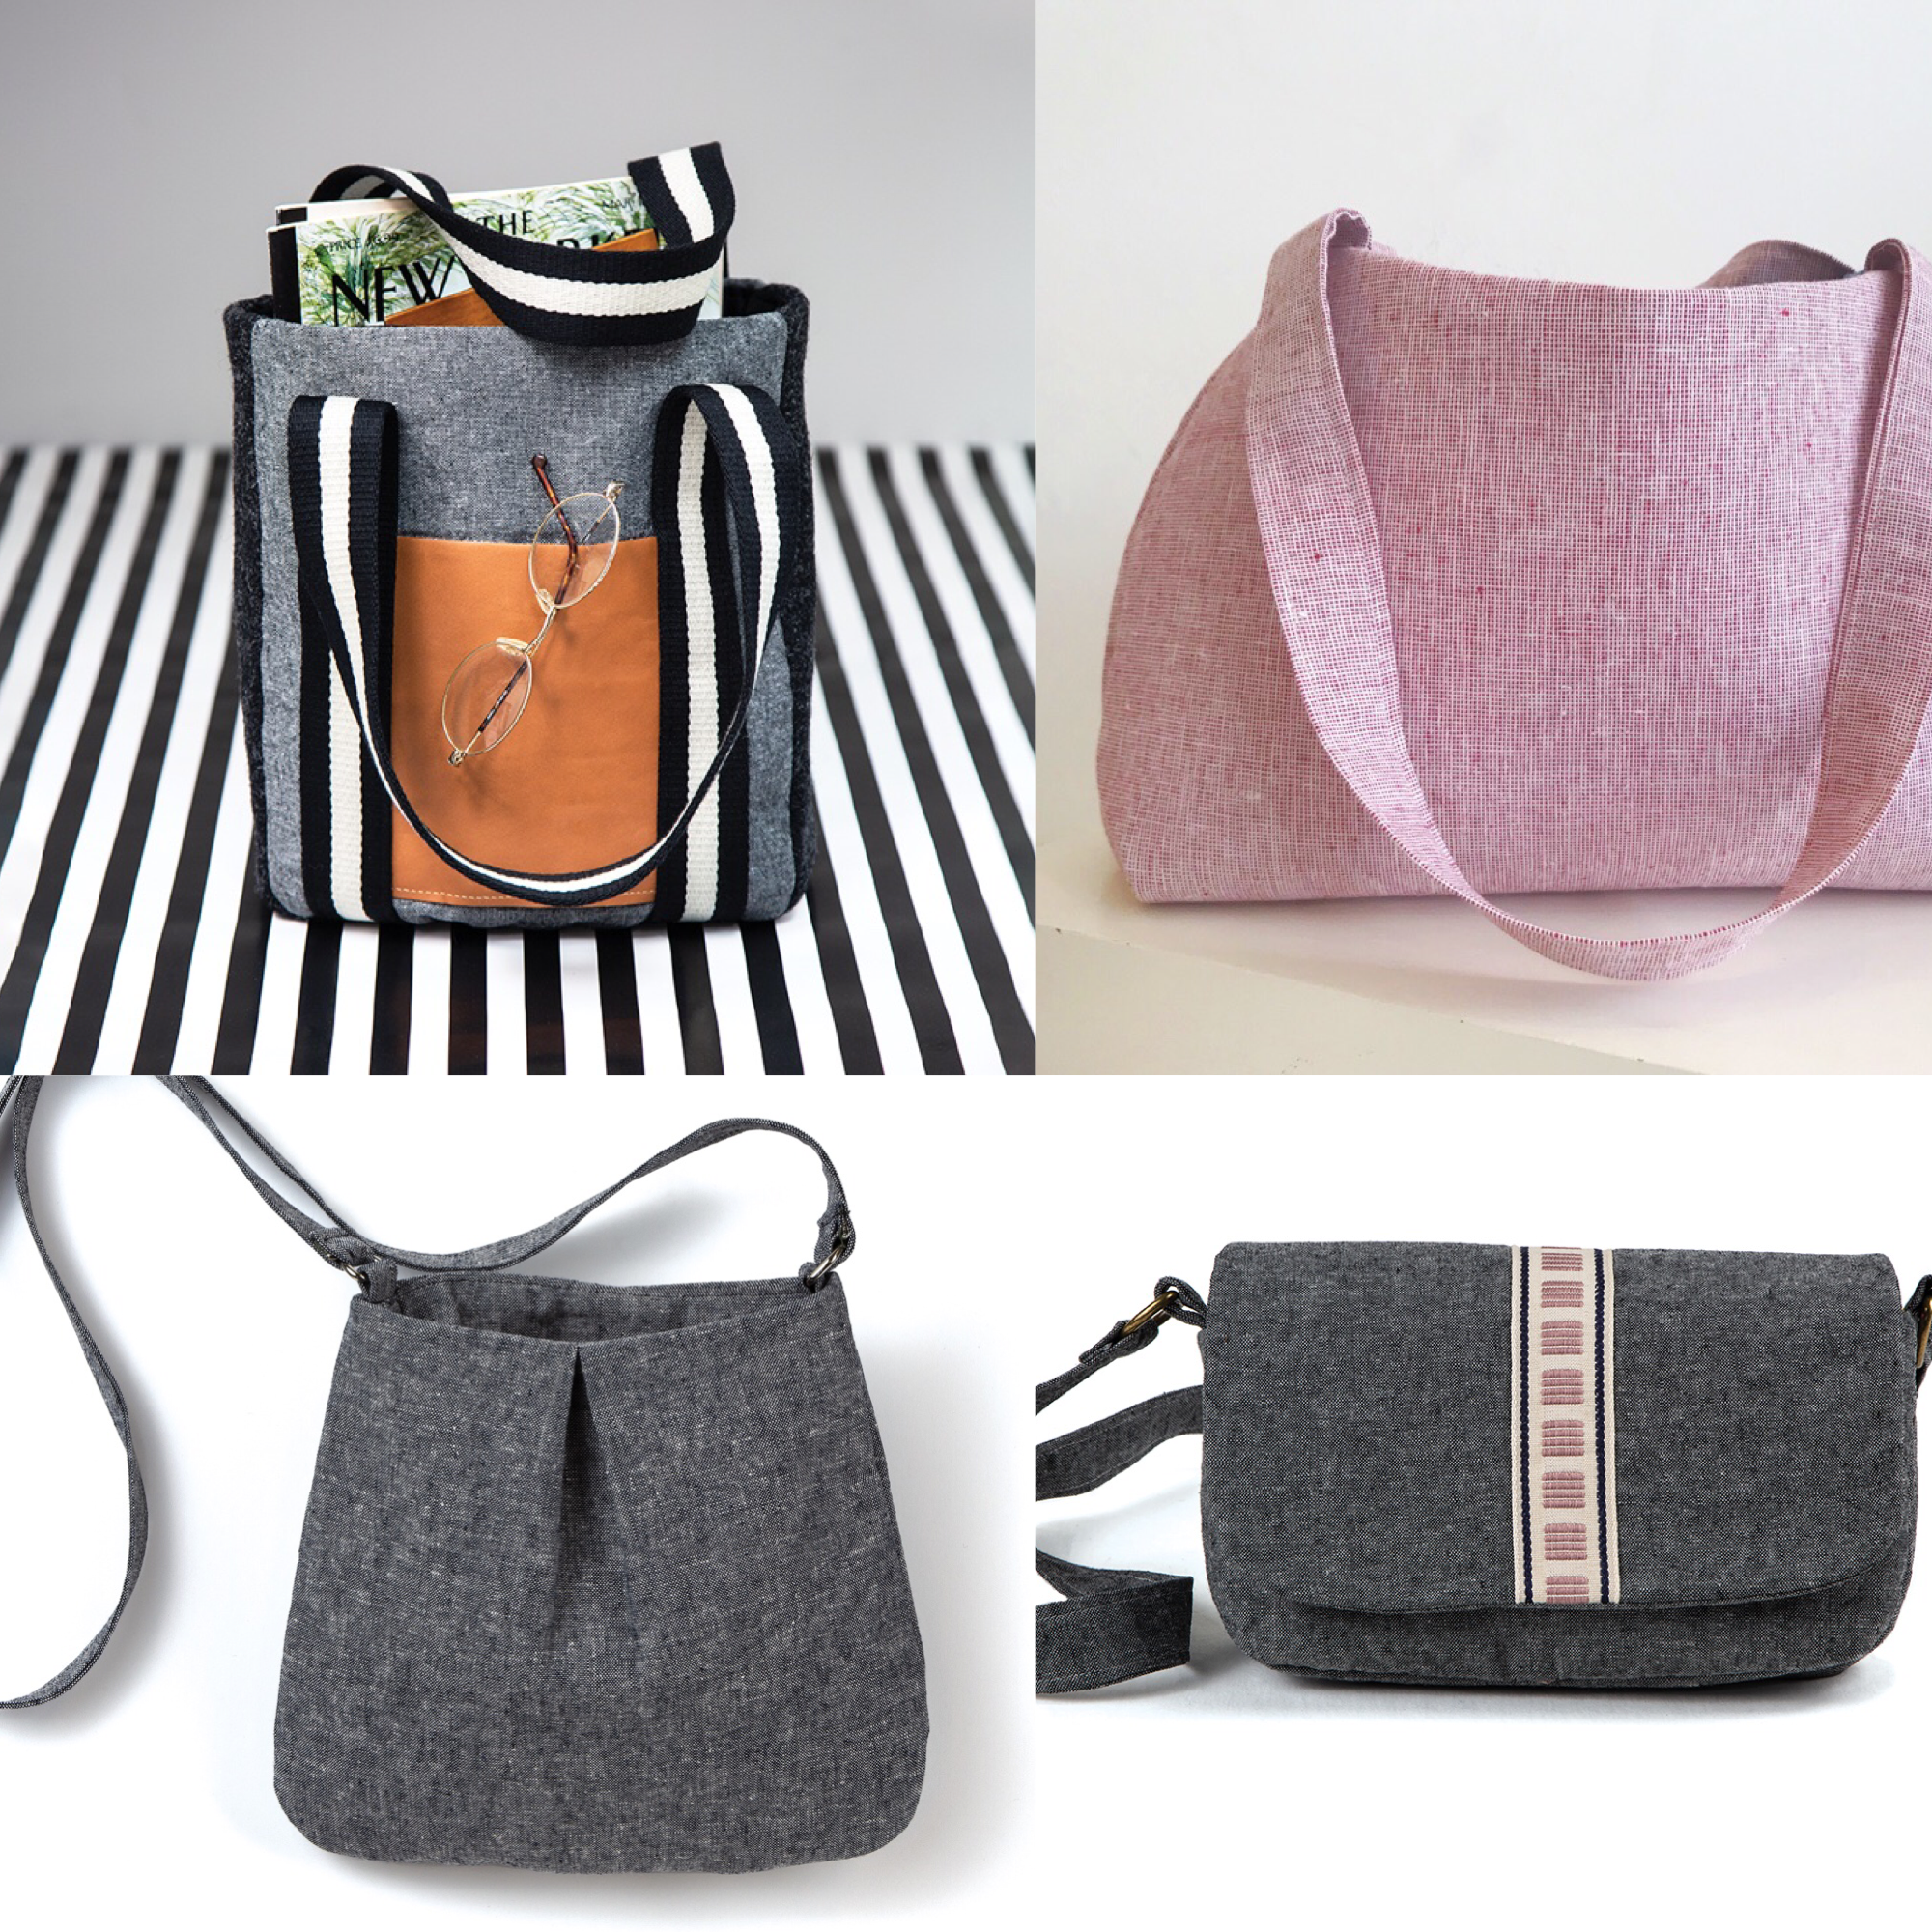
Hands down, Robert Kaufman Essex Linen is one of my favorite bag making fabrics. It is truly beautiful and available in so many colors. Though at the lighter weight for bag making, adding layers of interfacing and/or interlining or even quilting goes a long way toward adding shape and body.
If you would like to gain a deeper understanding of fabric and fibers, I’ve written a guide to help you. You can get it by clicking the link below.
The featured bags are projects from my new book, Sew Bags: The Practical Guide to Making Purses, Totes, Clutches & More; 13 Skill-Building Projects, available at book stores nationwide.
What are your favorite fabrics to make bags out of?
XOXO, Hilarie

Sew Bags; The Blog Tour Re-cap
I teach sewing and design because I believe that everyone possesses some innate creative ability and once you tap into that and discover your passion, it can build confidence that flows into all aspects of life.
These past few weeks, I have had to take a deep dive into my confidence reserve.
As the publication of my book drew near, I knew that it was time to begin to organize a promotional book blog tour. In order for the book to sell, people have to know about it - right? By May, sheer panic set in. Besides the fact that I am terribly introverted and likely would never own a phone, let alone leave the house given the chance, I had to ask complete strangers to read my book and to (PLEASE!) make something from it and share it with the world.

I teach sewing and design because I believe that everyone possesses some innate creative ability and once you tap into that and discover your passion, it can build confidence that flows into all aspects of life.
These past few weeks, I have had to take a deep dive into my own confidence reserve.
As the publication of my book drew near, I knew that it was time to begin to organize a promotional book blog tour. In order for the book to sell, people have to know about it - right? By May, sheer panic set in. Besides the fact that I am terribly introverted and likely would never own a phone, let alone leave the house given the chance, I had to ask complete strangers to read my book and to (PLEASE!) make something from it and share it with the world.
At first, I thought, who am I going to ask? Fabric companies? maybe. Celebrities? nah. Some sewing blogging superstars with comanding audiences? (well…..) Then I began to scroll through my Instagram feed and consider who’s posts I always look forward to reading. Who seems approachable enough to ask? Who would even recognize my name if I did message them? Finally- who has a similar philophsy to teaching and style and would “get” my message. Well- that certainly narrowed down the possibilities considerably. Since I teach sewing, who better to ask then other fashion-forward sewing teachers too.
As it turns out, sewing teachers might just be among the nicest and most approachable people ever! Each of the following women are incredibly busy with a business, projects and families of their own. I owe them a huge thank you for the kindness that they have shown me by generously sharing their time and talents. I hope that each of you will read their posts and draw inspiration from their interpretation of my bag patterns.
Jesy, Needle, Ink and Thread
In a conversation with a friend who is also a sewing teacher, she asked me if I know Jesy. I answered that I didn’t. She told me to check out her work and mentioned that she is exceptionally talented and super nice! As it turns out, besides teaching sewing, Jesy was a former co-owner of Sew Dayton, has contributed a project to a new book as well as sewing custom projects and alterations. If she can pull that off, maybe a small bag wouldn’t be too much to ask:) Jesy agreed and was in!

Jesy made the Bunny Backpack from Sew Bags.

Adorable, right? I love her smile.

Jesy’s Tooth Fairy Pillow project is featured in this book, 50 Little Gifts.
Julia, Old Spool Sewing
Several months ago while looking through Instagram, a friendly smiling face appeared in my feed. I clicked on her post and woah! Another fun sewing studio for kids. Her studio looked bright and filled with lots of smiling kids. Then I saw this cute, cute red wrap top. Well, I do love a wrap top so I commented. She wrote back and then BAMN! #insta-friends:) As it turns out, Julia went to Parson’s and has a degree in Fashion Design which she now uses in her efforts to inspire and cultivate creative talent. So…. I asked Julia too- And she said yes!

Julia made the Abigail Boxed- Bottom tote - complete with hand dyed shibori!

The red wrap-top

Julia was a contestant on Slice TV’s Stitched.
Katie of Katie Kortman
Last summer I saw on Facebook that a new sewing and art studio for kids had opened in a neighboring city. Intrigued, I clicked to find out more. It turns out, Katie had moved in like the week before. I guess as a military mom of 4, she was well practiced in the art of moving and managing kids and projects. I reached out to introduce myself and see if she was taking on new students as I was maxed out at the time and know that families would be thrilled to hear that there was another place to send their kids. This was before Katie blew up Instgram with her hashtag game and spinning color wheel of fun. So- is it safe to say I “knew” Katie before she was famous?? Somehow she fit my project in with everything else she is juggling. Hello- new Spoonflower collection!!

Katie’s handprinted suede Savannah Cross-body bag.

Katie’s fabric collection with Spoonflower.

More fabric and color inspiration!
Tree, Stitchless TV
A few years ago during Makers for Fashion Revolution, #makersforfashrev, I discovered both Tree of Stitchless TV and Kate of Sewing with Kate. Tree had posted a picture of a bathing suit that she had made with a custom printed fabric. I commented that years ago, I worked with a swimwear designer and had made many, many suits over the years. She immediately wrote back and we have followed each other’s feed since. While we have never met in person, I do feel a strong creative connection with Tree. She is absolutely fearless in her approach to both teaching and sewing. And, as many of you know, I loathe TV and YouTube but make a special point of sharing her videos and tutorials with my students. They are that good!
One thing that Tree always emphasizes is her belief that with a bit of experience, anyone can learn to design a bag or garment and experience the absolute thrill of using and wearing something that you made yourself.

When you see something like this, it is an immediate signifier that the person both knows what they are doing and is fearless in her approach.

How beautiful is this coat that the wearer made in one of Tree’s workshops?

Ribbon embroidery on mohair. Seriously.
Kate, Sewing with Kate
Kate had me at first glance of her Sashiko. Anyone who spends that much time sewing by hand is someone who really understands the importance of attention to detail. Hand sewing allows a much finer degree of control over the fabric and fit, compared with using a machine. Kate understands that. Also- perhaps since she is a mom of a bunch of kids, hand sewing is portable and thus, gets done and is a great way to keep your hands busy while endless waiting for kid sports and activities.
After gushing over her sashiko samplers and bags (she has an etsy shop with patterns too! ) I then saw her clothes. That was it- I was a fan for life. Come on now, how freaking fantastic are these next two dresses? The embellishment and that leather. So I had to ask….would you make one of my bags?

Kate made the Rachel Drawstring Pouch- and hand stitched the sashiko pattern before sewing the bag.

This proves that there is nothing better than a well- fitting garment with one stand out feature.

Leather shoulder inset of my dreams.
I just love how each of these ladies took the original pattern and spun it to create something that is unique to their style. That is my ultimate goal as a pattern maker, sewing teacher and now author. To impart the lesson that you don’t have to just follow the pattern; treat the suggestions in your pattern as starting points and use your own imagination and skills to make the bag that suits you.
Happy Sewing!
XOXO, Hilarie
Please remember to tag me on social media with your makes using the hashtag #sewbags. I can’t wait to see what you share.

5 Best Places To Shop For Fabric on the Web
I am frequently asked where the best places to shop for fabric are both locally and of course on the web. Locally, there isn’t a huge selection. You can go to Fabric Hut which is where I go and to Joanne’s. Both will have you covered for pretty much all-purpose sewing. But sometimes you have a vision for the perfect dress and you just can’t find the fabric. Here is what you need to know!

I am frequently asked where I shop for fabric. Locally, we don’t have a huge selection of fabric stores. You can go to Fabric Hut and Joann’s. Both will have you covered for pretty much all-purpose sewing. But sometimes you have a vision for the perfect dress and you just can’t find the fabric. Here is what you need to know!

I primarily sew clothing and accessories and always use natural fibers, as such, I mostly order my fabric. You will pay a bit more, but the quality and look are worth it. Cotton quilting fabric which is available widely, is not designed for clothing. Often times the plain weave is just too heavy and stiff for clothing and doesn’t drape. Additionally, it is printed after the weaving process. This means that the print can actually be off-grain which will make it tricky to sew with.
Apparel fabric is generally much lighter in weight and is designed for making clothing. It drapes beautifully, is more comfortable to wear and comes in endless varieties of weave, knit and texture. No matter what type of fabric you are looking for, have fun exploring.
Here are my top five fabric shopping sites:
Mood Fabrics Yes, there is a reason this shop makes every designers top list. Endless aisles of inspiration abound. Fabric, lace, notions, trim, leather, it is heaven.
Hawthorne Supply Company Hawthorne has excellent customer service and a large selection of contemporary designer cotton fabrics. Before I had wholesale accounts of my own, much of the fabric I bought for my classes was purchased here.
Purl Soho Besides yarn, purl has an excellent selection of fabrics by Robert Kaufman, Michael Miller and Liberty of London.
Britex Like Mood, Britex has a legendary array of fine fabric and supplies for fashion sewing.
Etsy and Ebay Etsy and Ebay are my go to sites when I am looking for something fairly specific. You will need to type in a search term, but you will be surprised what you can find. Vintage silk, Hmong indigo, Indian Block Print, Black Cotton Eyelet, Organic Cotton Jersey.
I know that I promised you five shops- but I like to over deliver:) Topstitch Atlanta has been open for a few years. I have enjoyed watching them grow on Instagram and am always impressed by their pattern selection and fabric. And of course, no list would be complete without mentioning the ability to go the custom route and design your own fabric on Spoonflower.