

How to print and assemble a PDF sewing pattern
There are many benefits to buying and downloading a digital, or PDF sewing pattern. Instant gratification is one, and also storage. If you buy a lot of patterns, you will have to put them somewhere! The ability to endlessly print instead of tracing off a pattern or even worse- mistakingly cutting out the wrong size on a tissue pattern that you will have to repurchase and start over, whereas with a digital pattern, you can just re-print specific pages. Like with so many things, the internet has provided a way for independent designers offer their patterns without having huge overhead and a financial backing from a large pattern company.

There are many benefits to buying and downloading a digital, or PDF sewing pattern. Instant gratification is one, and also storage. If you buy a lot of patterns, you will have to put them somewhere! The ability to endlessly print instead of tracing off a pattern or even worse- mistakingly cutting out the wrong size on a tissue pattern that you will have to repurchase and start over, whereas with a digital pattern, you can just re-print specific pages. Like with so many things, the internet has provided a way for independent designers offer their patterns without having huge overhead and a financial backing from a large pattern company.
PDF sewing patterns are designed to be printed on a home printer using A4 or US Letter sized paper. To begin, you will need:
A printer
A4/US letter paper
Paper Scissors
Tape (scotch tape or washi work great)
Download your pattern and save it to your computer files. Open it in a PDF reader such as Adobe Reader, which you can download for free. There are other PDF readers available, but you may find that some scale the pattern to the wrong size. I offer my patterns through Etsy. To further assist, Etsy has provided a handy guide to downloading digital items.
Depending on the size of the pattern, you will likely be printing several pages that may look a little crazy. I promise that they will assemble with a little effort and look similar to a traditional tissue paper pattern- but much sturdier. And you will not suffer the added challenge of refolding the pattern and trying to stuff in back in the envelope.
Before you print, read through the pattern's printing instructions. In your Print Dialogue Box, set print scale at 100%. Do not check, "scale to fit". Identify the test square. If you don't see it, check your pattern printing instructions again. You will want to print the page with that scale square first. Measure the square to be sure that the scale is correct. If it is not, check your print settings. Additionally, you can change the print quality, opting for draft or fast printing to use less ink. Also, printing in black and white (even though all of those colors are so pretty!) It saves ink.


It is not necessary to print every page. Just print the pattern and view the instructions on your screen. It will save ink, time and paper. READ through the instructions first, they will guide you to which pages to print.
The pattern pages will need to be trimmed before being taped together. It can be a bit tedious to assemble the pattern and tape the entire thing together, but once you have done it a time or two, they come together pretty quickly.

Trim around the border of each page.

I find it easiest to work one row at a time. I begin by laying out each row, then trimming each page. Then I align the quarter circles and tape.
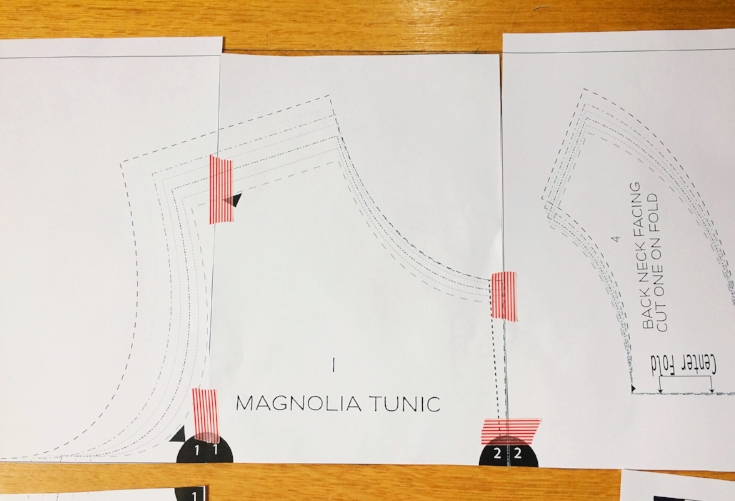
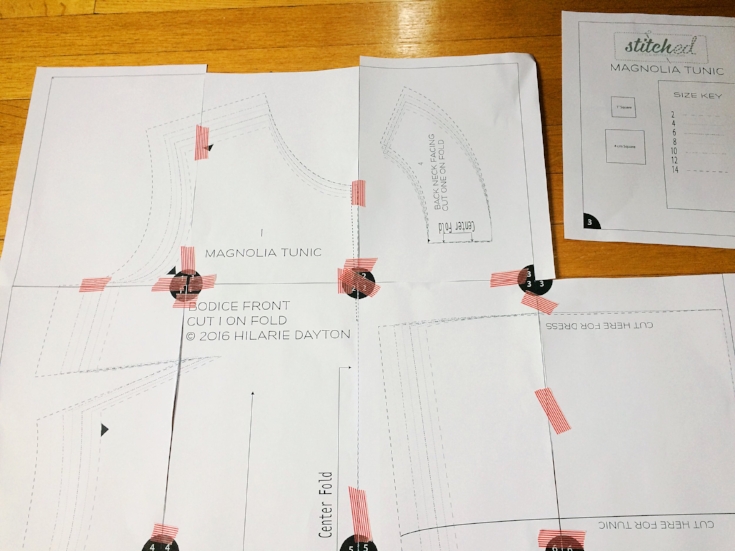
Continue to tape. It's starting to look like a real pattern!

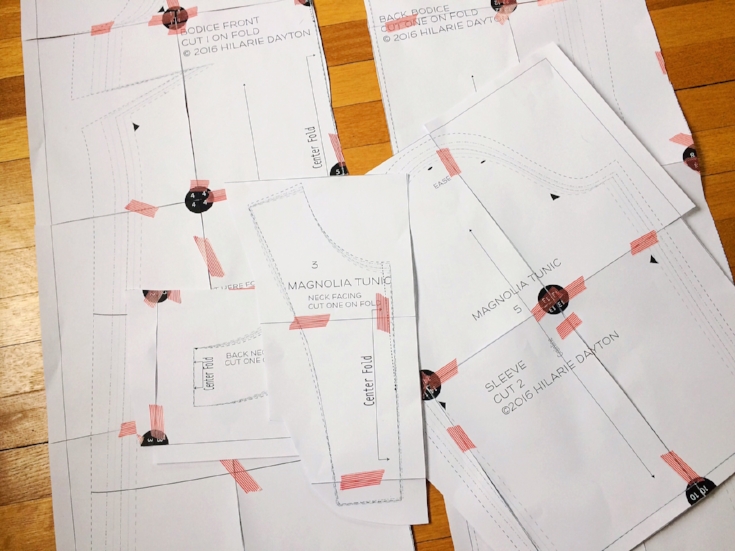
Once I have the entire pattern assembled, I rough cut around each piece to separate.
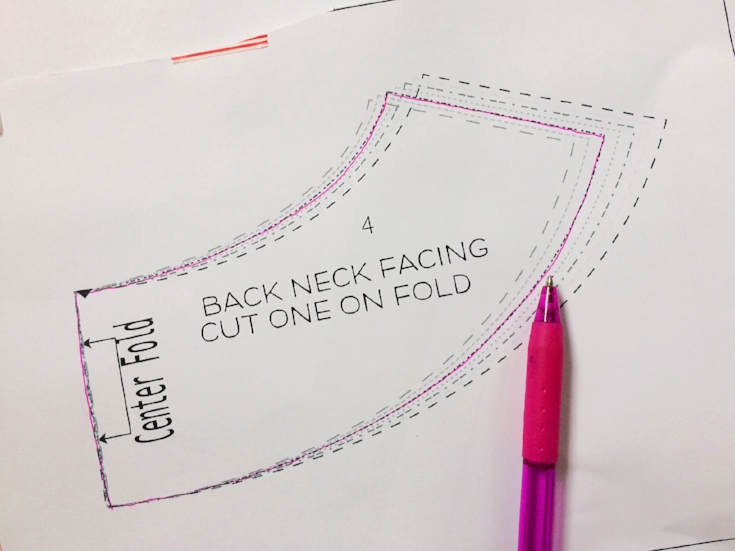
Since the patterns are multi-sized and you may not have printed in color, it may help to take a pen or marker and highlight your correct size. Do you see how each size has a coordinating line (stroke) design? Look at the pattern's size chart to determine your size then refer to the size key to find your size.
Cut out each piece and get your fabric ready! At this point you can lay the pieces directly on your fabric and following the layout and cutting instructions, begin pinning, tracing, transferring and cutting. I think that you will find this paper much easier and more durable than standard tissue paper.

Do you have any tips or tricks to add? Have you used a PDF sewing pattern yet?

Obi sash Pattern and Tutorial
I was asked to make an Obi sash belt for Annabel Wrigley's debut fabric line, Maribel for Windham Fabrics. Pretty awesome, right?! I love how she styled it for the Lookbook. A pretty floral, Breton stripes, some faded denim? What's not to love!
I was asked to make an Obi sash belt for Annabel Wrigley's debut fabric line, Maribel for Windham Fabrics. Pretty awesome, right?! I love how she styled it for the Lookbook. A pretty floral, Breton stripes, some faded denim? What's not to love!

NOTE: I am also making an alternate version in a beautiful raw silk for you to more clearly understand my instructions. For the silk version, I have omitted interfacing.
Ready to make it?

Supplies:
2 yards of lightweight woven fabric (always wash and dry your fabric before cutting to allow for shrinkage)
Coordinating thread
Tailor's Chalk
Lightweight fusible interfacing (I like Pellon Shape Flex, SF101.)
Download Pattern (One size fits most)
Cut the pattern out and tape together aligning notches and page numbers. Each pattern page includes shaded circles with guide numbers to show how the pattern pieces should be organized. Be sure to match up all 4 quarter circles along the edges of the tile.
Fold your fabric lengthwise.
Lay the pattern on the fold line.
Pin the pattern to the fabric and cut.
Cut interfacing 1/4 inch smaller all around (this will help prevent bulky seams)
Mark the dots and notches with a chalk pencil.
Seam allowance for construction is 1/2".

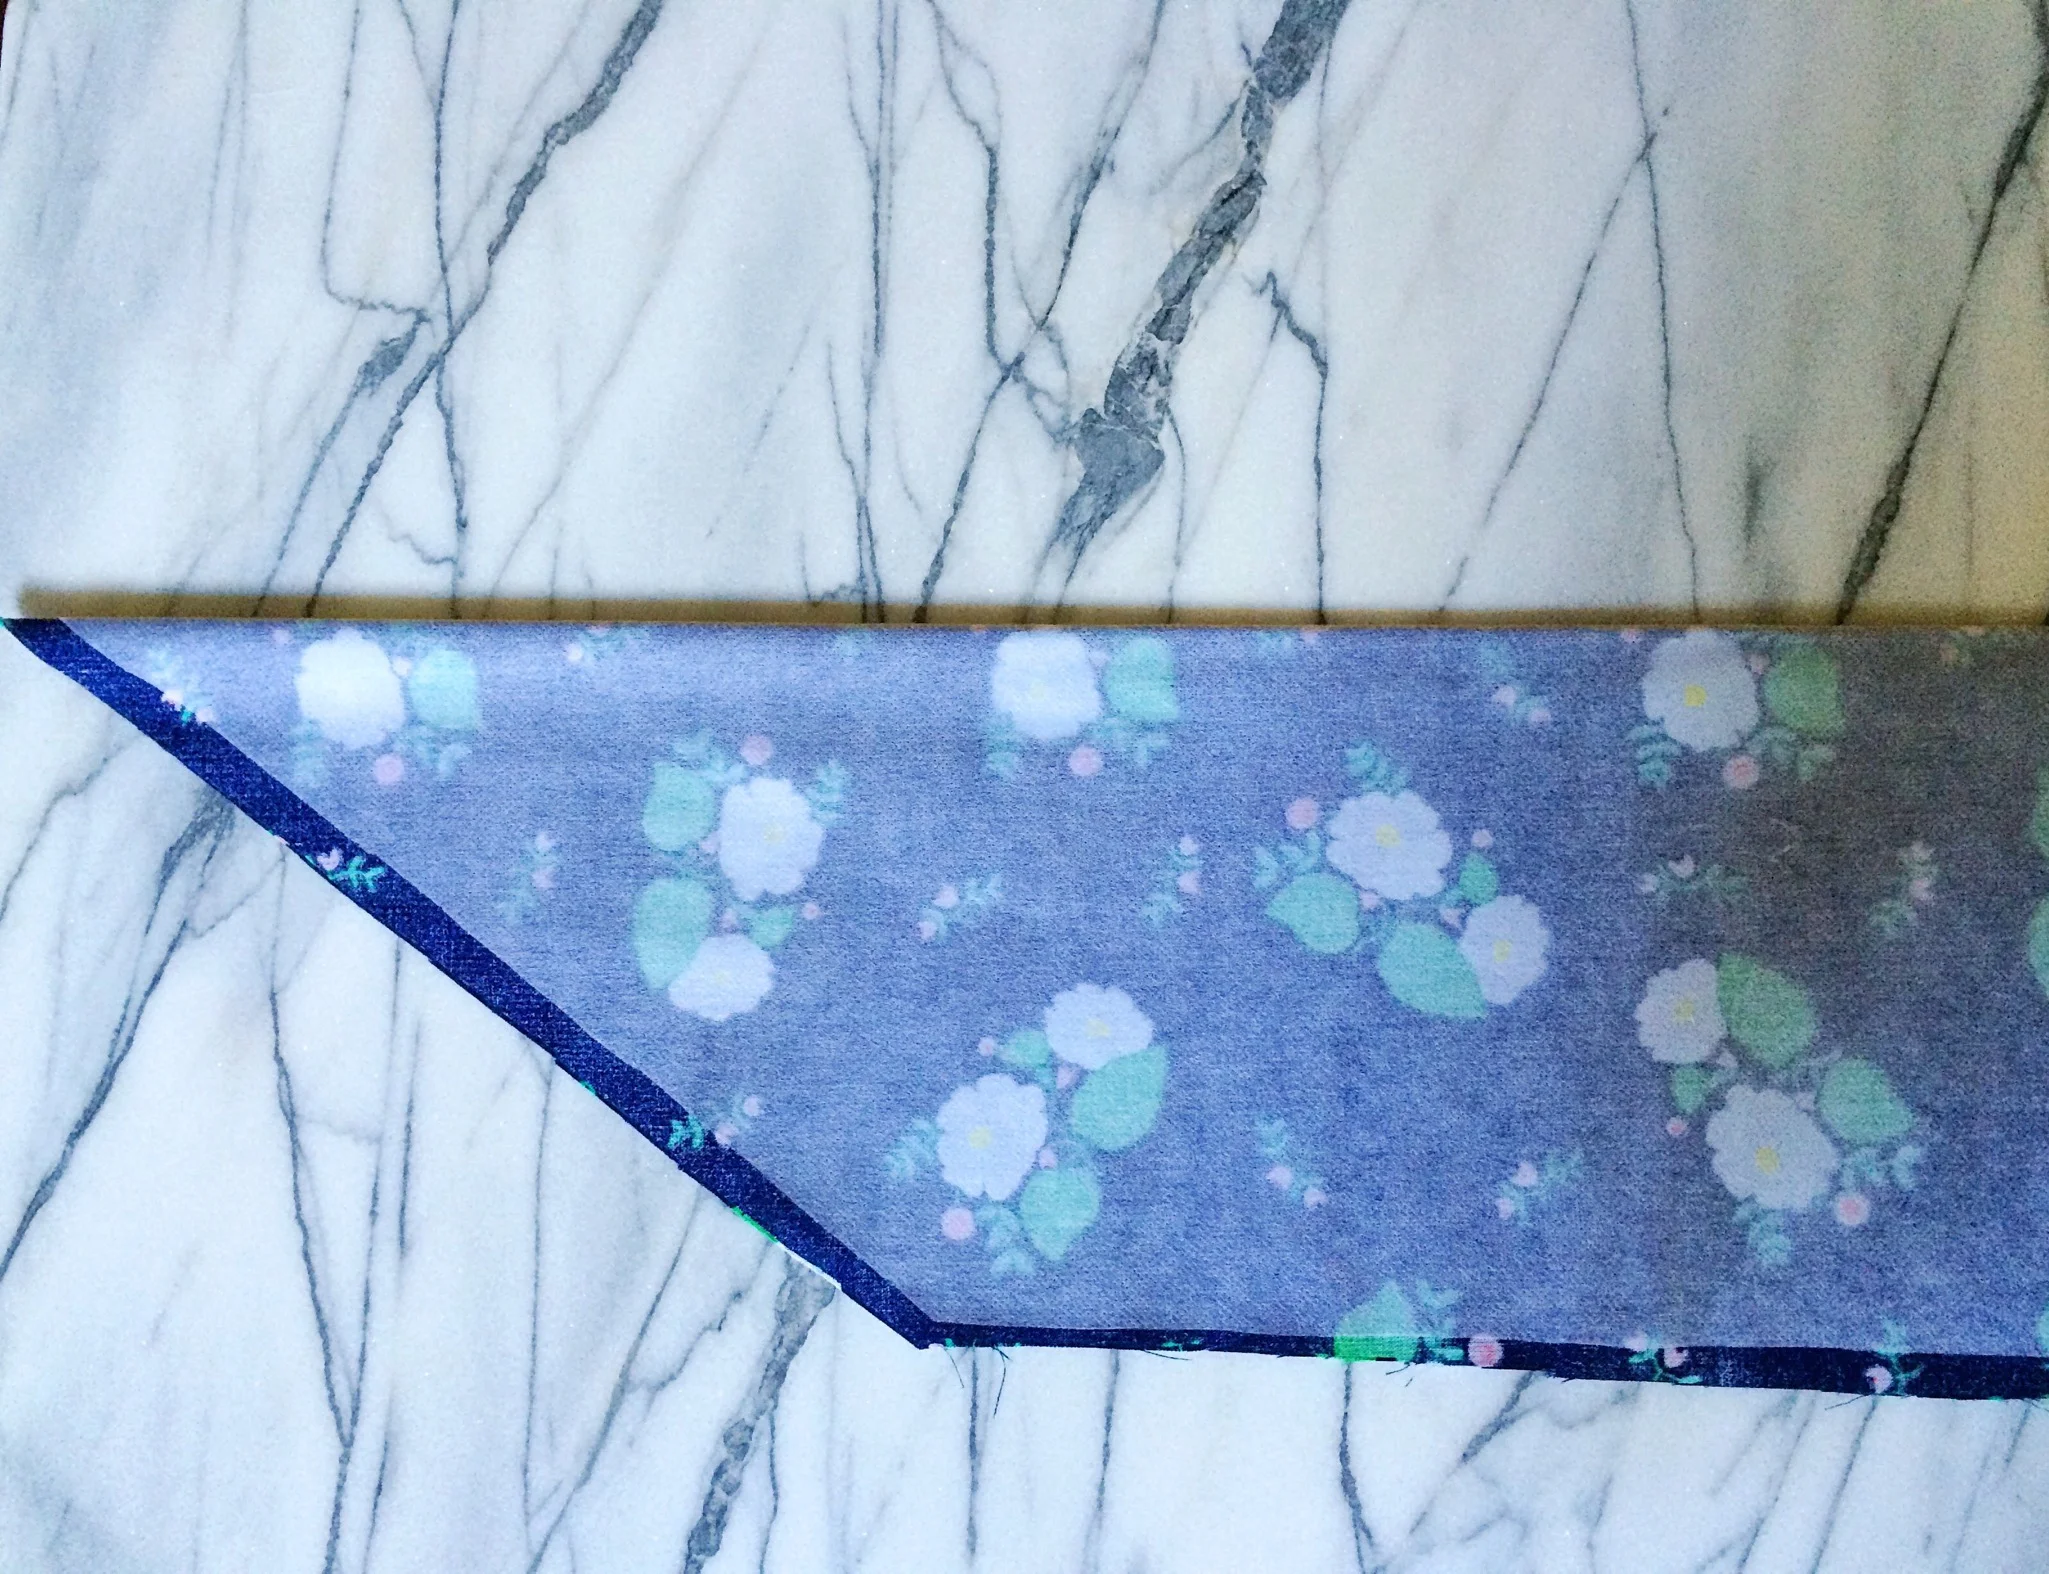
Fold the fabric with the right sides facing together and matching the notches, and pin. Begin stitching around the belt beginning at the point. Stitch the perimeter of the belt with a 1/2" seam, leaving an opening between the dots you marked for the pattern piece for turning the belt right side out. When you begin and end stitching at each dot, begin stitching at the selvage, stitch 1/2" and pivot. Stitch along the long side. By extending the stitch line, just a bit, it will help the fabric turn inside when it is time to finish.
Be sure not to stretch the fabric as you work toward the points on each end.
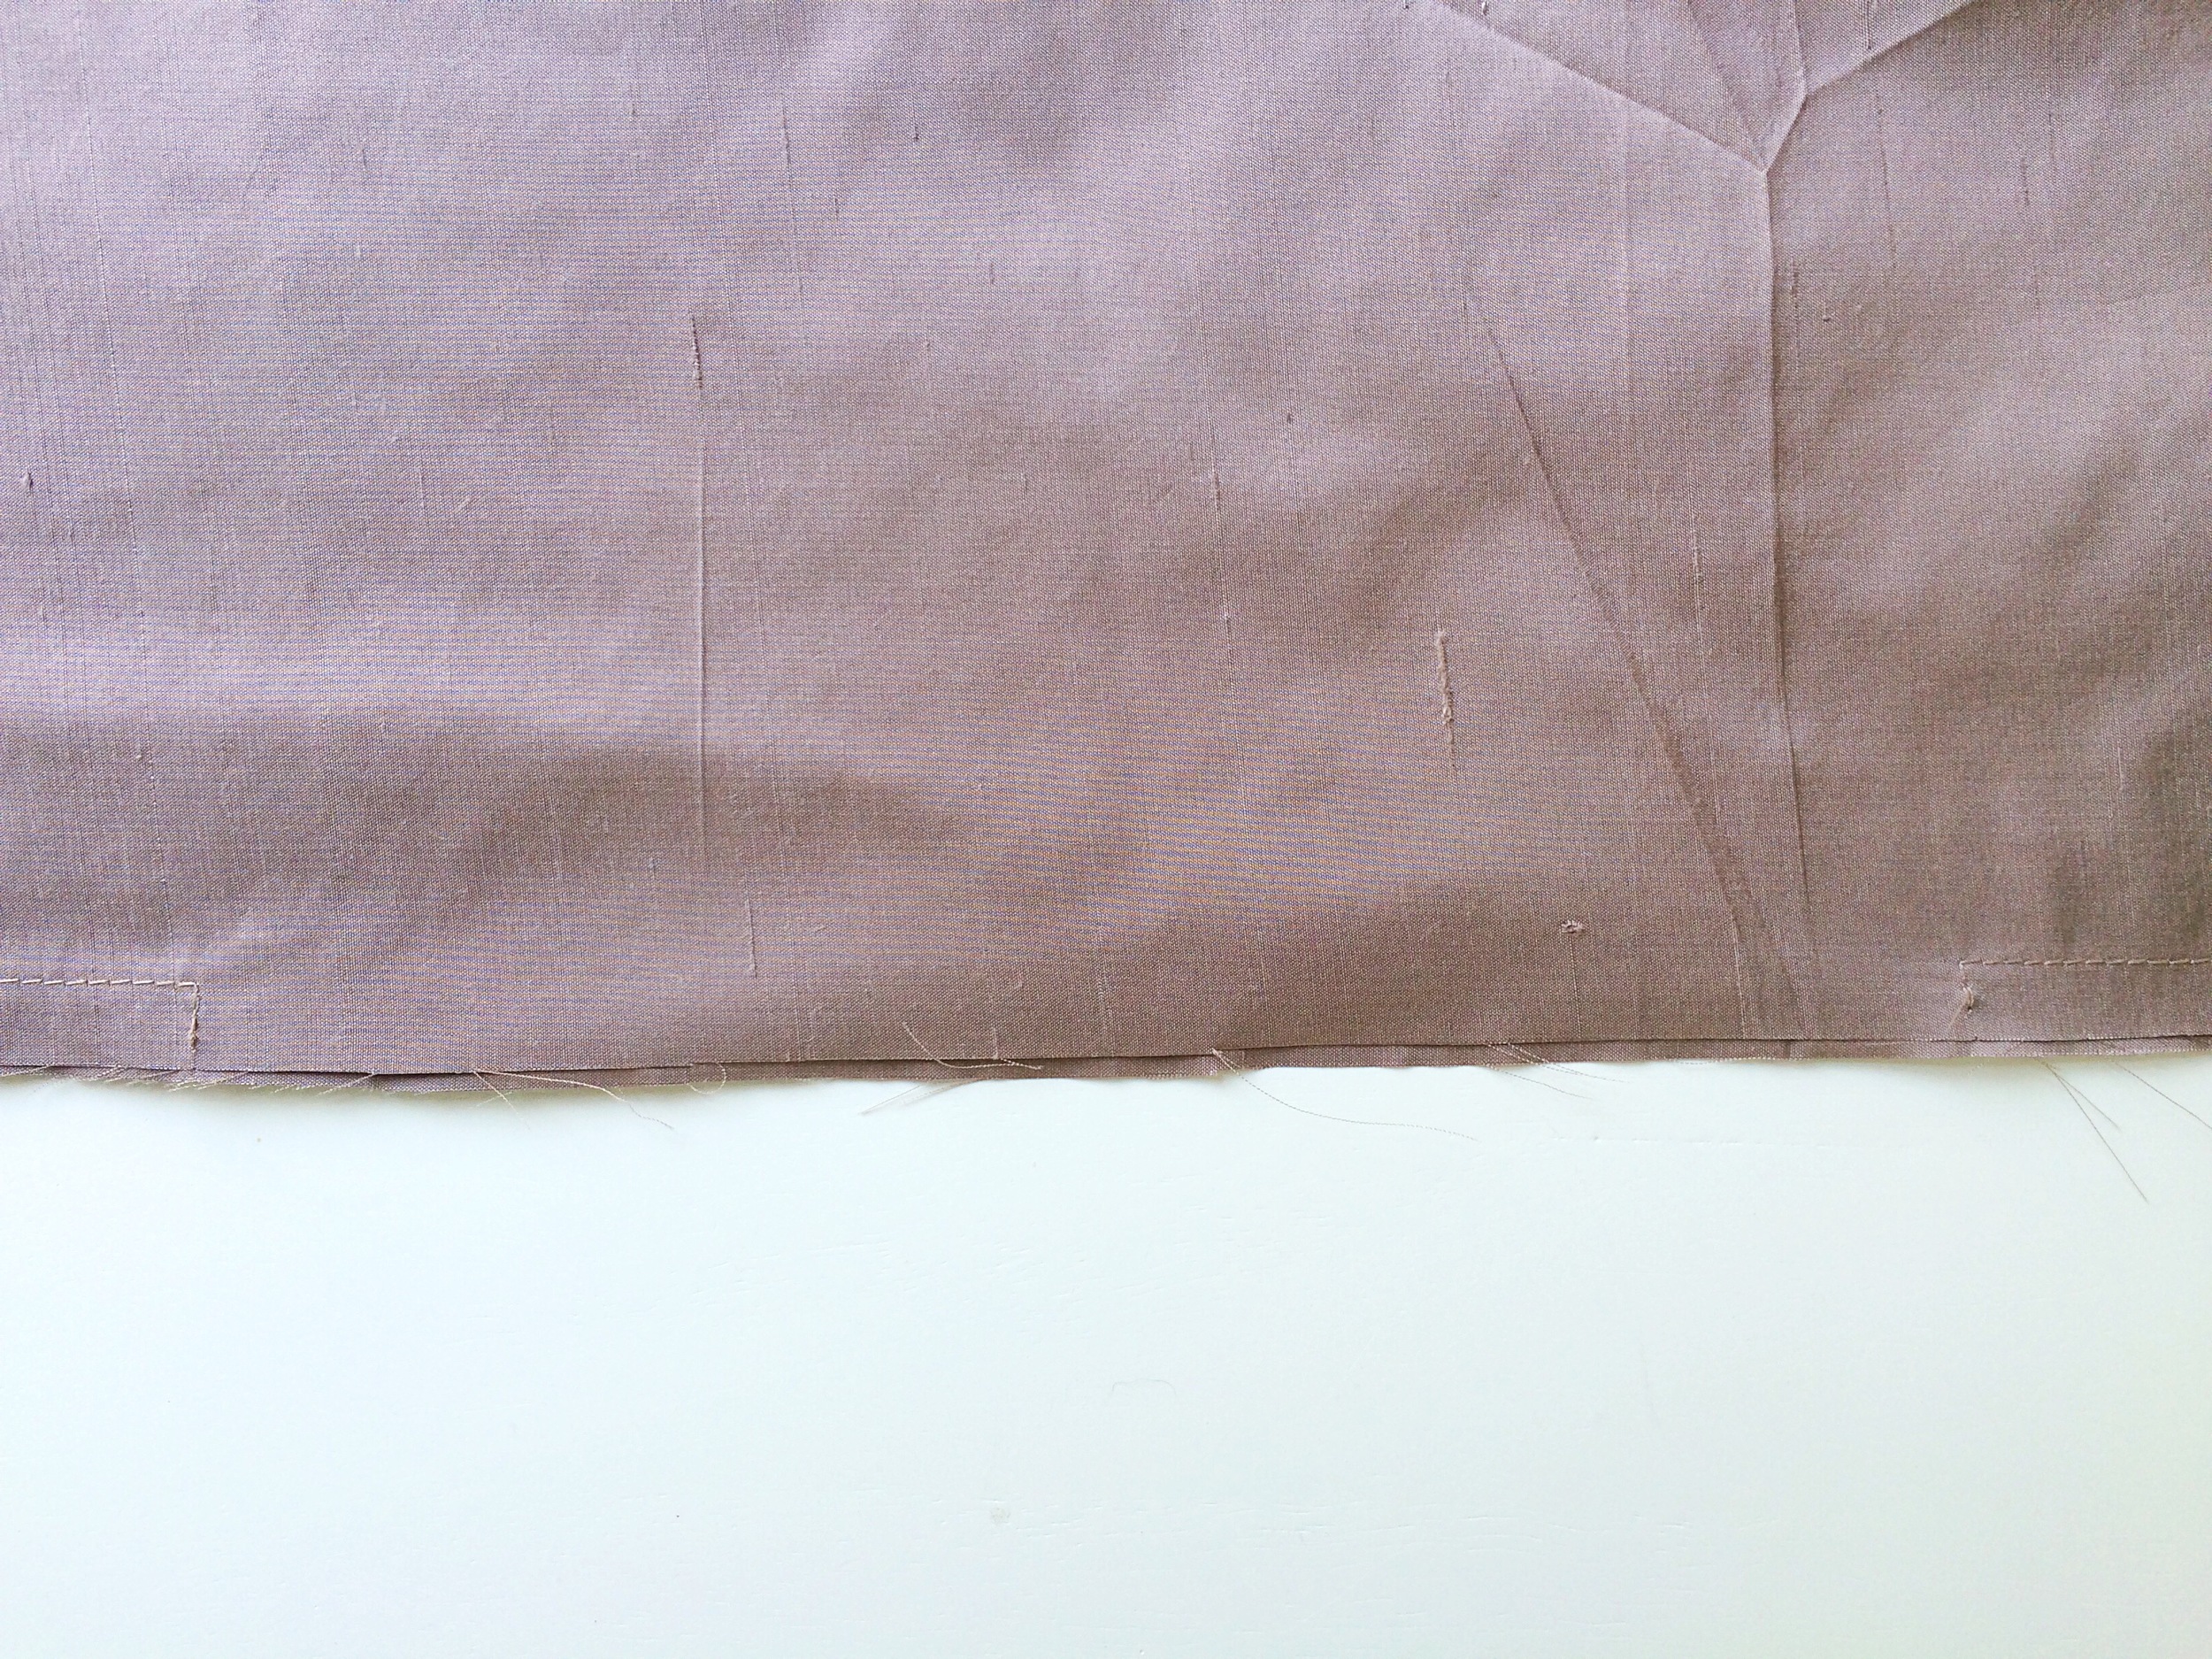
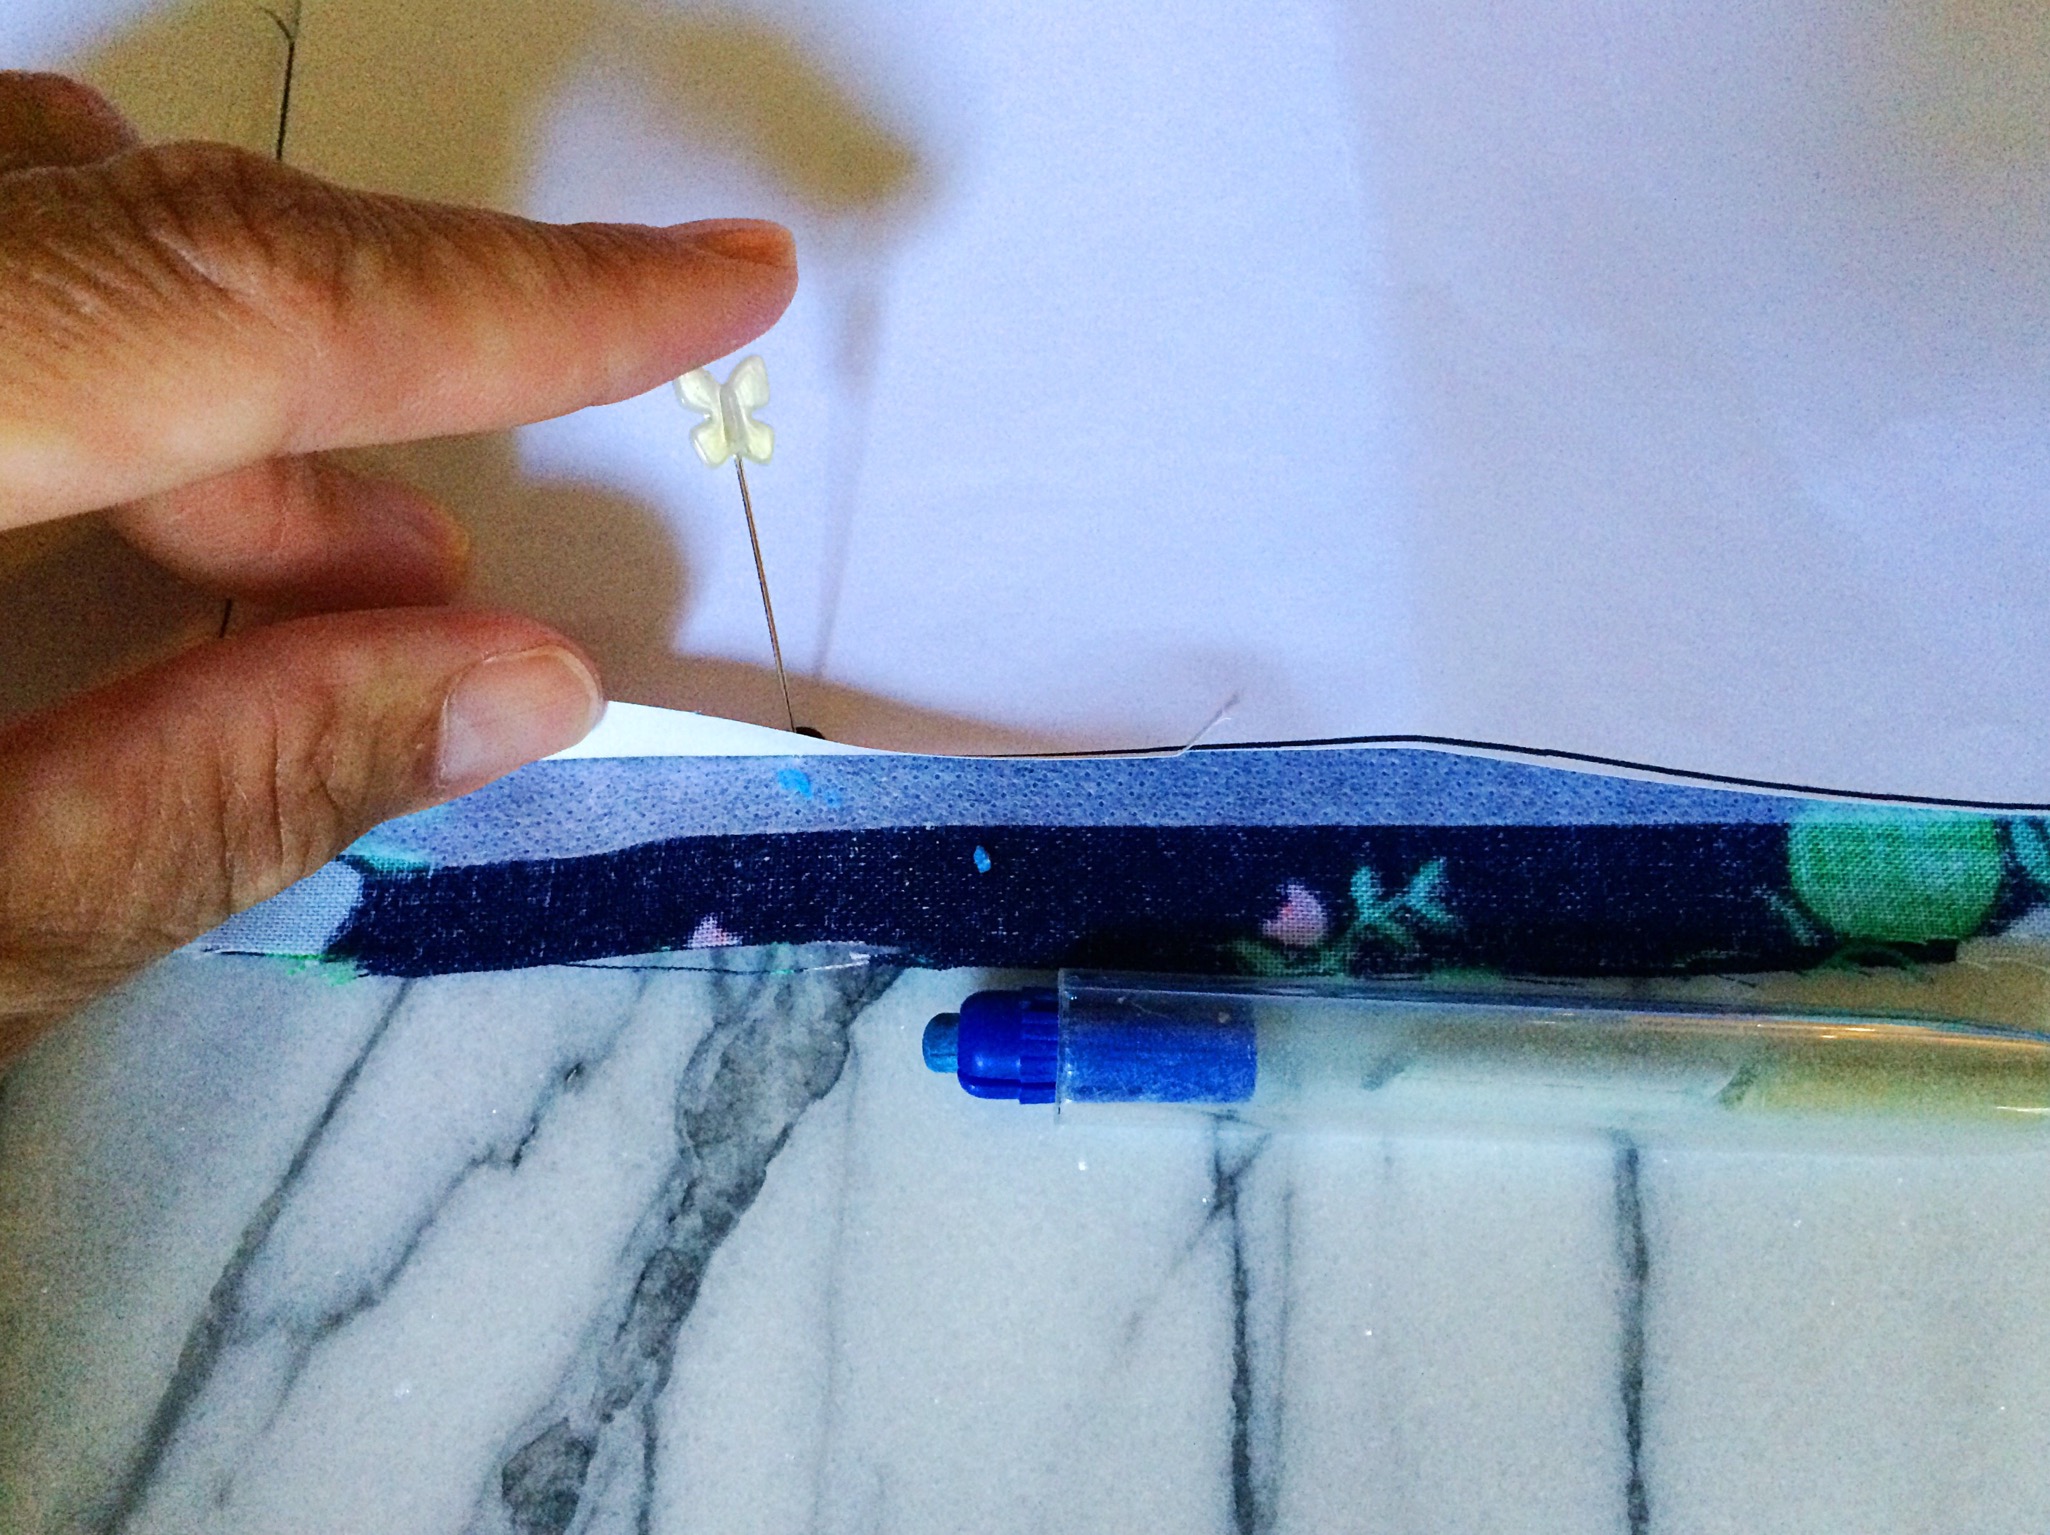
Trim the seam allowances (except for those in the opening) to about 1/8"; then turn the belt right side out. Finger press the edges to smooth the stitching, tuck the seam allowances inside the opening, and press with an iron to meld the seams.

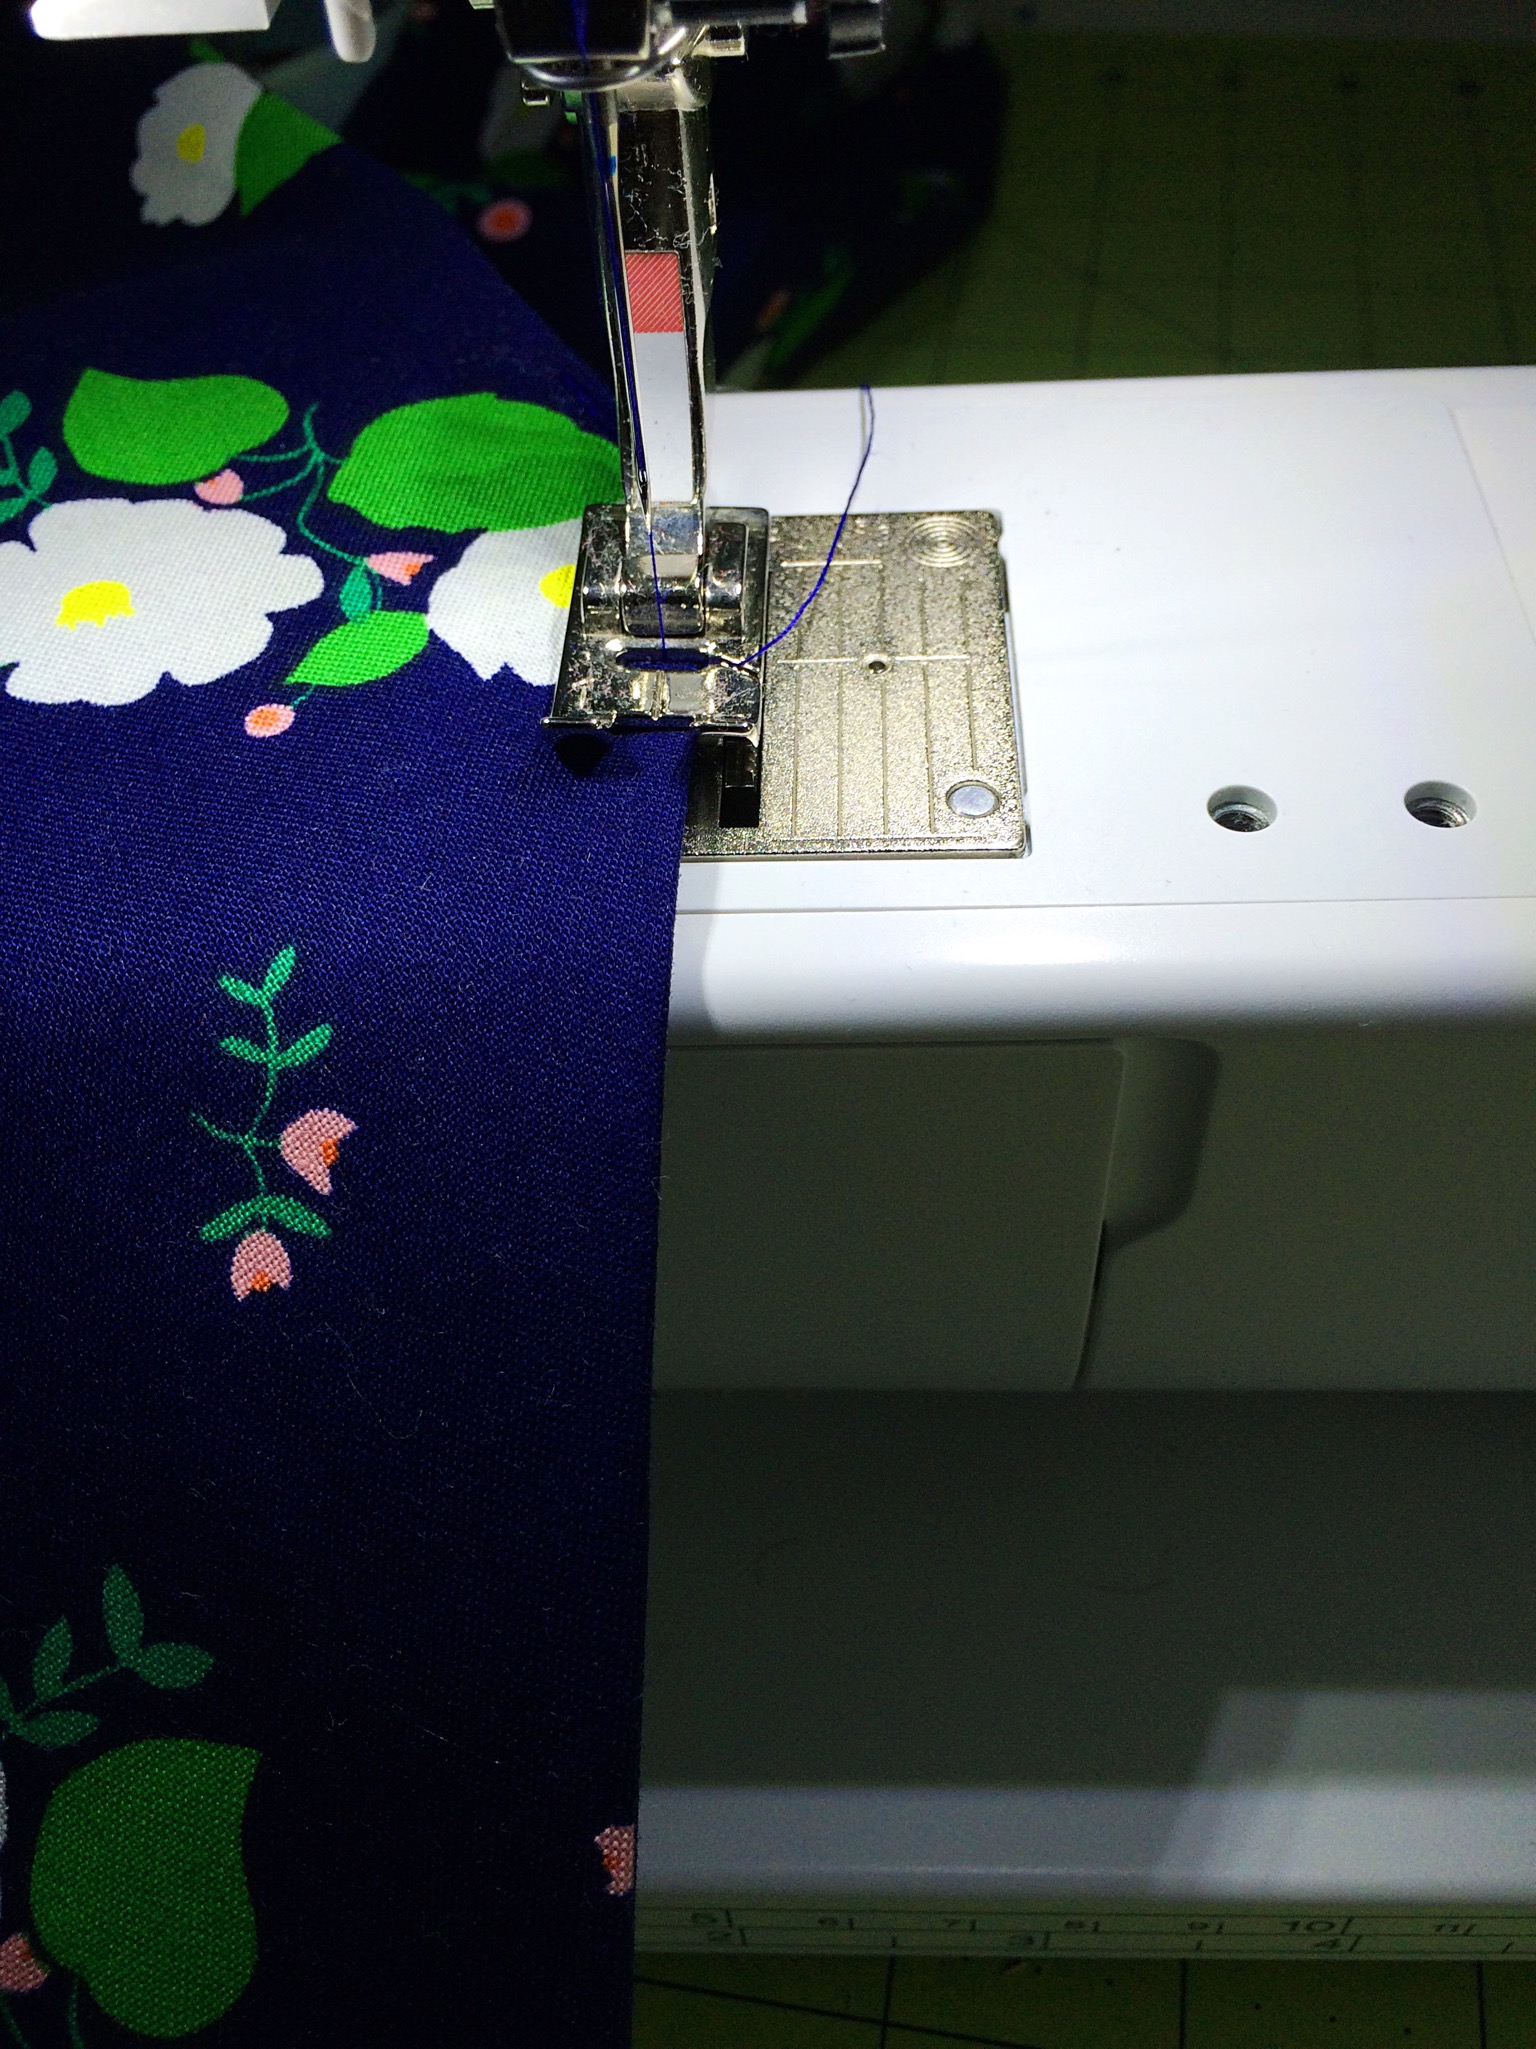
Topstitch 1/4" from the edge around the perimeter of the belt in one continuous seam, pivoting at the points and catching the folded inside edges that we used for turning. Be sure to backstitch to prevent all of those pretty stitches from unraveling! Press.
Your sash is done and ready to wear!

Sew a Softie Day!
Sew a Softie Day! Shopkin-ish edition.

I am so very honored to be included as a guest contributor to Sew A Softie Day! Trixi Symonds of Colored Buttons envisioned Sew a Softie Day as a way to share the craft of hand sewing. As a sewing teacher (and a mom!) I know first hand how seriously excited kids are about making things with their own hands. Sewing is a skill that they can learn that is super useful, accessible and fun. Yet there are so few adults in their life that sew anymore. I have a fun project for you In case you need a little inspiration to get started.
First, I'd like to share some thoughts on sewing with kids. To begin, ask them what they want to make. Kids really take to sewing when the rules are limited and they have lots of creative freedom and attractive materials to choose from. Good supplies are essential! I hate to sew with cheap fabric, flimsy needles and dull scissors. Sewing supplies don't cost that much money and the nicer felts, fabrics and tools make sewing so much more pleasurable. Get the better quality stuff. You will thank yourself. Kids are so much more invested in a project if they get to pick out the fabric and thread. Take them to the store, (seriously), and let them pick out the thread, felt, and buttons they like. The color combinations they choose are always fantastic.
If you are teaching a group of kids, have a sample made. Understand that sometimes what we think is terrific, they will not want to make. When this happens to you, try not to be disappointed! Ask them how they would change it and adapt. Kids know what they like.
Preparation is key. Precut the patterns, gather the supplies, thread the needles, tie the knots. Have it all ready to go. I find that simple 2-D shapes work best for little hands and growing minds. A simple shape is a blank canvas for them to embellish. (and they will!) Kids love to personalize whatever they make, More is more.
Turn on some music, thread some needles, snuggle up with your favorite little ones and have fun with it. To begin hand sewing with kids, I have them choose a small piece of felt and a few colors of embroidery floss. Then I draw a path of dashed lines each about 1/2" long across the felt. I give them a strand of floss and knot the end with a "tail" below the knot. We begin by pushing up through the back of the felt. We pretend that the needle is a dolphin or a mermaid who bursts up from the water (beginning of the line) and dives back in (the end of the line). However, the mermaid has to hold her nose when she dives (pinch the thread around the eye of the needle). Because she is just a little mermaid and just learning to swim. At this point we are focusing on process only. Wonky stitches are just fine! In fact, most kids prefer them. They want their stitches to show so that everyone else will know that they made it.

Kids need a lot of help threading needles and tying knots. They eventually get it, and when they do, they feel incredibly accomplished. They can't wait to help their struggling classmates.
When I joined Sew a Softie Day, my original project was going to be a marionette puppet. I thought it would be lots of fun and couldn't wait to show my resident focus group (my own children). While they liked to play with the puppets, stringing them and making them move correctly proved really frustrating. I needed plan B! Later that week, in one of my sewing lessons, a young girl asked to make an avocado "Shopkin". Shopkins! Yes, of course, Shopkins are the perfect project! If you don't spend a lot of time around elementary aged girls, Shopkins are these adorable little shopping themed characters. Food, household items, clothes. Cute stuff that kids collect, trade and promptly loose.
While this project is not exactly a Shopkin, it has been a huge hit. The ideas are endless and can be tailored to each child's interest. Omit the inner circle on the doughnut and suddenly, it's a cookie or an alien spaceship. Perhaps make 2 circles and it becomes a Starwars BB-8! Simple shapes, few "rules", cute details and fun colors. Are you ready to try it?

Felt Shopkin-ish
Supplies Needed:
Felt
Embroidery Floss or Pearle Cotton
Embroidery needles with a large eye
Scissors
Chalk pencil or Frixion pen
Stuffing

To begin, download and print the pattern. (Make sure that the scaling square measures one inch.) Trace around the templates and cut on the trace line. It may help to trace the pattern onto cardstock or posterboard and then cut the shape out for the kids to trace onto felt. Paper can be tricky for most kids to align, pin and cut.
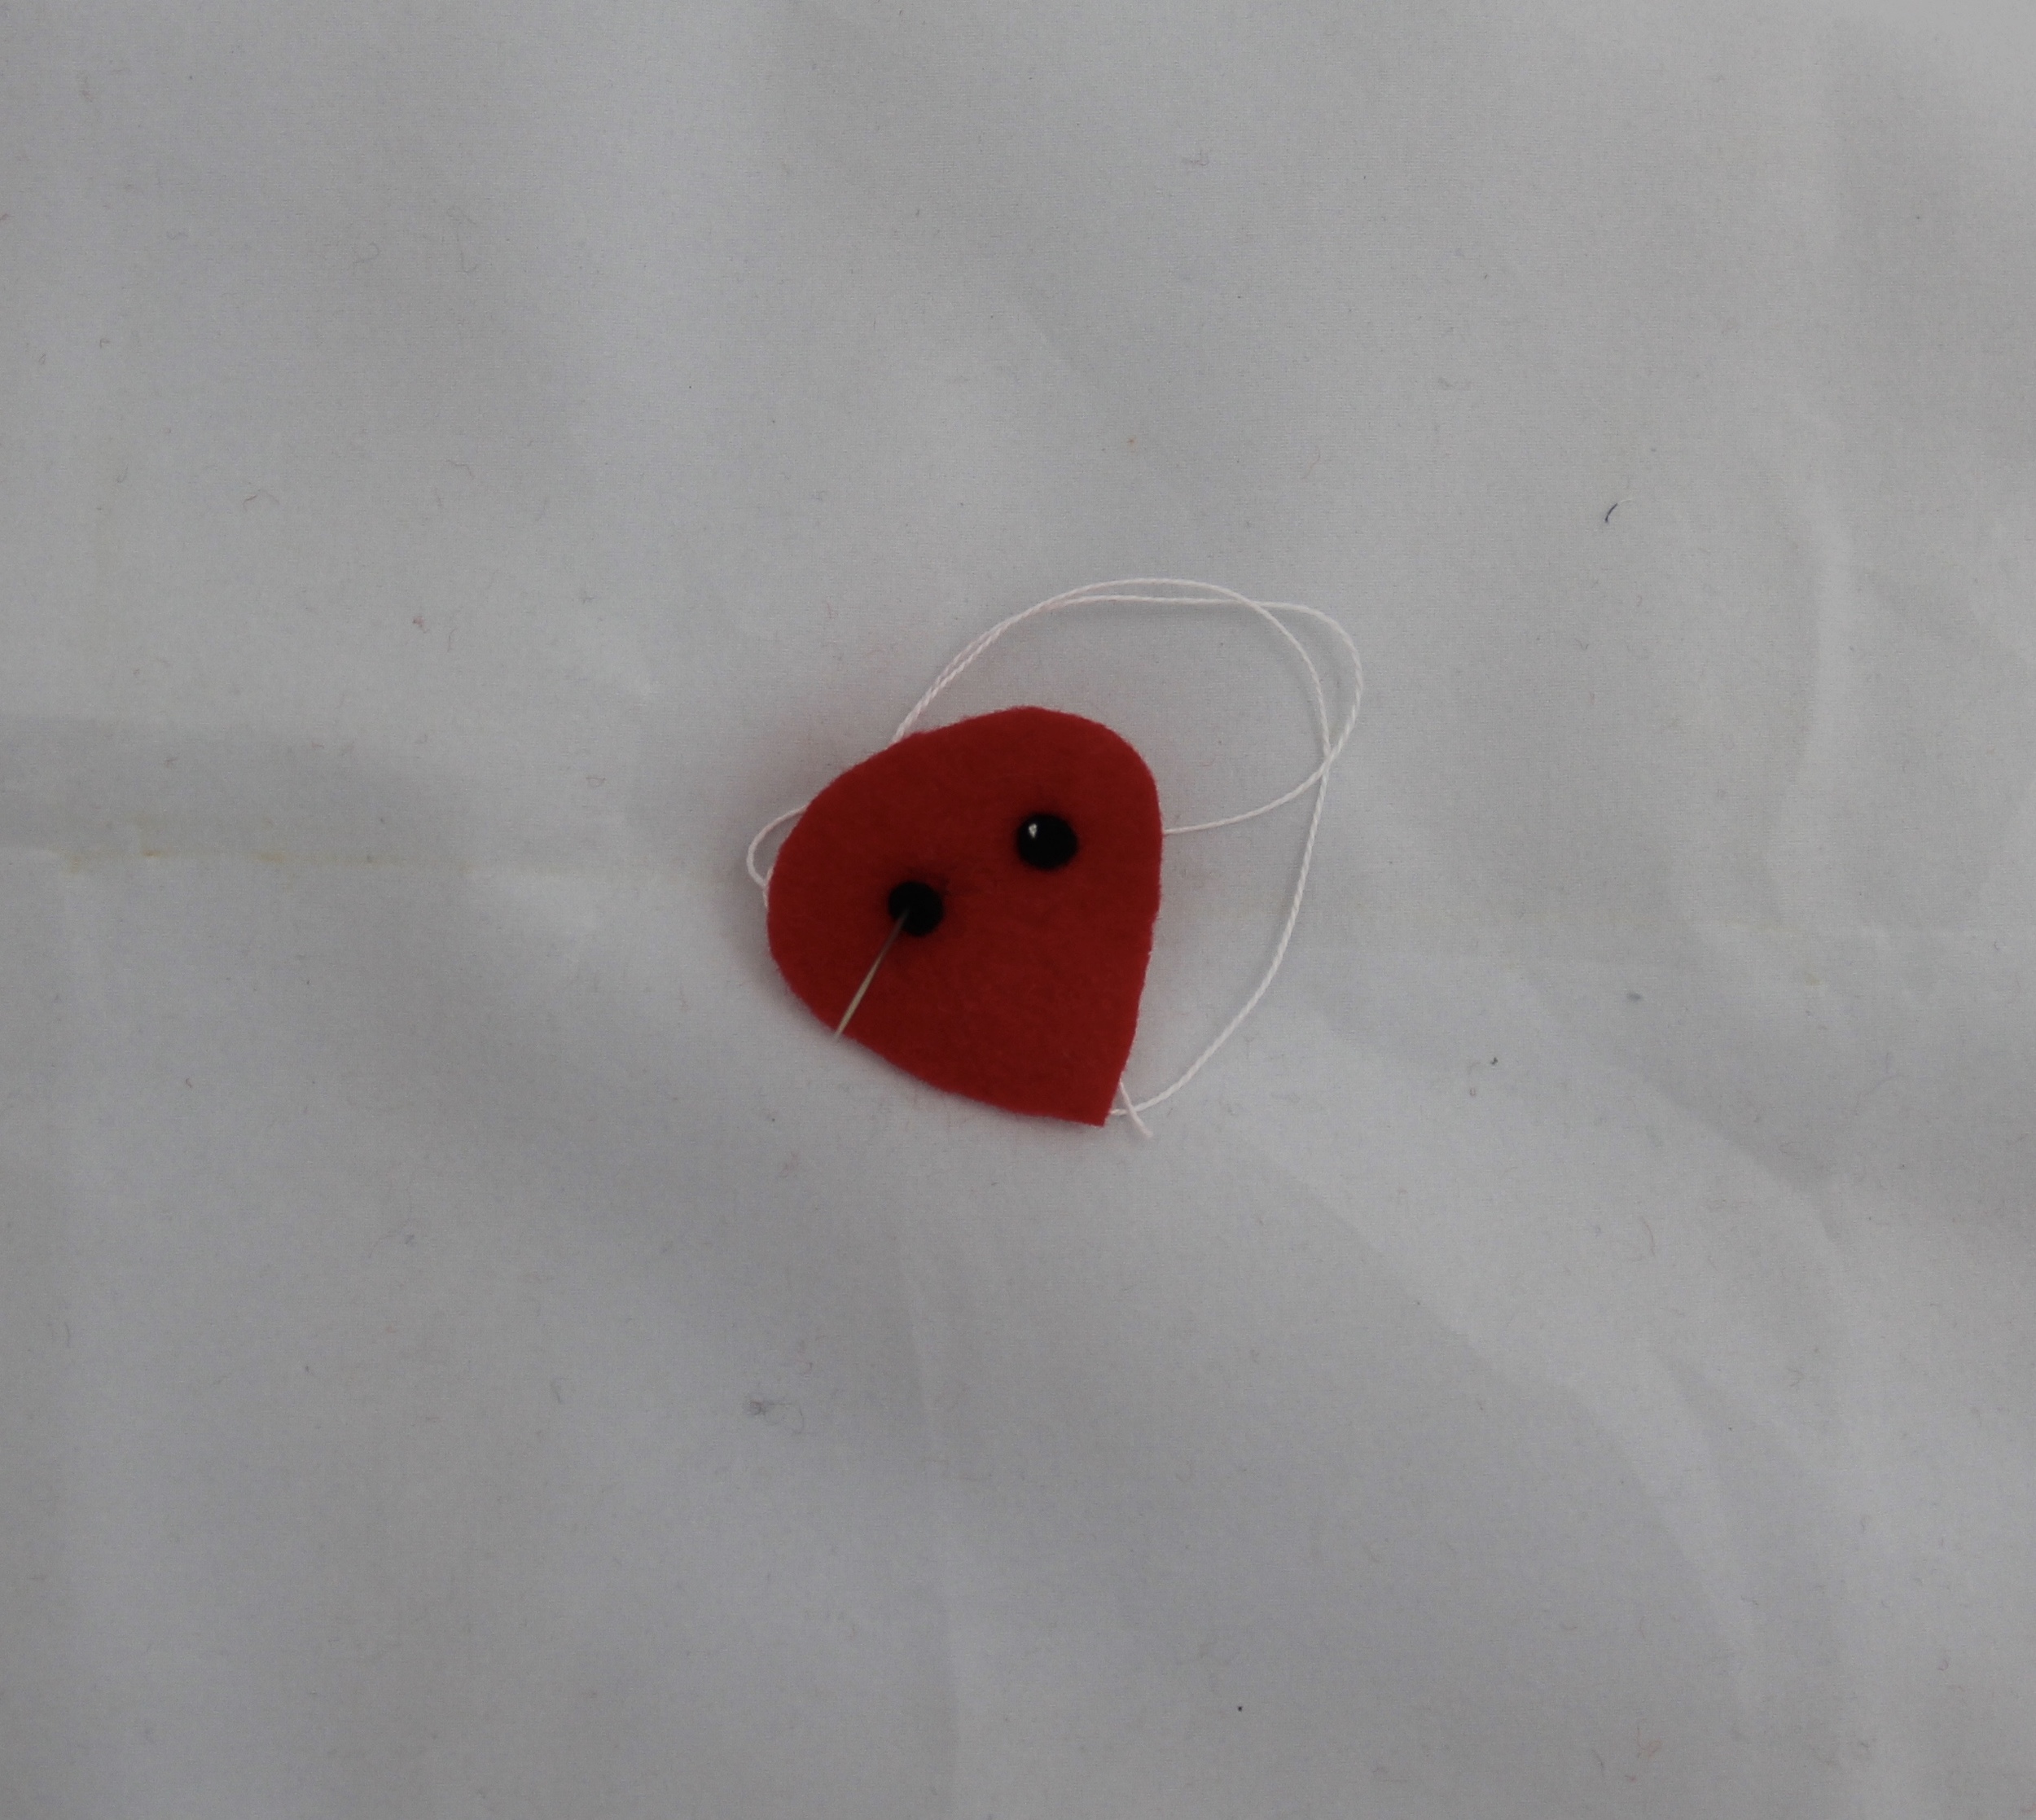
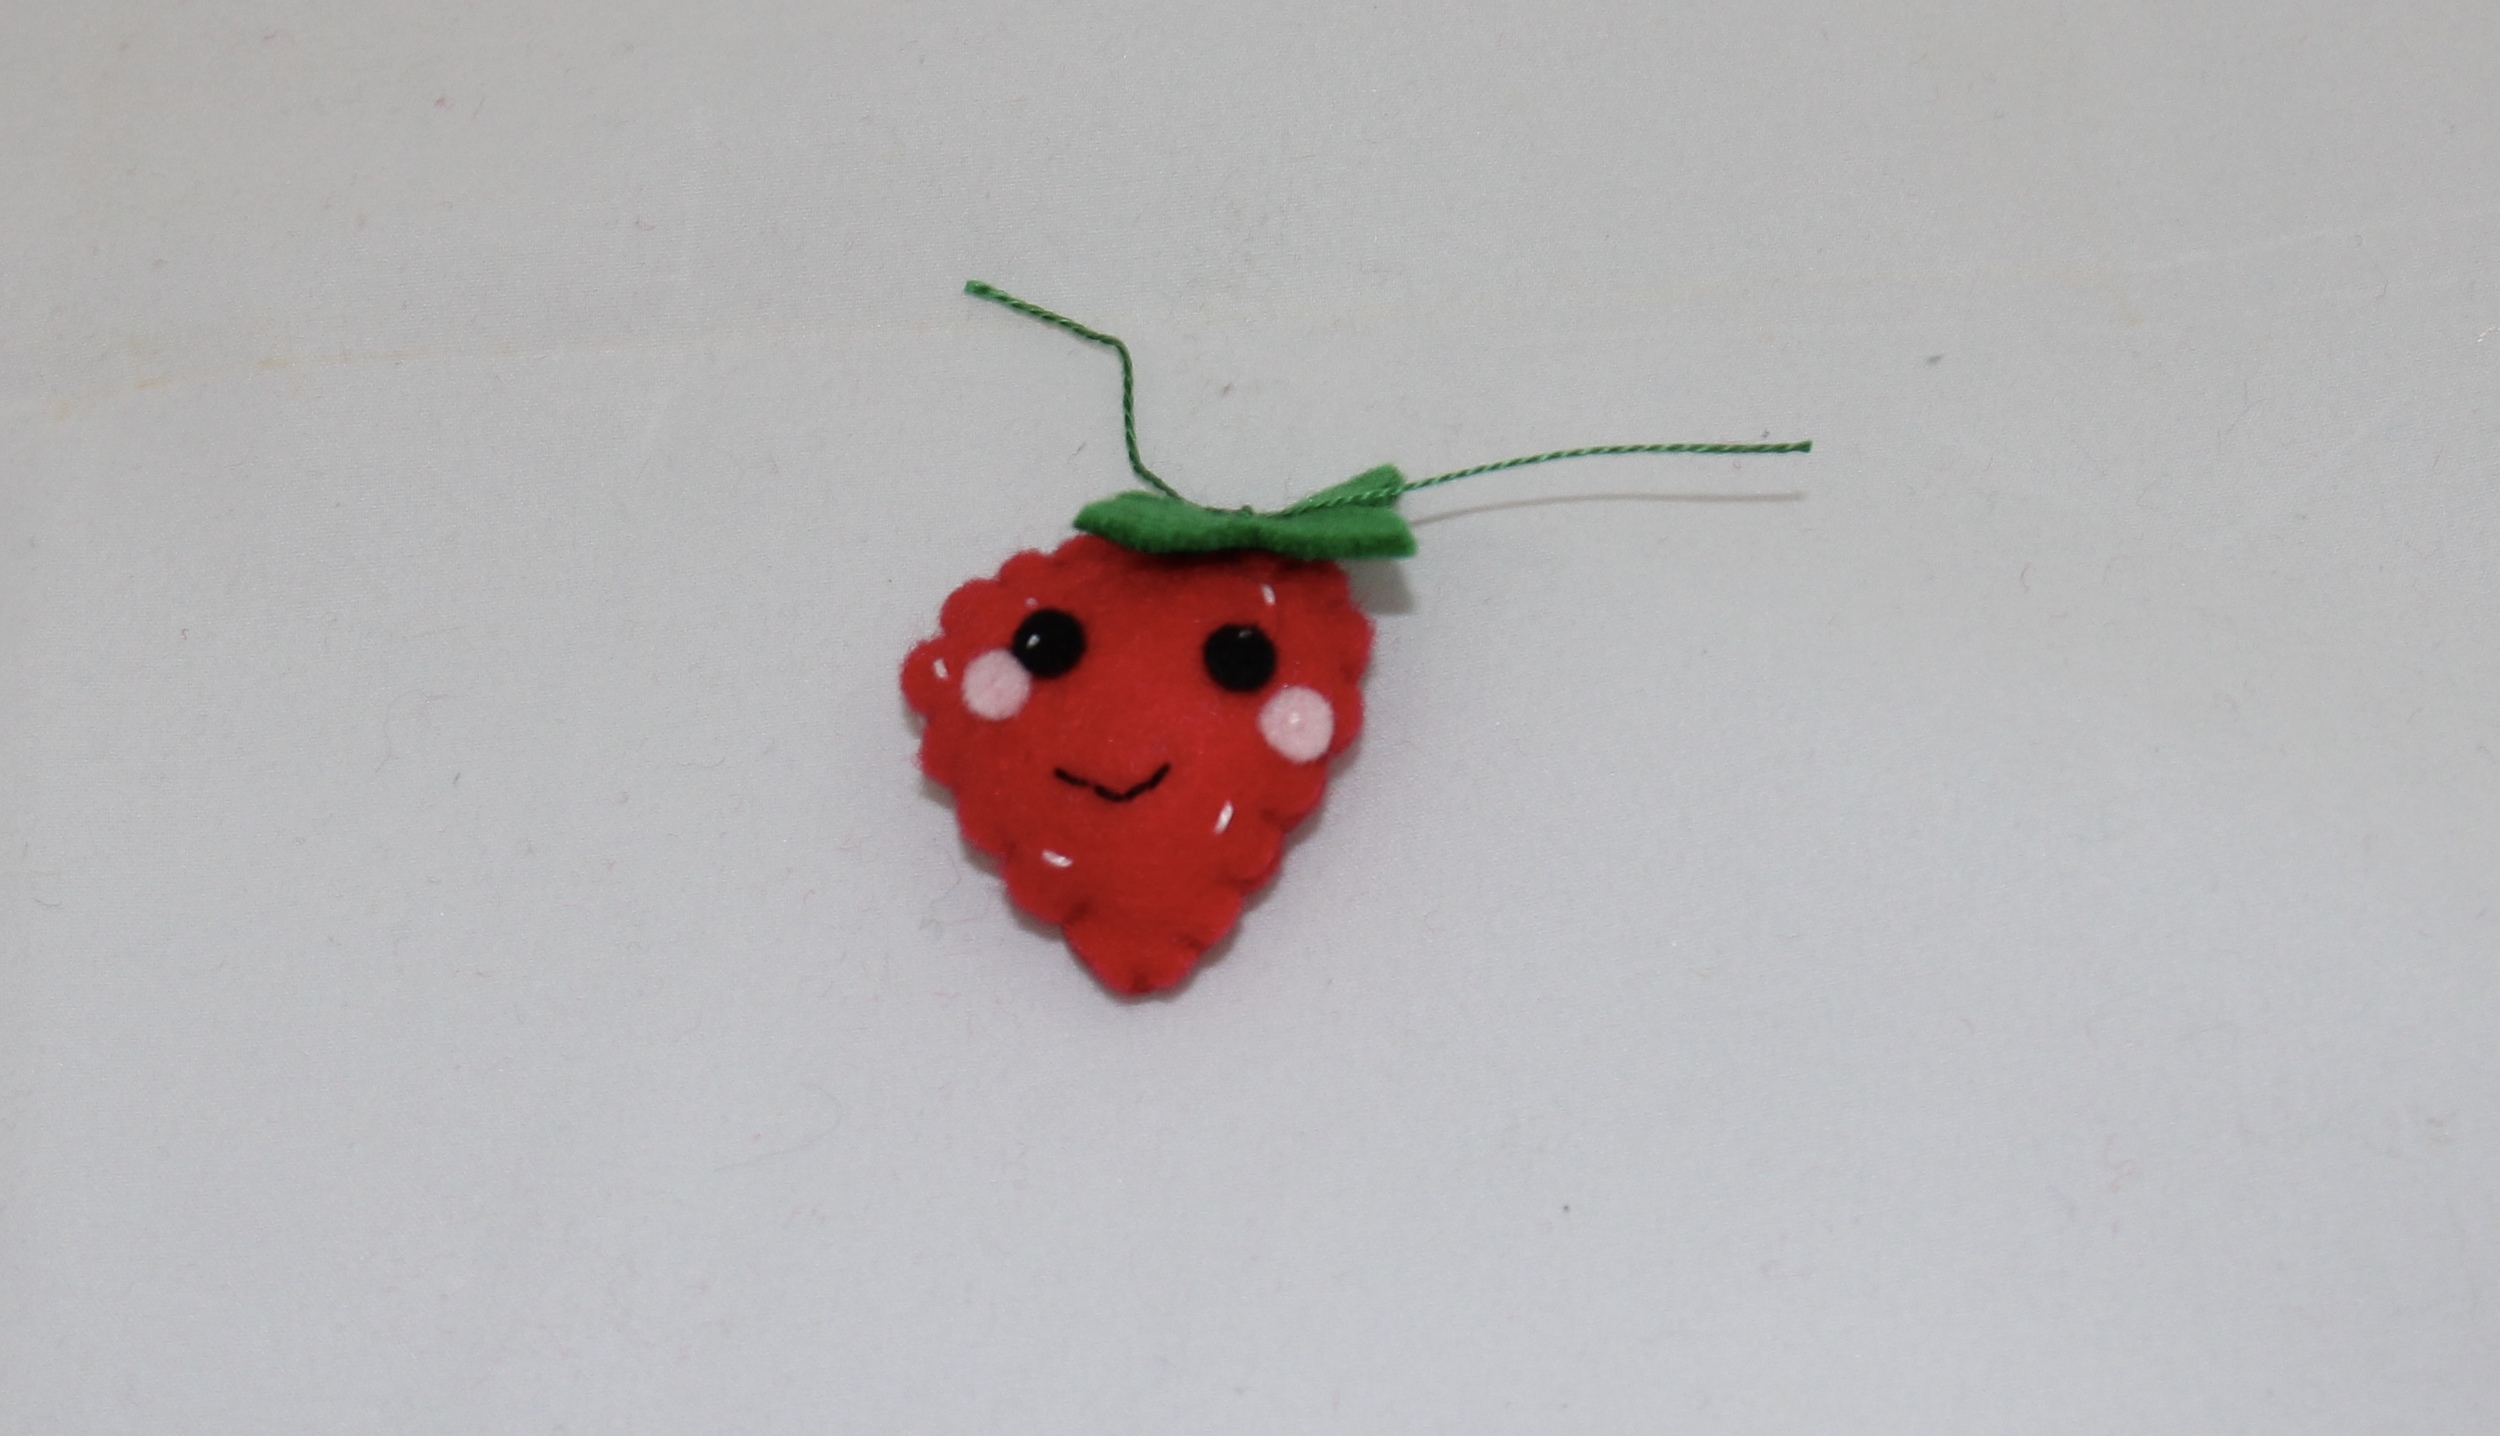
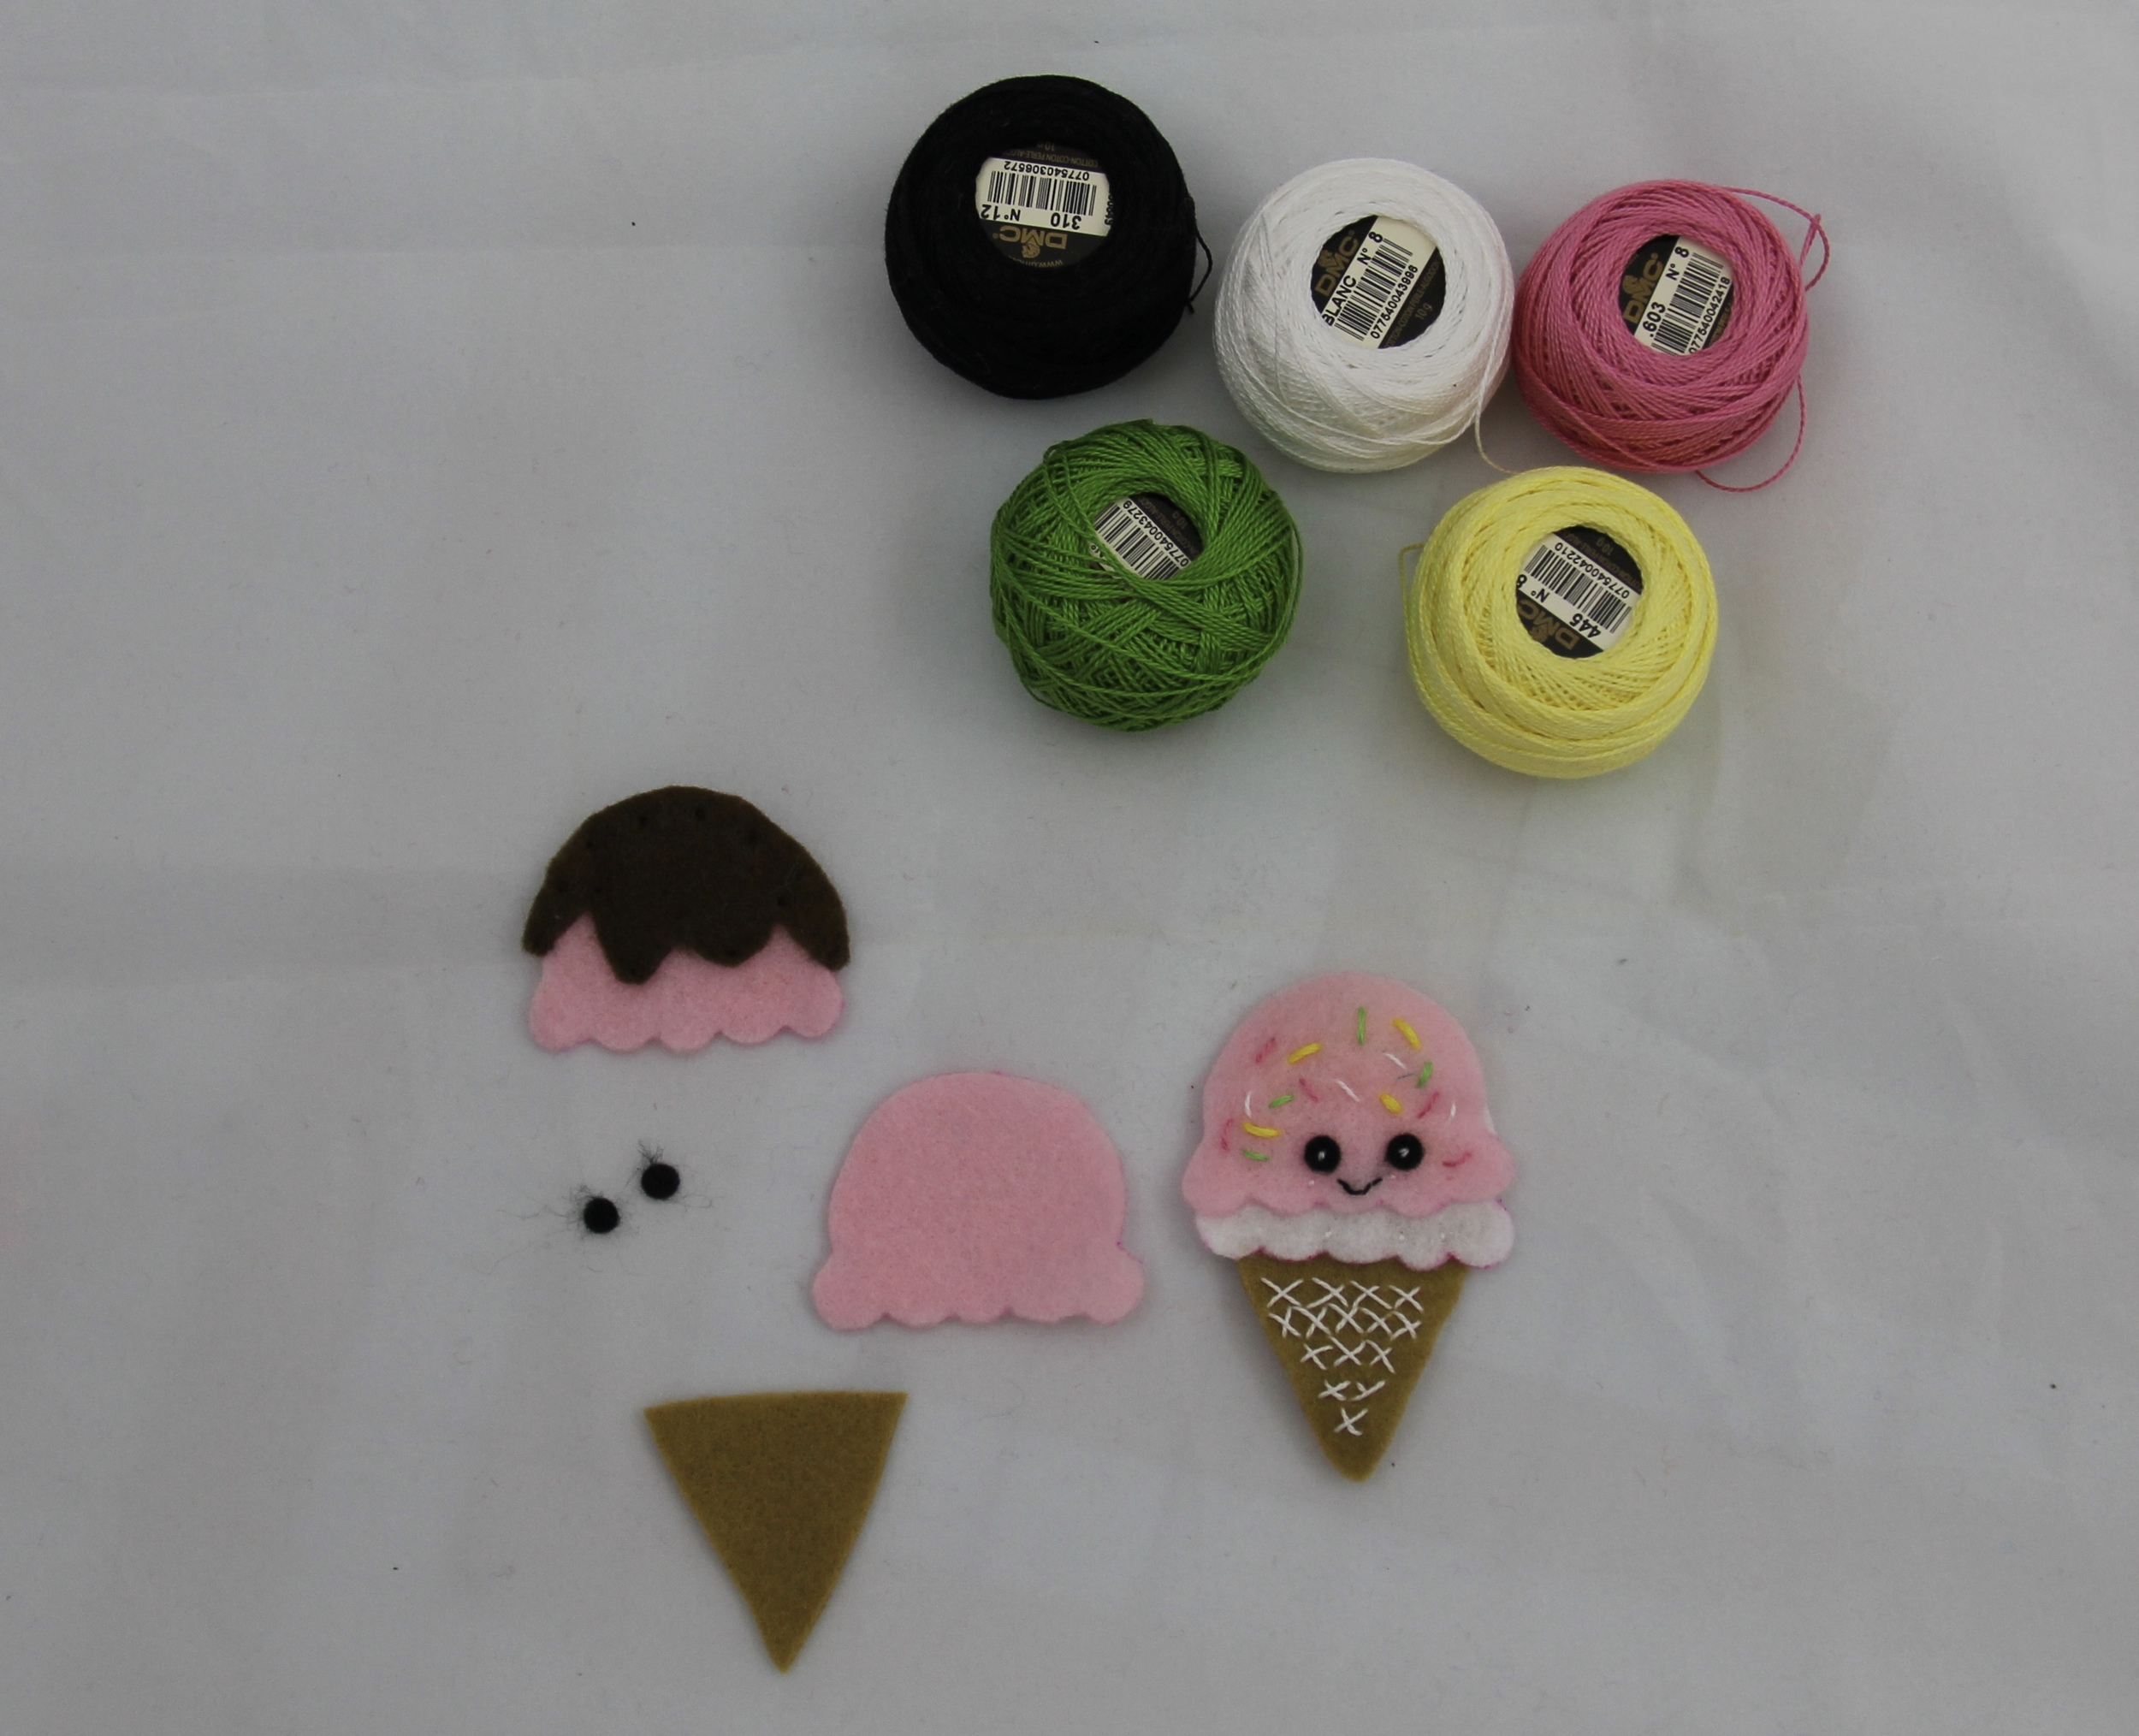
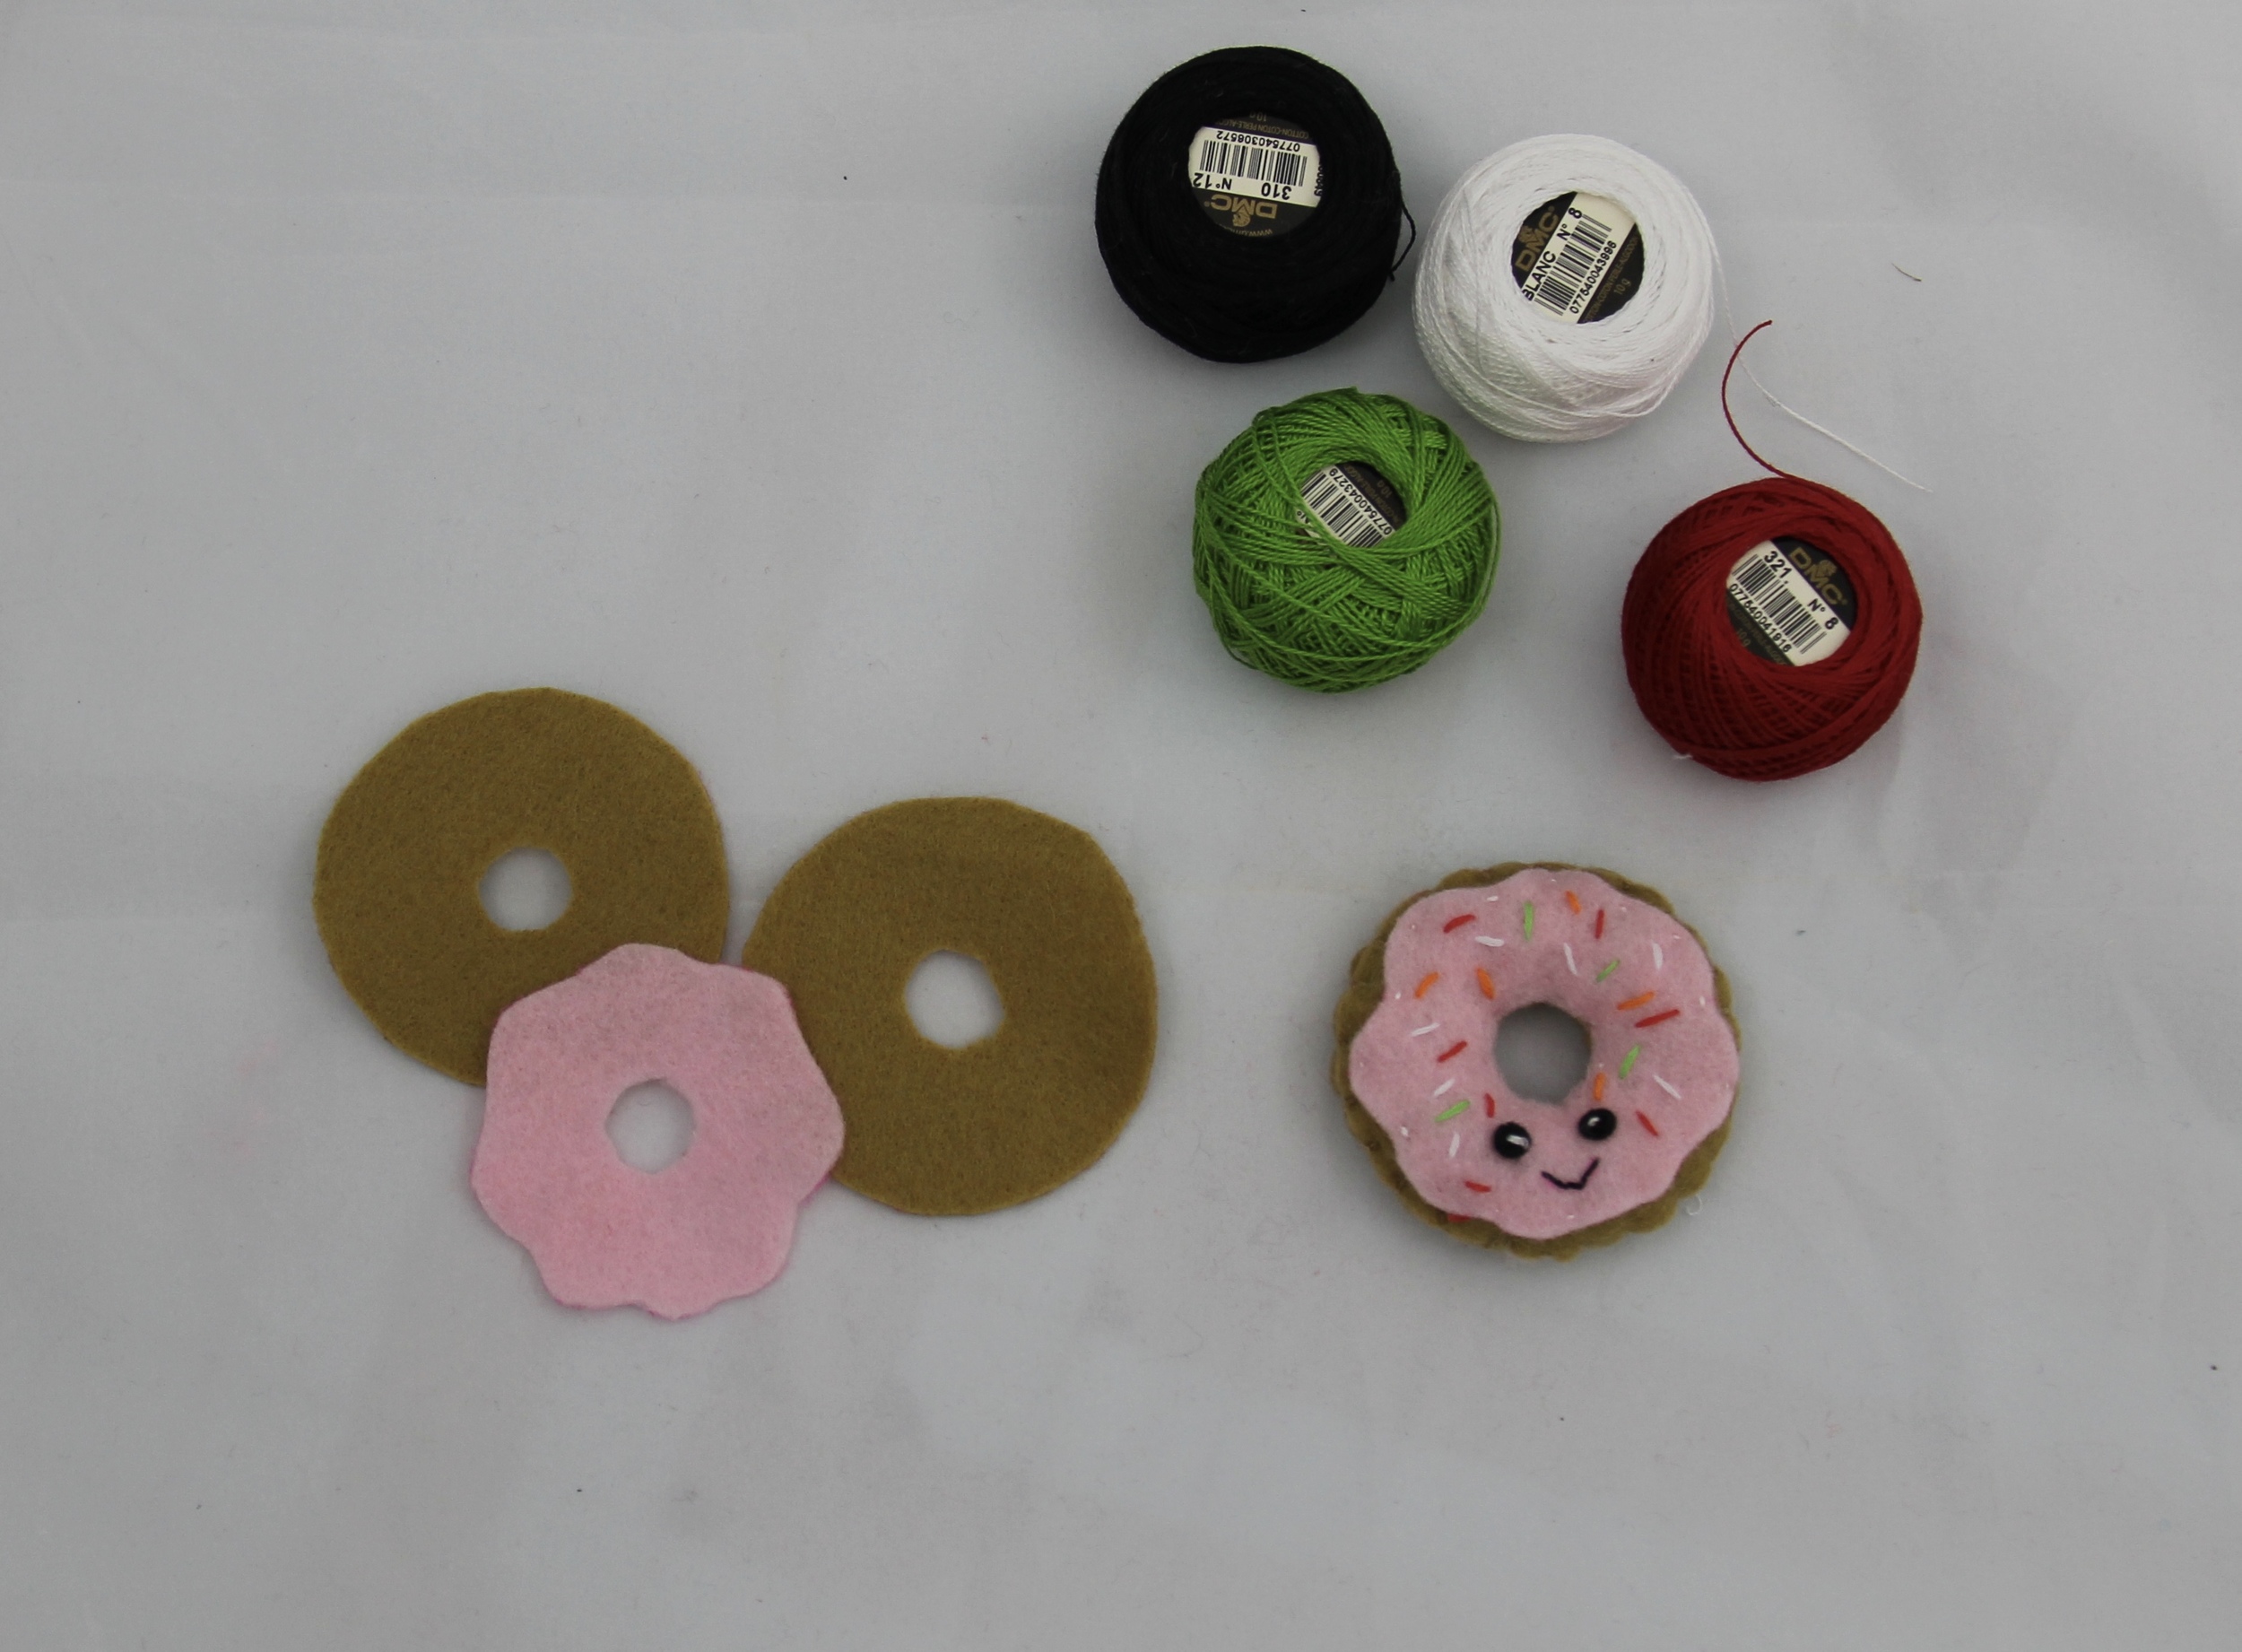
Once you have your shapes, decide where to add the eyes, cheeks and smile. Since I didn't add a template for the eyes and cheeks, just have your kids cut out small circles out of scrap felt. I used a paper punch for mine.
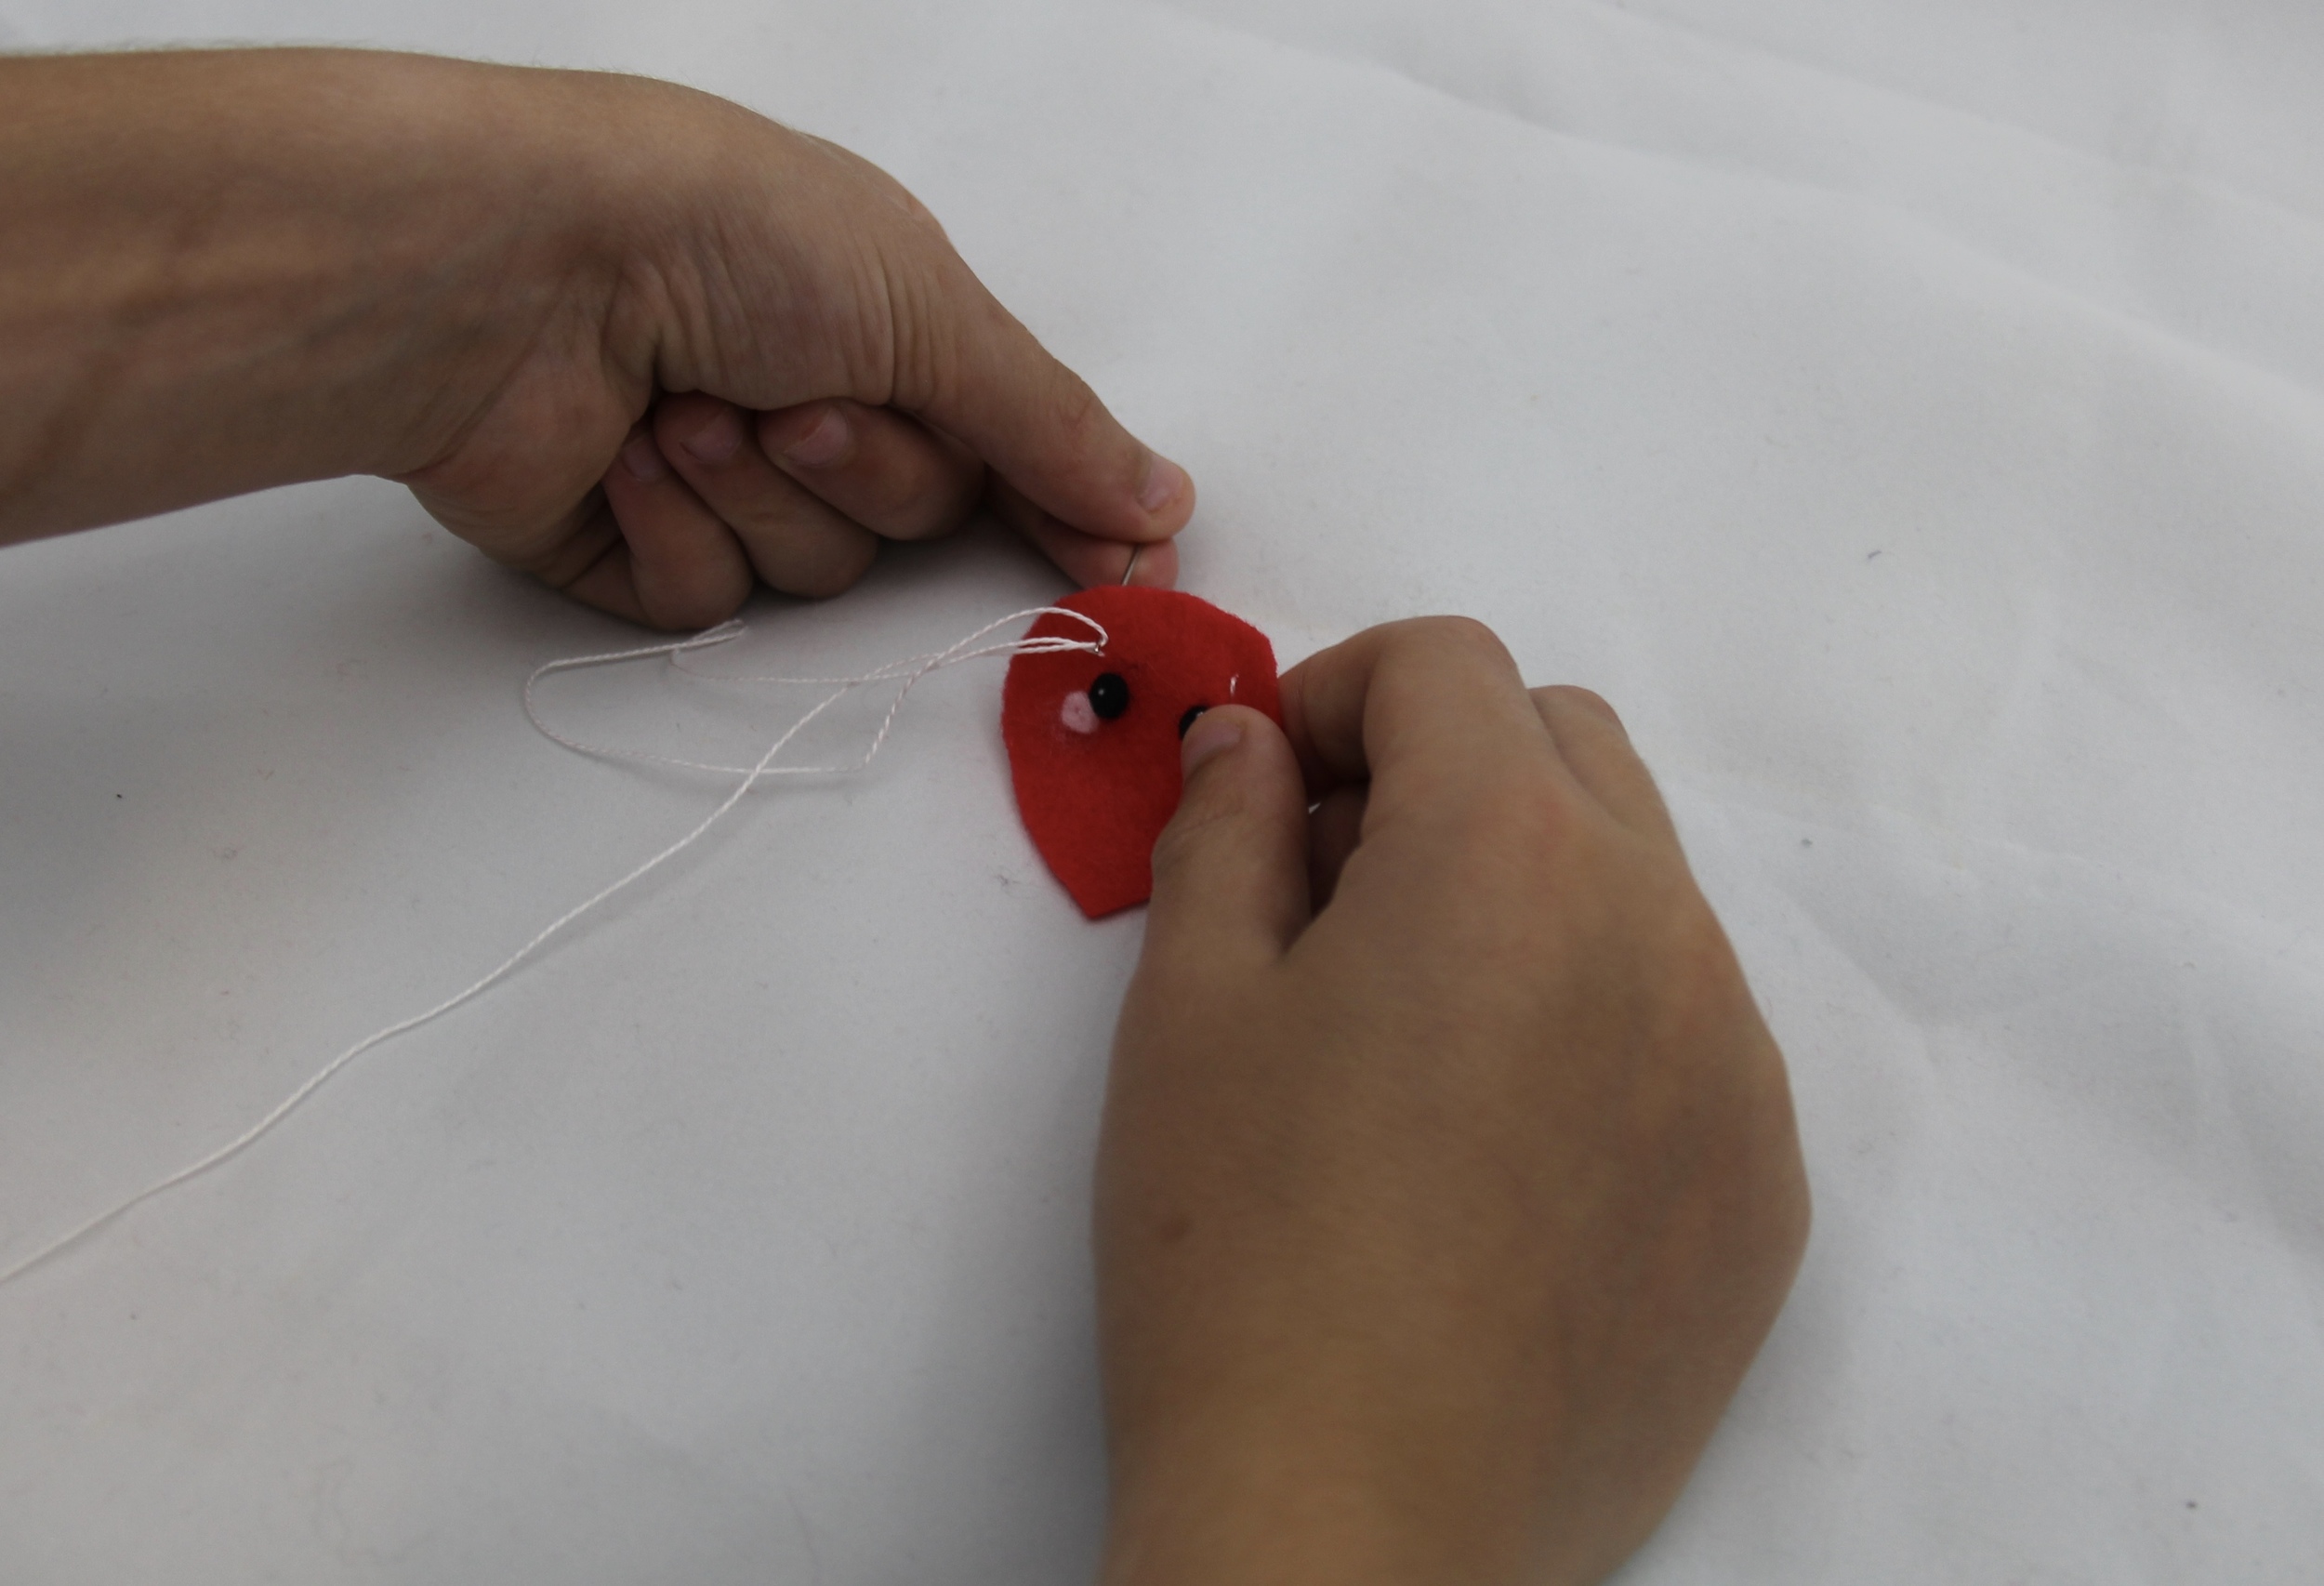
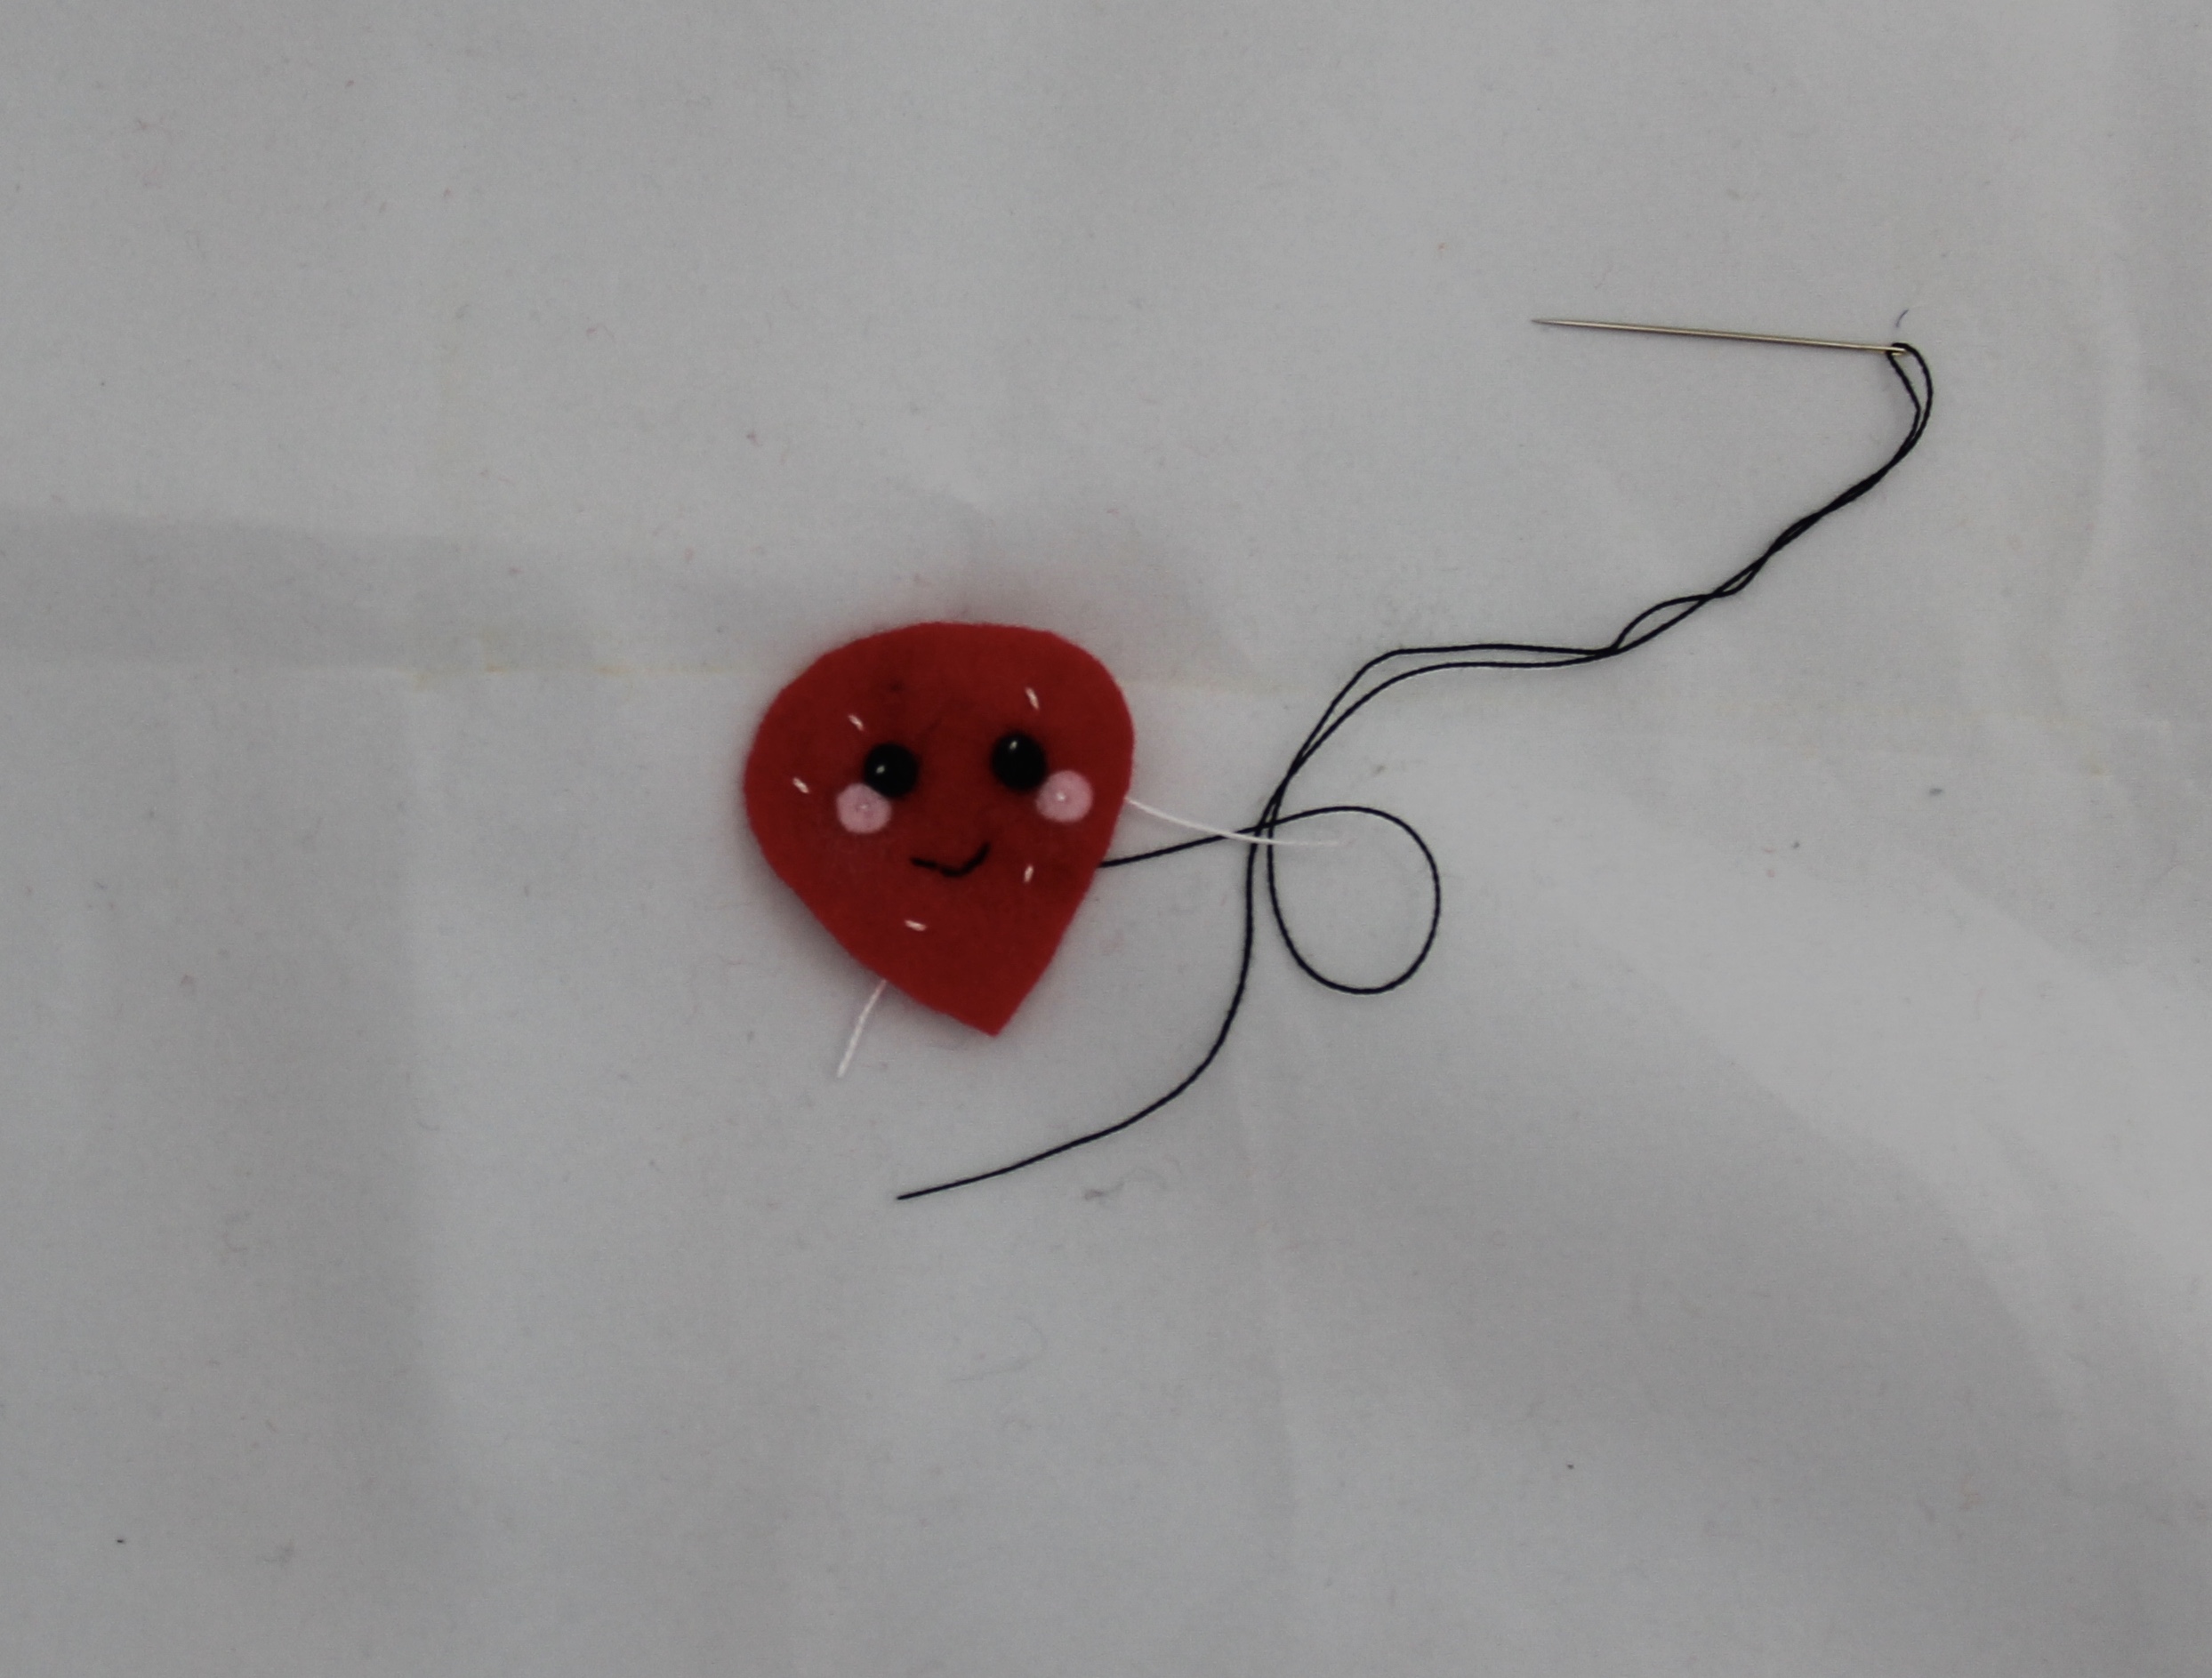
To sew the facial features and details, we are going to use a basic running stitch. It's beautiful in its simplicity, utility and function. Vary it with size and color and it adds such vitality and expression to this project.
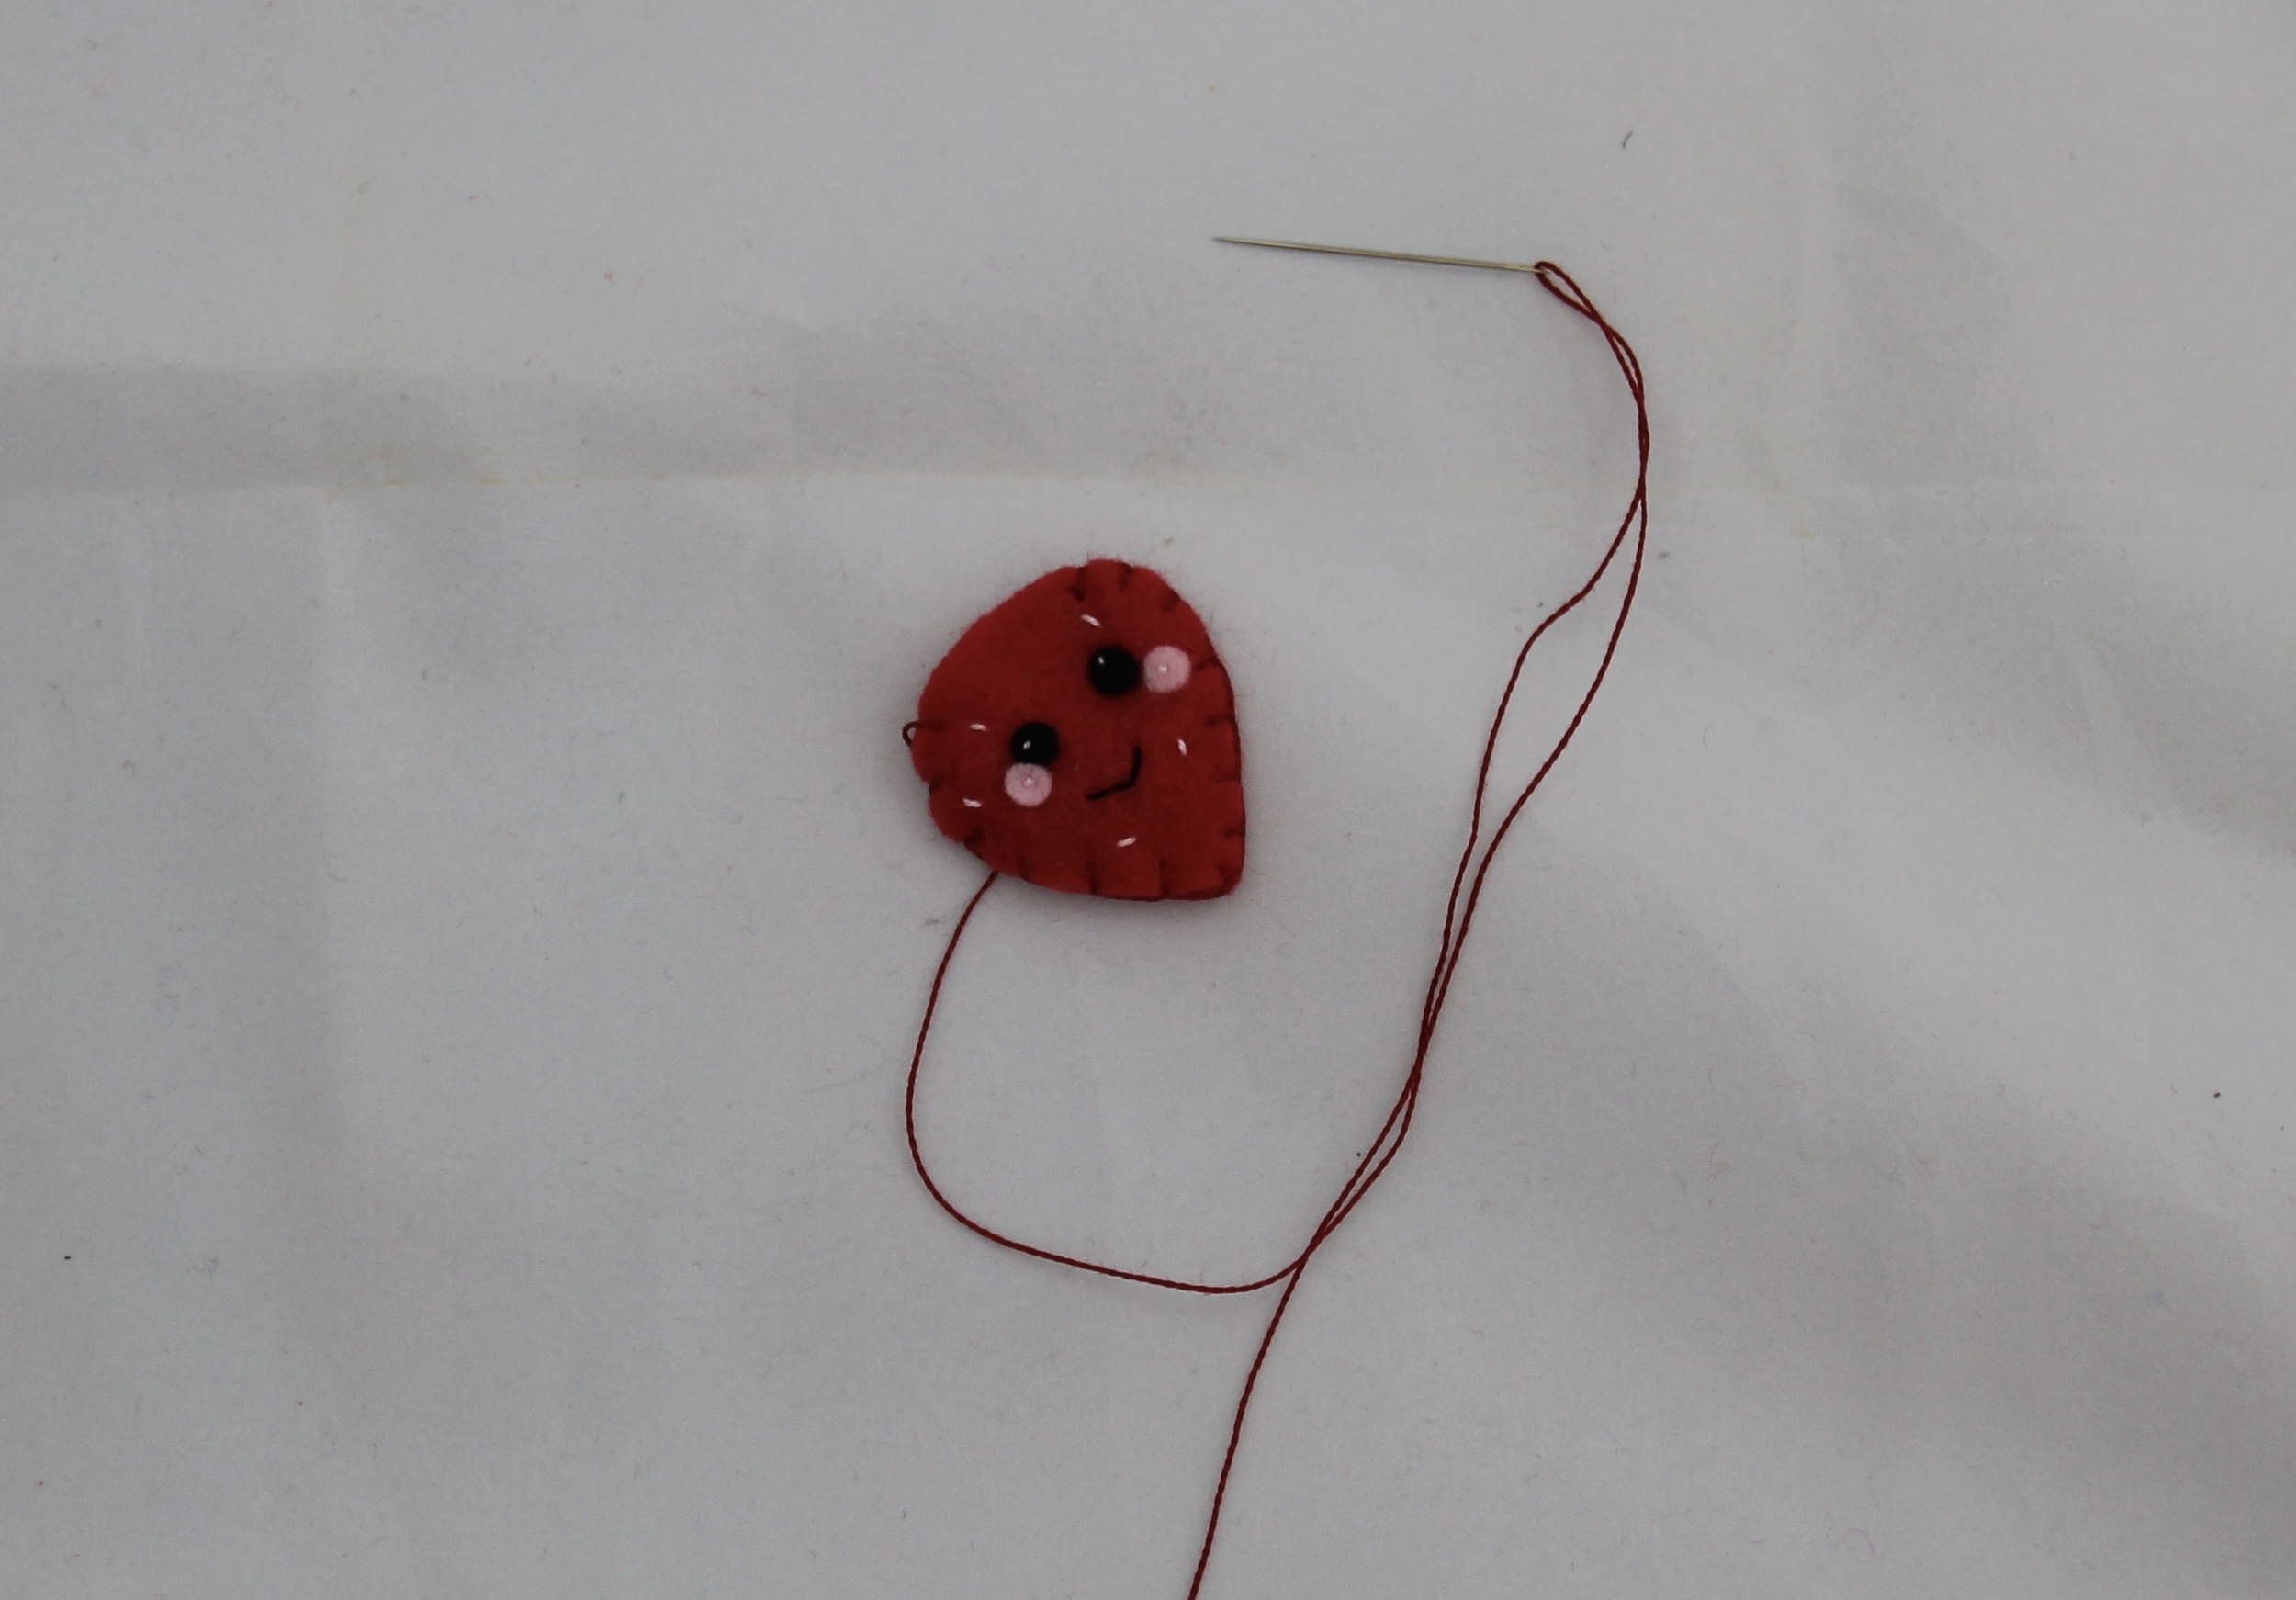
To sew the sides together (wrong sides together, we want to see those stitches!) I used a blanket stitch. Feel free to use any stitch you feel comfortable with.
Each Shopkin-ish is stitched and assembled in the same way. Eyes, cheeks, mouth, sprinkles, sides, stuff, close and finish.
I hope that you have enjoyed this tutorial and make something awesome with your special little ones. Thank you again, Trixi for inviting me to contribute.
XO,
Hilarie
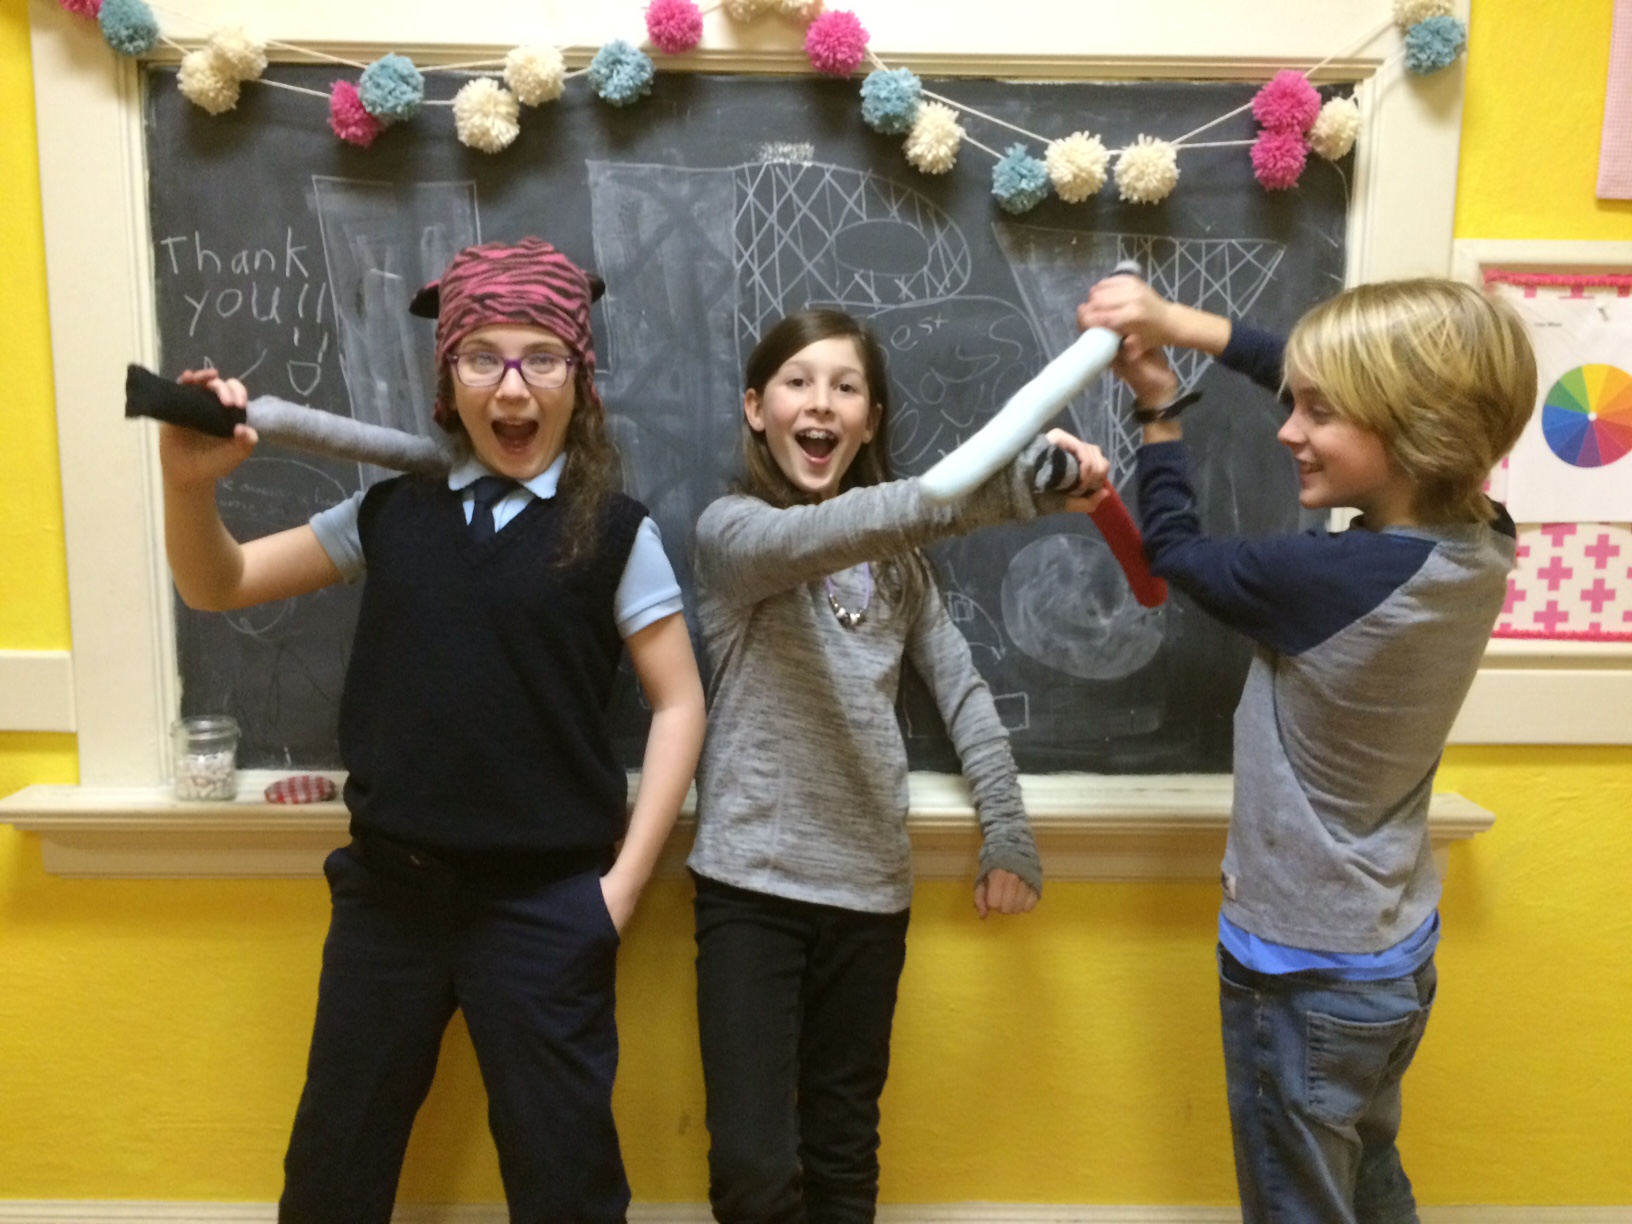
The force is strong with this one.
This past winter in my weekly sewing classes, the kids wanted to make something Star Wars. (The classes take on a whole different attitude when they include boys!) It only took a few minutes to come up with the idea, but why not make a "lightsaber" that they can actually hit each other with and not get hurt. This is a super easy project, that kids love!
This past winter in my weekly sewing classes, the kids wanted to make something Star Wars. (The classes take on a whole different attitude when they include boys!) It only took a few minutes to come up with the idea, but why not make a "lightsaber" that they can actually hit each other with and not get hurt. This is a super easy project, that kids love!
May 4th and 5th, are highly regarded holidays around our house. My kids can't wait to go downtown to the annual Revenge of the Fifth Lightsaber Battle. They have been plotting details and their battle strategies for weeks now. In honor of May the Fourth and Revenge of the Fifth, I've prepared a DIY Lightsaber tutorial for you.
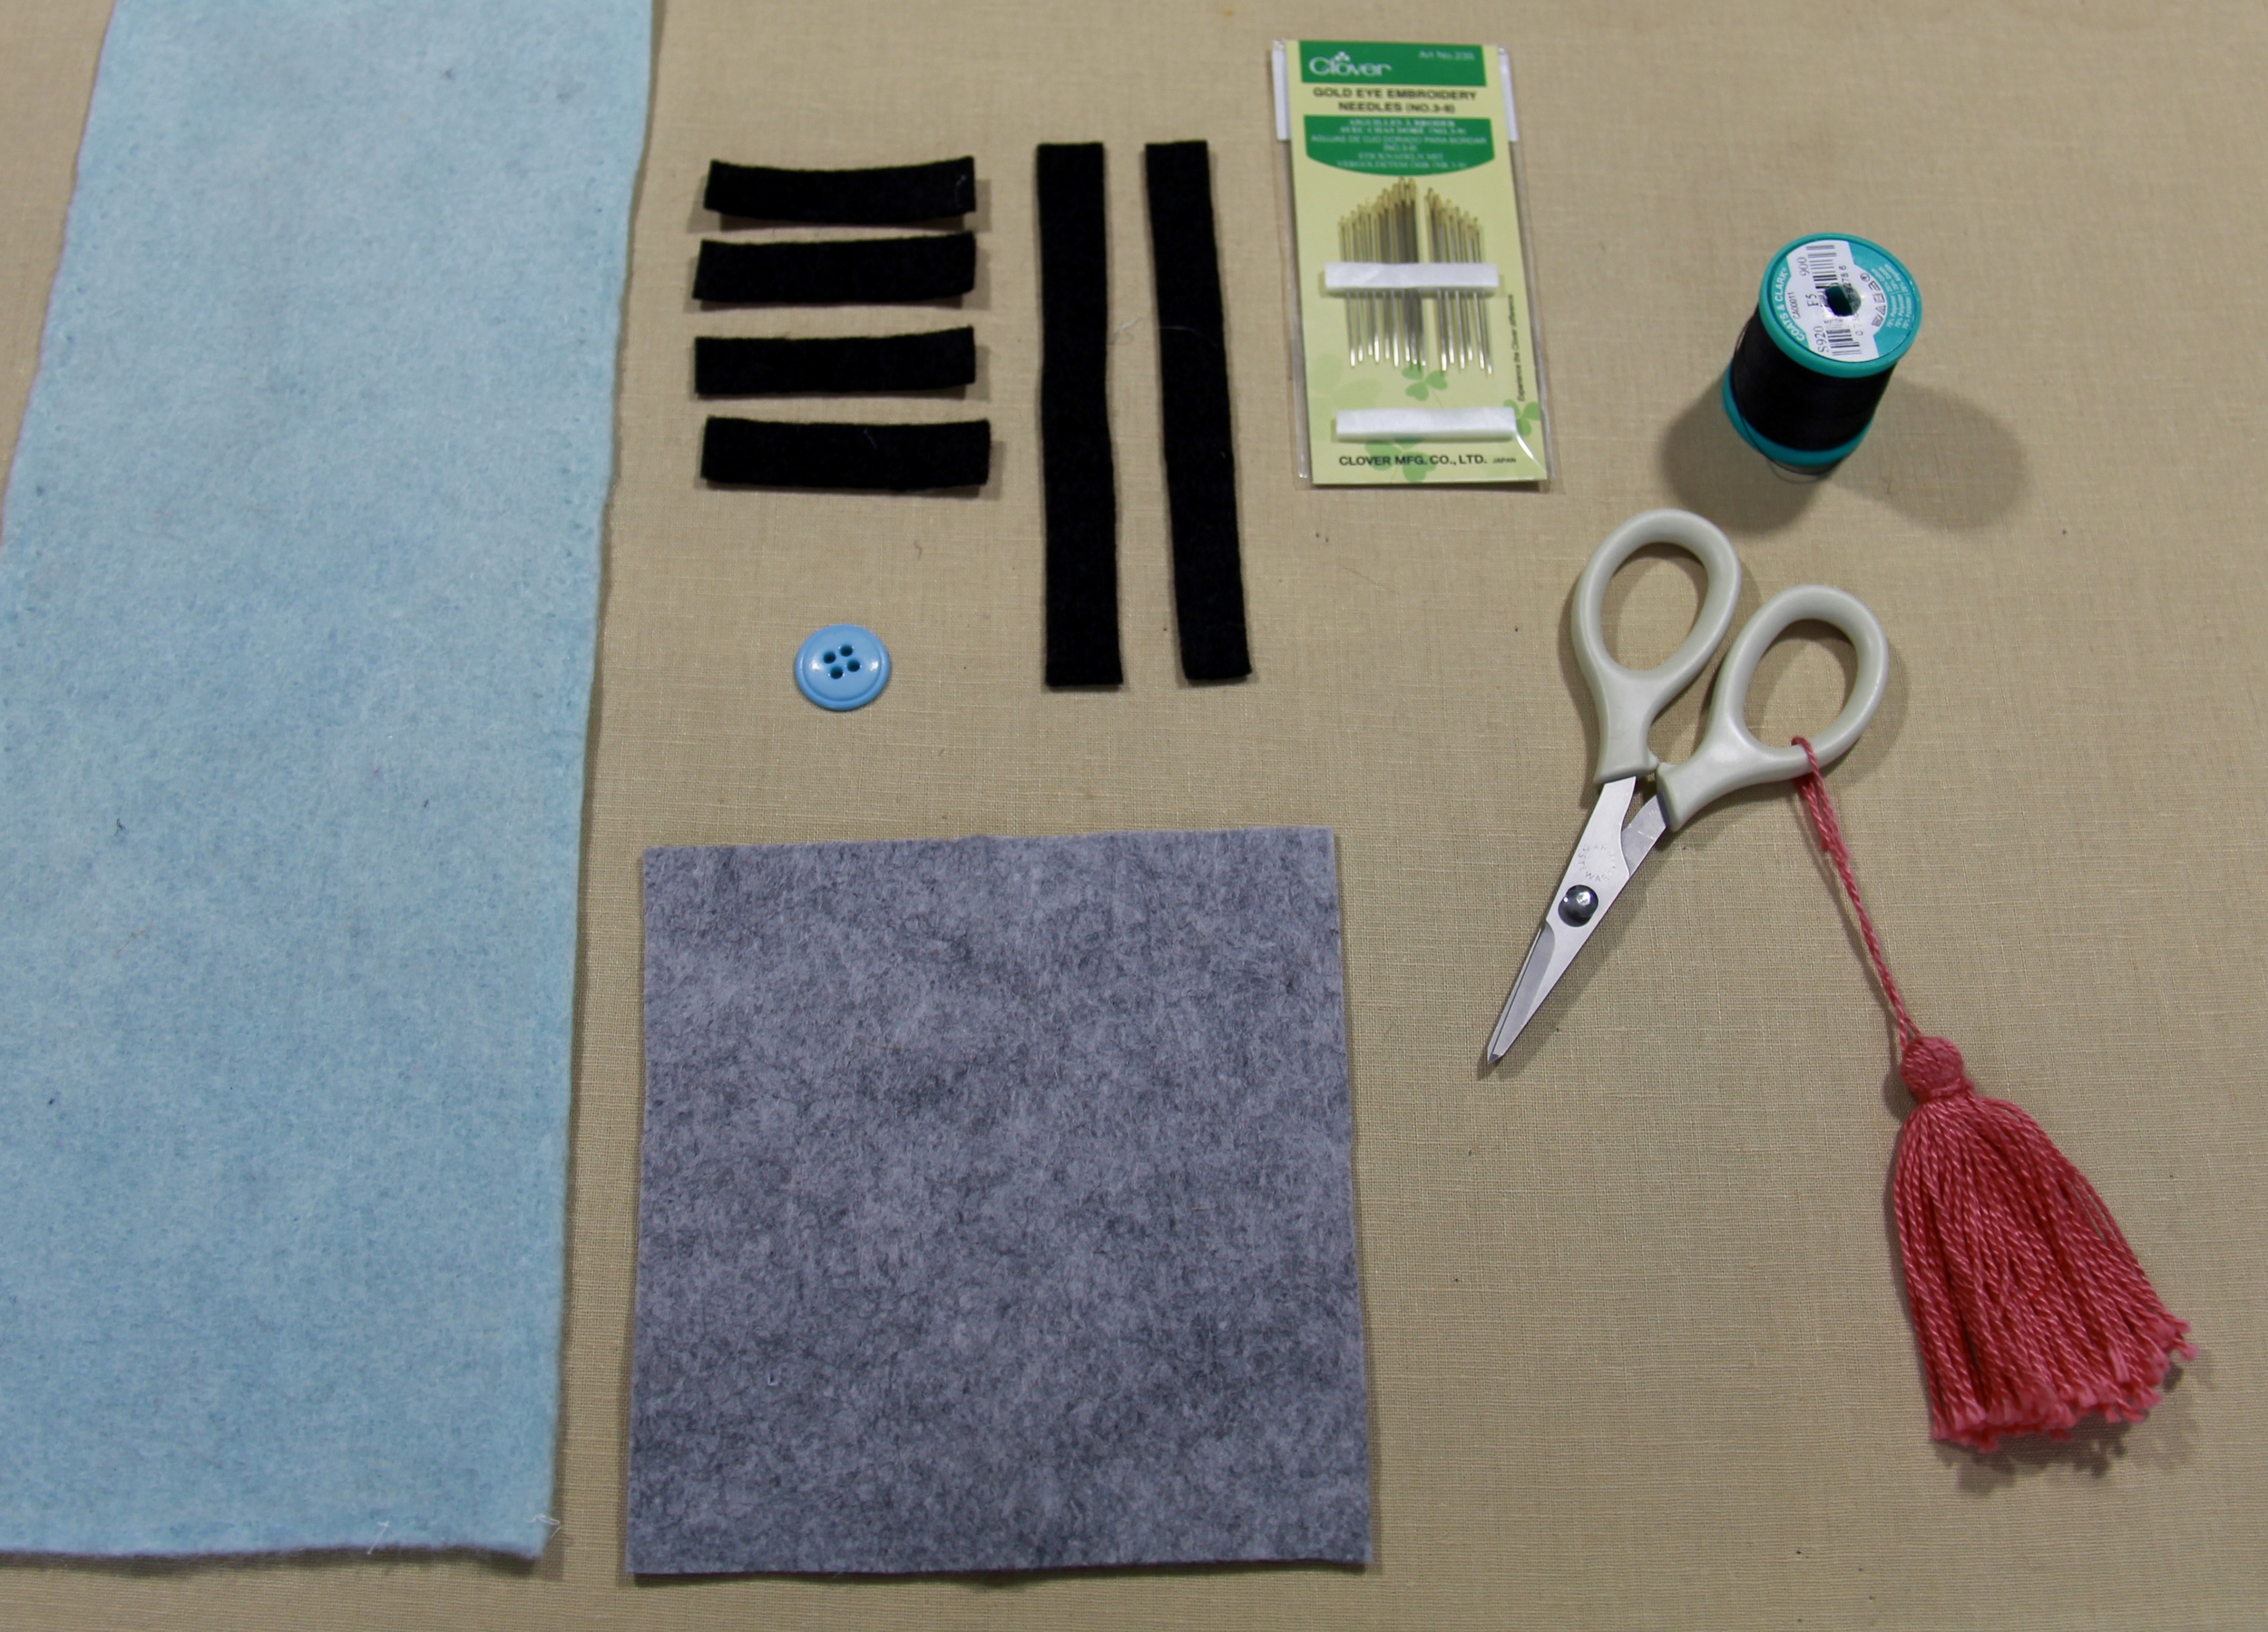
Materials Needed
Wool felt grey and black for the hilt and blue, green or red (Jedi or Sith?) for the blade
thread
needle
3/4" button
polyfill
a 30" piece of yarn or string
Cutting
one 5"x5" piece of grey felt for the hilt
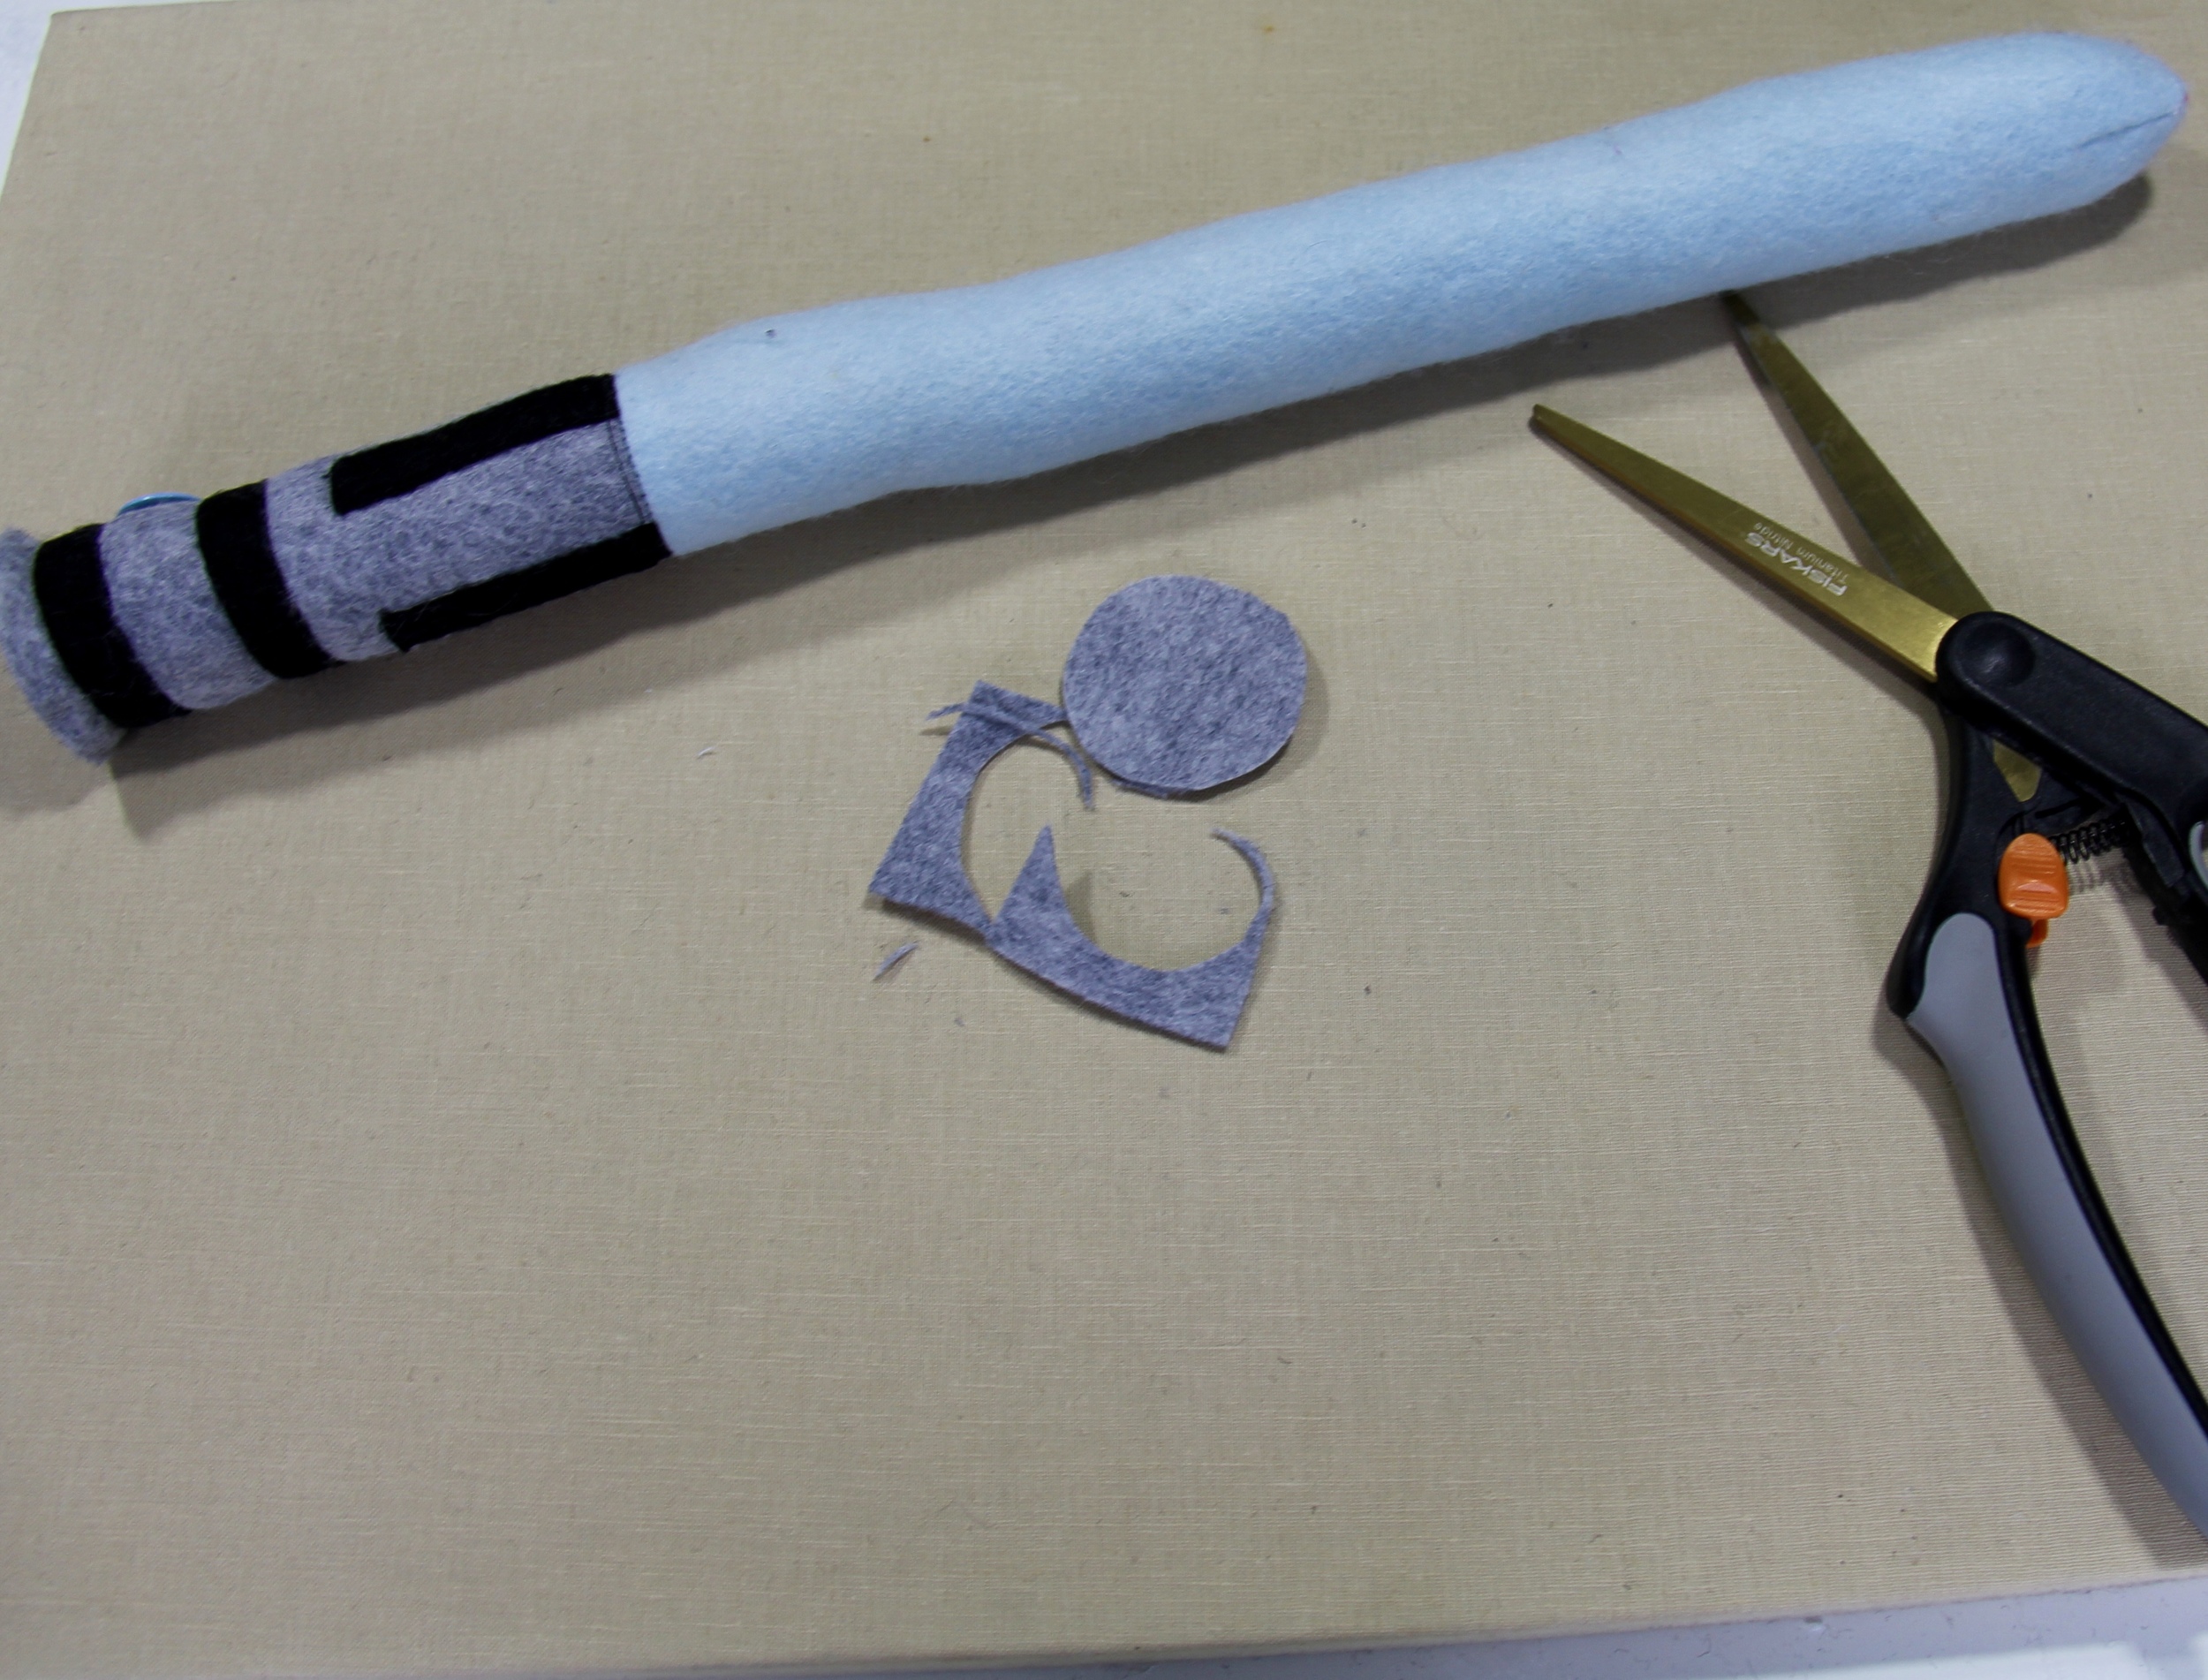
one small piece of grey felt to cut into a circle to cap the hilt (we will cut this out a bit later)
one 13"x5" piece of colored felt for the blade
two 1/2" x 5" strips of black felt
four 1/2"x 2" strips of black felt
Sewing
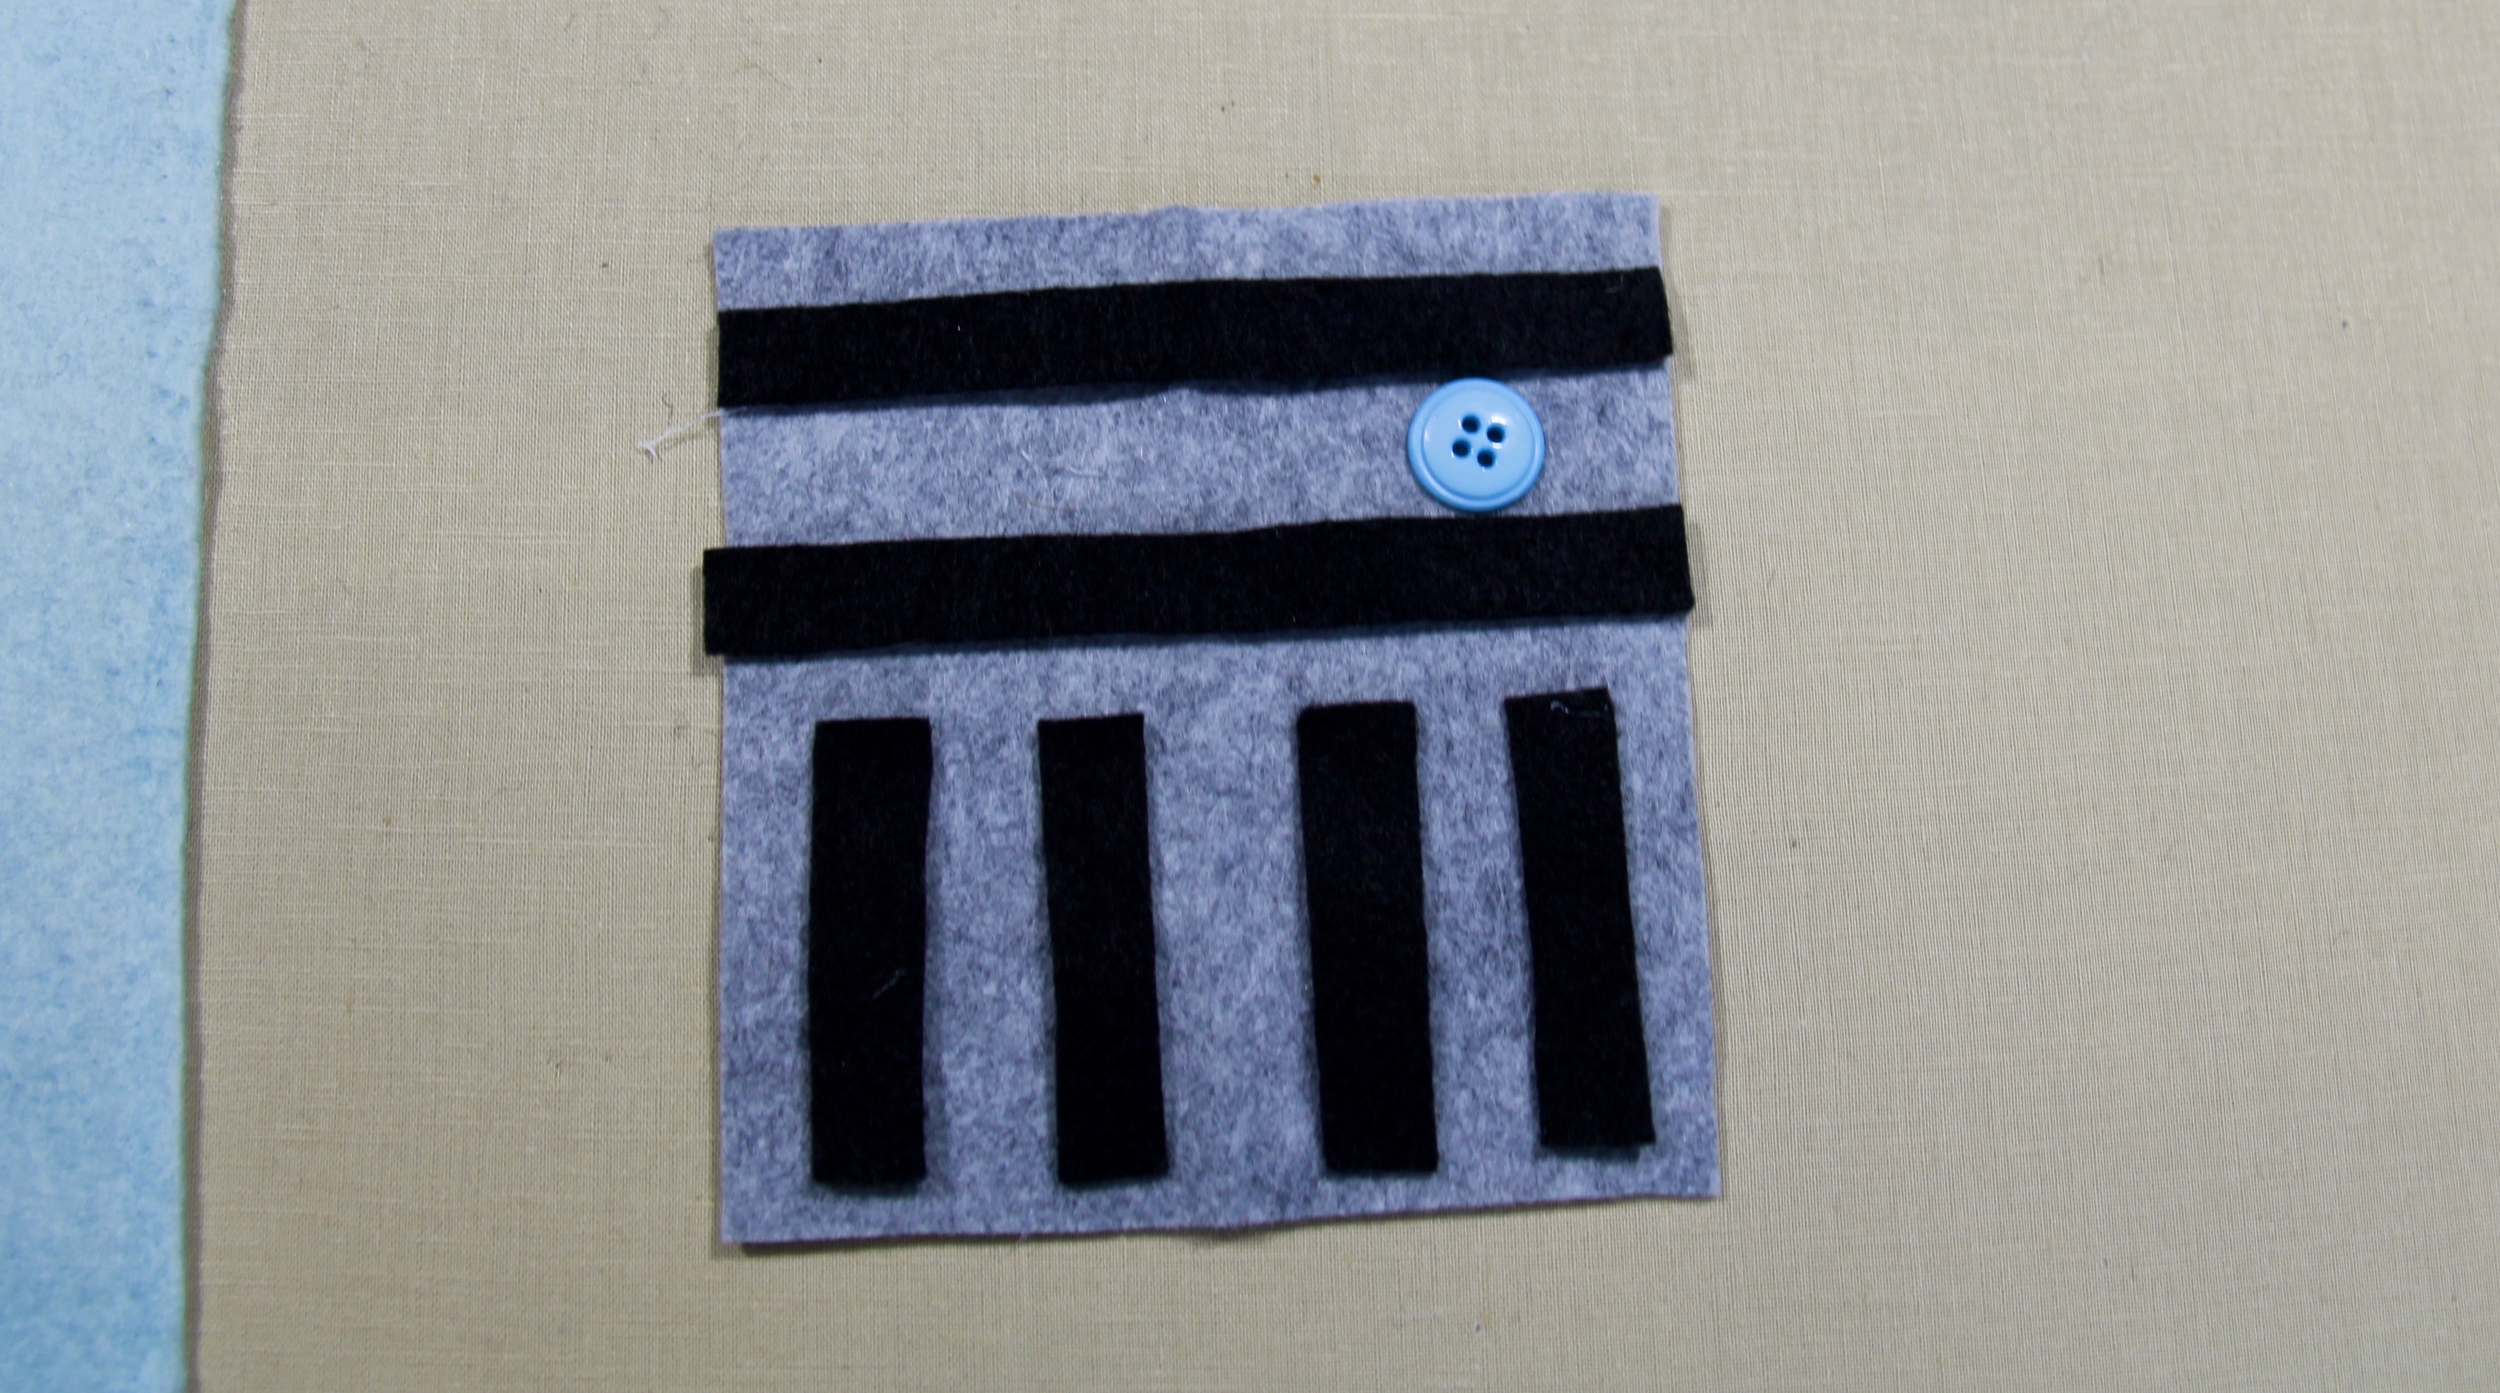
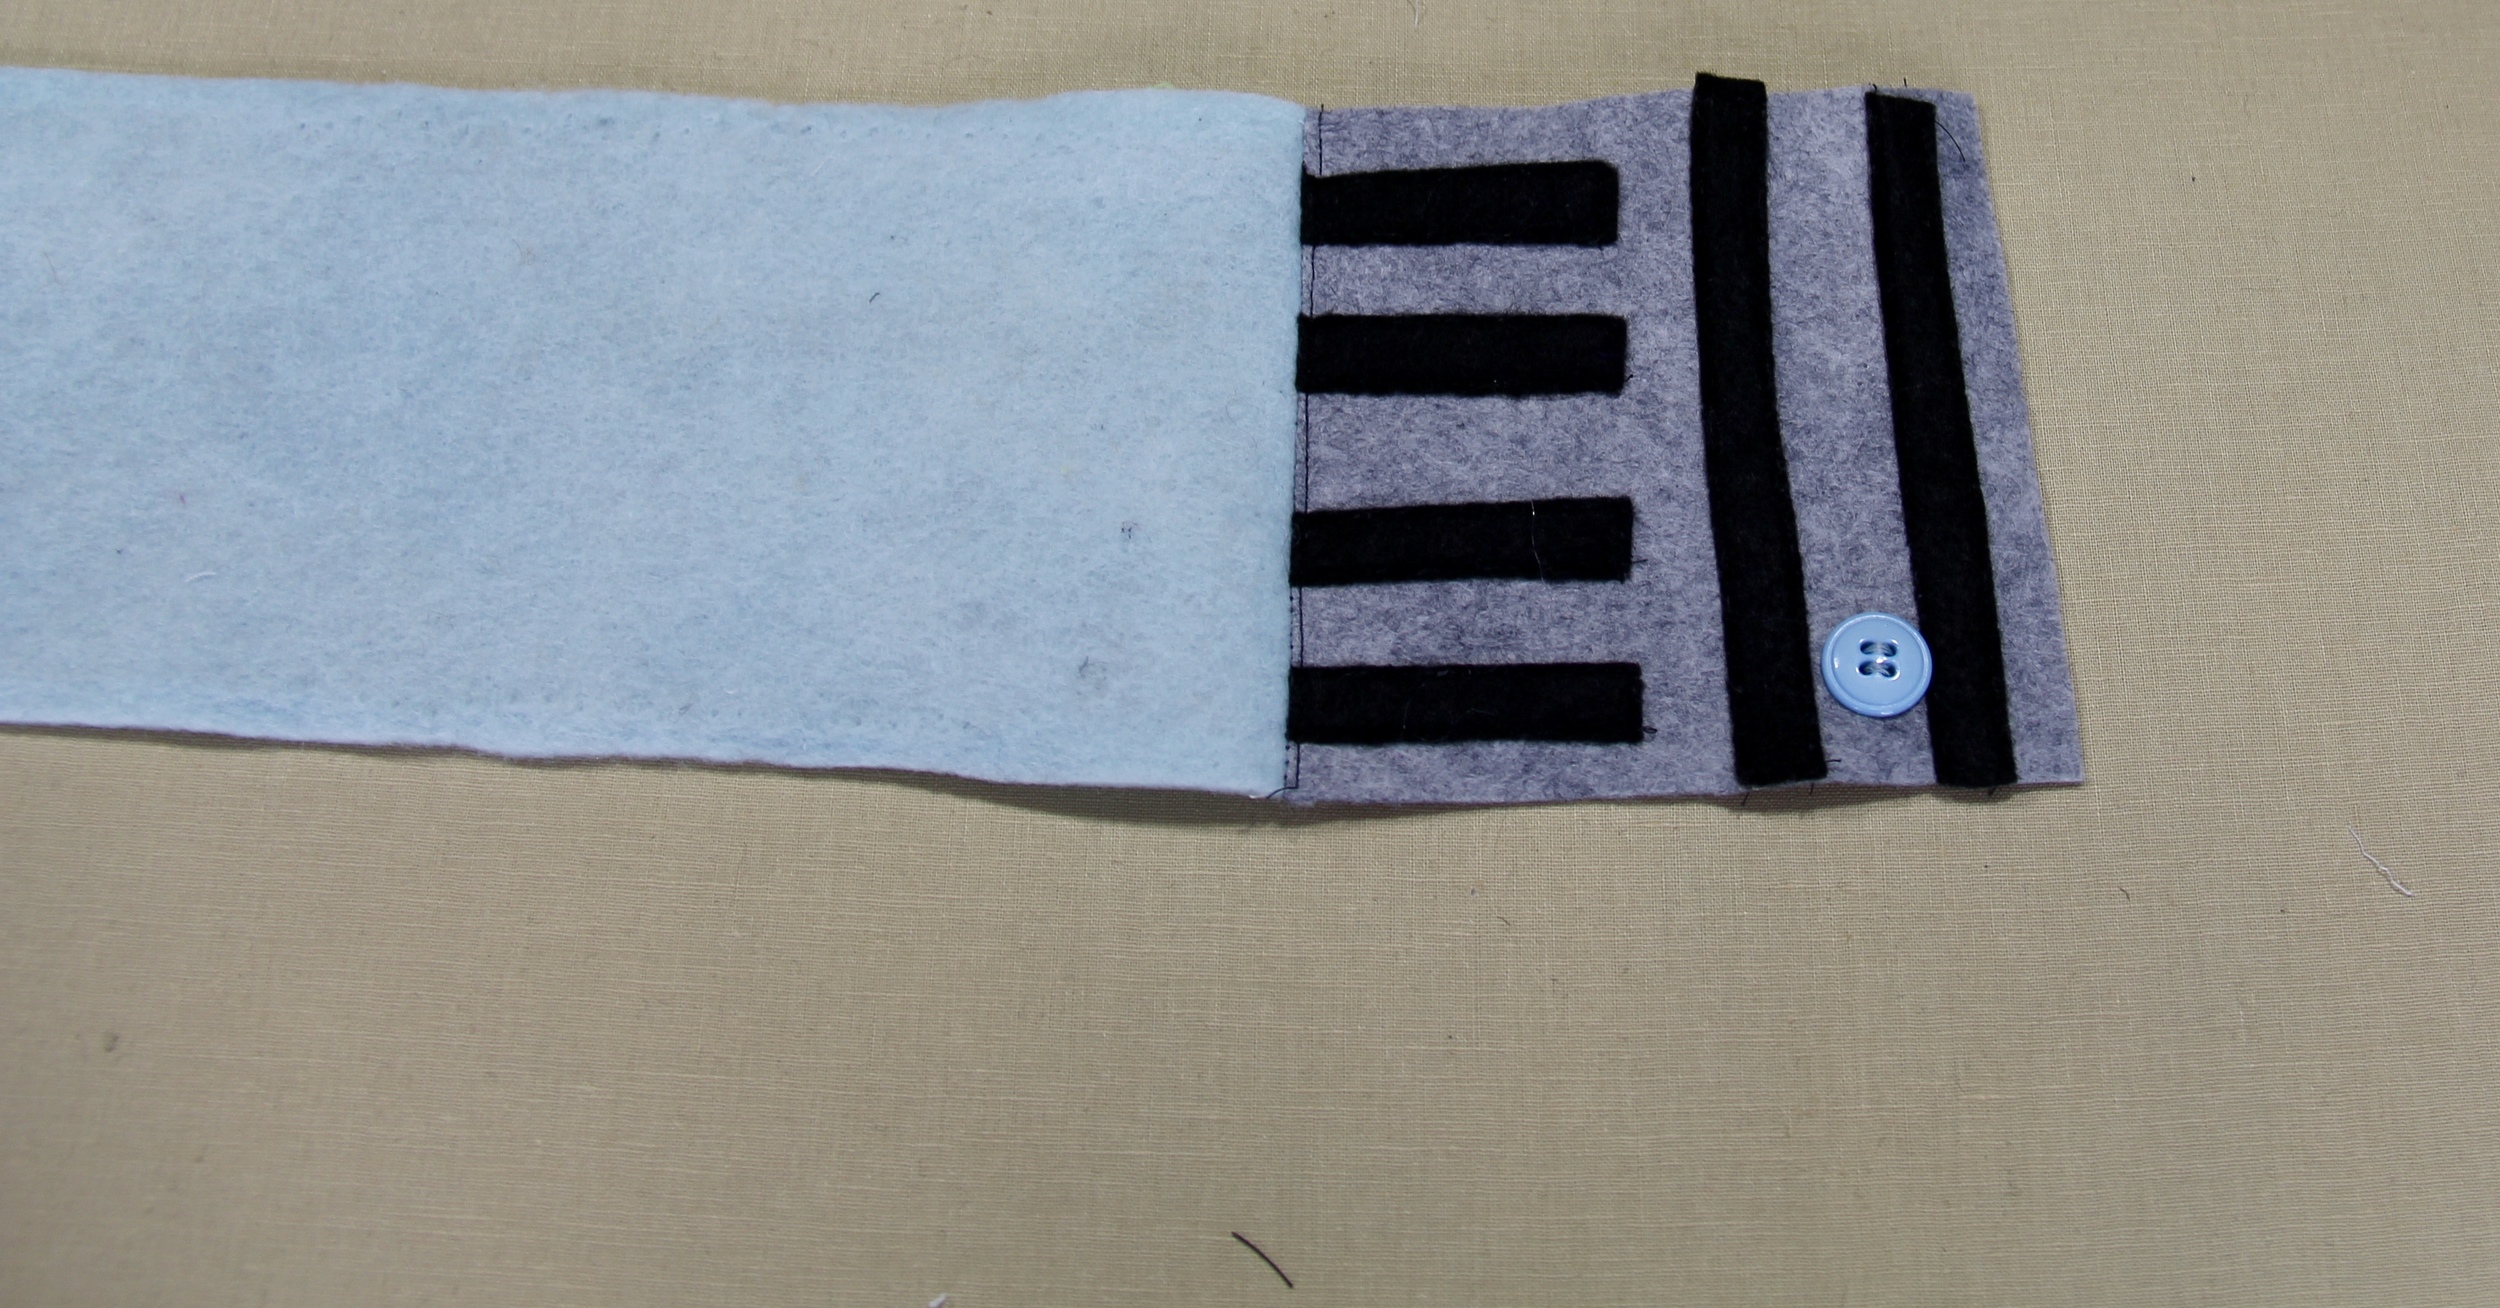
Begin by threading a needle with about an 18" length of thread. Stitch each black piece of felt to the grey hilt. Sometimes it helps to use a glue stick and glue each piece first. Let it dry for a couple of minutes, then stitch over it.

Next, sew the button between the two longer horizontal strips.
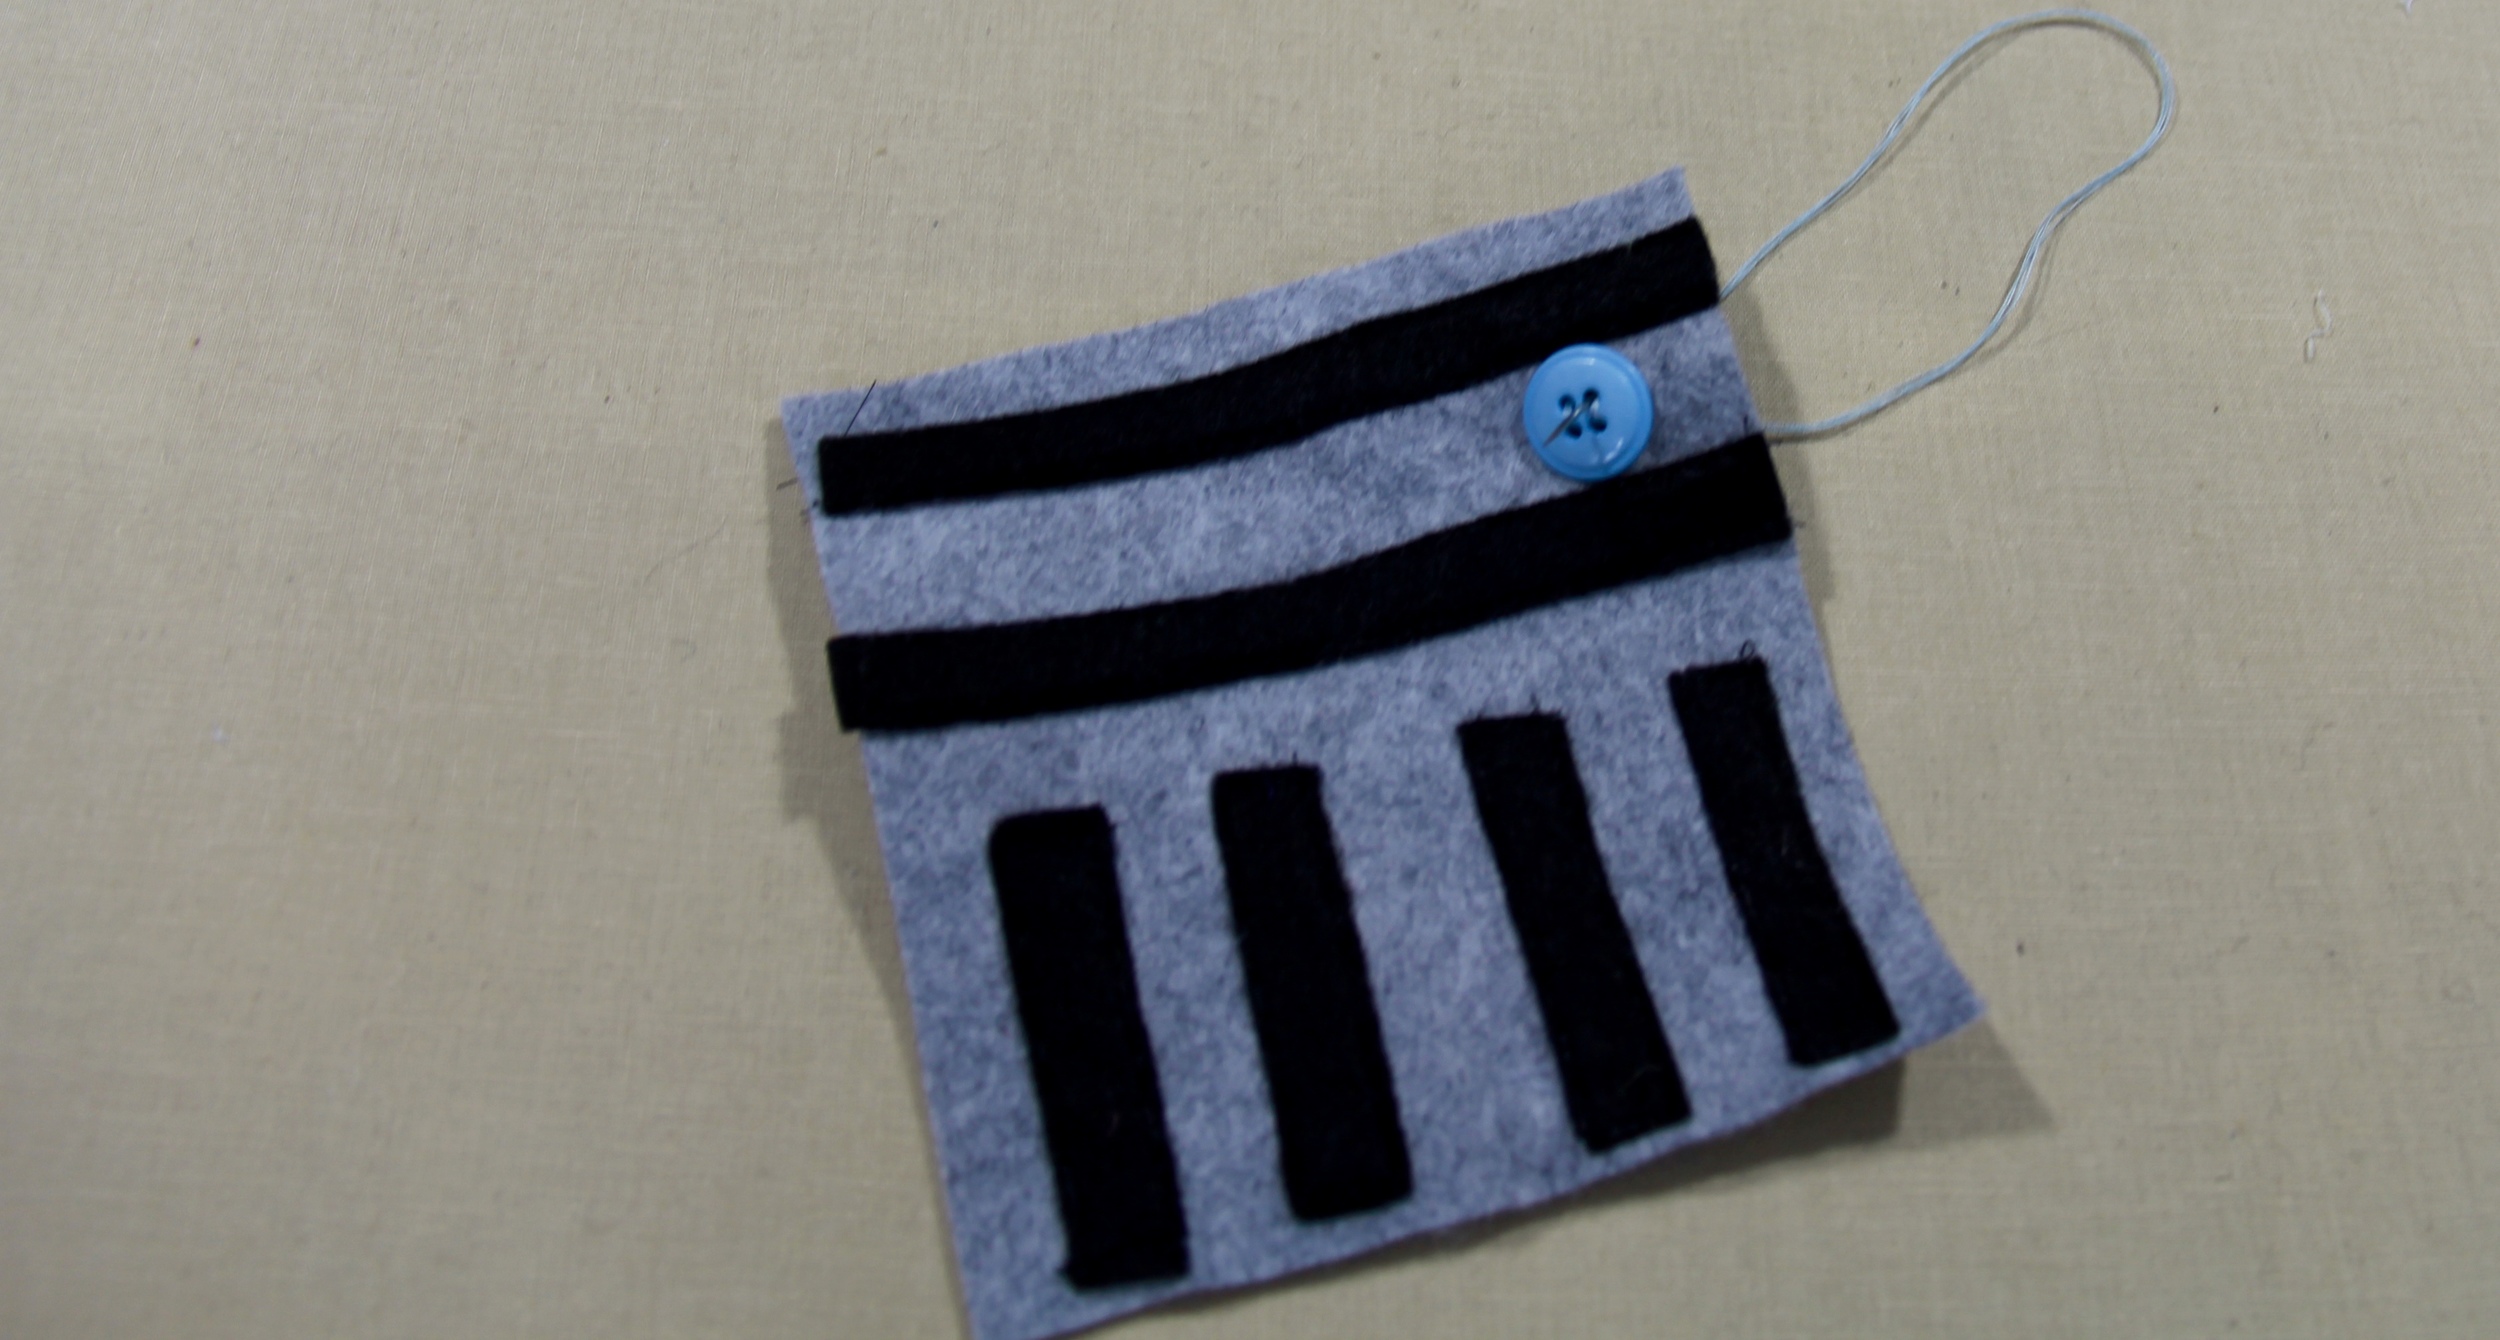
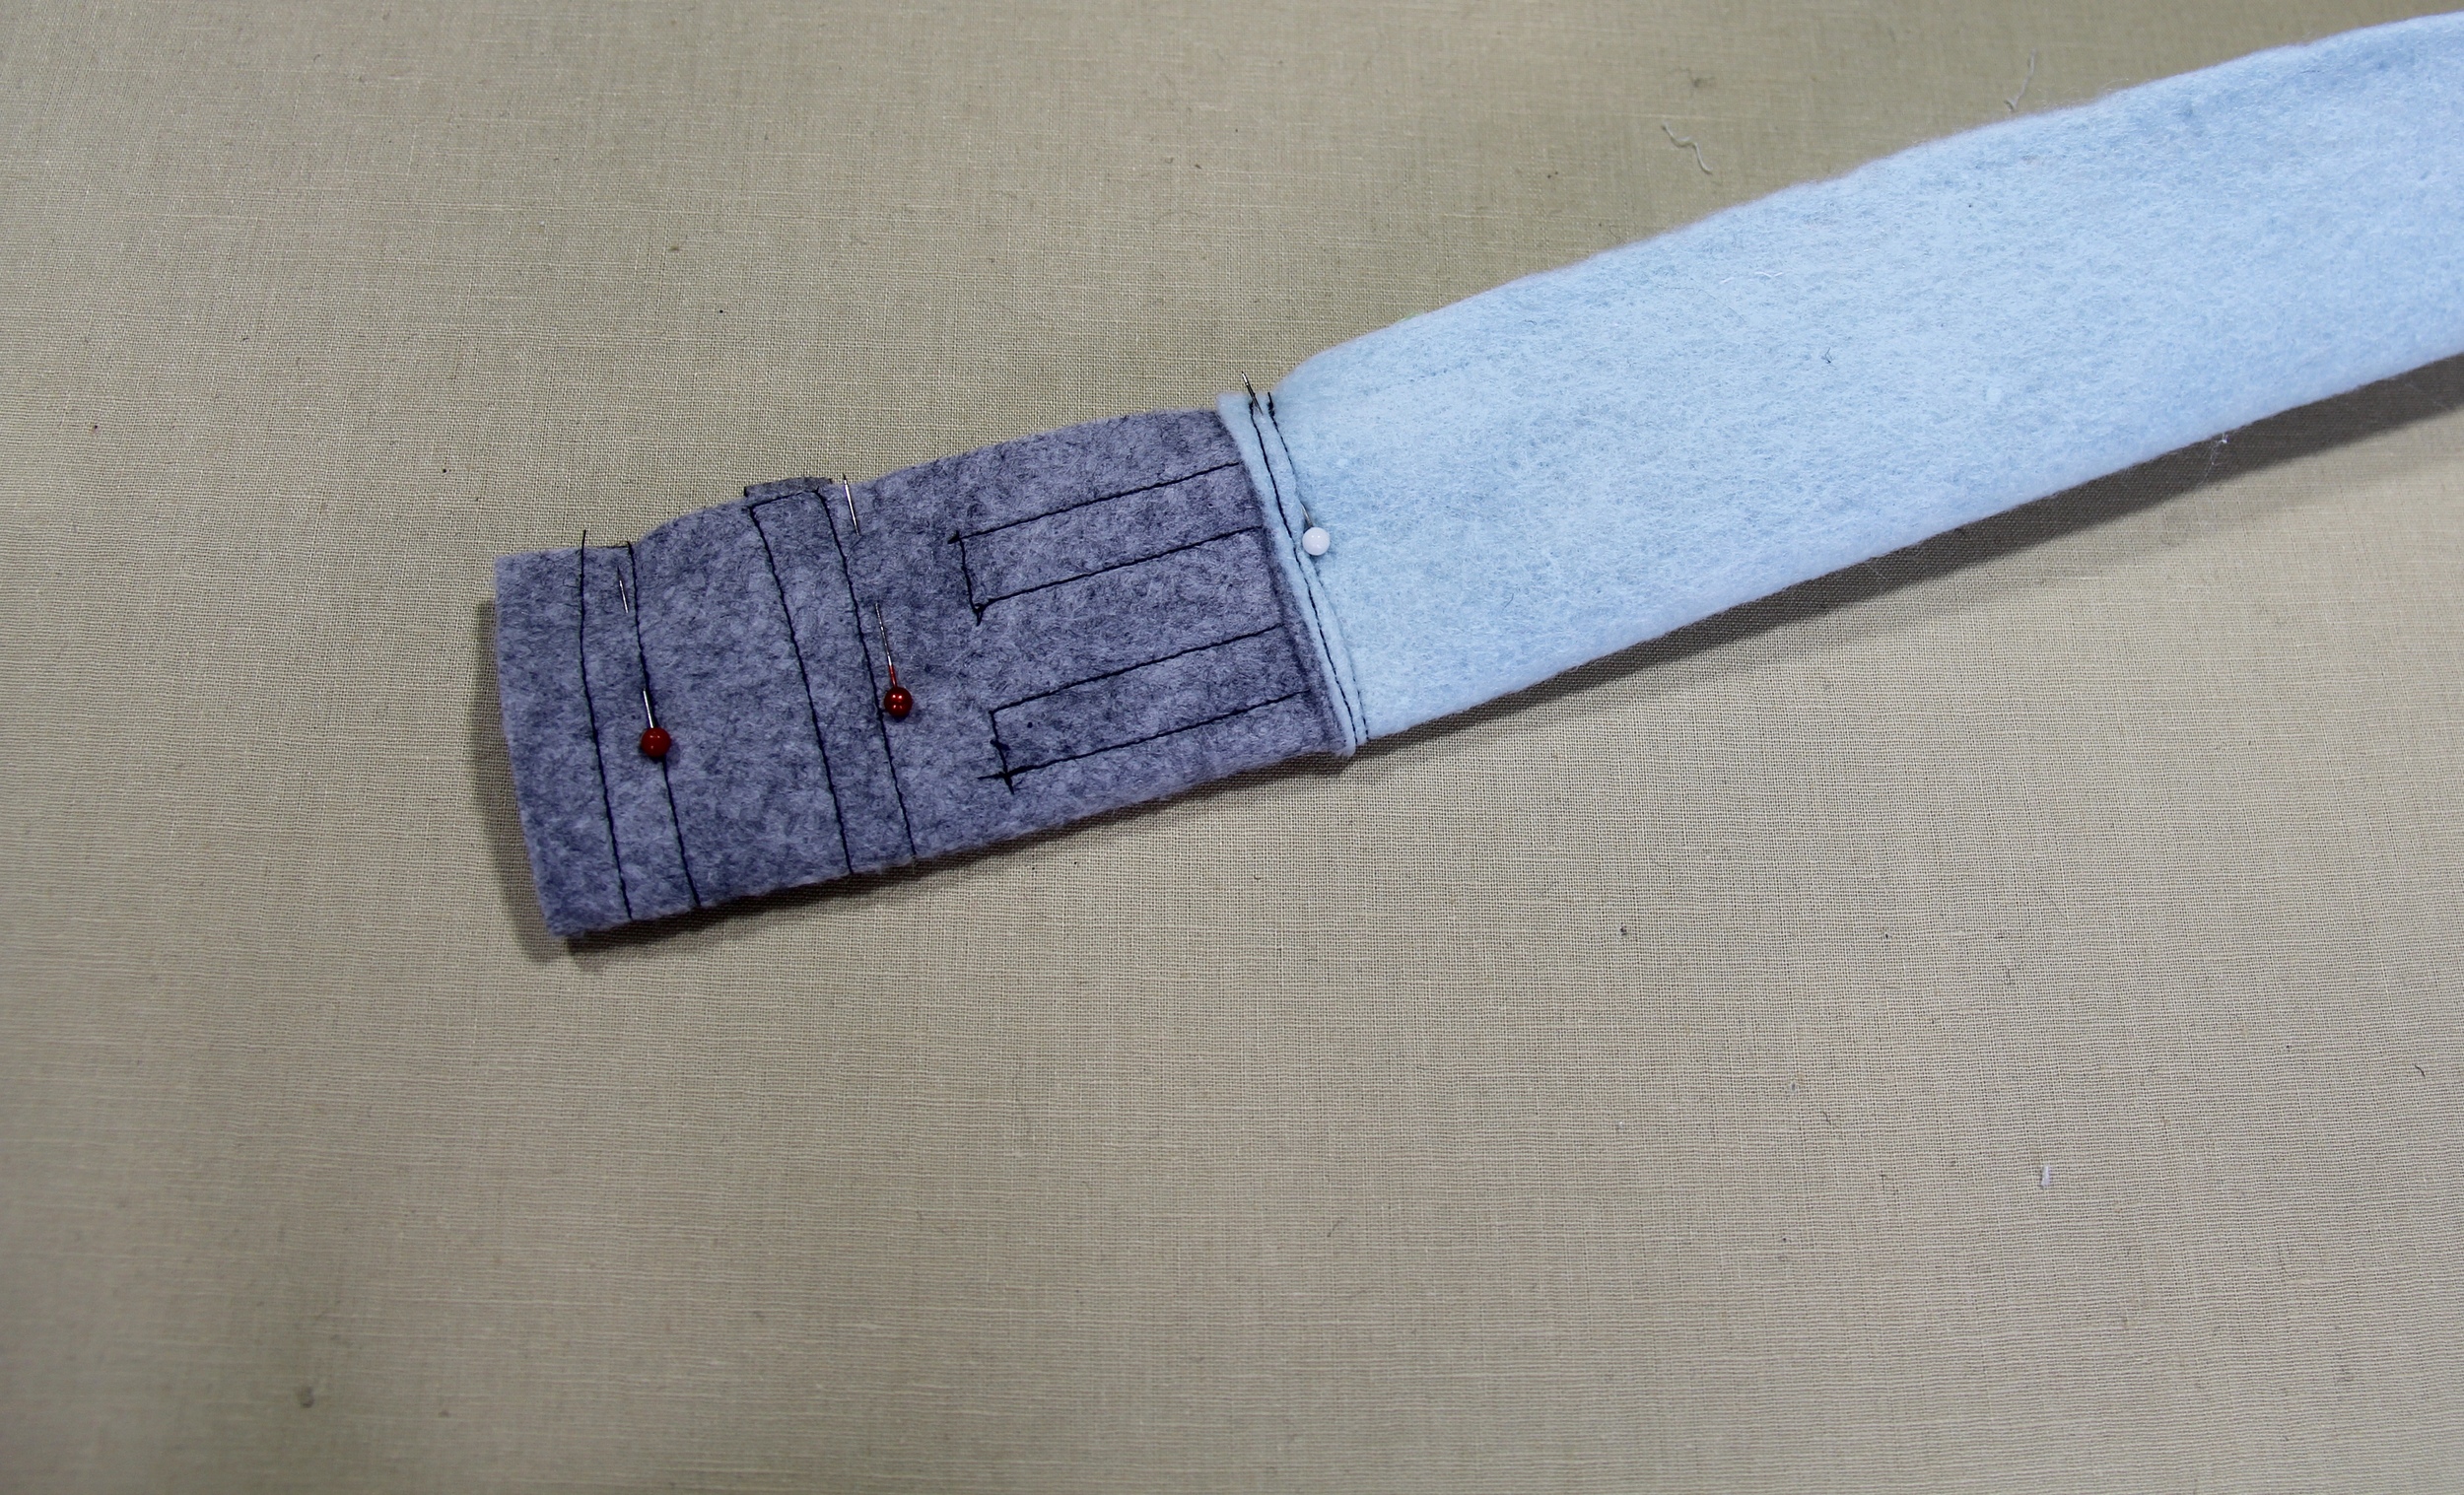
After you have stitched the button and each black strip, place the right sides of the hilt and blade together, pin and stitch.

Turn over and stitch across the hilt, make sure to tuck the previous seam toward the hilt and topstitch across.
It's coming along nicely, right? I told you this was easy. Almost done.
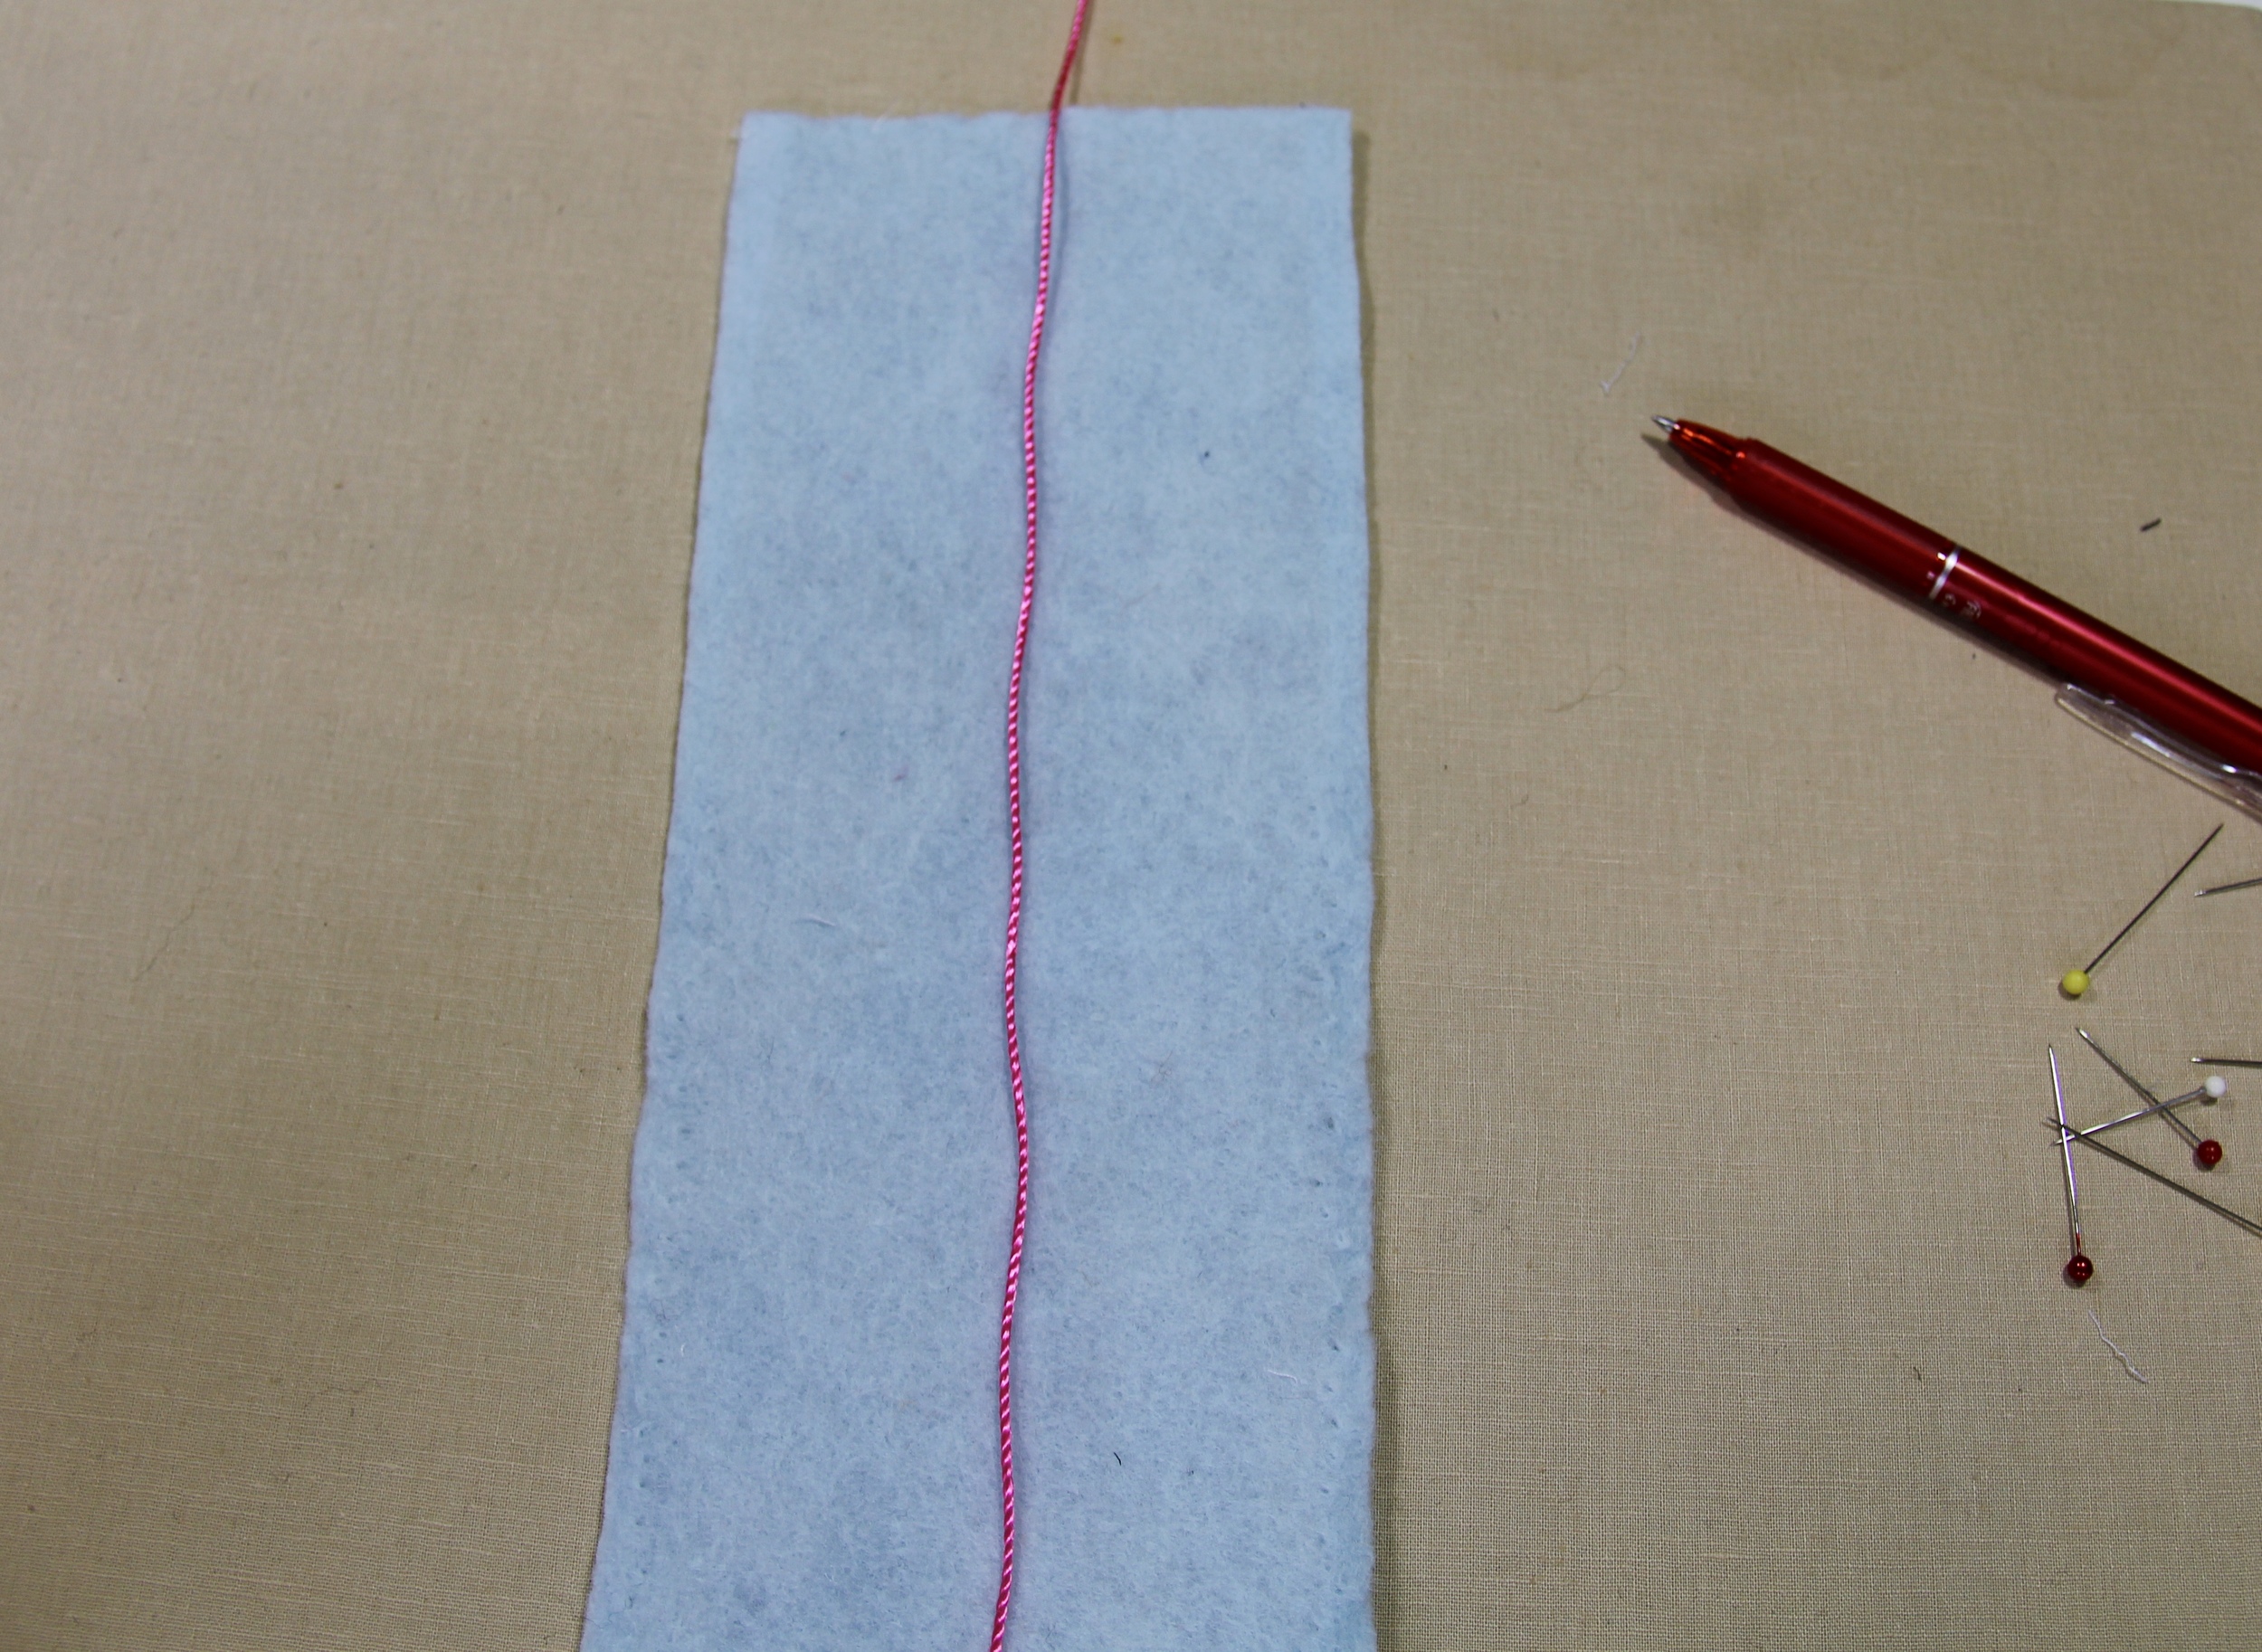
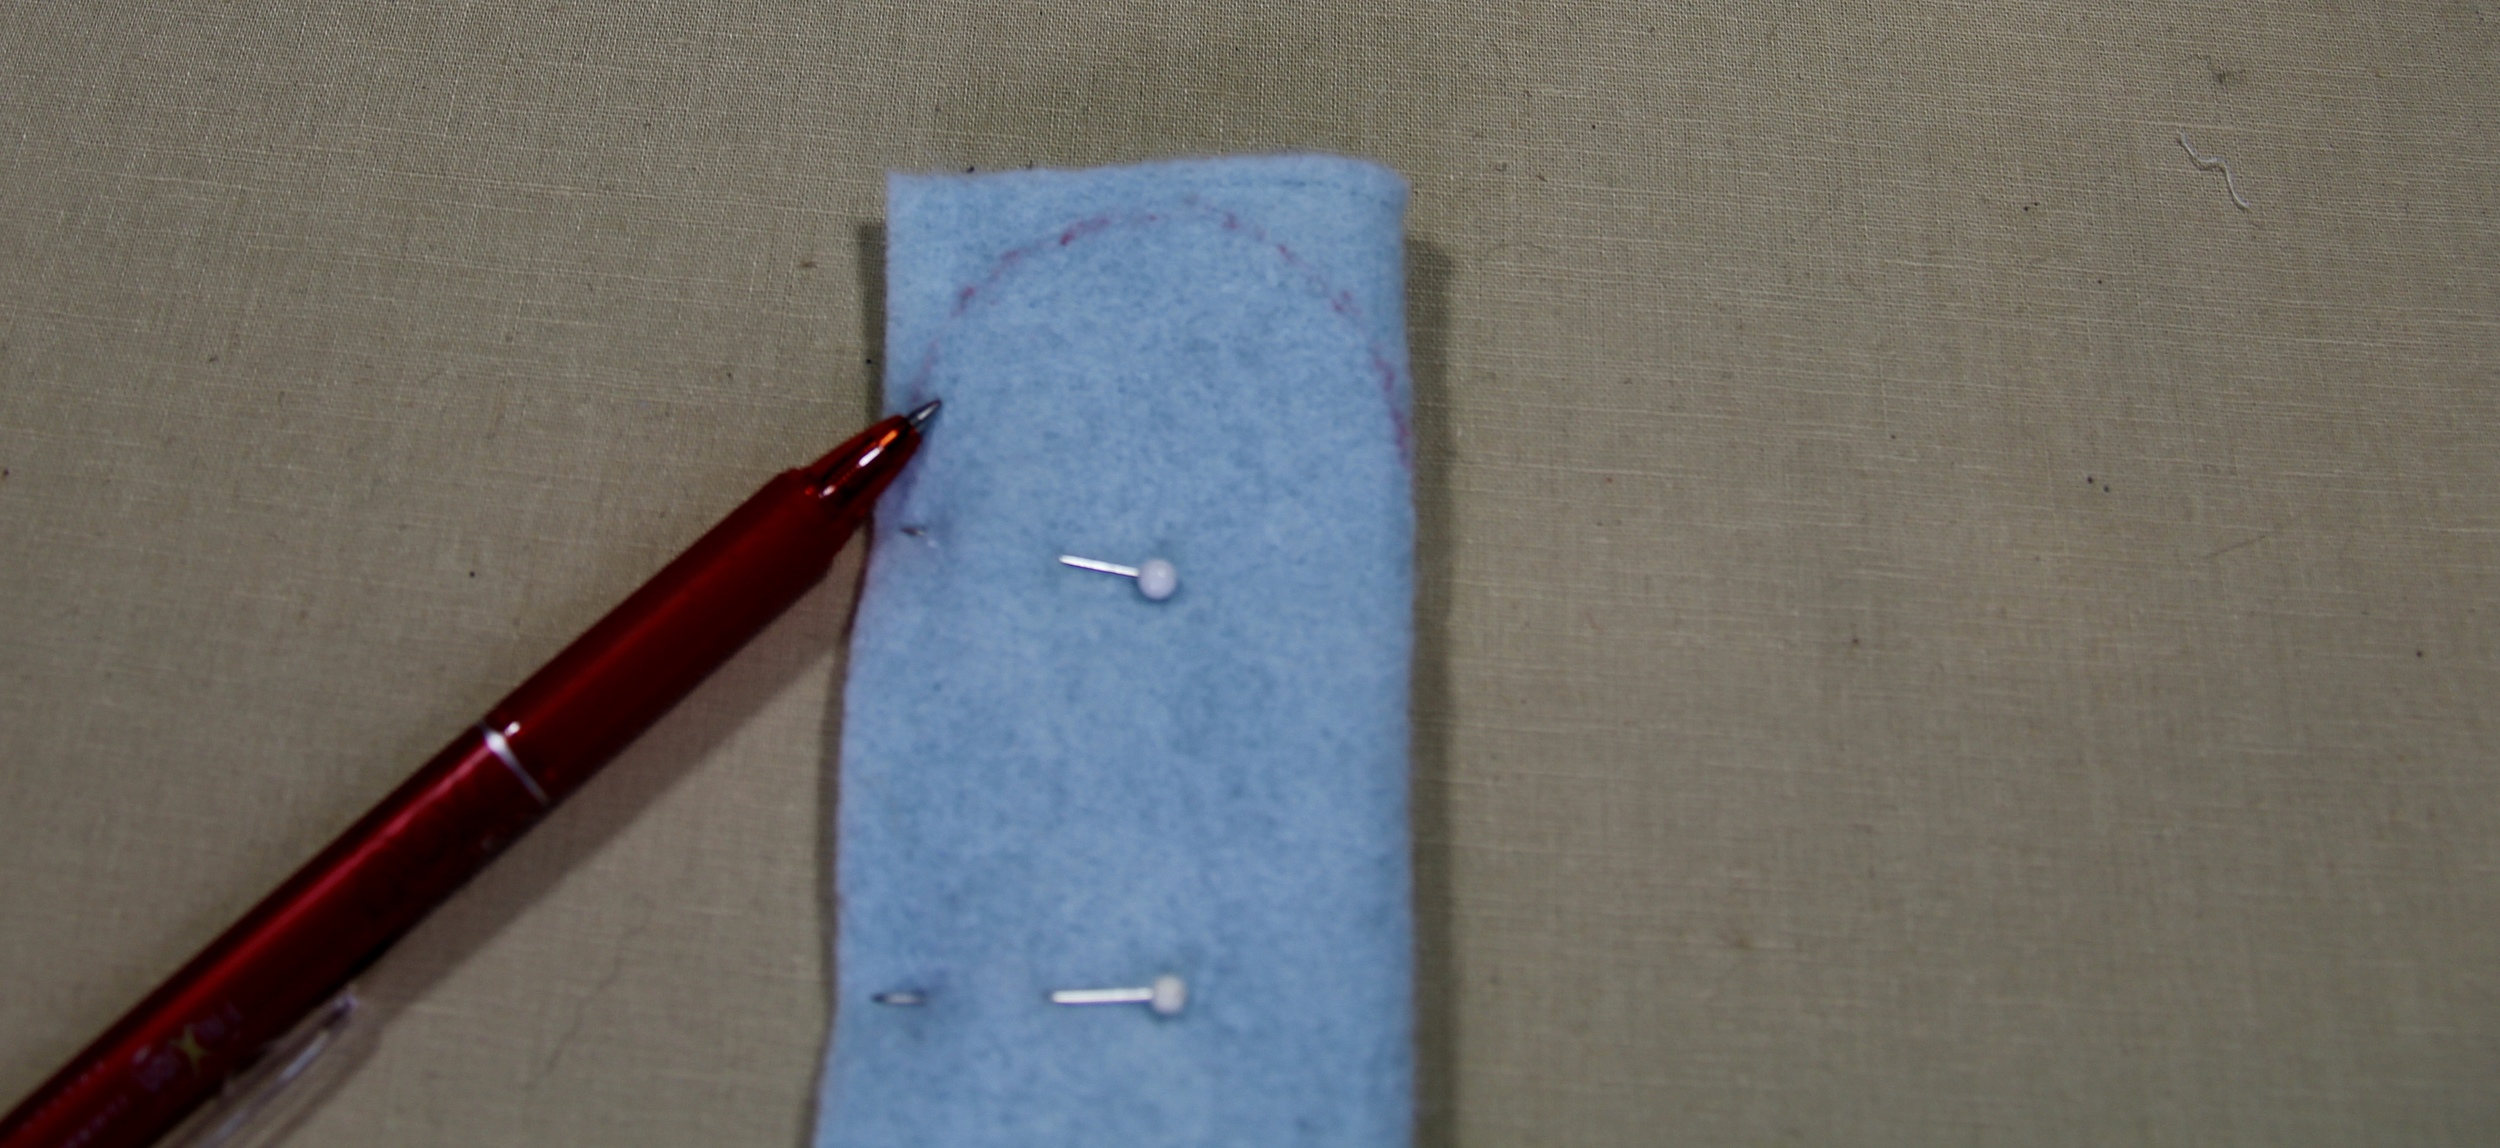
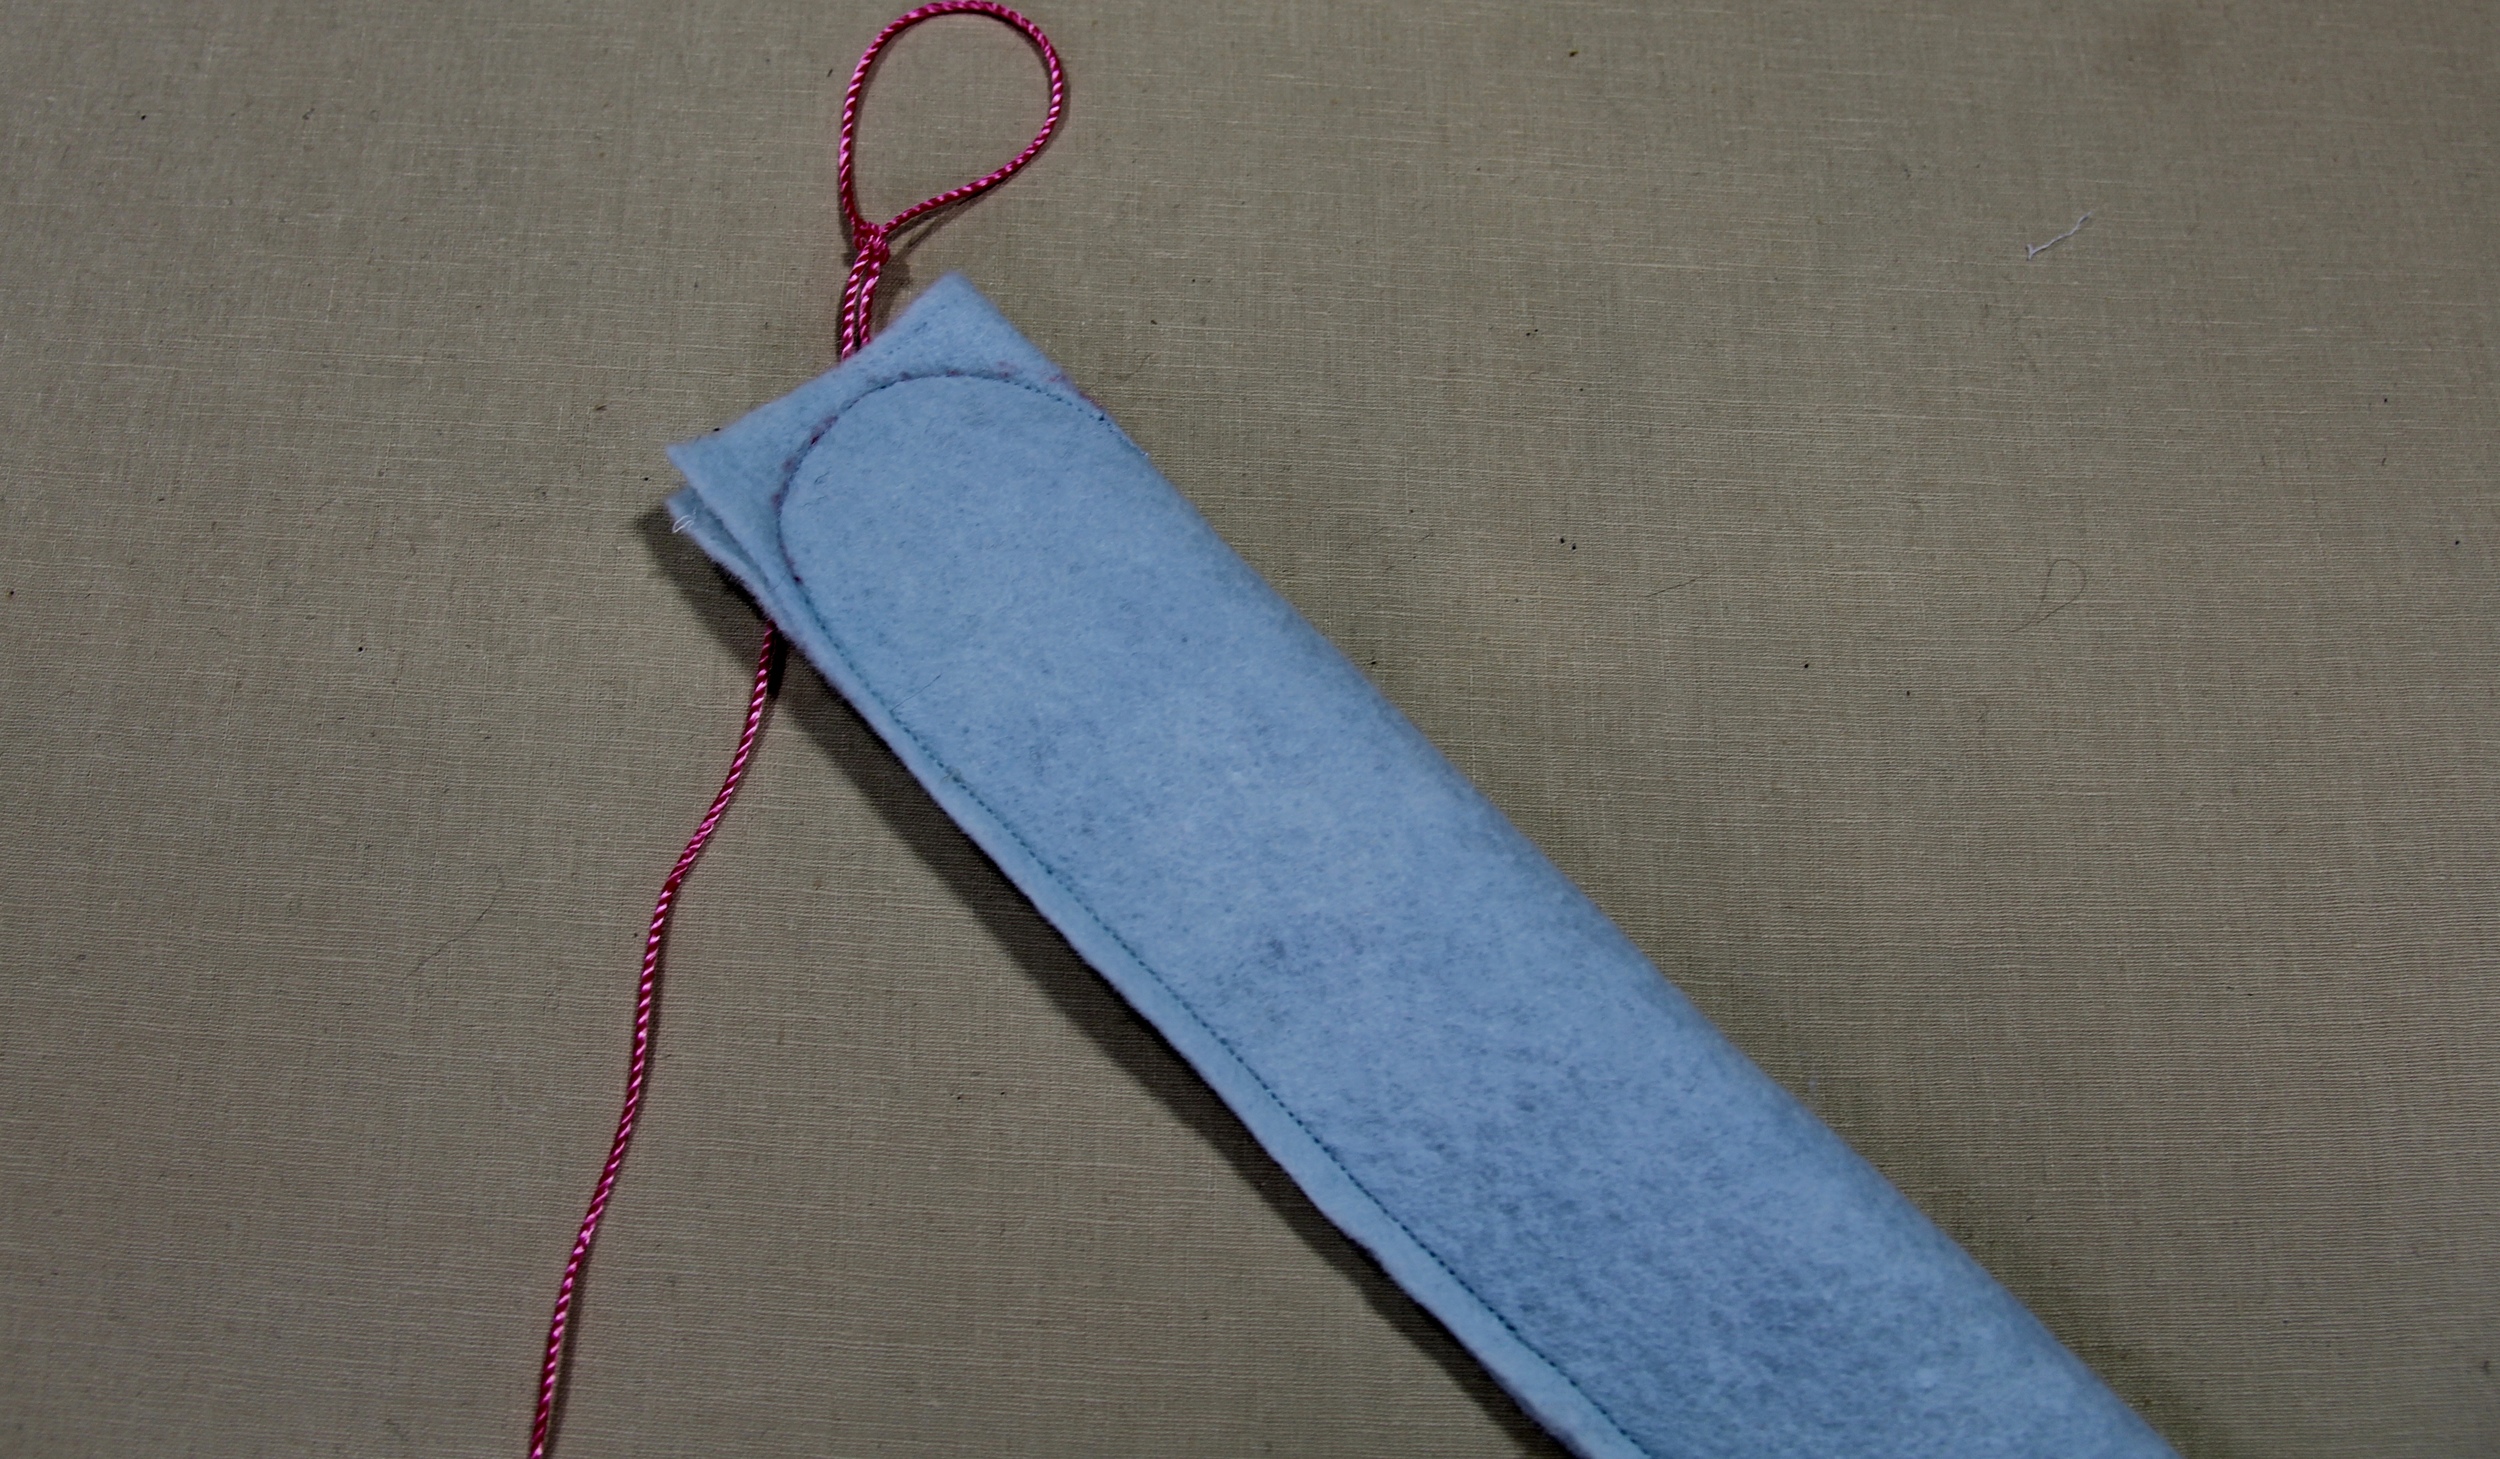
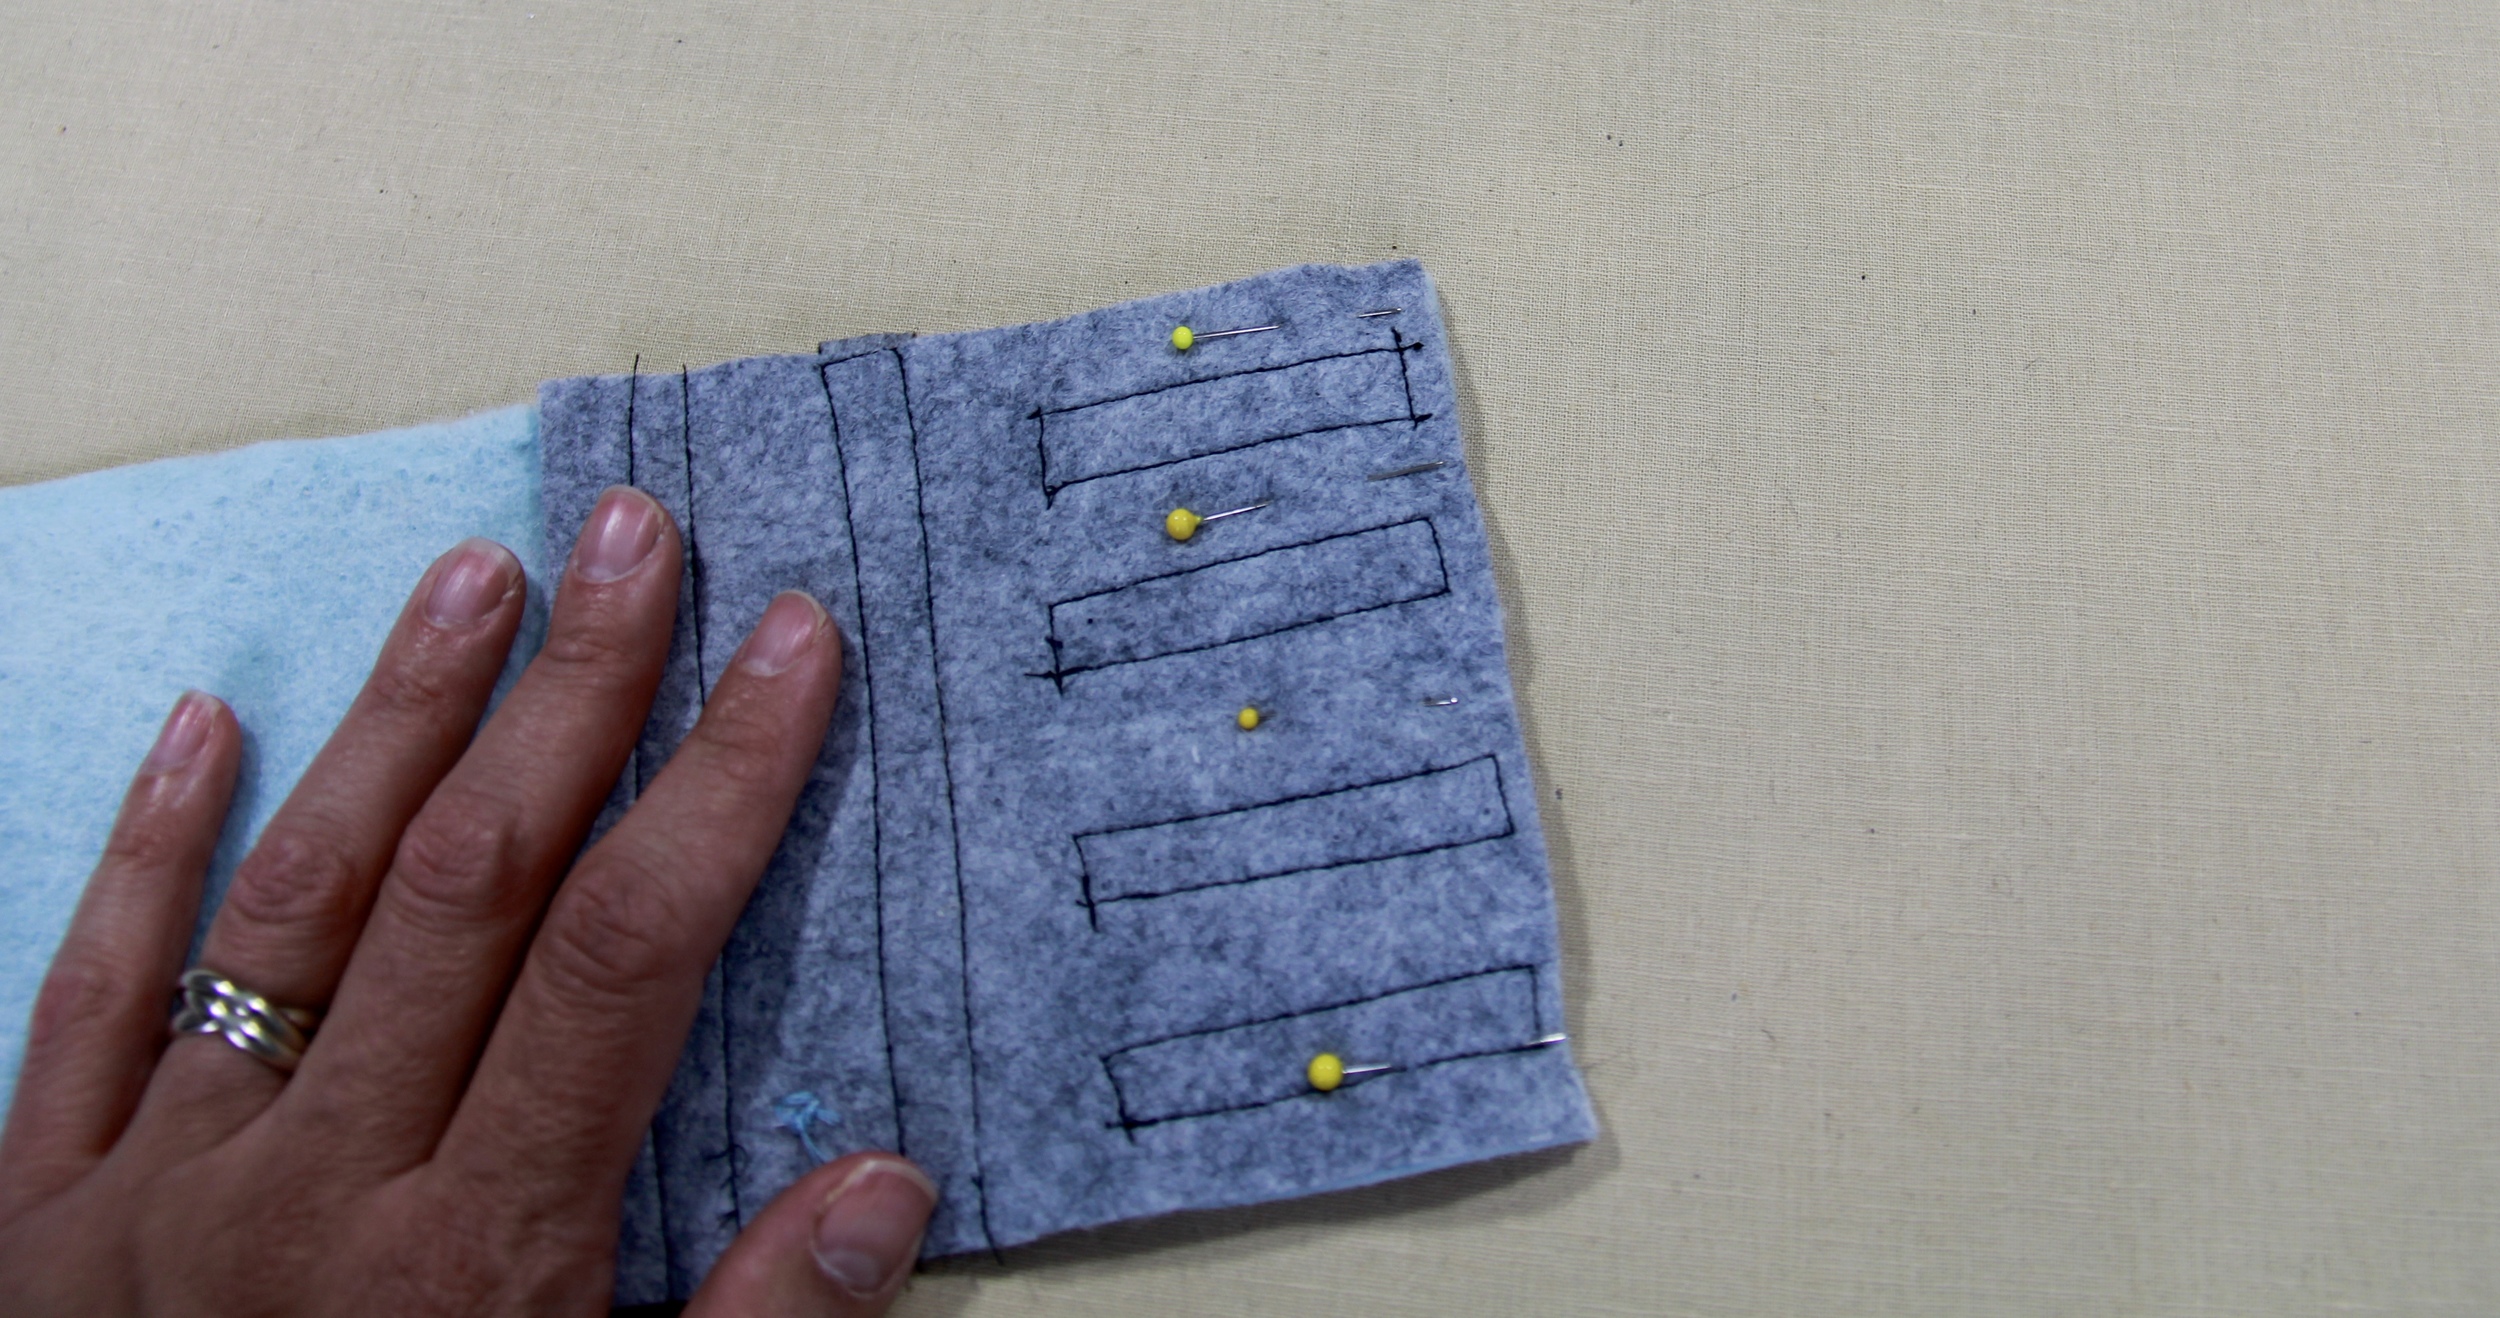
Take the piece of yarn or string and lay it down the middle of the blade. Fold the lightsaber in half lengthwise and pin. When pinning, begin at the hilt, making sure to evenly line up the black strips. After pinning, take a pen and draw a nice curve around the top of the blade. This is going to be your stitching line. Begin stitching at the bottom of the long side of the hilt. Using about 1/4" seam allowance, sew straight up toward the top of the blade. When you get to about 2" to the top, slow down and stitch around the curve that you drew. Make sure that you stitch over the yarn. Back stitch to secure and trim your threads. Now trim the felt closely around the stitch line being careful not to cut through the stitches.
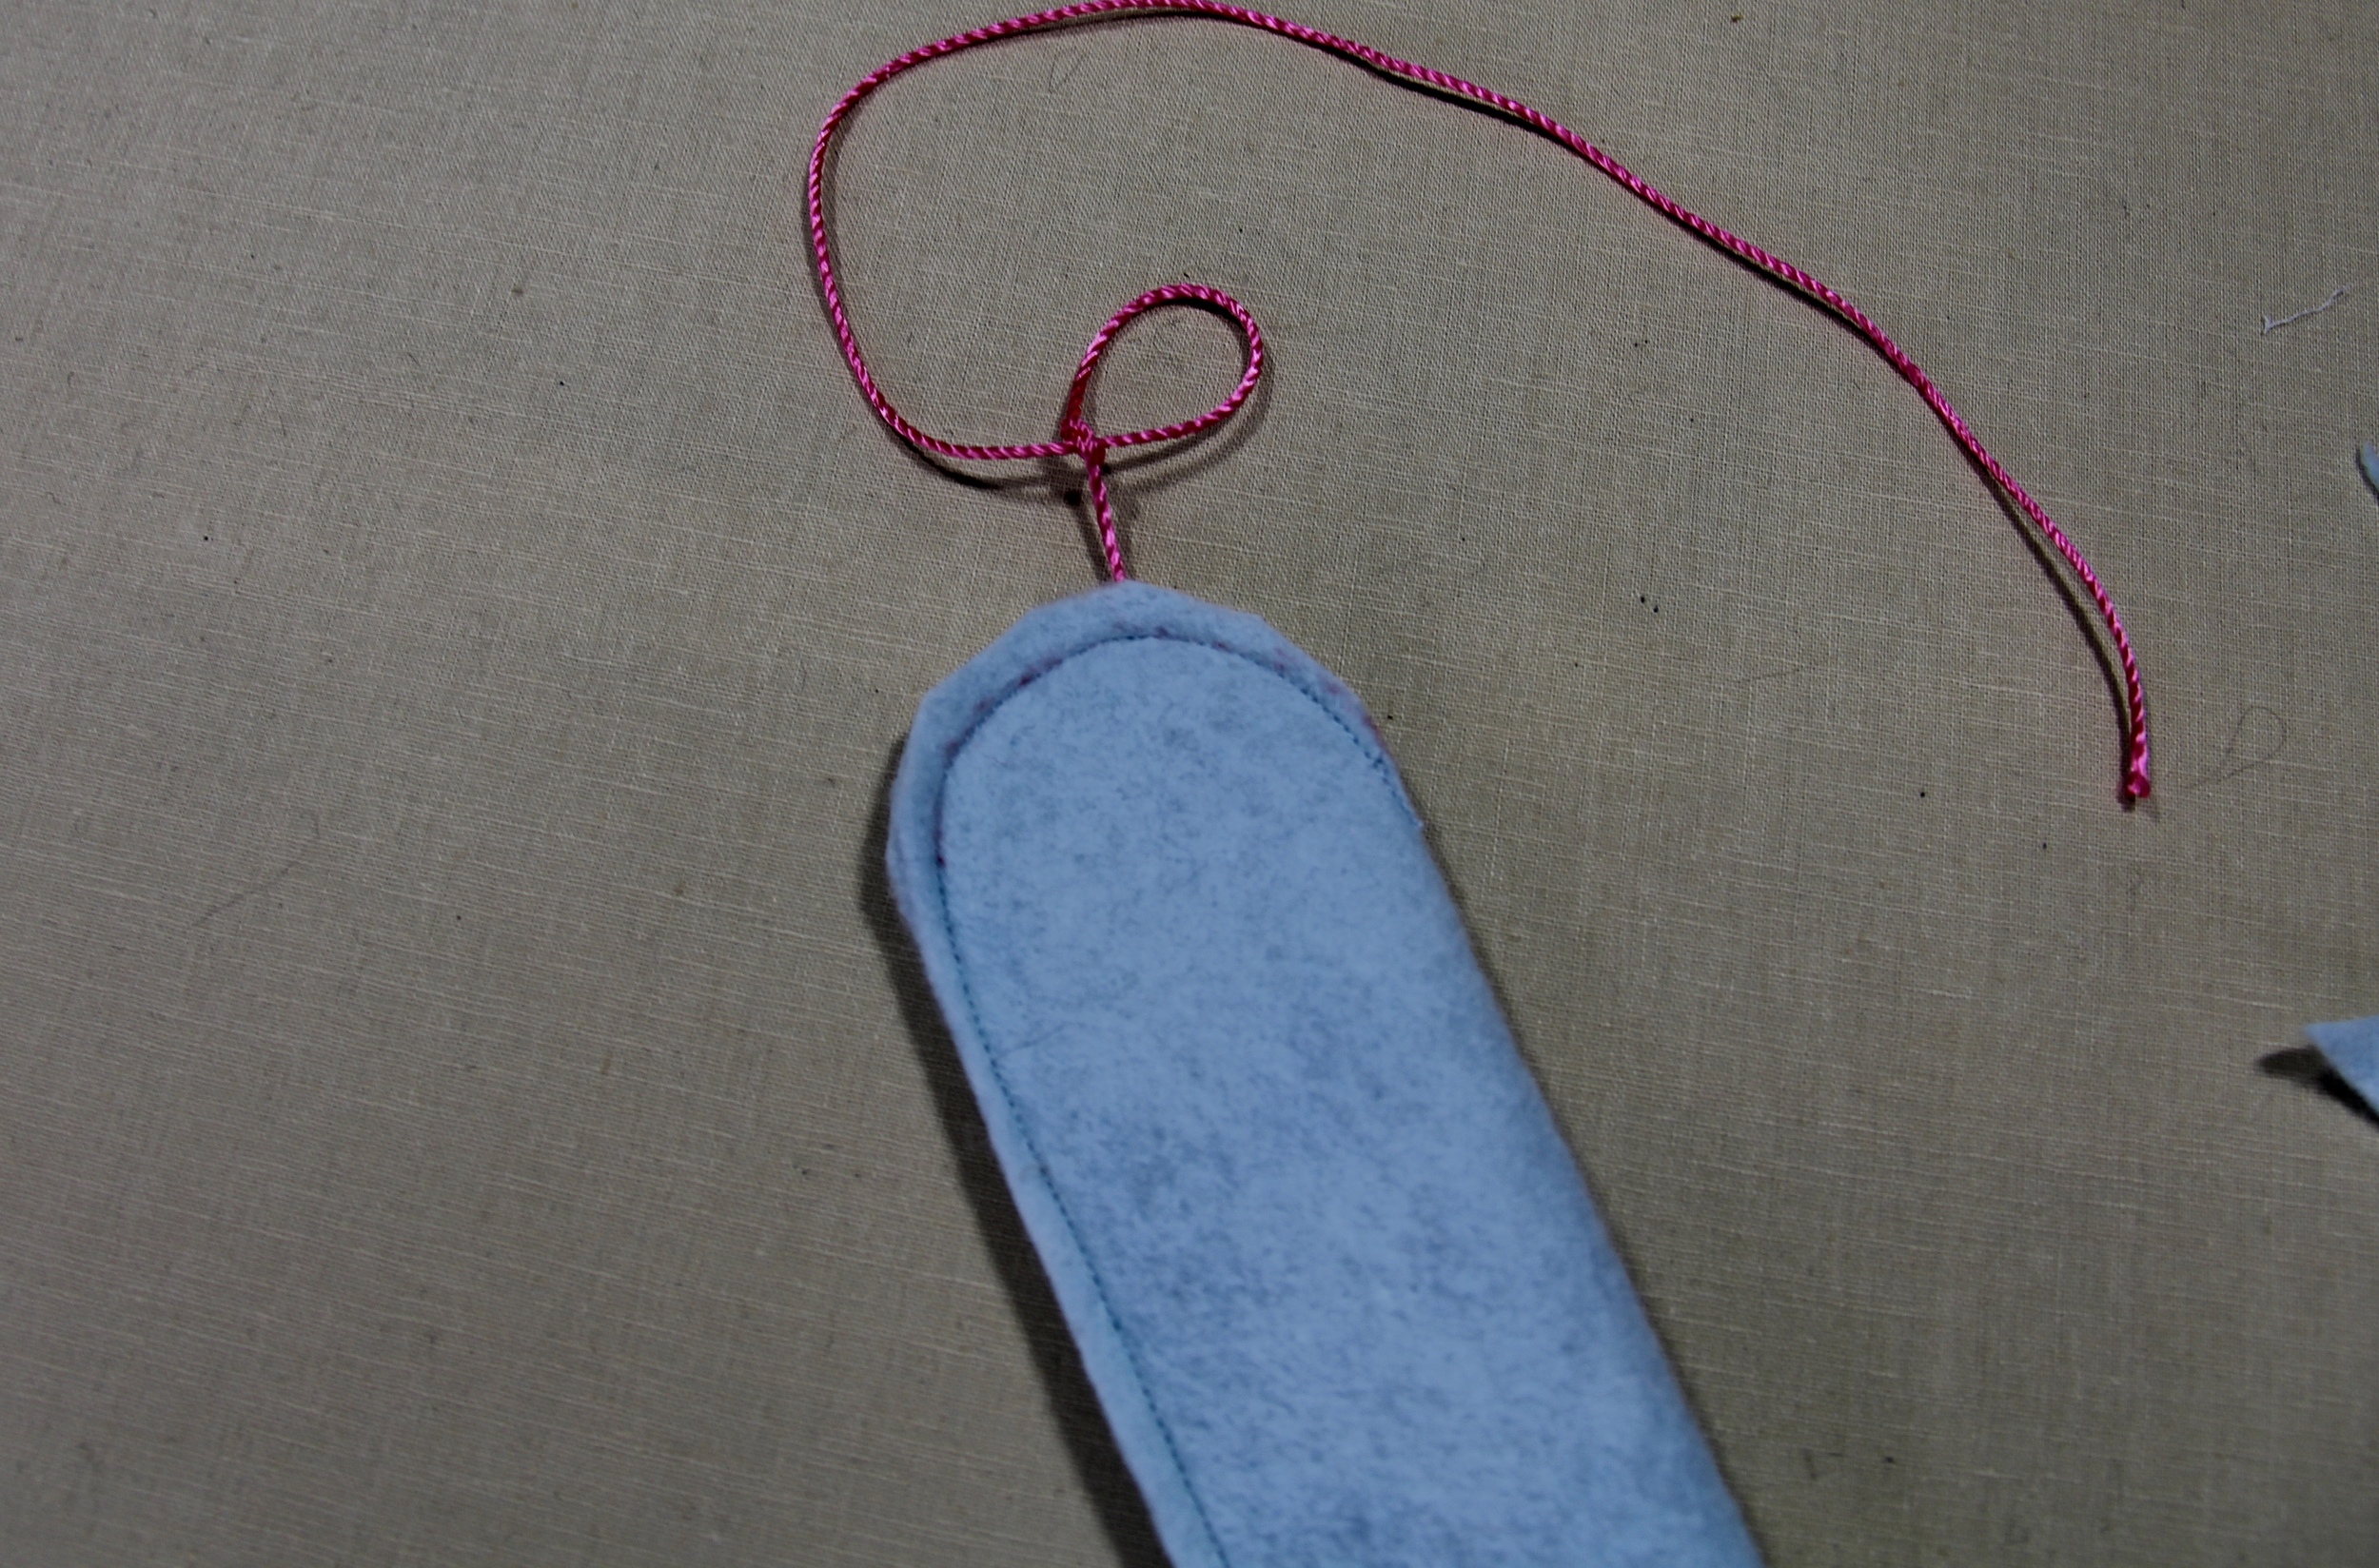
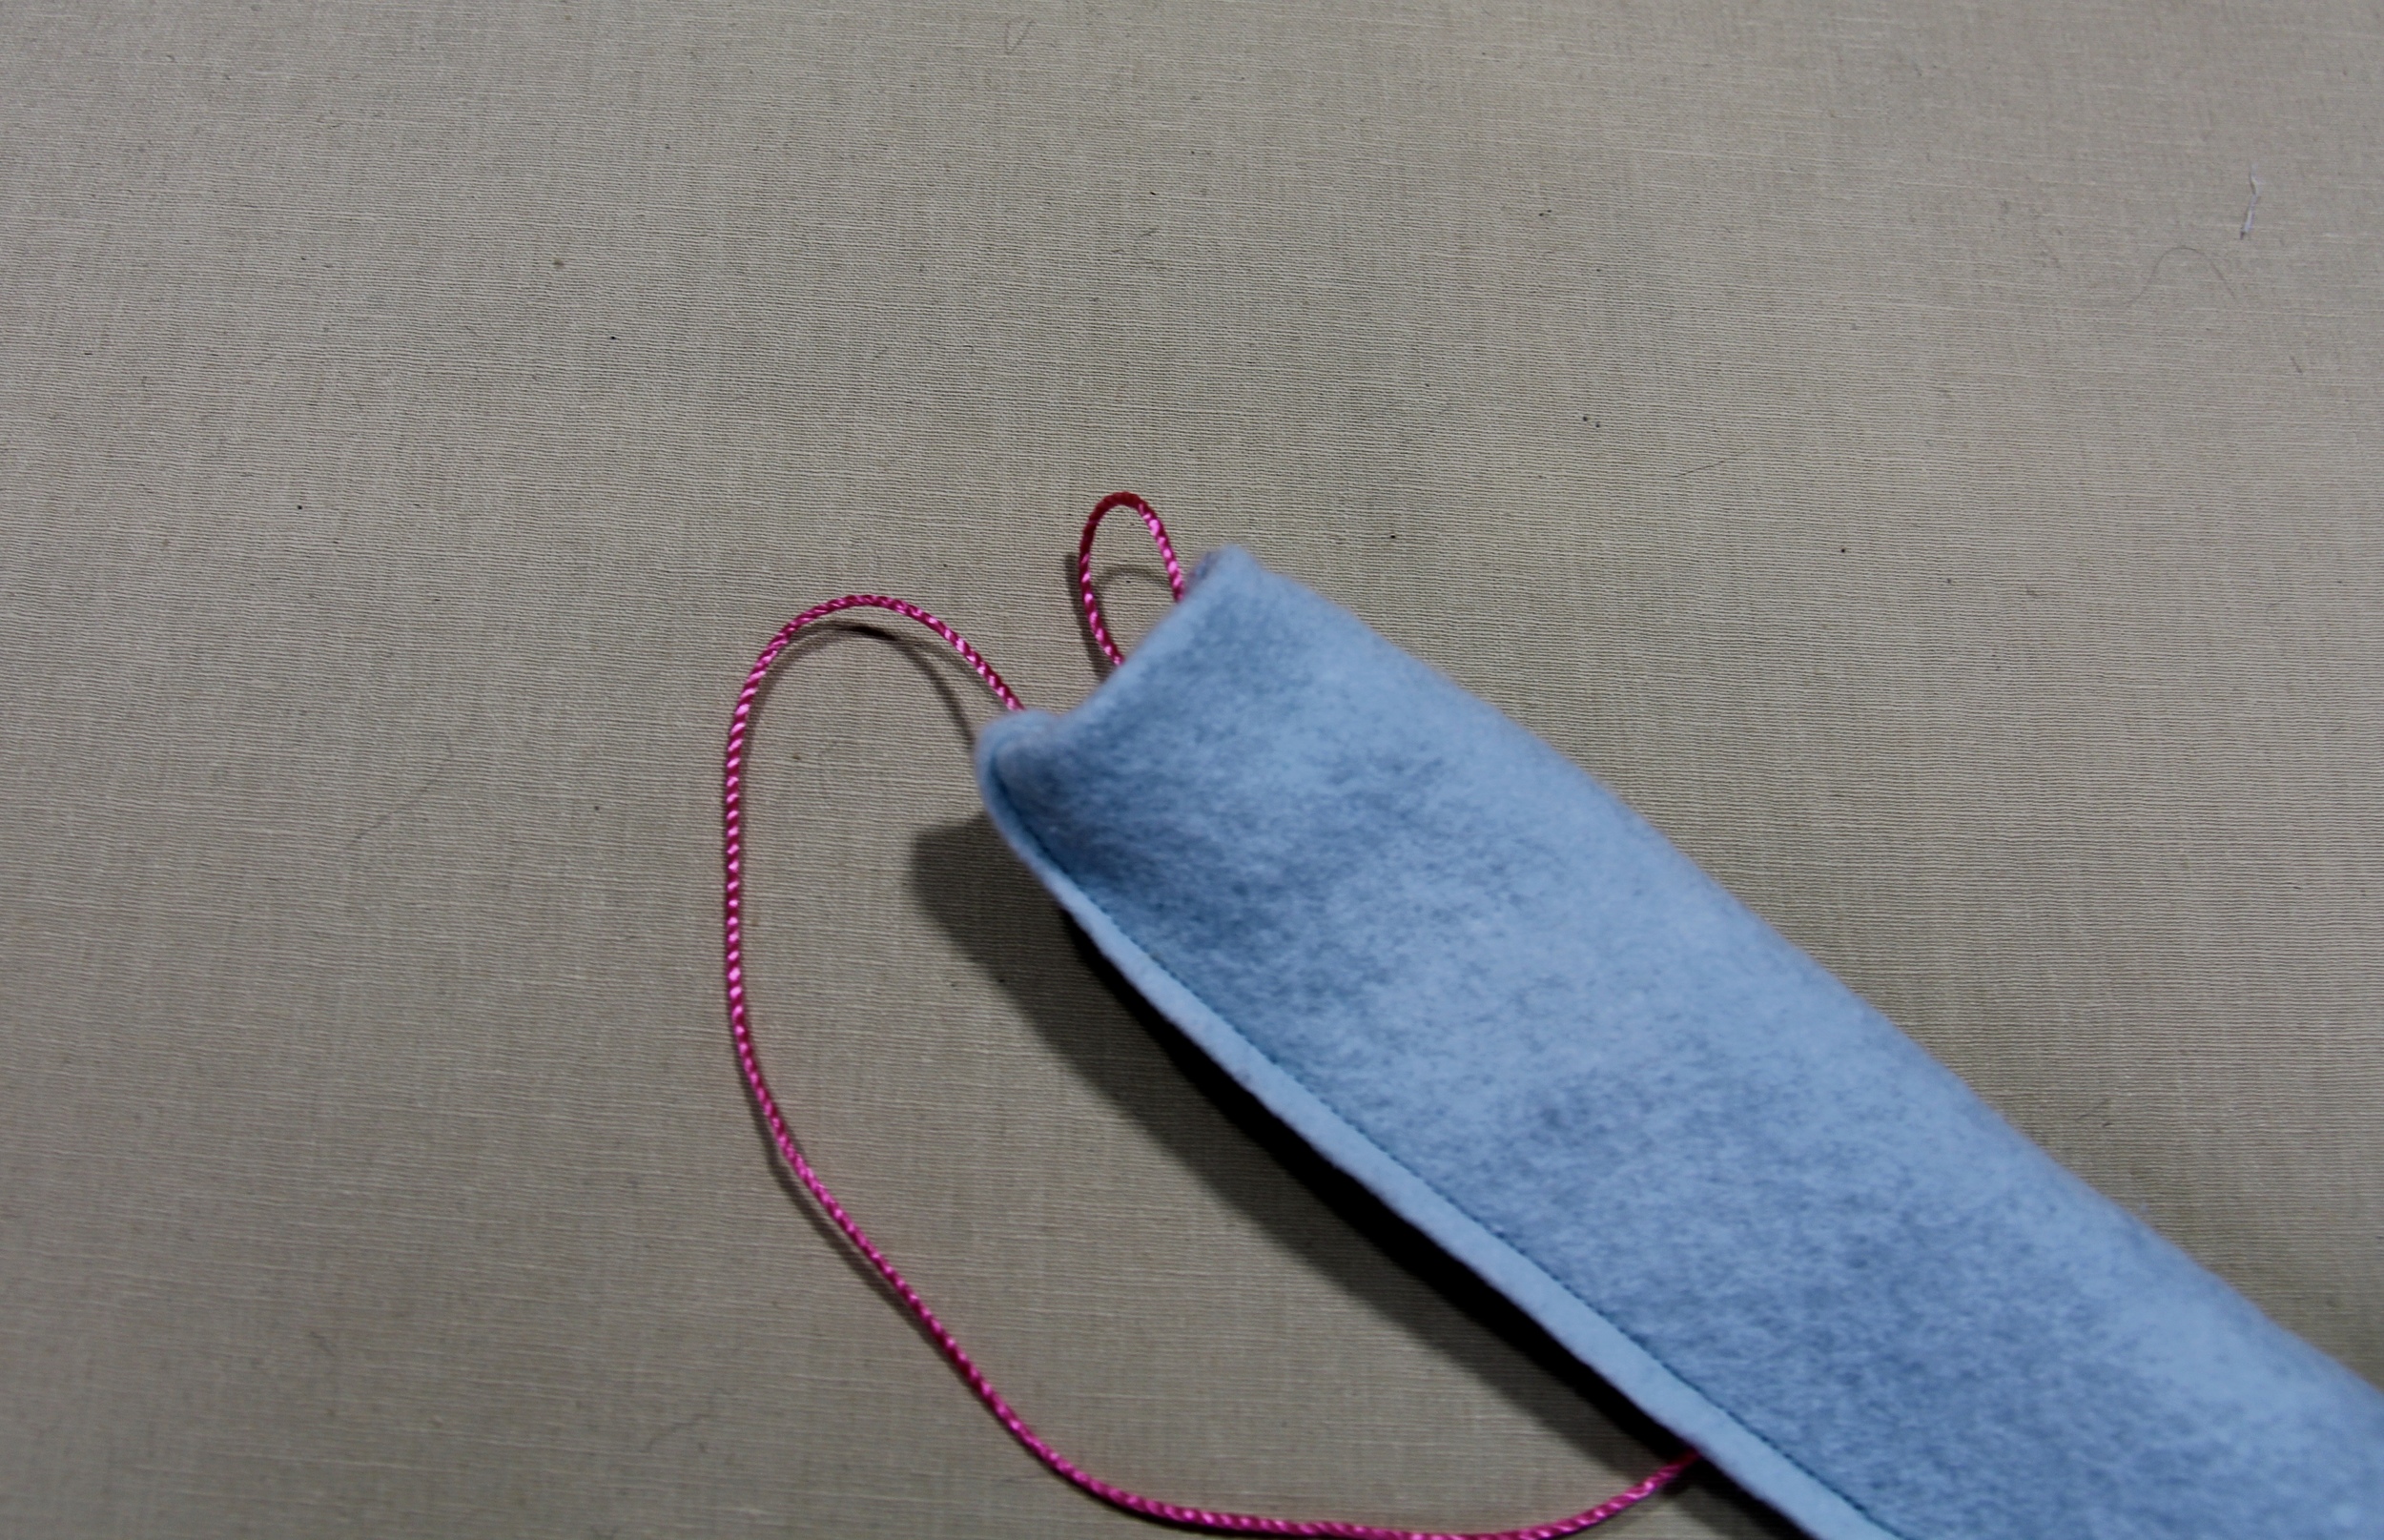
Tie a slip knot in the yarn, right above where you just stitched. Grab the yarn on the opposite end and pull gently. As you pull you will begin to turn the lightsaber right side out. Fun, right?
Once you have it turned, you can cut the yarn. Now it's time to stuff.
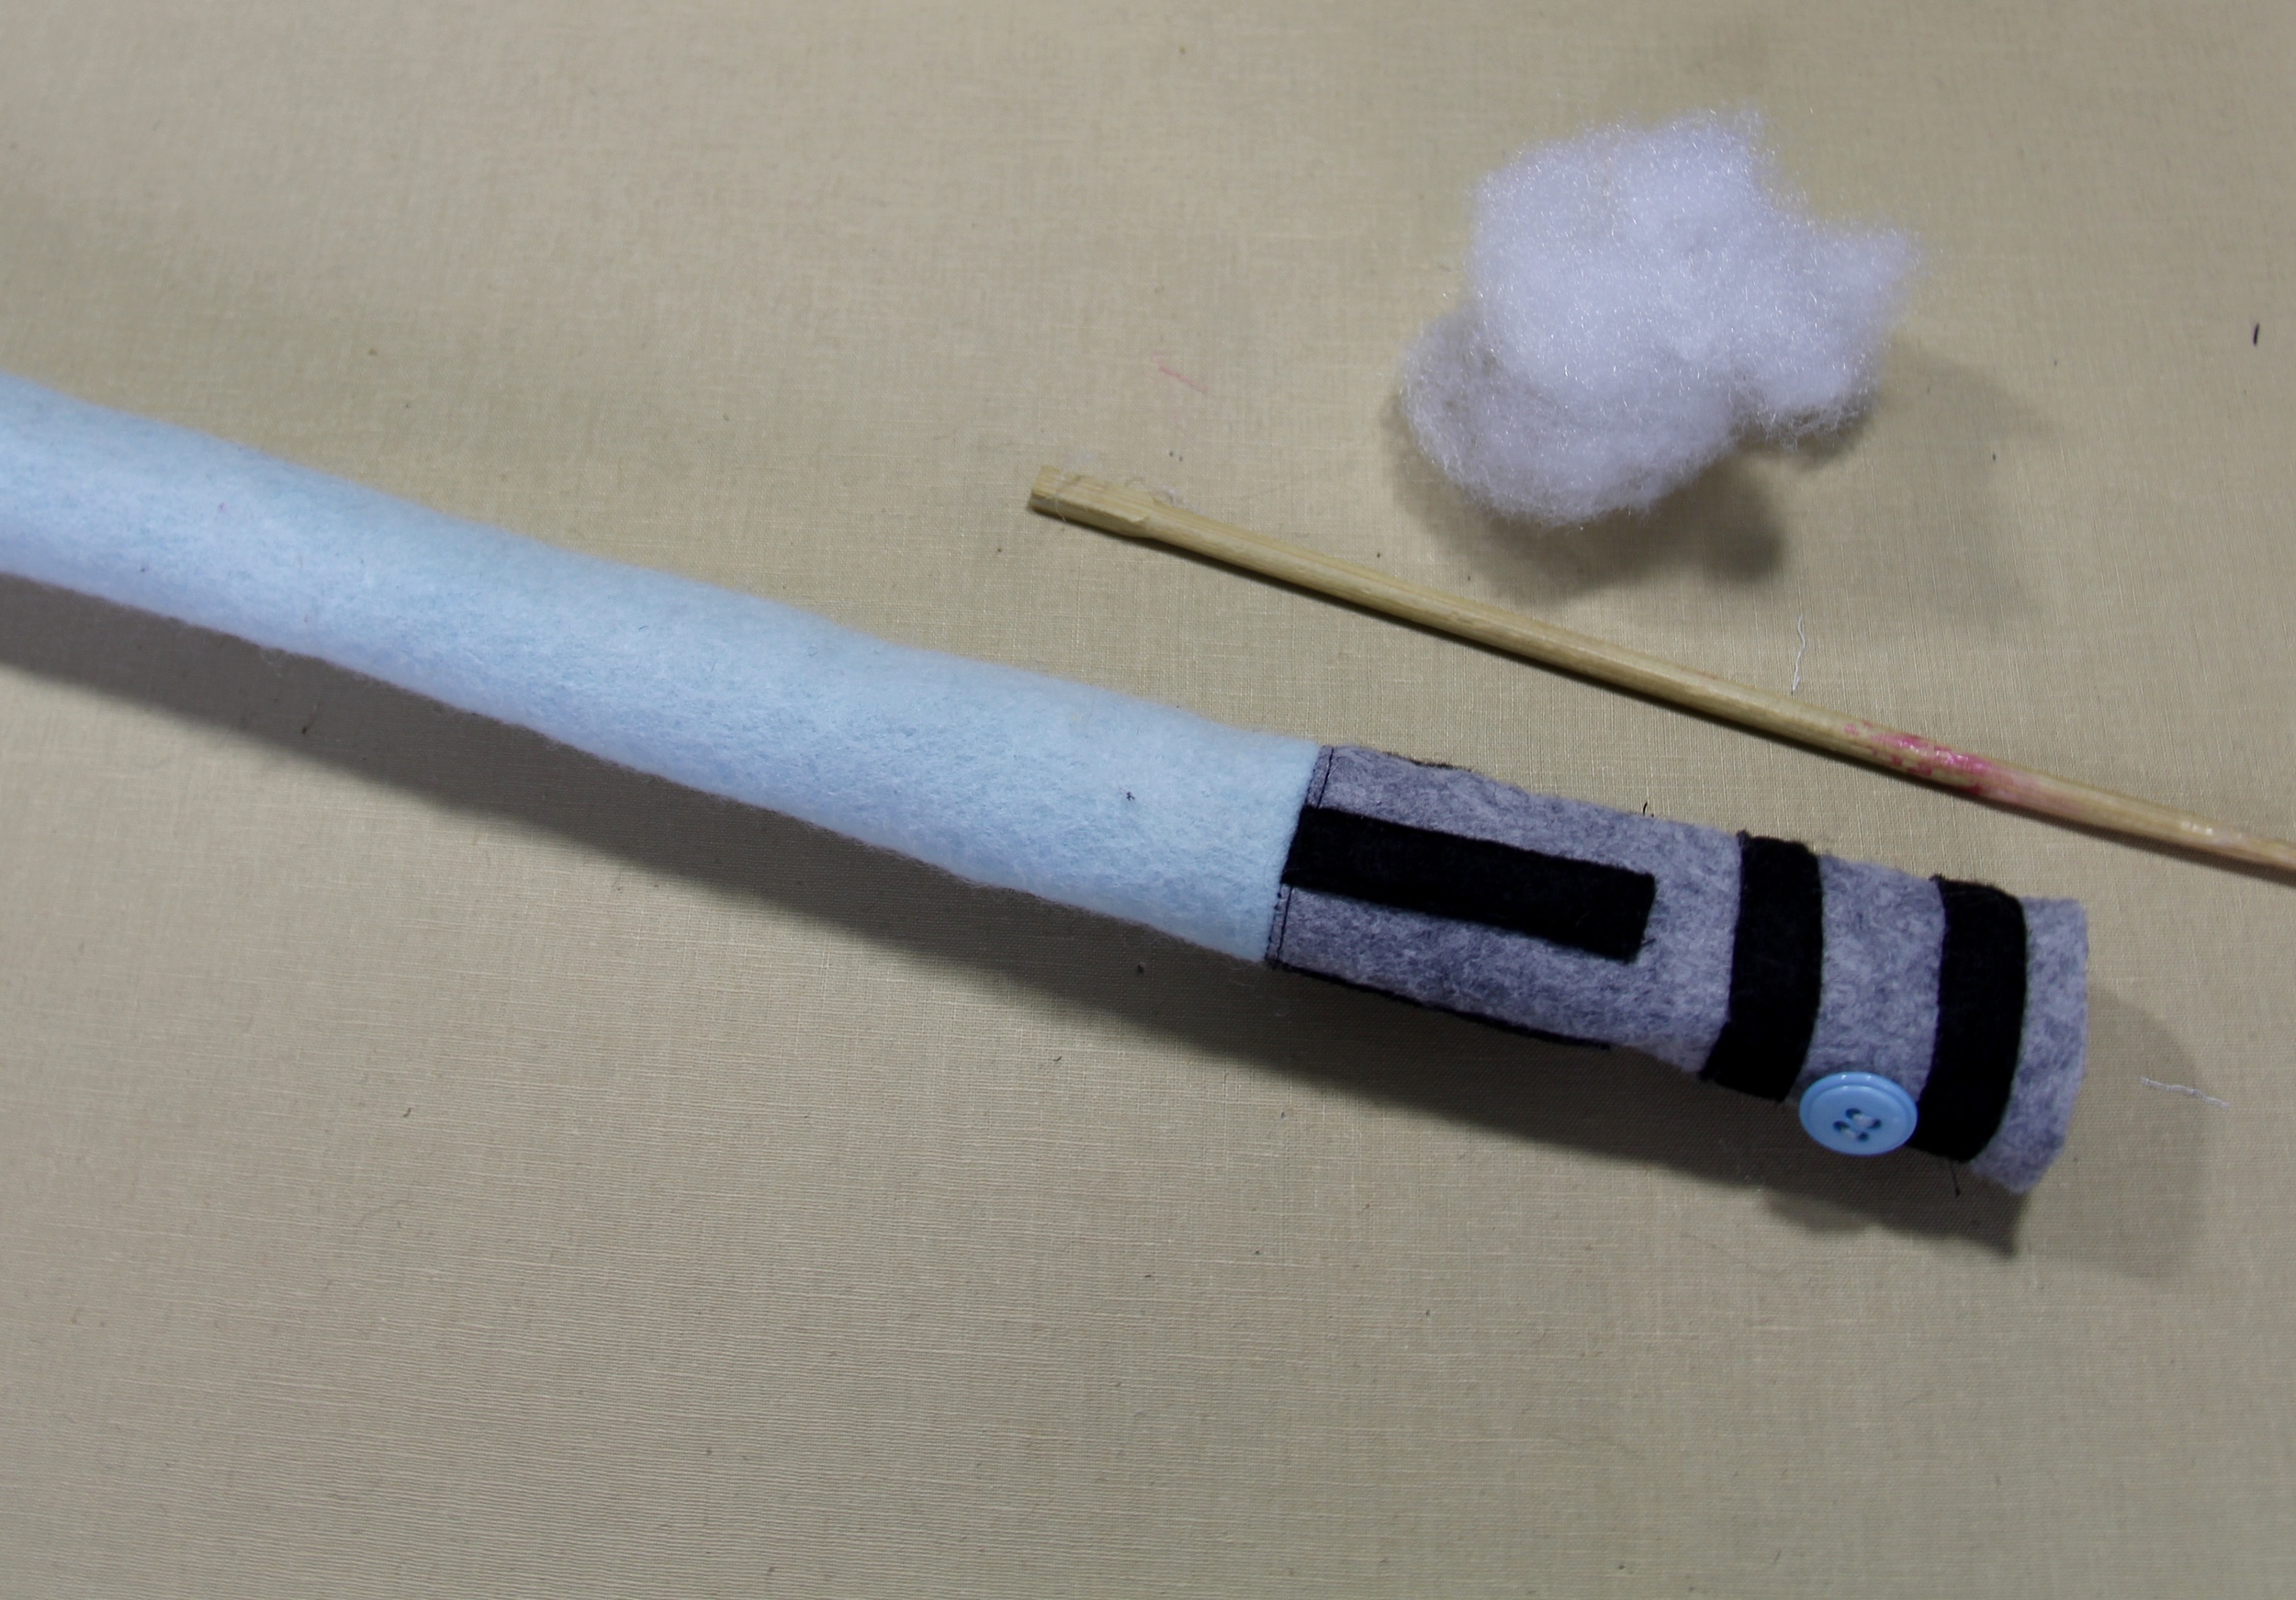

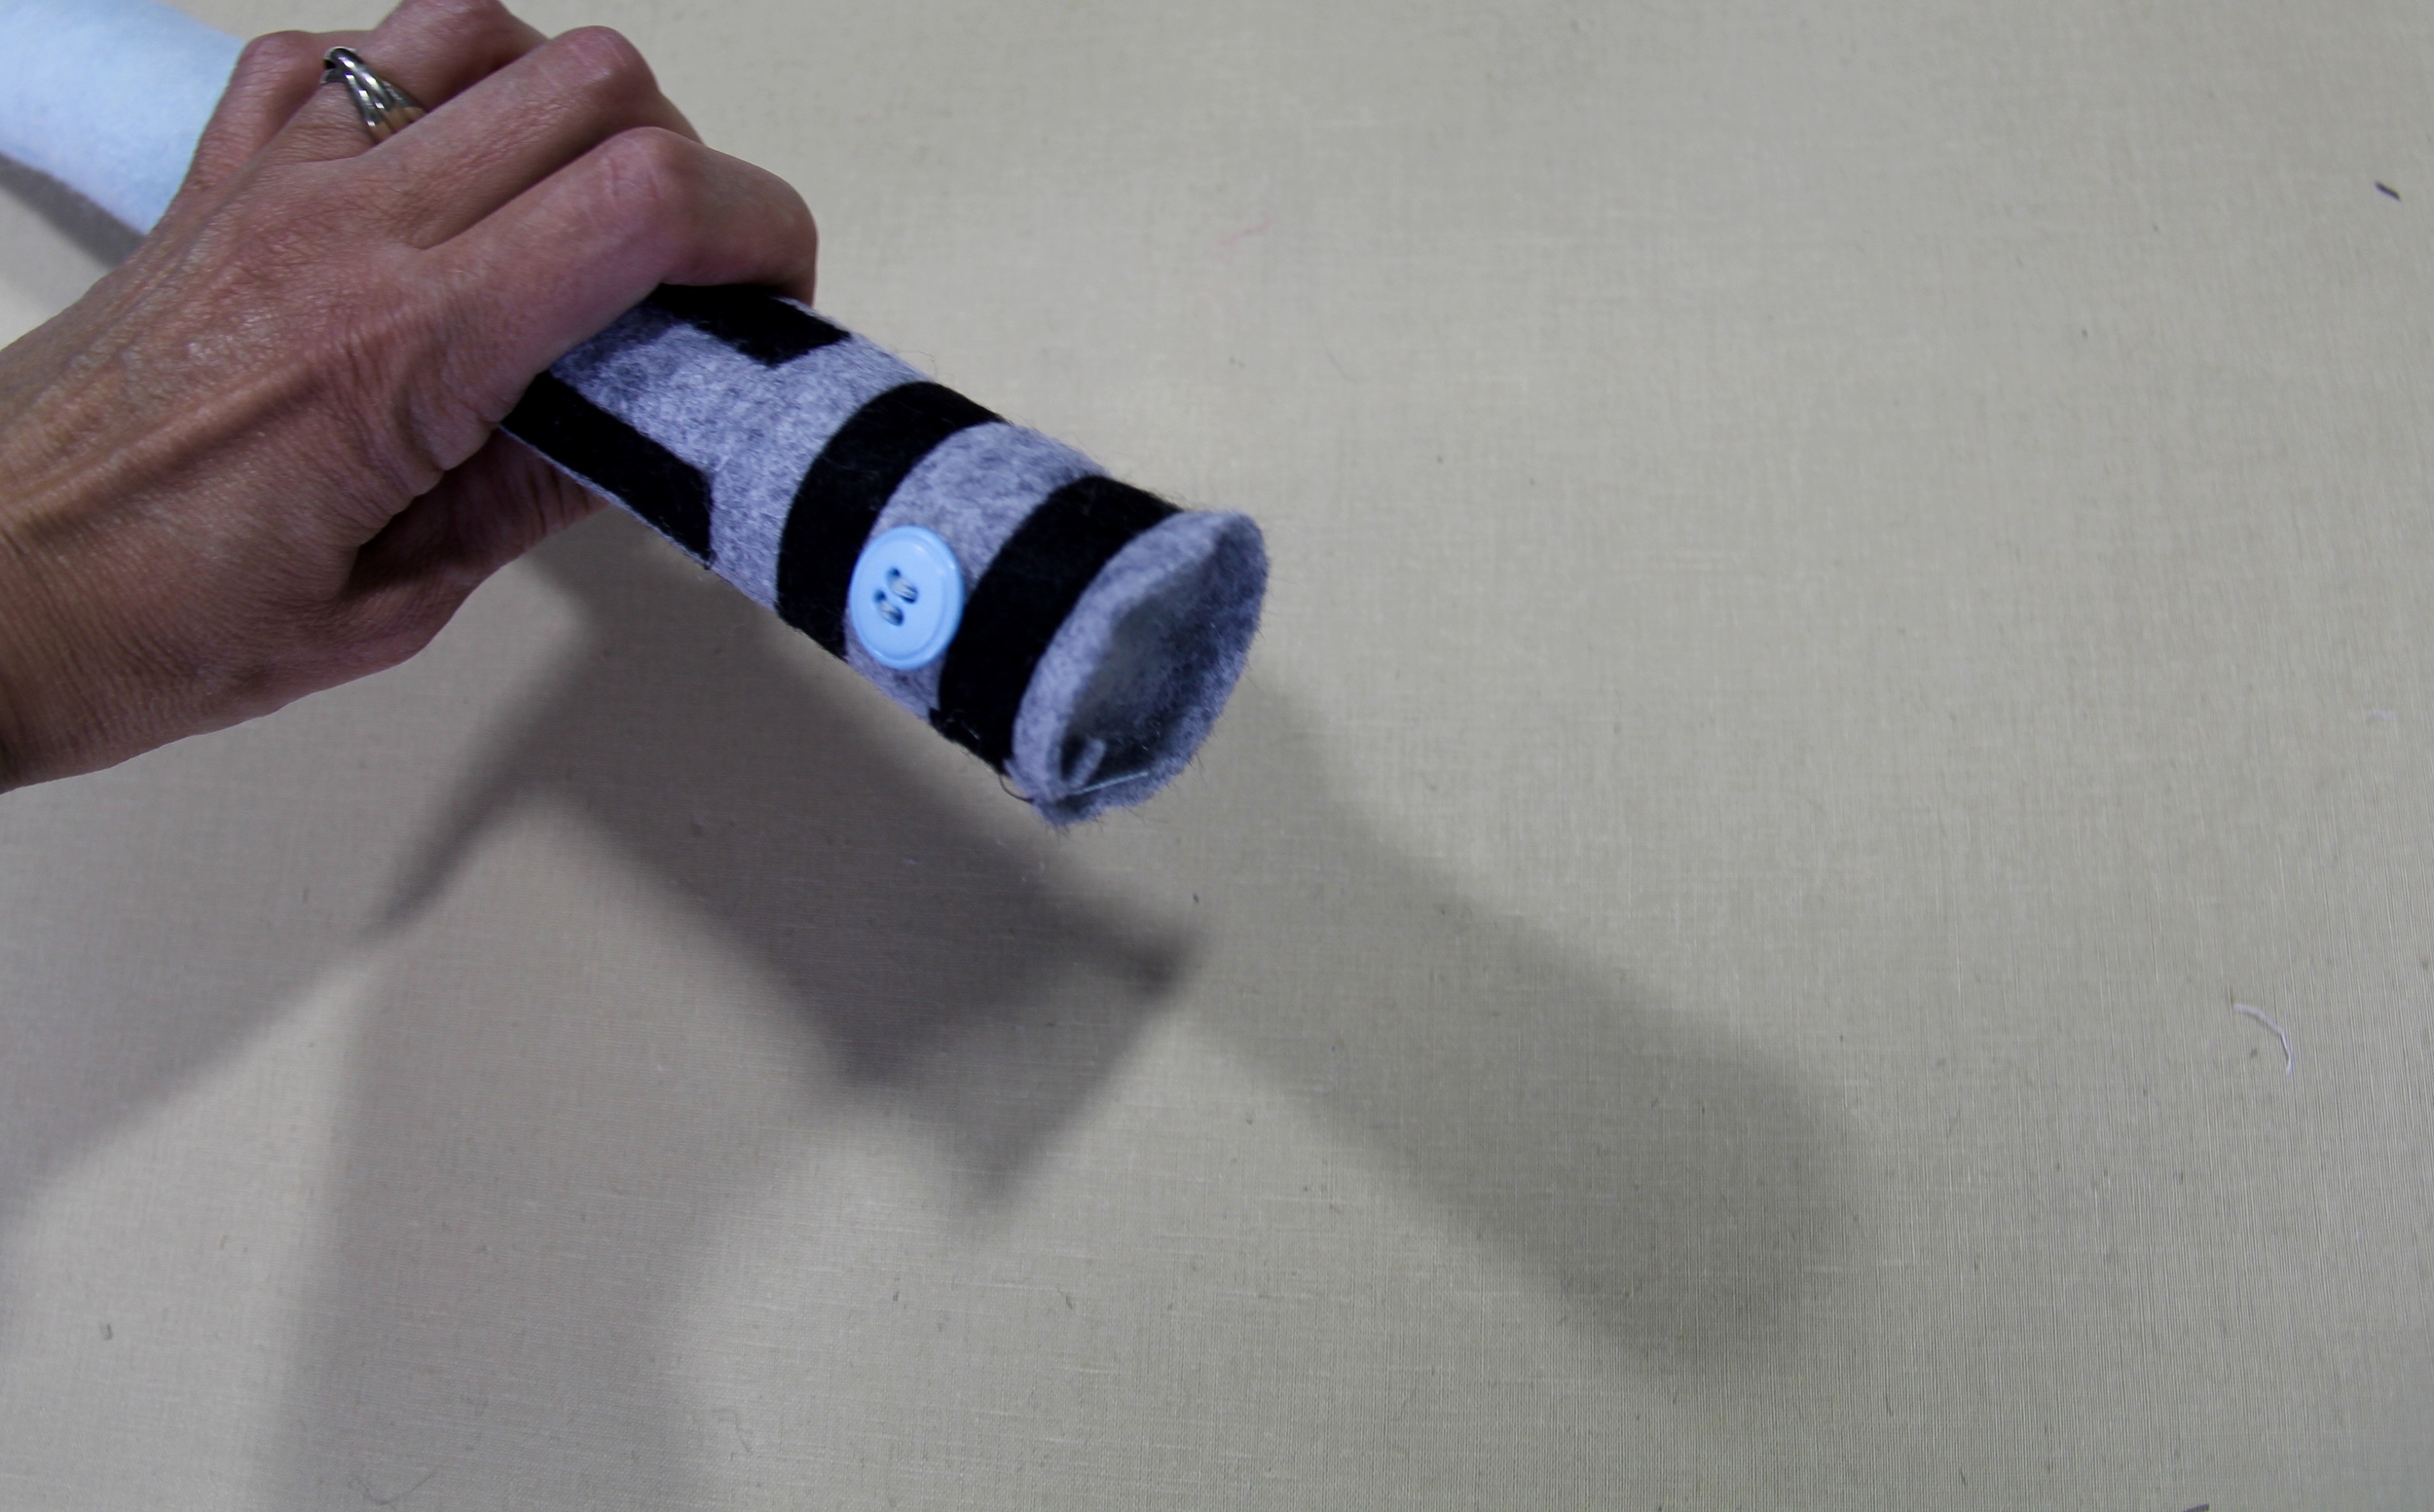
Using small bits of Poly-fill, begin to stuff. A chopstick or eraser side of a pencil makes this much easier. As you stuff, roll the lightsaber against the table, like a rolling pin. This will help to keep the stuffing from looking lumpy.
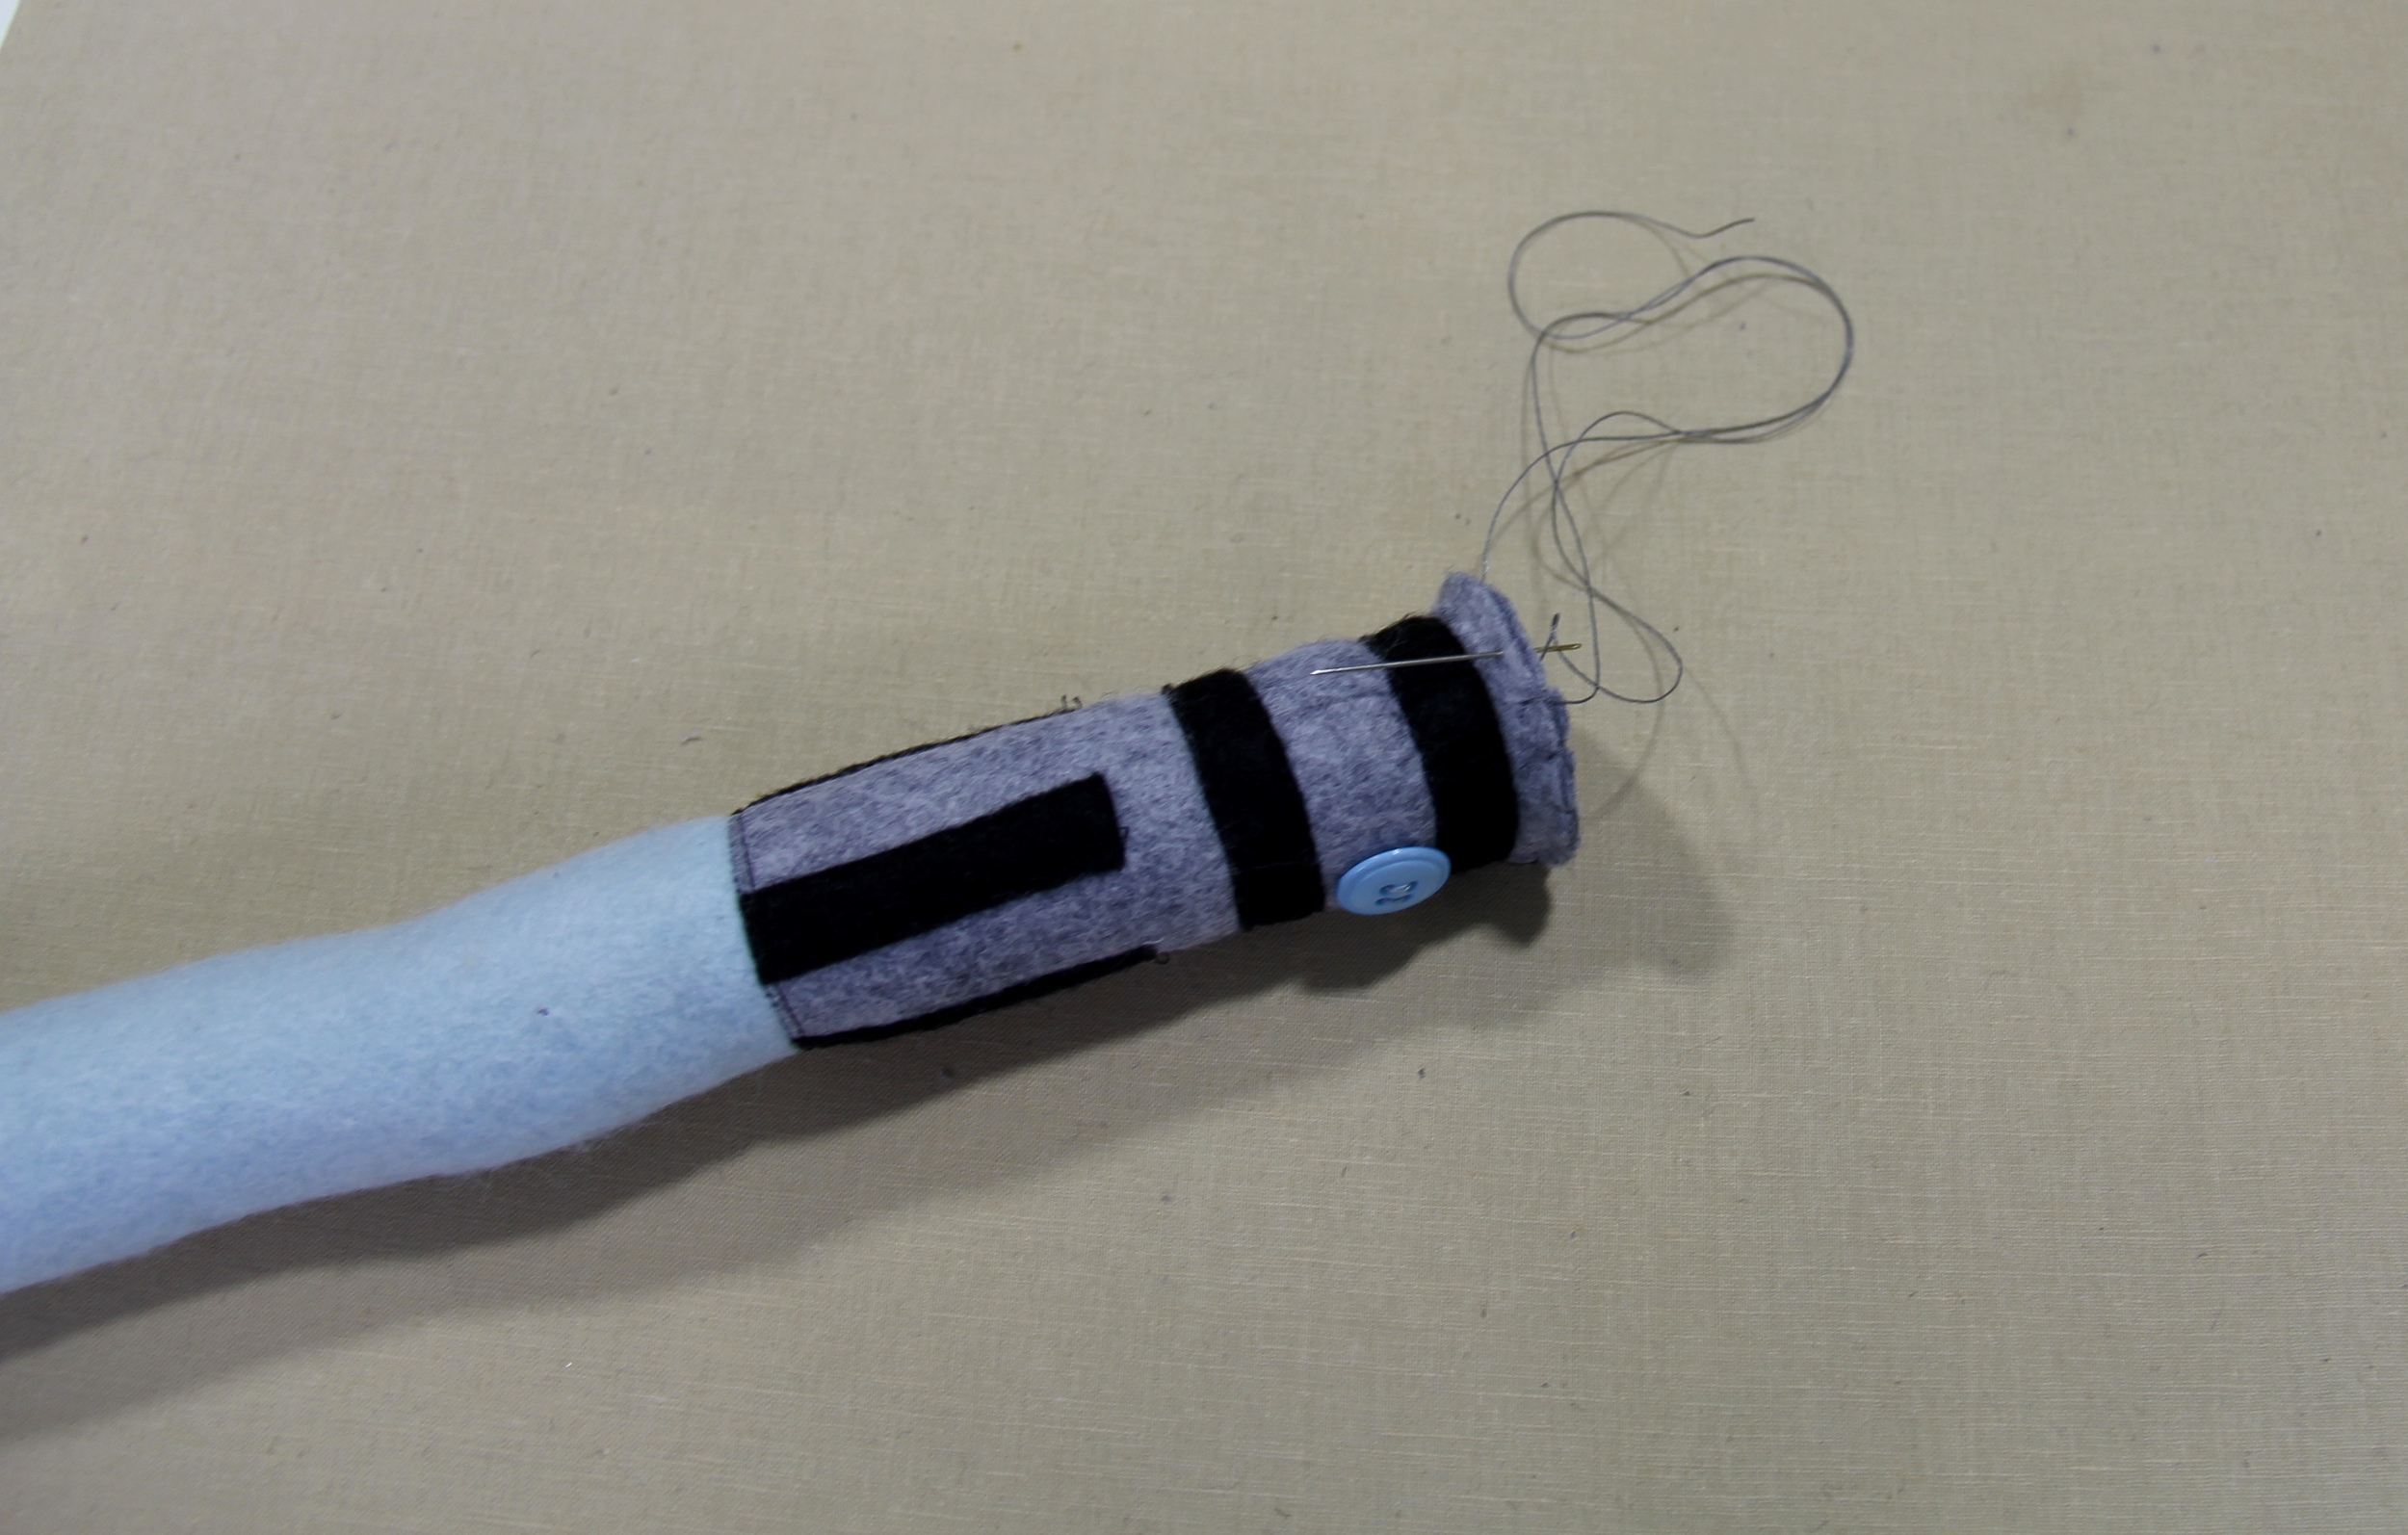
When you are satisfied with the firmness and shape, its time to close the hilt. You may call it quits and just stitch right across the top or you can cut a circle and hand stitch that piece to the bottom of the hilt and close it nicely. I like to use button and craft thread for this. Its a bit thicker and tends to withstand play a bit better.

Ta-da! You did it!! Now you can give it to your child and let him go for it! (If you are going to give this to a child under 5, you may not want to use the button)
Let me know if you have any questions.
XO,
Hilarie
Hand smocking tutorial
I love tutorials. The simple, image-driven instructions really appeal to me in a way that video doesn't. I have been asked for years to create a blog and post sewing and crafting tutorials, but I always seem to procrastinate when it comes to writing. The time has come, my friends. Here is my first tutorial! (drumroll, please...)

I love tutorials. The simple, image-driven instructions really appeal to me in a way that video doesn't. I have been asked for years to create a blog and post sewing and crafting tutorials, but I always seem to procrastinate when it comes to writing. The time has come, my friends. Here is my first tutorial! (drumroll, please...)
How to Make a Hand Smocked Scarf
Smocking. To a southerner, its as essential as a monogram, sweet tea and humidity. As beautiful as smocking is, it's generally reserved for young children. (or for kids that might be a bit older, but their moms' can't bare to pack away the bishop dresses.) This smocking project isn't for kids though, its for grown-ups. It's very easy and I'll walk you through the entire project!
Materials Needed

2 yards of lightweight cotton (I used a gingham with a 1/4"-inch check from Annabel Wrigley's debut line Maribel with Windham Fabrics) Coming to finer fabric stores soon!
1 skein of embroidery floss (I used DMC 893)
Cotton thread
An embroidery needle (I really like Clover Gold Eye Embroidery needles)
A ruler and marking pen if you are not using gingham fabric ( I really like the Frixion pens)
Tweezers are really helpful too!
Cutting
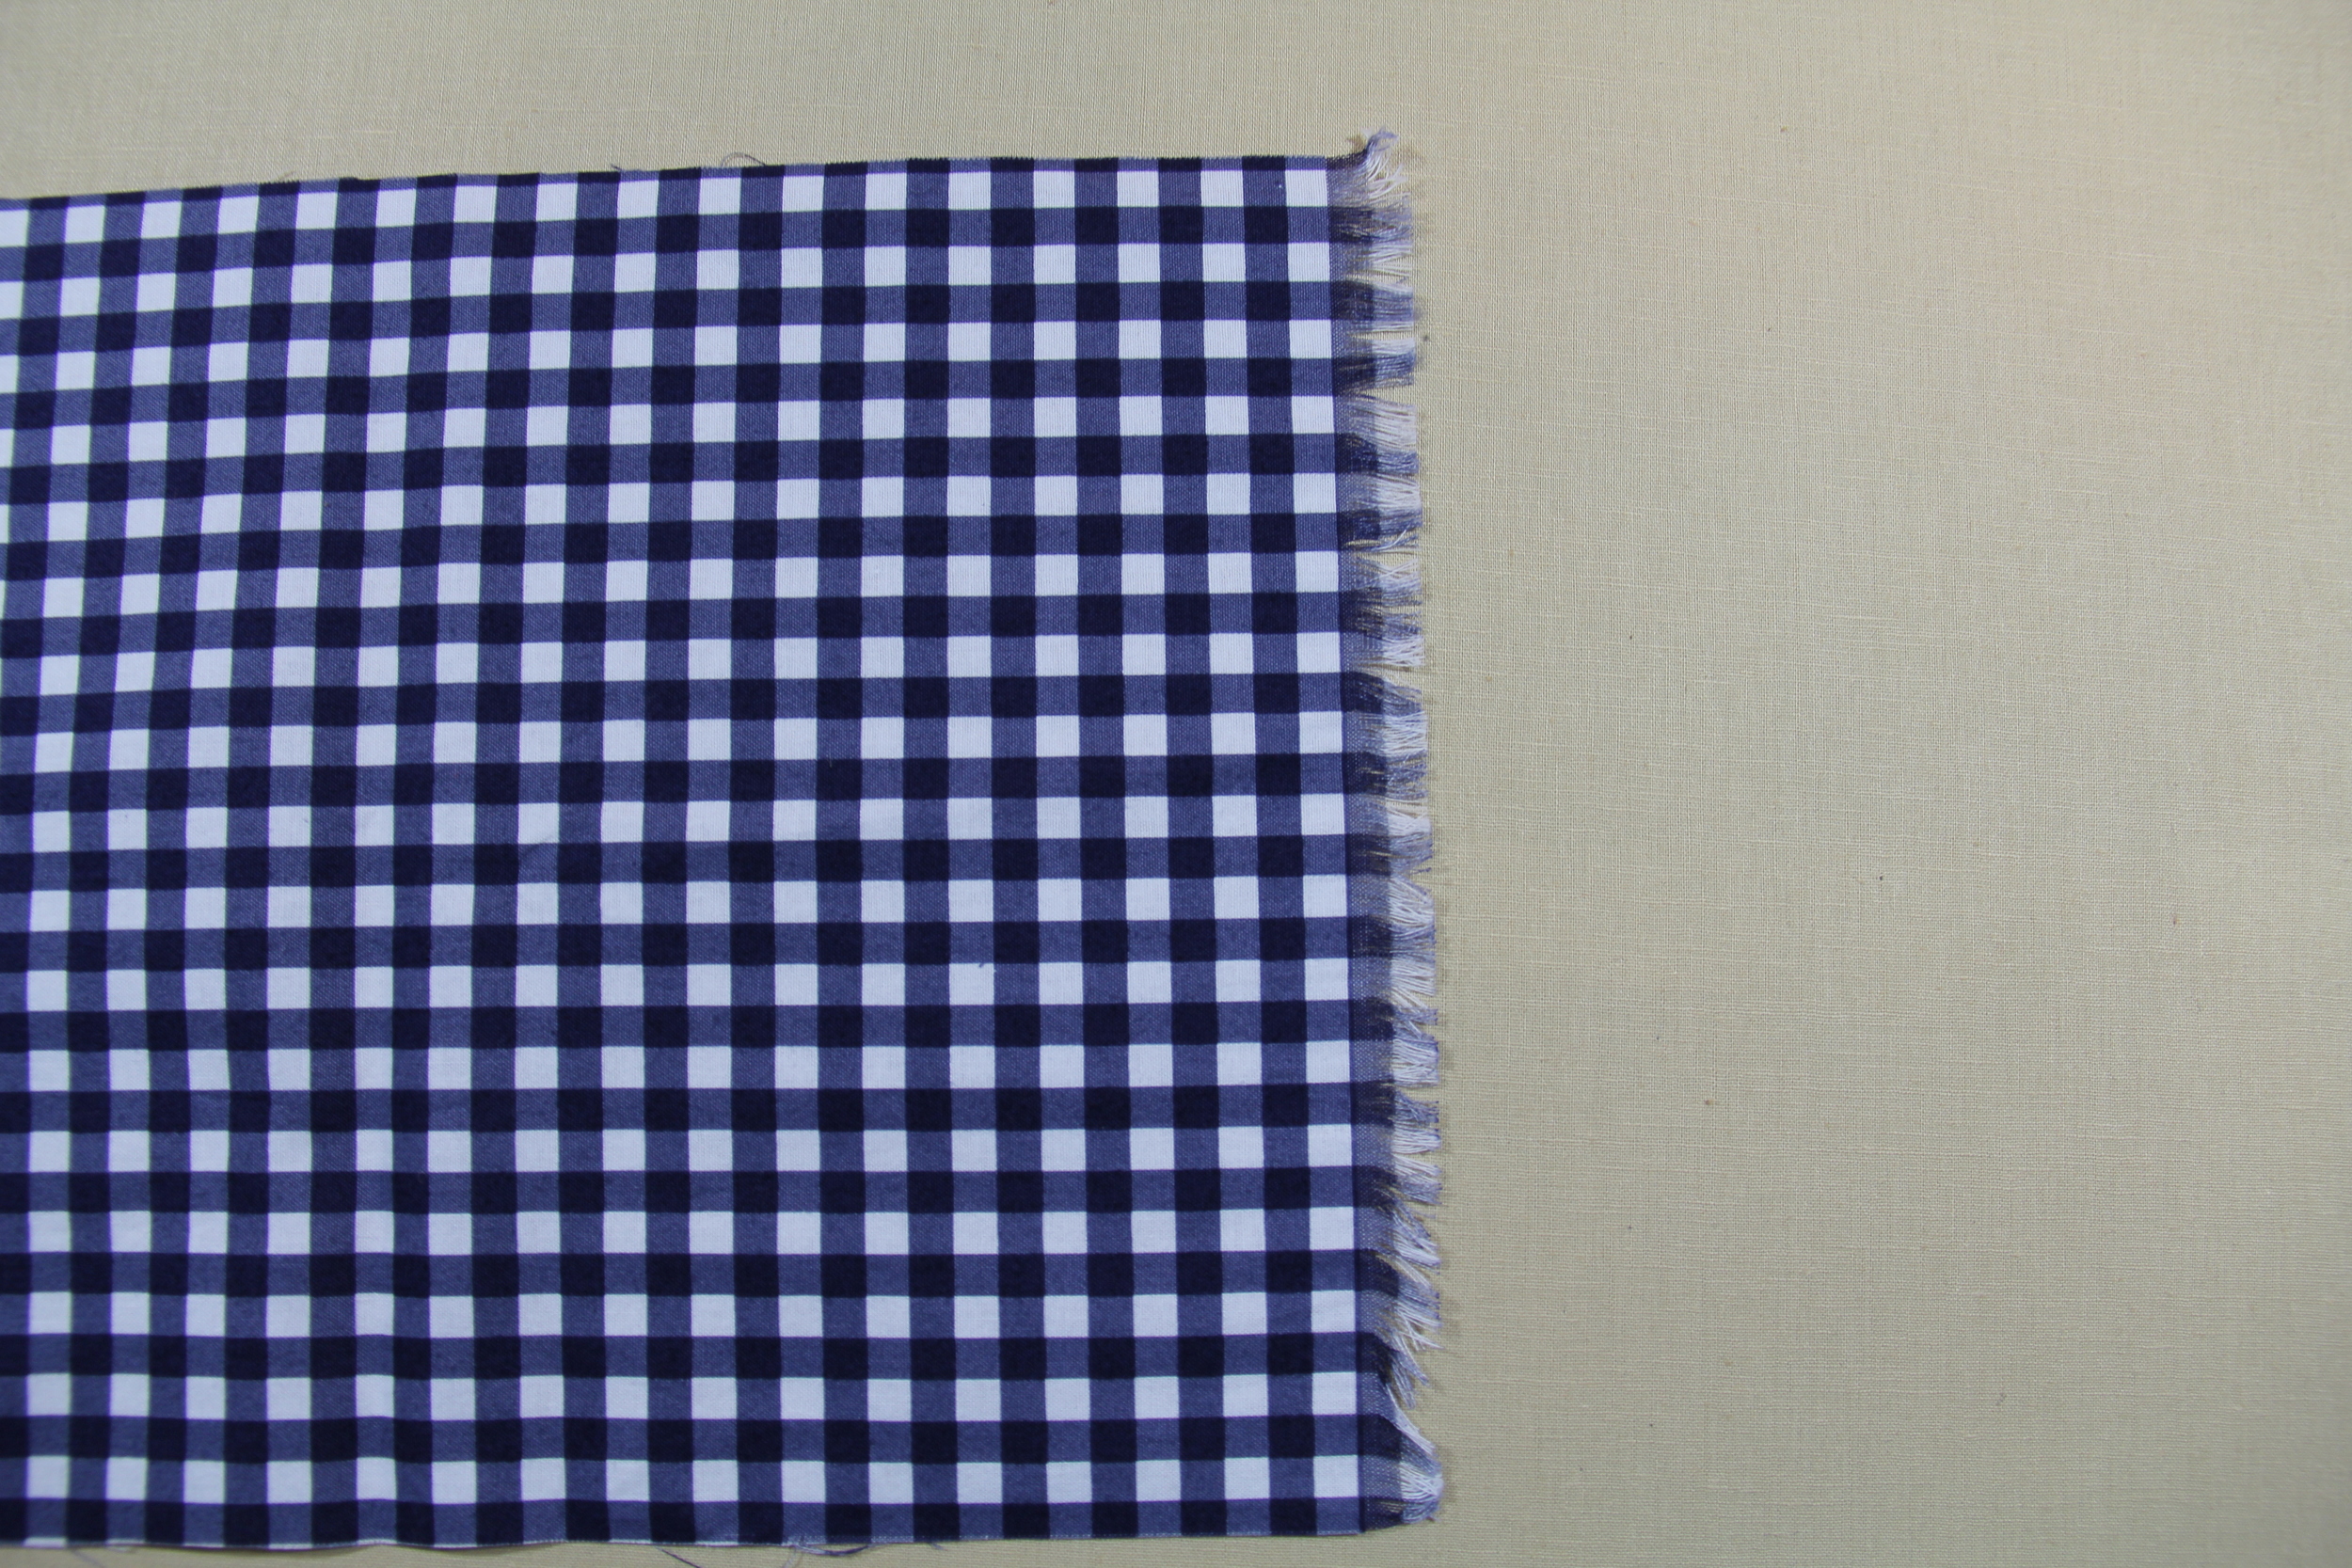
To begin, fold the fabric in half vertically. Cut out two lengths of fabric 72" x 10". Take the first piece and we will begin to fray the ends to make fringe.
Fringe
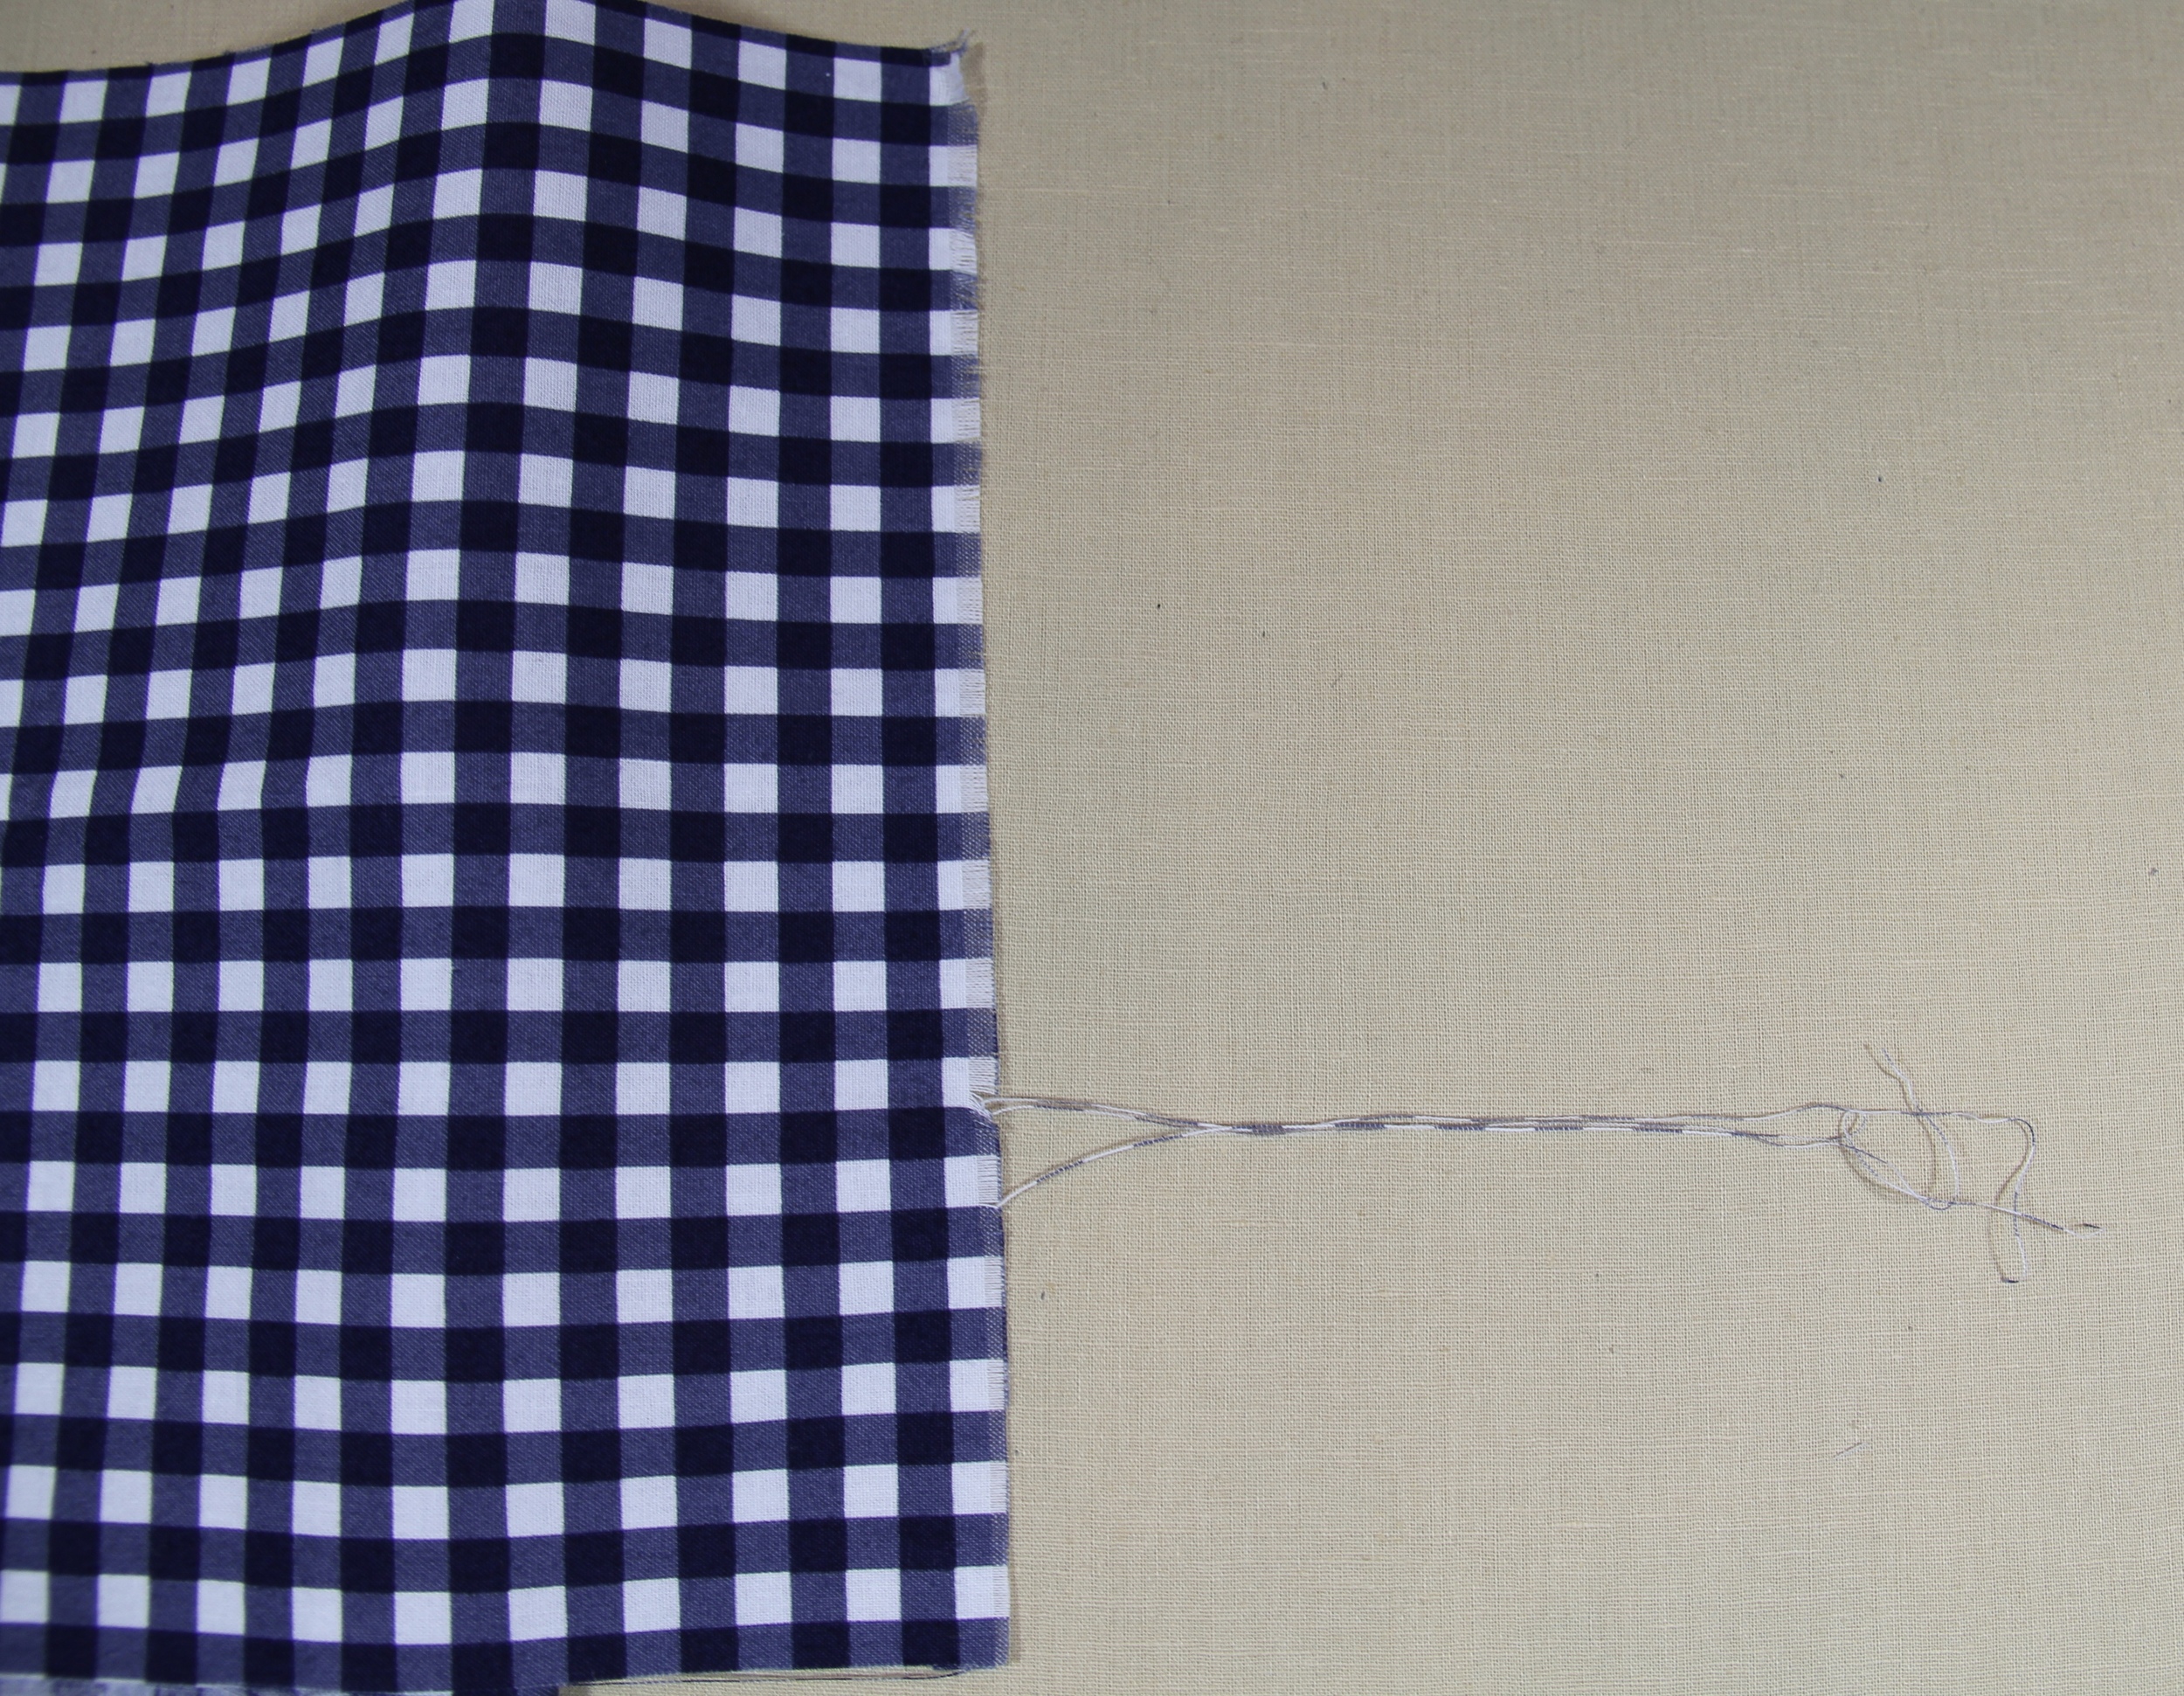
A good way to start, is by cutting the ends very straight. Begin by pulling the first weft thread (the threads that go side to side) in the weave. Sometimes I use tweezers to help pull the thread. Try to pull just one thread at a time or it will bunch up and create a mess. As you pull the thread, the fabric will begin to gather. Keep pulling until the thread snaps or won't pull any further. Snip it, tease the other side to loosen a thread and continue. Keep at this until the fringe is 1/2". Turn the fabric over and do it again.

Honeycomb Smocking
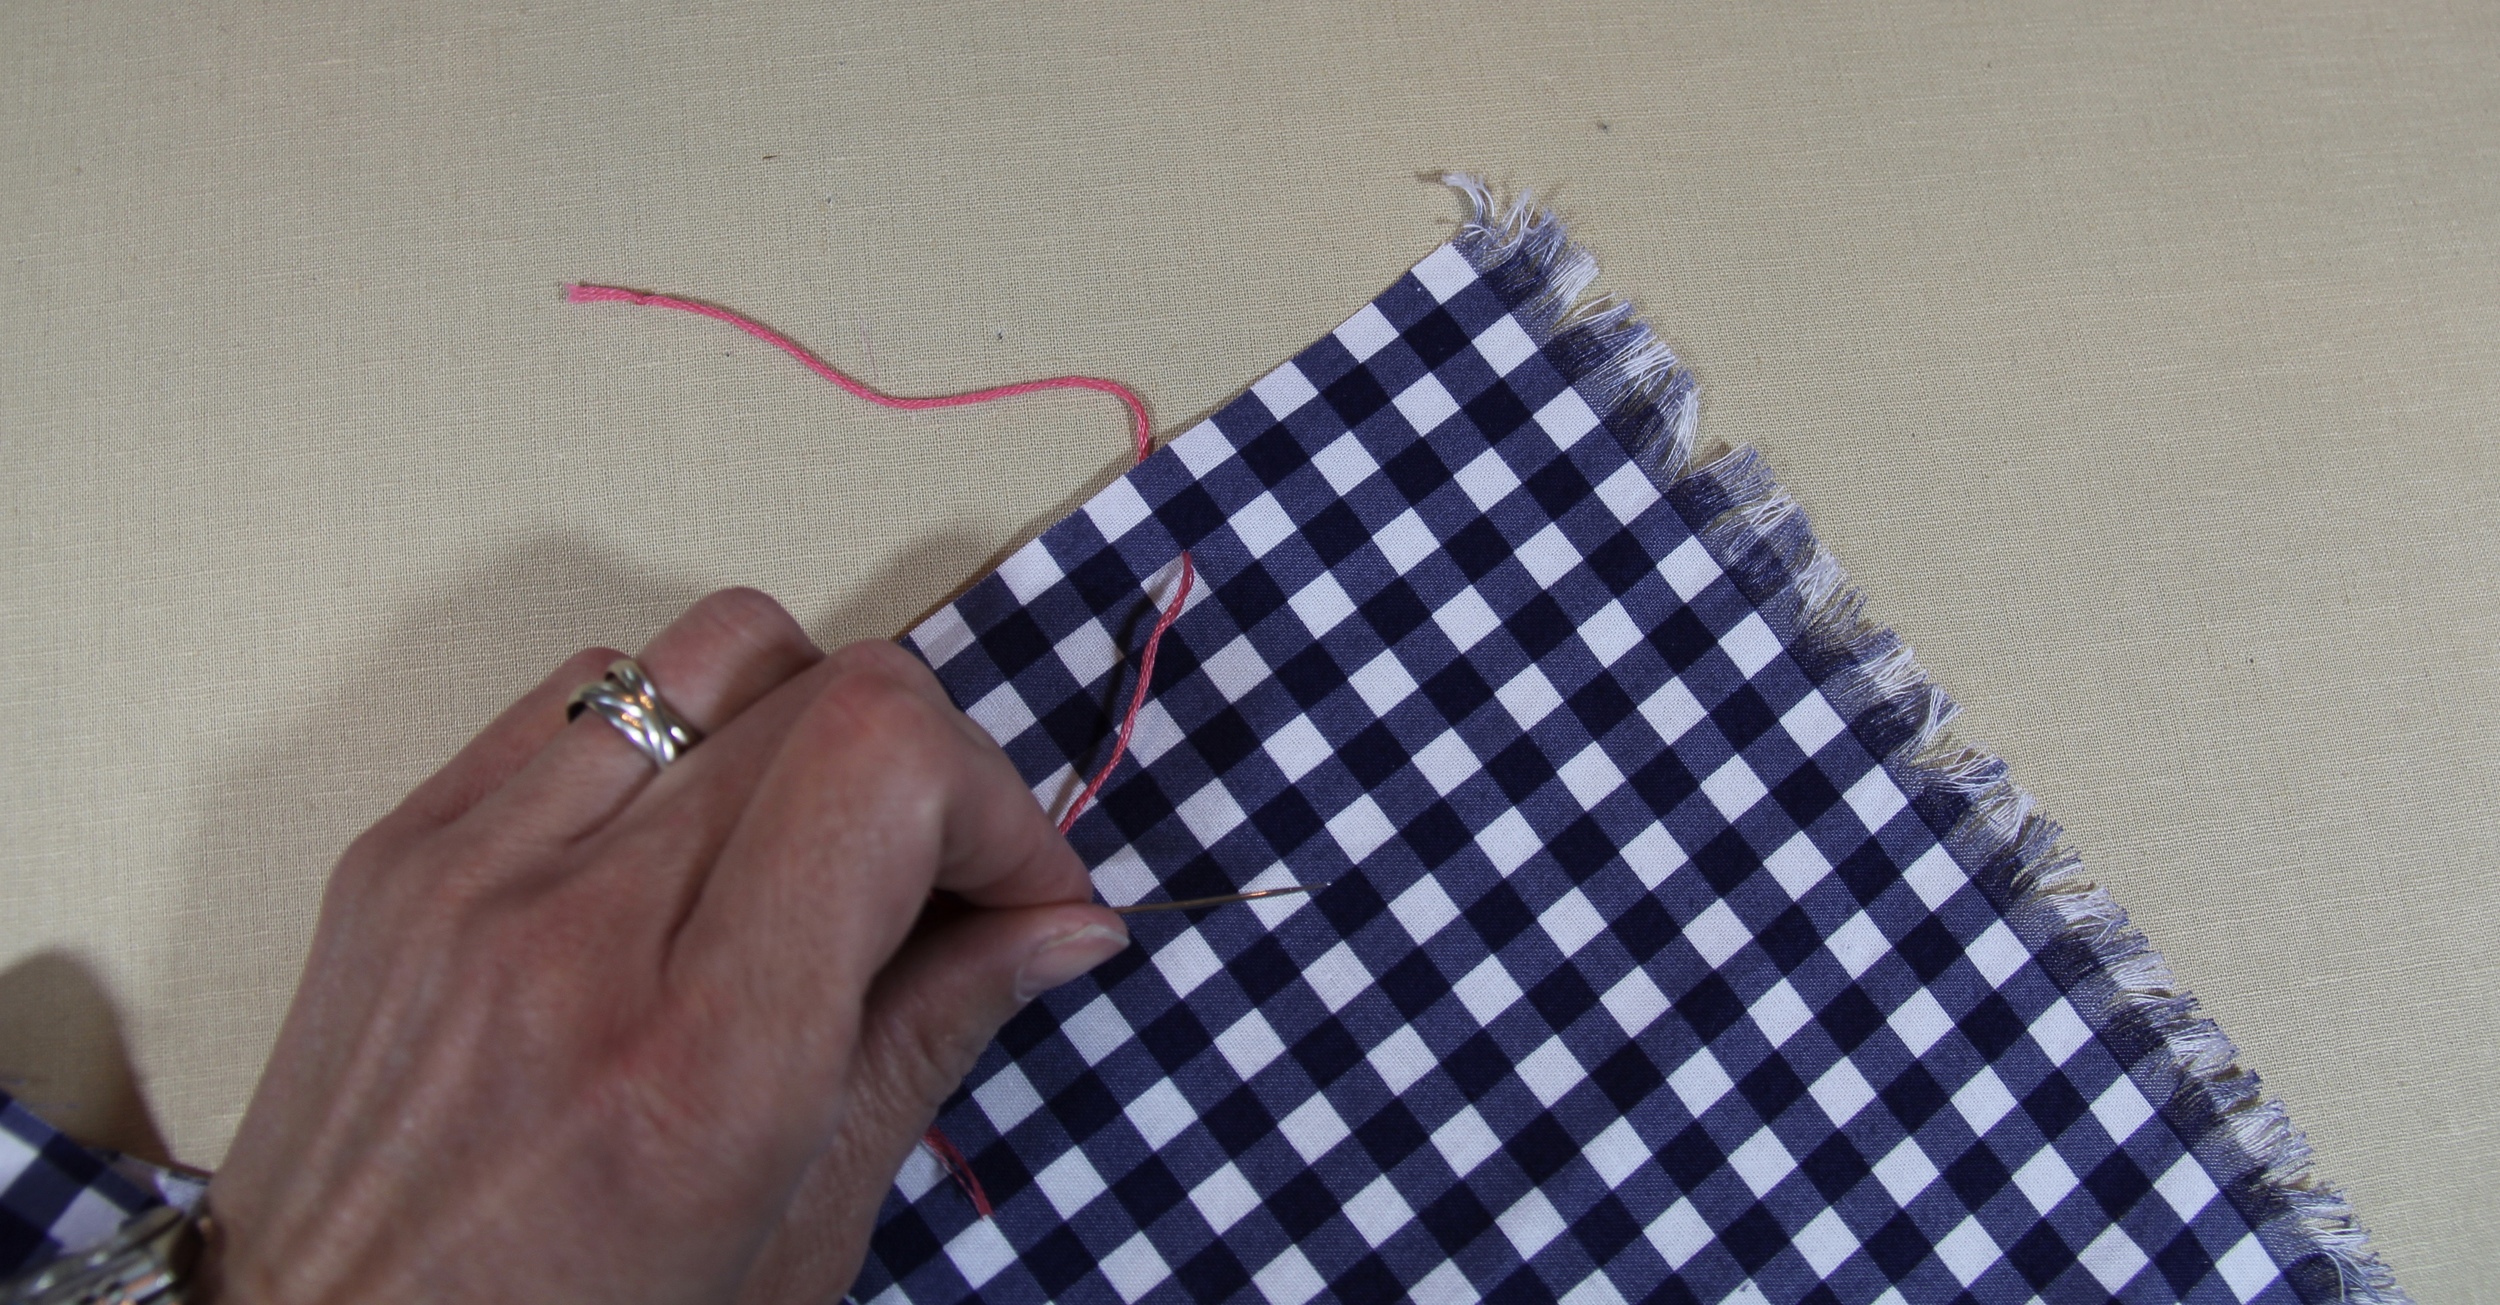
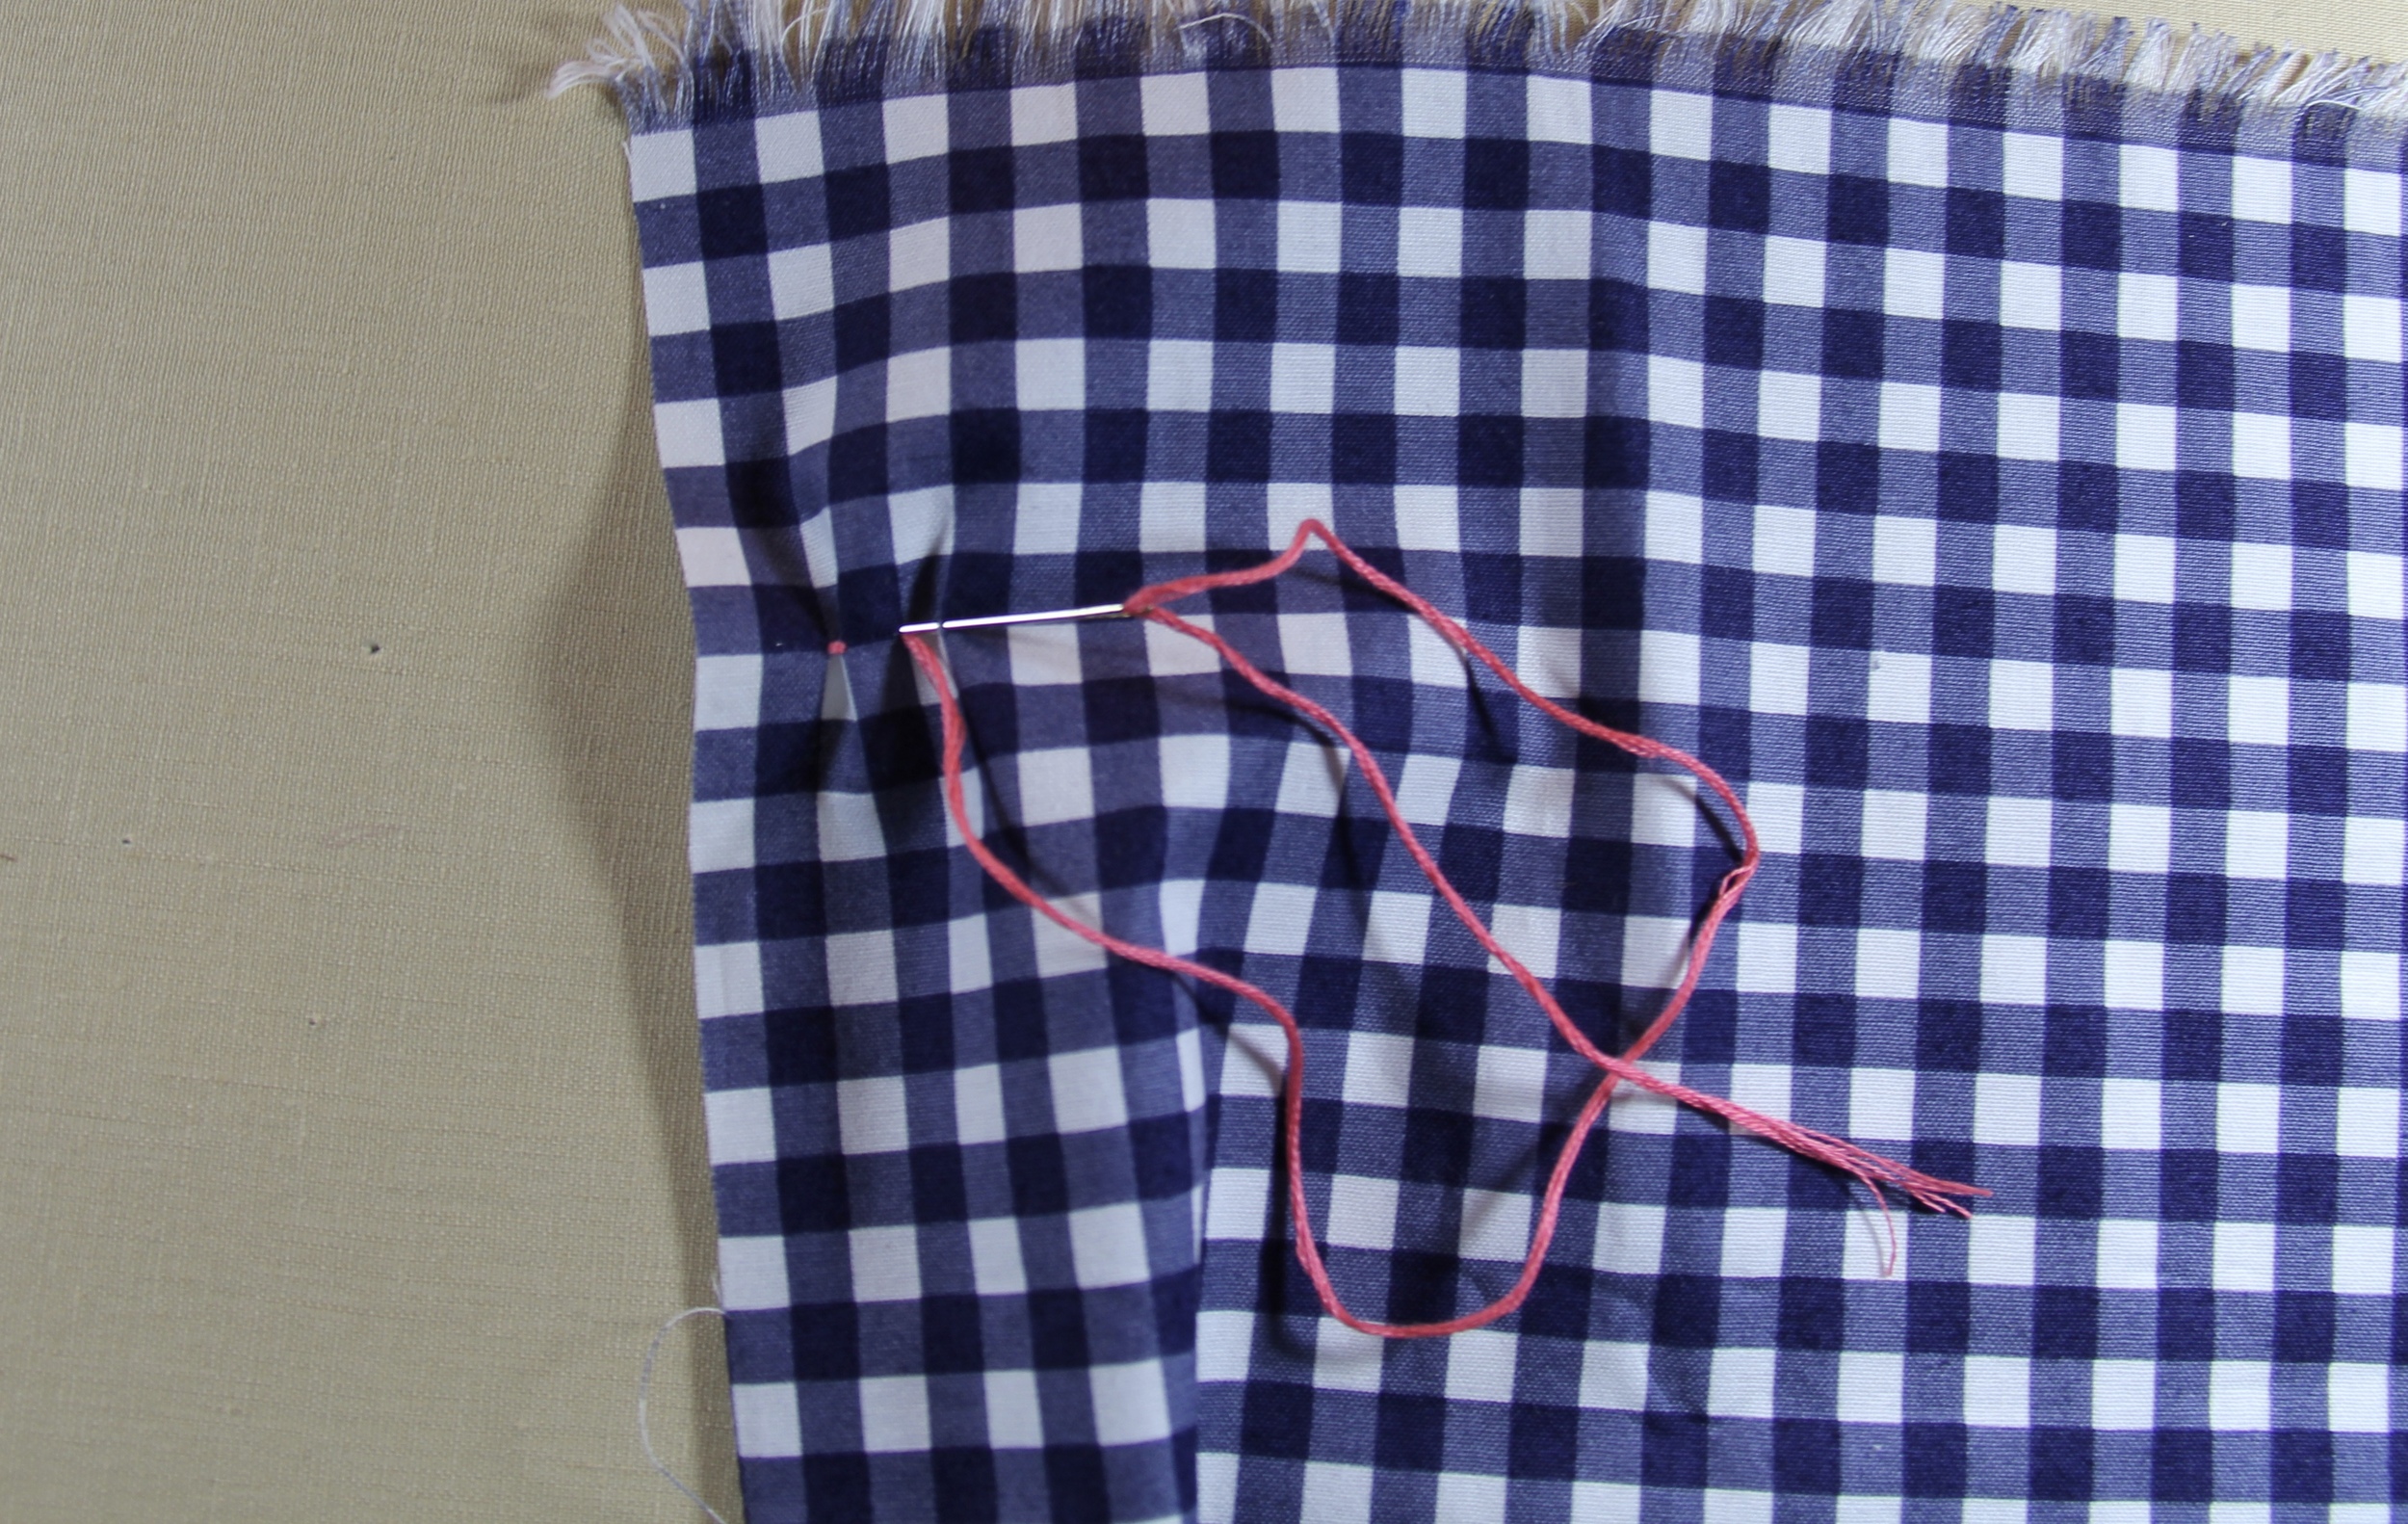
How to Hand Sew a Diamond Smocking Stitch
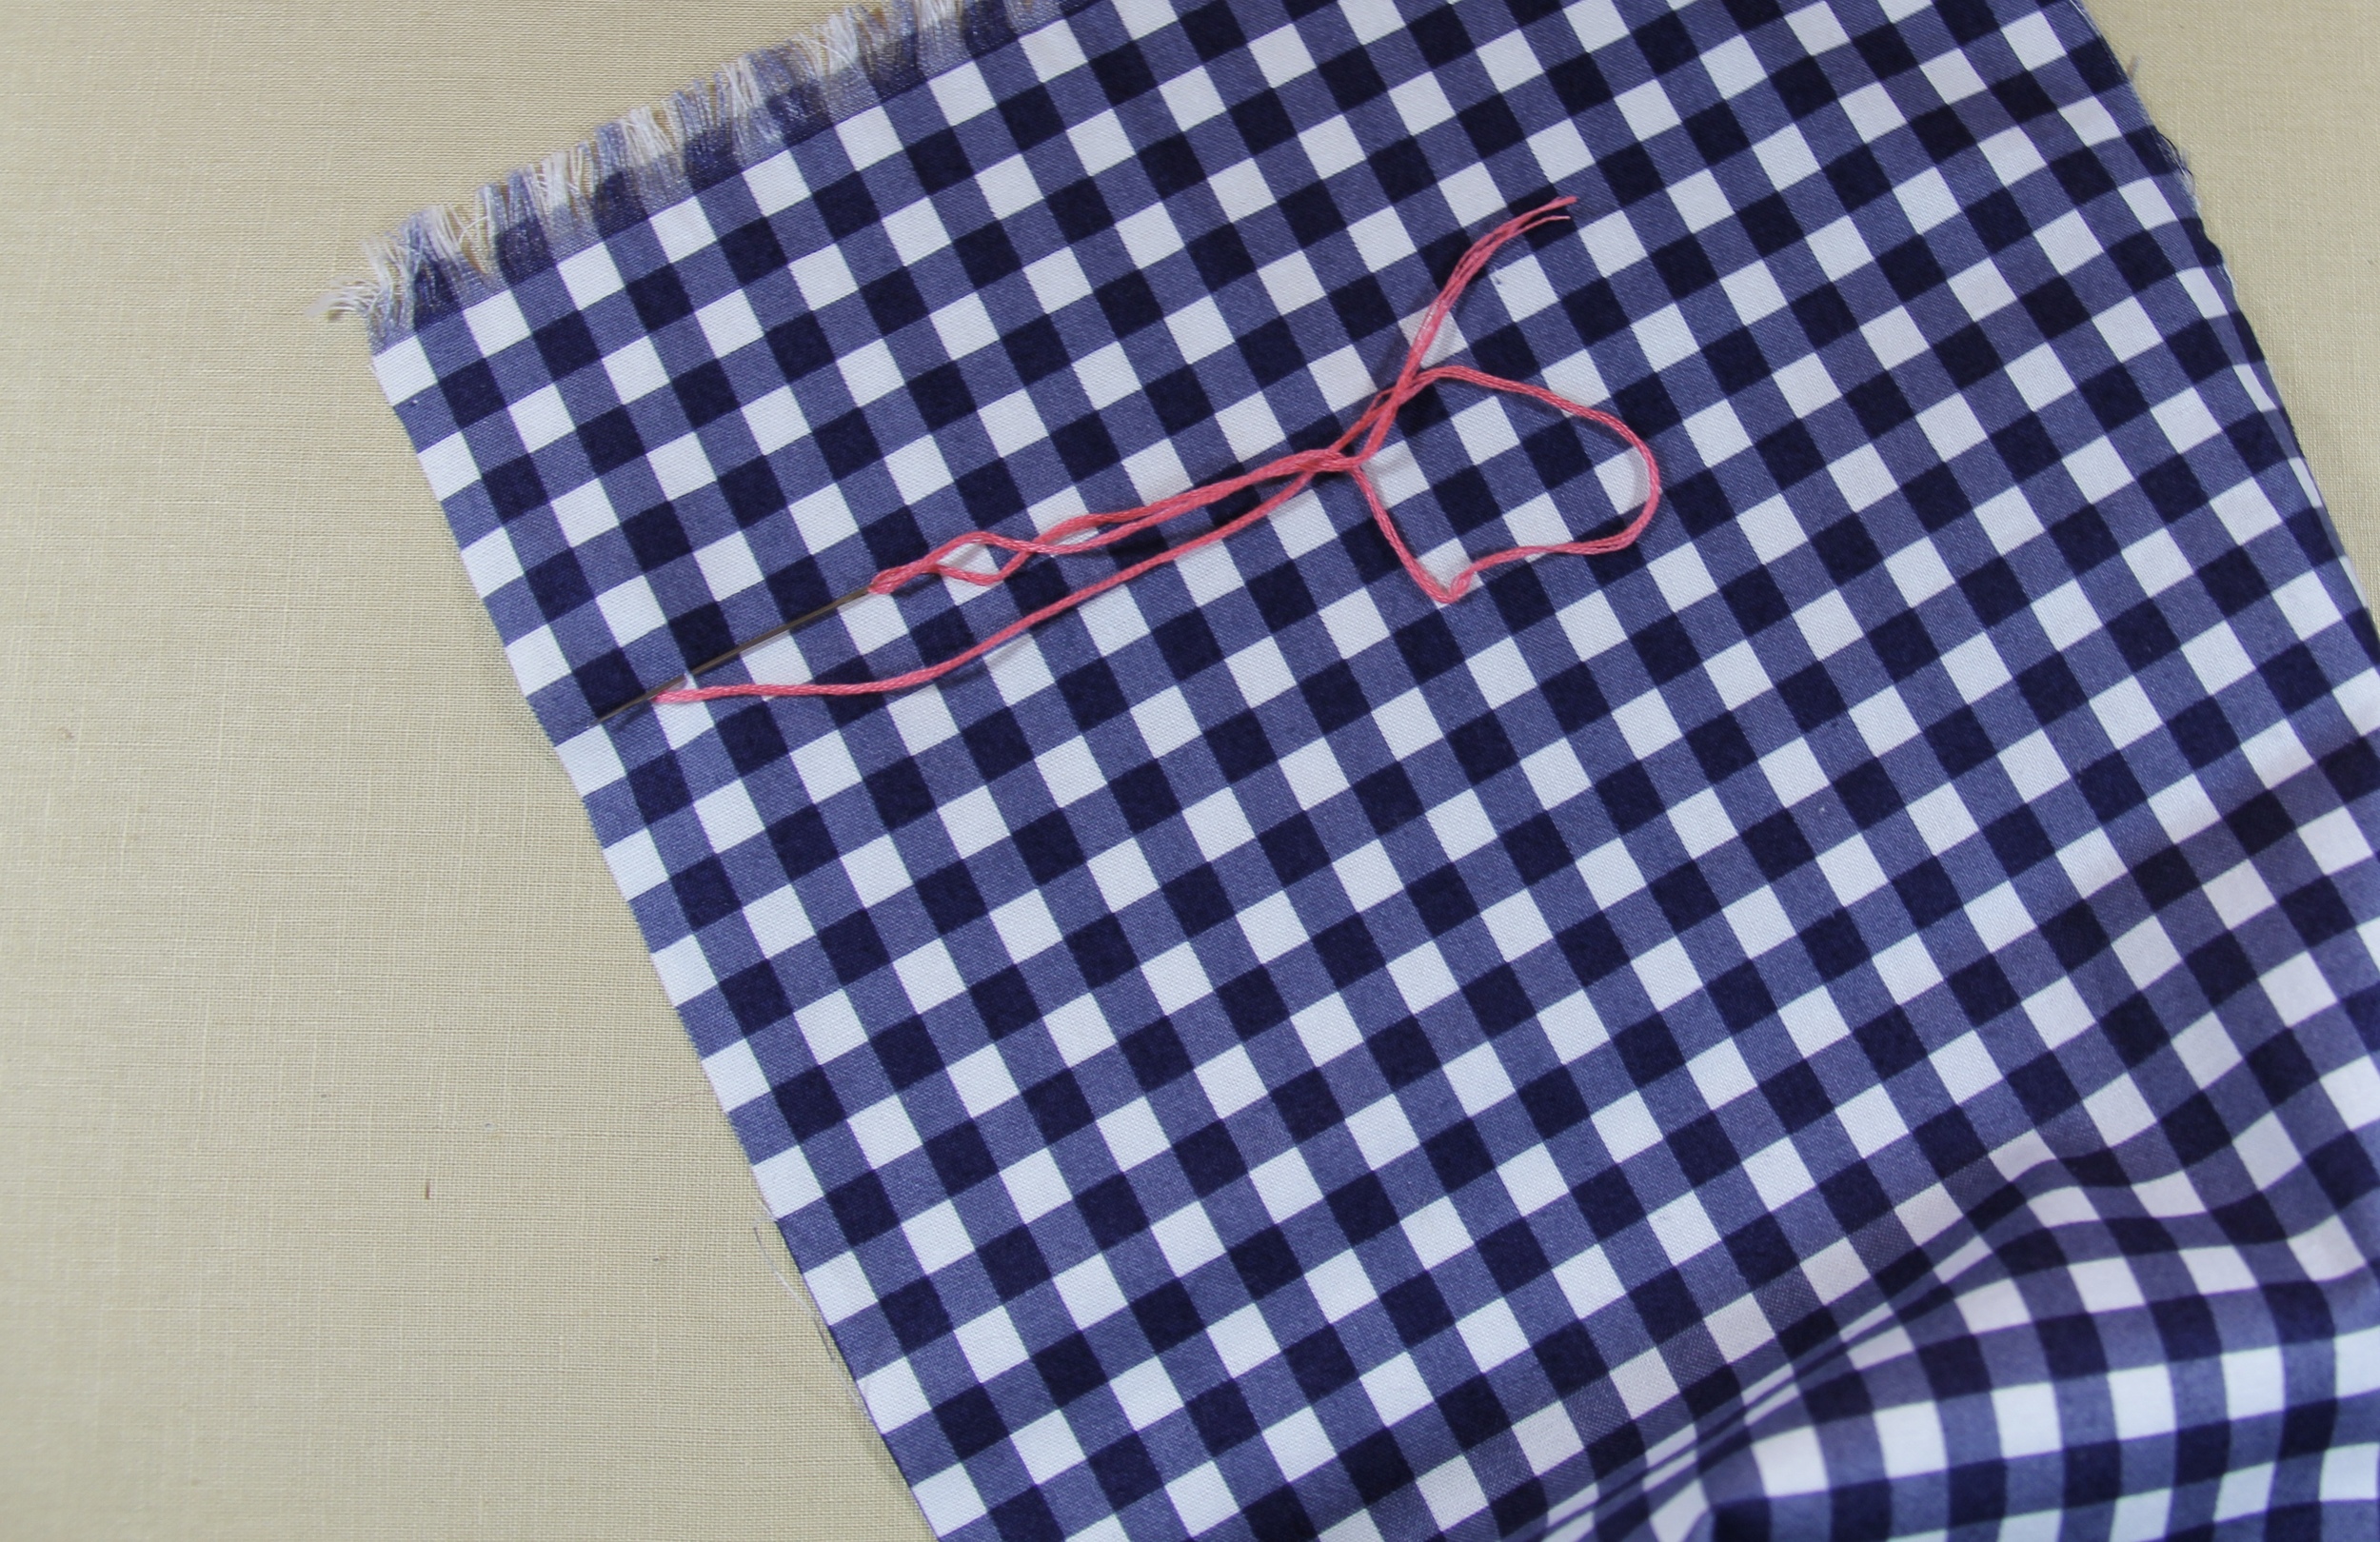
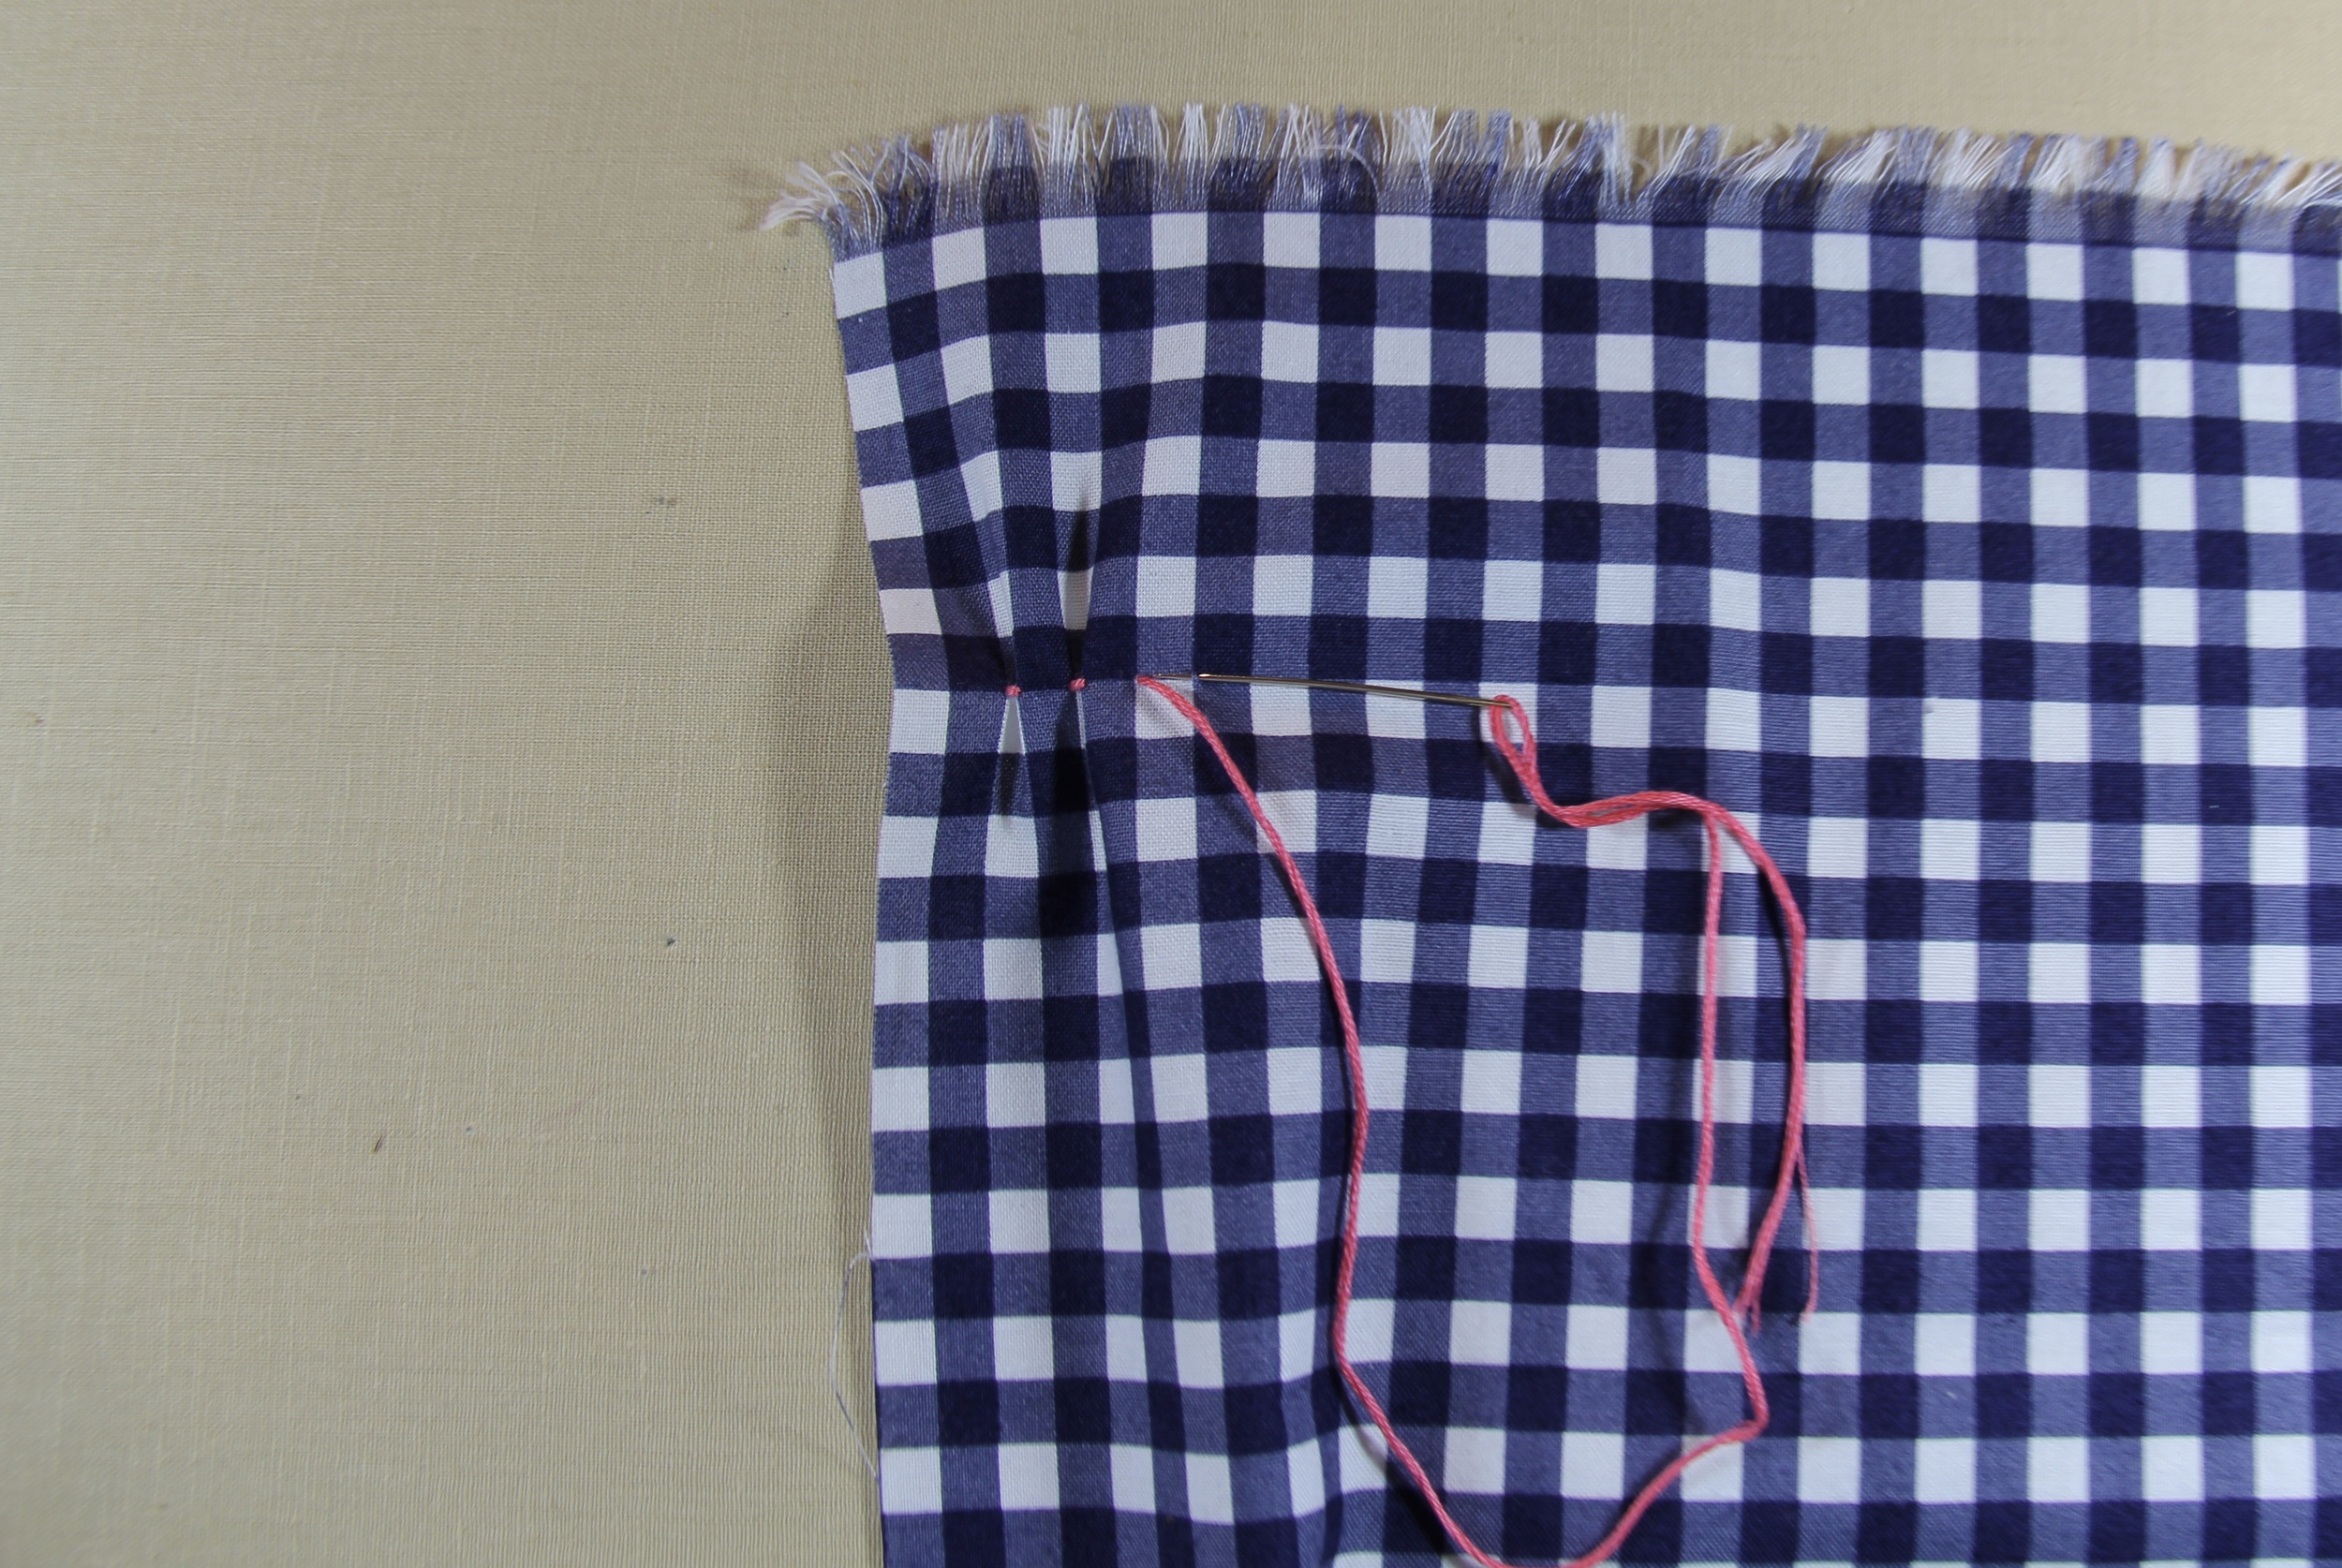
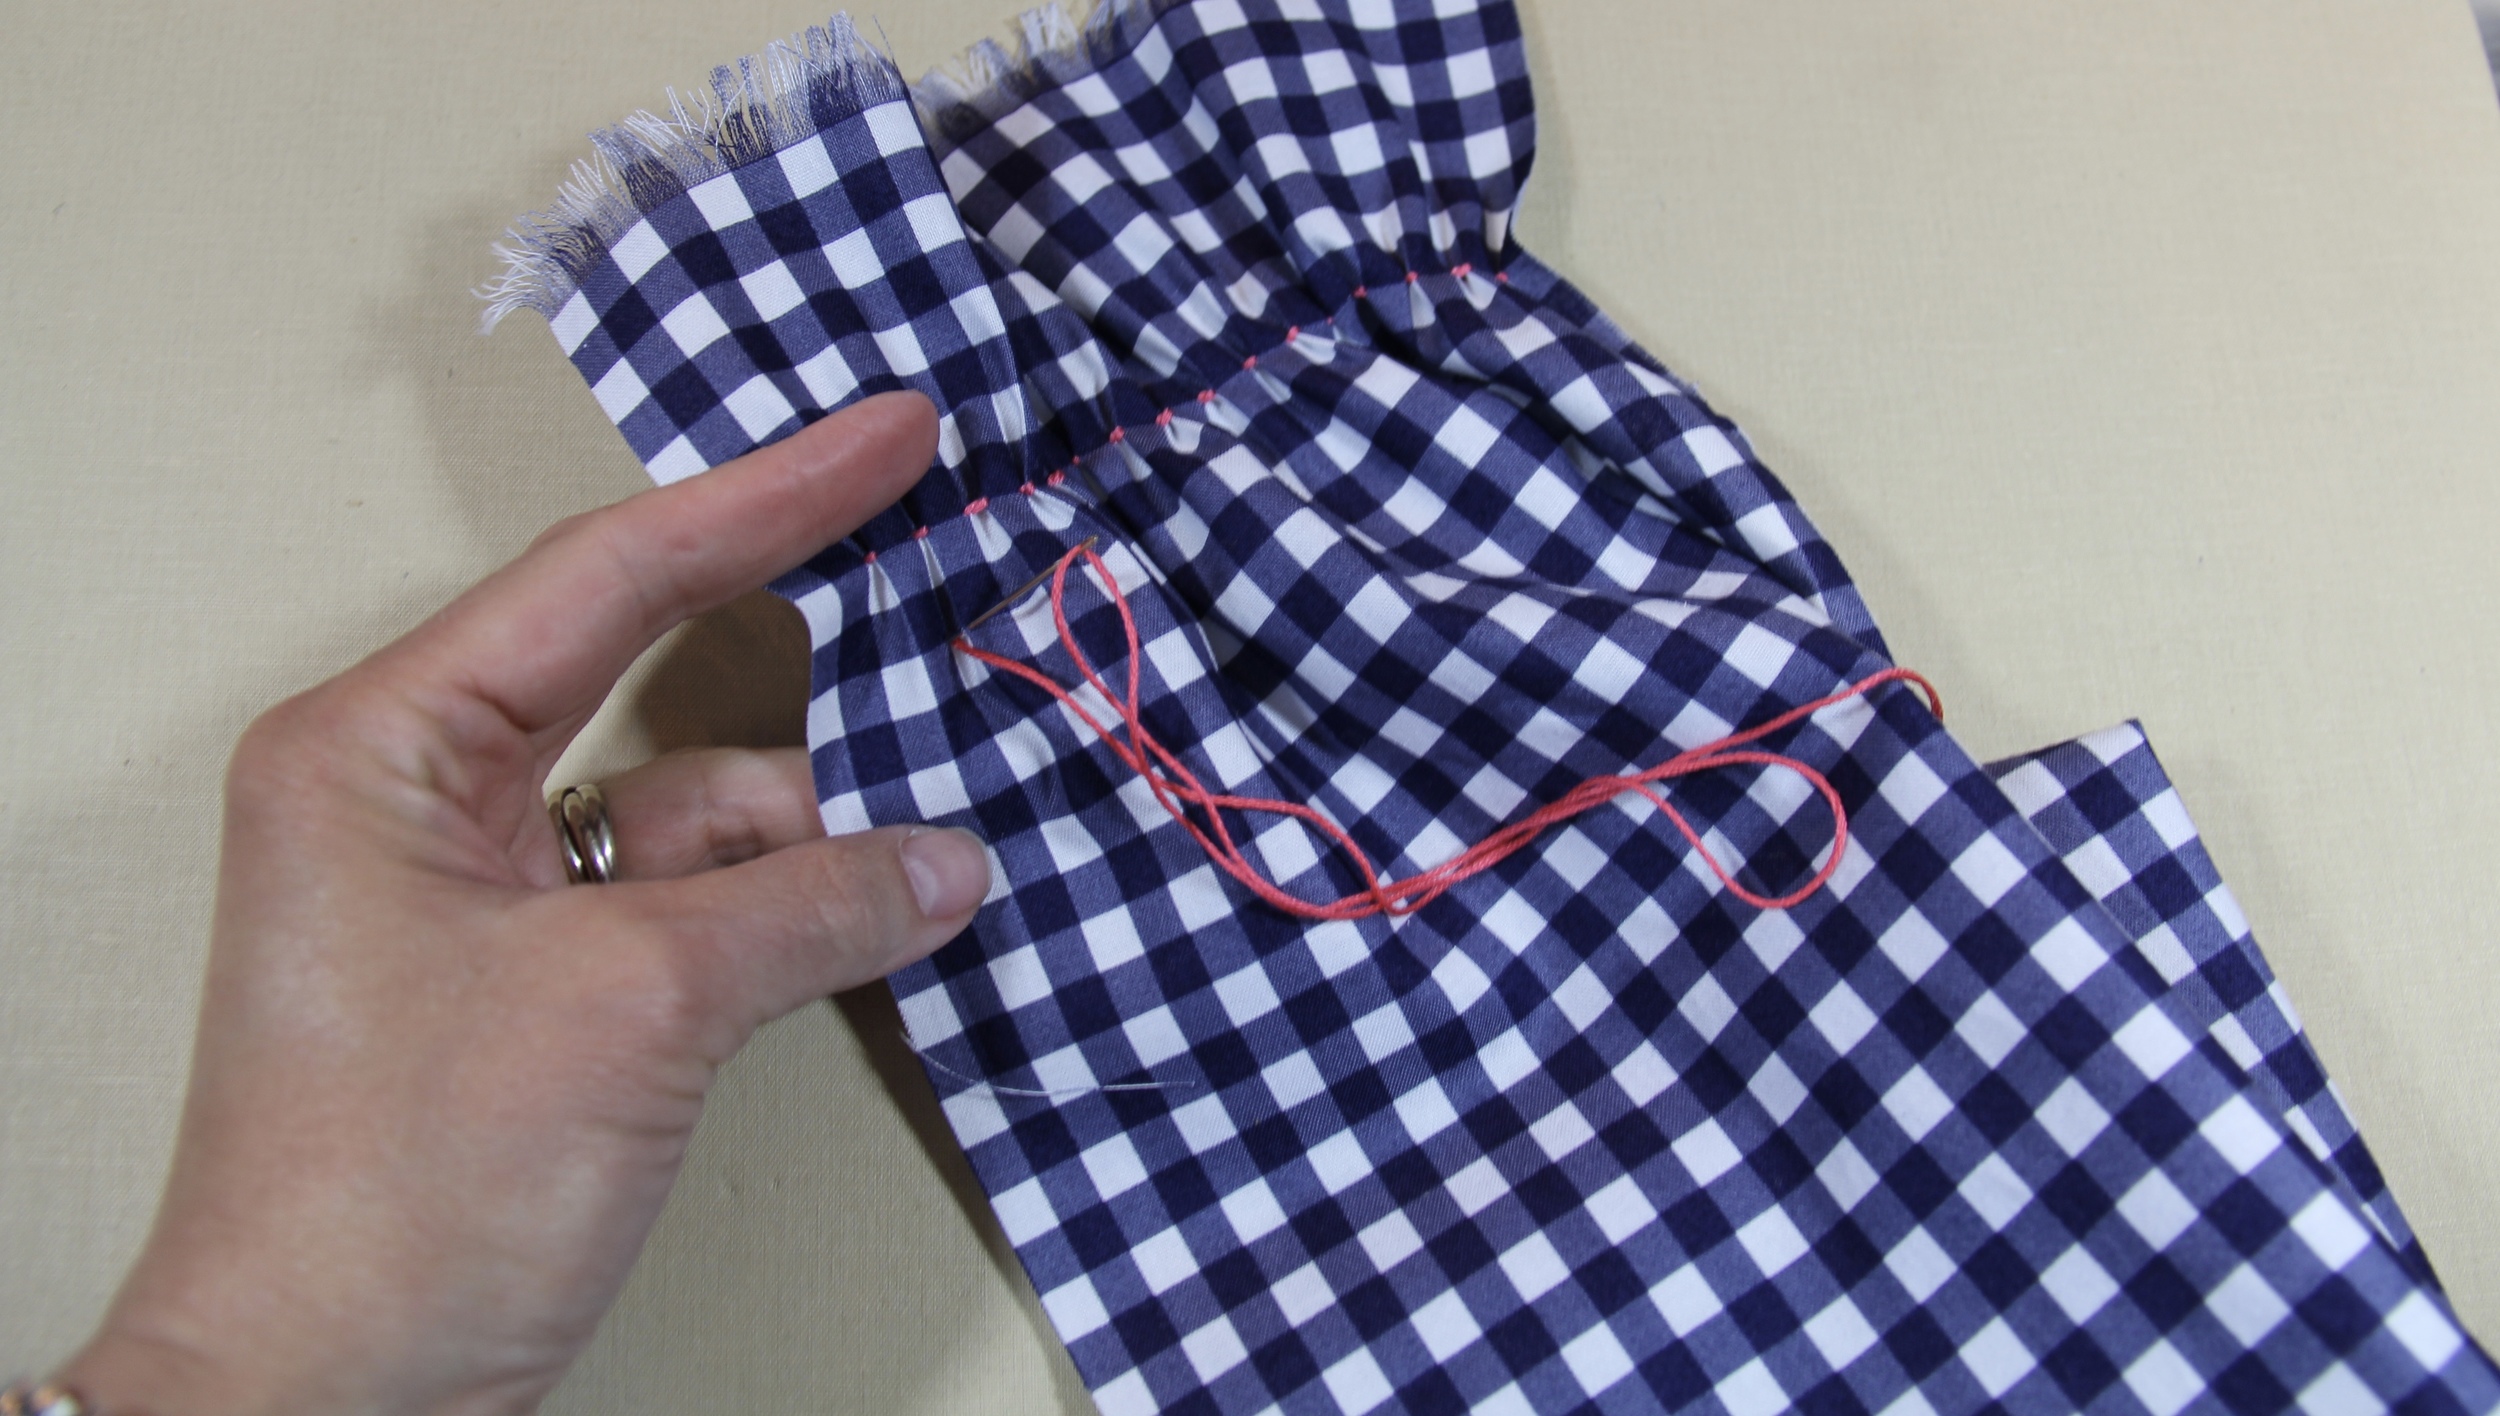
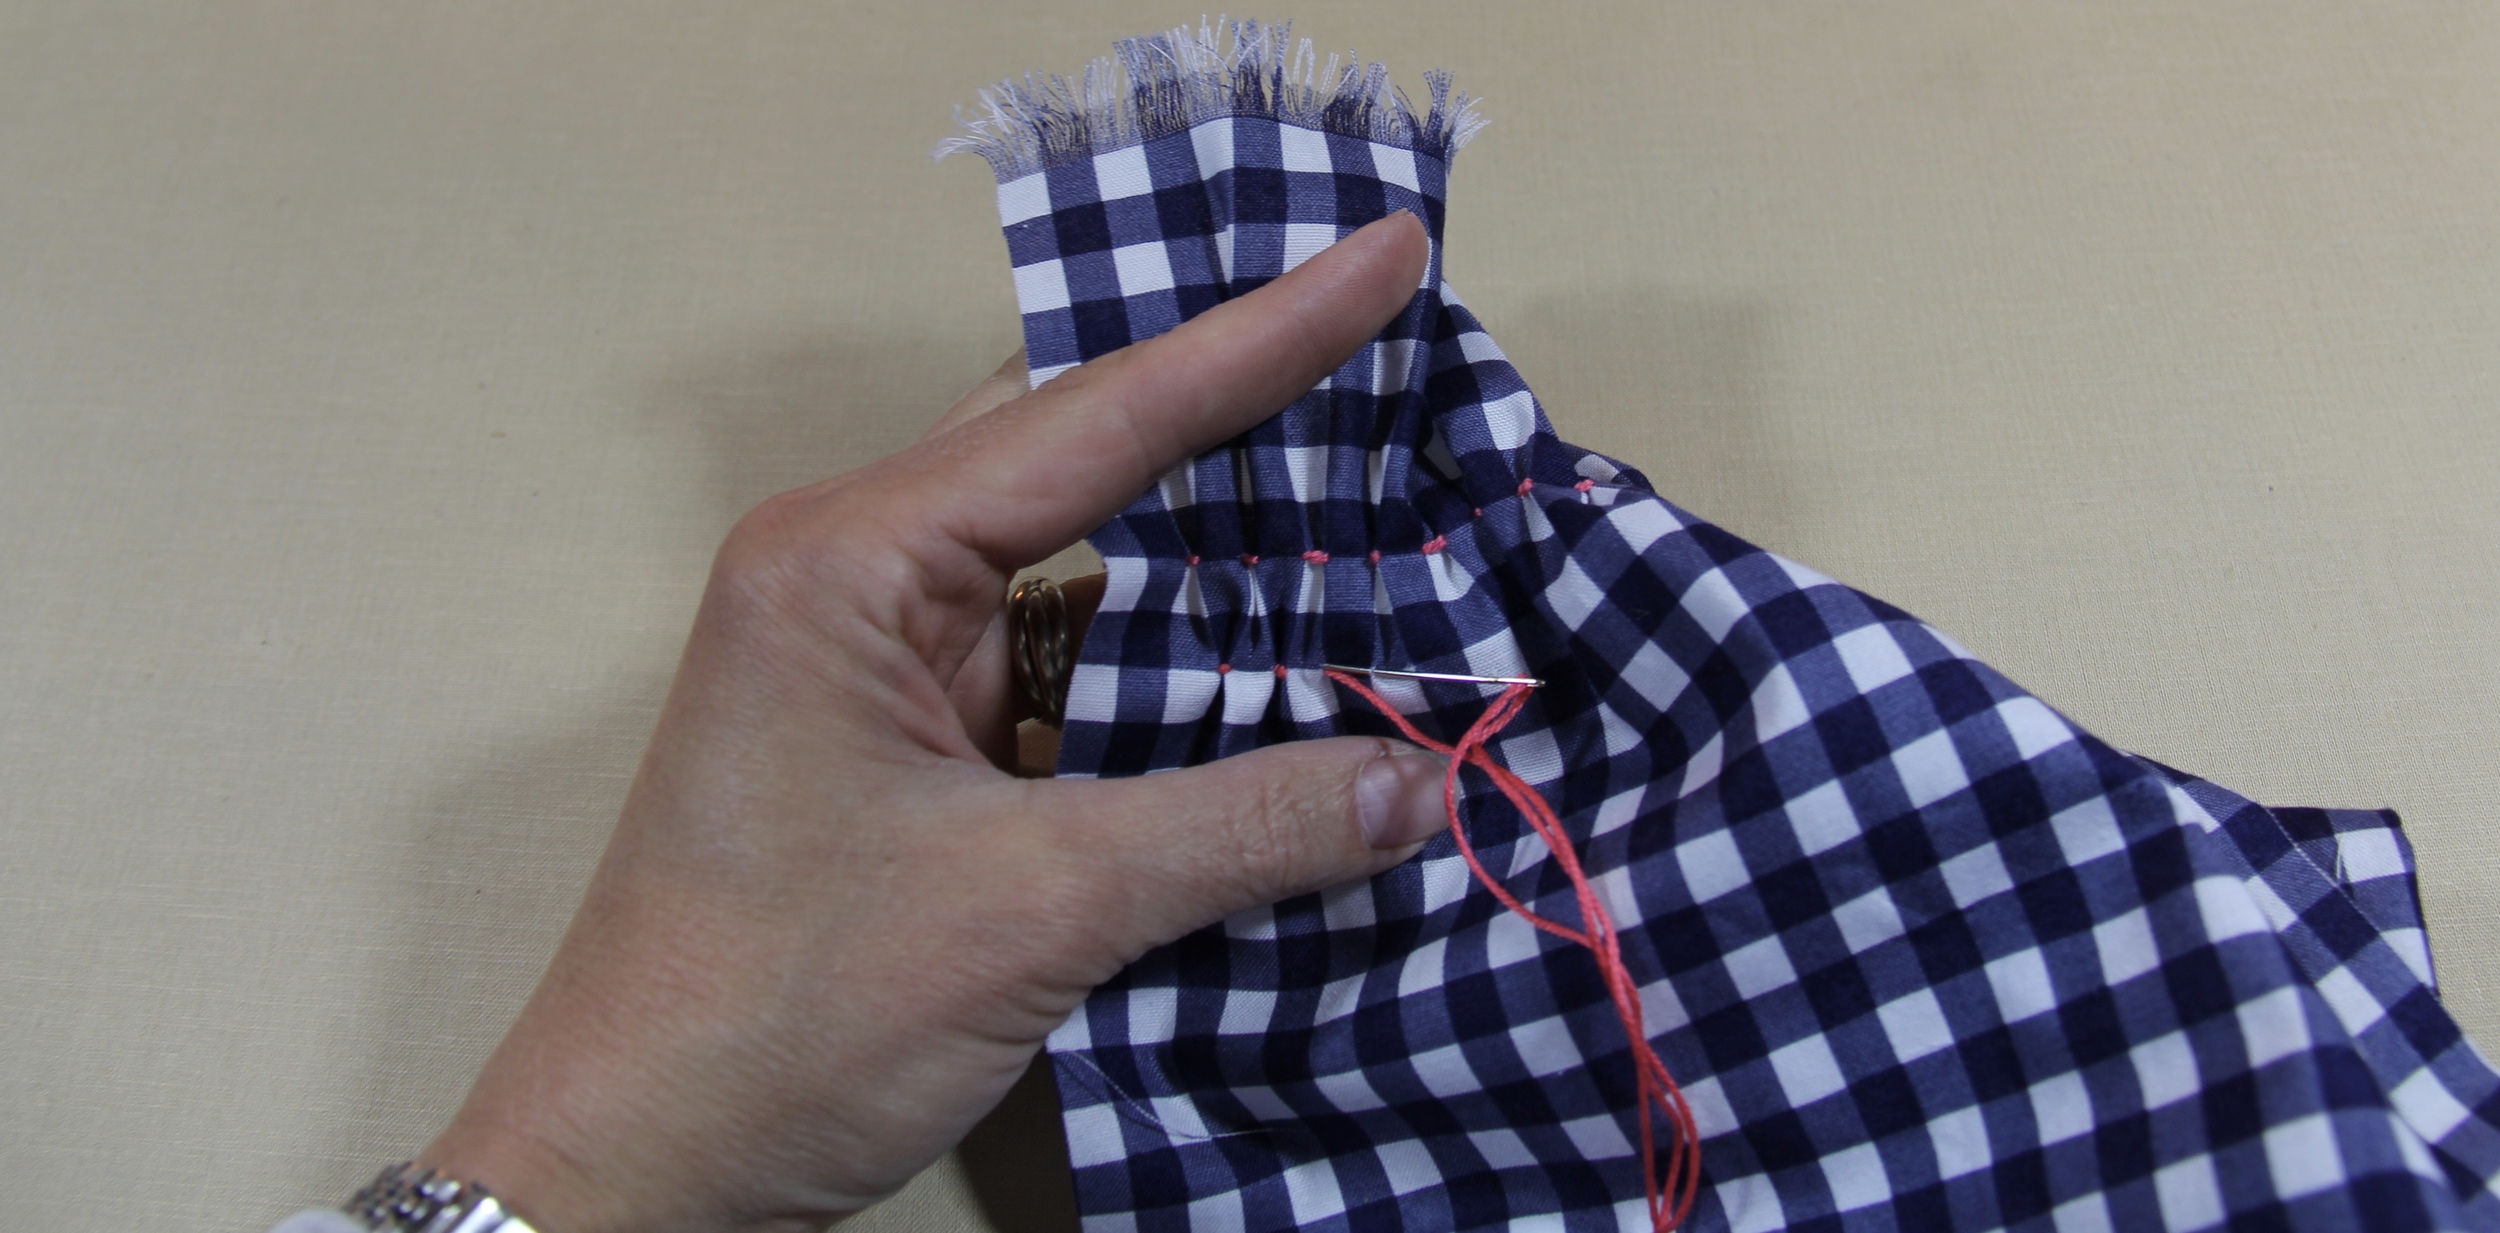
We are going to use a modified Diamond Smocking Stitch. This stitch is worked in a honeycomb pattern over several rows. To begin, cut a length of floss about 18" long, thread the needle and knot one end. If you are using gingham, bring the needle through the back of the fabric 8 squares down and 2 squares from the edge. ( If you choose to use another fabric, begin 2" down and 1/2" in. and make a mark every 1/2"in. across the row.) Pull through the front, stopping when you feel the knot. Move the needle over one square to the right (or 1/4"), picking up two small stitches 1/4" apart. Pull the needle and thread all the way through to make the first pleat. Push the needle from front to back through the right side of the stitch. Stitch one complete. Easy, right? Now skip the next square (or 1/4" inch) and bring the needle through the back of the following top left corner. We will continue this stitch across the width of the scarf.
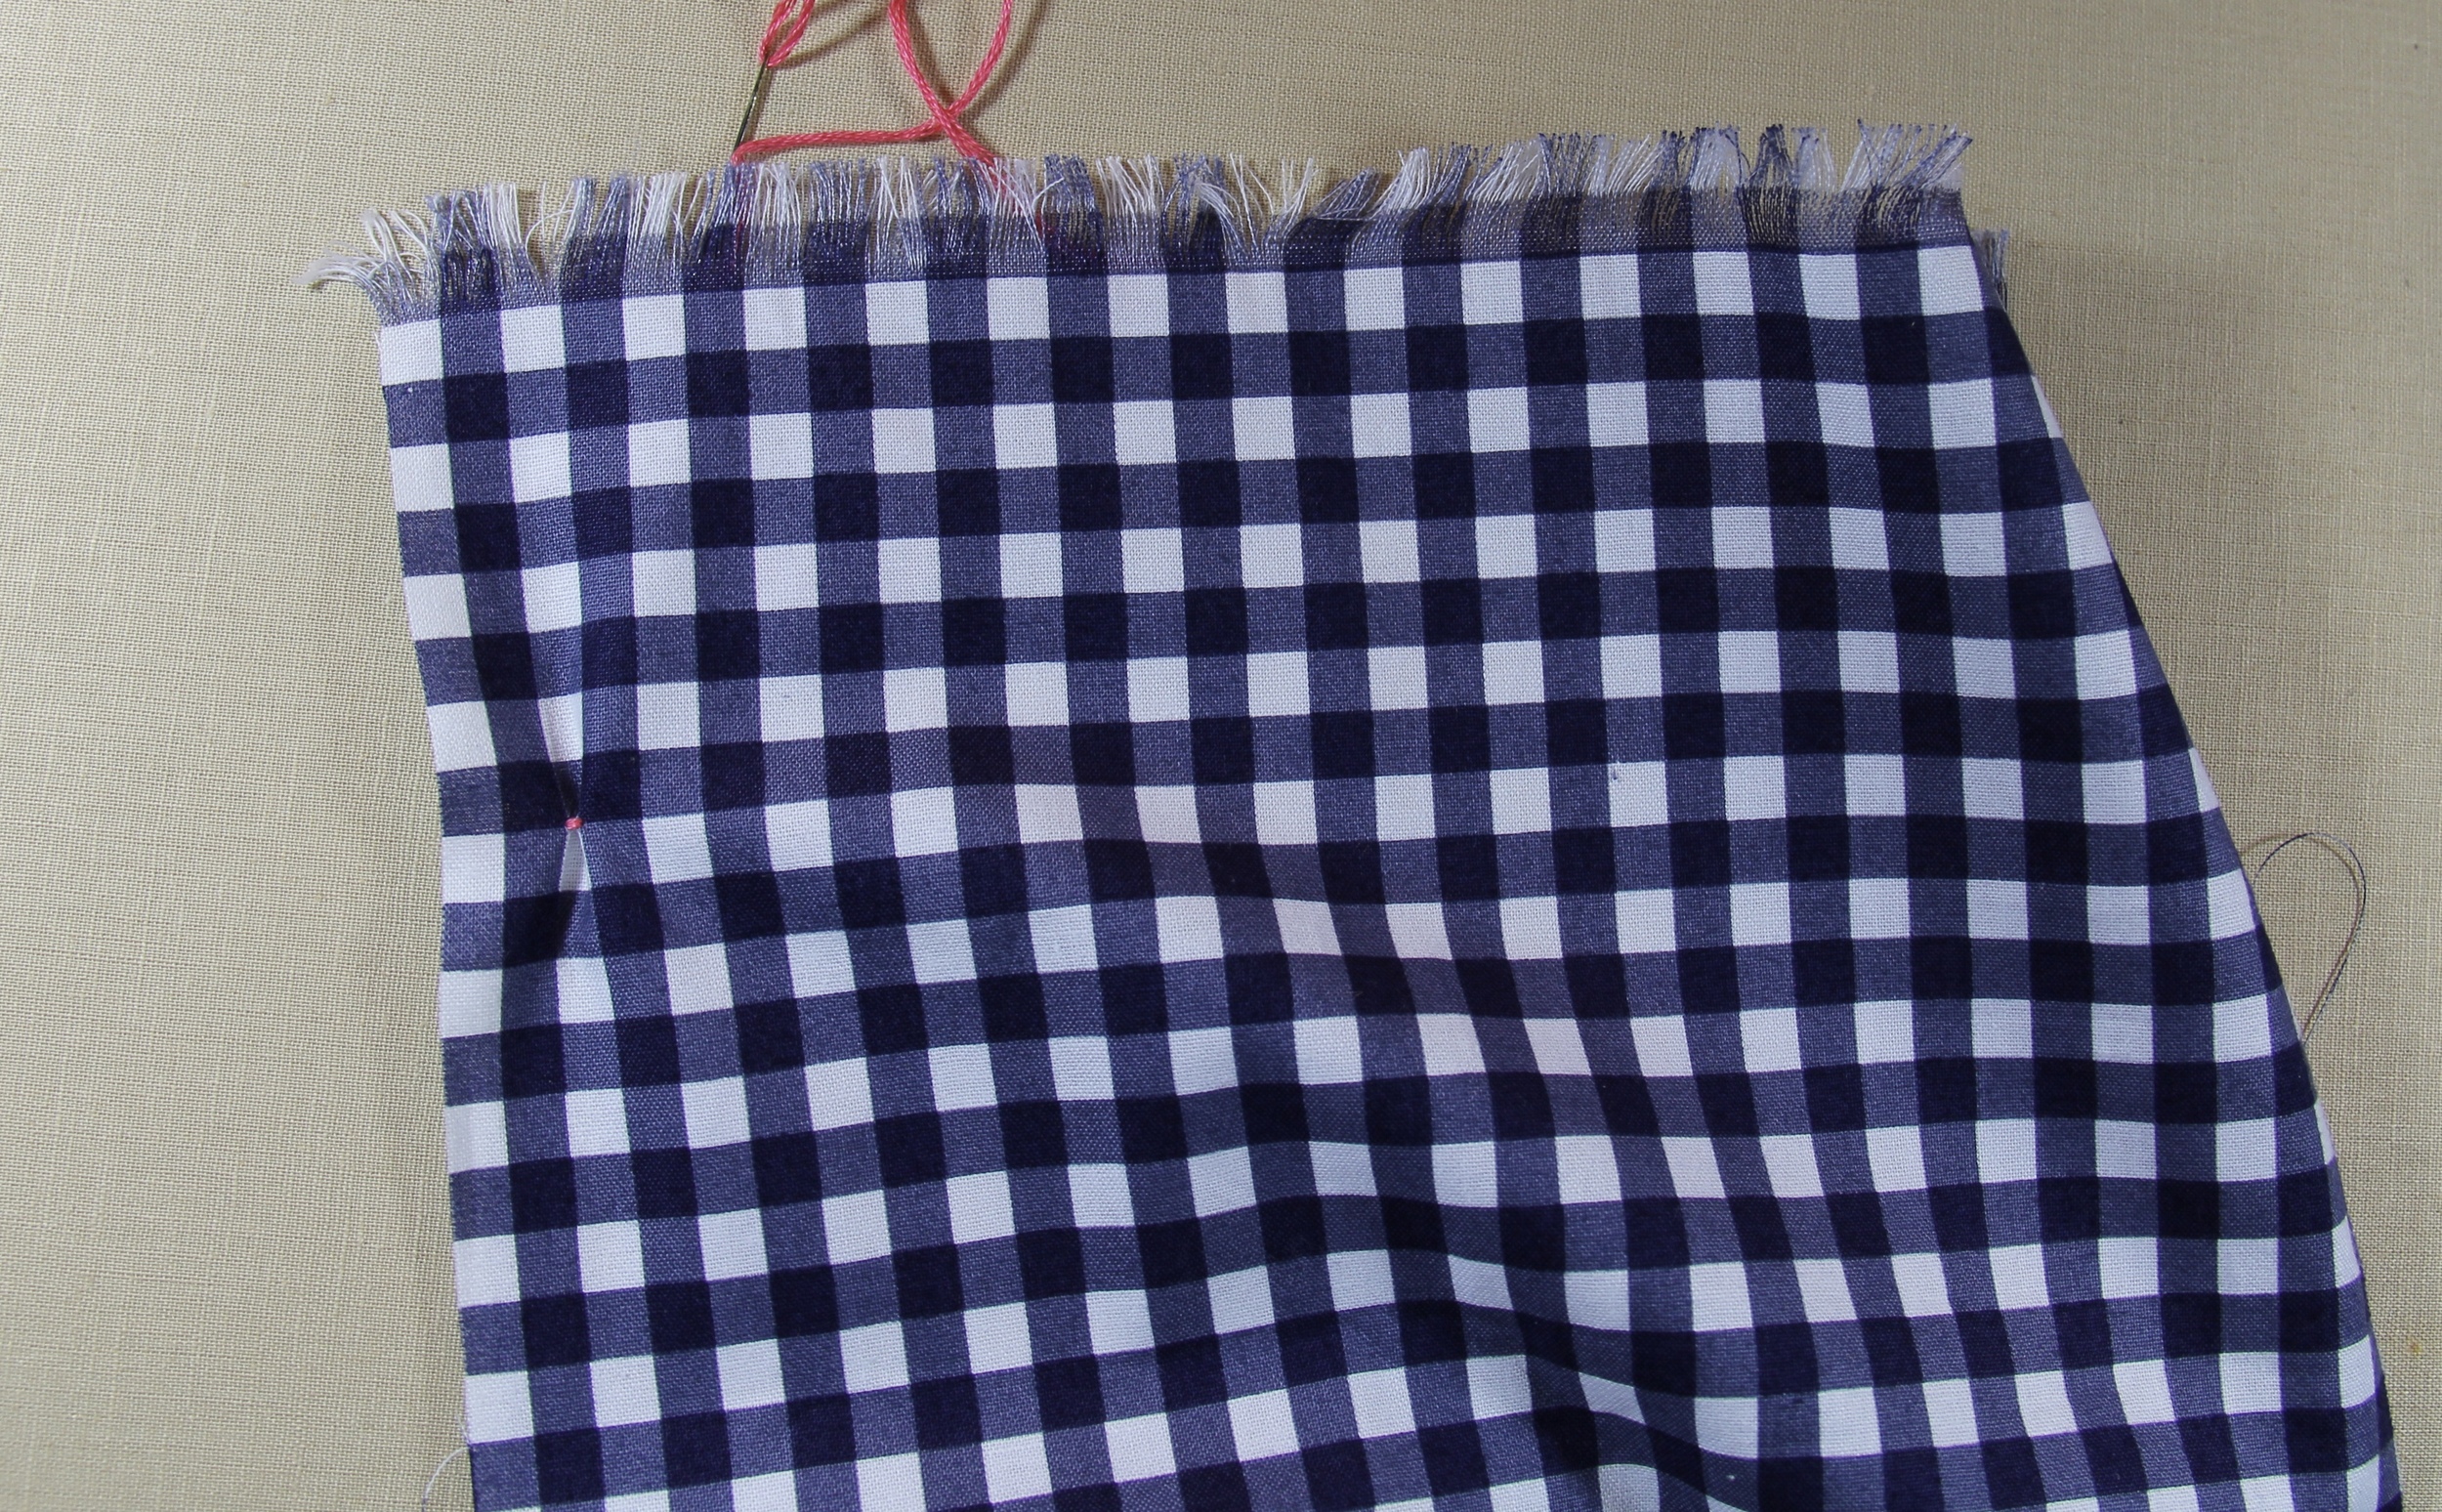
Second Row and every even remaining row
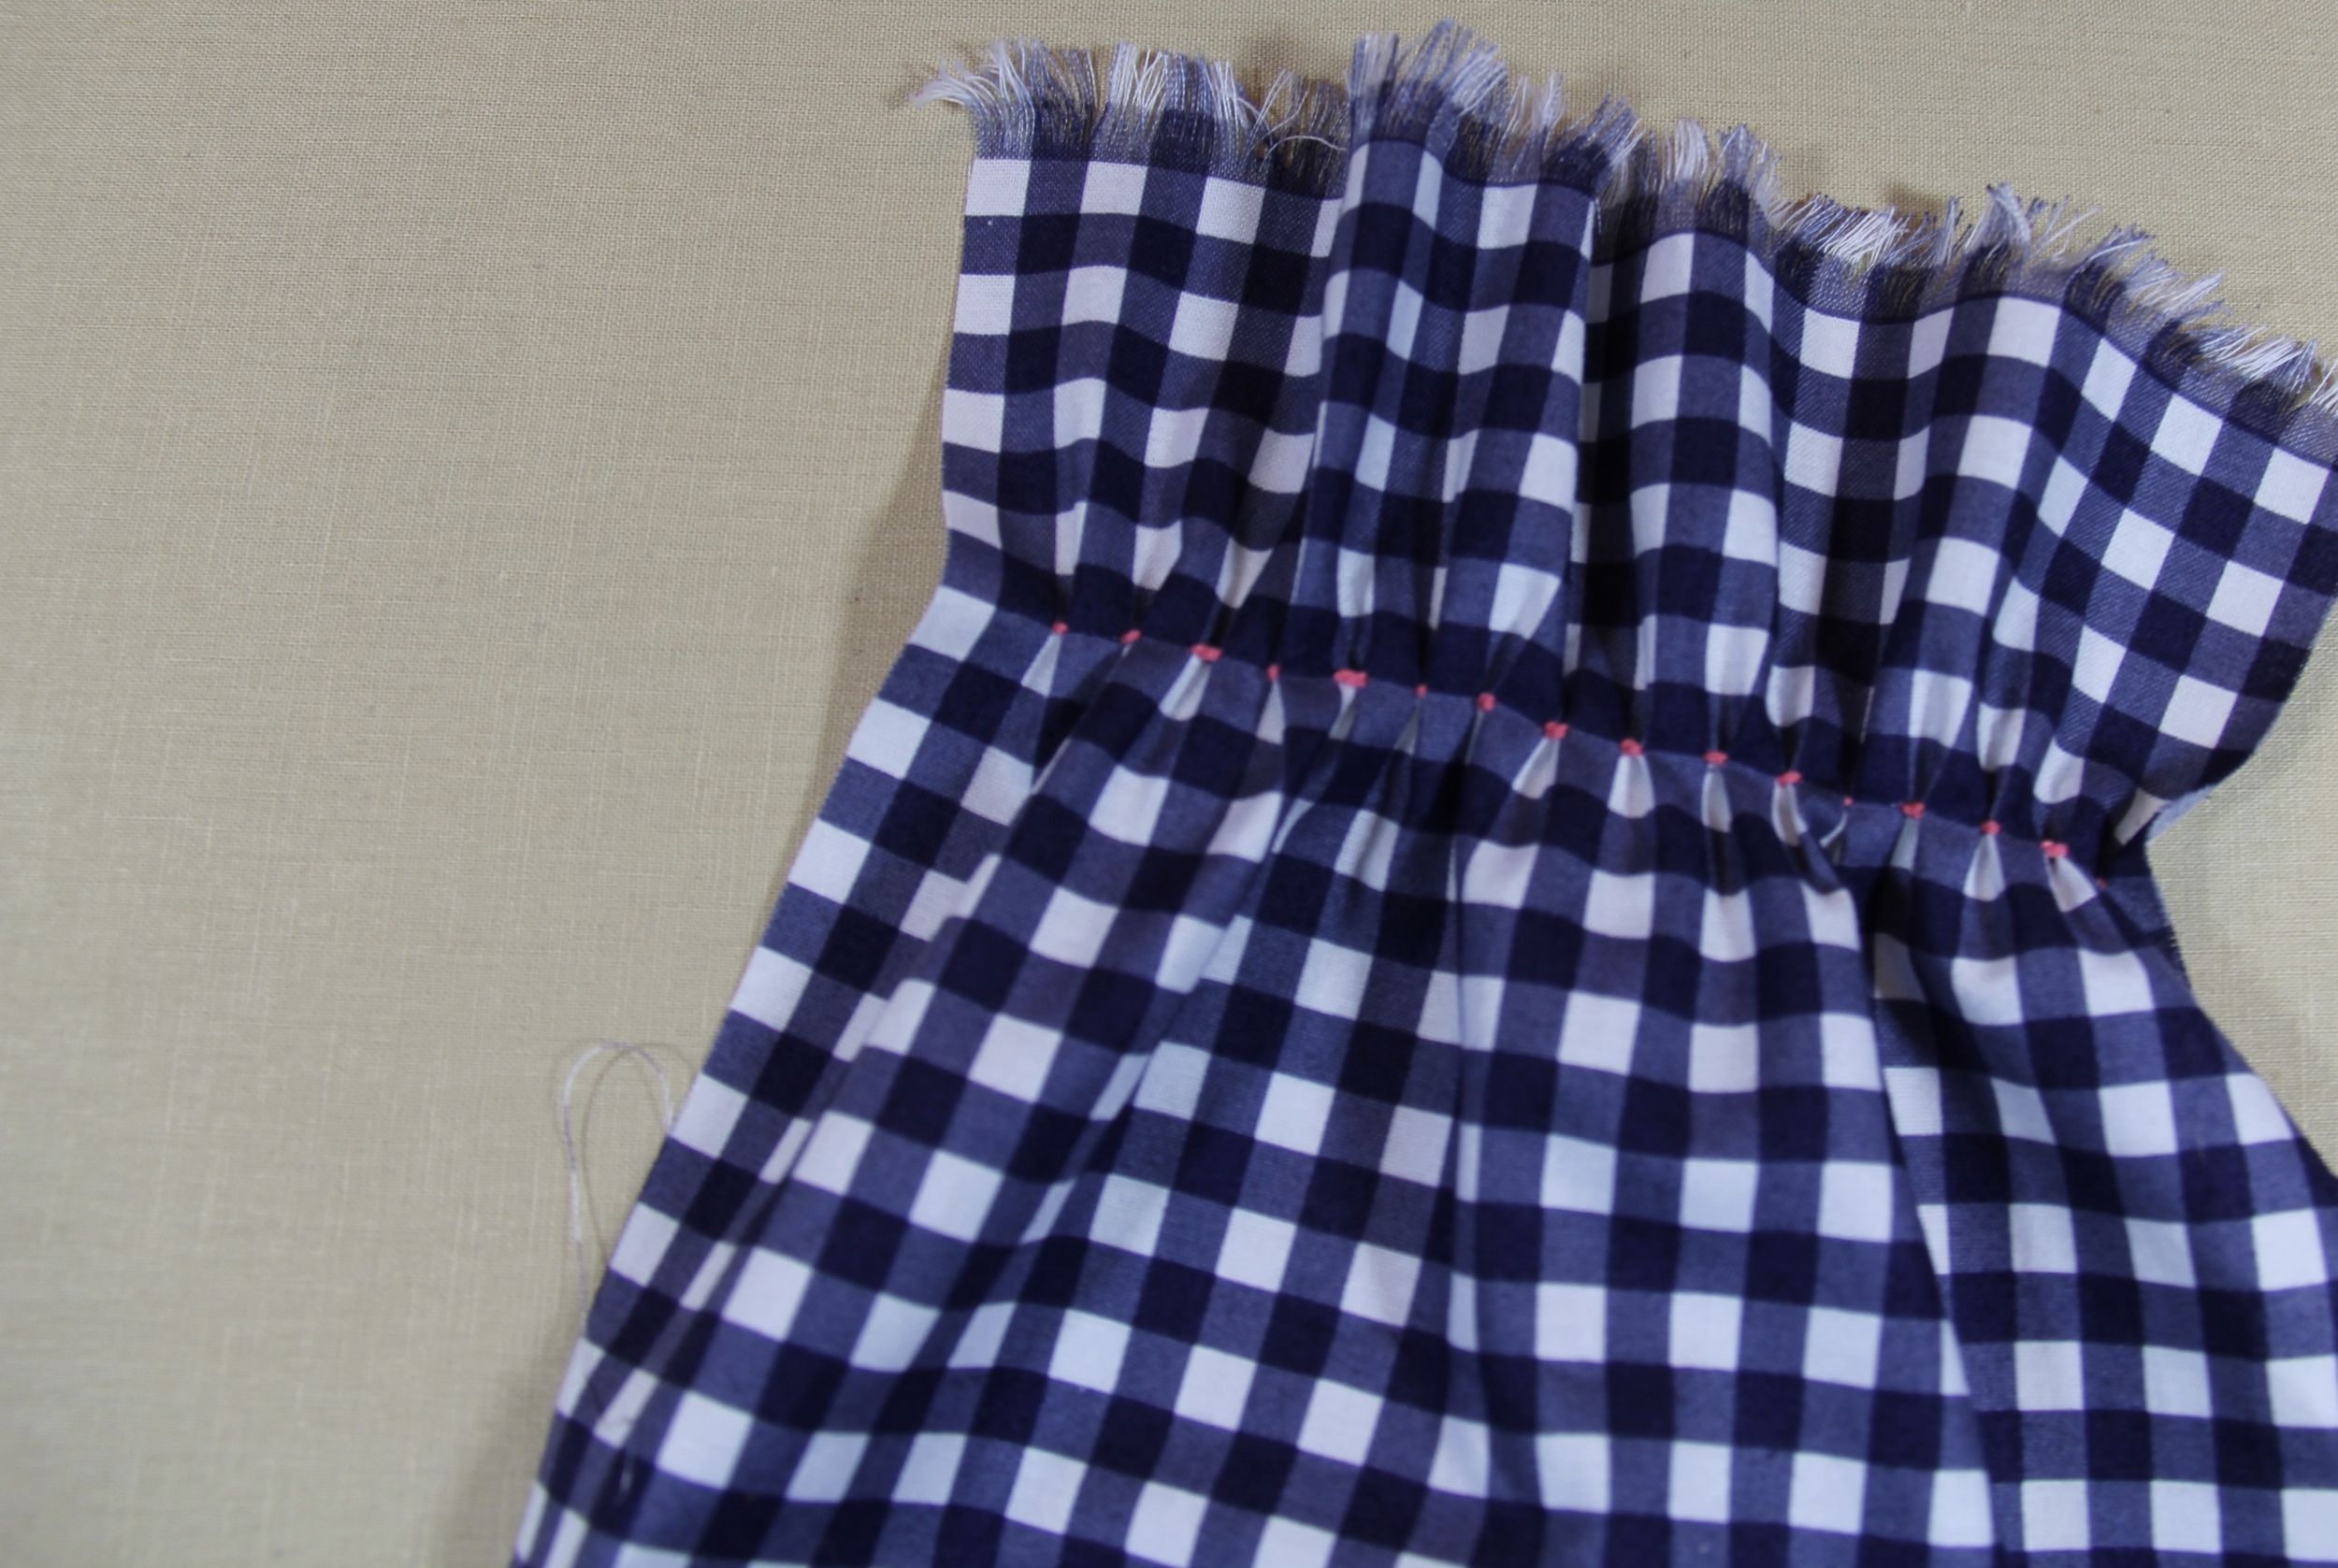
Skip two full squares or 1/2" inch and begin at the top left corner of the 3rd full square down and 3rd square (3/4 inch) in from the first row of stitches and repeat the stitch . (If you aren't using gingham, mark your fabric every 1/2" across the row) End this row of stitches with one less stitch than on the row above.
Third Row and every odd remaining row
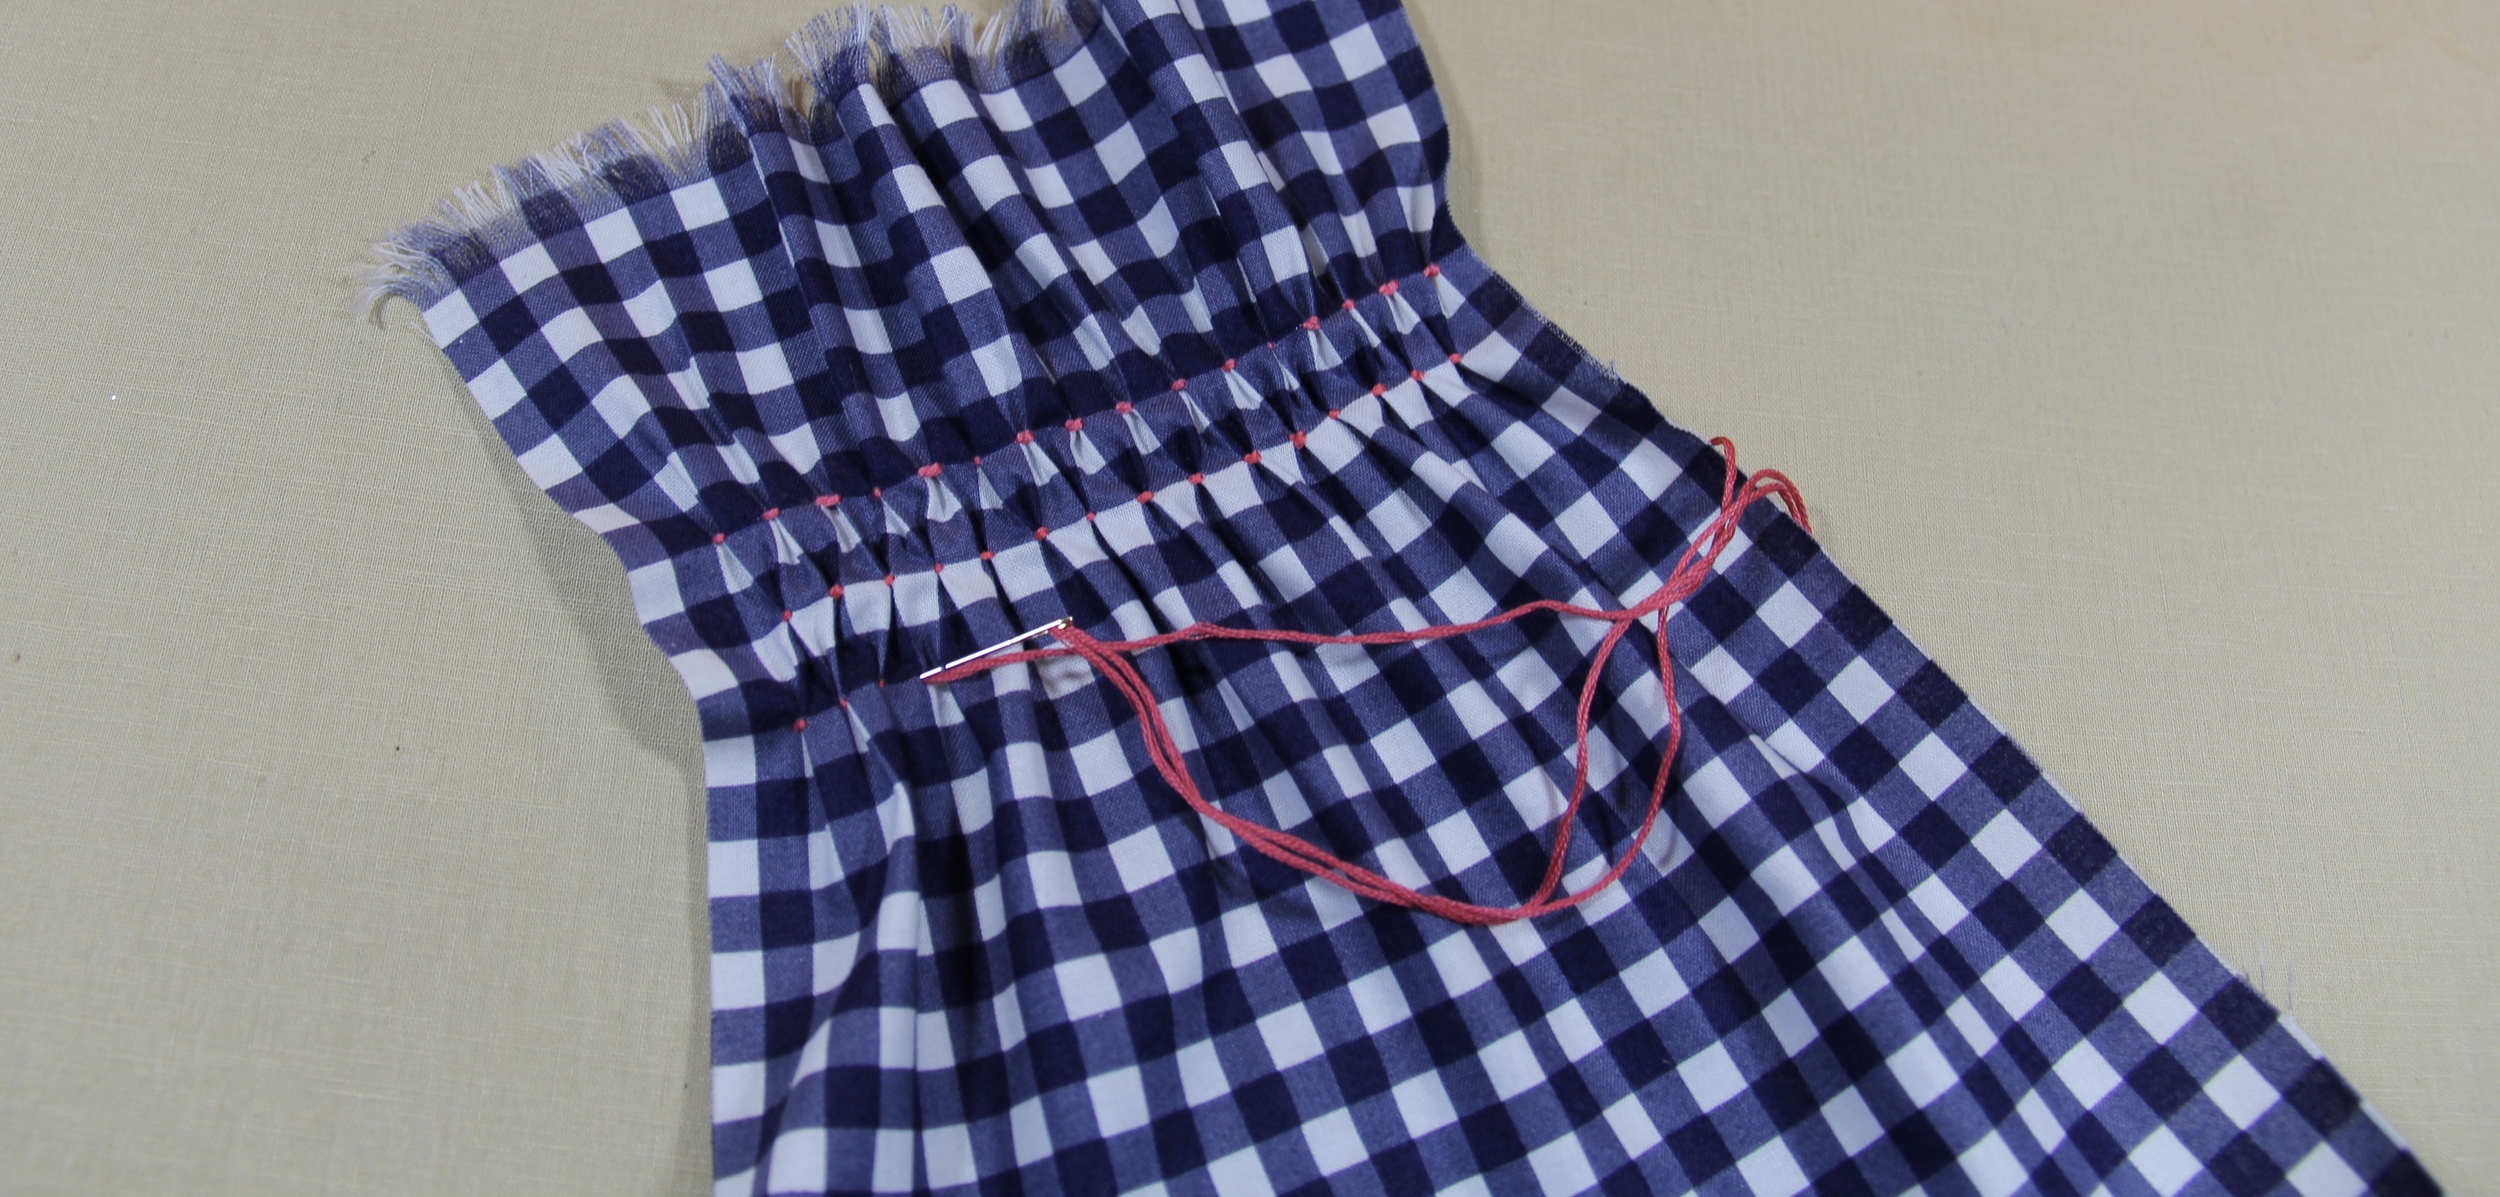
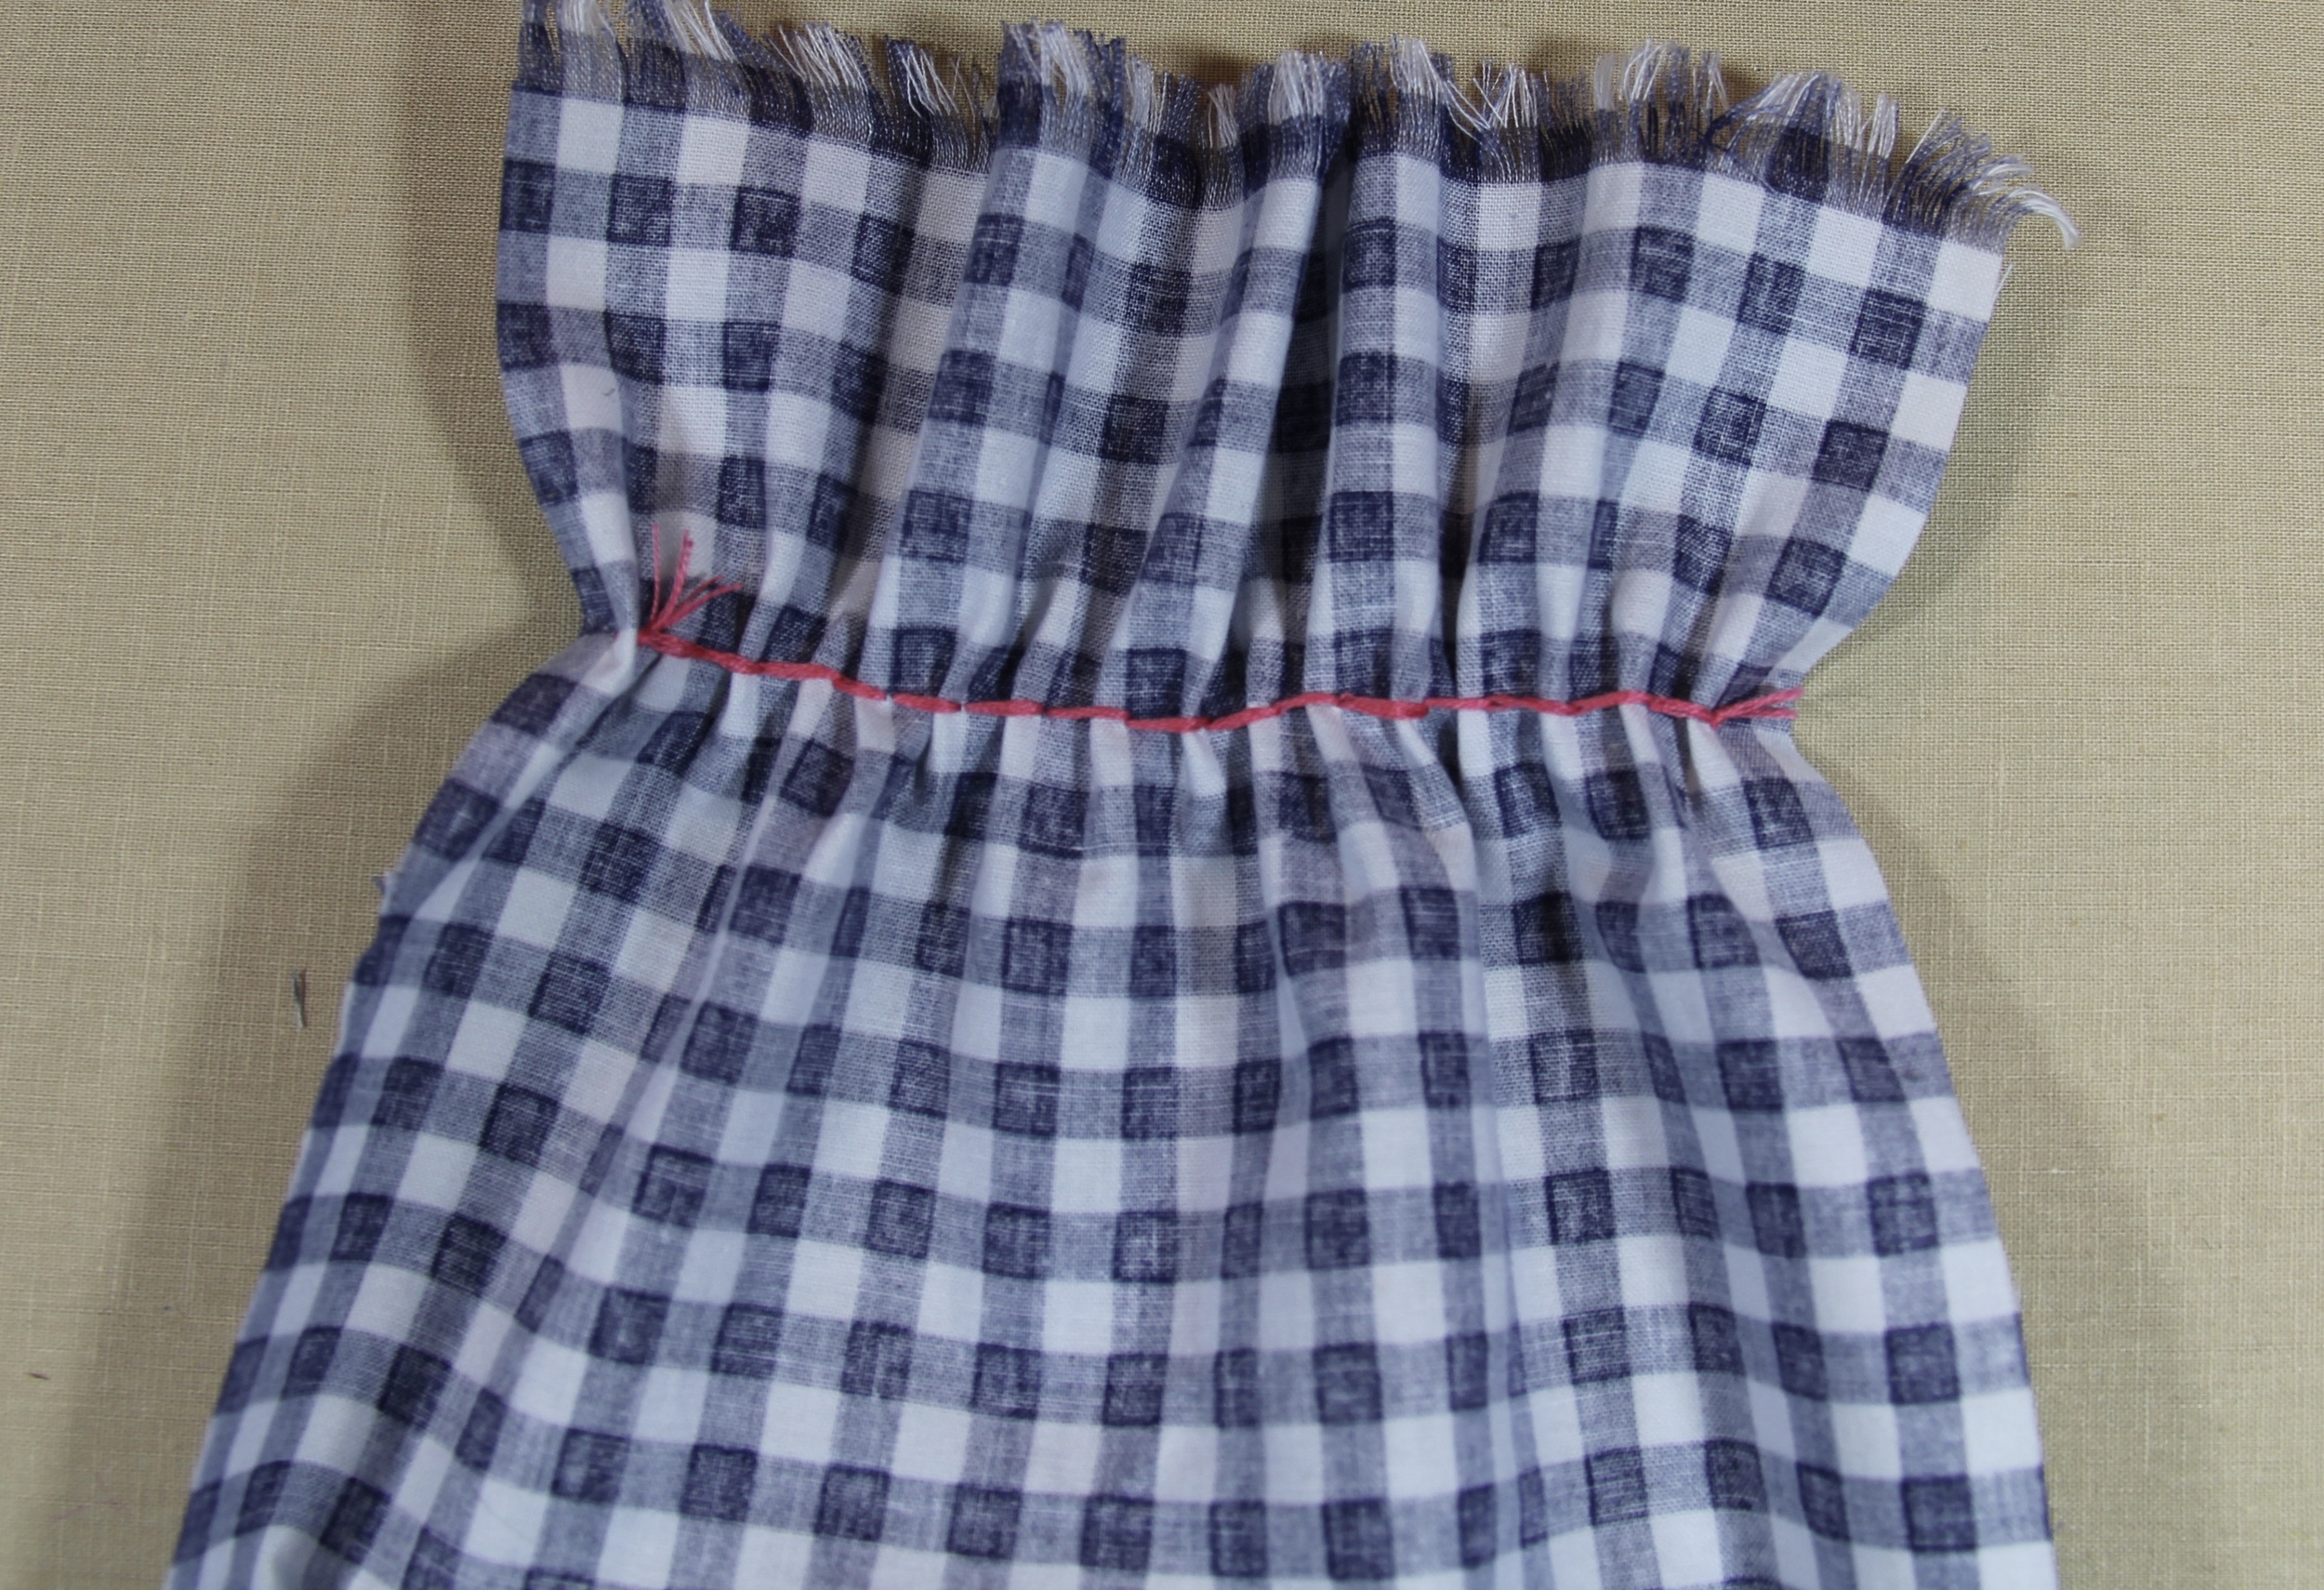
Insert the needle from behind 2 squares under the previous row and 2 squares from the edge. Make sure that it lines up with first row. (Again, if you are using another fabric, begin marking 1/2" across) Isn't this a pretty pattern?
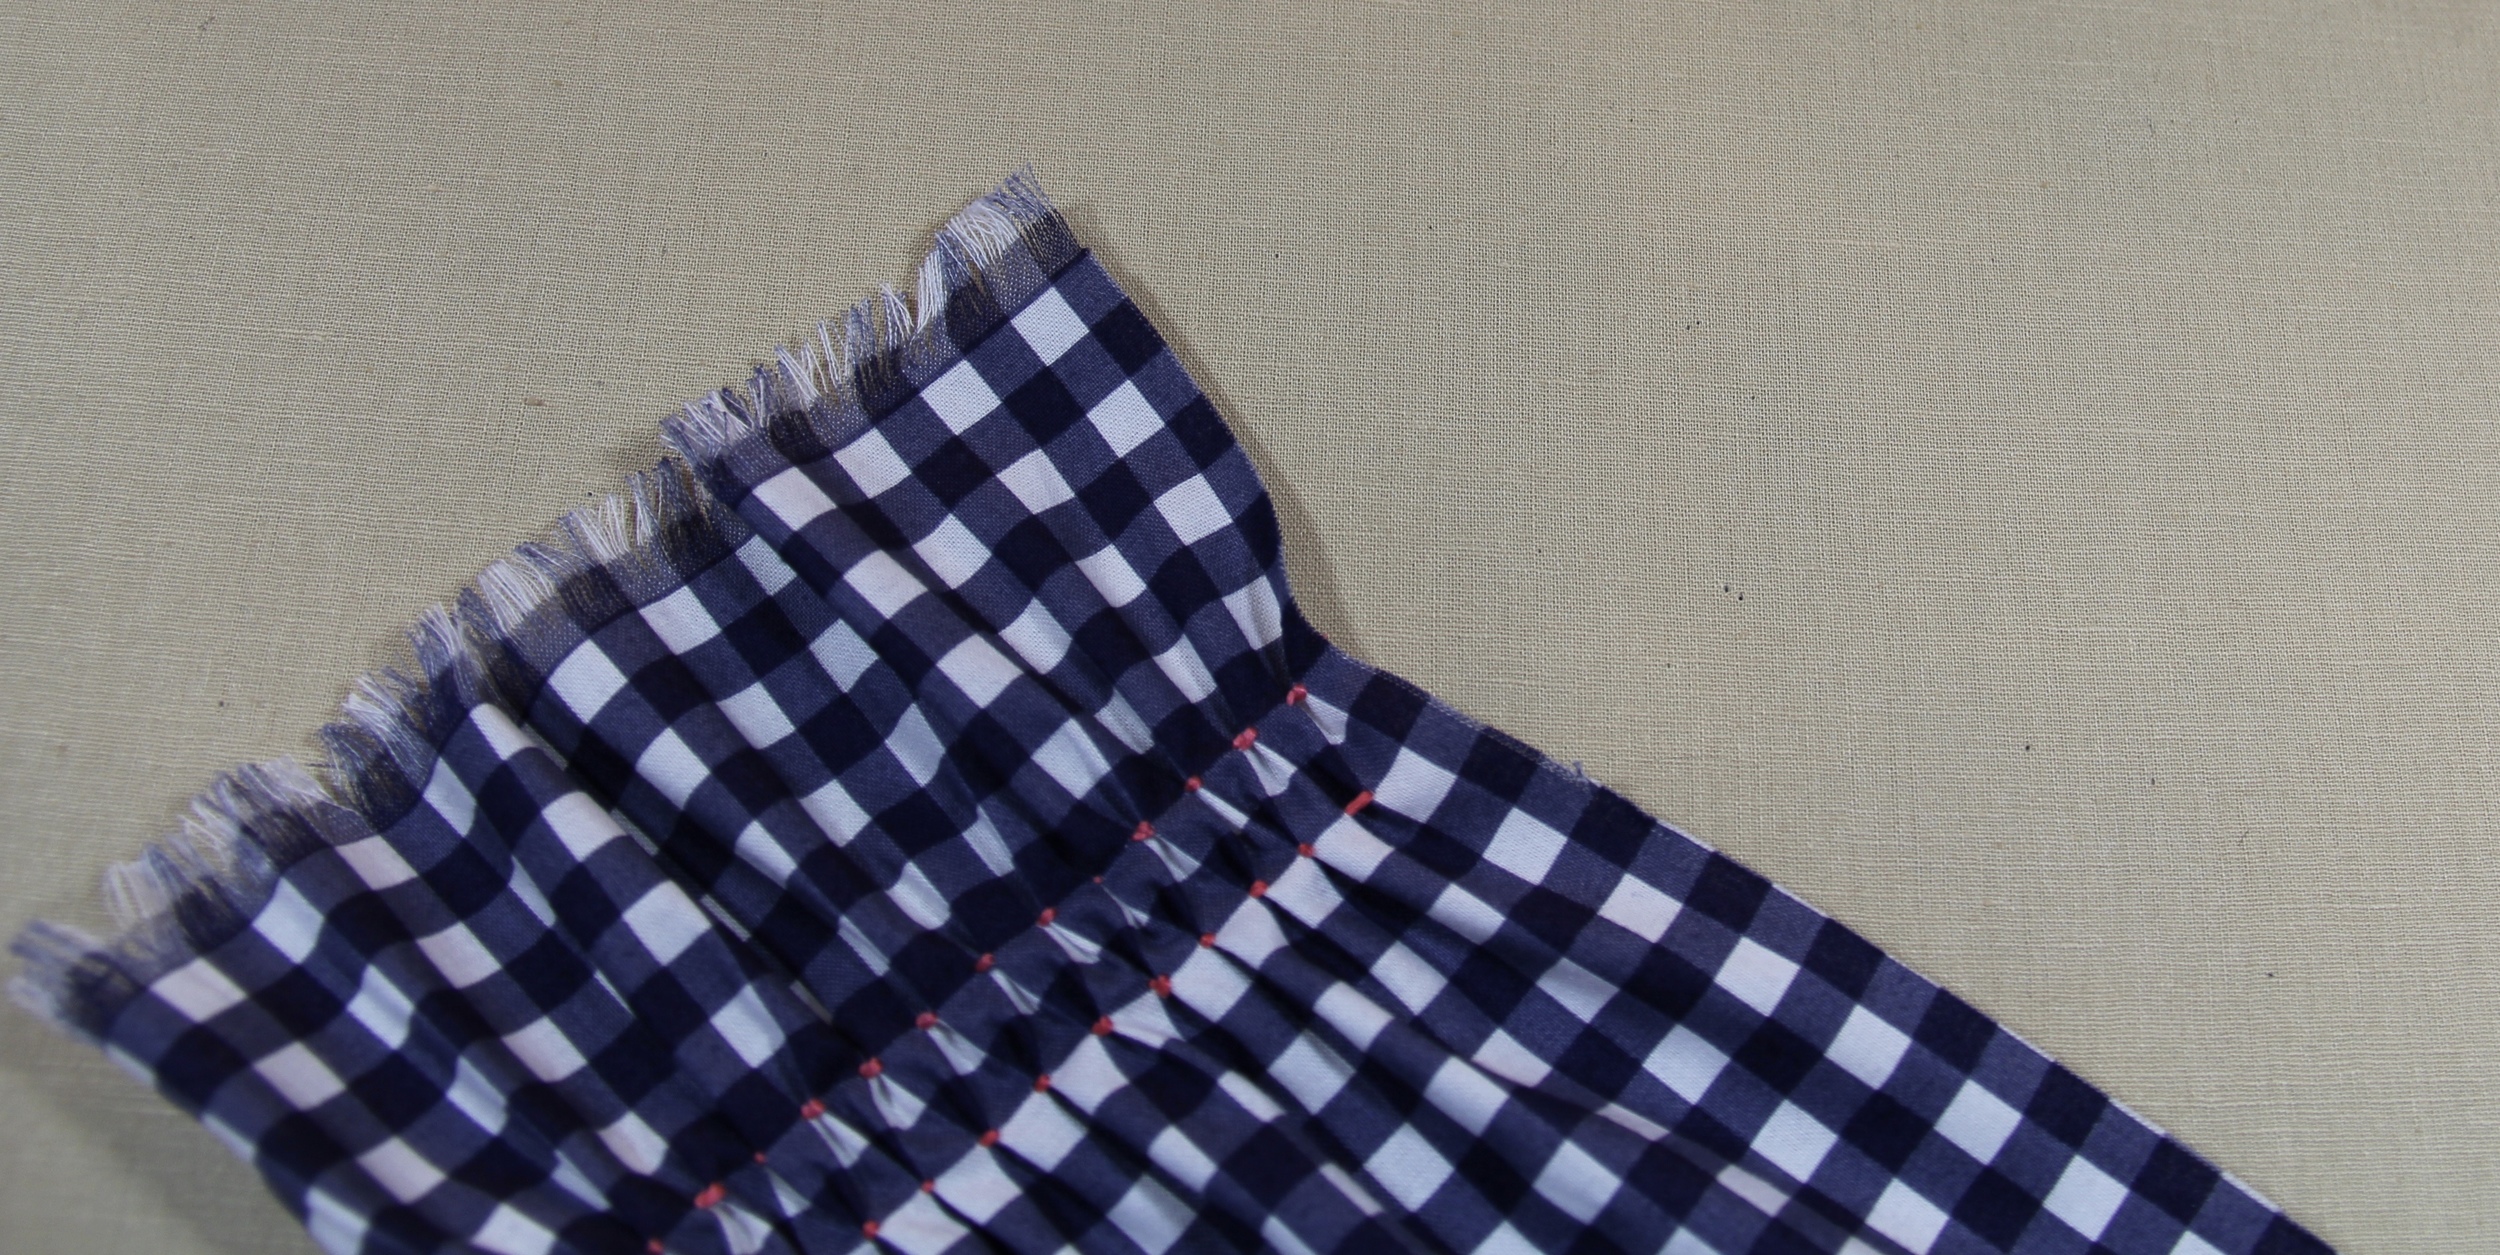
Continue stitching pattern until you have completed 10 rows. Then repeat this on the opposite end of the scarf and then again on both sides of the other scarf piece.
Sewing the Side Seams
Take both lengths of the scarf and line them up, making sure the right sides (the pretty sides) are facing each other. We are going to pin the long sides and sew straight down each side with a 1/2-inch seam allowance. Leave the fringes edges open. (We won't be sewing those).

Finishing
Give the scarf a good pressing, concentrating on flattening the side seams. Reach your hand through one fringed end and grab the opposite side, pulling it right-side out. Ta-da! Finished! What do you think?
This tutorial was featured in the Windham Fabrics Lookbook for Annabel Wrigley's Maribel Line
Please email me with any questions. Also, I'm happy to make a chart to further explain how to do this without a gingham "grid".