
Hand-sewing and a time to dream
Hand sewing. It was always the last thing I did. I put it off because it was just too slow and by the time I got to that point I was done with the project anyway and just wanted to finish. I was all about getting whatever I was working on done so that I could wear it and move on to the next thing.

Hand sewing. It was always the last thing I did. I put it off because it was just too slow and by the time I got to that point I was done with the project anyway and just wanted to finish. I was all about getting whatever I was working on done so that I could wear it and move on to the next thing.
Then I had babies. For a few years, my sewing machine and all of my supplies were packed away in the closet on the third floor. The extra room was now a baby nursery. There was no space and very little time to sew. I felt pretty lost. One day in early 2008, I was reading Liesl Gibson's blog, Disdressed. She was introducing the Alabama Stitch Book. It looked so familiar. Wait, What??? Alabama. Like Project Alabama? Natalie Chanin? I remember seeing her clothes in NYC just a few years before. I would look at these great deconstructed tops she made and try to figure out how in the world she put them together. It was her! I immediately ordered the book.
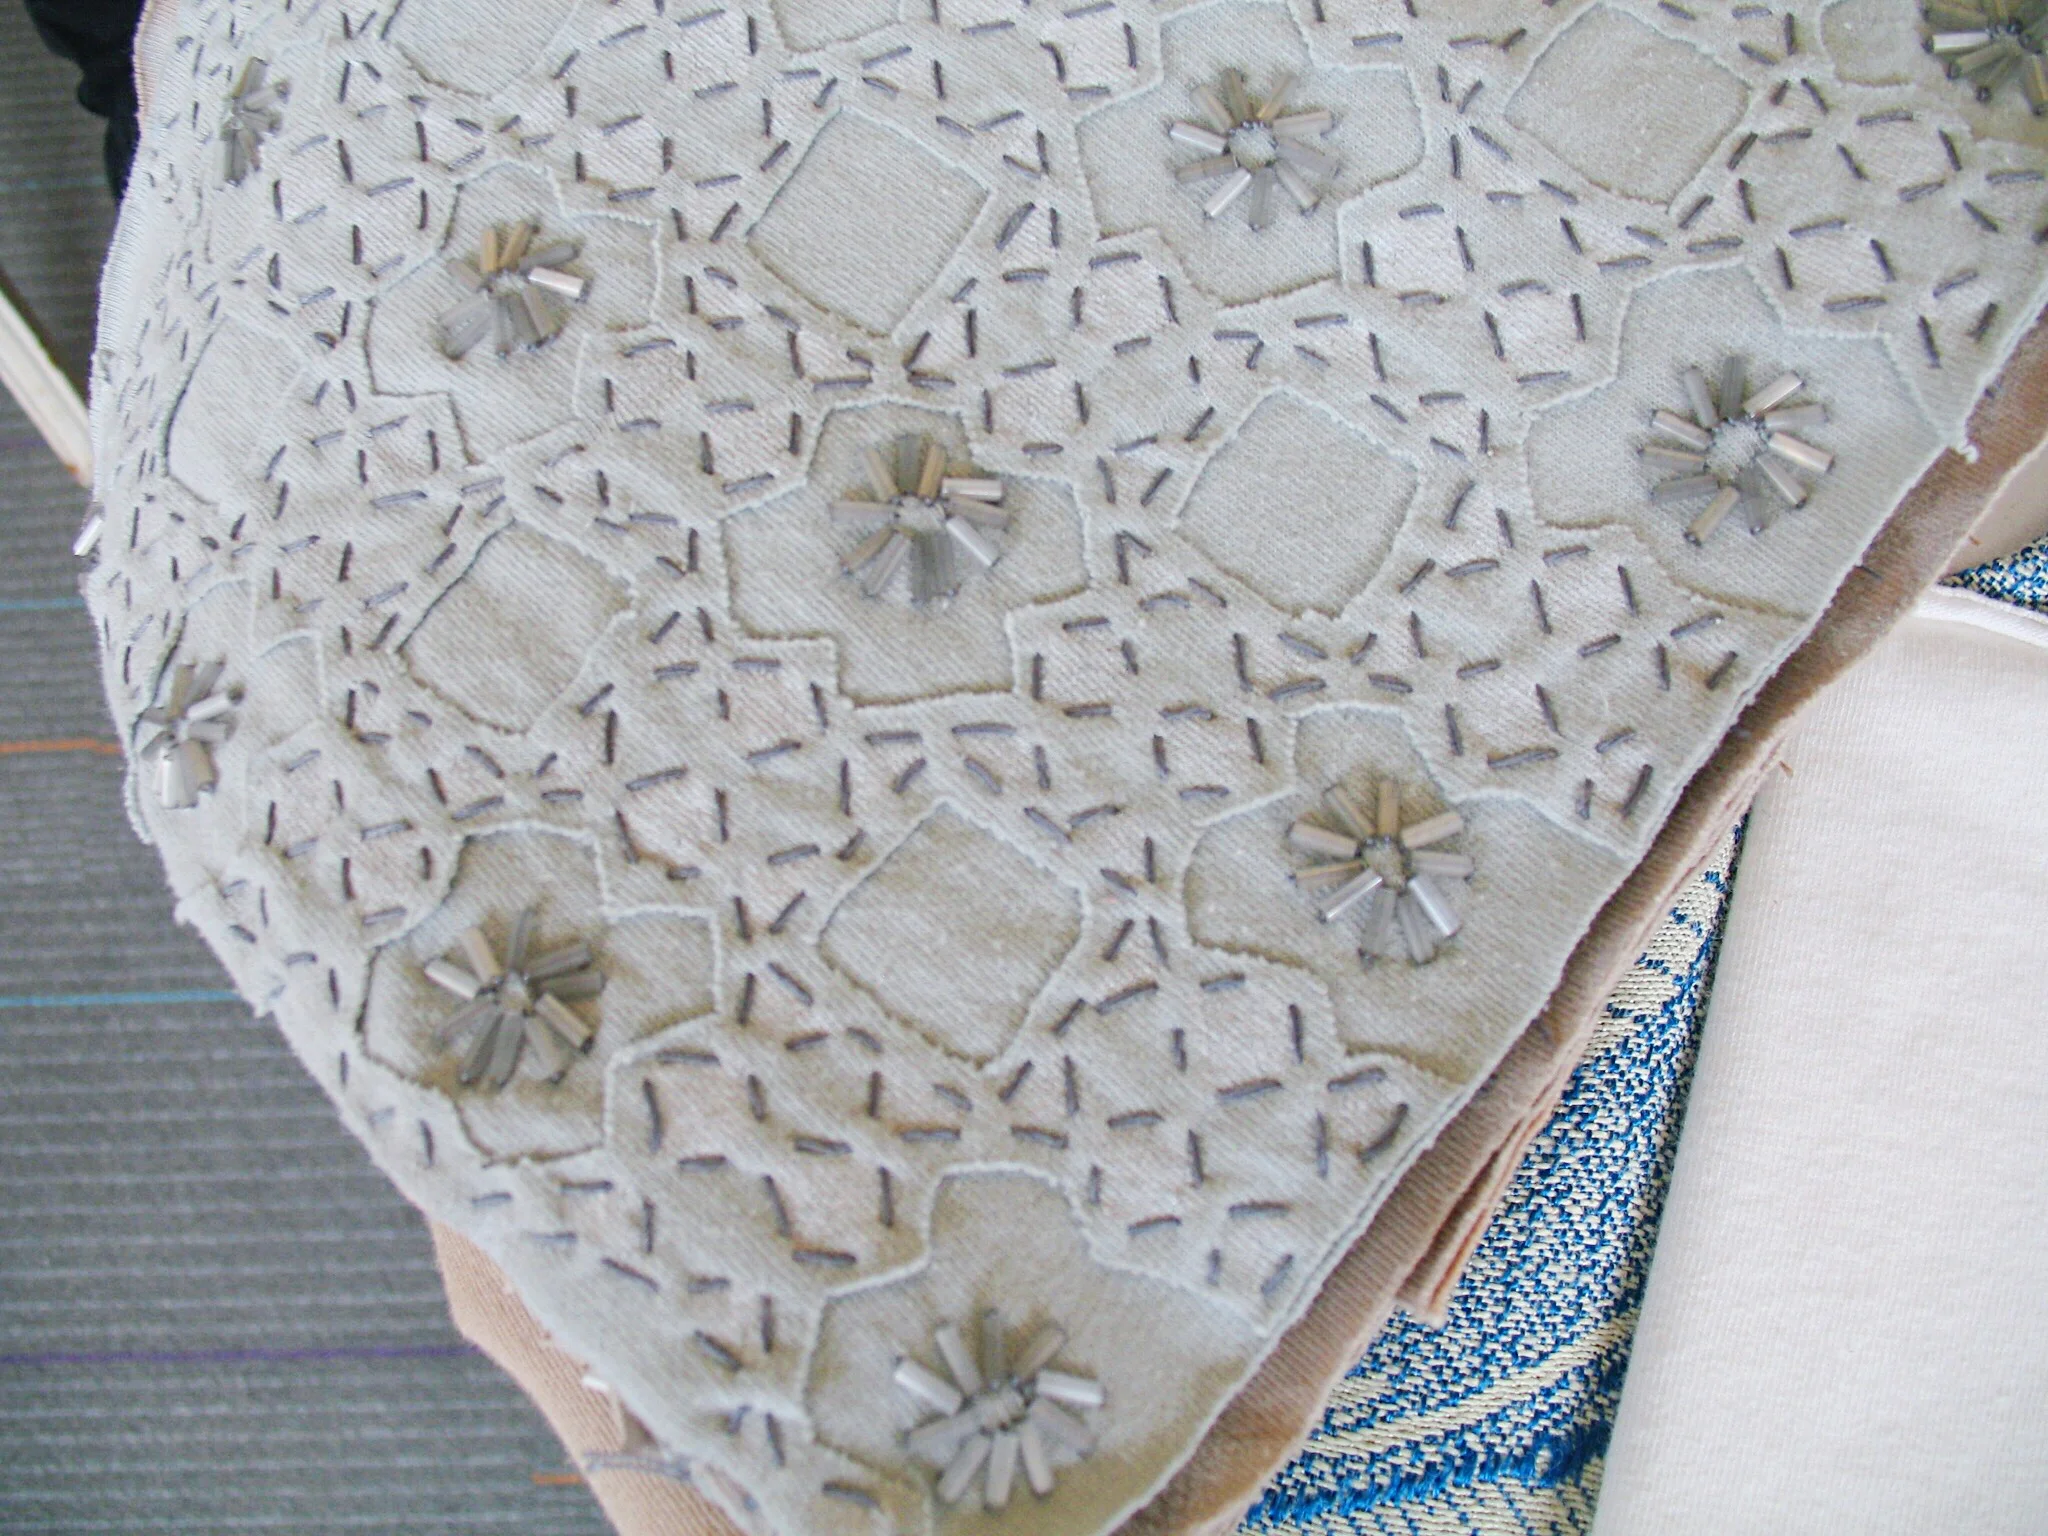
It came and I couldn't wait to get started. My first project was the Over-the-Arm pincushion. I still use it everyday. It is a favorite, it rolls up so it's perfect for traveling or just moving from room to room.
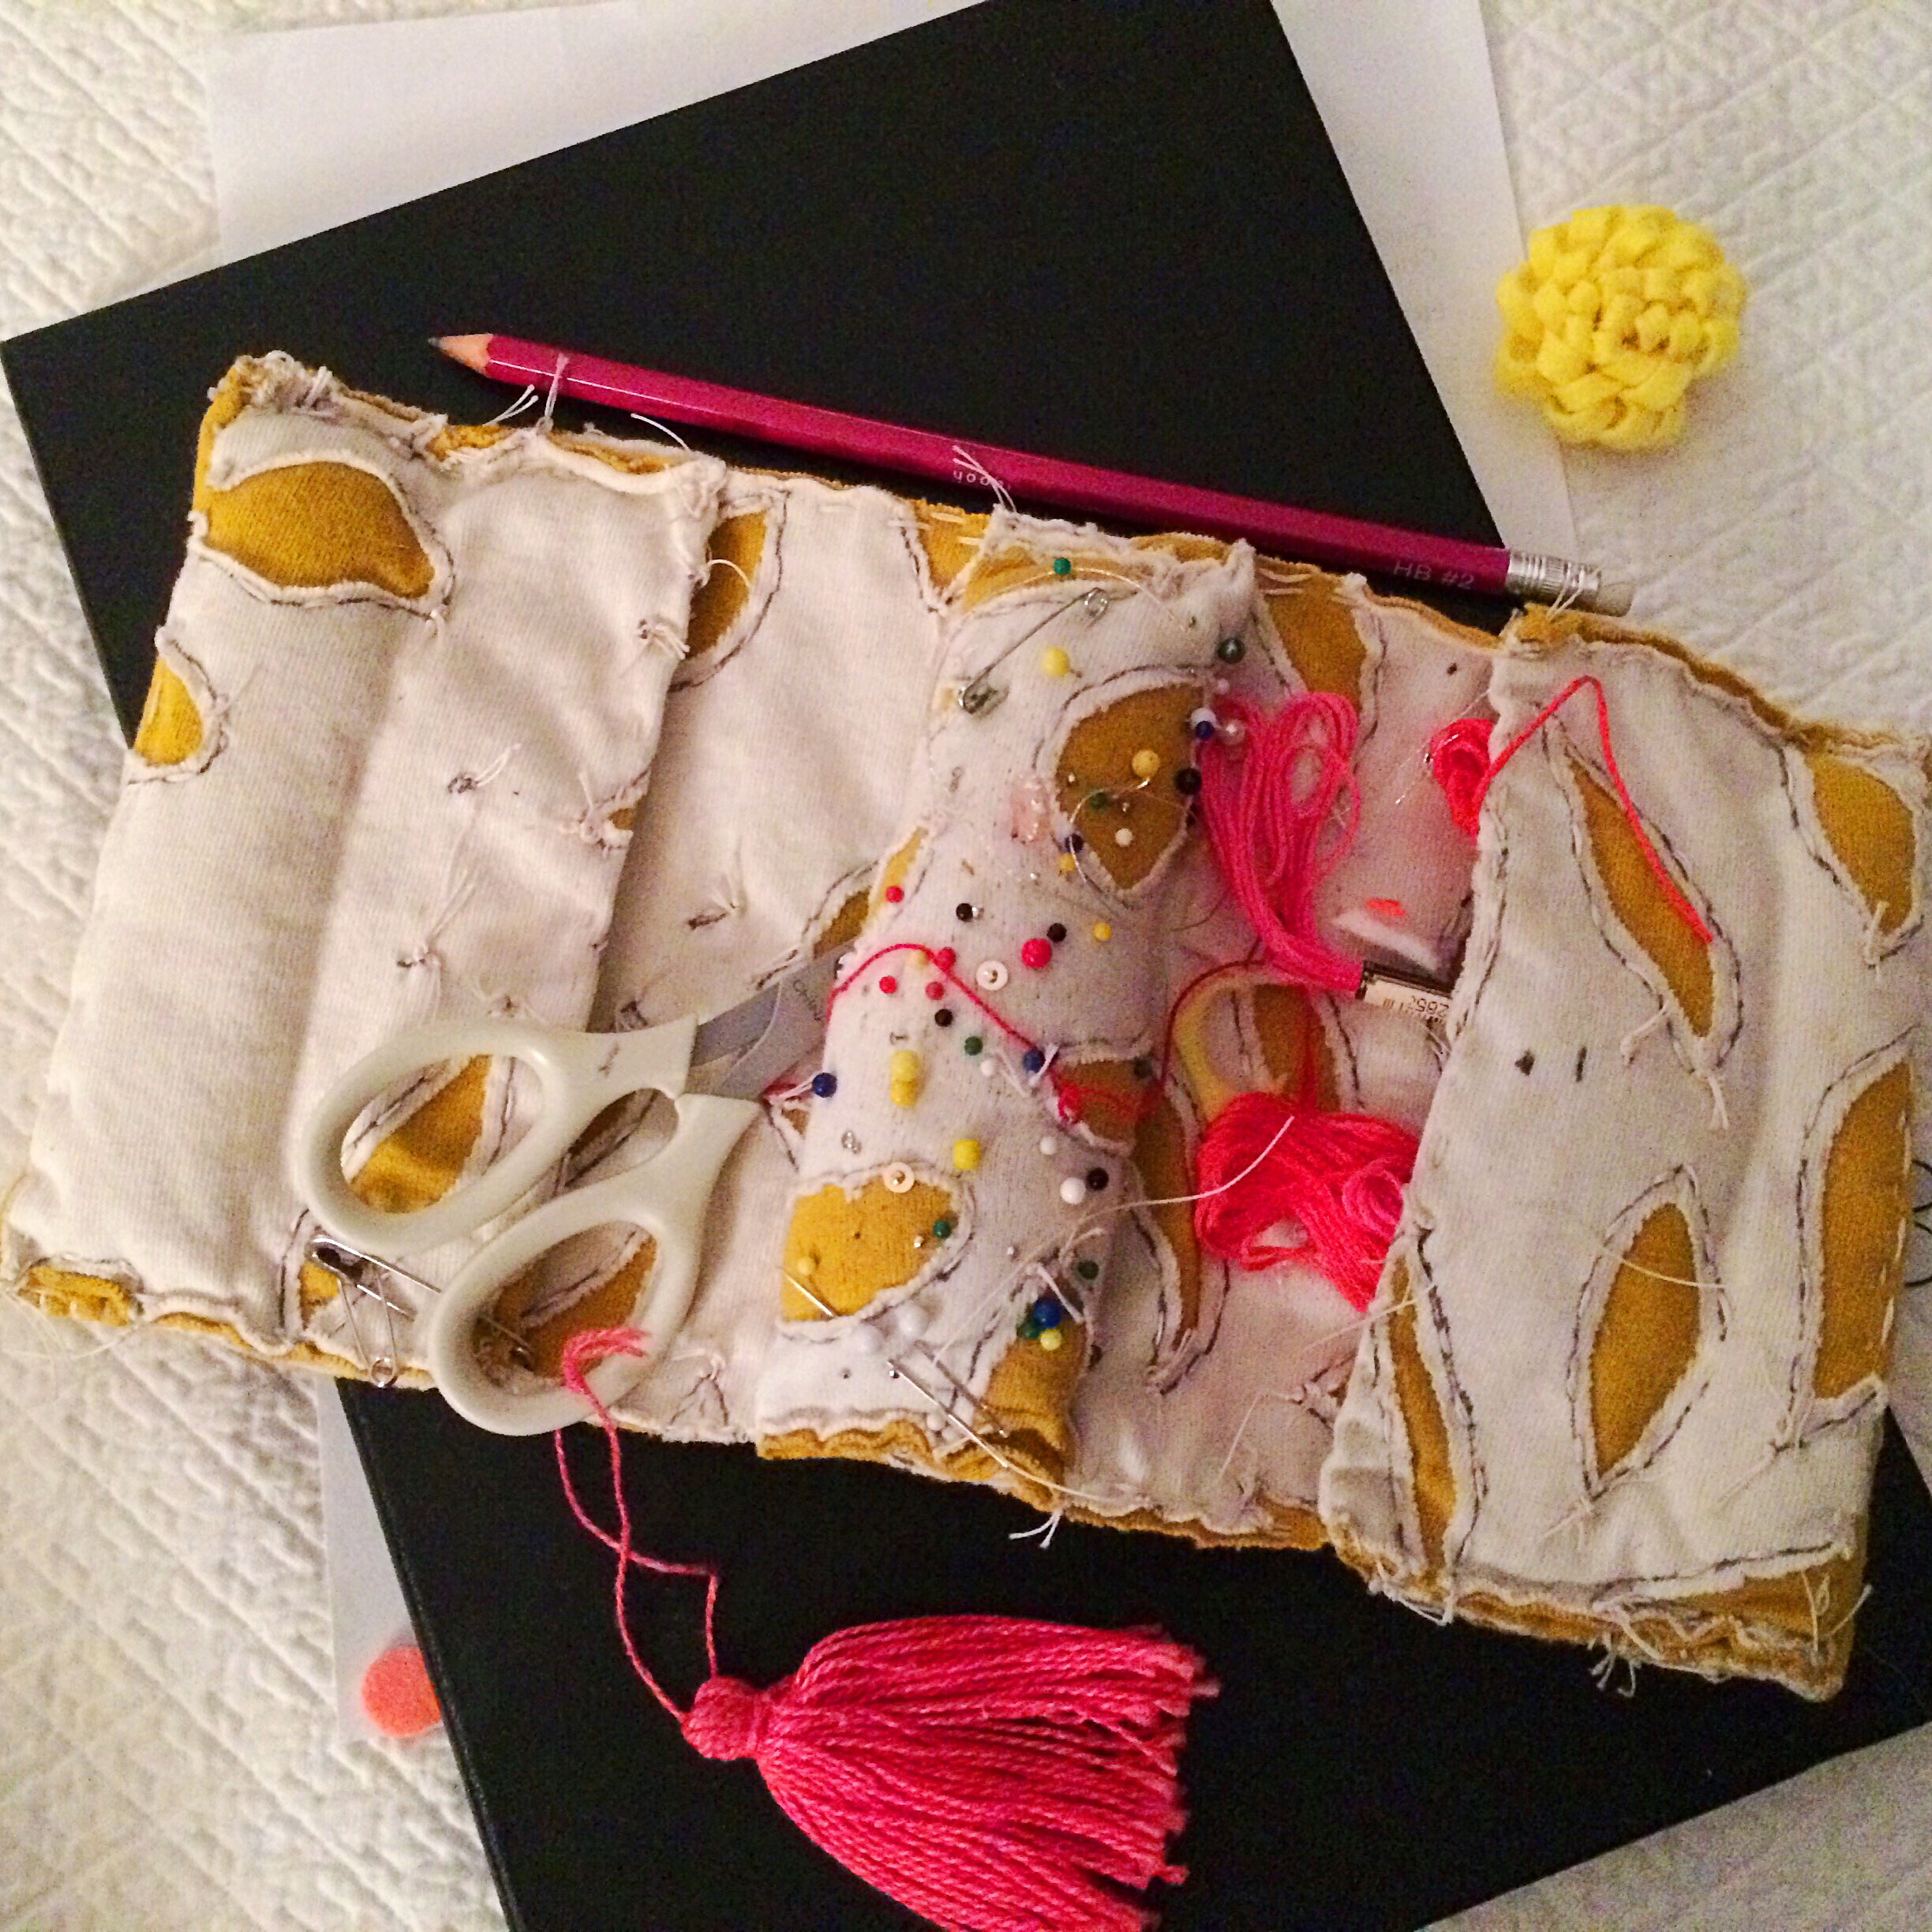
Her method and philosophy completely changed the way I thought about sewing and my approach to design. It is where I first heard the term Slow Fashion. Slow-anything appealed to me at that time. I could begin to sew and design clothes again without having to haul everything out of the closet, set it up only to pack it back up an hour later. Now everything I needed could fit inside a tote bag. I could sit on the floor for seemingly endless hours with tiny kids, nursing, doing puzzles, building blocks and have a small project beside me. This brought me unmeasured peace and happiness.
In 2009, Natalie Chanin came to Richmond for a workshop. I bought a ticket and we decided to take the kids to the Great Wolf Lodge for the night. That way I could go to Richmond to meet Natalie and take her class, leave to nurse the baby, and return to finish the class. It was worth every minute.
Natalie Chanin is such a well read and interesting person. I could listen to her honey-ed voice all day. She entertained us with stories of her life, her kids, travel, cooking, design and sewing. It was a modern day sewing circle. One day I will visit her studio in Alabama for a weekend workshop.

Every year since, I have made another item of clothing in her unmistakable style. Each piece takes months to make and I couldn't be happier with the result. As my children get older, having a project that I can take with me to work on at the pool, in the car, or any marathon waiting session where my presence is required by not my participation is a lifesaver.
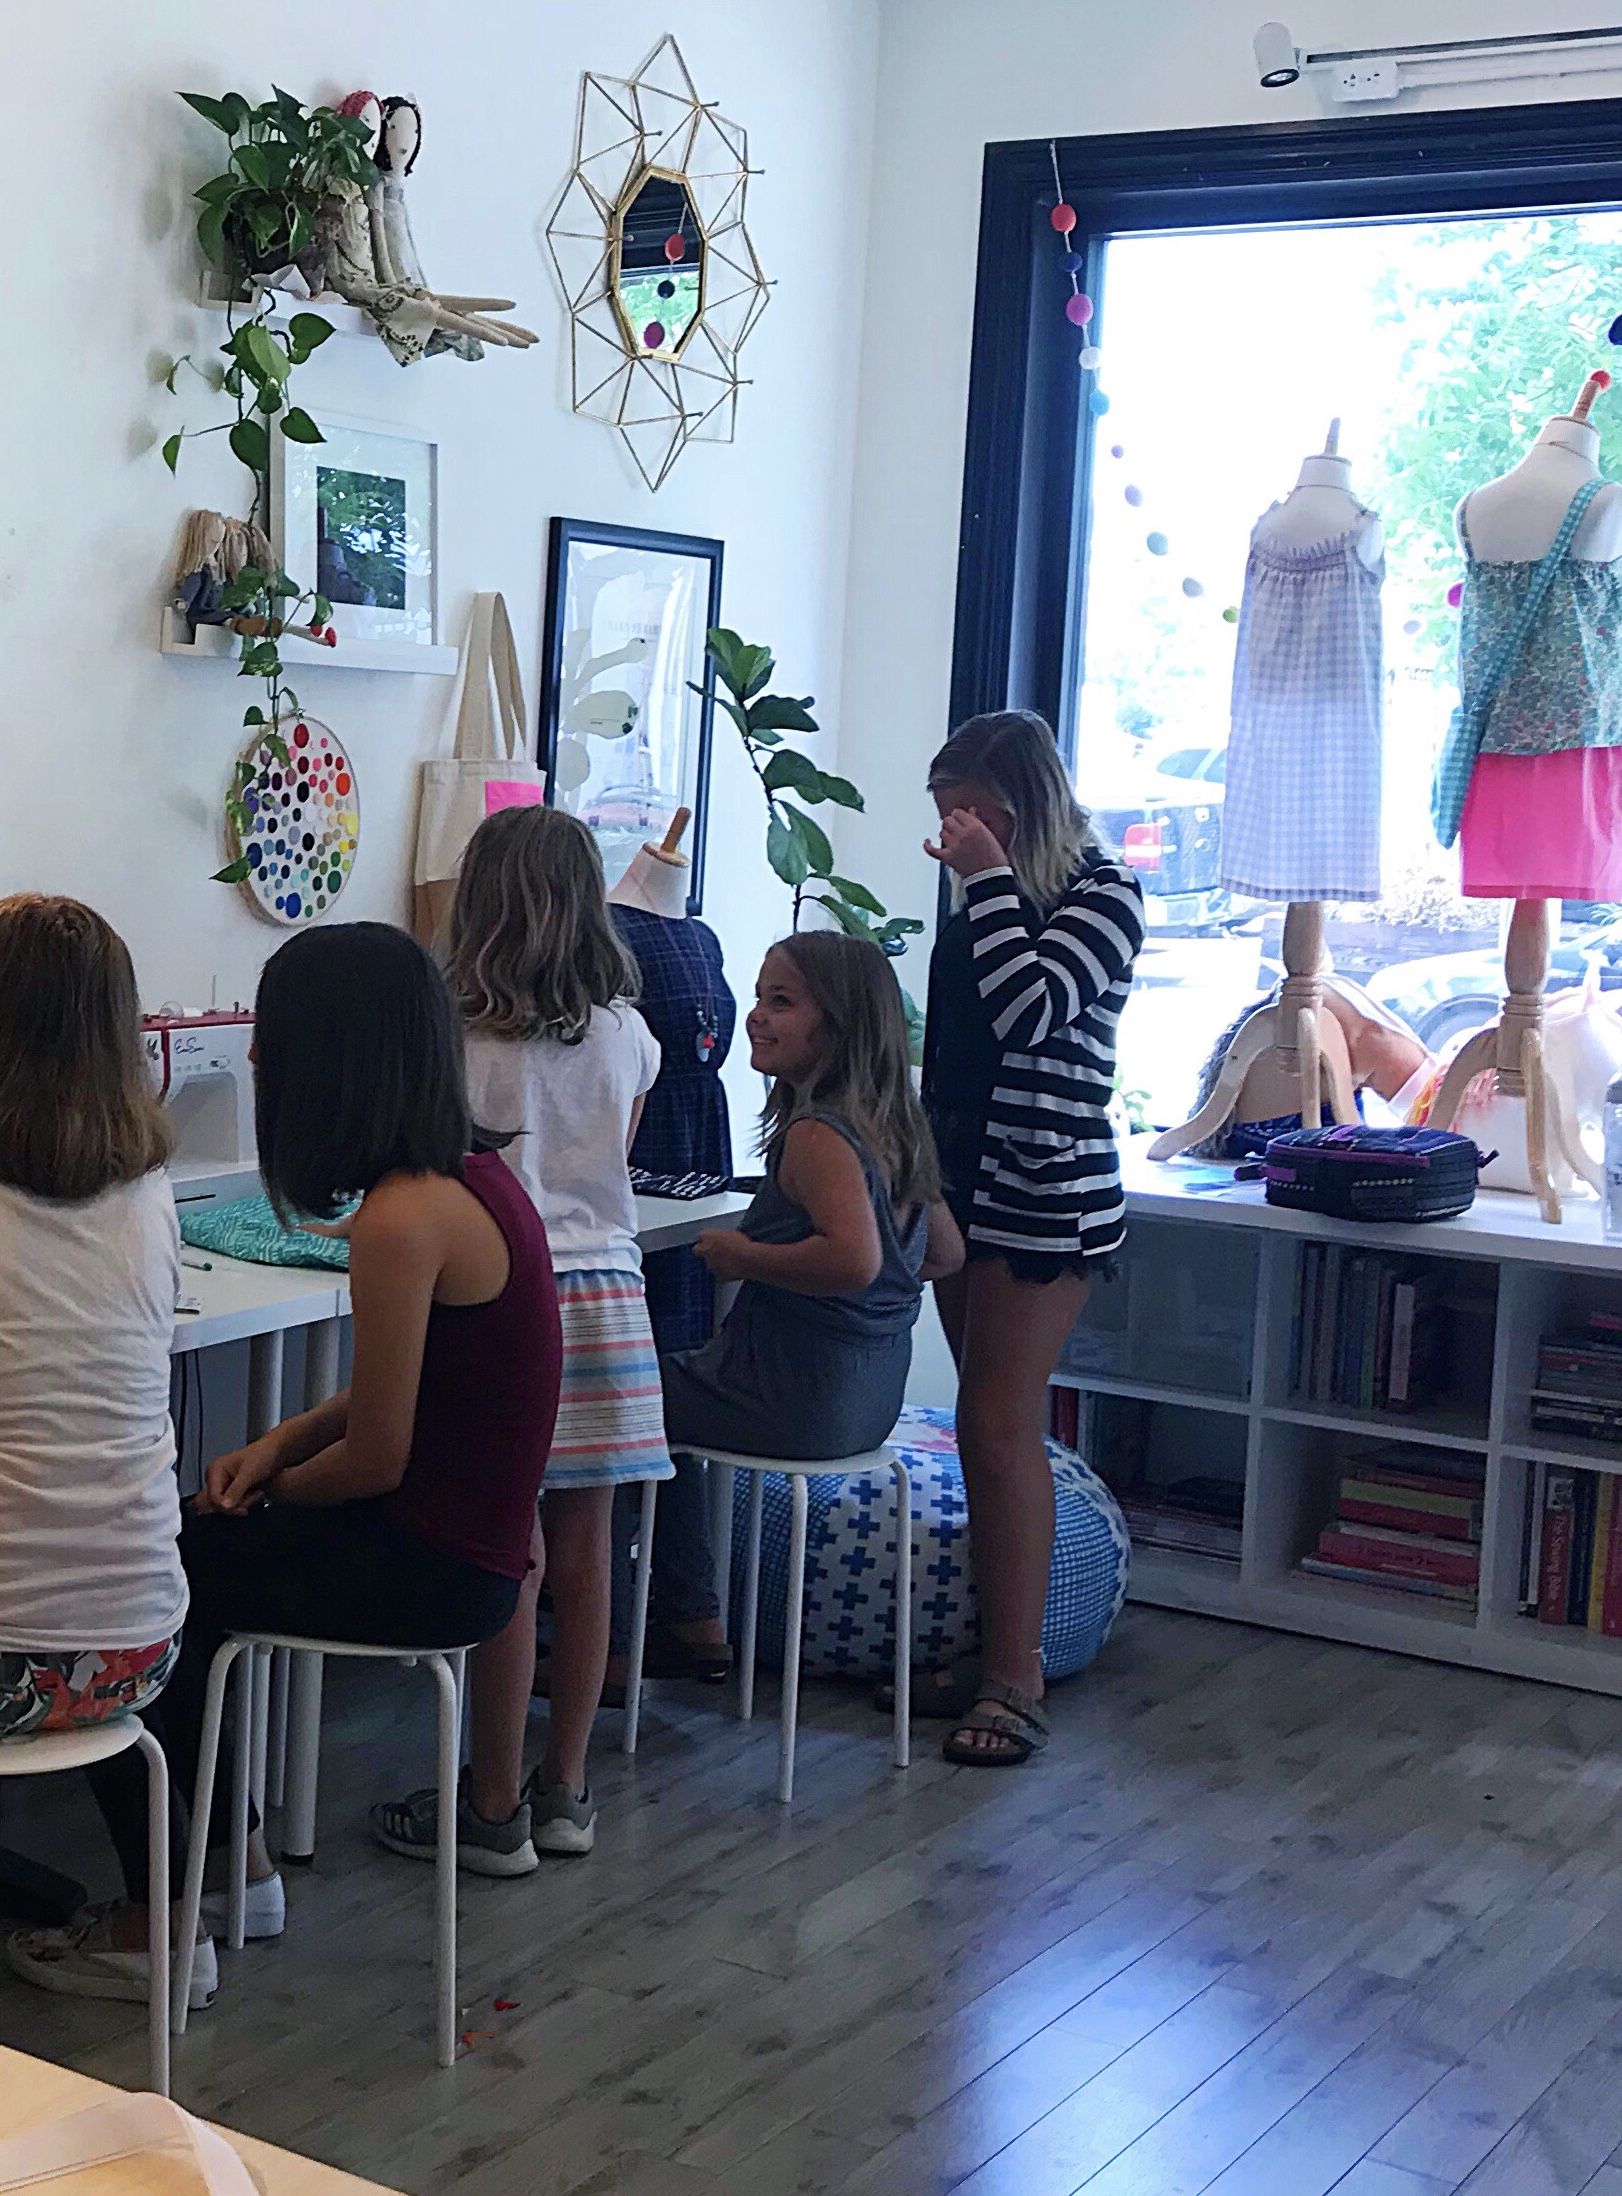
When teaching kids to handsew, I try to make it entertaining and approachable. I want to create a feeling in them that will inspire them to go out and make something beautiful. I love to show them pictures of things they can make with only a needle, thread and some plain cotton fabric. No machines, nothing fancy. Just some good stitching, peace and time to dream.
XO,
Hilarie

Cocktails, Crafts & Camaraderie with Spoonflower
A couple of weeks ago while looking on Facebook, I saw an upcoming event with Spoonflower and the NCMA, North Carolina Museum of Art. I love Spoonflower and Raleigh isn't that far away. I haven't been away from my kids for a night in almost 6 years, so.... I bought the ticket. Yea!

A couple of weeks ago while looking on Facebook, I saw an upcoming event with Spoonflower and the NCMA, North Carolina Museum of Art. I love Spoonflower and Raleigh isn't that far away. I haven't been away from my kids for a night in almost 6 years, so.... I bought the ticket. Yea!
I found a sitter, a hotel and planned a great outfit and was counting down the days, to a night. All. By. Myself. The day finally came!! Now, I'm not much of a planner. Some of you may be surprised by that. As a mom, I'm on it. I have it under control-ish. (sort of!) I've got their schedule down. Breakfast, activity, lunch, reading, activities, homework, dinner, bath, stories, bed. Done. It works. My own life? I fit it in. Now my husband, on the other hand, every detail is meticulously nailed down. Thought out. No need for Plan B. Where as I am on very friendly terms with Plan D. Life is fun for us. I prefer to go with the outline. It works and results in few disappointments.
As I was leaving, he calls from work. He asks the usual questions. Do I have gas? yes. Do I know where I'm going? Sure. Where are my directions? In my car, I say. (my phone is in my car after all.) Did you check the weather? Did I check the weather?? It's August. In the South. It's going to be hotter 'en hell. Why bother checking the weather?
So I go on my way. Siri was great with directions. Flawless, actually. I arrived on schedule with 30 minutes to check into the hotel, change and get to the museum. The museum. I forgot to check how far that was from the hotel. How far could it be? I mean the hotel was in Durham and the museum in Raleigh. It's pretty close. I'll check. 39 minutes! ouch. I'll make it. I tell the valet that I am parking but will be down in 10 minutes to leave again.
I walk in the hotel. Wow! It's pretty great. I couldn't decide if I was more excited about creating my own fabric or staying in the fab 21C Hotel. 21C. The magenta penguin and all. I quickly change and dash back to the car. It's pouring down rain. Damn. I realize that my raincoat and umbrella are in my front hall at home where they have been drying since last Tuesday's storm. I forgot to put them back in my car. Oh well, I was sure it would stop by the time I get to Raleigh. It didn't. So there I was, in the parking lot of the North Carolina Museum of Art. In a huge downpour. Unprepared. This would never have happen if I had my children with me. I actually contemplated calling Uber for a ride from the parking lot to the East building. (a three minute walk).
My strongest quality is that I am resourceful. I always have been. So I thought, what do I have in my car that I can use to protect my dress and bag from the storm? Nothing in the backseat. Nothing much under the cover in the hatch. Grocery bags, a snorkel, a few lego pieces. Damn. Why had I cleaned up a bit? So I lifted up the floor cover, BINGO! There was a plastic liner that I use when I haul trees, shrubs and mulch. And I had my workbag. Plastic lining, scissors and tape... think Project Runway! Make a rain cover with what is available in your car. Go! After a quick measure and wrap that gave me flashbacks of younger days of quick changes in the car. I was all set.
I arrived to the building completely dry and deposited my "coat" just to the side of coatcheck. On the floor. Next to the umbrellas. The event was great! There was a bar and food. Also, just outside the door was a refurbished little truck and trailer with ice-cream. It had stopped storming and there was a brilliant rainbow smiling over the ice-cream trailer. After a glass of wine, I went out to get an ice-cream. I swear if a bedazzled unicorn had flown out of that rainbow I would not have been surprised. The night was just like that. Crafts. Wine. And bourbon ice-cream.
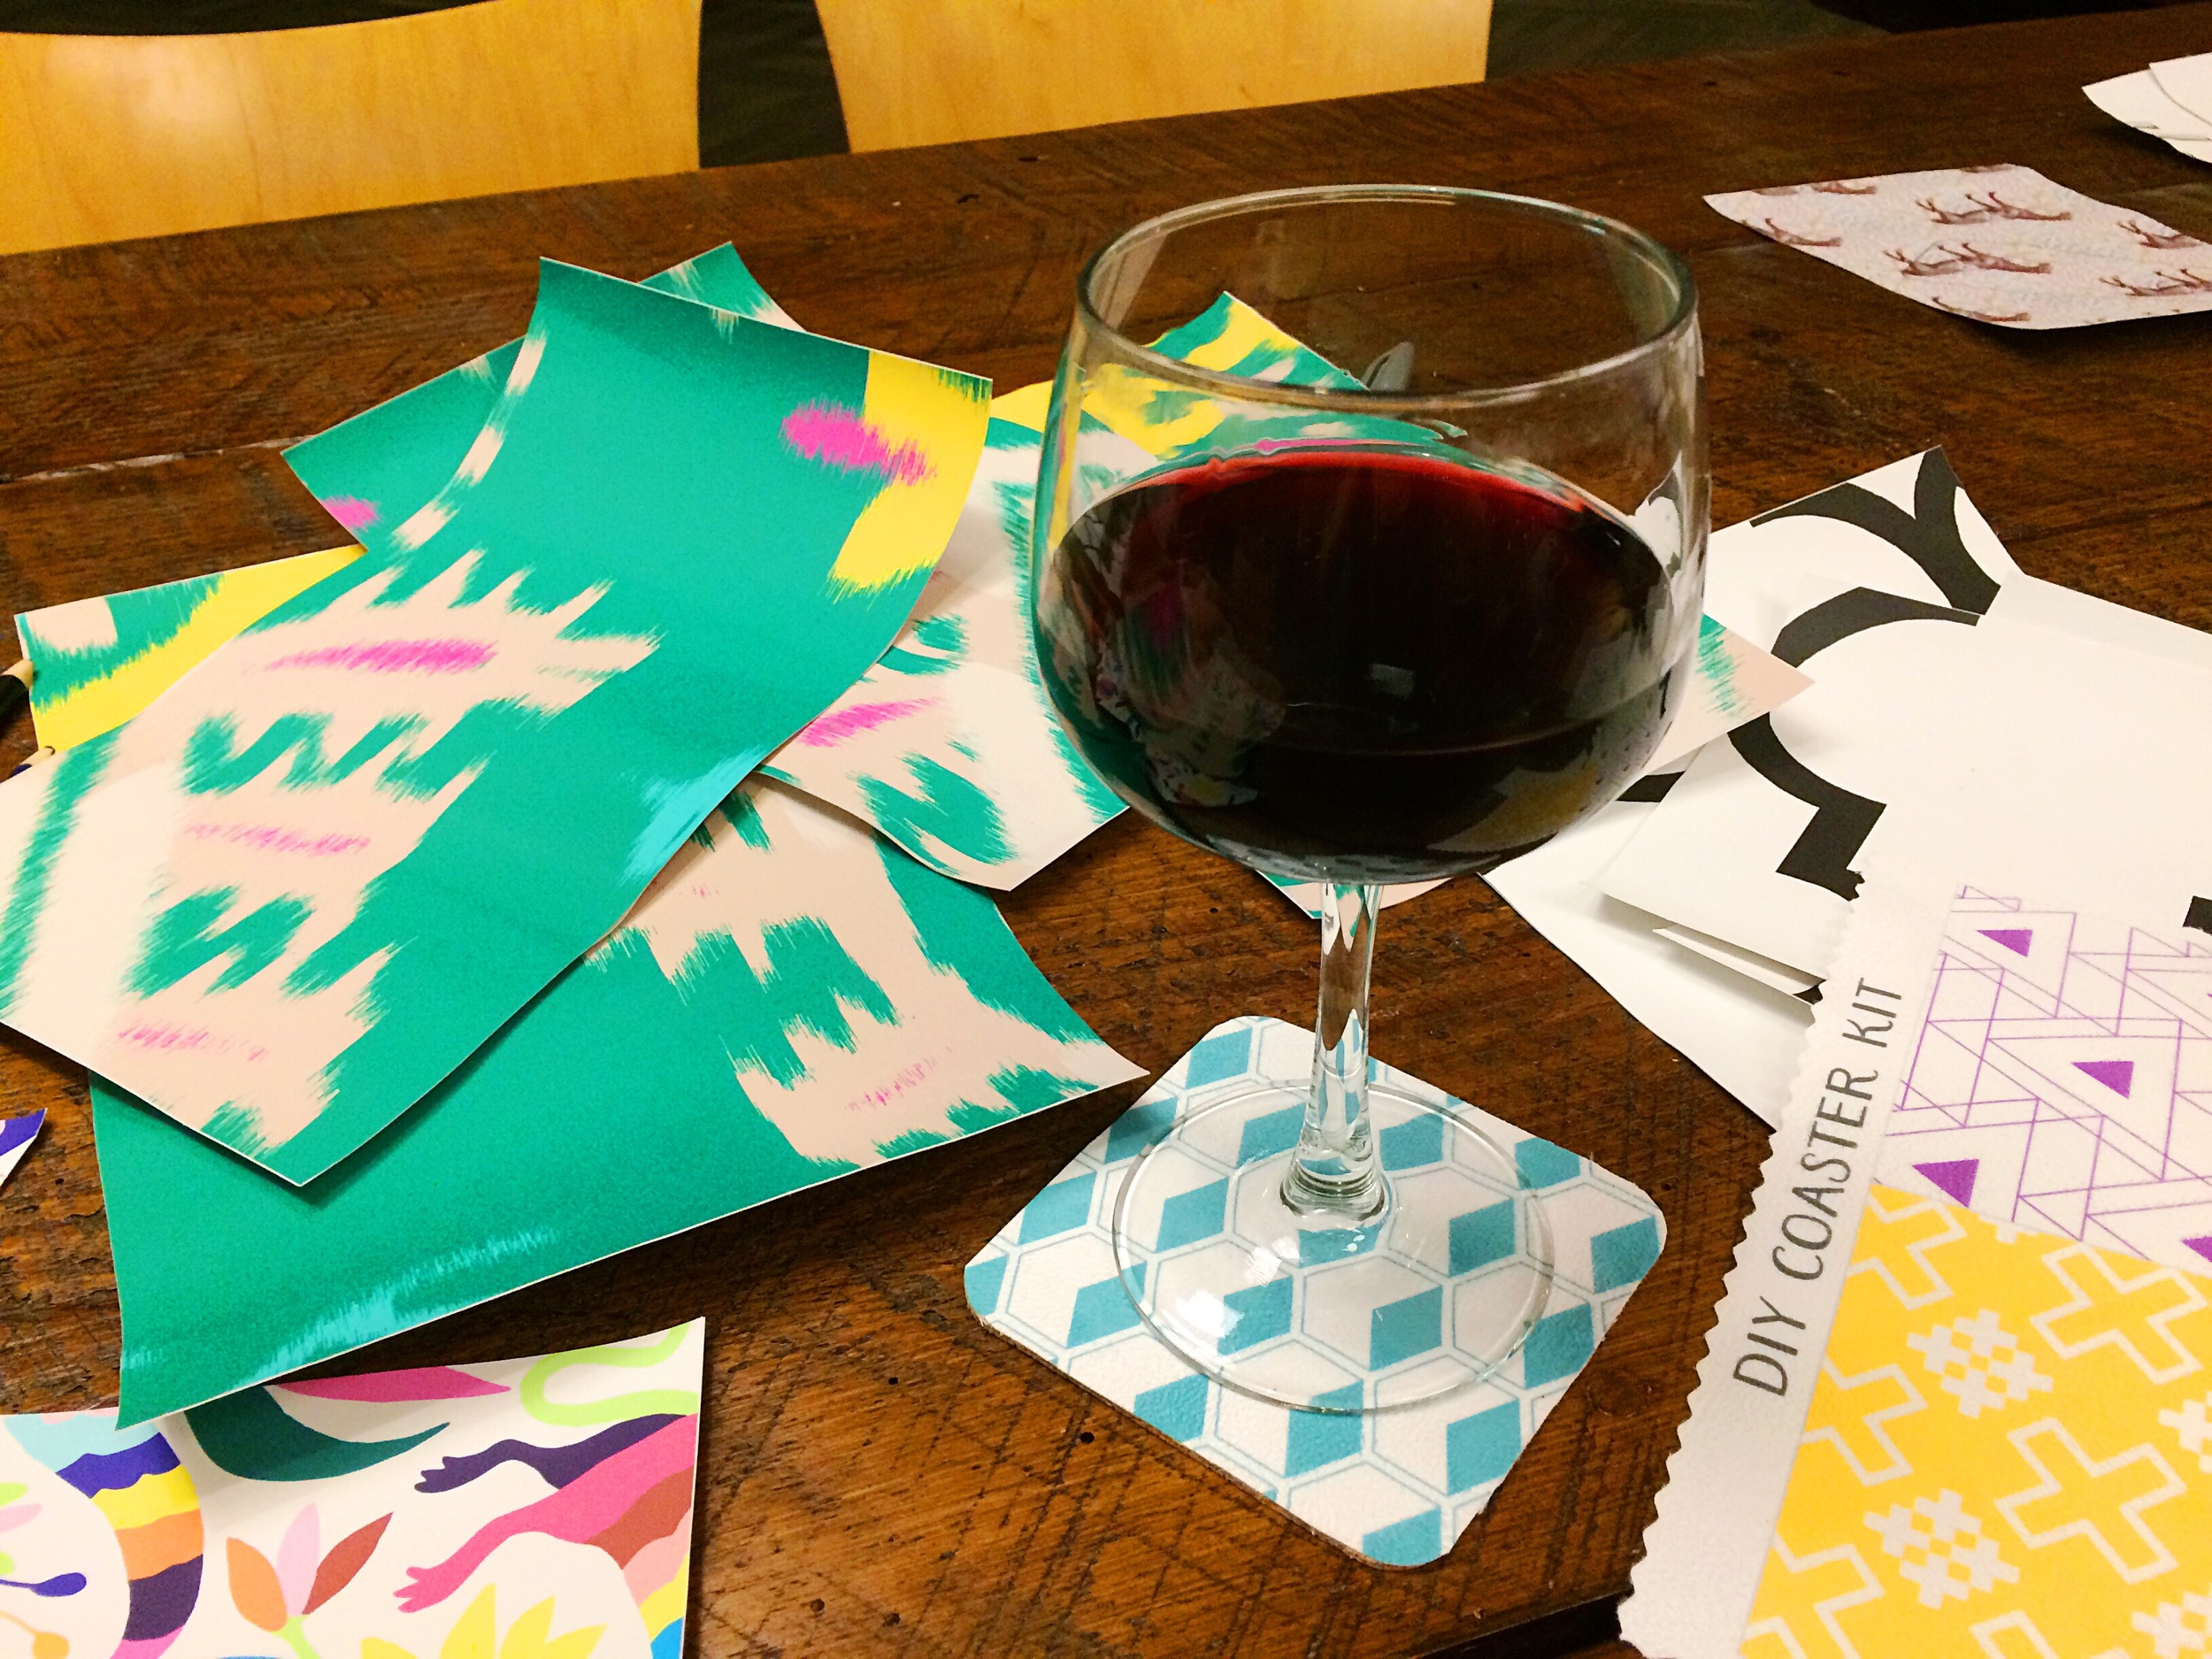
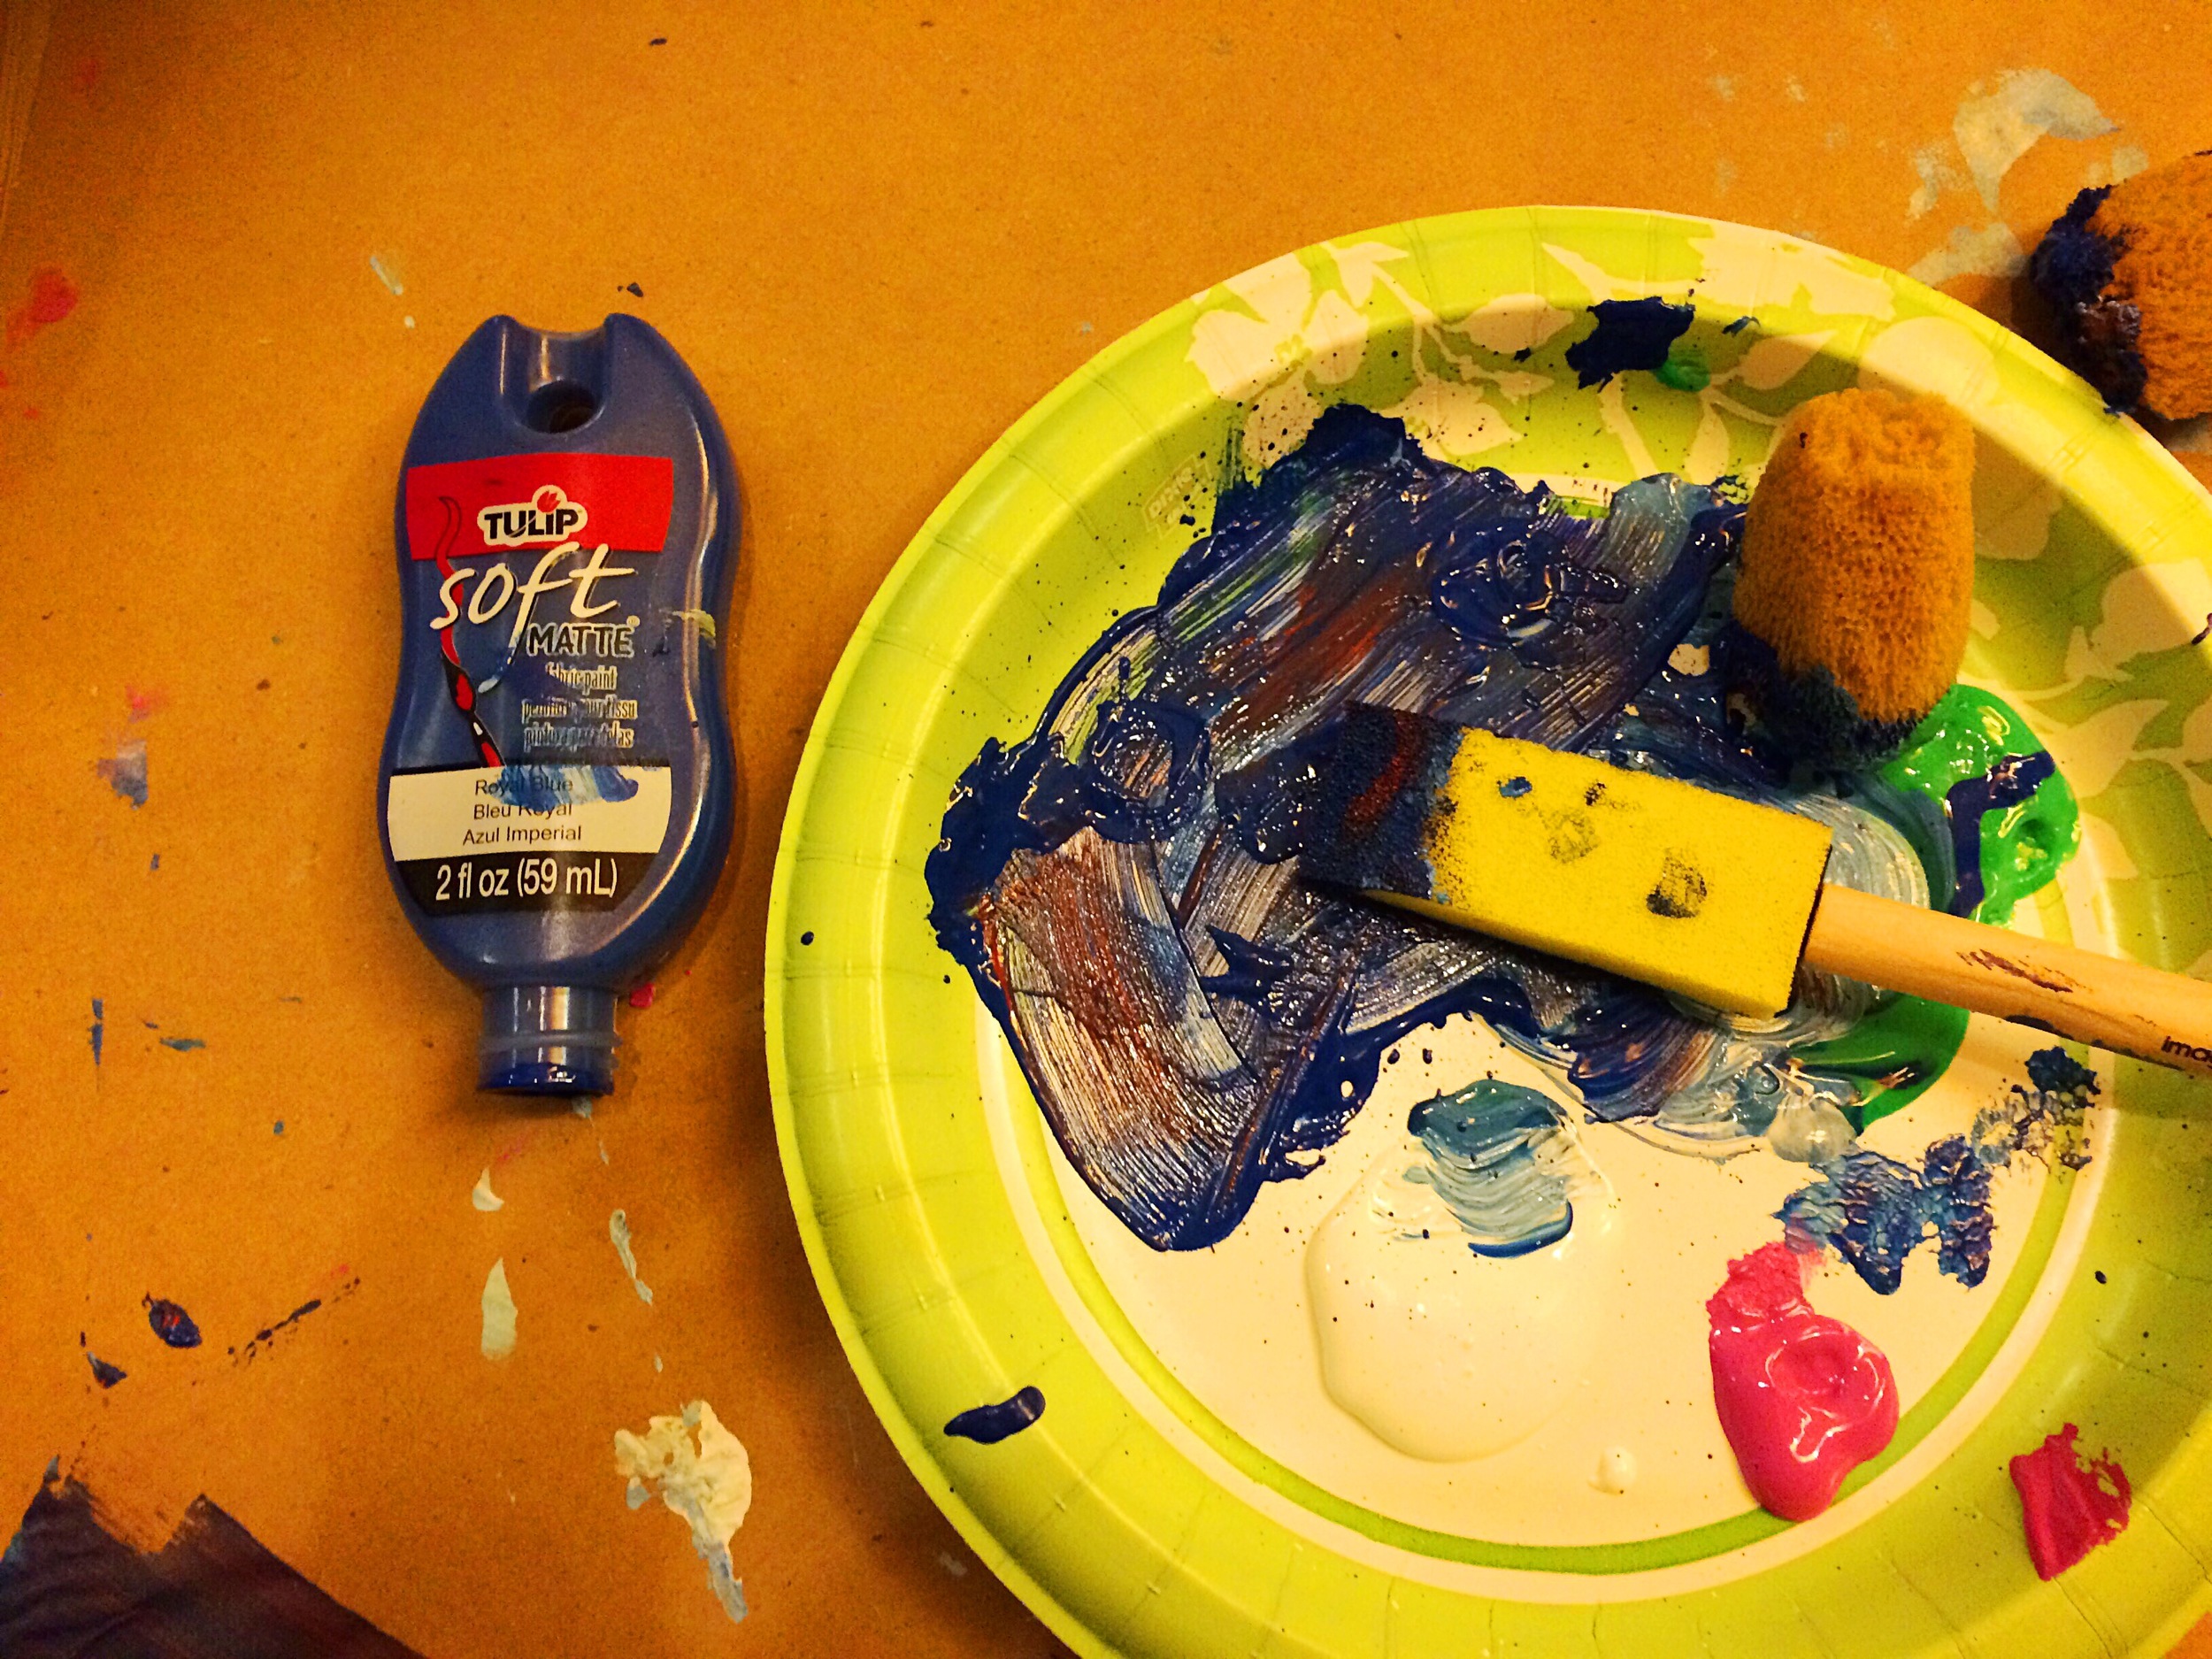
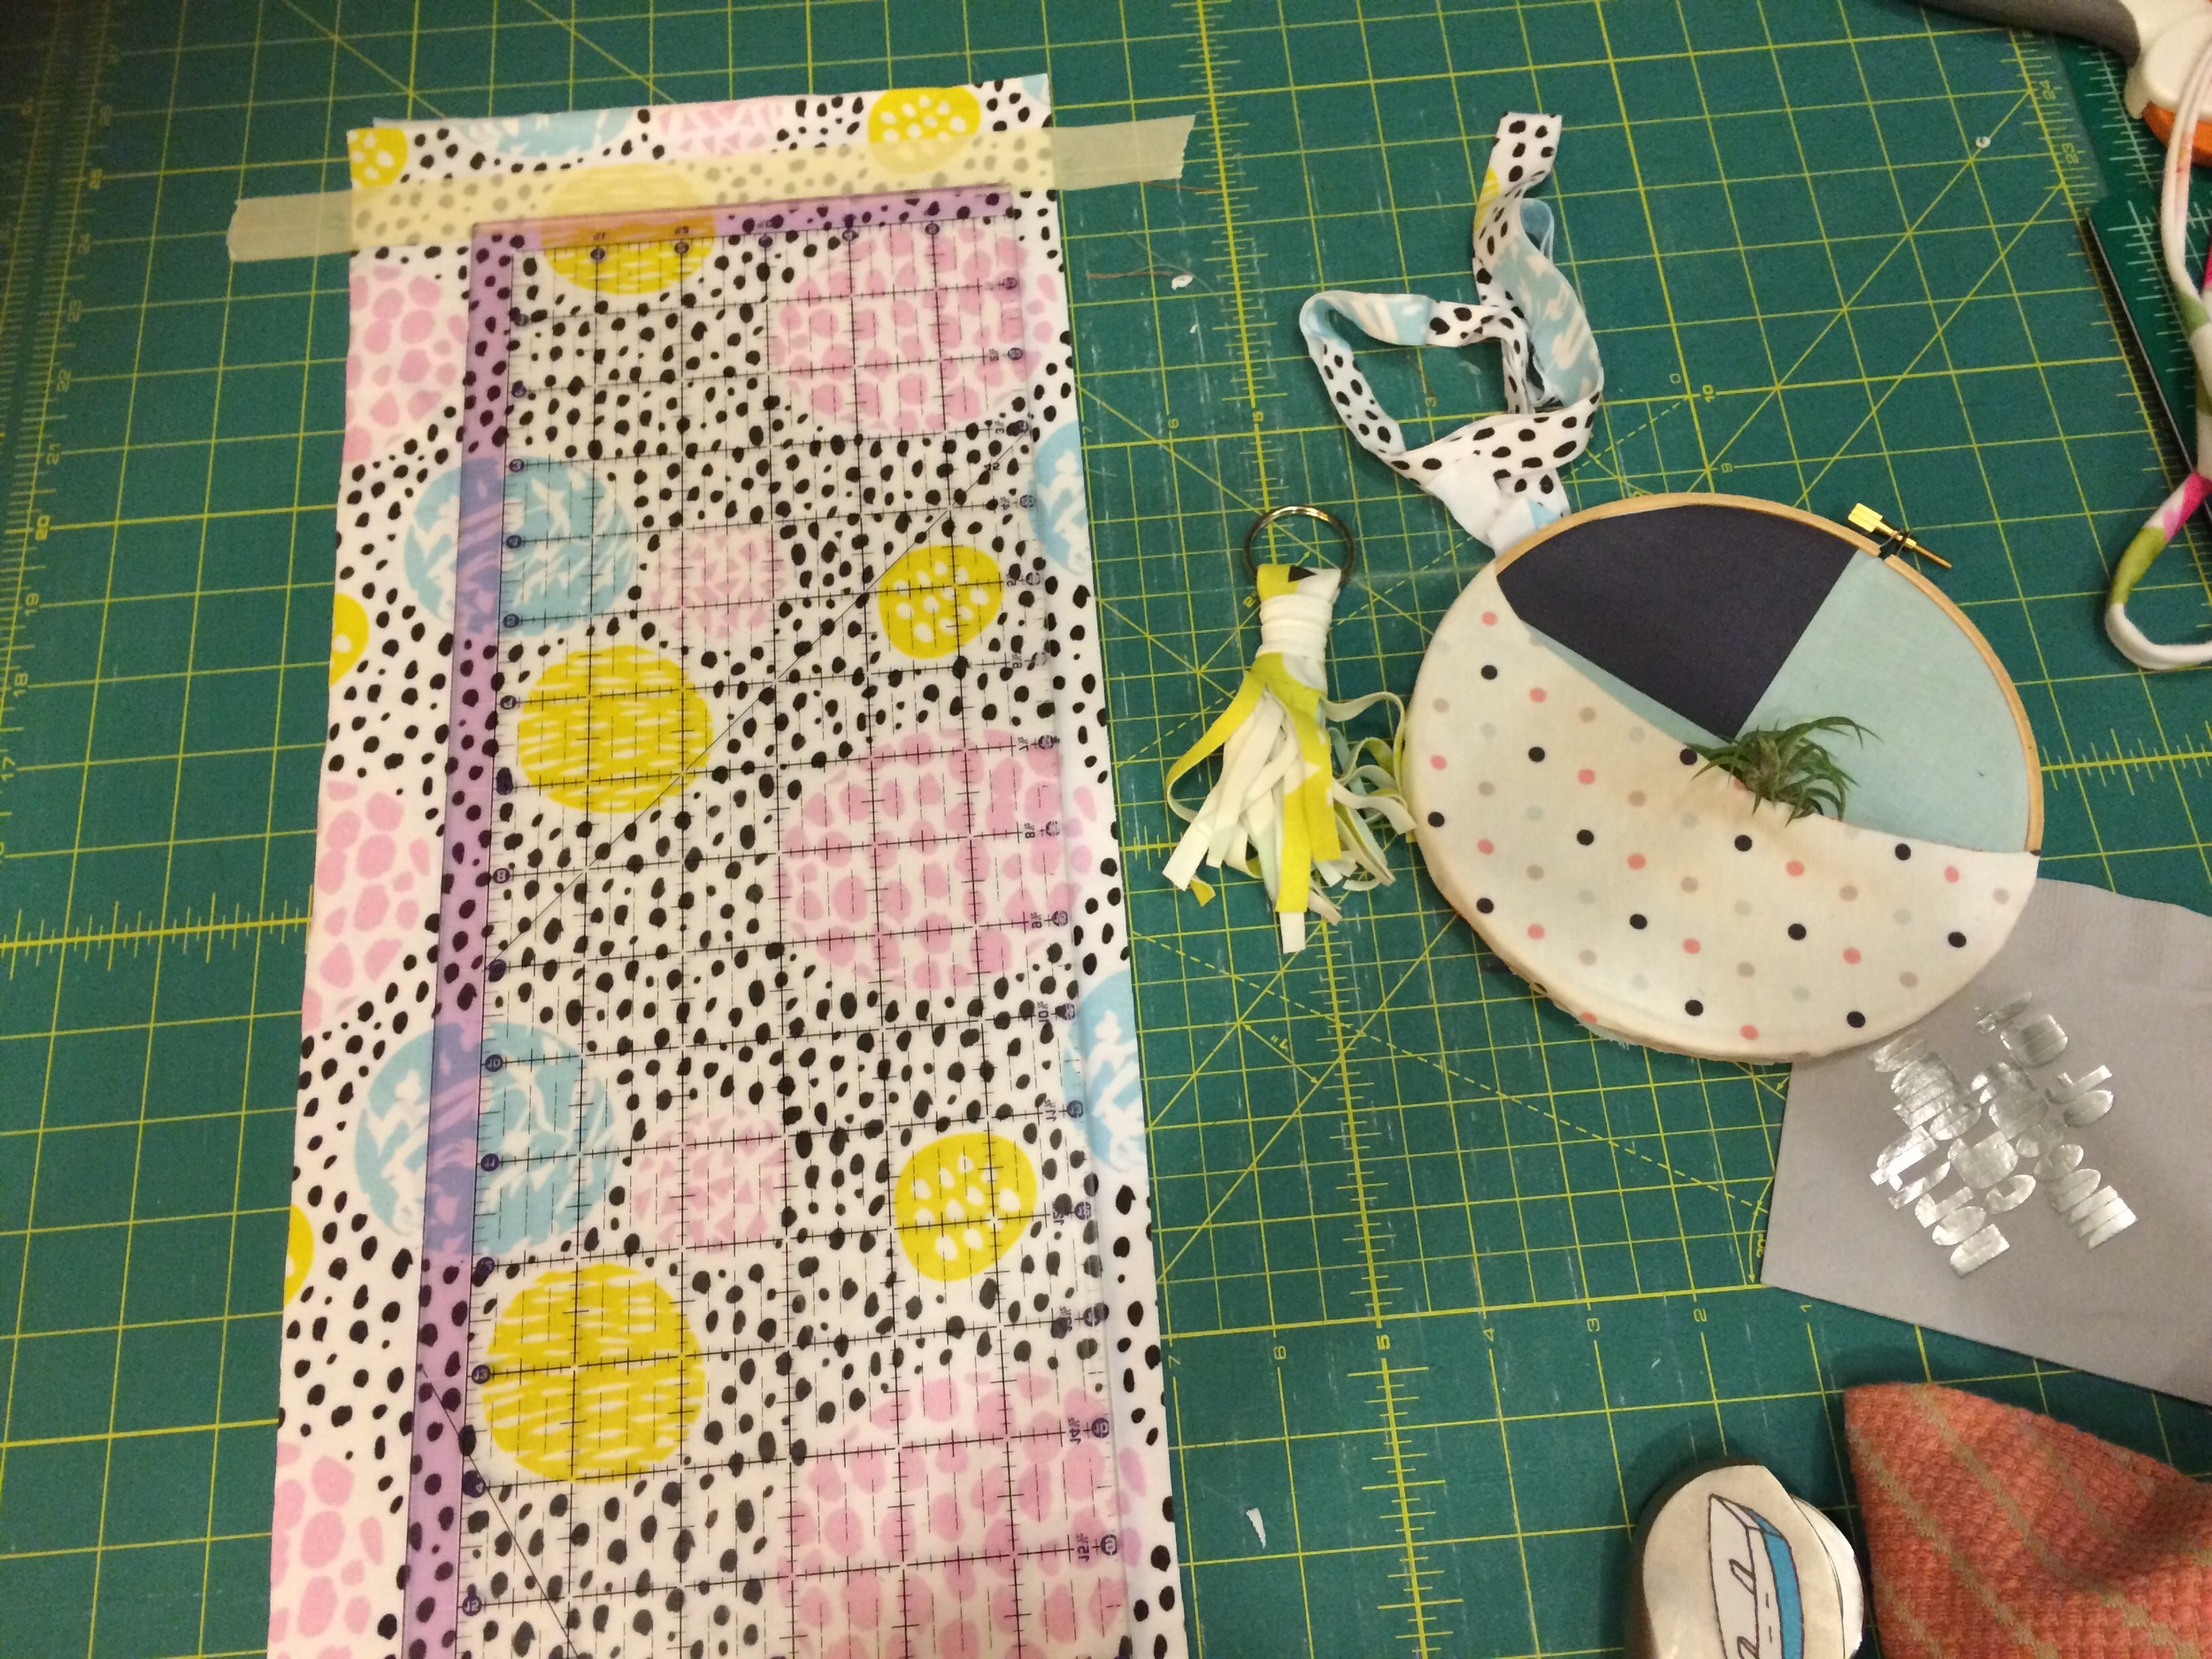
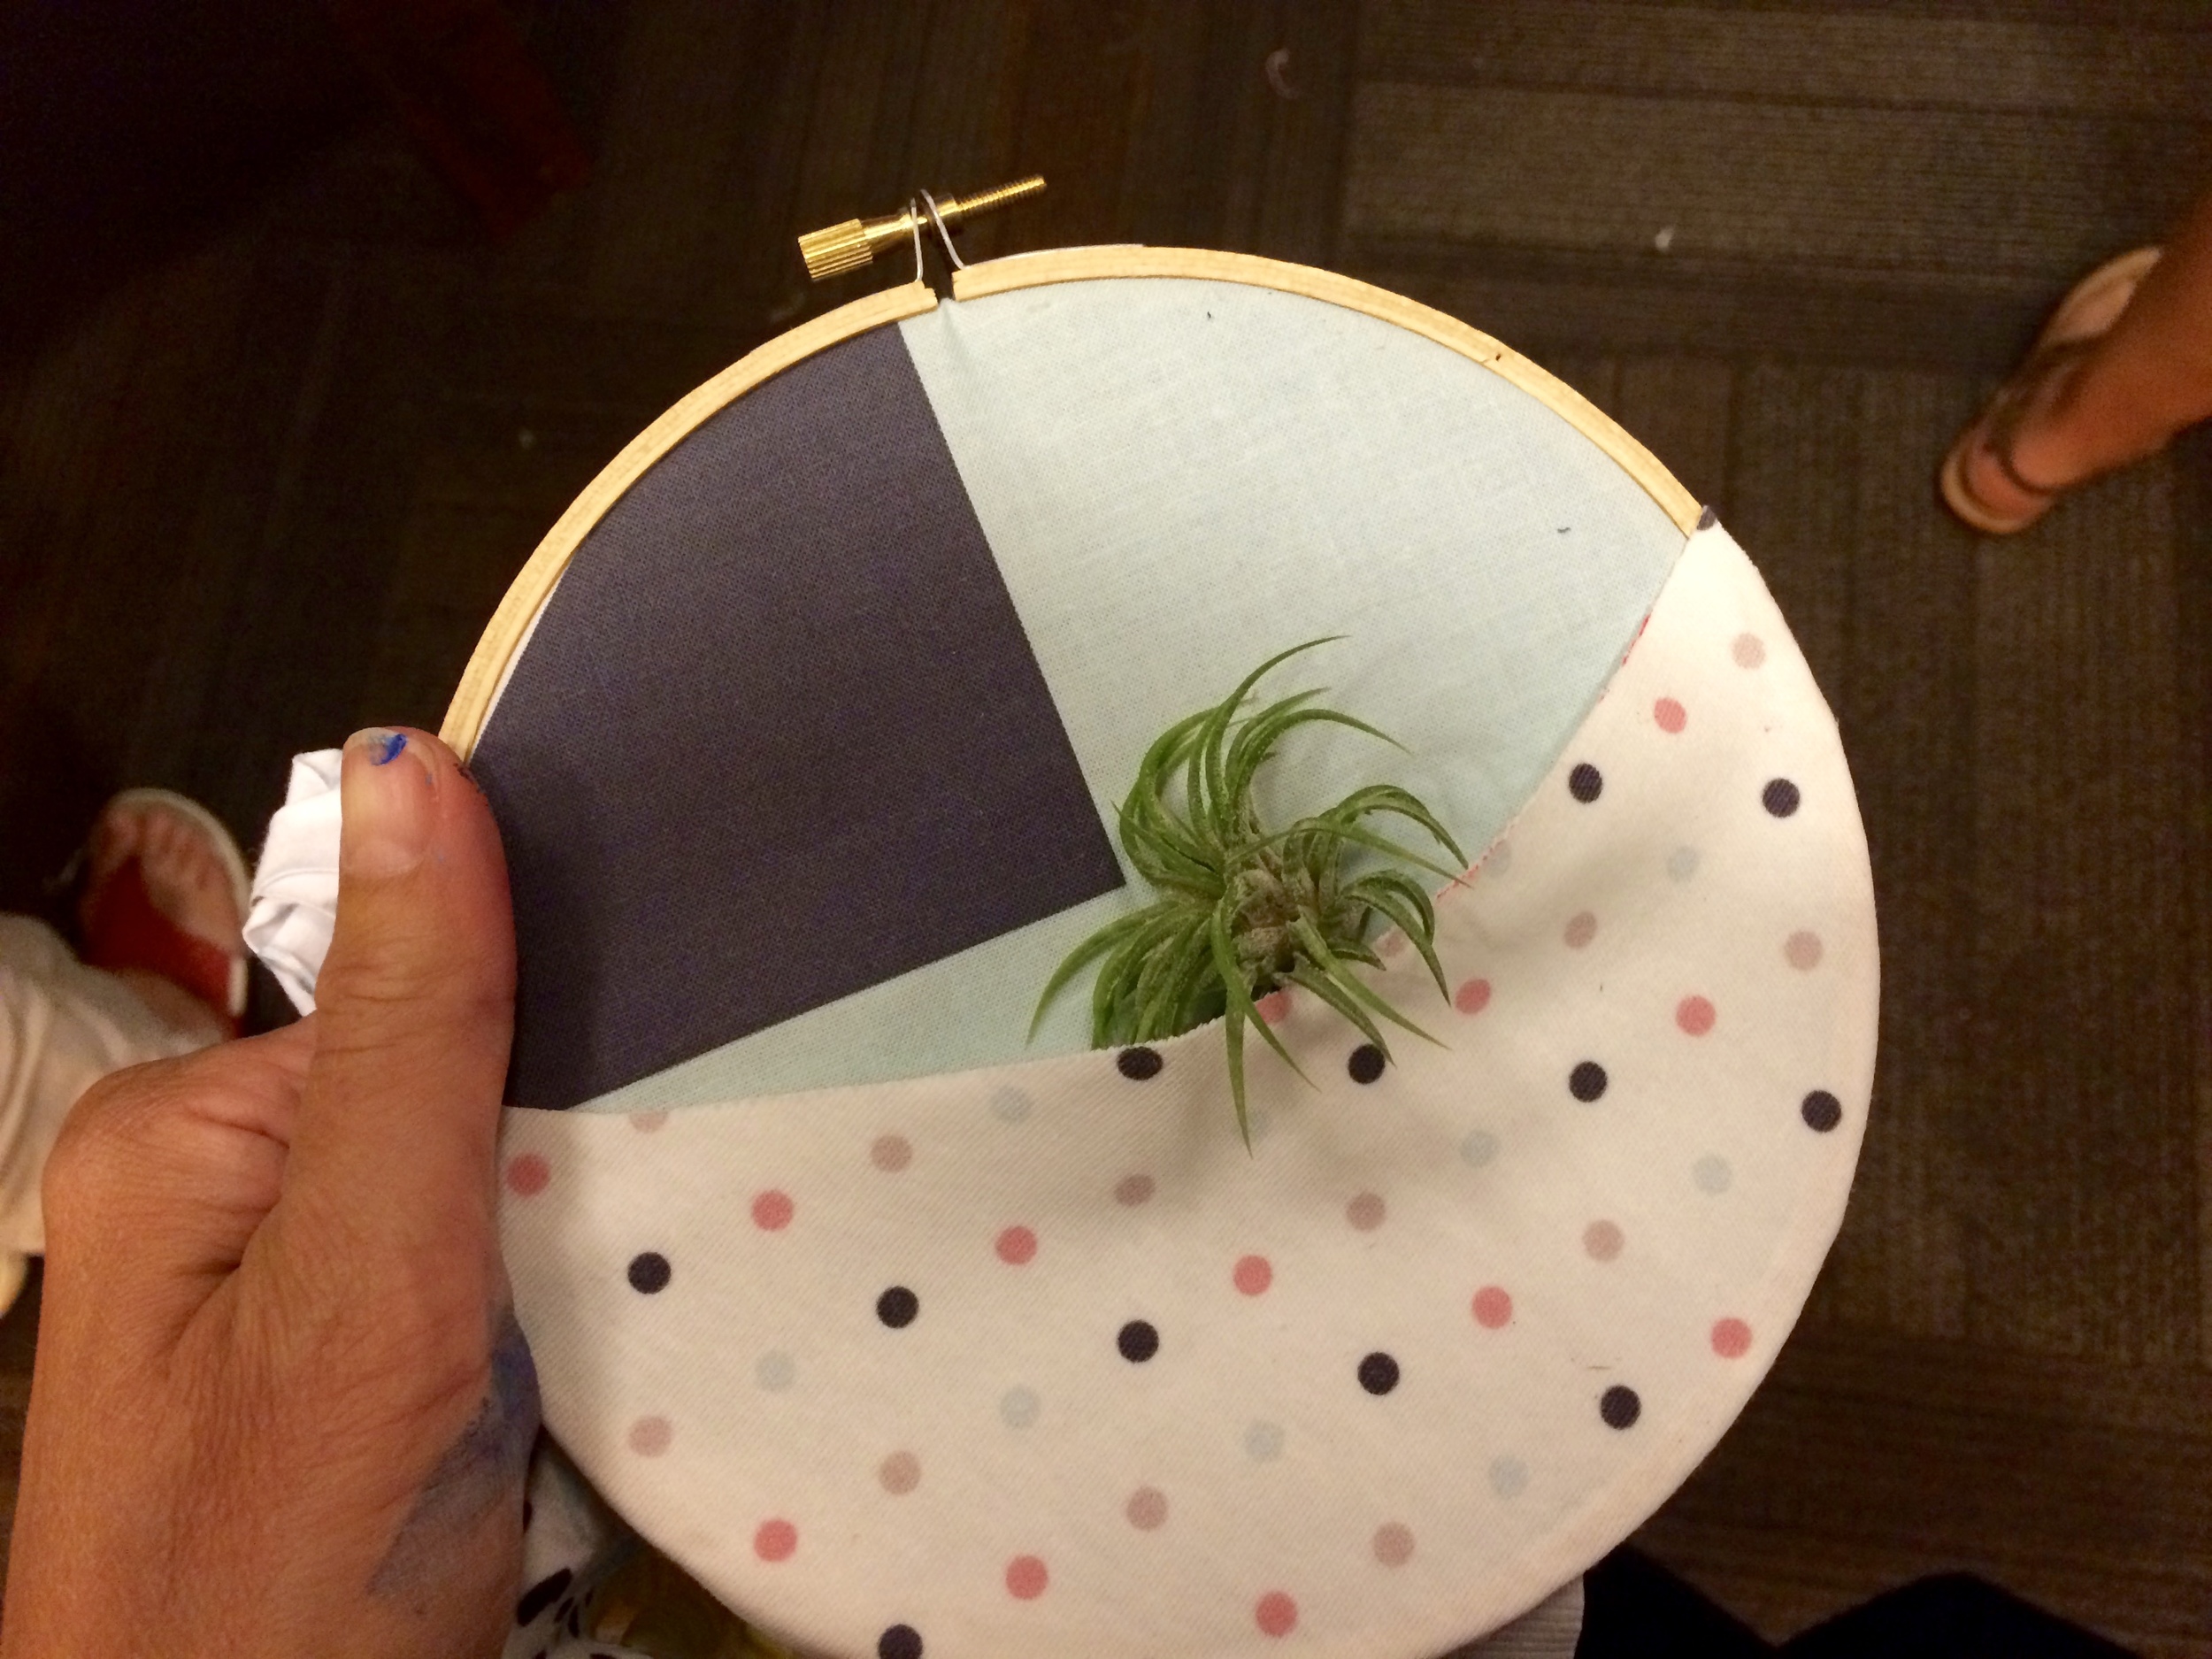
Spoonflower and the North Carolina Museum of Art know how to have a craft party. There were six craft stations set up. We were invited to try one or as many as we could fit in before nine. No problem. I did them all. Make your own coaster, tassel keychain, fabric necklace, hoop and fabric air plant planter, design your own fabric, and a phone case sticker. Each one was super easy and a delight to see the fabrics that Spoonflower chose for us to play with.
As the evening came to a close, I gathered my goodies and set out to find my way back to the hotel. What a night! I have my Spoonflower Handbook, a head full of ideas, Photoshop and Illustrator at the ready to go home and send off some new fabric ideas to print. I think that Little Stitch Studio and The Chrysler Museum need to partner up to bring an event like this to Norfolk.

Coat check.

Sew a Softie Day!
Sew a Softie Day! Shopkin-ish edition.

I am so very honored to be included as a guest contributor to Sew A Softie Day! Trixi Symonds of Colored Buttons envisioned Sew a Softie Day as a way to share the craft of hand sewing. As a sewing teacher (and a mom!) I know first hand how seriously excited kids are about making things with their own hands. Sewing is a skill that they can learn that is super useful, accessible and fun. Yet there are so few adults in their life that sew anymore. I have a fun project for you In case you need a little inspiration to get started.
First, I'd like to share some thoughts on sewing with kids. To begin, ask them what they want to make. Kids really take to sewing when the rules are limited and they have lots of creative freedom and attractive materials to choose from. Good supplies are essential! I hate to sew with cheap fabric, flimsy needles and dull scissors. Sewing supplies don't cost that much money and the nicer felts, fabrics and tools make sewing so much more pleasurable. Get the better quality stuff. You will thank yourself. Kids are so much more invested in a project if they get to pick out the fabric and thread. Take them to the store, (seriously), and let them pick out the thread, felt, and buttons they like. The color combinations they choose are always fantastic.
If you are teaching a group of kids, have a sample made. Understand that sometimes what we think is terrific, they will not want to make. When this happens to you, try not to be disappointed! Ask them how they would change it and adapt. Kids know what they like.
Preparation is key. Precut the patterns, gather the supplies, thread the needles, tie the knots. Have it all ready to go. I find that simple 2-D shapes work best for little hands and growing minds. A simple shape is a blank canvas for them to embellish. (and they will!) Kids love to personalize whatever they make, More is more.
Turn on some music, thread some needles, snuggle up with your favorite little ones and have fun with it. To begin hand sewing with kids, I have them choose a small piece of felt and a few colors of embroidery floss. Then I draw a path of dashed lines each about 1/2" long across the felt. I give them a strand of floss and knot the end with a "tail" below the knot. We begin by pushing up through the back of the felt. We pretend that the needle is a dolphin or a mermaid who bursts up from the water (beginning of the line) and dives back in (the end of the line). However, the mermaid has to hold her nose when she dives (pinch the thread around the eye of the needle). Because she is just a little mermaid and just learning to swim. At this point we are focusing on process only. Wonky stitches are just fine! In fact, most kids prefer them. They want their stitches to show so that everyone else will know that they made it.

Kids need a lot of help threading needles and tying knots. They eventually get it, and when they do, they feel incredibly accomplished. They can't wait to help their struggling classmates.
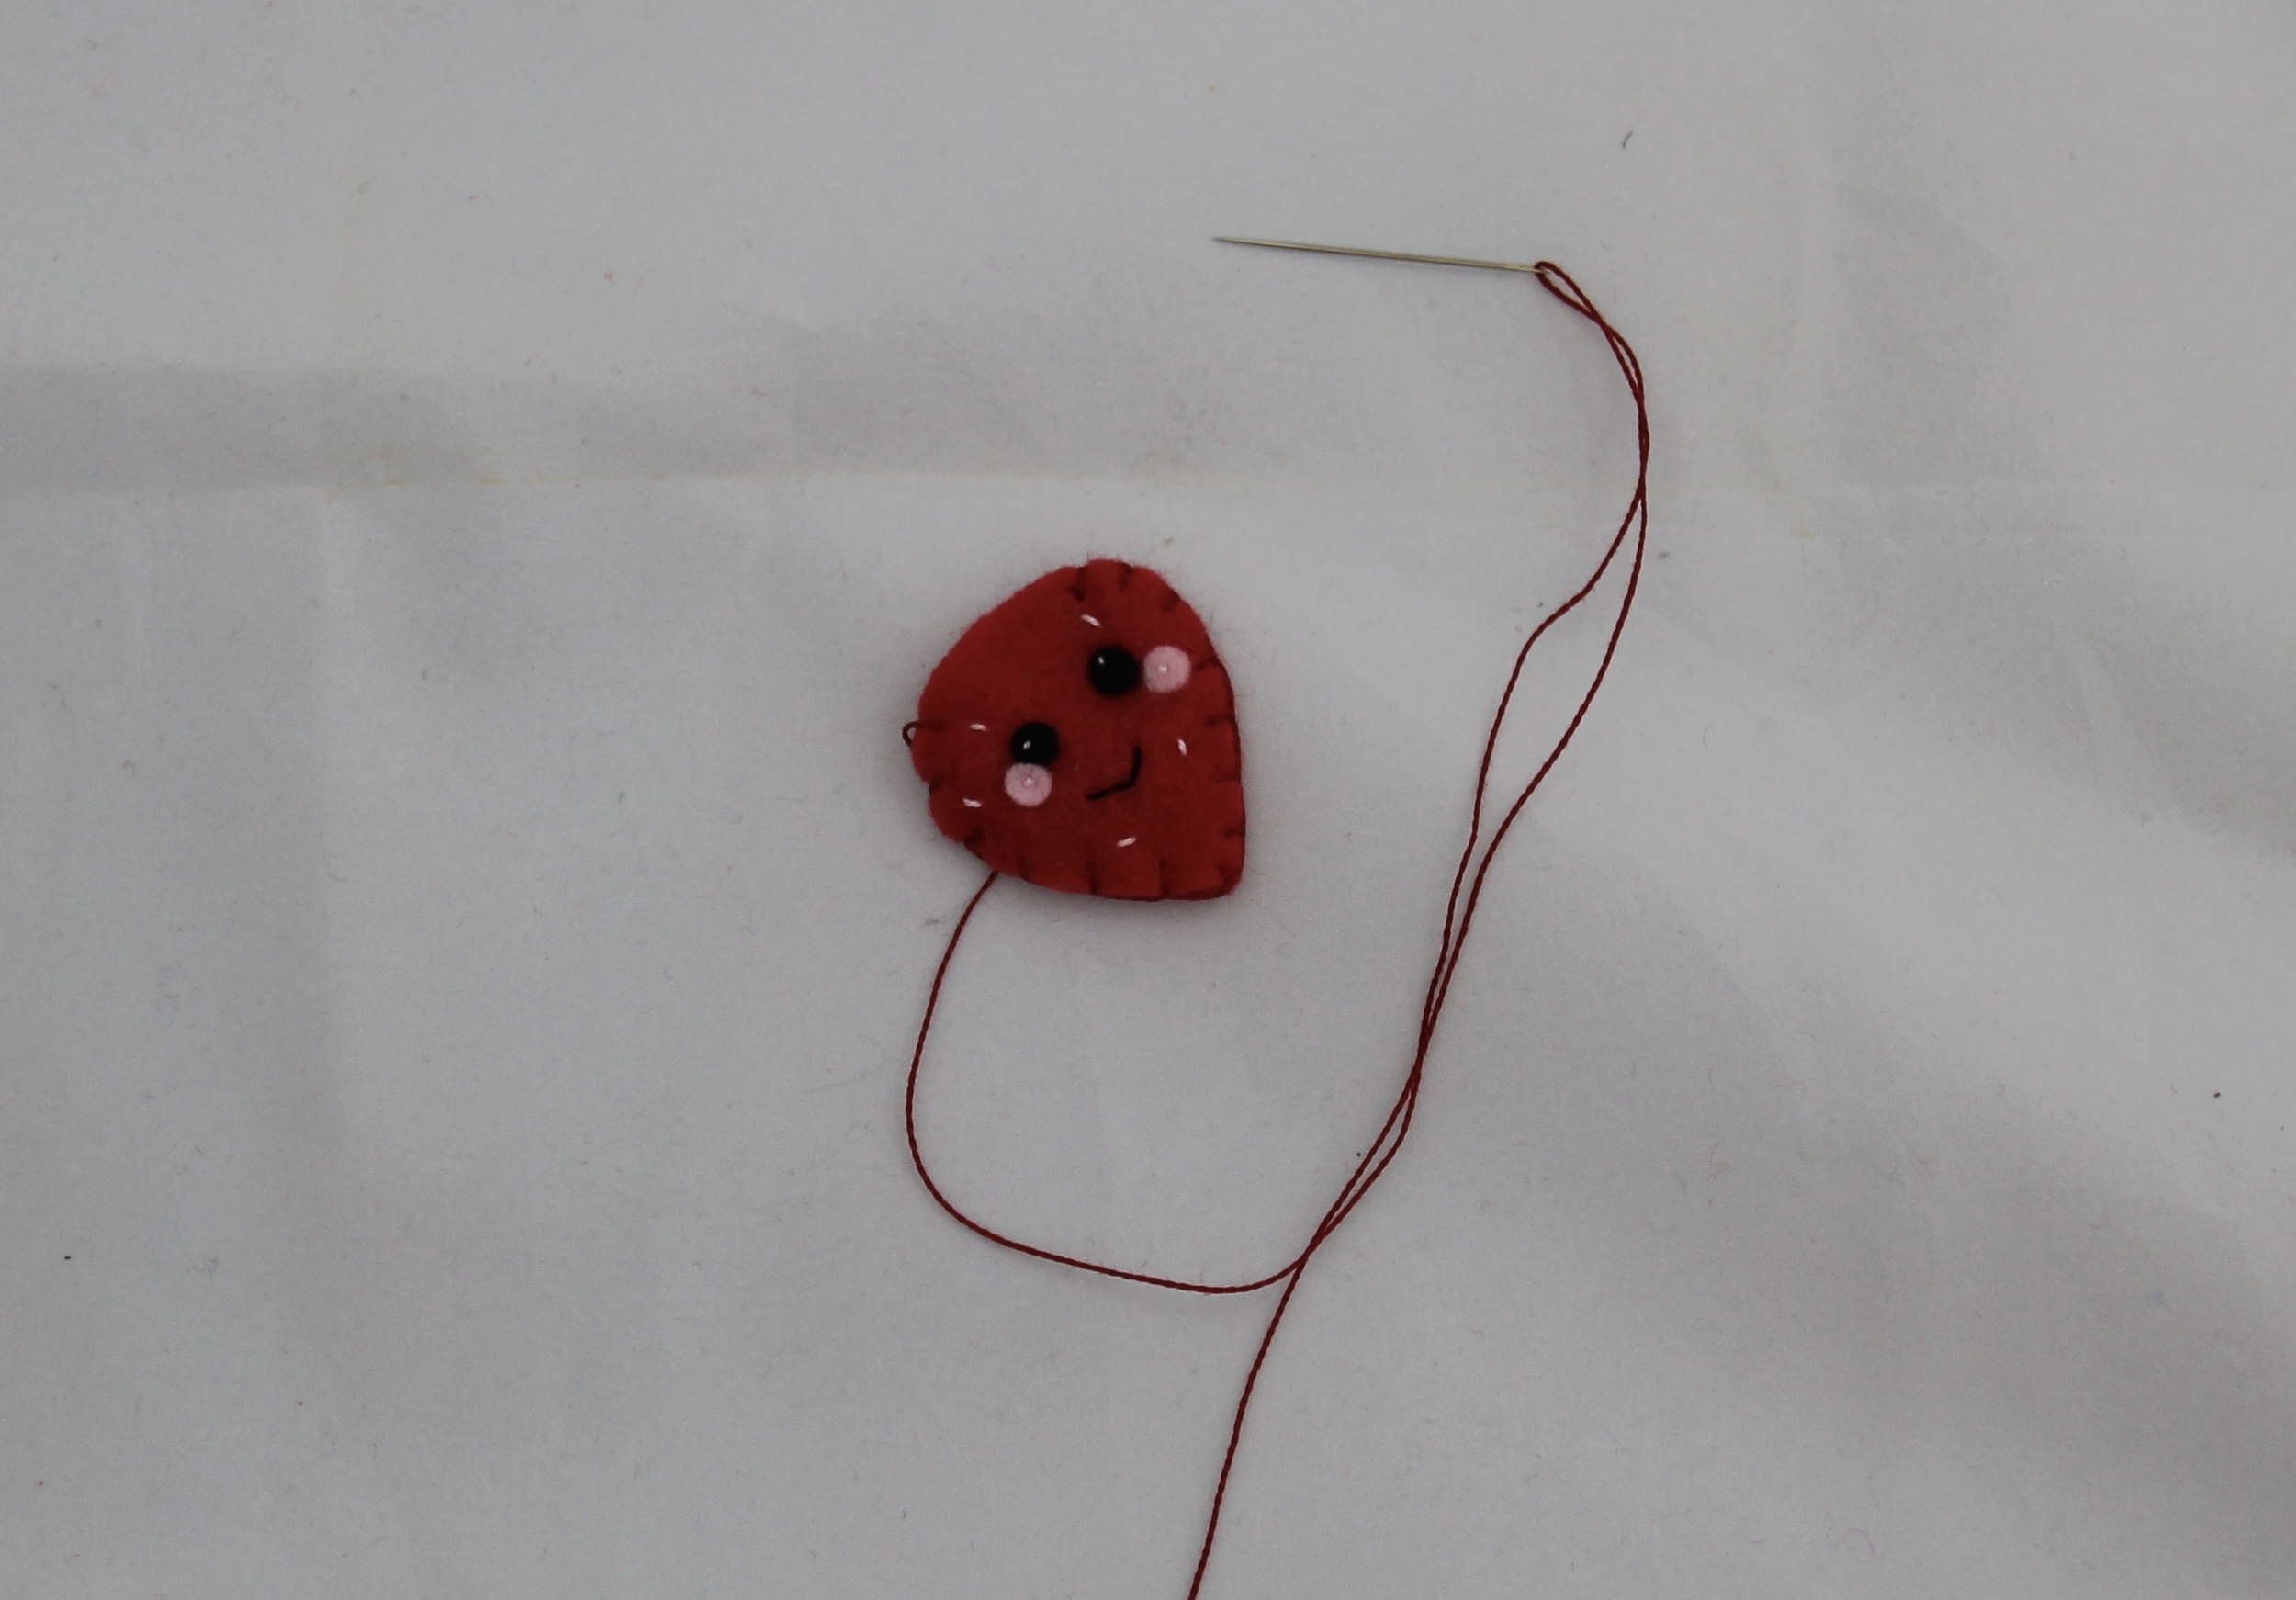
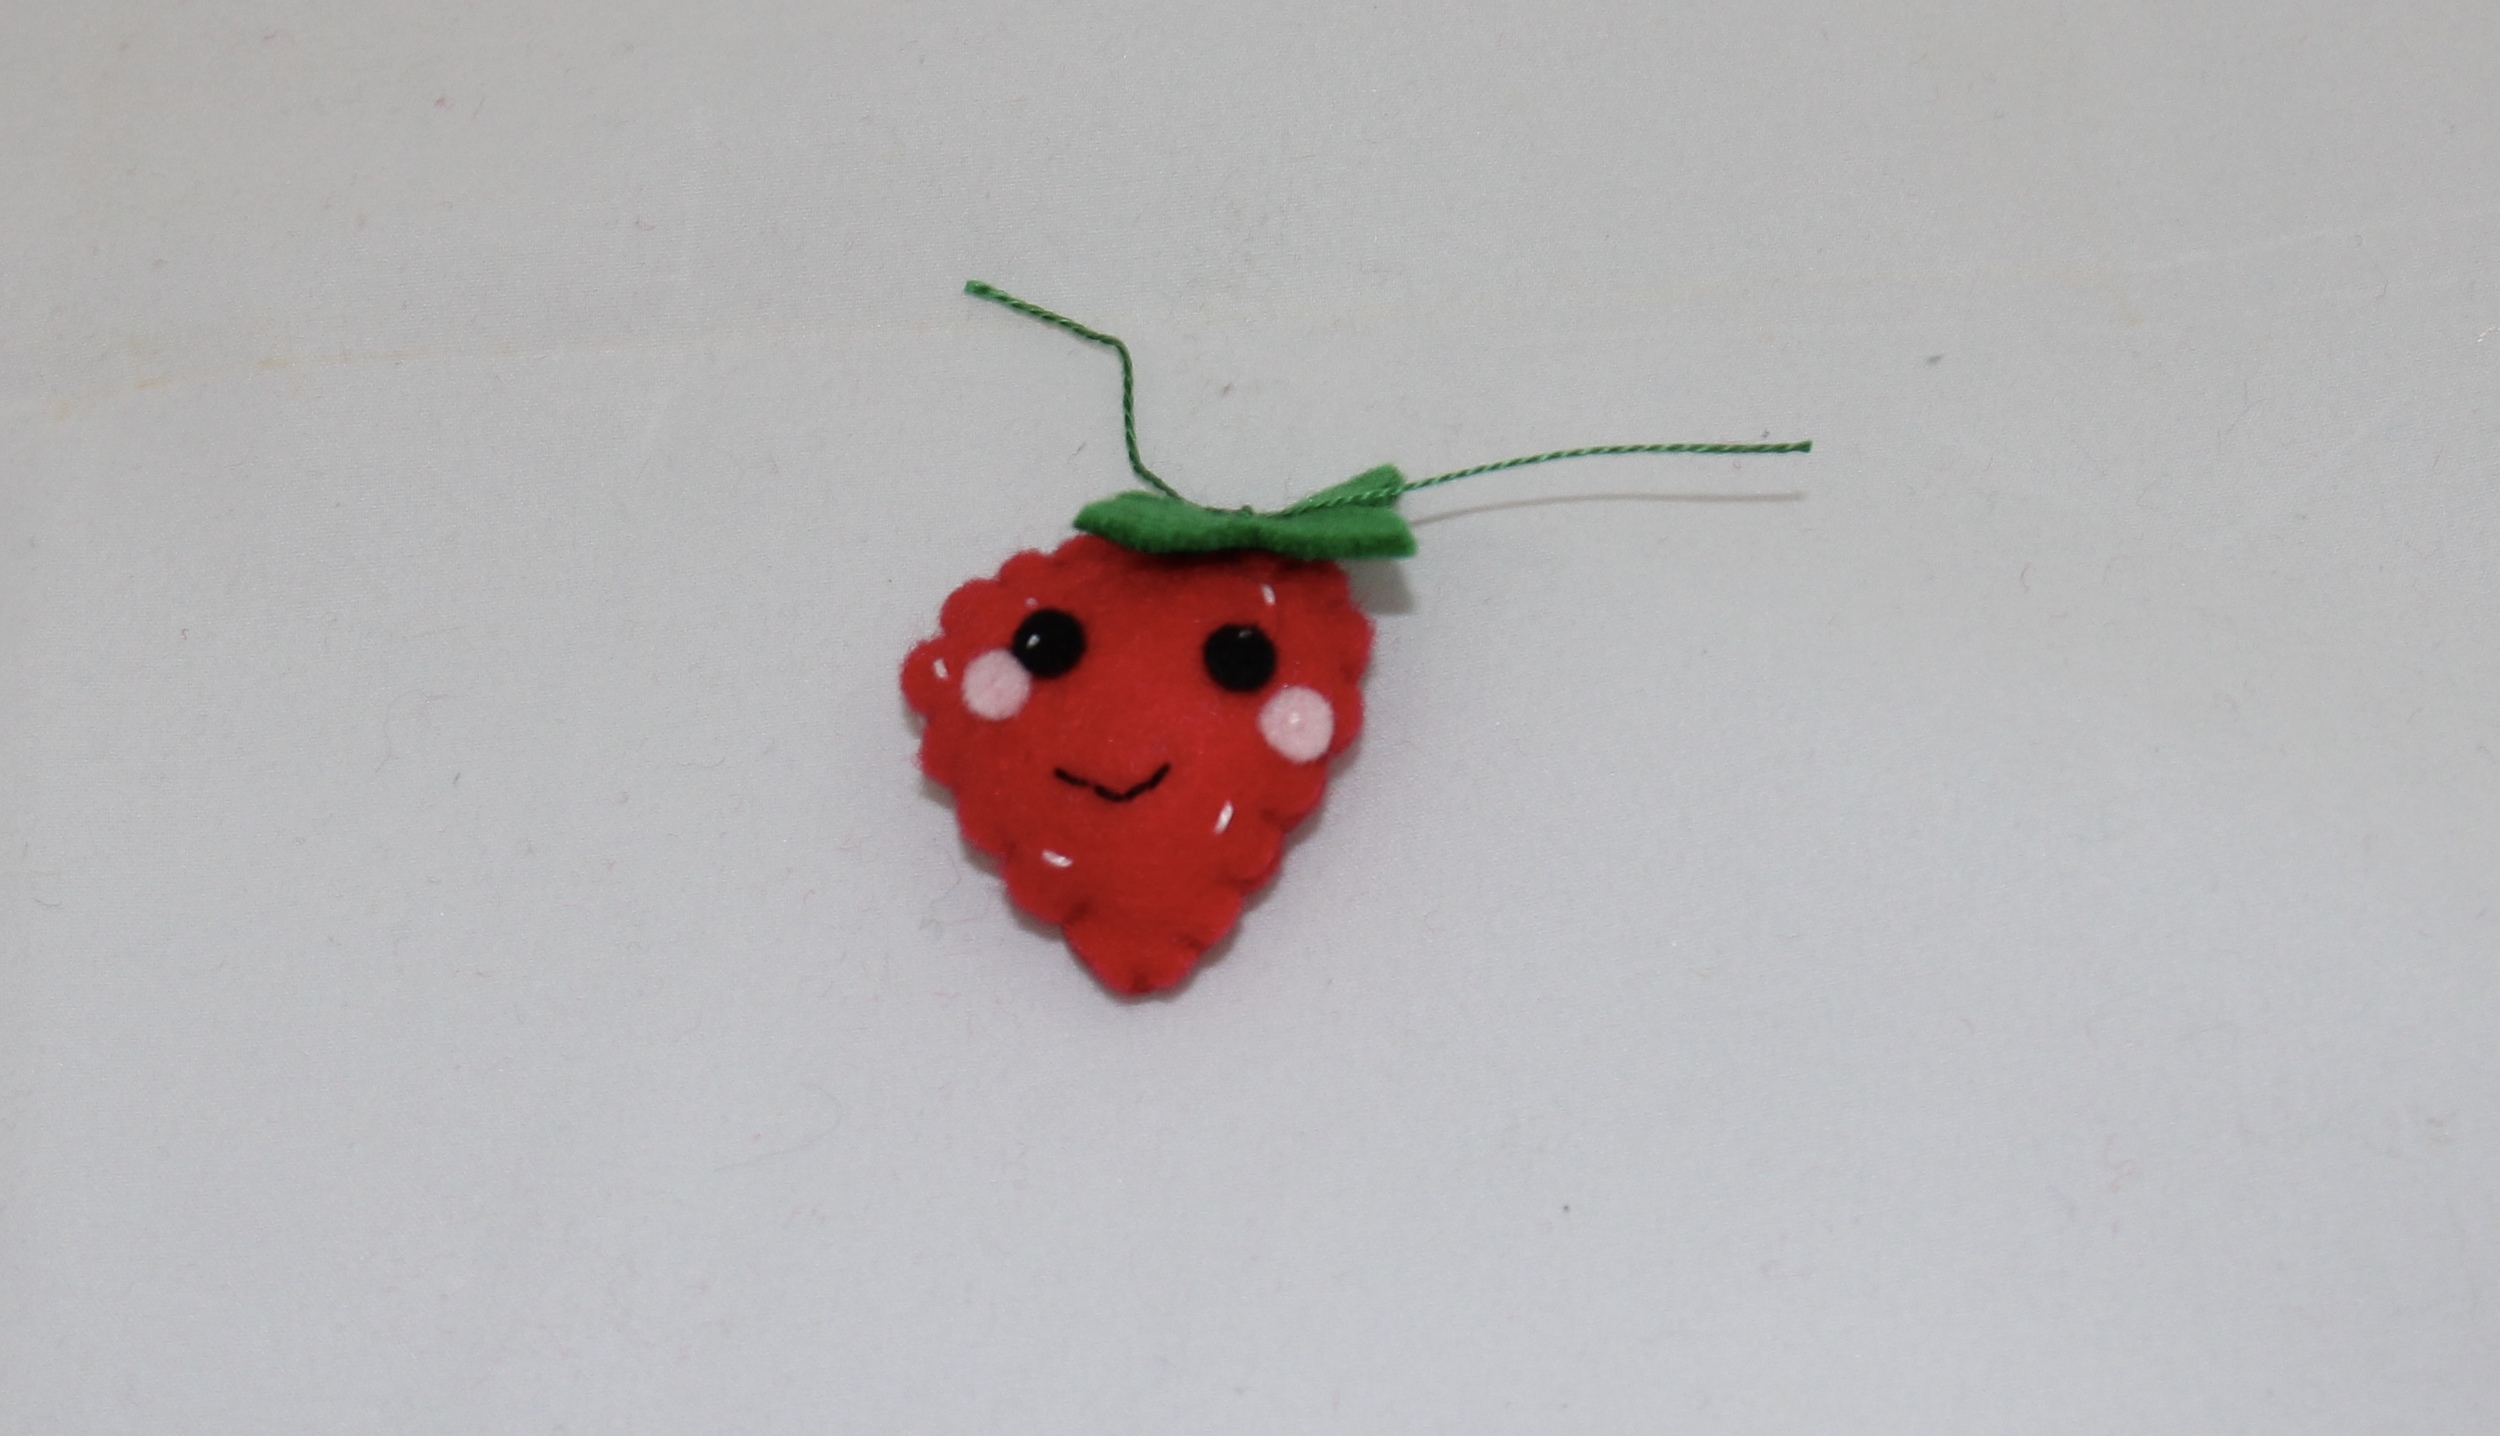
When I joined Sew a Softie Day, my original project was going to be a marionette puppet. I thought it would be lots of fun and couldn't wait to show my resident focus group (my own children). While they liked to play with the puppets, stringing them and making them move correctly proved really frustrating. I needed plan B! Later that week, in one of my sewing lessons, a young girl asked to make an avocado "Shopkin". Shopkins! Yes, of course, Shopkins are the perfect project! If you don't spend a lot of time around elementary aged girls, Shopkins are these adorable little shopping themed characters. Food, household items, clothes. Cute stuff that kids collect, trade and promptly loose.
While this project is not exactly a Shopkin, it has been a huge hit. The ideas are endless and can be tailored to each child's interest. Omit the inner circle on the doughnut and suddenly, it's a cookie or an alien spaceship. Perhaps make 2 circles and it becomes a Starwars BB-8! Simple shapes, few "rules", cute details and fun colors. Are you ready to try it?

Felt Shopkin-ish
Supplies Needed:
Felt
Embroidery Floss or Pearle Cotton
Embroidery needles with a large eye
Scissors
Chalk pencil or Frixion pen
Stuffing

To begin, download and print the pattern. (Make sure that the scaling square measures one inch.) Trace around the templates and cut on the trace line. It may help to trace the pattern onto cardstock or posterboard and then cut the shape out for the kids to trace onto felt. Paper can be tricky for most kids to align, pin and cut.
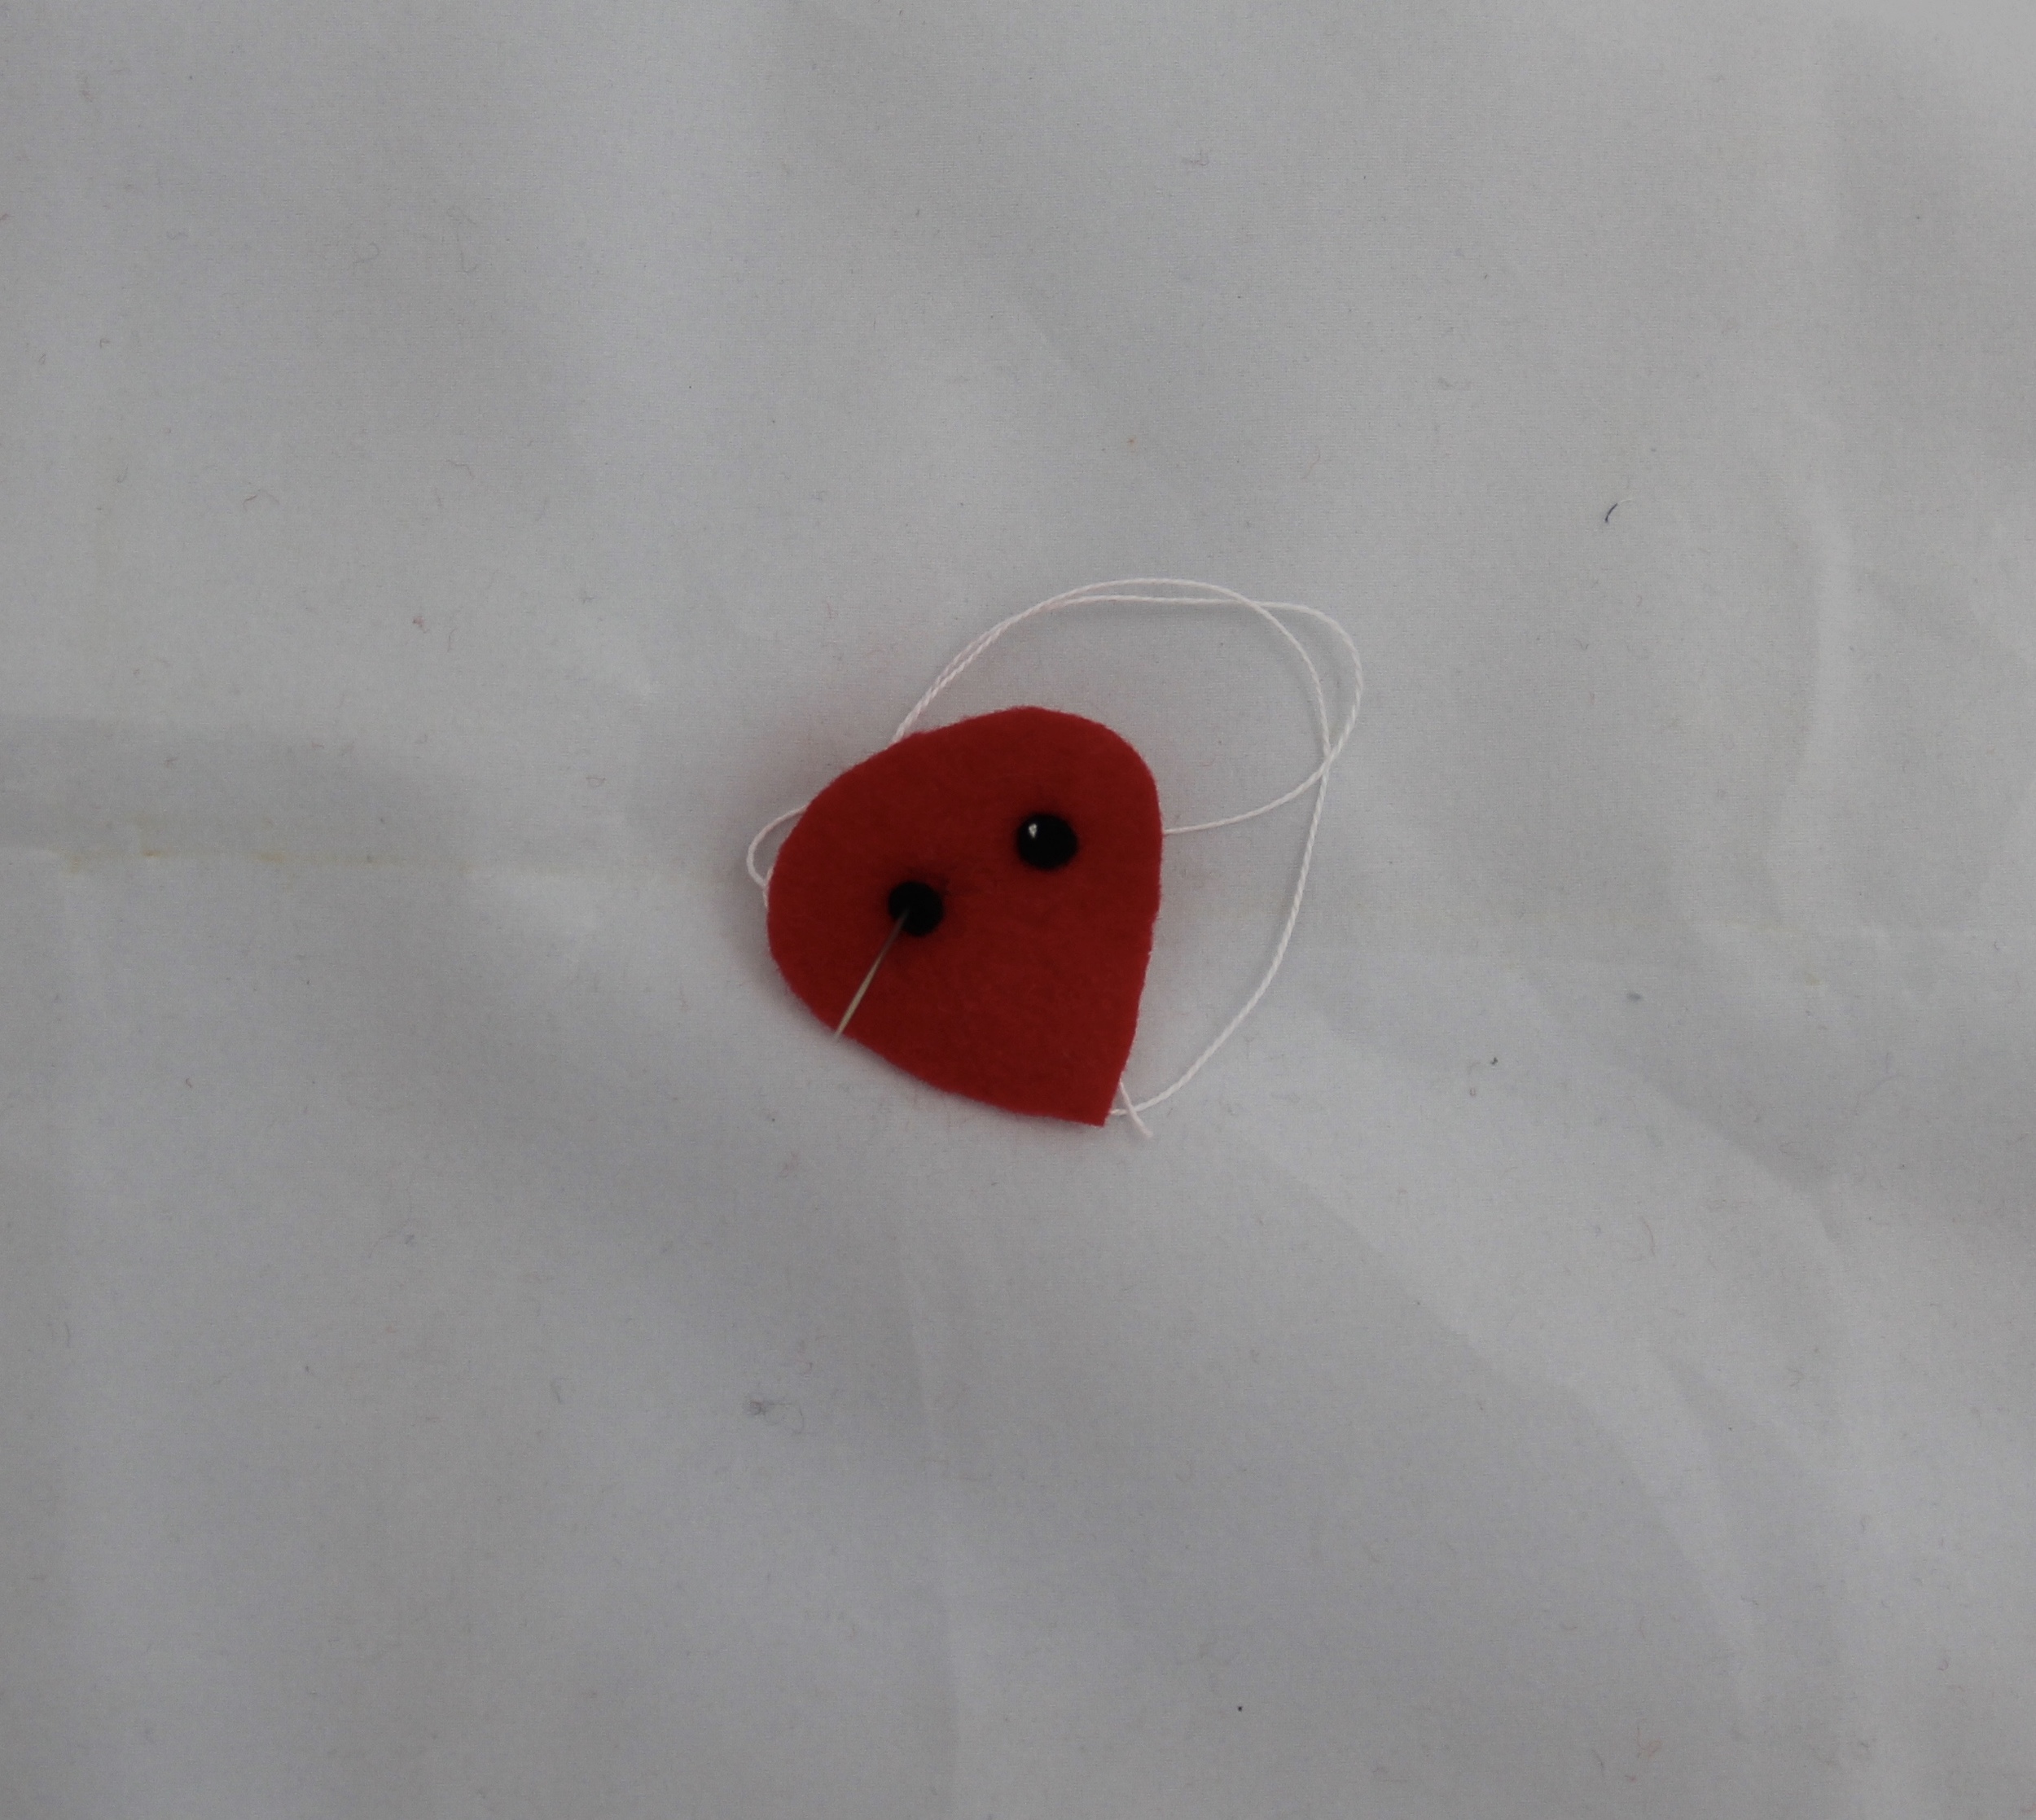
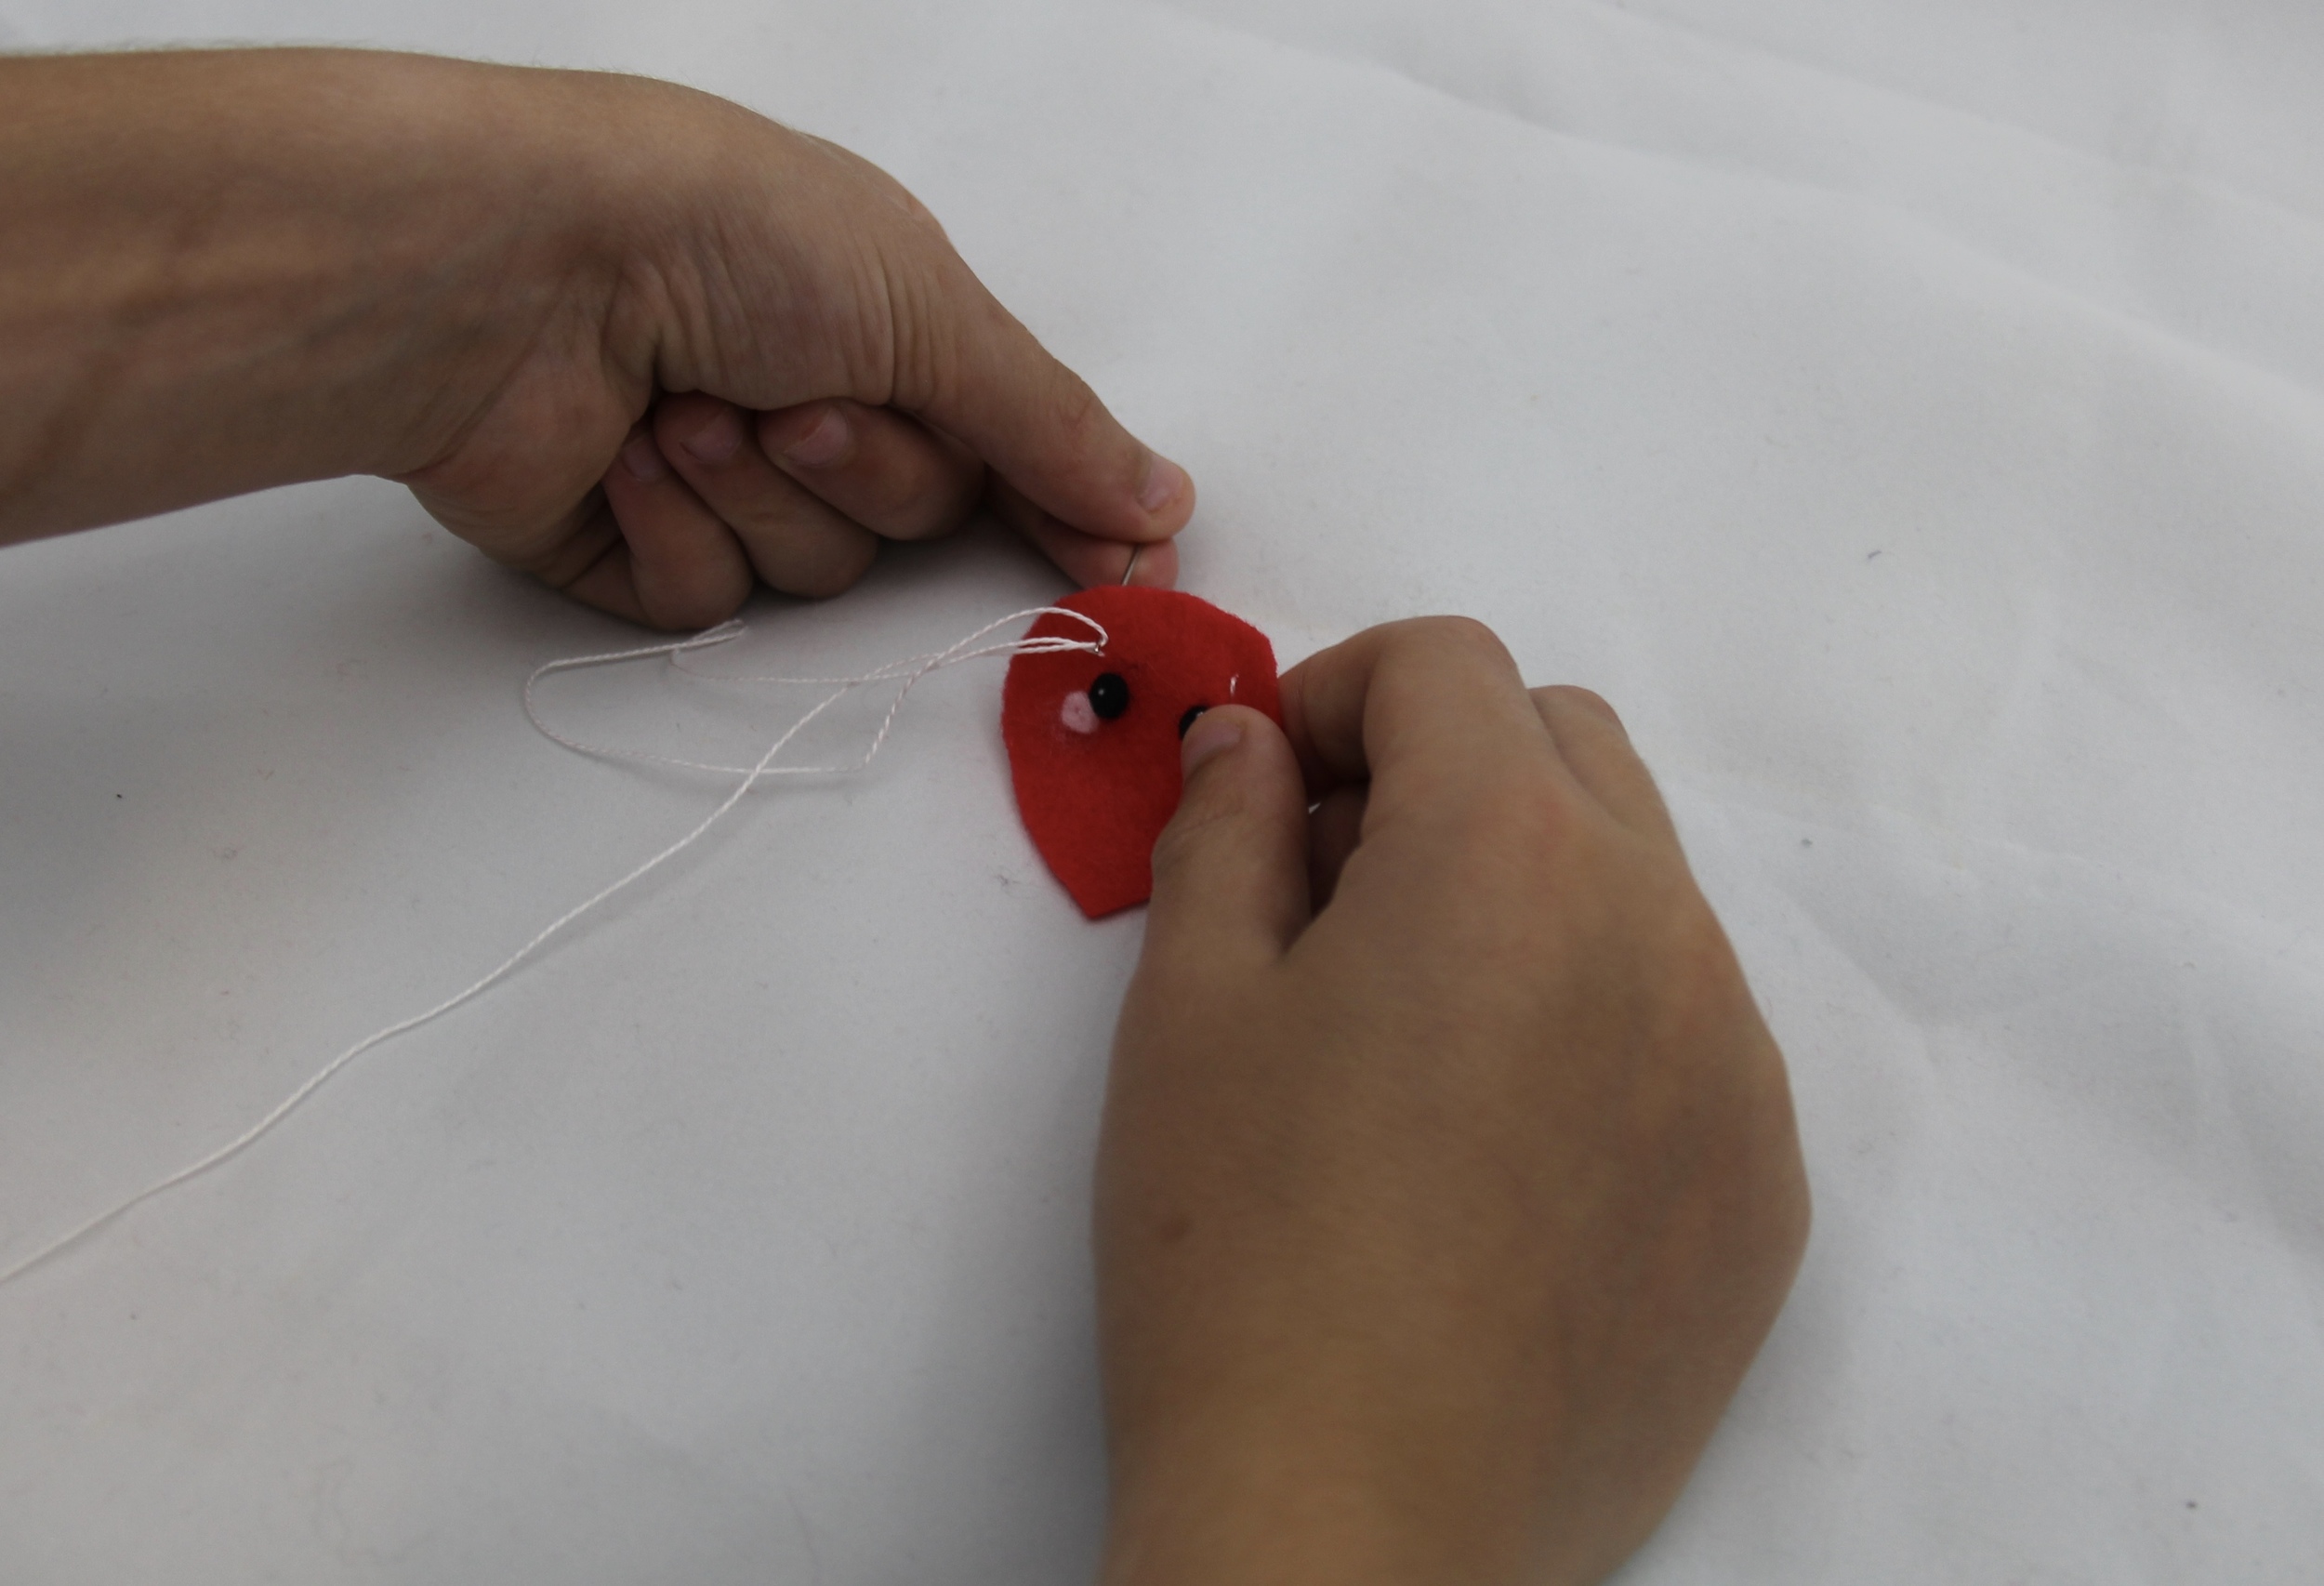
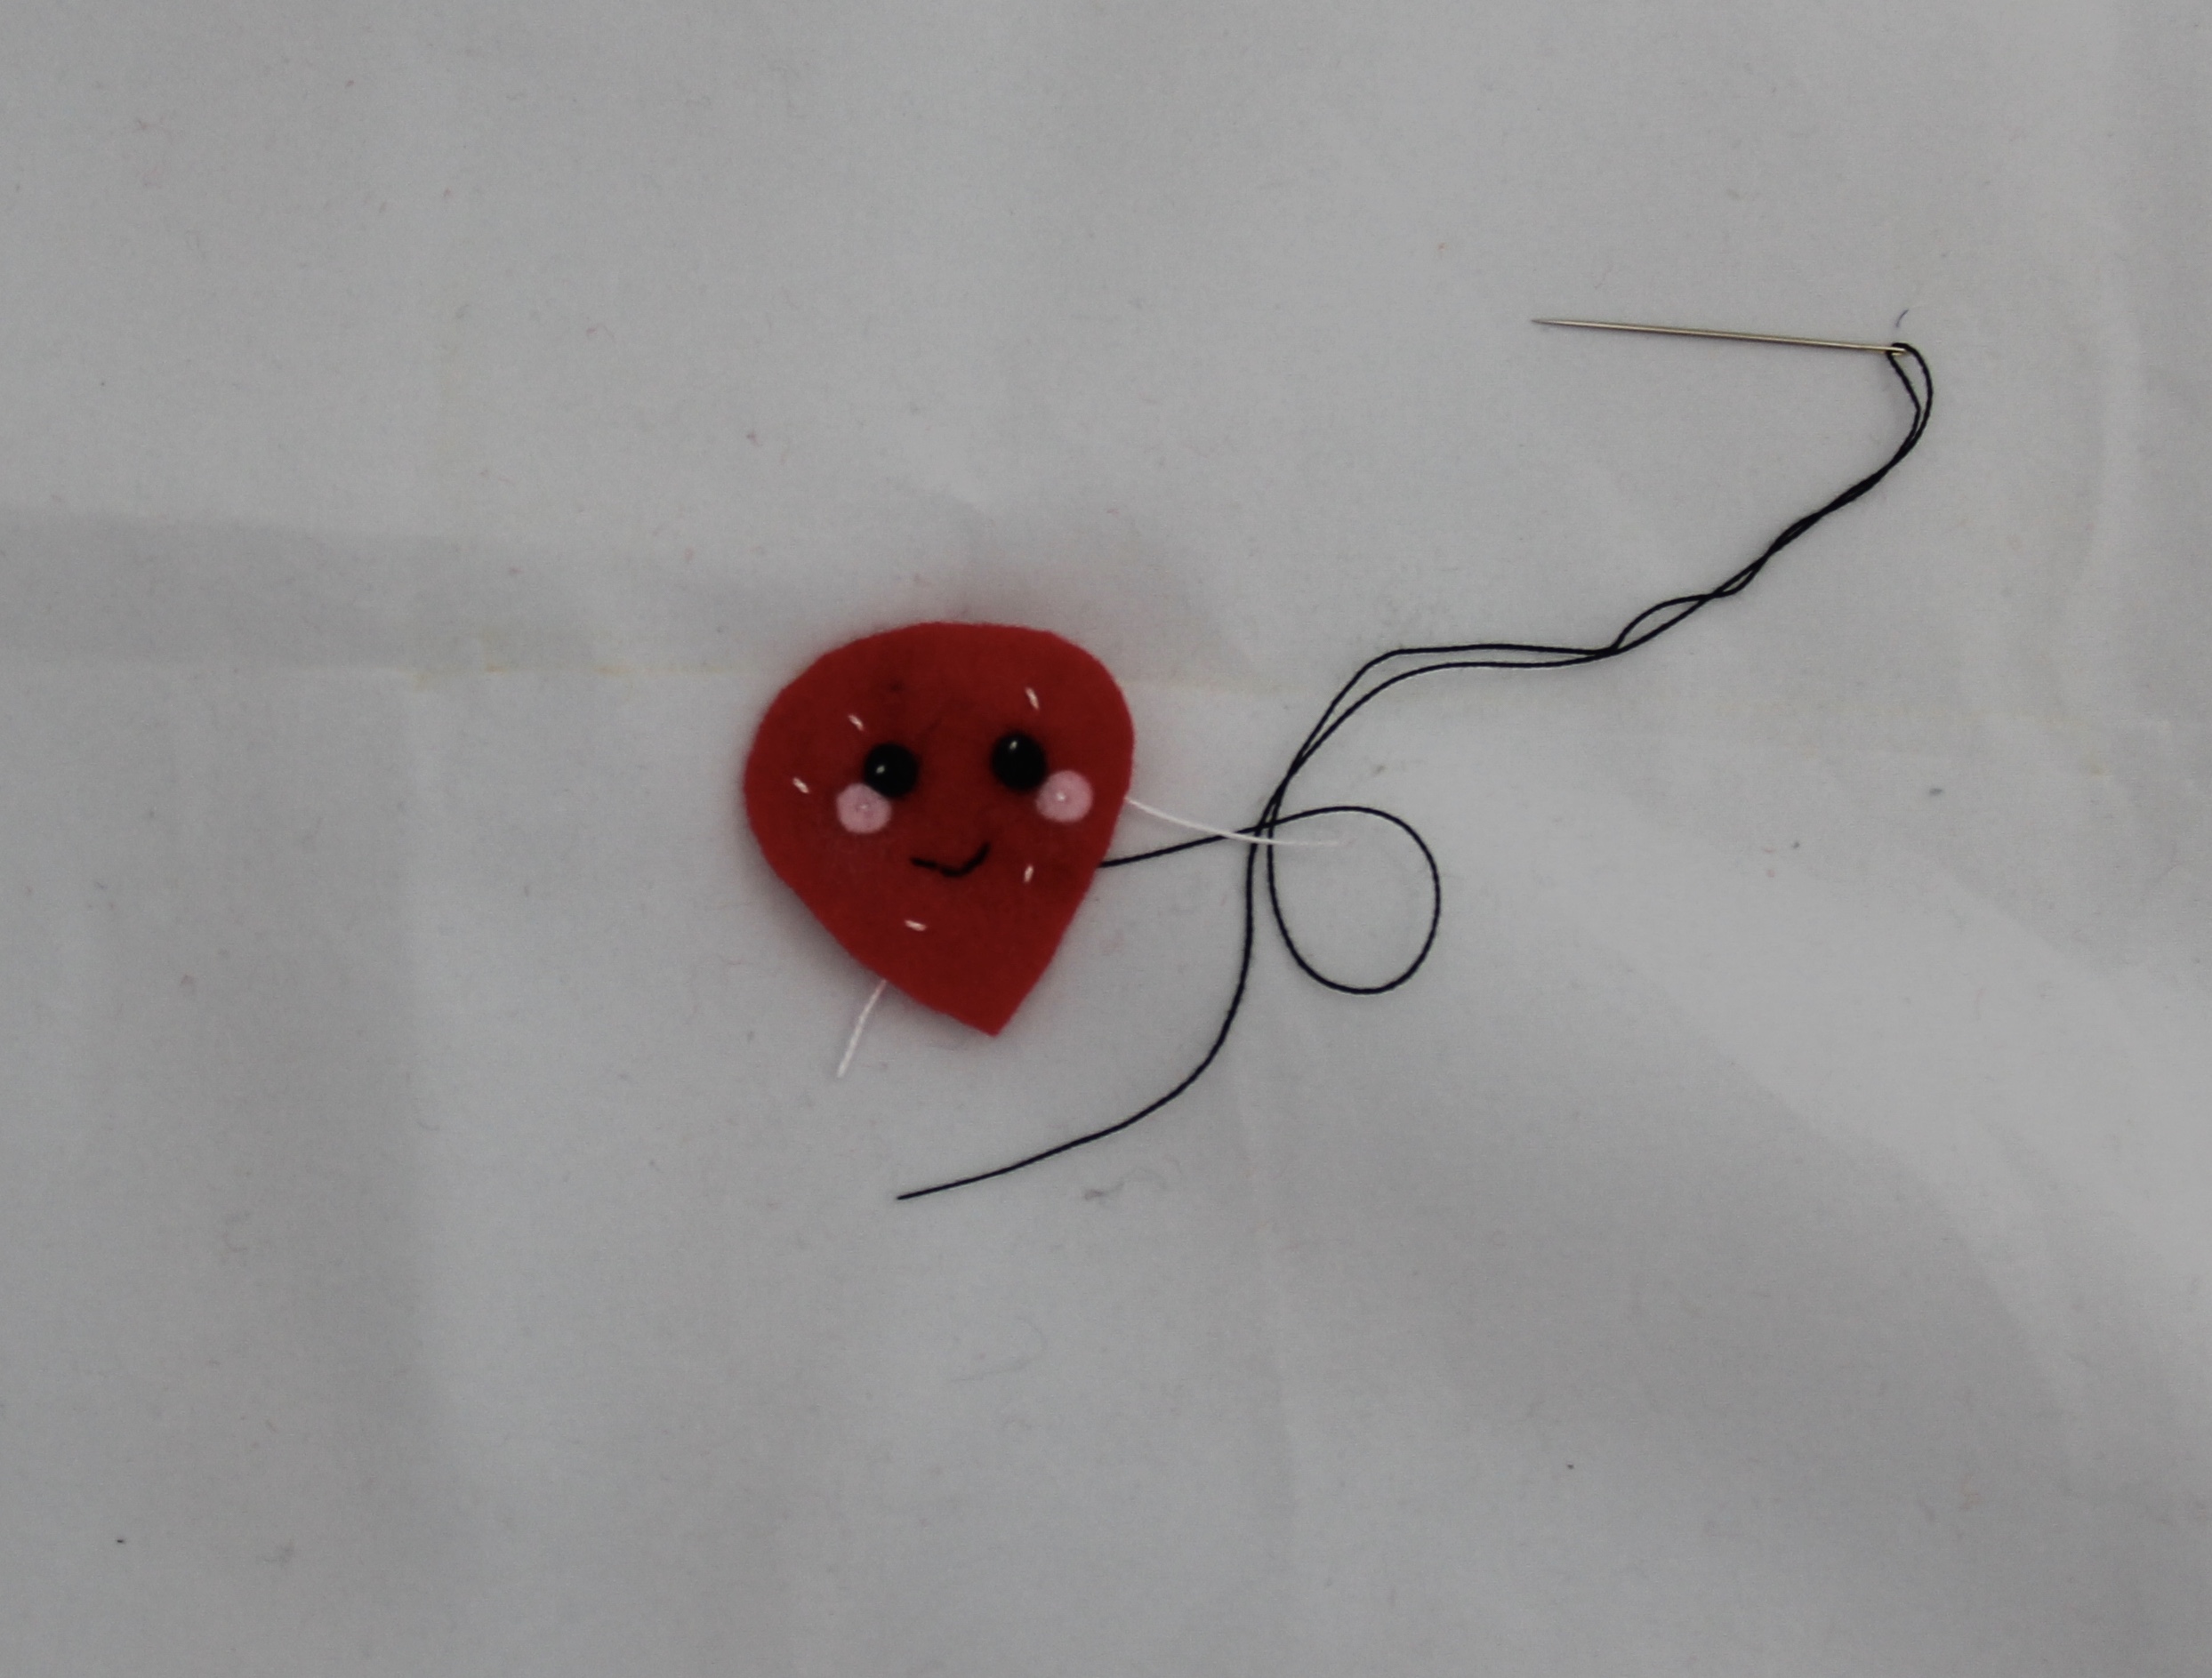
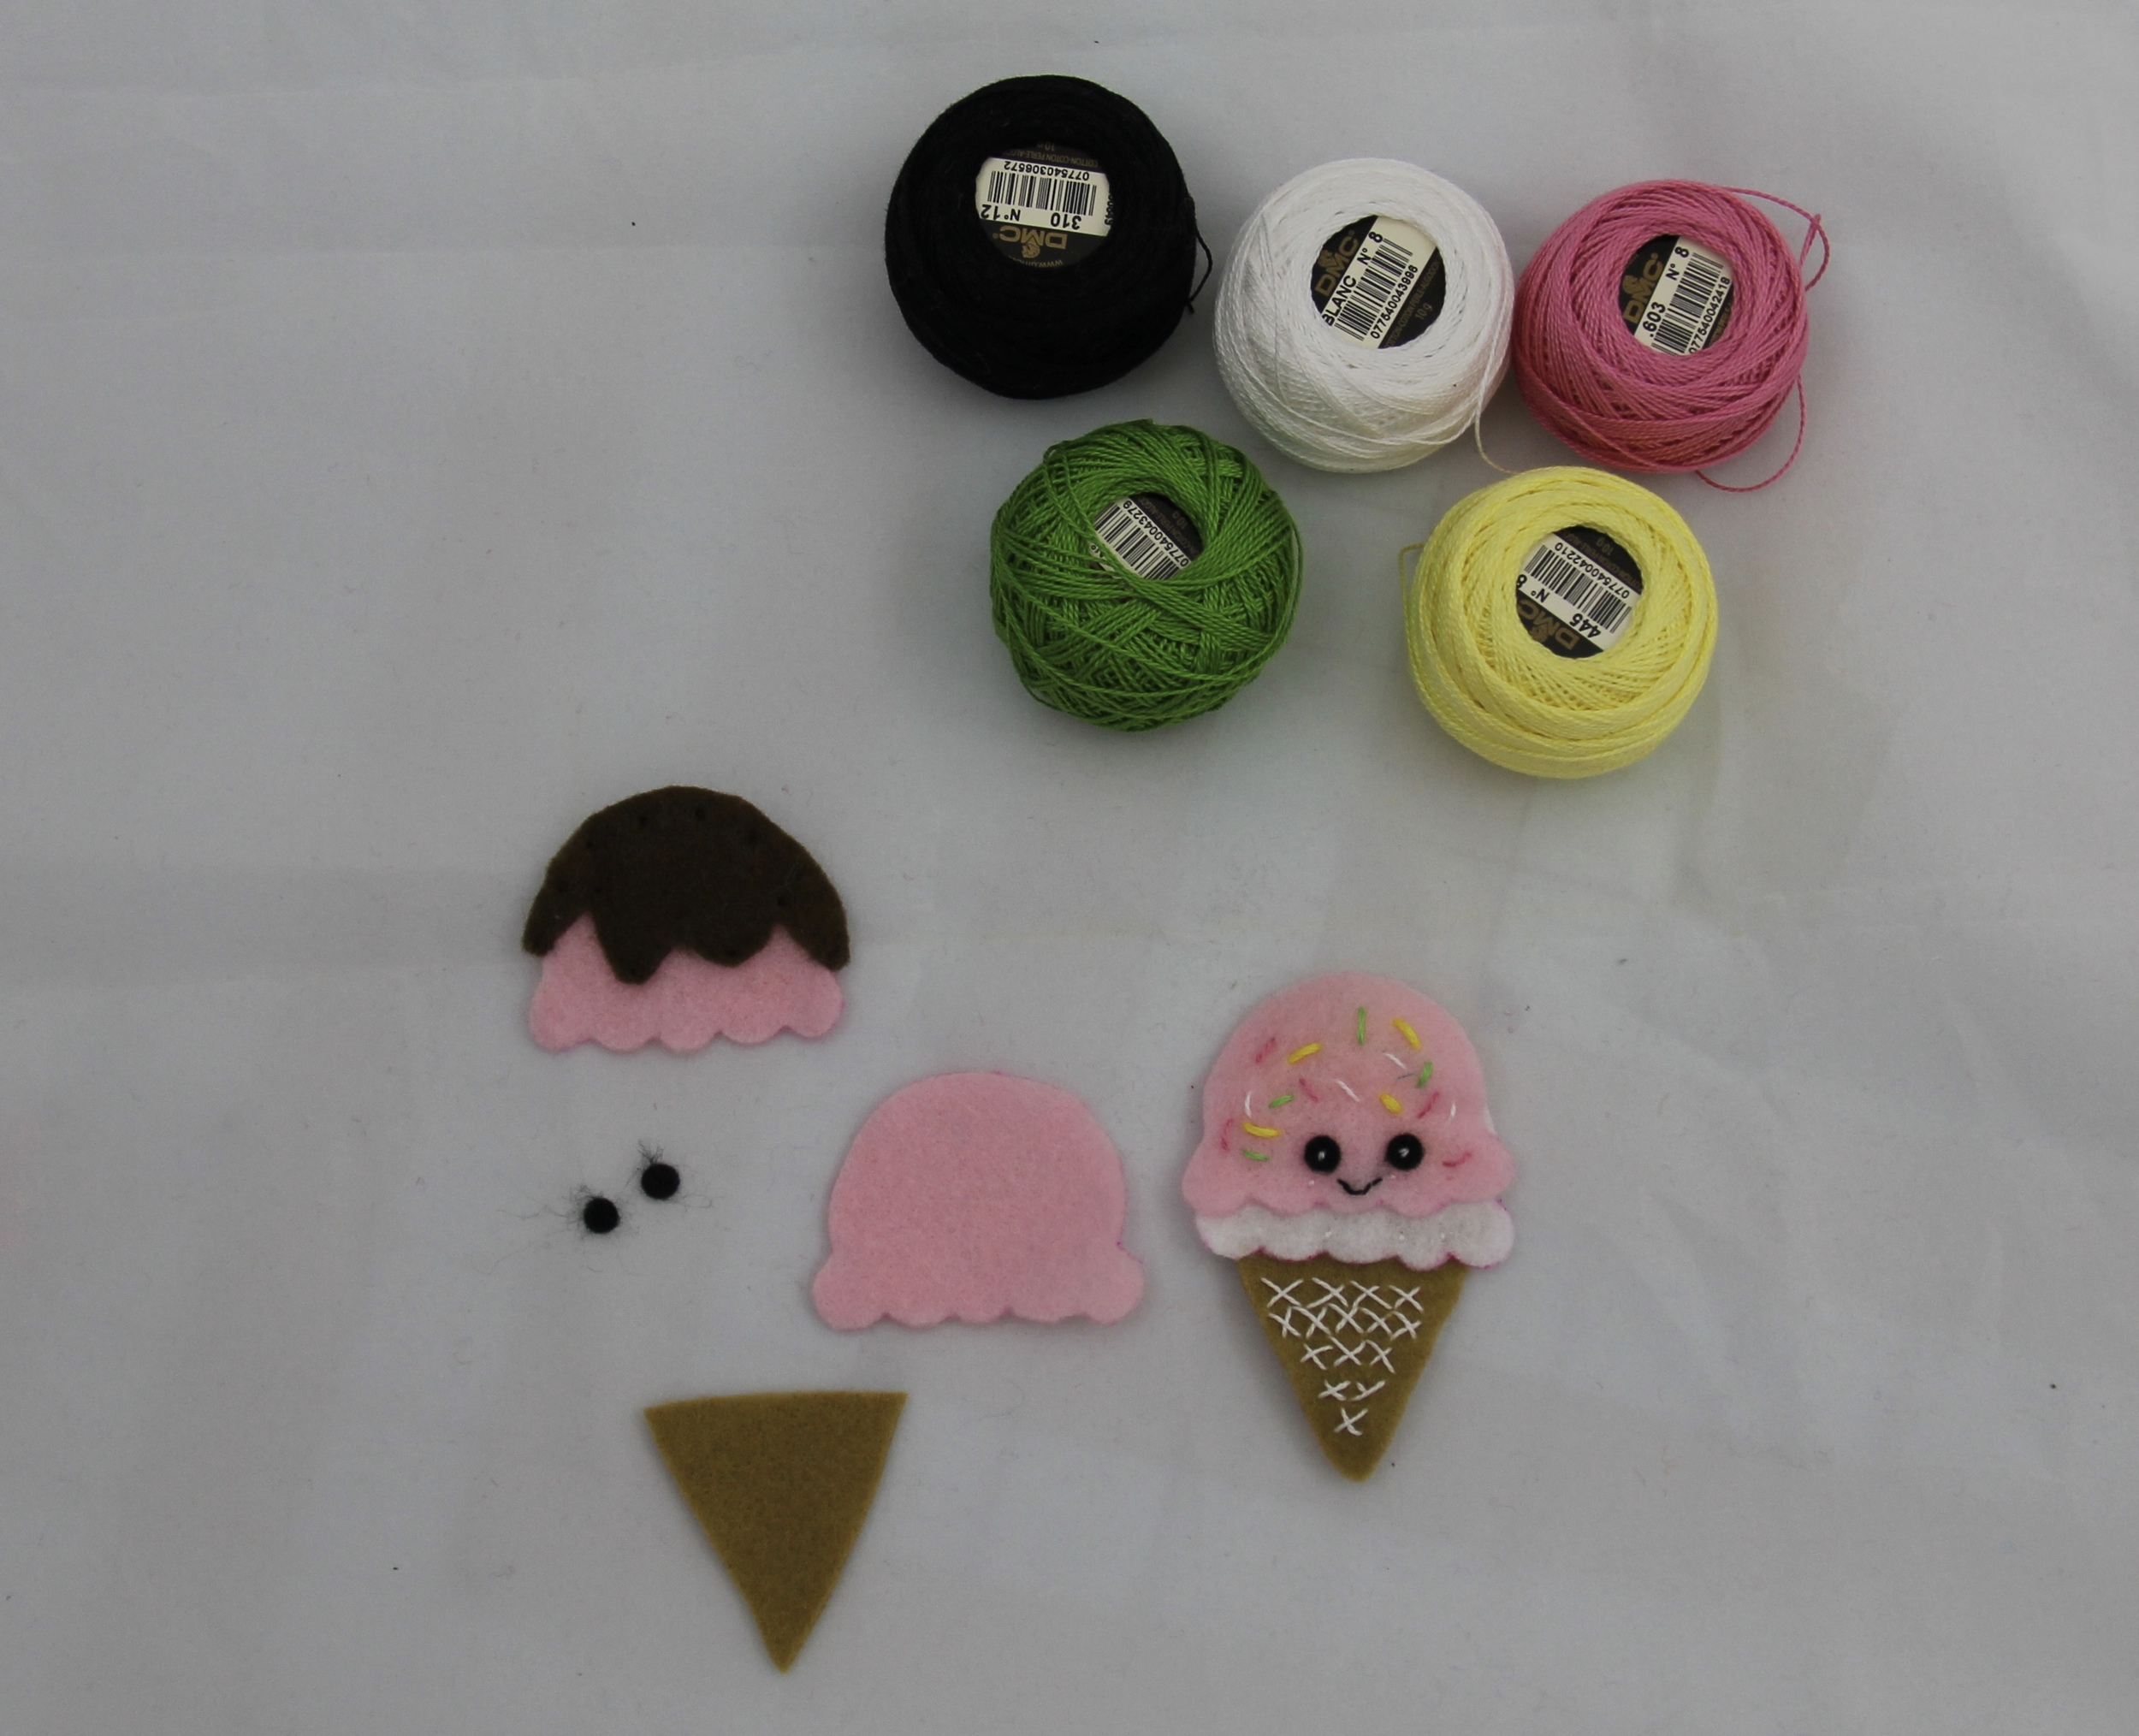
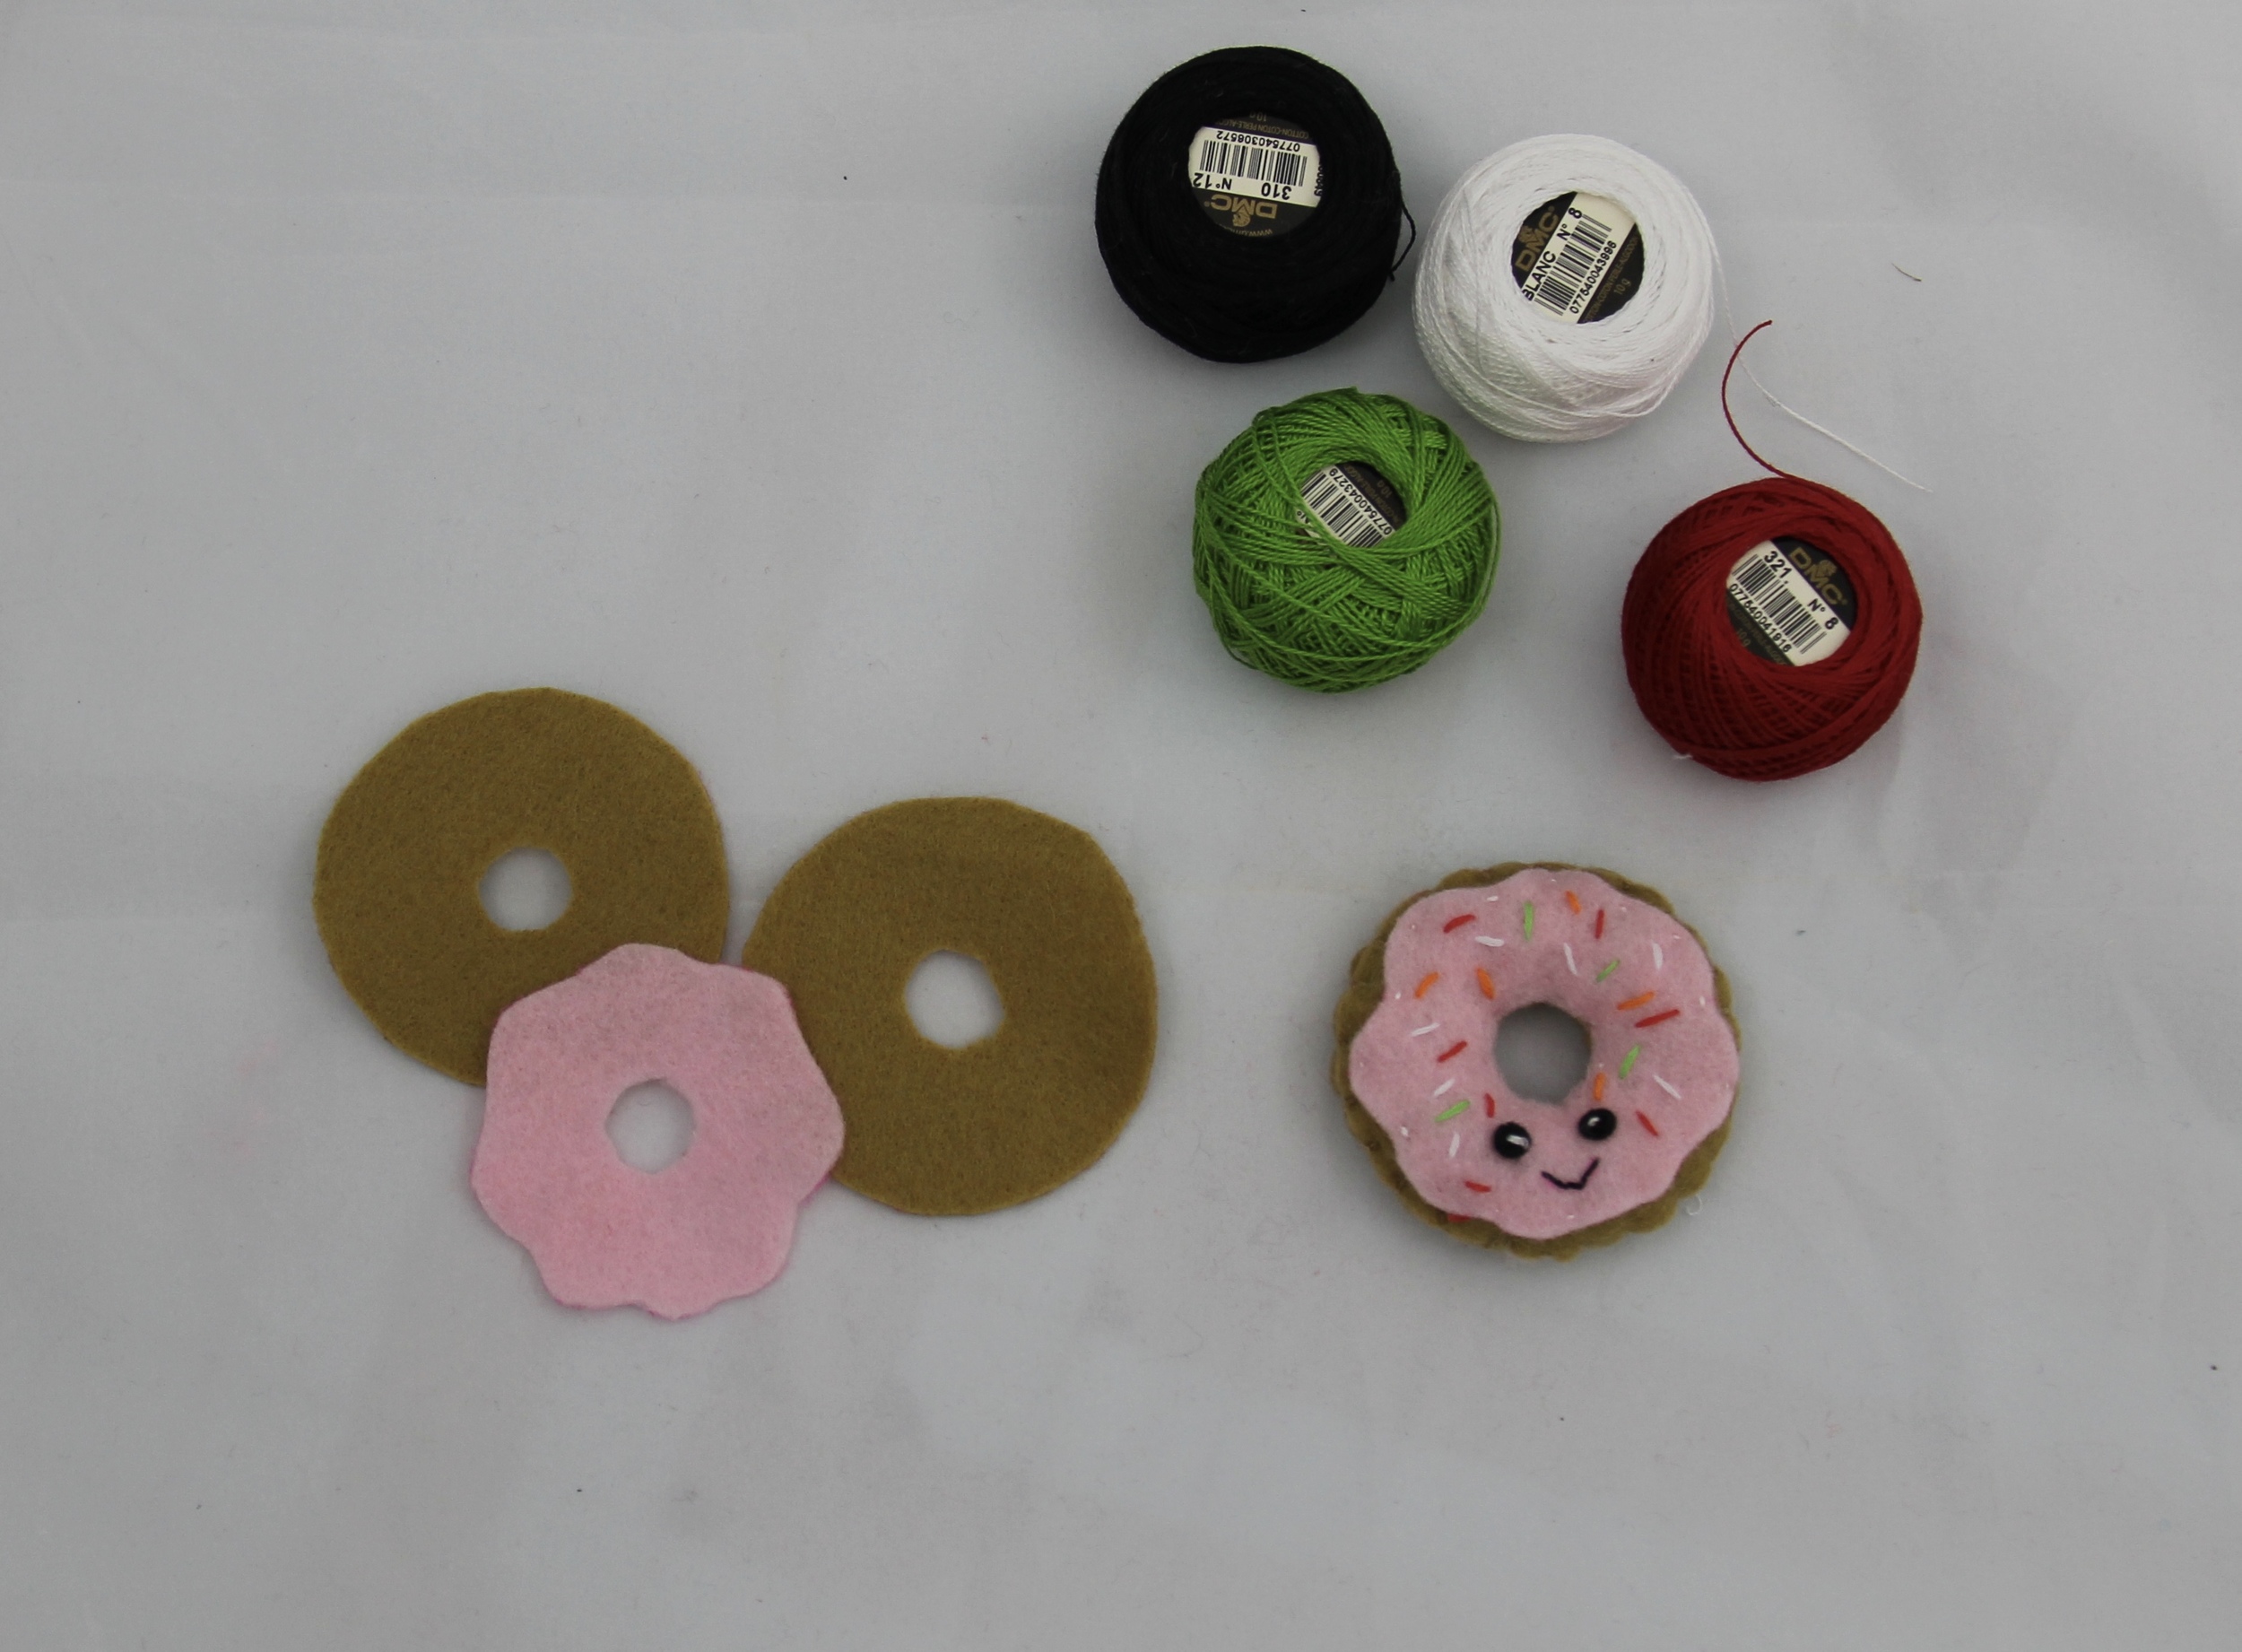
Once you have your shapes, decide where to add the eyes, cheeks and smile. Since I didn't add a template for the eyes and cheeks, just have your kids cut out small circles out of scrap felt. I used a paper punch for mine.
To sew the facial features and details, we are going to use a basic running stitch. It's beautiful in its simplicity, utility and function. Vary it with size and color and it adds such vitality and expression to this project.
To sew the sides together (wrong sides together, we want to see those stitches!) I used a blanket stitch. Feel free to use any stitch you feel comfortable with.
Each Shopkin-ish is stitched and assembled in the same way. Eyes, cheeks, mouth, sprinkles, sides, stuff, close and finish.
I hope that you have enjoyed this tutorial and make something awesome with your special little ones. Thank you again, Trixi for inviting me to contribute.
XO,
Hilarie
The force is strong with this one.
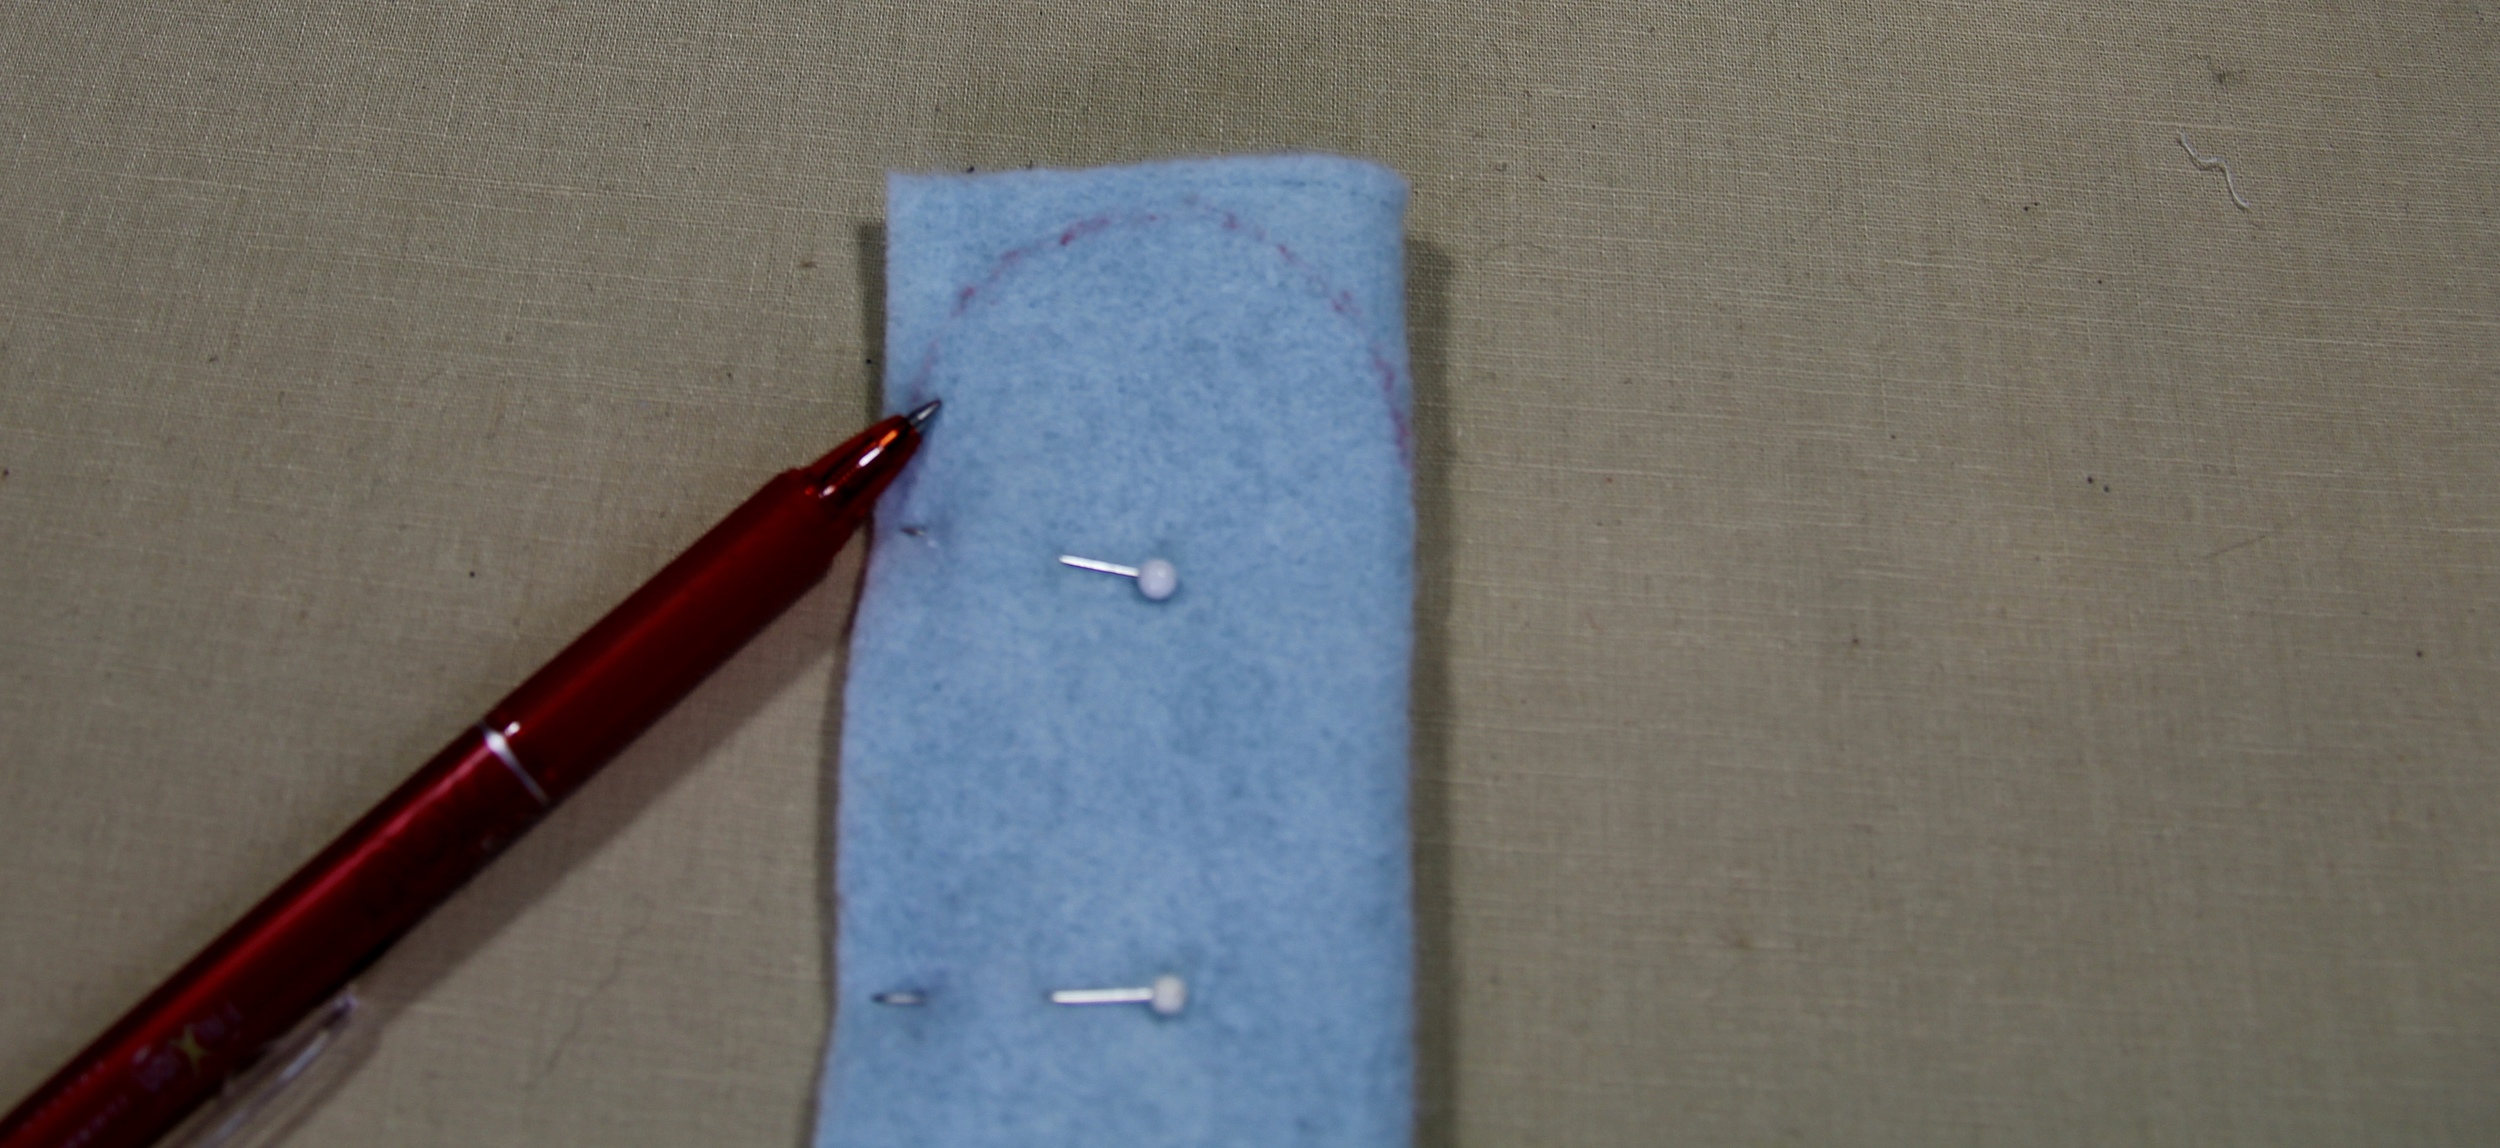
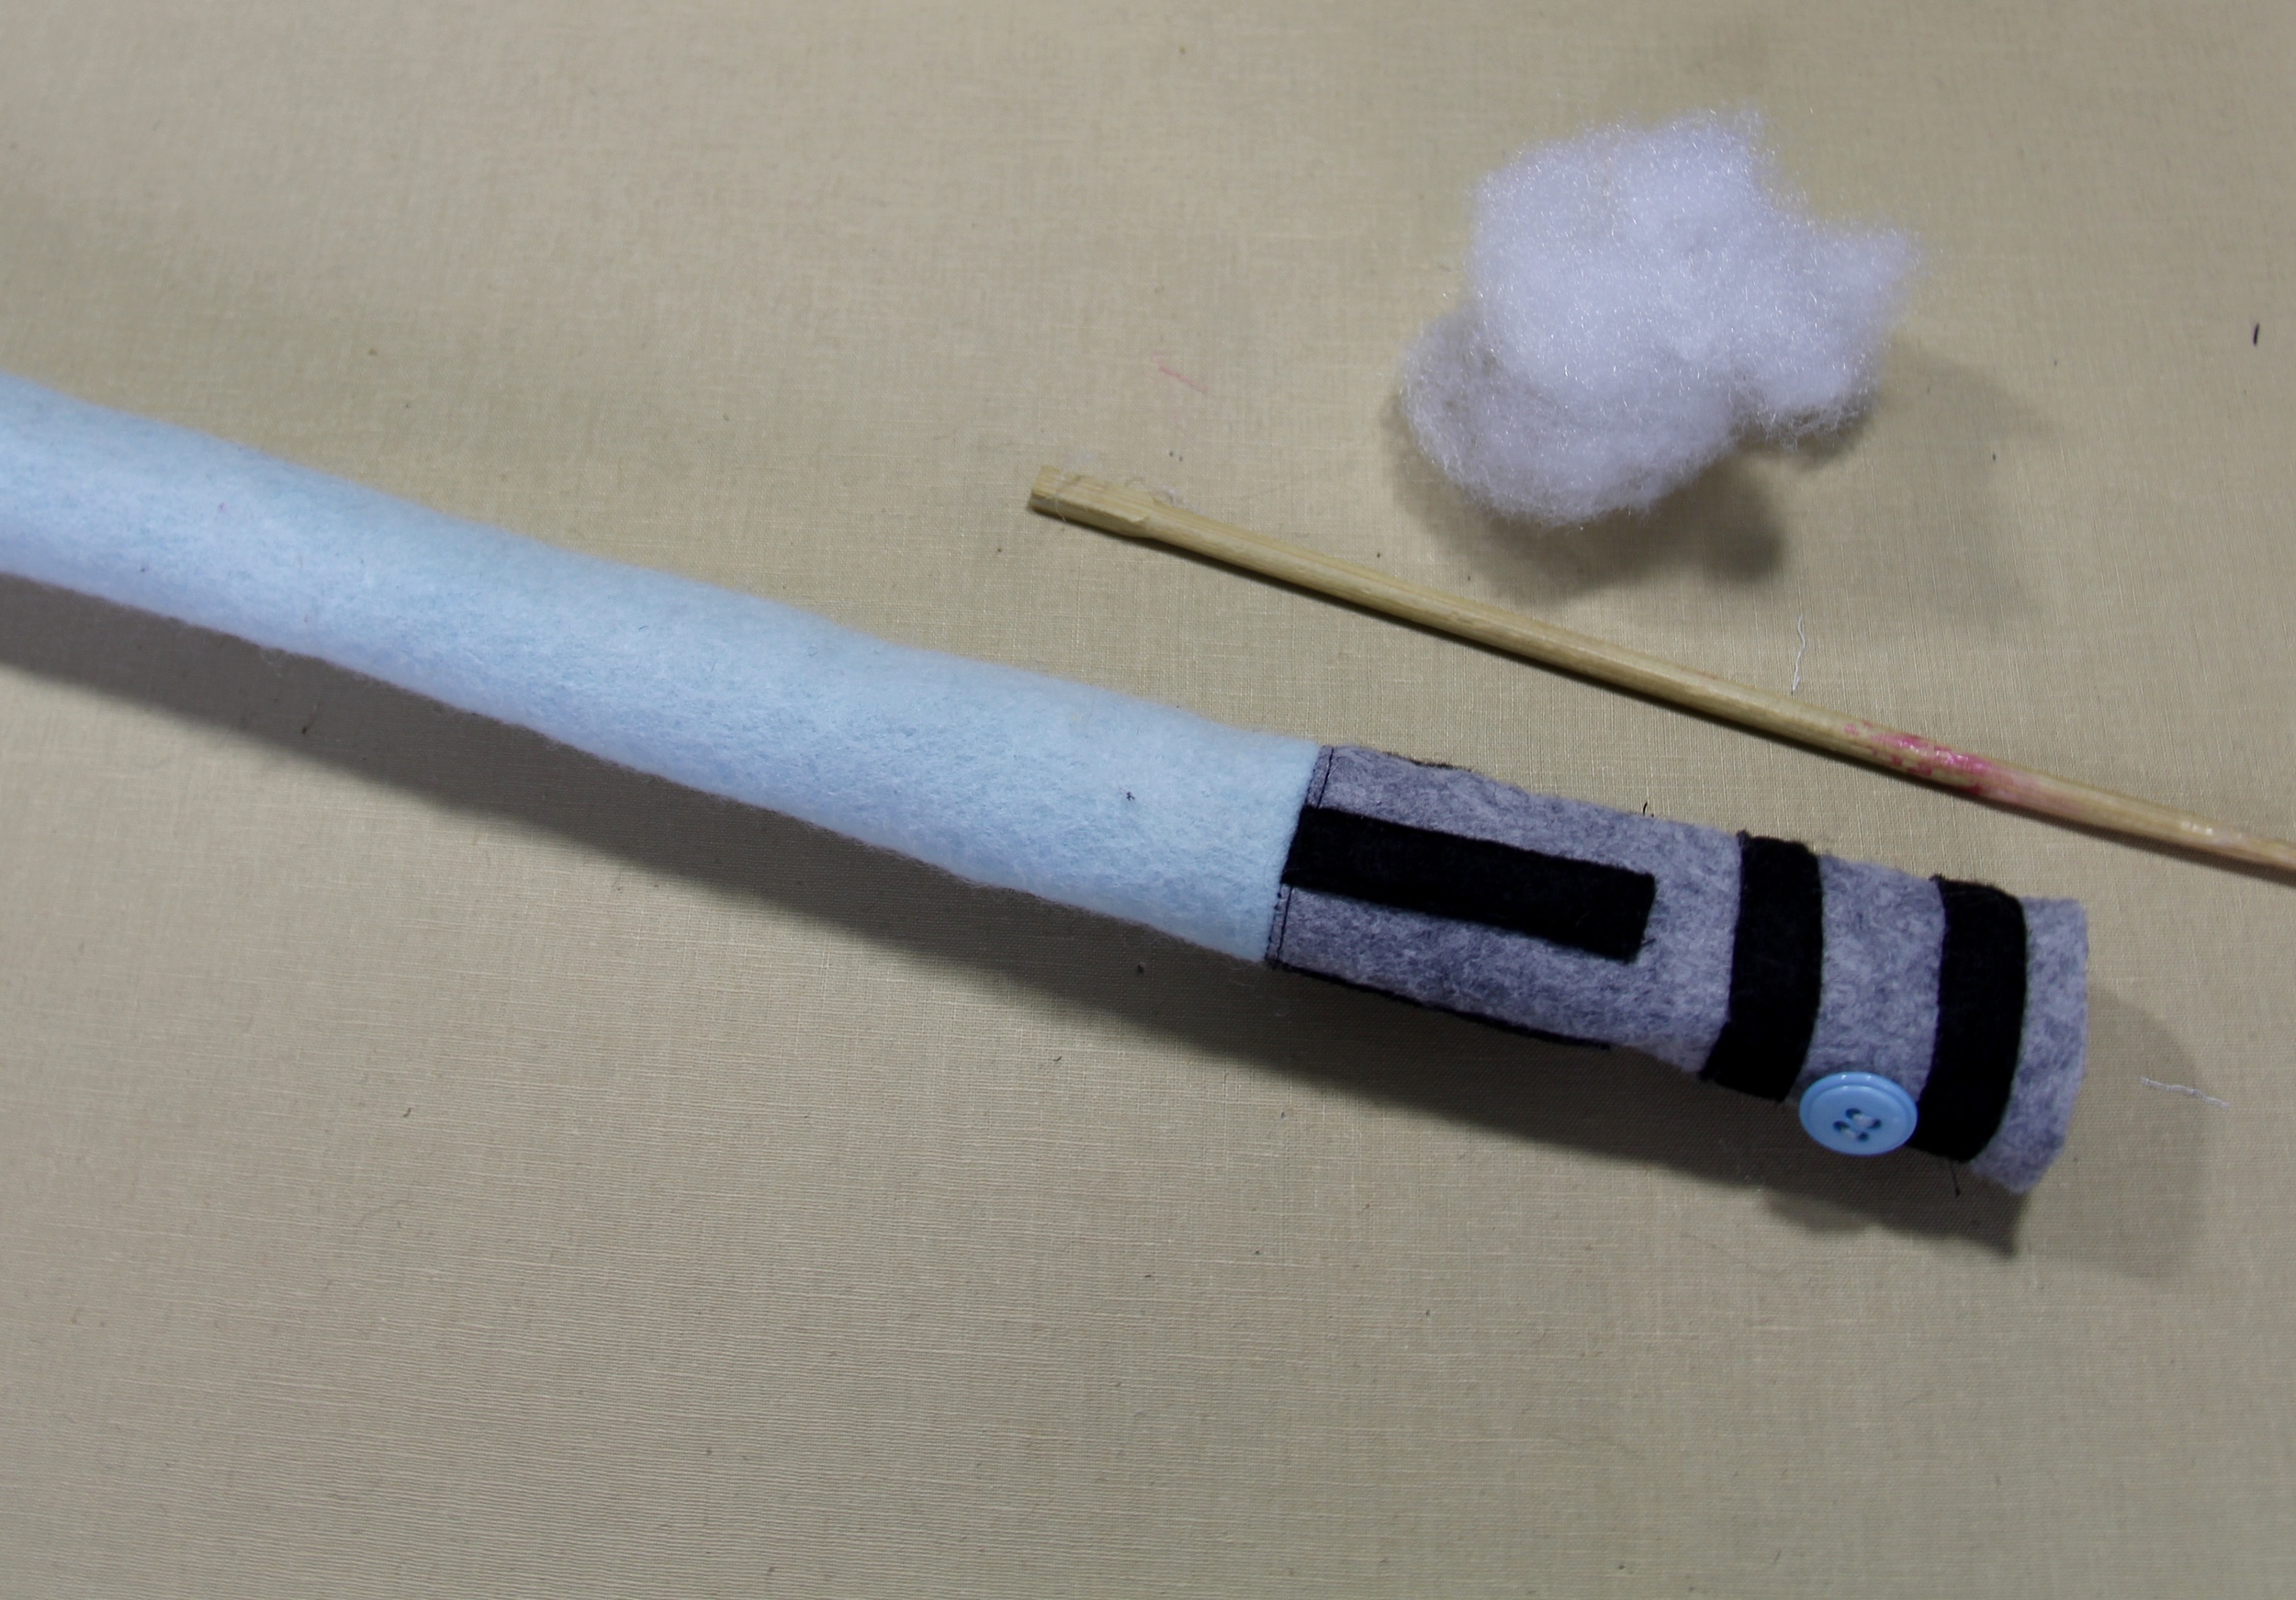
This past winter in my weekly sewing classes, the kids wanted to make something Star Wars. (The classes take on a whole different attitude when they include boys!) It only took a few minutes to come up with the idea, but why not make a "lightsaber" that they can actually hit each other with and not get hurt. This is a super easy project, that kids love!
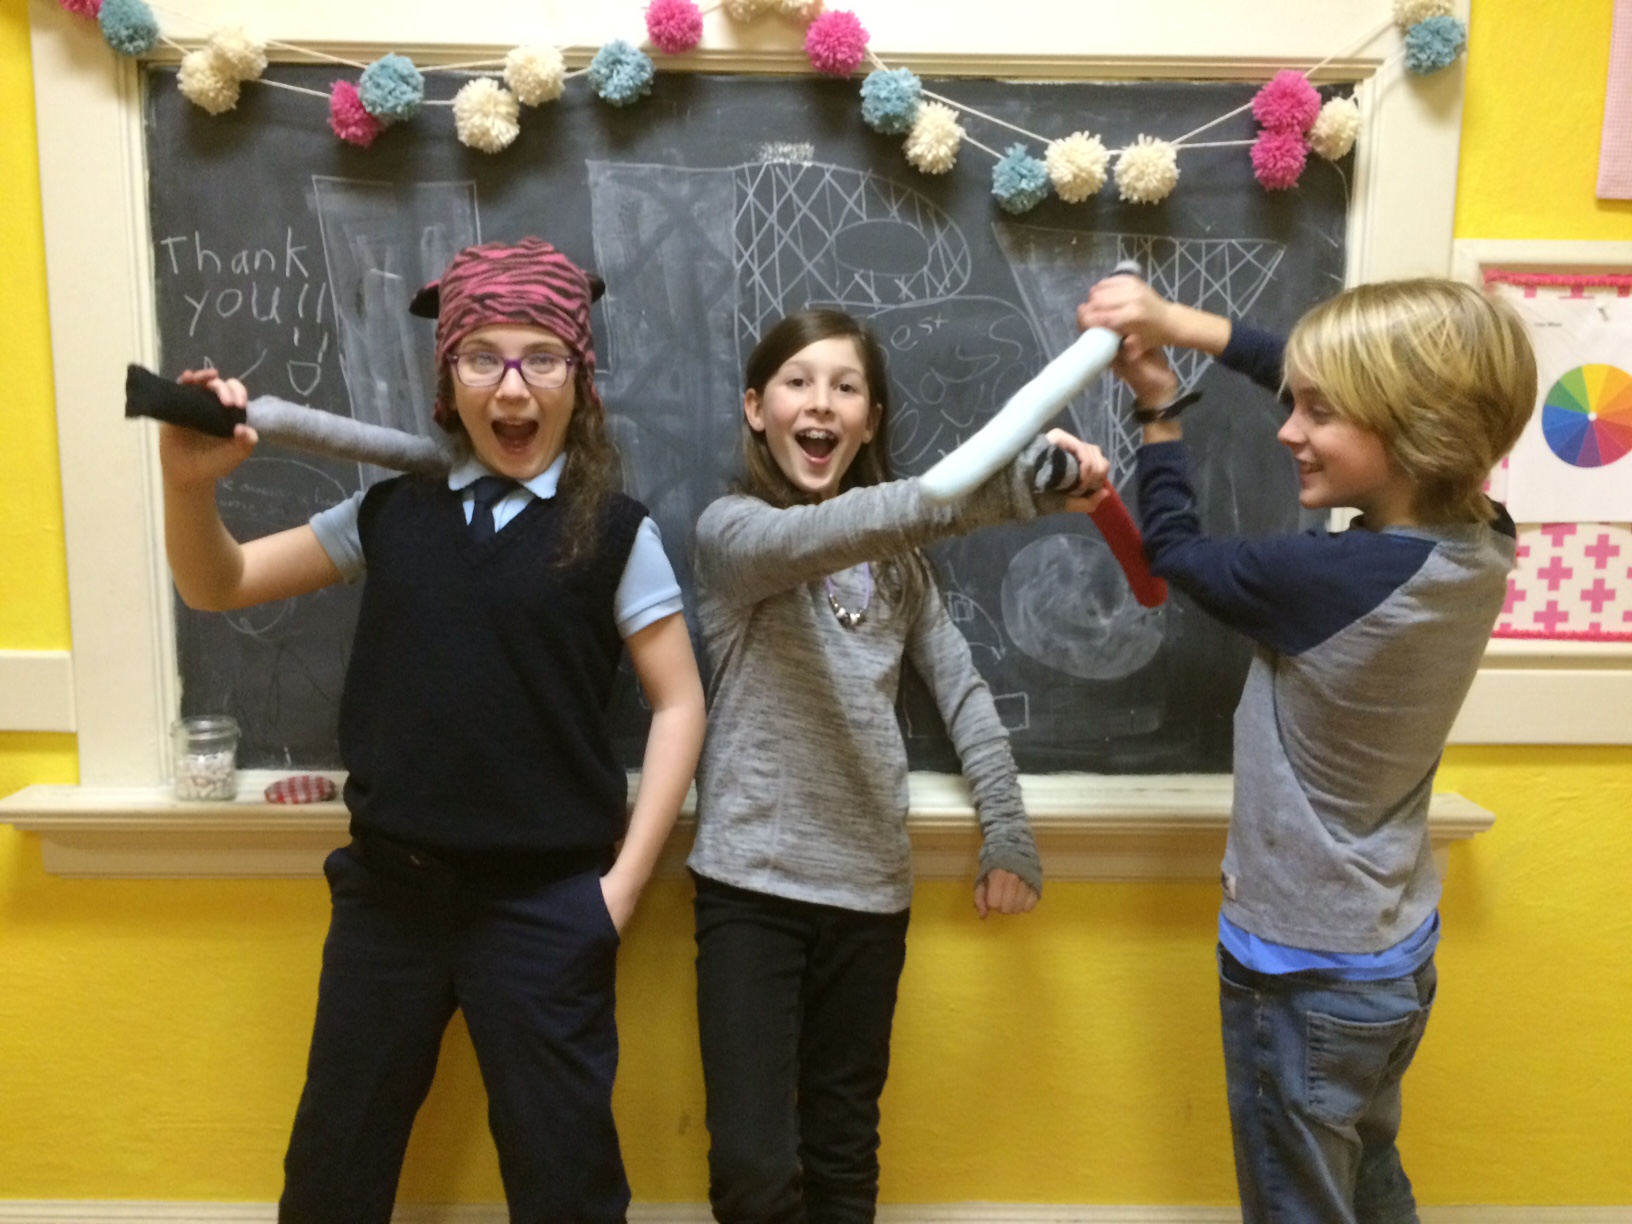
This past winter in my weekly sewing classes, the kids wanted to make something Star Wars. (The classes take on a whole different attitude when they include boys!) It only took a few minutes to come up with the idea, but why not make a "lightsaber" that they can actually hit each other with and not get hurt. This is a super easy project, that kids love!
May 4th and 5th, are highly regarded holidays around our house. My kids can't wait to go downtown to the annual Revenge of the Fifth Lightsaber Battle. They have been plotting details and their battle strategies for weeks now. In honor of May the Fourth and Revenge of the Fifth, I've prepared a DIY Lightsaber tutorial for you.
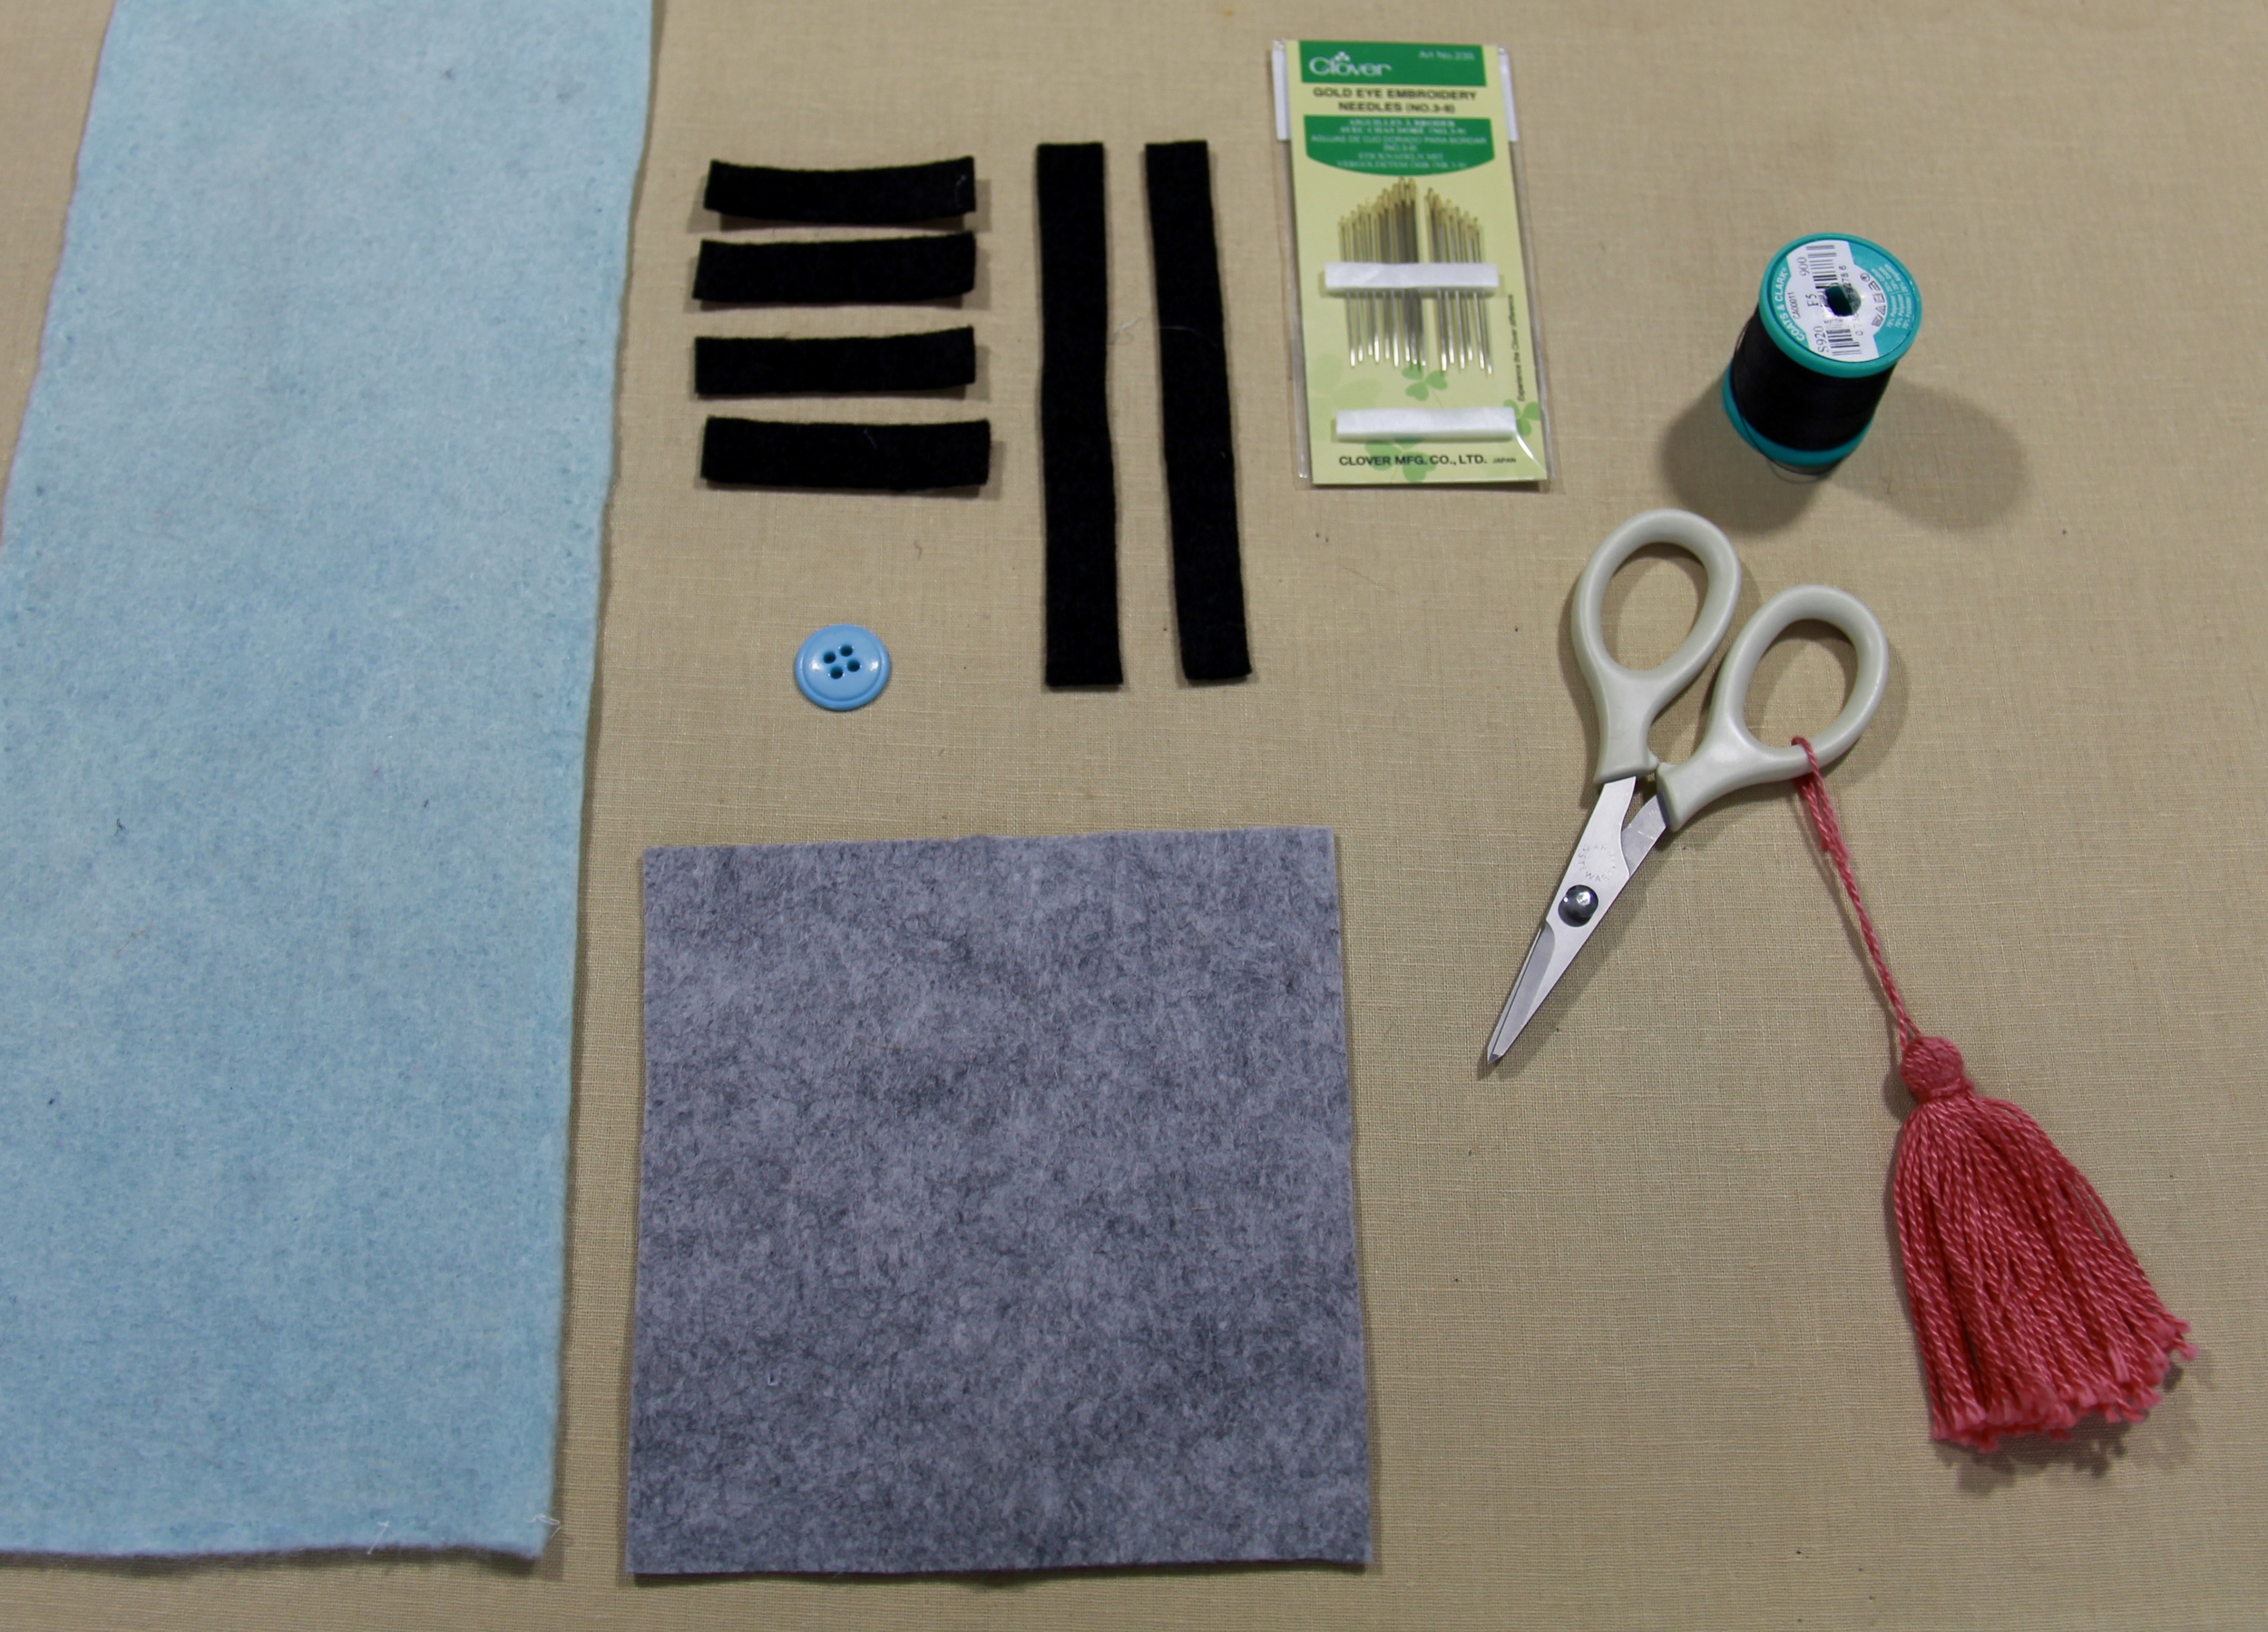
Materials Needed
Wool felt grey and black for the hilt and blue, green or red (Jedi or Sith?) for the blade
thread
needle
3/4" button
polyfill
a 30" piece of yarn or string
Cutting
one 5"x5" piece of grey felt for the hilt
one small piece of grey felt to cut into a circle to cap the hilt (we will cut this out a bit later)
one 13"x5" piece of colored felt for the blade
two 1/2" x 5" strips of black felt
four 1/2"x 2" strips of black felt
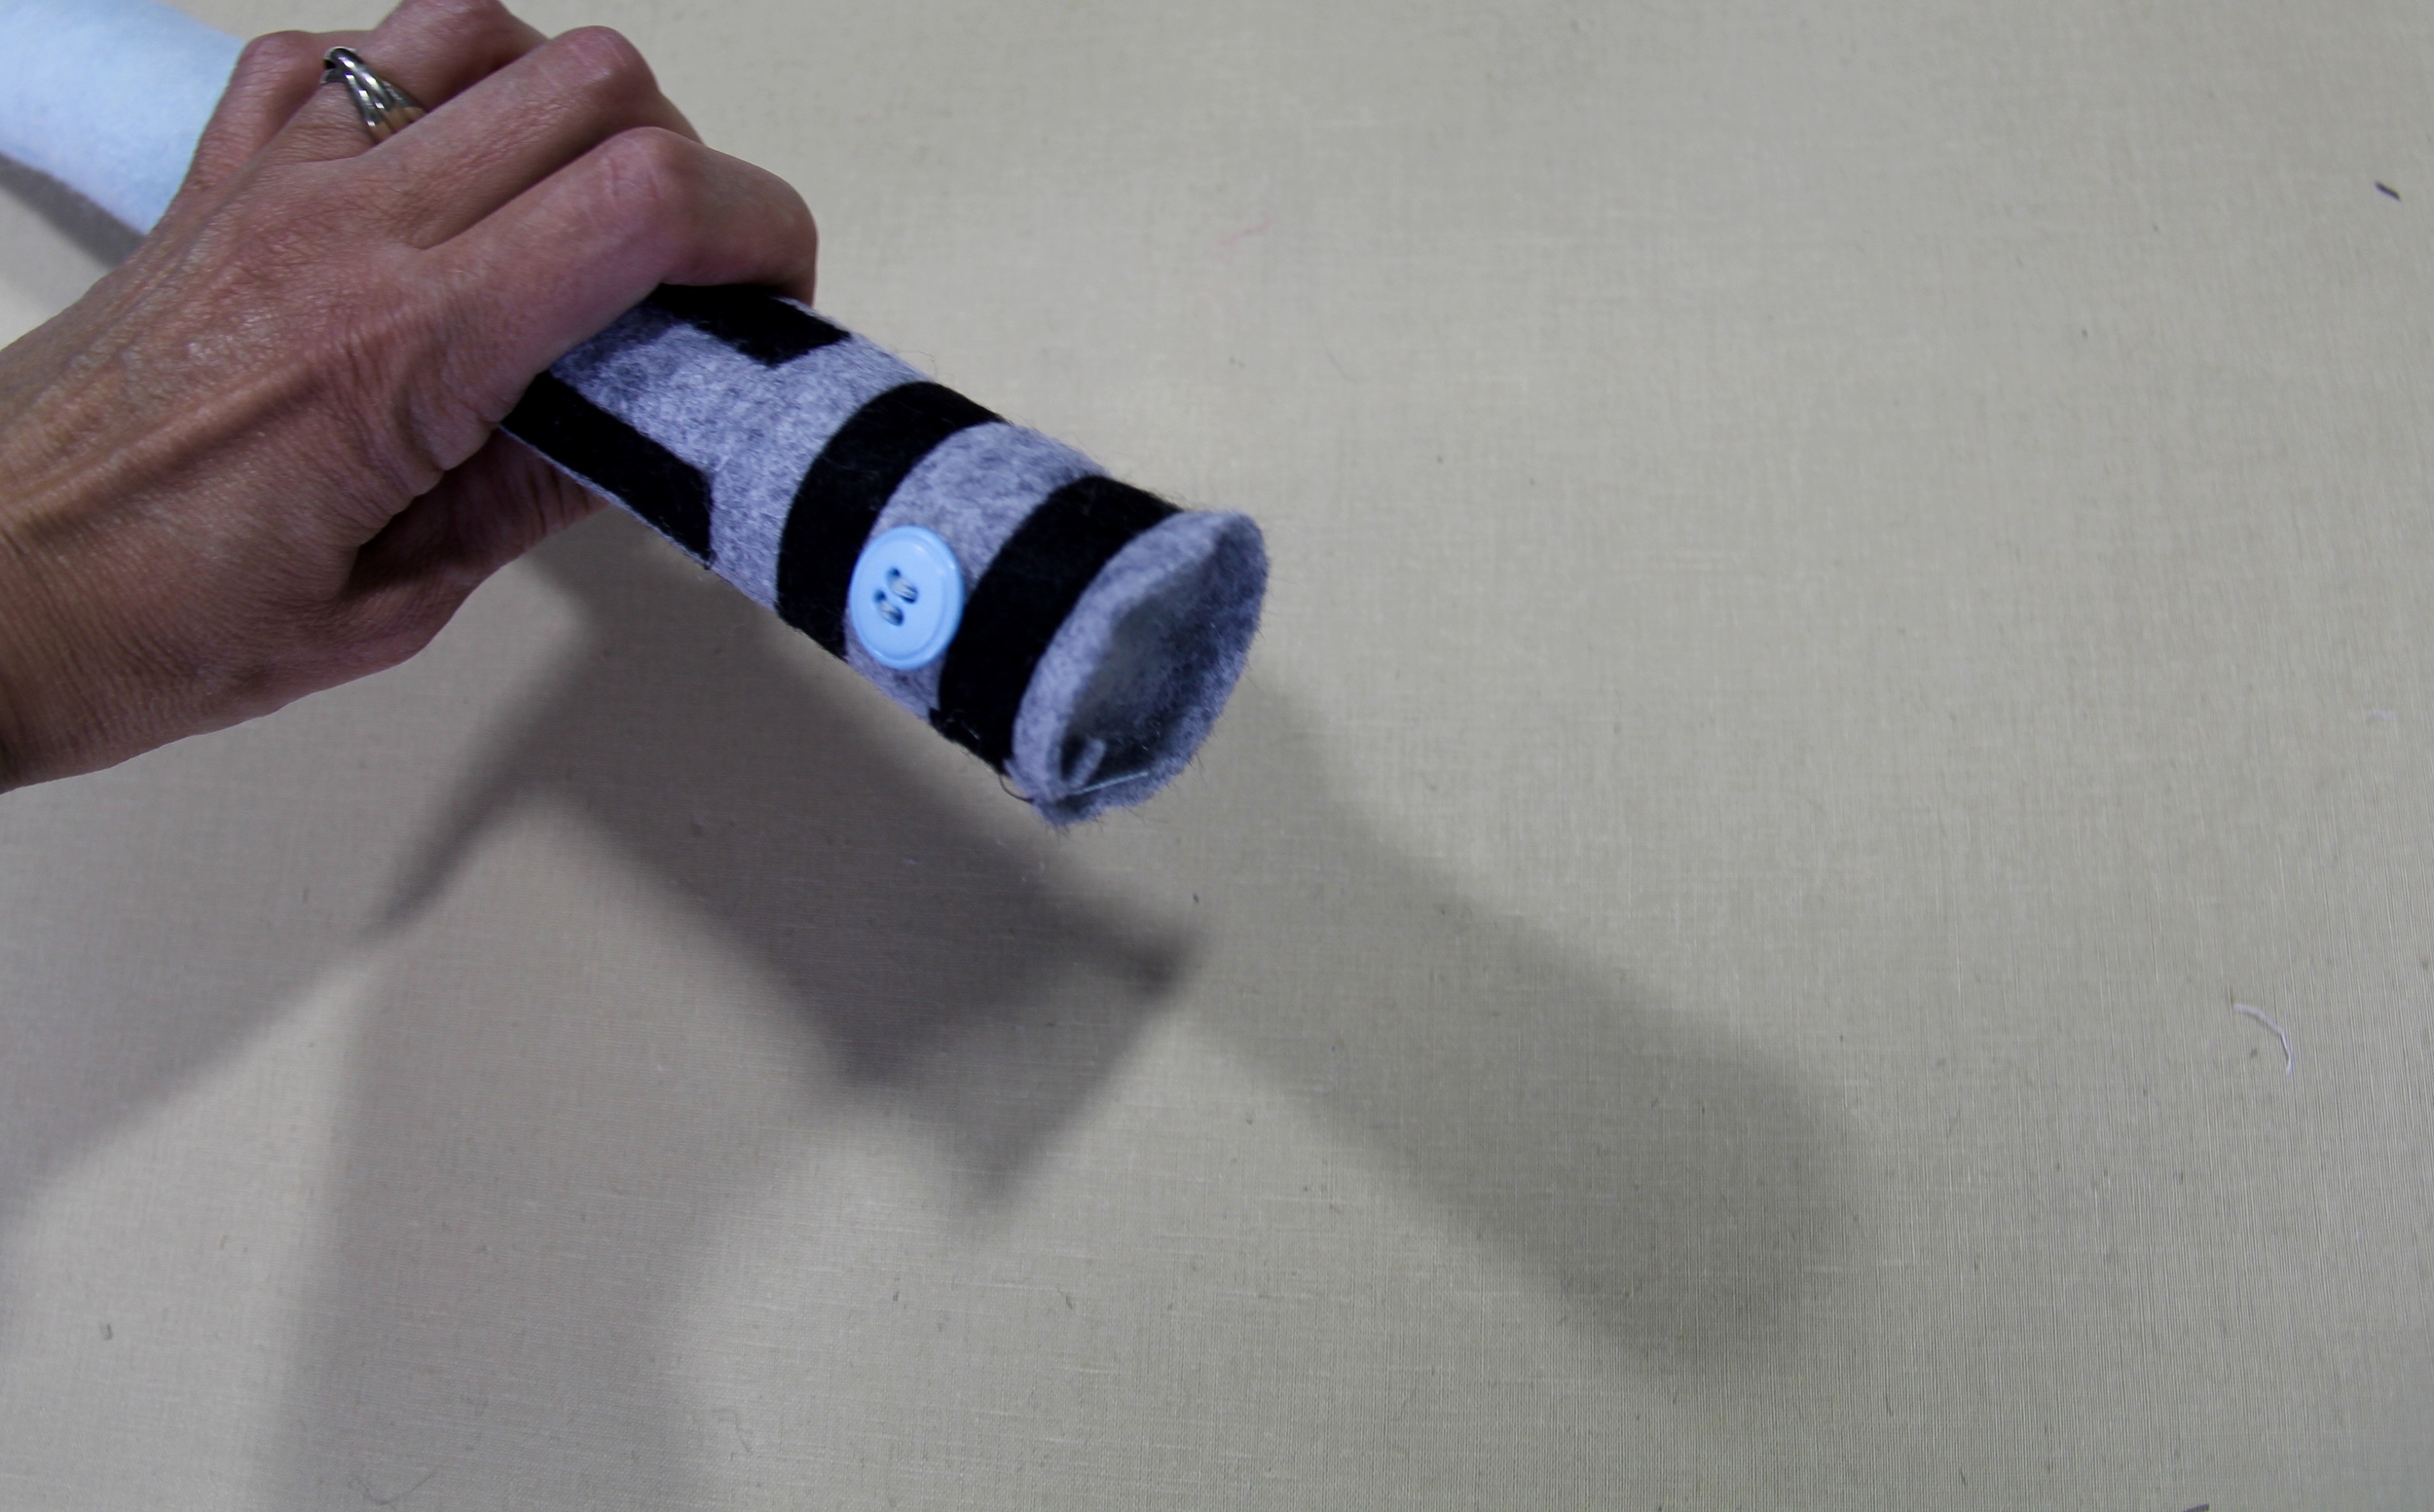
Sewing
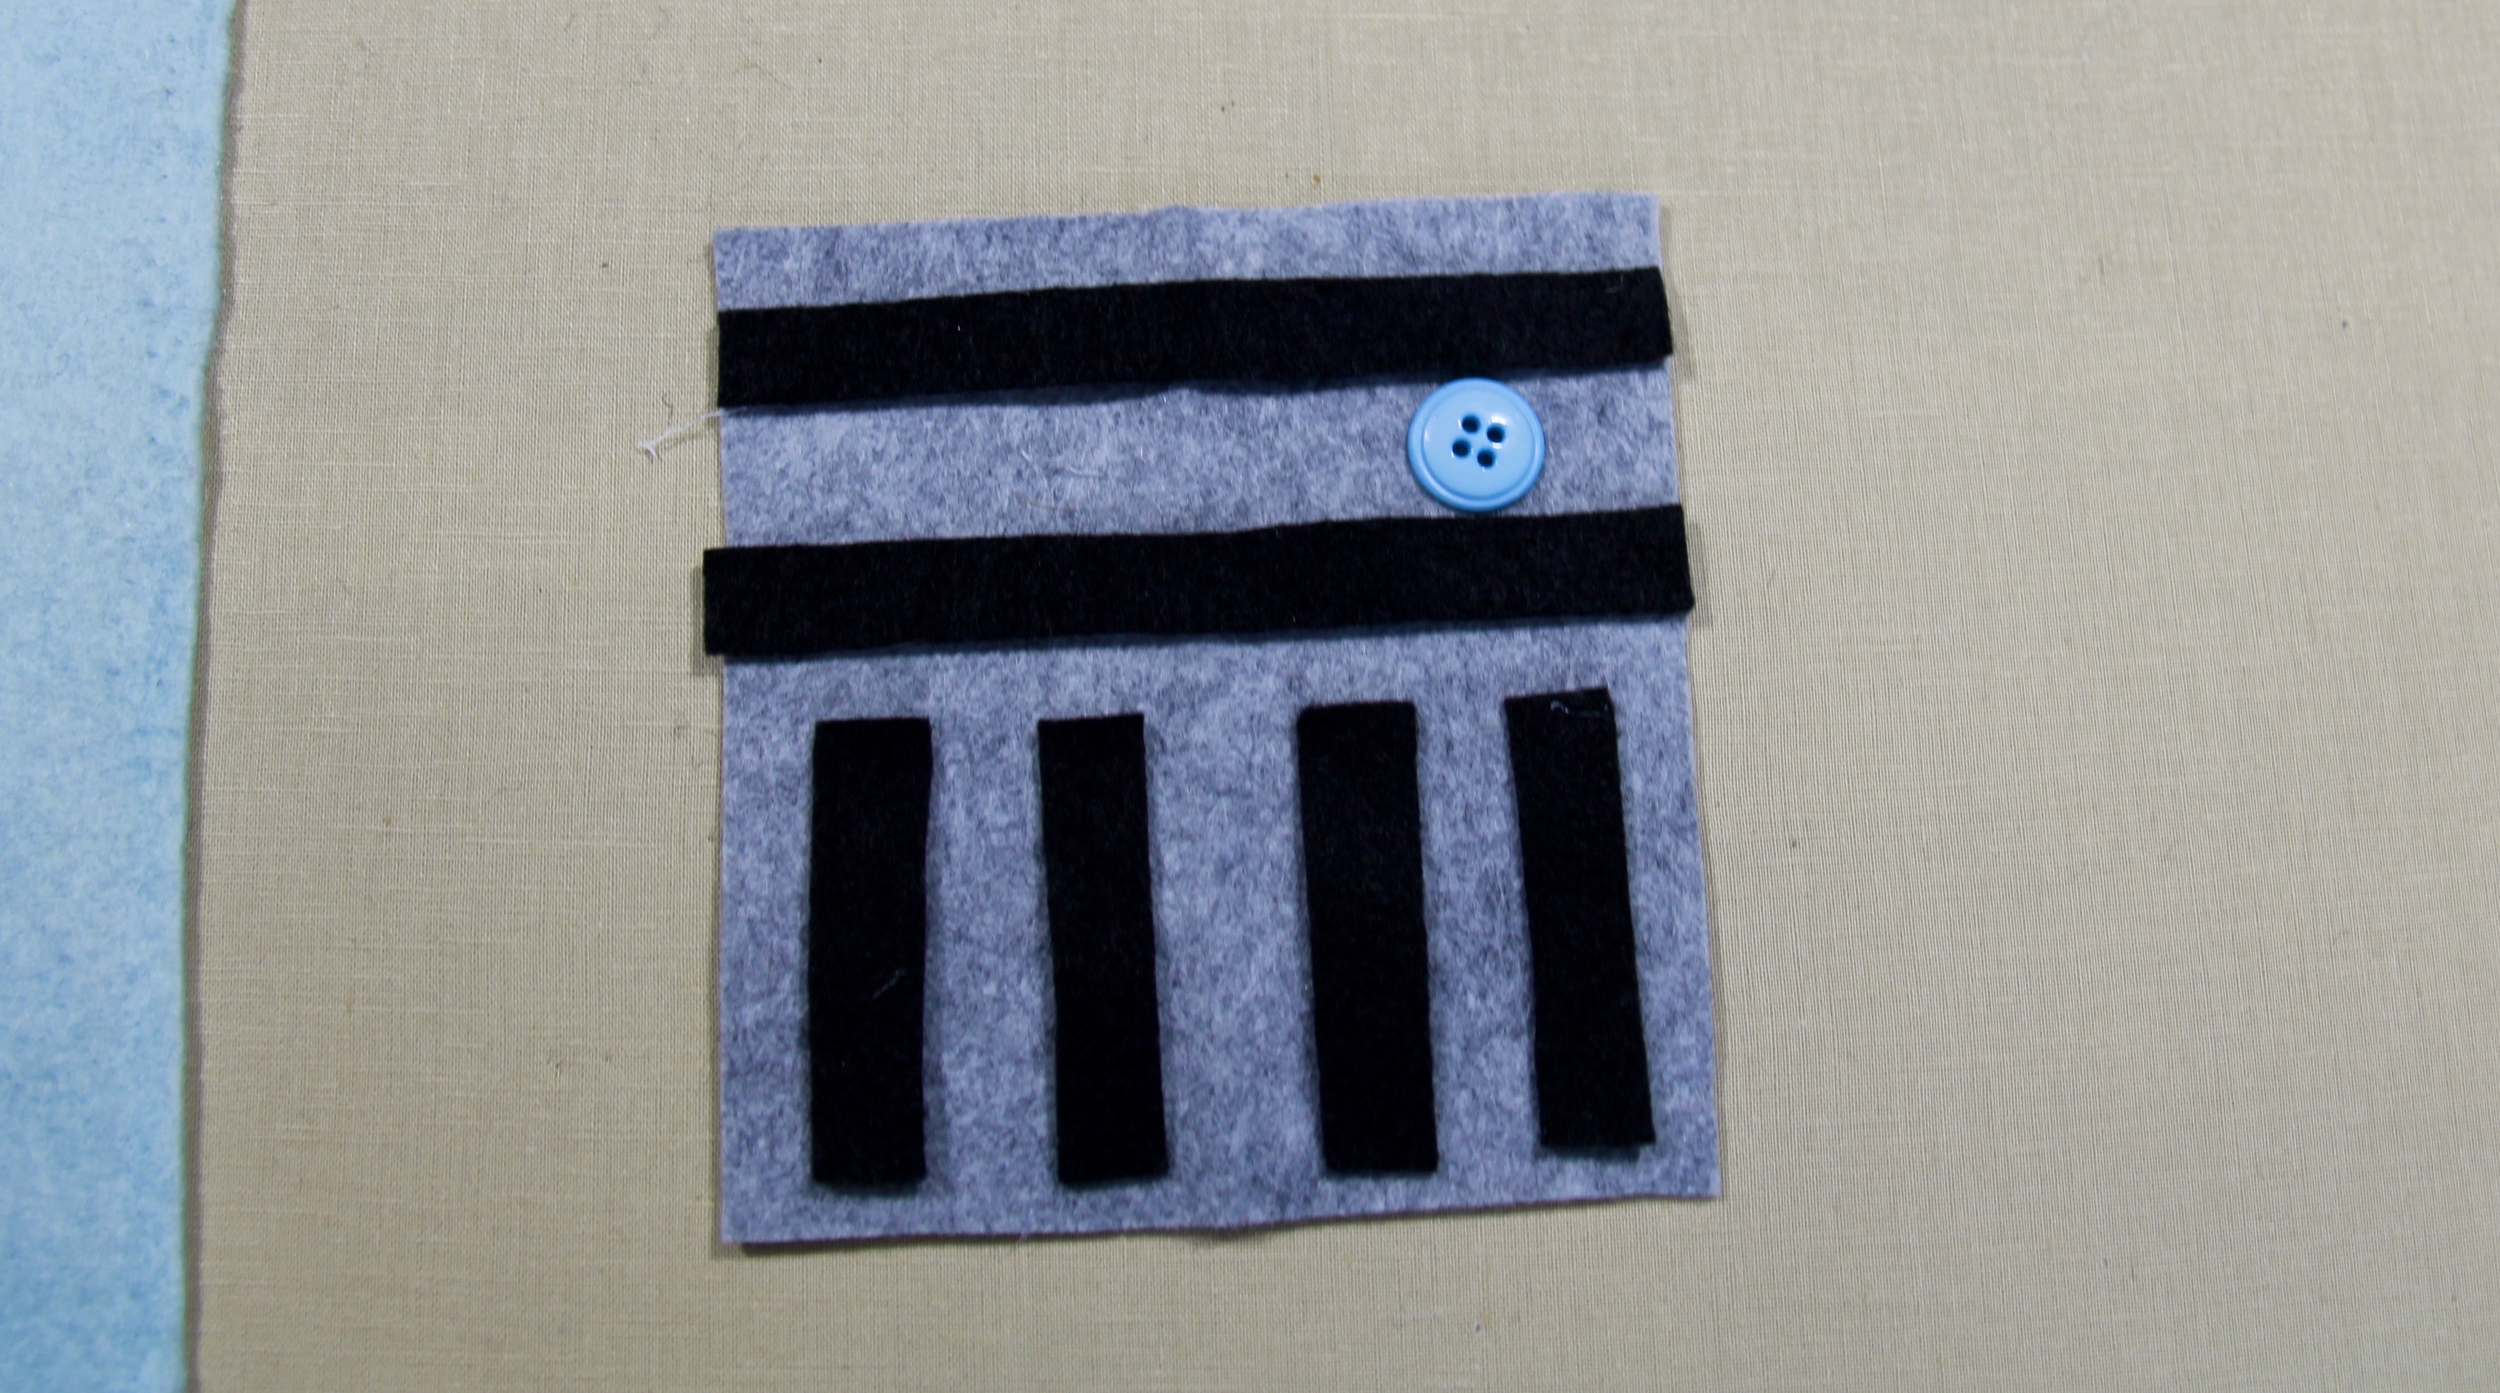
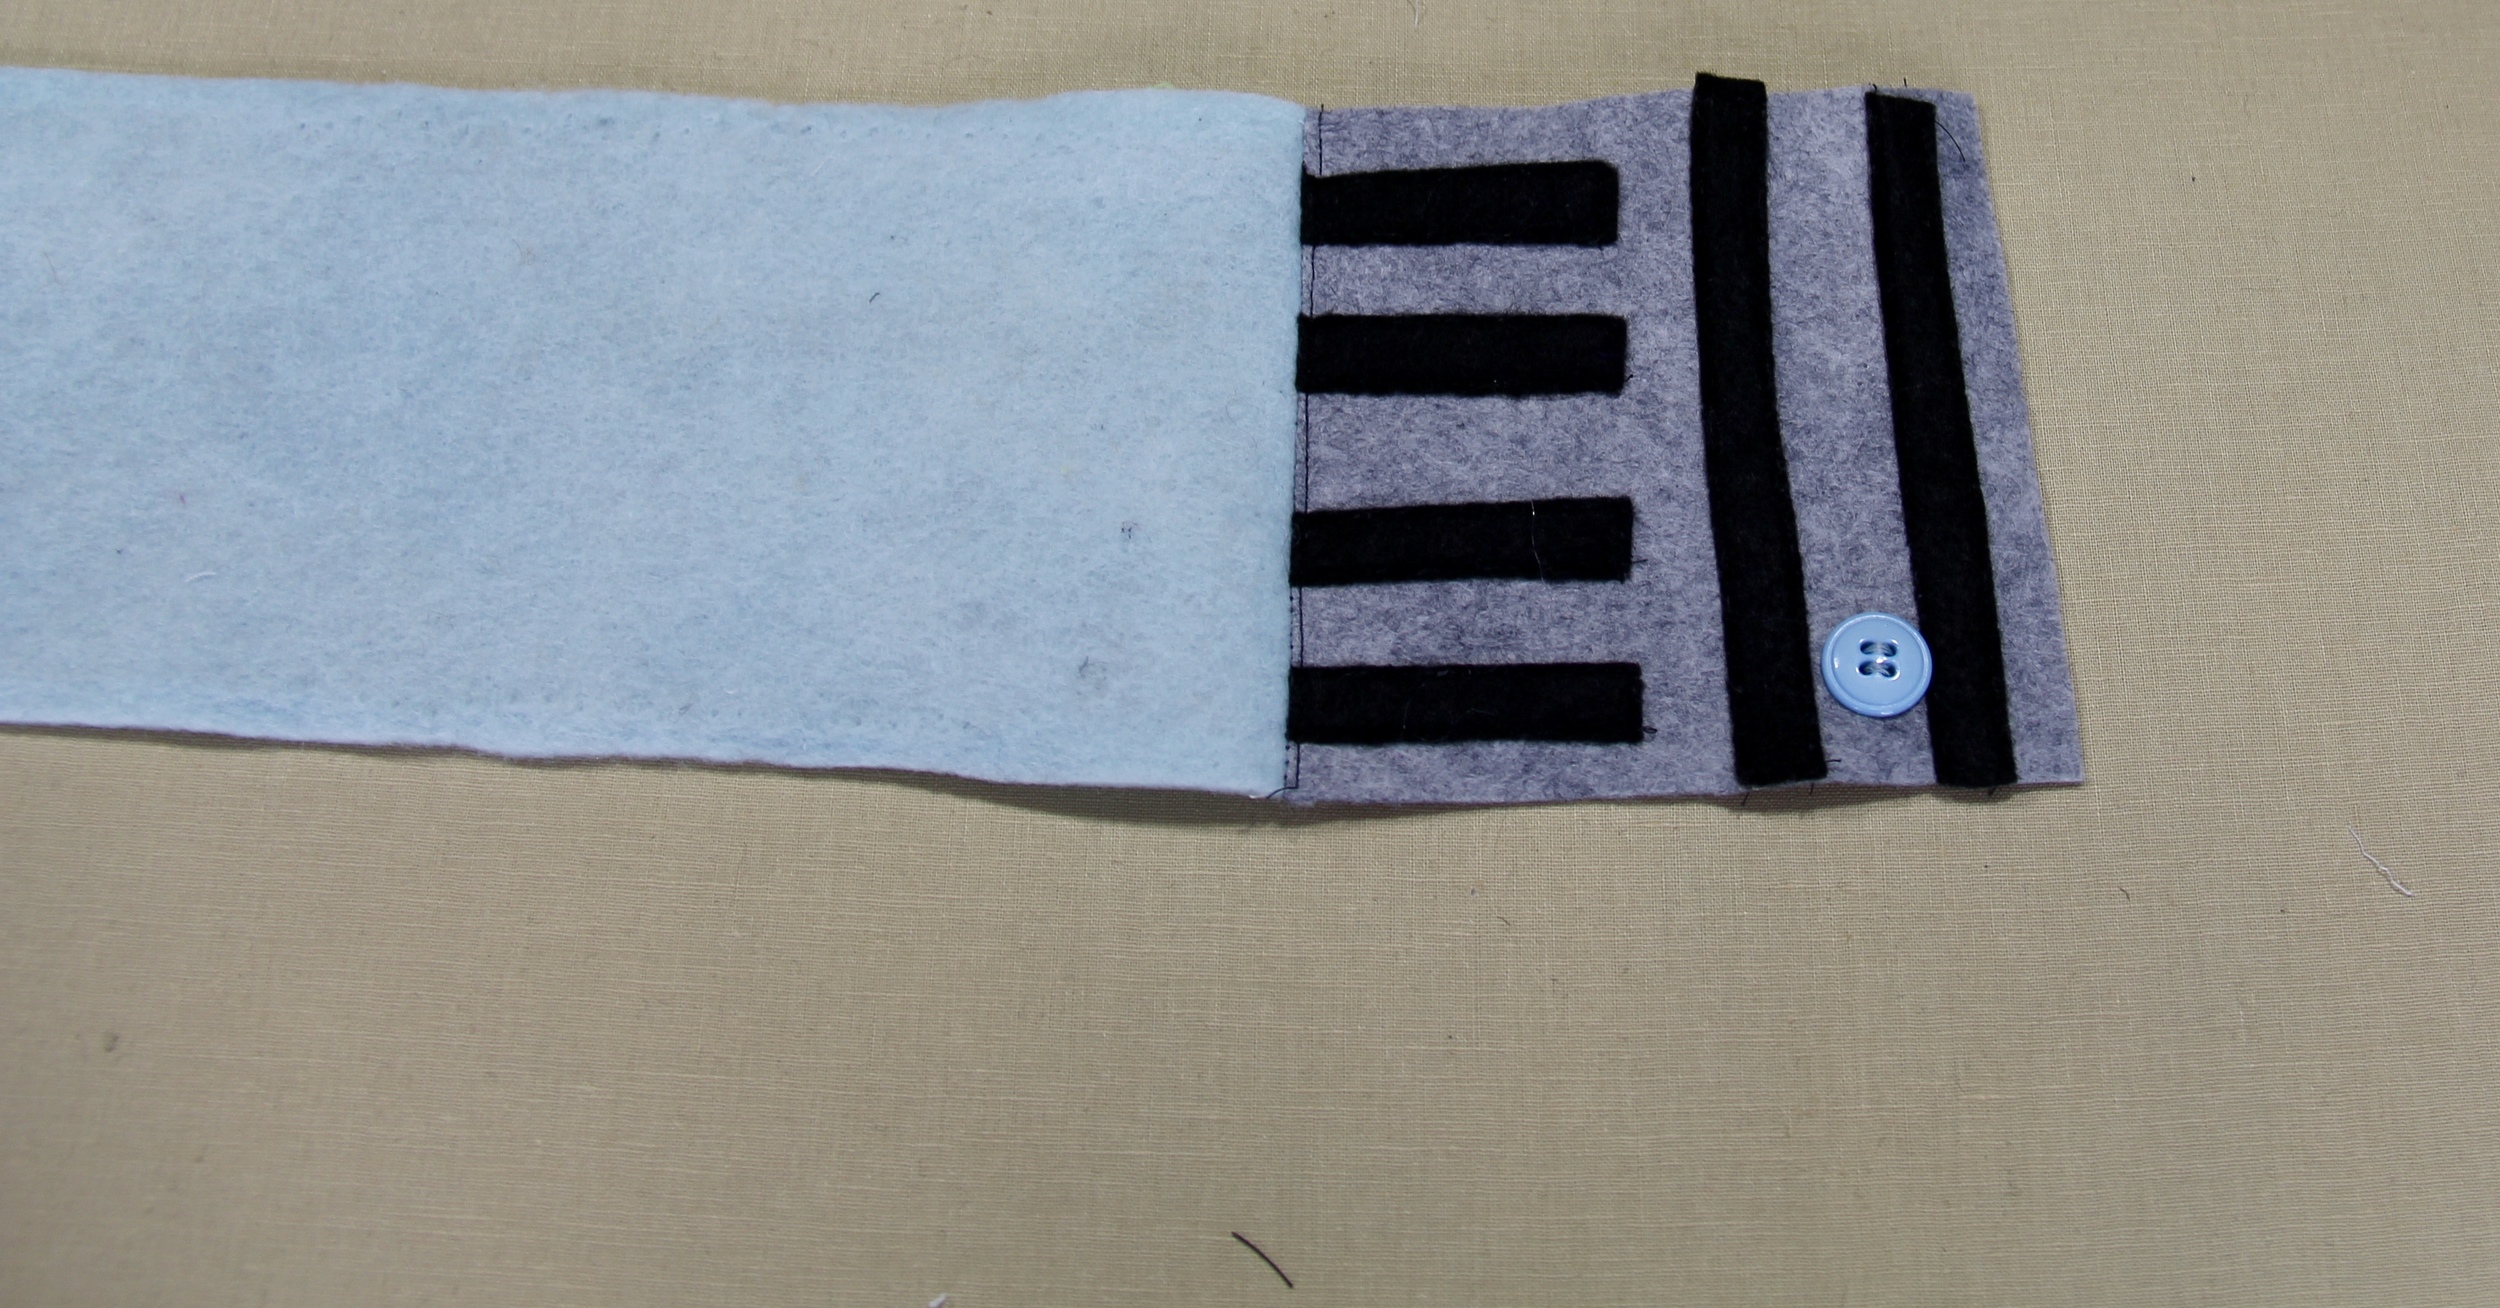
Begin by threading a needle with about an 18" length of thread. Stitch each black piece of felt to the grey hilt. Sometimes it helps to use a glue stick and glue each piece first. Let it dry for a couple of minutes, then stitch over it.

Next, sew the button between the two longer horizontal strips.
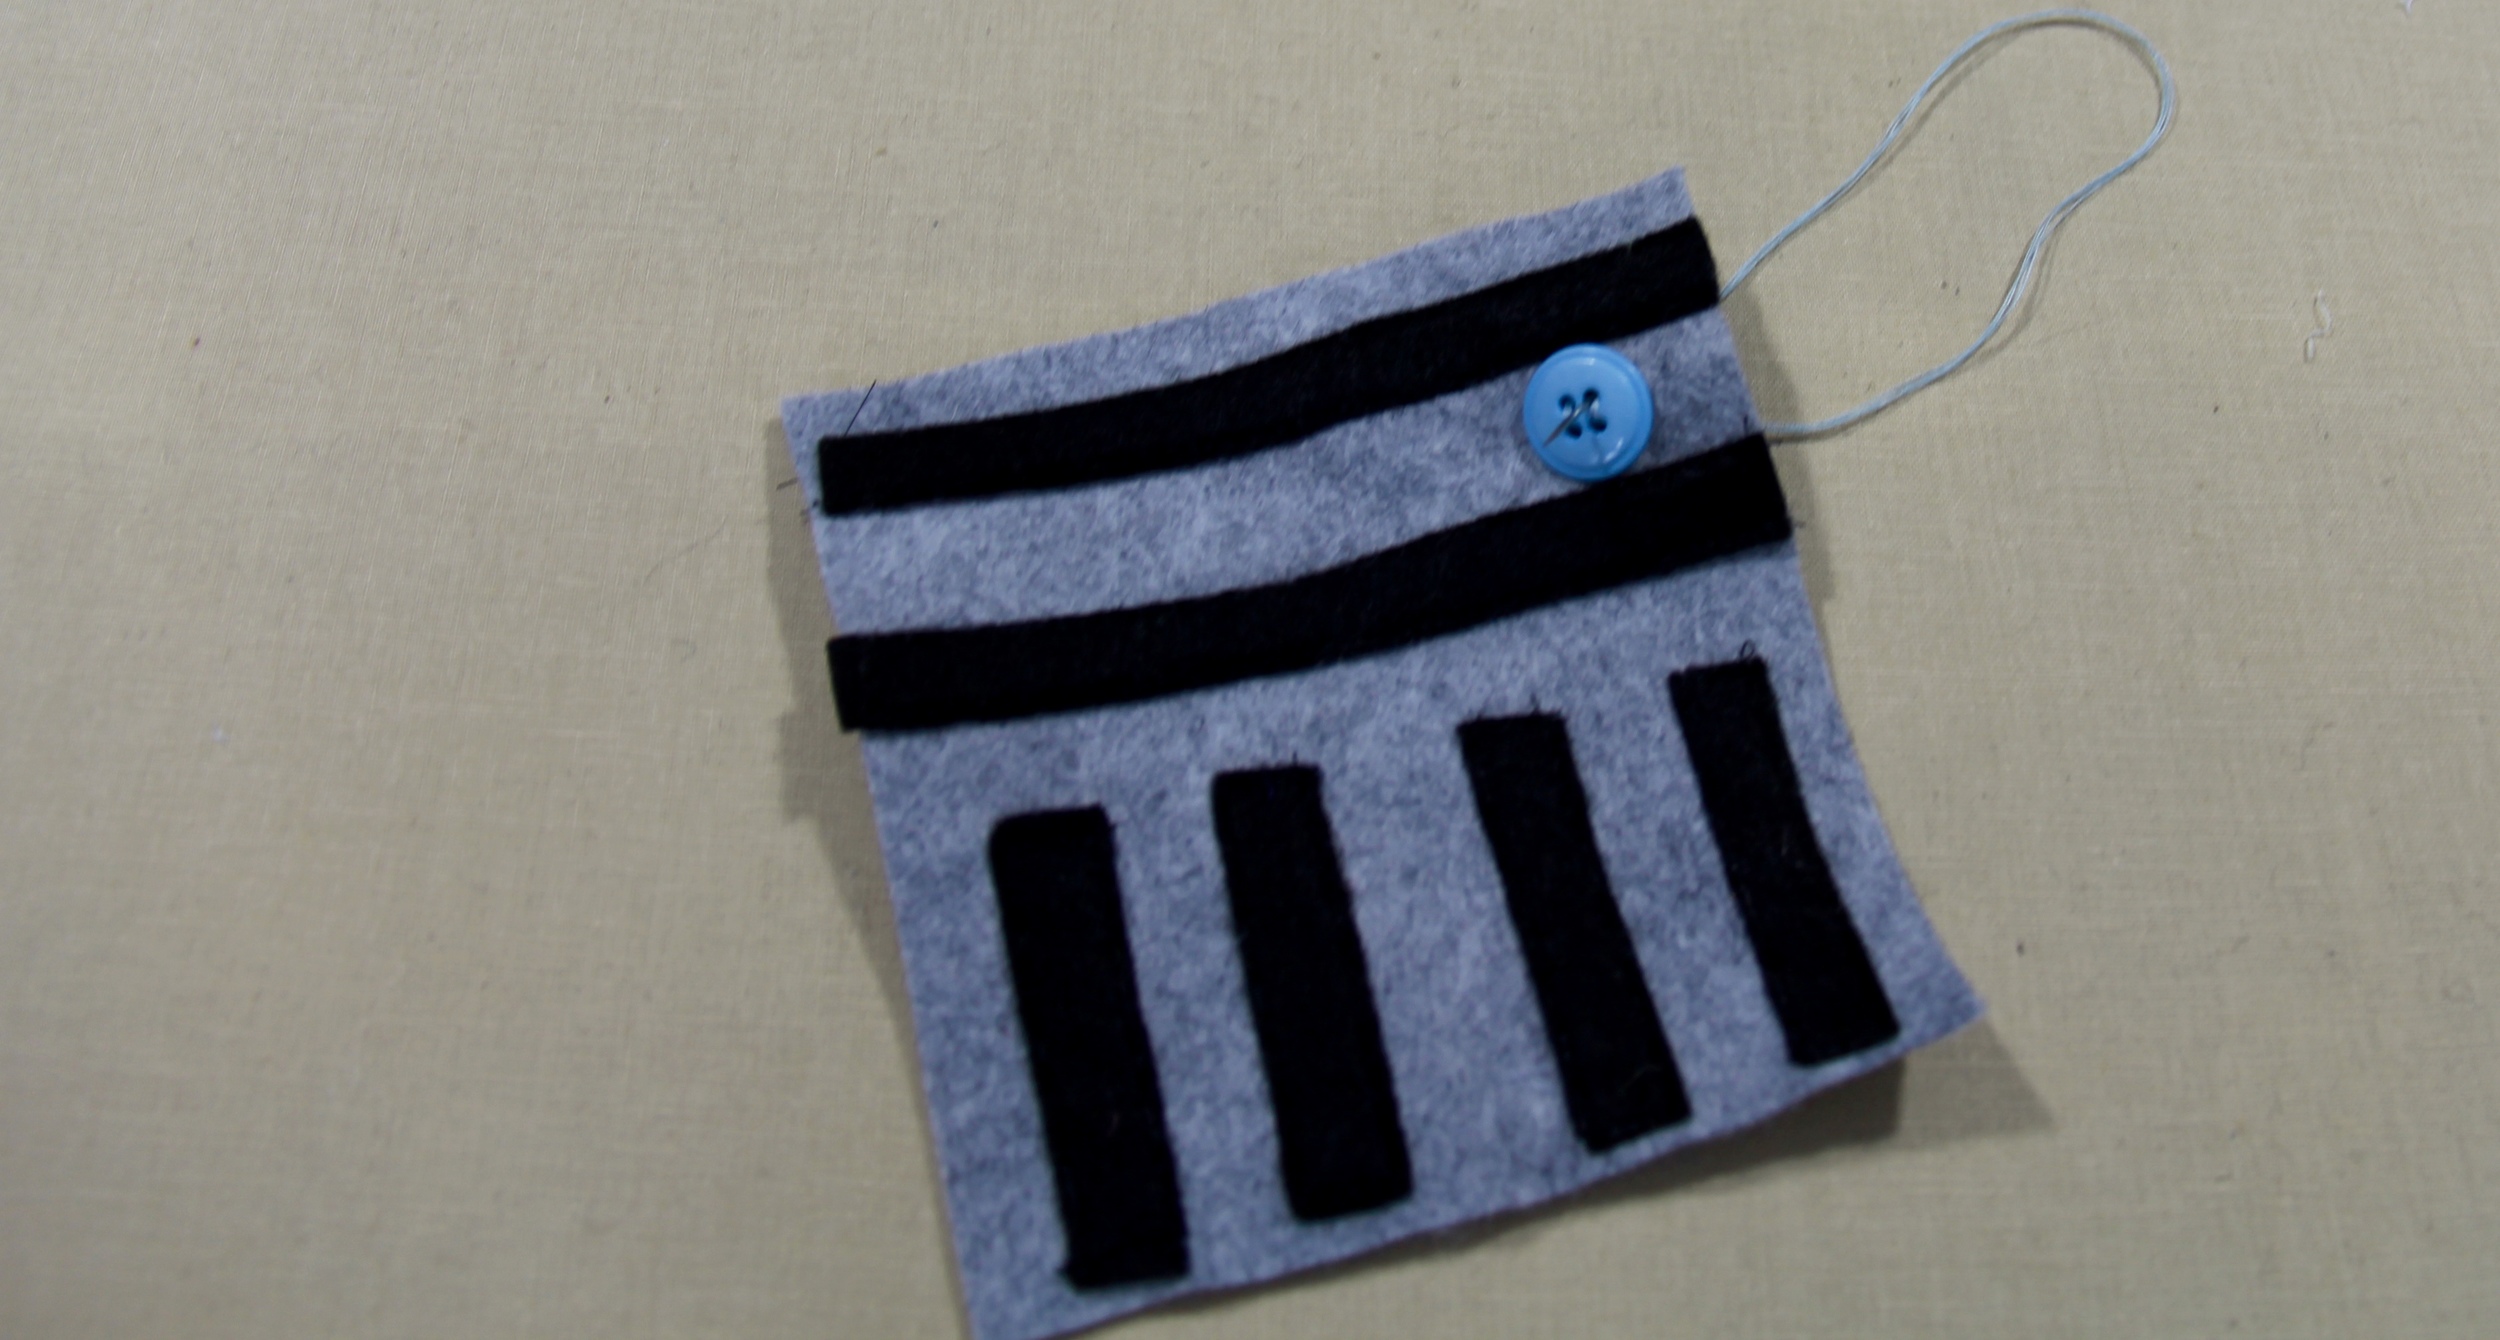
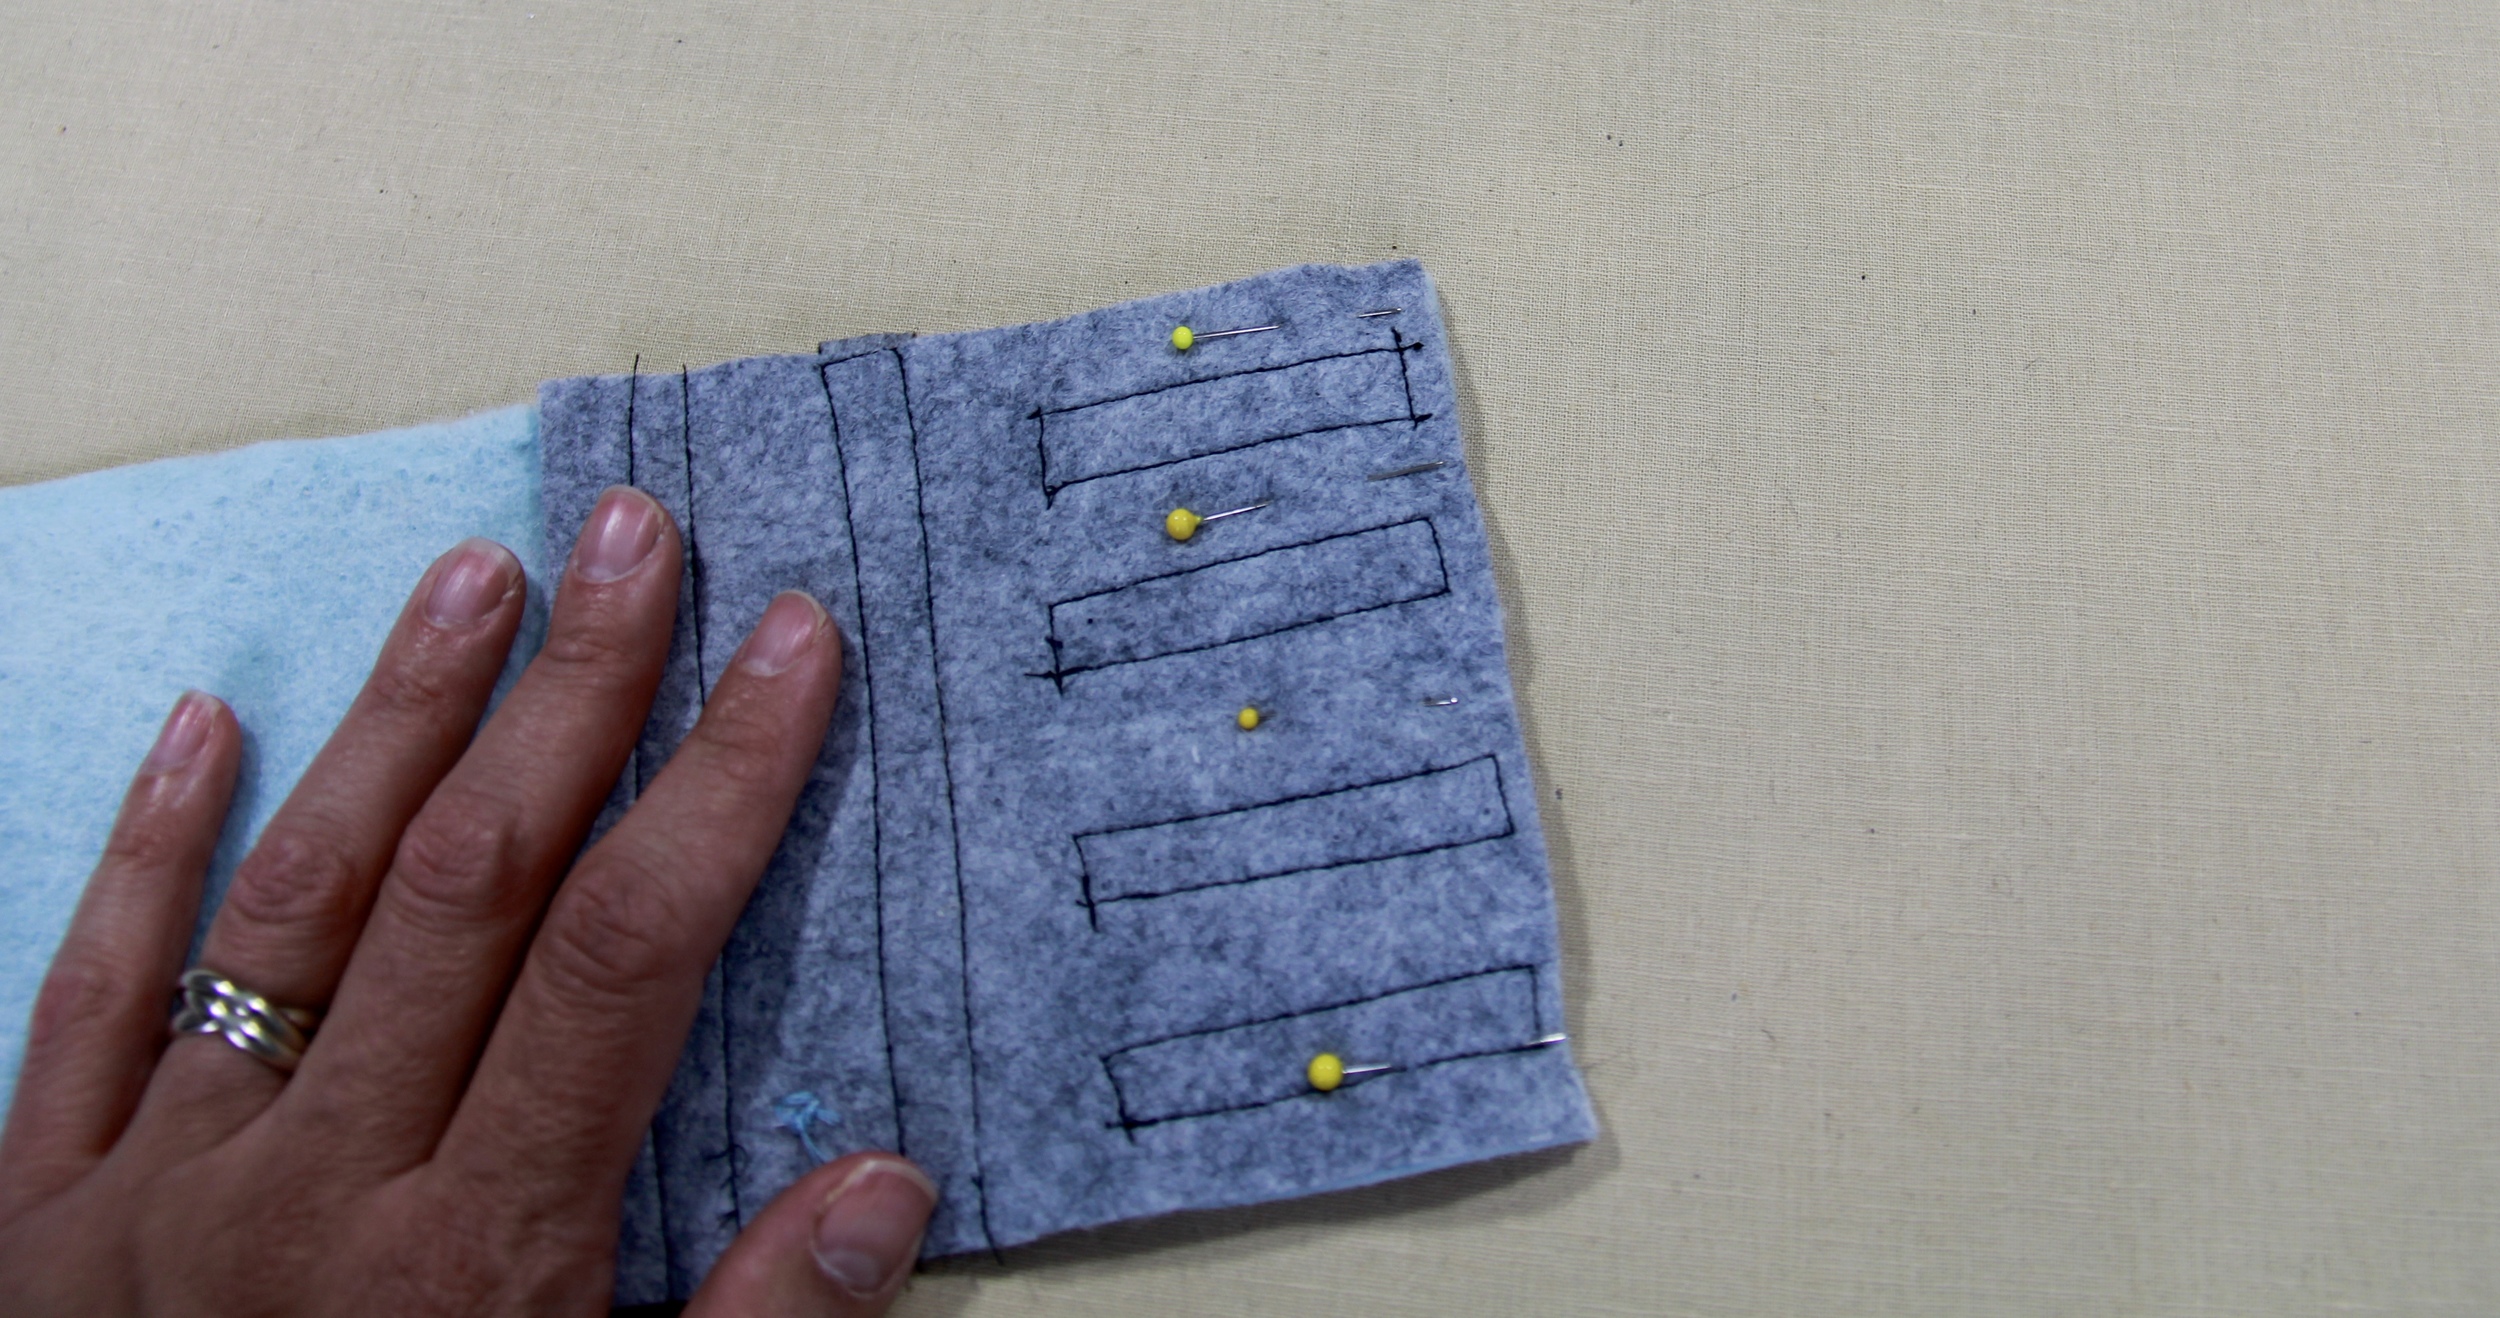
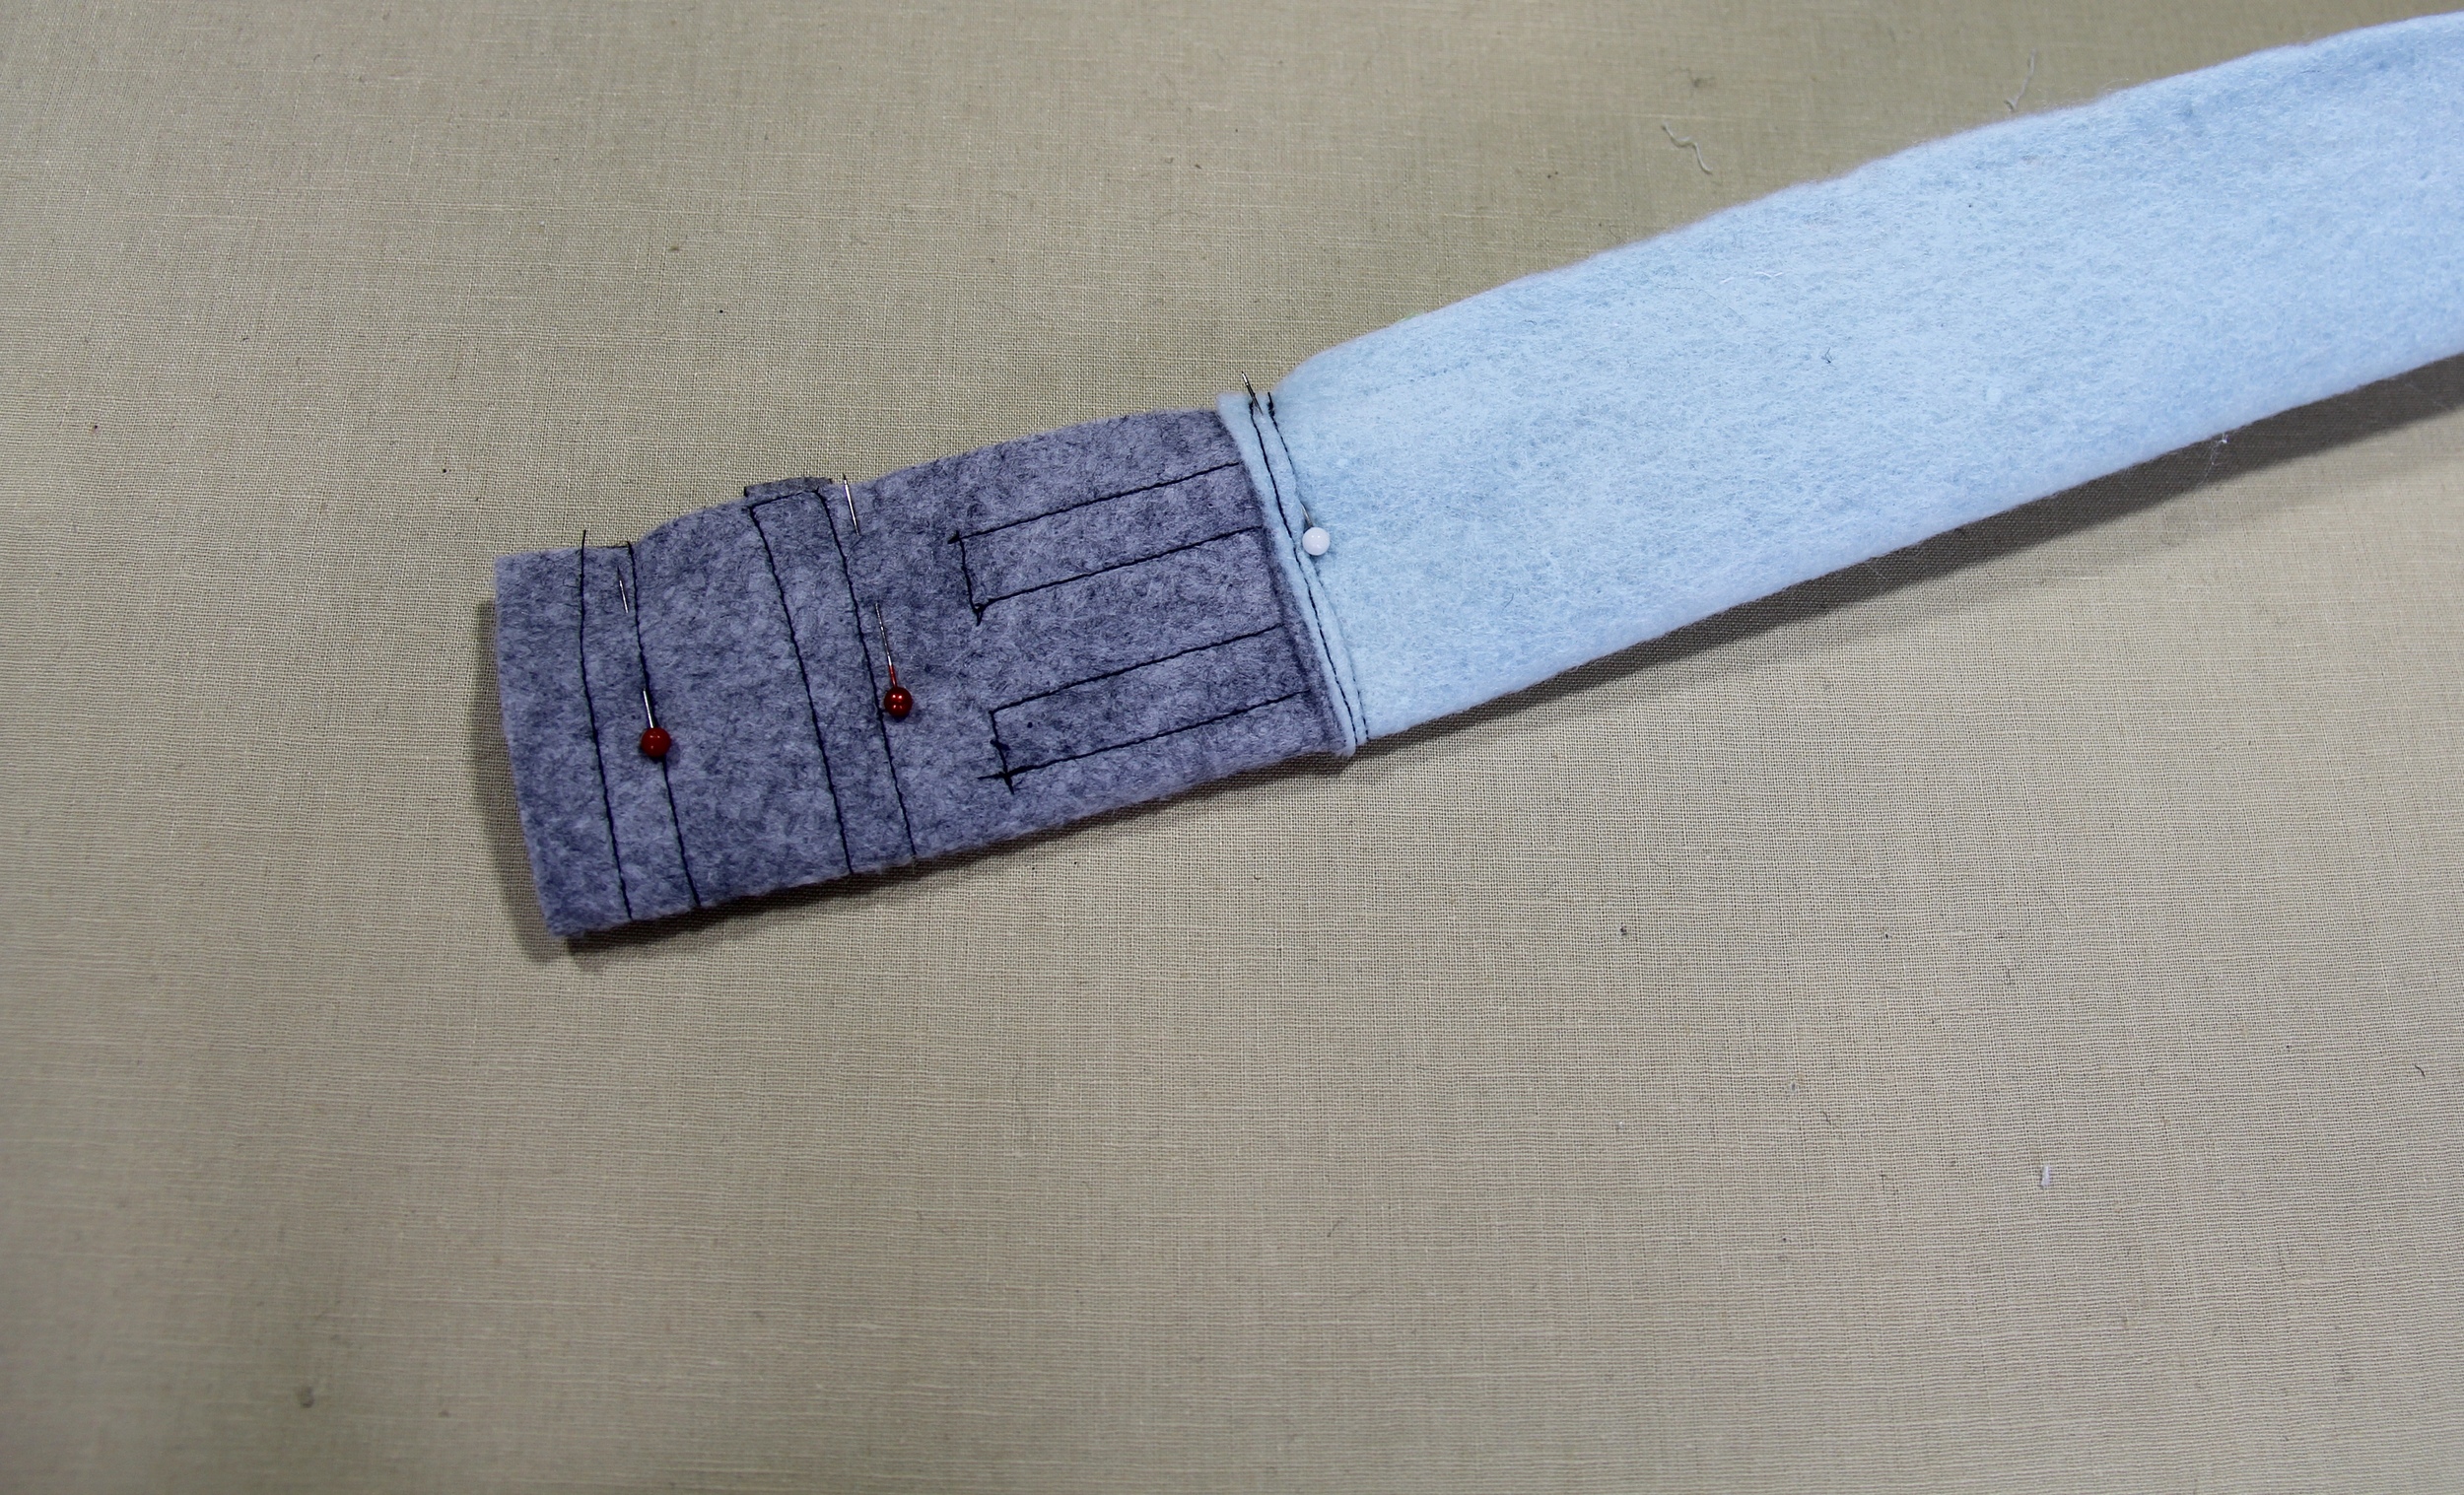
After you have stitched the button and each black strip, place the right sides of the hilt and blade together, pin and stitch.

Turn over and stitch across the hilt, make sure to tuck the previous seam toward the hilt and topstitch across.
It's coming along nicely, right? I told you this was easy. Almost done.
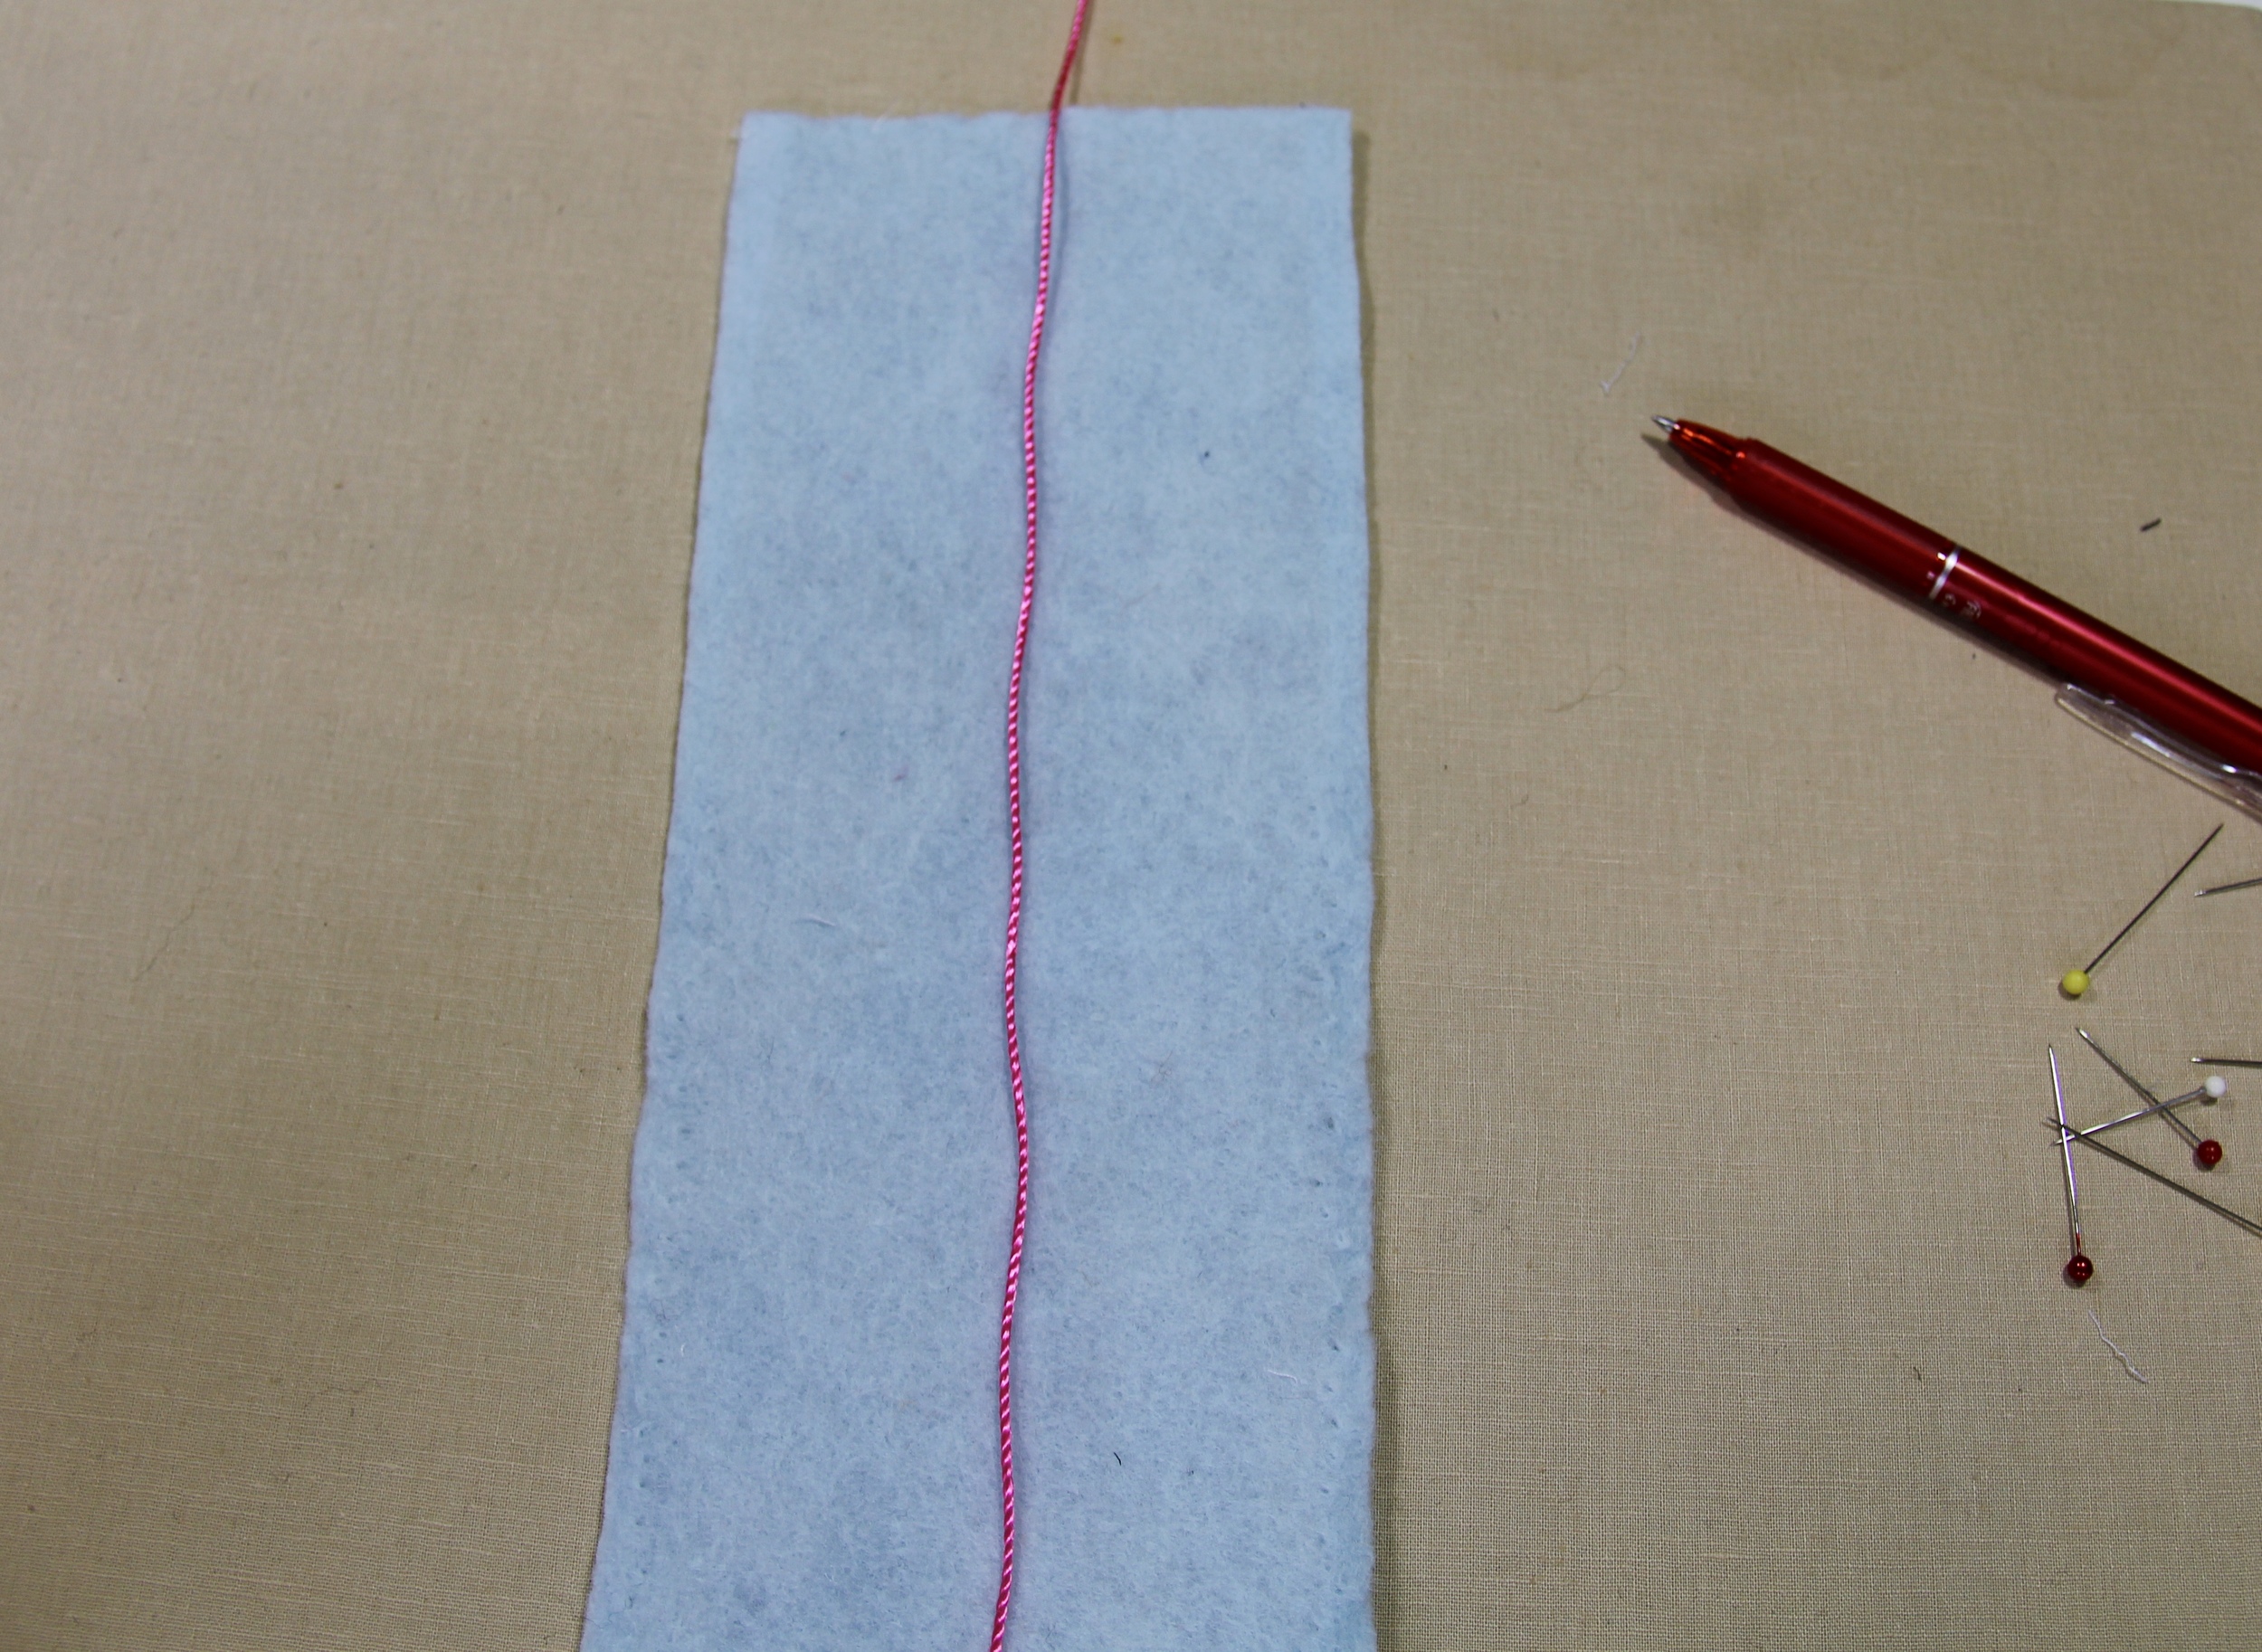
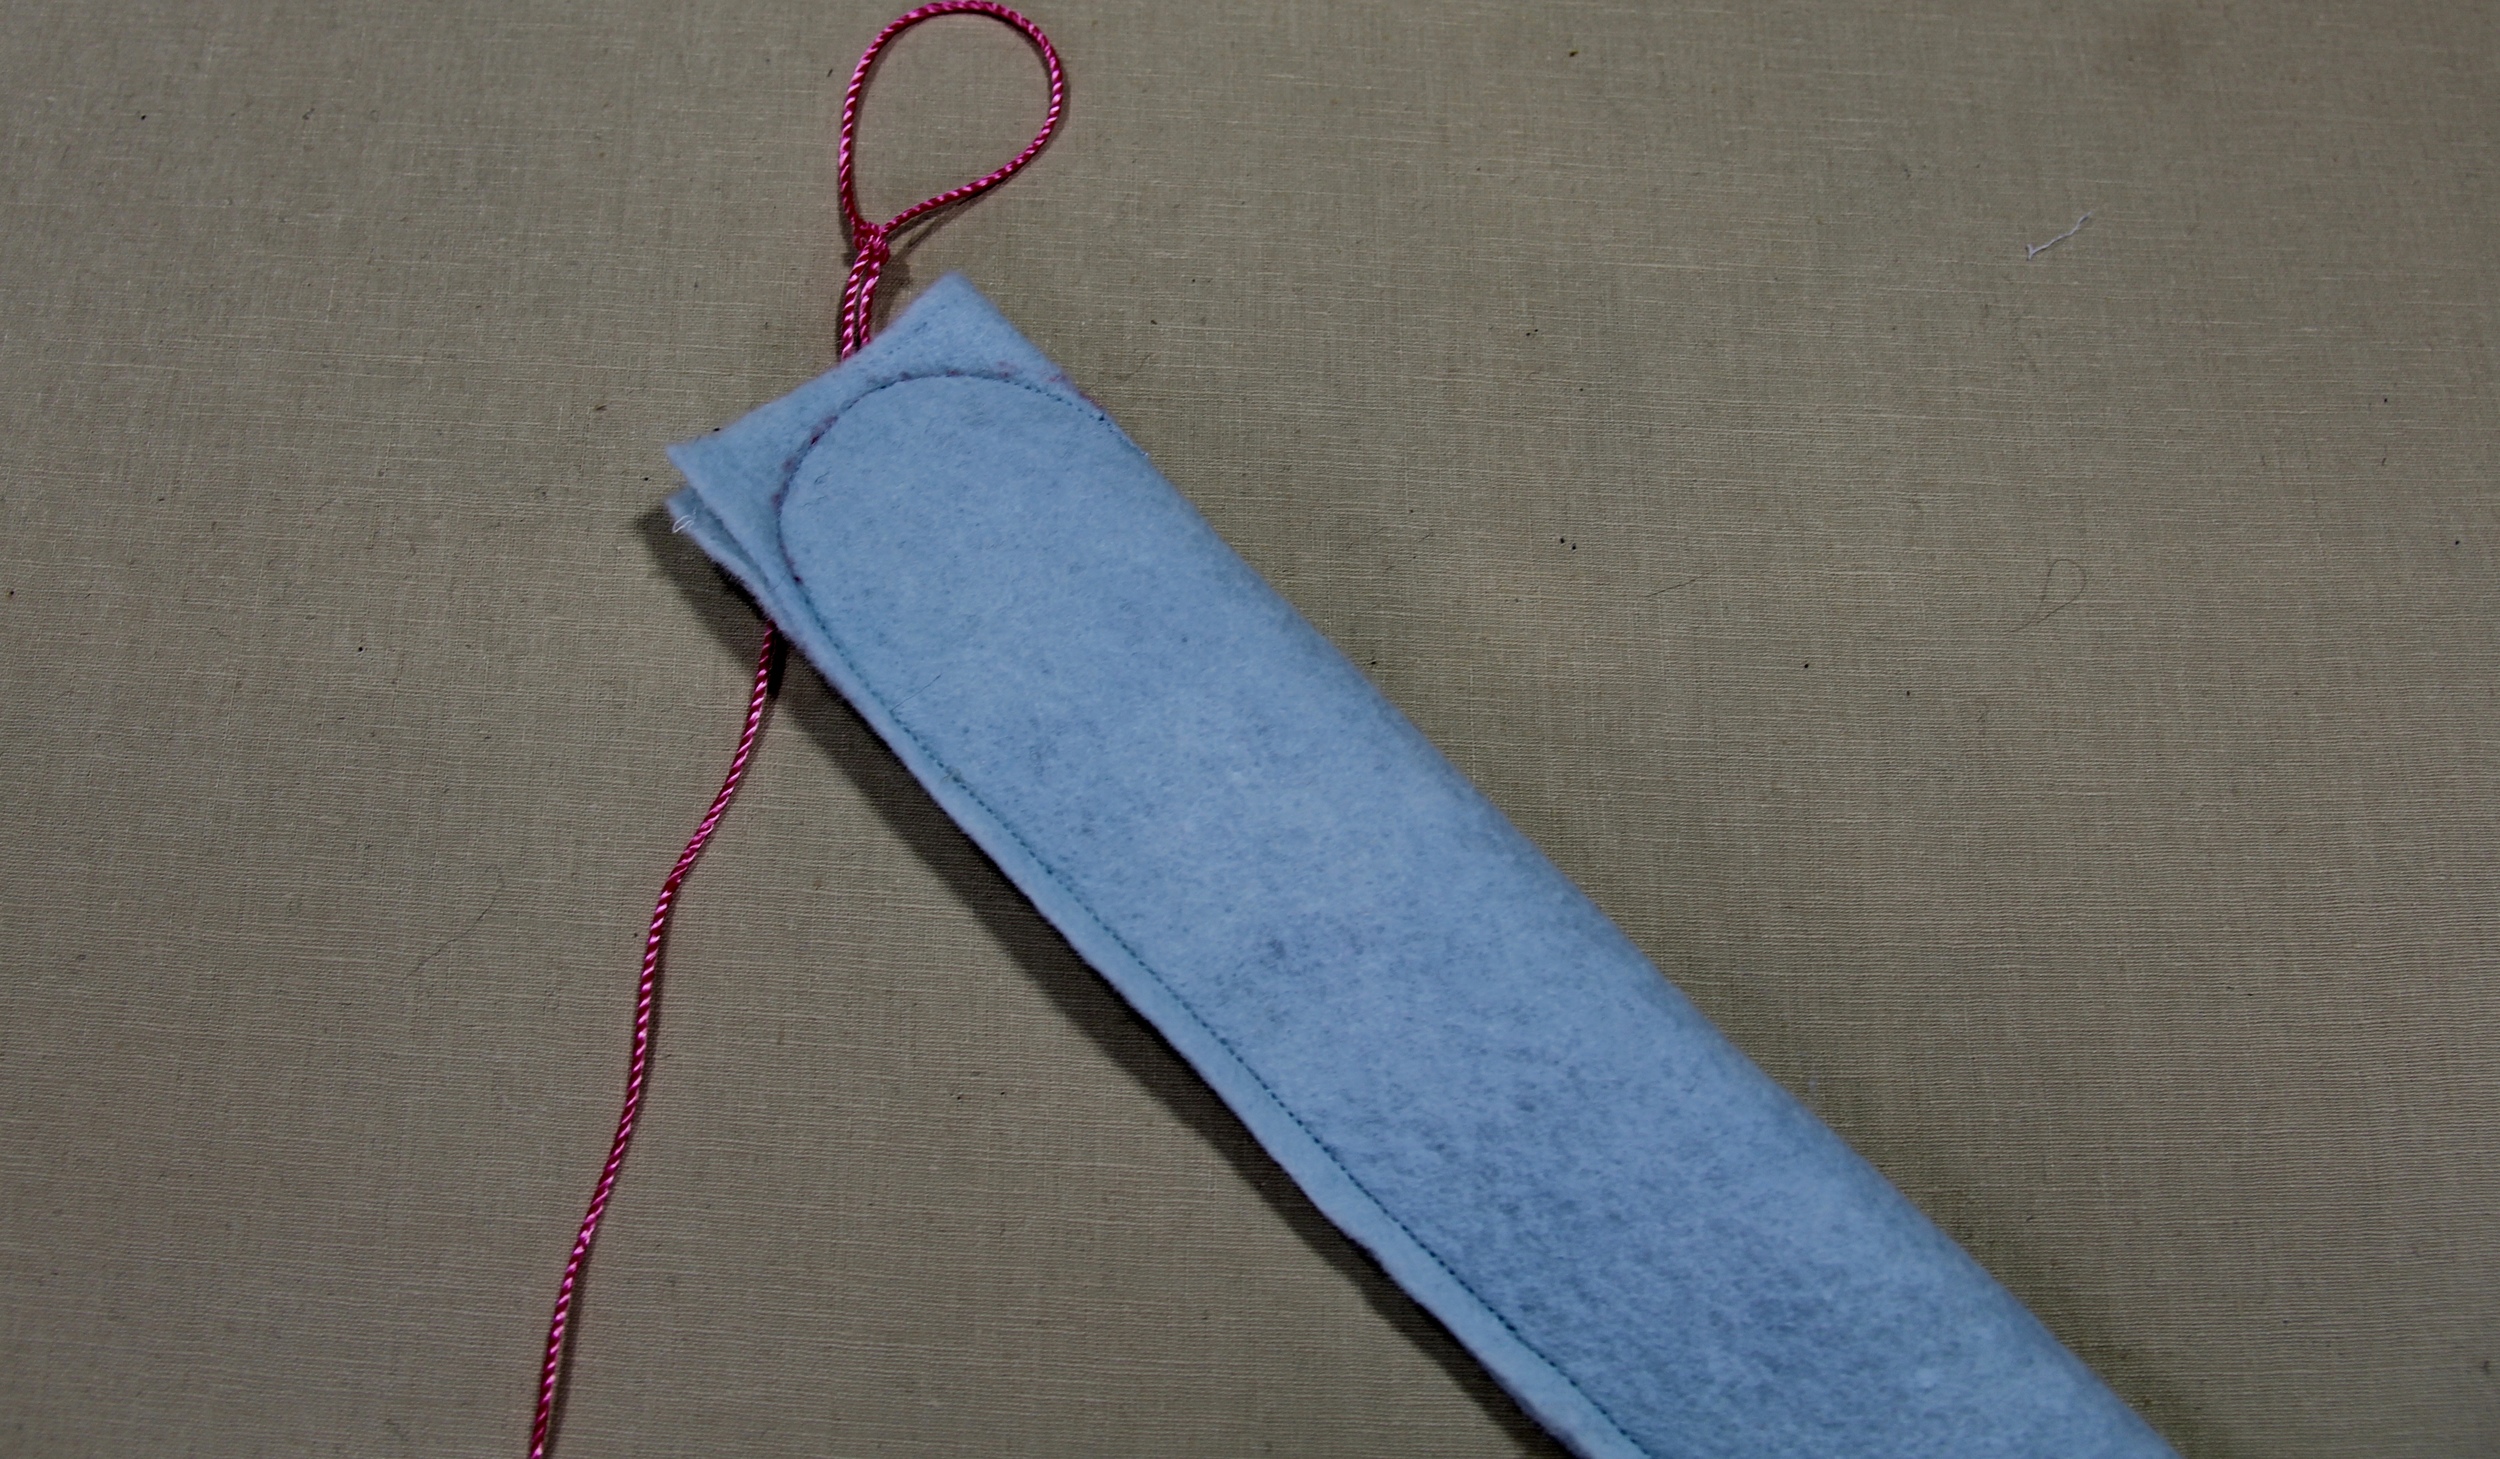
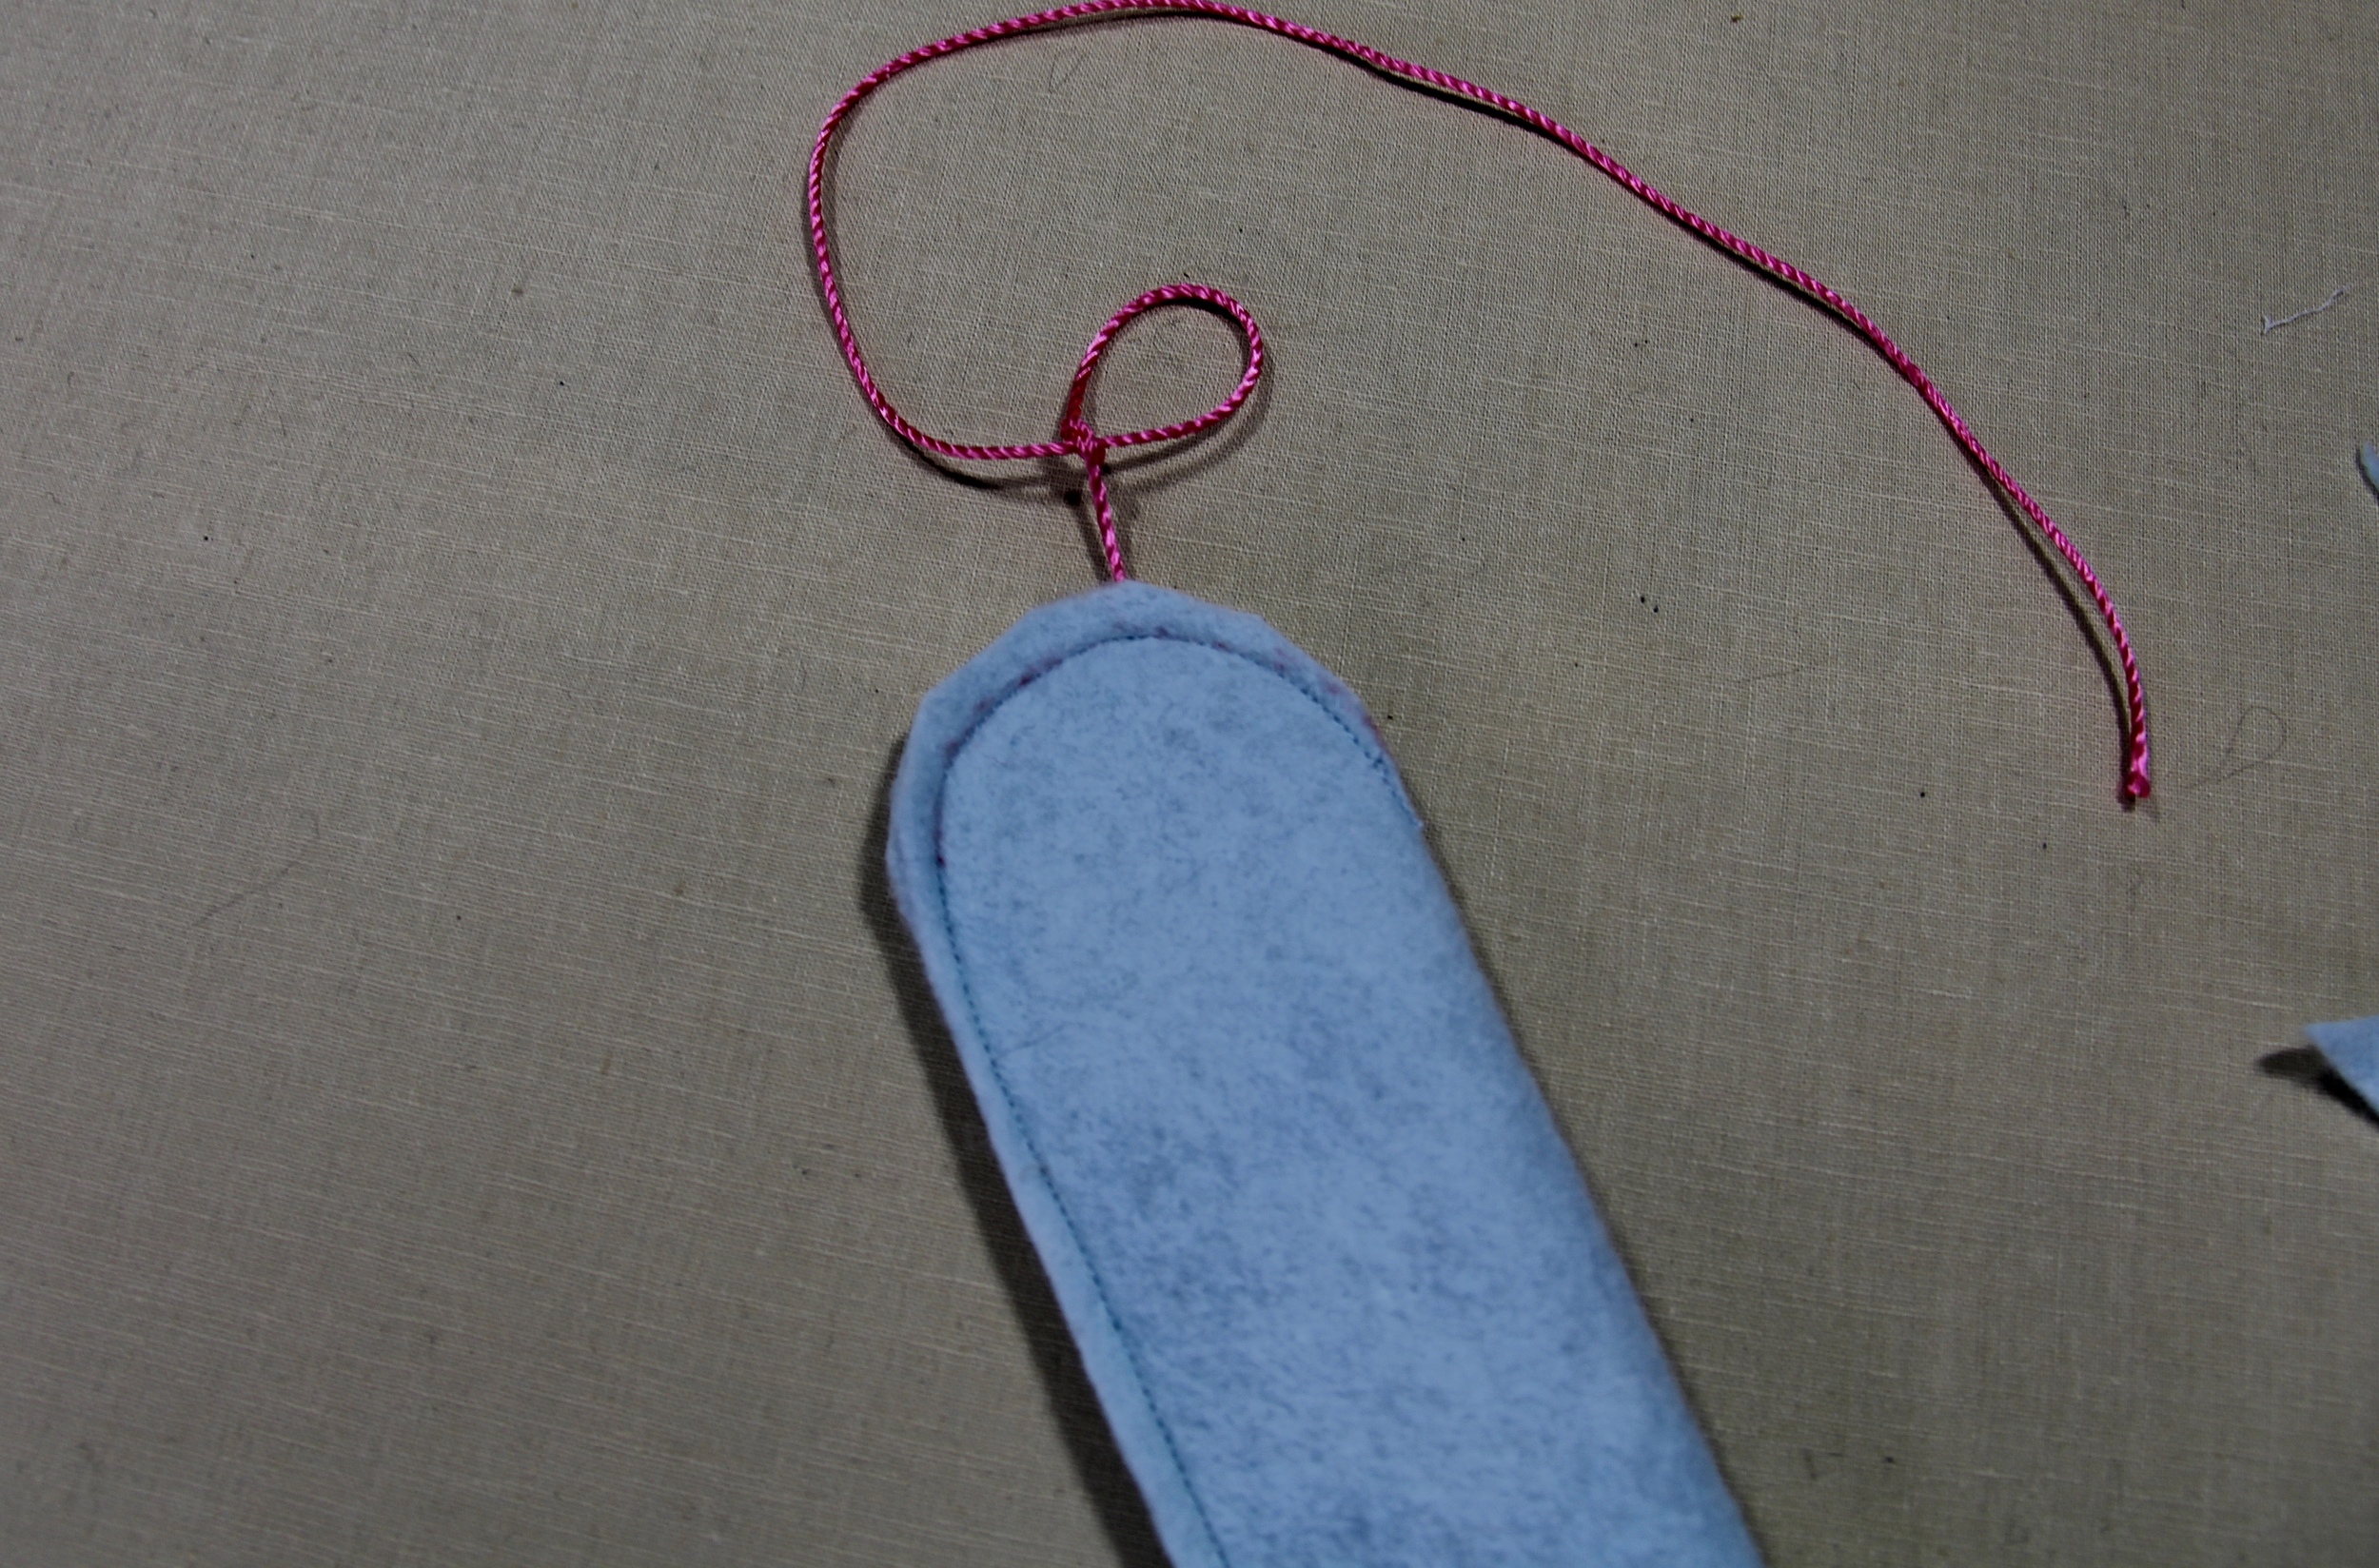
Take the piece of yarn or string and lay it down the middle of the blade. Fold the lightsaber in half lengthwise and pin. When pinning, begin at the hilt, making sure to evenly line up the black strips. After pinning, take a pen and draw a nice curve around the top of the blade. This is going to be your stitching line. Begin stitching at the bottom of the long side of the hilt. Using about 1/4" seam allowance, sew straight up toward the top of the blade. When you get to about 2" to the top, slow down and stitch around the curve that you drew. Make sure that you stitch over the yarn. Back stitch to secure and trim your threads. Now trim the felt closely around the stitch line being careful not to cut through the stitches.
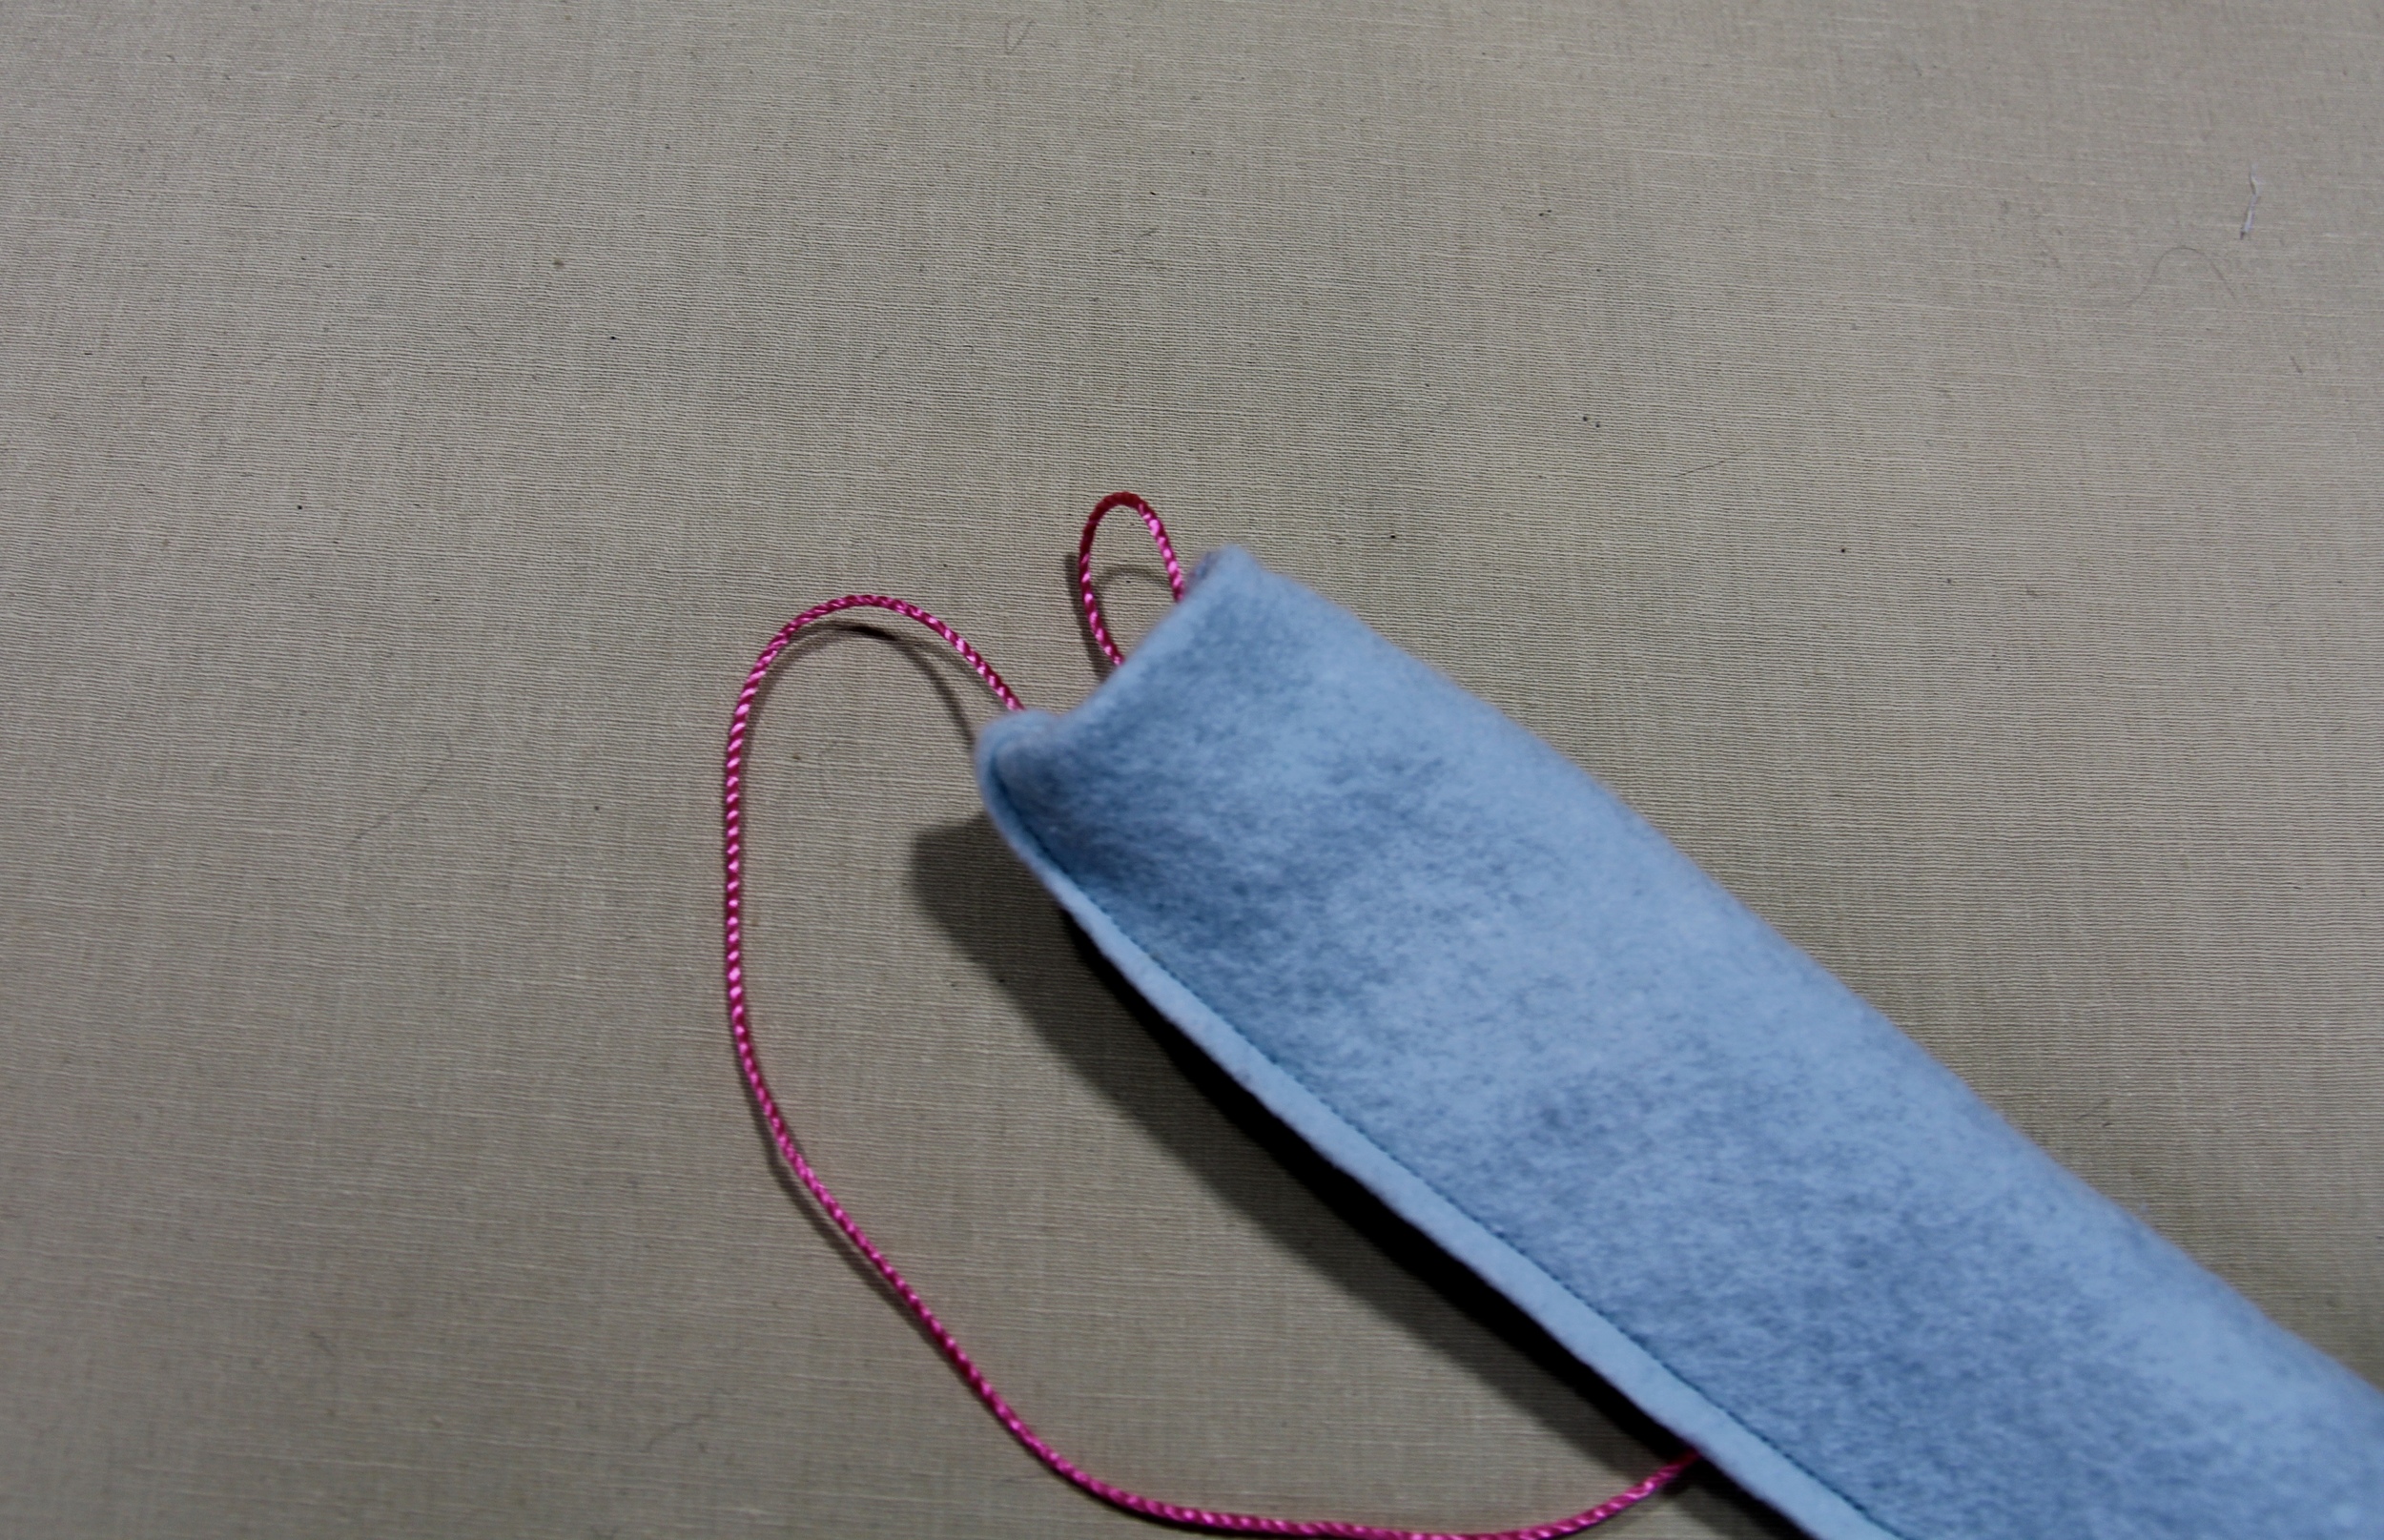
Tie a slip knot in the yarn, right above where you just stitched. Grab the yarn on the opposite end and pull gently. As you pull you will begin to turn the lightsaber right side out. Fun, right?
Once you have it turned, you can cut the yarn. Now it's time to stuff.

Using small bits of Poly-fill, begin to stuff. A chopstick or eraser side of a pencil makes this much easier. As you stuff, roll the lightsaber against the table, like a rolling pin. This will help to keep the stuffing from looking lumpy.
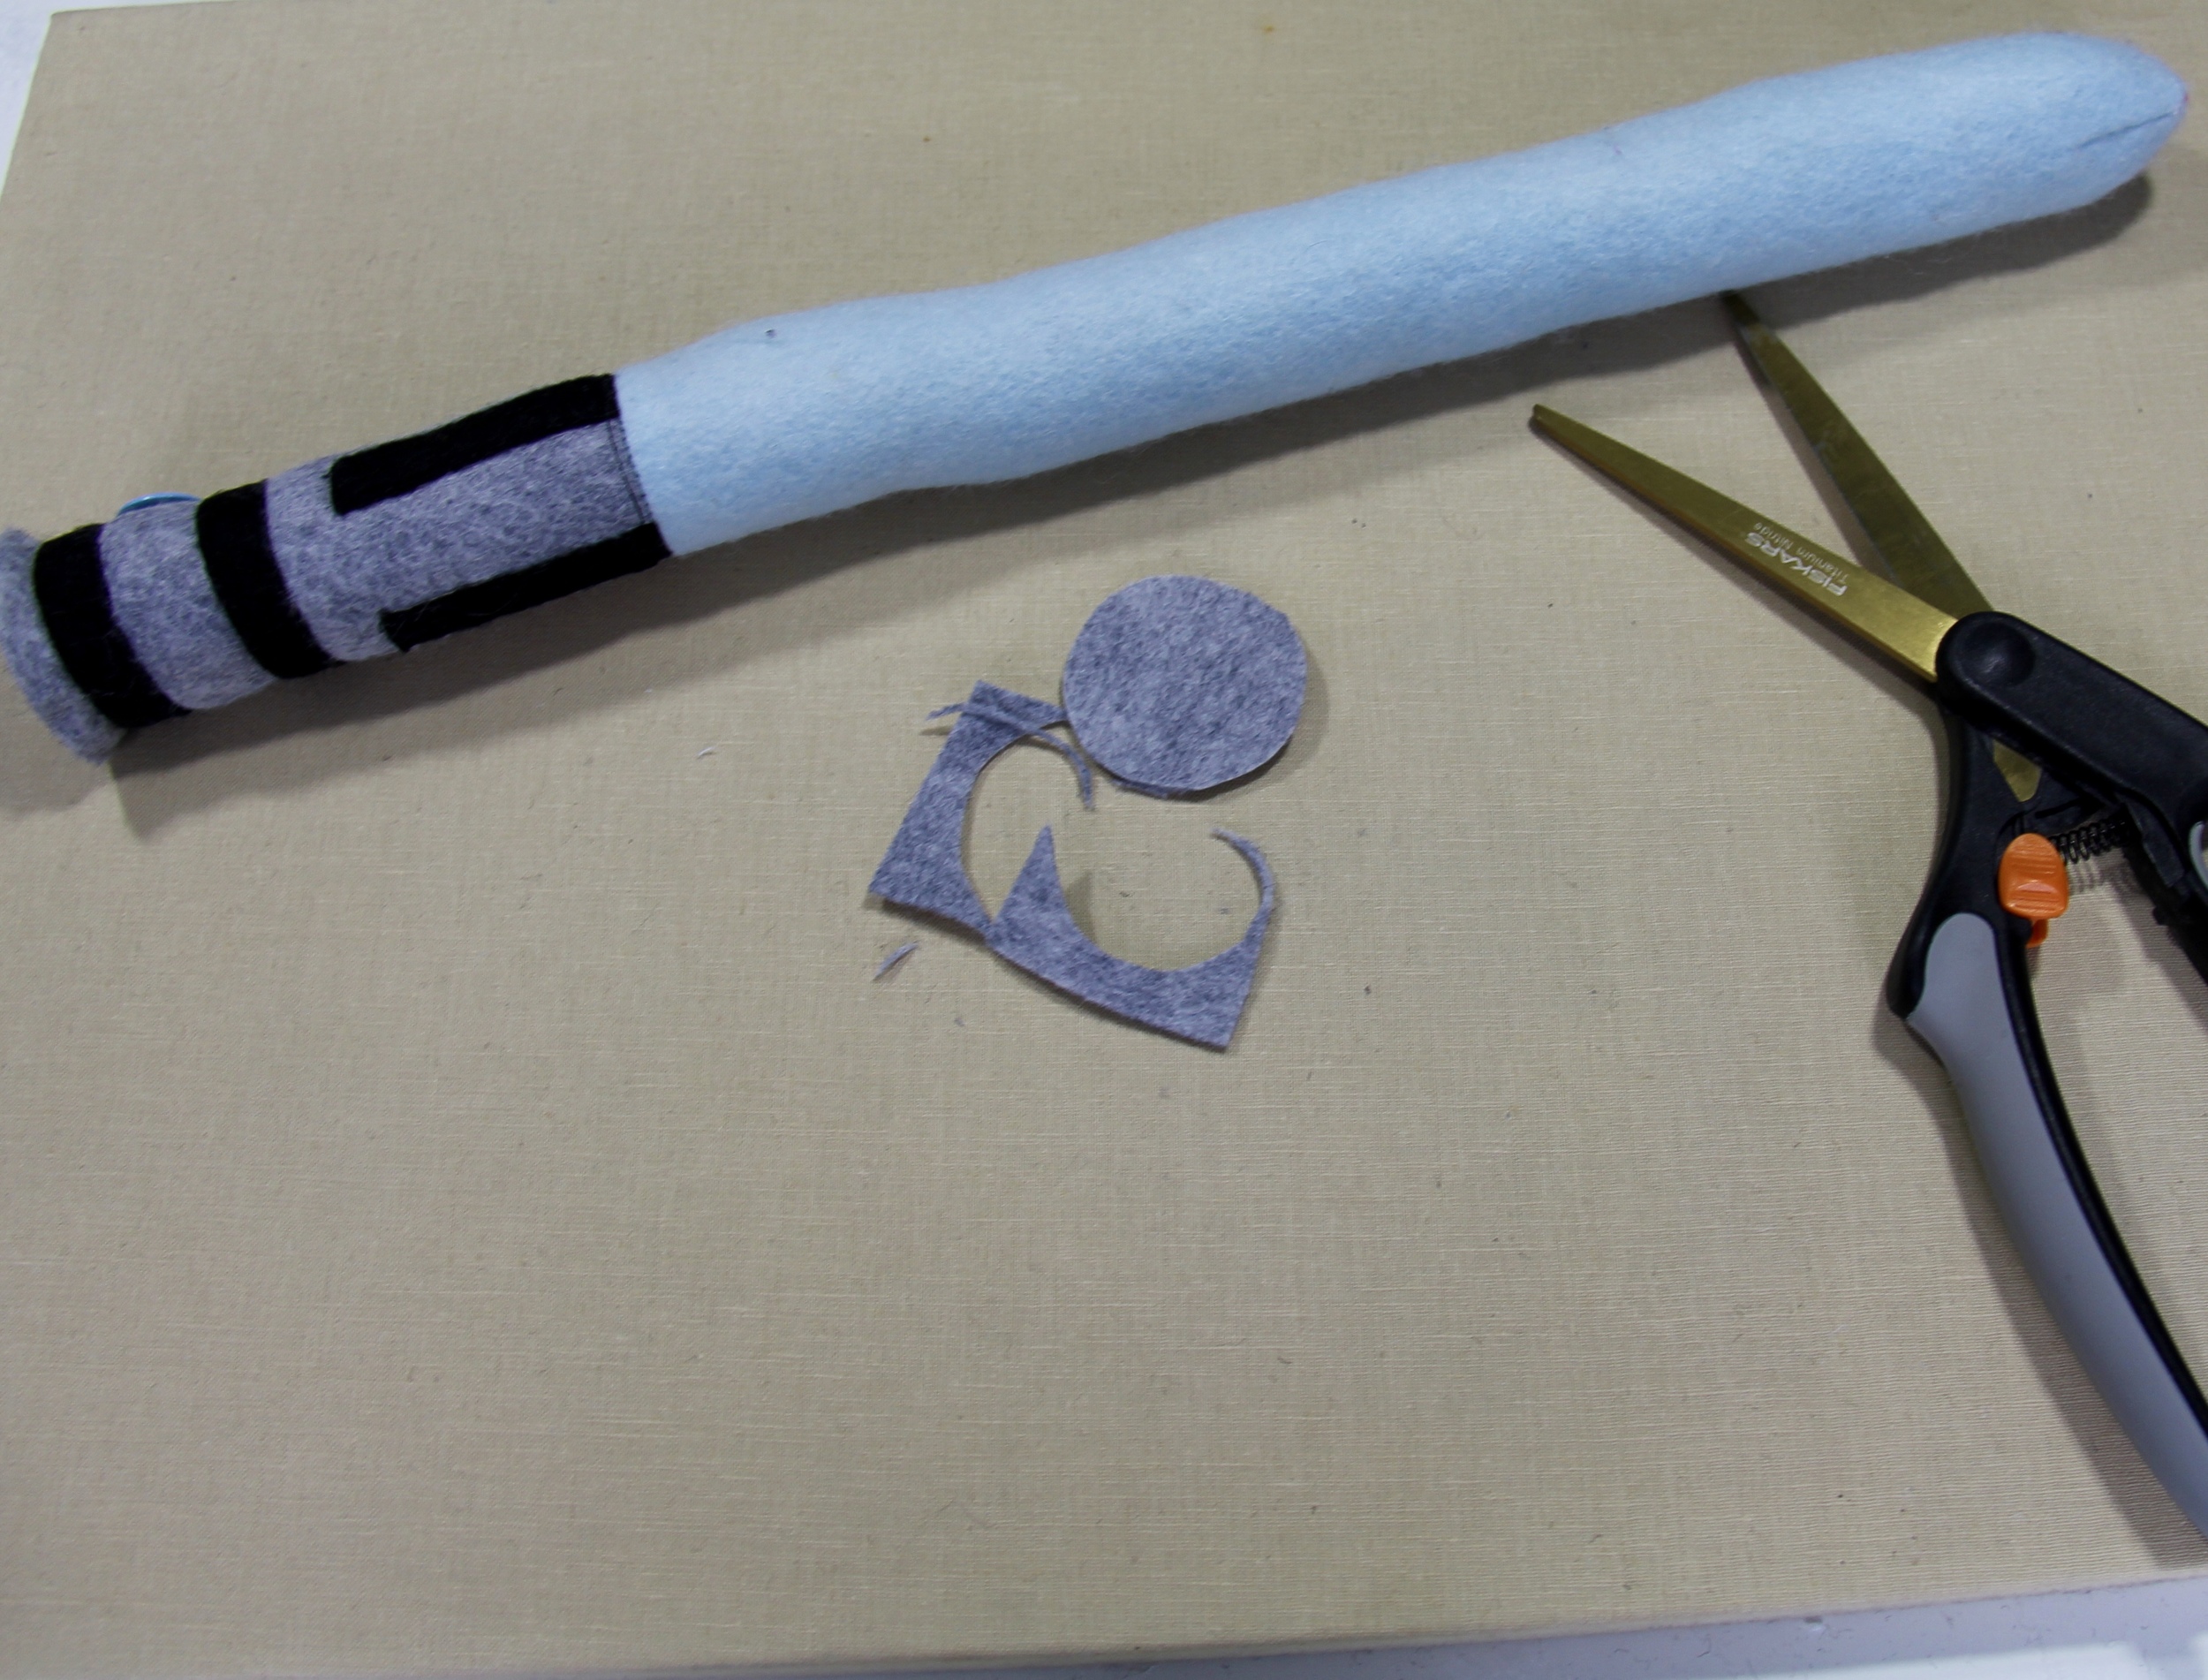
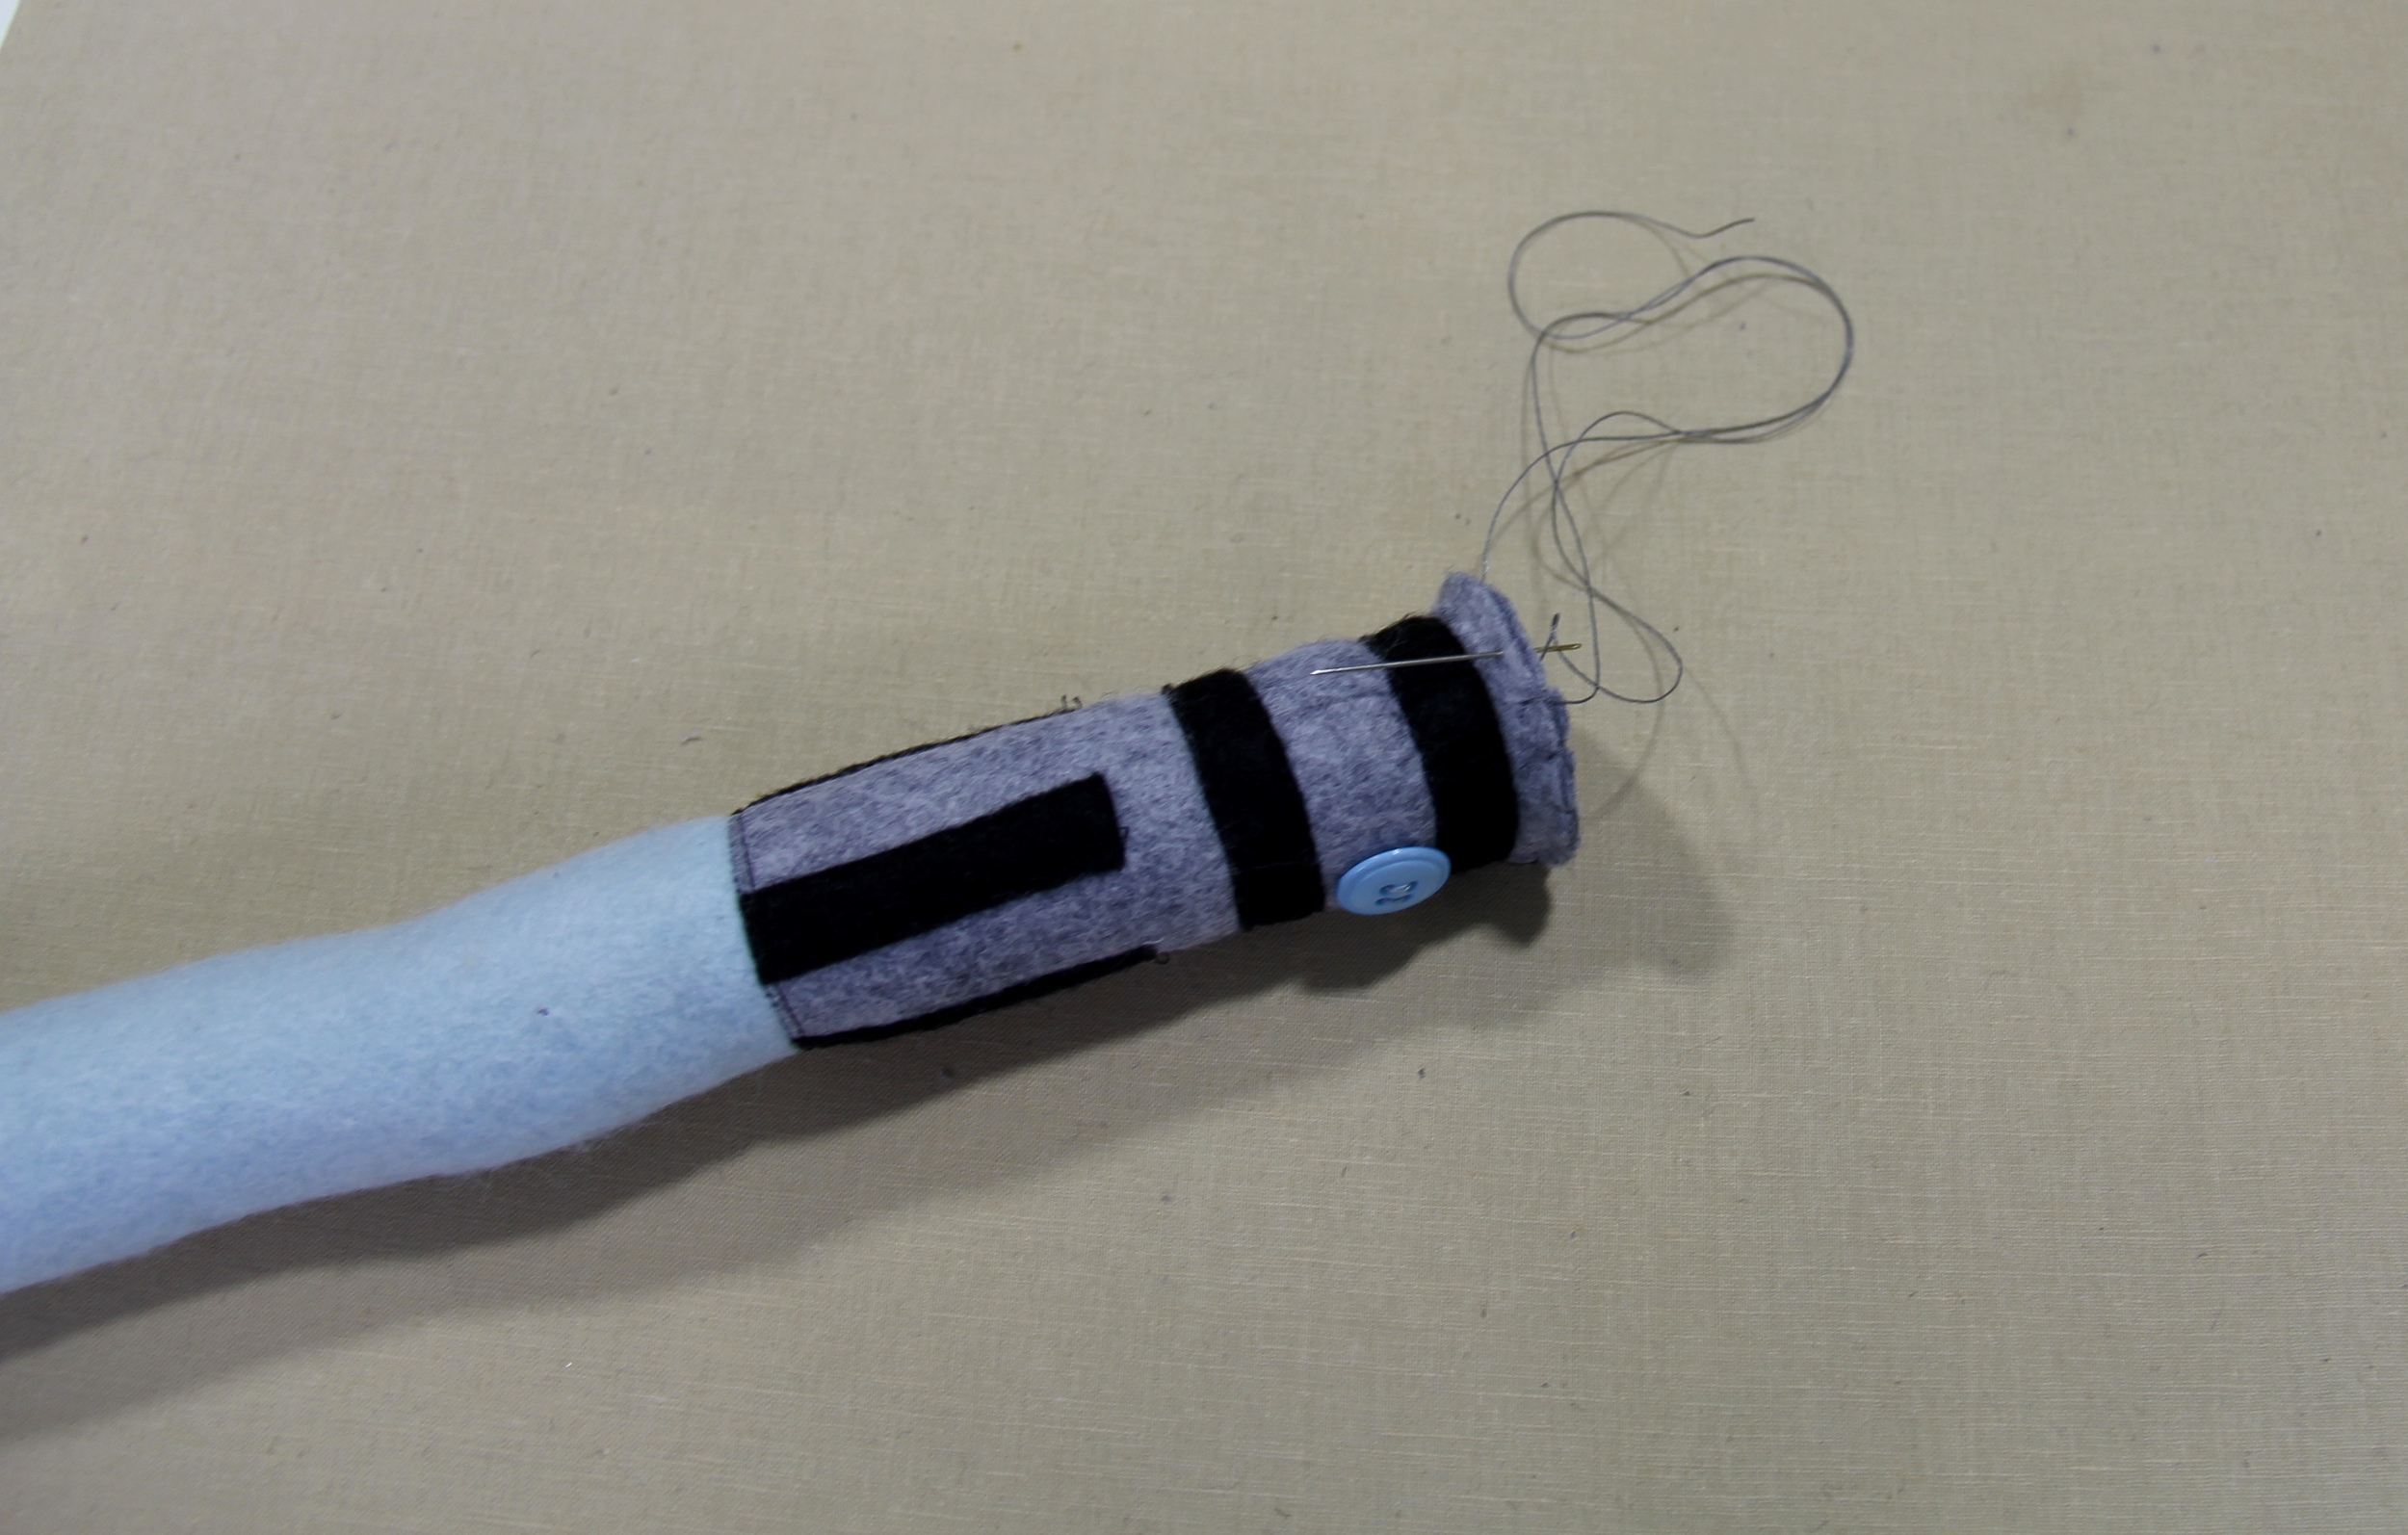
When you are satisfied with the firmness and shape, its time to close the hilt. You may call it quits and just stitch right across the top or you can cut a circle and hand stitch that piece to the bottom of the hilt and close it nicely. I like to use button and craft thread for this. Its a bit thicker and tends to withstand play a bit better.

Ta-da! You did it!! Now you can give it to your child and let him go for it! (If you are going to give this to a child under 5, you may not want to use the button)
Let me know if you have any questions.
XO,
Hilarie
Creativity and Children

Since writing my last post, I have been thinking a lot about the nature of creativity and children. What can we do as parents to foster it? By insisting that all of the paper scraps (origami) are picked up off the floor and thrown away, am I discouraging it?
Creative children become thoughtful, innovative, creative adults. That is the end goal, right? We want to lead our kids to explore, to achieve, to be curious. Among my children's friends, and many kids that take my sewing classes, I see loads of creativity. But I hear that they don't have time to make things outside of class. "We are just too busy!", I hear or, "we don't have any craft stuff!". While I'm not certain the lack of craft stuff is the real issue, but I think time is.
We all have the same amount of time in a given day. If you are like me, you feel stretched. My kids are limited to two activities at any given time, but still, we're busy. To foster creativity in our kids, they need unstructured time. With homework, lessons, sports, and friends, it's tough to do. I don't know about your house, but in mine, unstructured time frequently ends with my kids bickering. Often on weekends, unplugging just isn't enough. When I say its time to turn off the TV or iPad, they get restless and claim they are bored and that there is nothing to do. Sometimes we go on an outing, but other times, we stay home. On those days, instead of engaging in their bickering, I will start collecting things around the house and eventually ask for their help fetching some of the more "interesting" supplies. Pretty soon, I have their attention and the house is a wreck in their (our) creative endeavor.
Let's be honest, there are days when I don't want to start another project for my kids. I want them to take the initiative and start their own and leave me to mine. That doesn't always work out well. Kids need us to provide just enough time and space for them to unwind a bit and tap into their creativity. A bit of persistence, some supplies and just enough direction for them to confidently create. It often takes us to initiate the project. I'm not sure at what age the screen stops being the default activity.
As a kid, I spent a lot of time quietly drawing, sewing, knitting, reading and daydreaming. As the oldest of 10 children, we didn't have a lot of extra-curricular activities and weren't showered with attention. When I wanted to make something, I didn't have the internet to look up how to do it, I just figured it out. As for supplies, my grandmother sewed and gave me some things, but mostly I had to make do and use my imagination and be resourceful. That resourcefulness has served me well in life. I wonder if I am robbing my children of that. I often think as I am driving my kids to the hardware store, or art/craft supply store, do we really need something else?!?! Then I pause, and see their little faces and think that there are worse things to ask for than wood dowels, duct tape and PVC.
I wish you a creative weekend.

The Best Sewing Machine for Beginning Sewers
Frequently, I am asked to recommend a sewing machine that is both suitable for kids and that isn't too expensive. I get it! As a parent with young children that have growing (and ever-changing!) interests, I understand the delicate balance we face when trying to encourage our kids creativity vs. the reality of them loosing interest and having yet another "thing" that you have to look after.
I’ve written a new post with more considerations and updated suggestions and links. Read it here.
Frequently, I am asked to recommend a sewing machine that is both suitable for kids and that isn't too expensive. I get it! As a parent with young children that have growing (and ever-changing!) interests, I understand the delicate balance we face when trying to encourage our kids creativity vs. the reality of them losing interest and having yet another "thing" that you have to look after.
Sewing machines cost anywhere between $10- $10,000 or more. You don't want the $10 one and unless you have very specific embroidery or quilting needs, you won't need the $10,000 either. Let’s talk about what's in the middle, or say machines that cost under $300. If you want your child to enjoy sewing and to learn something, you will need to buy a real sewing machine instead of a toy sewing machine. I am often presented with toy machines to fix. These are tiny machines, generally around 2 pounds and not very sturdy. They have a narrow sewing base and are quite loud. While they do sew a straight stitch and you can make things with them, they really end up being a pain and making sewing much more frustrating than it needs to be. A real "starter" machine doesn't have to cost that much money, but it will set you back at least $100. My eight-year-old daughter loves her Janome Hello Kitty Sewing Machine. It is a 3/4 sized machine, with some real weight to it and full of features to grow into. I really like that it is a solid machine (it weighs about 12 pounds) with metal parts. The stitch quality is nice and it sews evenly over a variety of fabrics.
I learned to sew on a Singer machine that I think my mom received as a gift but didn't use. I clearly remember her (finally!) setting it up on the dining room table in 1975 or '76 and letting me go for it. I made a little yellow burlap purse with yarn "embroidery" and a "monogram". That was my machine until college. It was mechanical, which means, there is not a lot to break and I could learn to sew and troubleshoot and fix anything that went wrong. It had two stitches, straight and zigzag, and a buttonhole attachment. Everything that a beginning-intermediate sewist needs. I made everything that I could dream up with it. Clothes, toys, accessories, home decor, bras for the neighbors, everything! The Hello Kitty machine is similar to my old Singer.
At Little Stitch Studio, I have Husqvarna Viking Emerald Sewing Machines (Both 116 and 118) as well as Eversewn Sparrow. The Viking Emerald's are mechanical machines well and offer some convenient features. For teaching sewing, I like that they have a transparent drop-in bobbin case. It helps for kids to be able to see the bobbin and easily change it themselves. (Personally, I prefer front-loading bobbins housed in a metal case. The case keeps the thread tension exceptionally even. Though it is trickier to trouble shoot and if it is positioned incorrectly, the needle jams and breaks.) So for teaching kids, drop-in bobbins work! The machines also have knobs and dials for Stitch Selection, Stitch Width and Length and Speed Control which are fairly intuitive to use. The machines come with several specialty sewing feet and accessories (and a warranty). You will need to purchase from a dealer. When you buy a machine from a dealer, you know where to take it for maintenance and often you get free classes.
The Eversewn Sparrow line feature mechanical, electronic and computerized sewing machines. They may very well be the most kid friendly machines that I have found. They have a solid weight, intuitive features and sew like a dream. Eversewn machines are designed by Philipp Ueltschi, one of the fifth generation family owners of BERNINA. Phillipp designed the line of machines to appeal to a younger customer, one who is enthusiastic about sewing and wants a machine that is both durable and packed with really thoughtful features that are typically available in more expensive machines.
BERNINA also offers another introductory line, bernette. Like BERNINA and Eversewn, bernette machines are available in mechanical, electronic and computerized models. They are solid machines that have intuitive features and sturdy construction.
The Janome Magnolia is similar to the Viking Emerald. It is a substantial machine with a wide, sturdy base. Though it costs a bit less and is available at fine fabric stores and of course amazon. While I do not have this machine, several of my students do and love it. It comes with a bag full of accessories and a nice warranty.
An old, refurbished machine is a great option to consider as well. These old machines are heavy and sturdy. With a good cleaning and tune up, you will be sewing everything you can imagine. The vintage machine bodies are similar in the sleekness of vintage cars. You can tell the decade the machine was built by looking at the paint job and shape.
Brother machines are very popular for their price and convenience of buying them just about anywhere. I have some students (both kids and adults) that have them and have no complaints. They are machines that work and have loads of features. You can buy a fully computerized one for less than $150.
While this is not a comprehensive review, I hope whichever machine you choose, that you will sew happily with it for many years to come. Of course, if you have specific questions, I am always happy to discuss with you!
Best,
Hilarie XO
Hand smocking tutorial
I love tutorials. The simple, image-driven instructions really appeal to me in a way that video doesn't. I have been asked for years to create a blog and post sewing and crafting tutorials, but I always seem to procrastinate when it comes to writing. The time has come, my friends. Here is my first tutorial! (drumroll, please...)

I love tutorials. The simple, image-driven instructions really appeal to me in a way that video doesn't. I have been asked for years to create a blog and post sewing and crafting tutorials, but I always seem to procrastinate when it comes to writing. The time has come, my friends. Here is my first tutorial! (drumroll, please...)
How to Make a Hand Smocked Scarf
Smocking. To a southerner, its as essential as a monogram, sweet tea and humidity. As beautiful as smocking is, it's generally reserved for young children. (or for kids that might be a bit older, but their moms' can't bare to pack away the bishop dresses.) This smocking project isn't for kids though, its for grown-ups. It's very easy and I'll walk you through the entire project!
Materials Needed

2 yards of lightweight cotton (I used a gingham with a 1/4"-inch check from Annabel Wrigley's debut line Maribel with Windham Fabrics) Coming to finer fabric stores soon!
1 skein of embroidery floss (I used DMC 893)
Cotton thread
An embroidery needle (I really like Clover Gold Eye Embroidery needles)
A ruler and marking pen if you are not using gingham fabric ( I really like the Frixion pens)
Tweezers are really helpful too!
Cutting
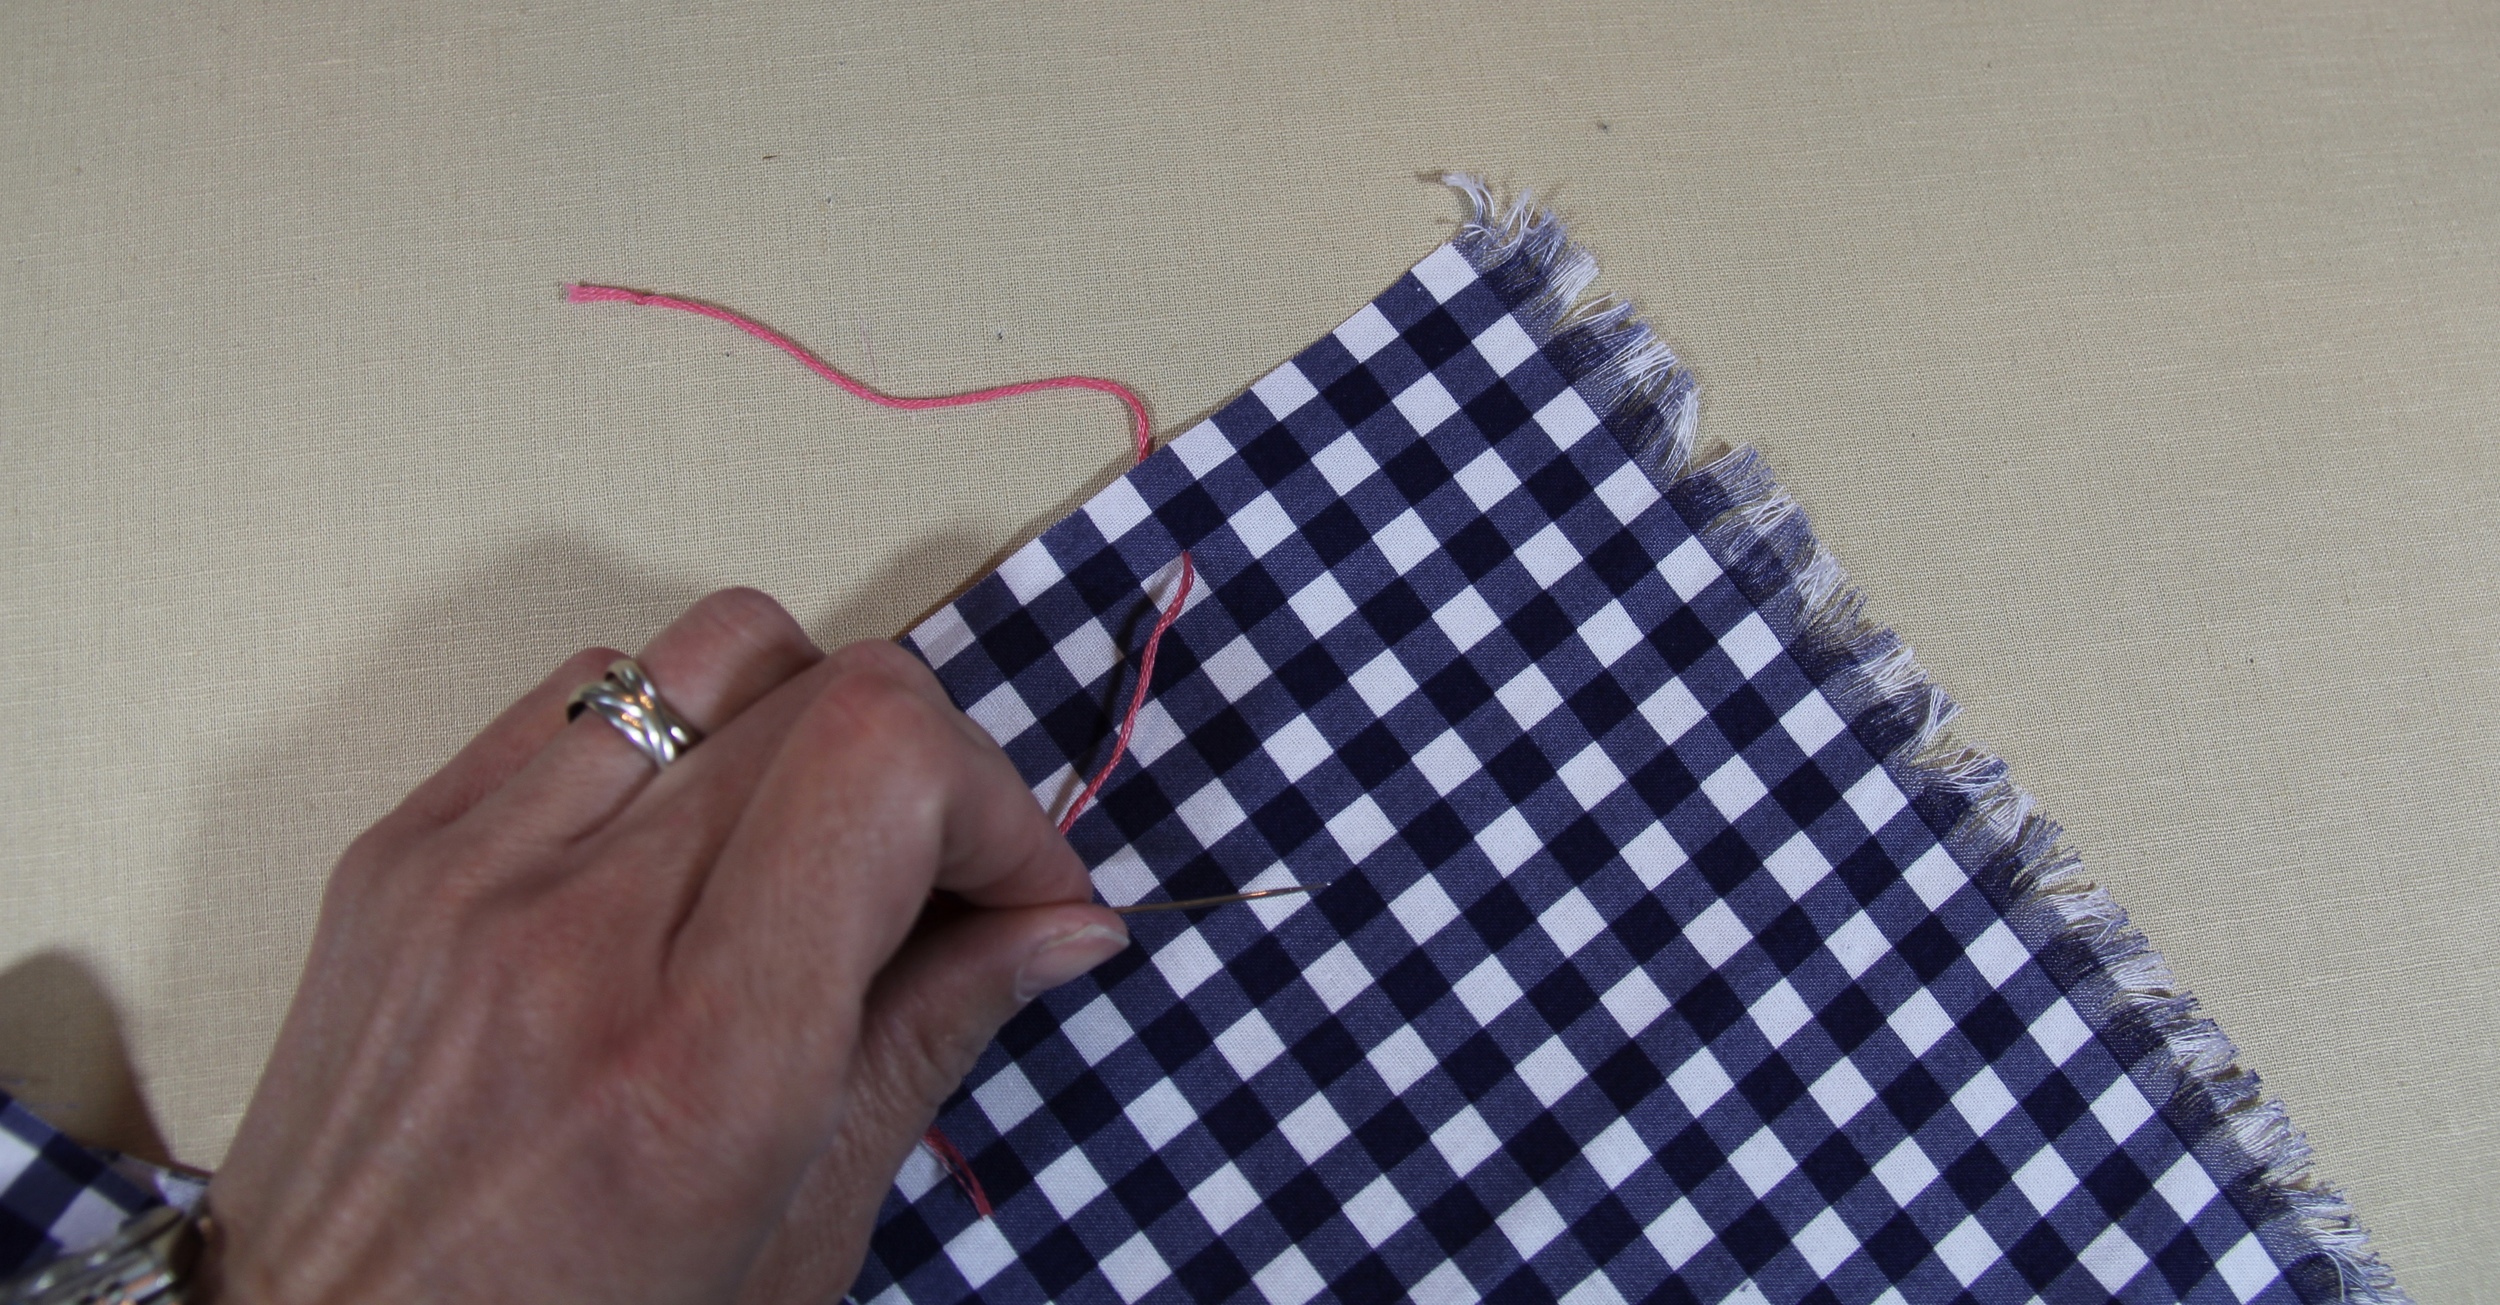
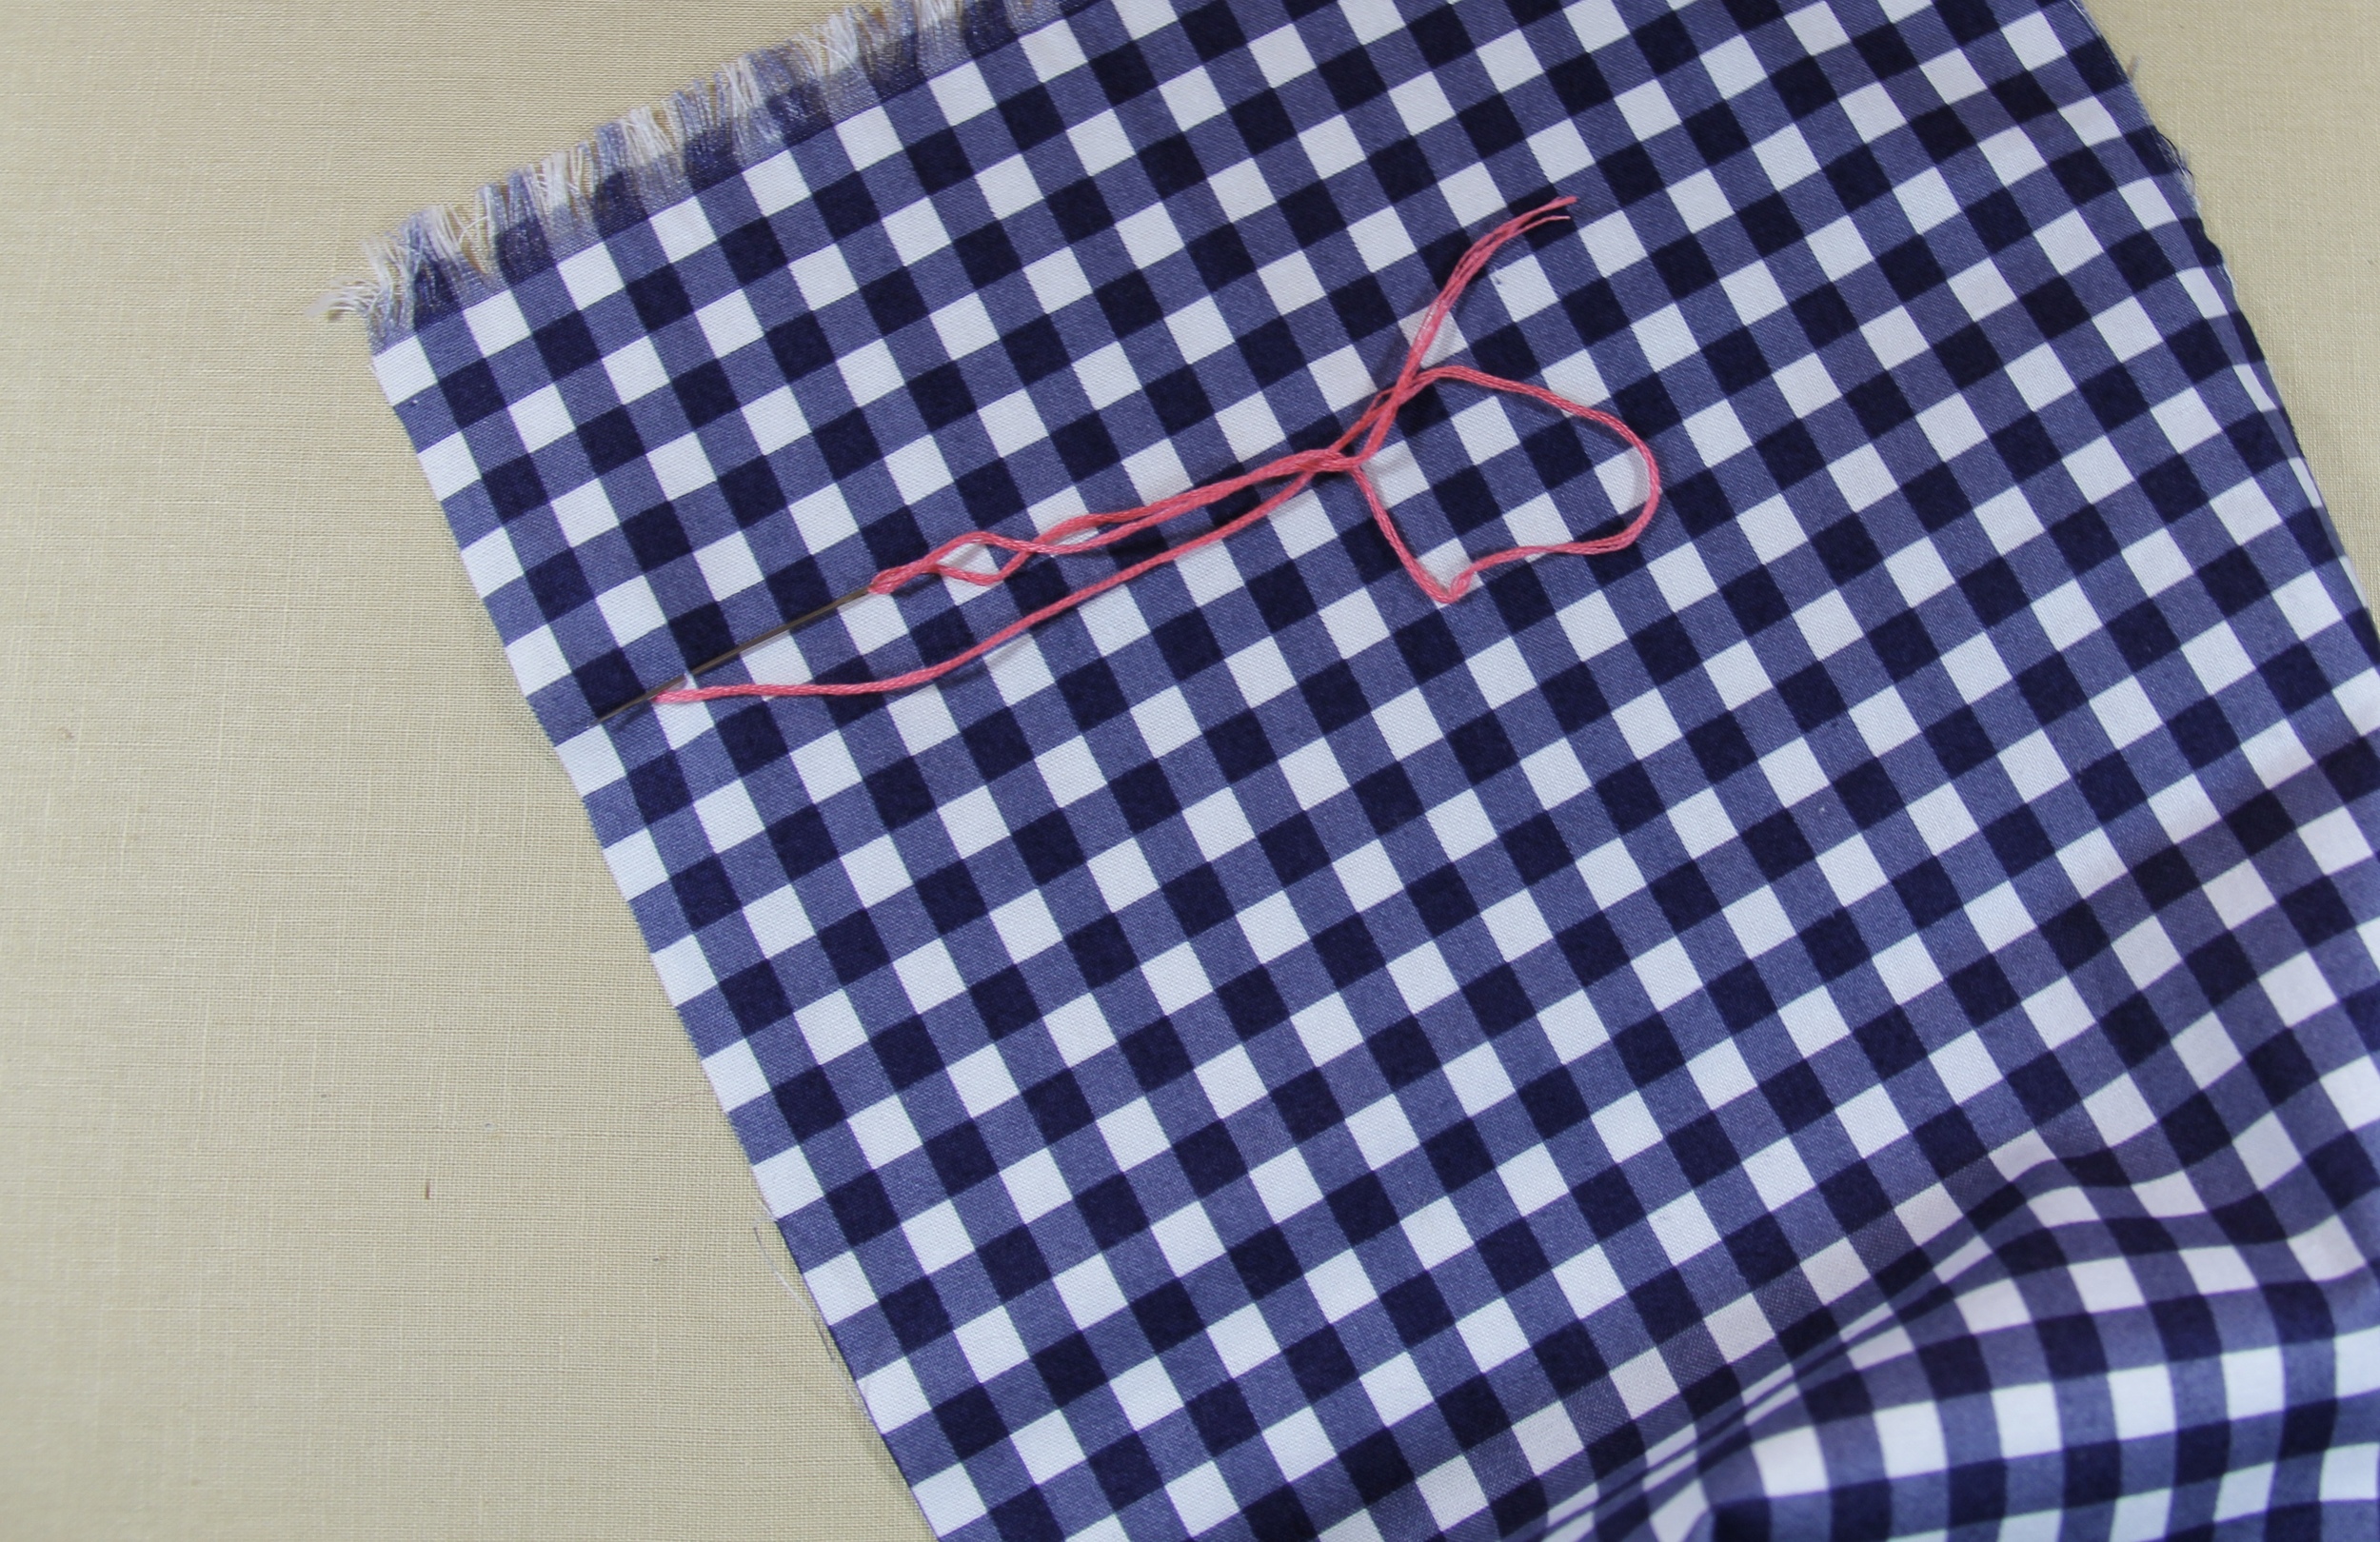
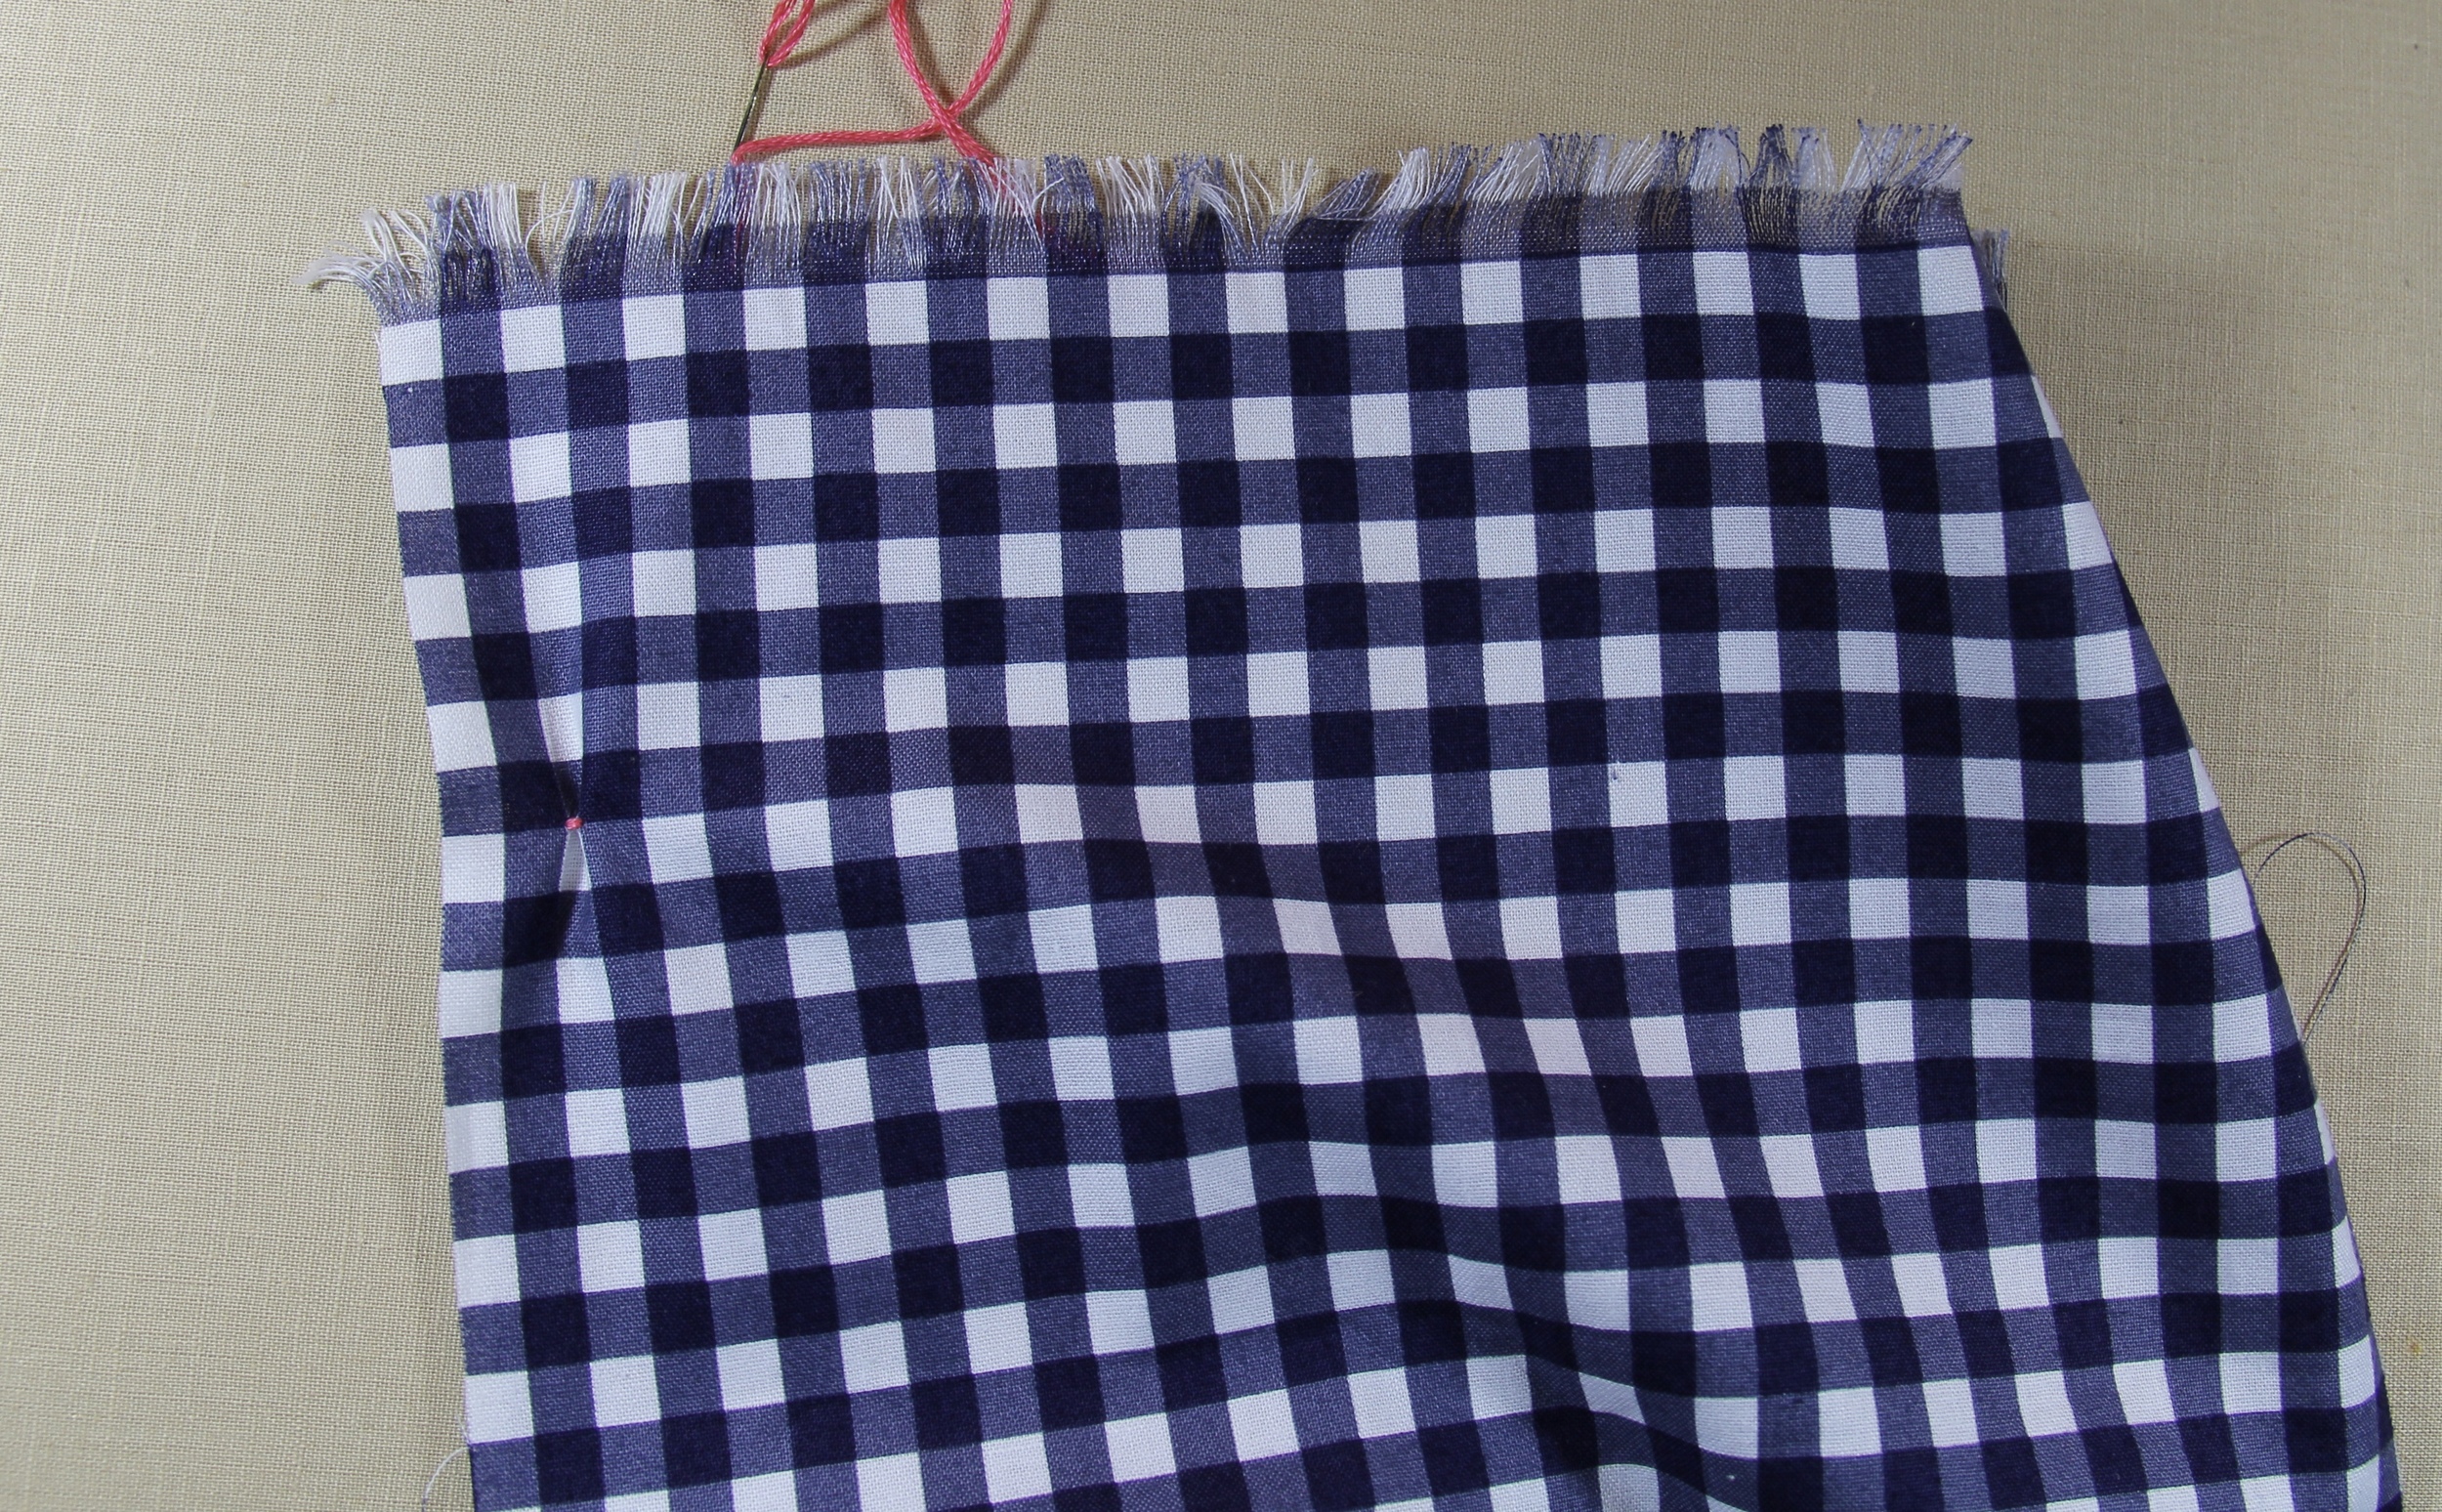
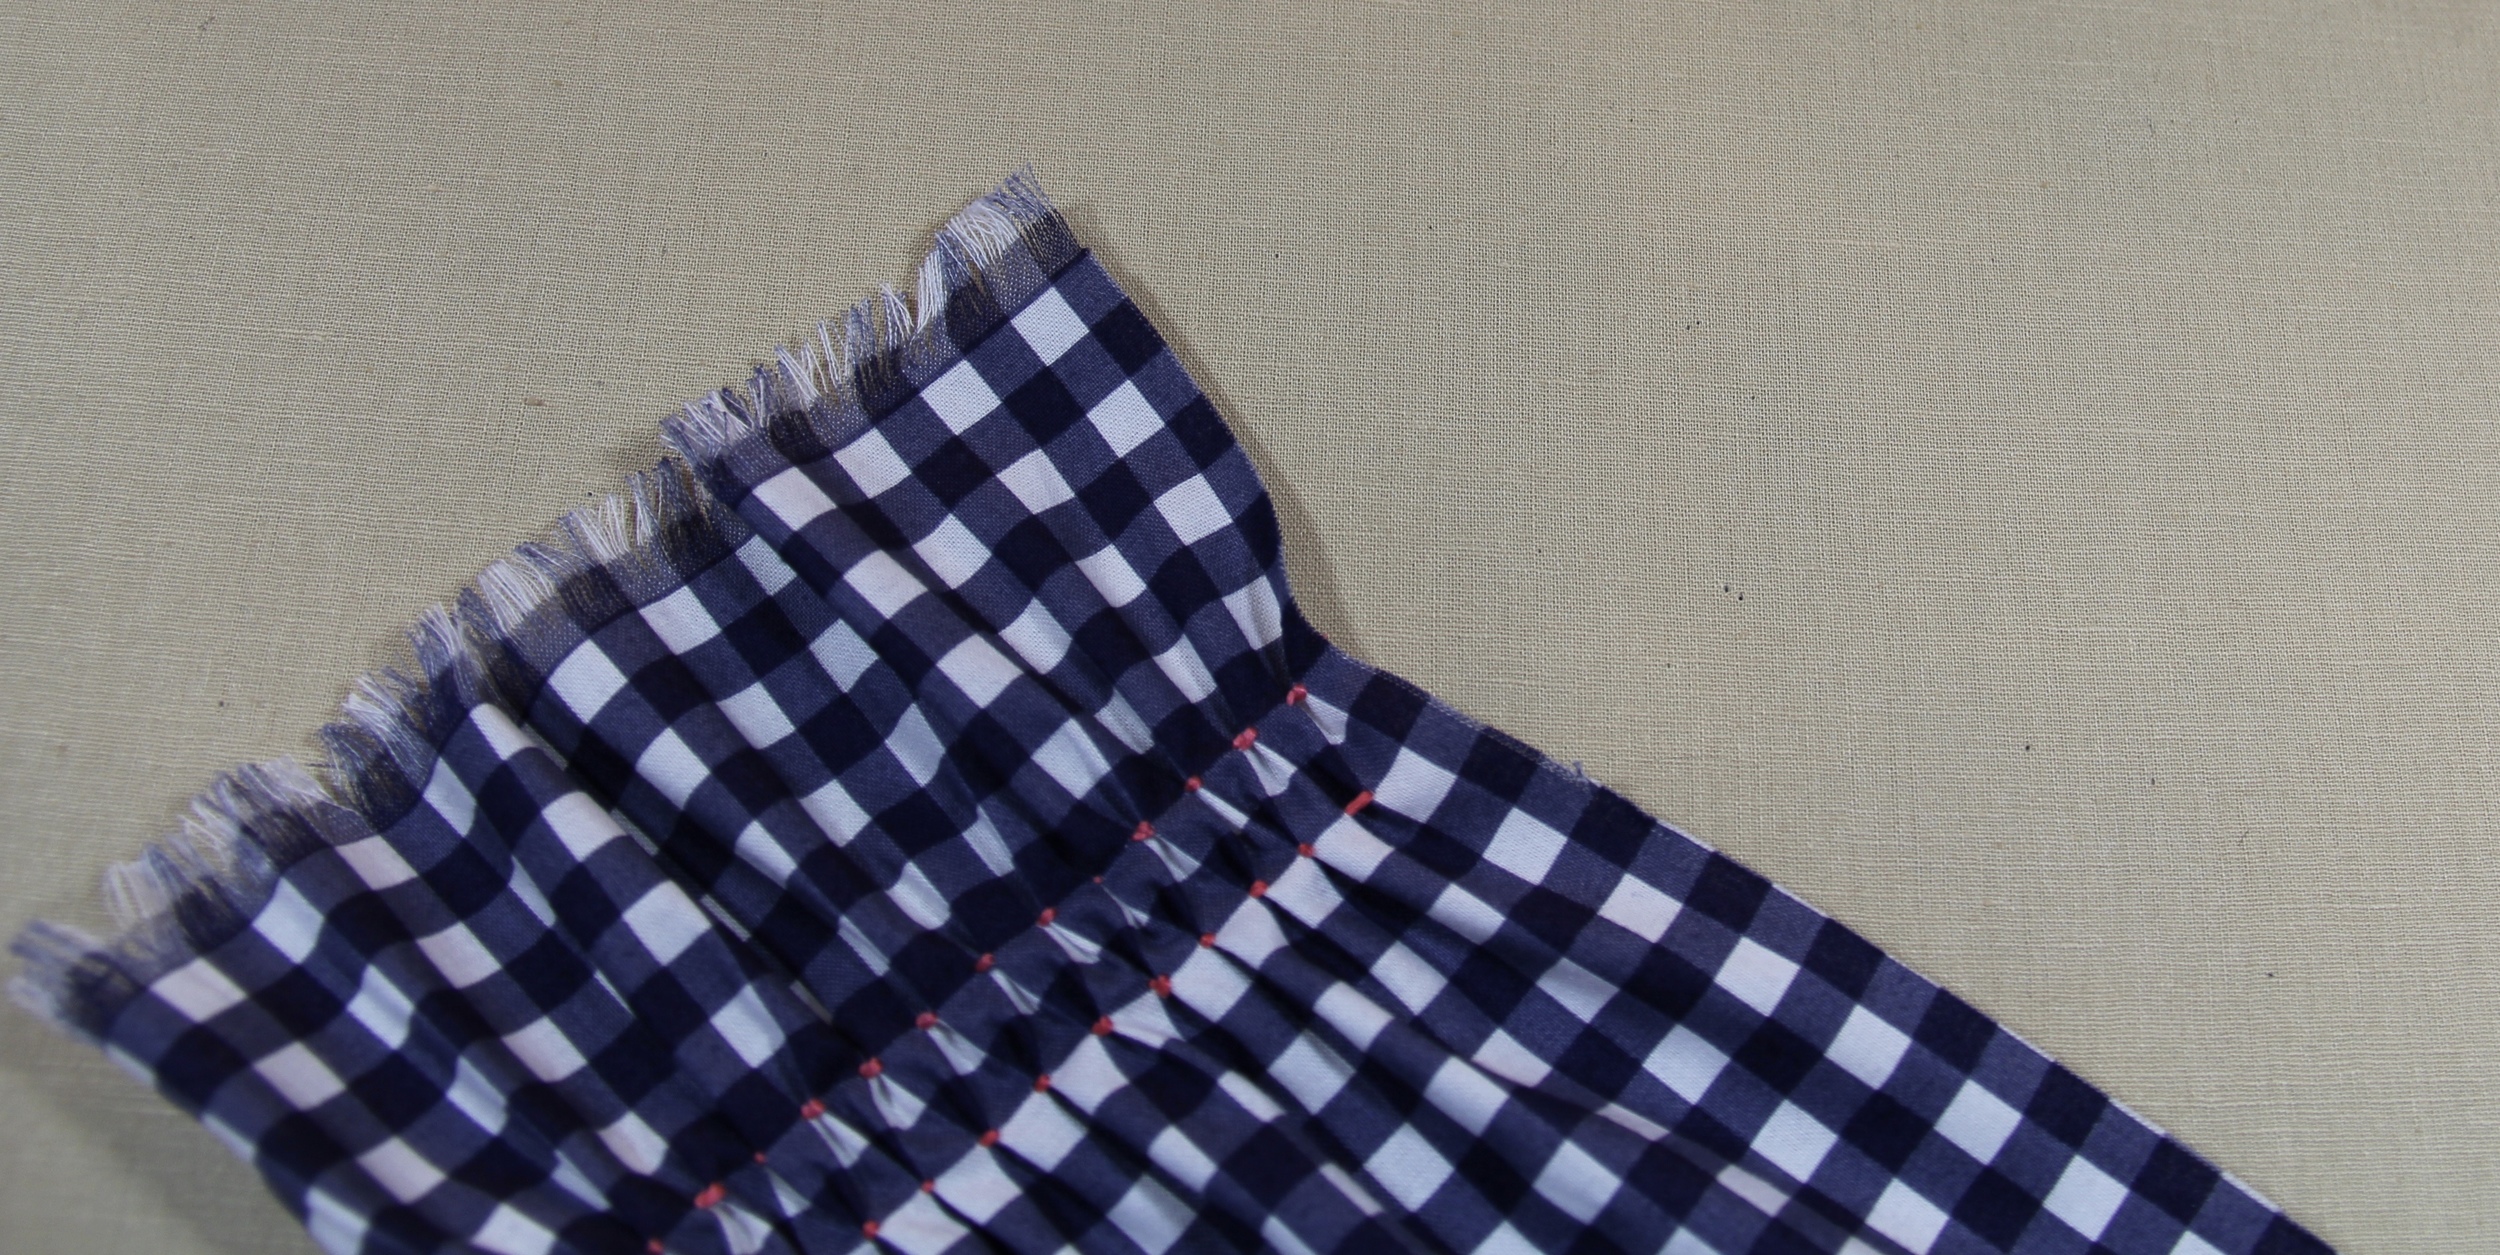
To begin, fold the fabric in half vertically. Cut out two lengths of fabric 72" x 10". Take the first piece and we will begin to fray the ends to make fringe.
Fringe
A good way to start, is by cutting the ends very straight. Begin by pulling the first weft thread (the threads that go side to side) in the weave. Sometimes I use tweezers to help pull the thread. Try to pull just one thread at a time or it will bunch up and create a mess. As you pull the thread, the fabric will begin to gather. Keep pulling until the thread snaps or won't pull any further. Snip it, tease the other side to loosen a thread and continue. Keep at this until the fringe is 1/2". Turn the fabric over and do it again.

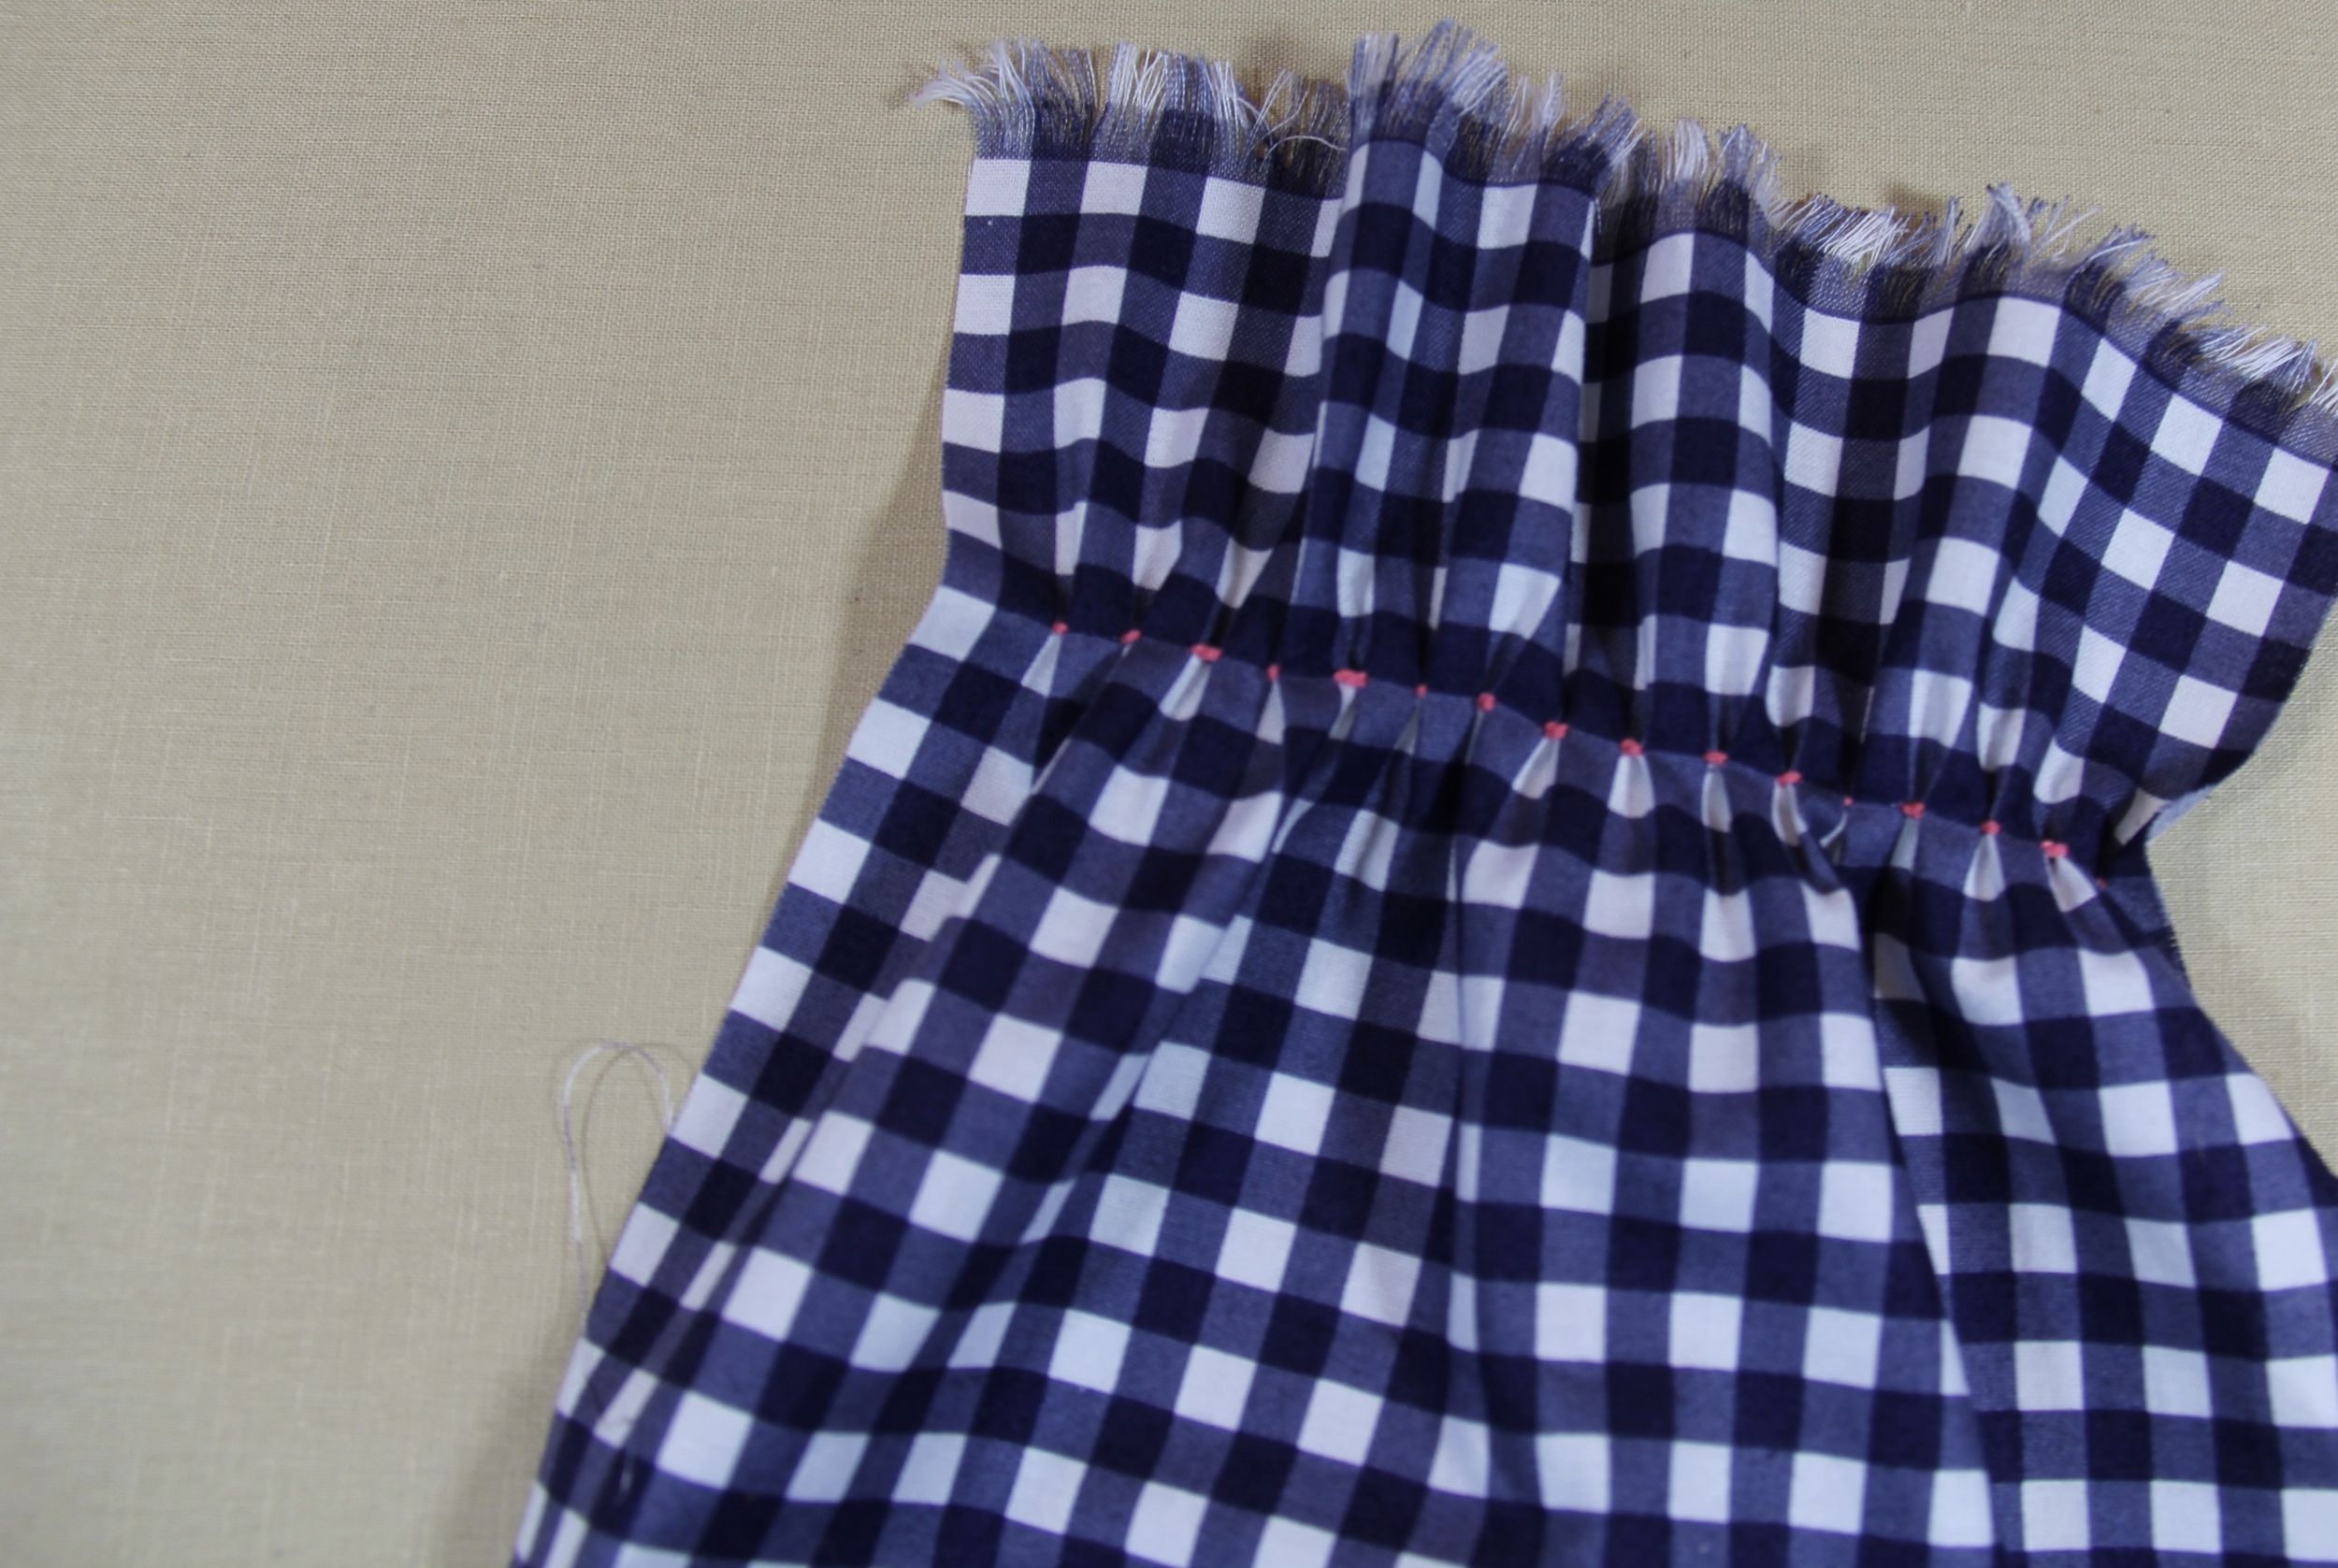
Honeycomb Smocking
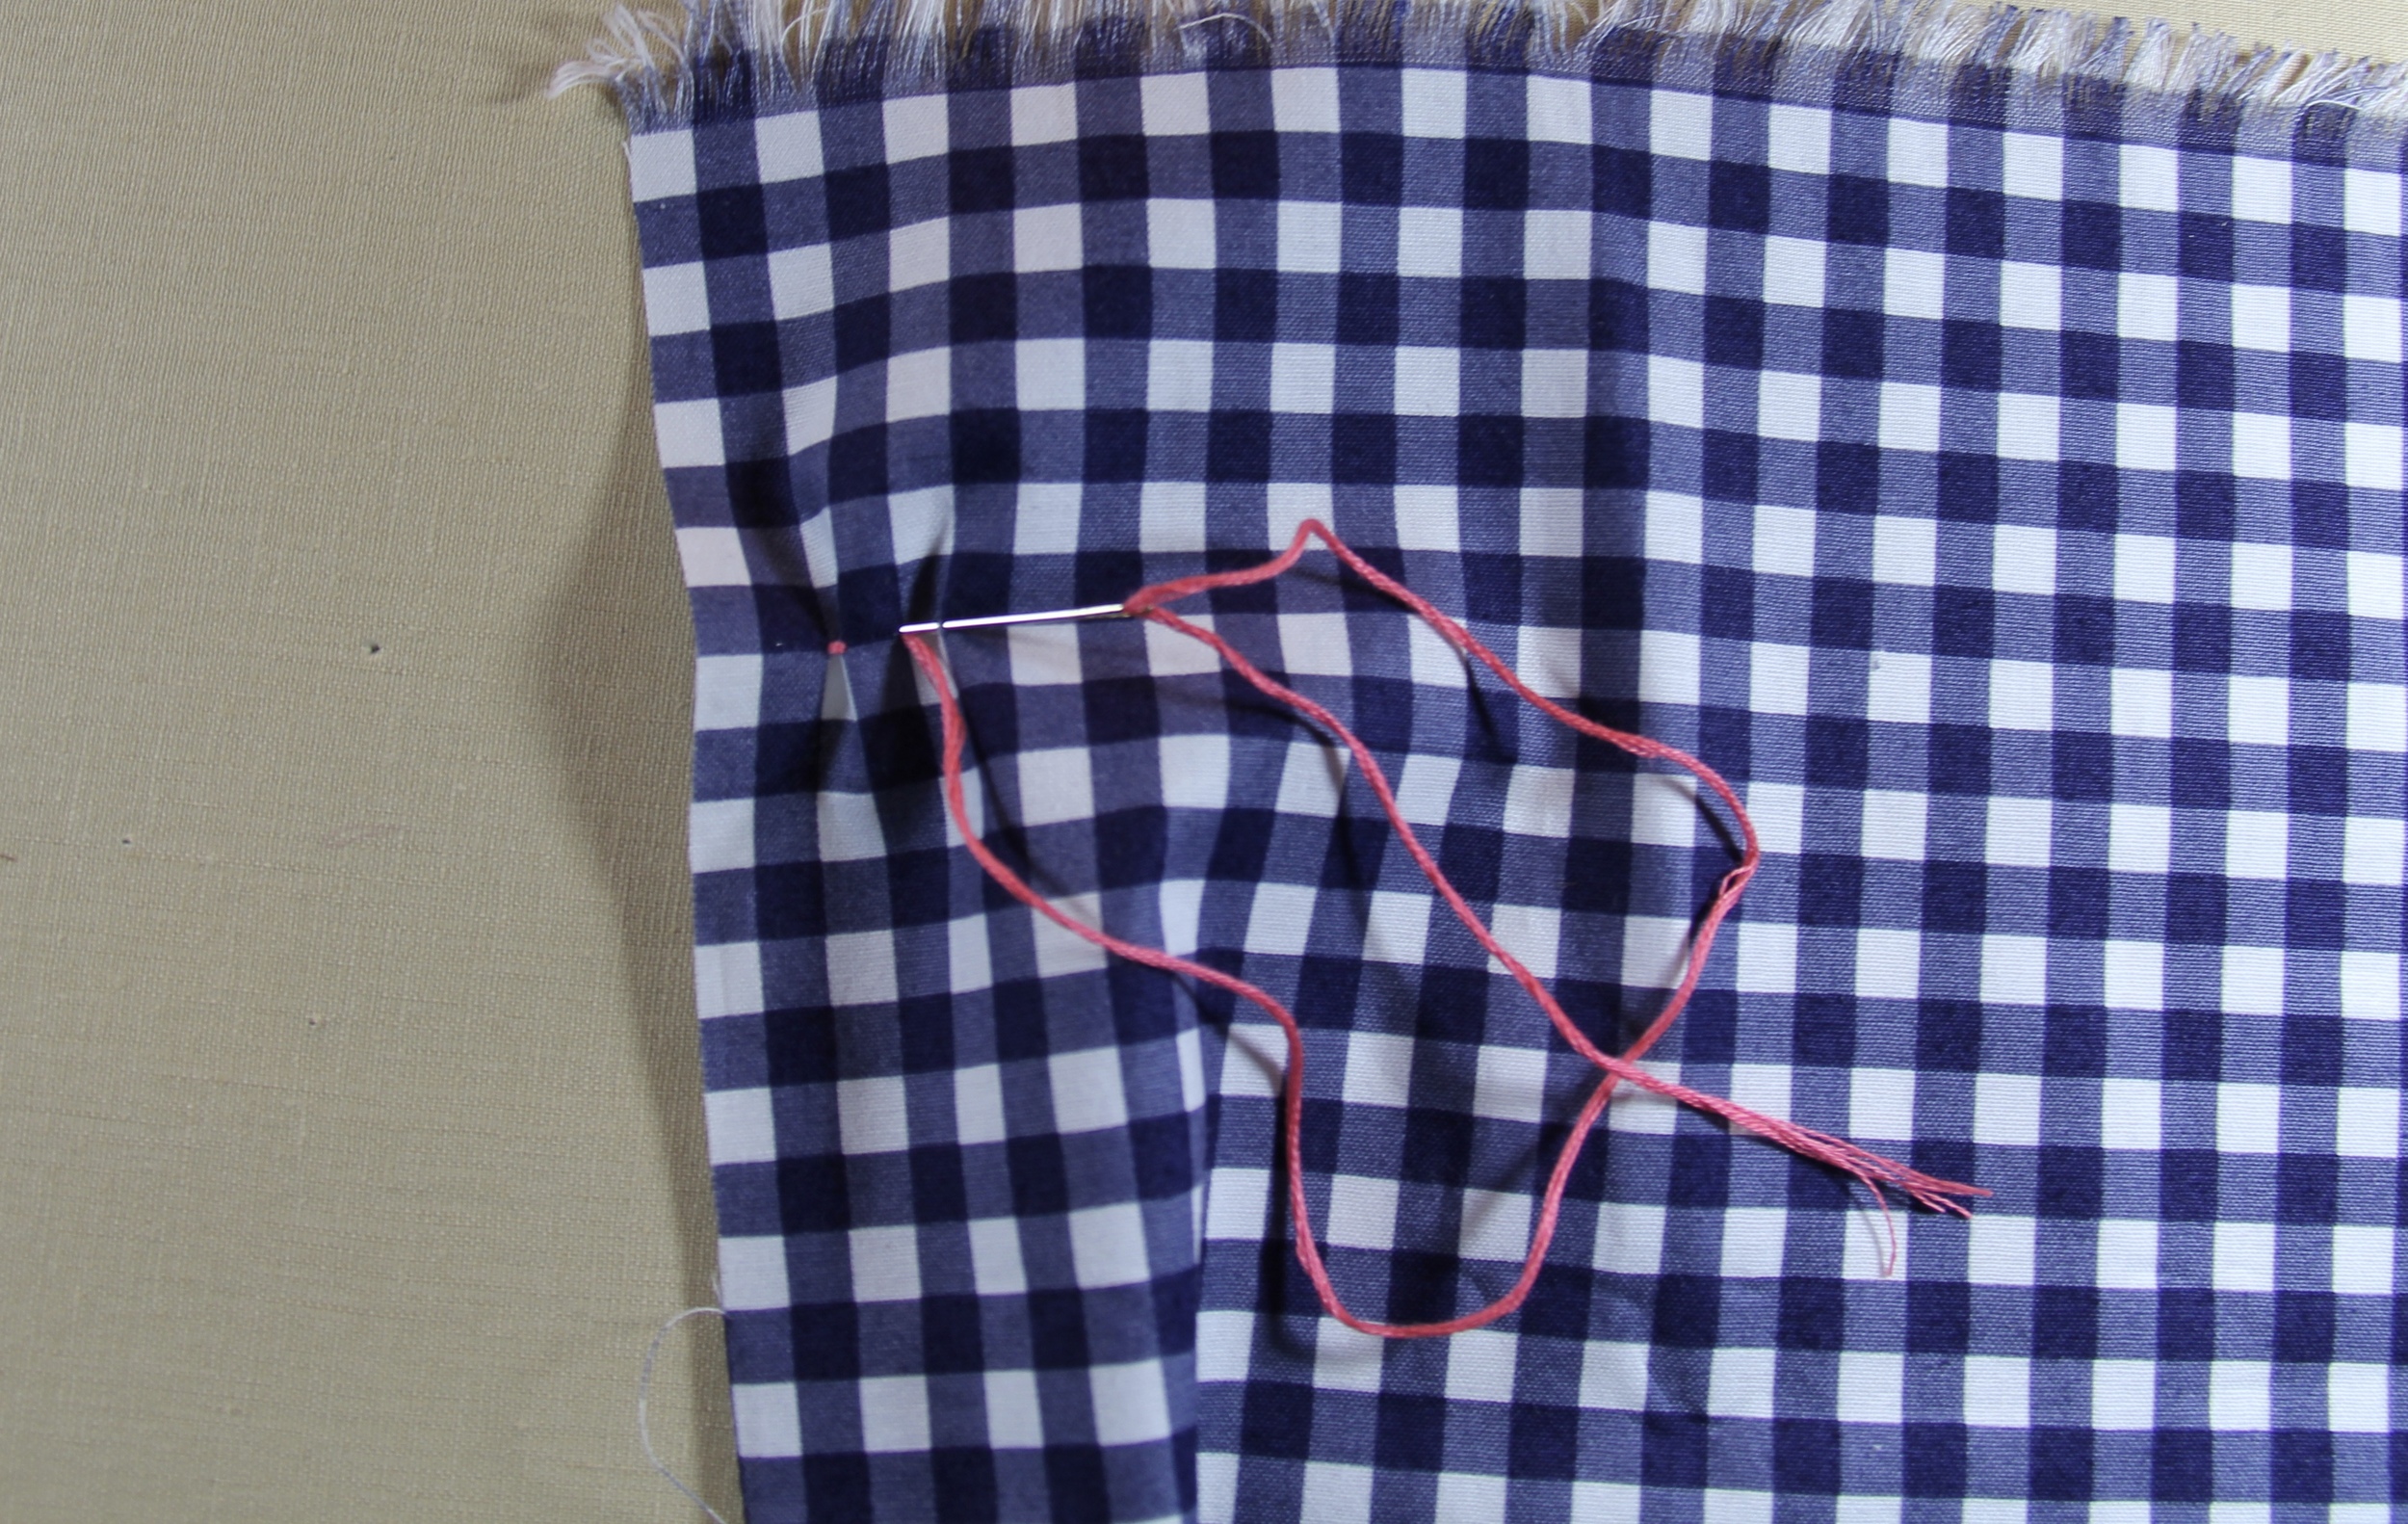
How to Hand Sew a Diamond Smocking Stitch
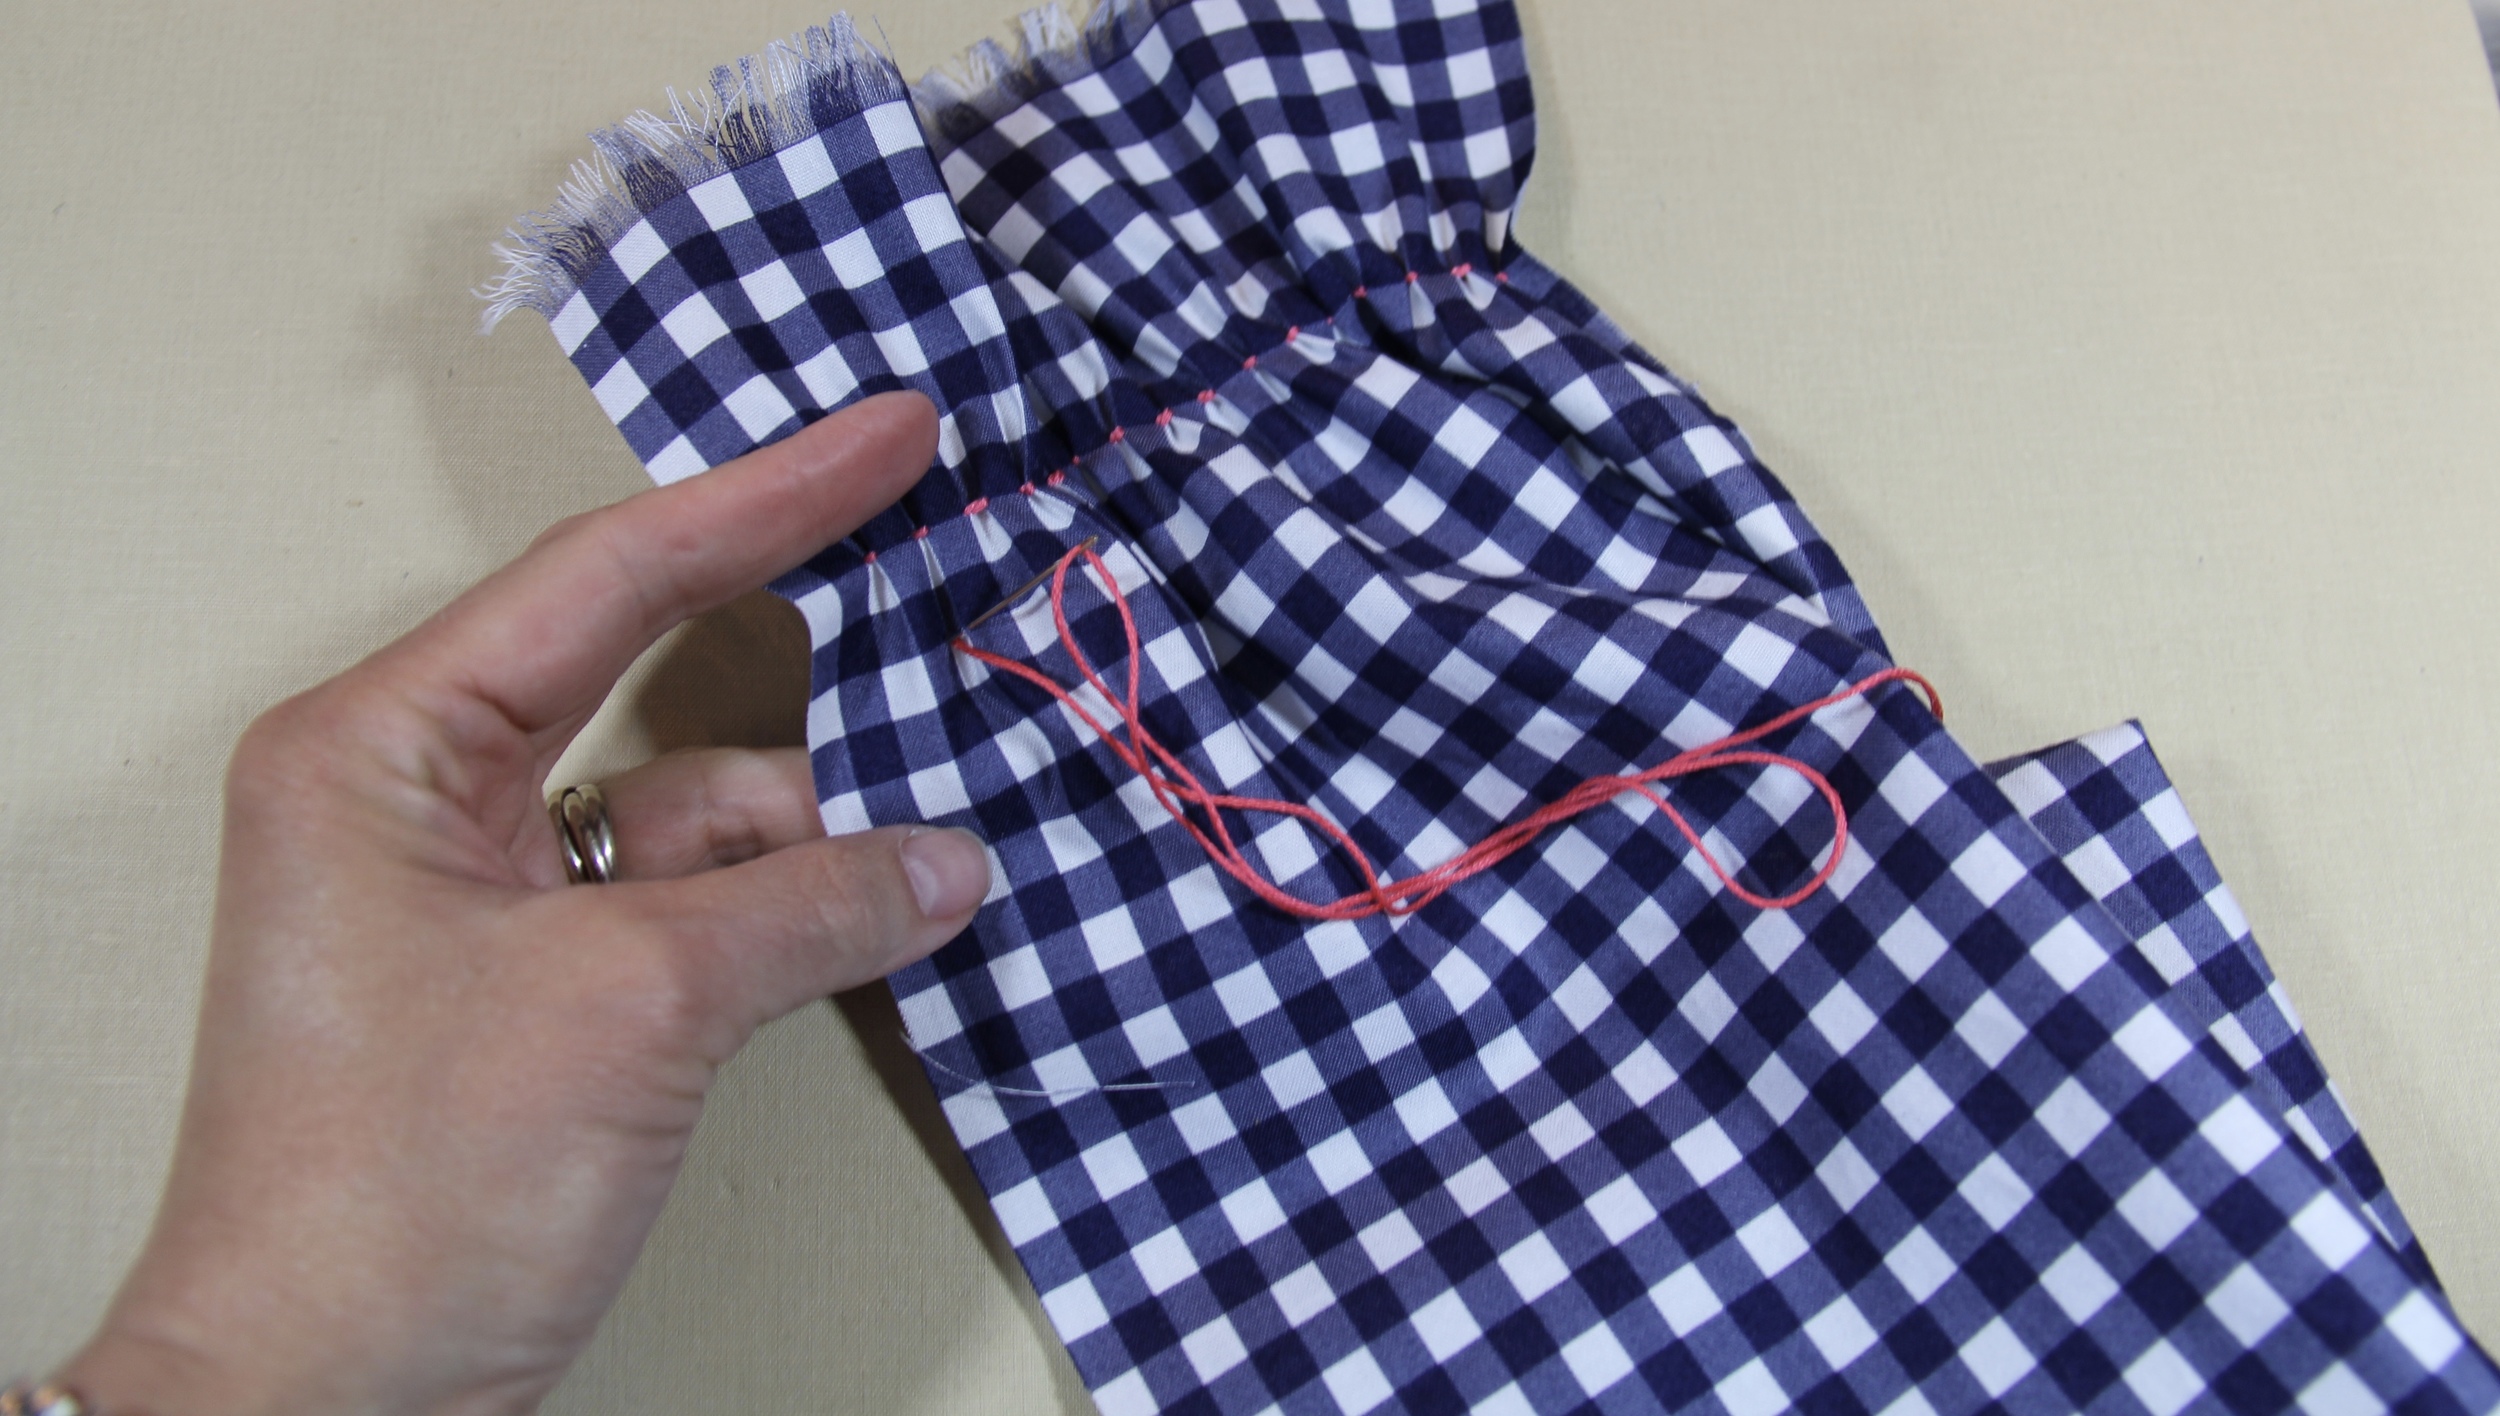
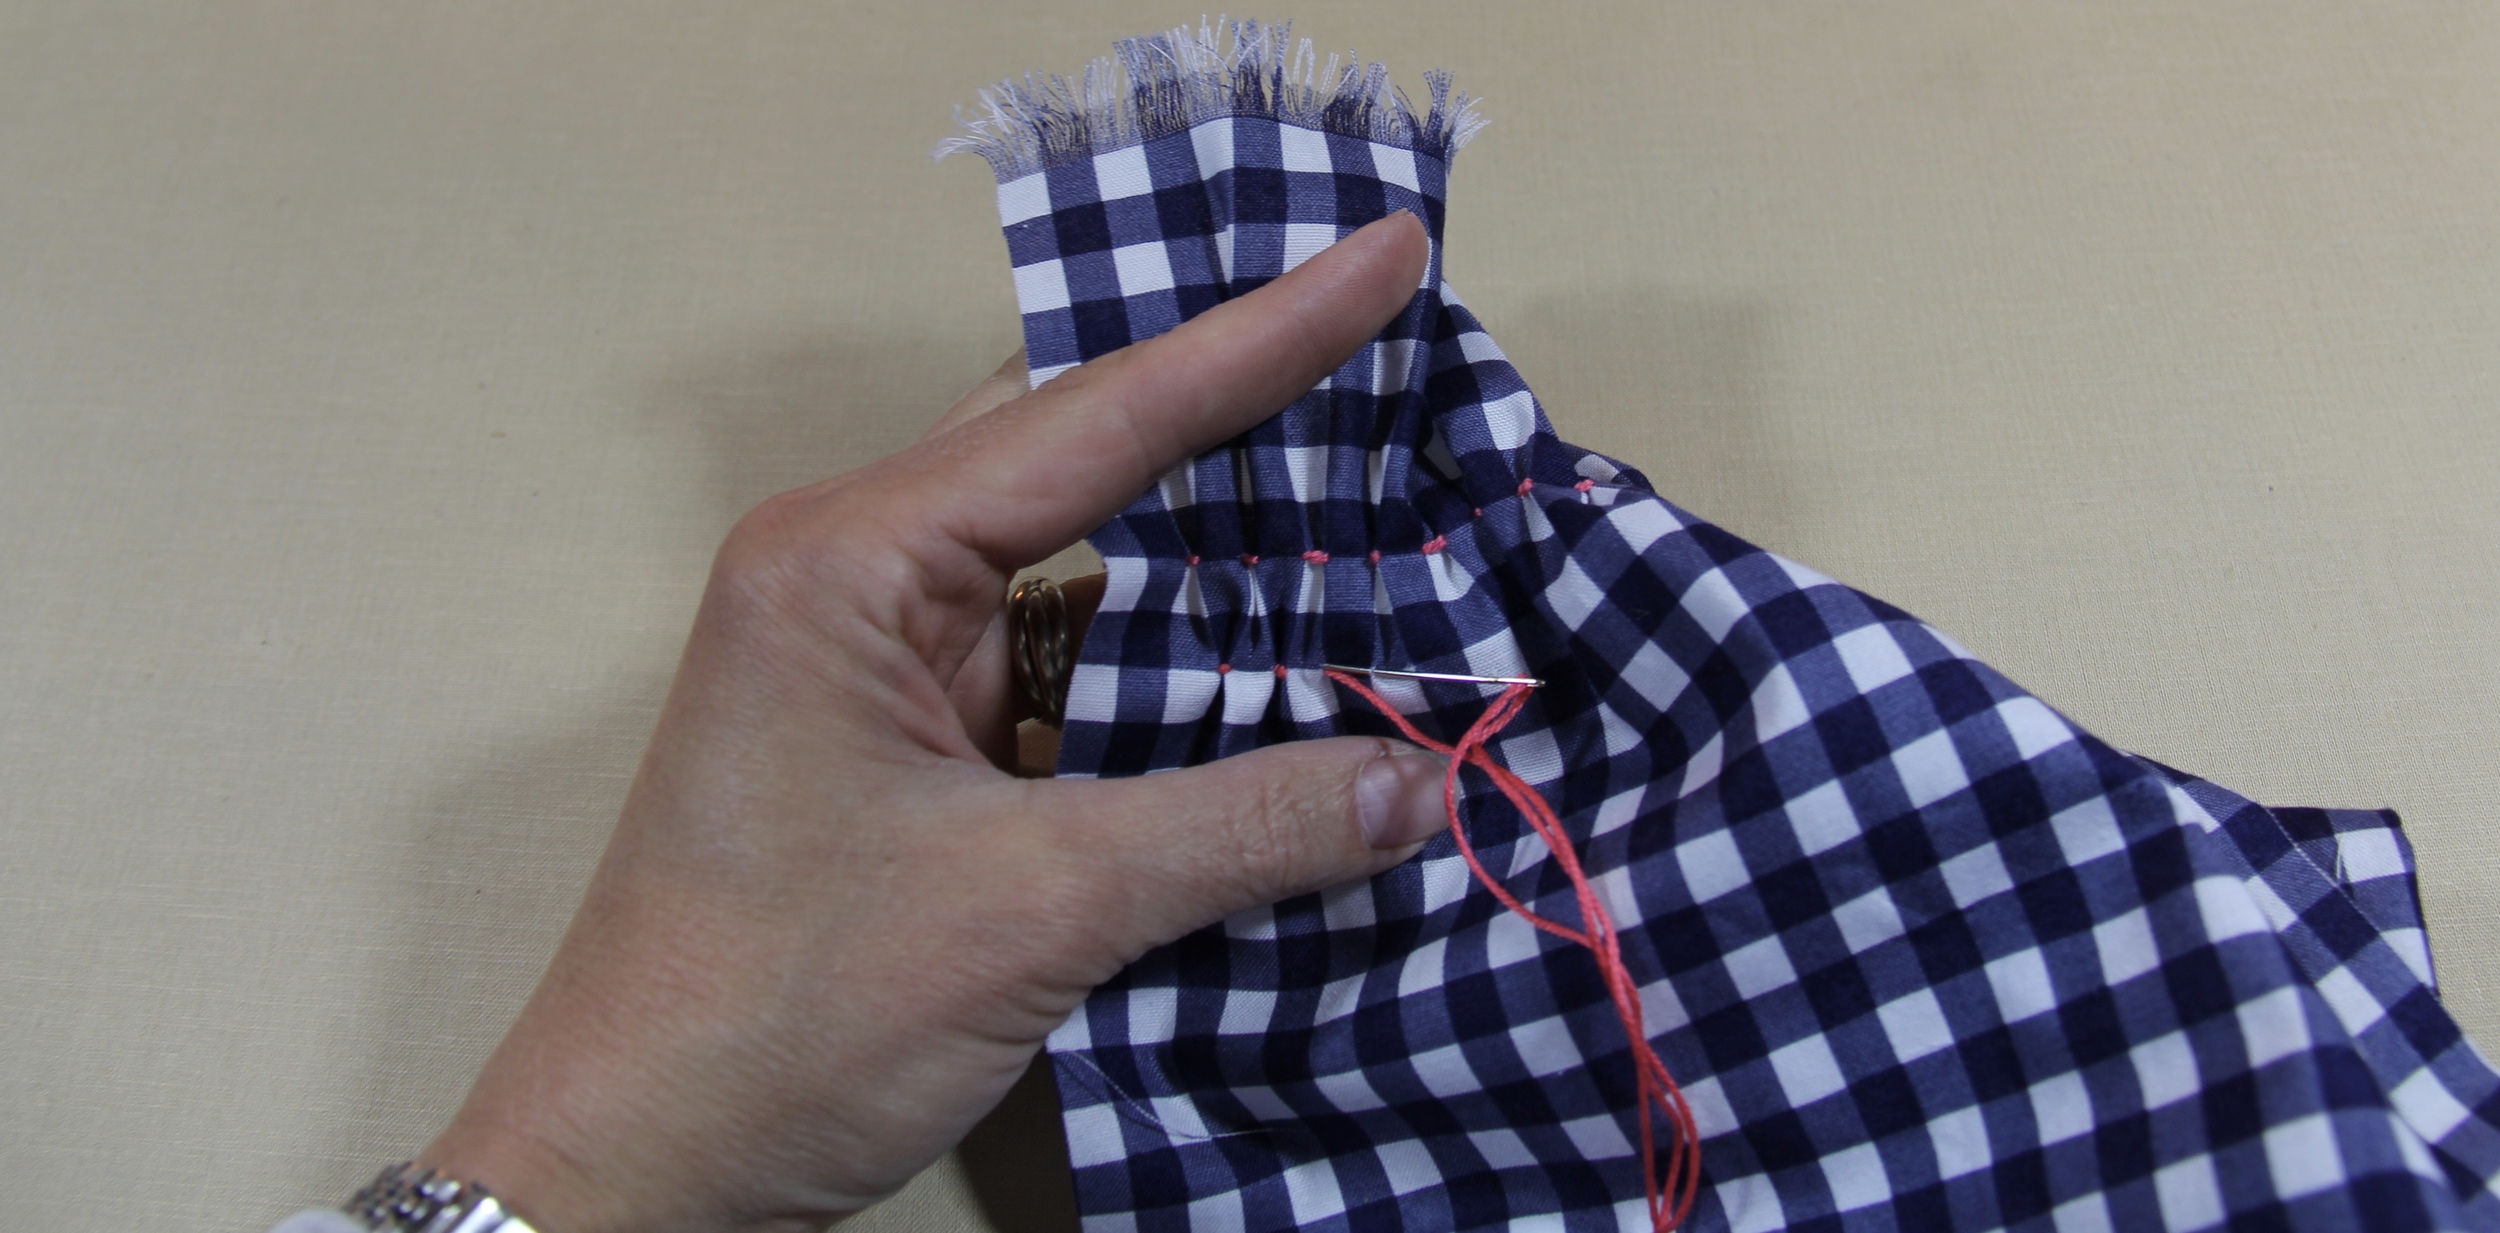
We are going to use a modified Diamond Smocking Stitch. This stitch is worked in a honeycomb pattern over several rows. To begin, cut a length of floss about 18" long, thread the needle and knot one end. If you are using gingham, bring the needle through the back of the fabric 8 squares down and 2 squares from the edge. ( If you choose to use another fabric, begin 2" down and 1/2" in. and make a mark every 1/2"in. across the row.) Pull through the front, stopping when you feel the knot. Move the needle over one square to the right (or 1/4"), picking up two small stitches 1/4" apart. Pull the needle and thread all the way through to make the first pleat. Push the needle from front to back through the right side of the stitch. Stitch one complete. Easy, right? Now skip the next square (or 1/4" inch) and bring the needle through the back of the following top left corner. We will continue this stitch across the width of the scarf.
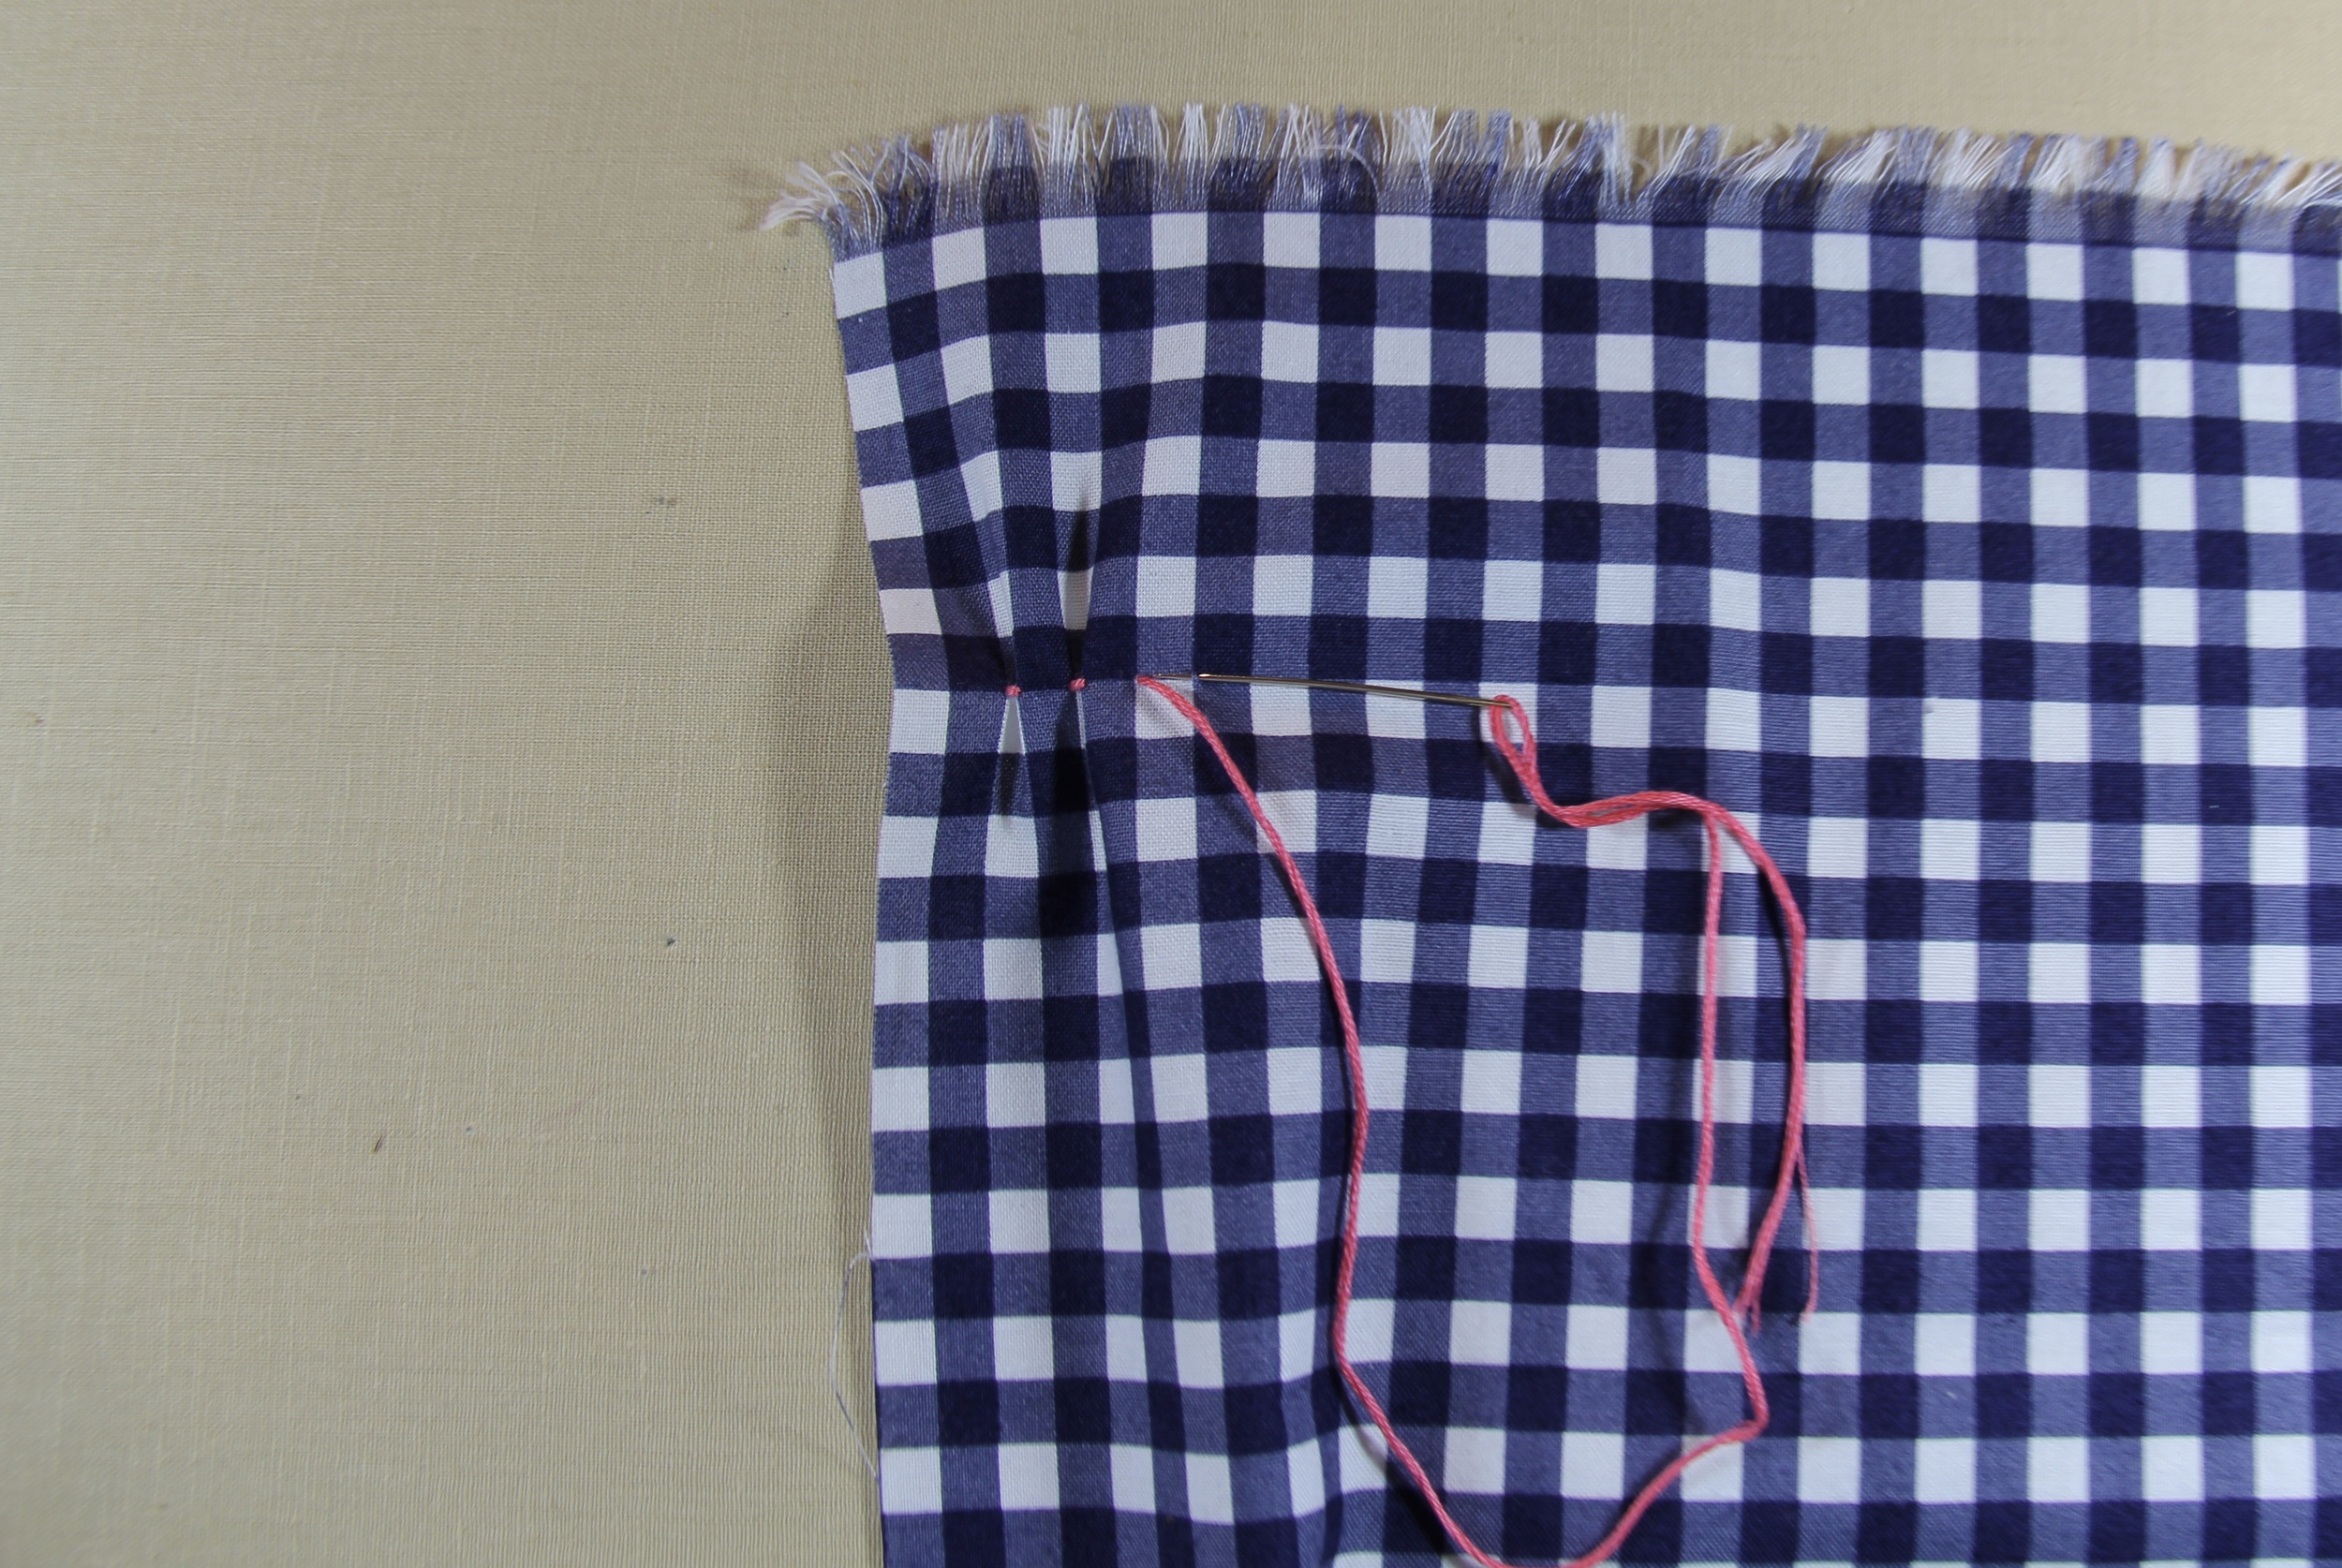
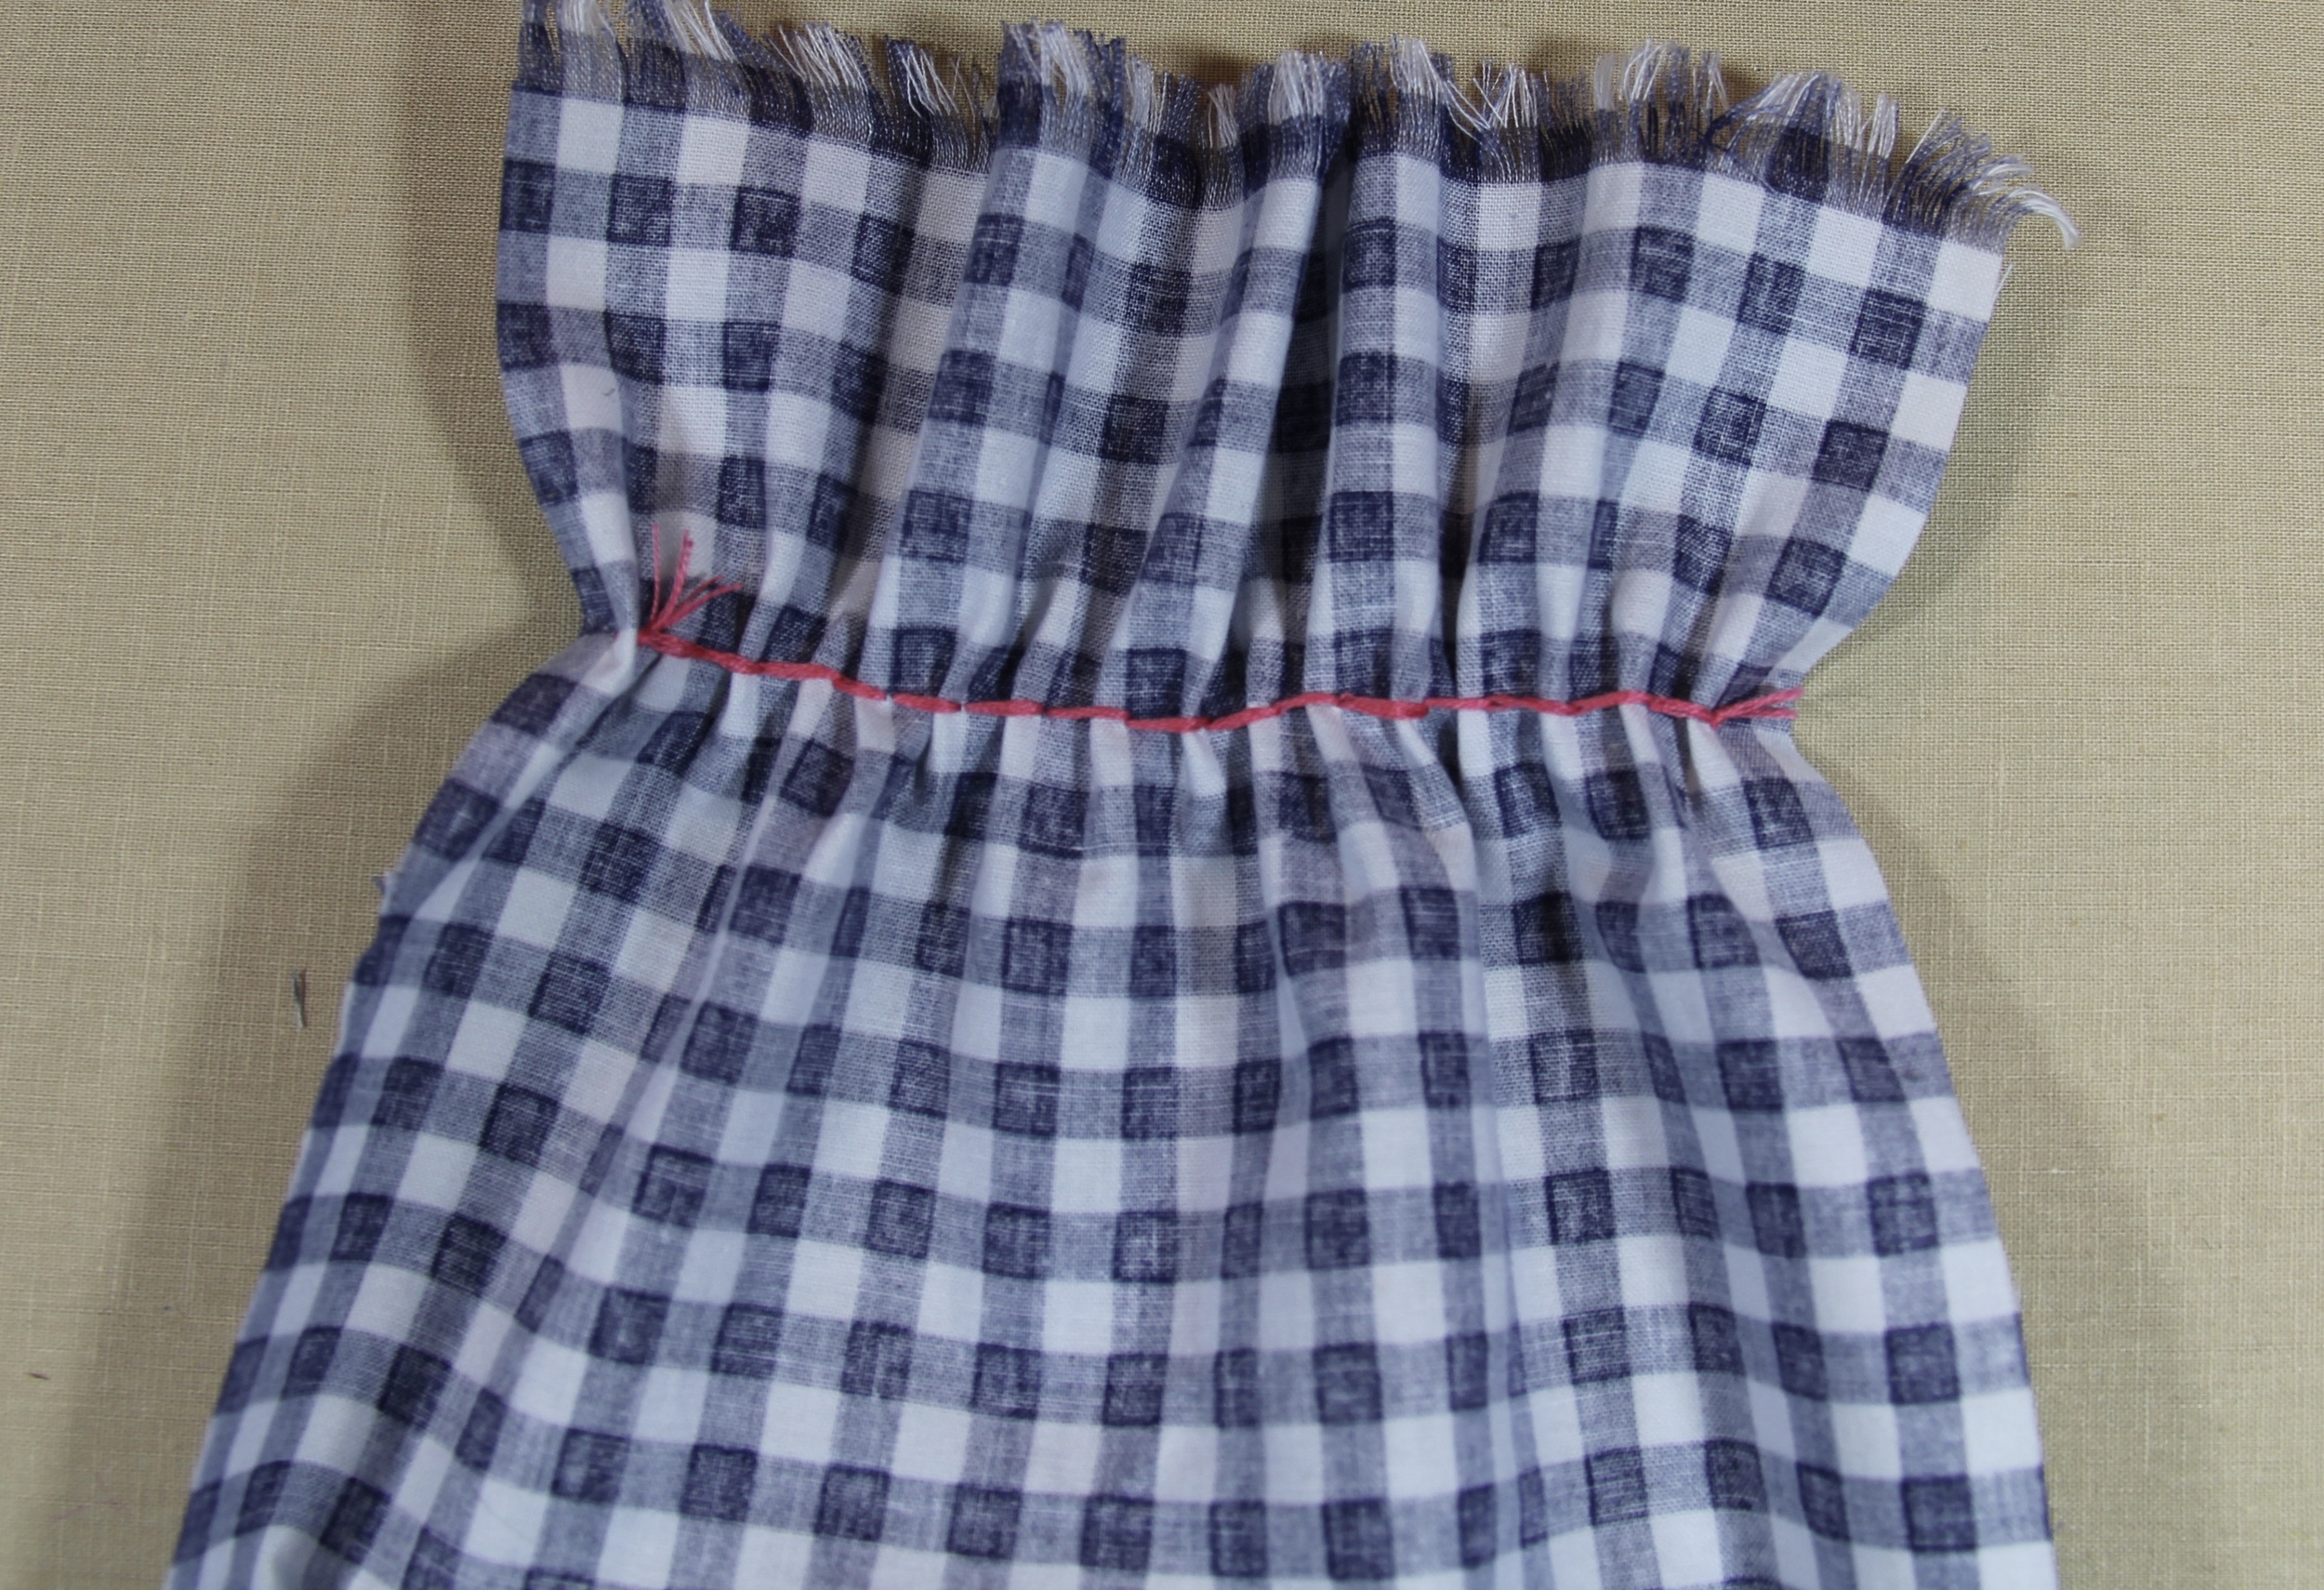
Second Row and every even remaining row
Skip two full squares or 1/2" inch and begin at the top left corner of the 3rd full square down and 3rd square (3/4 inch) in from the first row of stitches and repeat the stitch . (If you aren't using gingham, mark your fabric every 1/2" across the row) End this row of stitches with one less stitch than on the row above.
Third Row and every odd remaining row
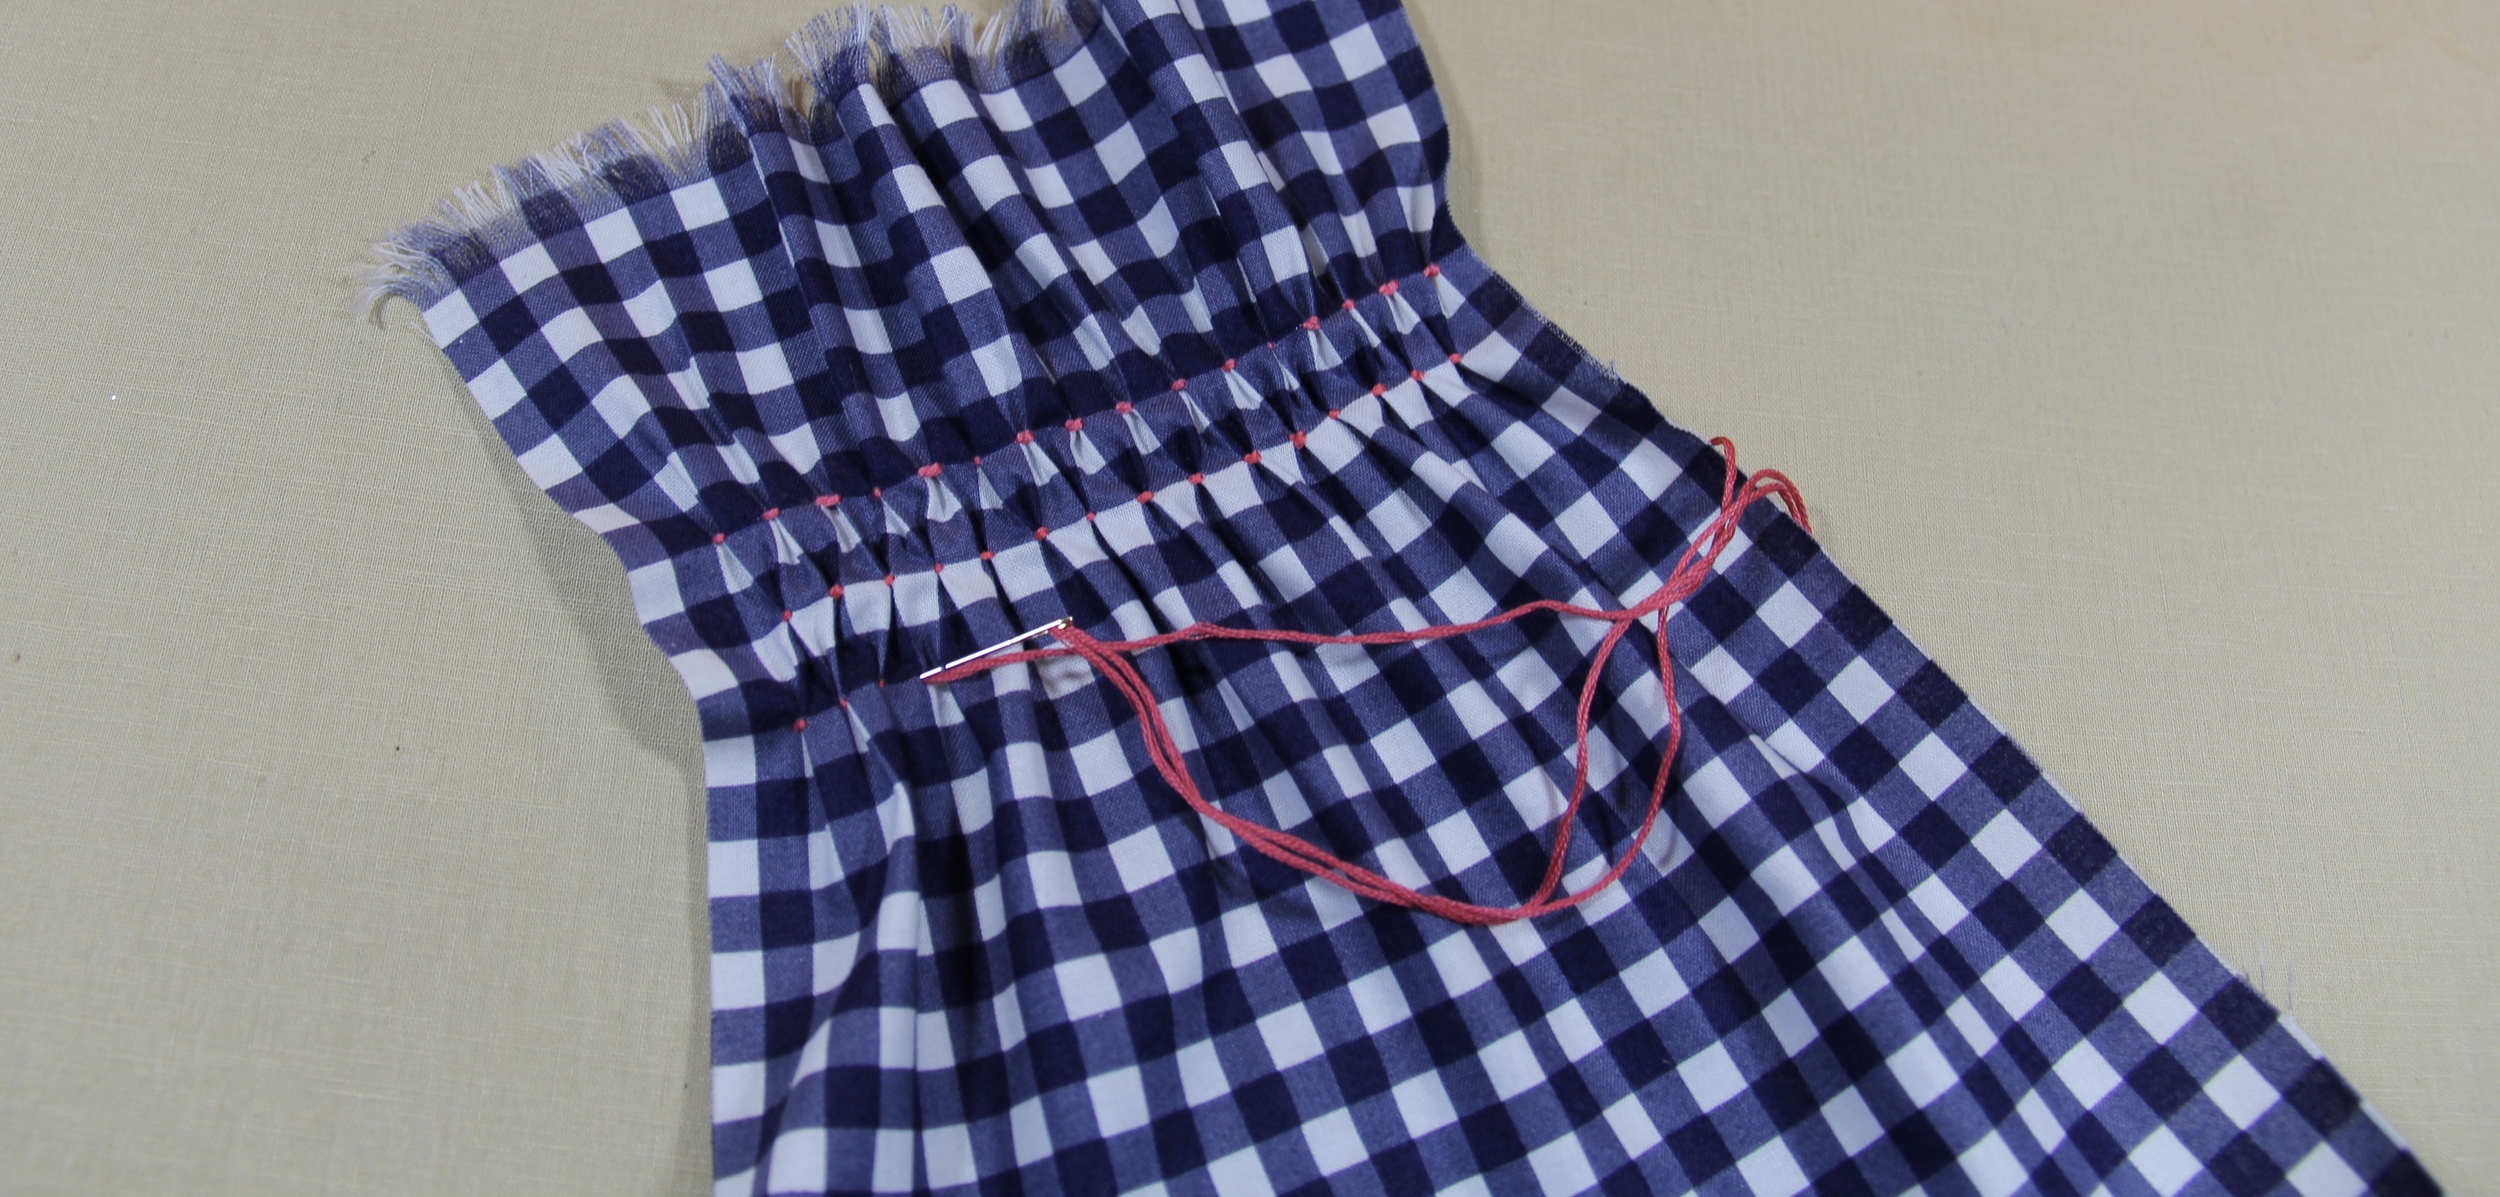
Insert the needle from behind 2 squares under the previous row and 2 squares from the edge. Make sure that it lines up with first row. (Again, if you are using another fabric, begin marking 1/2" across) Isn't this a pretty pattern?
Continue stitching pattern until you have completed 10 rows. Then repeat this on the opposite end of the scarf and then again on both sides of the other scarf piece.
Sewing the Side Seams
Take both lengths of the scarf and line them up, making sure the right sides (the pretty sides) are facing each other. We are going to pin the long sides and sew straight down each side with a 1/2-inch seam allowance. Leave the fringes edges open. (We won't be sewing those).

Finishing
Give the scarf a good pressing, concentrating on flattening the side seams. Reach your hand through one fringed end and grab the opposite side, pulling it right-side out. Ta-da! Finished! What do you think?
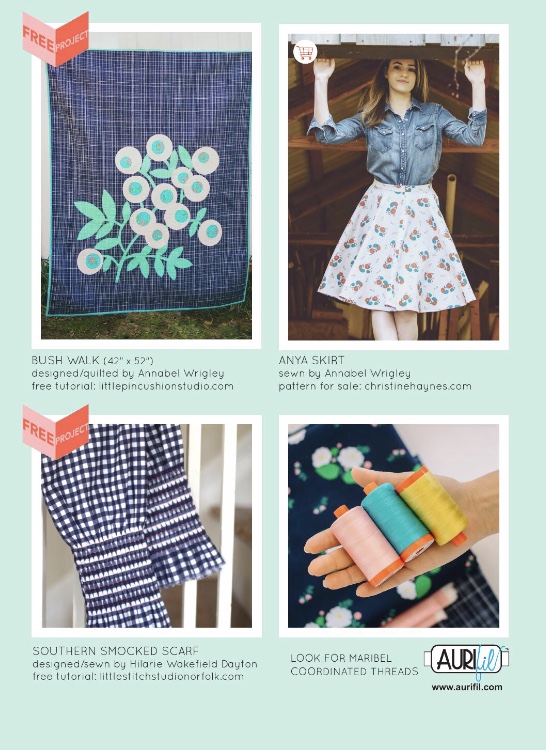
This tutorial was featured in the Windham Fabrics Lookbook for Annabel Wrigley's Maribel Line
Please email me with any questions. Also, I'm happy to make a chart to further explain how to do this without a gingham "grid".
Stitch-ed

Lots of exciting things are happening around here. I have a few fun projects to share with you. For starters, I will begin to post some patterns and tutorials. You may have noticed a change to my Stitch logo, Stitch-ed. Stitch-ed is a line of hand-made items for sale. Dolls, accessories, patterns and pillows. Coming soon!

From one gift come many
This morning as I sat in the dentist office with my little girl she presented me a gift she had made. It was a beautiful little pink pompom tassel. The perfect expression of her at this time. Simple, loving and warm. Children love to present gifts. Its so easy to provide them the materials and skills. A sewing machine or even a needle, thread and some felt and they have the ability to make endless gifts for you, their friends and teachers.
A birthday party!

Each year about mid-summer we begin to make plans for my daughter, Bunny's birthday party. She chooses a theme and the plans build from there. This year was no exception. Macarons, sewing and a chocolate fountain. Go!
I drew inspiration from my daughter. I love the way she see's the world through color, pattern and texture. As well as sewing events that I have had at Little Stitch Studio, and the American Girl Doll Movie, Grace Stirs up Success with the macaron croquembouche.
She rode her little bike around the neighborhood delivering each invitation to her friends. At night, we sewed gifts for each girl and made decorations for the party. The day finally came!

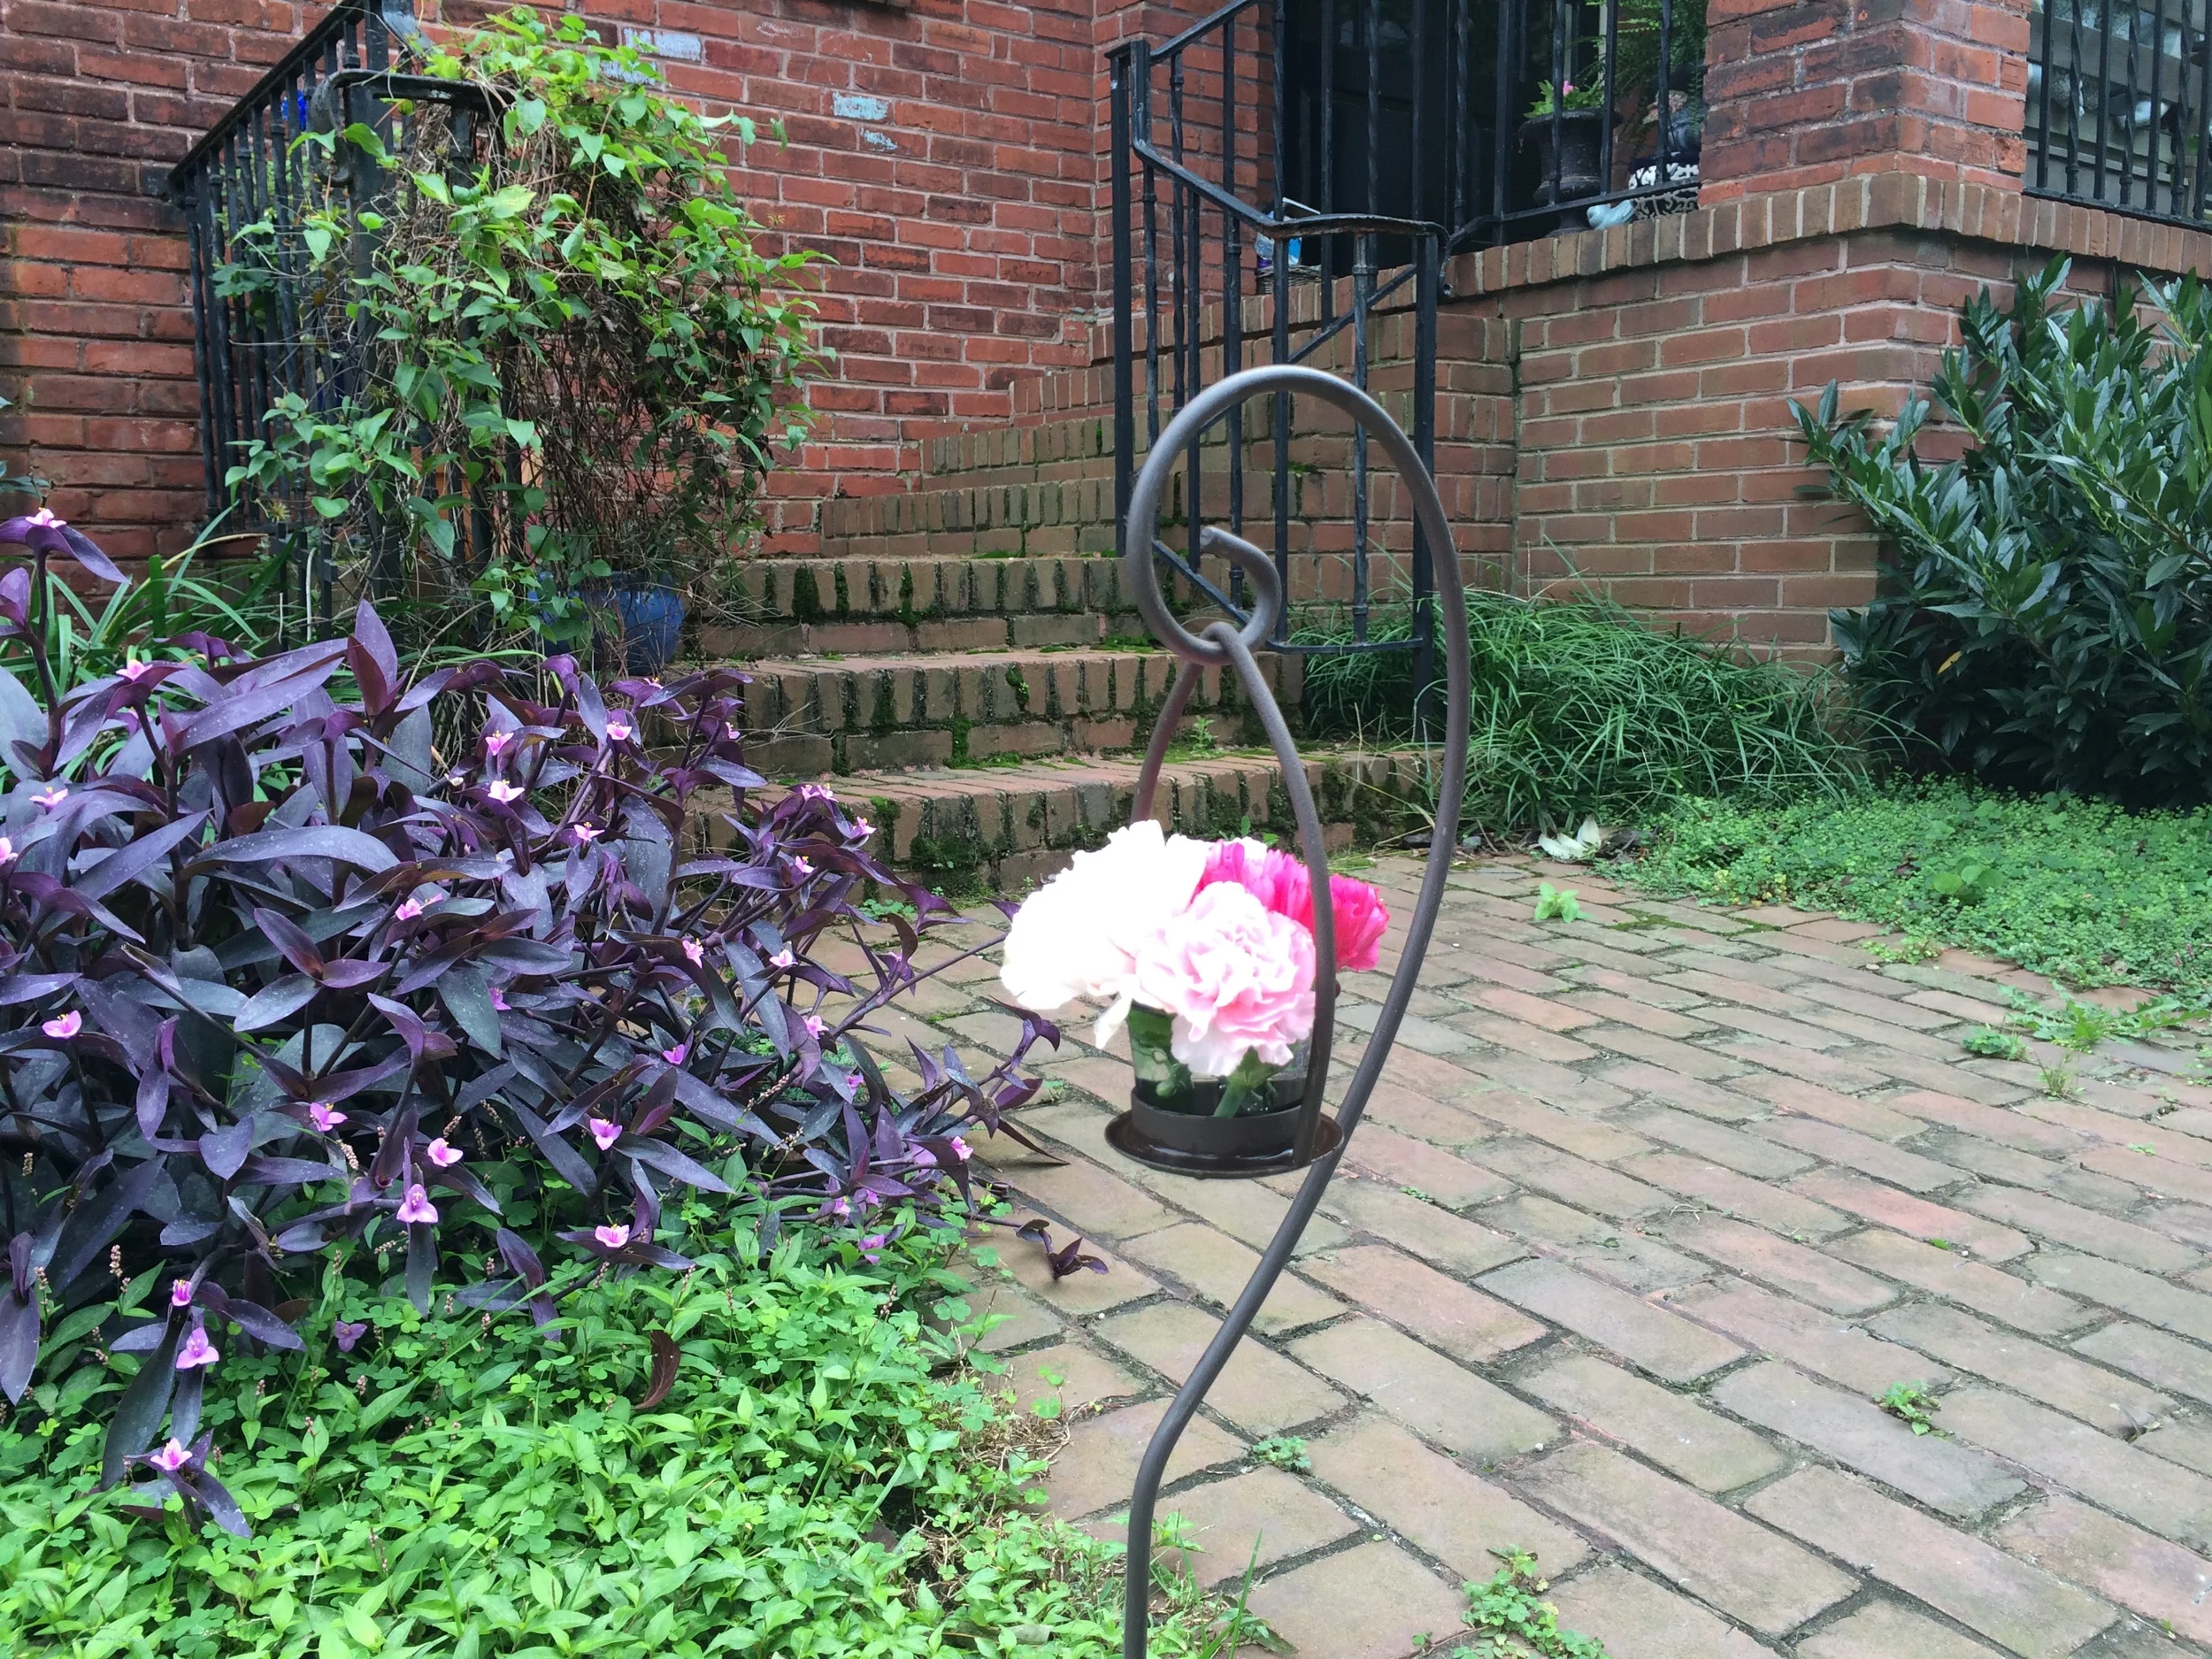

To set the tone, I used lots of fresh flowers in varying shades of pink throughout the house. We also used lots of pompoms, ribbon and paper flowers. With each type of arrangement, I try to balance the casual material with a fun dose of stylized whimsy. The pompom chandlier is always a fun statement.


For the sewing activity, the girls made messanger style bags out of coordinating prints (with bunnies of course!) and yarn tassles with wood beads. The bag is super easy and always a sucess with young sewists. The pattern is from Annabel Wrigley's We Love To Sew.

While the girls were waiting for dessert, they took turns signing a cute pillow with colorful fabric markers.
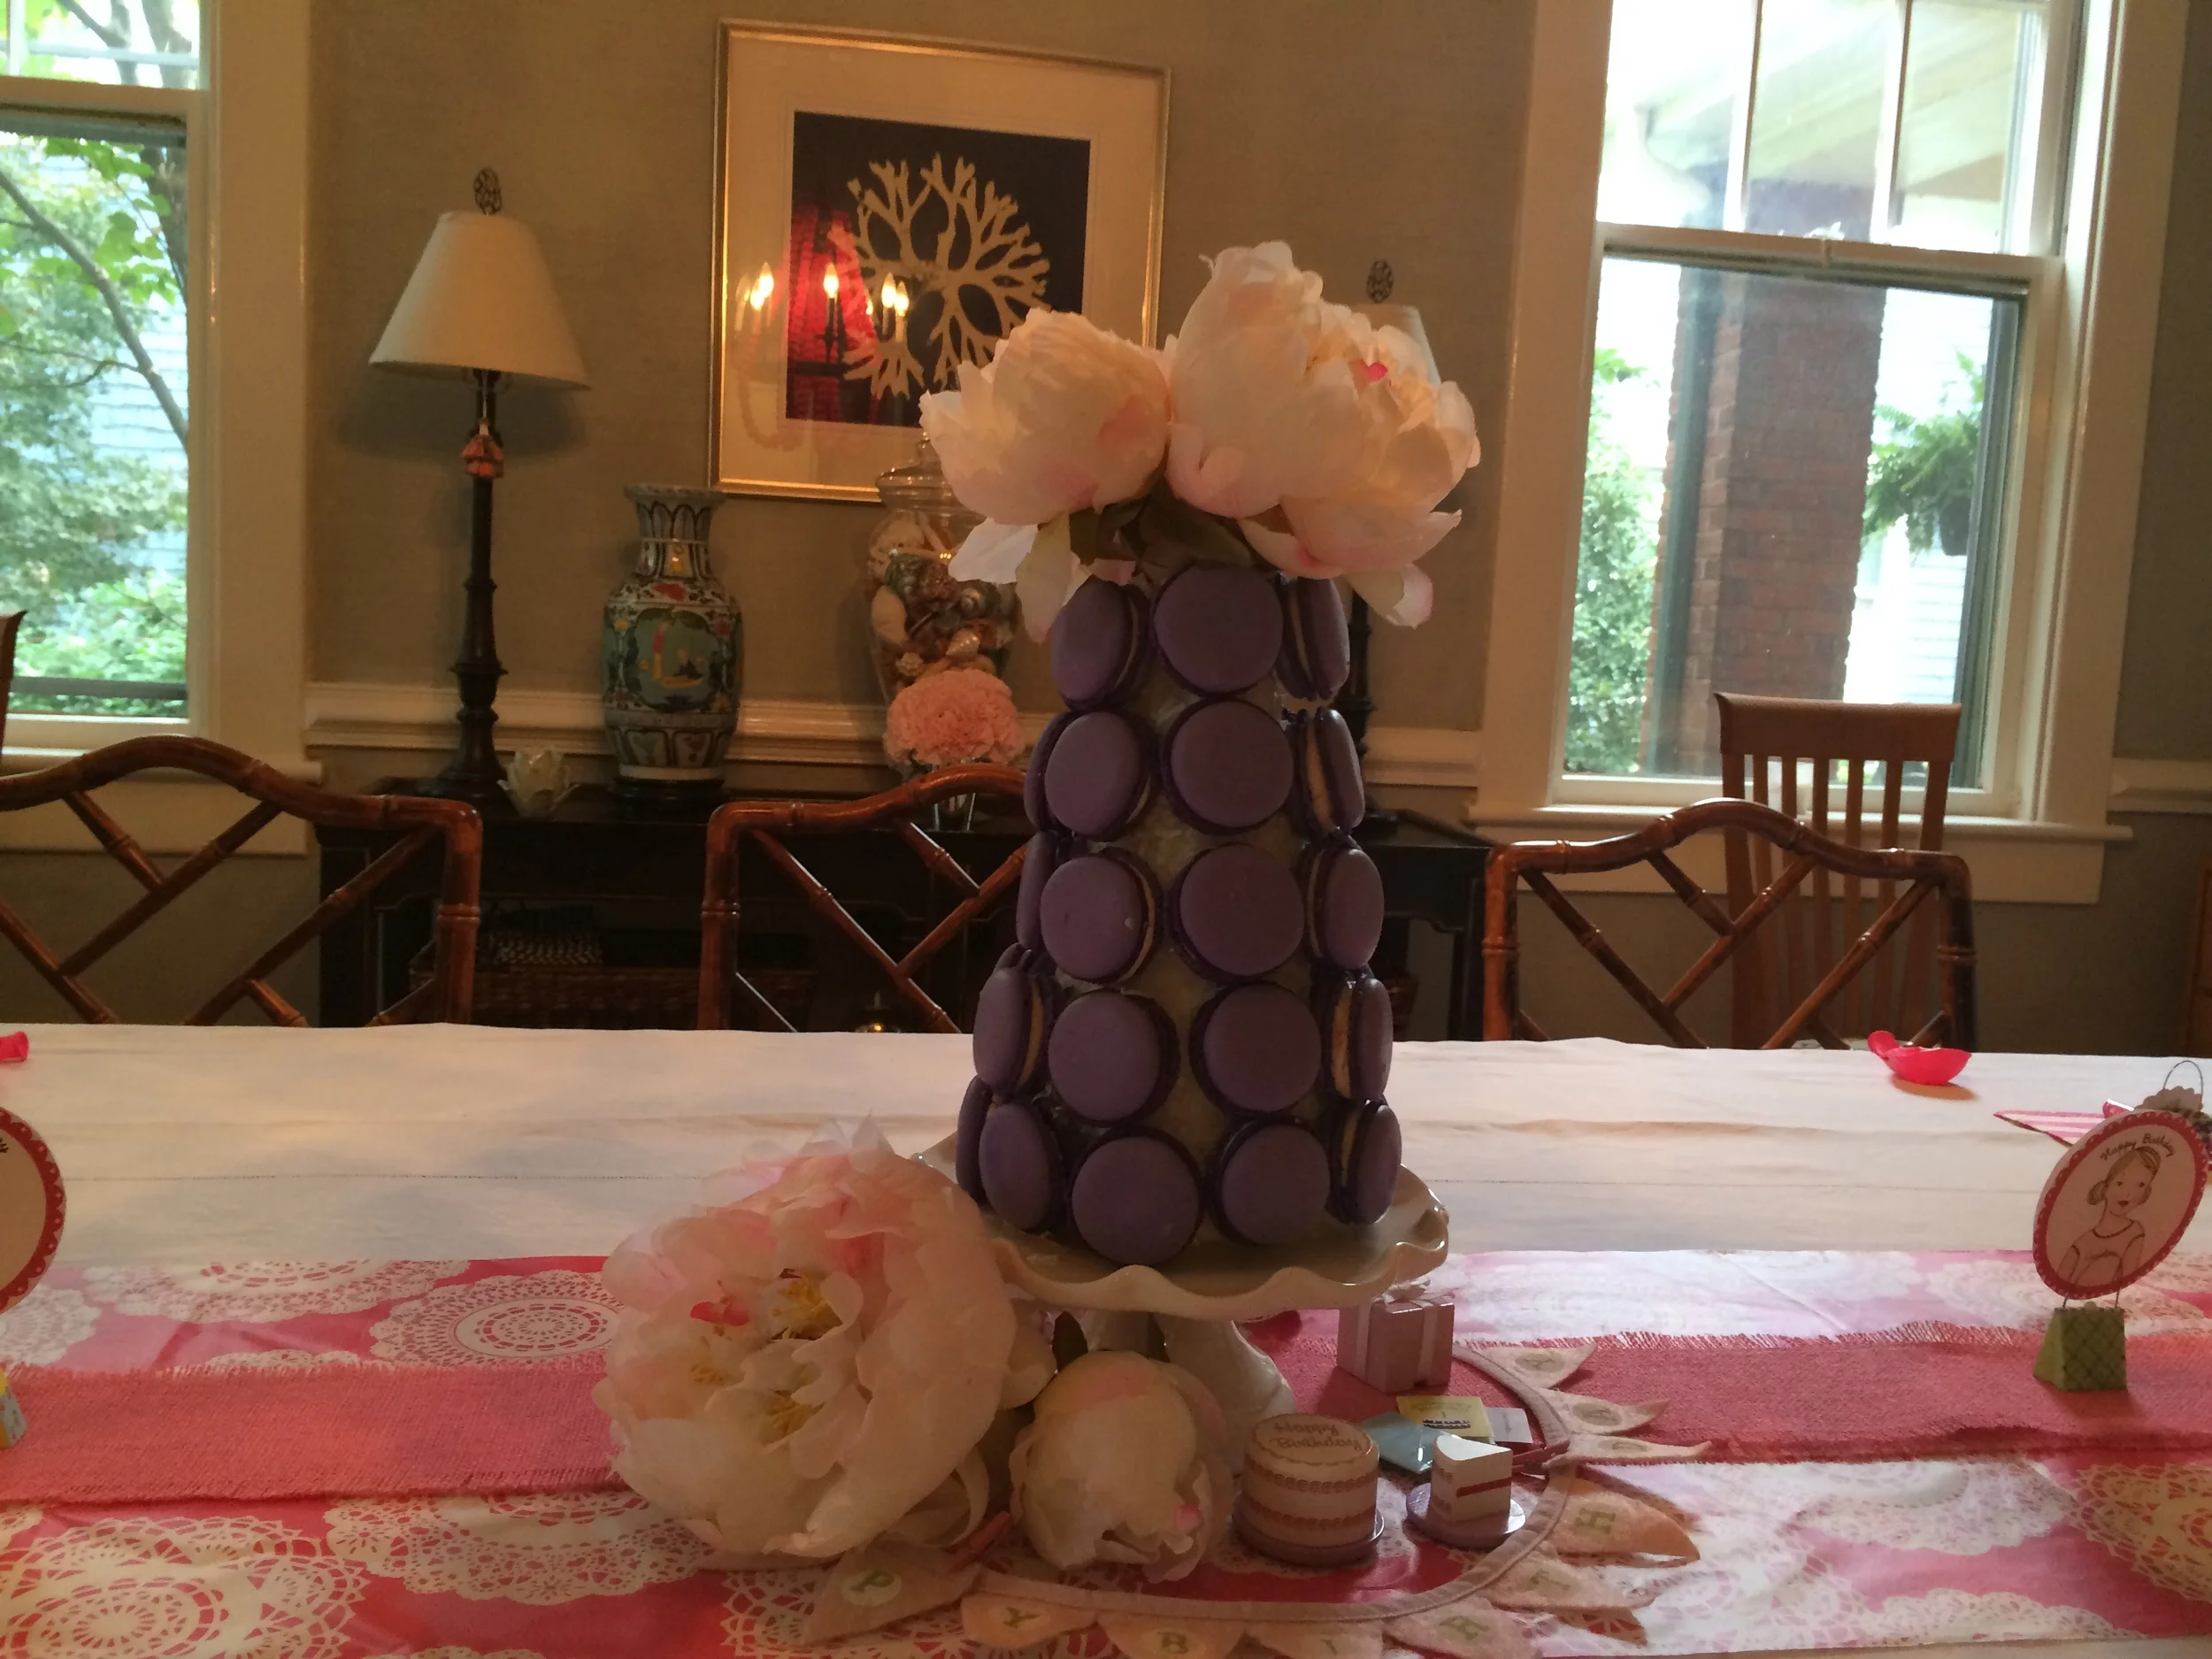
For dessert we served the macaron croquembouche, and strawberries dipped in chocolate with strawberry lemonade.

Each year I try to make something special and memorable that we can look forward to unpacking and using for years to come. This crown was from her 5th birthday. The satin ribbon allows her a comfortable fit year after year.
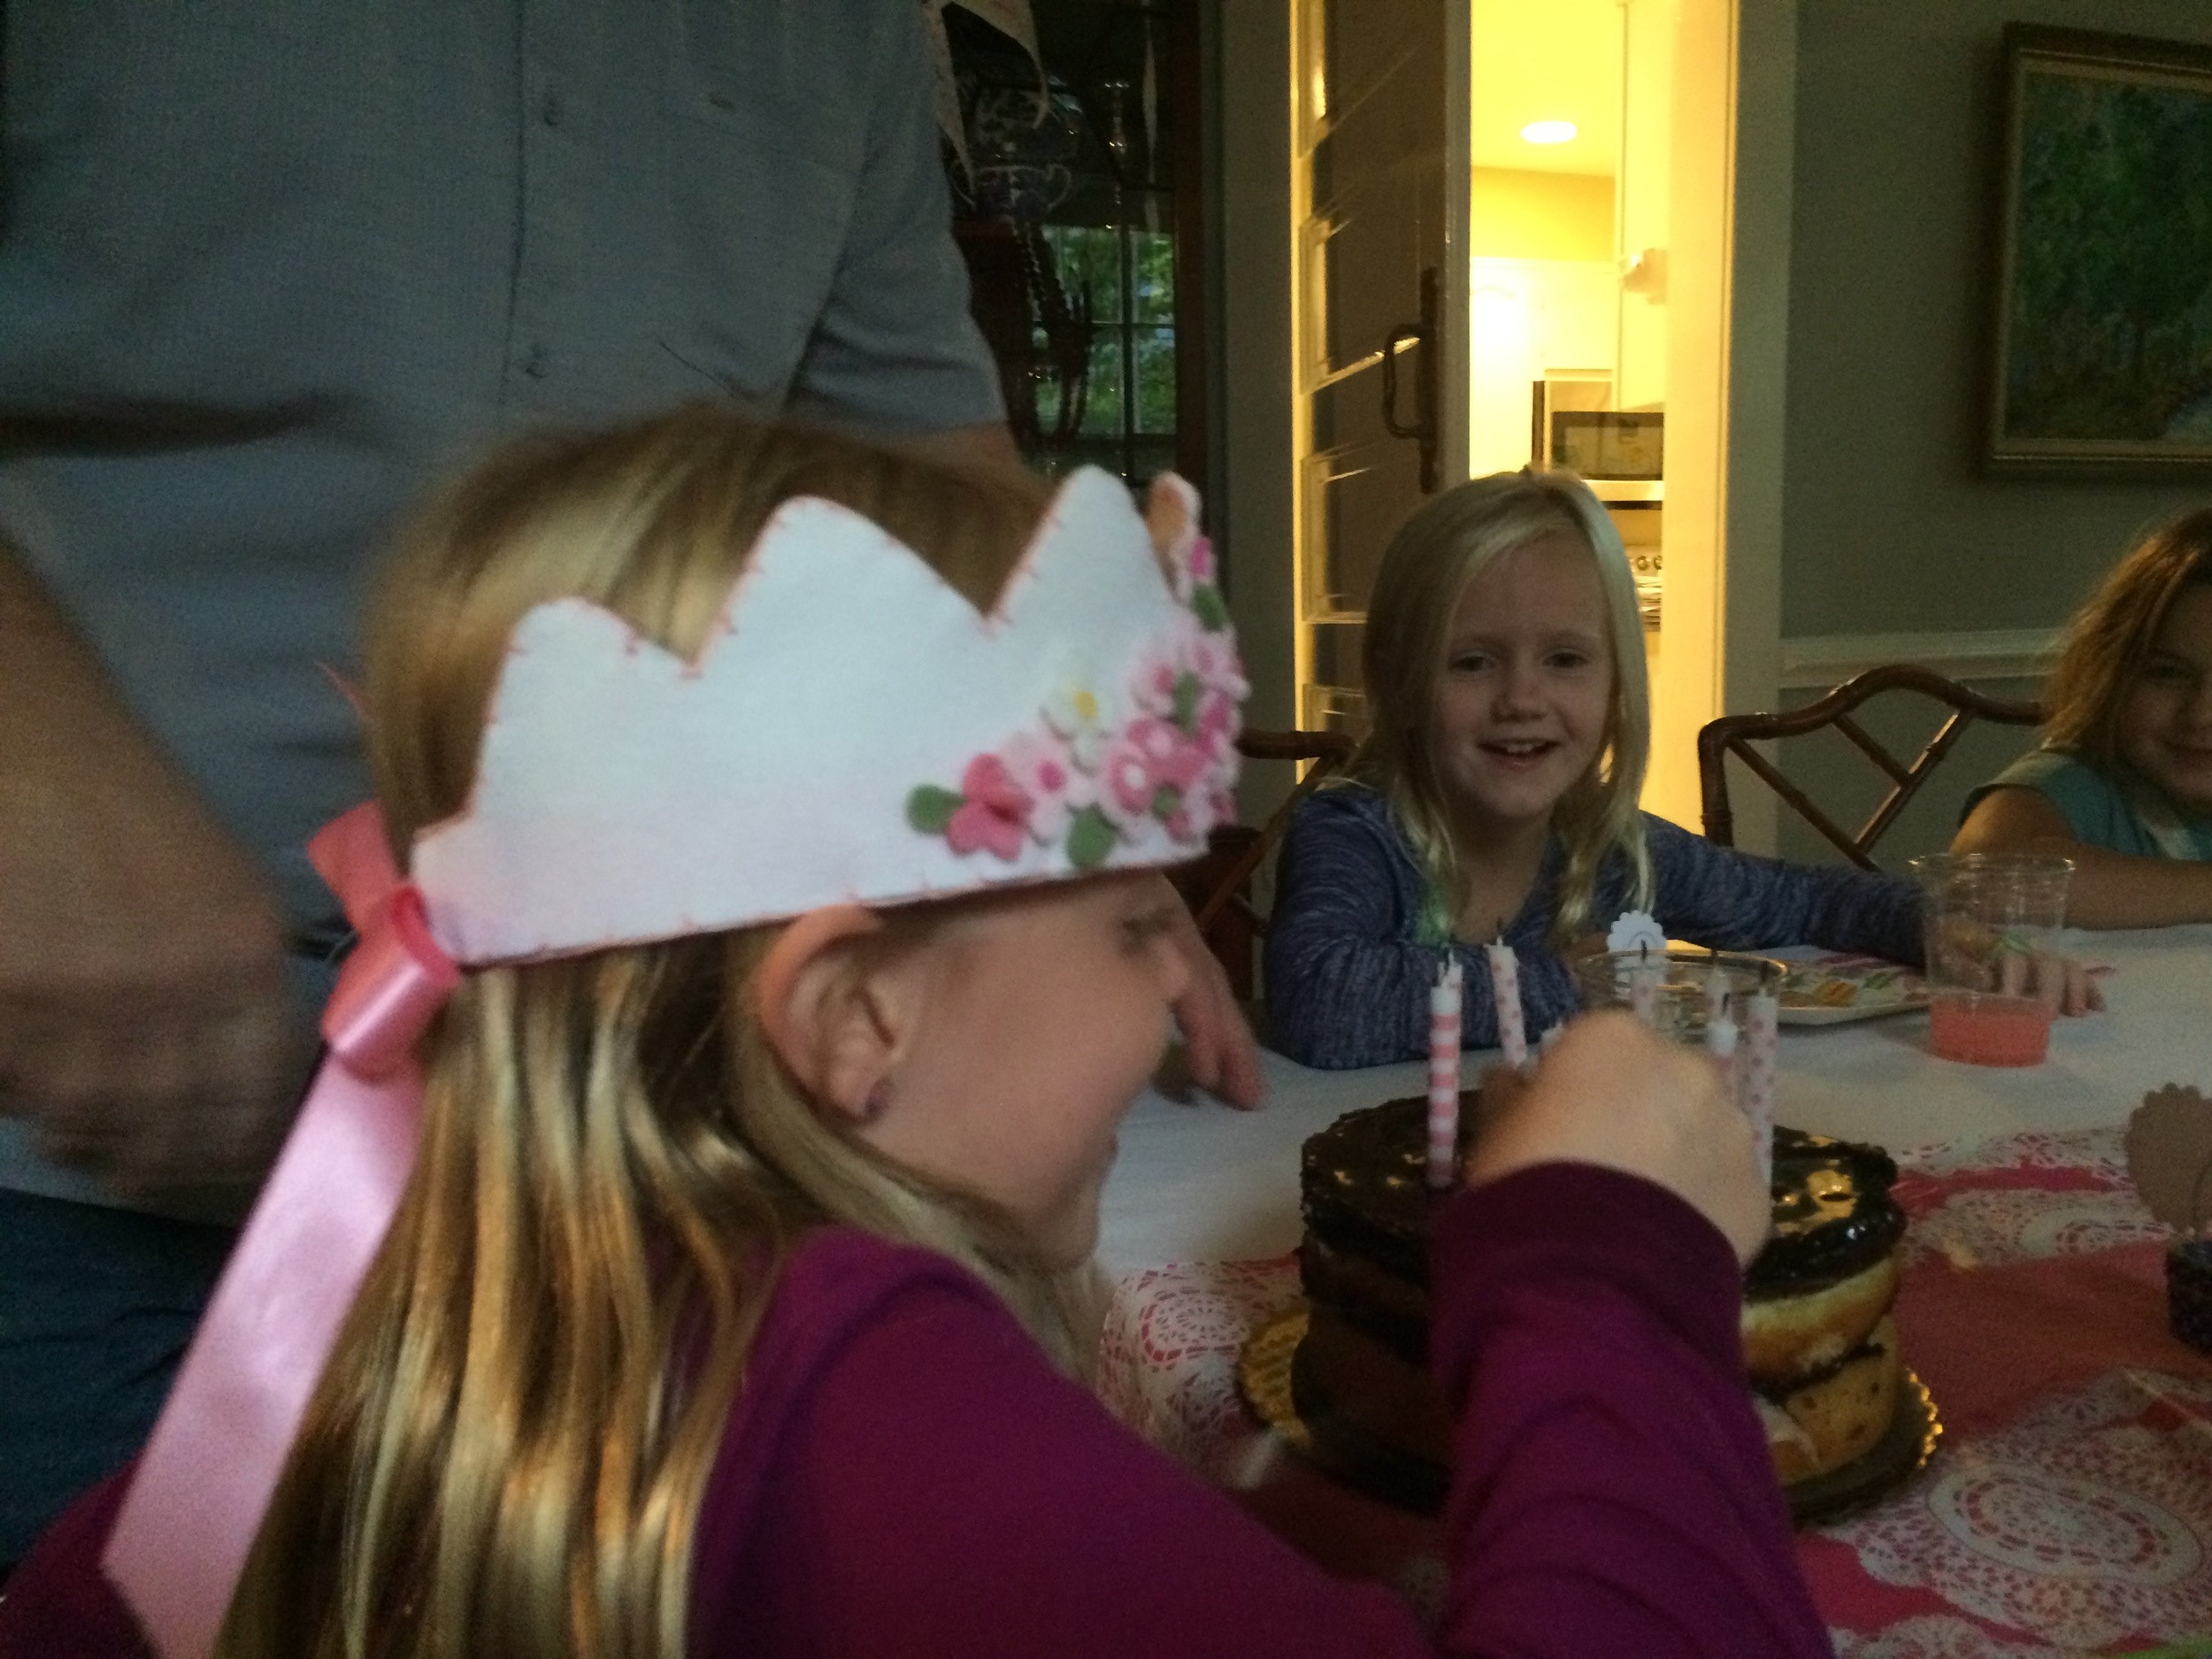
Happy Birthday!