

How to Sew A Detachable Statement Collar- Part Two
Learn to sew a detachable statement collar with perfect collar points.
Welcome to part two of the series, How to Sew a Detachable Collar. Detachable Statement Collars are such quick and satisfying sewing projects. There is so much mix and match potential in the variations that you might find yourself amassing quite a collection. Throughout this series, we will begin with a basic collar pattern and learn how to change the design to create a look that is uniquely you.
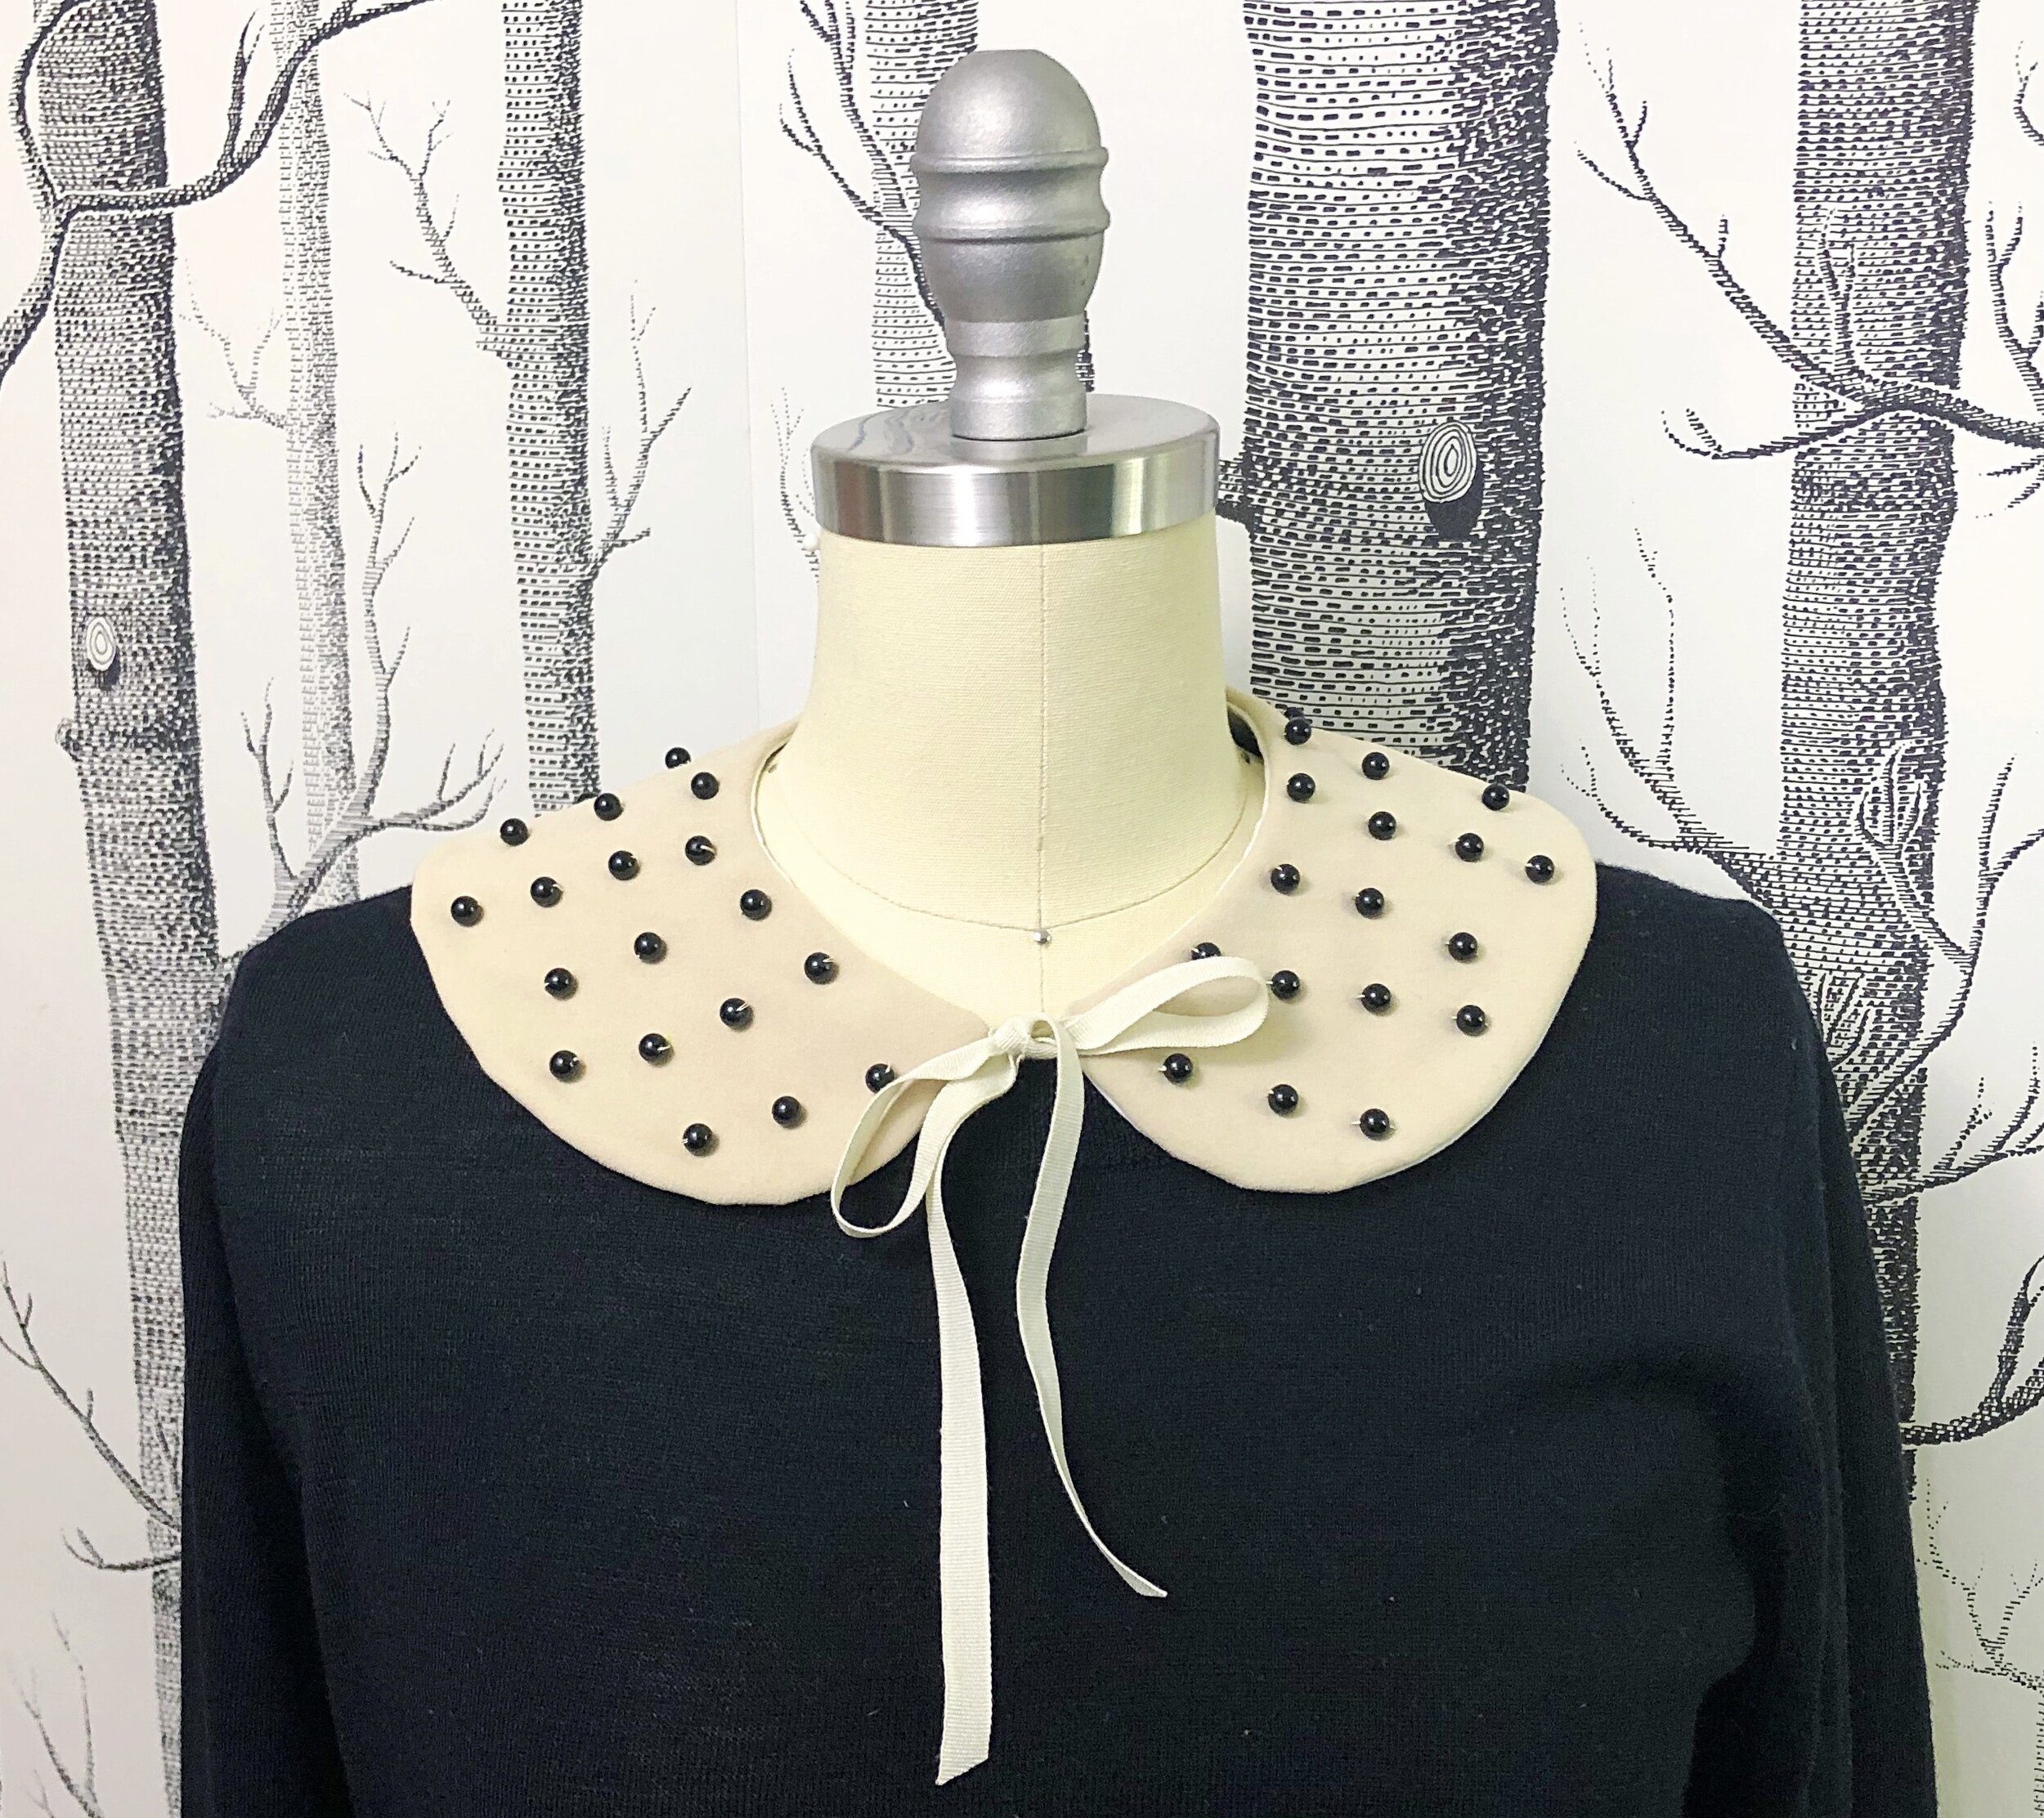
In my introductory post, I showed you how to make a Peter Pan-style rounded collar with additional tips for sewing curves. For this installment, we are going to learn a bit about the structure of woven fabric and how it relates to creating sharp points to sew a Pilgrim-Esque maxi collar.
If you missed the first post, catch up here: How to Sew a Detachable Statement Collar, Part One

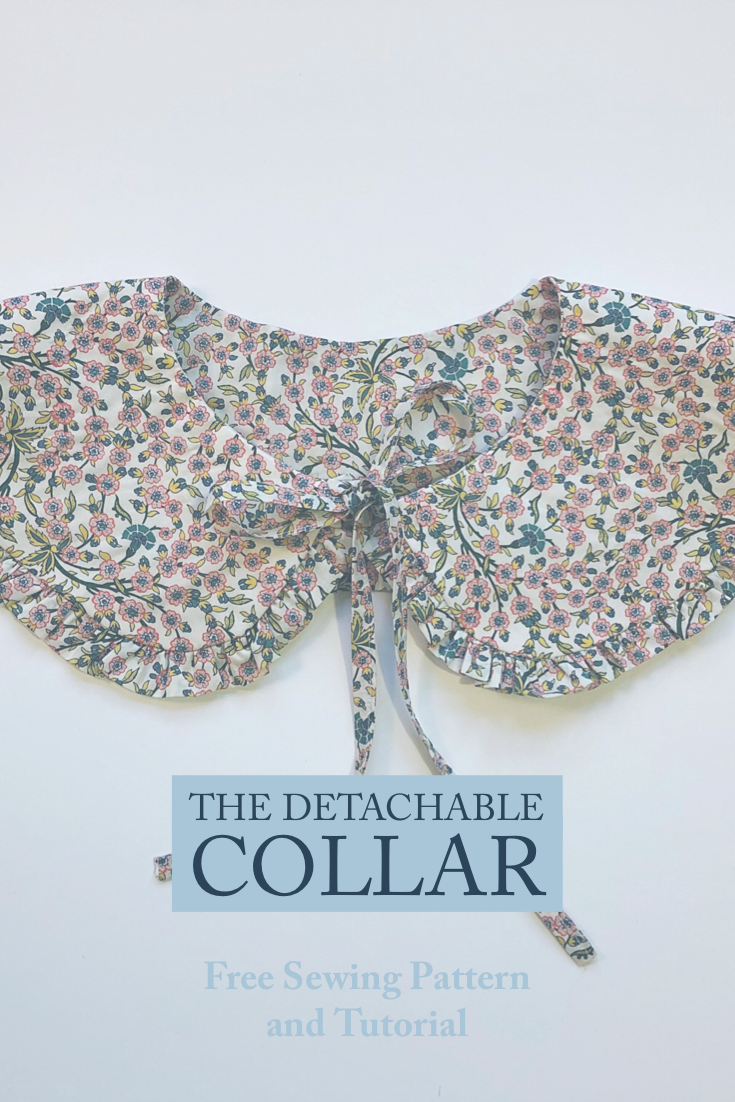
These are two of the many variations that you can create with this pattern. The chambray collar looks great with a mock-neck top worn with a stack of chains and pearls. The plaid taffeta collar has a bit of a softened point and I added a self fabric gathered ruffle to amp up the fun. The possibilities to add your own touch are only limited by your imagination. Have some fun with it!

The pattern is available for download here and also at weallsew where you will find the step by step tutorial. I can’t wait to see what you make!
New to using PDF sewing patterns? Check out this link for tips on assembly.
Head over to weallsew to download and get the tutorial.
Happy Sewing!
XOXO, Hilarie


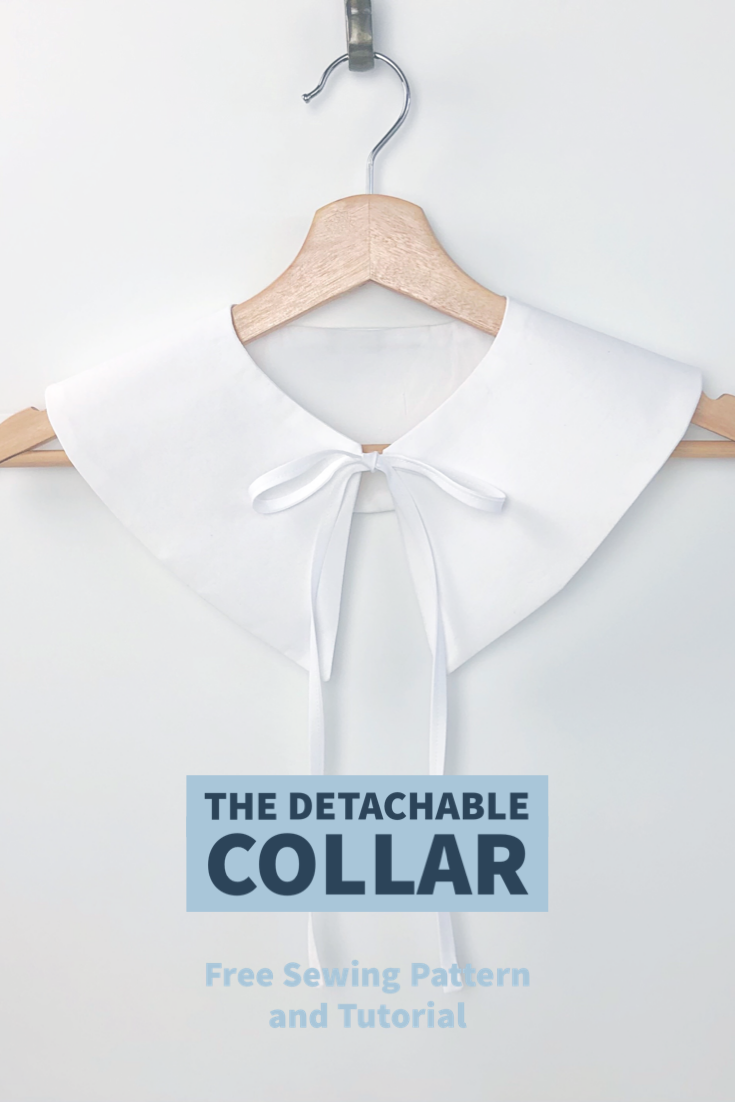
The Detachable Statement Collar Free Sewing Pattern and Tutorial
Statement collars are everywhere right now- and with good reason. They can be easily tied on over tees, coats, sweaters and even dresses for an instant outfit upgrade. The collars are really easy to make and to give as gifts too!
Detachable Statement Collar Free PDF Sewing Pattern and Tutorial
Statement collars are everywhere right now- and with good reason. They can be easily tied on over tees, coats, sweaters and even dresses for an instant outfit upgrade. The collars are really easy to make and to give as gifts too!
From pristine white collars with lace trim to knitted capelets and quilted denim, there are collars for every occasion and outfit. Beaded collars, fur collars, collars with plumes, collars with lace, collars with piping, and tiers of ruffles. For someone who loves fashion and sewing, these collars offer a sewist a chance to pull out all of the stops and finally try an embellishing technique that perhaps has seemed too daunting for a larger project.
Detachable statement collars are really easy to make- the hard part is choosing a style as there are so many new and fun options. Mini, maxi, round and pointed. Lace, ruffles, trimmed and beaded- the variations are endless. I thought you might enjoy learning all about collars in general and how to make and customize them. To that end, I have designed a group of patterns that I will share with you over the coming lessons. To that end, you can think of this as a sort of mini-course in collars.
The pattern is available for download here and also at weallsew where you will find the step by step tutorial. I can’t wait to see what you make!
New to using PDF sewing patterns? Check out this link for tips on assembly.
Head over to weallsew to download and get the tutorial.
Happy Sewing!
XOXO, Hilarie

DIY Easy Mini Felt Bunny Ornaments
Easter is on Sunday! Since quarantine began, I am never really quite sure what day it is anymore. Somehow in all of this uncertainty, I hadn’t gotten around to putting out any type of seasonal decoration. With a daughter called Bunny, we generally take Easter decorating pretty seriously around here. So, in an effort to jump start on all things Bunny, here is a quick hand-sewing project for you to make and enjoy.
DIY Easy Mini Felt Bunny Ornaments

Easter is on Sunday! Since quarantine began, I am never really quite sure what day it is anymore. Somehow in all of this uncertainty, I hadn’t gotten around to putting out any type of seasonal decoration. With a daughter called Bunny, we generally take Easter decorating pretty seriously around here. So, in an effort to jump start on all things Bunny, here is a quick hand-sewing project for you to make and enjoy.
DIY Easy Mini Felt Bunny Ornaments Free Pattern and Tutorial

MATERIALS

These mini felt bunnies sew together pretty quickly and it is likely that you already have the supplies on hand.
To make an assortment 2 1/2-inch bunny place ornaments:
9 X 12-inch sheets of felt in assorted colors; each sheet will make one bunny plus a little felt left over.
Embroidery Floss or Pearle Cotton (if you don’t have either, thread is fine.)
A Felt Mini Bunny Ornament template available for free download here, printed and cut out.
Craft glue
Embroidery needle
Scissors
PATTERN
FINISHED SIZE
About 2.5” inches high, plus ears
CUTTING

Cut eight circles from the felt and two ears

Press each of the cut circles in half, making a crease along the center. Place the ears aside for now.
SEWING

Cut a piece of thread about 20” long. Thread a needle and knot the end to tie. Insert the needle from the back of one of the circles and make a small stitch to secure.
*This thread should be long enough to complete one bunny. The idea is to keep sewing with the same strand of thread between all layers. If you run out- no worries. Just tie off the end and rethread another strand.

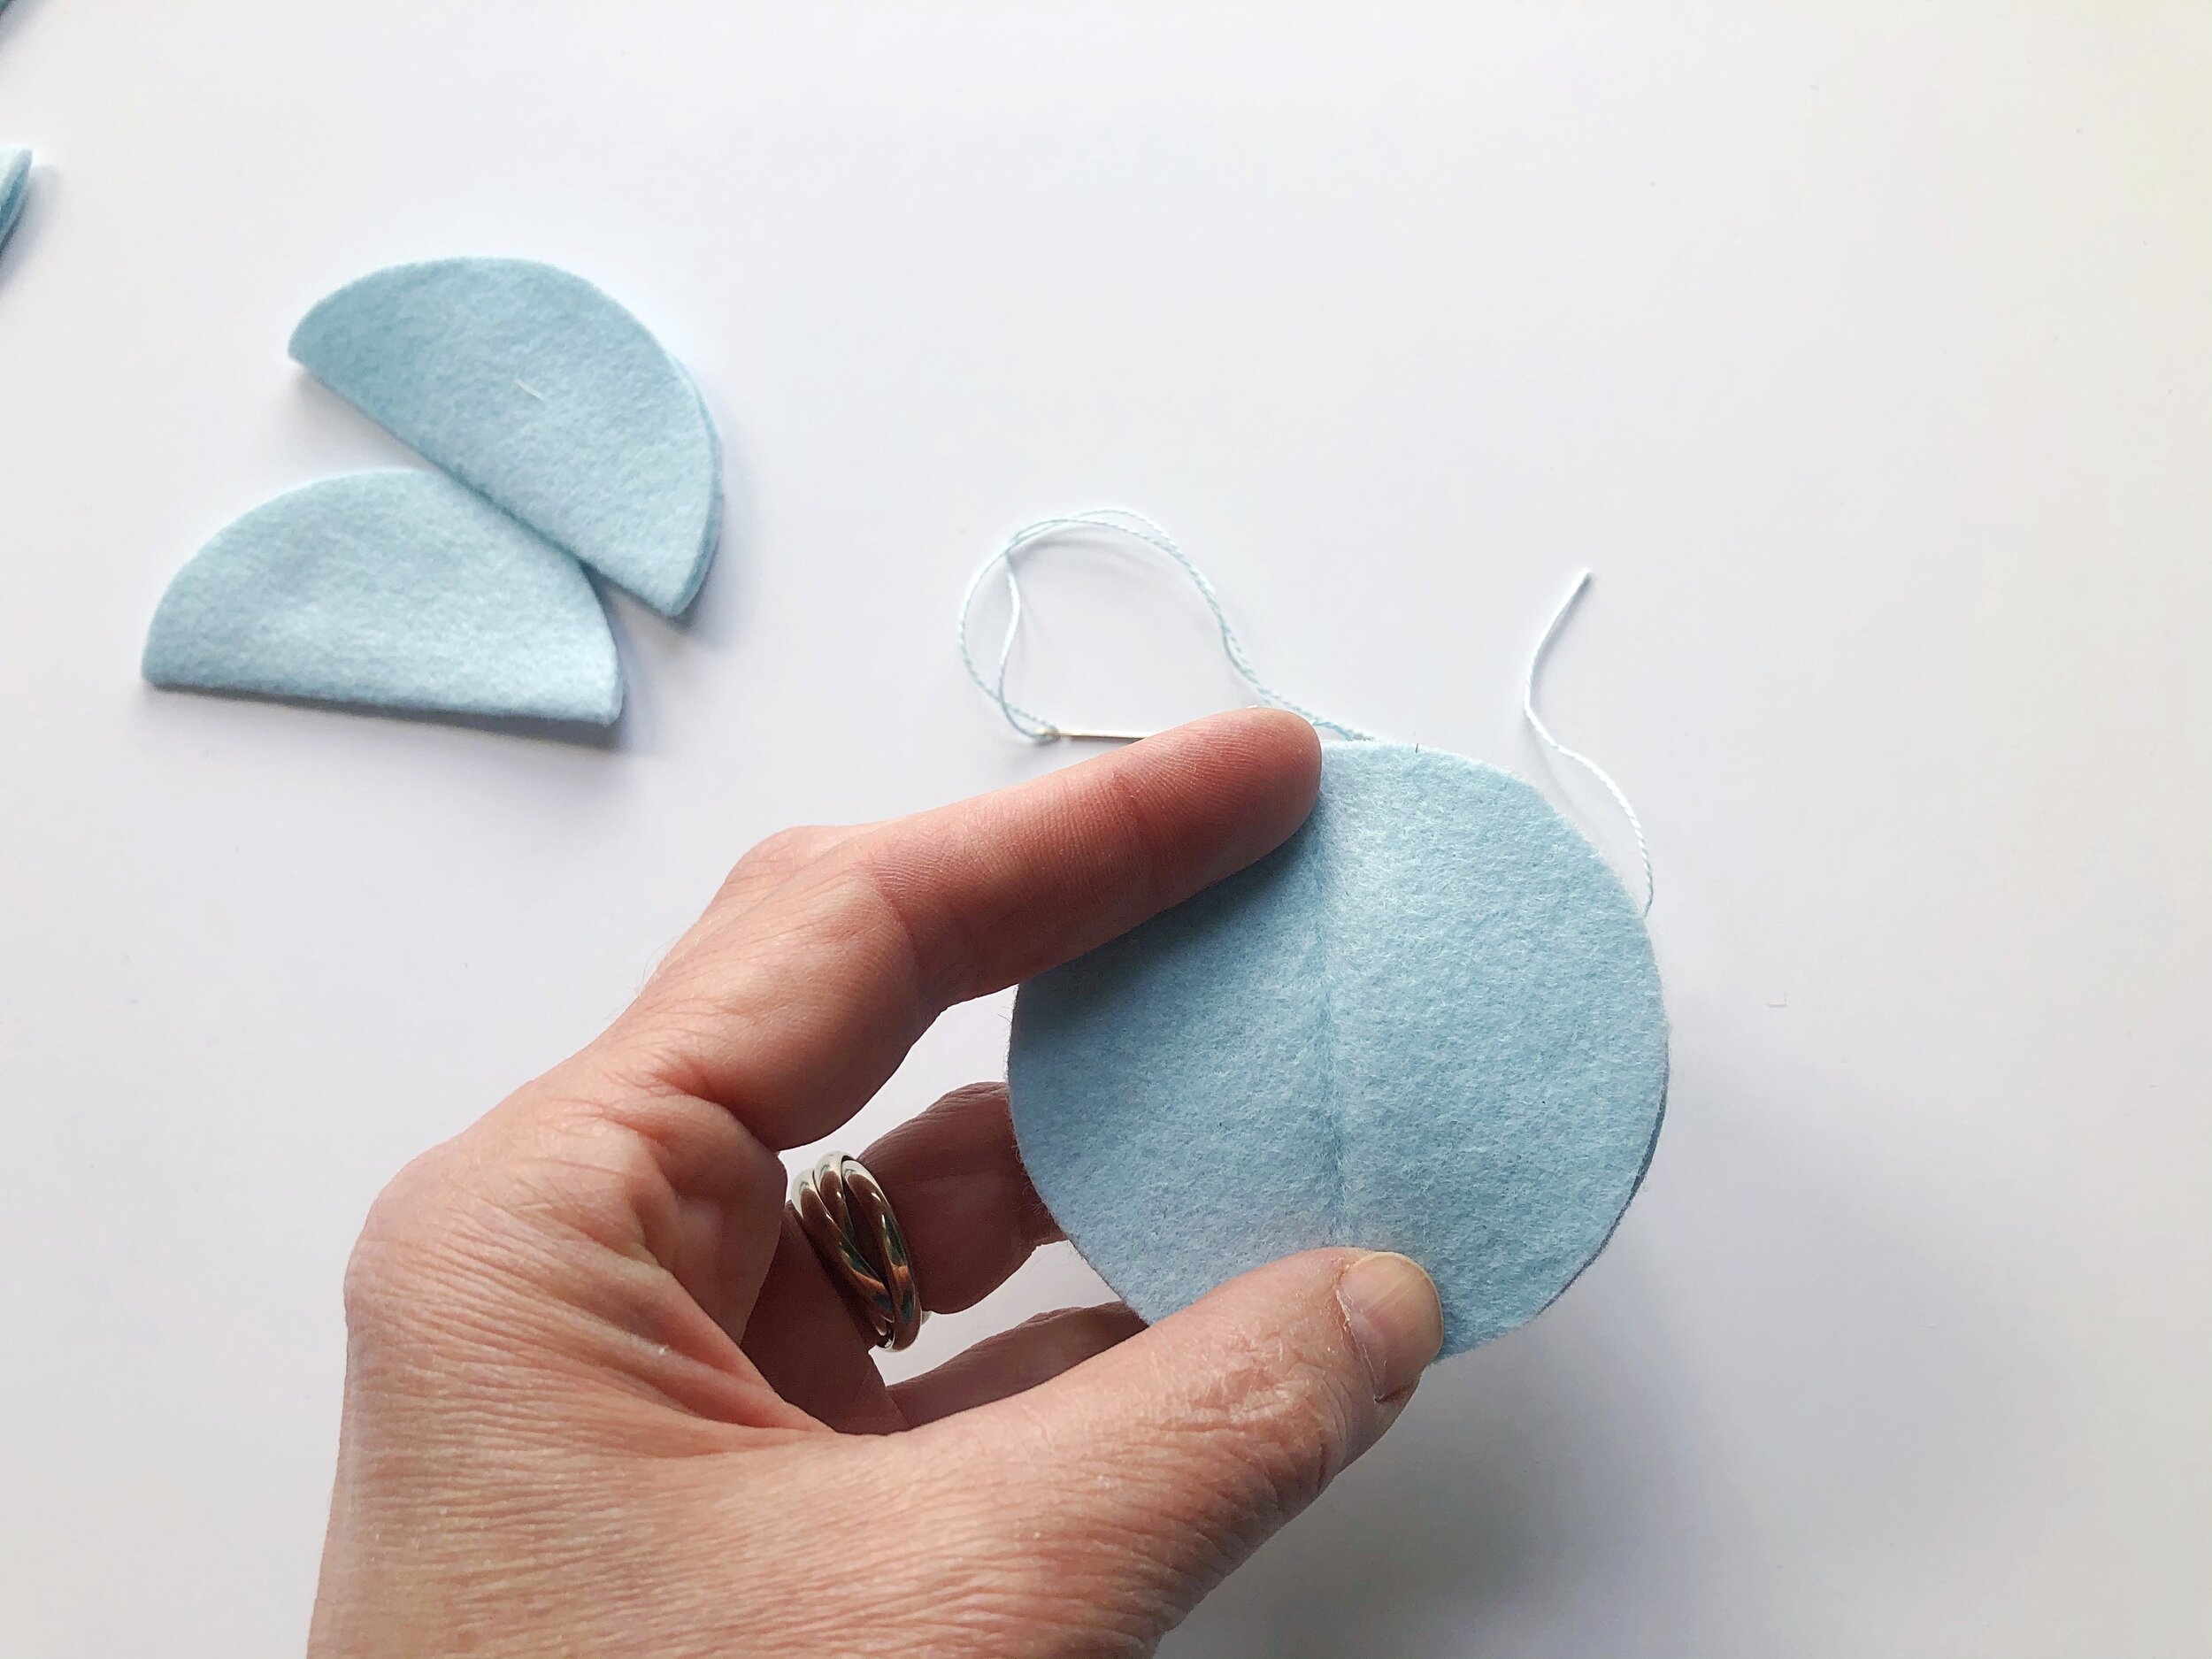
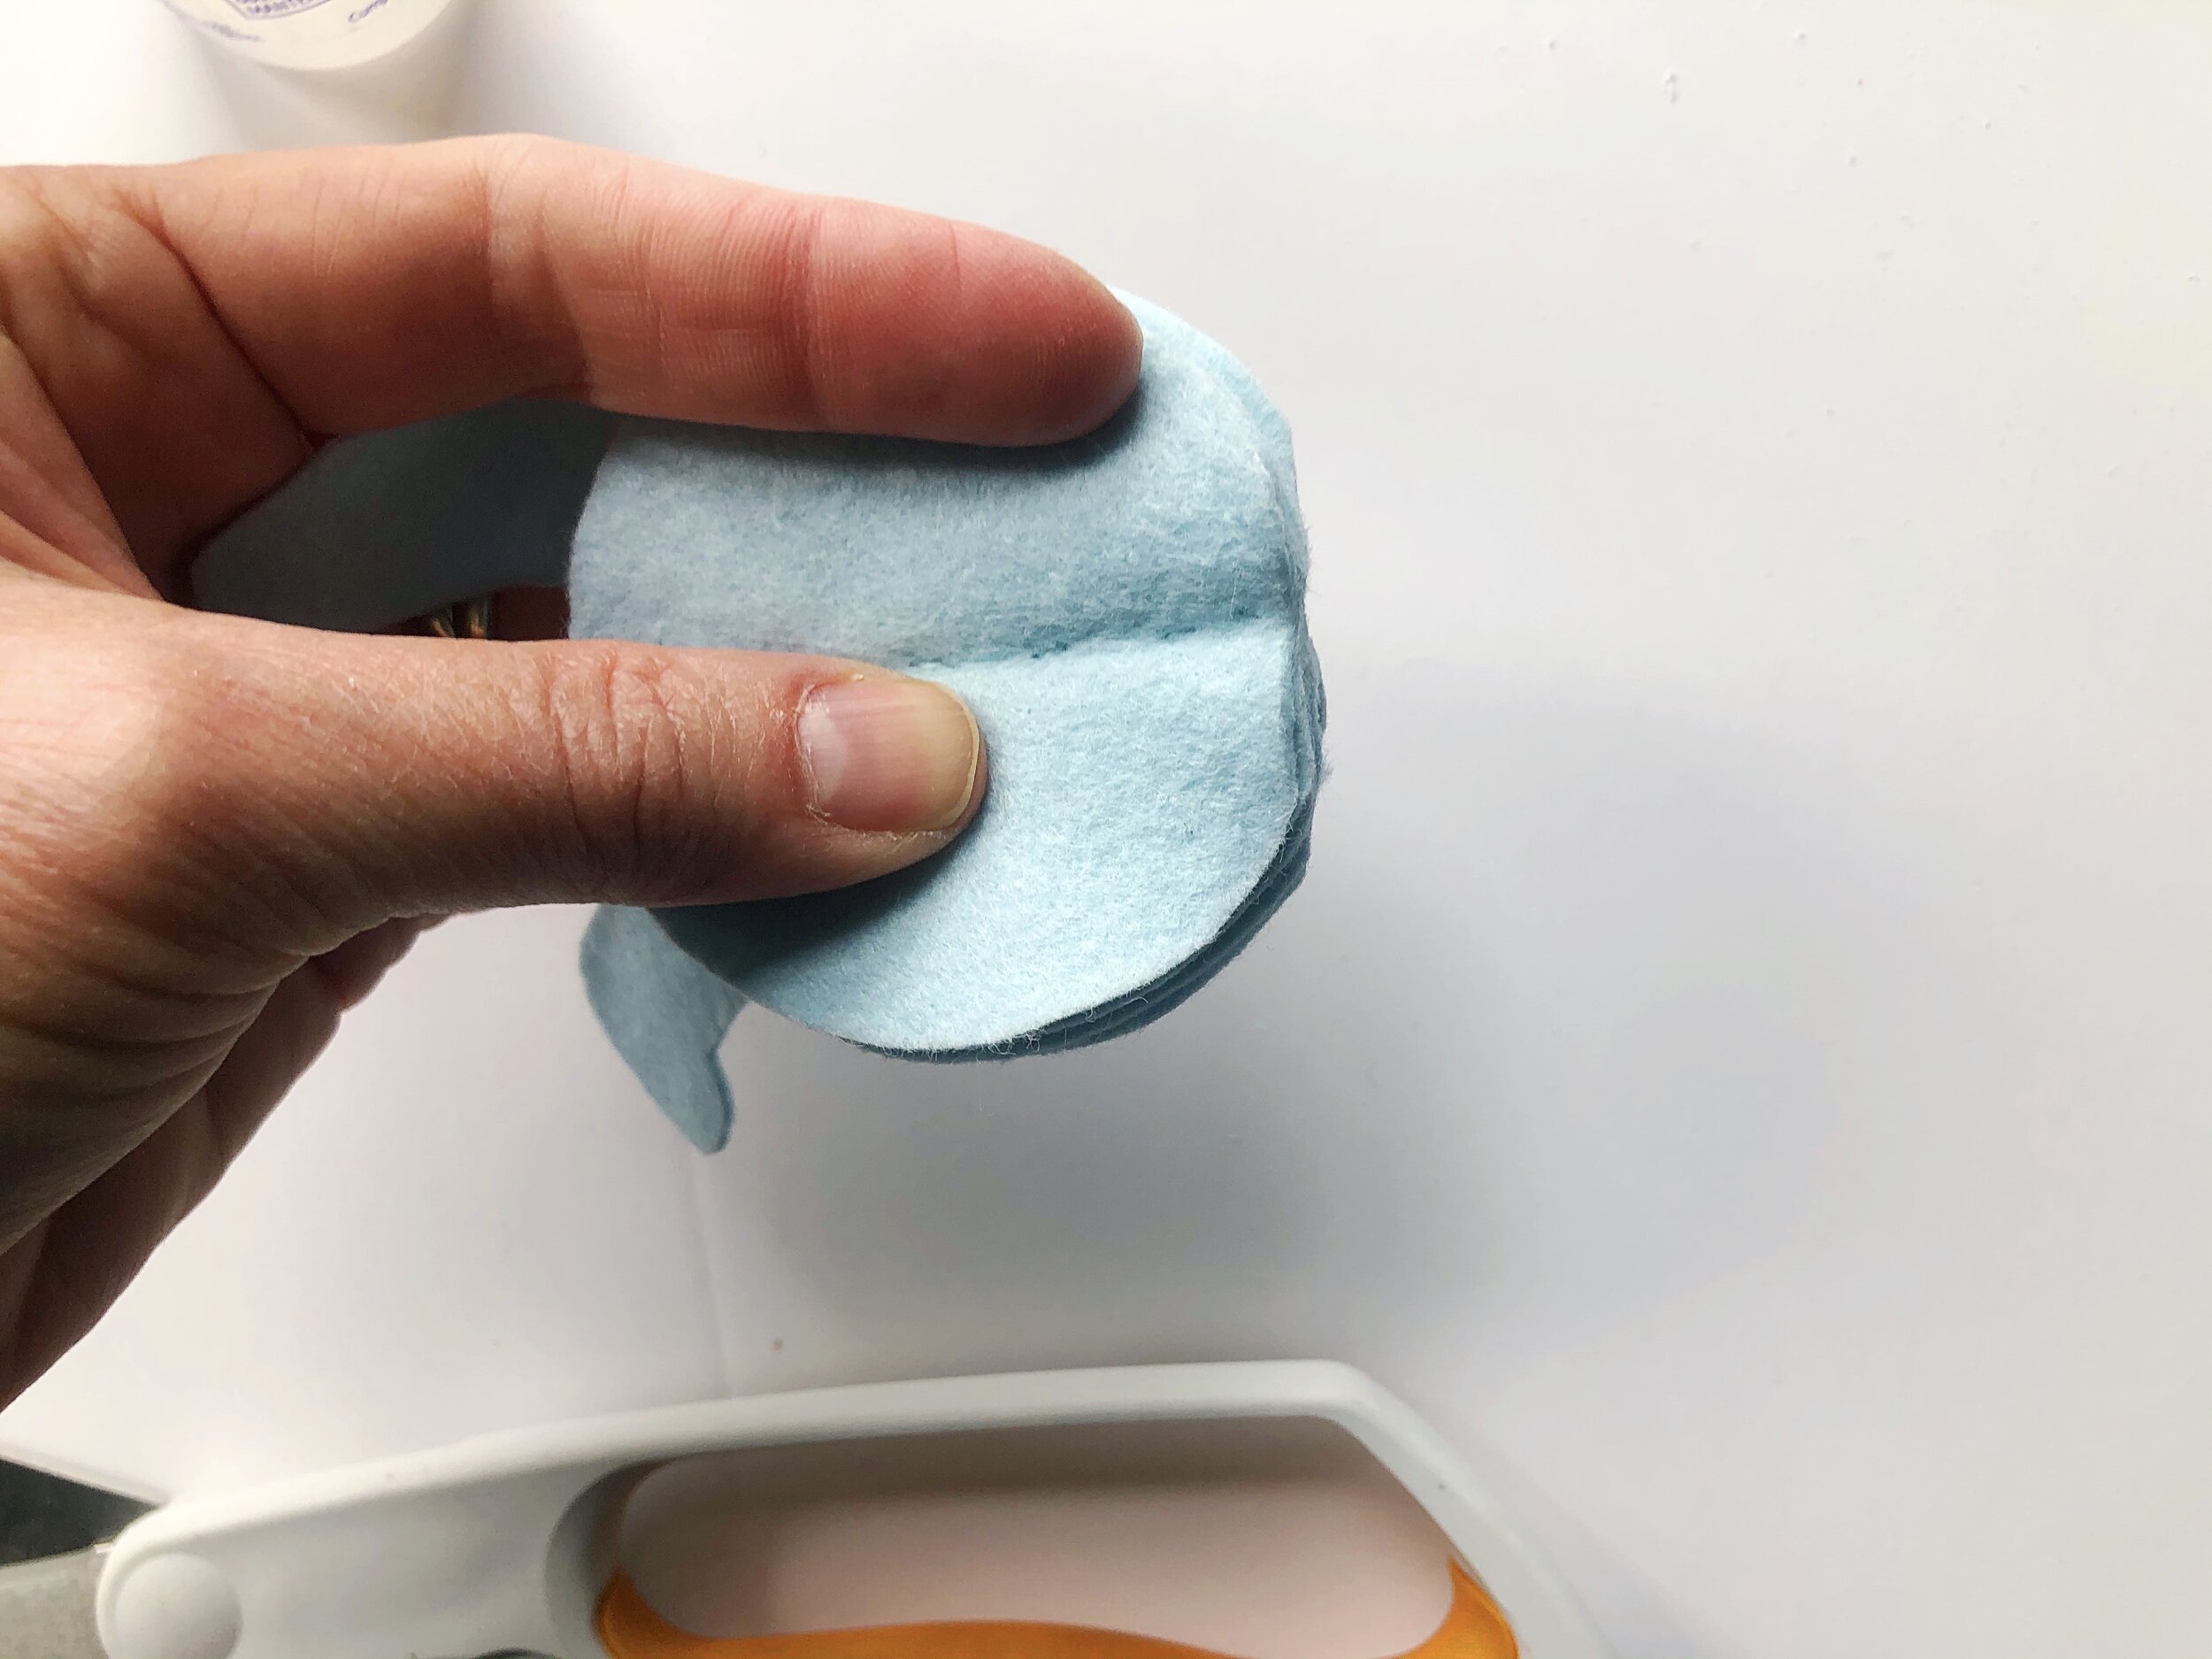
Fold the circle in half. Grab a second circle, keeping it folded in half as well, and align both so that the straight fold of each piece mirrors the fold of the other.
You might find it helpful to think of each piece as a folded tortilla.


Stitch the two pieces together along their crease lines with a small hand stitch.

Try to keep your stitches even and be sure that both circles are aligned. Sew across the entire fold and stop. Keep your working thread- do not cut.

Fold the pieces that have just been sewn in half, like two tortillas.
Grab two more felt circles and layer them with the just sewn pieces in between.

Doesn’t it look like a tortilla sandwich? Make sure that the center fold creases remain aligned with the center seam of the inner layer


With the working thread, sew these two new pieces together along their center fold lines in the same manner as before.
Sew to the end of the folded crease. Remember-don’t cut your thread.

Now we are going to repeat that same step again, by folding all of the circles closed and placing the two more felt circles on the top and bottom. Be sure to align the creases.
Sew these two pieces together through the center as before. At this point the felt is getting a bit bulky to sew through. Just be patient- you are almost finished.


Repeat this process for the final two creased circles, layering them opposite to one another through the center and stitch.

Sewing is complete!
FINISHING

Give each section a little tug to straighten, then divide the circle in half to place the ears.

For the ears, I dabbed a bit of glue on each side and placed the ear. You may need to pinch it for a minute or two to set.
If you plan to have your bunny sit, you may need to flatten the bottom just a bit. To do this, I pinched the circle in half and gave it a bit of a trim. Just watch your stitching. If you happen to cut through- add a bit of glue and pretend it never happened.
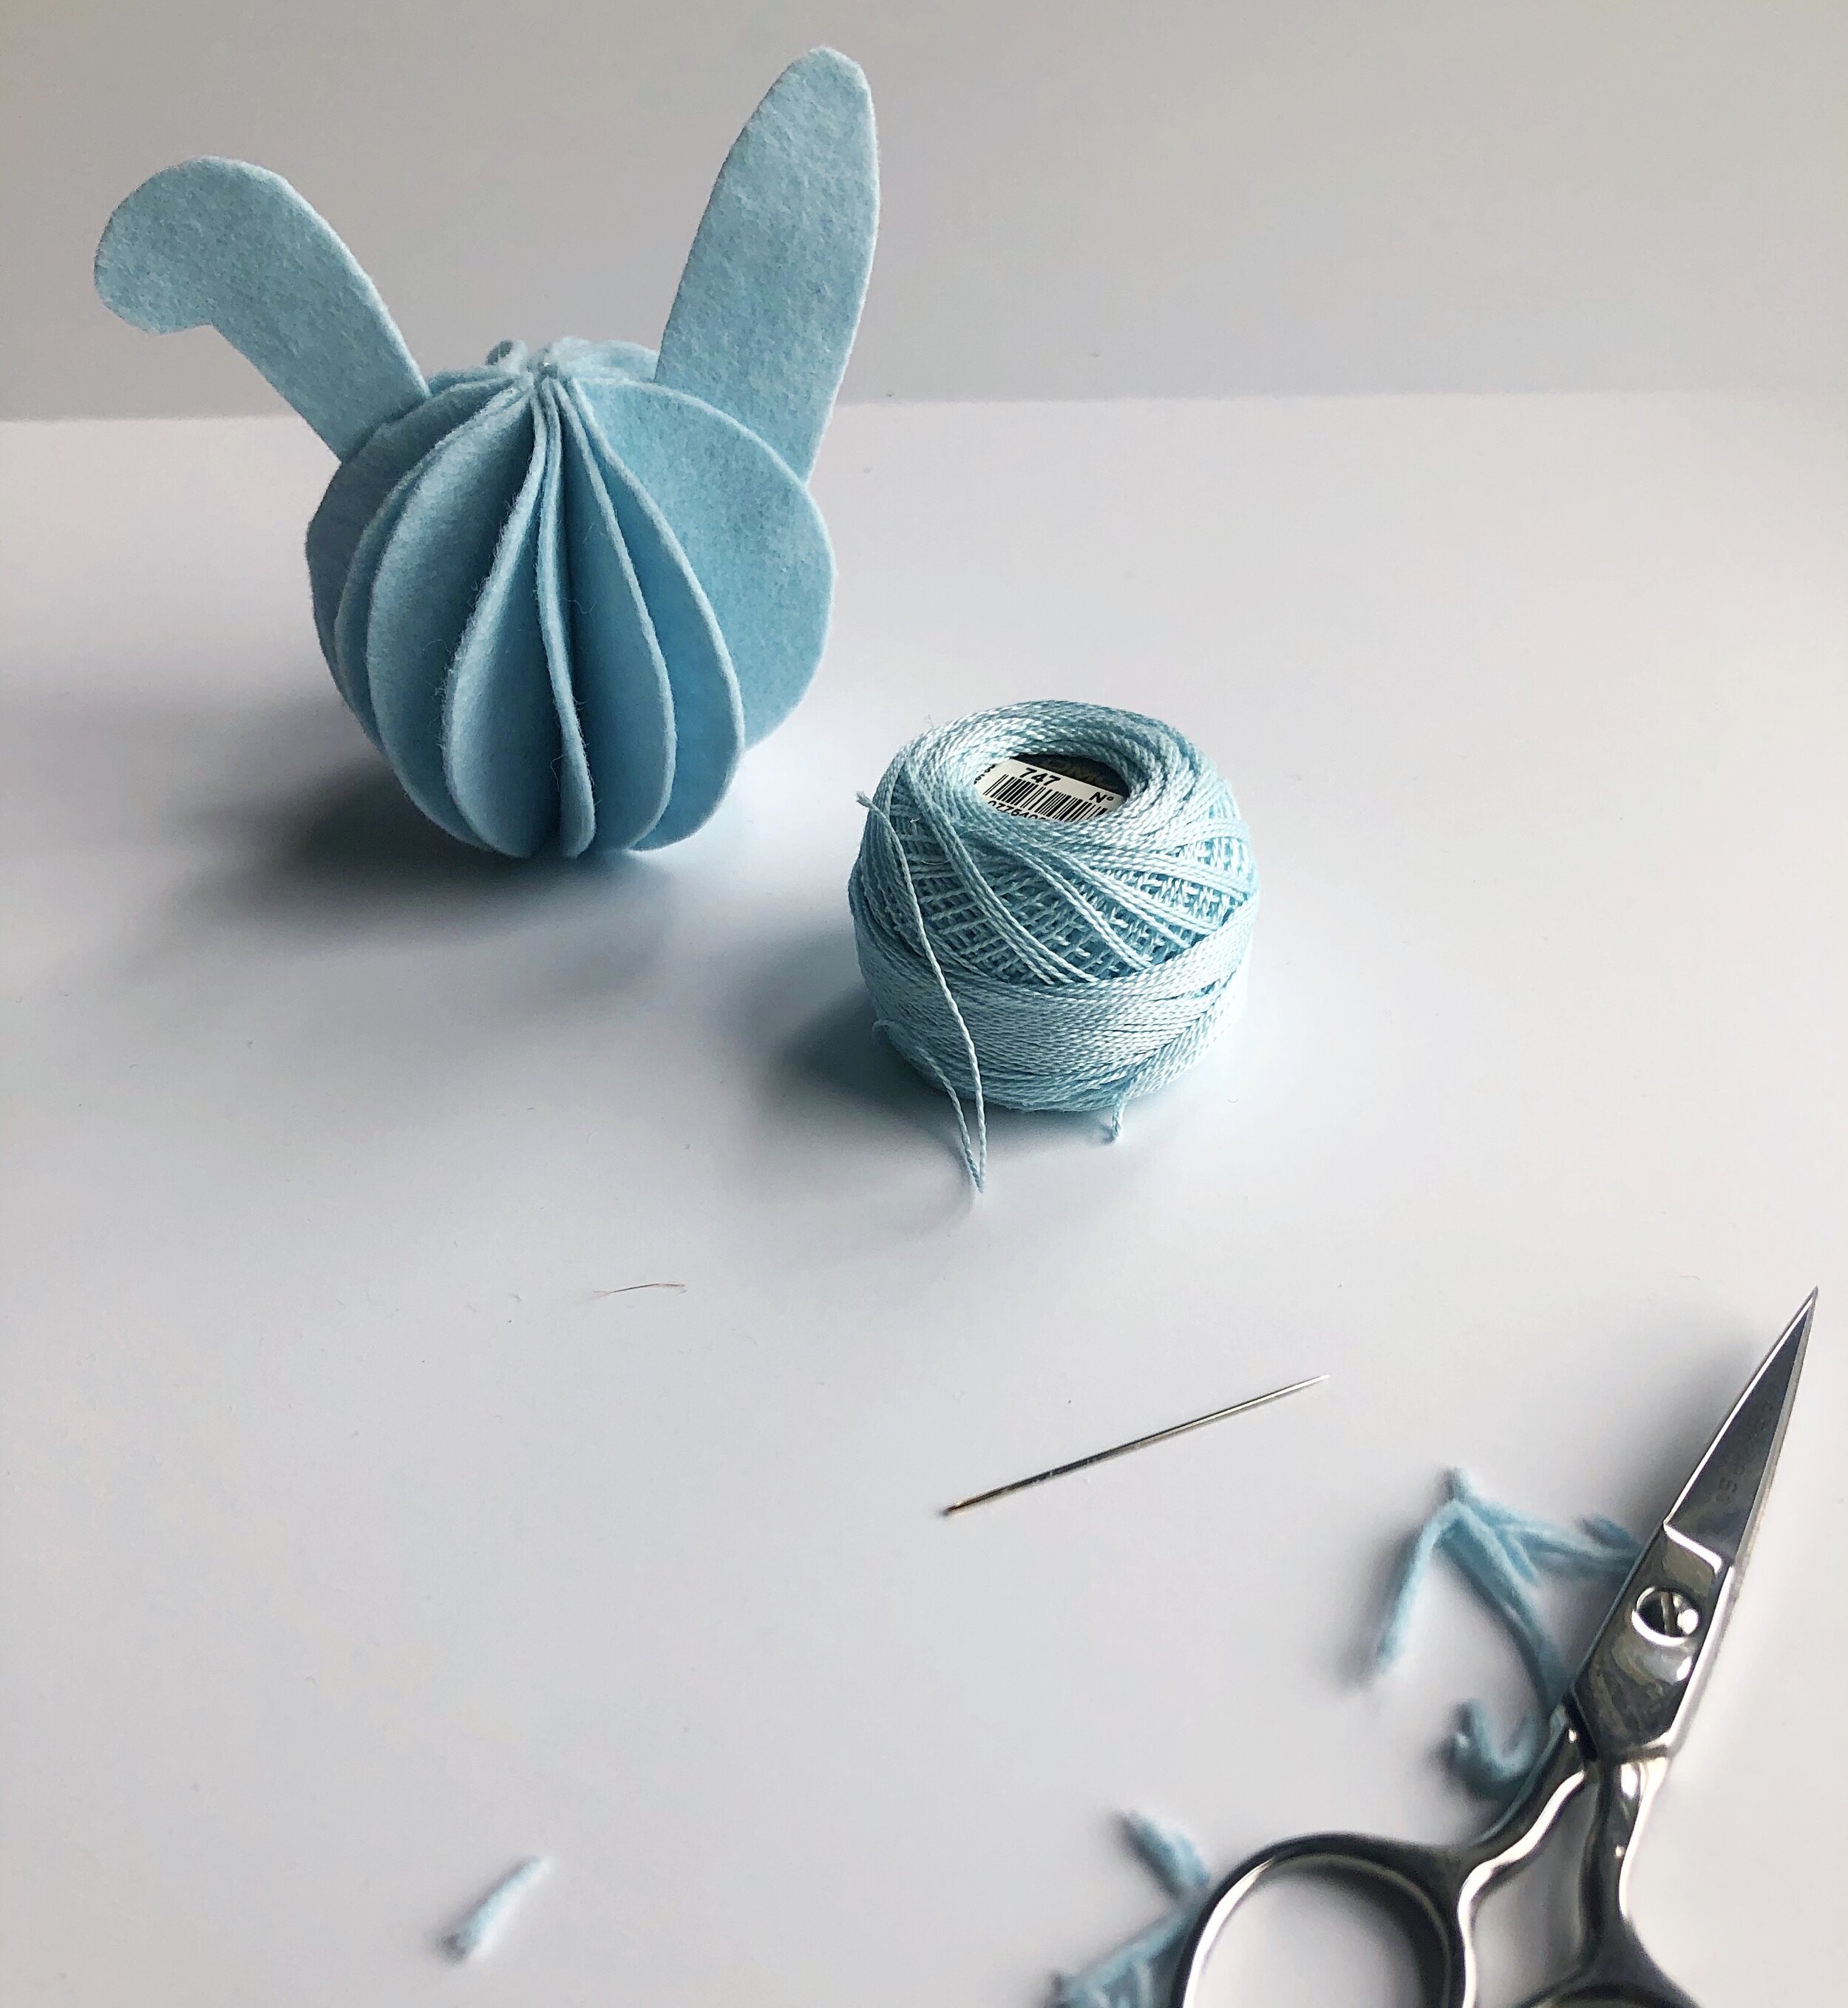
All done! Doesn’t it remind you a bit of a weeble?

Wouldn’t these look adorable strung as an Easter bunny garland?


I made one into a chick by cutting two hearts for wings and one tiny heart for a beak.
This Easter may be the perfect opportunity to focus on renewal. Let it serve as a reminder that life goes on and that love is greater than fear. With that sentimant in mind, I wish you all a lovely Easter holiday.
XO, Hilarie

Felt Lovebirds Pattern and Tutorial
Make these pretty felt love birds for Valentine's Day. With these sweet love birds you can show the one you love how much you care.

Make these pretty felt love birds for Valentine's Day. With these sweet love birds you can show the one you love how much you care.
MATERIALS FOR LOVEBIRD
White Felt
Pink Felt in two shades for feathers and wings
Small piece of Black Felt for beak
Handsewing needle
Thread
Black embroidery floss
Metallic thread (optional)
Poly-fil
A free Lovebird Template, printed and cut out (This pattern has a 1"/ 4CM test square. Measure the test square, and if it does not measure correctly, check your print scaling options.)

SIZE
8 1/2"x 4 1/2"
MAKE THE LOVEBIRD
CUT
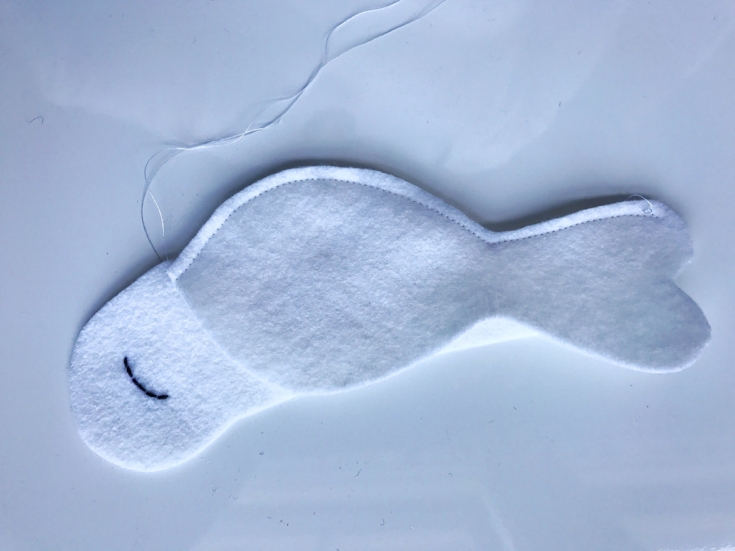
Using the Lovebird Template, cut 2 bird body pieces, 1 gusset, and 1 wing out of white felt. Cut the beak out of black felt and tail feathers from each of the pink. Cut one more set of wings from pink.
MARK
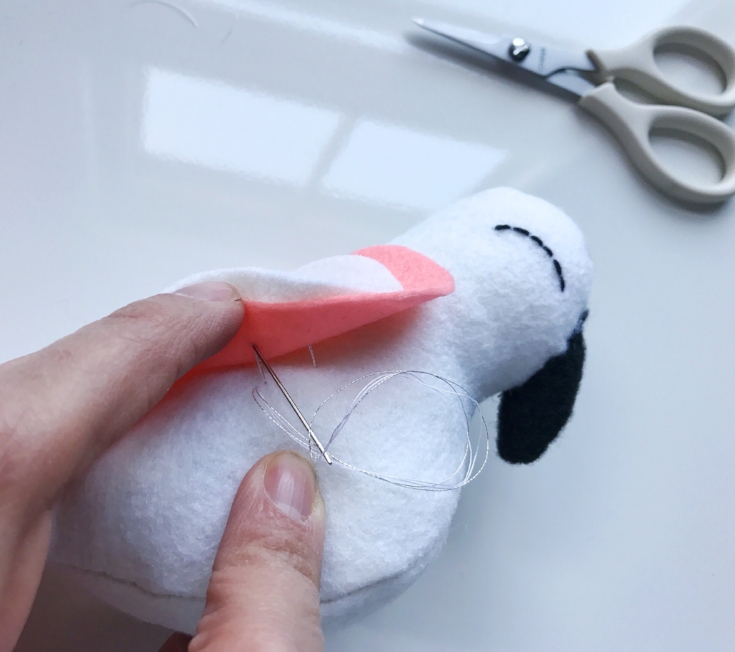
Using a water-soluble marking pen, Begin marking the fabric with the pattern piece still pinned to it. When you mark a pattern, you always want to begin at the pattern pieces outside edges and work toward the center. Easy, right? Let’s do it! Using a straight pin, pierce the pattern piece and fabric right through the center of the first dot. Carefully lift the pattern paper (while still holding the pinned fabric in place) and mark the fabric with the pen. Repeat on the underside of the next piece of felt so that the sides are mirror images of each other.

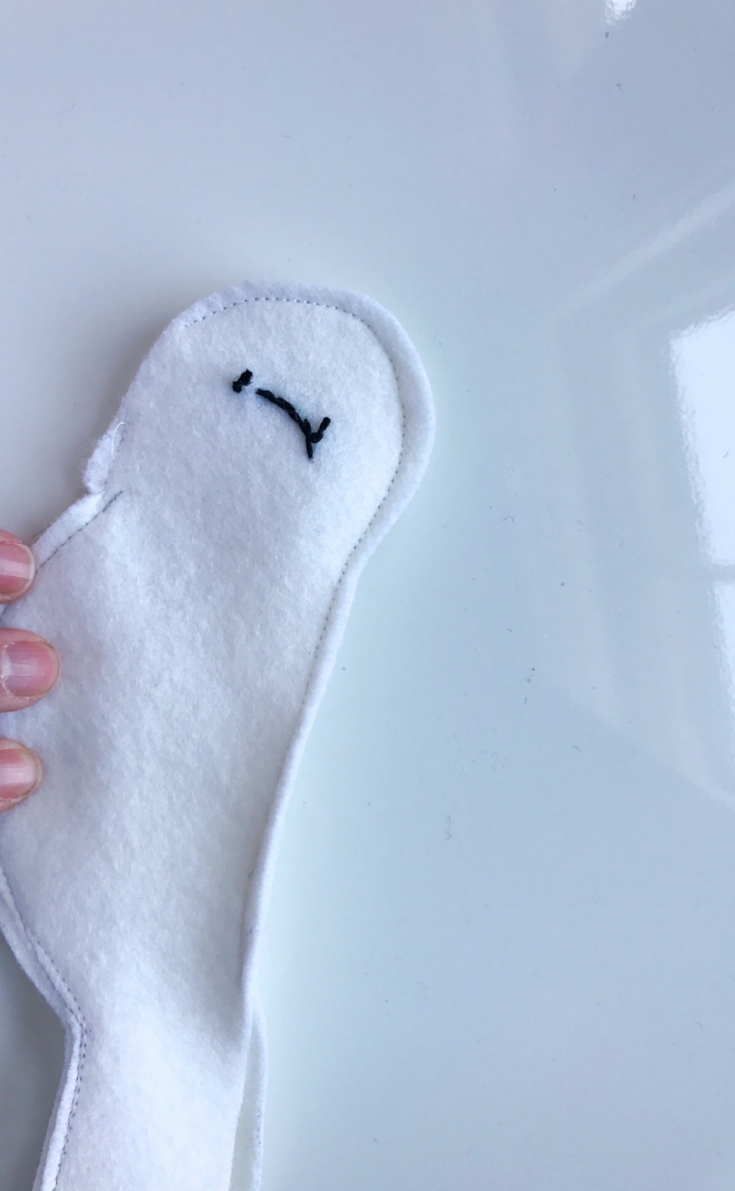
STITCH THE EYES
To sew the eyes, we are going to use a basic running stitch. It's beautiful in its simplicity, utility and function. Vary it with size and color and it adds such vitality and expression your projects.
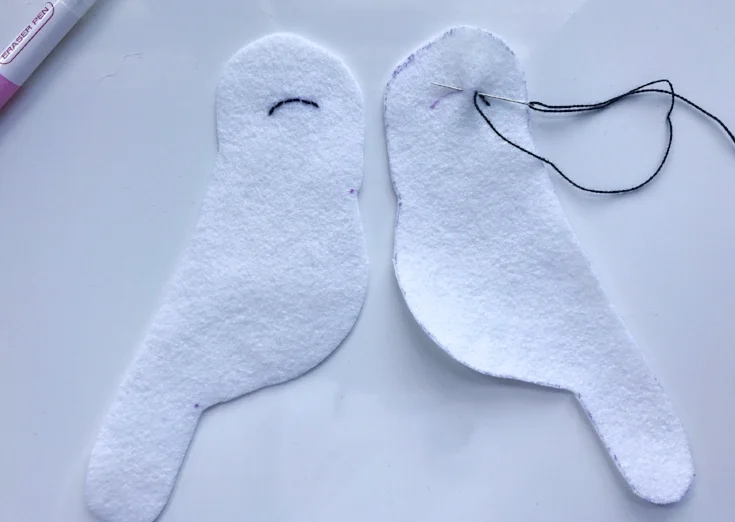
The pieces should be marked as to be mirror images.
BEAK
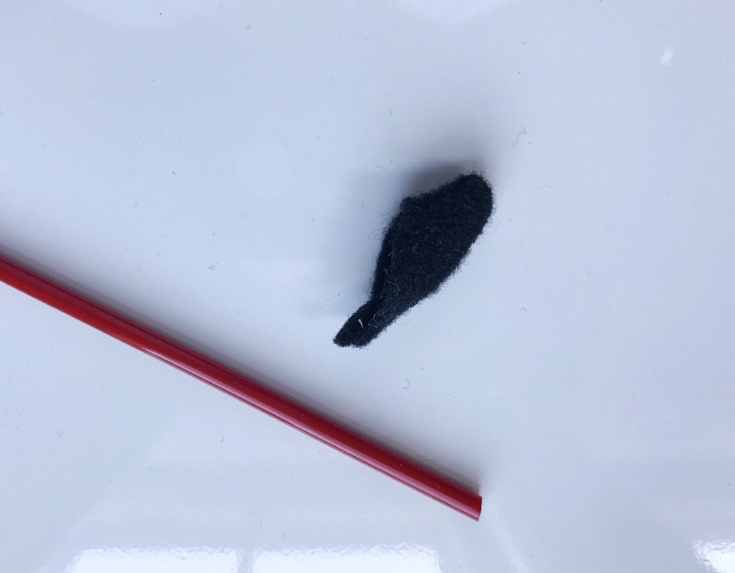
Fold the beak along the center line and stitch along the long side using a 1/8" seam.

Turn right side out. It helps to use a tool to push the tiny end through. A chopstick or eraser end of a pencil work well for this.
MAKE THE LOVEBIRD
Take a bird body piece and the gusset, place them with the Right Sides Facing Together and match the markings. Pin and stitch around the outside edges of one side from tip to tail, using a 1/4" seam allowance.
Pin the other bird body to the opposite side of the gusset and stitch.
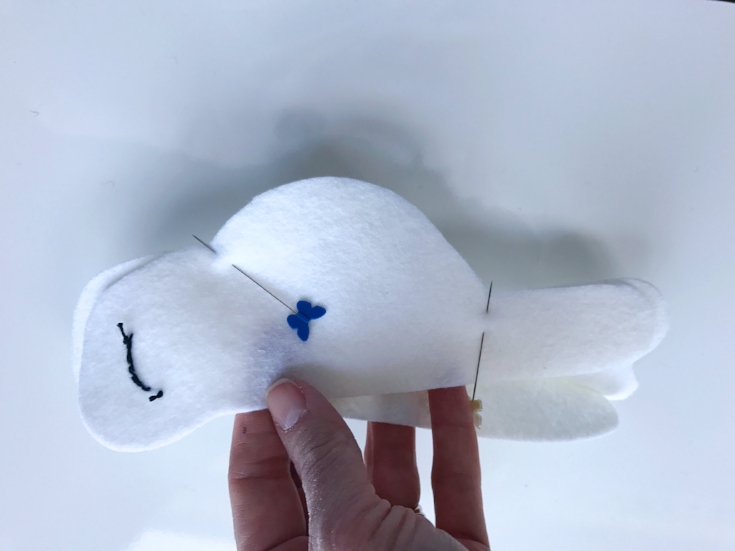
Pin and sew the bird body together at the center back seam beginning at the dot level to the eye around the head and to the top of the tail. Leave the area where the beak will be attached open.
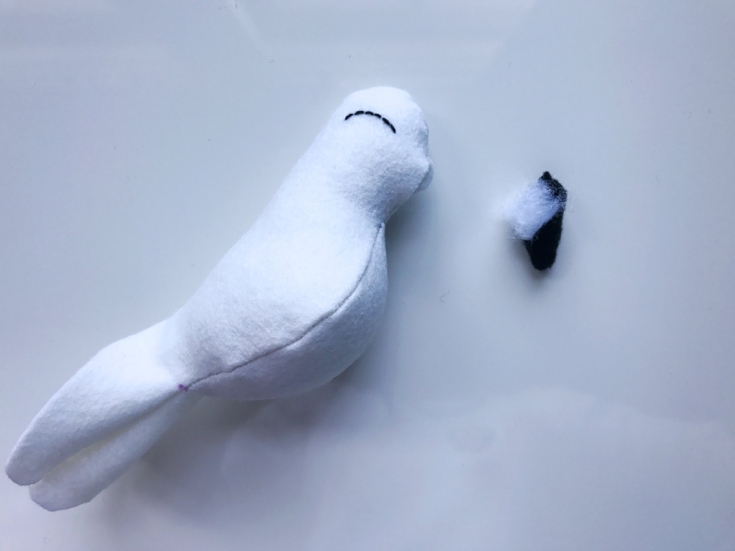
TURN AND STUFF
Turn the bird body right side out and stuff nice and firm with polyfil.
ATTACH THE BEAK
Add a tiny bit of stuffing to the beak. Pin the beak to the bird and whipstitch around the beak to attach it to the bird body.

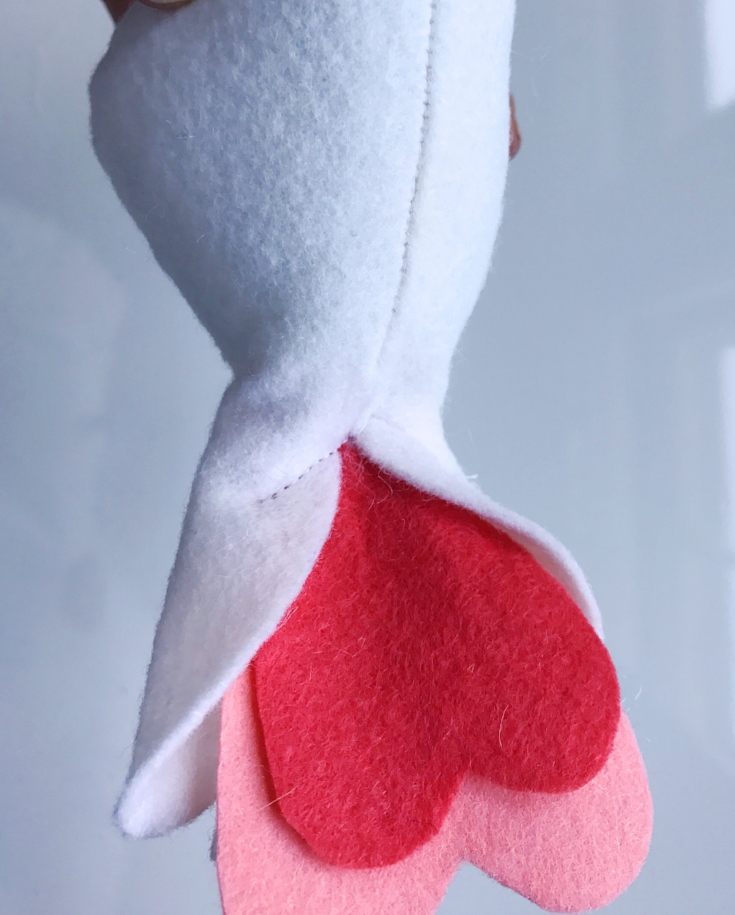
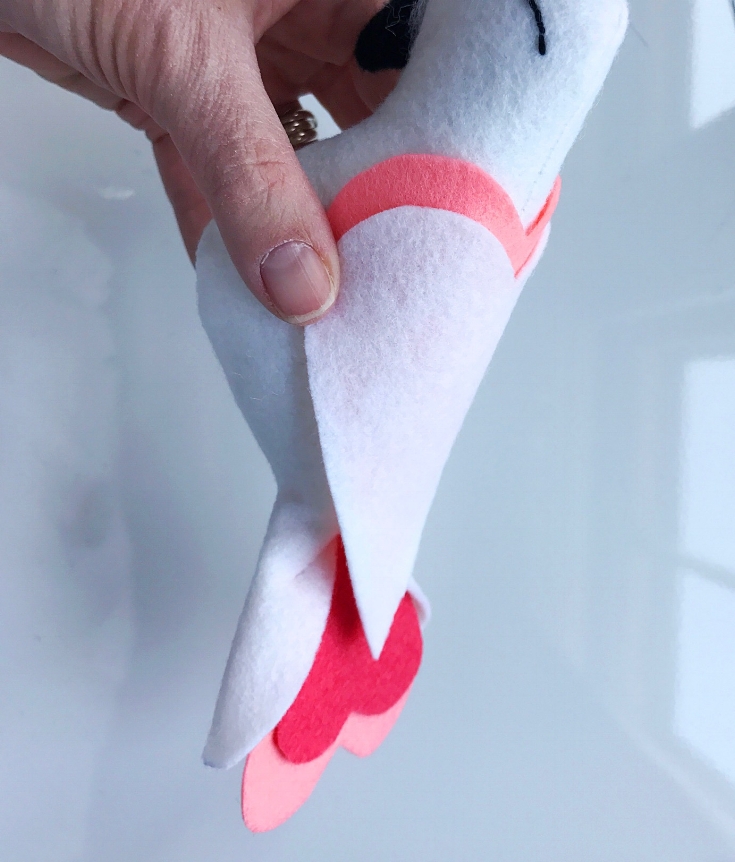
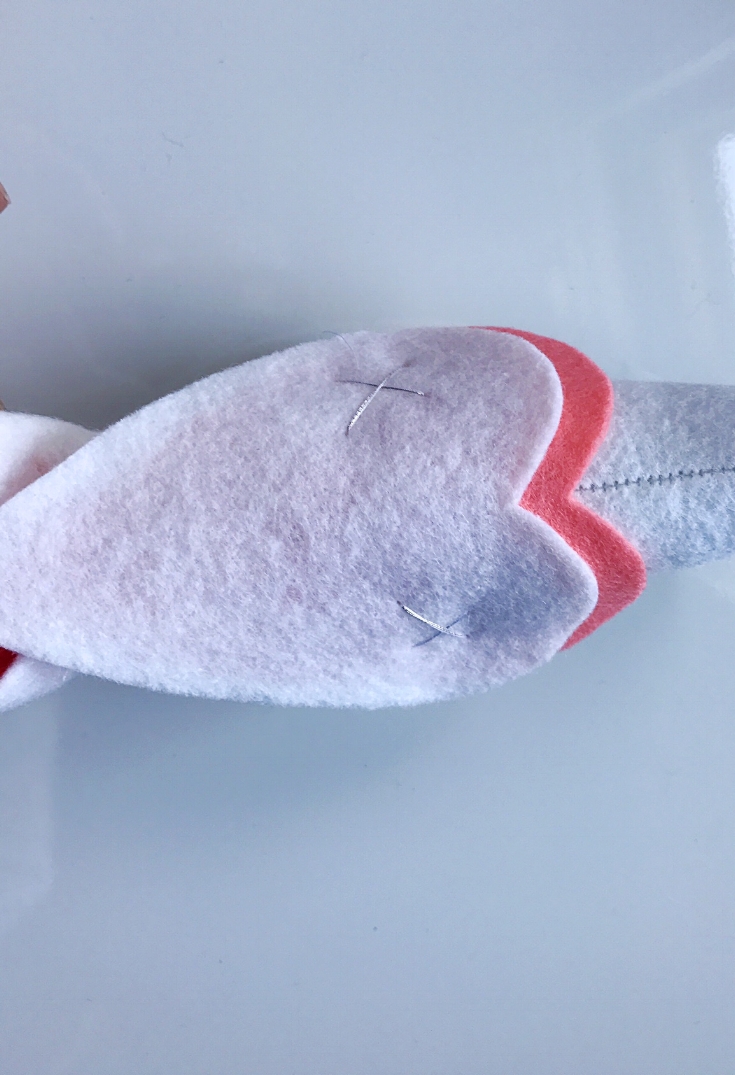
TAILFEATHERS
Insert the tail feathers into the body of the bird. I shifted the layers of feathers a bit to create some visual interest. Pin in place and stitch in an inverted V shape to secure.
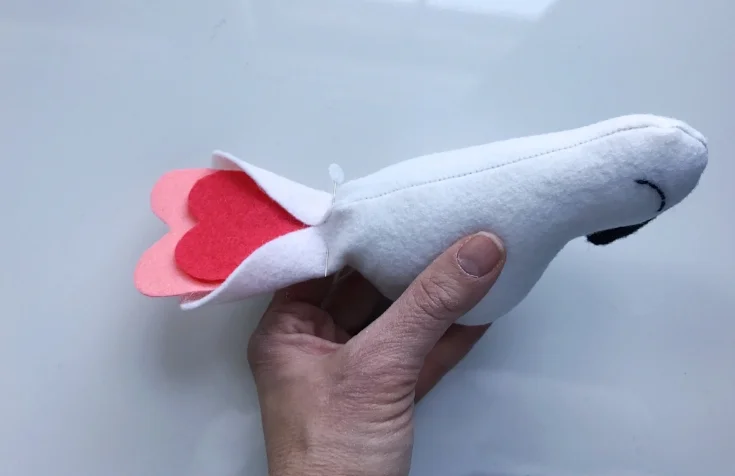
WINGS
Arrange the wings and pin to the bird. Again, I shifted the placement of the wings to overlap just a bit.
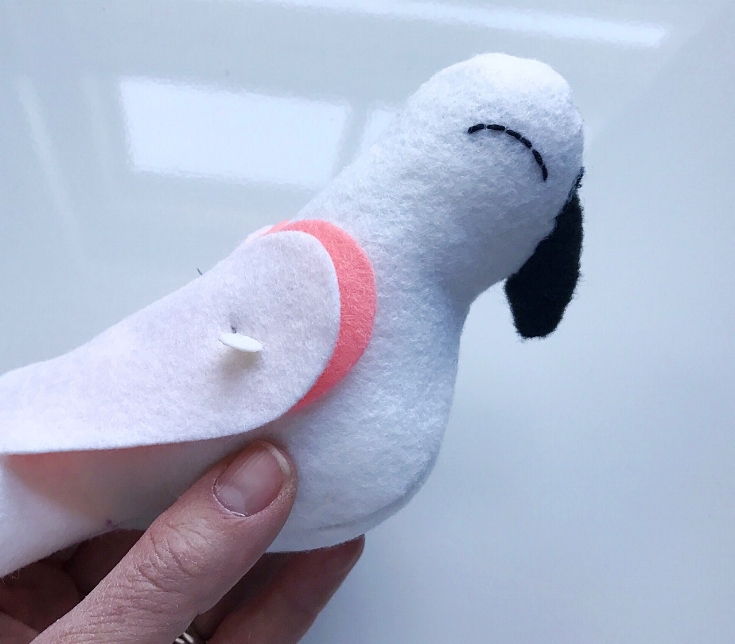
Stitch in place. I used some silver metallic thread to attach the wings and give them a bit of glam. Feel free to add your own touch!
Trim threads and use a quick bit of steam from the iron to get rid of your markings.
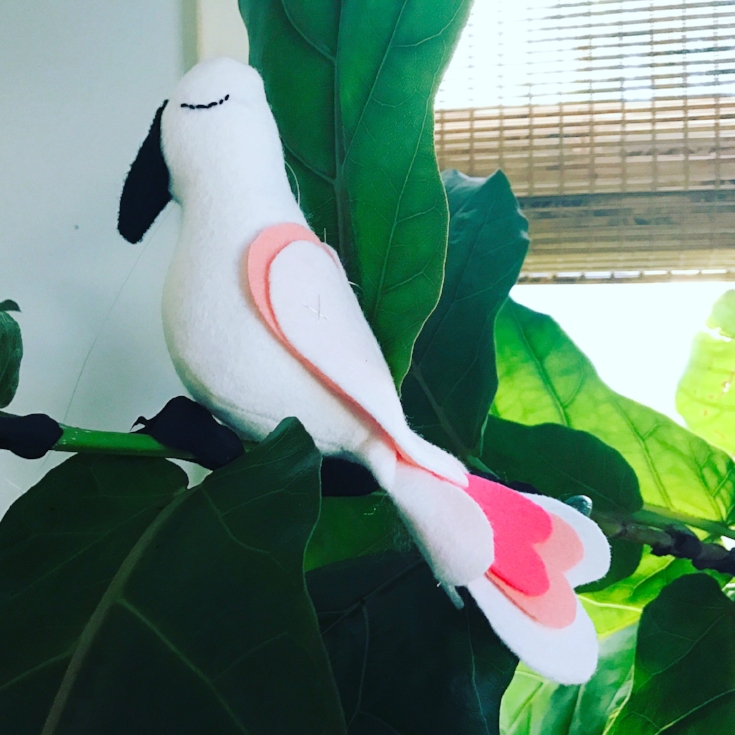

Would you like to learn how to make the perch? Come back tomorrow!
XO, Hilarie

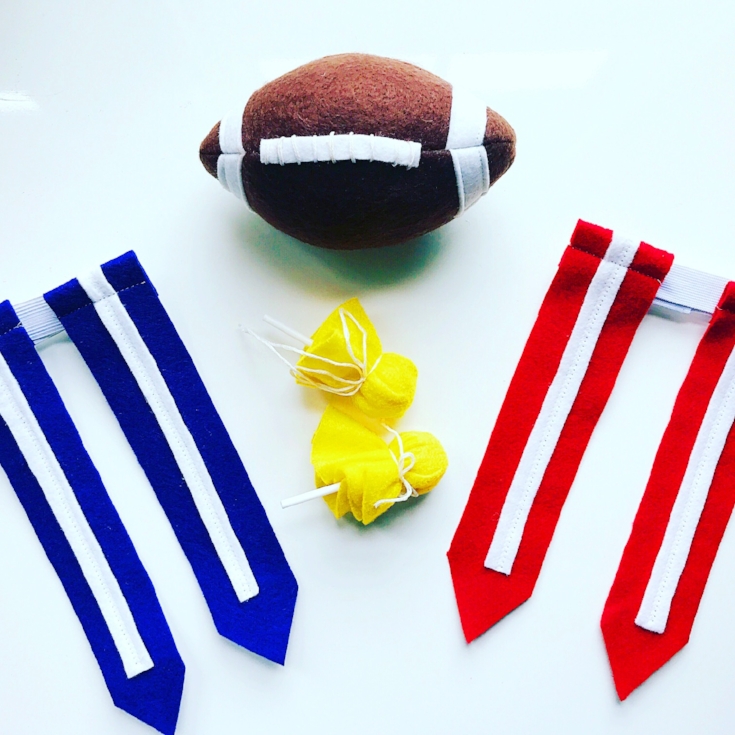
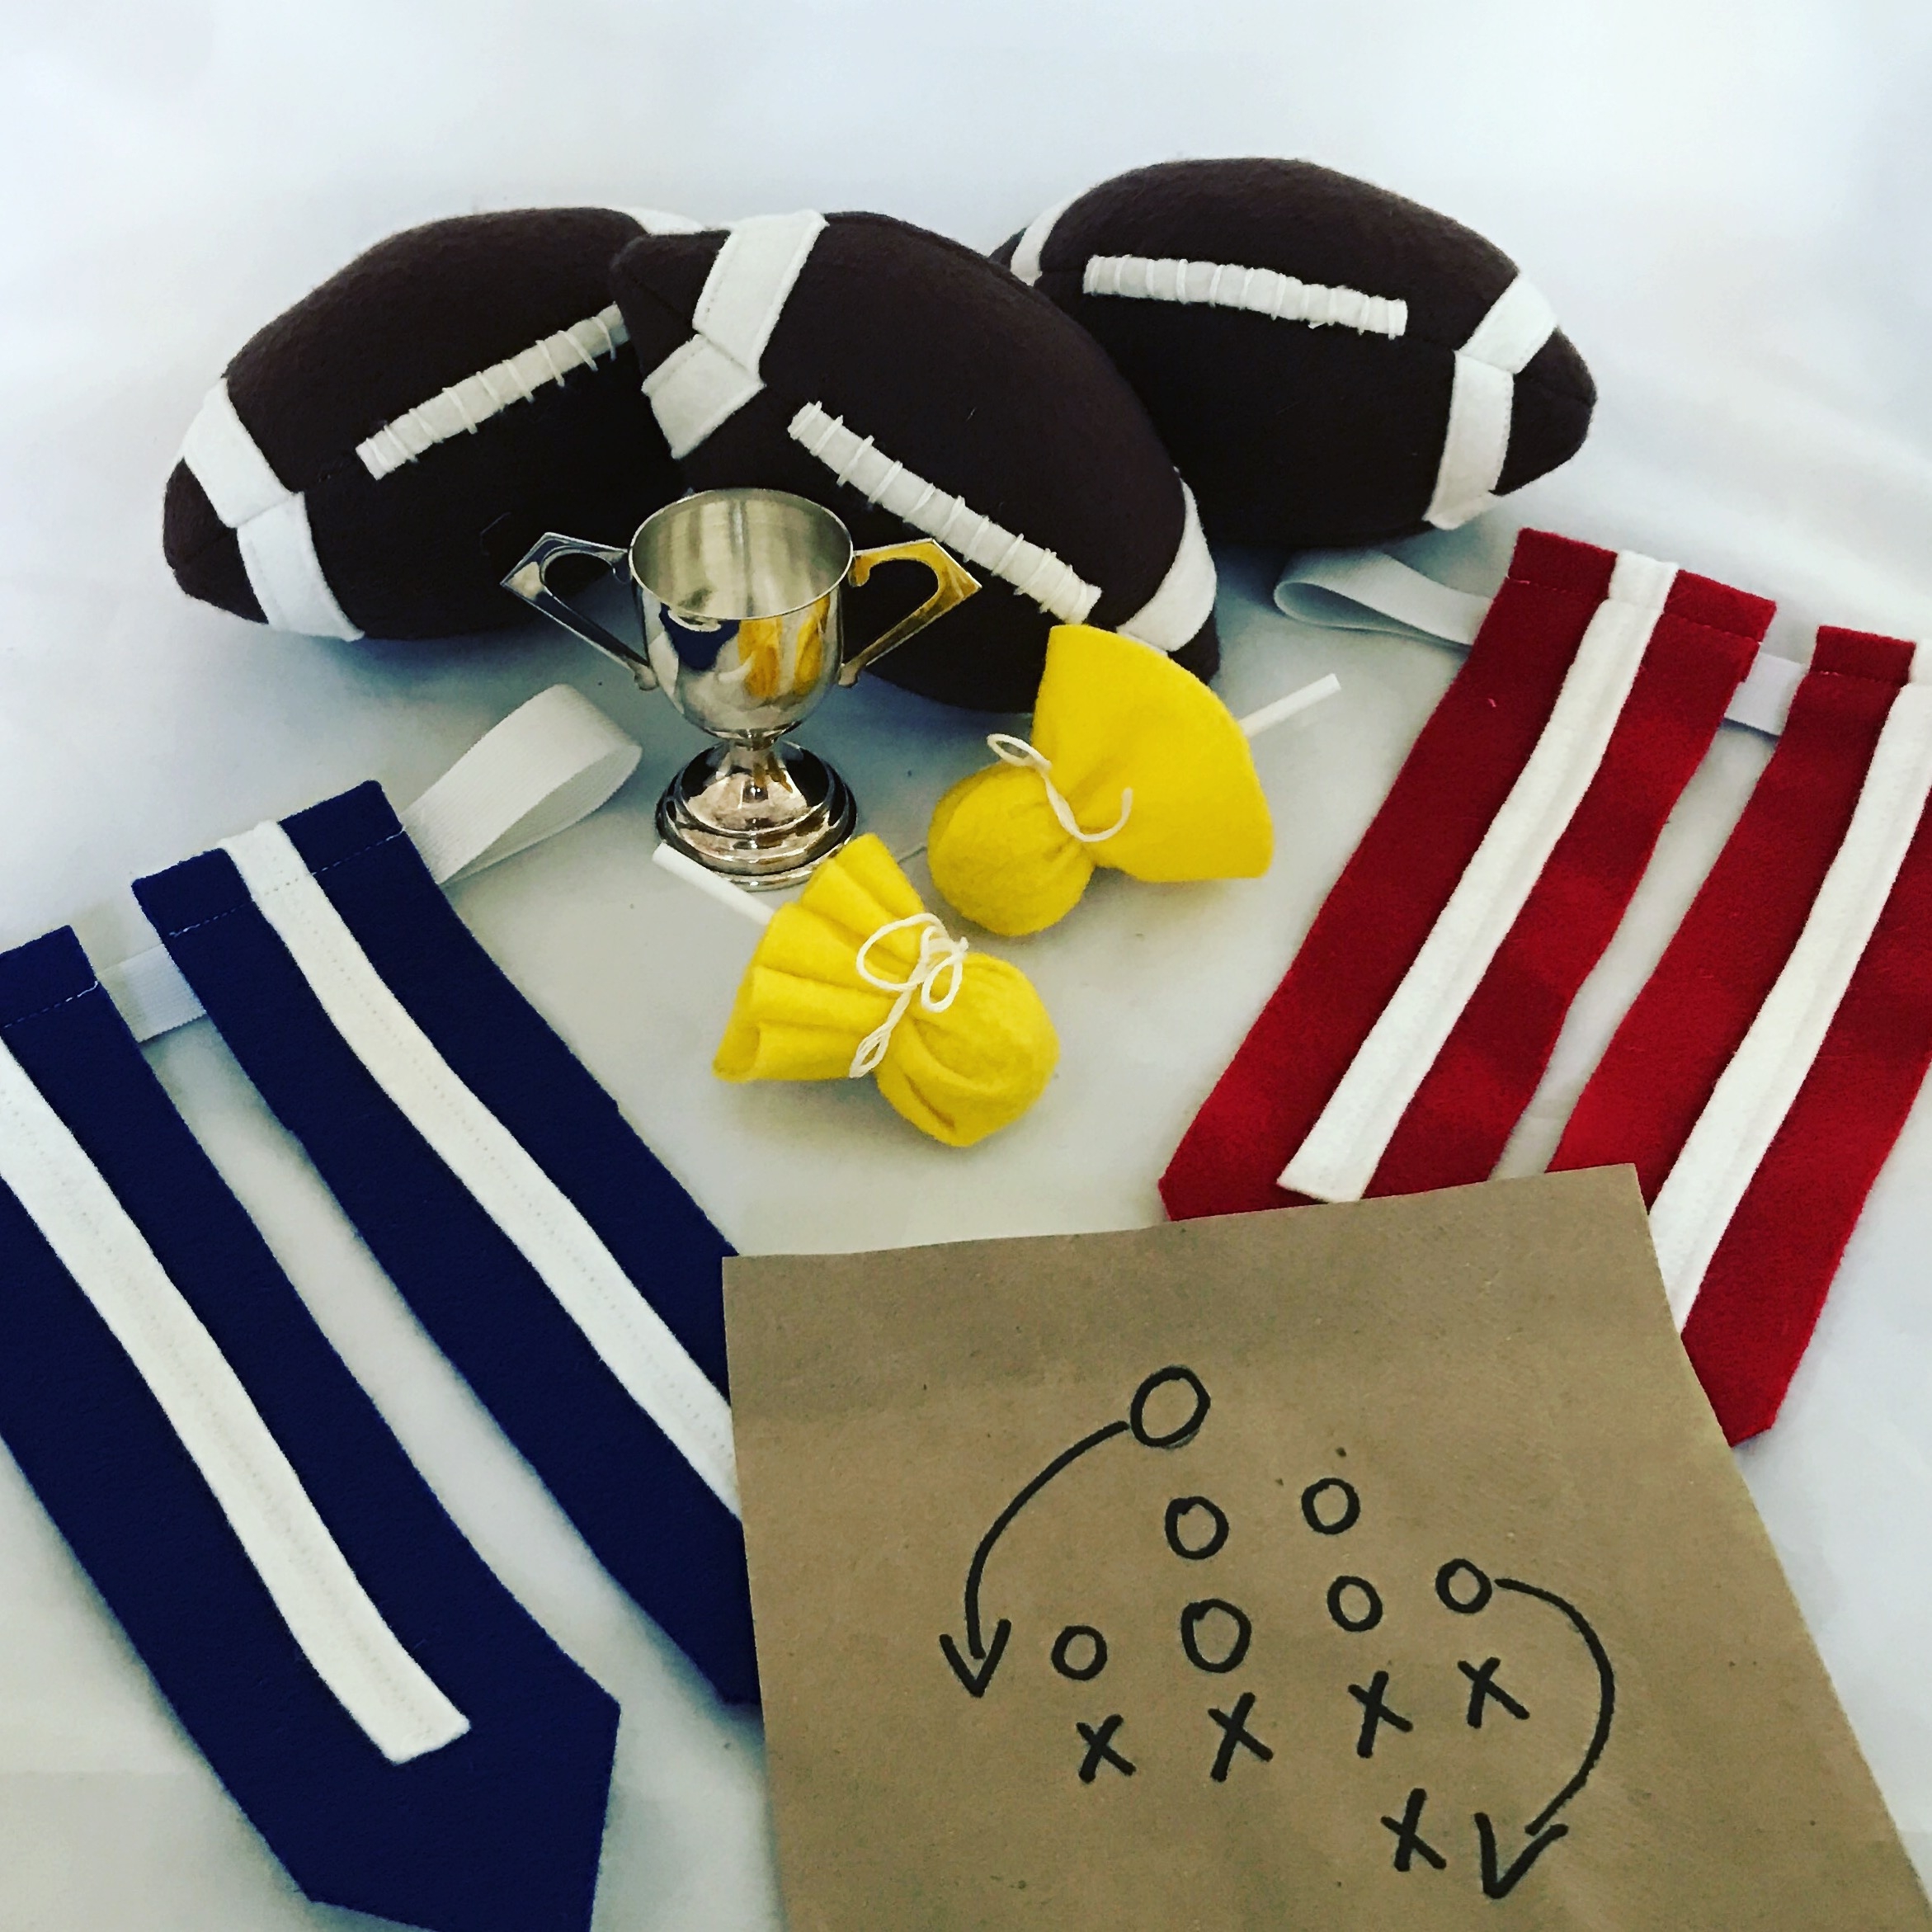
Score big with this kid-friendly flag football set!
You can help set the game mood for your kids by making this cute felt football, penalty flag and flag set. It will turn game day into family fun and your kids will feel like part of the team! Added bonus: this will keep you entertained even the game doesn't.
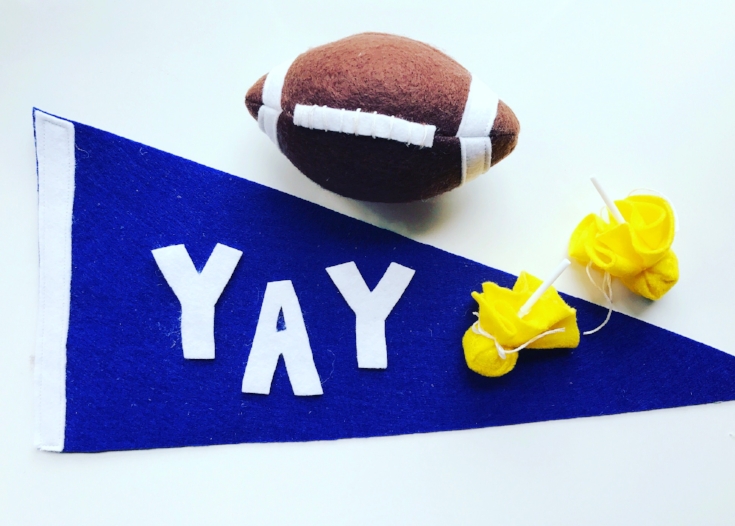
You can help set the game mood for your kids by making this cute flag football set. It will turn game day into family fun and your kids will feel like part of the team! Added bonus: this will keep you entertained even the game doesn't.
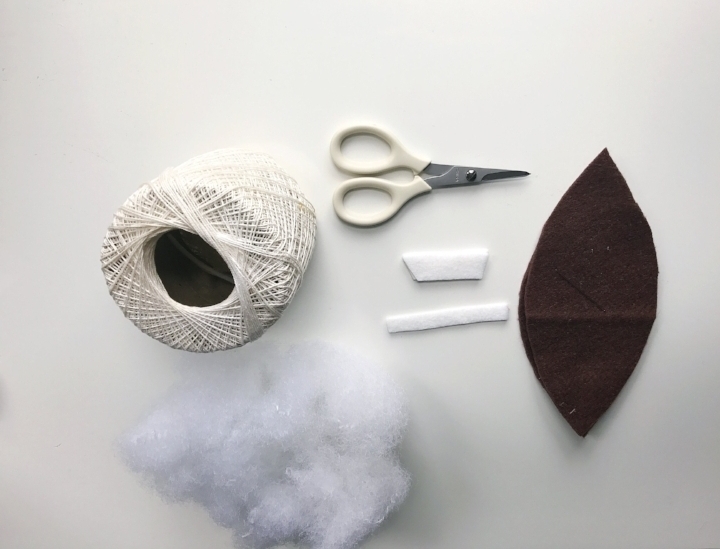
MATERIALS FOR FOOTBALL
2 sheets of Brown Felt
White Felt for trim on football
Handsewing needle
Thread
White Crochet or Embroidery Floss
Poly-fil
Glue Stick (Optional)
A free Felt Football and Flag Set Template, printed and cut out (This pattern has a 1"/ 4CM test square. Measure the test square, and if it does not measure correctly, check your print scaling options.)
SIZE
7 x 3"
MAKE THE FOOTBALL
CUT
Using the Mini Football Template, cut 4 ball pieces, 8 end stripes, and one center strip.
EDIT: It has been brought to my attention that only high school and college footballs have the white stripes. The NFL football does not. So for all of you purists out there, please omit the stripes!
EMBELLISH
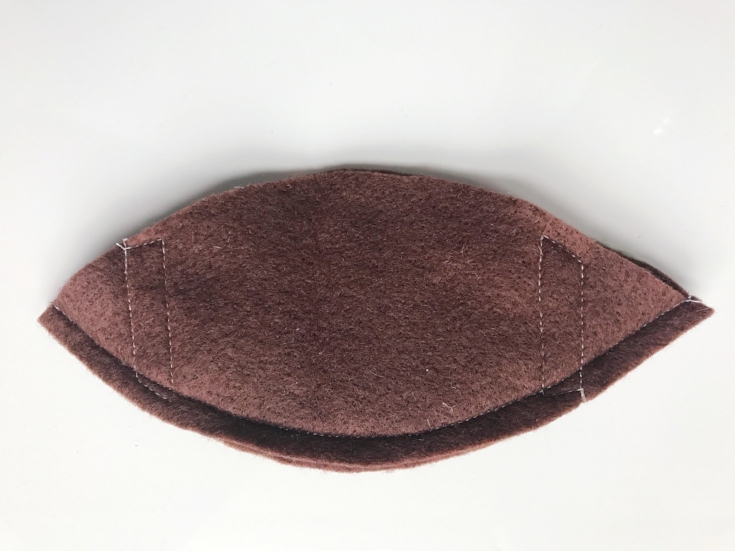
Following the pictures as a guide, pin and stitch a white stripe 1.25" from each tip of the football using a straight stitch and some white thread. Alternately, you could glue it.

MAKE THE FOOTBALL
Take two ball pieces and place them with the Right Sides Facing Together and align the stripes. Pin and stitch around the outside edges of one side from tip to tip, using a 1/4" seam allowance. Repeat with the remaining two pieces.
Take the two halves, and place them with the Right Sides Facing Together and again aligning the stripes. Pin and begin stitching just before the white stripe and continue stitching around the entire ball just past the bottom white stripe, leaving a 3 inch opening in-between the stripes.
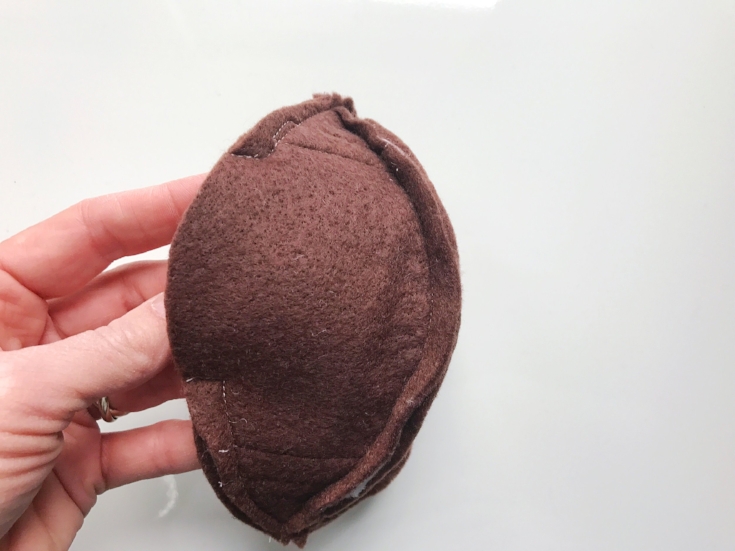
Turn the ball right side out and give it a tug to straighten the seams. Stuff the ball, beginning at each tip, until it is firm. (It helps to use just a little stuffing at a time, to keep it from looking lumpy). Handstitch the opening closed.
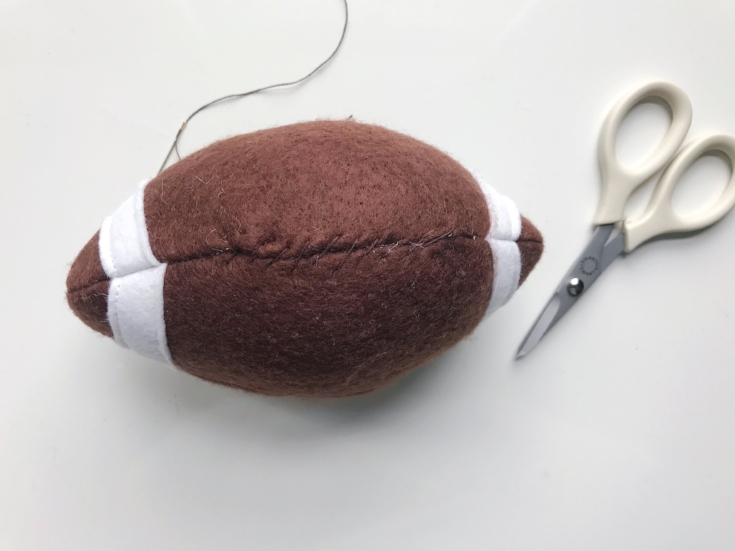
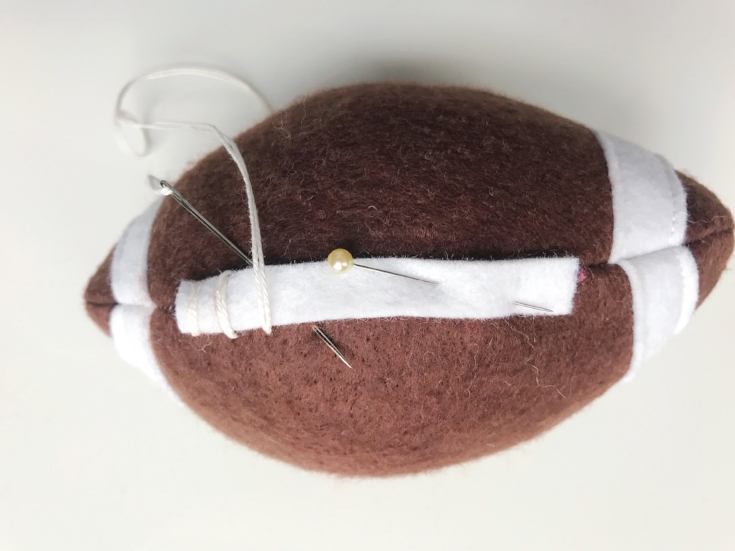
To finish, place the center strip along the hand-stitched closing. Sometimes when sewing with kids, I use a bit of glue to hold felt in place while stitching. Pins can be tricky for them to work with. Thread the needle with Crochet Thread or Embroidery Floss and knot both ends to form a double thread. We want these "laces" to look real!
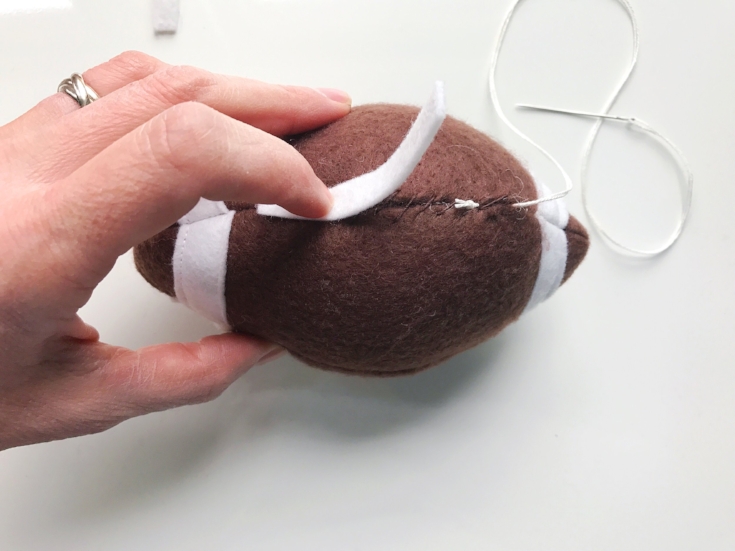
Begin stitching by piercing the football and tucking the knot under the center strip as shown in the picture above. Now stitch from side to side, down the length of the center strip. Knot the thread, bury it in the football and trim.
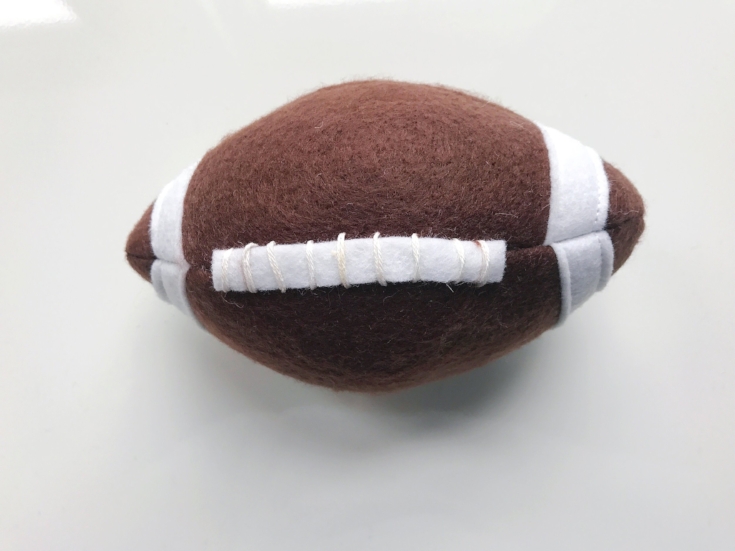
Warning: This ball will get tossed! You might want to do this project away from the TV, lamps, windows, or beer.
PENALTY FLAGS
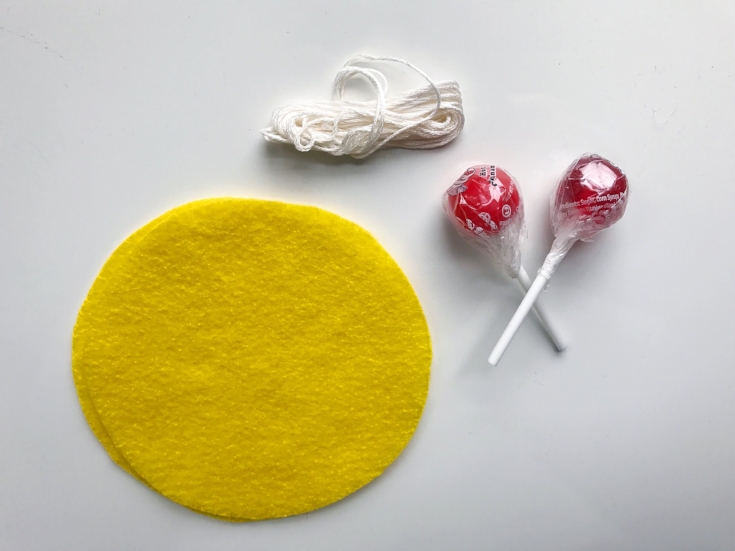
MATERIALS FOR PENALTY FLAGS
Yellow Felt or Fabric
String
Lollipops
MAKE THE PENALTY FLAGS
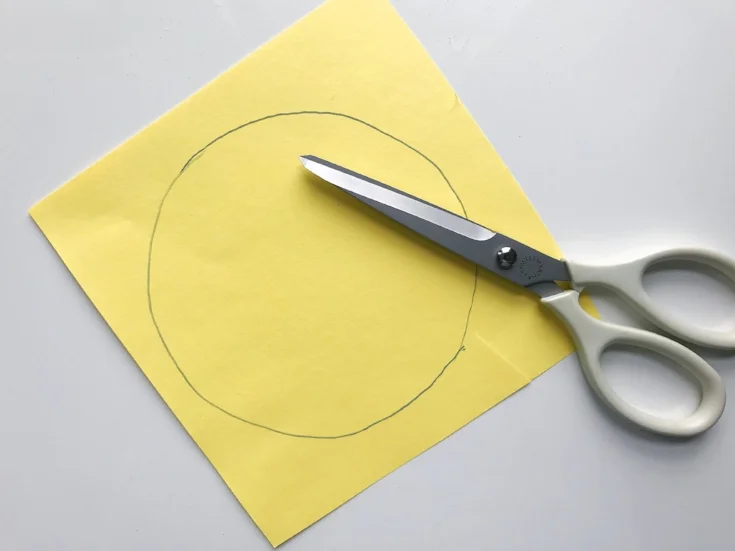
Cut a 5-6" circle out of felt. Cutting can be tricky for kids. It helps to have an adult draw the circle onto the felt and cut a square around it. Then try having the child do the "precision cutting".
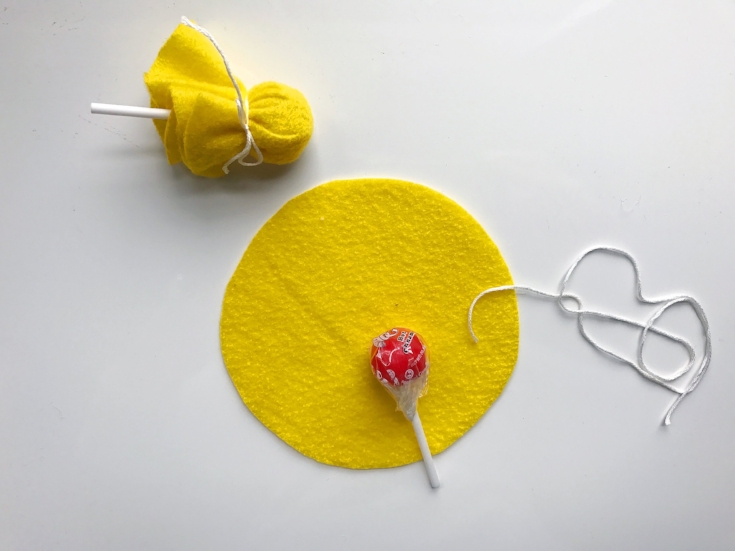
Place the lollipop in the center and wrap the felt around it and tie. SCORE!
FLAG AND BELT SET
FLAG AND BELT SET
This one can be made lots of different ways, depending on your (or your child's) skill level and what materials you may have available. I used elastic so that the belt wouldn't be tied around some smaller person's neck. You may have children that behave:) in that case you could use a sash or even a piece of fabric!
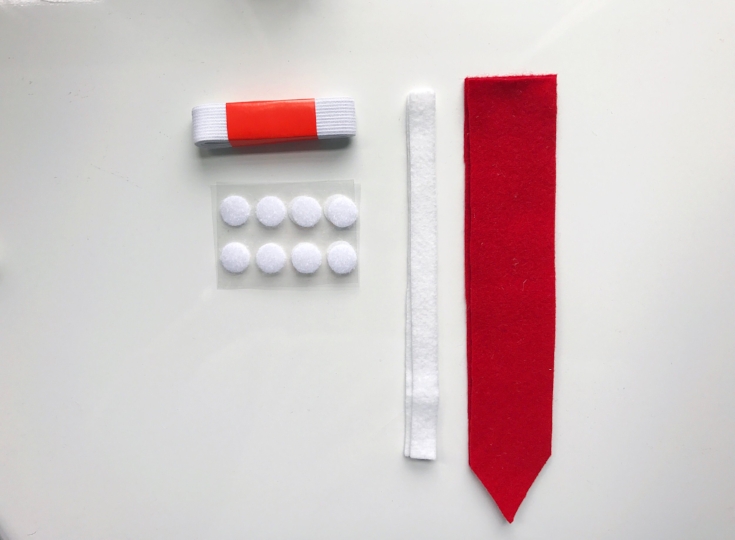
MATERIALS FOR FLAG SET
2 Sheets of Felt
Scrap Felt for embellishing
Needle
Thread
Velcro, either Sew on or Adhesive is fine
3/4" Elastic, 2 yards will make 2-3 belts, depending on the size of your child.
Glue Stick (optional)
A free Felt Football and Flag Set Template, printed and cut out, (This pattern has a 1"/ 4CM test square. Measure the test square, and if it does not measure correctly, check your print scaling options.)
CUT
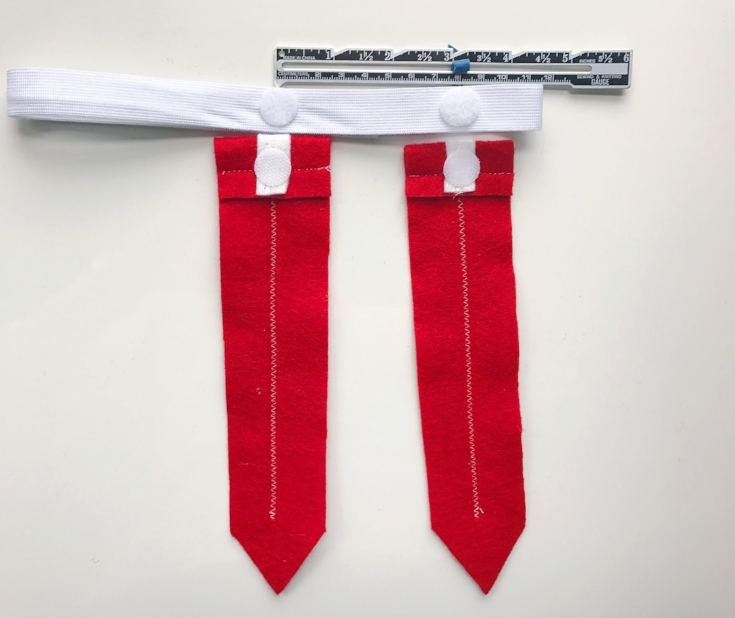
Using the Flag Template, cut 2 flag pieces, and two long stripes out of felt.
EMBELLISH

Following the pictures as a guide, pin and stitch a white stripe from the top of each flag down the center using a straight stitch and some white thread. Alternately, you could glue the strip of felt. Repeat for the remaining flag.
MAKING THE FLAG AND BELT

Fold the top edge of the flag one inch toward the back side. Pin and stitch across. Repeat for the second flag.
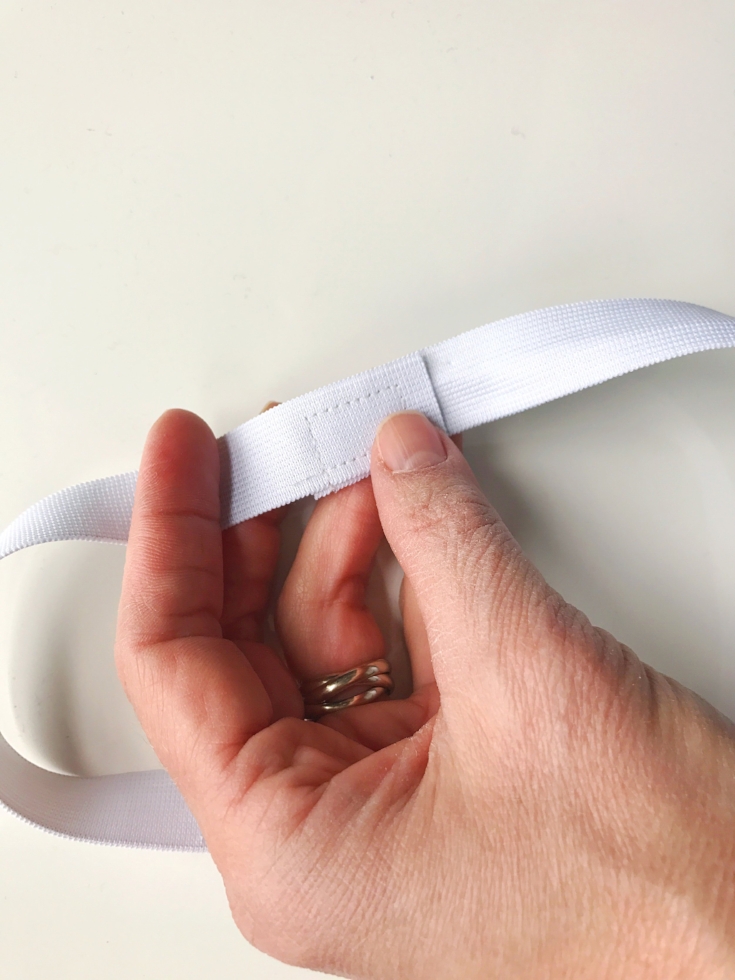
To make the elastic belt, measure your child's waist and add 2" inches. You will want this to fit comfortably over clothes and even a jacket. Following the picture as a guide, overlap the edges, pin and stitch. Now its time to place the velcro on the belt. Cut 2 pieces of velcro and using the loop side (the soft side) stitch or adhere each piece to the belt about 3" apart.
Stitch or adhere the hook side (the rough side) to the top back center of each flag. *If you are using the "glue type" velcro, allow the glue to set before using.
A very special thanks to Amy at A Lively Affair and WTKR Coast Live for featuring this on the "Big Game" segment. Thank you for letting me be part of the fun!
I hope that you have enjoyed this tutorial. Please be sure to tag me @hwakefielddayton on Instagram or use #stitchedmakers to show off your awesome skills.
XO,
Hilarie

On the Twelfth Day of Christmas.....Festive Stocking Holders
One of my favorite Christmas traditions is handmade gifts. For me, making something for a friend, sister or child, is what makes the holidays so special.
These mini stockings are sure to be a hit at your table. Their small size make them perfect to hold a treat, a gift card, or flatware. Additionally they can double as Christmas ornaments next year!
MATERIALS

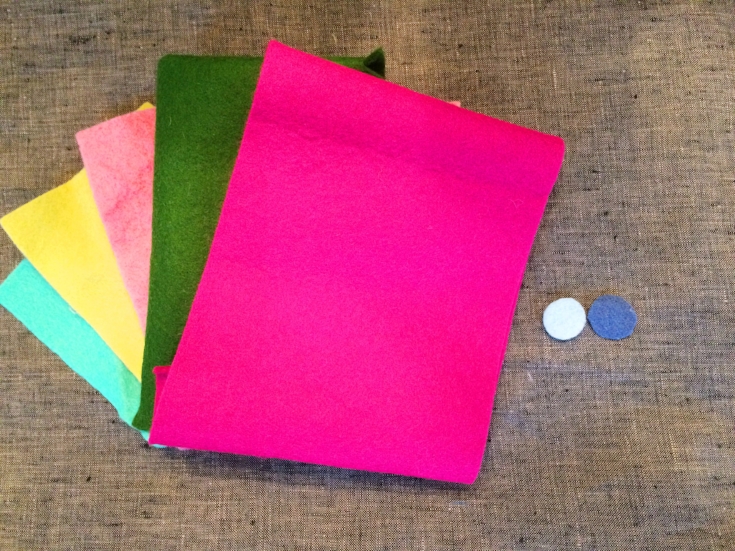
White felt
Scrap felt in a variety of fun colors
Handsewing needle
White thread
Metallic Embroidery Floss in White Gold
A free Mini Christmas Stocking Template, printed and cut out
SIZE
3 x 5 3/4
MAKE THE STOCKING
CUT
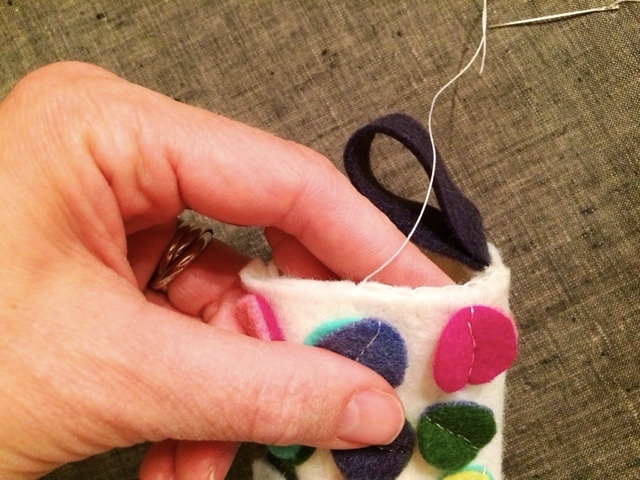
Using the Mini Stocking Template, cut 2 foot pieces, one cuff piece, one loop, and 18 felt circles.
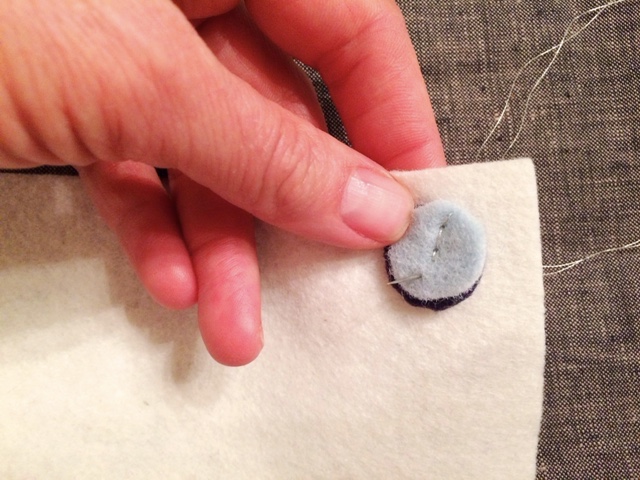
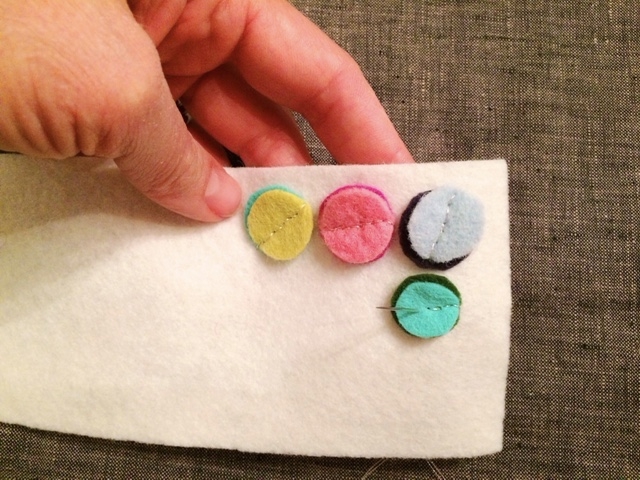
EMBELLISH
Following the pictures as a guide, stitch two circles at a time to the stocking cuff using a straight stitch and some metallic thread. For added interest, I offset the direction that I stitched the felt circles to the cuff.
MAKE THE STOCKING
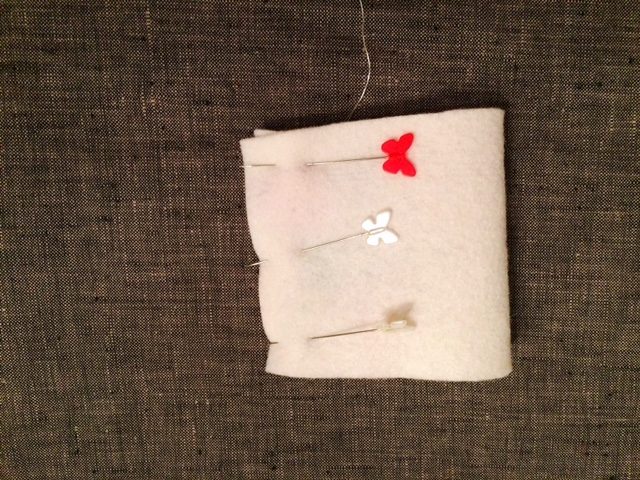
Fold the embellished stocking cuff inward with Right Sides Facing Together. Stitch the short side using a 1/4" seam allowance.
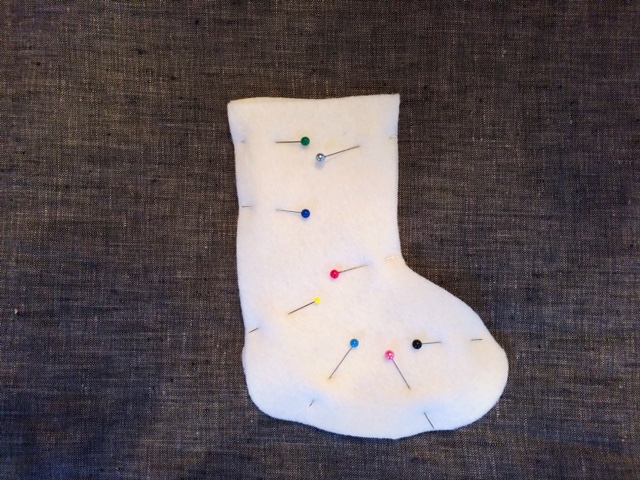
Place the stocking front and back on top of each other. Pin together along the outside edges (leave the top of the stocking open). Stitch around the foot of the stocking using a 1/4" seam allowance. Be sure to backstich at the beginning and end of each seam.
ASSEMBLE
With both the stocking and the cuff turned Right Side Out, slide the cuff over the stocking. Push it all the way onto the stocking body so that it fits snuggly.

Pin the top pieces together around the inside of the opening, making sure that the side seams meet. Tuck the raw ends of the loop into the back right side of the cuff. Pin.
HEMMING THE TOP
Using the white thread, stitch the top together using a straight stitch or a blanket stitch. Make sure to reinforce the loop by sewing over it twice.
You are all done and ready for treats!

On the ninth day of Christmas... A Sew a Softie Round up
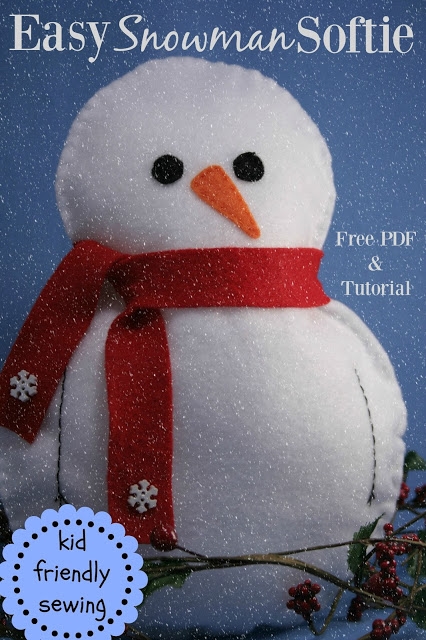
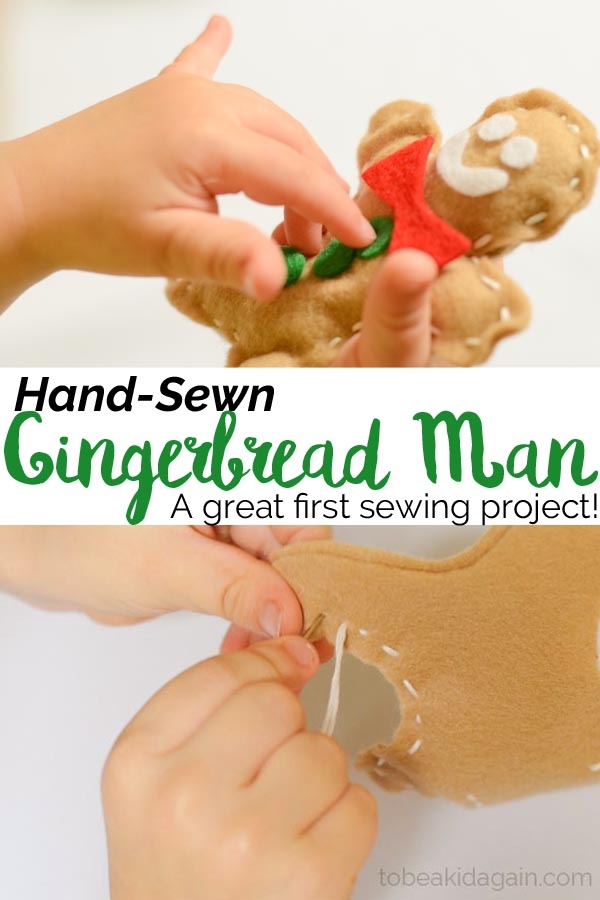
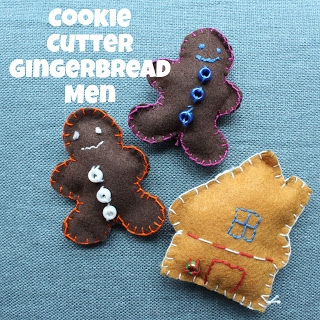
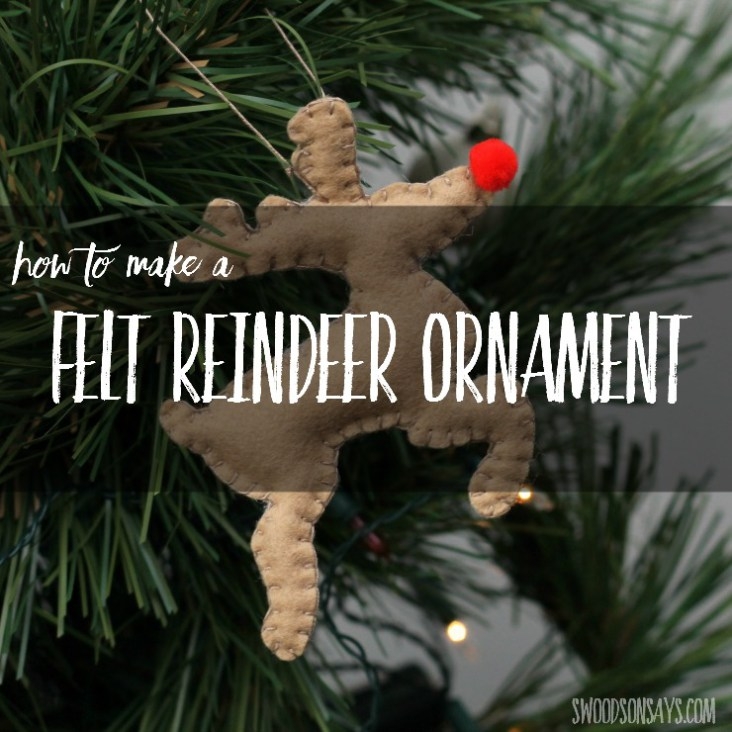
The last two weeks, we've celebrated everything hand-sewing and softie-related and it’s clear you love sewing with kids as much as we do. In this post you will find all of the inspiration you will need to sew an ornament or toy for Christmas.
But perhaps the best part of Sew a Softie for Christmas is the blog tour. These lovely ladies showed us their take on simple sewing projects with kids. So many of our blogger friends have posted darling sewing projects over the past few days, it's hard to know where to start!
Sew a softie for Christmas Round-up

This is the Christmas Treat Cone that I made.


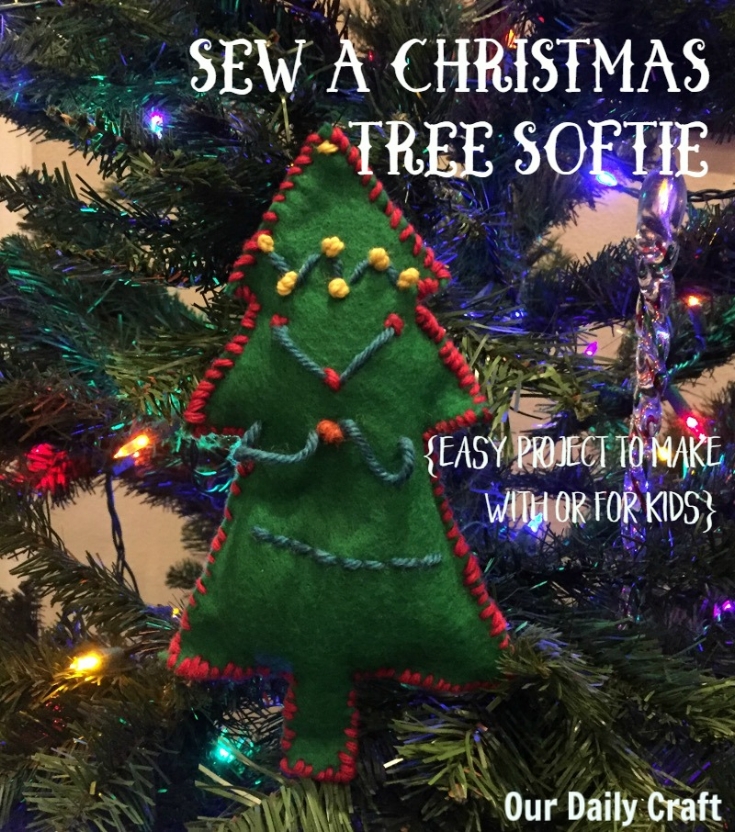
Christmas tree softie http://www.ourdailycraft.com/2016/12/02/sew-christmas-tree-softie/


Thank you so much to everyone who is included here. Such a lot of wonderful sewing you've done with this idea! What are you going to make first?
XO, Hilarie

Obi sash Pattern and Tutorial
I was asked to make an Obi sash belt for Annabel Wrigley's debut fabric line, Maribel for Windham Fabrics. Pretty awesome, right?! I love how she styled it for the Lookbook. A pretty floral, Breton stripes, some faded denim? What's not to love!
I was asked to make an Obi sash belt for Annabel Wrigley's debut fabric line, Maribel for Windham Fabrics. Pretty awesome, right?! I love how she styled it for the Lookbook. A pretty floral, Breton stripes, some faded denim? What's not to love!

NOTE: I am also making an alternate version in a beautiful raw silk for you to more clearly understand my instructions. For the silk version, I have omitted interfacing.
Ready to make it?

Supplies:
2 yards of lightweight woven fabric (always wash and dry your fabric before cutting to allow for shrinkage)
Coordinating thread
Tailor's Chalk
Lightweight fusible interfacing (I like Pellon Shape Flex, SF101.)
Download Pattern (One size fits most)
Cut the pattern out and tape together aligning notches and page numbers. Each pattern page includes shaded circles with guide numbers to show how the pattern pieces should be organized. Be sure to match up all 4 quarter circles along the edges of the tile.
Fold your fabric lengthwise.
Lay the pattern on the fold line.
Pin the pattern to the fabric and cut.
Cut interfacing 1/4 inch smaller all around (this will help prevent bulky seams)
Mark the dots and notches with a chalk pencil.
Seam allowance for construction is 1/2".

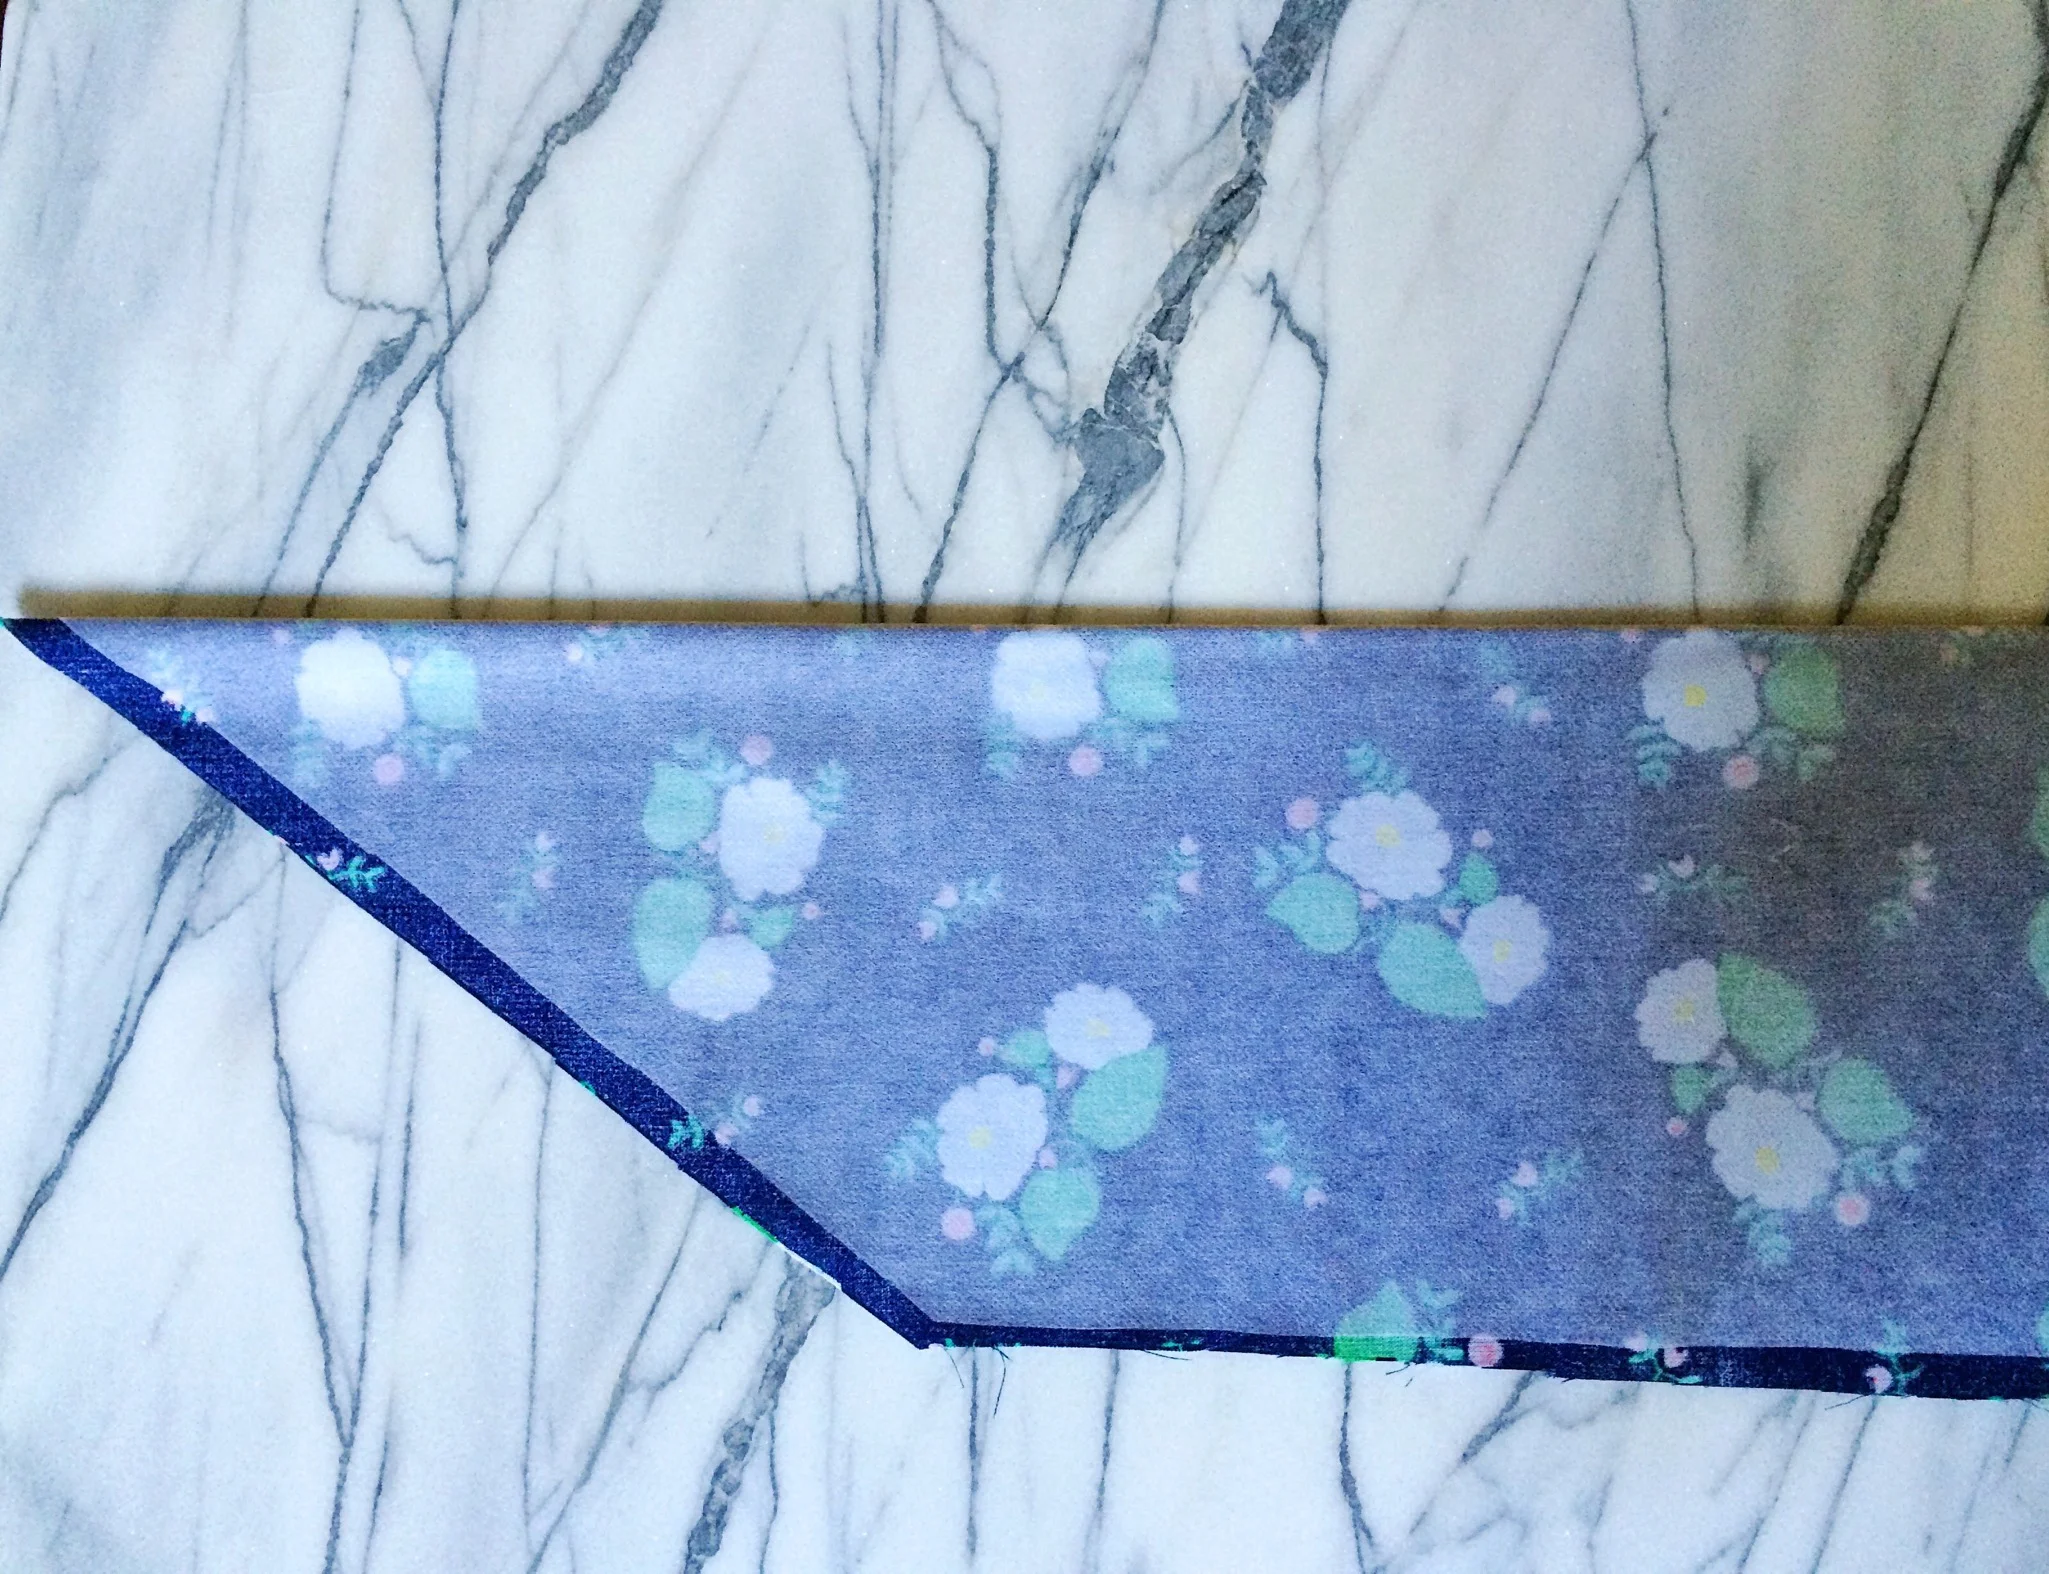
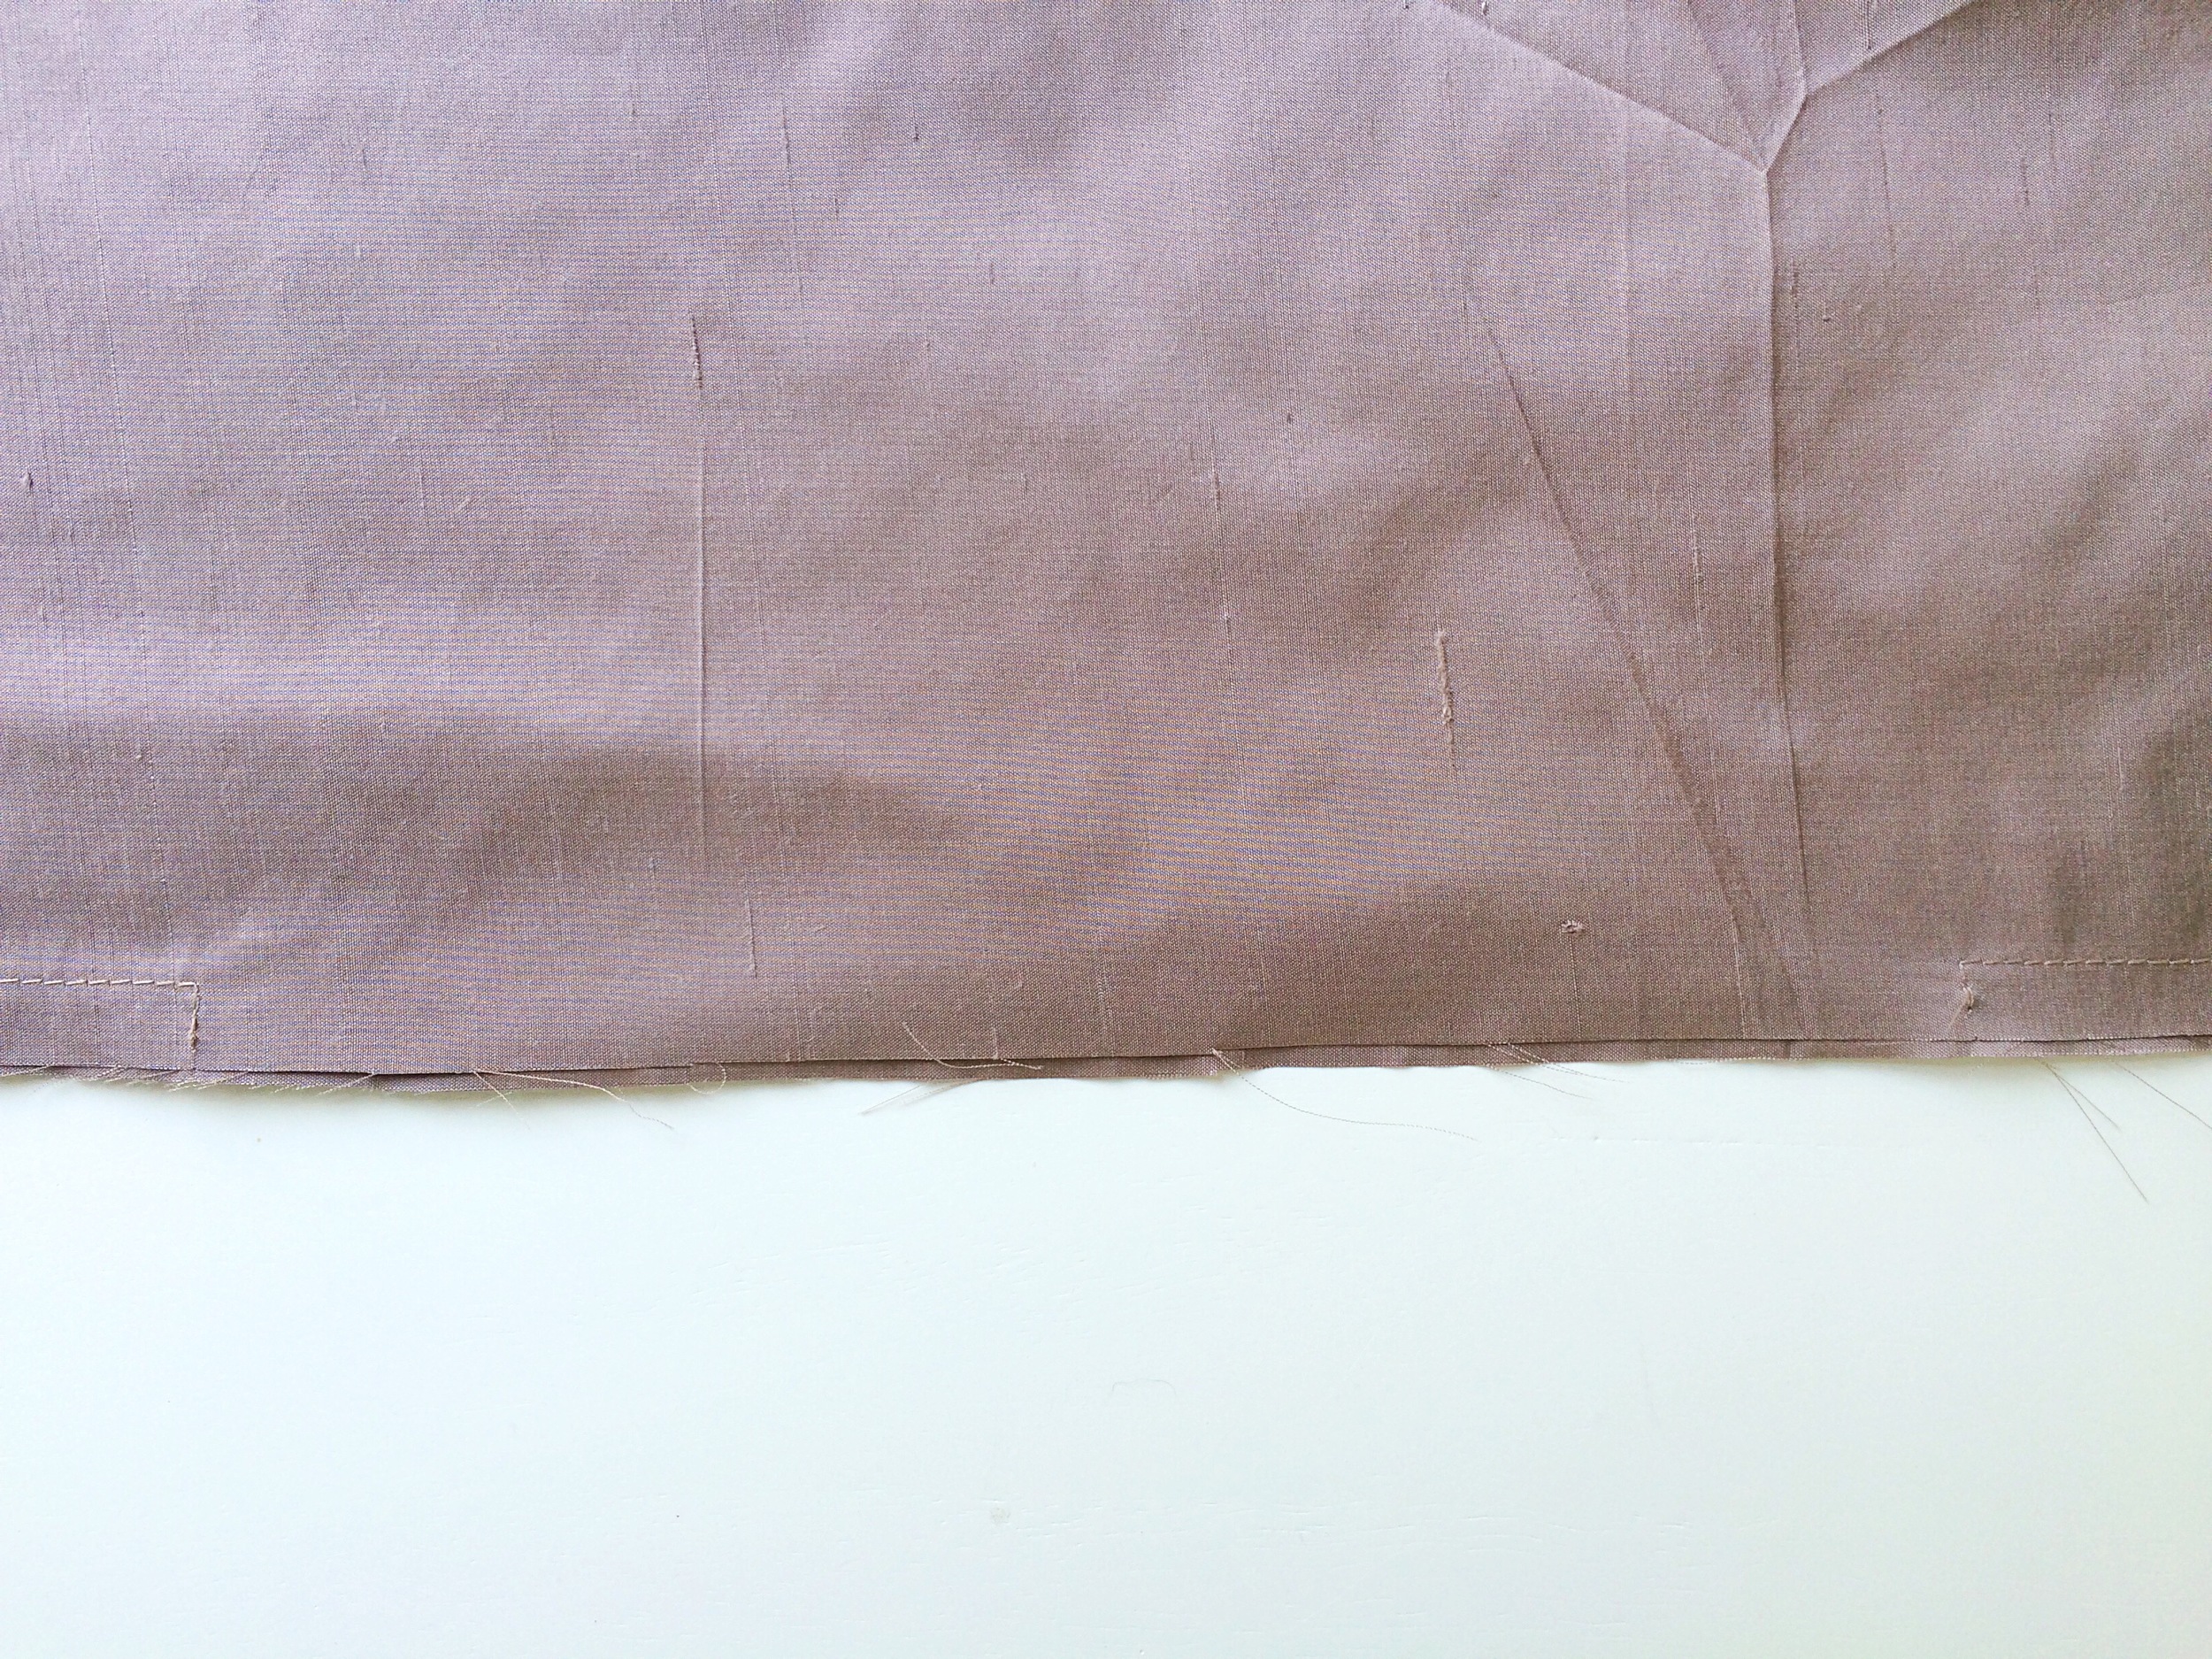
Fold the fabric with the right sides facing together and matching the notches, and pin. Begin stitching around the belt beginning at the point. Stitch the perimeter of the belt with a 1/2" seam, leaving an opening between the dots you marked for the pattern piece for turning the belt right side out. When you begin and end stitching at each dot, begin stitching at the selvage, stitch 1/2" and pivot. Stitch along the long side. By extending the stitch line, just a bit, it will help the fabric turn inside when it is time to finish.
Be sure not to stretch the fabric as you work toward the points on each end.
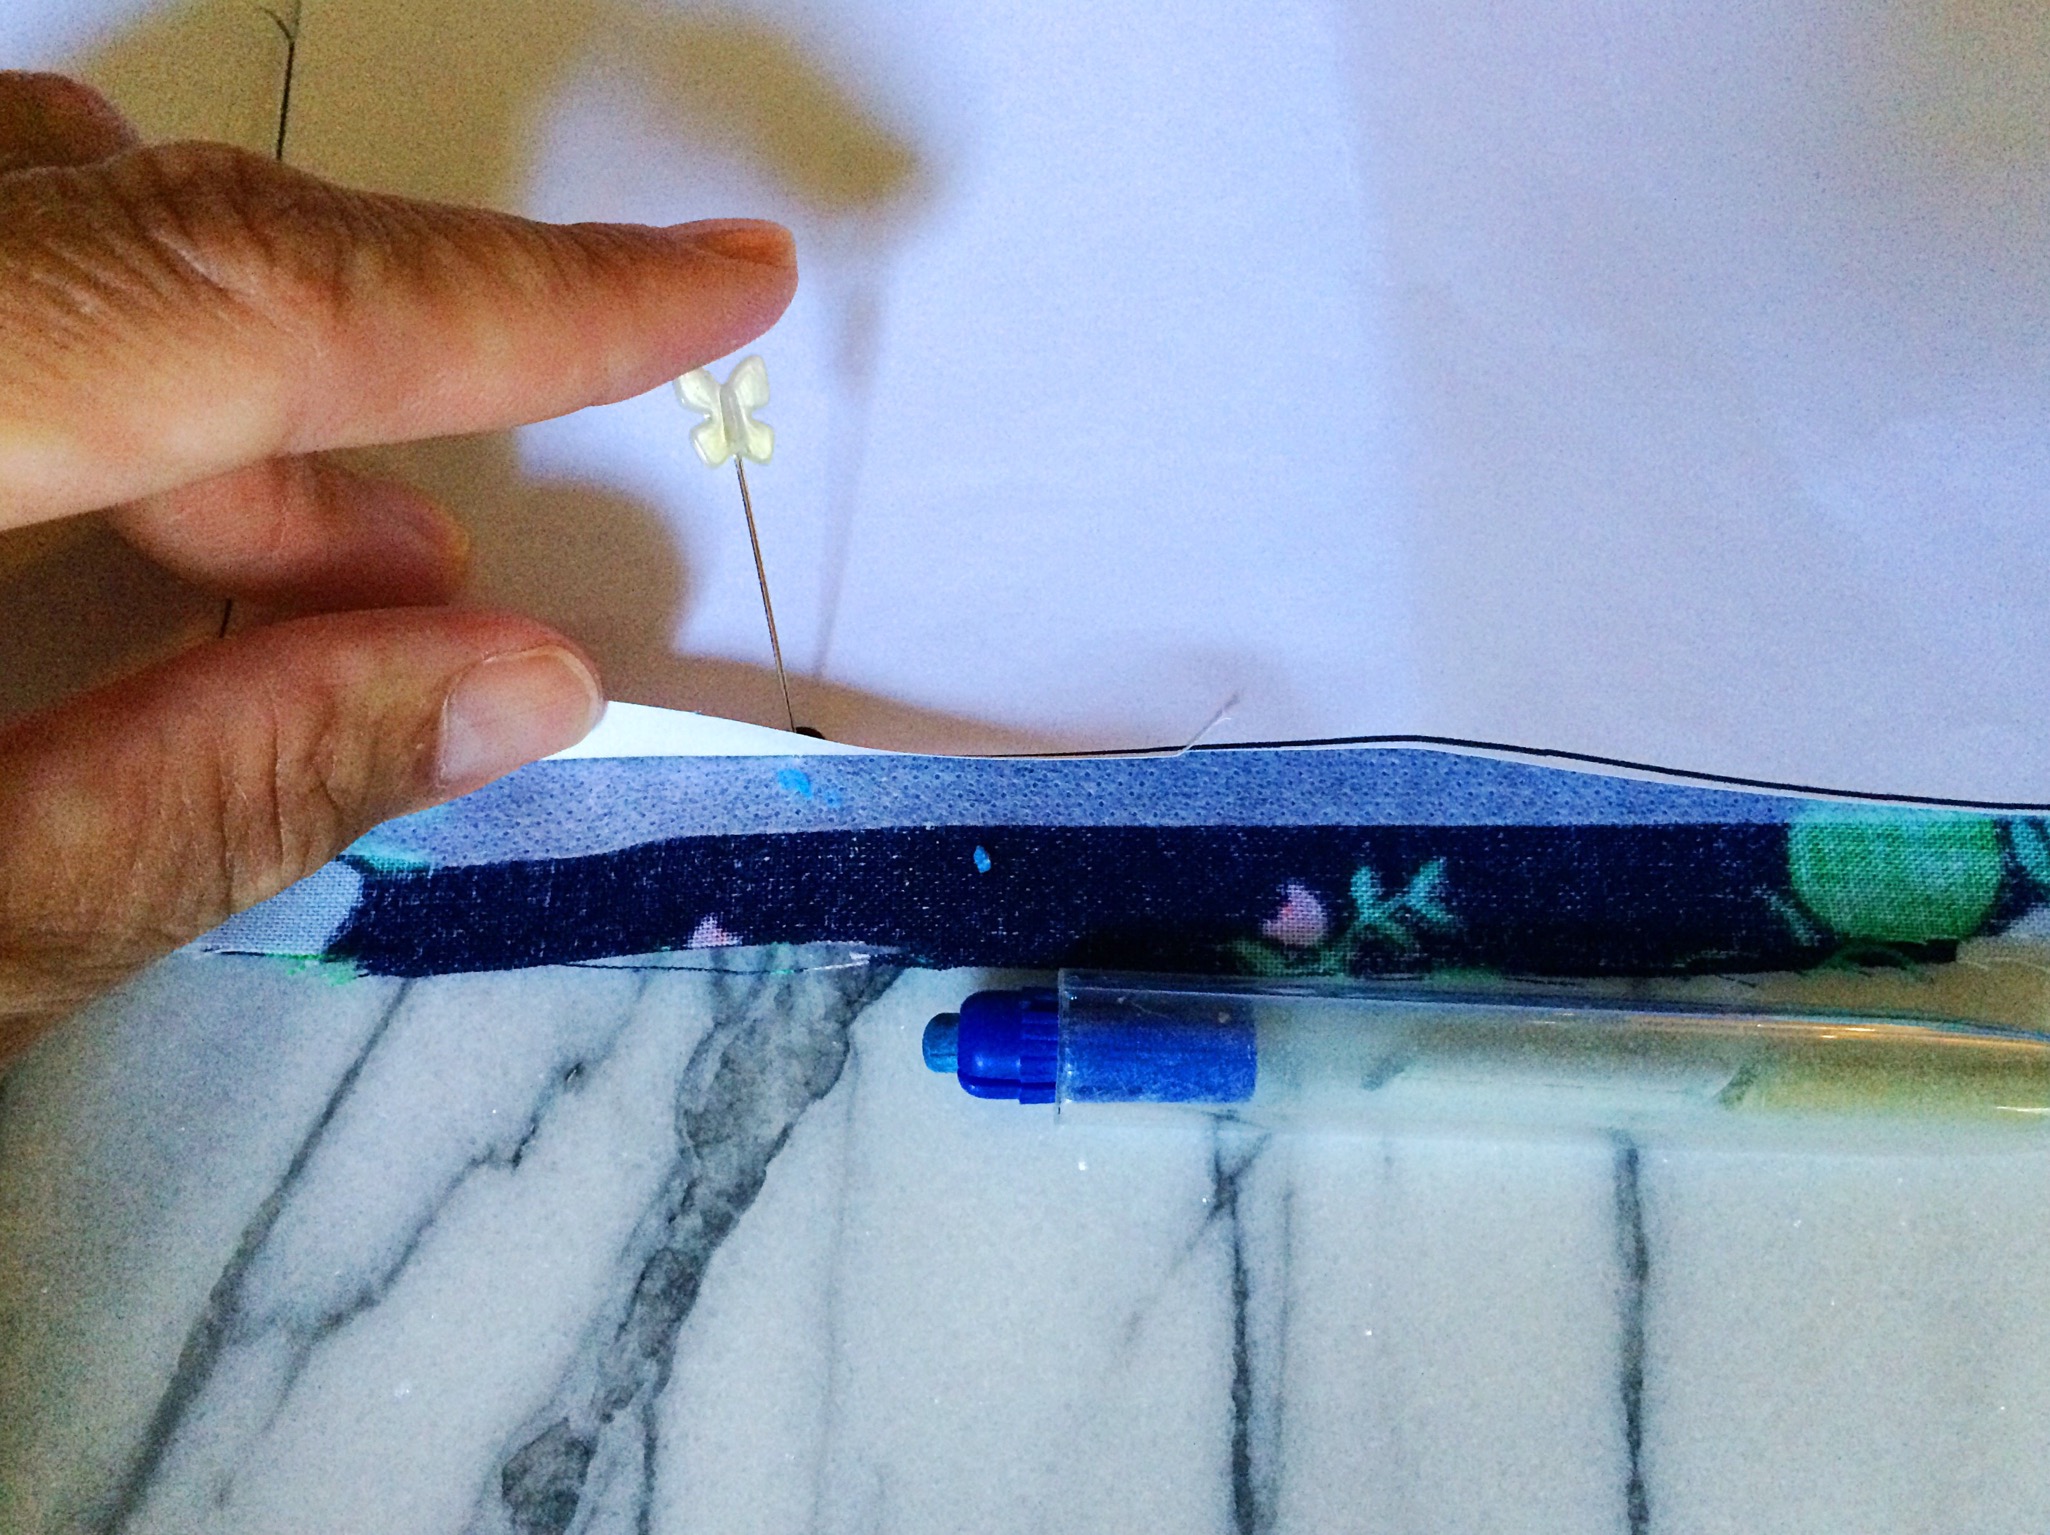
Trim the seam allowances (except for those in the opening) to about 1/8"; then turn the belt right side out. Finger press the edges to smooth the stitching, tuck the seam allowances inside the opening, and press with an iron to meld the seams.

Topstitch 1/4" from the edge around the perimeter of the belt in one continuous seam, pivoting at the points and catching the folded inside edges that we used for turning. Be sure to backstitch to prevent all of those pretty stitches from unraveling! Press.
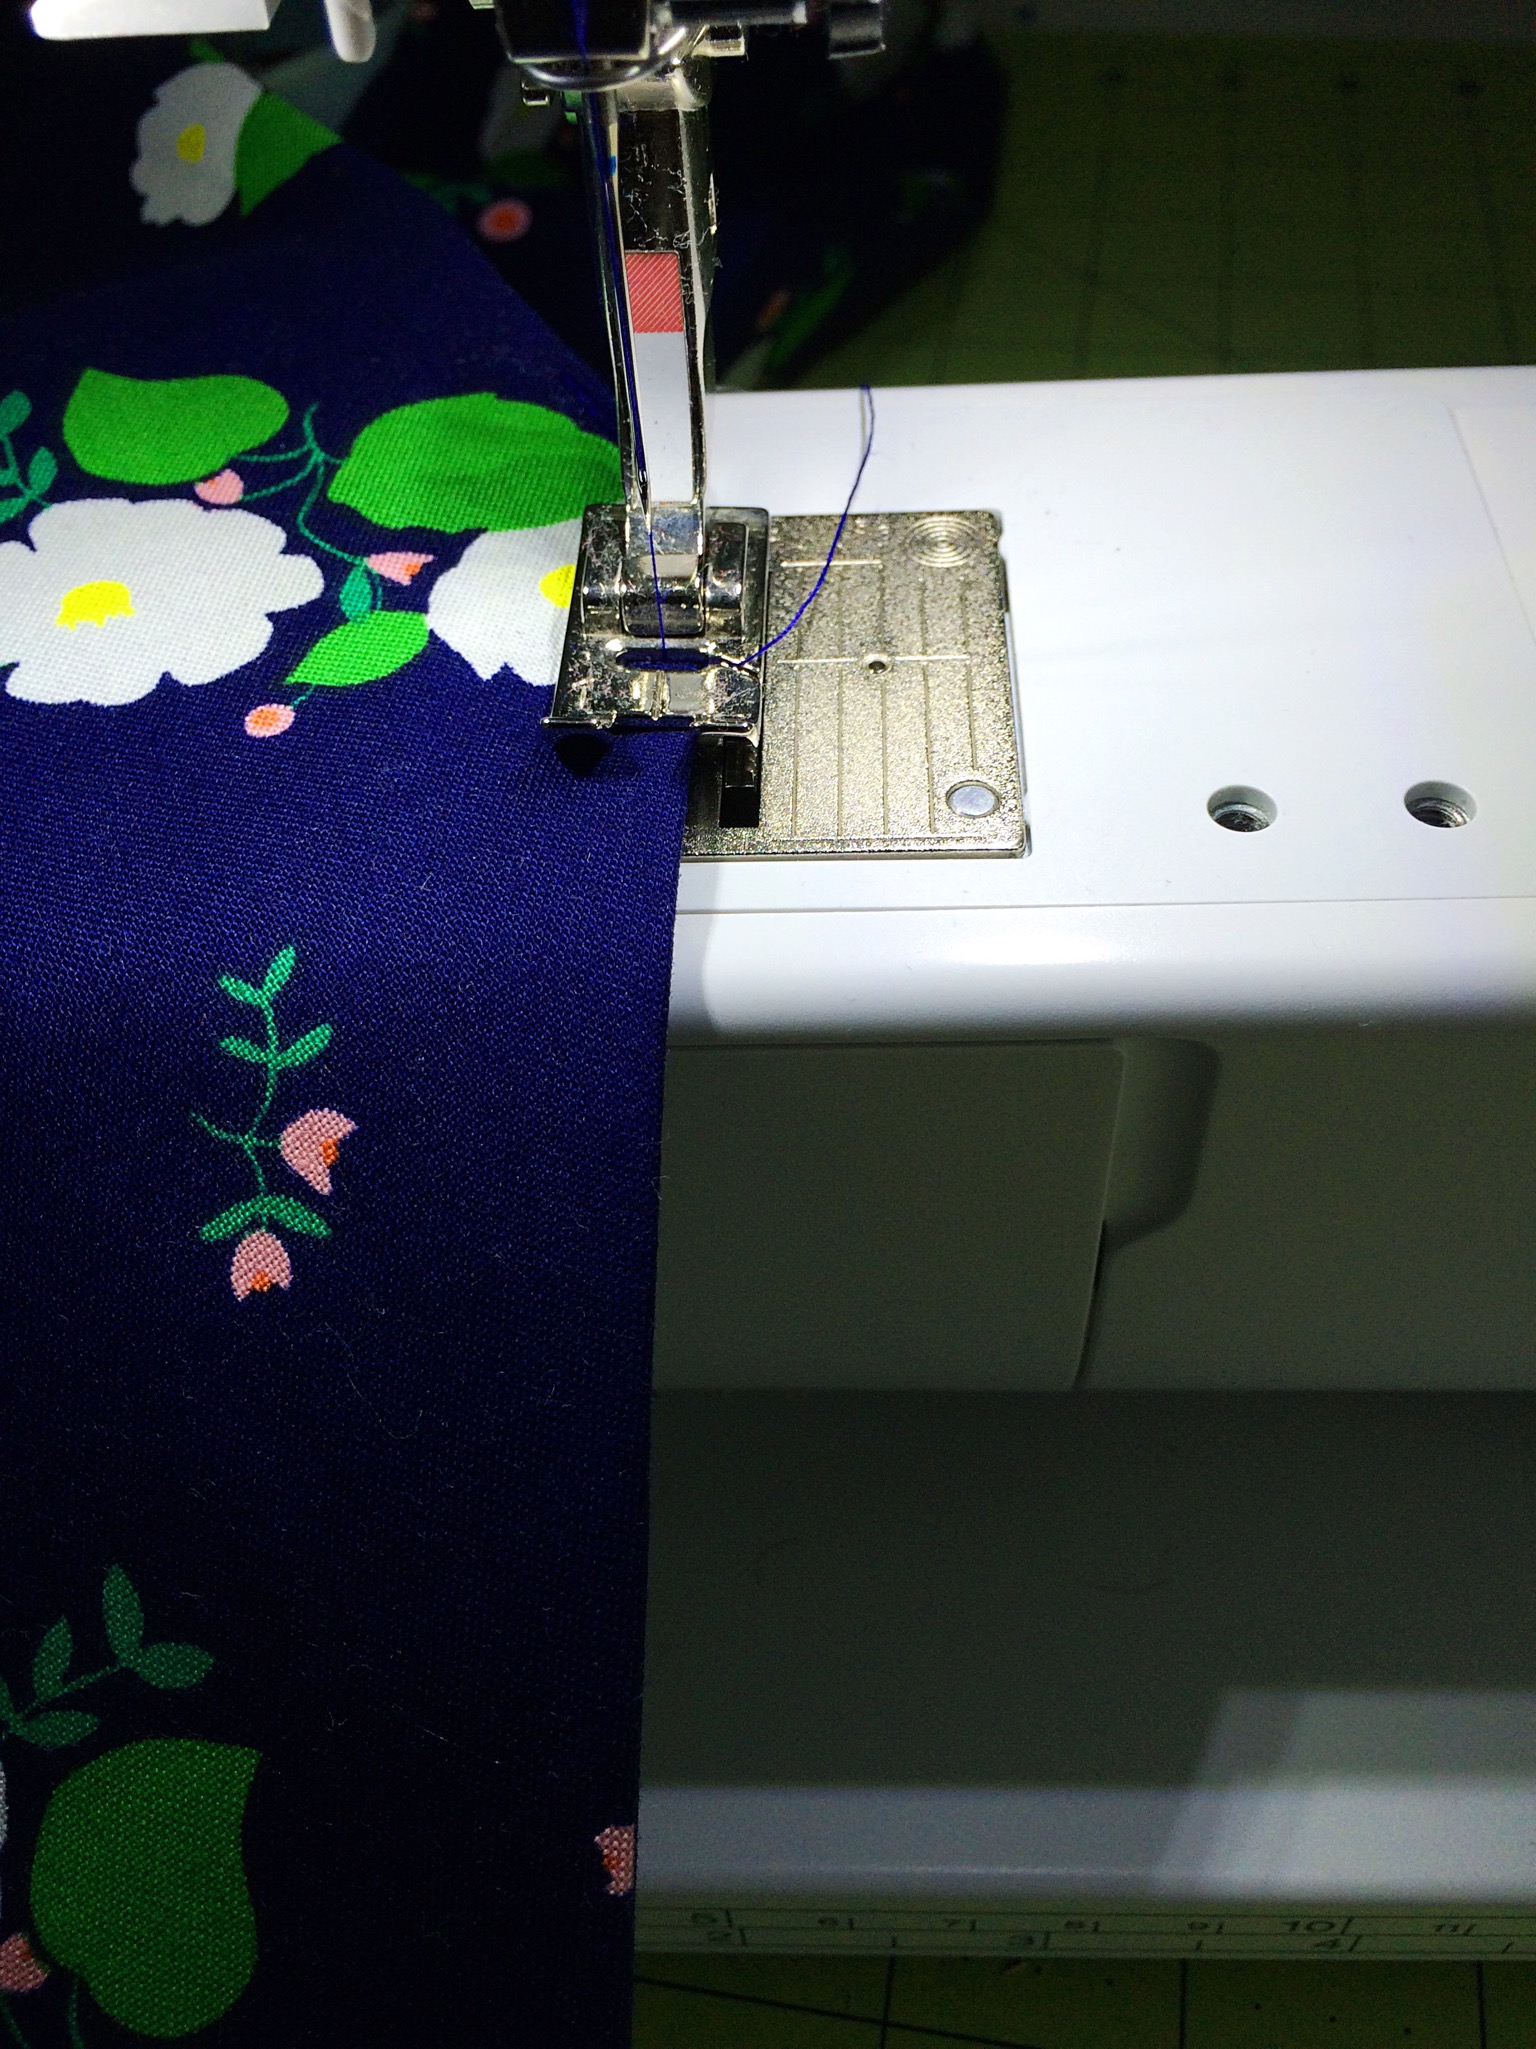
Your sash is done and ready to wear!

Sew a Softie Day!
Sew a Softie Day! Shopkin-ish edition.

I am so very honored to be included as a guest contributor to Sew A Softie Day! Trixi Symonds of Colored Buttons envisioned Sew a Softie Day as a way to share the craft of hand sewing. As a sewing teacher (and a mom!) I know first hand how seriously excited kids are about making things with their own hands. Sewing is a skill that they can learn that is super useful, accessible and fun. Yet there are so few adults in their life that sew anymore. I have a fun project for you In case you need a little inspiration to get started.
First, I'd like to share some thoughts on sewing with kids. To begin, ask them what they want to make. Kids really take to sewing when the rules are limited and they have lots of creative freedom and attractive materials to choose from. Good supplies are essential! I hate to sew with cheap fabric, flimsy needles and dull scissors. Sewing supplies don't cost that much money and the nicer felts, fabrics and tools make sewing so much more pleasurable. Get the better quality stuff. You will thank yourself. Kids are so much more invested in a project if they get to pick out the fabric and thread. Take them to the store, (seriously), and let them pick out the thread, felt, and buttons they like. The color combinations they choose are always fantastic.
If you are teaching a group of kids, have a sample made. Understand that sometimes what we think is terrific, they will not want to make. When this happens to you, try not to be disappointed! Ask them how they would change it and adapt. Kids know what they like.
Preparation is key. Precut the patterns, gather the supplies, thread the needles, tie the knots. Have it all ready to go. I find that simple 2-D shapes work best for little hands and growing minds. A simple shape is a blank canvas for them to embellish. (and they will!) Kids love to personalize whatever they make, More is more.
Turn on some music, thread some needles, snuggle up with your favorite little ones and have fun with it. To begin hand sewing with kids, I have them choose a small piece of felt and a few colors of embroidery floss. Then I draw a path of dashed lines each about 1/2" long across the felt. I give them a strand of floss and knot the end with a "tail" below the knot. We begin by pushing up through the back of the felt. We pretend that the needle is a dolphin or a mermaid who bursts up from the water (beginning of the line) and dives back in (the end of the line). However, the mermaid has to hold her nose when she dives (pinch the thread around the eye of the needle). Because she is just a little mermaid and just learning to swim. At this point we are focusing on process only. Wonky stitches are just fine! In fact, most kids prefer them. They want their stitches to show so that everyone else will know that they made it.

Kids need a lot of help threading needles and tying knots. They eventually get it, and when they do, they feel incredibly accomplished. They can't wait to help their struggling classmates.
When I joined Sew a Softie Day, my original project was going to be a marionette puppet. I thought it would be lots of fun and couldn't wait to show my resident focus group (my own children). While they liked to play with the puppets, stringing them and making them move correctly proved really frustrating. I needed plan B! Later that week, in one of my sewing lessons, a young girl asked to make an avocado "Shopkin". Shopkins! Yes, of course, Shopkins are the perfect project! If you don't spend a lot of time around elementary aged girls, Shopkins are these adorable little shopping themed characters. Food, household items, clothes. Cute stuff that kids collect, trade and promptly loose.
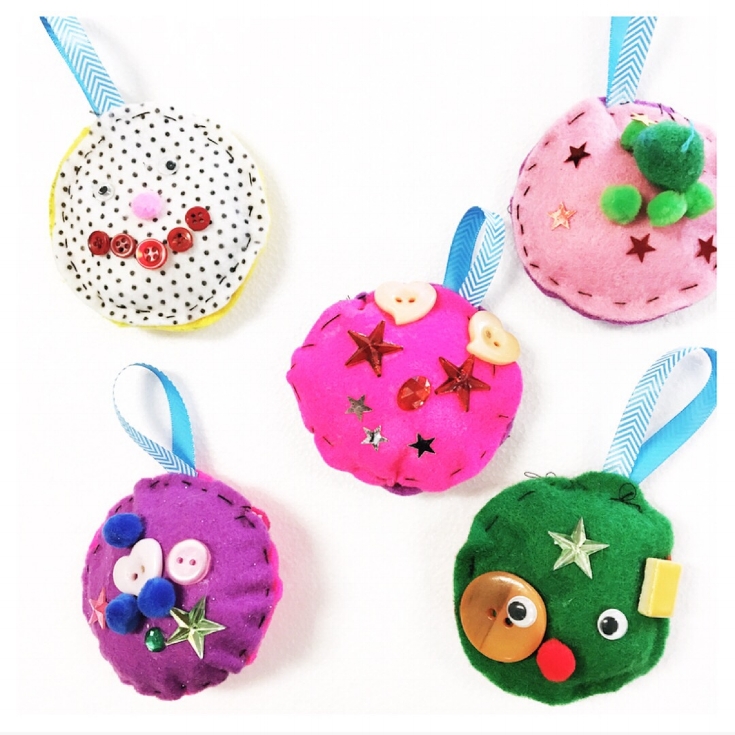
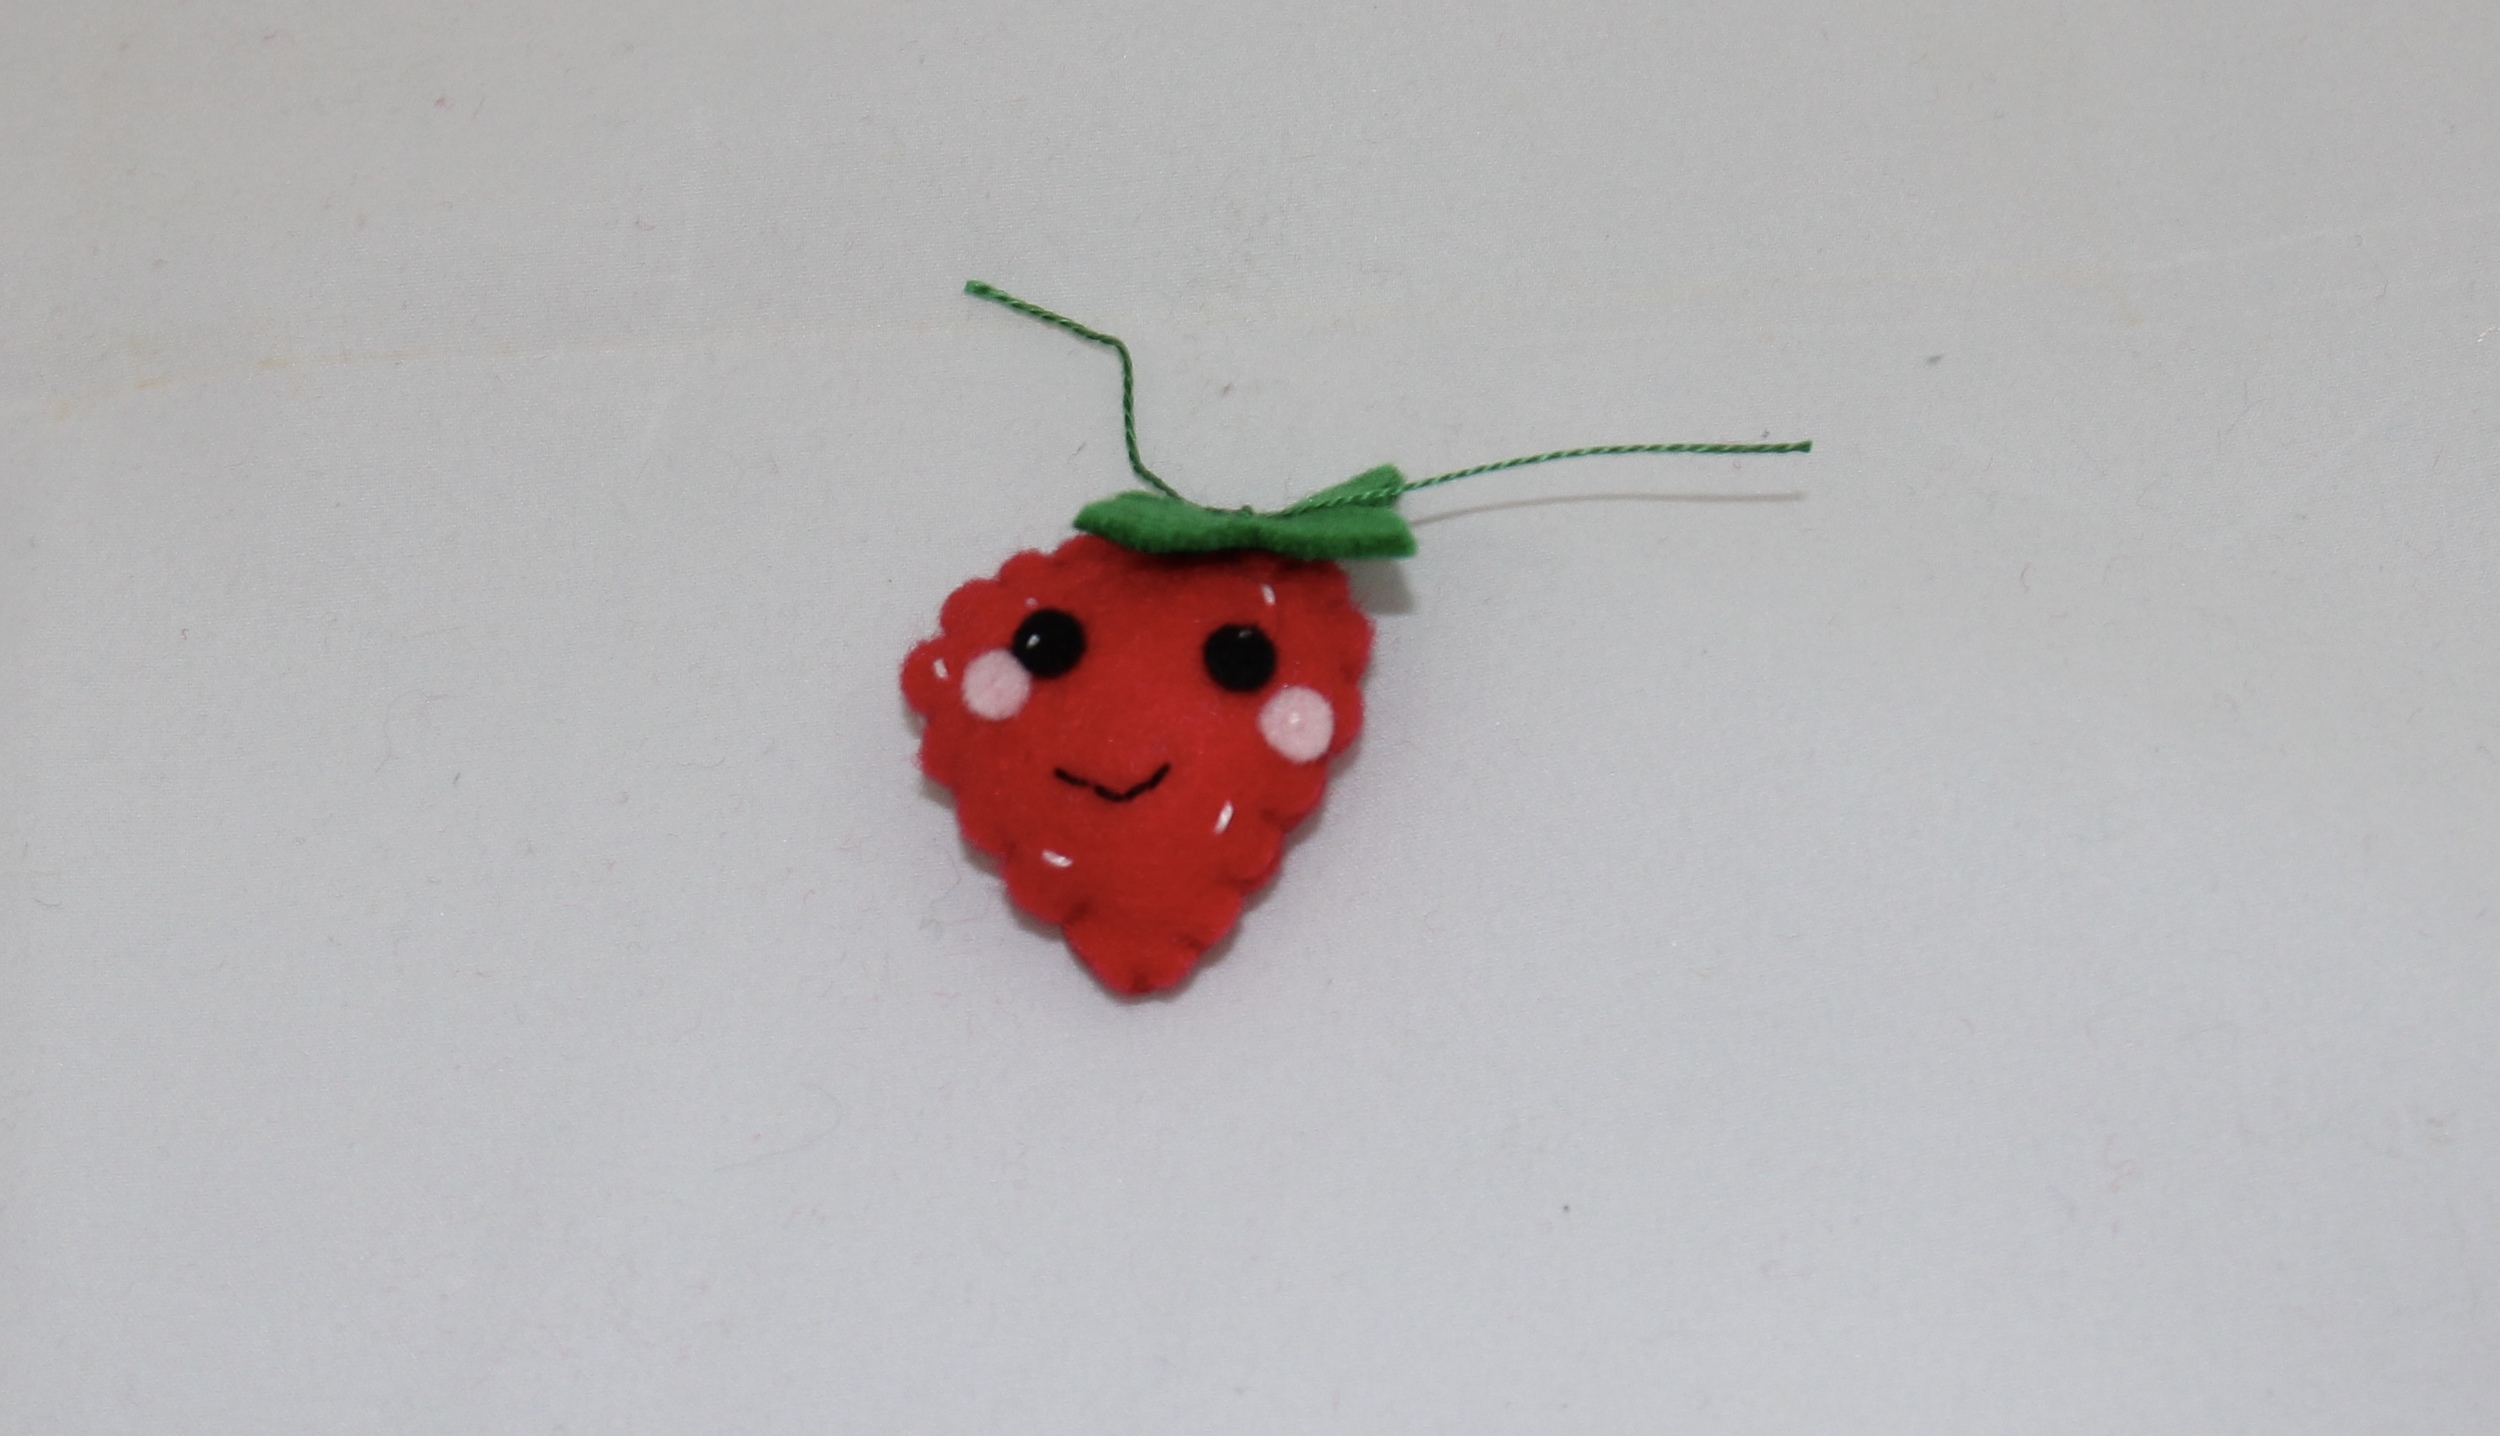
While this project is not exactly a Shopkin, it has been a huge hit. The ideas are endless and can be tailored to each child's interest. Omit the inner circle on the doughnut and suddenly, it's a cookie or an alien spaceship. Perhaps make 2 circles and it becomes a Starwars BB-8! Simple shapes, few "rules", cute details and fun colors. Are you ready to try it?

Felt Shopkin-ish
Supplies Needed:
Felt
Embroidery Floss or Pearle Cotton
Embroidery needles with a large eye
Scissors
Chalk pencil or Frixion pen
Stuffing

To begin, download and print the pattern. (Make sure that the scaling square measures one inch.) Trace around the templates and cut on the trace line. It may help to trace the pattern onto cardstock or posterboard and then cut the shape out for the kids to trace onto felt. Paper can be tricky for most kids to align, pin and cut.
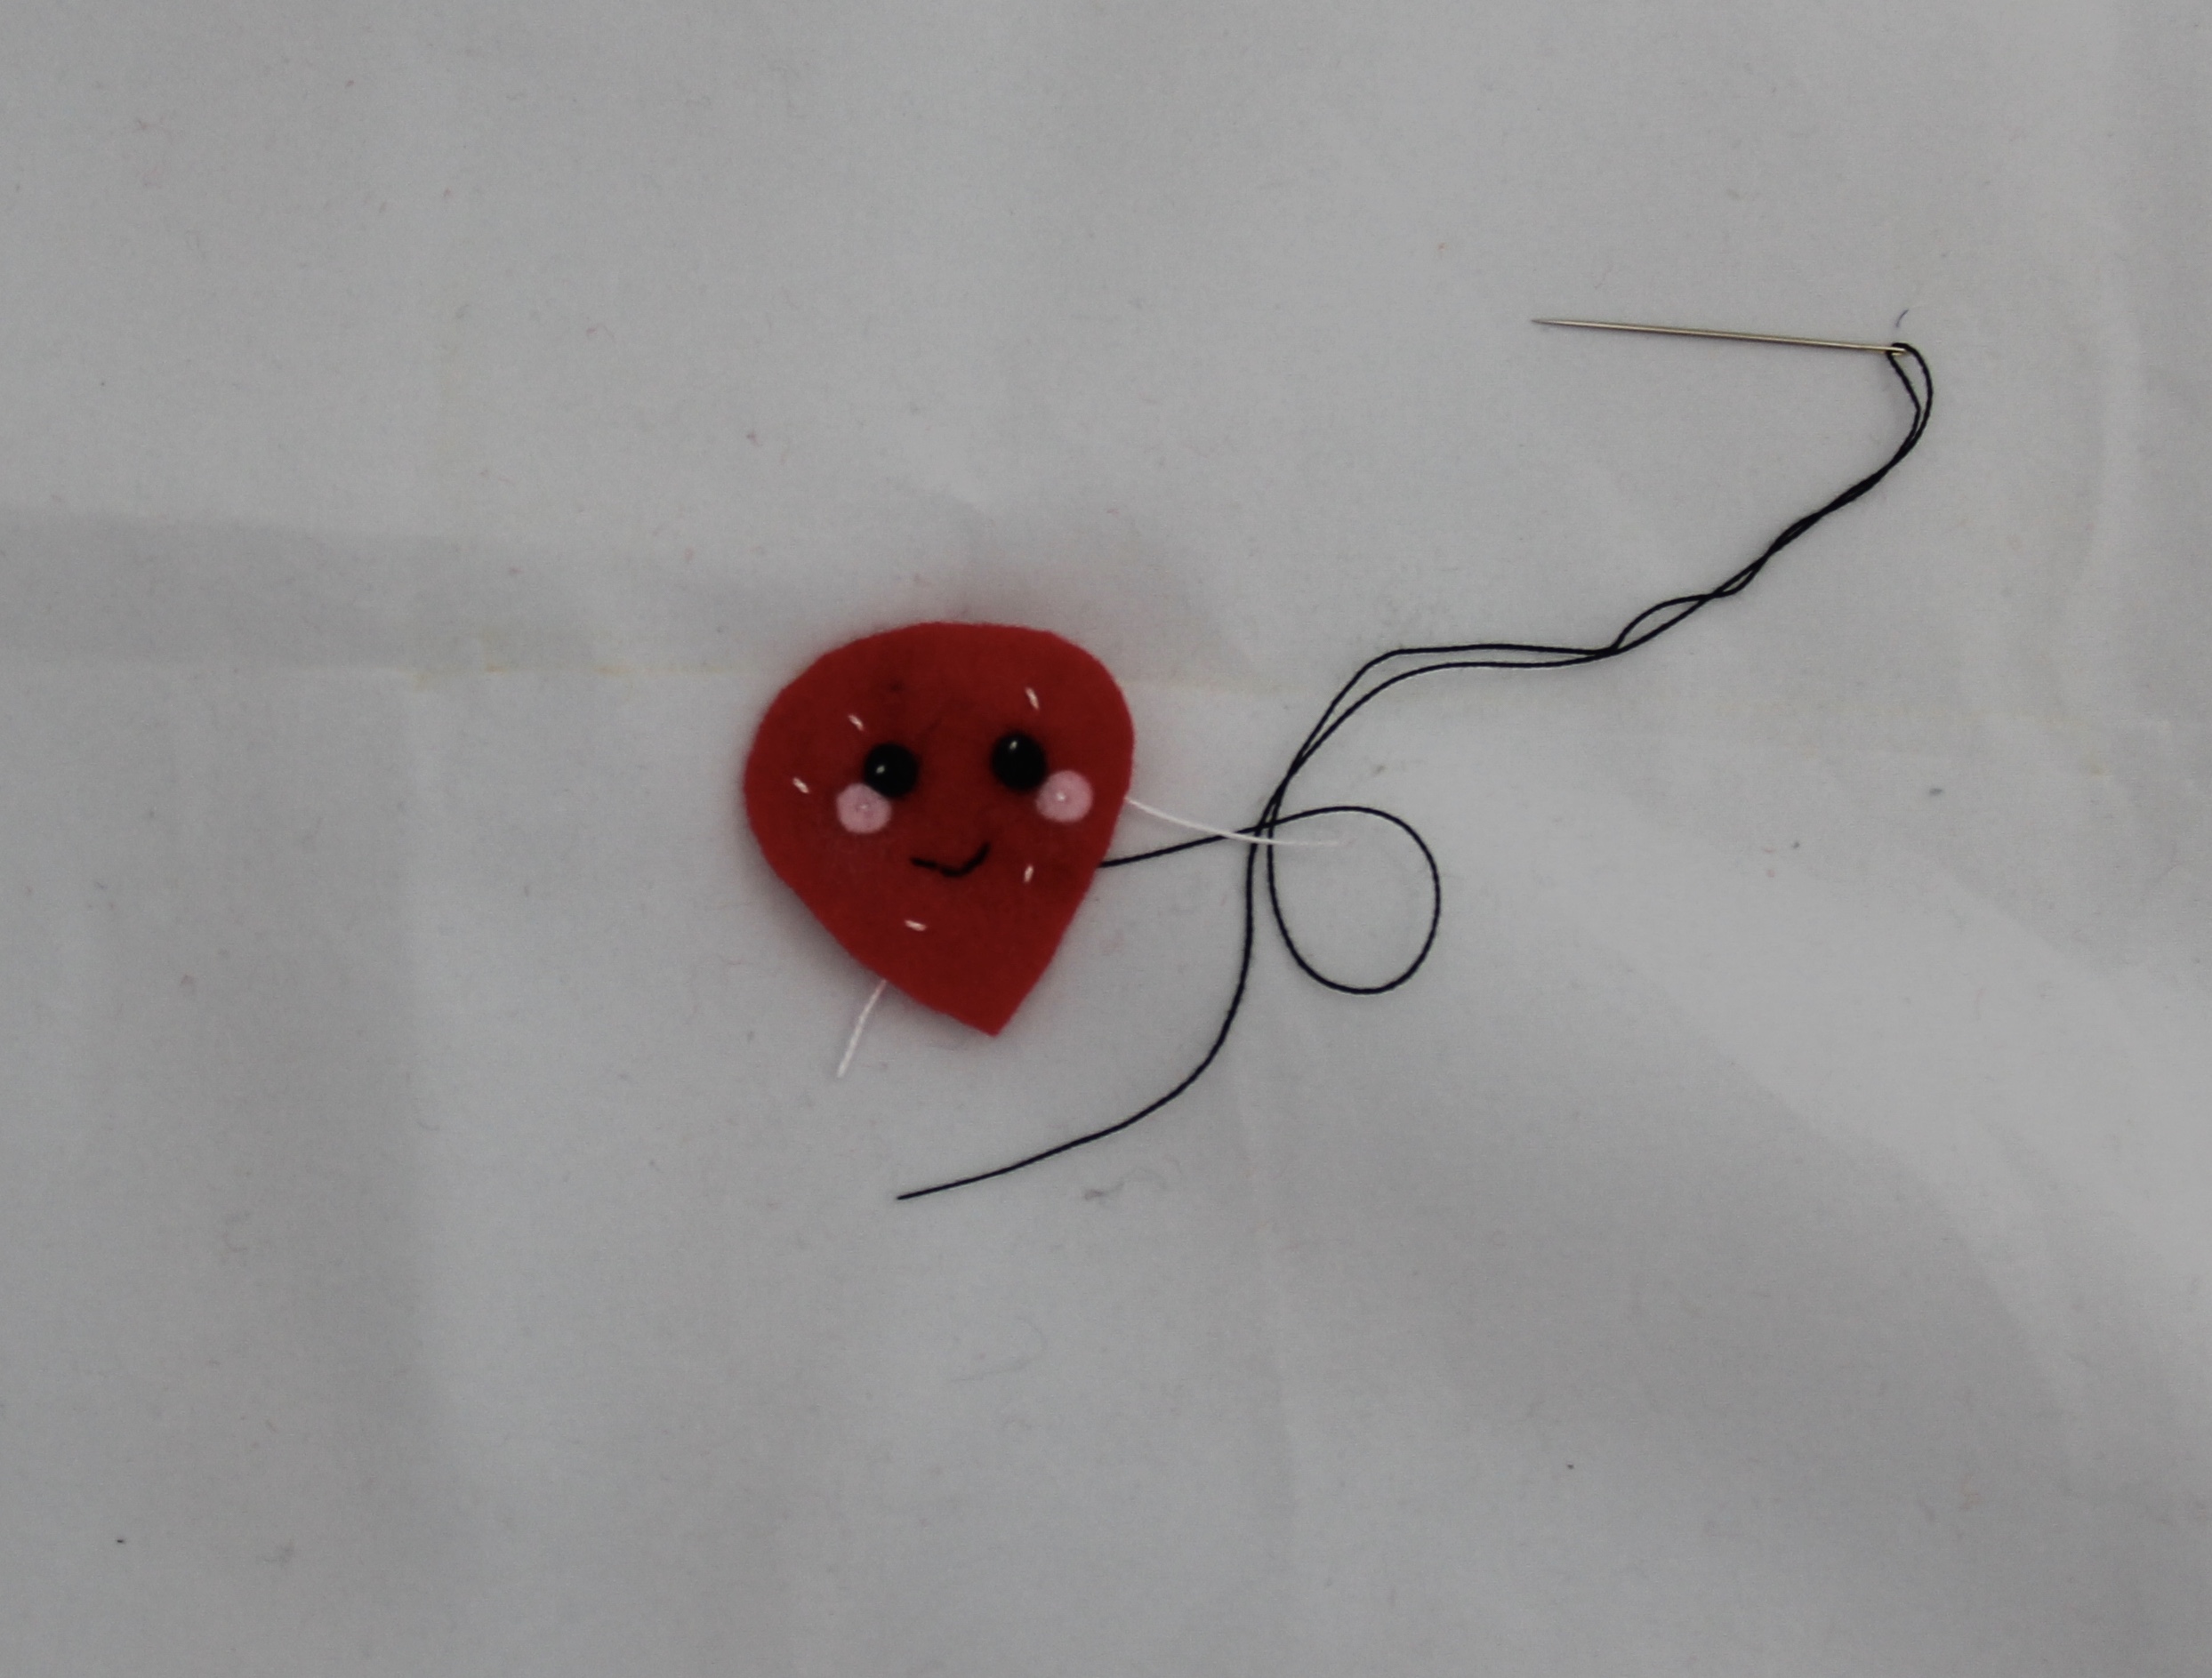
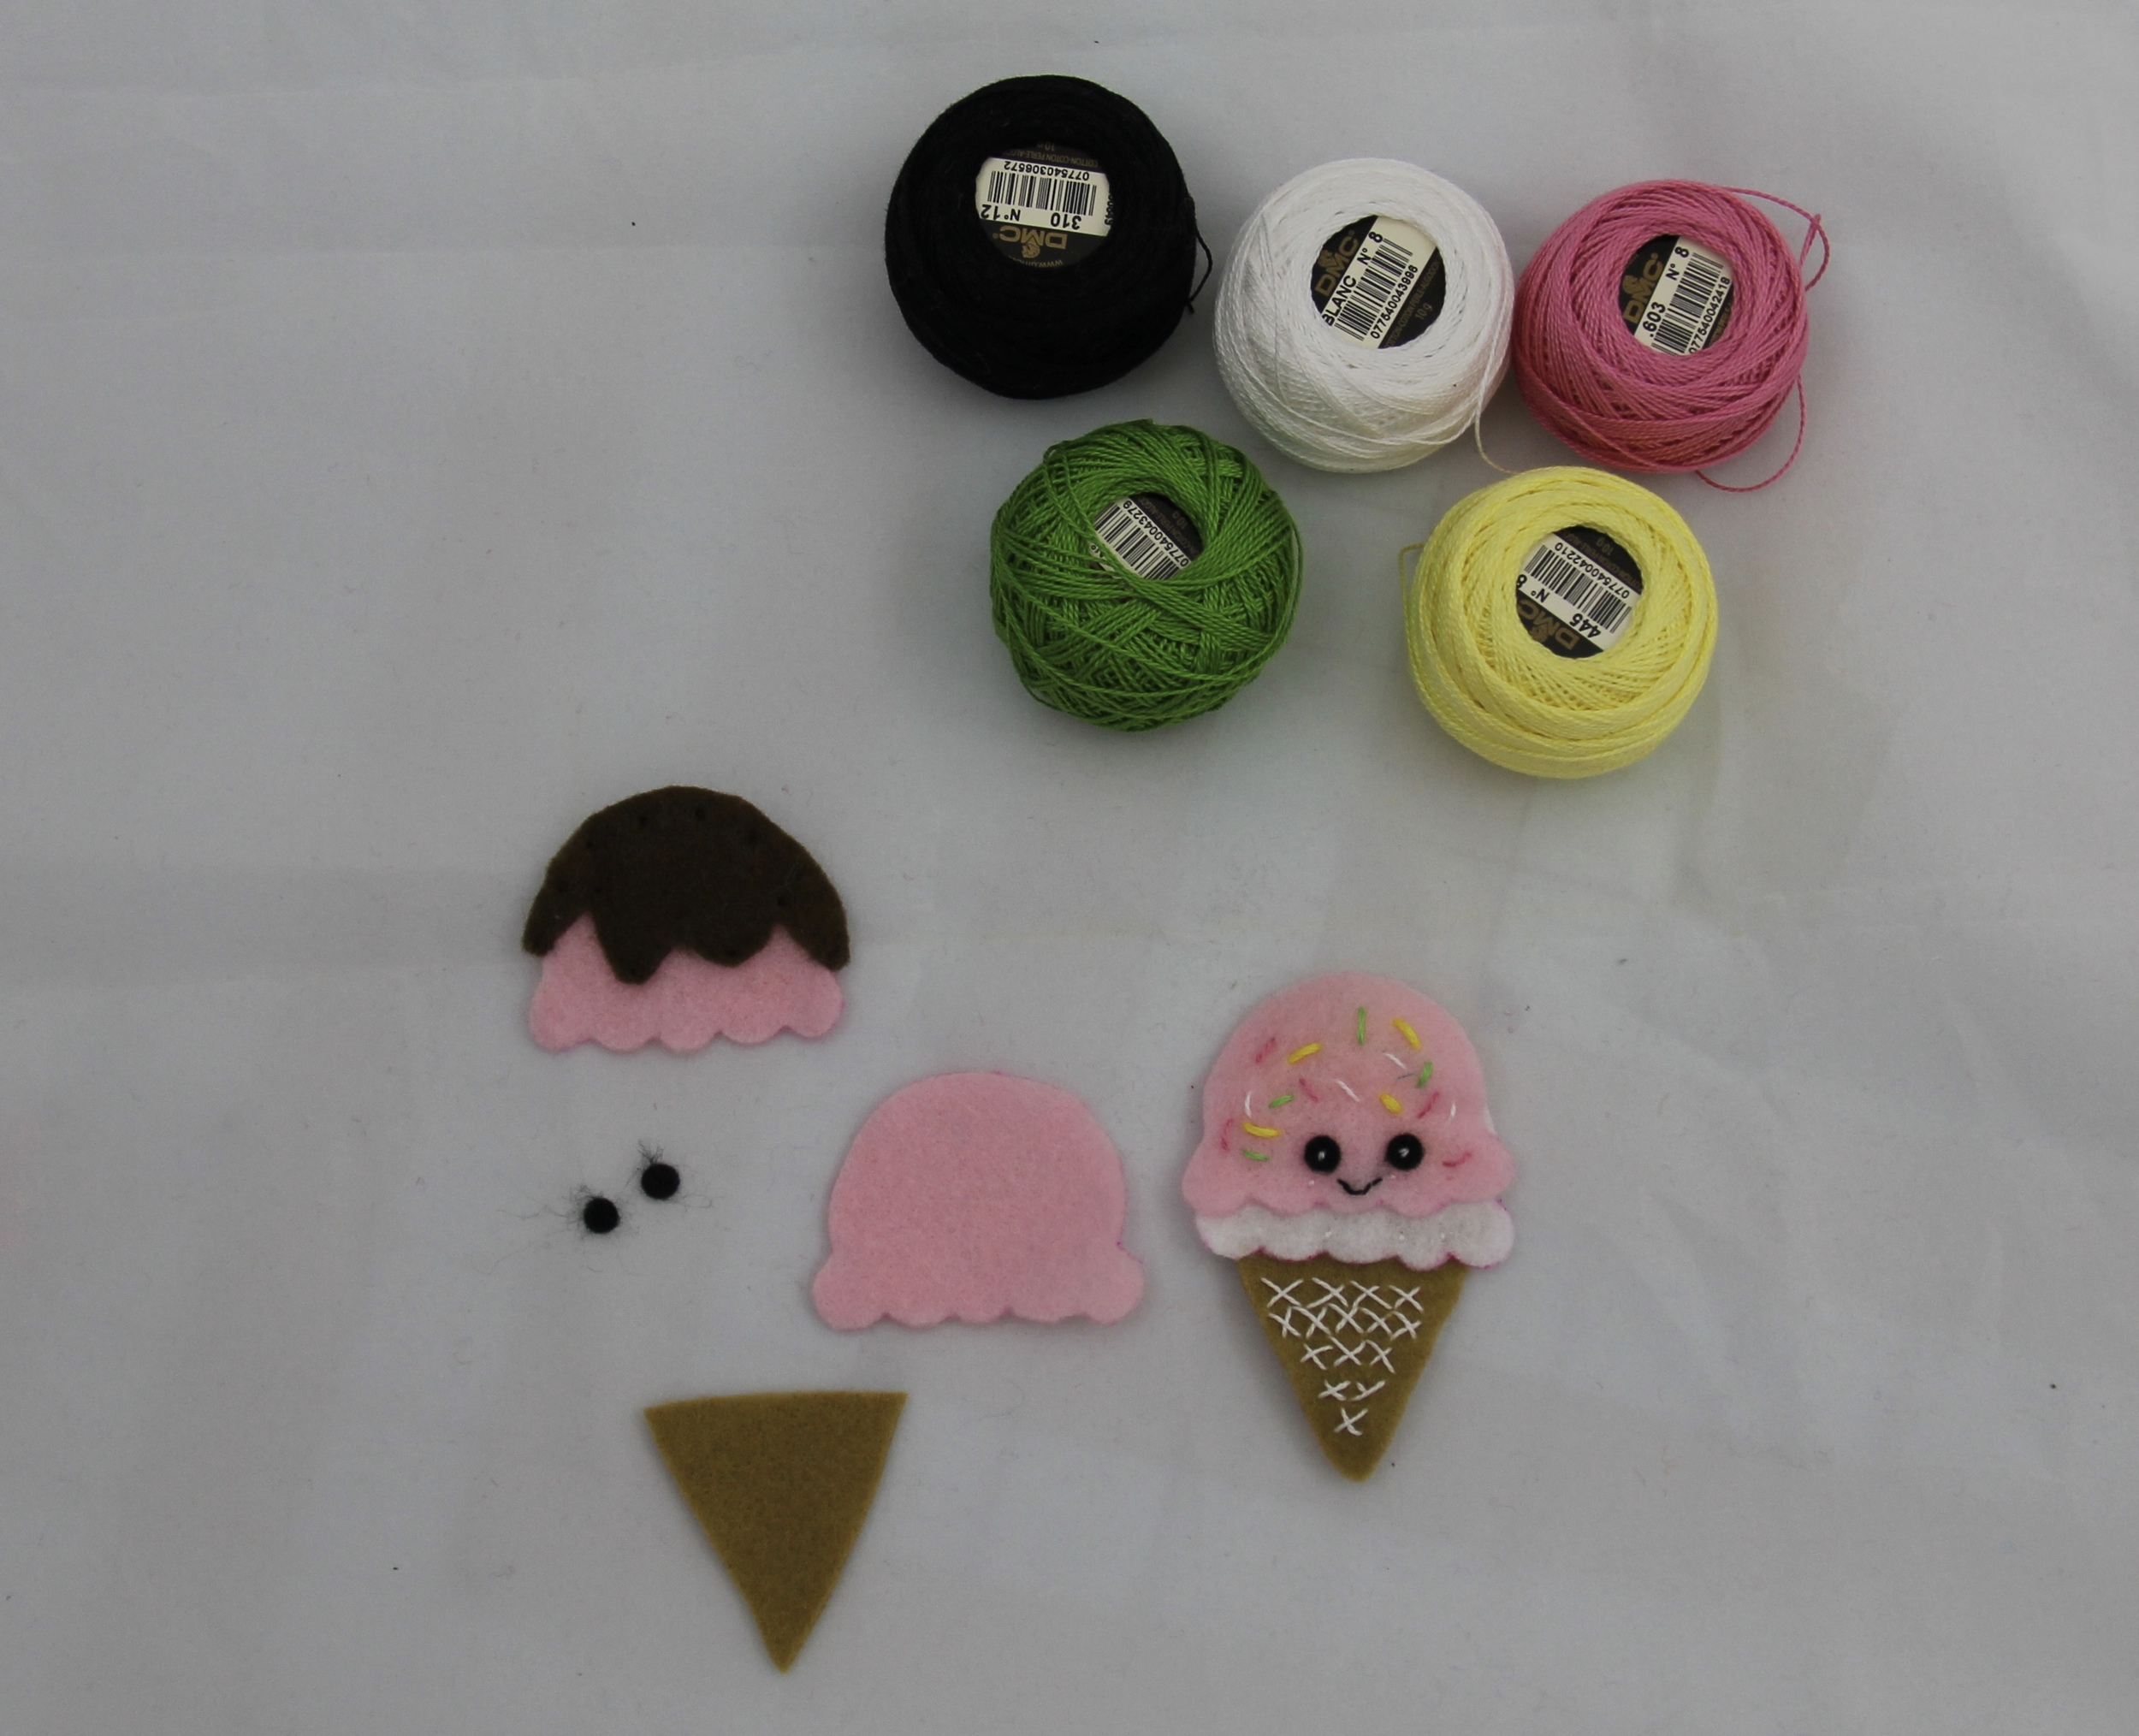
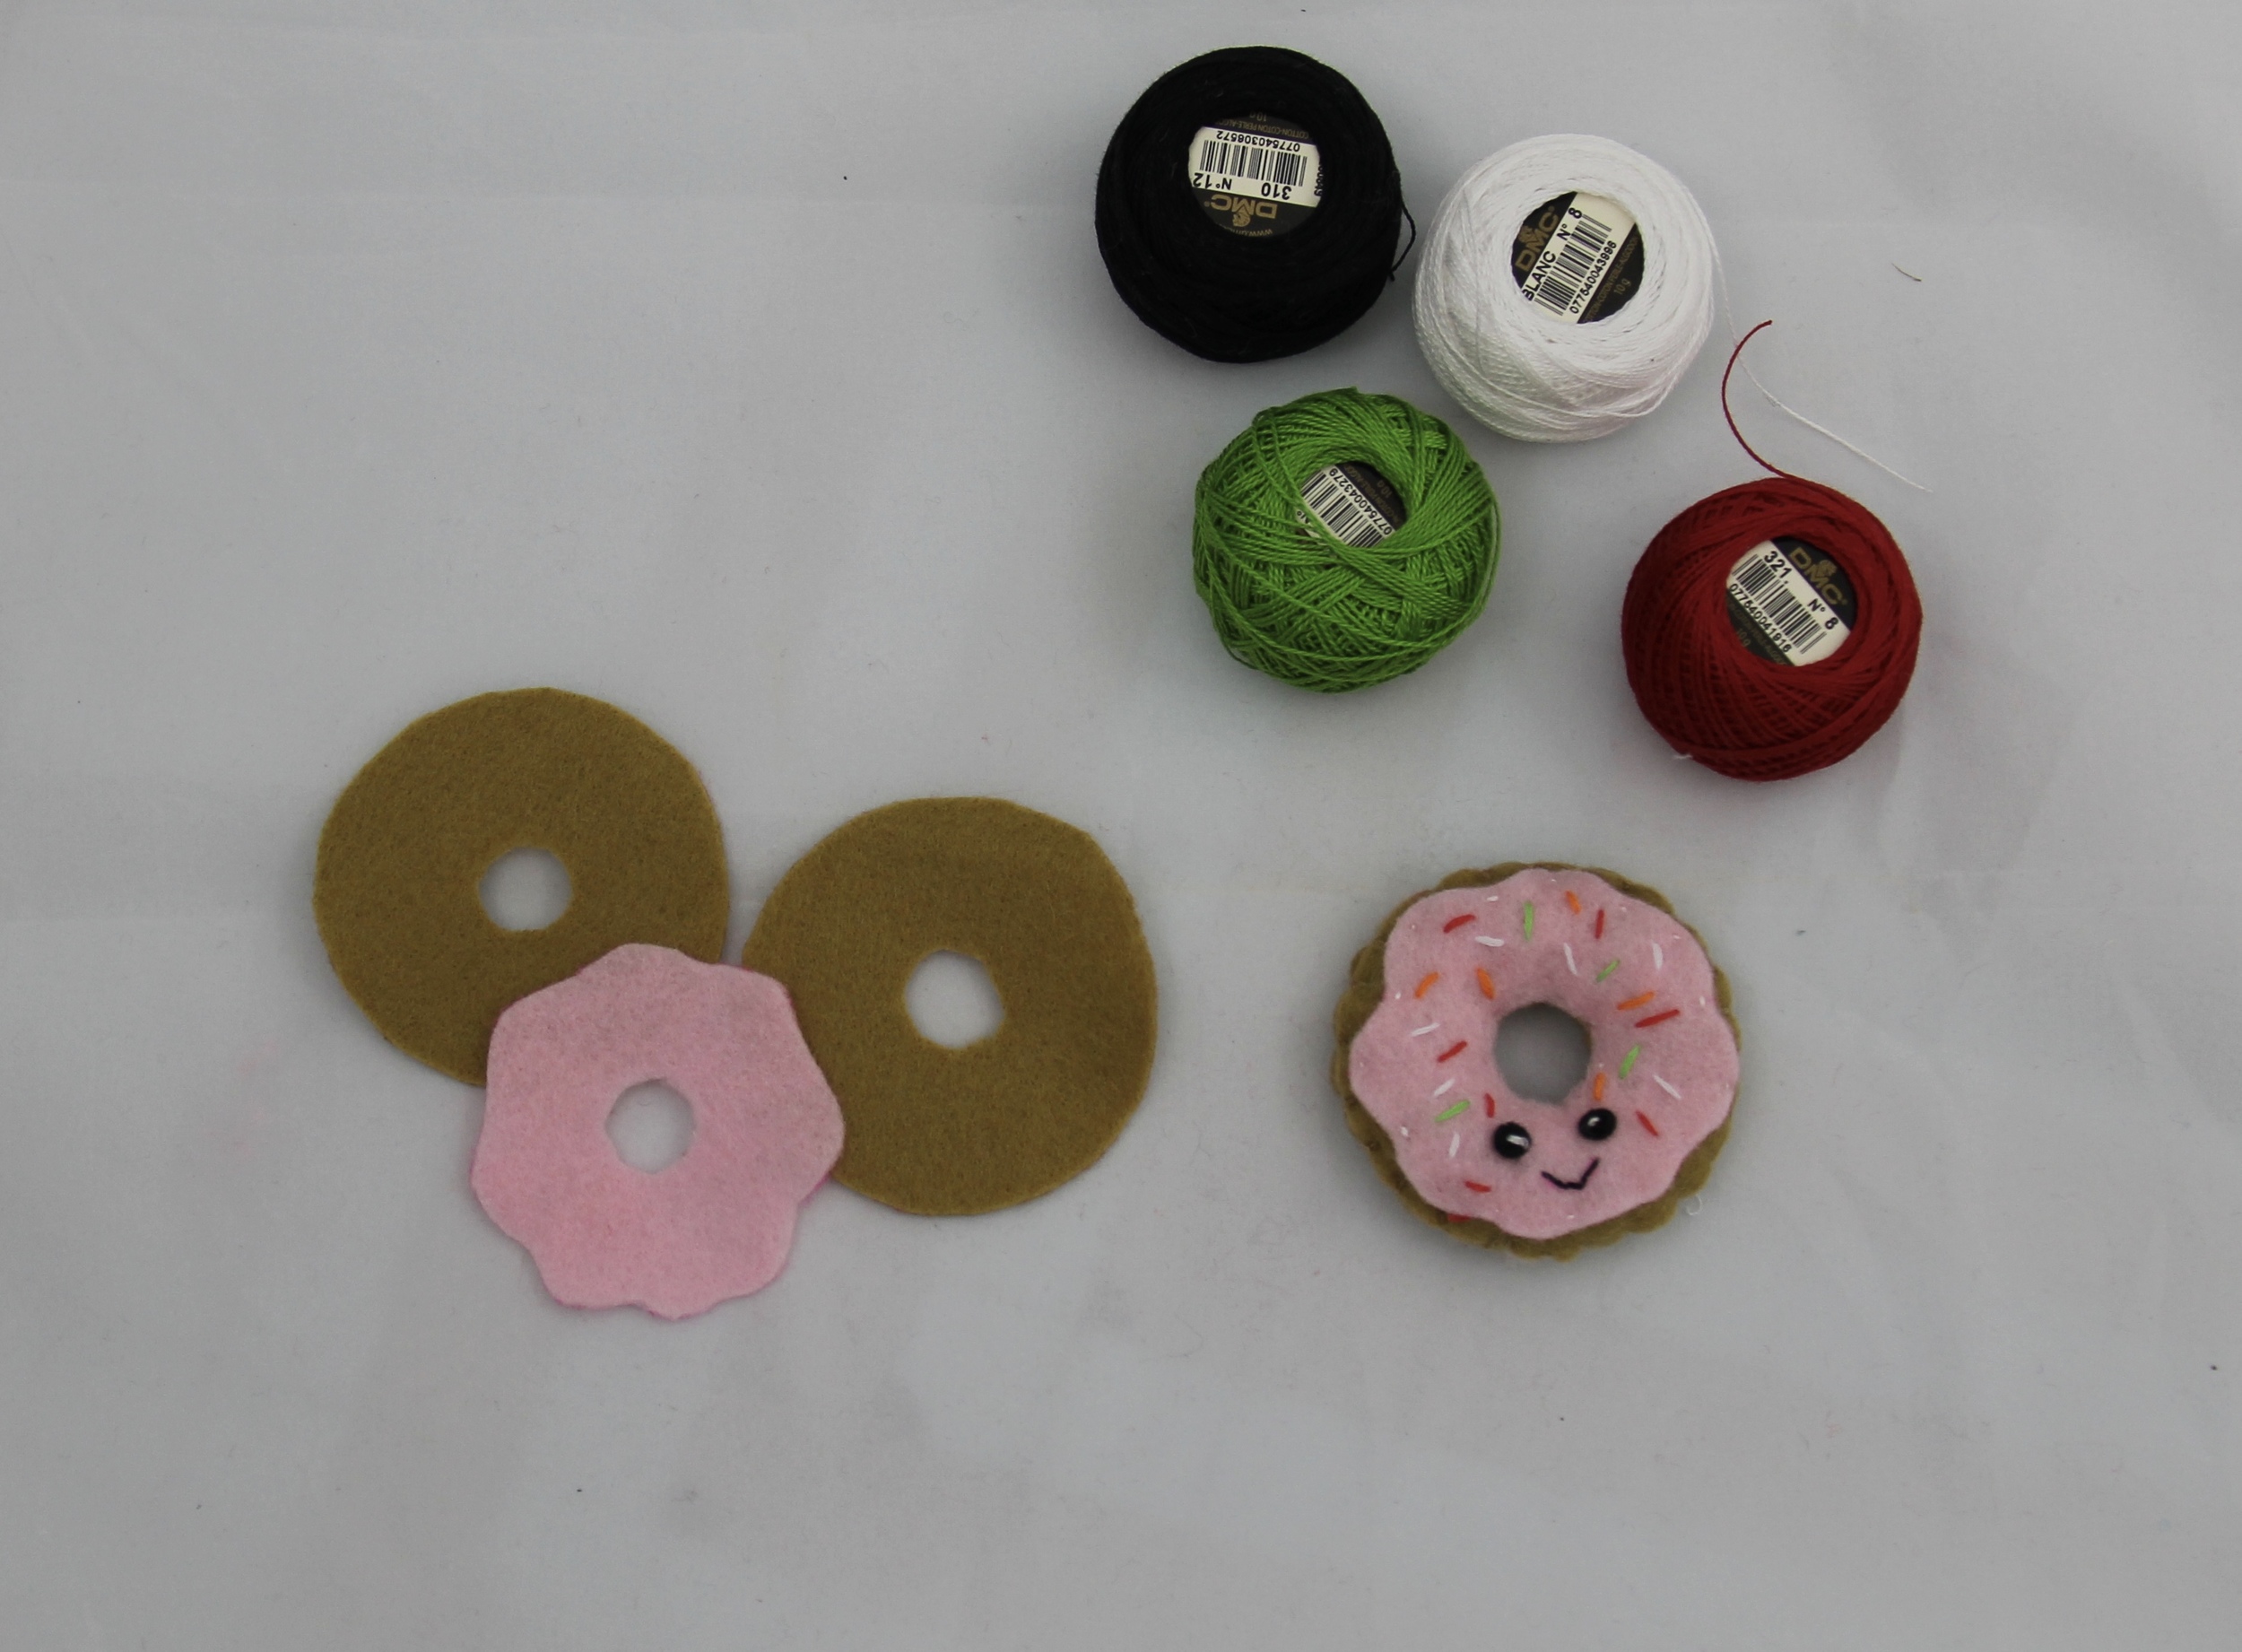
Once you have your shapes, decide where to add the eyes, cheeks and smile. Since I didn't add a template for the eyes and cheeks, just have your kids cut out small circles out of scrap felt. I used a paper punch for mine.
To sew the facial features and details, we are going to use a basic running stitch. It's beautiful in its simplicity, utility and function. Vary it with size and color and it adds such vitality and expression to this project.
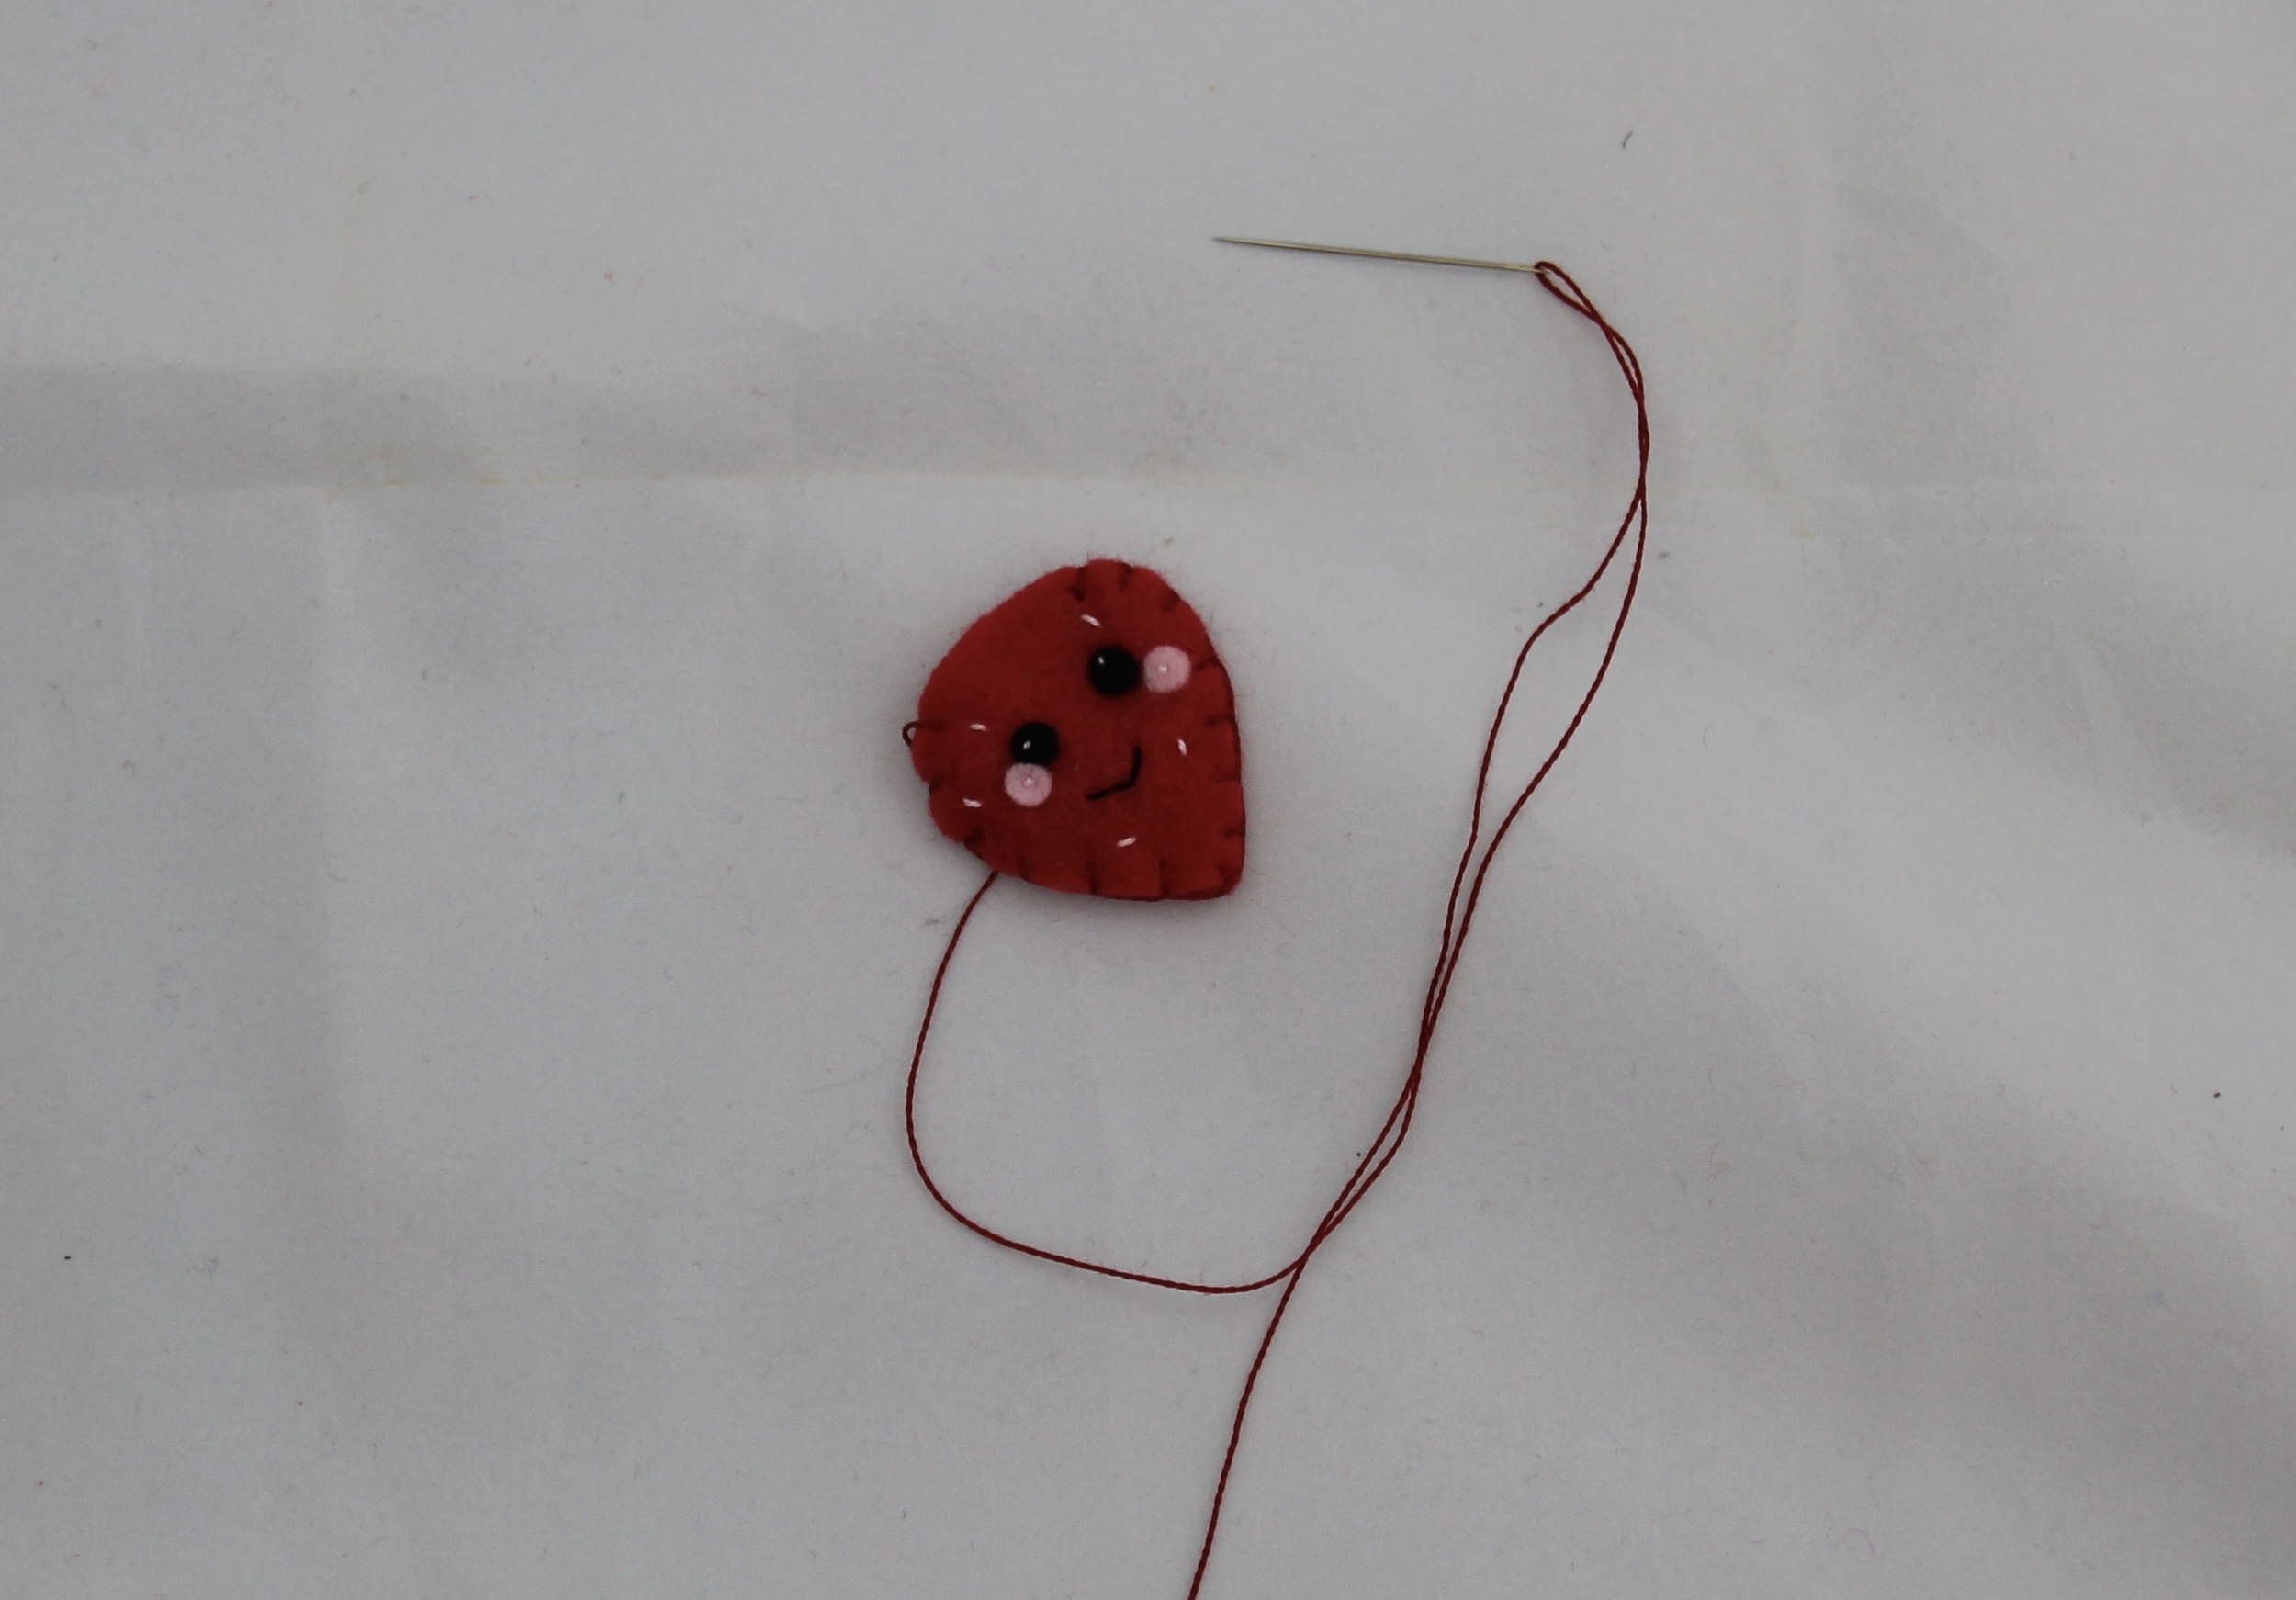
To sew the sides together (wrong sides together, we want to see those stitches!) I used a blanket stitch. Feel free to use any stitch you feel comfortable with.
Each Shopkin-ish is stitched and assembled in the same way. Eyes, cheeks, mouth, sprinkles, sides, stuff, close and finish.
I hope that you have enjoyed this tutorial and make something awesome with your special little ones. Thank you again, Trixi for inviting me to contribute.
XO,
Hilarie
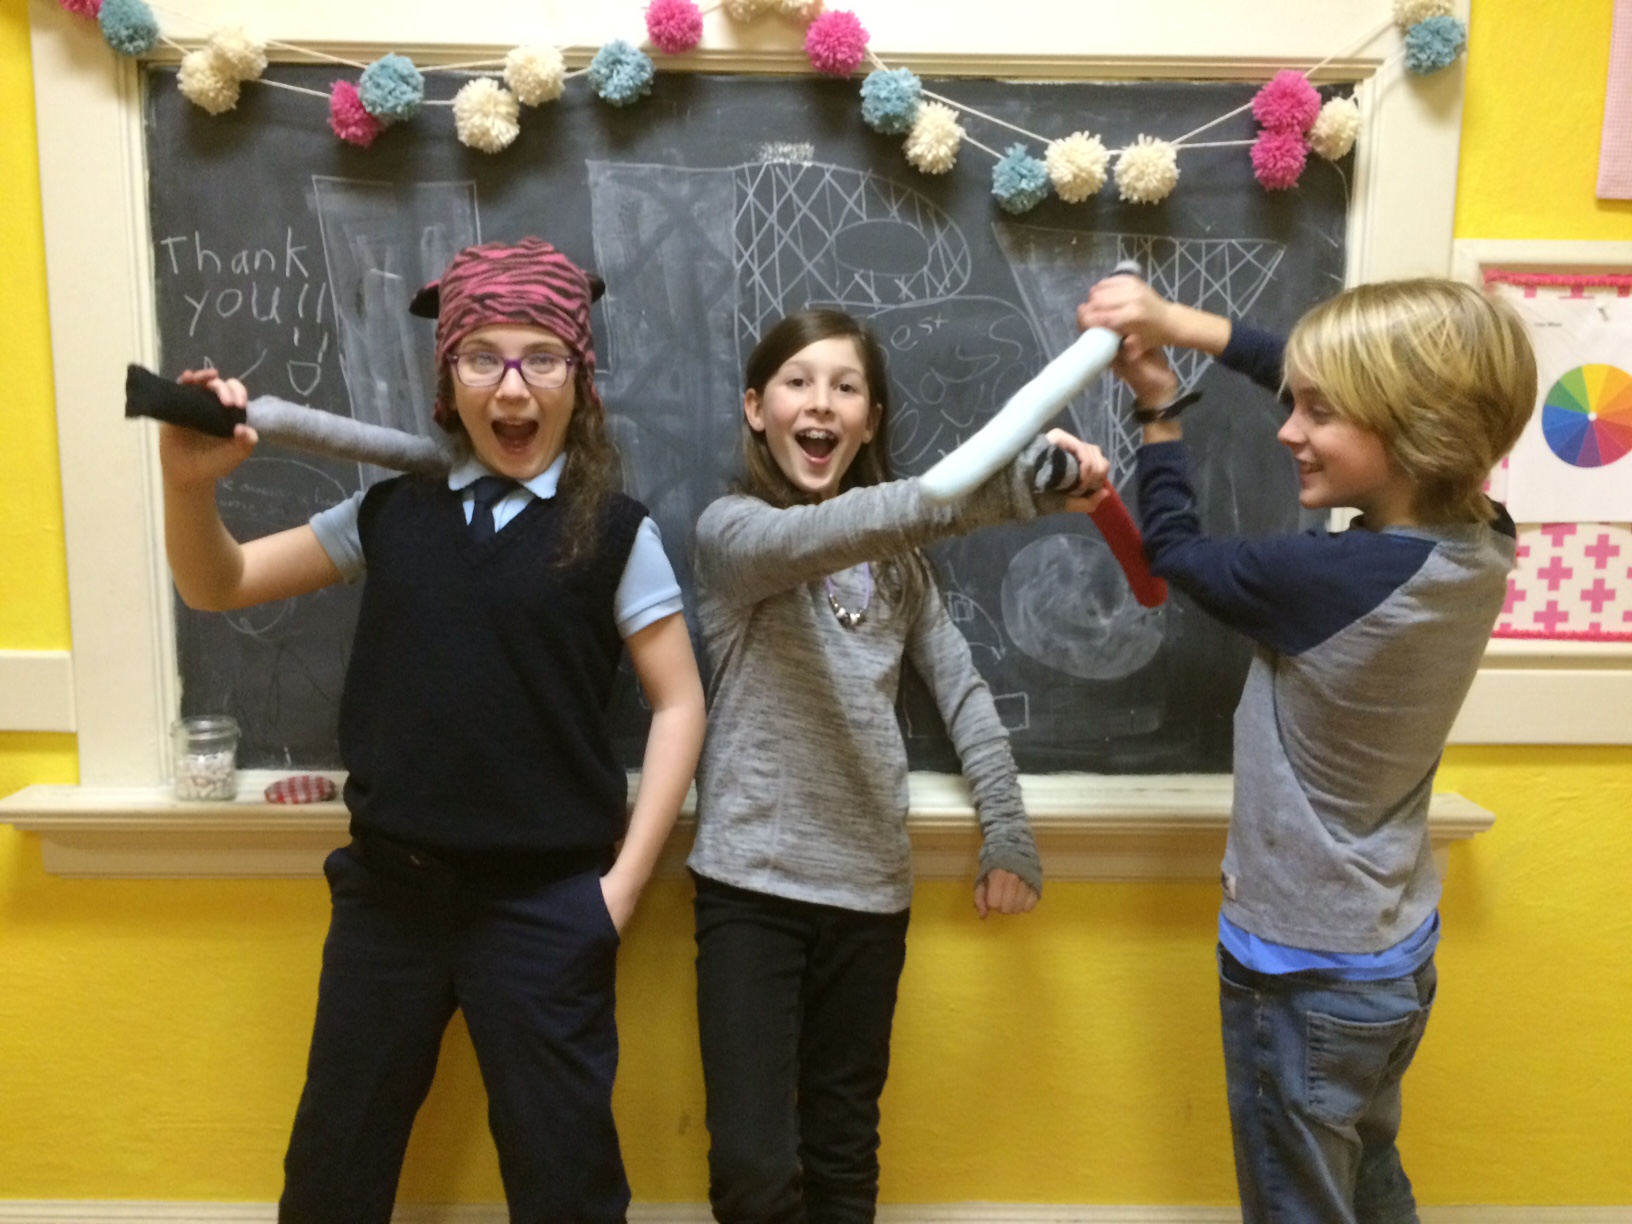
The force is strong with this one.
This past winter in my weekly sewing classes, the kids wanted to make something Star Wars. (The classes take on a whole different attitude when they include boys!) It only took a few minutes to come up with the idea, but why not make a "lightsaber" that they can actually hit each other with and not get hurt. This is a super easy project, that kids love!
This past winter in my weekly sewing classes, the kids wanted to make something Star Wars. (The classes take on a whole different attitude when they include boys!) It only took a few minutes to come up with the idea, but why not make a "lightsaber" that they can actually hit each other with and not get hurt. This is a super easy project, that kids love!
May 4th and 5th, are highly regarded holidays around our house. My kids can't wait to go downtown to the annual Revenge of the Fifth Lightsaber Battle. They have been plotting details and their battle strategies for weeks now. In honor of May the Fourth and Revenge of the Fifth, I've prepared a DIY Lightsaber tutorial for you.
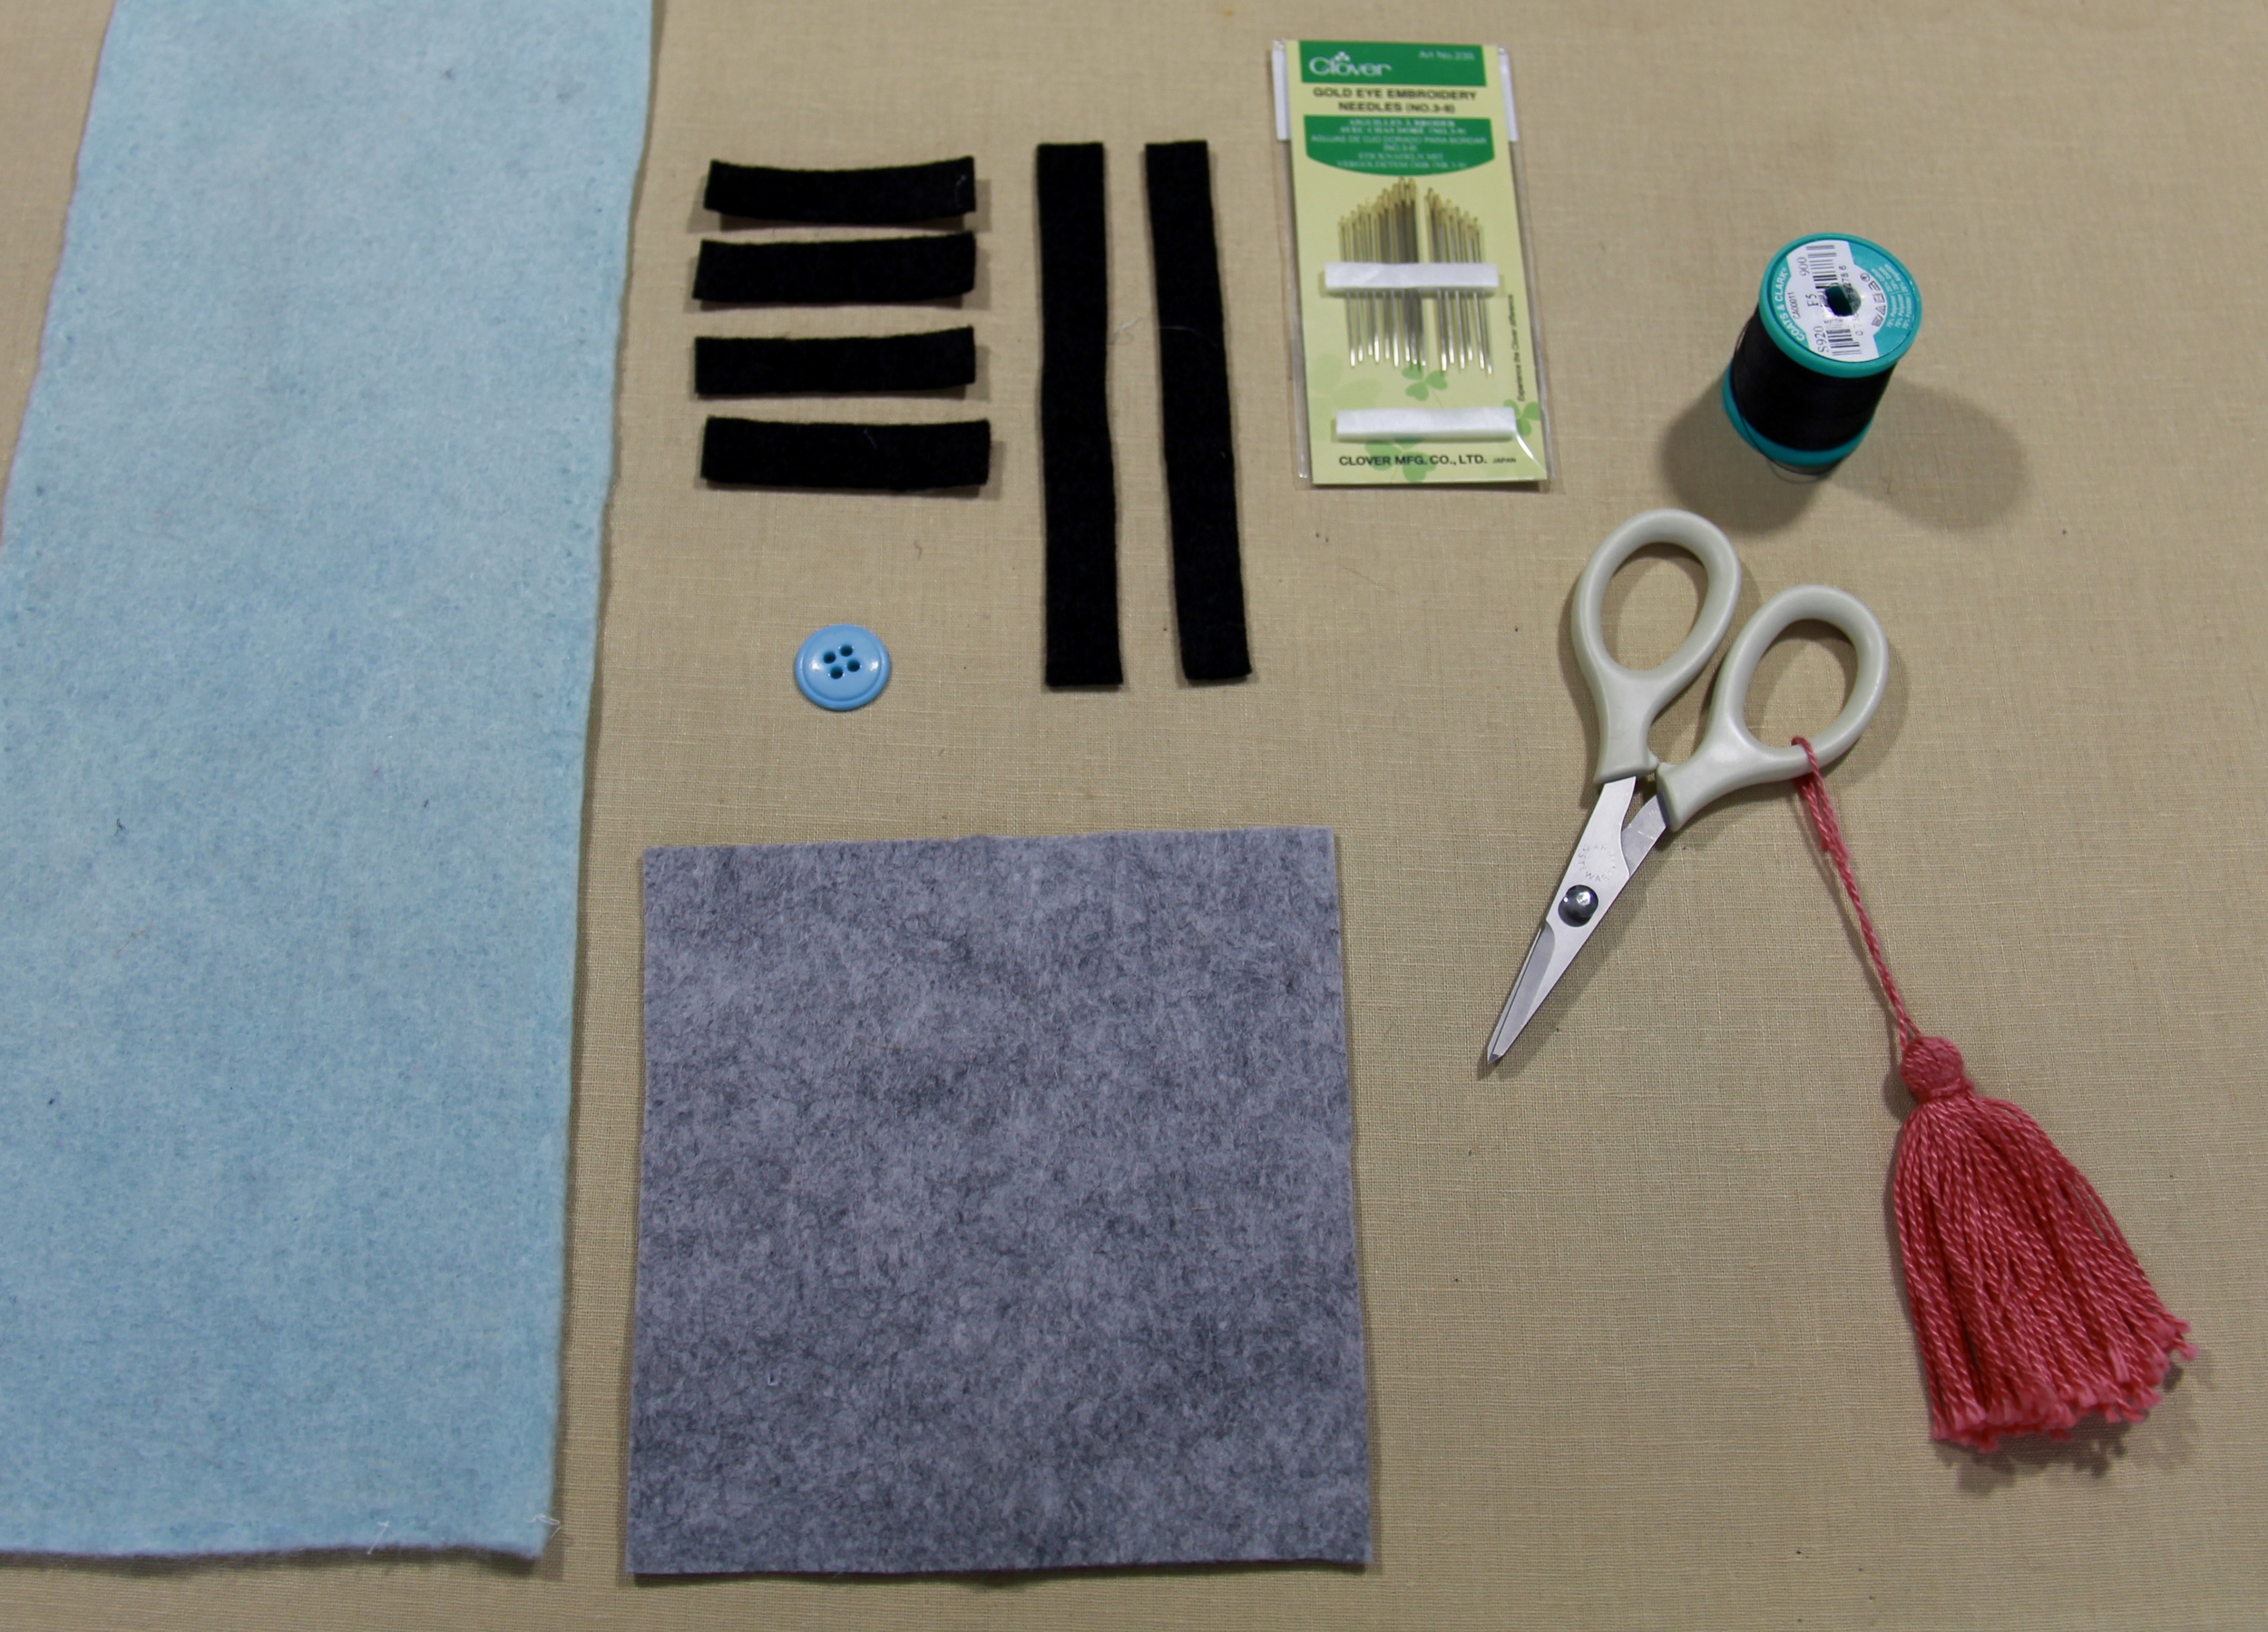
Materials Needed
Wool felt grey and black for the hilt and blue, green or red (Jedi or Sith?) for the blade
thread
needle
3/4" button
polyfill
a 30" piece of yarn or string
Cutting
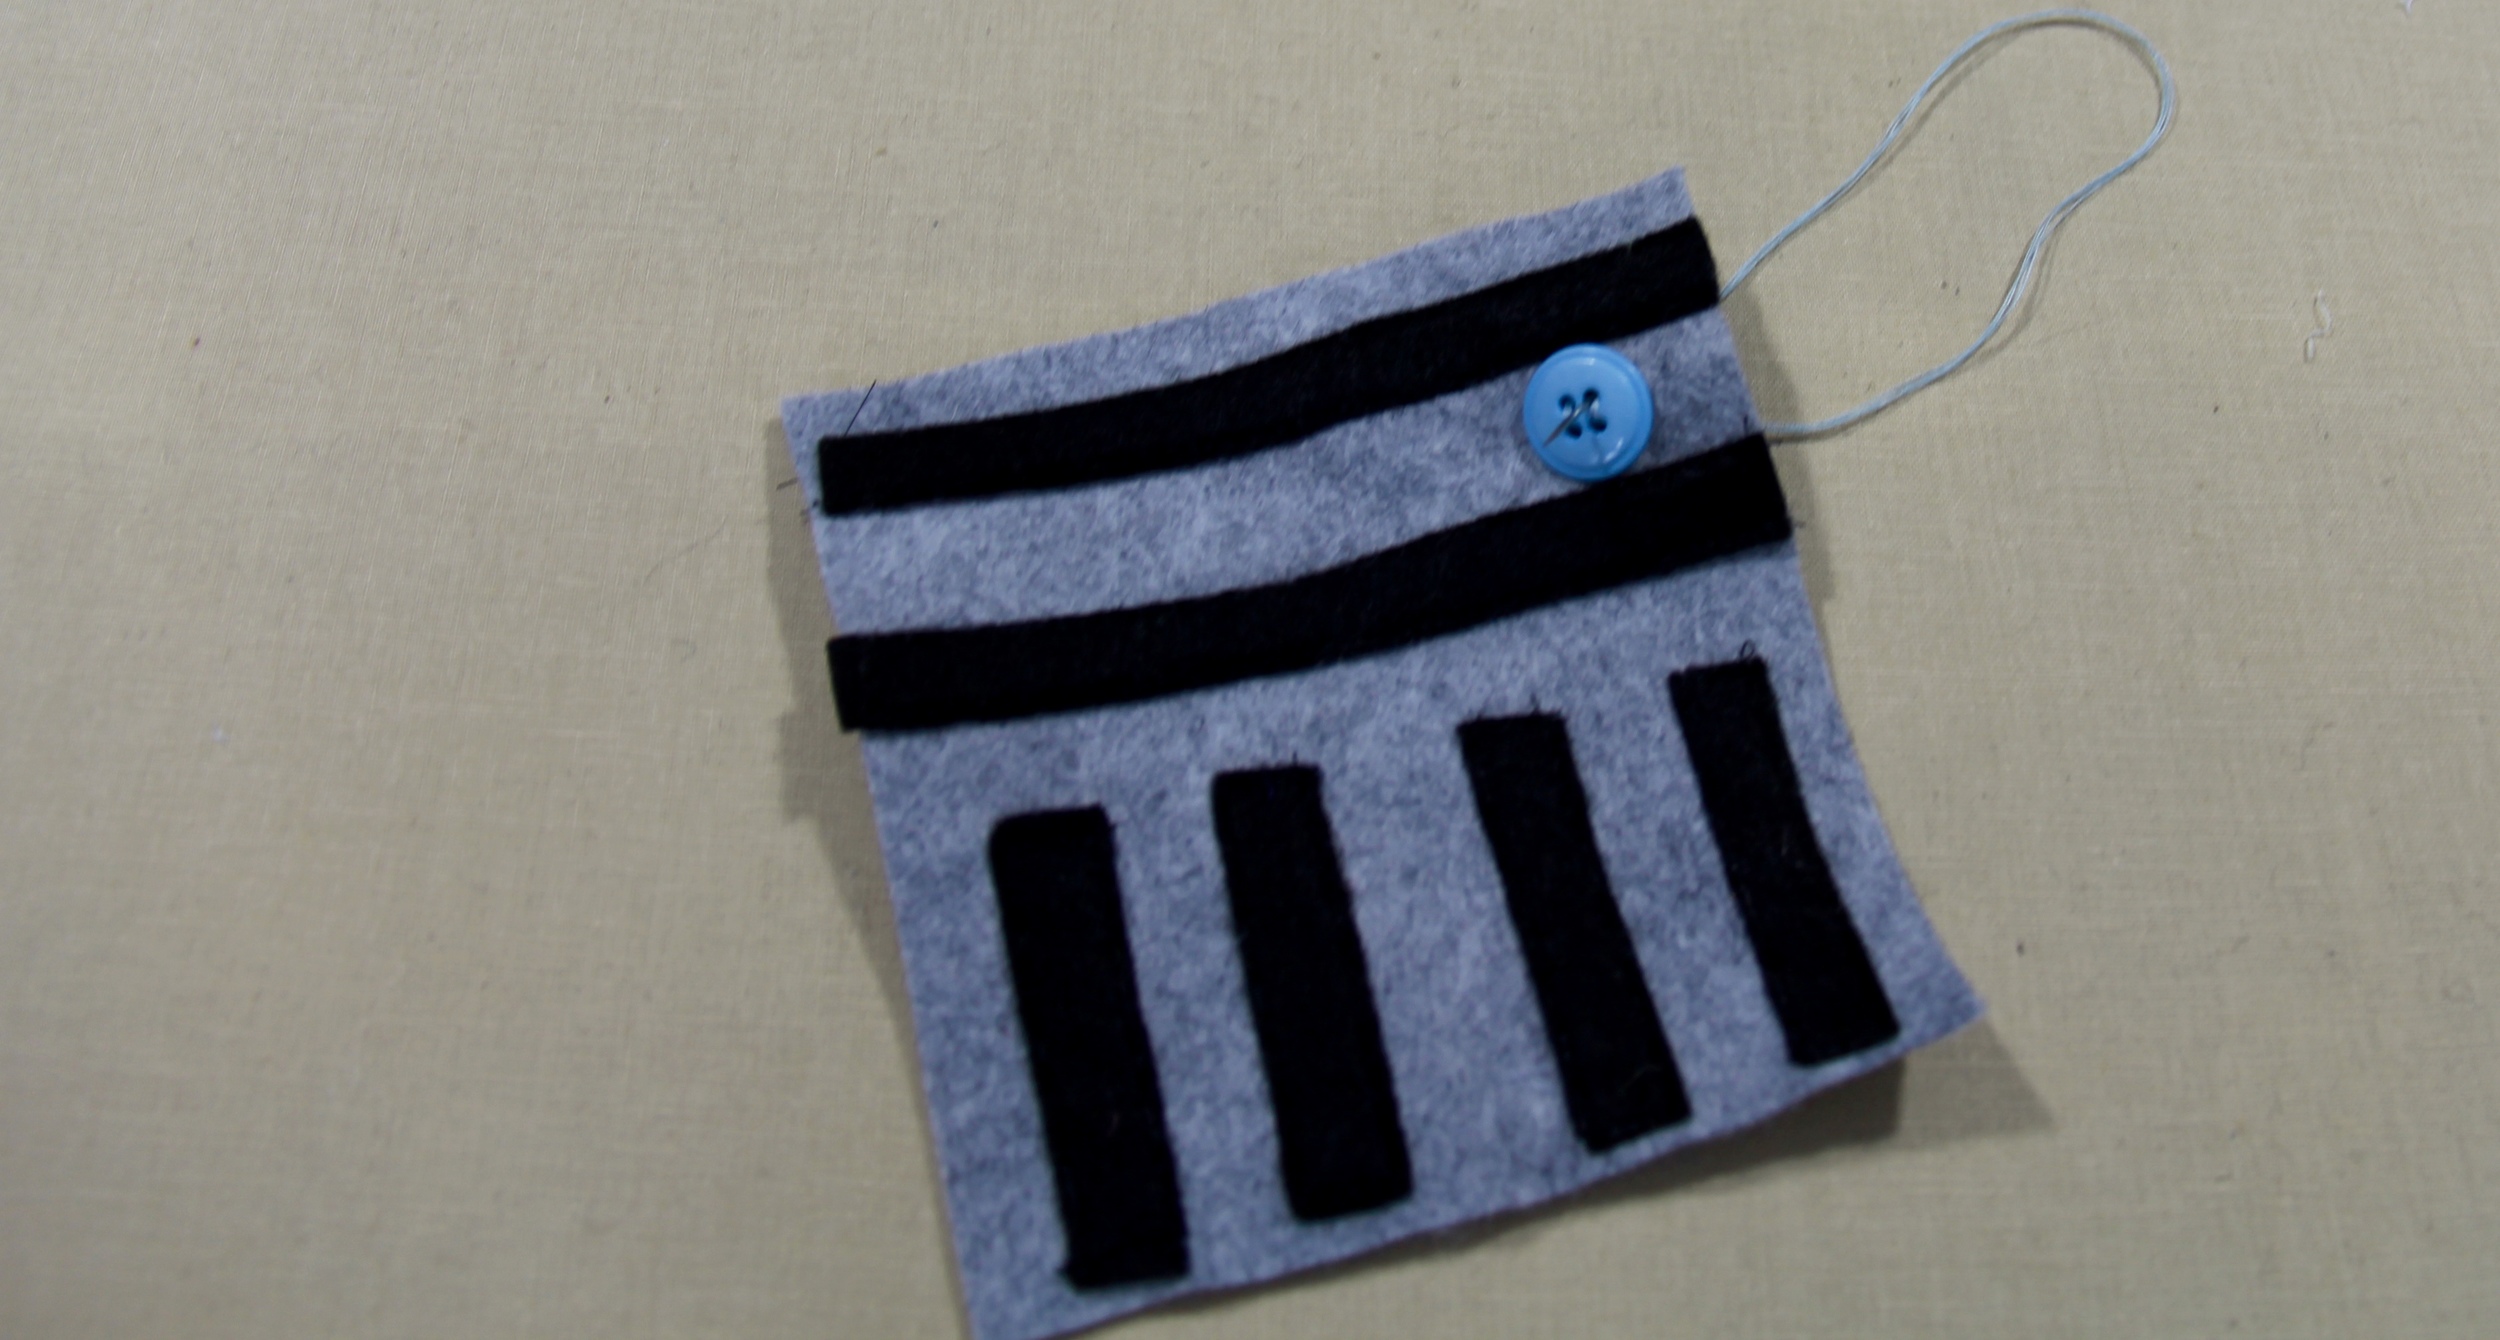
one 5"x5" piece of grey felt for the hilt
one small piece of grey felt to cut into a circle to cap the hilt (we will cut this out a bit later)
one 13"x5" piece of colored felt for the blade
two 1/2" x 5" strips of black felt
four 1/2"x 2" strips of black felt
Sewing
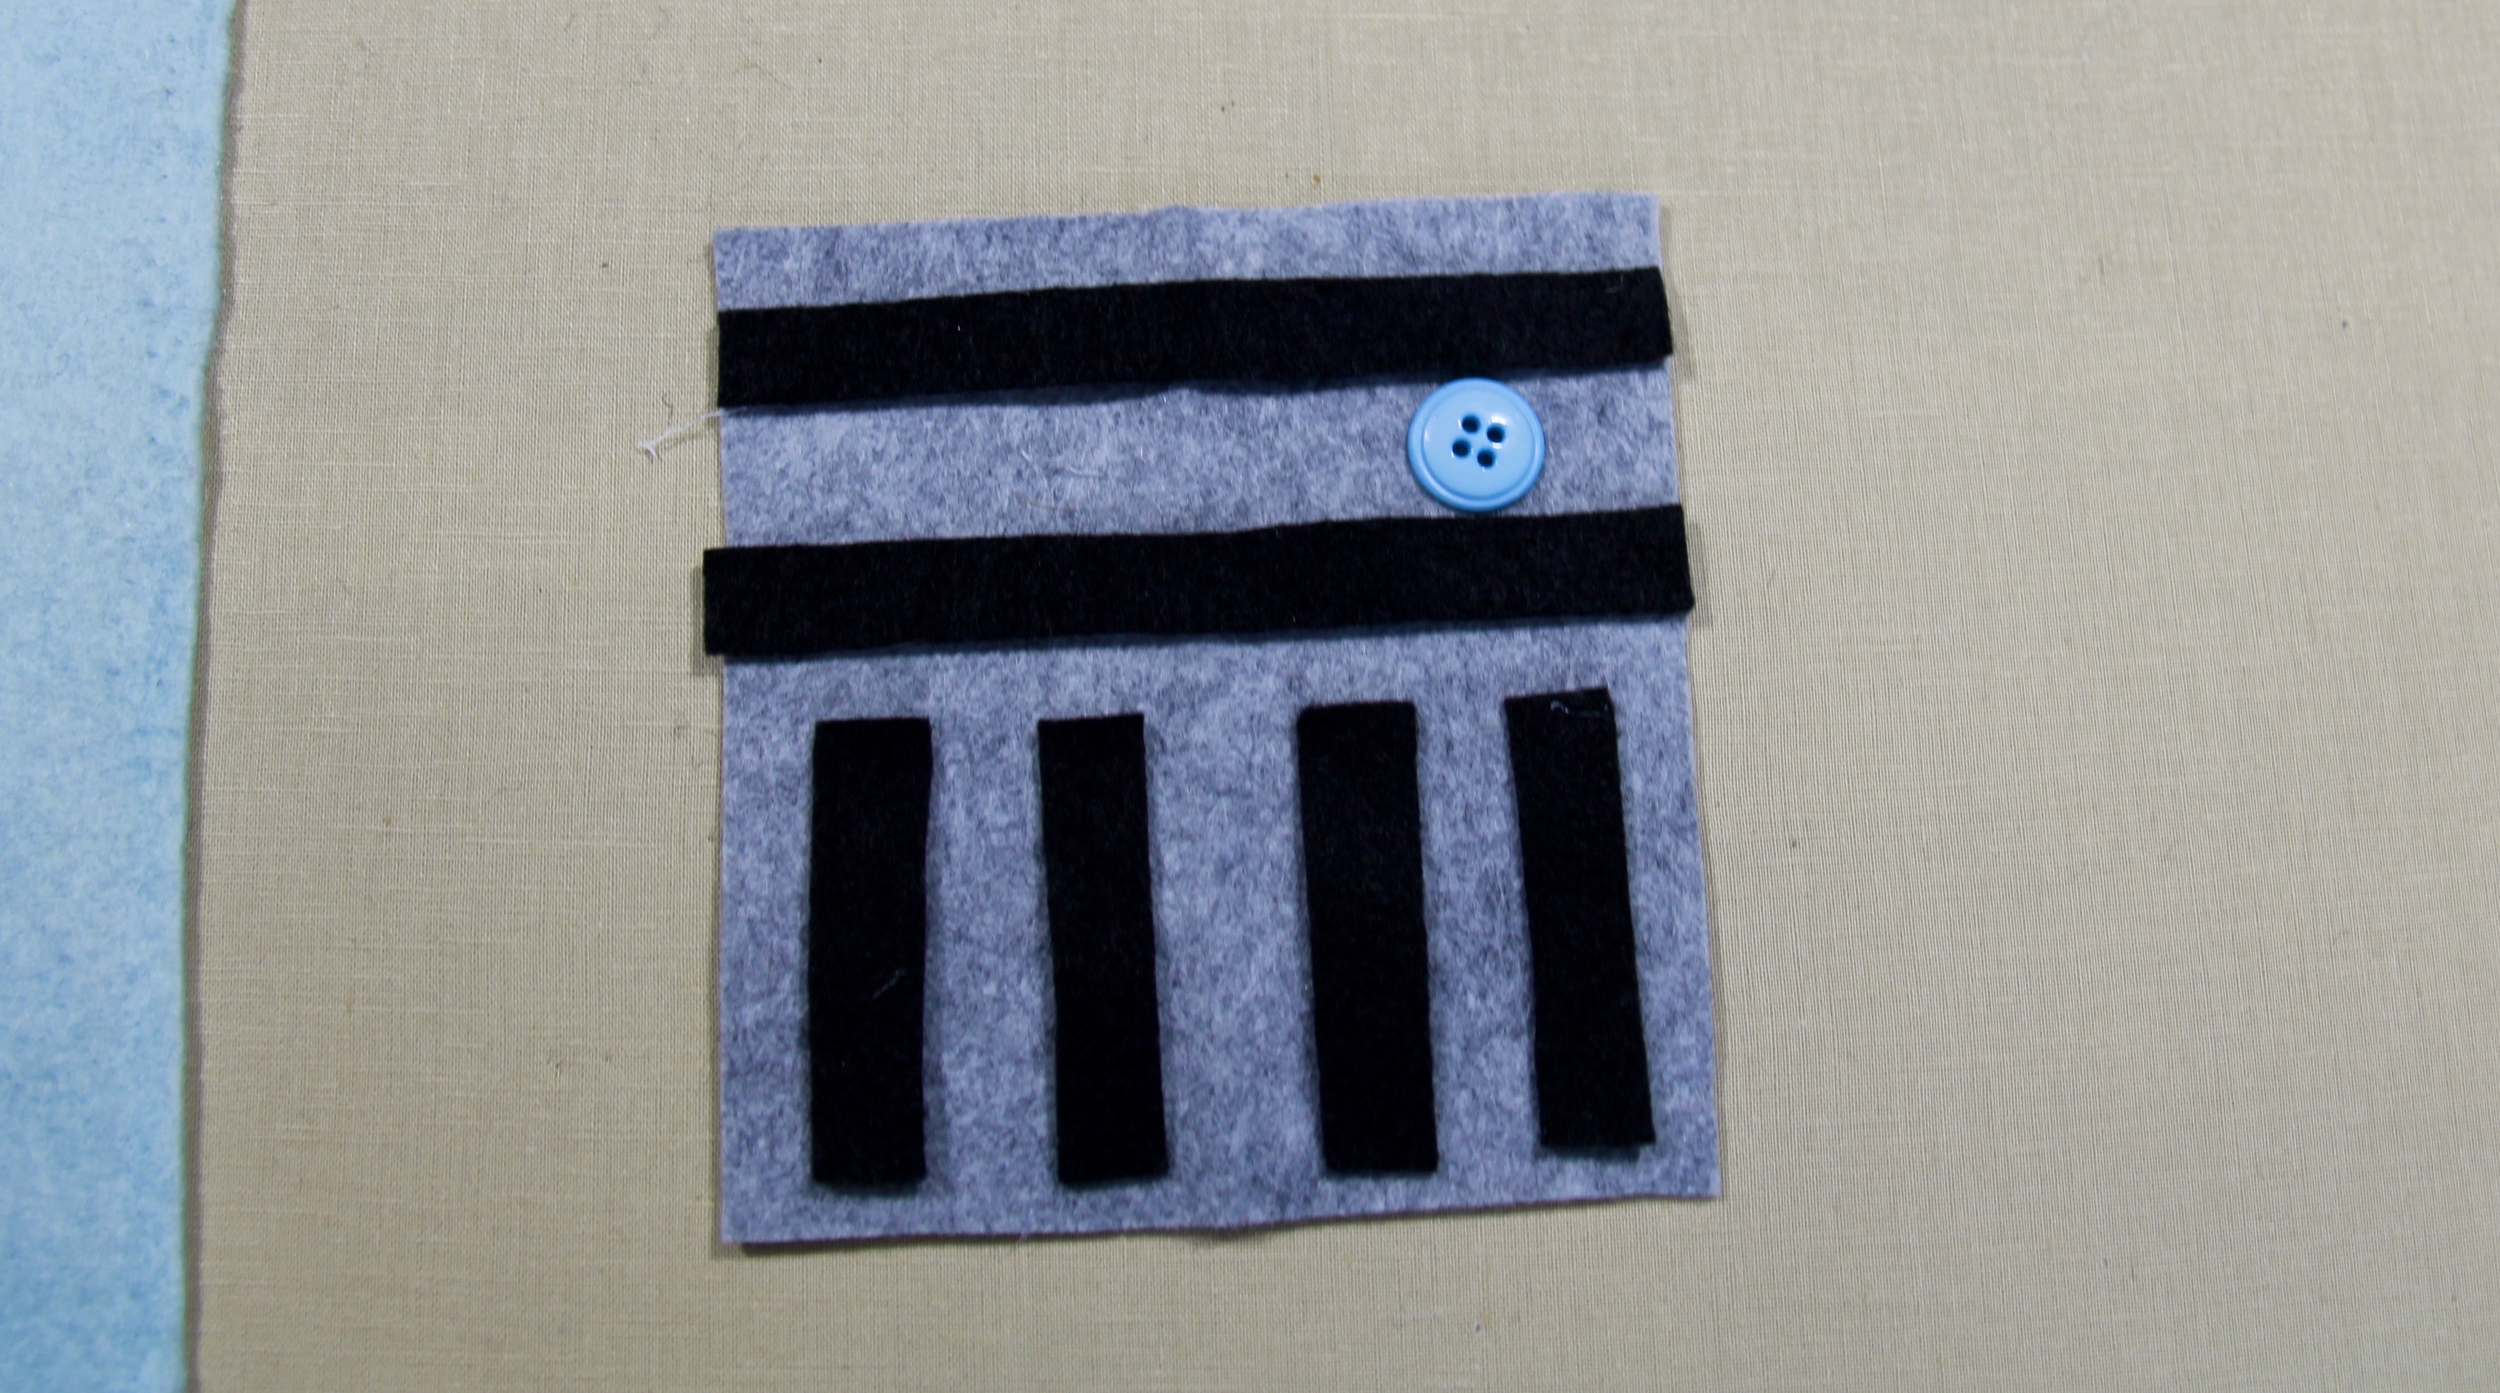
Begin by threading a needle with about an 18" length of thread. Stitch each black piece of felt to the grey hilt. Sometimes it helps to use a glue stick and glue each piece first. Let it dry for a couple of minutes, then stitch over it.

Next, sew the button between the two longer horizontal strips.
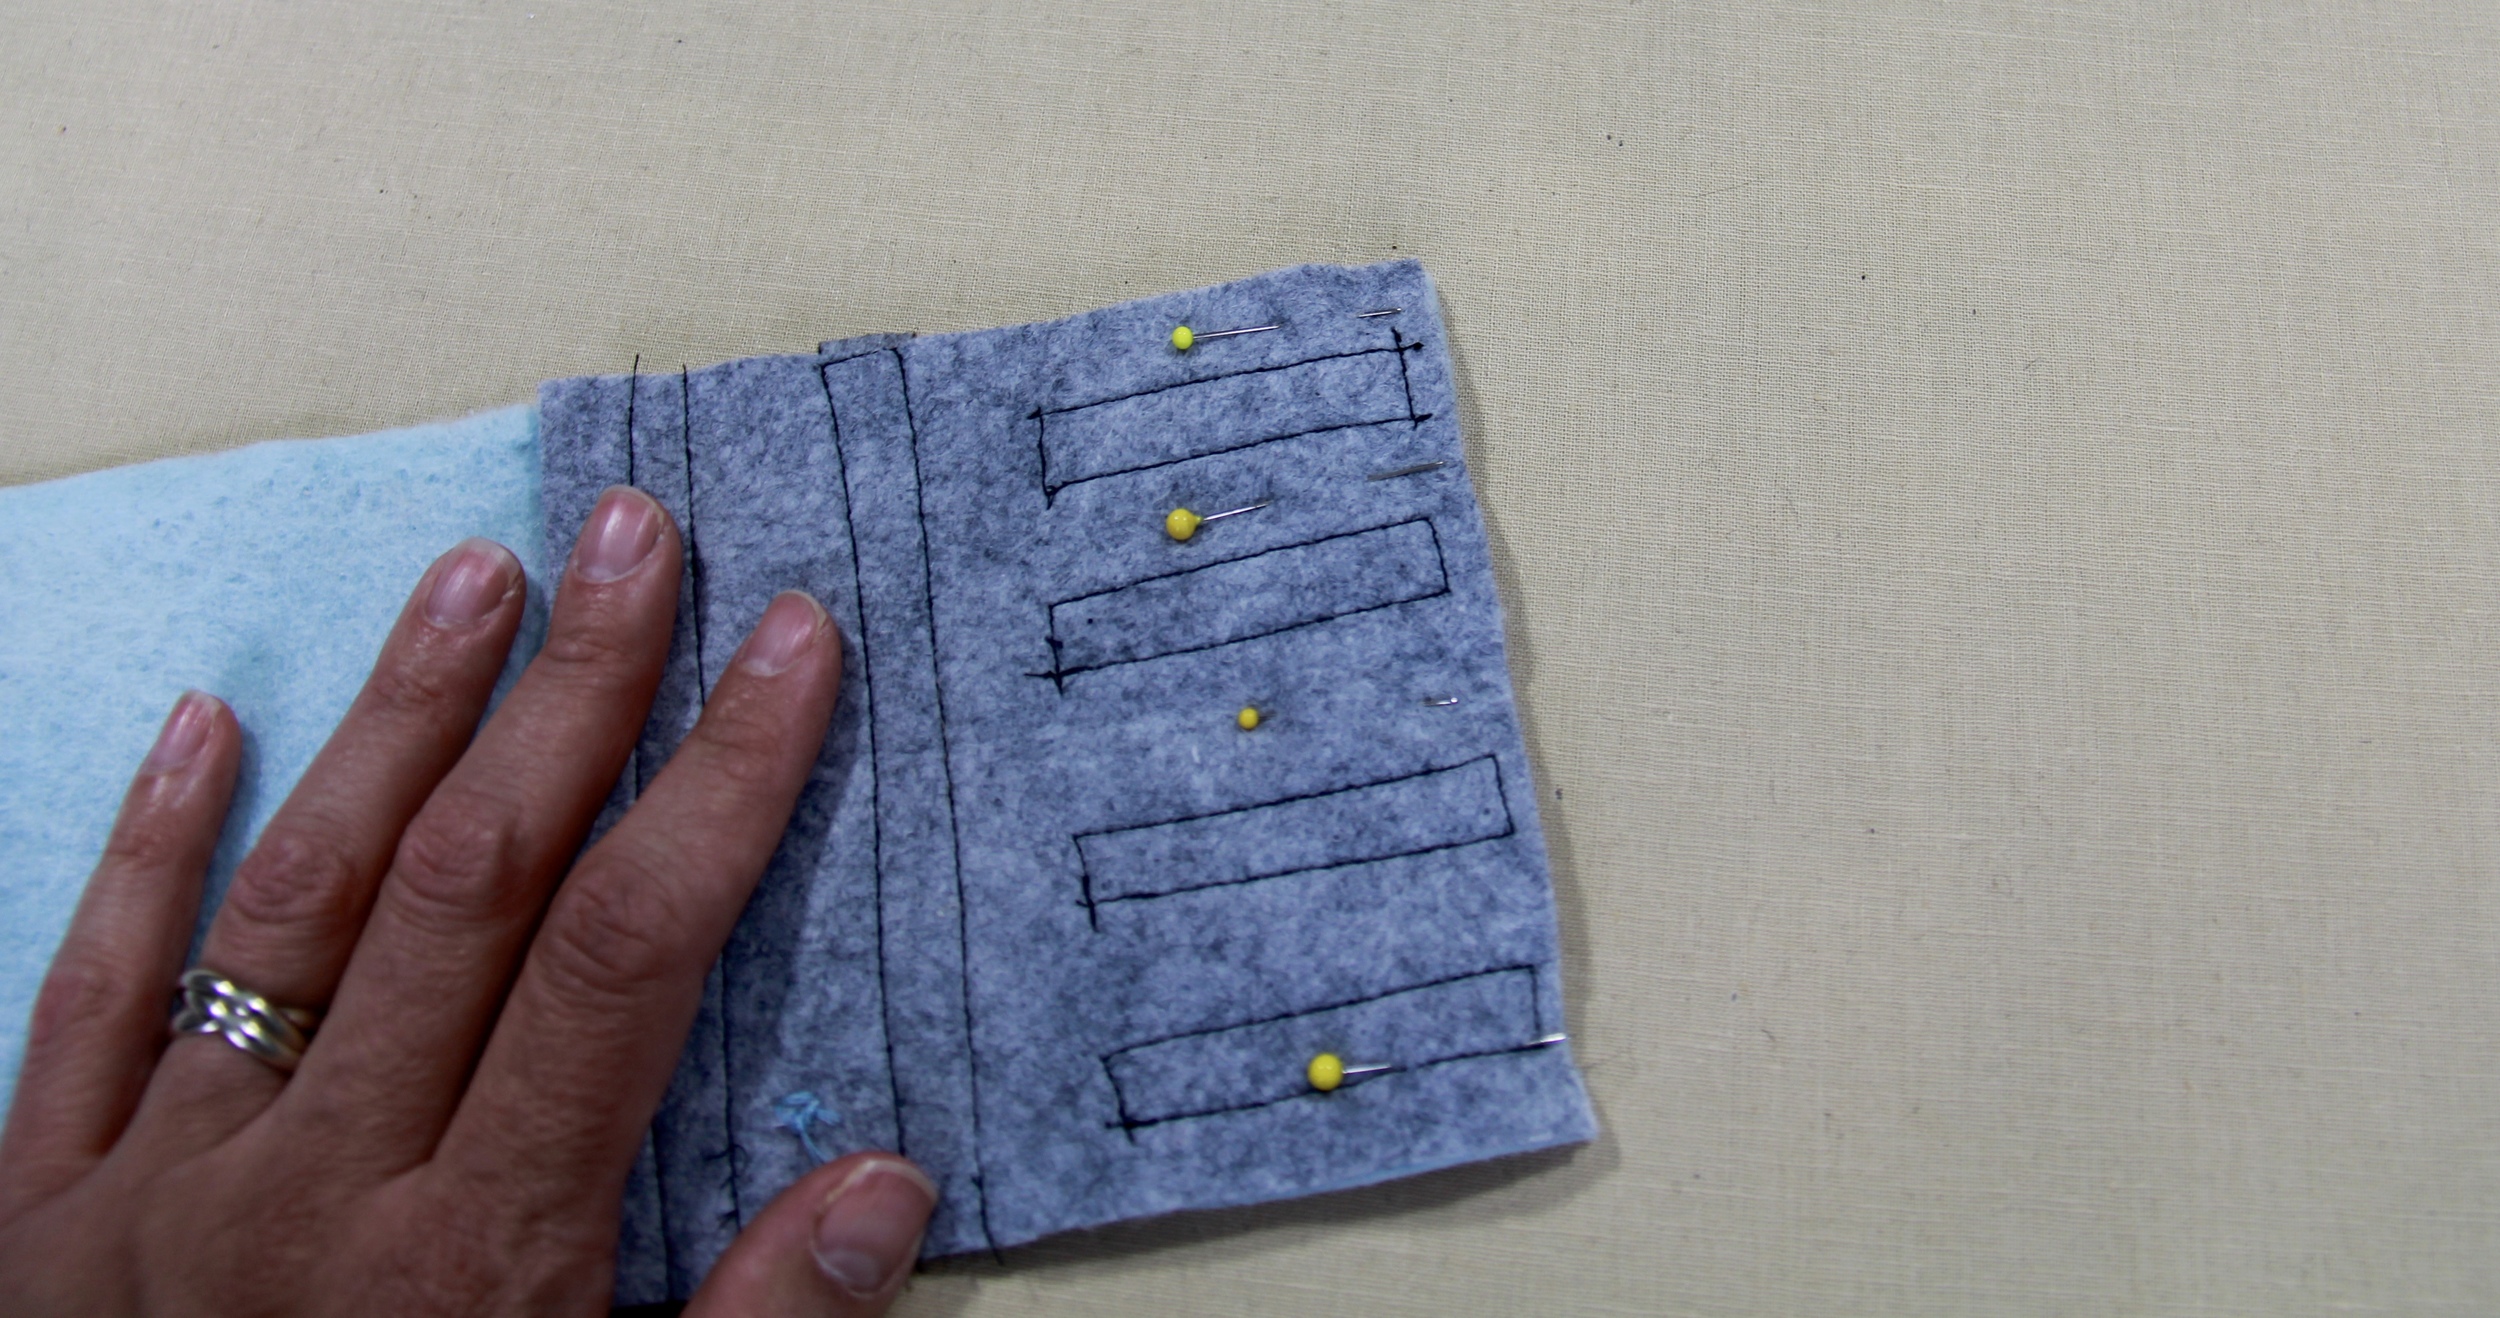
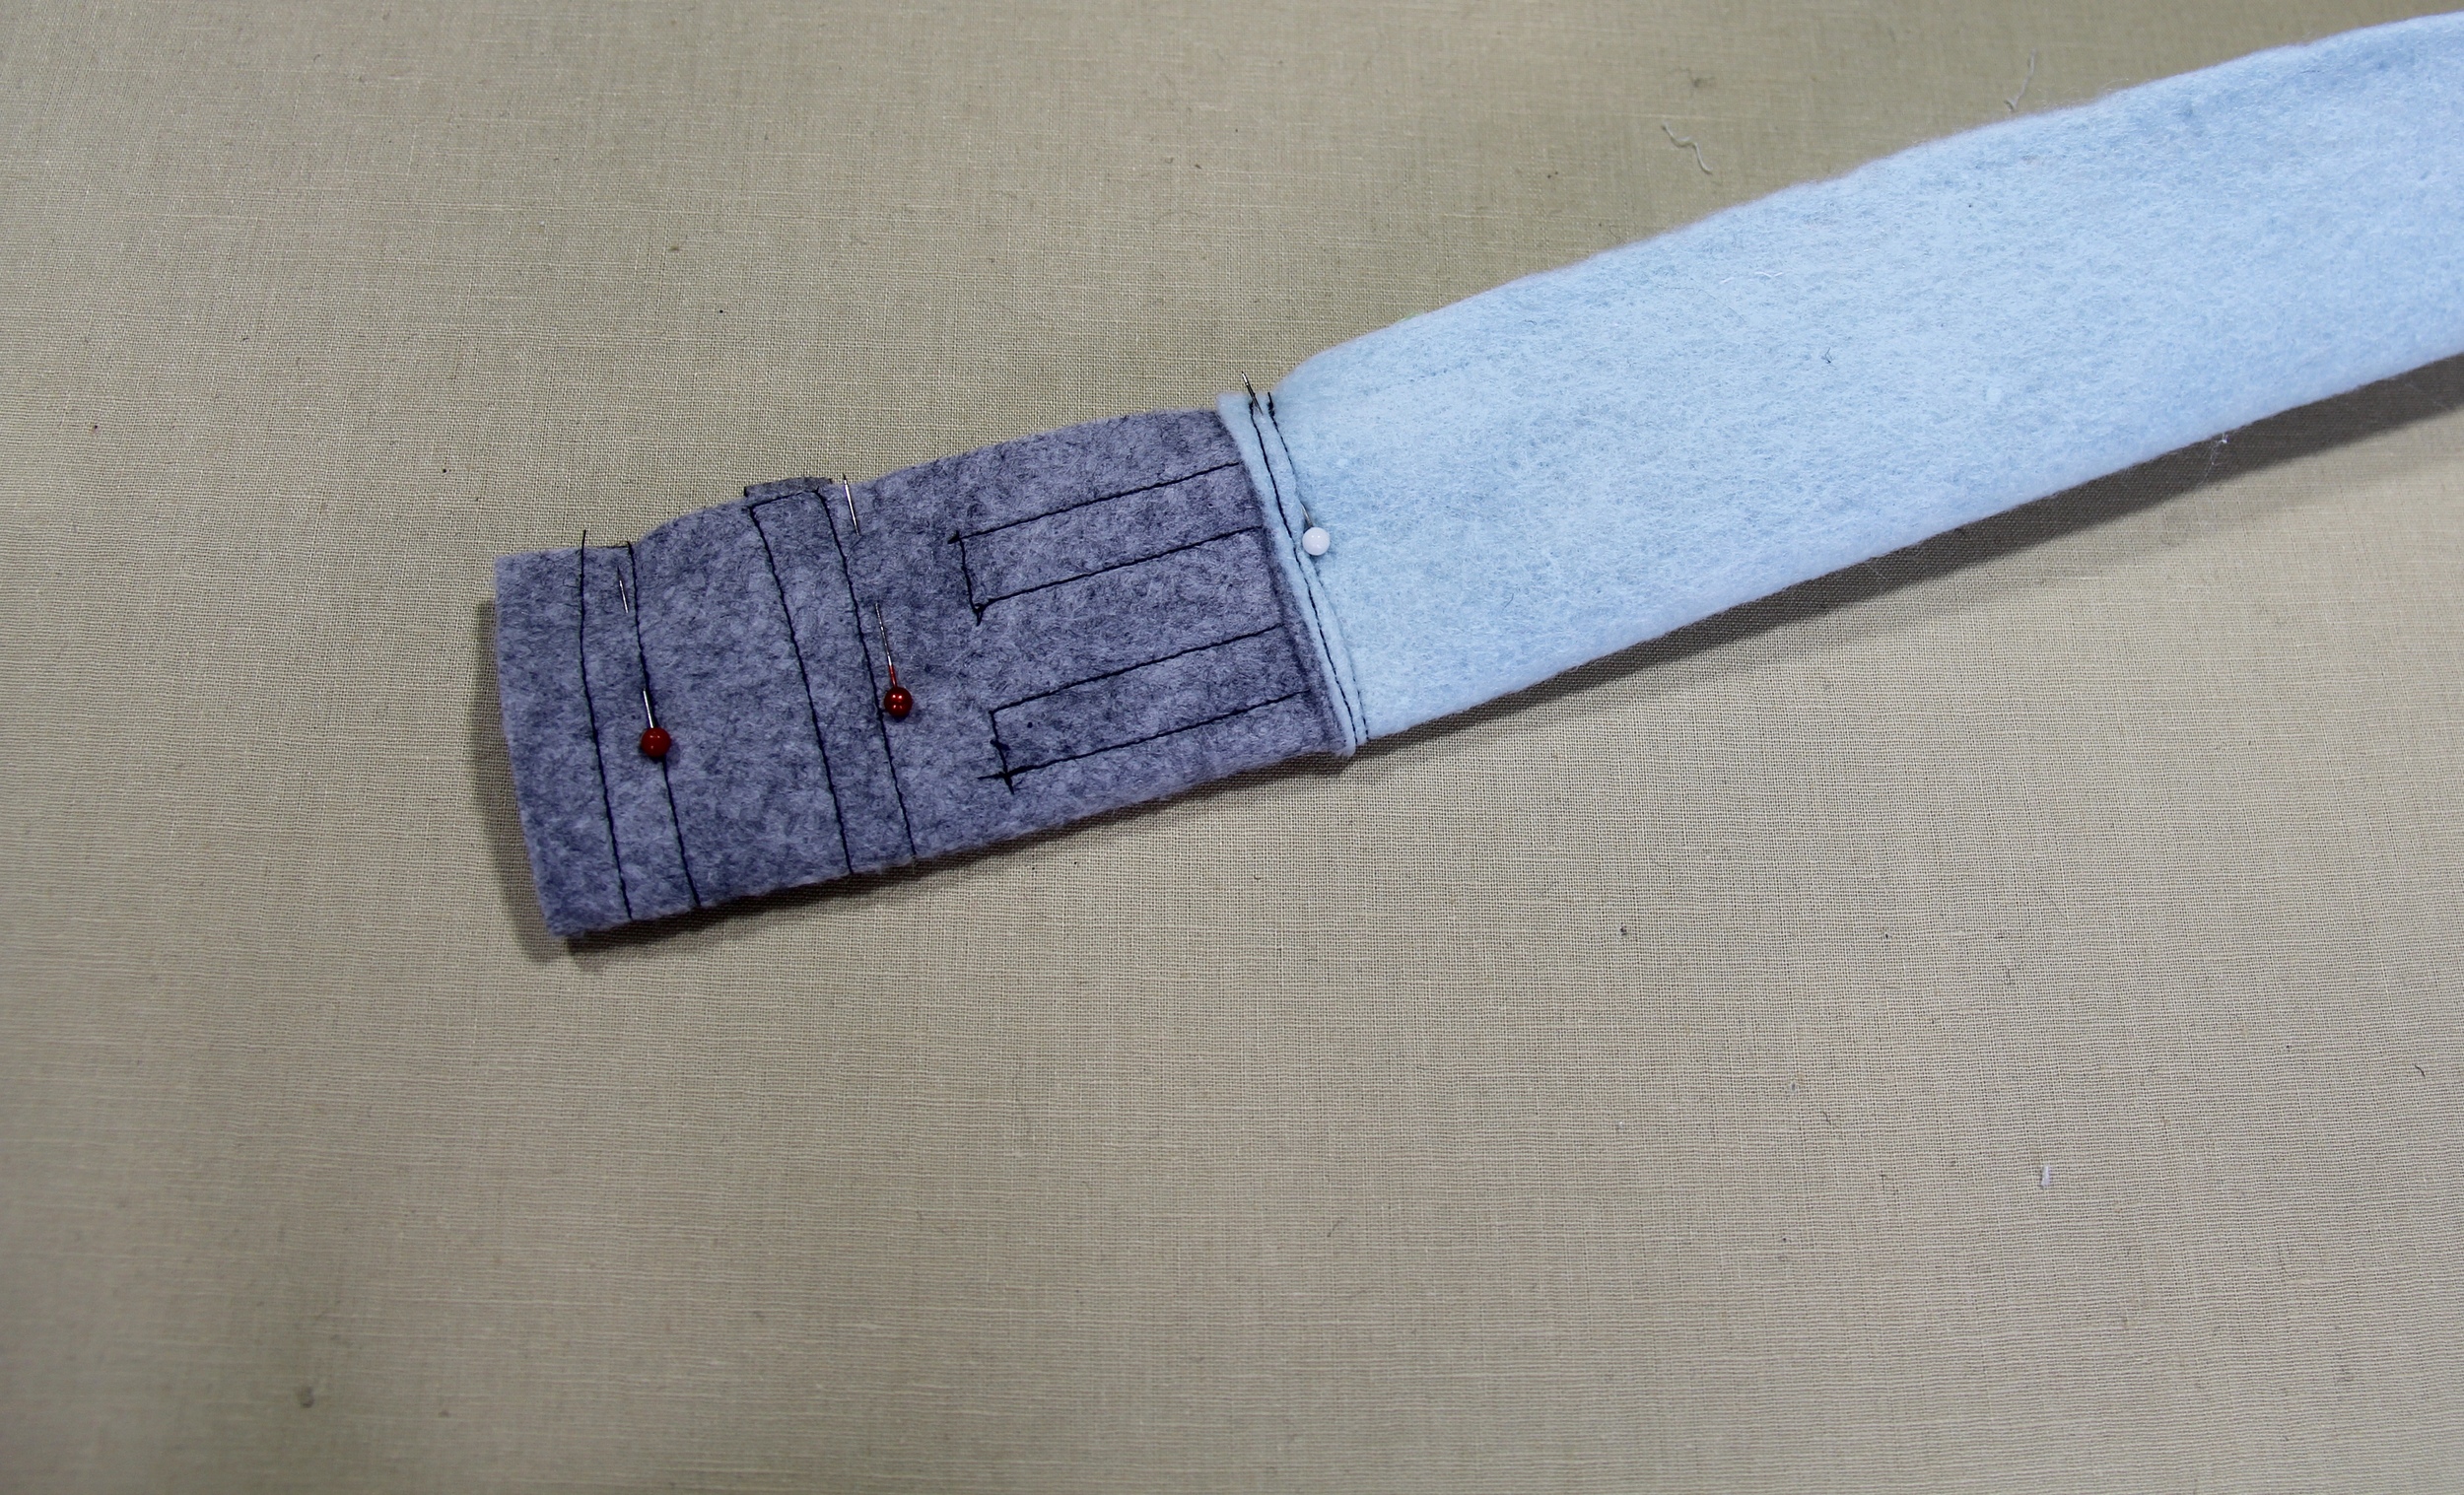
After you have stitched the button and each black strip, place the right sides of the hilt and blade together, pin and stitch.

Turn over and stitch across the hilt, make sure to tuck the previous seam toward the hilt and topstitch across.
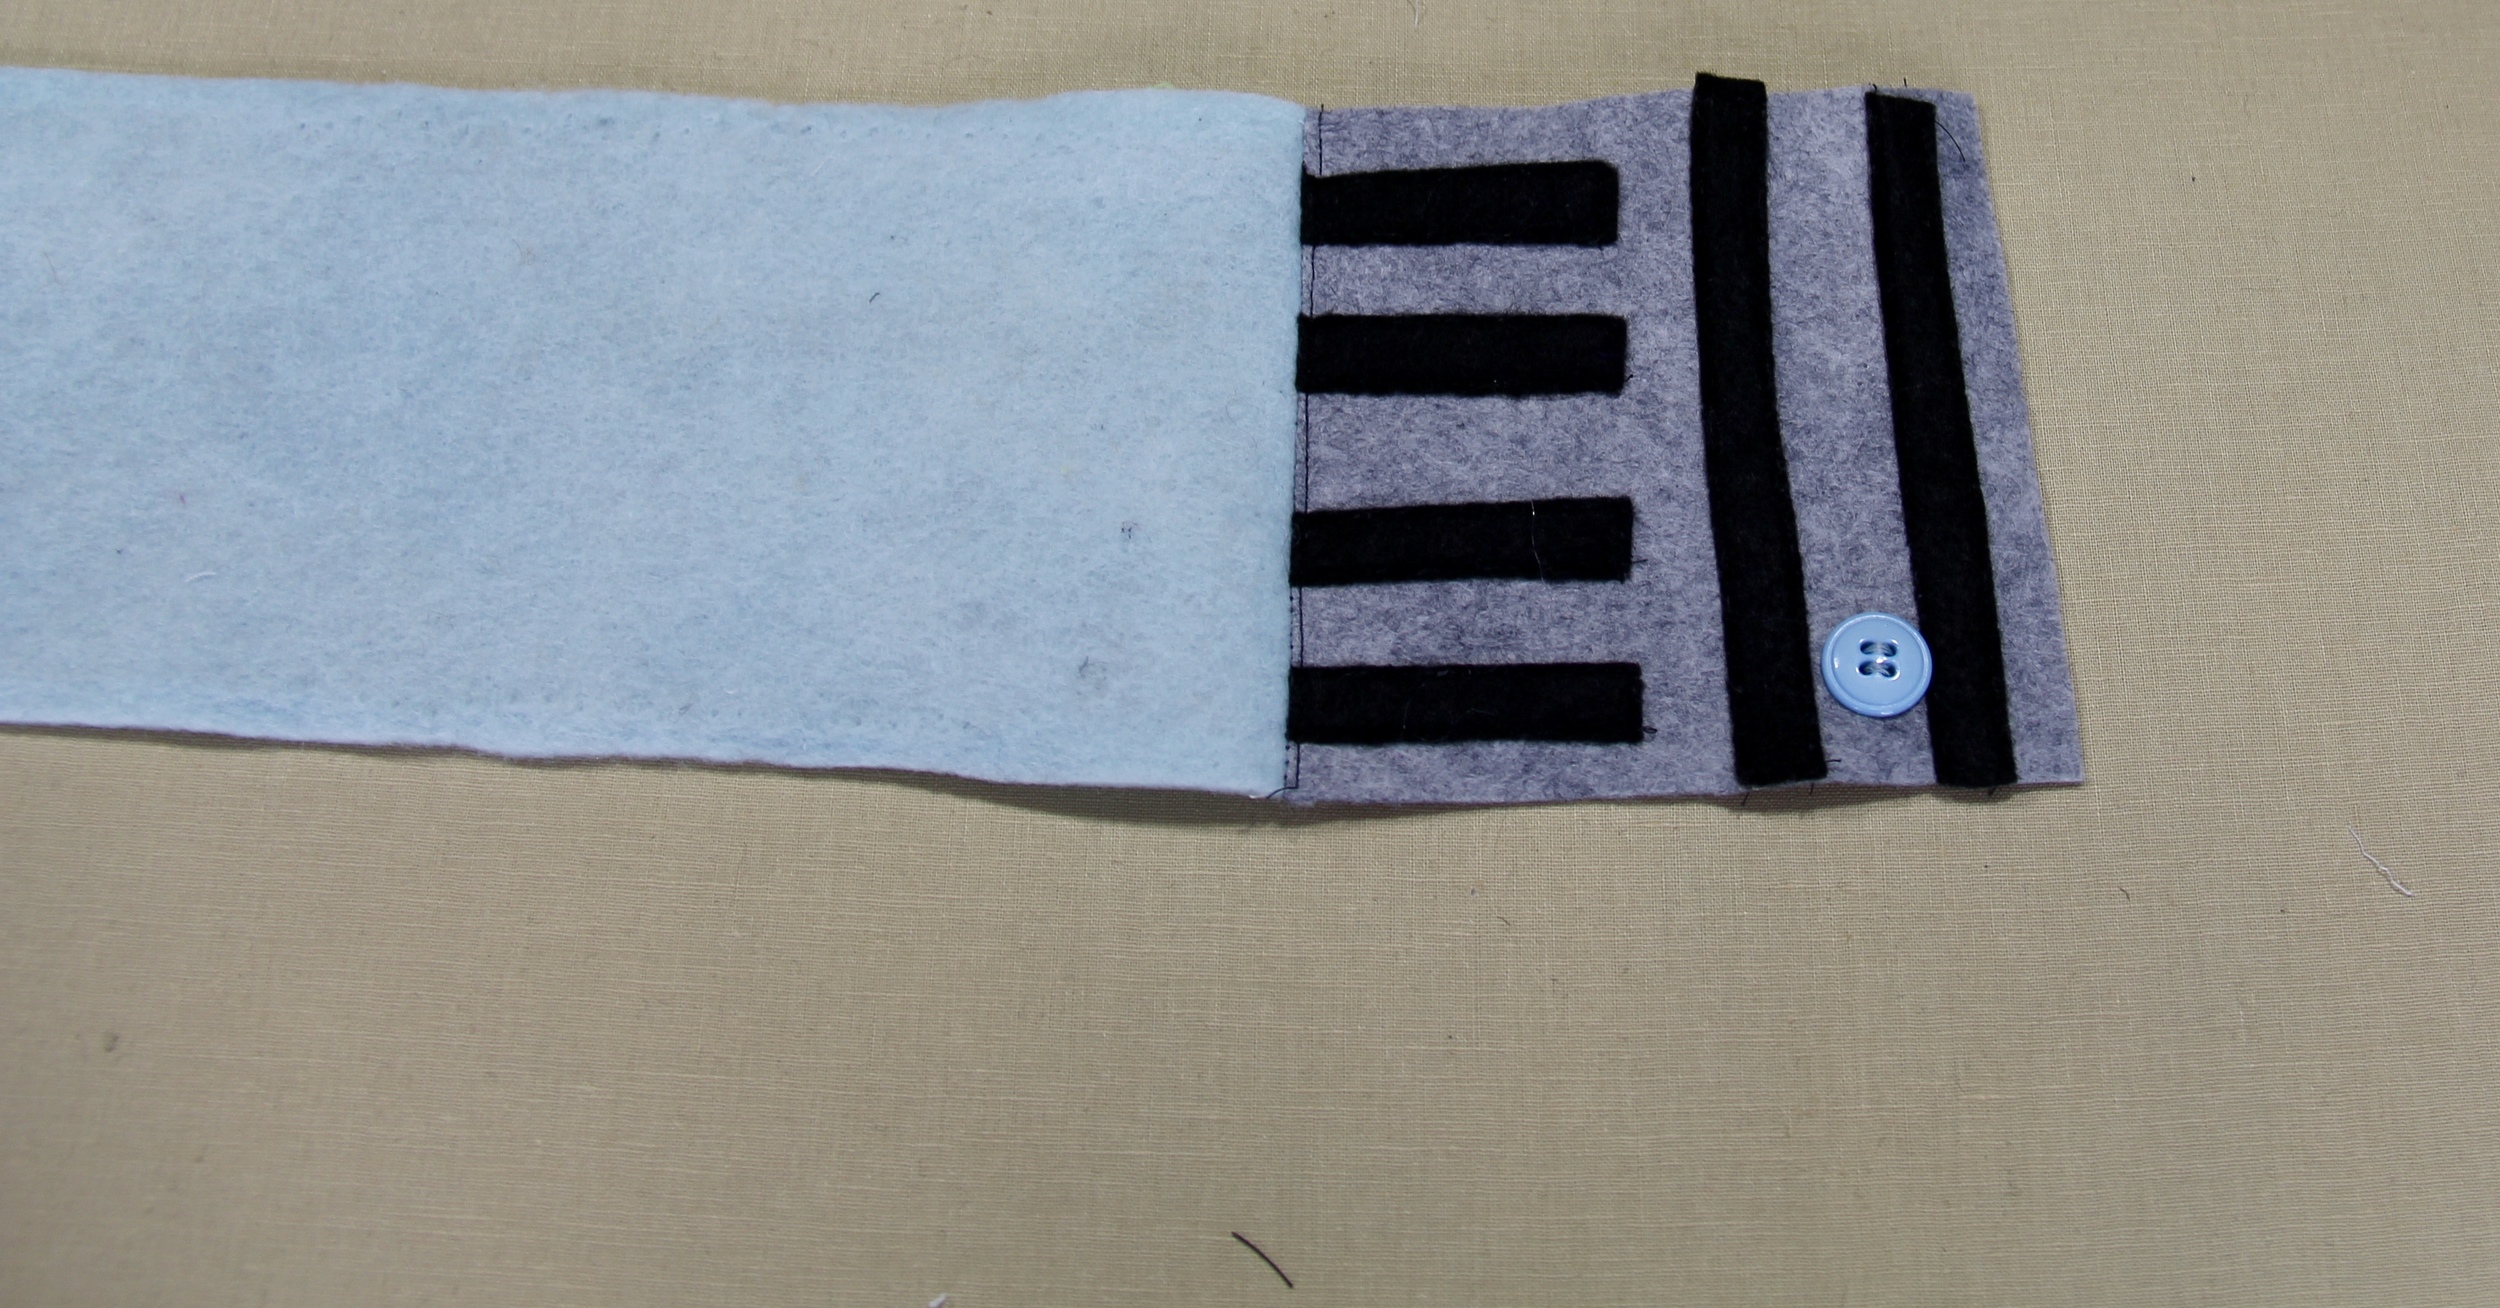
It's coming along nicely, right? I told you this was easy. Almost done.
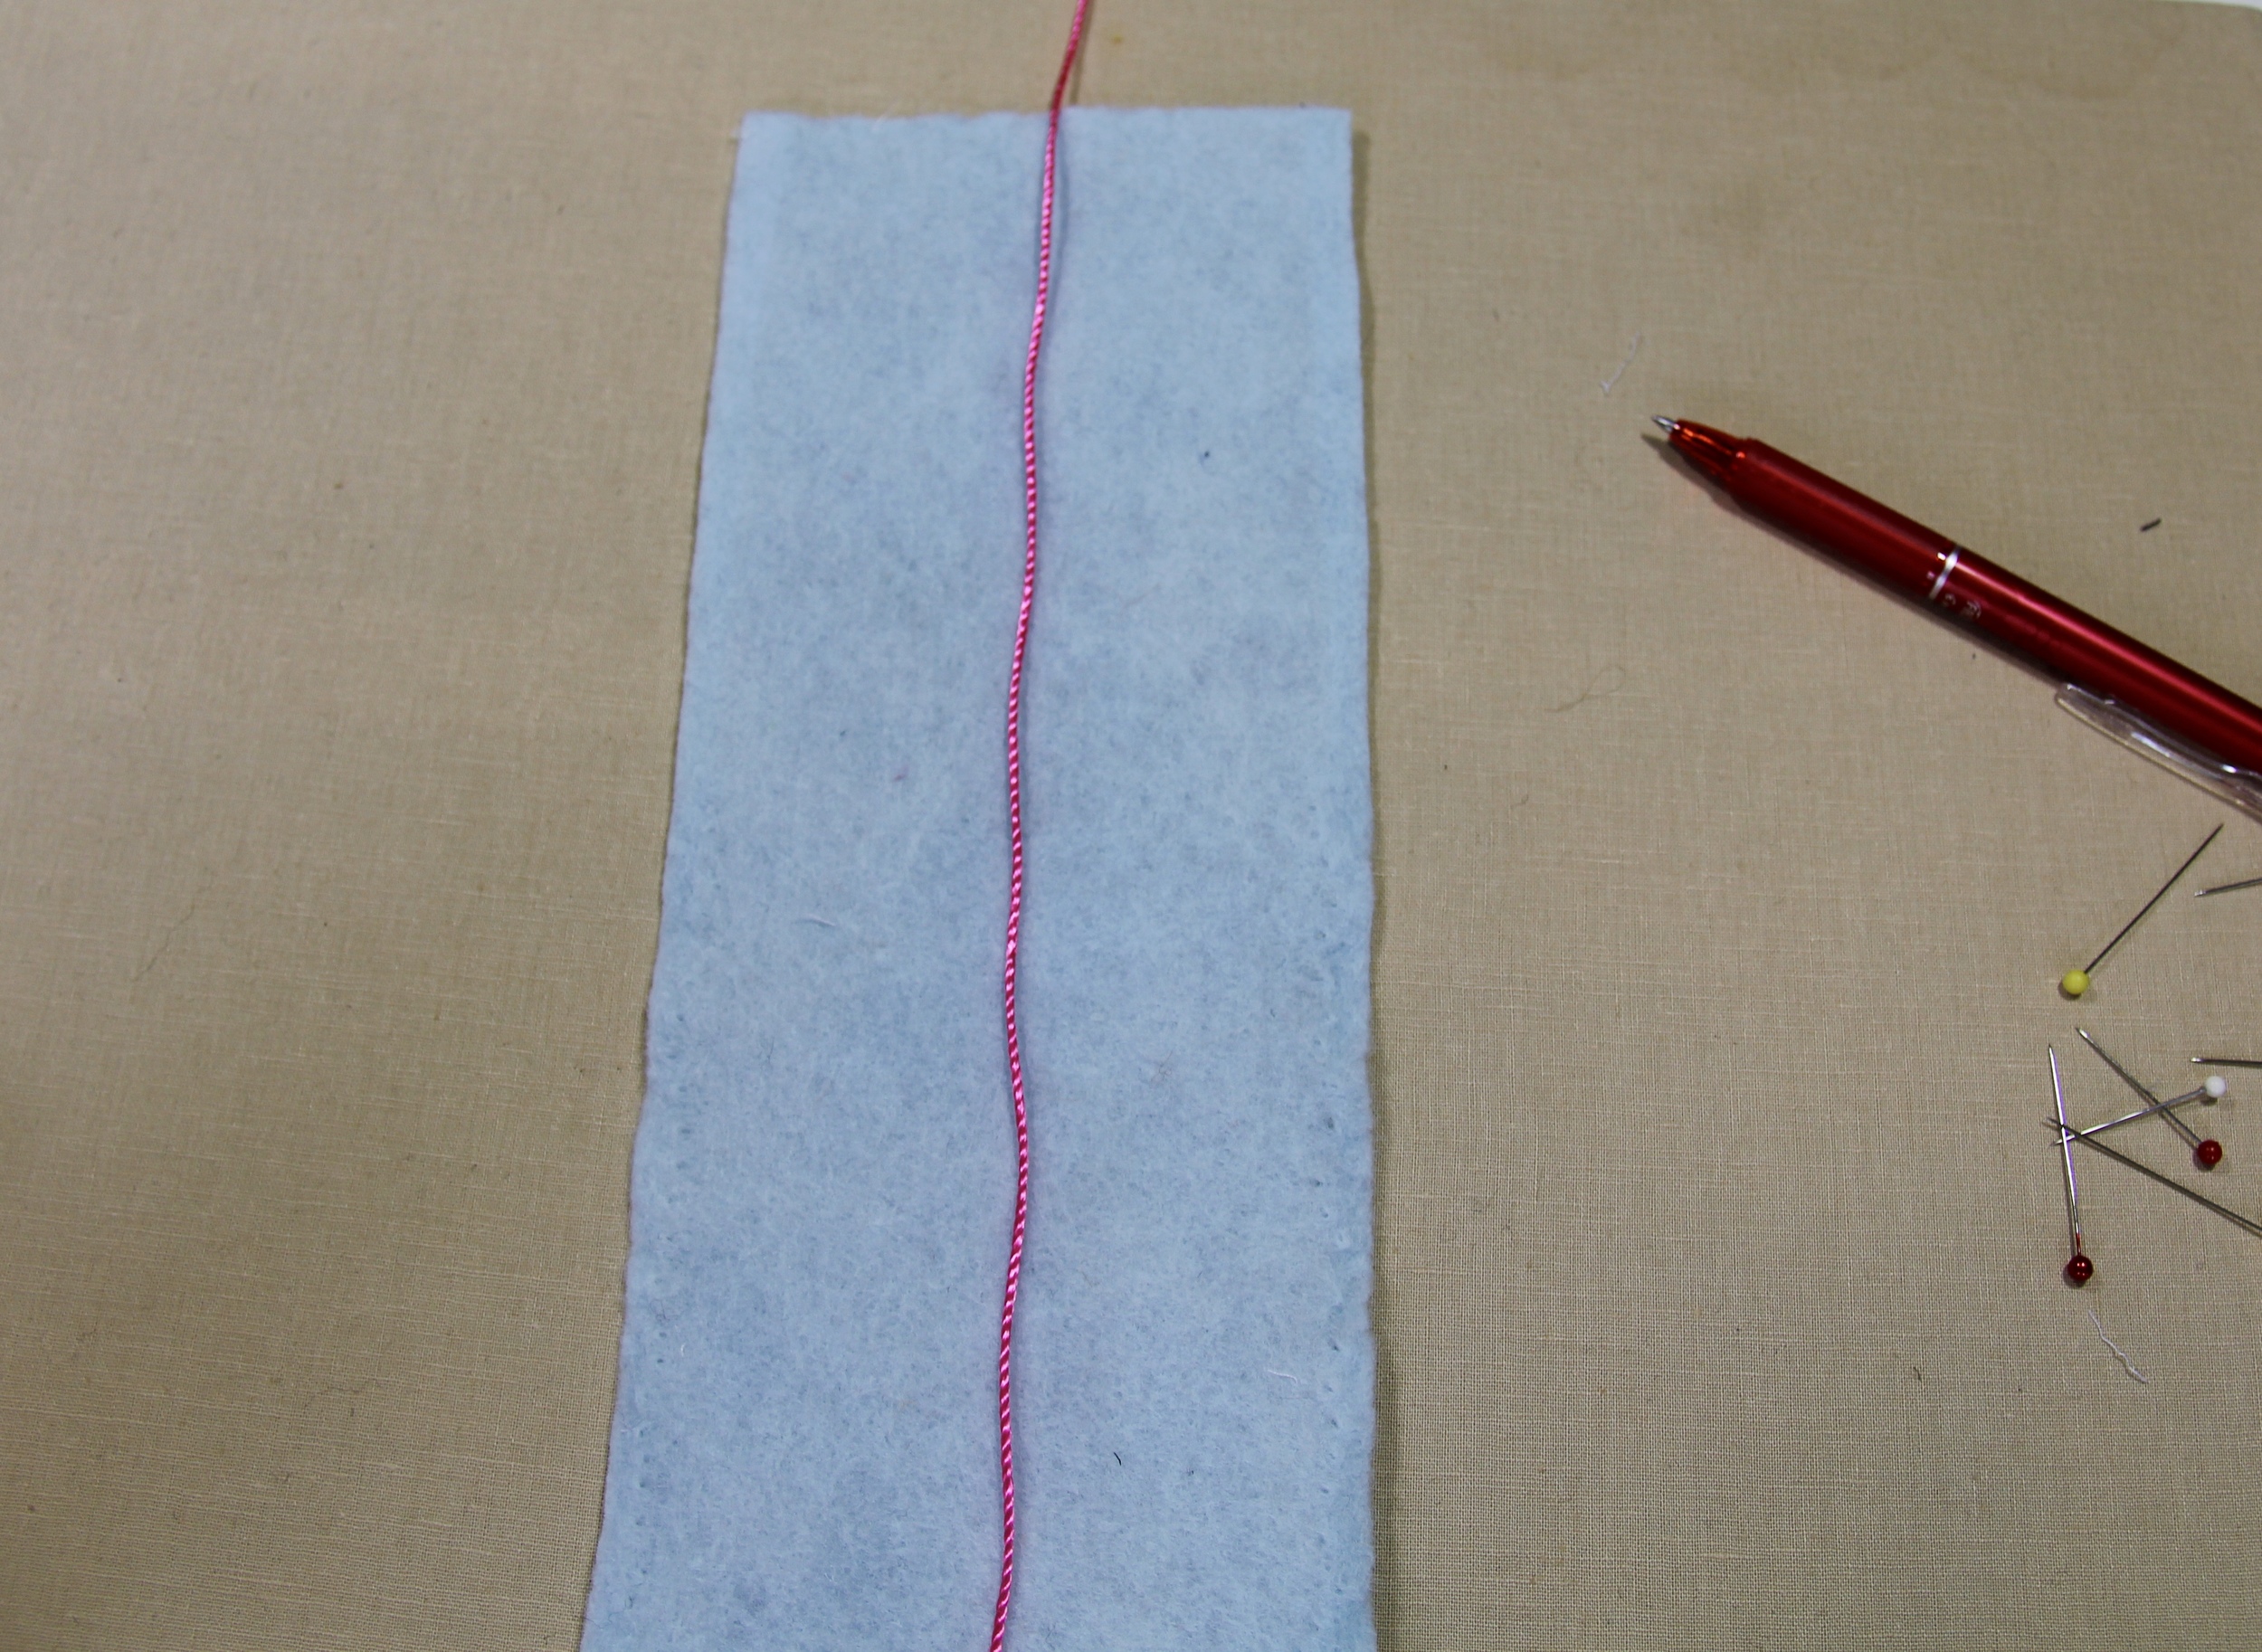
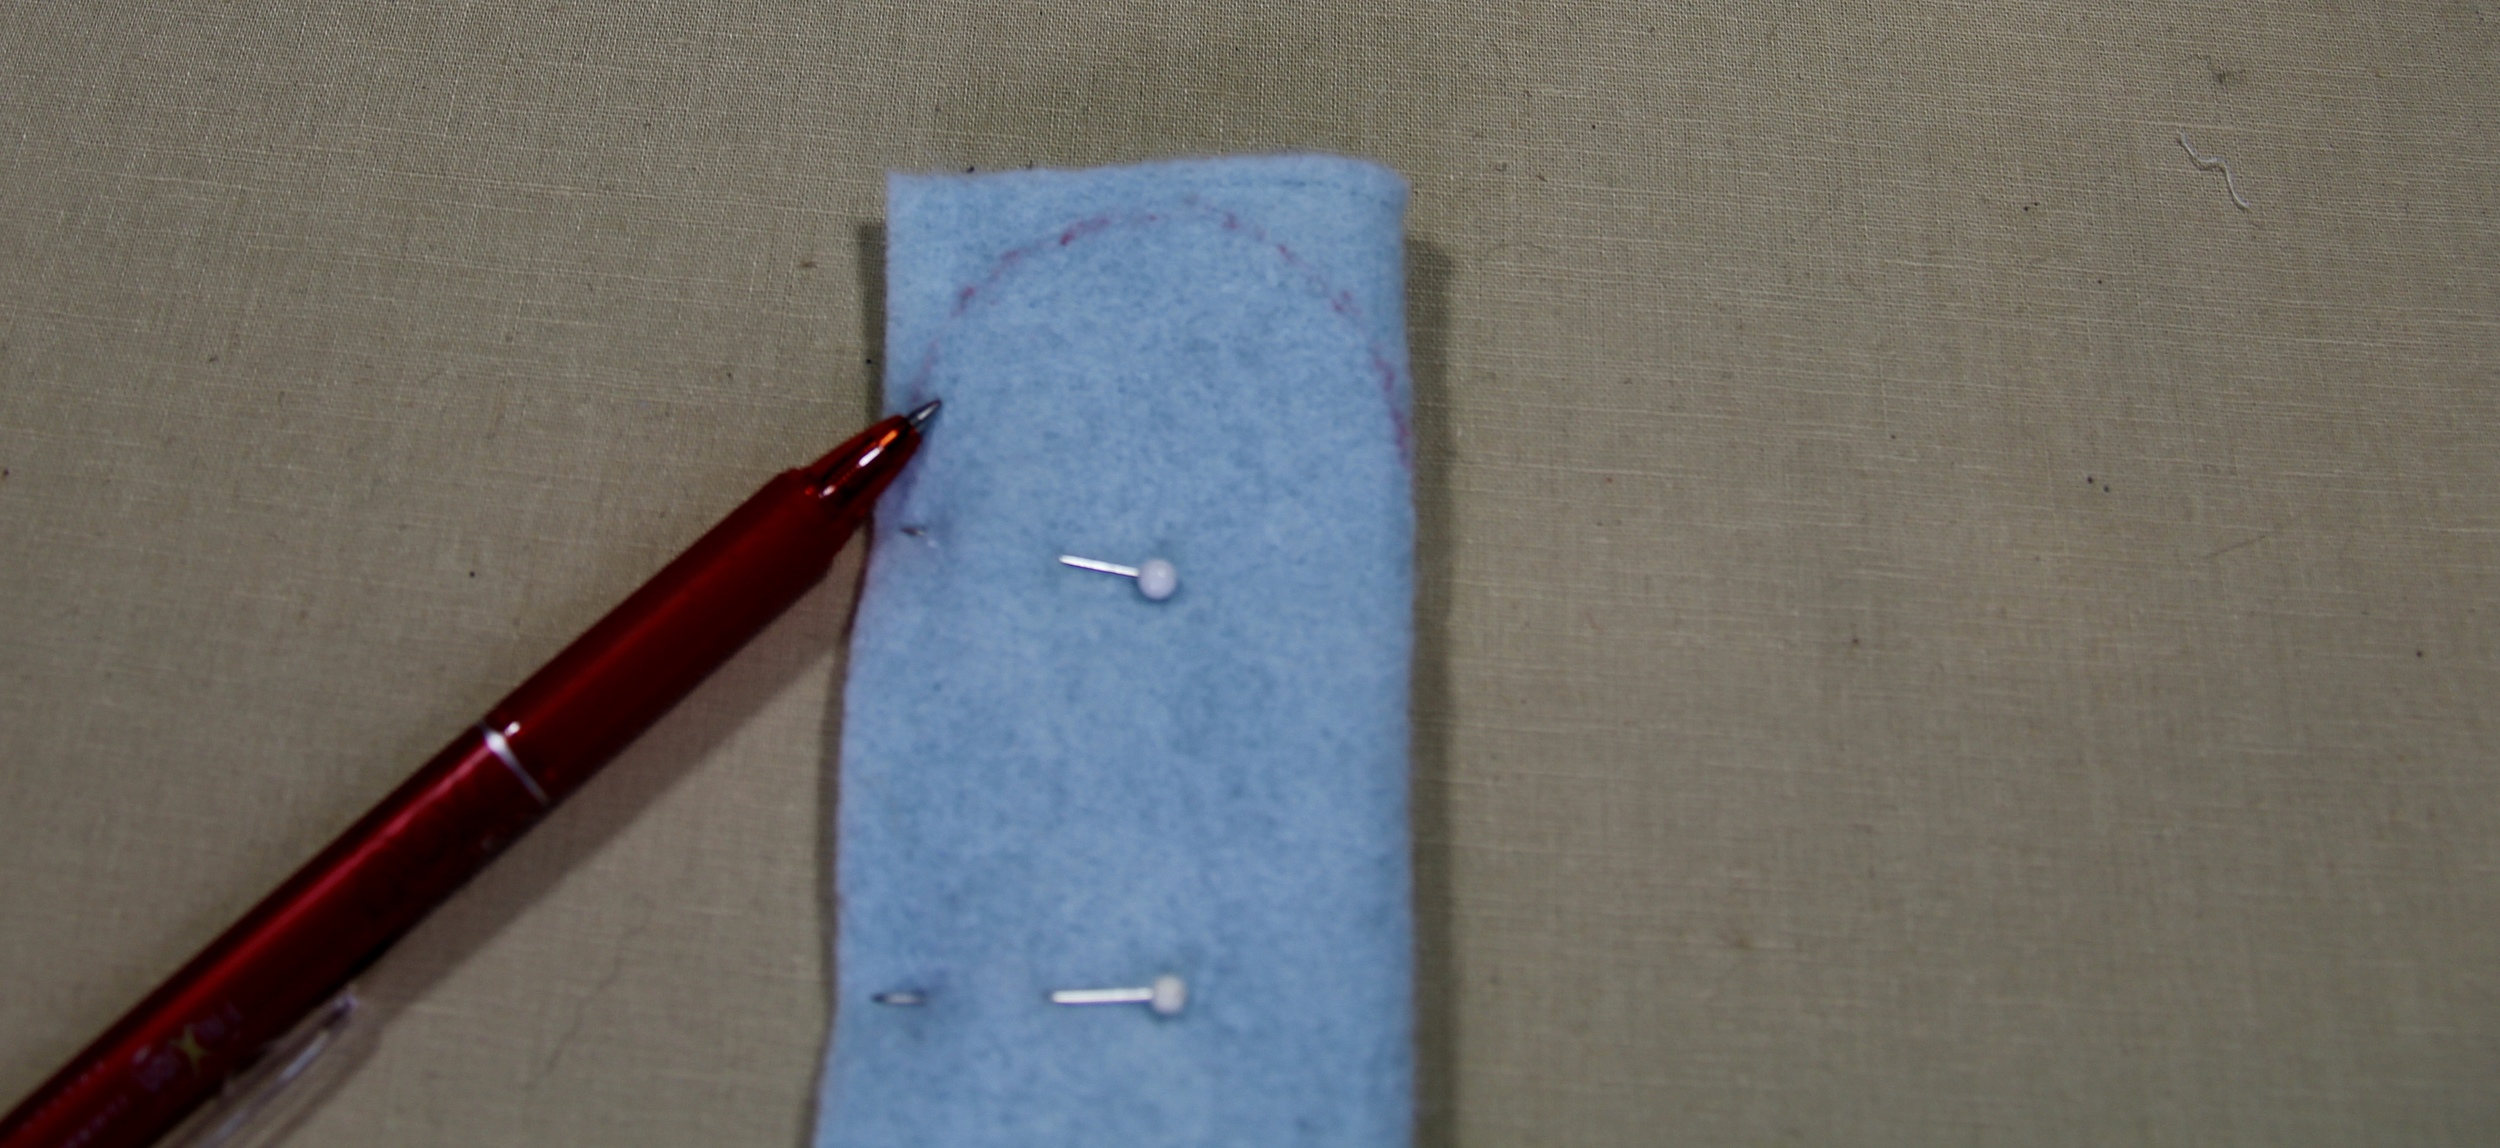
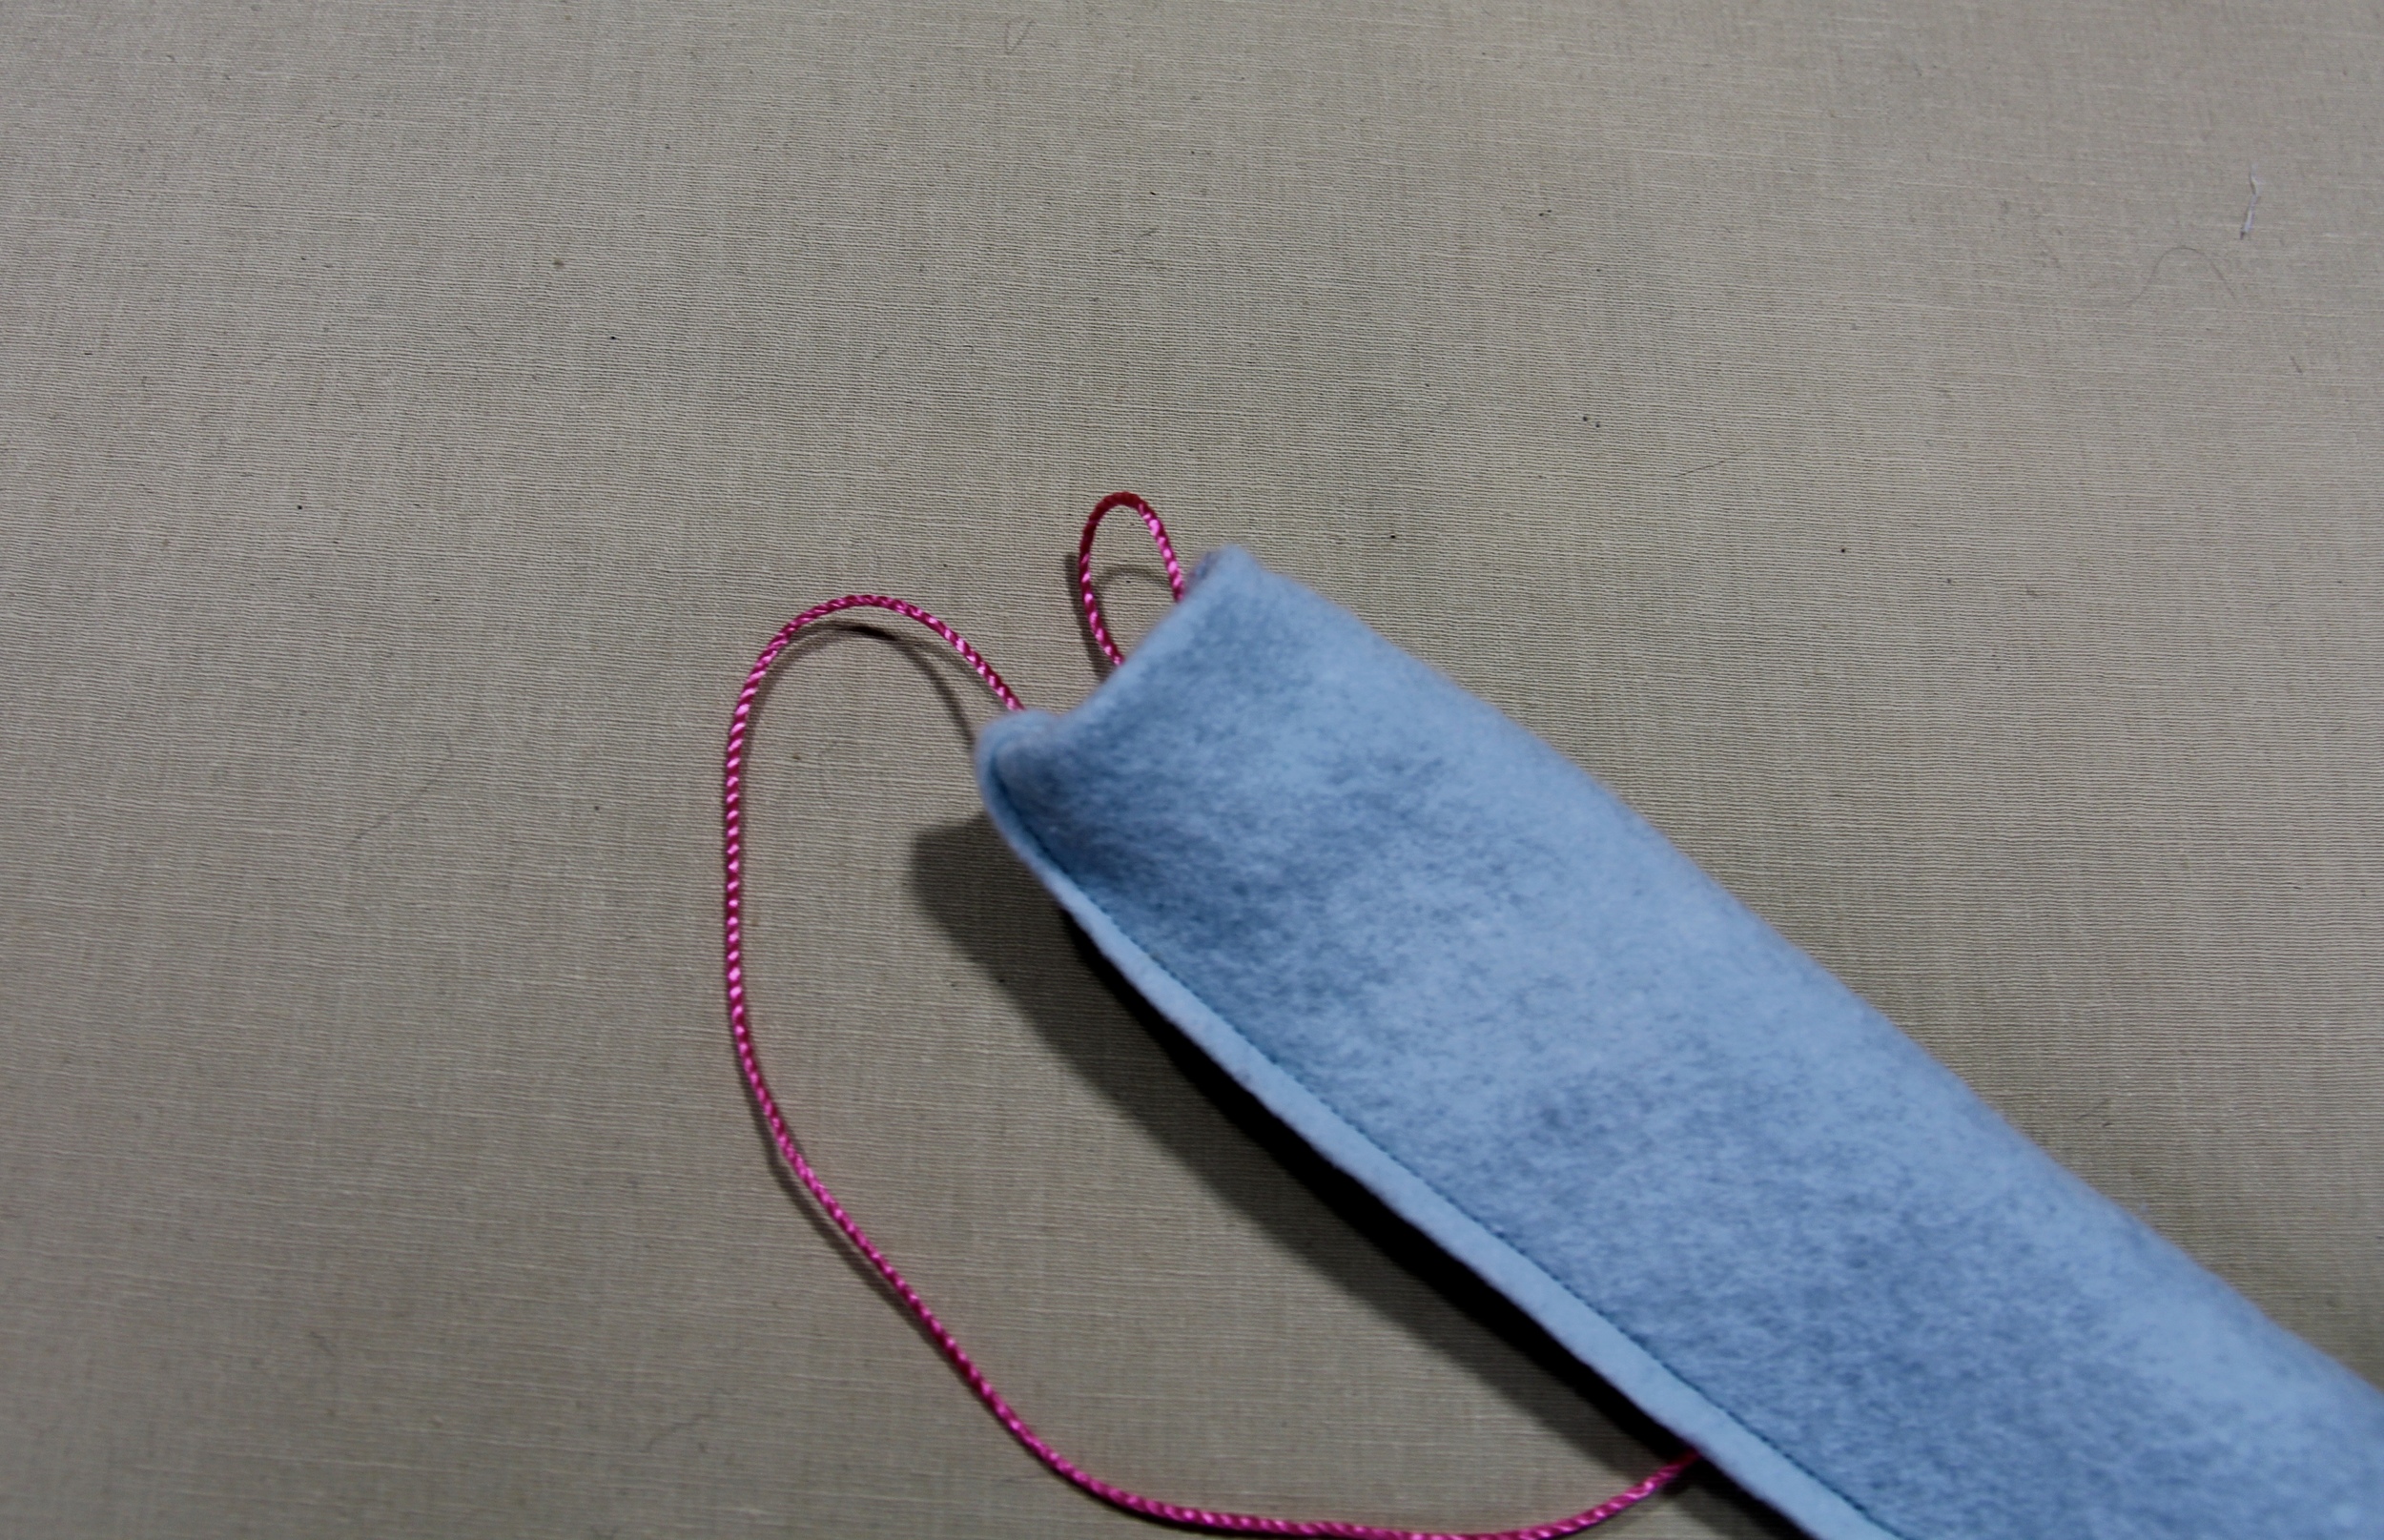
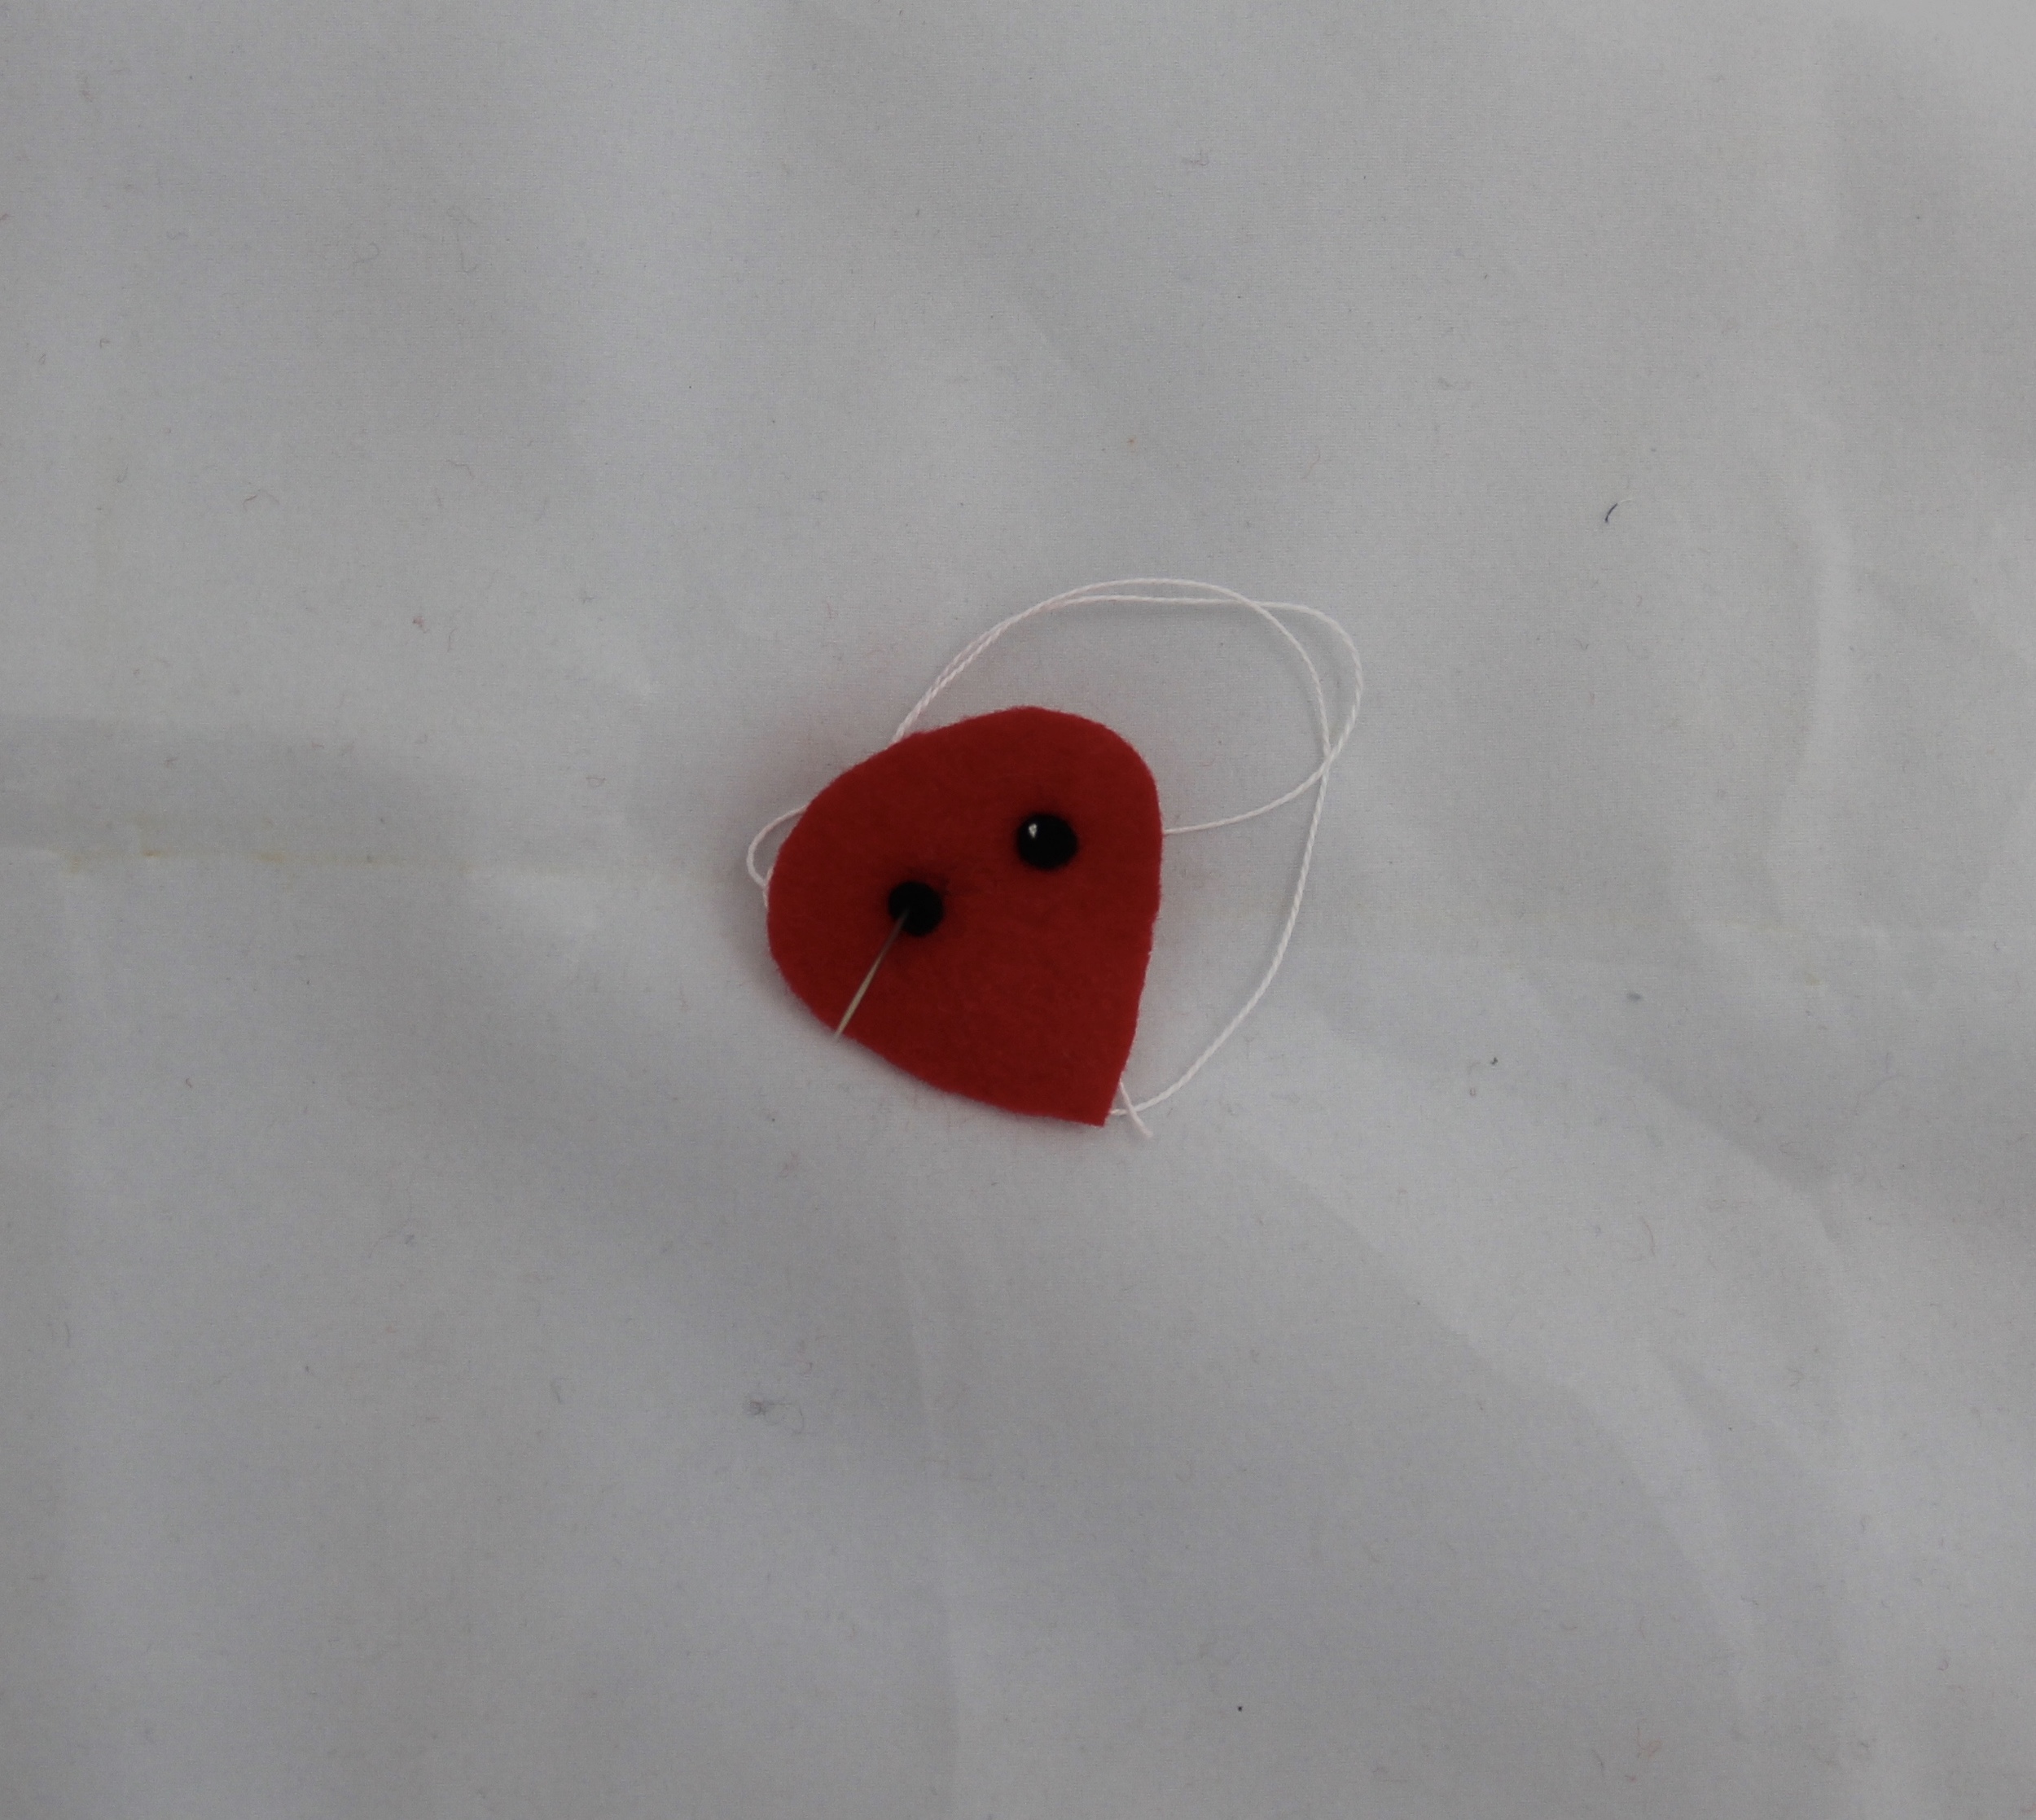
Take the piece of yarn or string and lay it down the middle of the blade. Fold the lightsaber in half lengthwise and pin. When pinning, begin at the hilt, making sure to evenly line up the black strips. After pinning, take a pen and draw a nice curve around the top of the blade. This is going to be your stitching line. Begin stitching at the bottom of the long side of the hilt. Using about 1/4" seam allowance, sew straight up toward the top of the blade. When you get to about 2" to the top, slow down and stitch around the curve that you drew. Make sure that you stitch over the yarn. Back stitch to secure and trim your threads. Now trim the felt closely around the stitch line being careful not to cut through the stitches.
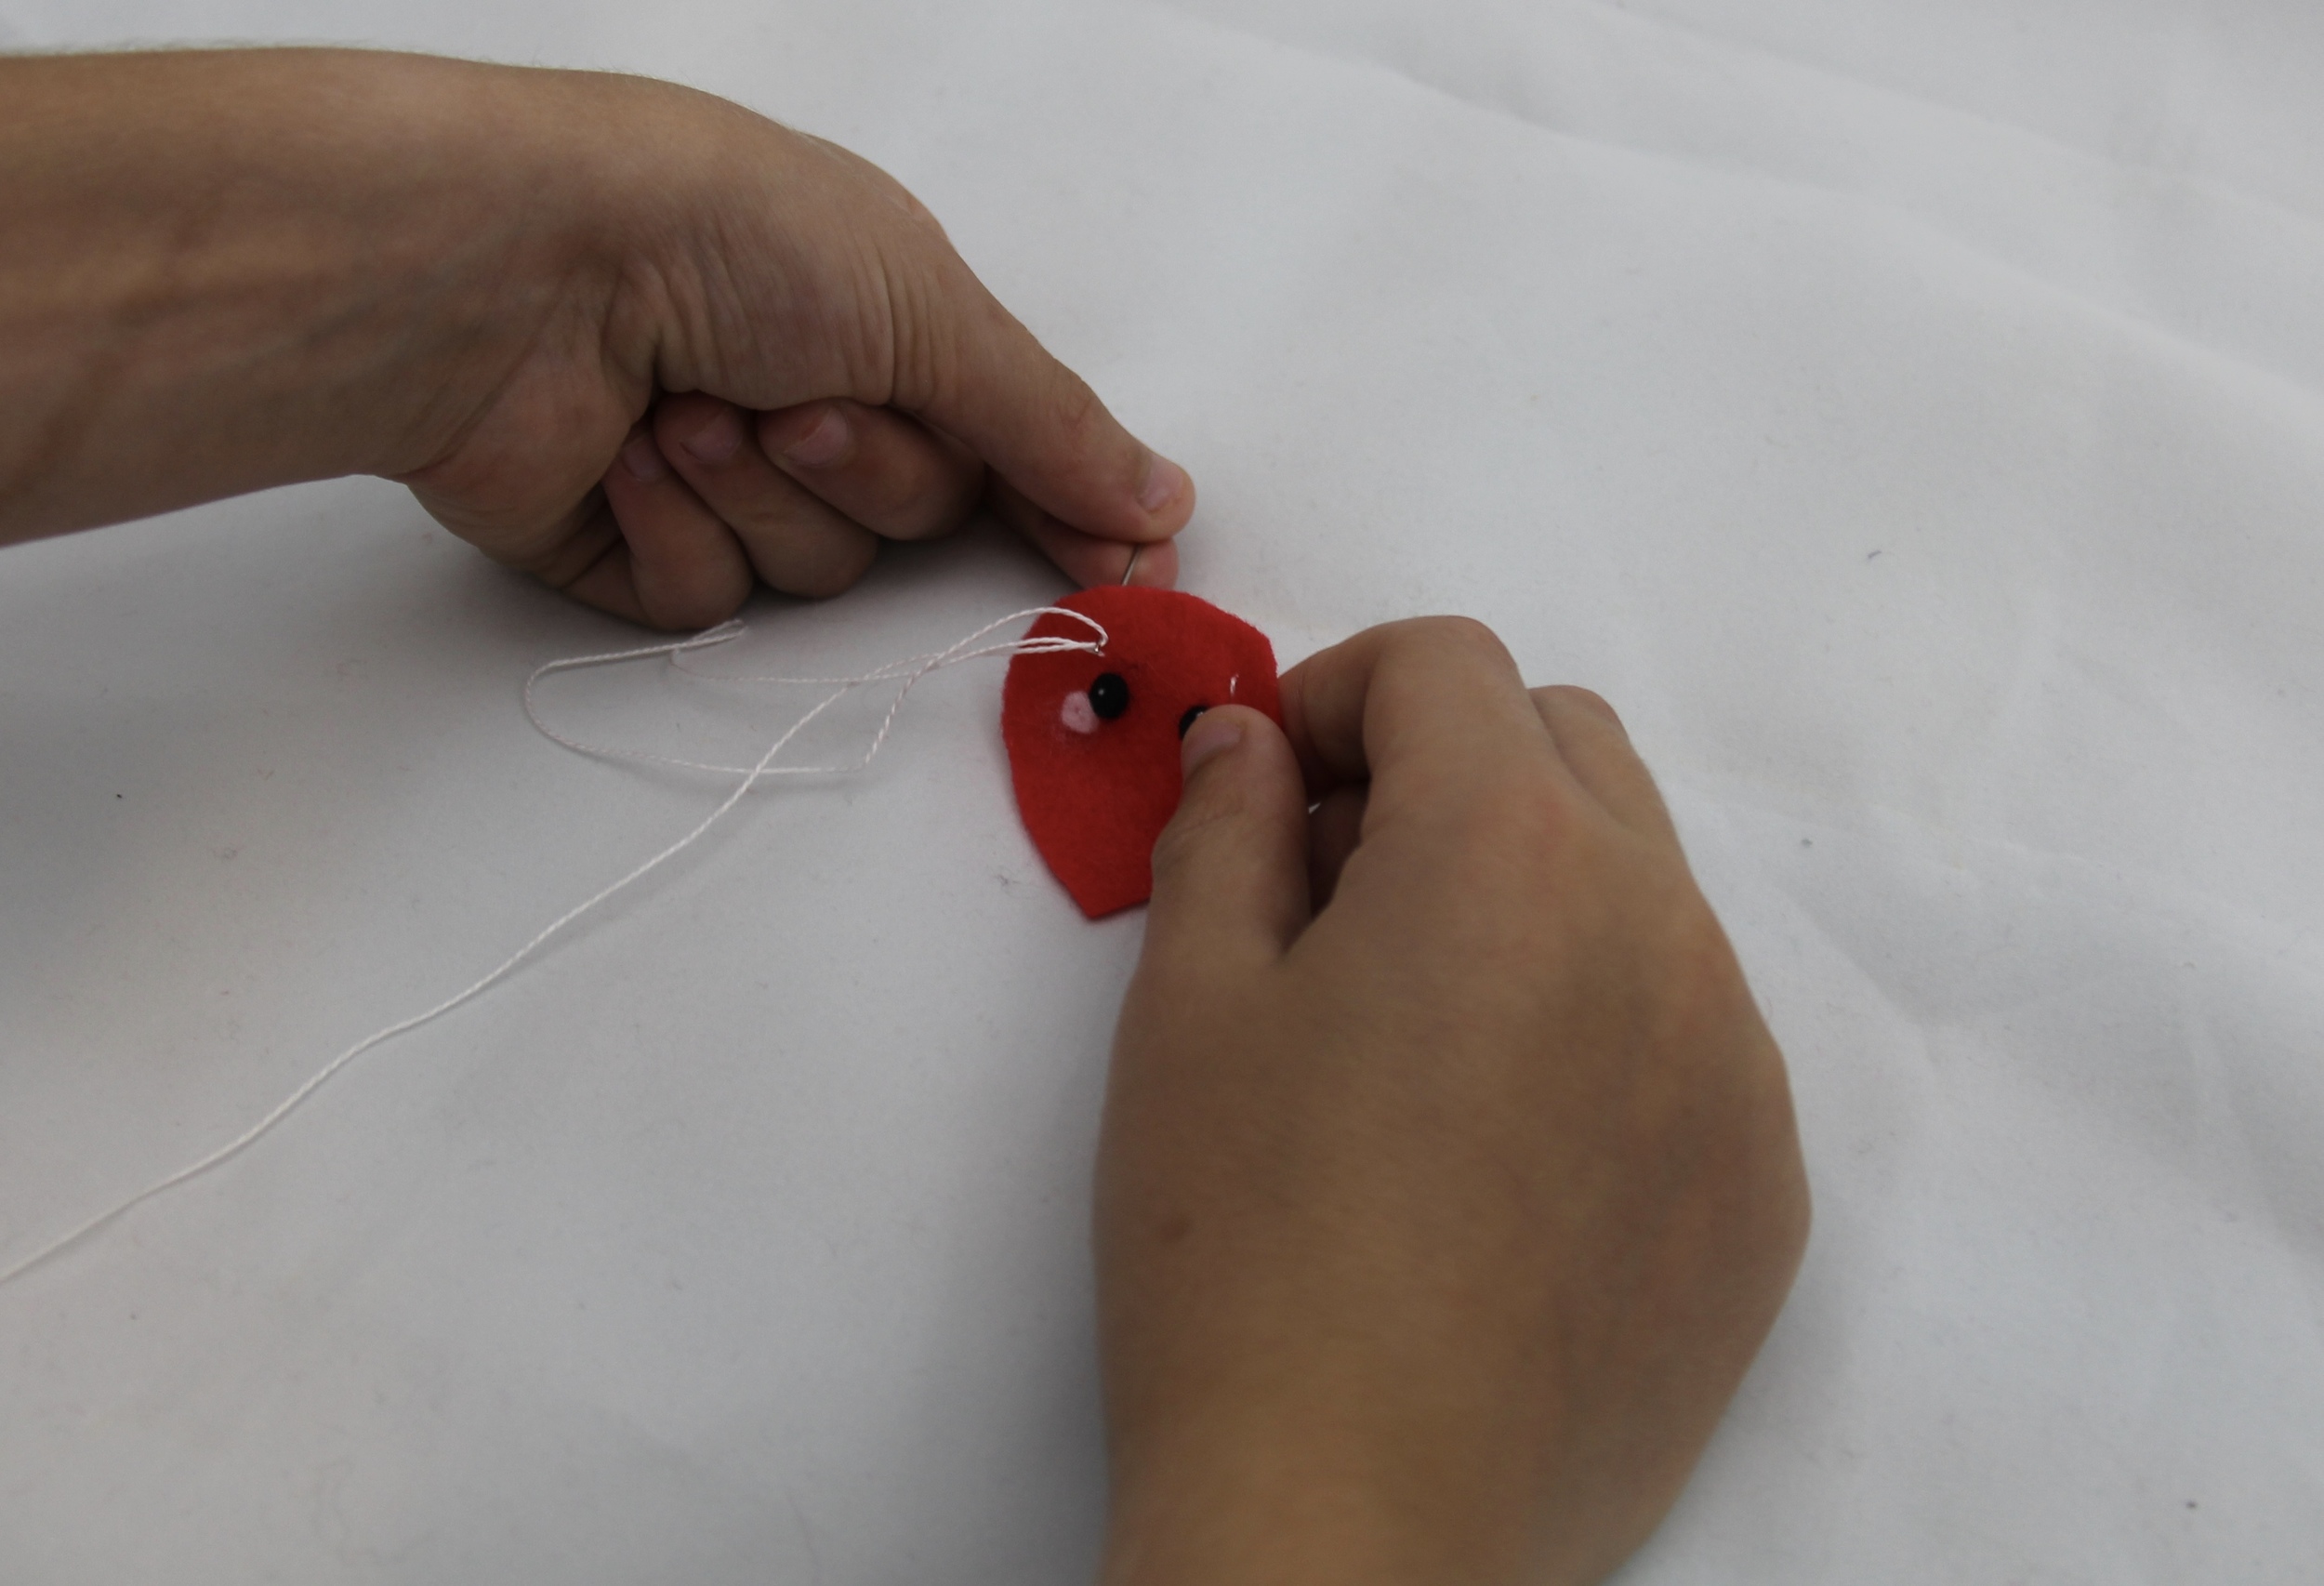
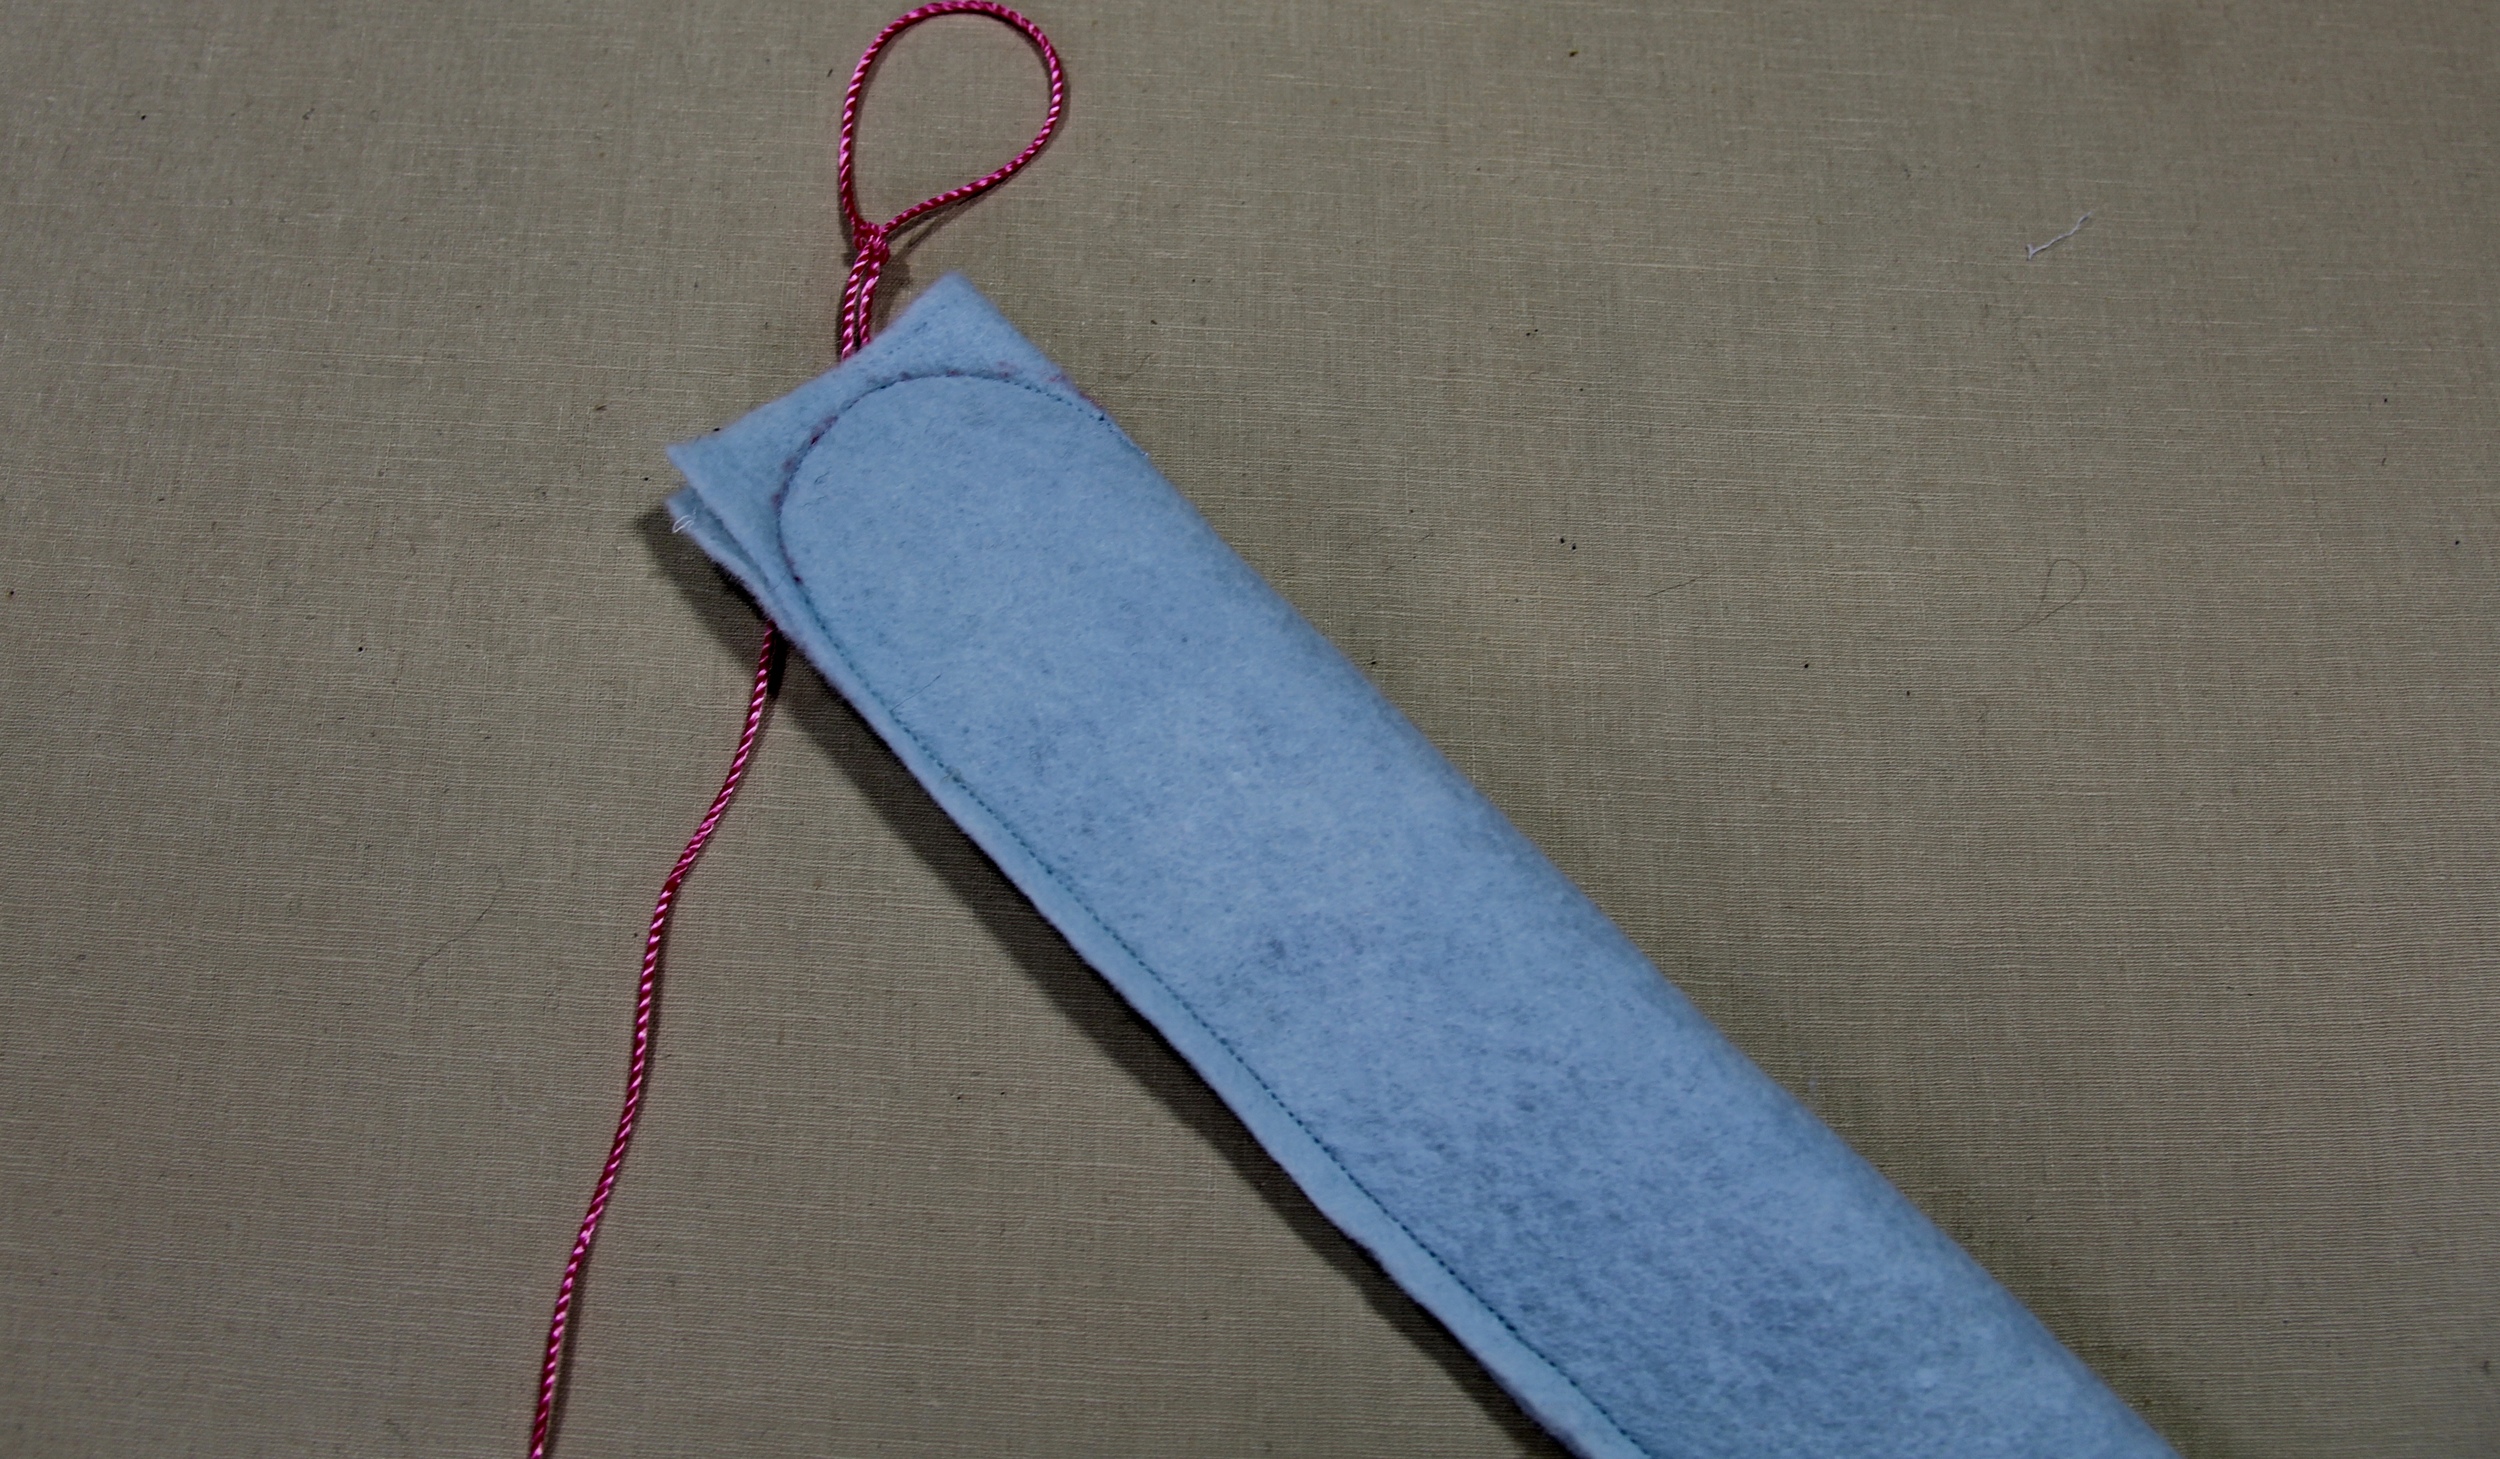
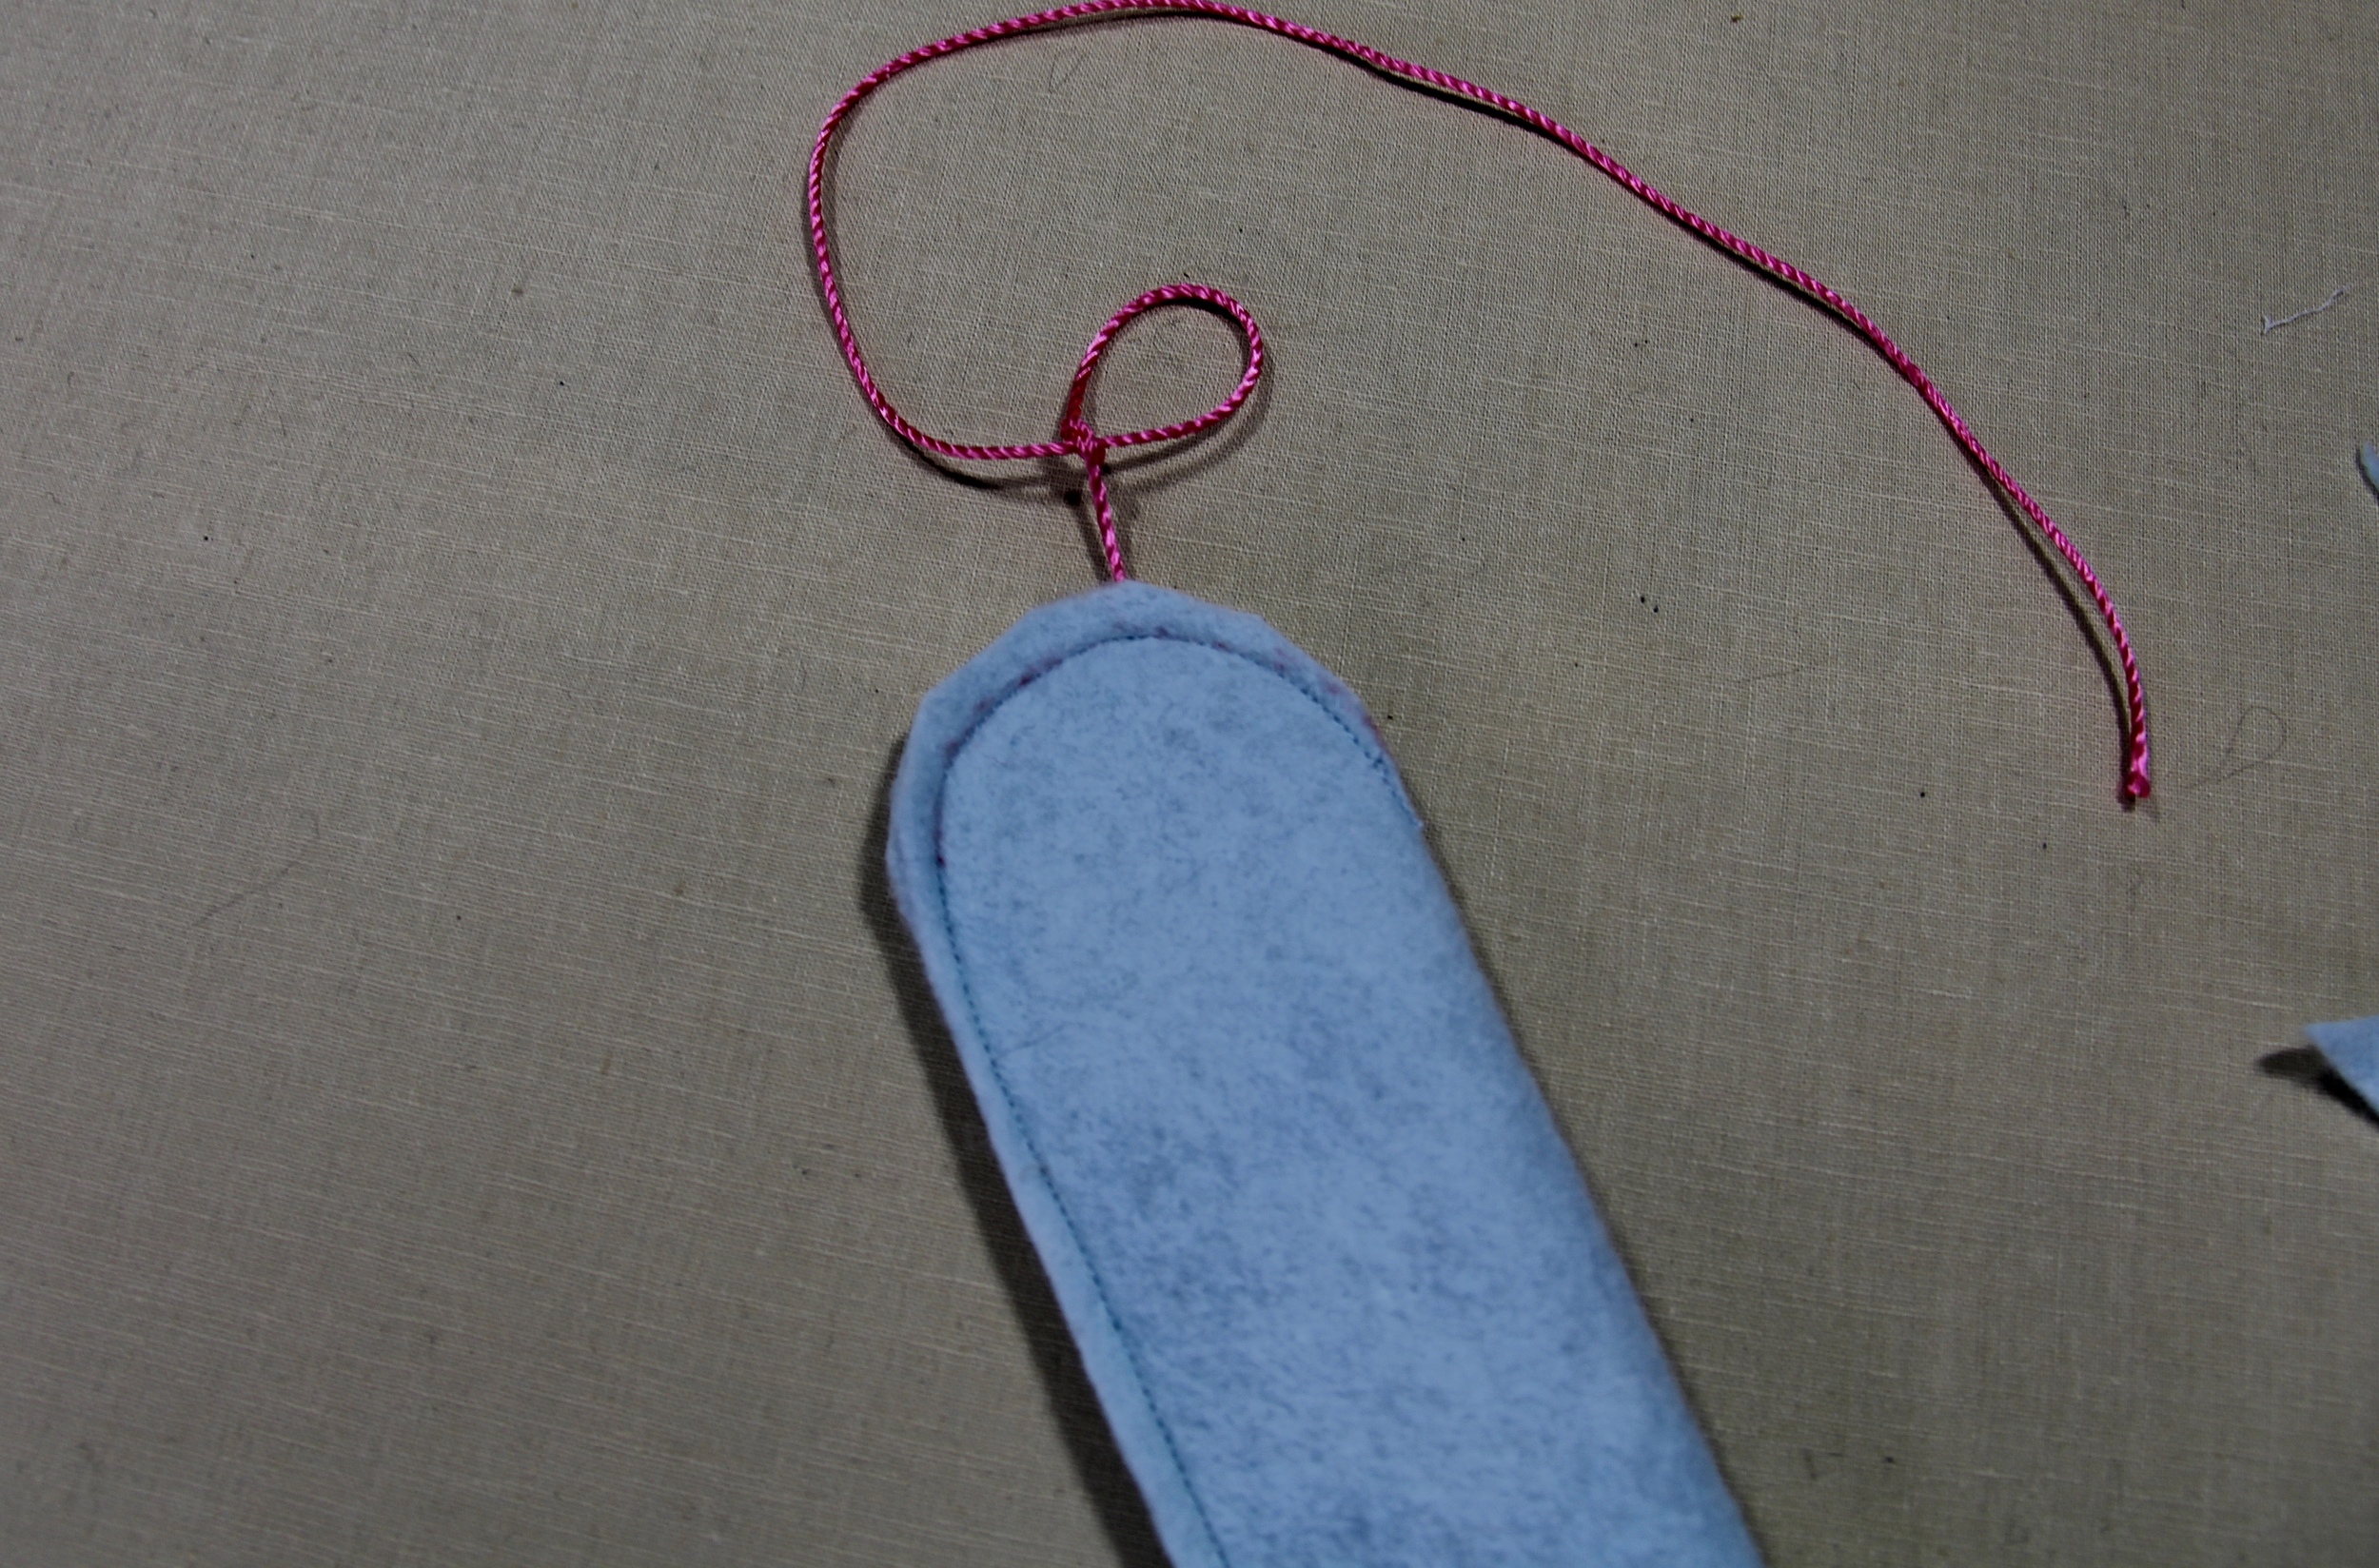
Tie a slip knot in the yarn, right above where you just stitched. Grab the yarn on the opposite end and pull gently. As you pull you will begin to turn the lightsaber right side out. Fun, right?
Once you have it turned, you can cut the yarn. Now it's time to stuff.
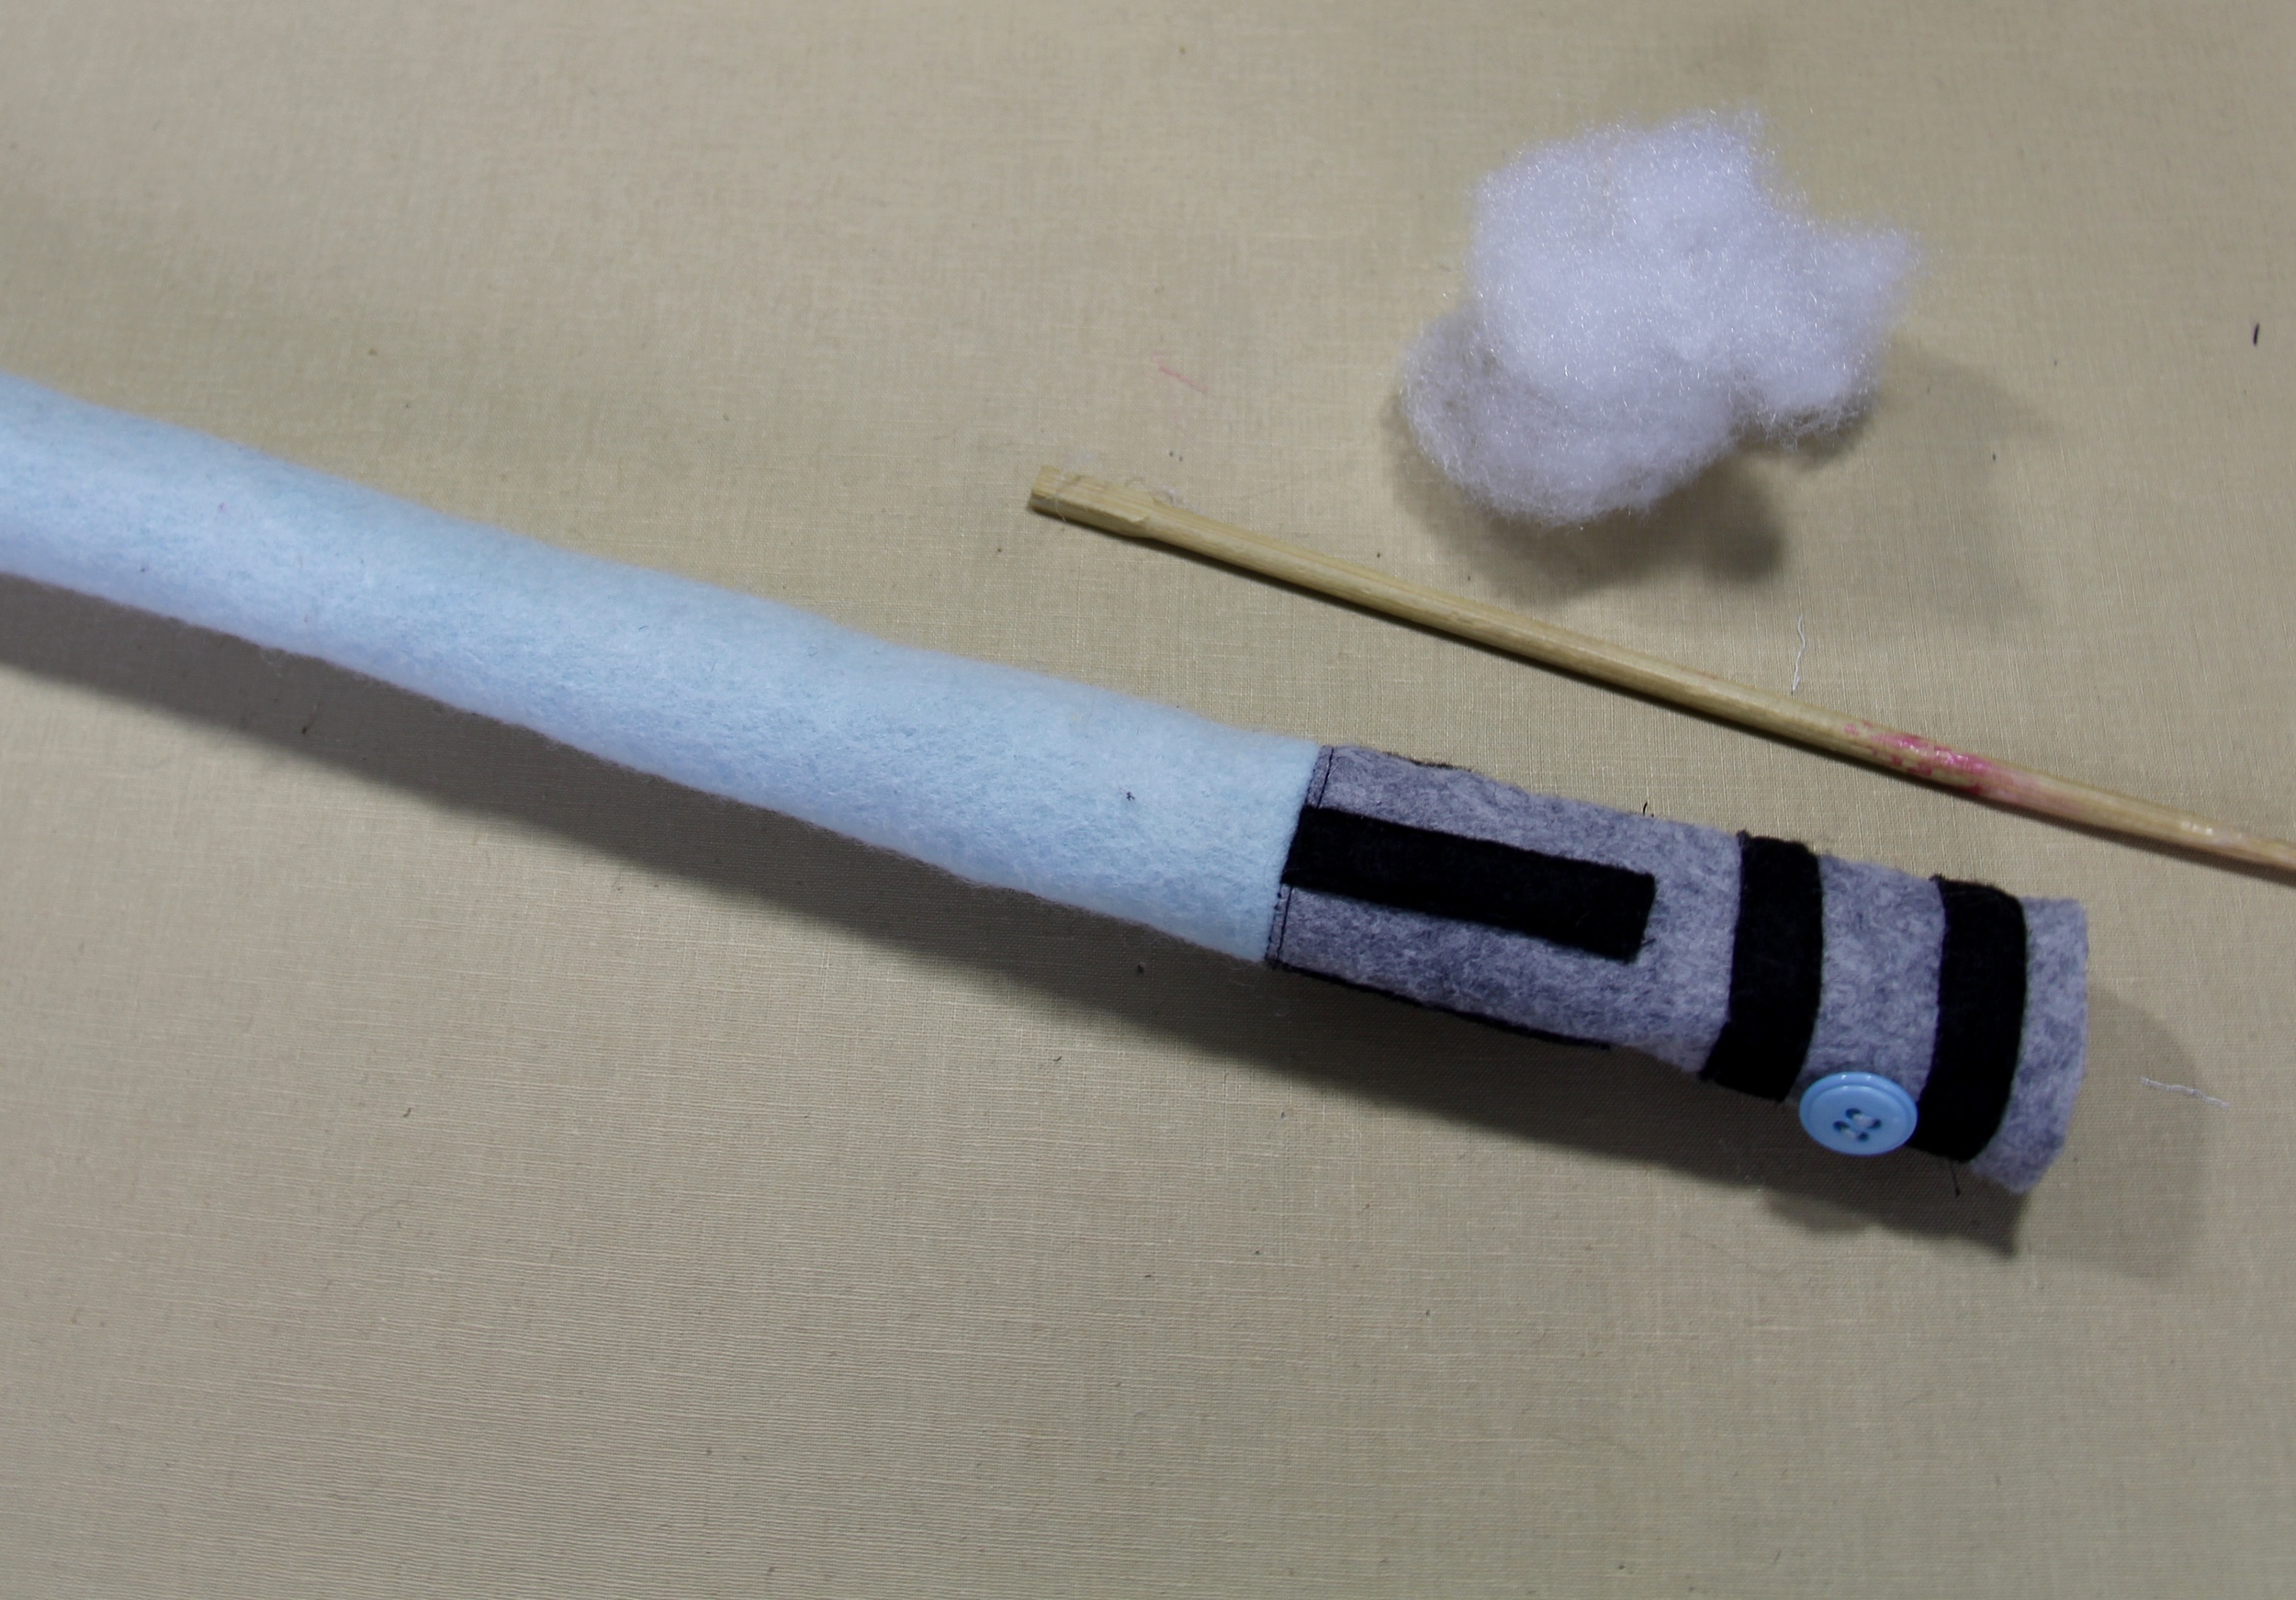

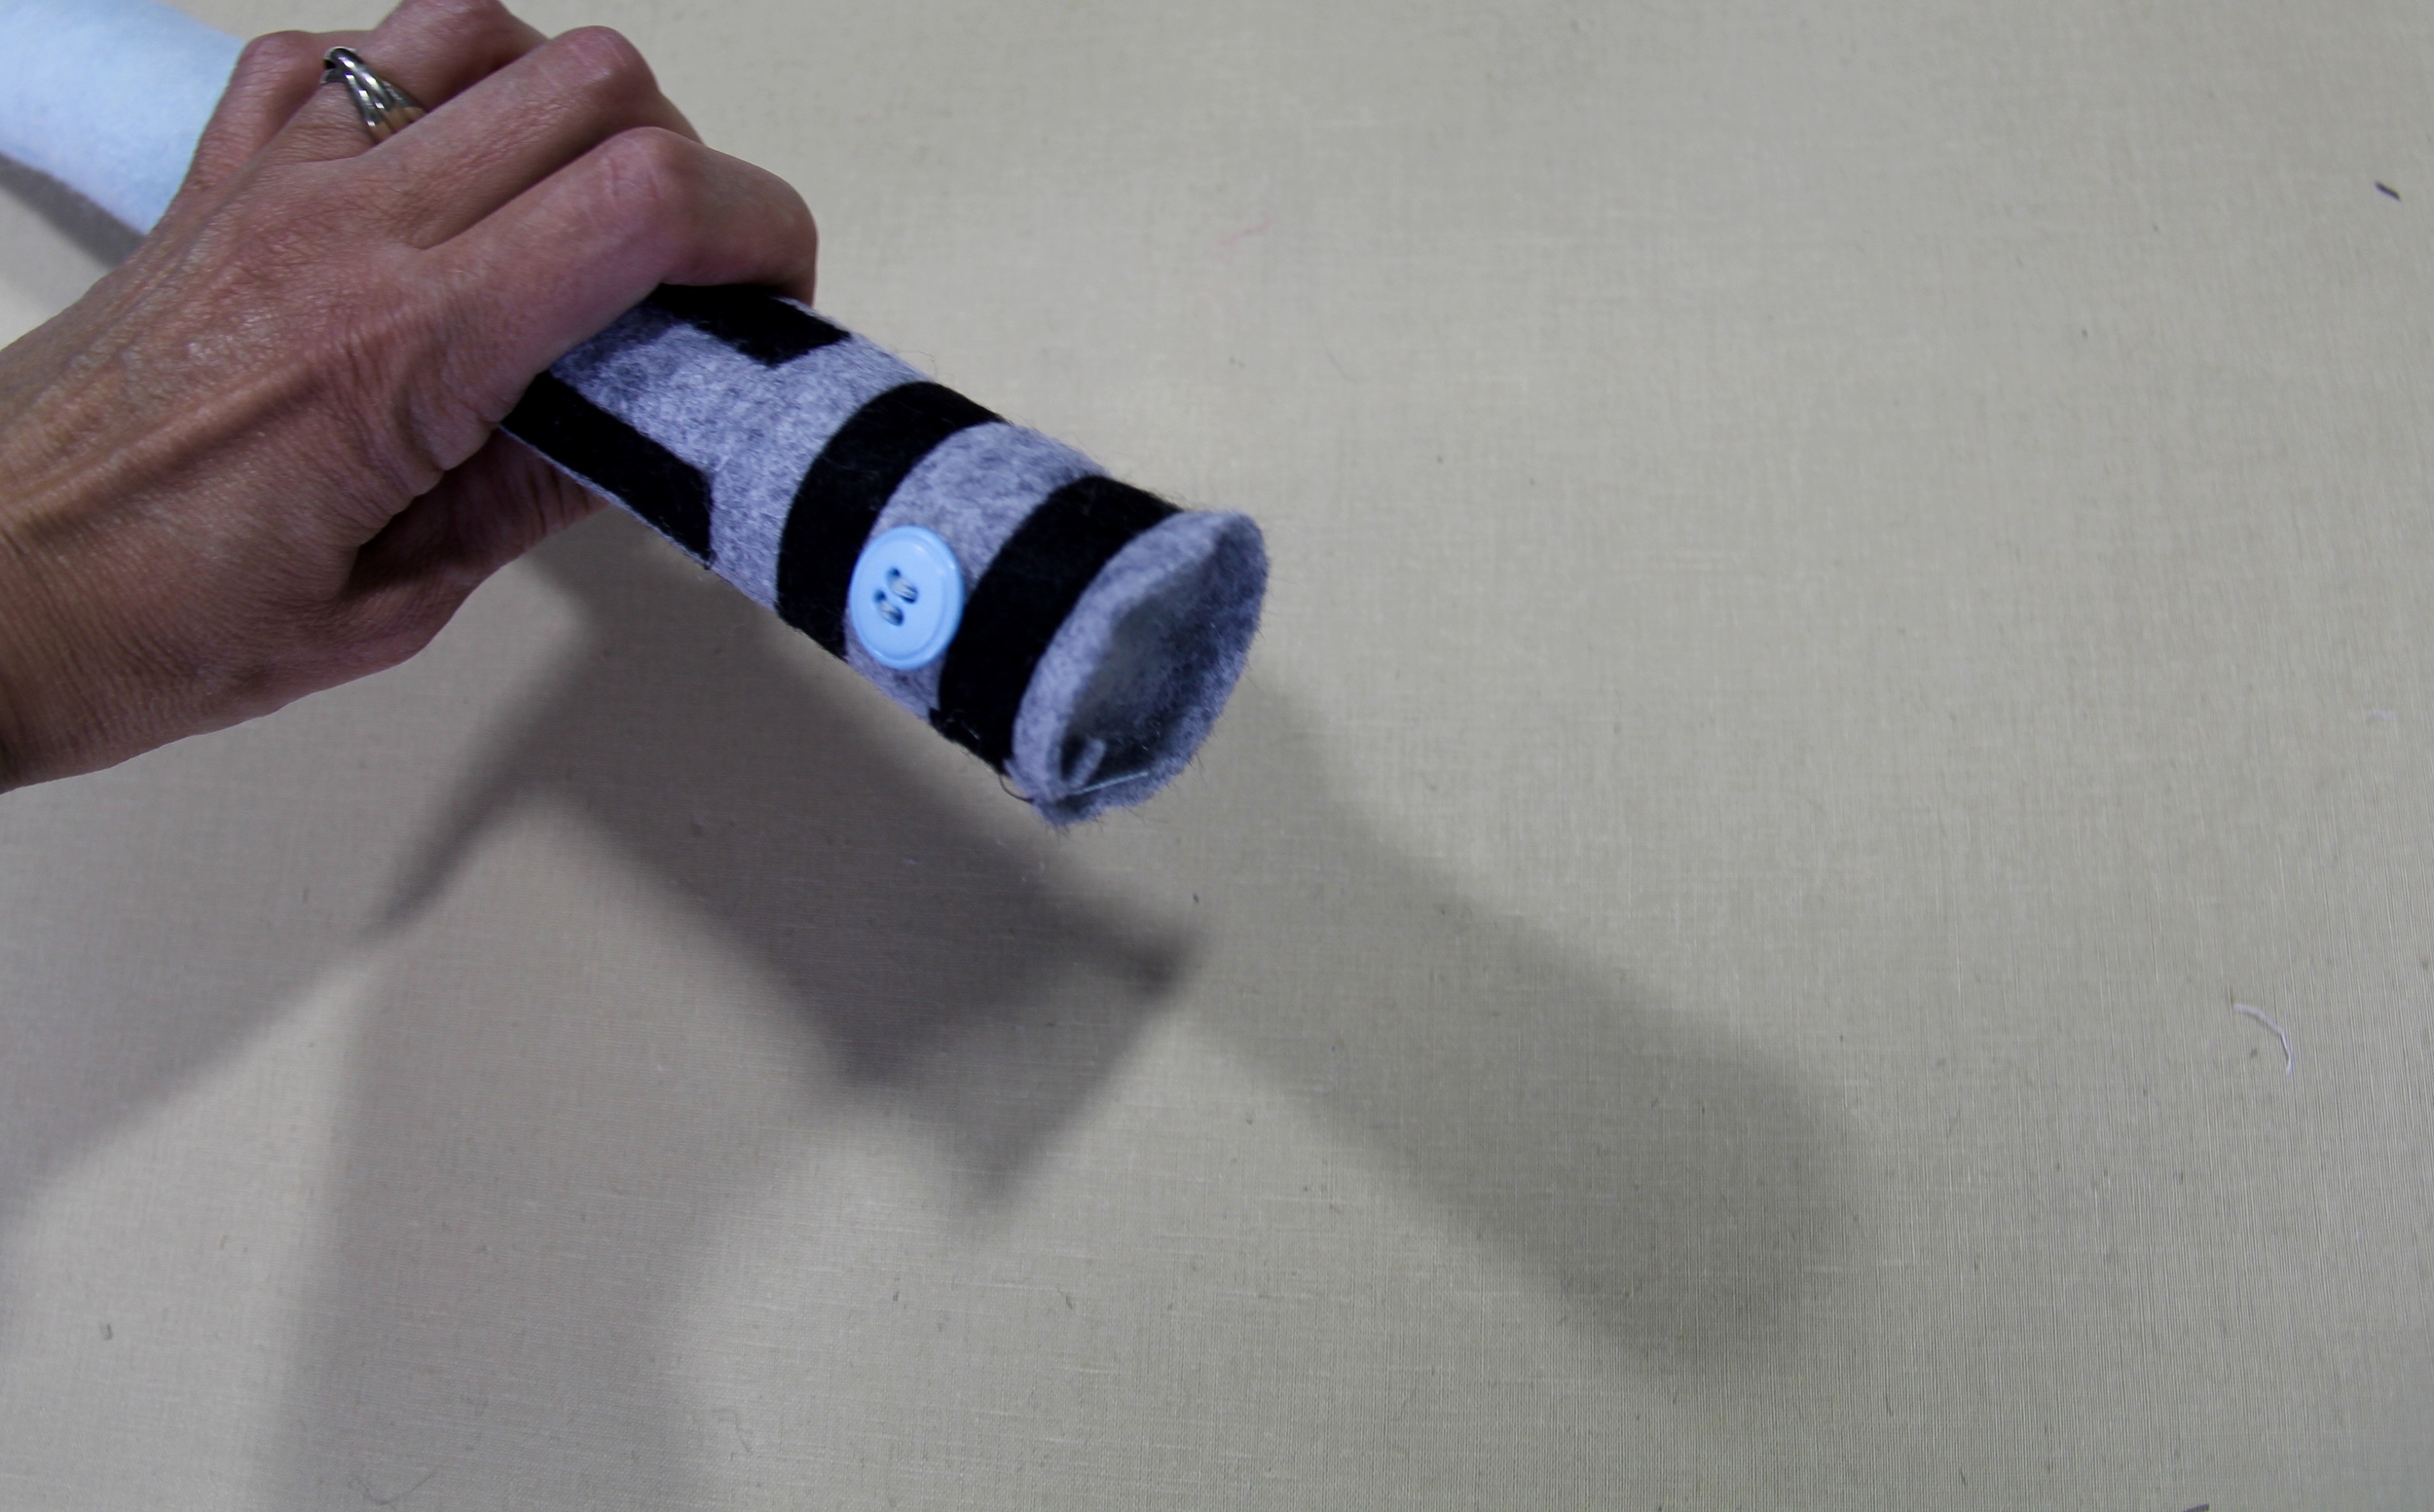
Using small bits of Poly-fill, begin to stuff. A chopstick or eraser side of a pencil makes this much easier. As you stuff, roll the lightsaber against the table, like a rolling pin. This will help to keep the stuffing from looking lumpy.
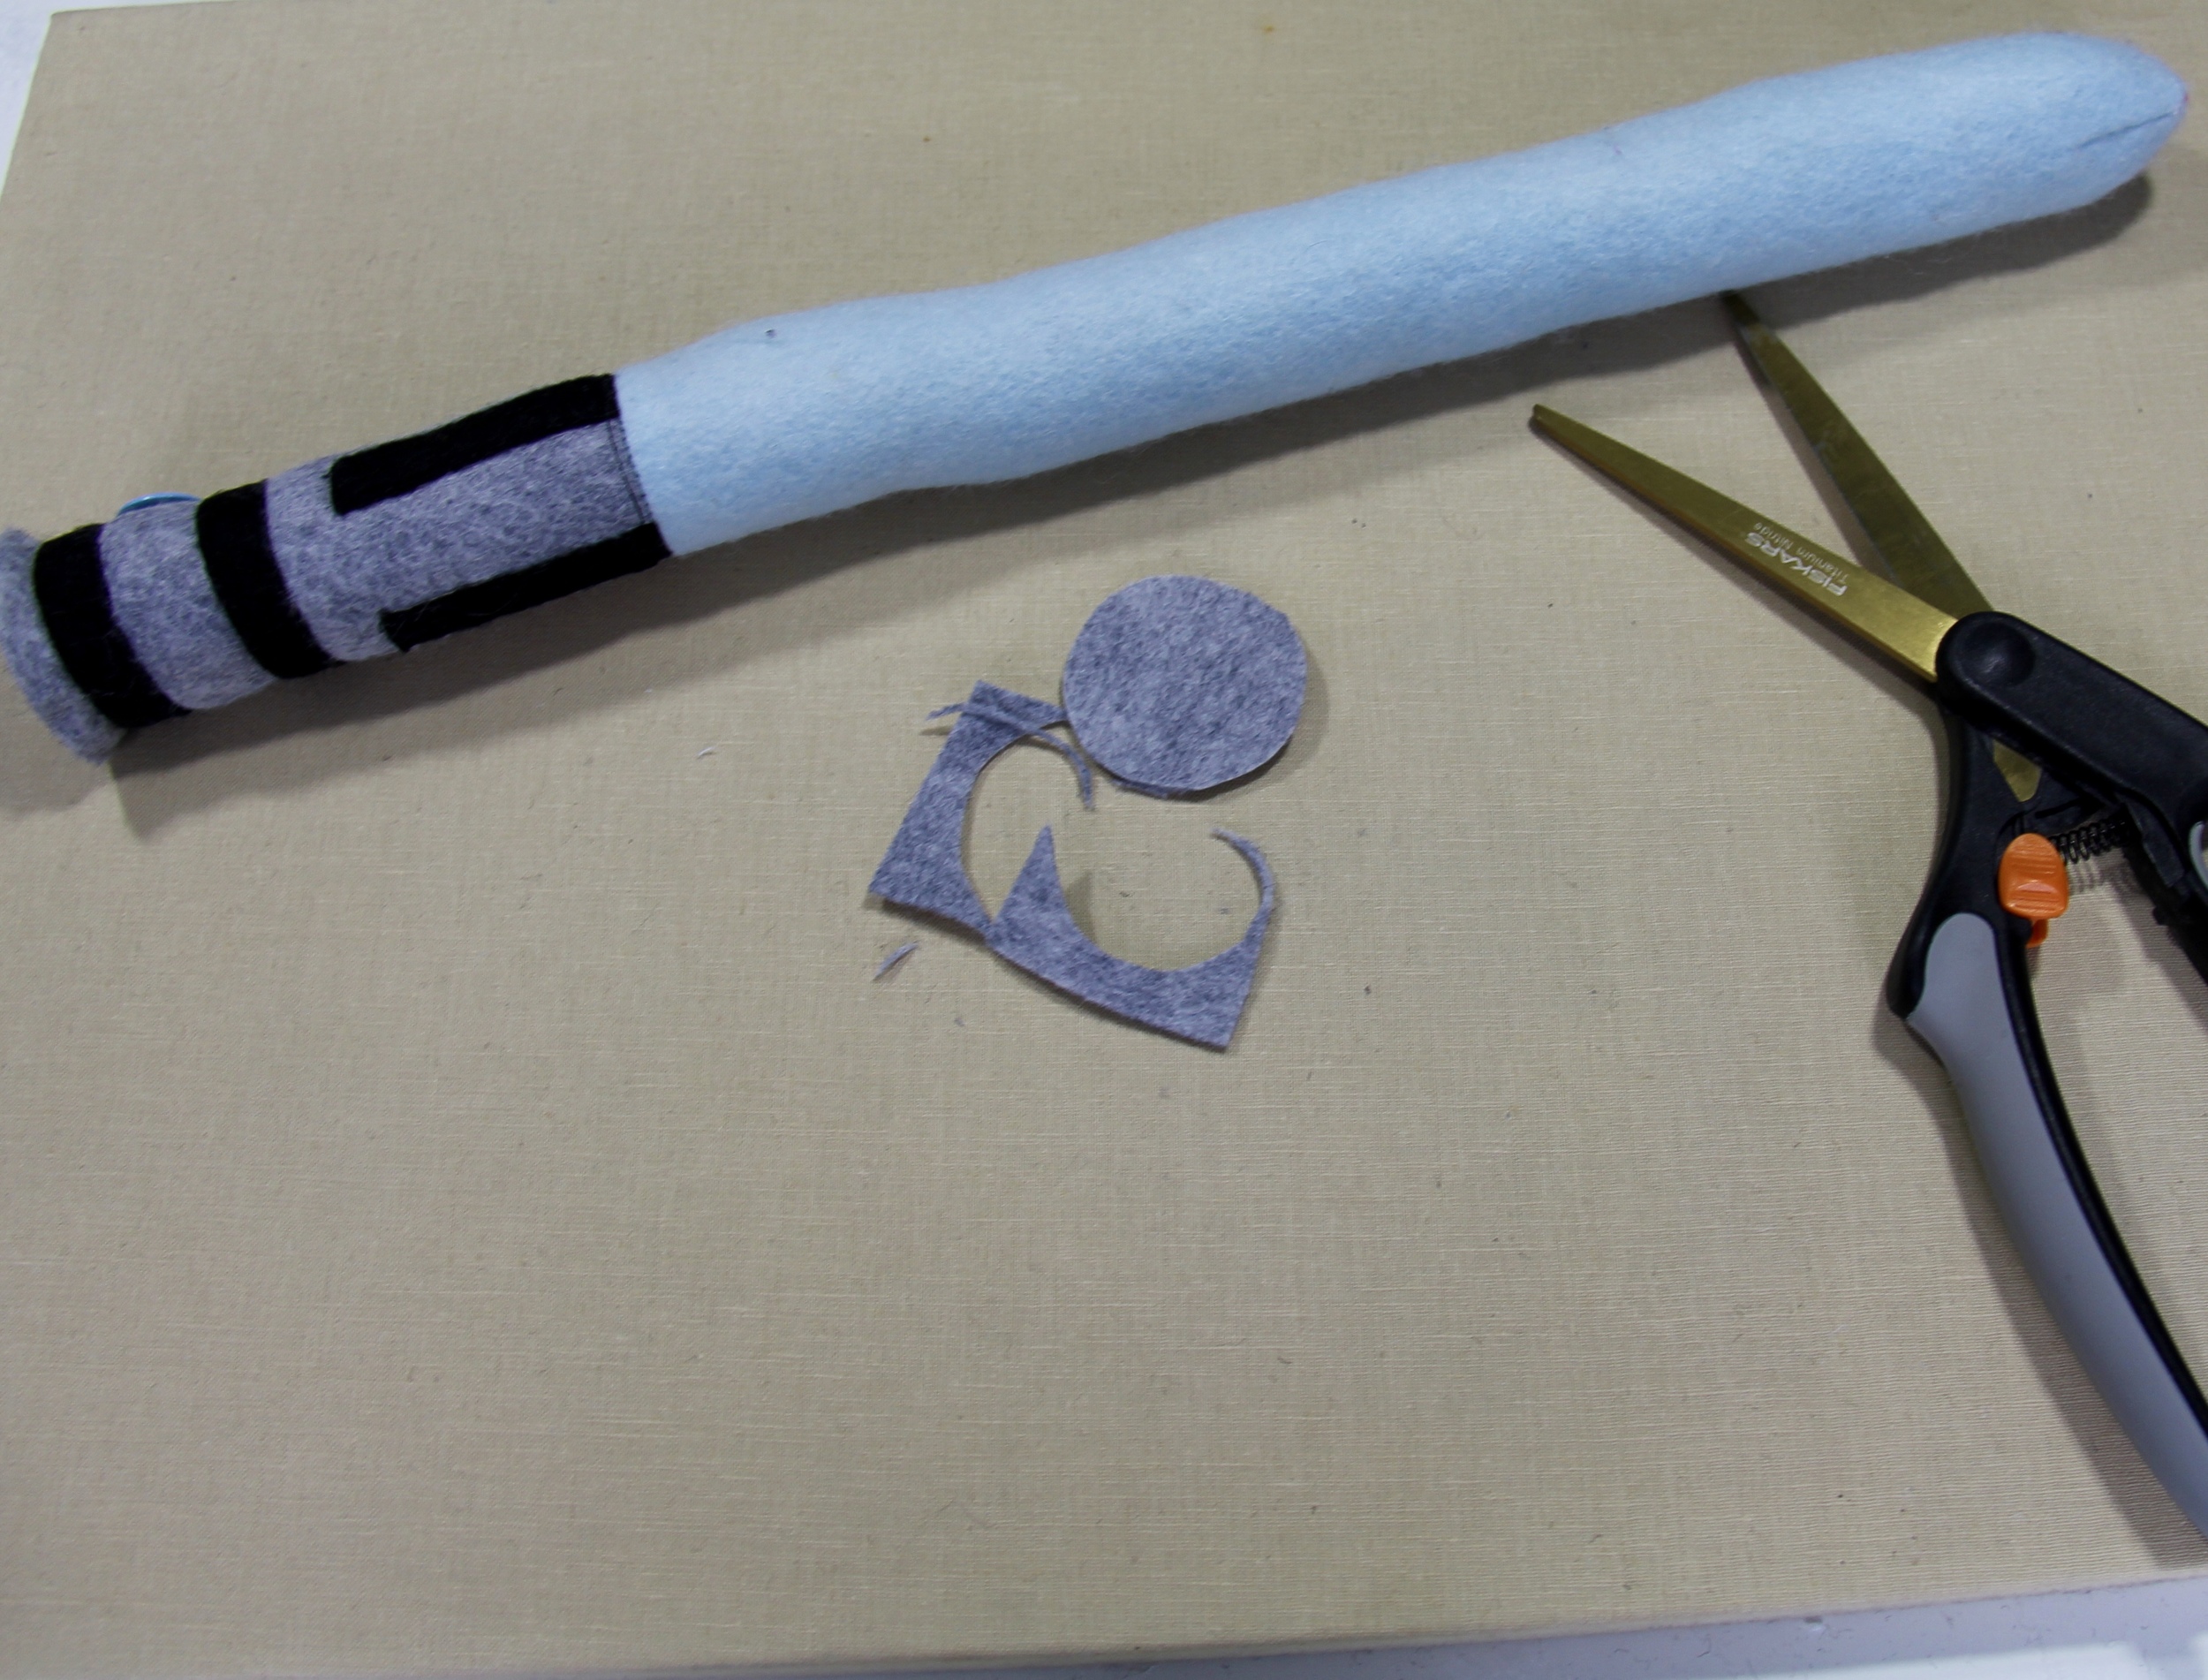
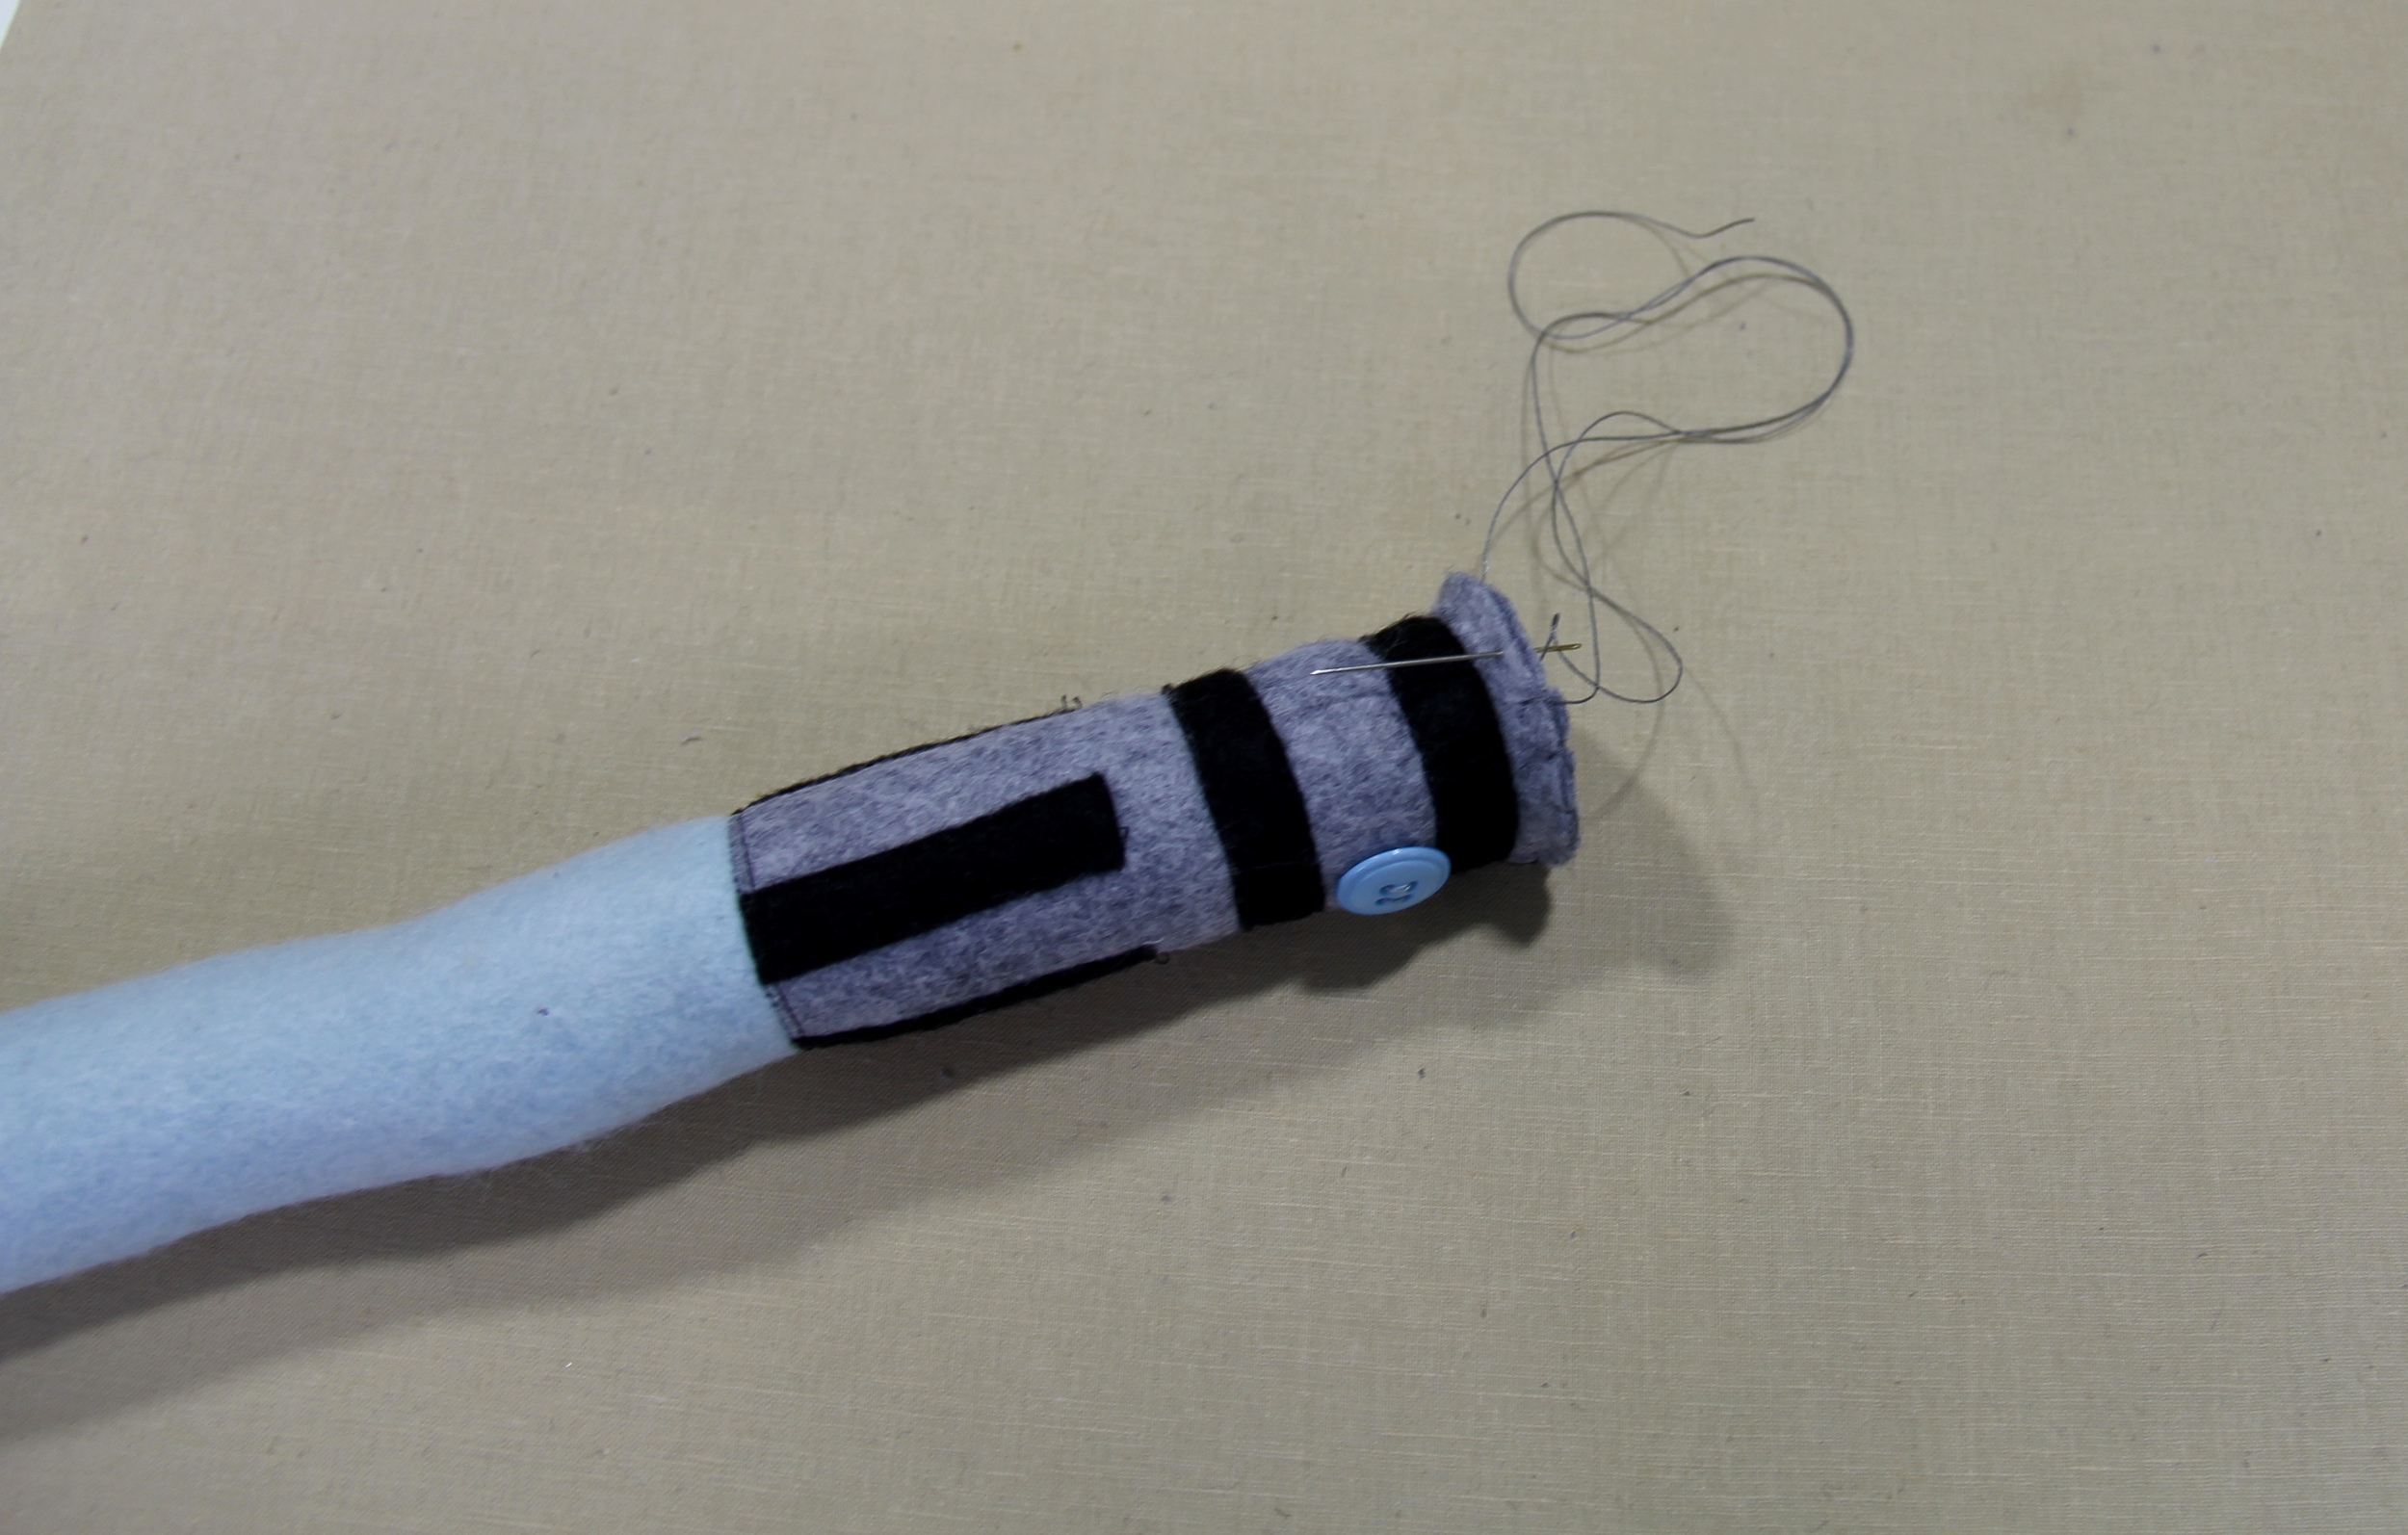
When you are satisfied with the firmness and shape, its time to close the hilt. You may call it quits and just stitch right across the top or you can cut a circle and hand stitch that piece to the bottom of the hilt and close it nicely. I like to use button and craft thread for this. Its a bit thicker and tends to withstand play a bit better.

Ta-da! You did it!! Now you can give it to your child and let him go for it! (If you are going to give this to a child under 5, you may not want to use the button)
Let me know if you have any questions.
XO,
Hilarie