
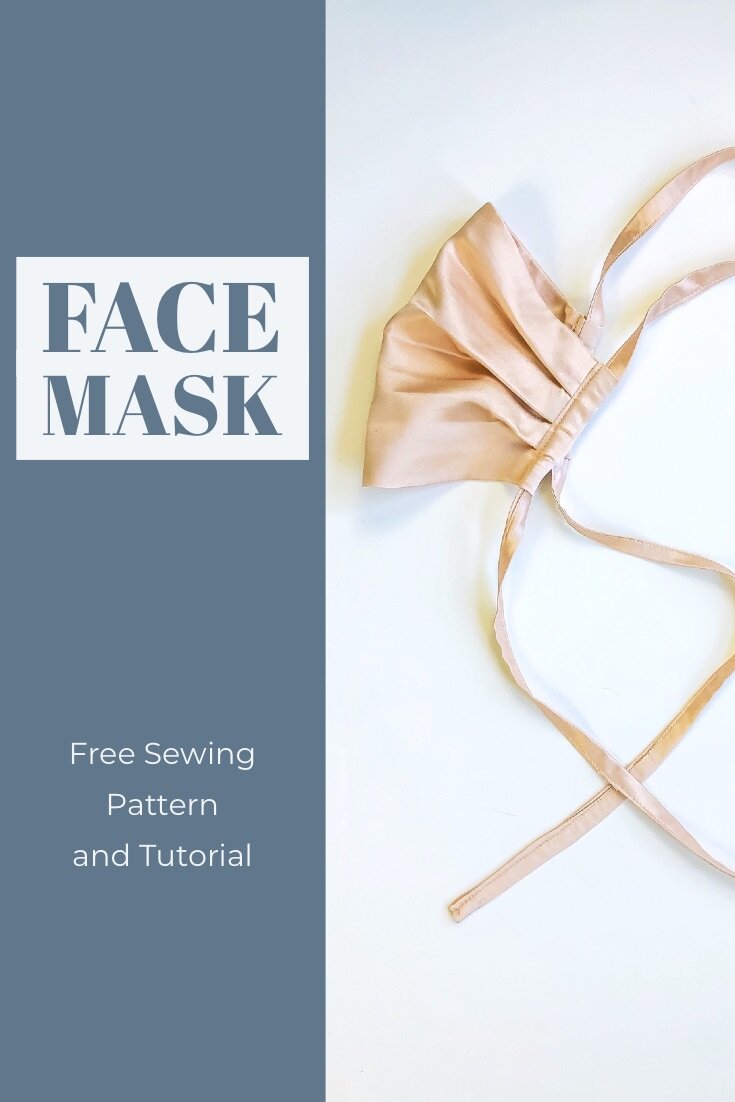
Pleated Face Mask Sewing Pattern and Tutorial Update
Since cloth face masks look like there are going to be the feature accessory for yet another season, I’ve updated my very popular, Pleated Face Mask Tutorial to add a PDF of the Pleated Face Mask Sewing pattern in three sizes: Adult, Older Child/Tween, and young child.
When I first wrote the tutorial last year, I had no experience in wearing a face mask. Like you,I have learned a lot in the past year and a half. Not just how to make a great looking, safe and durable mask, but also that in order to wear them, they have to be comfortable and they need to completely cover your nose and mouth.
Since cloth face masks look like there are going to be the feature accessory for yet another season, I’ve updated my very popular, Pleated Face Mask Tutorial to add a PDF of the Pleated Face Mask Sewing pattern in three sizes: Adult, Older Child/Tween, and young child.
When I first wrote the tutorial last year, I had no experience in wearing a face mask. Like you, I have learned a lot in the past year and a half. Not just how to make a great looking, safe and durable mask, but also that in order to wear them, they have to be comfortable and they need to completely cover your nose and mouth.
The fitting part can be tricky though. Just as we all have fit preferences in our clothes, masks are no exception. Some people like them snug, others want them to be a bit looser. Some like elastic, others ties- or both. The shape and style of a mask is important too as some prefer the pleated mask and others the shaped mask.
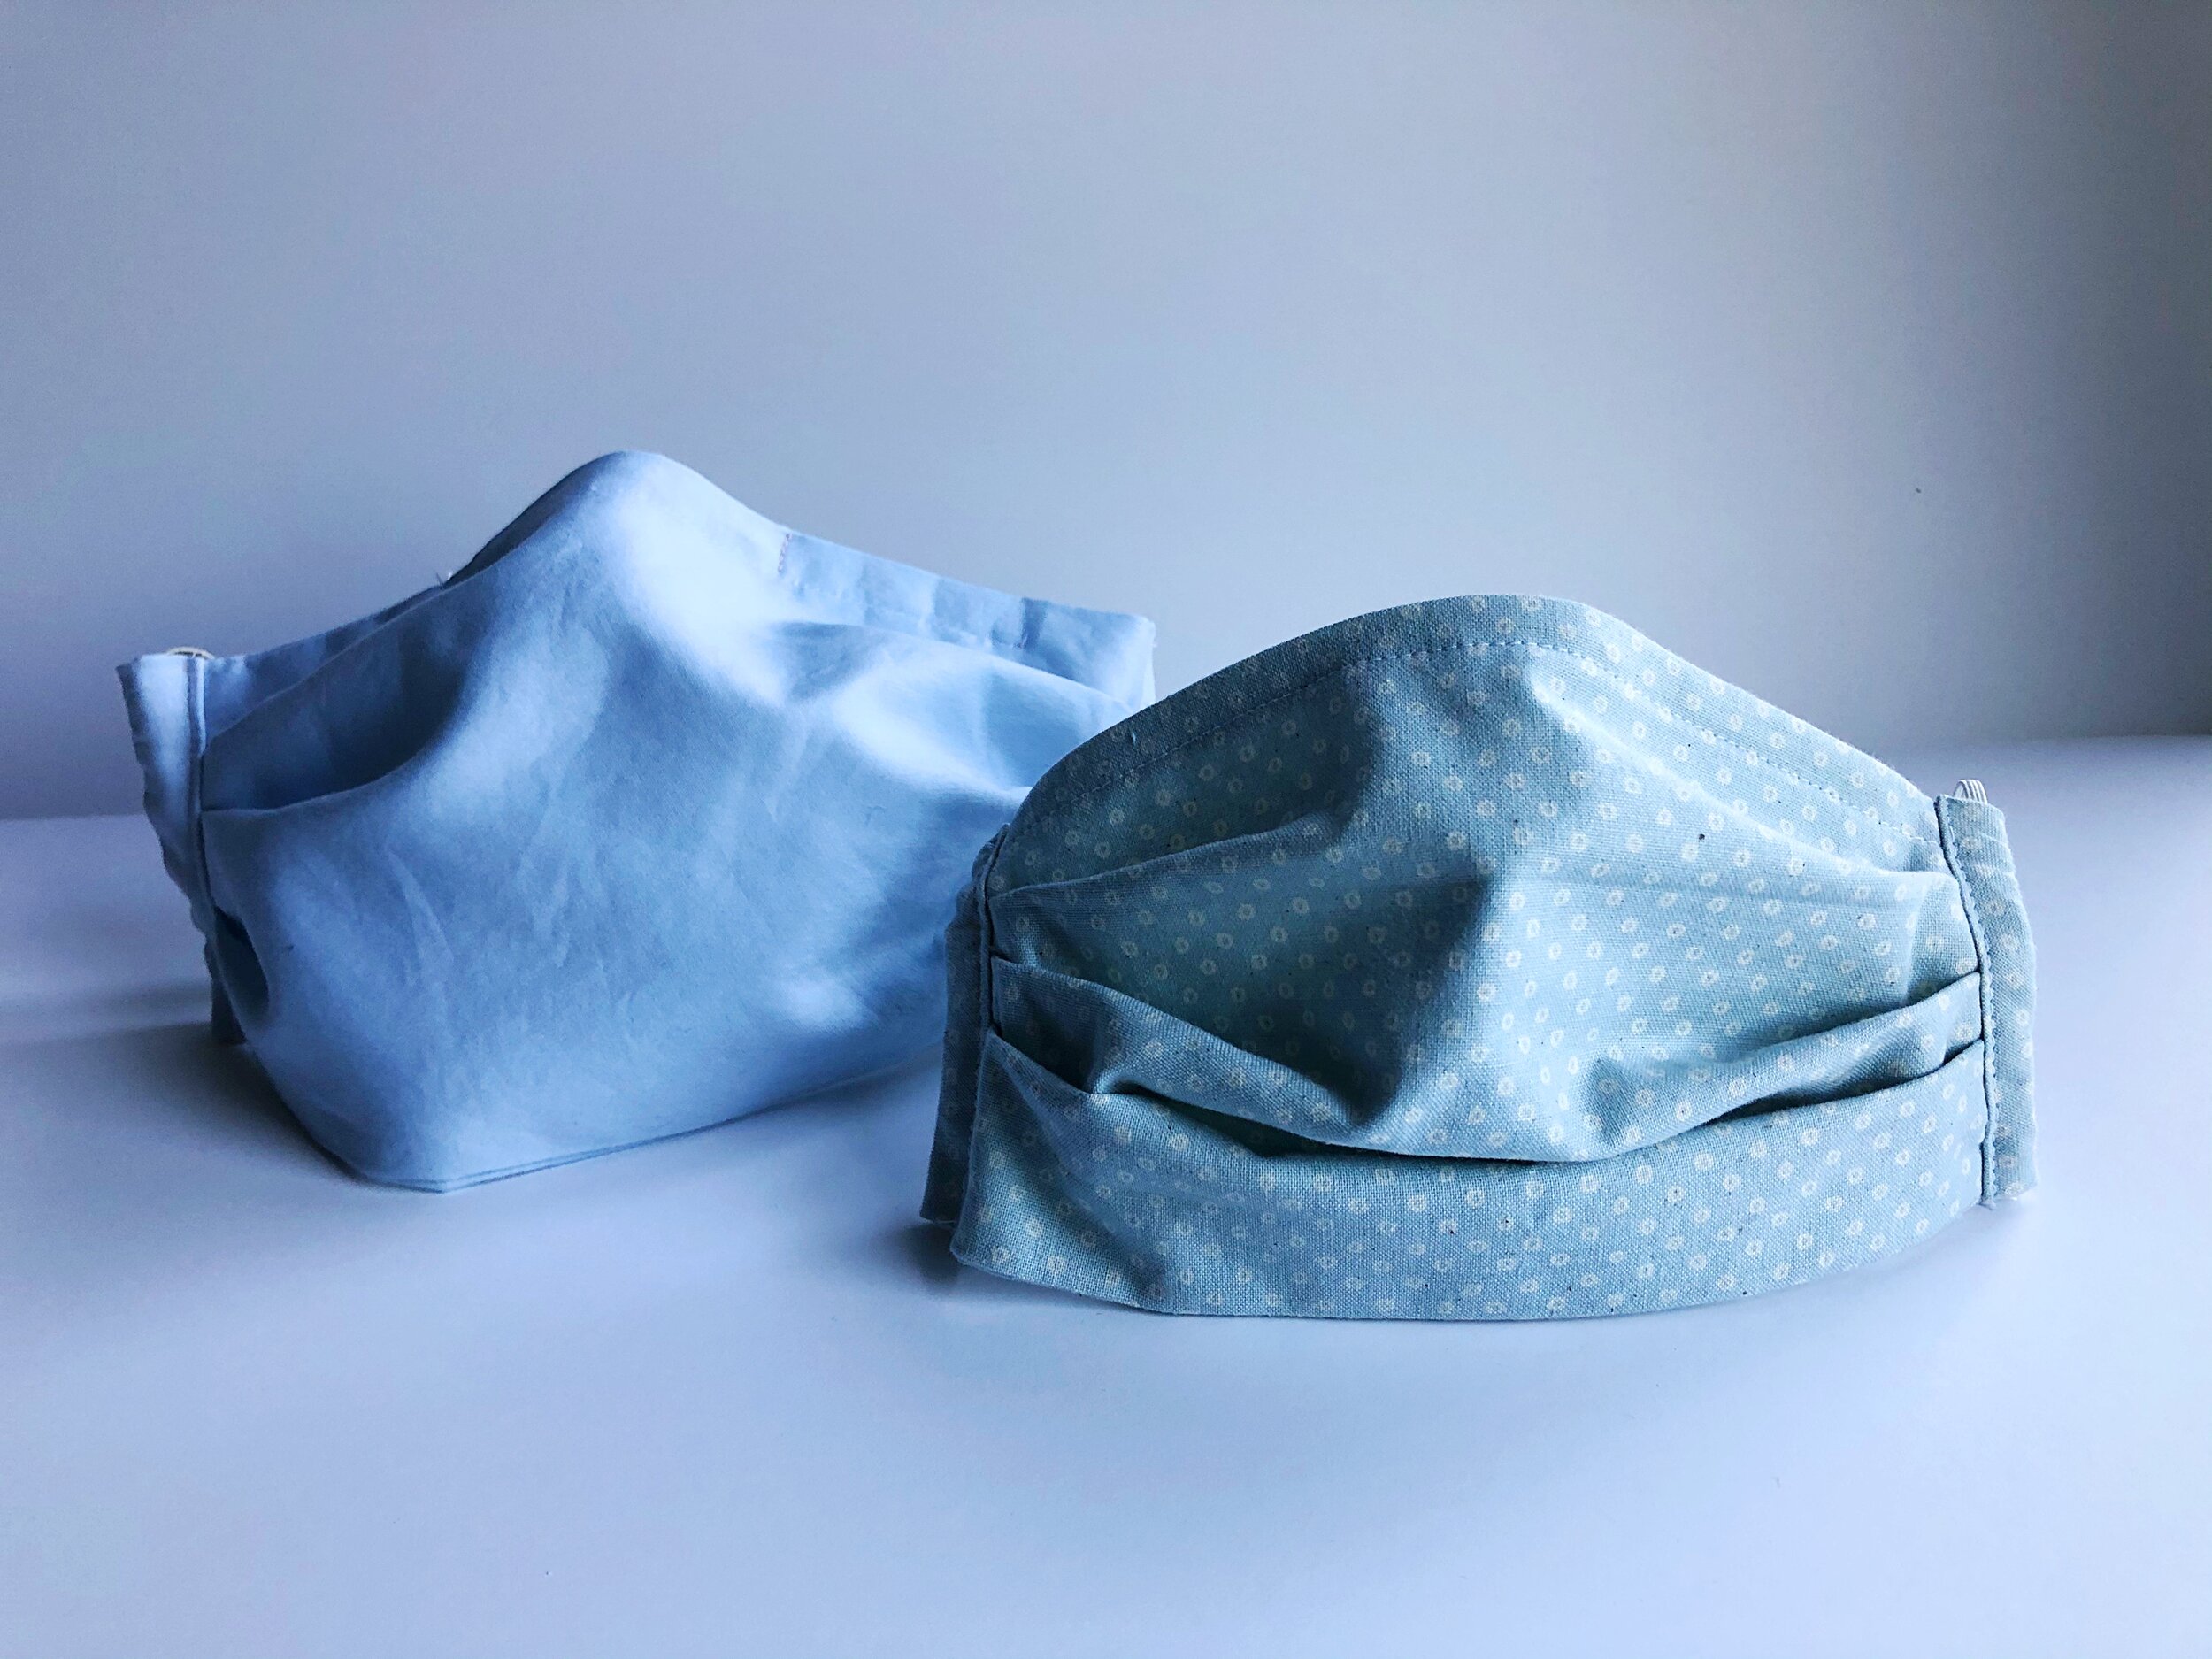
All sizes of the Pleated Face Mask are constructed in the same manner and feature a side casing that can be secured with elastic or a drawstring cord. (The addition of a drawstring cord acts as a neck strap so that the wearer can easily take it on and off when walking around.)
The small size fits a child around 5-11 years old. The older child/tween size is a bit larger and fits a child 12- a small adult. The adult size is the largest and should fit most grownups.
You can download the pattern here.
Mask, Vax, wash your hands and be safe out there y’all!
XO, Hilarie


Face Mask Making FAQ's
So many of the questions that I receive through comments, emails and phone calls, tend to focus around a few topics. In the presence of that, I present to you a Face Mask Making FAQ.
Thank you all for your comments, I am trying to keep up with as many as I can. My screen time is very limited as I have significant light sensitivity caused by migraines. As such, there are days when I cannot tolerate being in front of a screen.
So many of the questions that I receive through comments, emails and phone calls, tend to focus around a few topics. In the presence of that, I present to you a Face Mask Making FAQ.
Face Mask Making FAQ
What are the best filter options?
Since my degree is in Art and not medicine, I do not feel qualified to recommend filters. However, I am using kleenex, unbleached coffee filters and sew-in interfacing. Please refer to the CDC or a medical professional though.
Recommendations for washing masks.
I have had great success washing and drying masks by putting them in a lingerie bag and washing in hot water. If the sun is out, I hang them to dry, if not, I put them in the dryer set to high heat. After, it just takes a quick press and a small adjustment to realign the nose wire.
What can I use for elastic and wire?
The pattern calls for thin elastic, however, wider elastic can be trimmed and still be effective. For instance, you might have a 2” strip of elastic. That can be cut into several smaller strips and used.
Cotton jersey is an excellent option as well. Among the many properties of jersey that I find attractive is that when cut, it rolls toward the right side. Why not use that to your advantage next time you plan a hem- instant design detail!

To create jersey “rope” cut one-inch strips across the width of the grain. Pull gently to encourage it to roll.

Grossgrain ribbon.
For the masks that I am making for the Children’s Hospital of the King’s Daughters, we are using grossgrain ribbon and elastic. The picture below, is the Children’s Hospital Sample that I was given. On the right there is a piece of 6.5” elastic and on the left, a 36” piece of 3/8” grosgrain ribbon. Placing ribbon on both sides will work just as well. (For those of you who are very observant, you will notice that this mask is a bit different than my pattern and that the pleats are facing downward in this picture. This is a picture of the mask that I make for the Children’s Hospital of the King’s Daughters and is a different pattern from mine. Additionally, this is a picture of the “inside” of the mask. The pleats face up on the reverse.)

As for wire, twisty ties, paper clips, pipe cleaners, floral wire and even the metal inserts in file folders will all work. Now that I am writing this, I am looking at the stack of my kids school work scattered across the kitchen table- perhaps the wire from a spiral notebook could be clipped and pulled straight with pliers? (I will assign that task to my children today!)
What are some other (easier, quicker) mask options?
While I saw a gorgeous one made from a silk prada shoe bag here:, bandanas, t-shirts and scarves work too.
Again, I will refer you to the CDC.
How do I apply binding?
Binding can be tricky, but is so useful and beautiful. Here is another tutorial that I have written that might help you- and give you another project to work on.
The bias is applied to each side of the mask in the following manner:
Unfold the bias tape. With right sides together, pin the bias tape to the fabric aligning the raw edges of both the tape and the fabric. Stitch together with a 1/4" seam allowance.
Trim the seam allowance.
Fold the bias tape over the raw edge of the fabric to fully encase the seam allowance. Pin and press.
Recommendations for sizing for children?
The mask is based on an average adult sized face. To make a child’s size, I would recommend cutting one inch smaller. Instead of cutting 7.5” square, make it 6.5” and adjust the fit with ties or elastic.
It really comes down to the vertical measurement from the bridge of the nose to just under the chin and then the horizontal measument from ear to ear, adding enough volume to ease over the nose. Take those measurements, add seam allowance to all four sides of the pattern and you have a custom template.
Orientation of the pleats.
Pleats seem to be the biggest question of all. I was going to list this one first, but since it ties into volume as described in sizing, I think it fits better here. First of all, a bit about flat pattern making and volume.
A pattern is made of paper. It is flat. A pleat is one of many tools that turn that flat pattern (and later cloth) into a three-dimensional form which will fit the contours of the body. Within the body there are a series of curves and bulges, in this case we are discussing a human face, so we have a nose and mouth, and secondary curves (cheeks and breathing expansion). The mask needs to accommodate these shapes.
Darts (a pleat is a form of a dart) are shaping devices which allow enough fabric to cover the body where it is fullest while at the same time providing a means of taking in the excess fullness in a adjoining smaller area. You will find darts in your clothing where you need to allow for a curve or bulge. For example, at the bust, waist and hip of a garment.
Darts are not the only way to control shaping. Shaped seams, pleats, shirring, tucks, smocking and gathers accomplish the same purpose.
To be effective, the dart must be located in the area where the high point of any curve occurs. In the case of a mask, it is the nose. The dart is then controlled at each side with the bias encased pleats. Since the pleats are quite shallow and the mask is designed to be pulled from the bridge of the nose to under the chin, it really does not matter which way you orient the pleats, as the only place that you will see the pleat is just along the side casing.
There seems to be much debate about the orientation of the pleat. So many of you have written to me telling me that you understand the pleats need to be turned down so as not to catch particles. While I do understand that thought process, if that were the case, we need to rethink the side casings too as particles are just as likely to settle there too.
This pattern was created from a mask that was given to me at a recent doctor’s appointment. Since the pleats were facing in an upward manner on the front of that mask, that is how I created the pattern. When the mask is turned the opposite way, the pleats turn down.
This pattern was written to guide you through the face mask construction process. My goal as a sewing educator, is to explain to you, the reader how to cut and handle the fabric and to begin to understand the reasoning behind the methods used. Interest, motivation and enthusiasm are all essential to sewing. I hope that once this current pandemic is behind all of us, (and that we recover!) that many of you will continue to advance your sewing journey. It gets a whole lot more fun- I promise!

How to Maximize Your Time Sewing Cloth Face Masks With These Tips and Tricks
Learn how to save time and maximize the number of face masks that you can sew. How to sew a double-layer face mask with wire and pocket for filter or shield. Step by step cloth face mask tutorial and free pattern. Face masks are hard to come by and it seems that hospitals will be facing a shortage.
Thank you all so much for your lovely comments and kind word about my cloth face mask sewing pattern and tutorial. Like many of you, I am making masks daily and have discovered a couple of tricks to speed up the process a bit. Here is a video I made to share my tips with you. Enjoy!

THIS WEBSITE IS NOT INTENDED FOR THE PURPOSE OF PROVIDING MEDICAL ADVICE
All information, content, and material of this website is for informational purposes only and is not intended to serve as a substitute of a qualified physician or healthcare provider.
“In settings where facemasks are not available, HCP might use homemade masks (e.g., bandana, scarf) for care of patients with COVID-19 as a last resort. However, homemade masks are not considered PPE, since their capability to protect HCP is unknown. Caution should be exercised when considering this option. Homemade masks should ideally be used in combination with a face shield that covers the entire front (that extends to the chin or below) and sides of the face.”
Article from Courier & Press, Evansville, IND “Citing shortages, Deaconess Health System, including Henderson's Methodist Health, has asked the public to sew face masks for staff fighting coronavirus”.

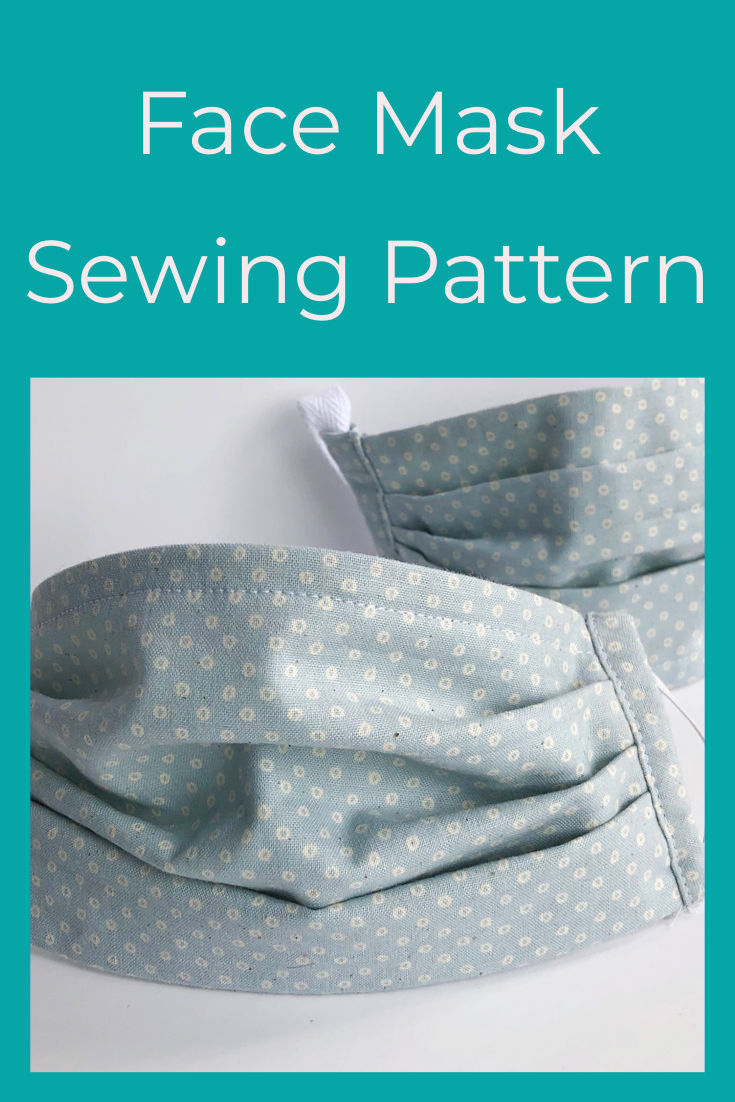
Face Mask Sewing Pattern and Tutorial
Across the world, we are all discovering just how unprepared we are for the COVID-19 situation. Face masks are hard to come by and it seems that hospitals will be facing a shortage in the near future. After reading this article I decided that I needed to put my skills to use make a mask pattern.
Across the world, we are all discovering just how unprepared we are for the COVID-19 situation. Face masks are hard to come by and it seems that hospitals will be facing a shortage in the near future. After reading this article I decided that I needed to put my skills to use make a mask pattern.
THIS WEBSITE IS NOT INTENDED FOR THE PURPOSE OF PROVIDING MEDICAL ADVICE
All information, content, and material of this website is for informational purposes only and is not intended to serve as a substitute of a qualified physician or healthcare provider.
“In settings where facemasks are not available, HCP might use homemade masks (e.g., bandana, scarf) for care of patients with COVID-19 as a last resort. However, homemade masks are not considered PPE, since their capability to protect HCP is unknown. Caution should be exercised when considering this option. Homemade masks should ideally be used in combination with a face shield that covers the entire front (that extends to the chin or below) and sides of the face.”
Article from Courier & Press, Evansville, IND “Citing shortages, Deaconess Health System, including Henderson's Methodist Health, has asked the public to sew face masks for staff fighting coronavirus”.
EDIT 9/2/2021: PDF Face Mask Sewing Pattern Free Download
Download Free PDF Pattern Here
EDIT 4/9/2020: I have written a Mask Making FAQ to address some of the more frequent questions. I hope you find it helpful.
HOW TO SEW A FACE MASK
This mask is made of two layers of cotton and can be fastened with elastic or ribbon and tied around your head. After wearing it around for a bit, it is surprisingly breathable.
Instead of recommending fabric to you, I have linked to a couple of articles above. Please read and decide for yourself which fabric you feel is best to use.
This mask pattern and tutorial has three variations. The first is a standard two layer mask with elastic to fit around your ears.
The second variation is to add ties to the mask so that it loops and ties around the head.
The final variation is to adapt the mask to allow it to hold a shield or filter.
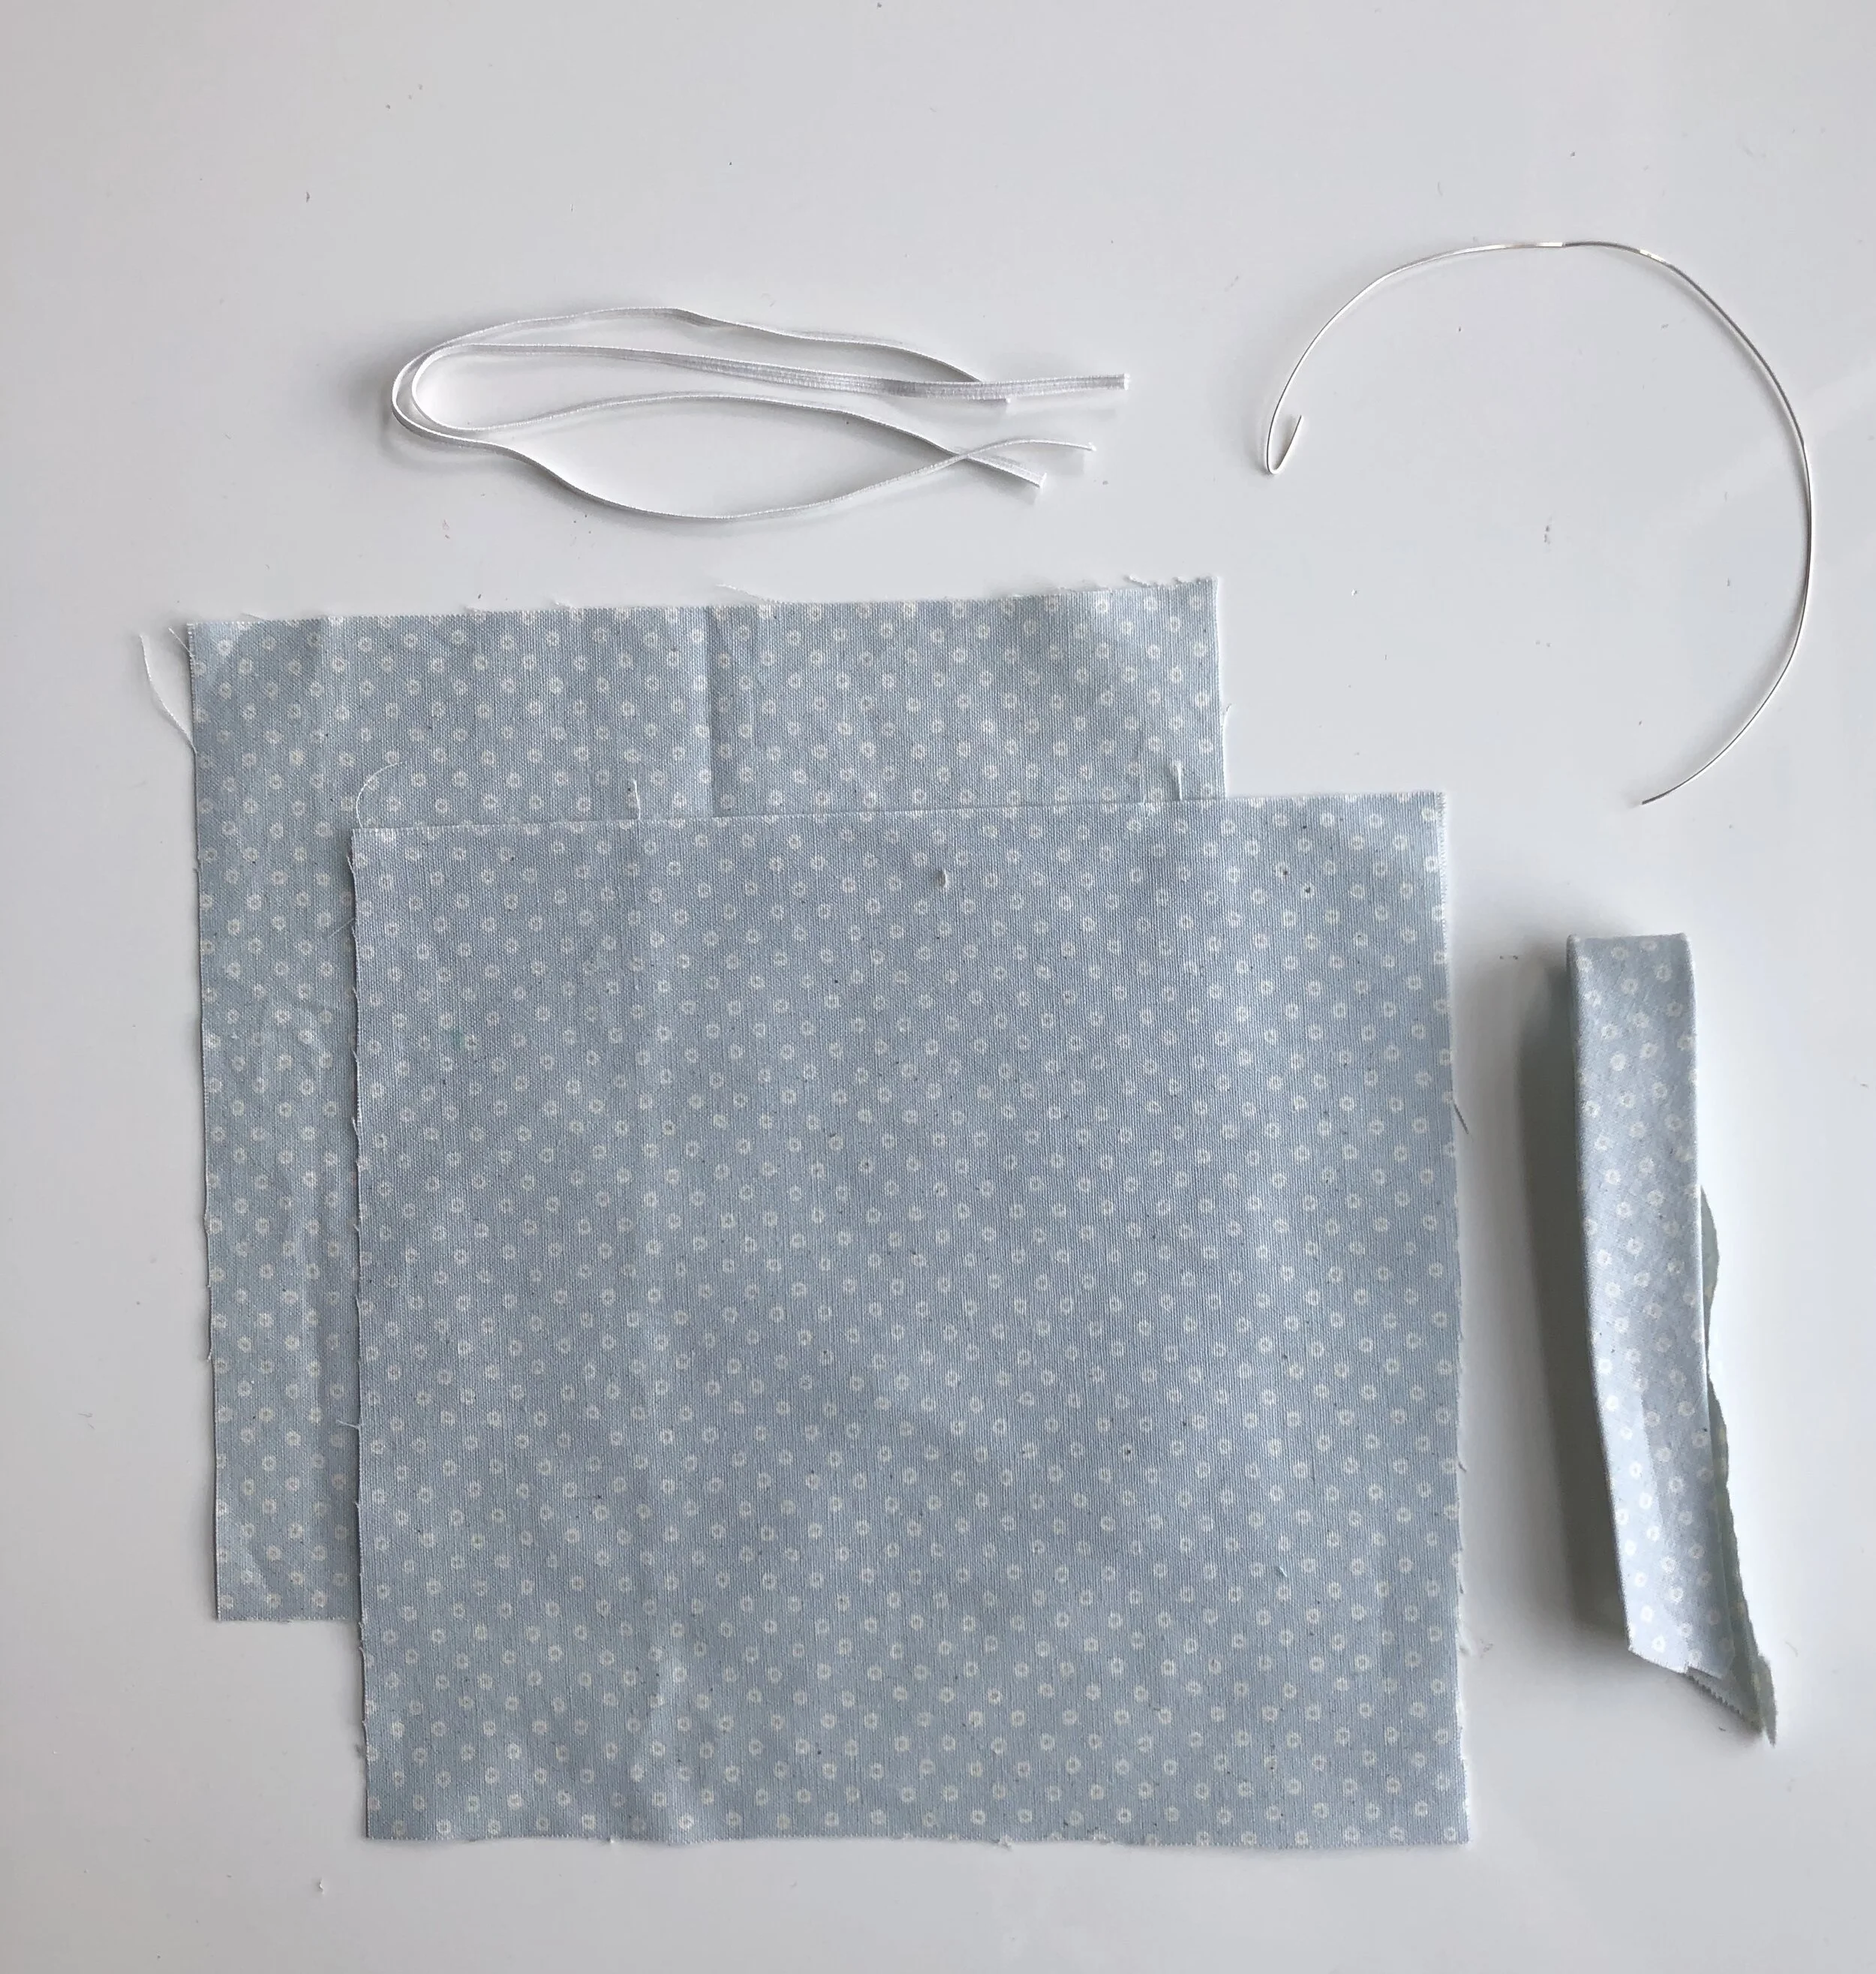
SUPPLIES
Fabric, Refer to CDC Guidelines *Instead of recommending fabric to you, please read this article and decide for yourself which fabric you feel is best to use.
2 - 10” pieces of 1/4” -1/2” flat elastic or 2 yards of 1/2” ribbon
7.5” of metal wire , I used 16 gauge wire, but would image that a straightened out paper clip would likely work in a pinch.
8” of Bias tape OR 2 rectangles of fabric 3 x 4.5”
Filter for pocket option
SIZE
Finished Dimensions: Approximately 3.5” x 7”
PREPARE
Cut 2 pieces of fabric in a 7.5” square. Pin and sew across the top and the bottom using a 1/2” seam allowance.
How to Sew a double layered face mask with elastic
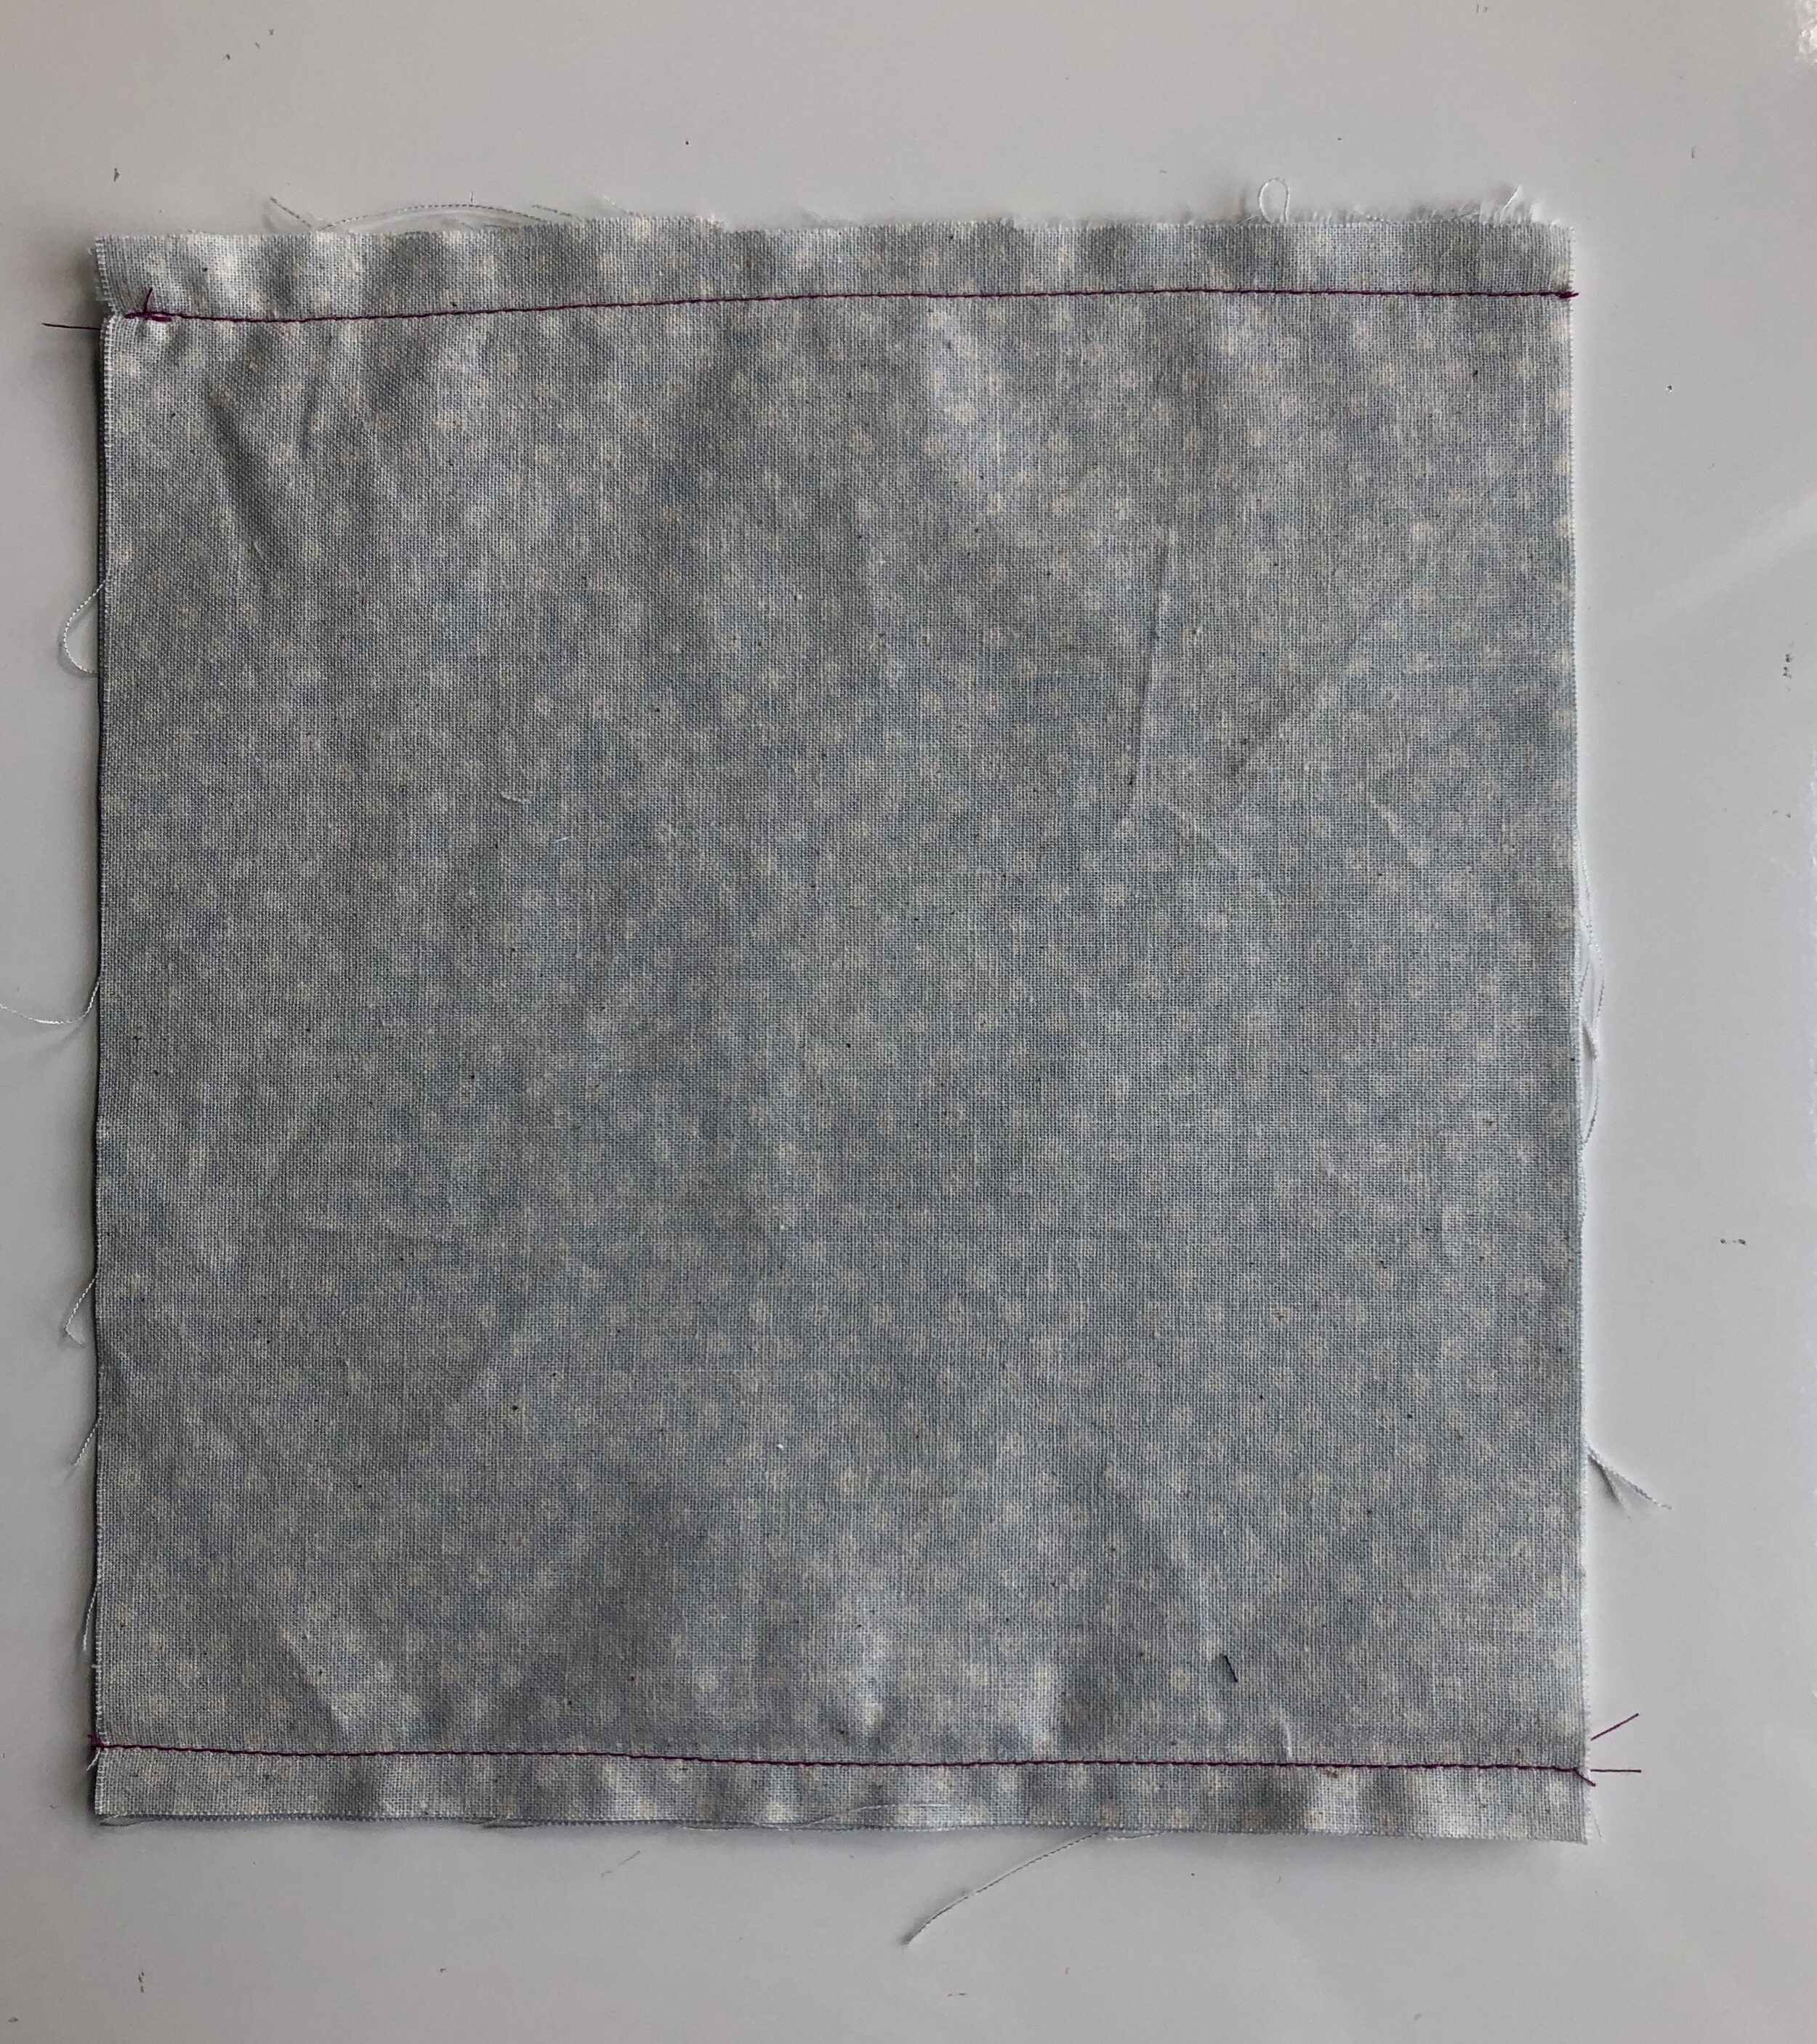
Trim the seam allowance, turn to the right side and press.
CASING
To form a casing, stitch through both layers along the top edge, again with a 1/2” seam allowance.

Fold the leading edge of the wire in just a bit so the it doesn’t poke through the fabric. Insert into the casing. Bend the opposite side.


PLEATING THE MASK
To form the pleats, mark your mask at the 1 3/4”, 3 1/2” and 5 1/4” points from the top. This will be your guide to fold the pleats. If you aren’t the exacting type of person, just wing it. The mask needs to be pleated so that it is 3.5” tall.
The image below is not sewn, however, it is cut to the same dimensions as if it were sewn with a 1/2” seam allowance at top and bottom.
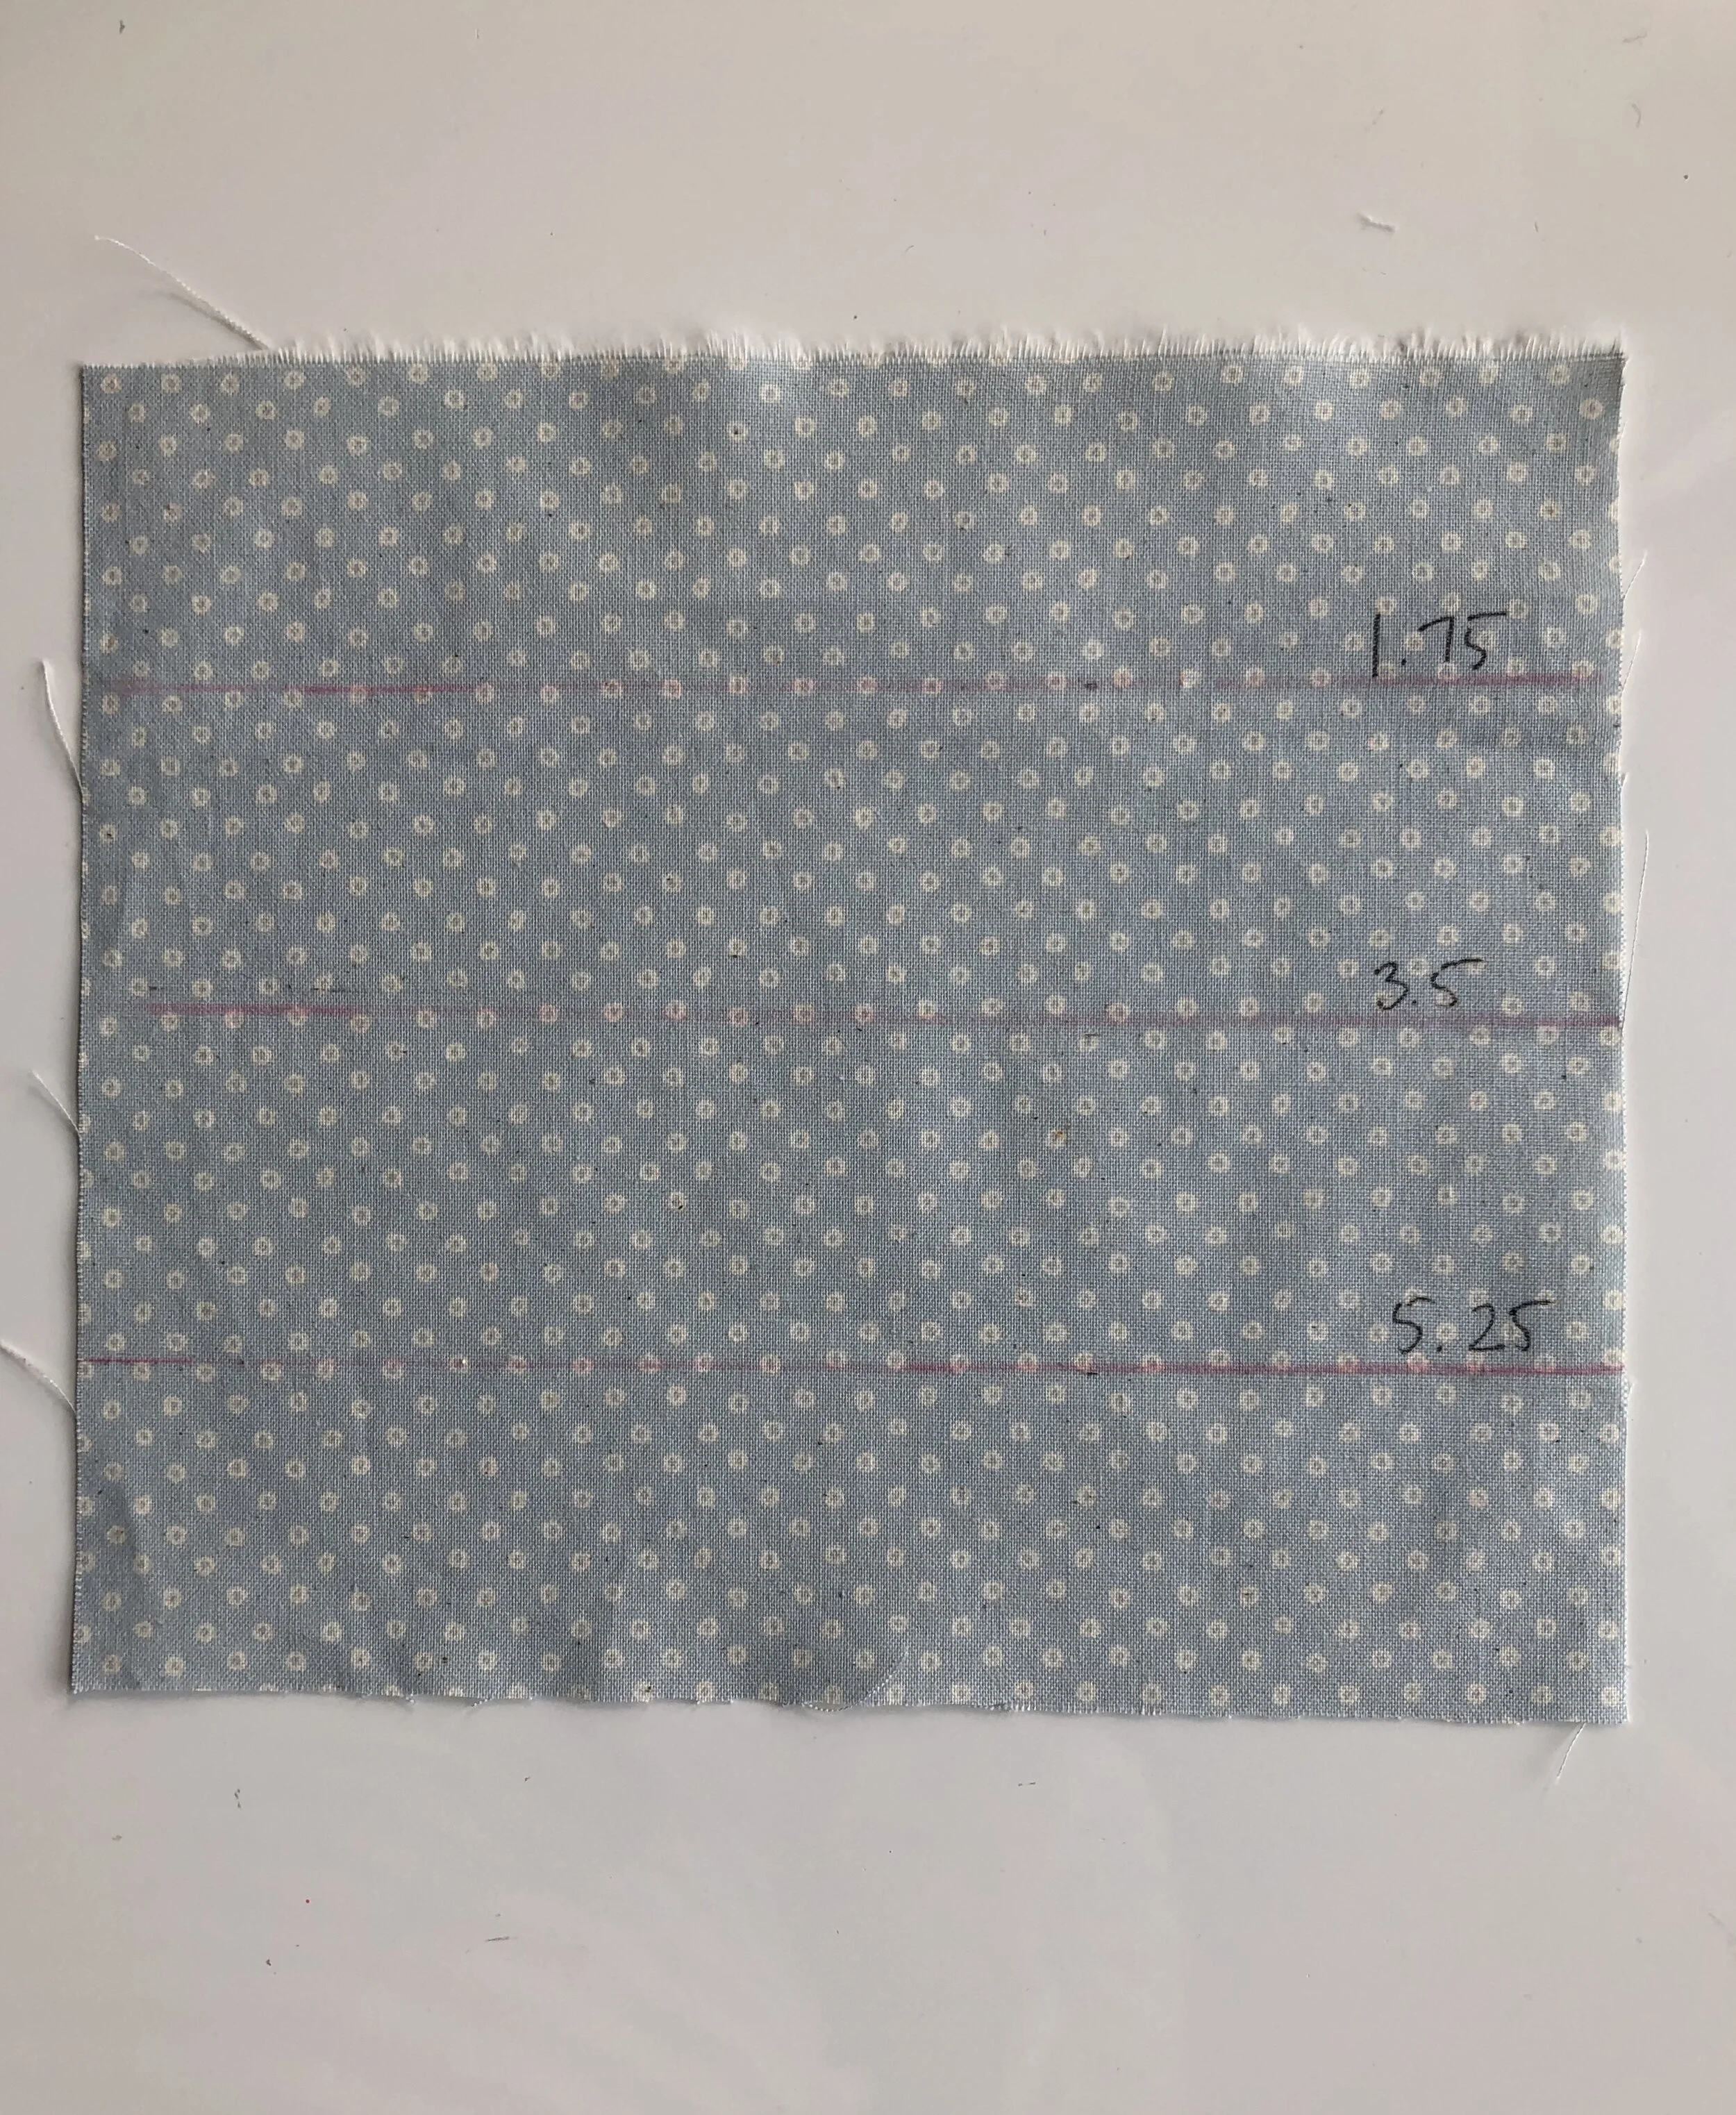
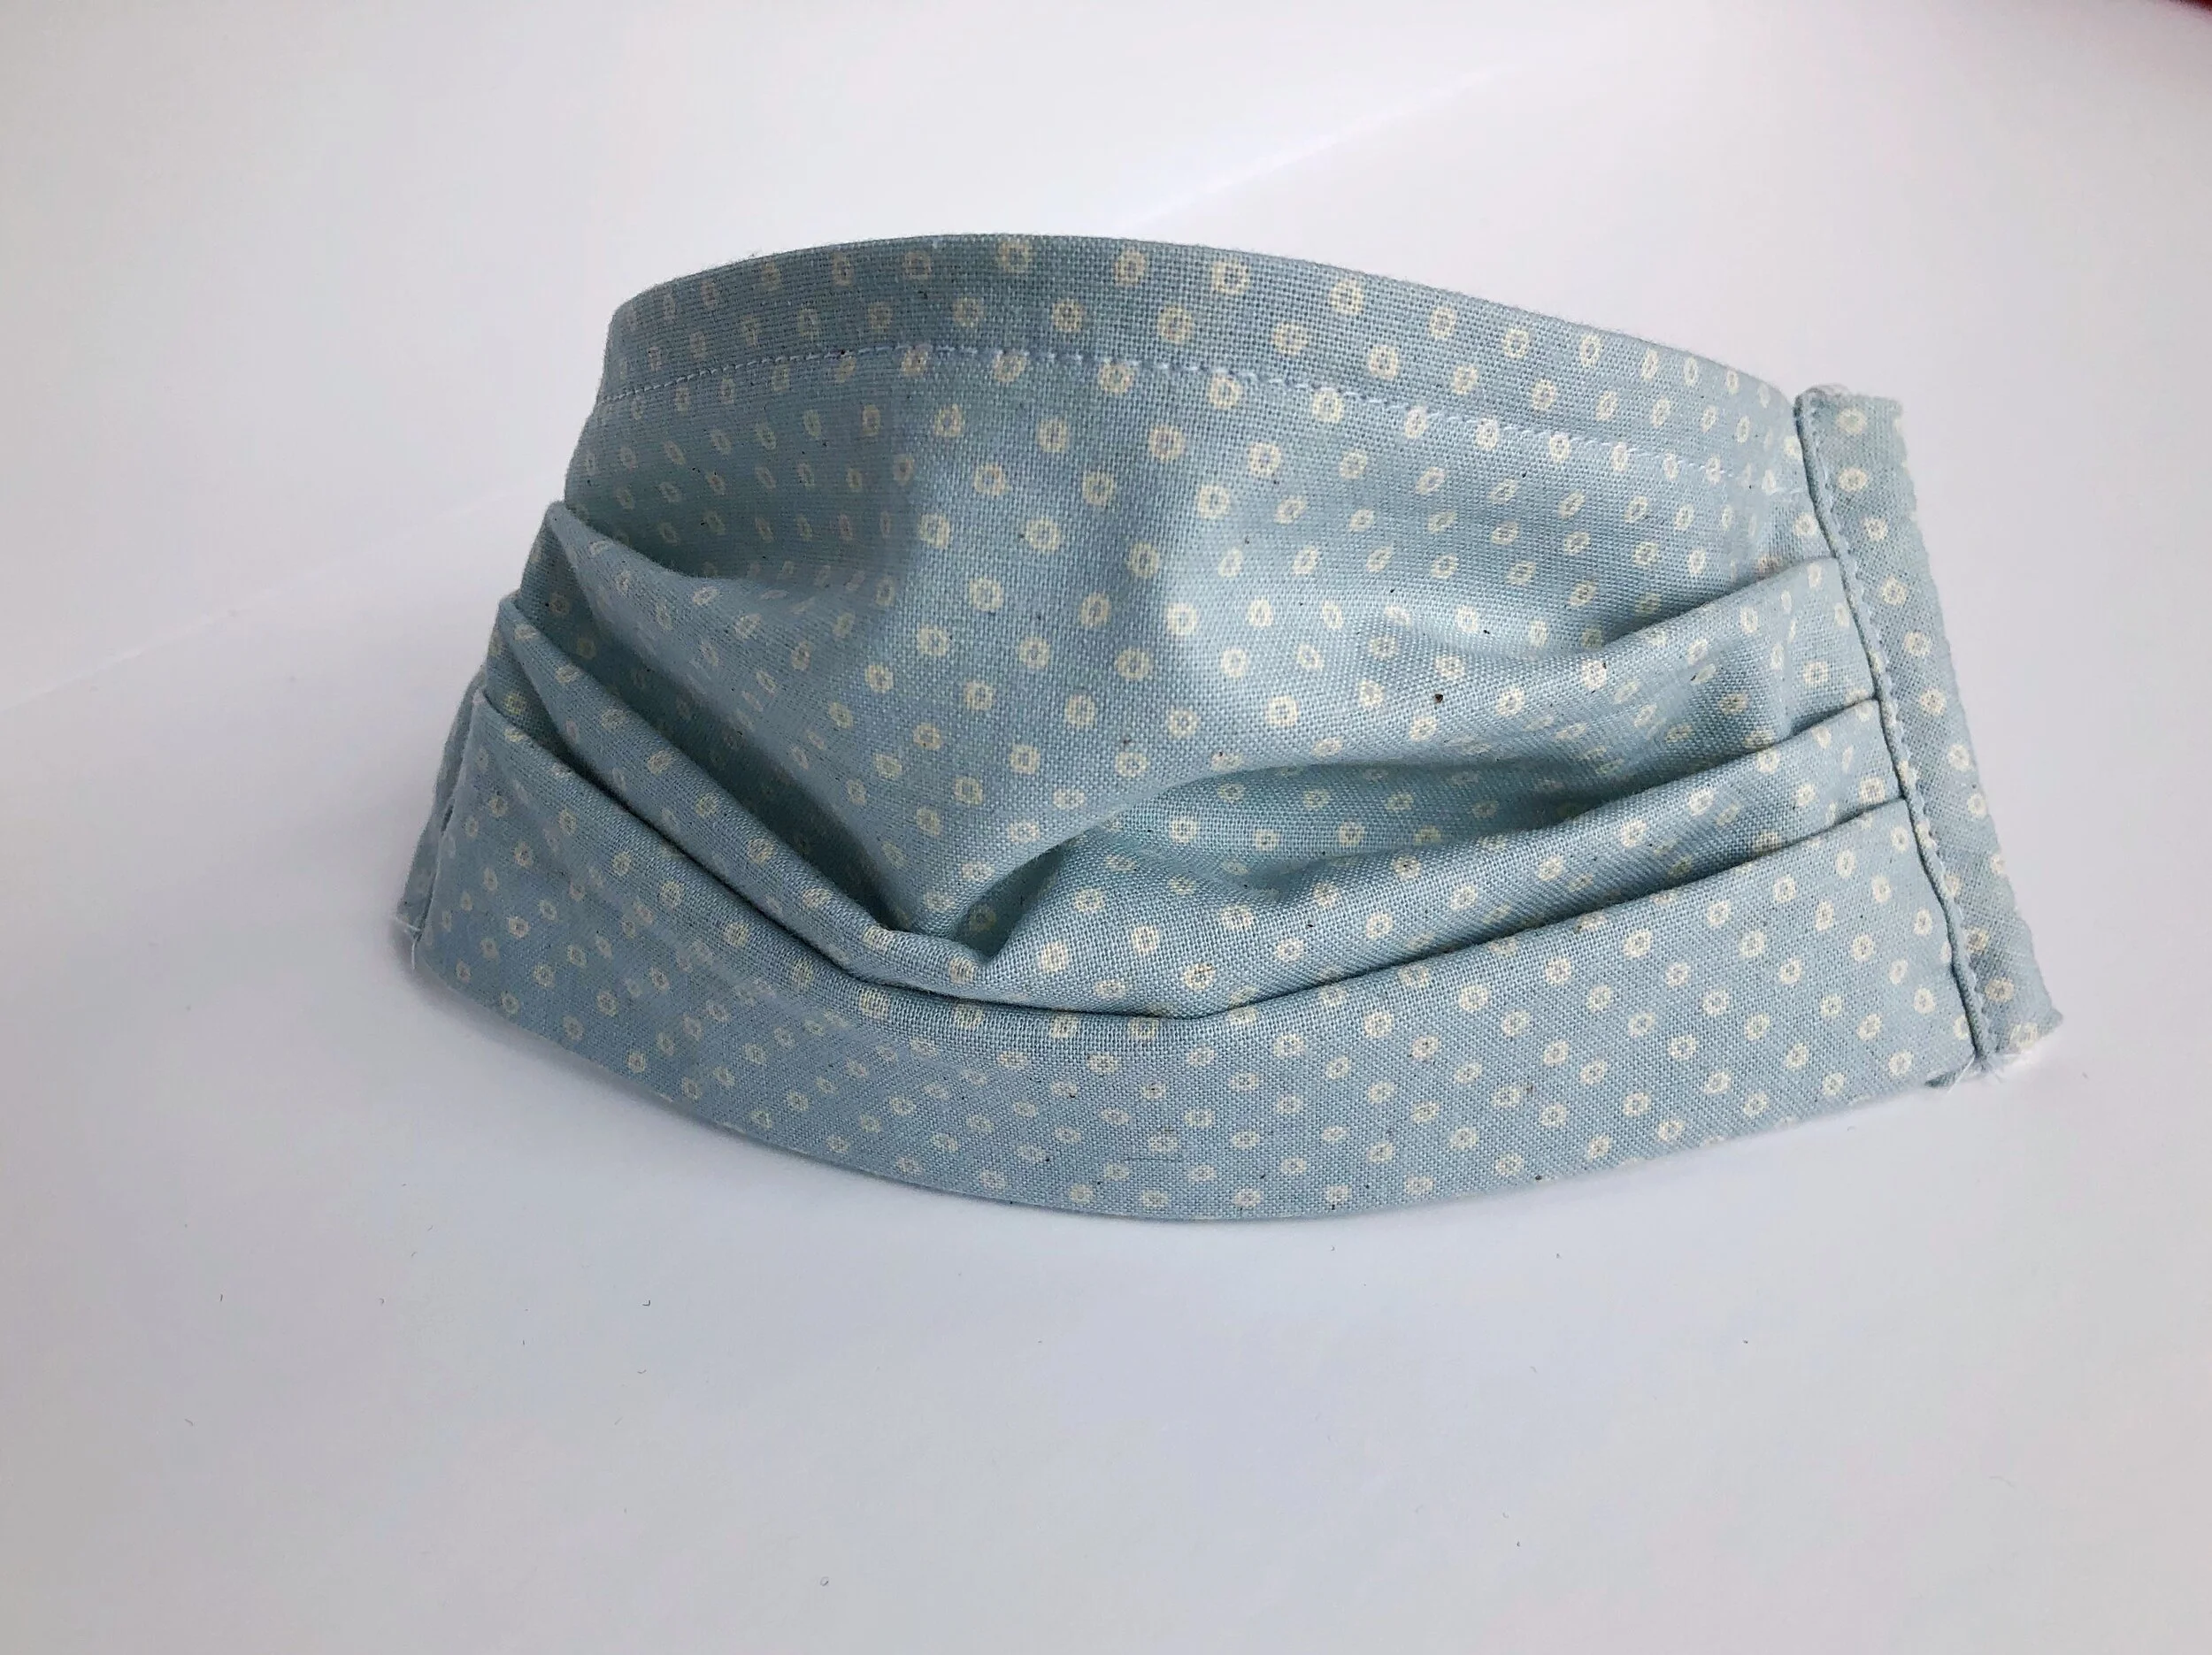
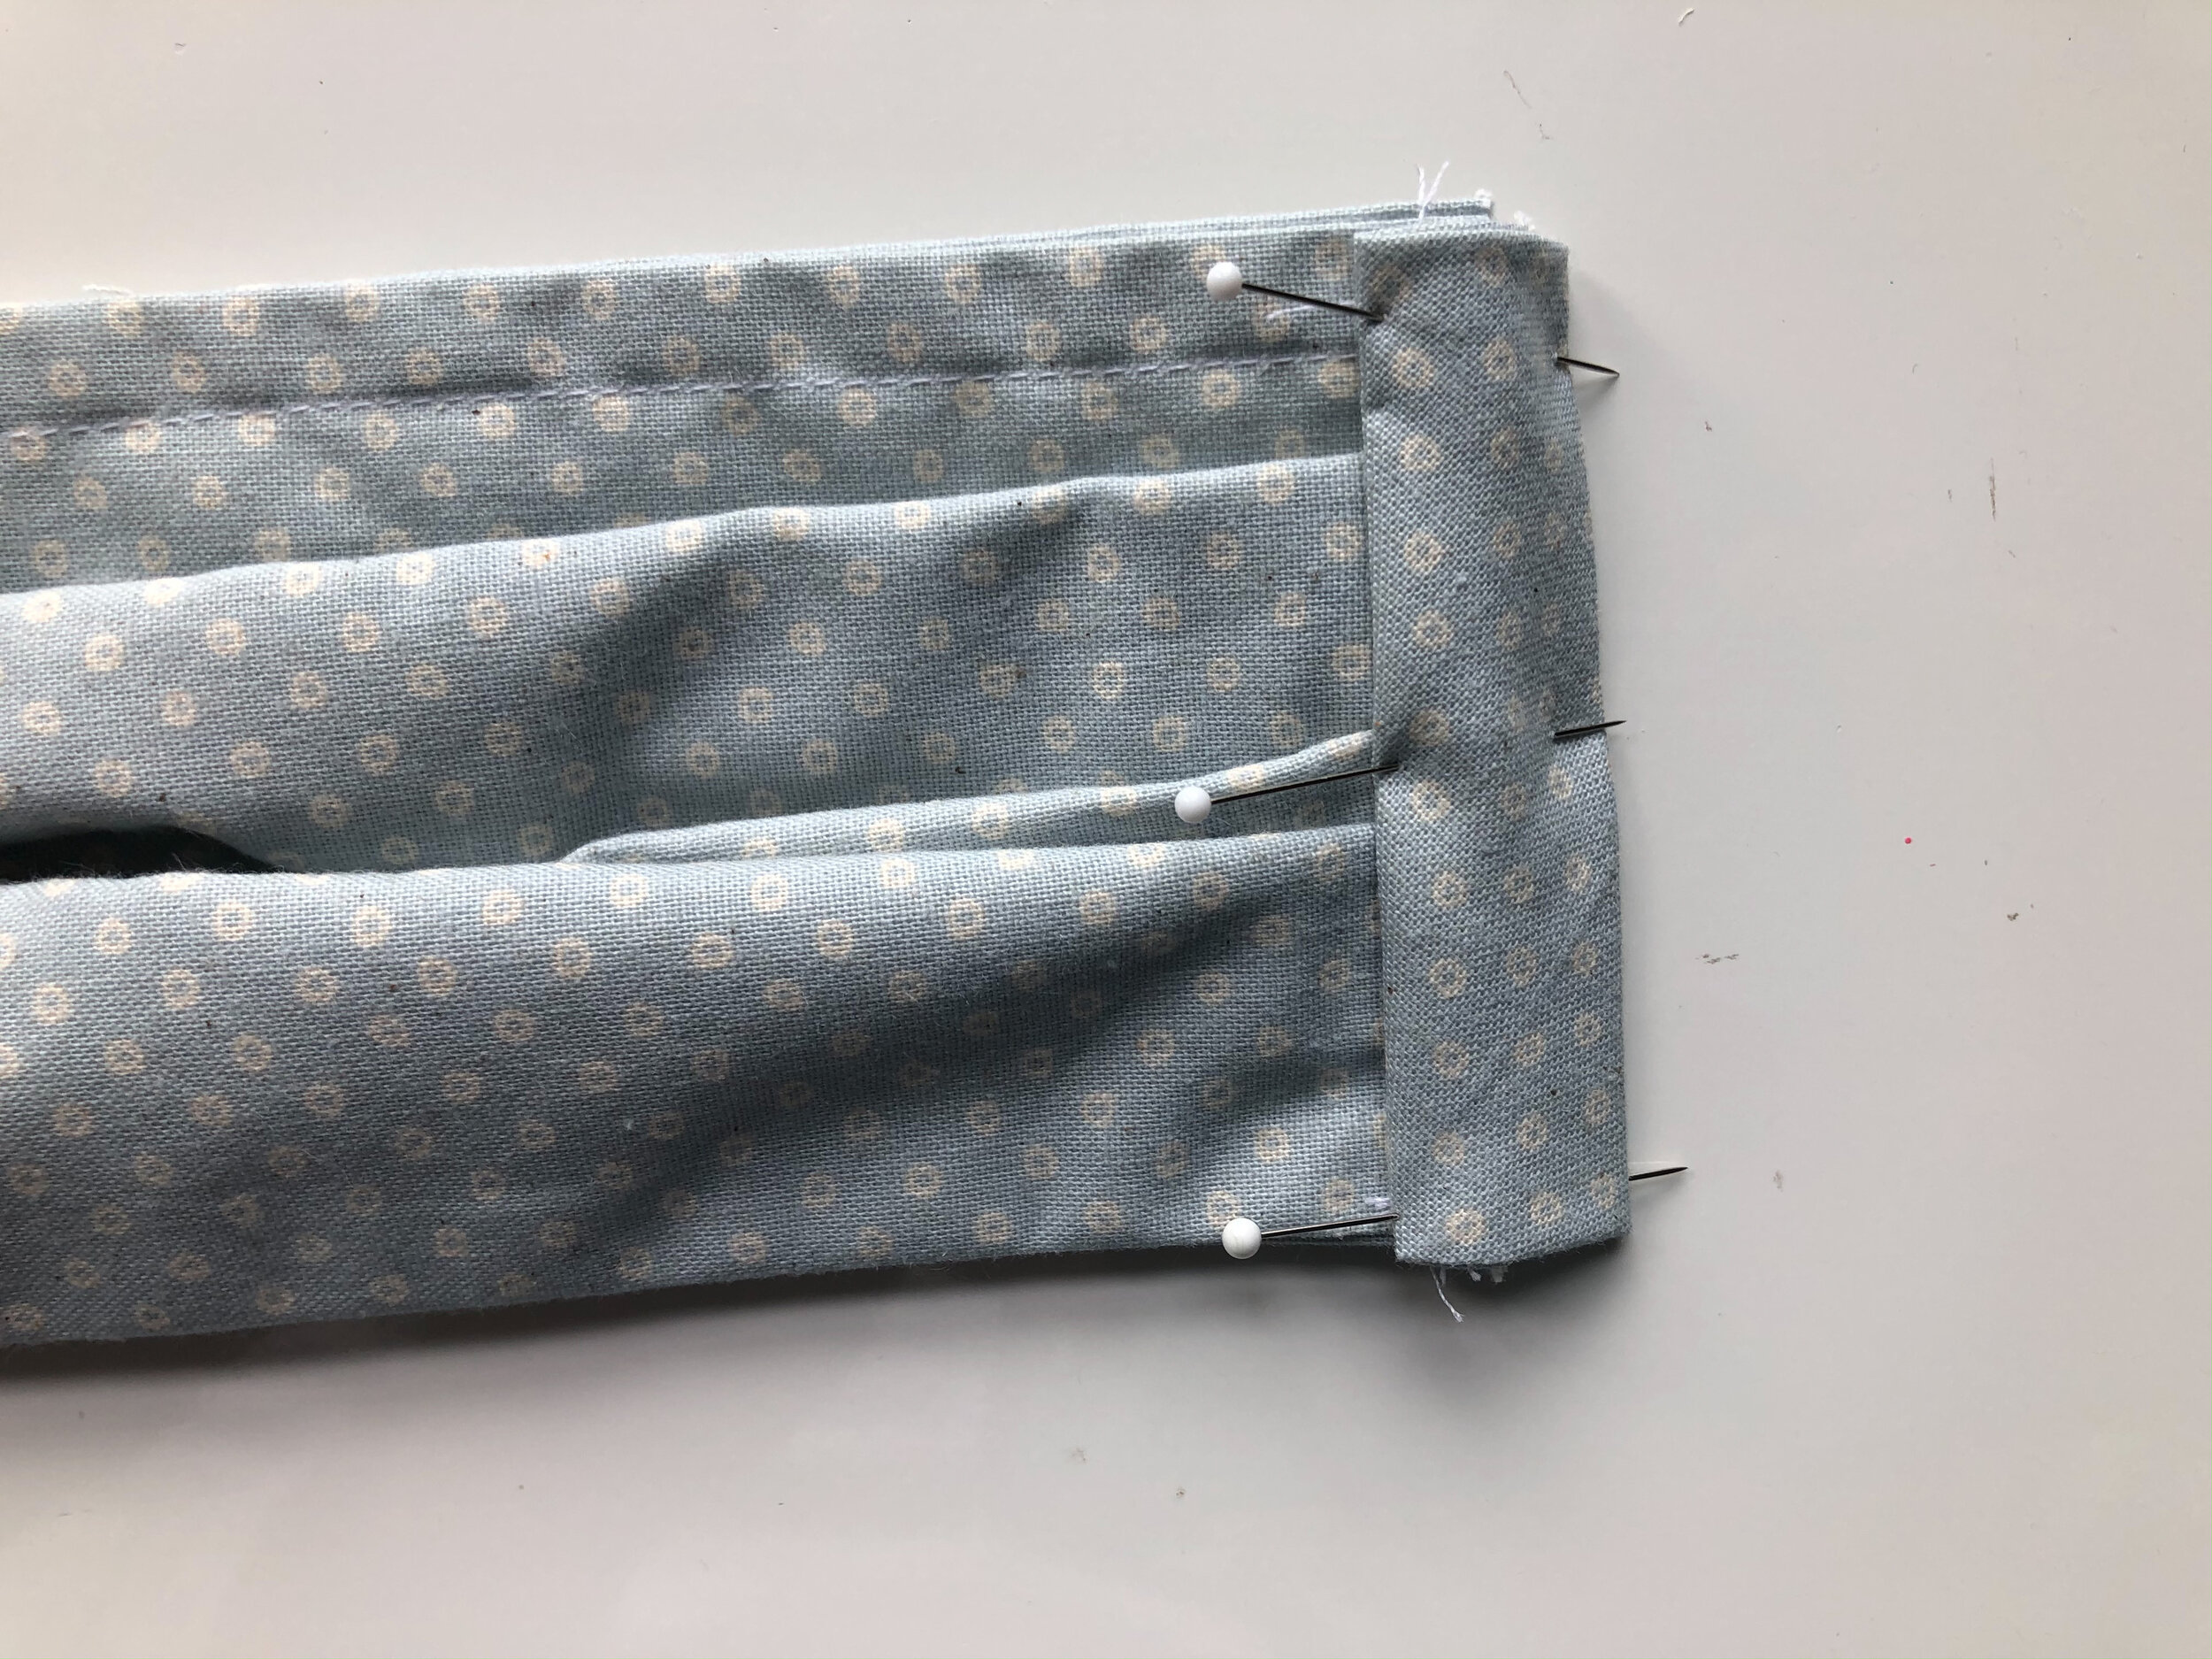
Each pleat is 1/2” deep. Fold pleats up, toward the top of the mask and pin.

Stitch along pleats using a 1/2” seam allowance. Repeat for opposite side.


APPLYING BIAS
Align folded edge of bias tape along the line of stitching. Trim tape to 1” longer than the side of your mask. Fold and press edge of top and bottom of bias 1/2” toward the inside. Repeat for opposite side.

Pin and stitch right over the previous row of stitching. (If you do not want to make bias tape, keep reading. I have another option for you.)

Fold bias inward along the fold line. Pin in place. Topstitch the edge of the bias.

FINISHING
Take one piece of elastic and using a safety pin, draw it through the mask side casing. Tie in a slip knot. Repeat for the opposite side.

Trim knot ends and pull through the casing to conceal. Repeat for the opposite side.
Your mask is complete! Try it on and bend the wire for a comfortable fit.
HOW TO SEW A FACE MASK WITH TIES
This pattern has a lot of flexibility as far as supplies and technique go.
The second variation involves just making the side edge casing a little wider to allow for ribbon to be drawn through.

SUPPLIES
Fabric, Refer to CDC Guidelines *Instead of recommending fabric to you, please read this article and decide for yourself which fabric you feel is best to use.
2 yards of 1/2” ribbon
7.5” of metal wire , I used 16 gauge wire, but would image that a straightened out paper clip would likely work in a pinch.
2 rectangles of fabric 3 x 4.5”
Filter for pocket option
SIZE
Finished Dimensions: Approximately 3.5” x 7”
Follow directions up until the bias tape application. Instead of bias tape, cut 2 rectangles of fabric 3” x 4.5”. Press the long sides in 1/2”. Press shorter sides in 1/2”.

Align the folded edge of the fabric along the line of stitching in the same manner as the bias tape application. Folding and press the edges of the top and bottom 1/2” toward the inside to conceal raw edges. Repeat for opposite side.
See section Applying Bias for step by step pictures. The fabric squares are applied exactly like the bias tape- just wider and a bit easier to handle for beginners.
Topstitch along the edge of the casing.
This casing is nice and wide and should easily accommodate a 1/2” wide ribbon or twill tape.

Pin the edge of a 36” long piece of ribbon or twill tape to a safety pin and pull through casing. Repeat for opposite side.
Try on and tie for fit. Feel free to use a longer or shorter length of ribbon.


UPDATE- HOW TO MAKE A FACE MASK WITH A POCKET FOR A FILTER OR SHIELD
For those of you who would like to make a mask with a pocket for a filter, here are the steps to create that variation.
Cut one square 7 1/2”
Cut 2 rectangles 7 1/2 x 4 1/4
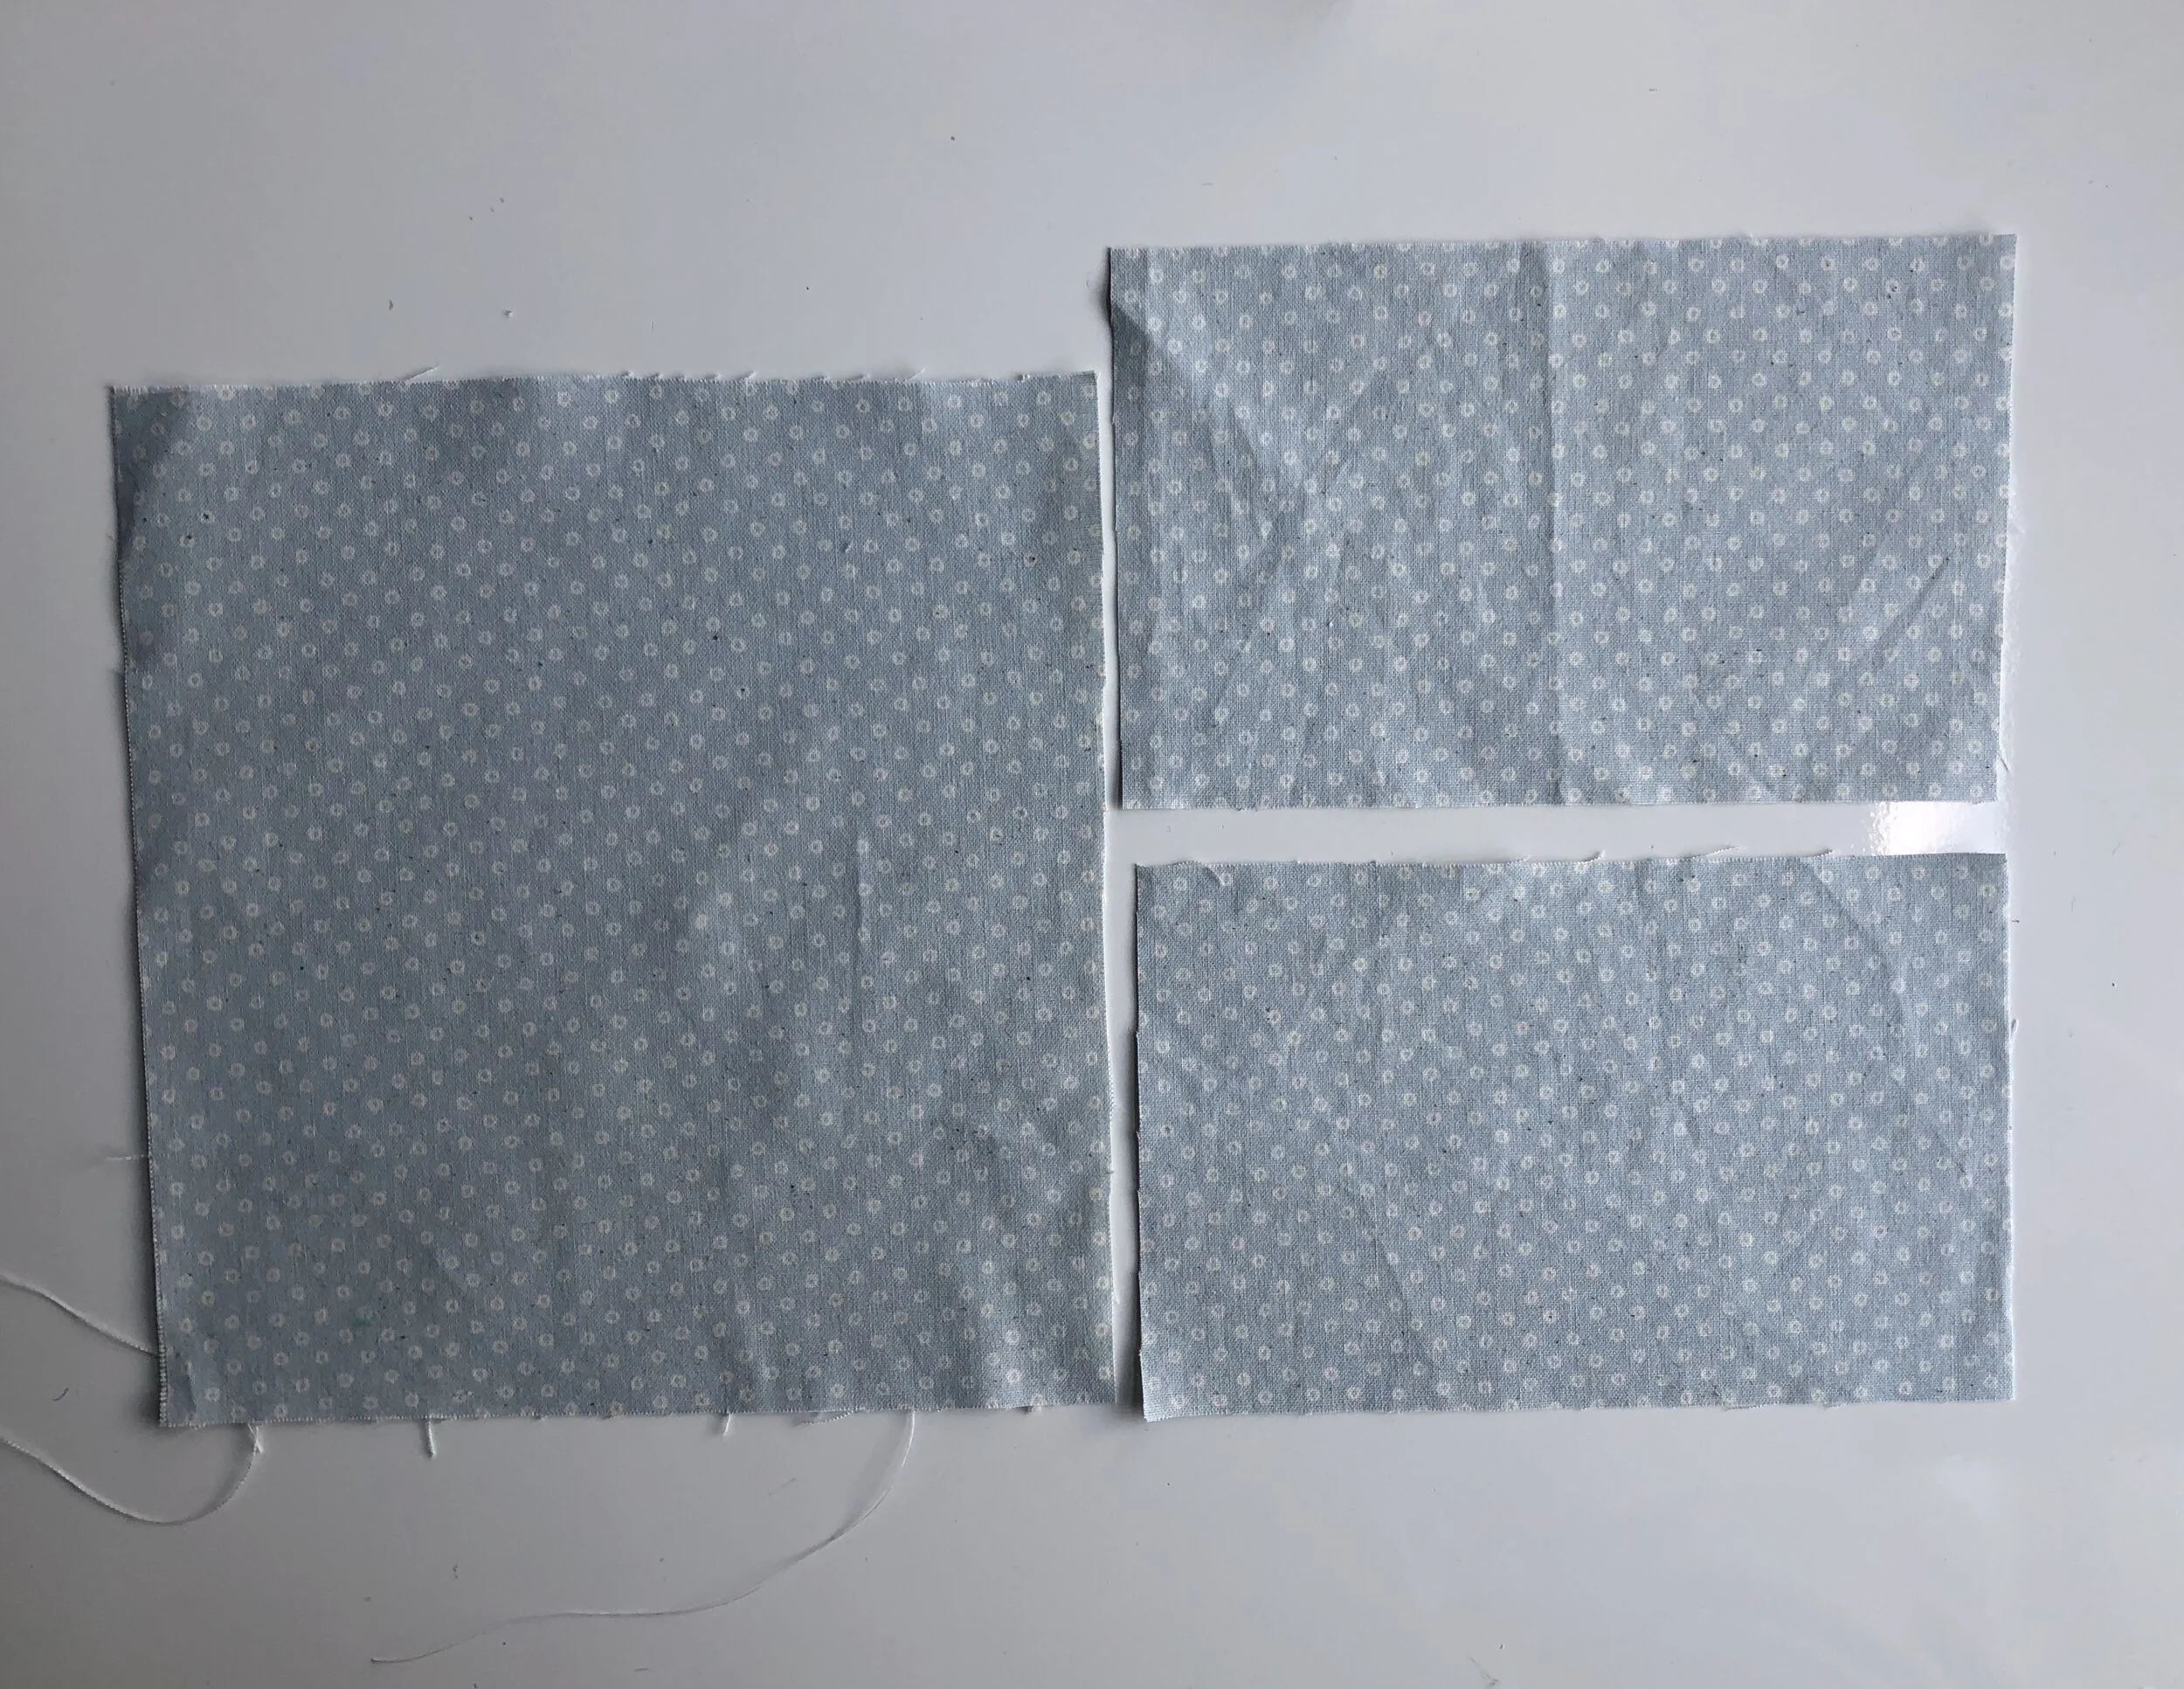
Take the two smaller rectangles and place them with their RIGHT sides facingtogether. Pin inward 1.5” in from each outside edge.

Stitch with a 1/2” seam allowance, leaving the center open.

Press the seams flat.
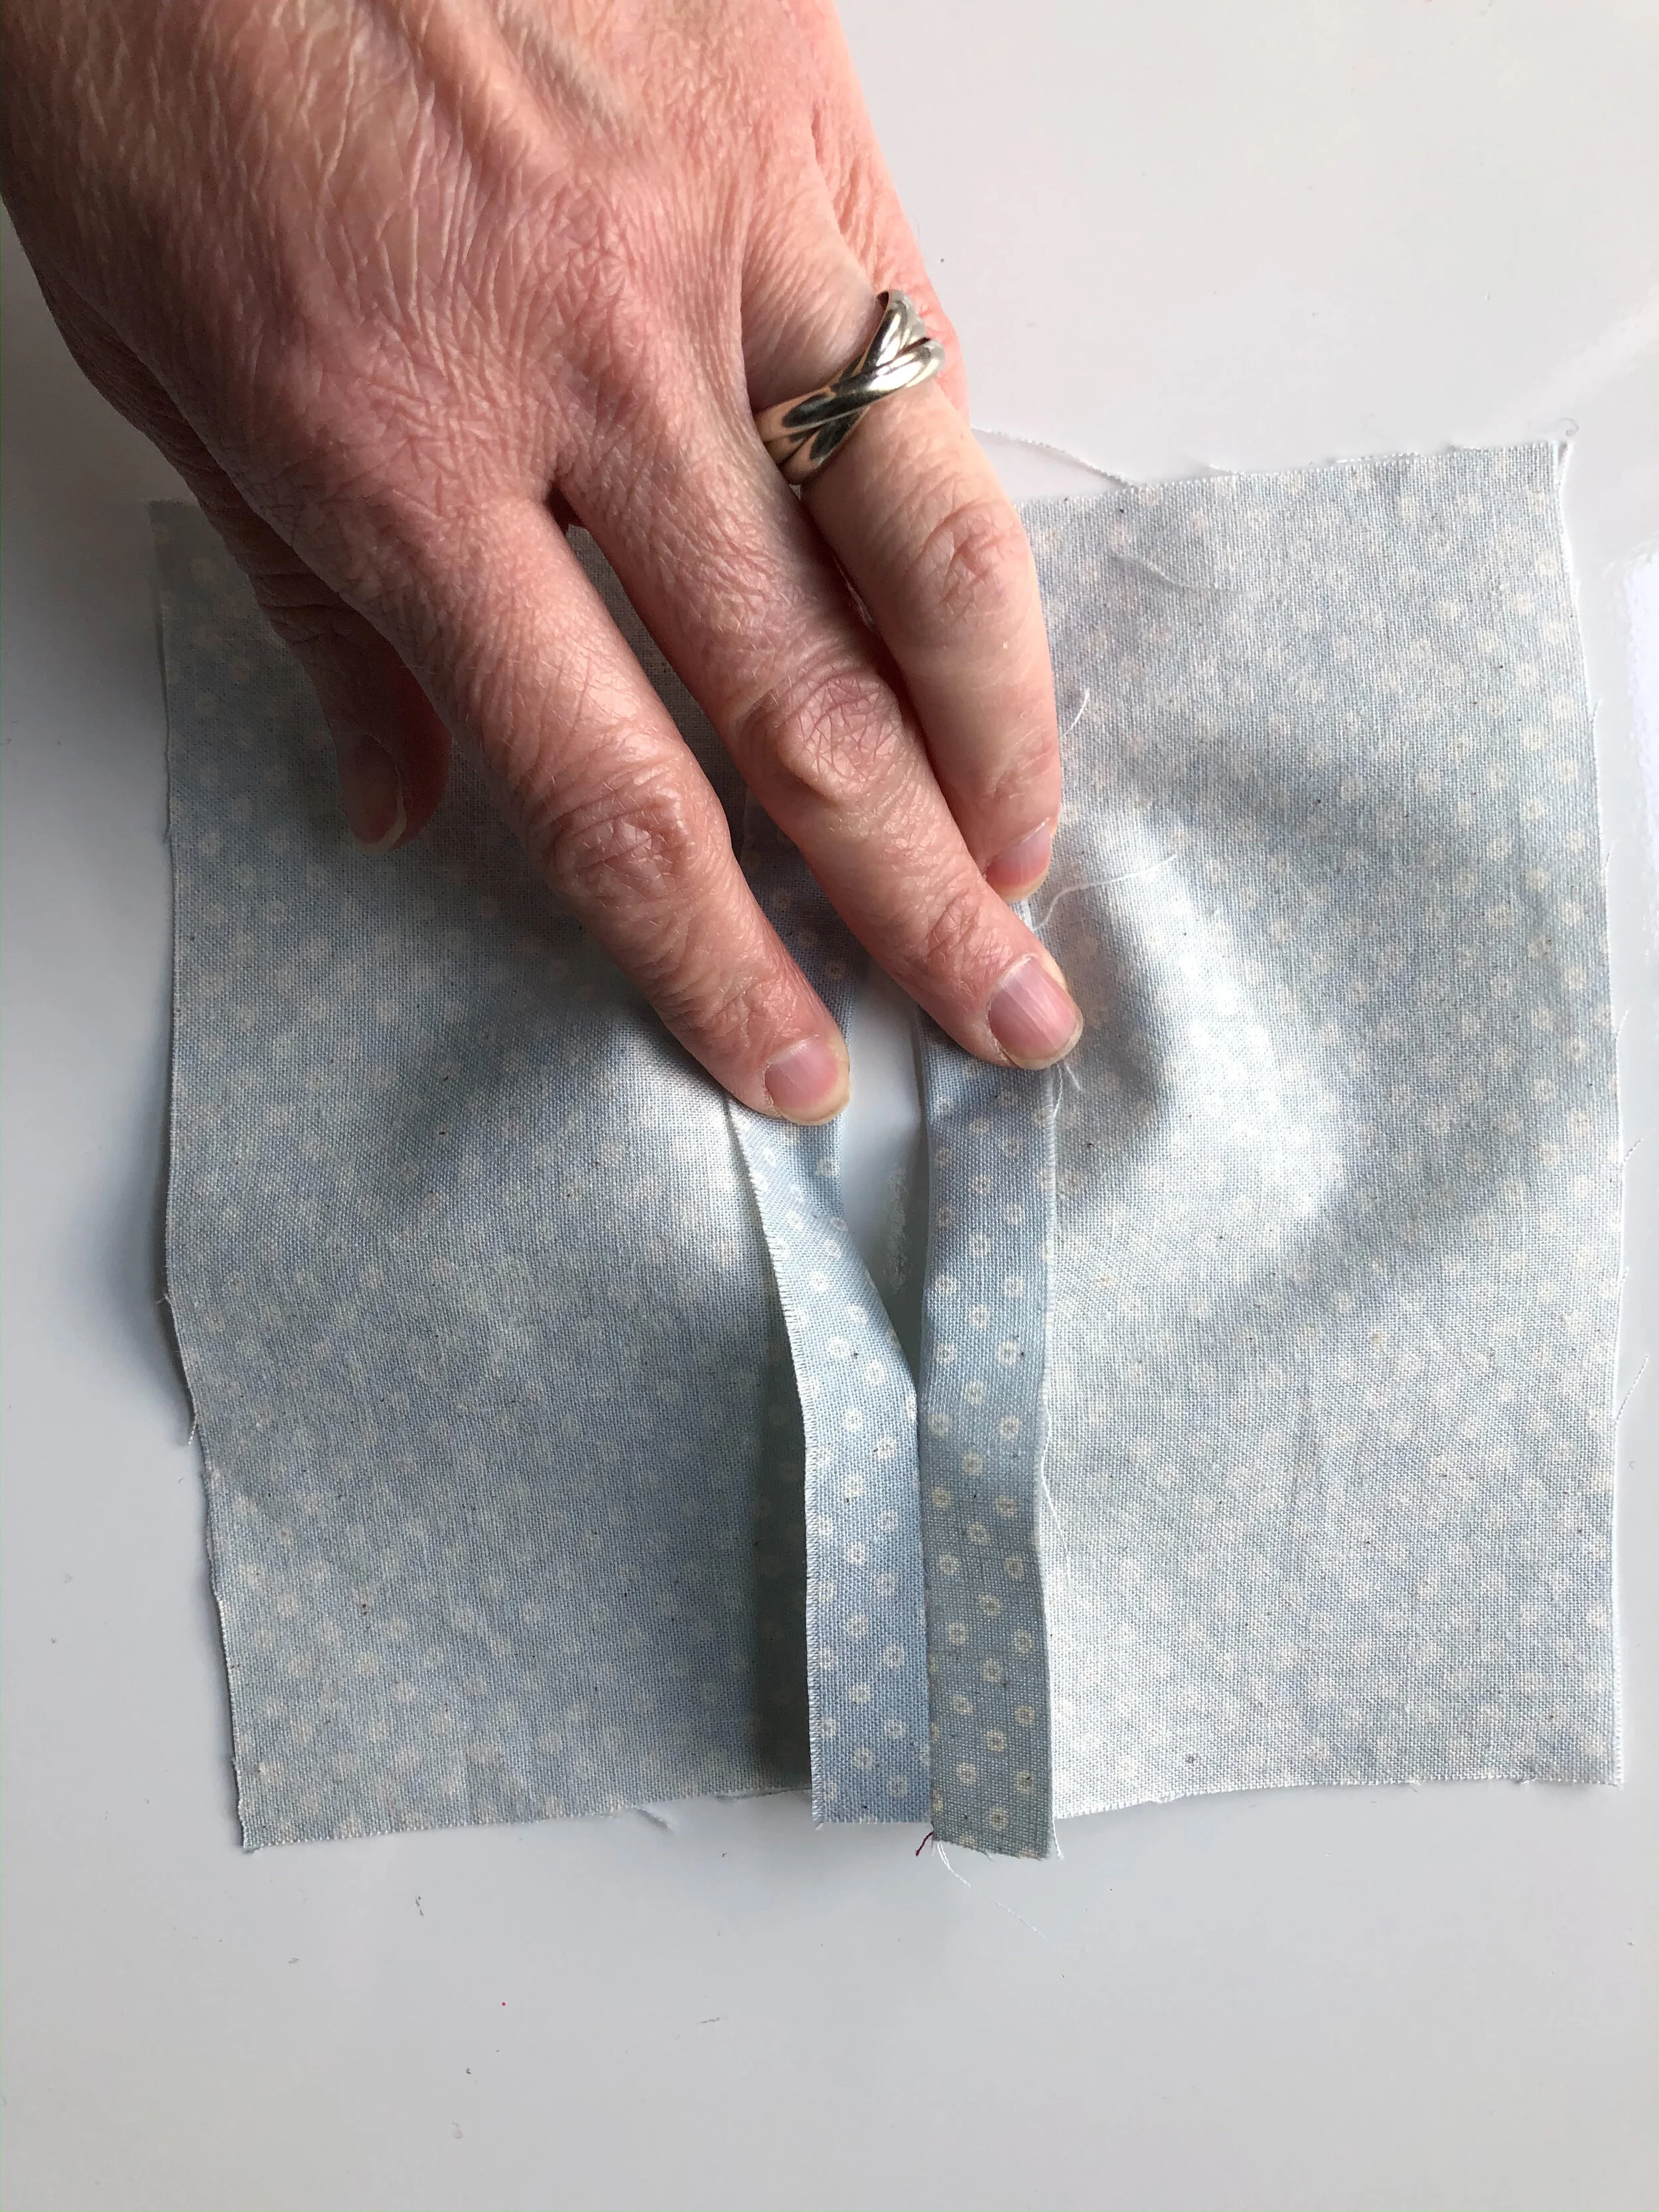
Top stitch along the seam line. This will help the fabric to lay flat.
Once you have pieced the fabric to make the pocket opening, if it is larger than 7 1/2”, trim to size.

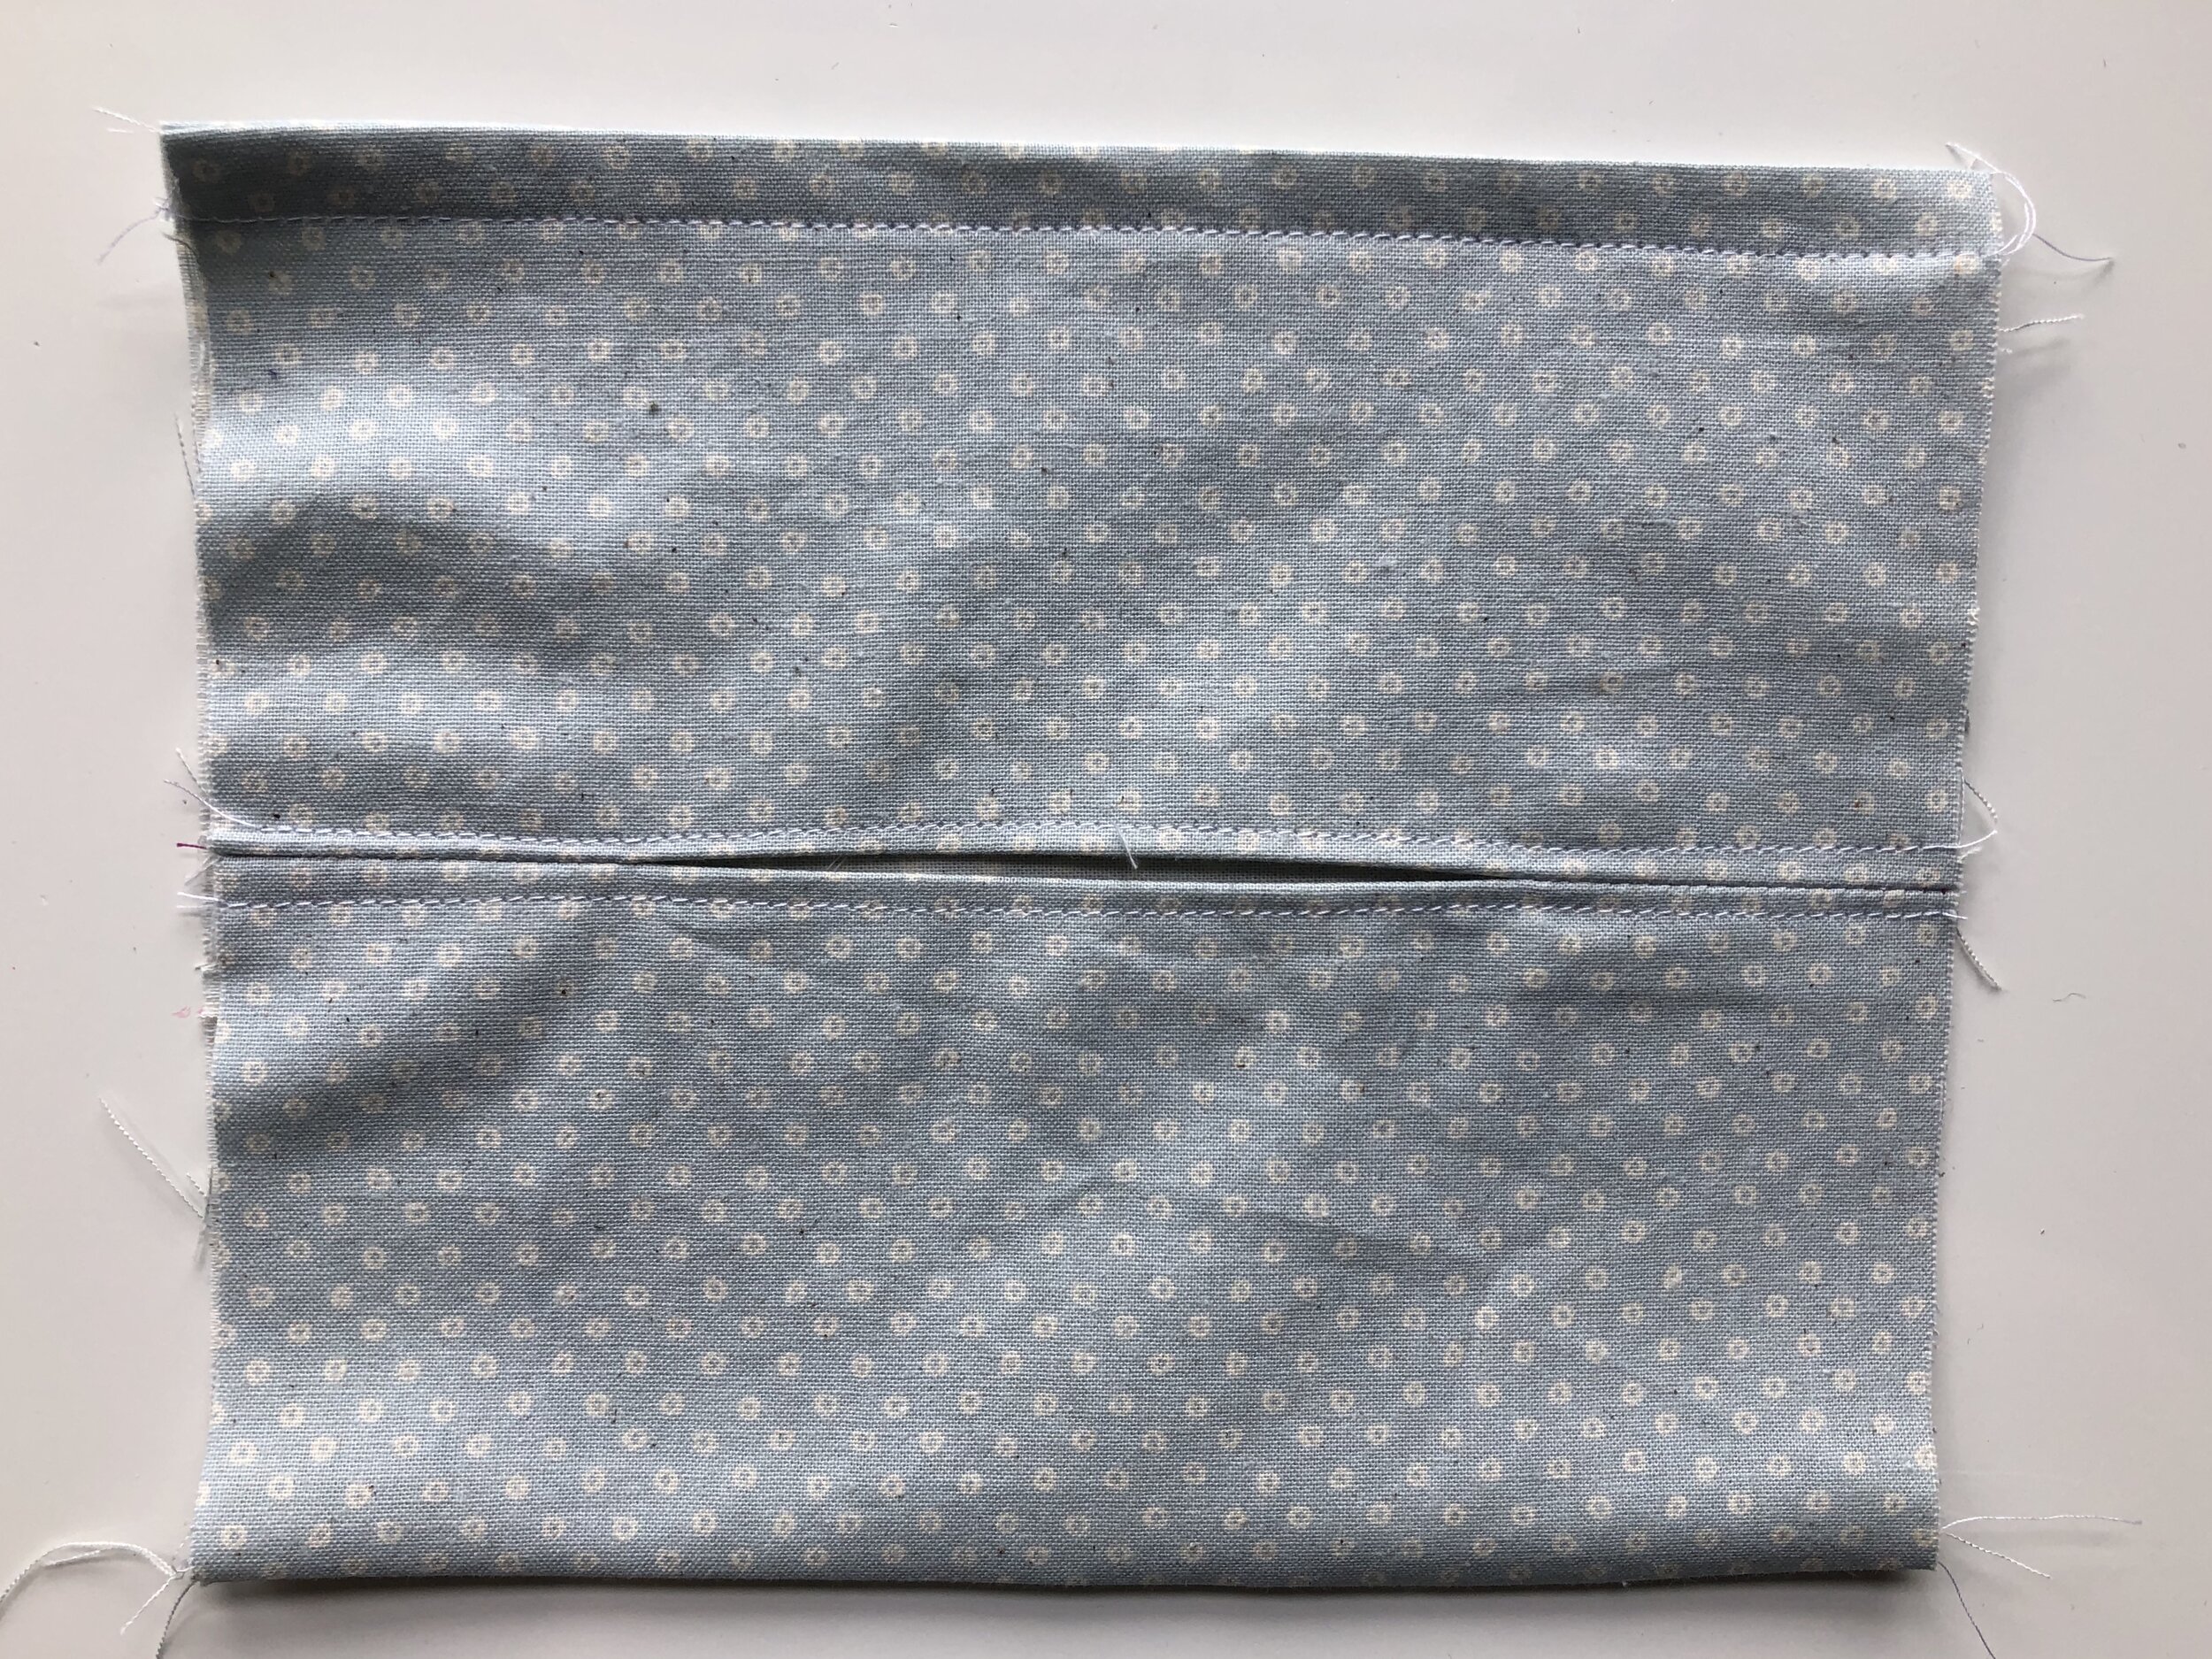
Place the stitched piece with the split opening and the 7 1/2” square with their RIGHT sides facing together and continue as explained in step one of first tutorial.
The following picture is what it will look like after the casing is stitched.
Once complete, the opening should allow for a filter to be place inside. The split opening should fold nicely between the pleats.
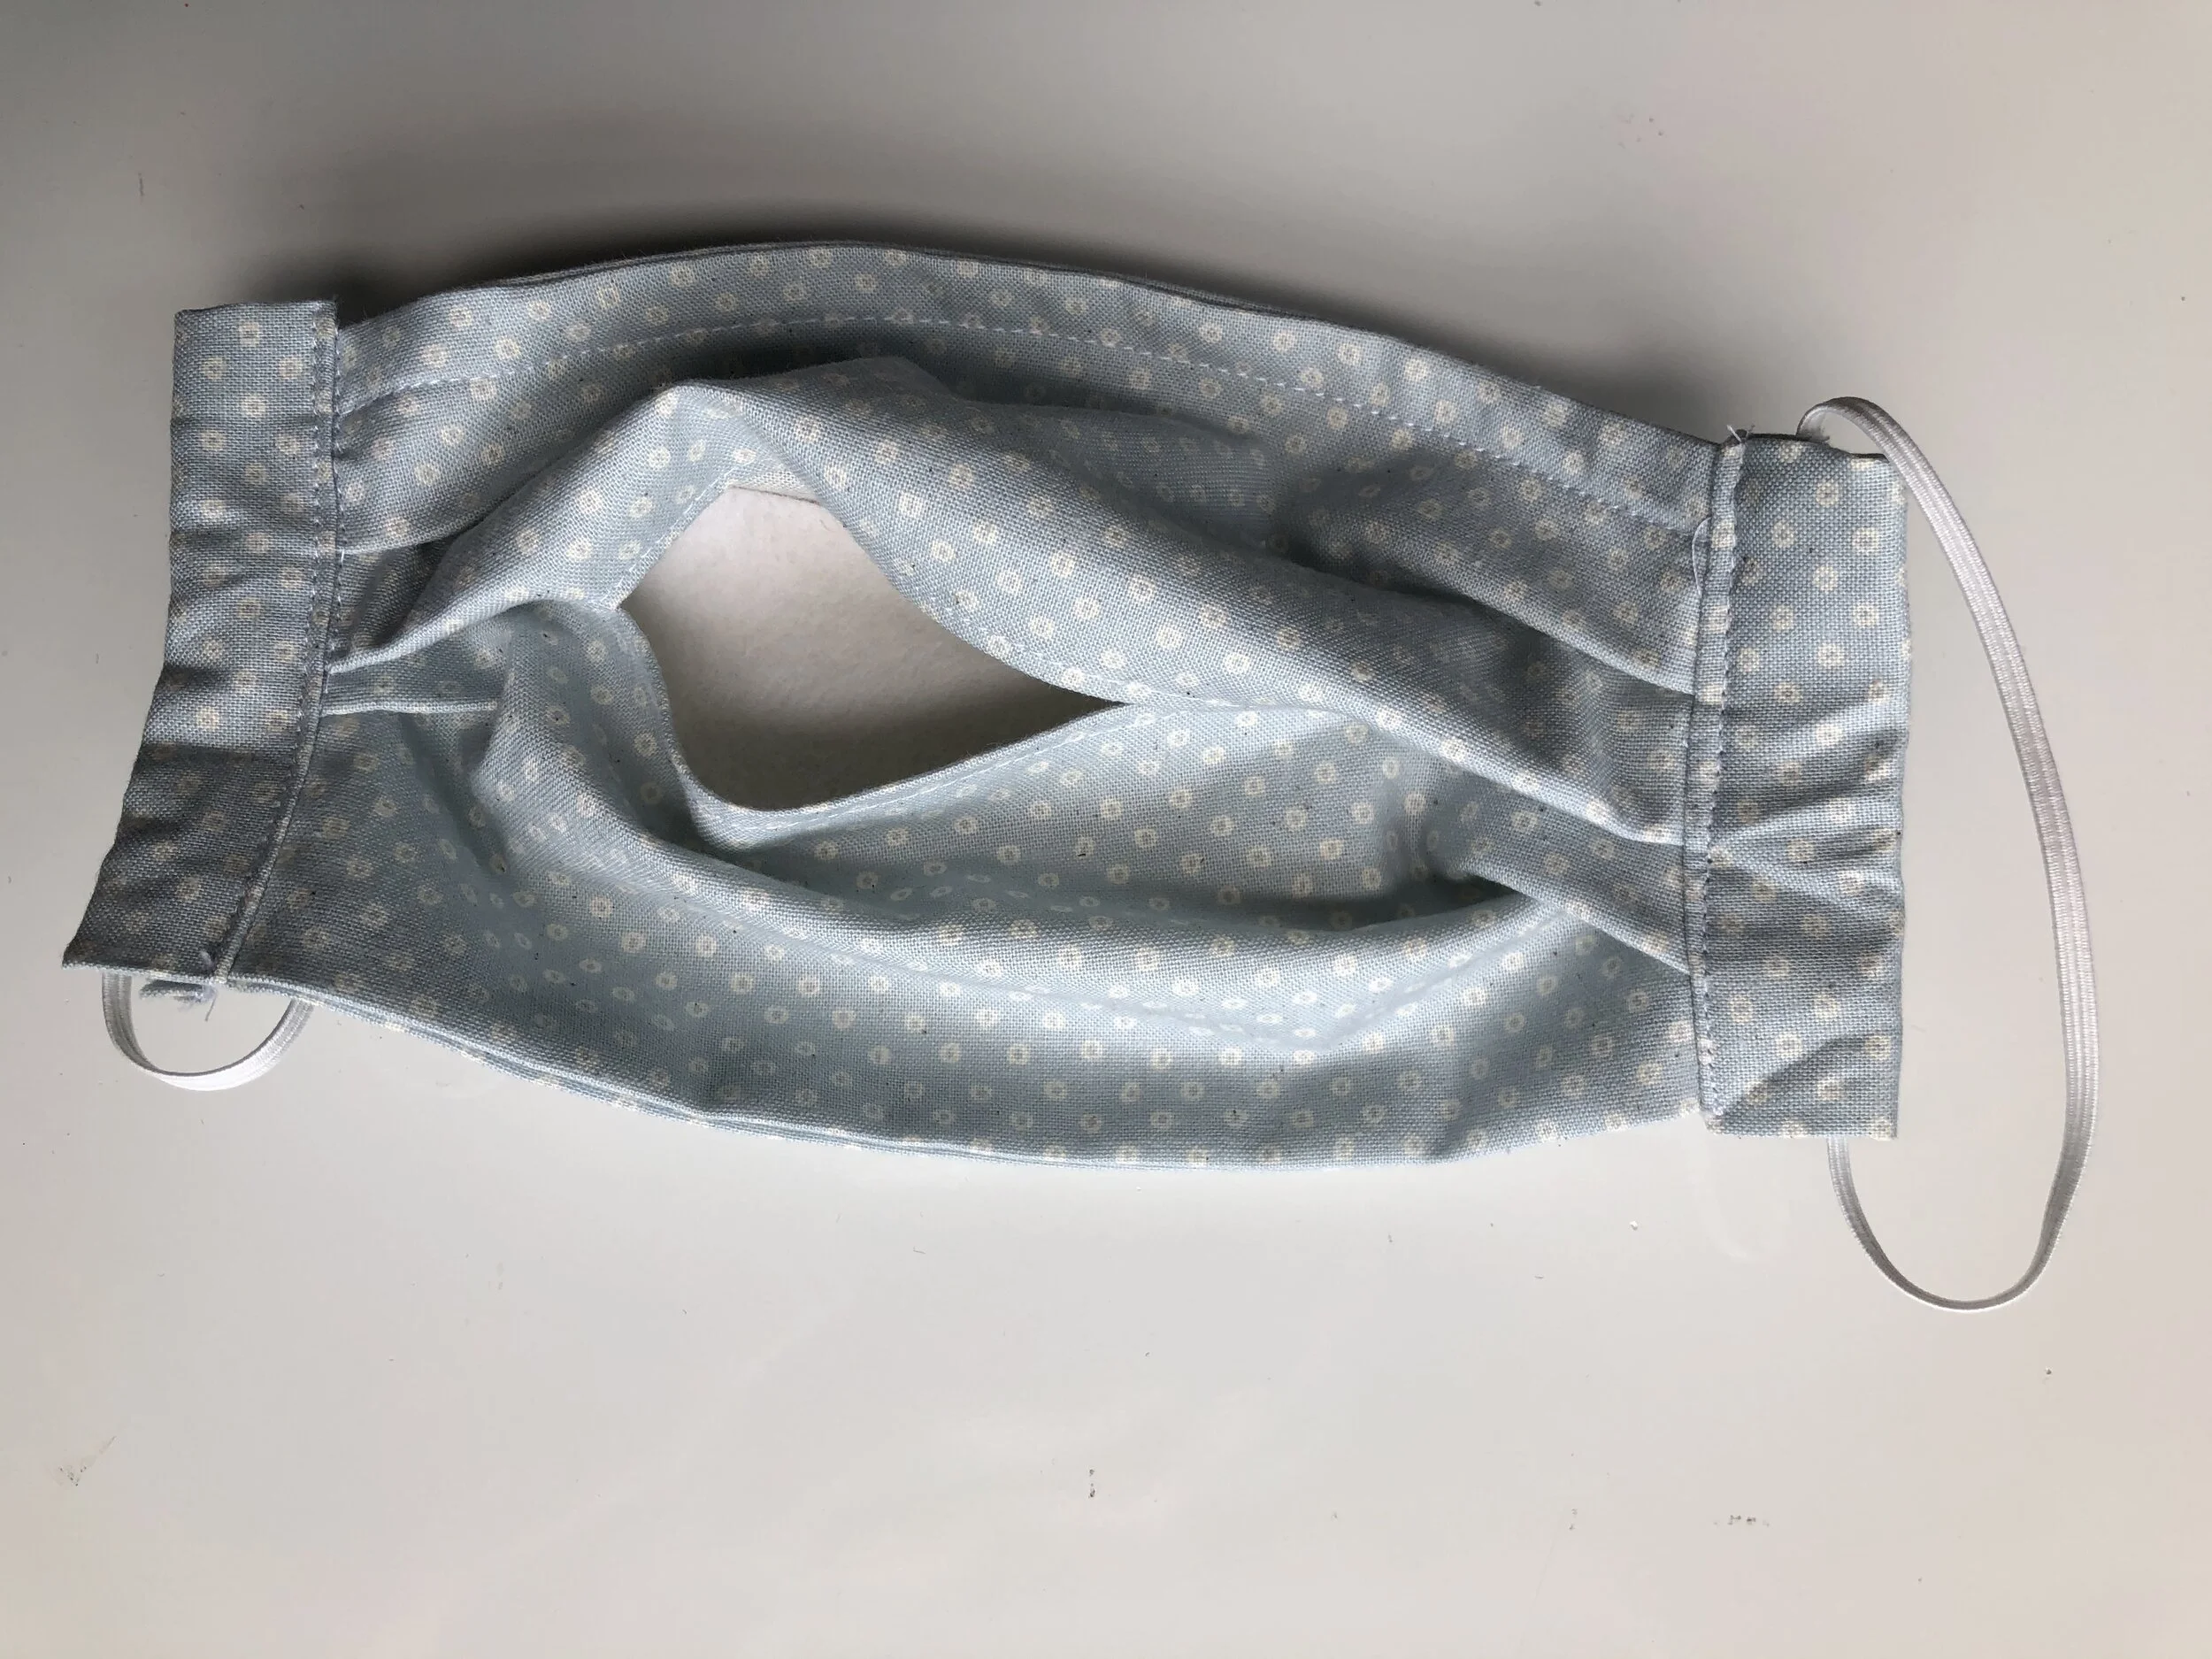
If you look closely, this mask has a filter inside. Once the sides are pulled, the center pleat pulls tight so that the wearer does not feel the filter.
I hope that this tutorial is helpful. Please feel free to email with any questions.
Wash your hands, hug your kids and stay home and sew.
XOXO, Hilarie