

New Course: Draft A Bag- Three Ways
Are you intrigued by the possibility of designing your own purse? Have you admired designer bags and purses and wished that you could make your own?
I am thrilled to launch my new bag design course with Topstitch Makers. This bag design course will help you to create beautiful purses and bags that blend style and function. Through live instruction, you will learn to draft a basic bag pattern and explore a variety of design options. From concept to construction, we will work through three classic bag styles: Clutch, Hobo and Tote. With an emphasis on detail, each lesson will present new techniques such as adding gussets, pockets, structure as well as straps and handles to further develop your skills.
You will have opportunities to get help, ask questions, post your progress and benefit from posts your instructor will write that are tailored to the skills you will be learning. This will take place in a dedicated bag design course activity feed.
Patterns and instruction will be included with the course series.
The sewing sessions will take place over zoom in a professional studio with multiple camera views.
The live sewing sessions will be recorded for you to return to at your convenience.
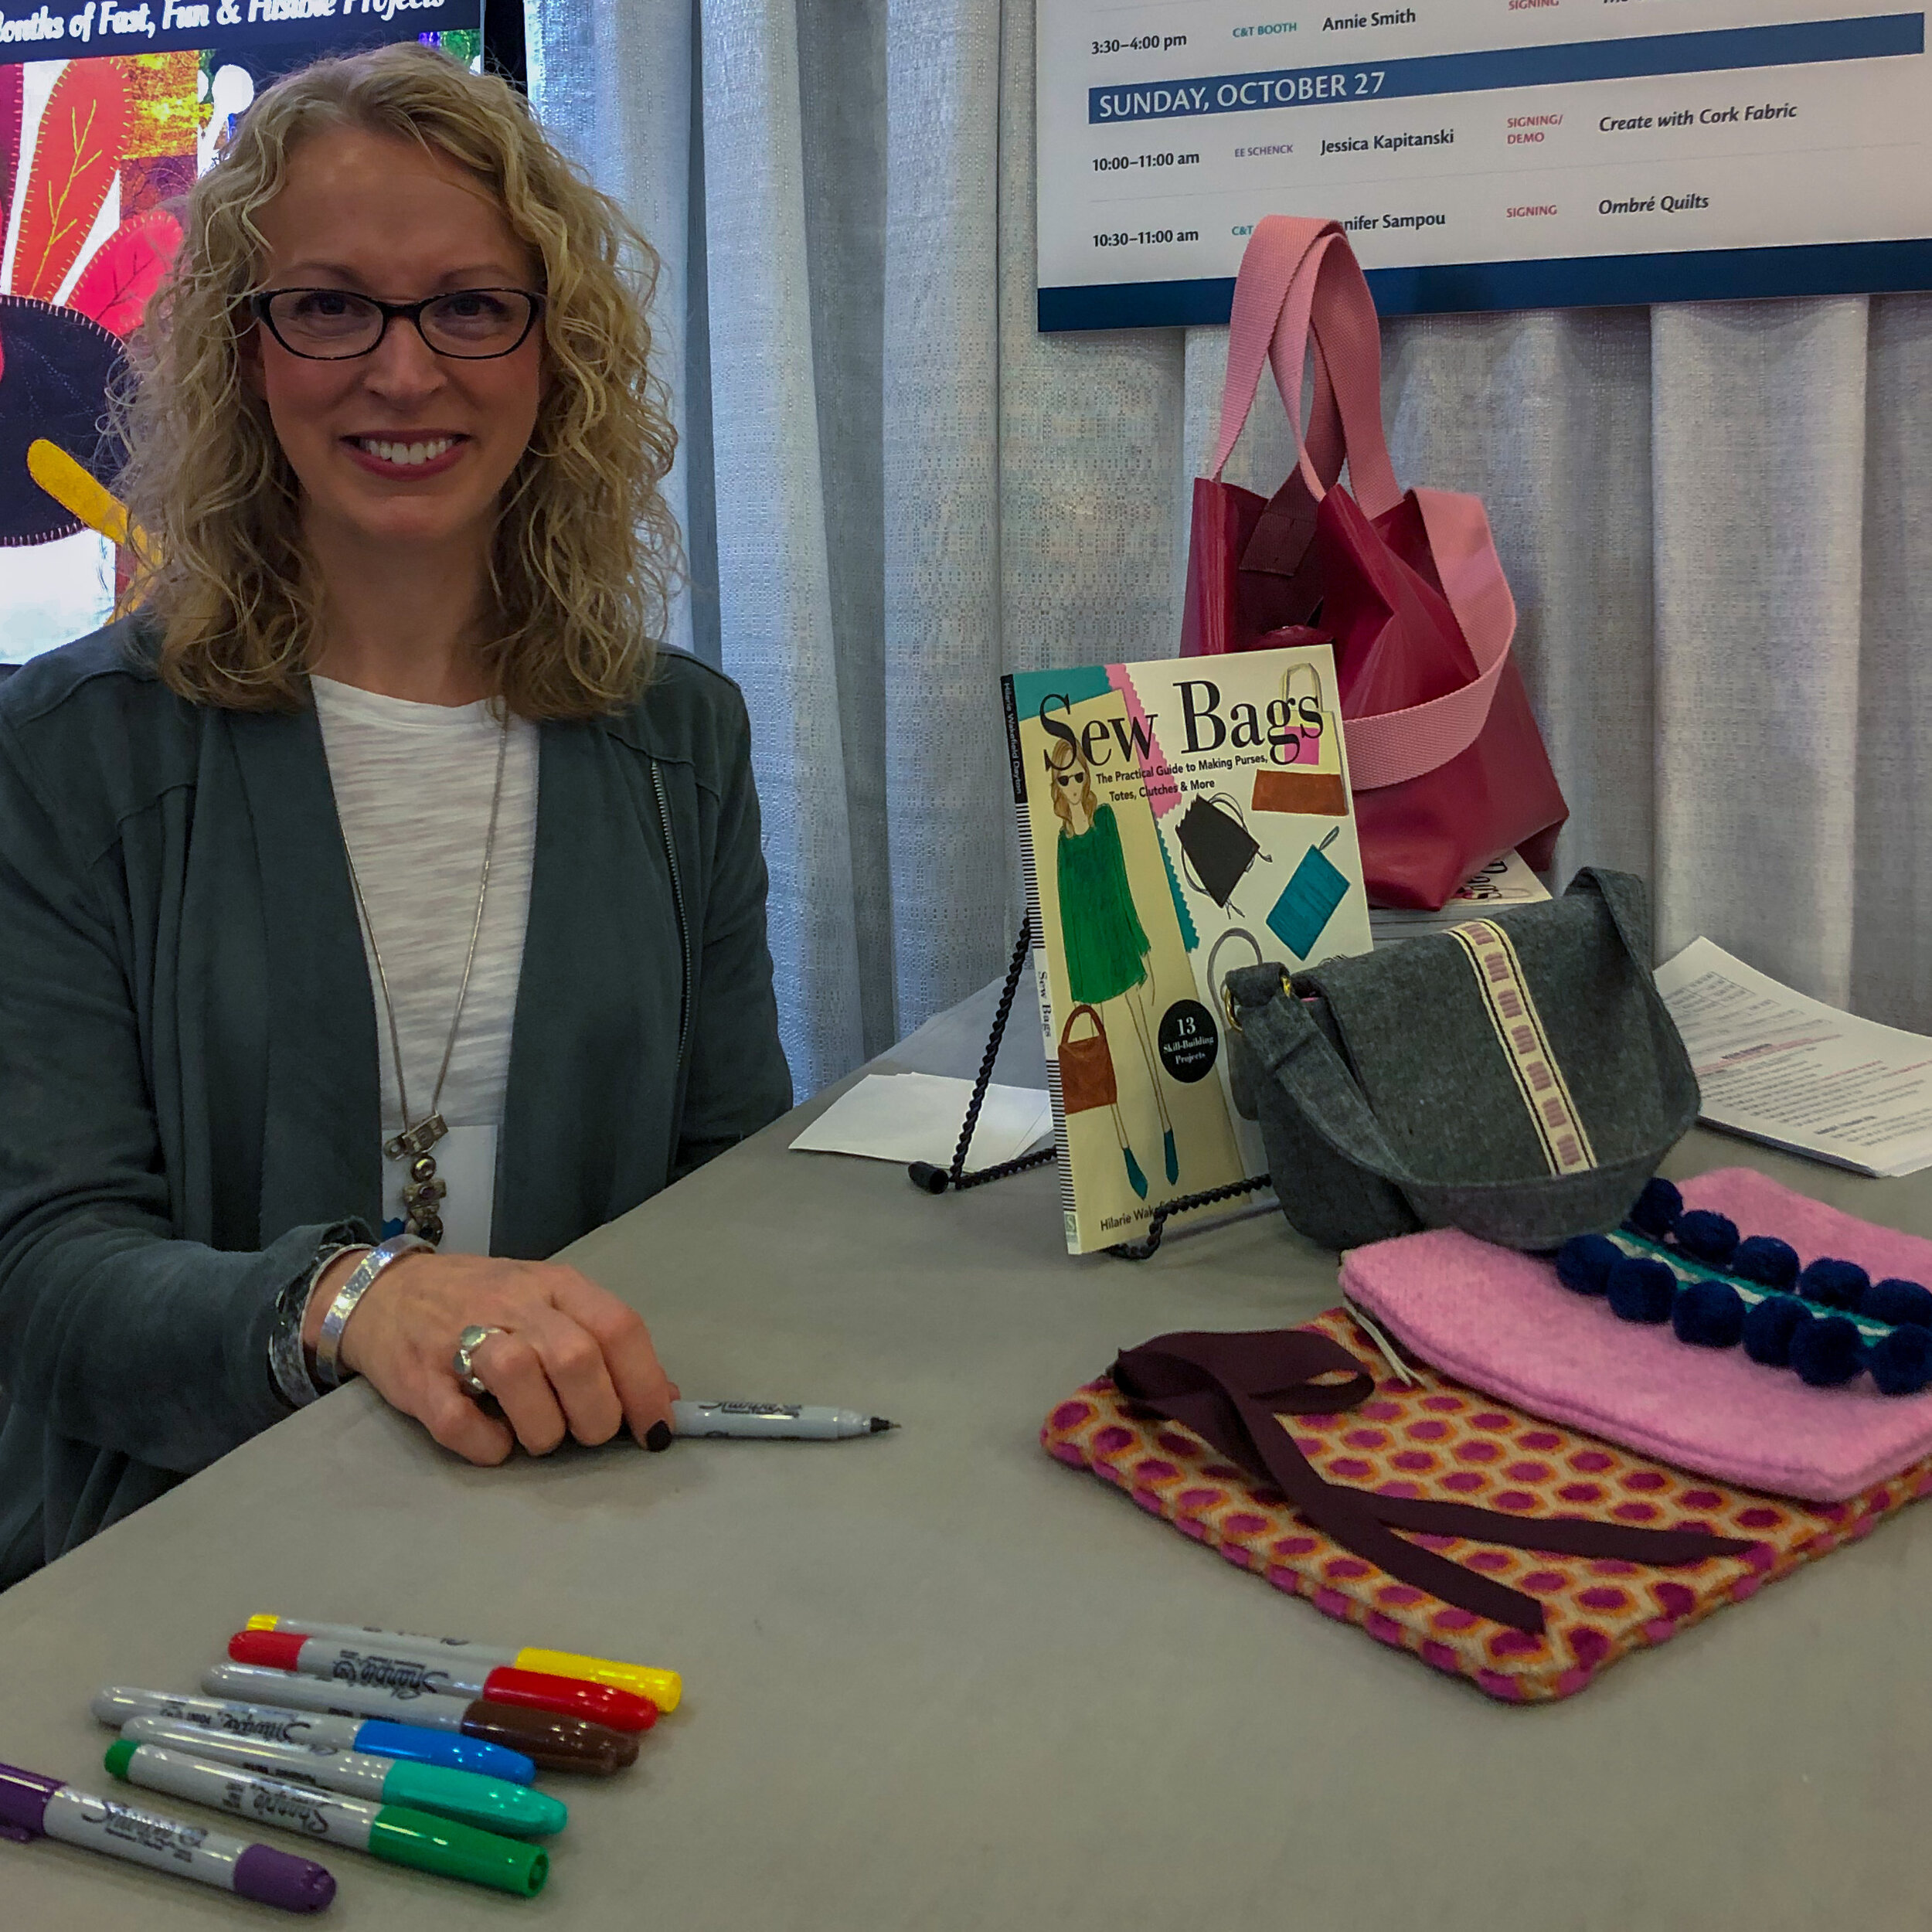
Students who register also receive a copy of my book Sew Bags.
Topstitch Makers brings together garment sewists to improve their sewing skills, gather in one unique place, to support and learn from each other, so they can reach their sewing goals. Members can attend a variety of live, online sewcial sessions, talks with community leaders and attend instructor guided sewalongs, workshops and courses. It is $4.99 per month to join the community membership and $29 per month to join the community + attend live sewalongs but there's one month free trial, so you can just check it out and come take my course for the course price of $195.
The dates are:
Sunday, July 11, 2-3pm EST Welcome Session
Sunday, July 18, 2-4pm EST Sewing the Clutch
Sunday, July 25, 2-4pm EST Sewing the Hobo
Sunday, Aug 1, 2-4pm EST Sewing the Tote
To learn more and register, visit https://www.topstitchmakers.com.
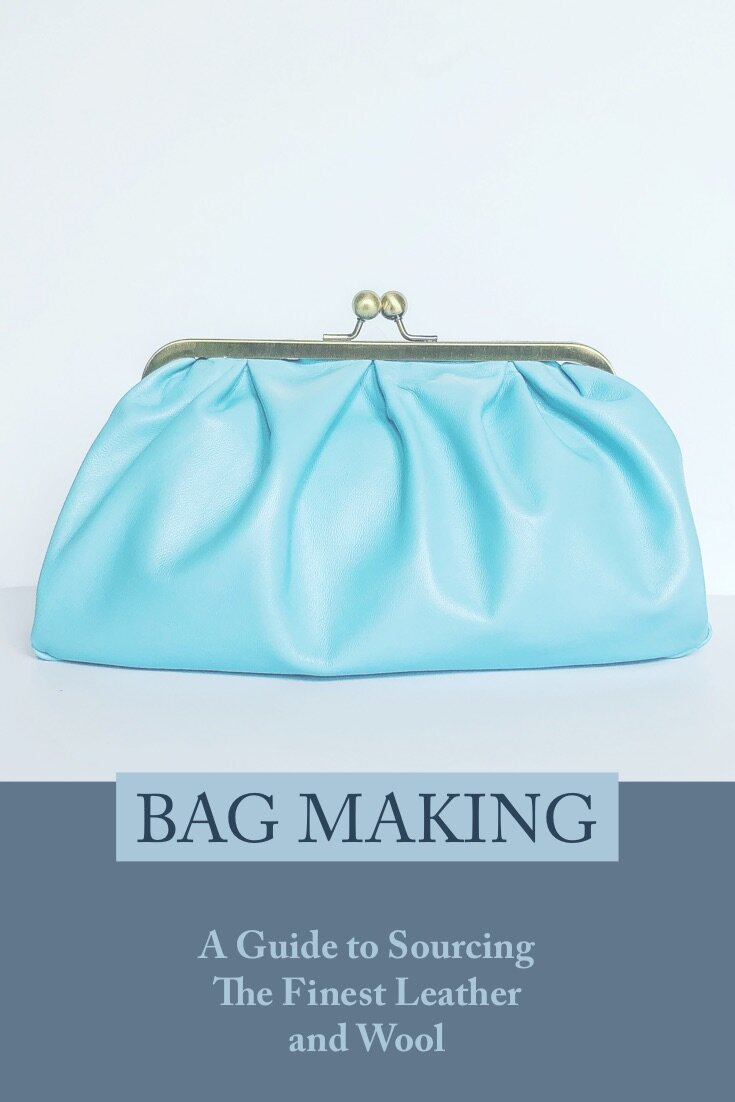
A Guide to Sourcing the Finest Bag Making Materials: Leather and Wool Felt
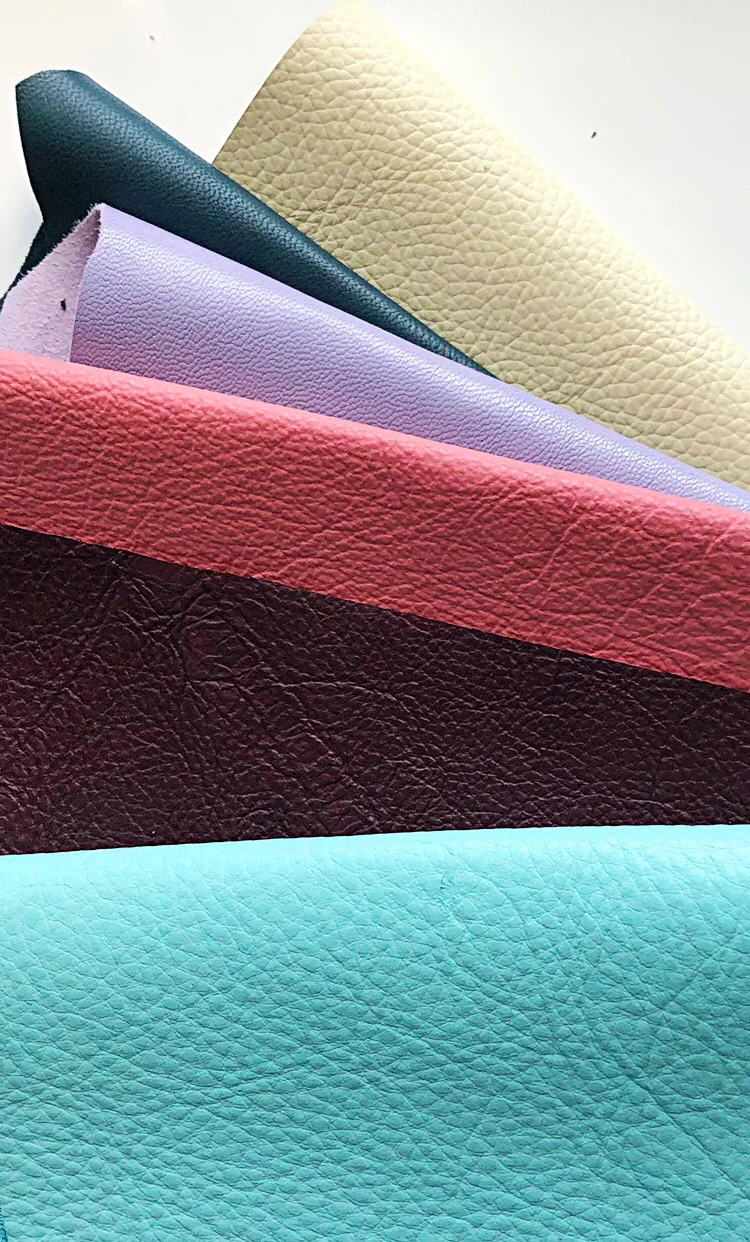
It’s hard for me to think about designing bags and not consider fabric as one of their defining features. There is color, shape, pattern and hardware, of course, but then, it’s the fabric. I am using the term fabric loosely as some of the textiles used to make the finest bags aren’t actually fabric at all. Leather and Wool Felt are two that come to mind. Both are natural resources, of course and offer exceptional durability, color fastness and a sculptural quality that fabric can’t really match.

It’s hard for me to think about designing bags and not consider fabric as one of their defining features. There is color, shape, pattern and hardware, of course, but then, it’s the fabric. I am using the term fabric loosely as some of the textiles used to make the finest bags aren’t actually fabric at all. Leather and Wool Felt are two that come to mind. Both are natural resources, of course and offer exceptional durability, color fastness and a sculptural quality that fabric can’t really match.
These materials are sumptuous on their own but in combination, they are a tactile delight. If you want to take your bags up a notch, you will want to try sewing with leather and wool felt.
Shopping for Bag Making Materials: Leather and Wool Felt
Leather
Before purchasing leather for sewing a bag or garment, it is always good to know a bit about how it is sold. This will help you to better select a leather that will work with you and your sewing machine.
Leather is measured in terms of ounces which refers to liner thickness rather than weight. One- ounce of leather, equals 1/64 of an inch thickness. This means with a weight of 7 to 8 ounces, the leather is about 7/64 to 8/64 of an inch thick.
1 oz. is about .4 mm thick
2 oz. is about .8 mm thick
3 oz. is about 1.2 mm thick, etc.
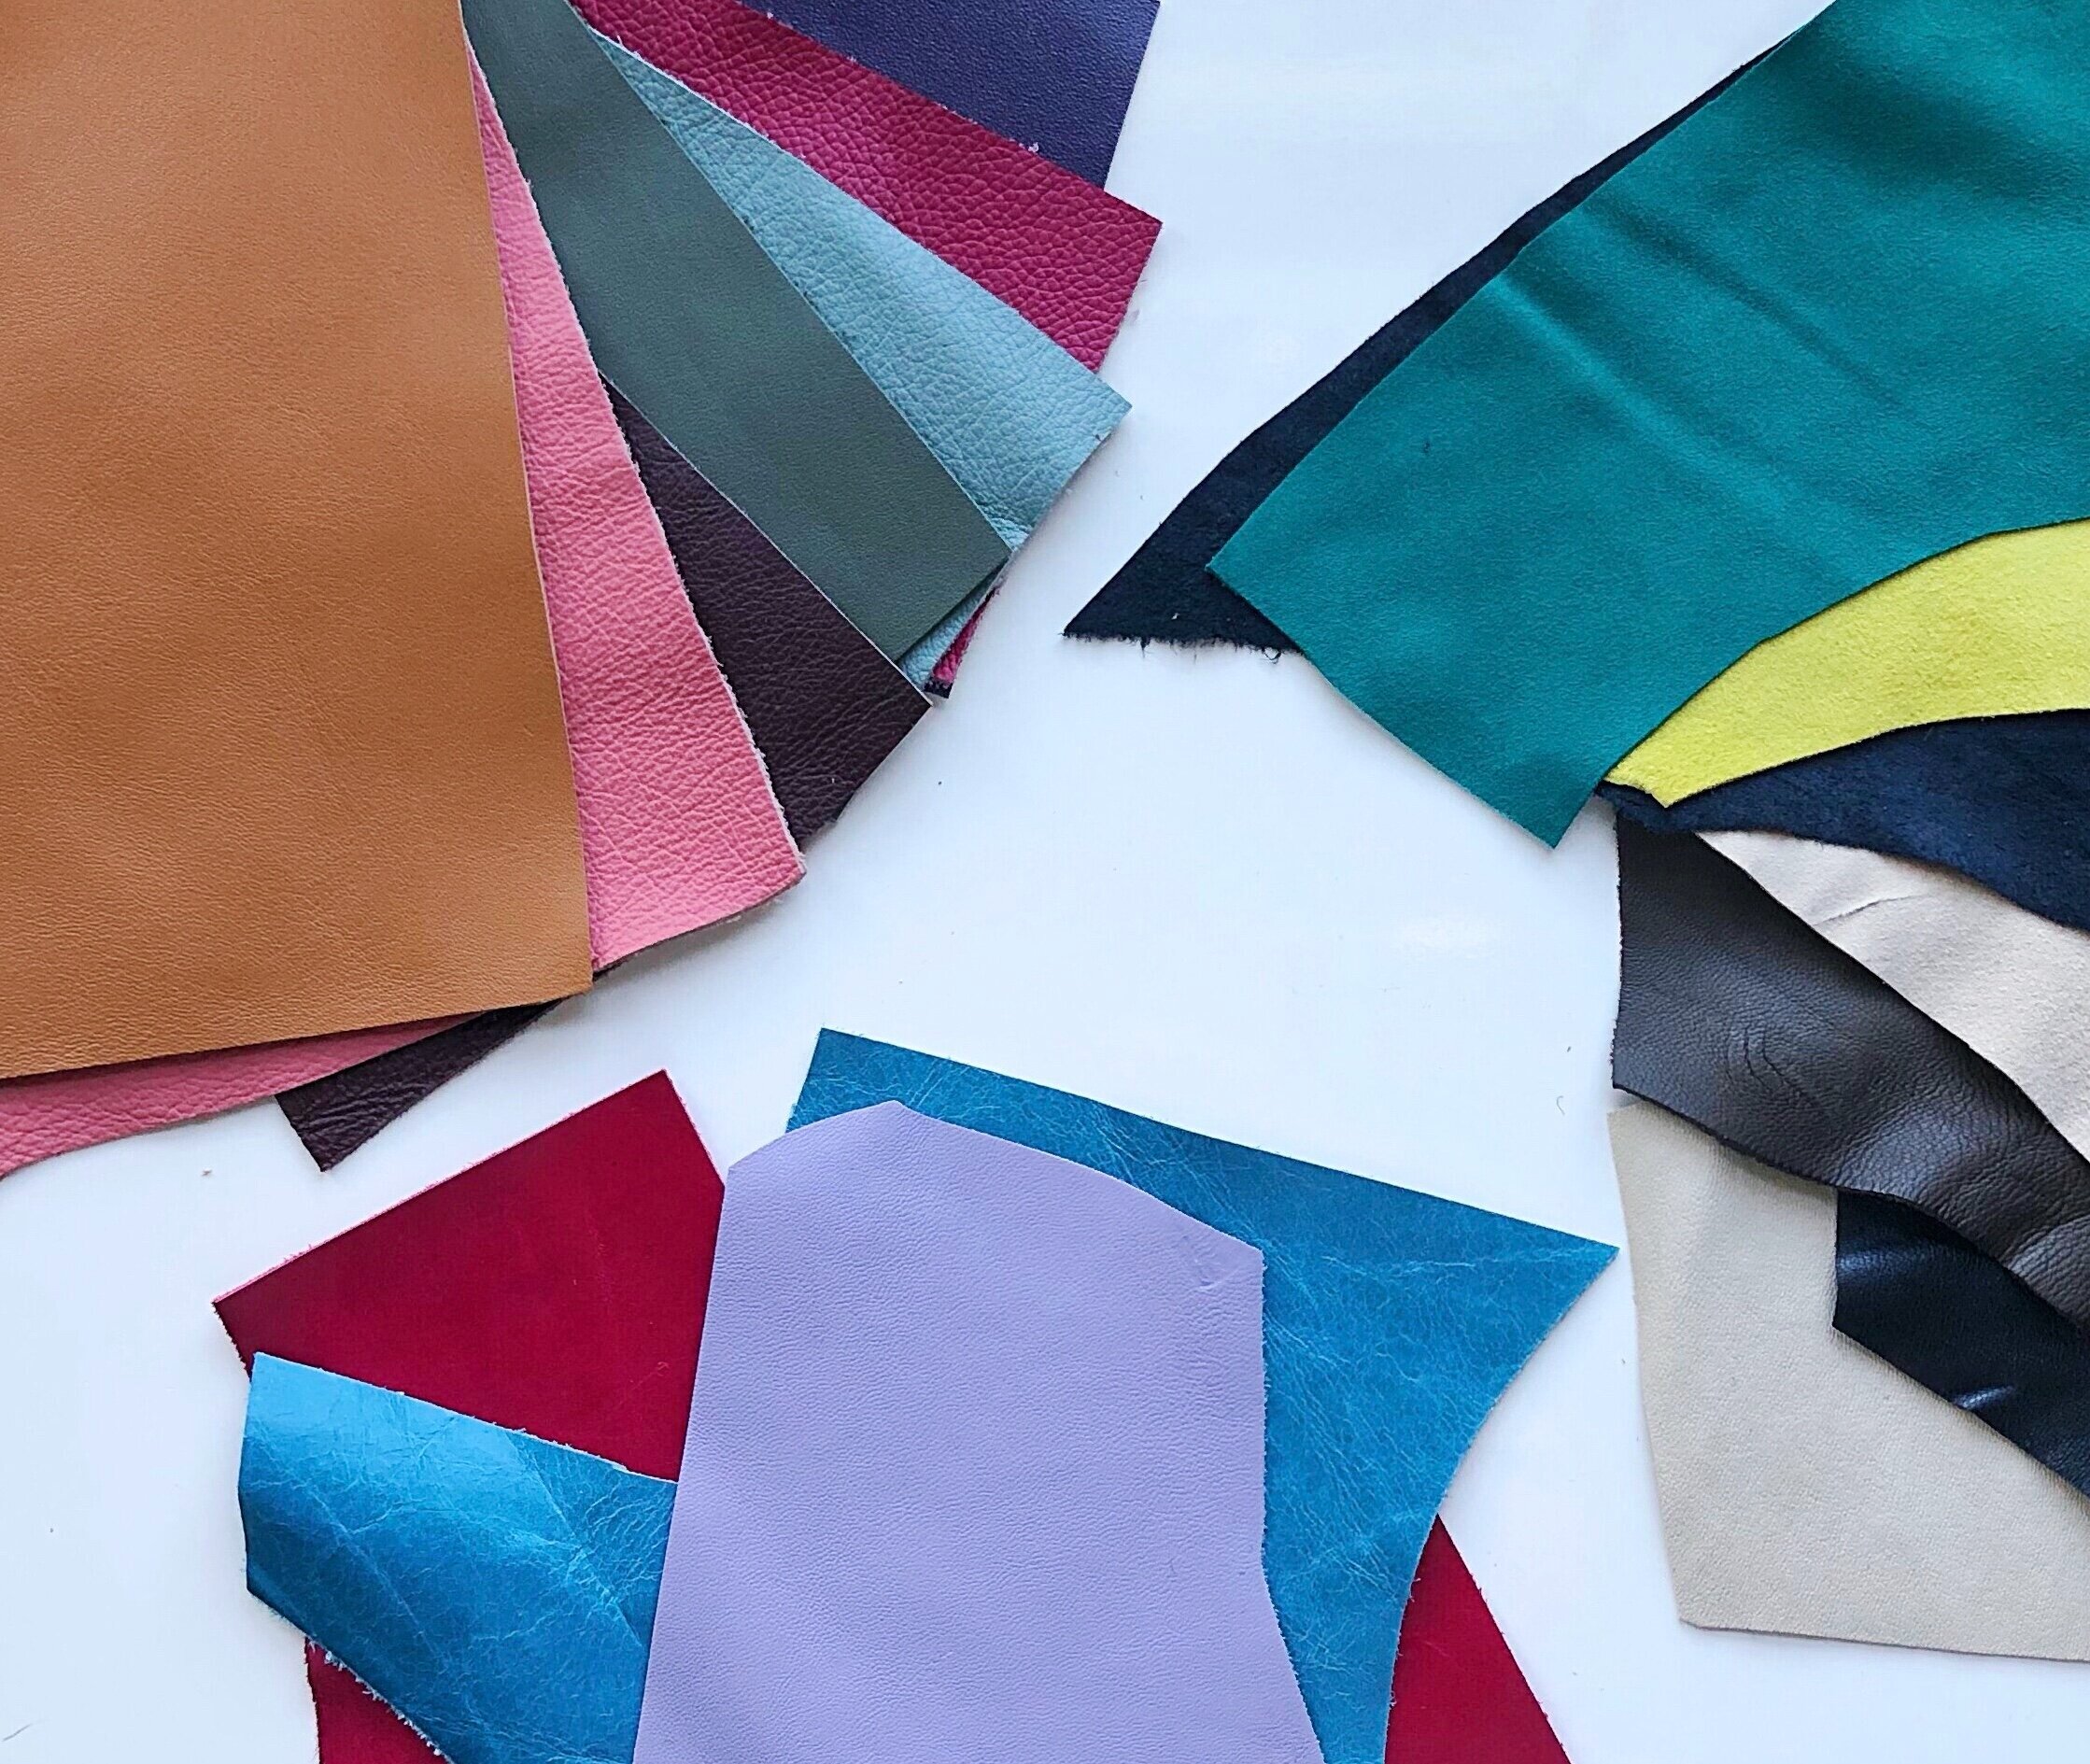
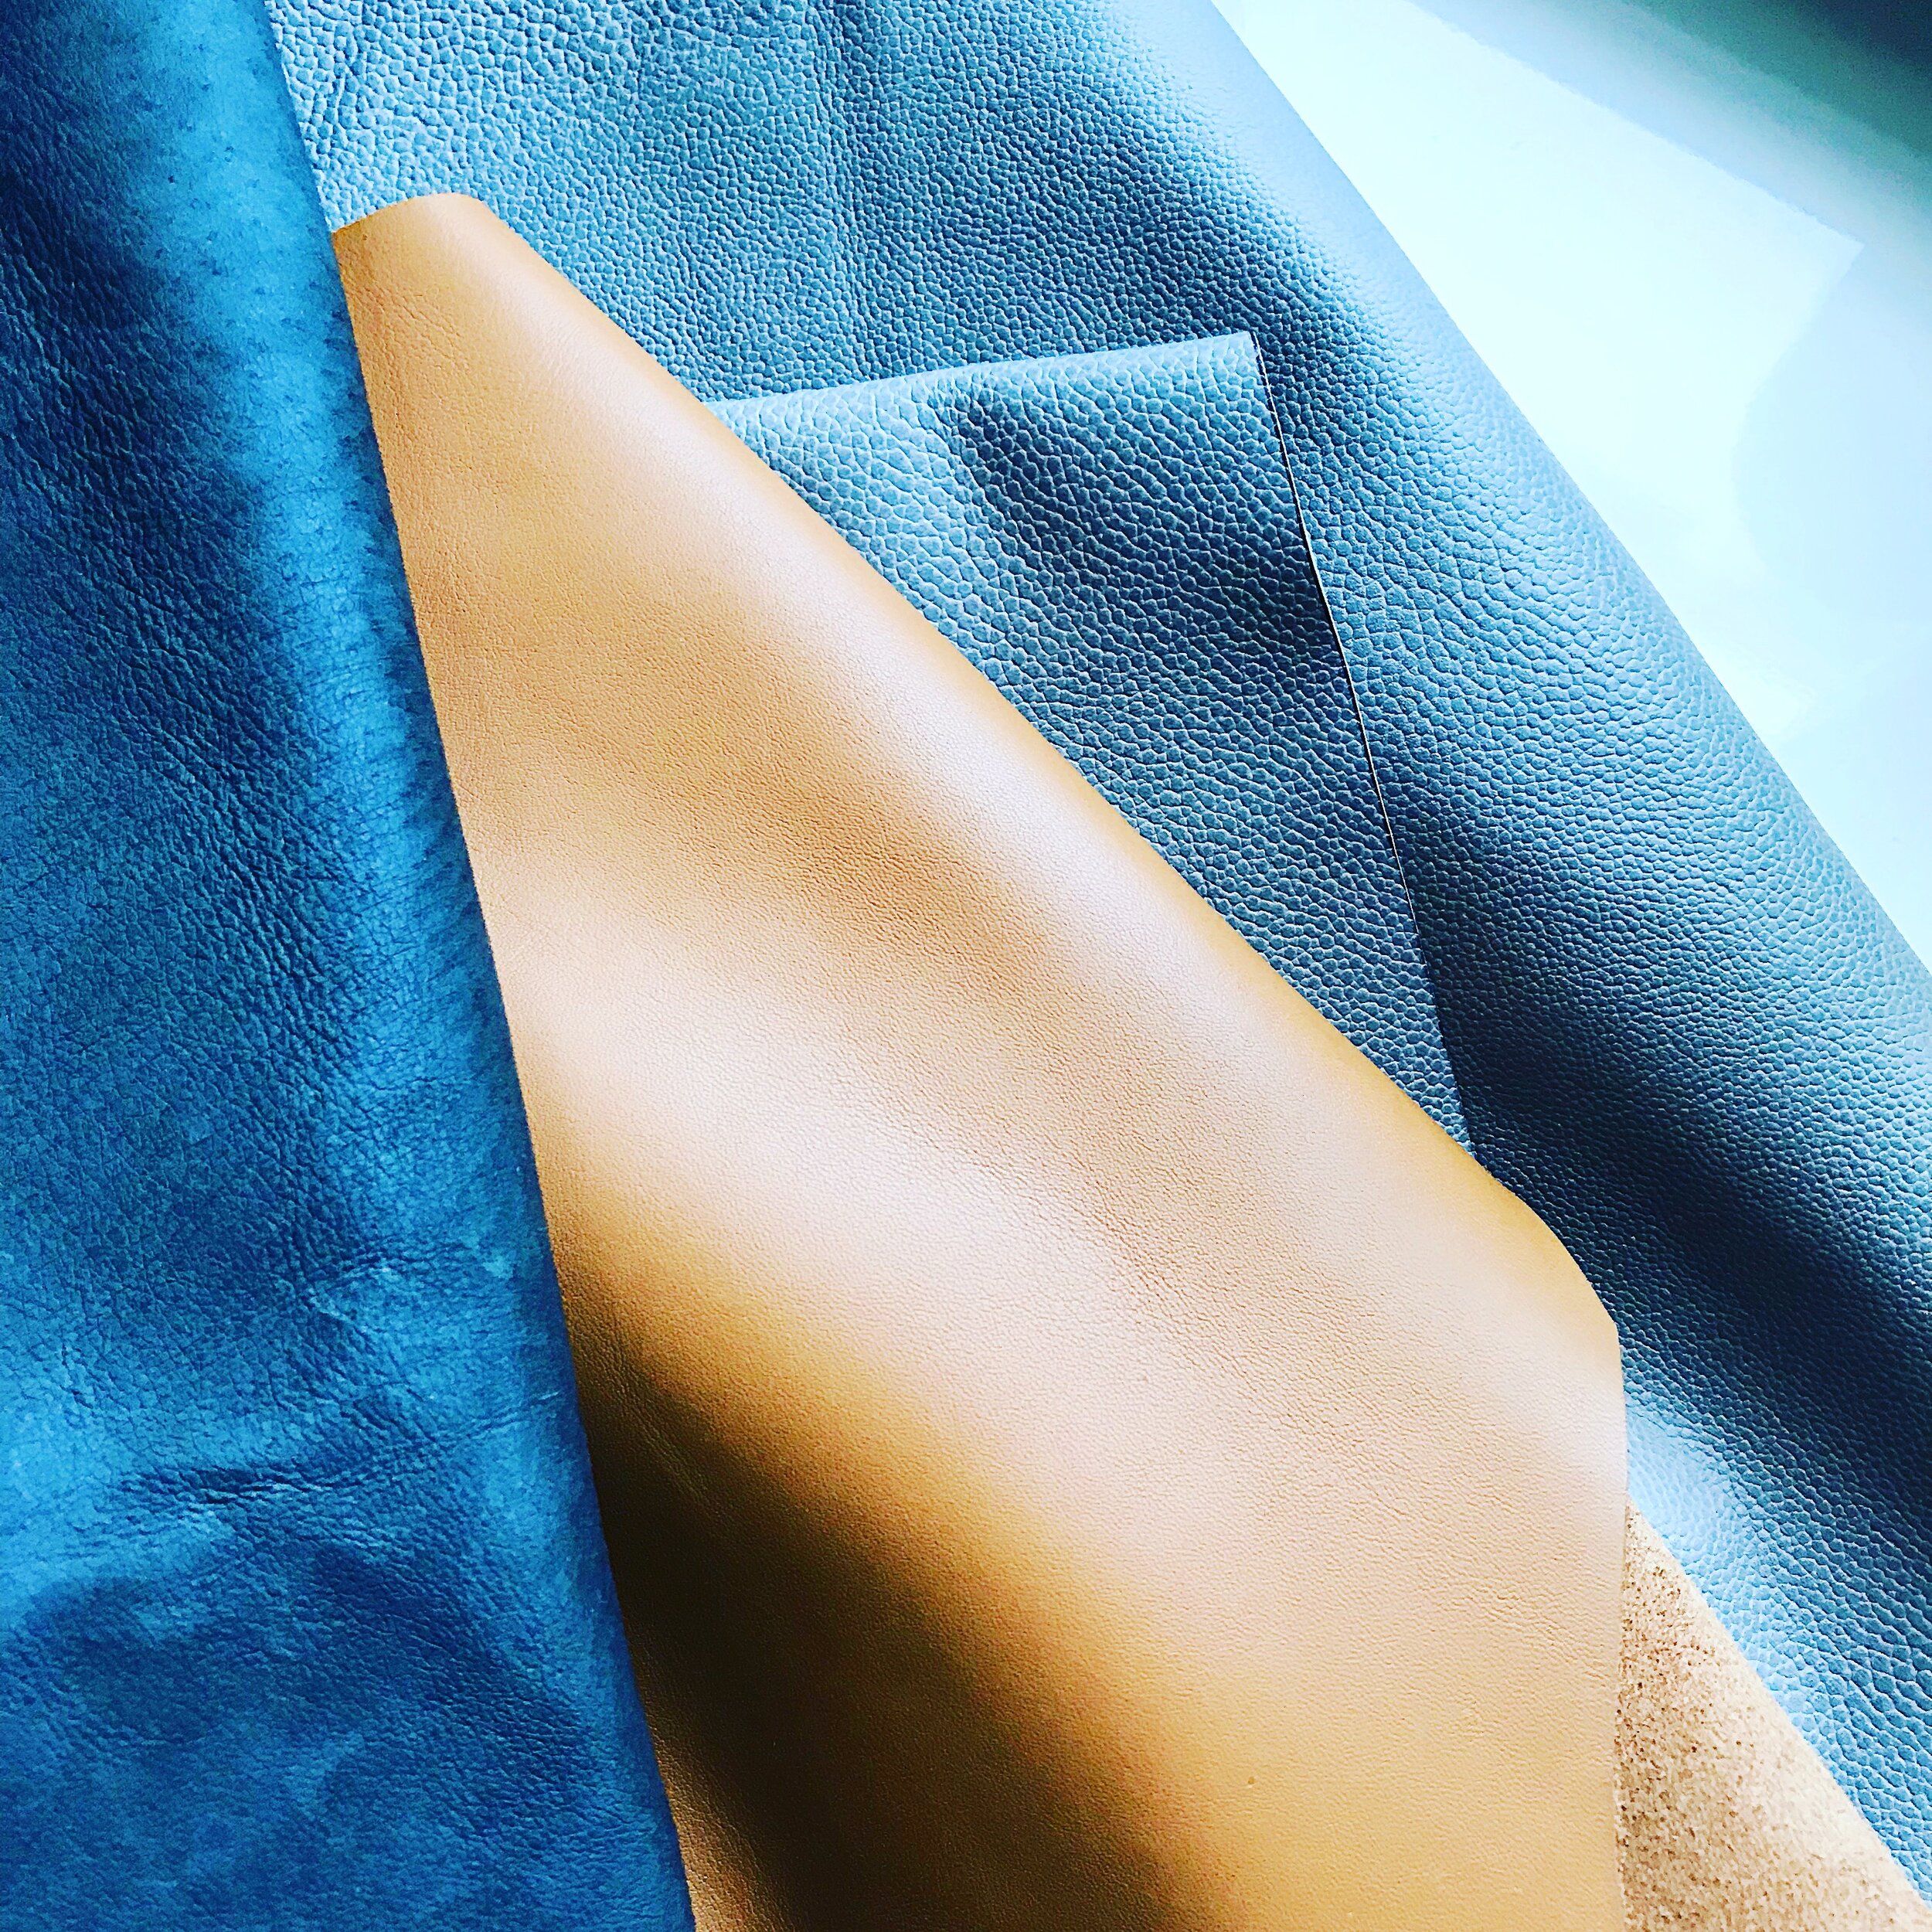
Leather comes from animals and like humans, each one is unique. So is our skin. Some have beautiful flawless skin, while others have lived life to its fullest and have the scars to prove it. During the splitting and tanning process, the variations in the thickness and character of the individual hide are revealed. To account for the variation, leathers are generally sold in a range of thickness, such as 2 to 3 ounces or 4 to 5 ounces.
Lighter weight leathers, up to about 4 ounces can be sewn on a domestic sewing machine. Anything heavier it is really best to use an industrial machine or even punch and hand stitch. More Tips and Tricks for Sewing with Leather here:
This chart by Tandy Leather can help guide you to selecting the ideal type and weight of leather for your next project.

These are some of my favorite sources for purchasing leather.
Leather, Suede, Skins is my go-to source for leather. Call and ask for Faina. She is exceptionally knowledgeable and will guide you to finding the ideal leather for your project.
Mood Fabrics Mood has a small but very fashionable selection of garment weight leather and trim.
Tandy Leather The granddaddy of all things leather. The website is full of great educational links and tutorials as well as a dizzying selection of hardware, paint, tools and accessories.
Don’t forget all of the leather that is readily available in thrift stores, ebay and in your own closet.
Wool Felt for Bag Making
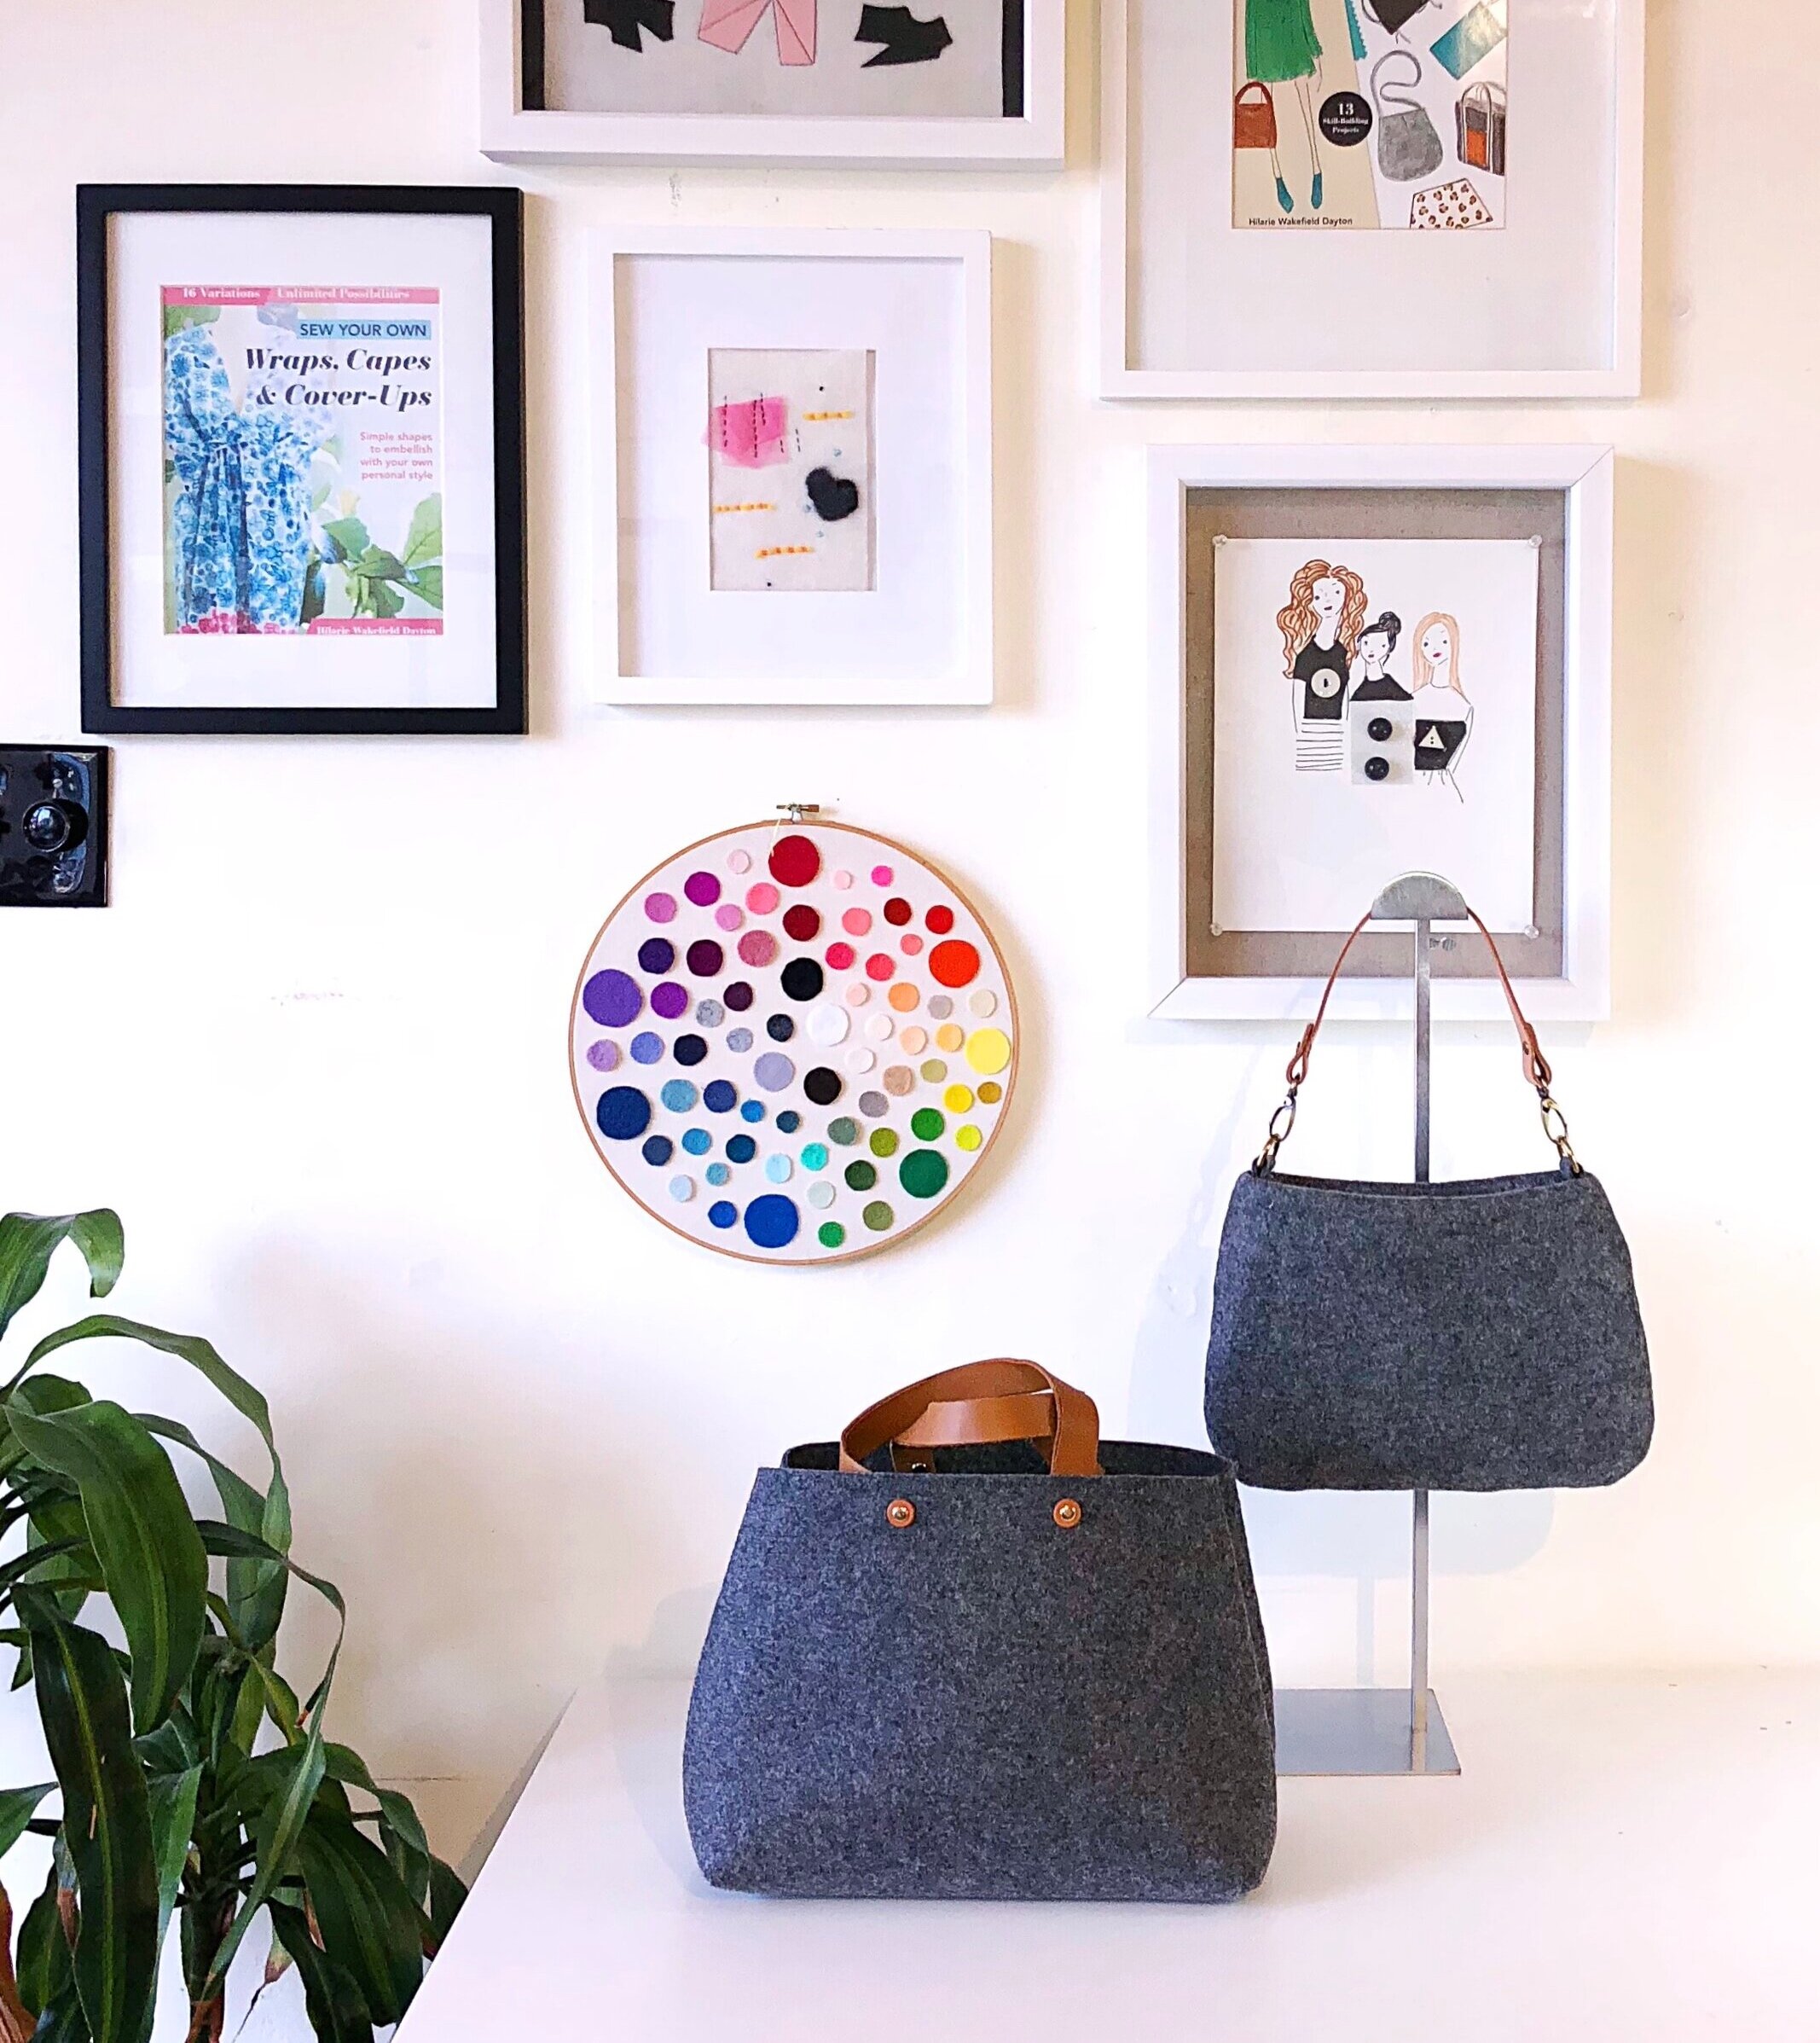
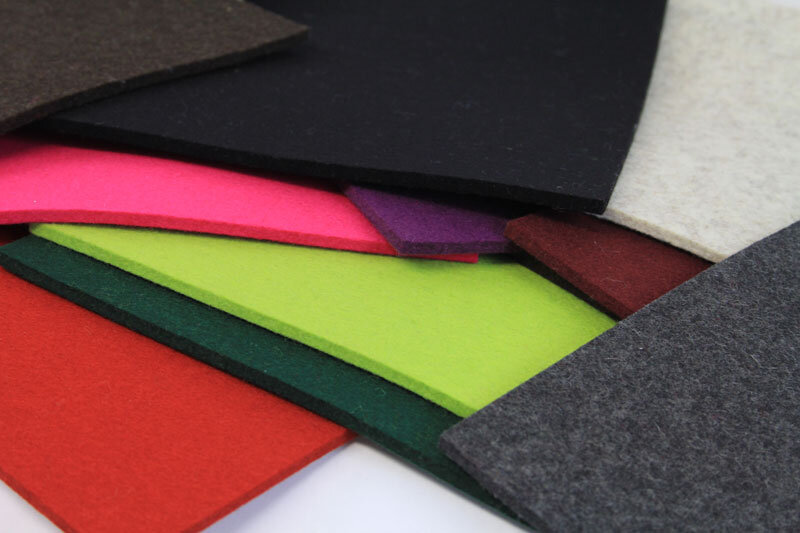
Merino Wool Felt
Wool felt is gorgeous for making bags and other small accessories. Merino wool felt has a beautiful and soft feel, it is available in nearly any color imaginable, is naturally water repellant, renewable and sustainable. Merino wool felt is a non-woven textile that is produced by densely matting fine wool fibers. As such, it does not fray or unravel and has no wrong side and doesn’t pill. Bags made of felt are able to withstand weight without losing their shape due to the inherent tensile strength or the fiber.
Wool felt is not always easy to find at your local fabric shop, but is readily available online. When shopping, look for a felt that is more of an industrial weight (2-4mm about 1/8”) and mostly wool.
When making bags, you will be working with multiple layers of felt. To help keep your seams smooth, a Walking Foot and clips are essential. Also, you will want to increase the length of your stitch. You may need to cut a test swatch and practice to determine the ideal machine settings.
Synthetic Industrial Felt
These are fairly inexpensive options that are ideal for small accessories, making bag bases, adding structure and to create bag organizers.
Are you curious to read more about The Best Fabrics for Bag Making? In this article I discuss sewing with leather, wool, decorators weight fabric and canvas.

The perfect handbag is elusive- I hope to change that by giving you the tools you need to design and make the bag of your dreams. For more about bag making, check out my blog posts under the tag “Bags” and of course, my book; Sew Bags: The Practical Guide to Making Purses, Totes, Clutches & More
XO, Hilarie

Room Rater Gave Me a 9/10!
You are familiar with Room Rater, right? Throughout the pandemic, Rate my Skype Room has been a fun Twitter follow into the snark and fun of rating home decor. Imagine how pleased (and surprised!) I was when I was featured. They gave me a 9/10 for my FB Live for C&T Publishing to kick off National Sewing Month.
You are familiar with Room Rater, right? Throughout the pandemic, Rate my Skype Room has been a fun Twitter follow into the snark and fun of rating home decor. Imagine how pleased (and surprised!) I was when I was featured. They gave me a 9/10 for my FB Live for C&T Publishing to kick off National Sewing Month.
And since I got a 9/10. That just means I need to do it again for the win. Stay tuned.

Introducing: Sew your own Wraps, Capes & Cover-ups. A Garment Sewing Primer.
I wrote this book to get you excited about making clothing that you will love wearing. The projects are all loose fitting so that you can concentrate on sewing and design and not get too focused on fitting. I show you how to manipulate fabric to make a wardrobe of timeless fashion accessories. Though it is really in the fabrication and finish of each garment where the true test of quality lies. The finish is exceptionally important. Clothing should be as beautiful on the inside as it is on the outside. The sewing techniques and projects in this book emphasize this principle of quality construction. Beyond the projects, the book is about craftsmanship. It explains in text and photos how to finish seams, embellish garments, and some pattern manipulation techniques that I hope will inspire you to expand your sewing skills.

It is hard for me to believe that I’ve nearly finished my second book, Sew Your Own Wraps, Capes & Cover-ups. As I work on the last of the illustrations, I am left feeling both exhausted and invigorated. Writing a book feels a whole lot like having a baby. From proposal to publication It takes about a year and a half of nearly everything you’ve got. Then it is submitted to the publishing team to take over and suddenly- is no longer “yours”.
The editing process is tough-and it can feel so personal. The manuscript and patterns get passed along to a variety of editors to comb through, question, mark up and pass back. Of course, without their skillful consideration- there would be no book! Since this was my second time writing a book, I thought- “I’ve got this! “– and was convinced that it was going to so much easier than the first one. Then 2020 began.
The manuscript and projects were due at the end of March- only a few weeks after the Governor of Virginia issued Stay at Home orders. At first the initial 2 -week shelter in place, seemed like a dream. More time to write and think! But, my kids were home too and those early days were filled with so much anxiety. Over time, we began to feel our way through it, and find a quiet, slower pace. The book provided a much-needed distraction. A distraction from politics, from Covid-19, from anxiety, from life really.
From March- July my business was closed. I was afraid. Besides not bringing in any income, I was issuing refunds each week as more classes, workshops, parties and camps were cancelled. Fortunately, I was able to rearrange my workspace and come up with a plan to return to teaching the day the restrictions were lifted and Virginia went into Phase 3.
A silver lining of the 2020 doomsday cloud is that so many more people are now sewing. At first it was for the animals injured and abandoned from the fires in Australia, and then Covid hit and we needed masks. Suddenly sewing machines were sold out everywhere and thread and elastic were scarce. People were sewing again! Now that masks are readily available, the new to the sewing crowd folks want to learn more. I cannot tell you the number of emails and calls I get each day with people eager to sharpen their new-found skills.
The book feels perfectly timed to help fulfill that burgeoning curiosity in those that are new to sewing as well as an invitation to explore pattern making and garment sewing to those already well on their path to mastery. As a way of introducing the book concepts and to educate a larger audience, you can look forward to lots of posts about garment sewing, pattern making and fashion design.
About the Book
Sew Your Own Wraps, Capes & Cover-Ups: 16 Variations; Unlimited Possibilities
Fashion made easy
Take your wardrobe from drab to fab with modern wraps, capes, and coverups. Start with the basic sewing patterns, and then customize your unique look with 16 variations and tons of embellishment options. Each pattern comes with variation and design options making it easy to alter looks for any season so you can be fashionable all year round. Learn how to pick the right fabrics to flatter your shape as well as how to best place pockets, details, and embellishments for a truly trendsetting look.
Elevate your wardrobe with stylish women's clothing patterns and designs
No detailed sewing! Simple garments made elegant with guidance on how to cut and drape the fabric into a flattering fit
Customize your unique look with endless embellishment choices
I can’t wait to share the book with you!
XO, Hilarie
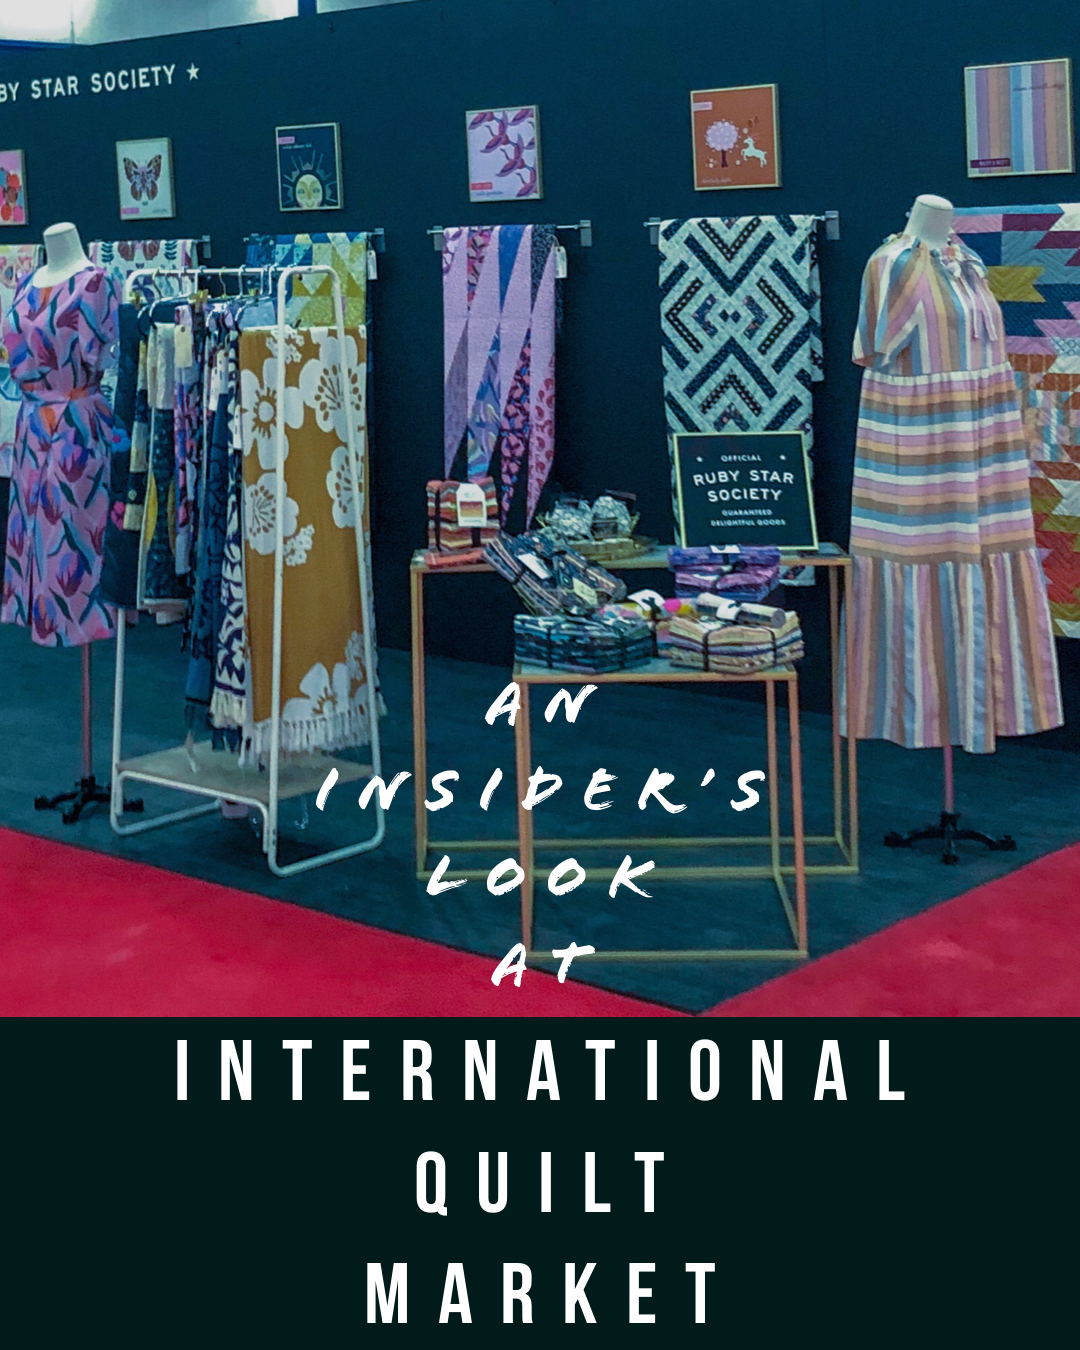
An Insider’s Look at International Quilt Market
I was so fortunate to be able to attend the Fall International Quilt Market. Why Quilt Market, you may ask? A reasonable question. It is a curious name, but don’t let that fool you. The International Quilt Market is the premiere trade show for the sewing industry. All manner of fabric, patterns, notions, sewing machines, tools, books and accessories are represented.

I was so fortunate to be able to attend the Fall International Quilt Market. Why Quilt Market, you may ask? A reasonable question. It is a curious name, but don’t let that fool you. The International Quilt Market is the premiere trade show for the sewing industry. All manner of fabric, patterns, notions, sewing machines, tools, books and accessories are represented.
It is held each year in the George R. Brown Convention Center in Houston, Texas.

The show, which is held twice each year, is a gathering place for store owners, buyers, representatives, authors, editors, magazines, designers and a few sewing studio owners too. It really encompasses the entire spectrum of industry insiders. My perspective as a first-time attendee was rather unique, as I was there with a badge as an author with a well-established and respected publishing company and as a small business owner. This outsider disguised with an “insider’s badge” gave me the ability to both stand out and fade into the background at once.

As an author, I was given some time at my publisher, C&T’s booth to have a book signing. Shop owners and representatives stopped by my table at the C&T booth to chat and have their book signed. This was such a fantastic opportunity to meet them and to hear about their work, their customers and what projects they are interested in making.
After the book signing wrapped up, I had a few minutes to change and refuel on coffee before filming a how-to tutorial. The tutorial, which will be coming soon, will be used as a promotional video for my book.
Once that was complete, I was free to explore the Quilt Market.

It truly was a fantastic experience for me to meet with representatives of magazines, sewing machines and fabric companies, distributors and suppliers. I learned a lot and made some valuable new contacts.
For example, while visiting the Kai Scissors booth, I mentioned that I personally love their scissors but don’t use them in my shop because I teach kids and the scissors are so sharp they could be a safety hazard. The representative informed me that they would be happy to blunt the tips of the scissors for me as a precautionary measure. Well, let’s just say that order was a no-brainer. Now the kids use beautiful and very sharp- but very safe scissors in class.

I spy my book on the shelf!

Testing new Eversewn sewing machines.

Each booth was an explosion of color, pattern and inspiration. The designers and team did an extraordinary job of not only designing the patterns for their fabric collections but in planning and designing their booths.
It did take a bit of restraint, but I managed not to go all fan-girl on some of the designers and authors I had the pleasure of meeting.


By closing, I was exhausted but exhilarated. Fortunately, my hotel was connected to the Convention Center, so it was just a short walk back. The hotel was gorgeous and lucky for me had some exceptional restaurants inside.


Check out the edible gold leaf. This dessert at Xochi was worth the price of the flight and hotel combined.
The fabric and supplies that I ordered just a few months ago are beginning to ship. Each time I pull a bolt off of the shelf, I will be reminded of my first time at Quilt Market.
XO, Hilarie

Reflections
Have you ever watched yourself on video? If you have, then you might describe it as an entirely shocking, altogether horrifying experience. Or at least cringe worthy. Growing up in the 70’s and 80’s, cameras were really only brought out on occasion, to document something that you wanted to remember. I can’t recall when my family got a video camera, but it was definitely later in life. Maybe in college? I do know that I was at least old enough to not have had to be on the recorded side of it. As I write this, a thought just struck me, I wonder if this new, young generation of kids will ever feel that way about seeing themselves on screen? Maybe since video has woven its way into the day to day experience, they have a wholly different attitude toward it? Perhaps they have grown accustom to seeing themselves in motion and they are more comfortable with their image as opposed to their reflection?
Have you ever watched yourself on video? If you have, then you might describe it as an entirely shocking, altogether horrifying experience. Or at least cringe worthy. Growing up in the 70’s and 80’s, cameras were really only brought out on occasion, to document something that you wanted to remember. I can’t recall when my family got a video camera, but it was definitely later in life. Maybe in college? I do know that I was at least old enough to not have had to be on the recorded side of it. As I write this, a thought just struck me, I wonder if this new, young generation of kids will ever feel that way about seeing themselves on screen? Maybe since video has woven its way into the day to day experience, they have a wholly different attitude toward it? Perhaps they have grown accustom to seeing themselves in motion and they are more comfortable with their image as opposed to their reflection?
This week, I received a blog post from C&T Publishing. Great, I thought, I wonder what it will be about. Imagine my surprise, upon opening, to be met with my picture and a video that we made at Quilt Market last fall to promote my book. To be honest, I was horrified. As of this moment, I still haven’t watched more than the first minute of it. I clicked on the link and immediately panicked when I saw it already had 12 likes and 3 thumbs down. Uggh. Thumbs down? That put my anxiety into an immediate whirlwind.
After thinking about it for the past few days, I asked myself what advice I would give to a friend or even to my own child when met with a similar situation. That change in perspective is a good reminder that growth does not come without challenges. If I want to write and sell books, I need an audience. People like video content- I get that. So, with the goal of growth in mind, I am putting aside my pride and thin skin and going to watch the video.
To be ever mindful that my work is a direct reflection of my own developing state. My intention in sharing with you is to get over the shock and horror and focus instead on how I can improve. To that end, how can I make it better? Is it content? More practice? Presentation skills? If you have a few minutes, I would truly value your thoughts.
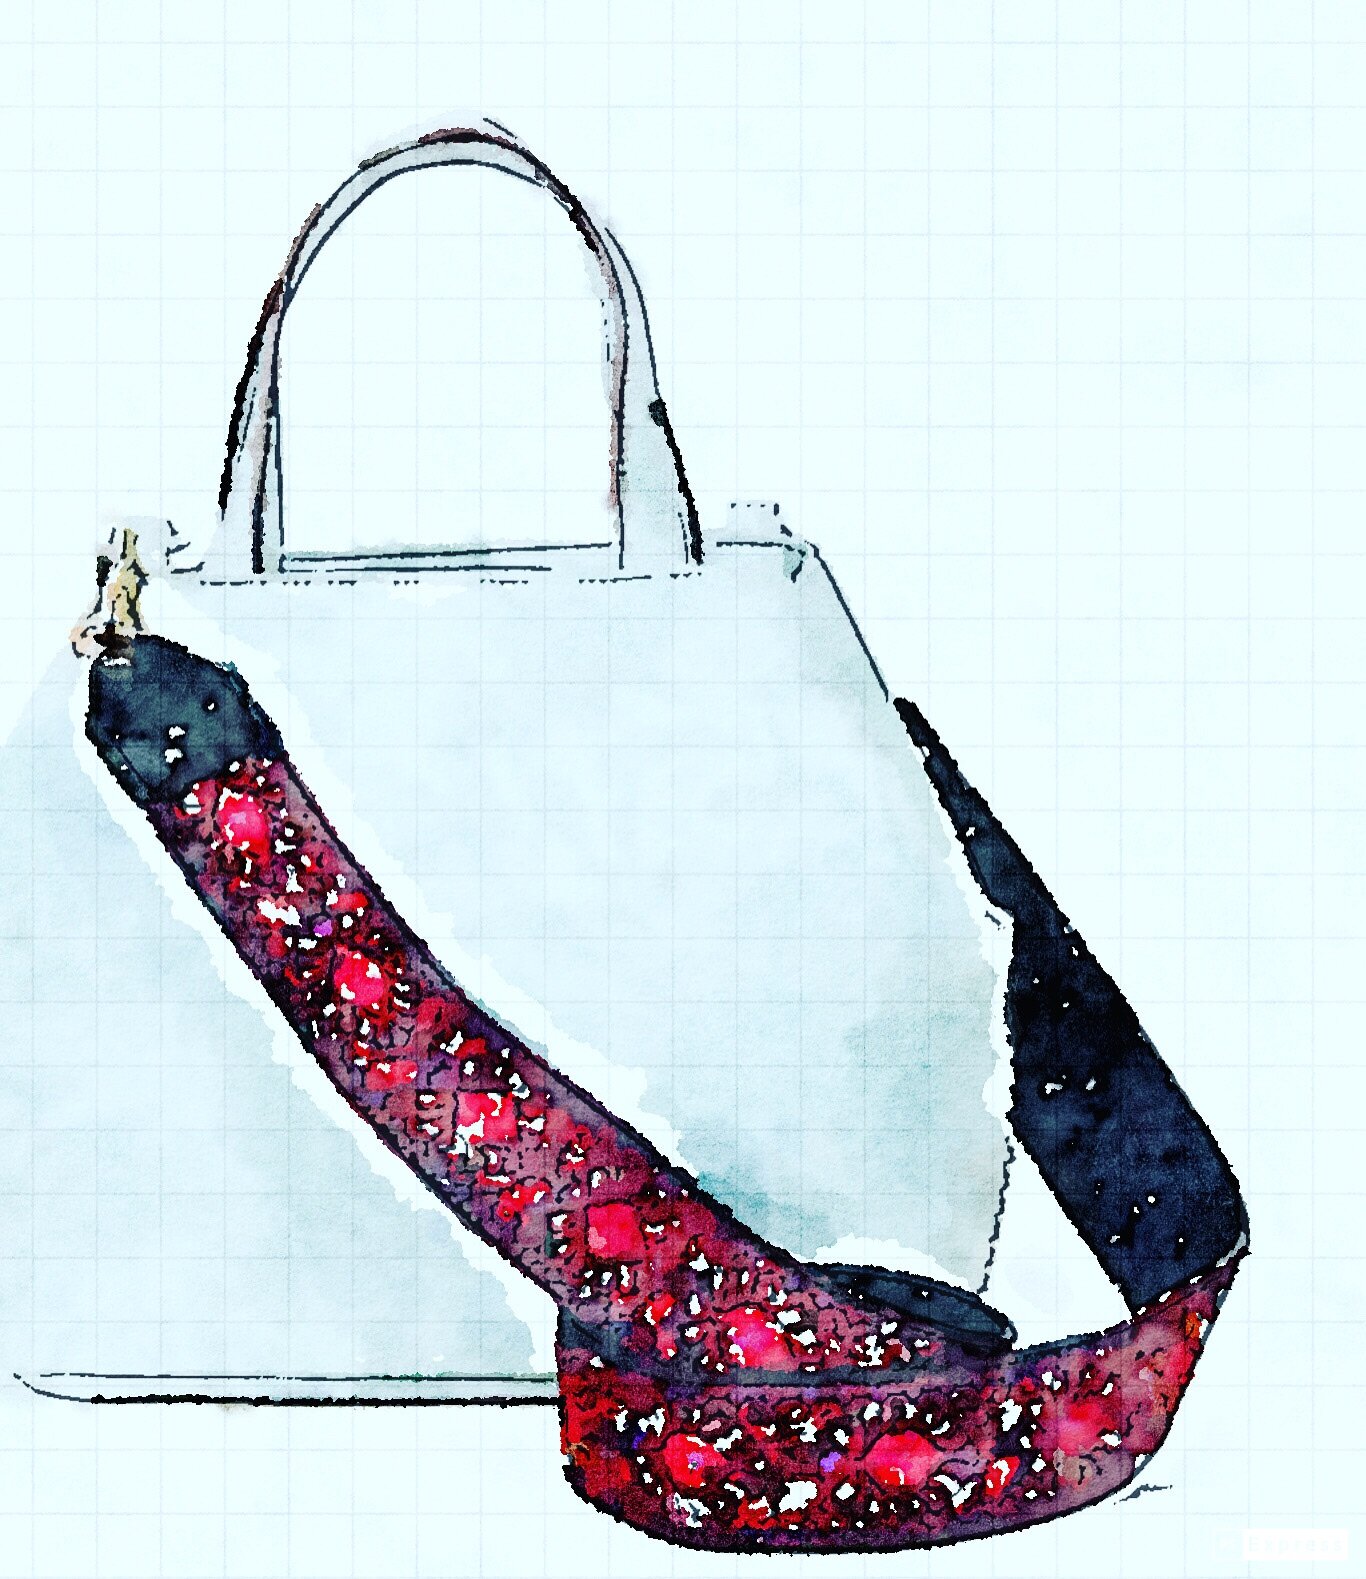
Now, who is ready to learn how to modify purse straps with leather?
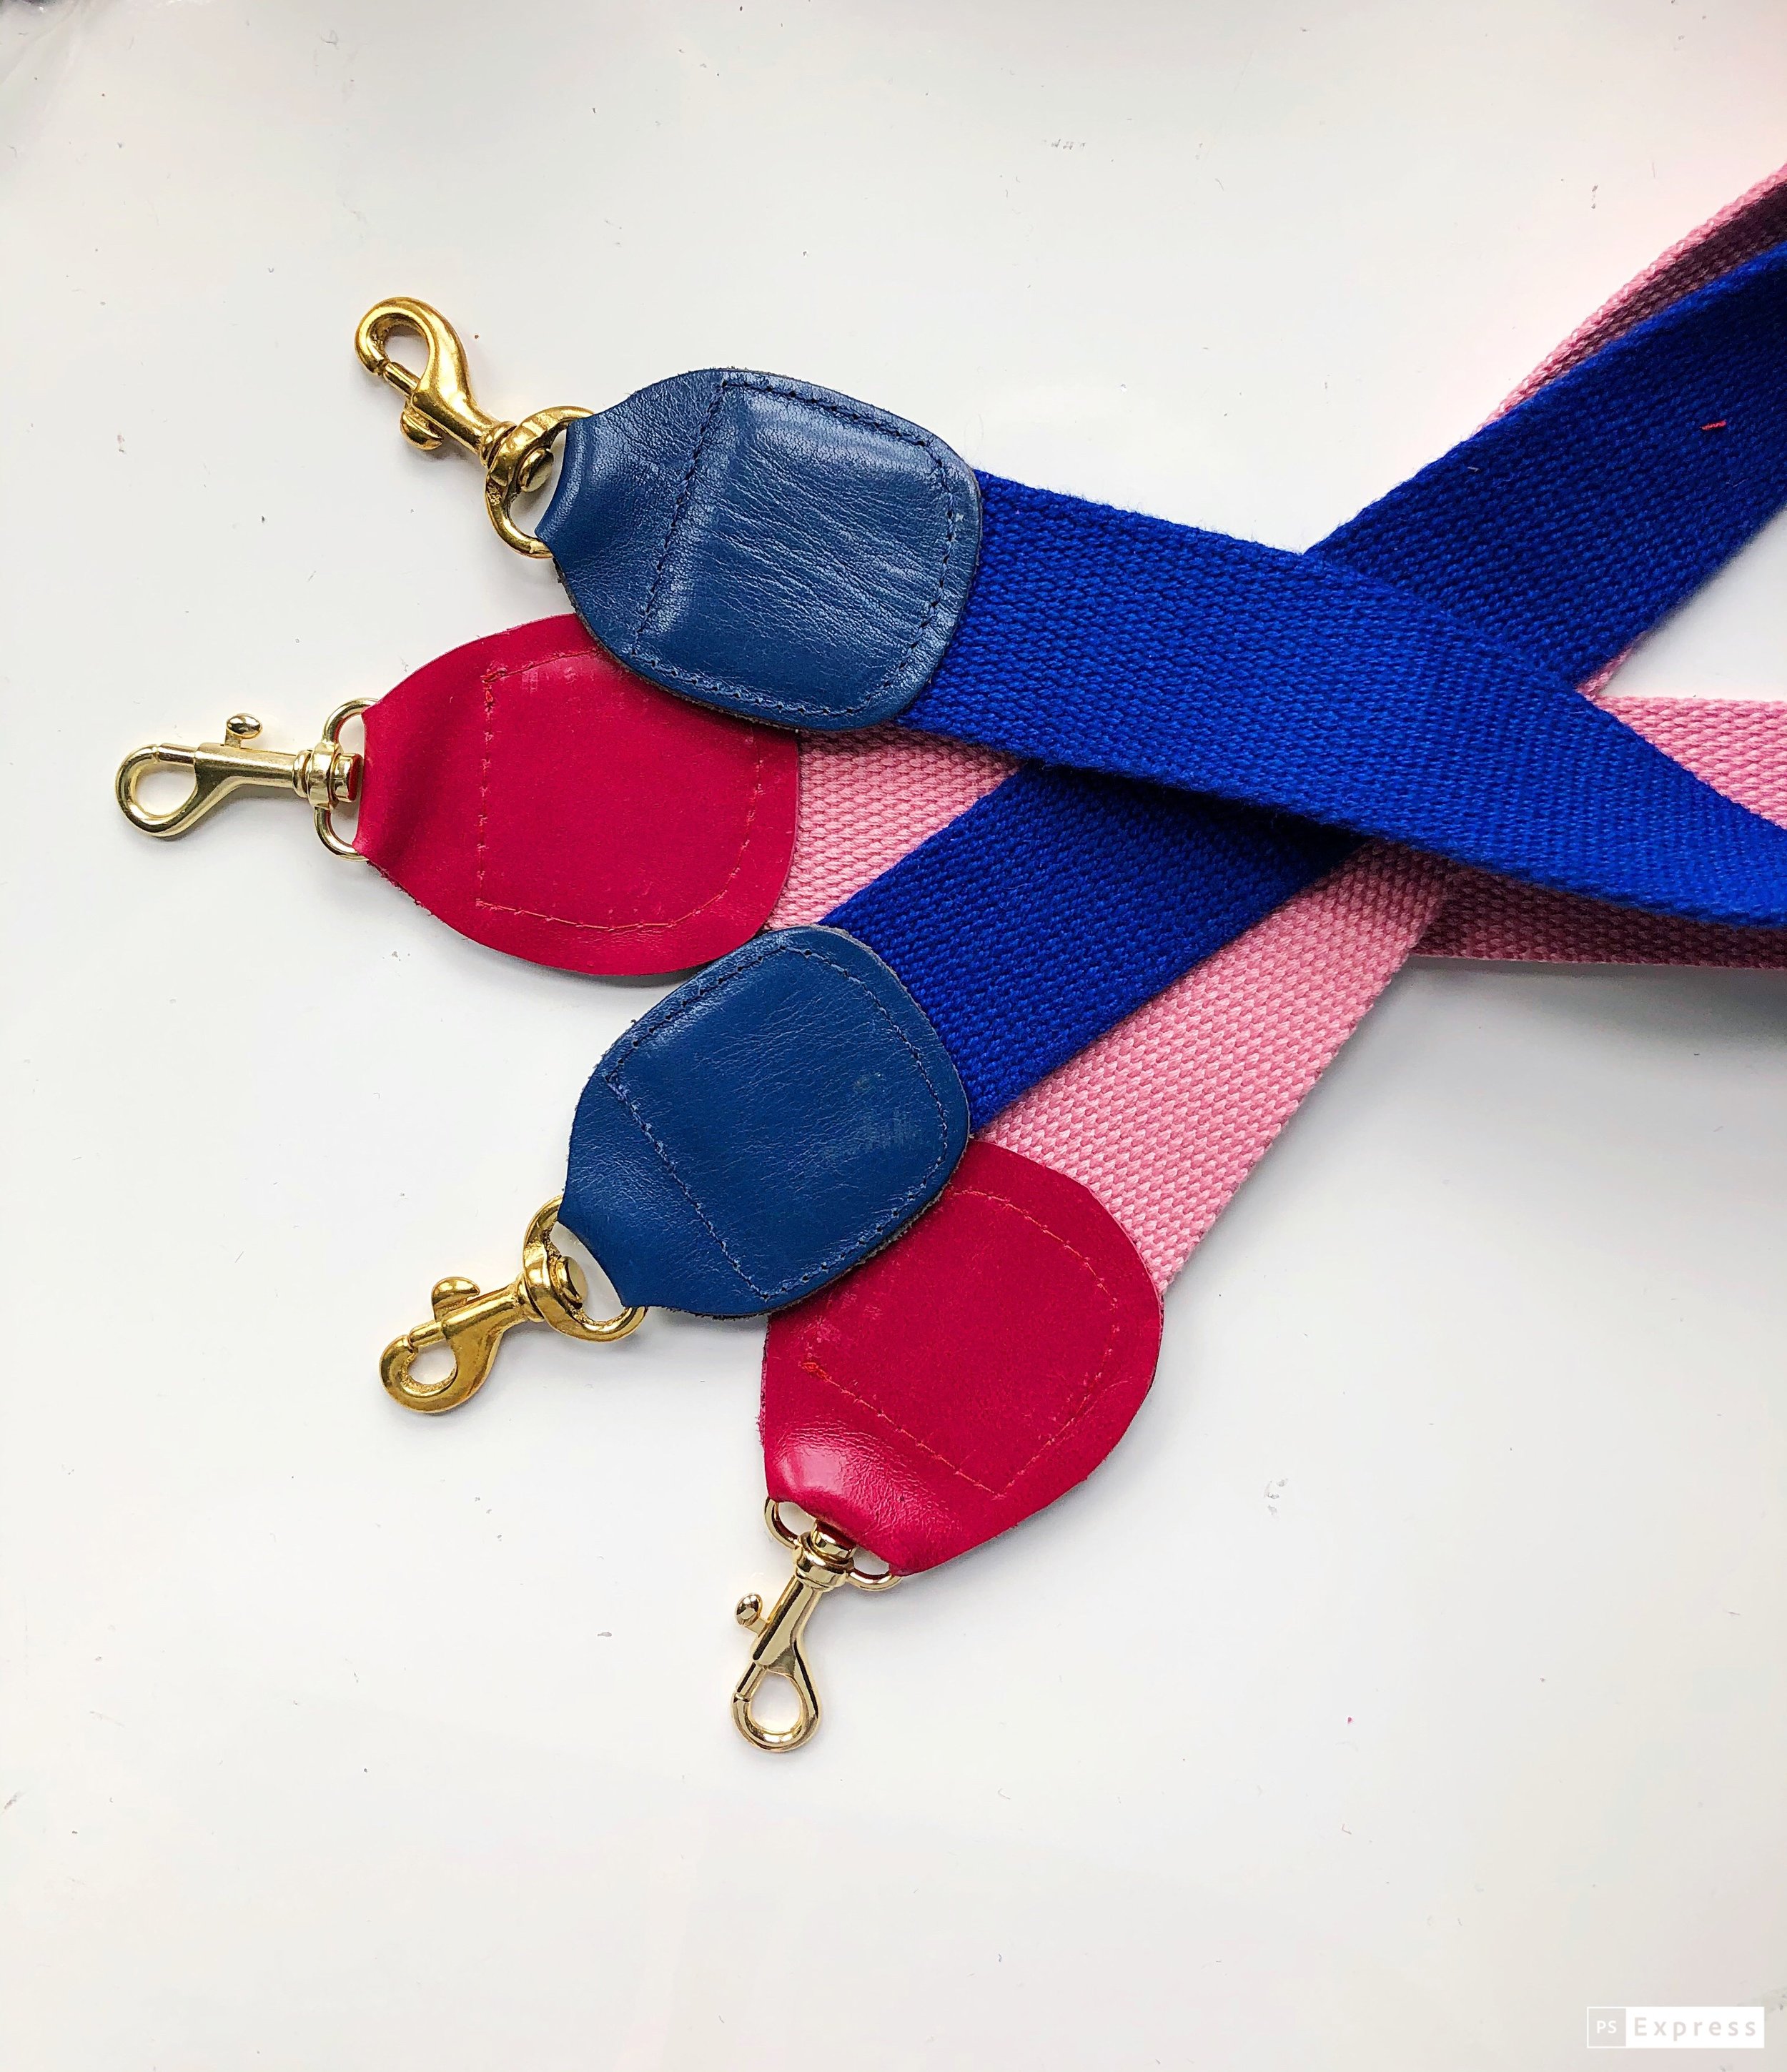
How to make a detachable shoulder strap for your bag
You have seen the new guitar type purse straps, right? While they weren’t really on my radar until early this year when I read an article in the NY Times. Since then, I haven’t been able to get this detachable strap out of my mind. I began to imagine the countless options and reinterpretations. Suddenly it seemed as if each bag I own needed to have its own wardrobe. And now, they do.
By now you have surely seen the new guitar type purse straps, right? They weren’t really on my radar until early this year when I read an article in the NY Times. Since then, I haven’t been able to get this detachable strap out of my mind. Suddenly it seemed as if each bag I own needed to have its own wardrobe. ( And now, they do. ) I began to imagine the countless options and reinterpretations.
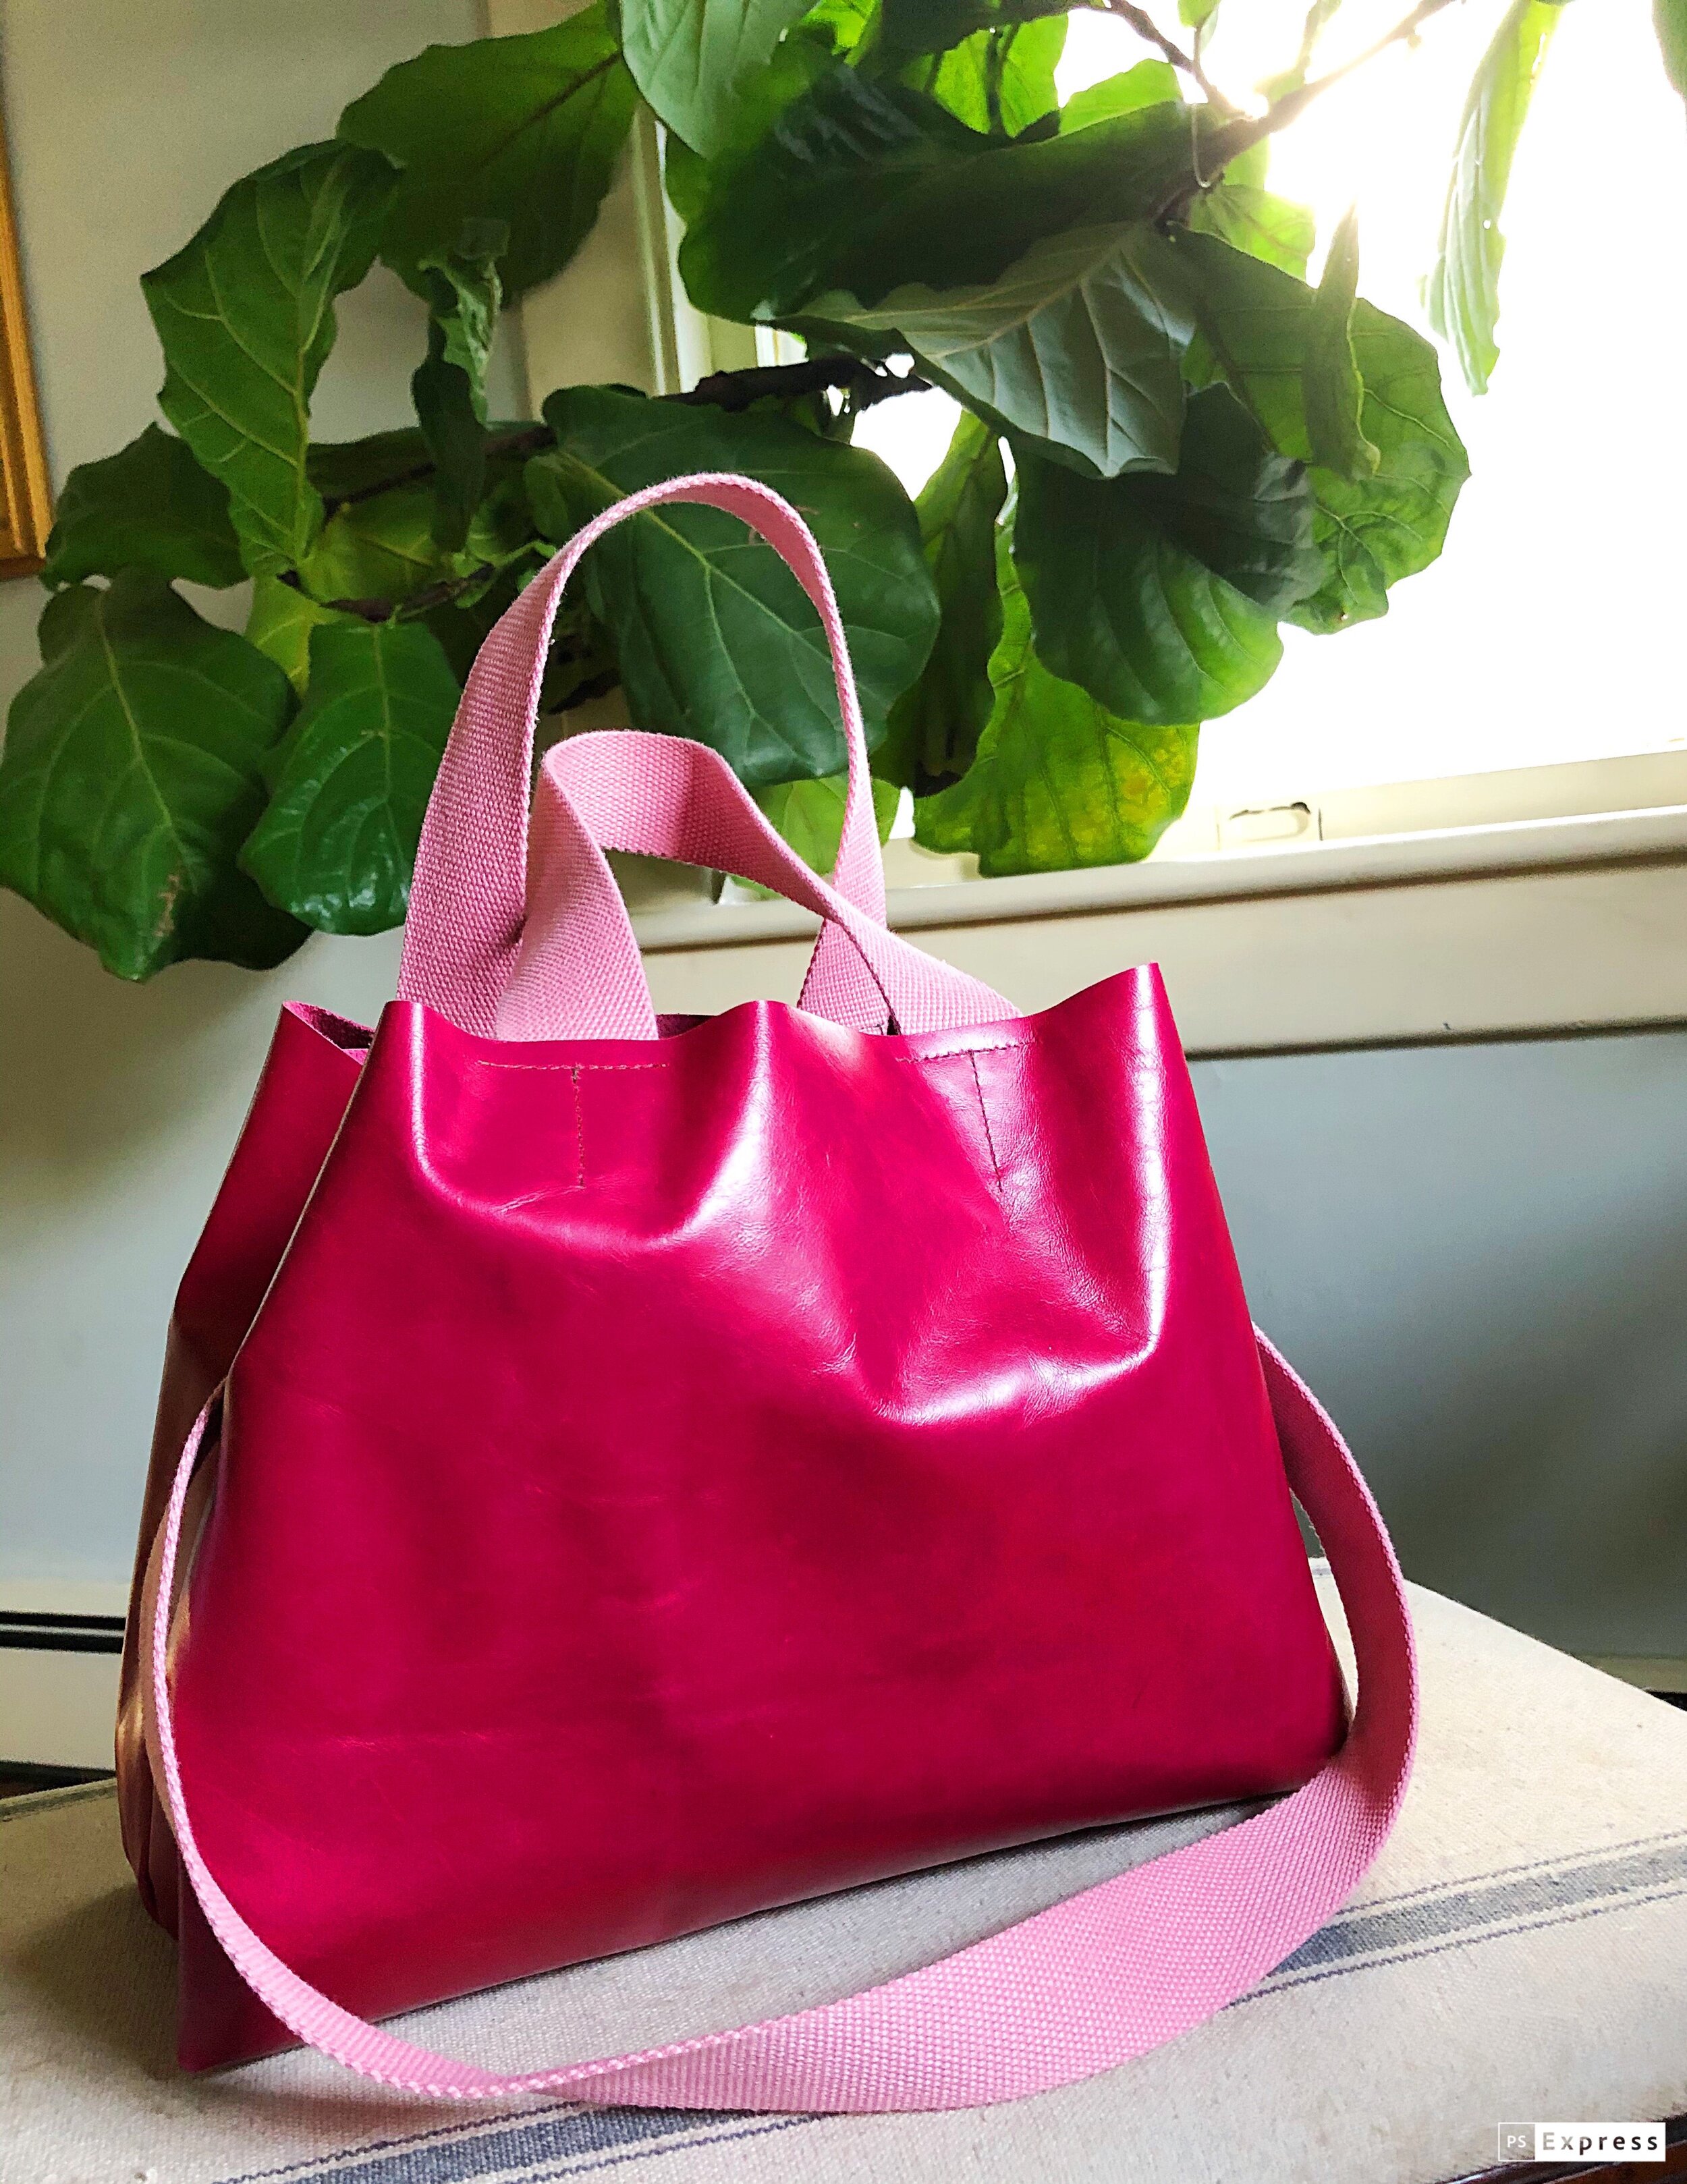
I love the fun of dressing up a bag with a different strap, and watching the transformation. These shoulder straps allows you to instantly add a personal touch to your bag. The first bag that I tried to pair it with was a crossbody style. The new contrasting strap made it so much more fun and interesting. Then I tried it with a belt bag- now that “belt” bag has three different options. It can be worn on the belt, with a crossbody strap and now, it has a new leather top handle. Same bag, three carrying options. Friends, isn’t that reason enough to pull out your sewing machine?
Today I am going to share with you at a shoulder strap tutorial so that you too can make a detachable shoulder strap that speaks to you, fits you and stands apart from the rest of your bag.
The Ultimate Hook-up: Make a detachable shoulder strap for your bag

HOW TO SEW A DETACHABLE PURSE STRAP
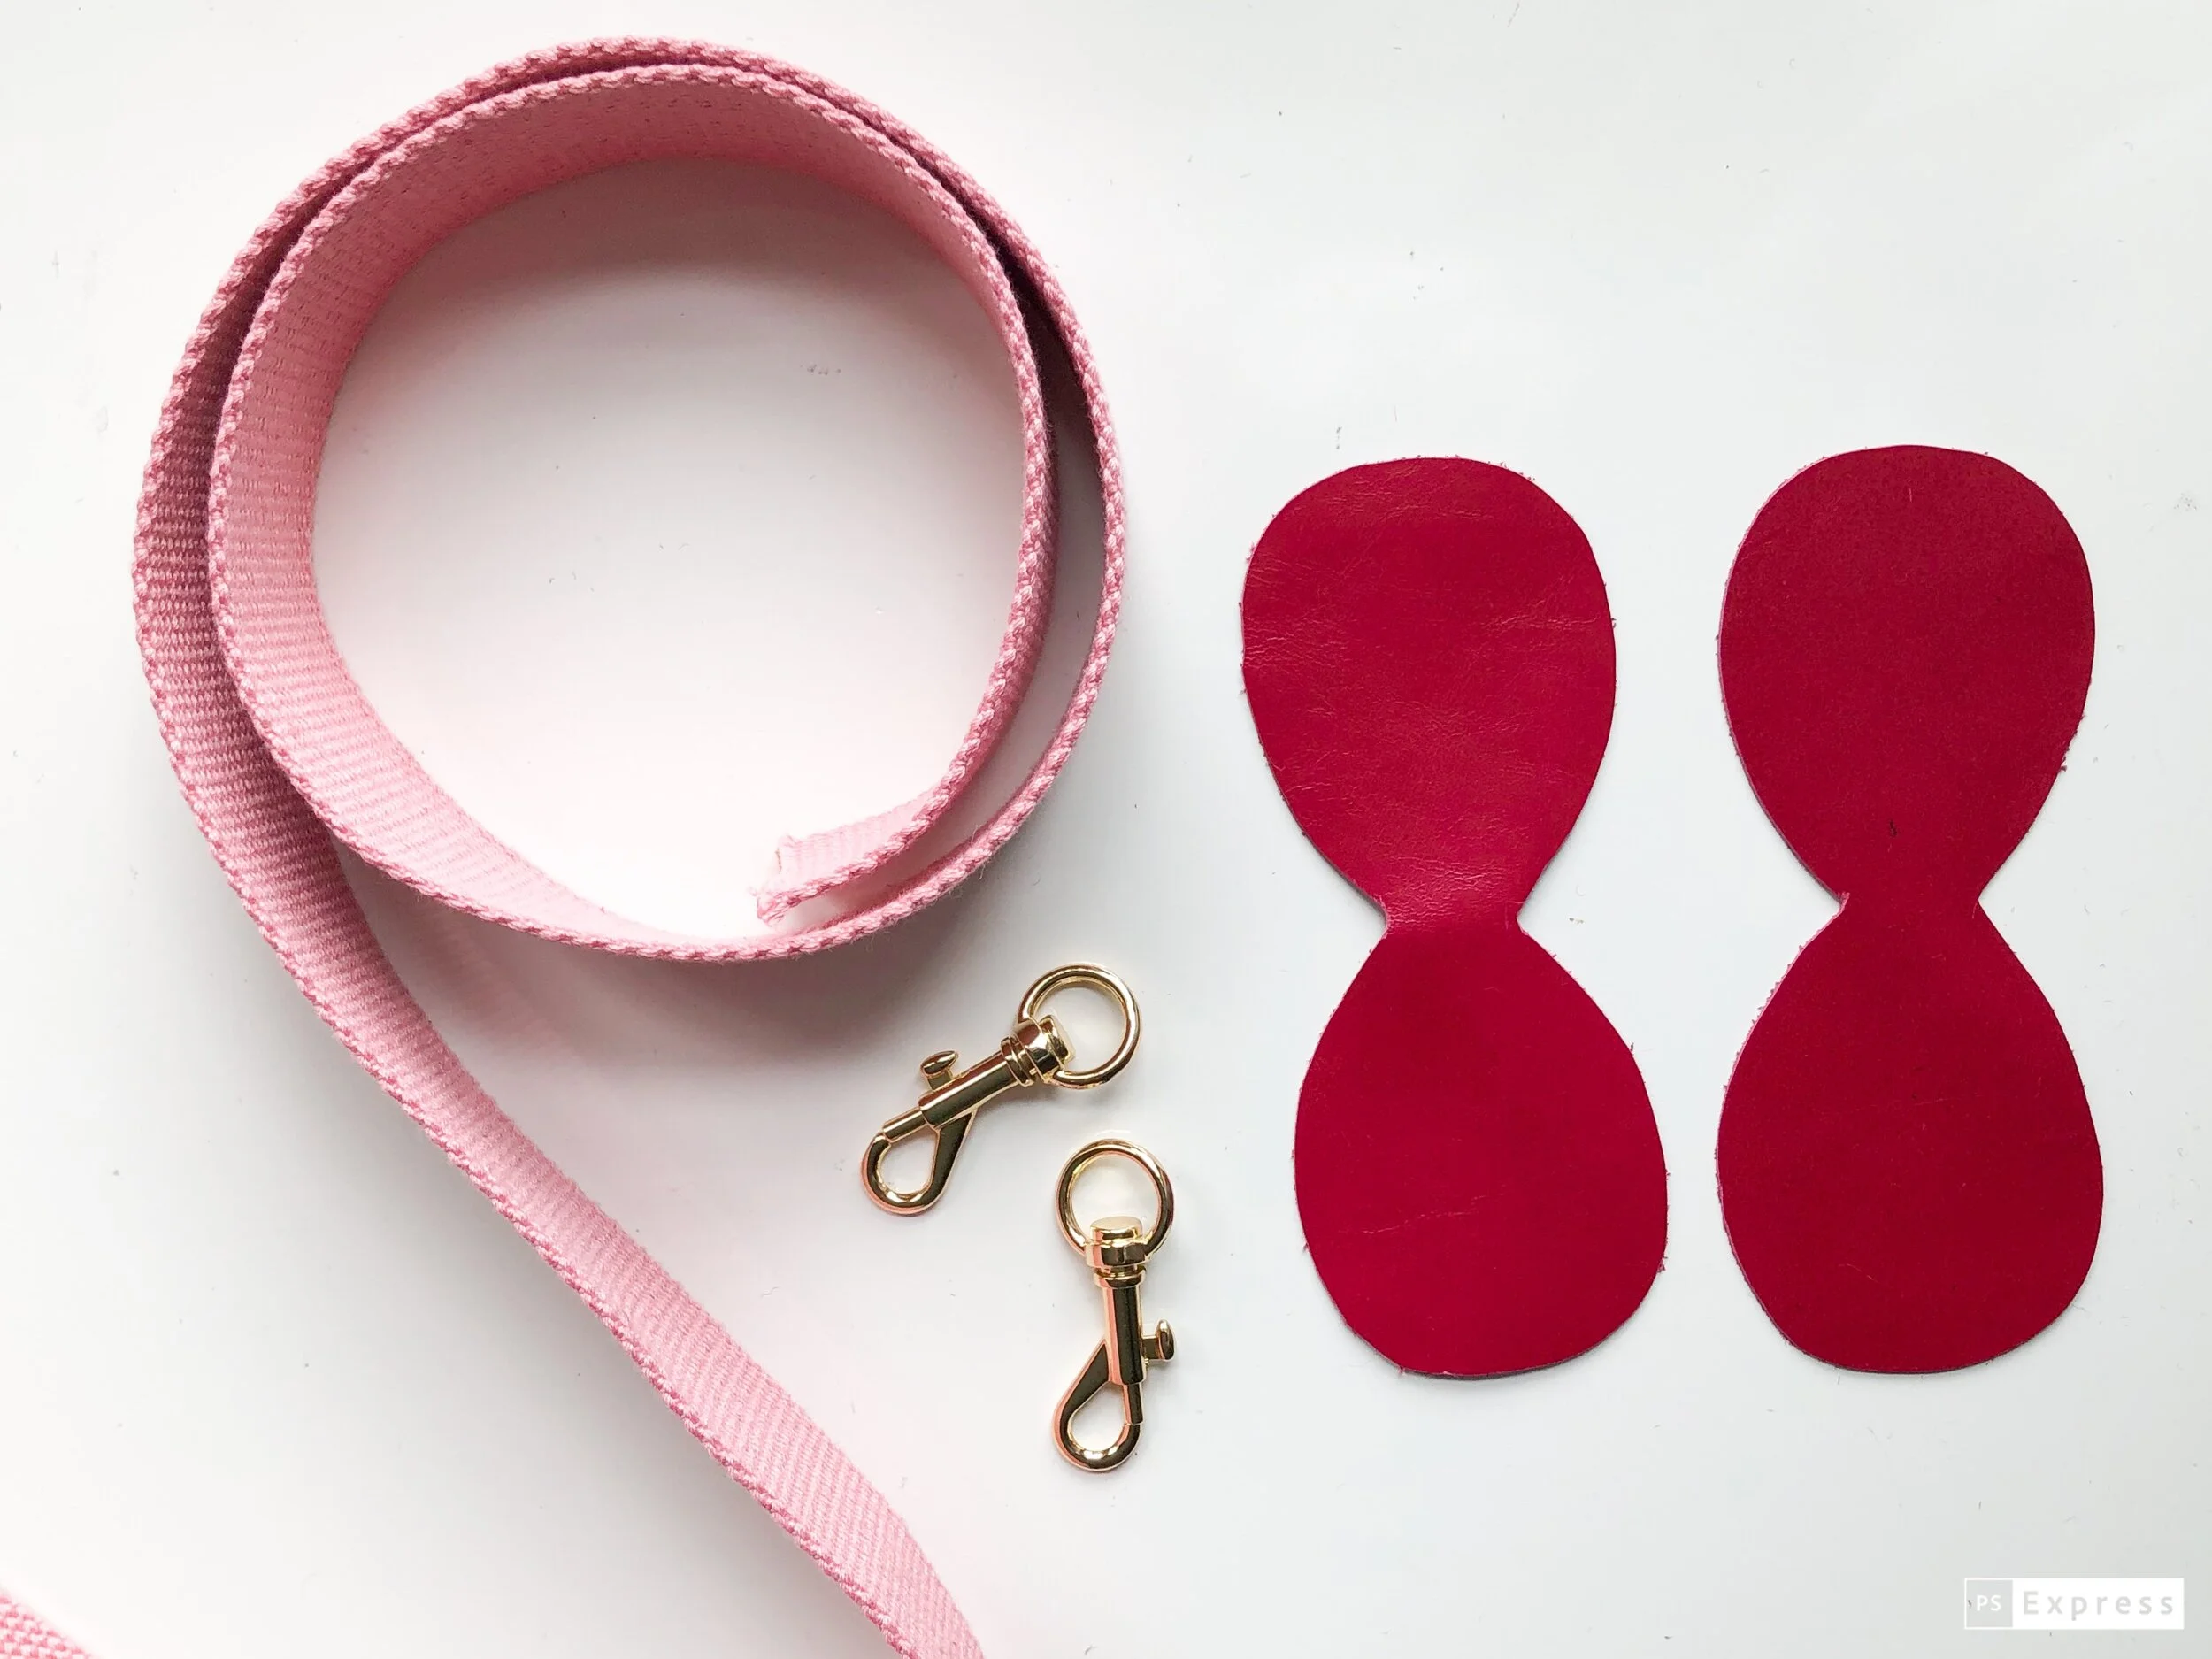
MATERIALS AND SUPPLIES
Sewing Machine with a walking foot
Leather scraps, (8 inch square should be enough)
Two 3/8” x 1 1/2” Swivel Snap Hook for the rounded cap; Two 1 1/2” x 1 3/4” for the squared off version.
1 1/4 Yards of Cotton Webbing Mine is 38mm (roughly 1.5”) wide and 44” long
Mid-weight polyester thread to match leather
Scissors or Rotary cutter
Rubber Cement
Chalk or water soluble fabric marking pen
SIZE
Finished dimensions are approximately: 2”x 47”
NOTES
See previous blog posts on sewing with leather, determining the best strap length and using an adjustable slider .
The leather used in this tutorial is from Leather, Suede, Skins, Inc. in NYC
For best results when sewing with leather, the stitch length should be set to about 7-10 stitches per inch depending on the thickness of the leather. Stitches that are too short make too many holes in the leather which decreases stability.
You can adjust the length of the stitch by testing on a scrap of leather. Does the leather feed evenly? Are there any skipped stitches? How is the tension? Are both the top and bottom threads flat and even?

PATTERN INSTRUCTIONS
Please read through the entire pattern before beginning your bag.
THE PATTERN
If you haven’t used a PDF Pattern before, here is a quick tutorial on printing and assembly: PDF Pattern
For more information on working with patterns, see pages 14-18 in my book, Sew Bags: The Practical
Guide to Making Purses, Totes, Clutches & More; 13 Skill-Building Projects C&T Publishing, 2019
PREPARE
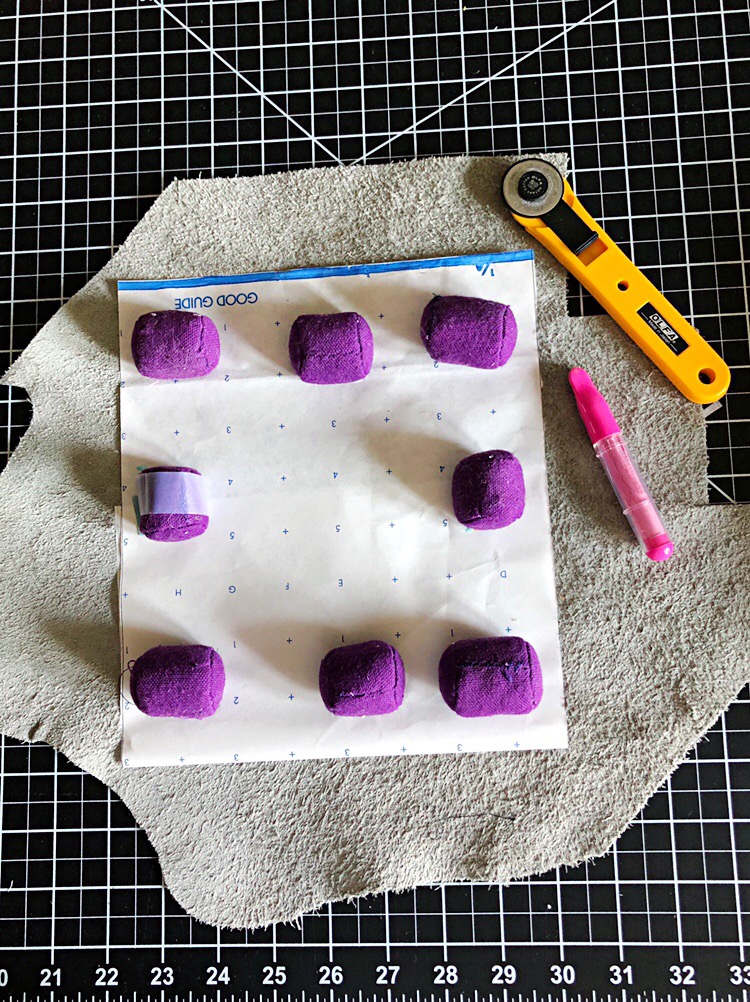
There are two end cap styles to choose from. Please be sure that you select the appropriate sized hardware and webbing to fit. For this tutorial, I am using the more rounded off shape to cap my strap.
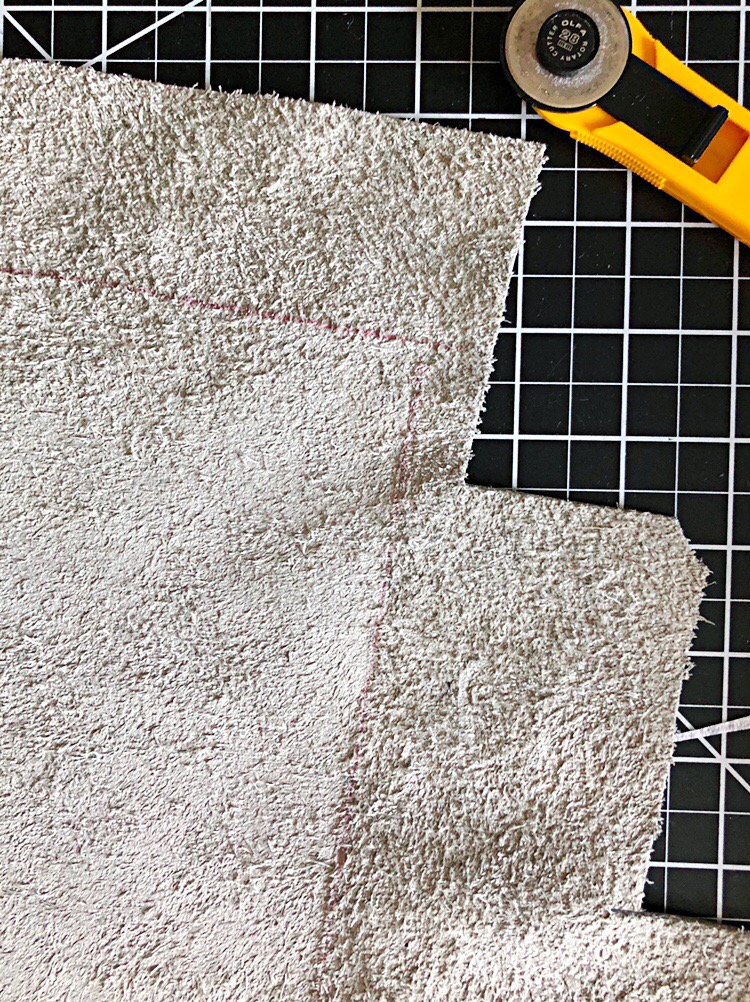
Trace the End Cap pattern onto the back side of the leather piece. Repeat for the second piece.

CUT
Carefully cut around the traced line.
Measure and cut the webbing to your desired length. Here is a recent article that may help guide you- or you can just measure a strap that you already own and that fits comfortably.
HARDWARE
Slide the leather piece into the bottom ring of the snap hook. I find it is easier to fold the leather in half, lengthwise (like a hotdog) and thread it through the ring. Once it is centered, unfold and flatten.

In a well- ventilated area, apply a generous glop of rubber cement to the center of the inside of the leather. Let it sit a moment to get tacky. Place the end of the webbed strap centered on the leather- making sure that the webbing is completely inside the leather. Press to help the rubber cement to adhere.

Add another bit of rubber cement to the top of the strap and press the leather to seal. Allow to dry for a few minutes.

Repeat for the opposite side of the strap end.
MARK
Take a piece of chalk or a water soluble pen and mark the stitching line on the outside of the leather.
SEW
Edgestitch around the end cap. You will be sewing a box that is about one and a half inches square. If you would prefer, feel free to round out your stitching instead (like I did) by just sewing 1/4” from the edge of the leather. It is easier to sew a box shape and get it right the first time. Whichever shape you choose, just try to sew slowly. You can even “walk” your machine if you need to.
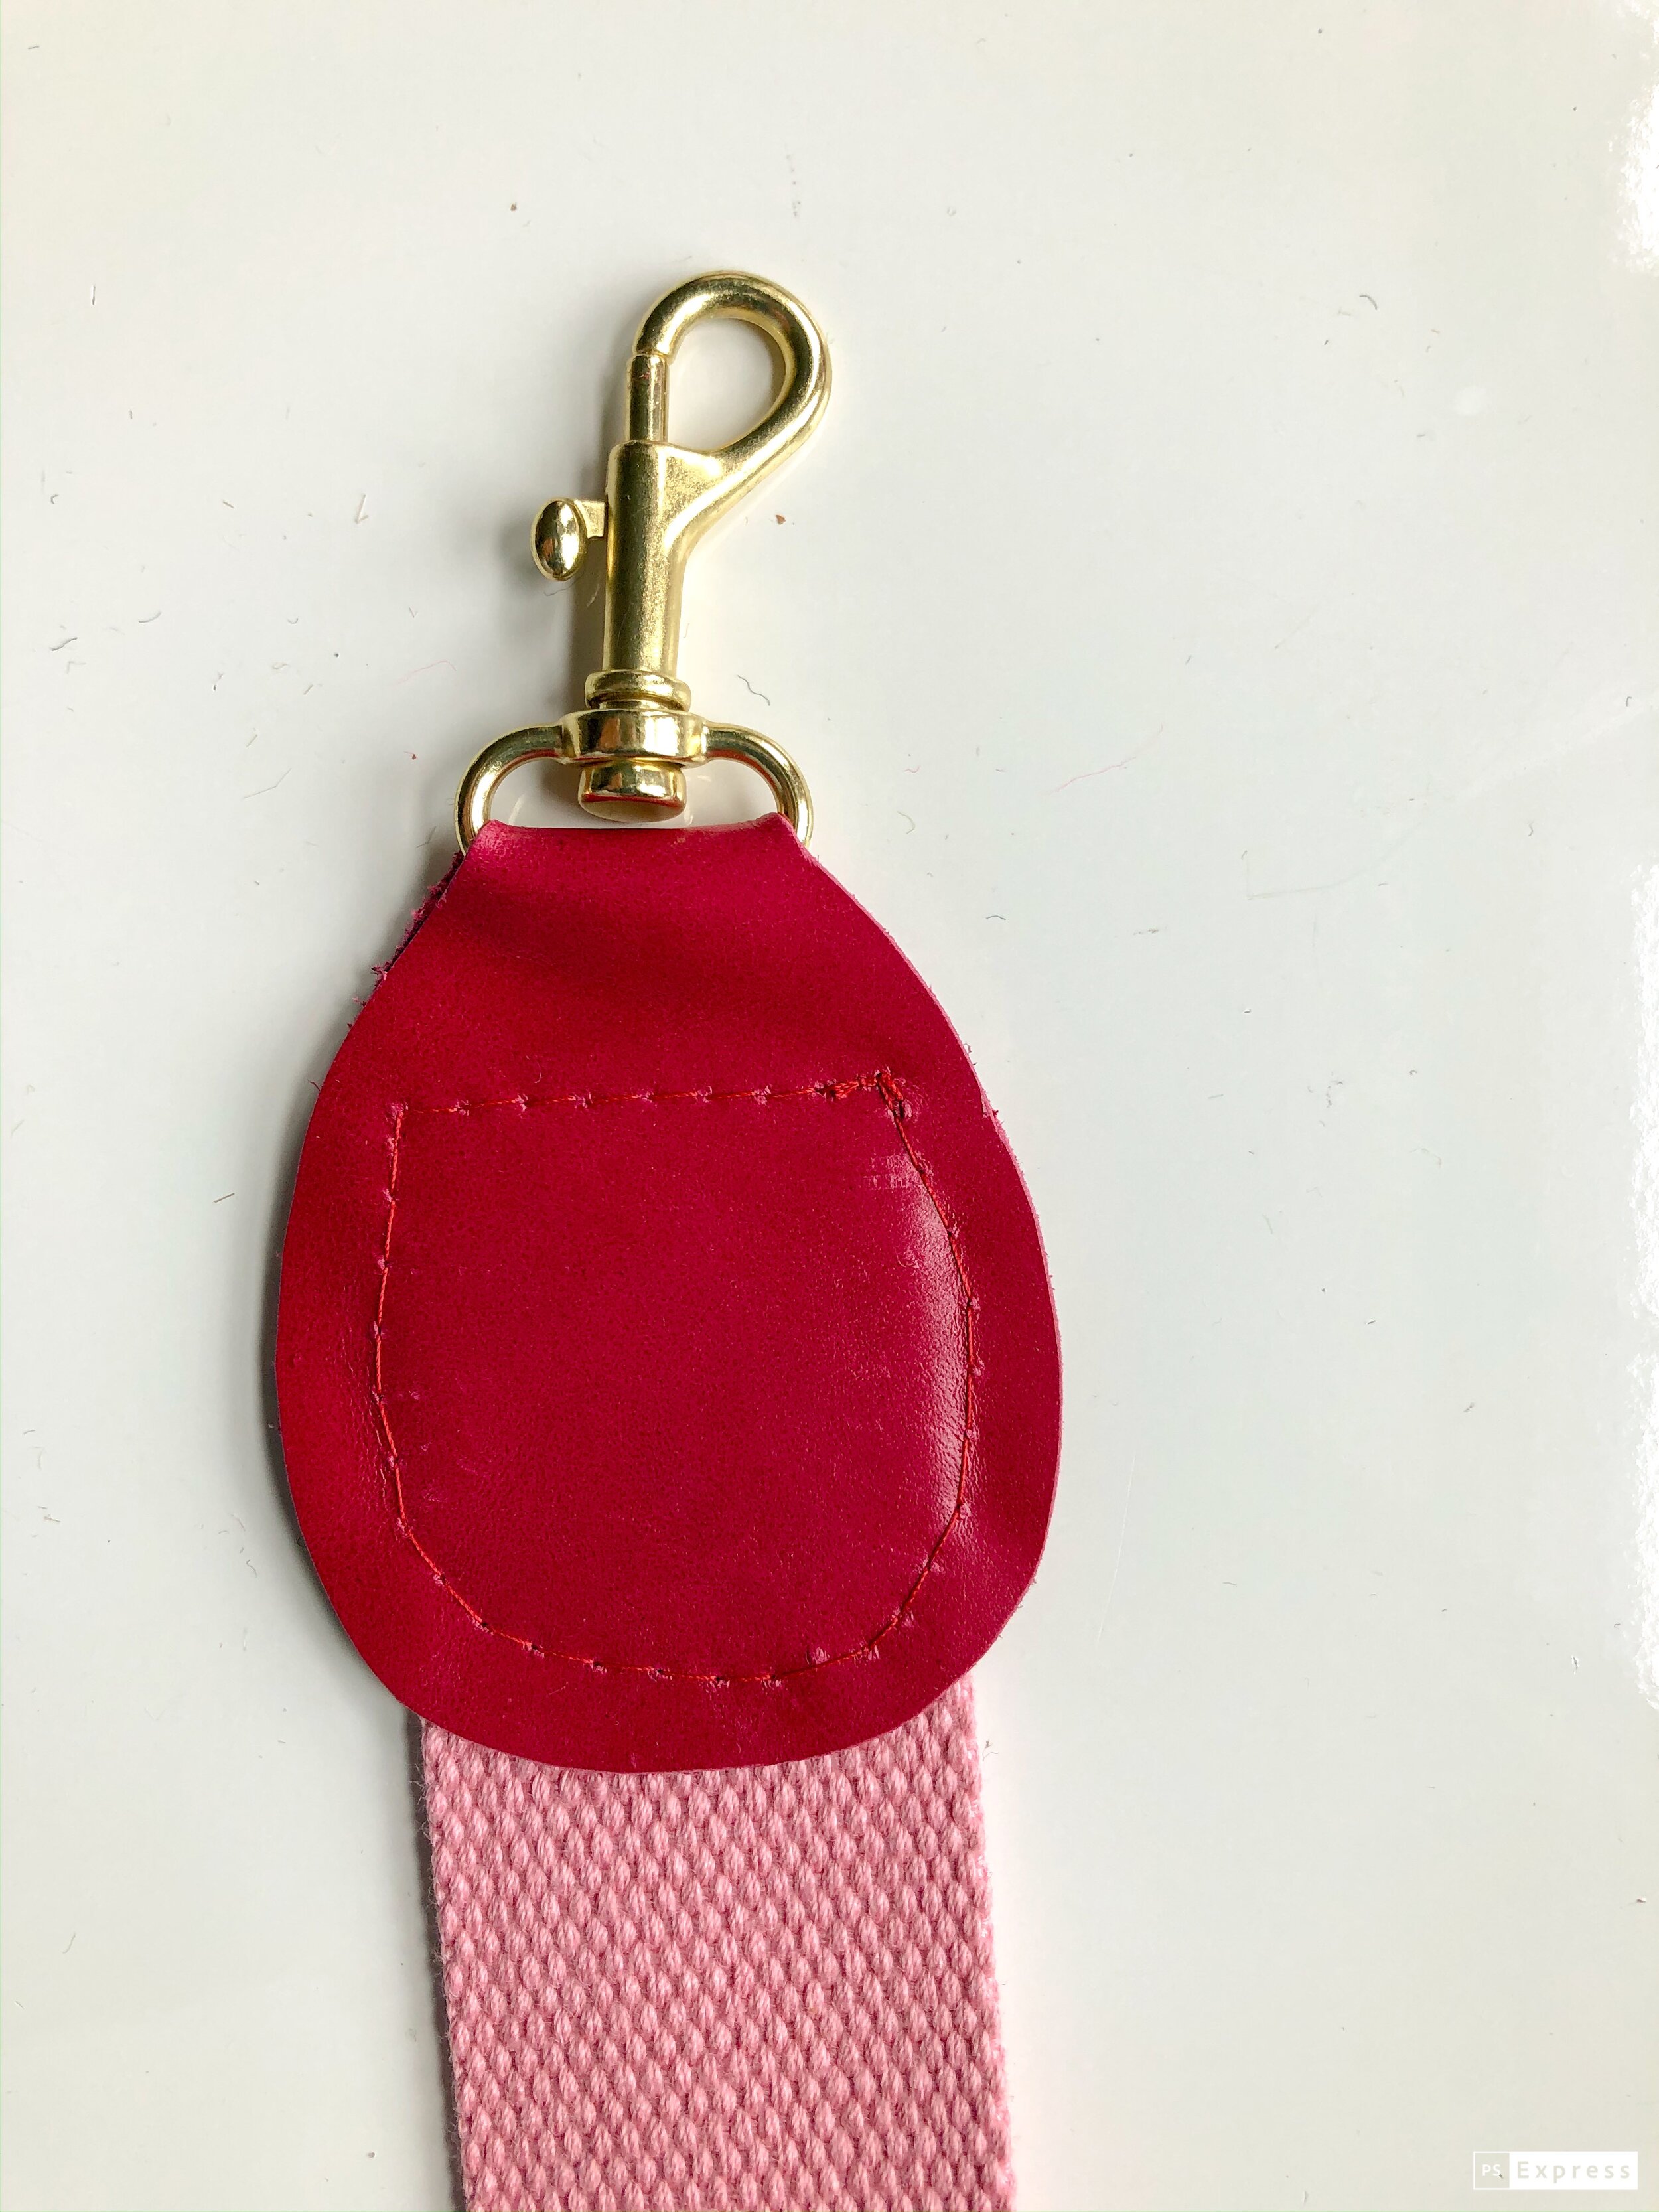
TRIM THREADS
Instead of back stitching, I generally recommend leaving long tails and hand knotting the ends, as backstitching can cut the leather. To hide the tails, tie in a double knot as close to the stitch as possible. Thread both ends of the thread onto a hand sewing needle. Insert the needle into the back of the strap of the underside of the seam. Pull through. Tie once again and snip.
Pictures of this method and more details are available here.
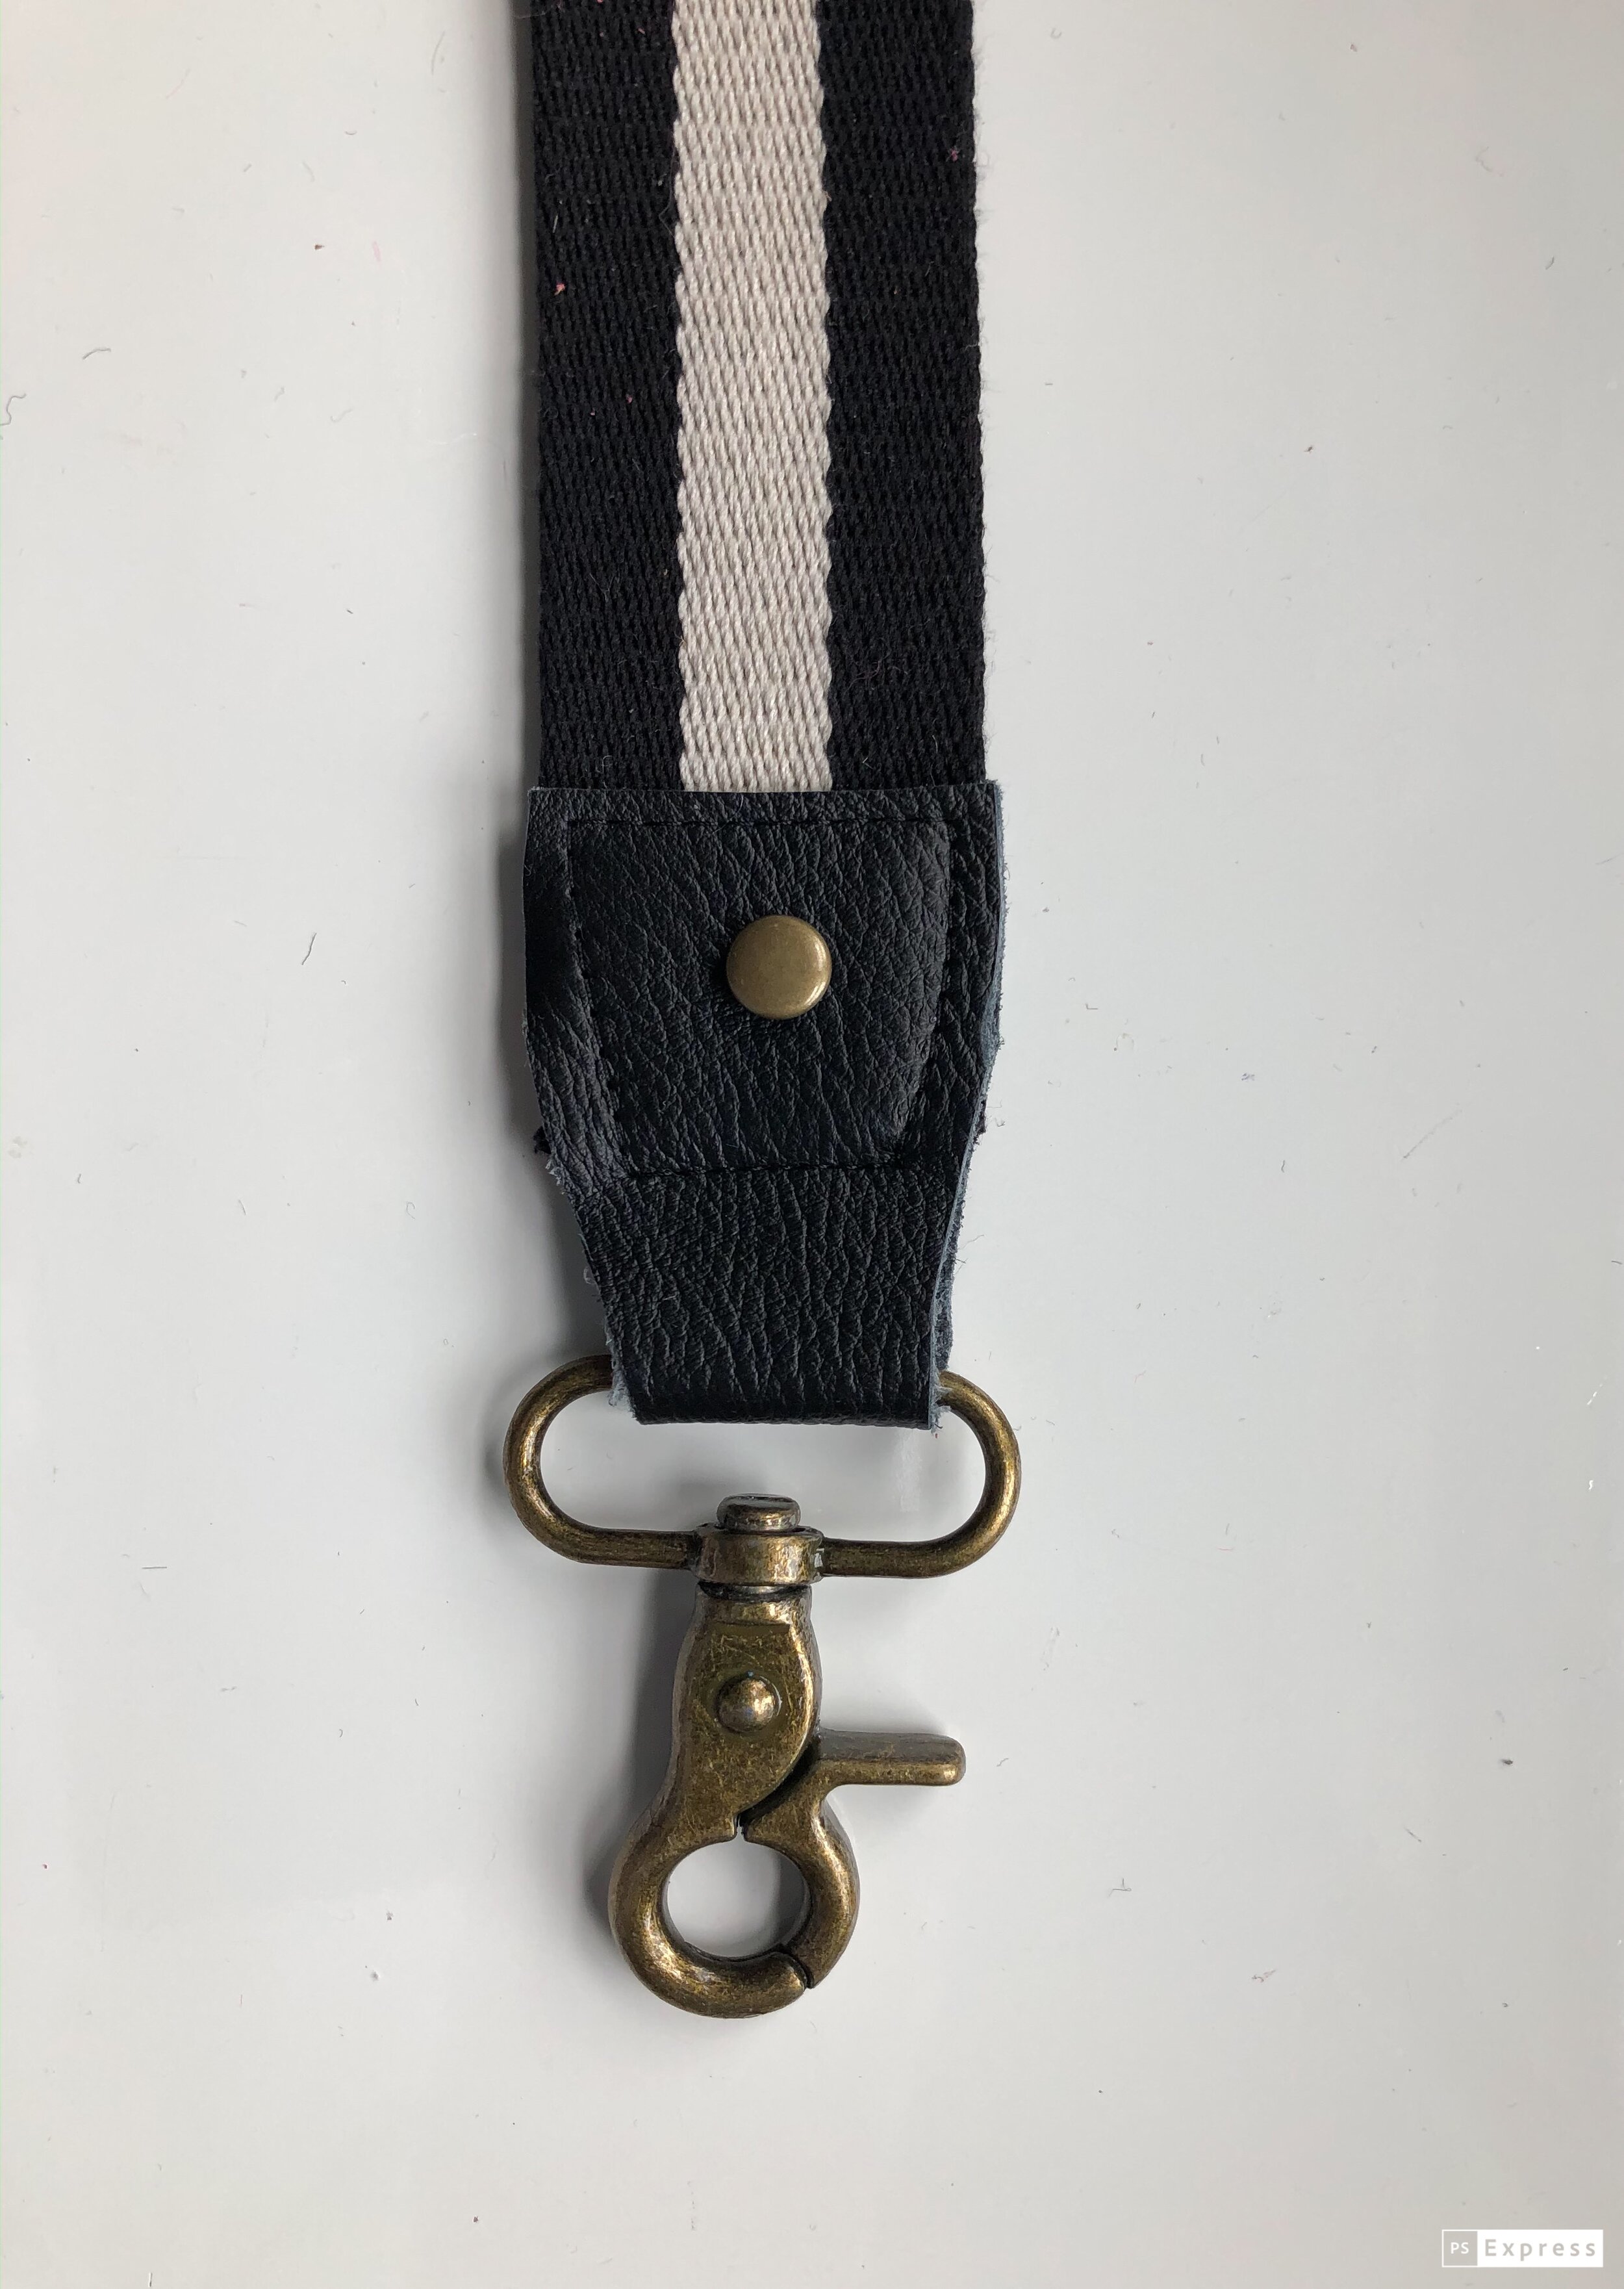
I added a rivet to this strap to both dress it up and to provide some additional reinforcement.

My next strap is all laid out and ready to go!
This accessory strap can be used with any bag that has a removable strap. Simply unhook the original, and swap it out for the new and improved.
With this fully customized option, you can breathe new life into old bags. Whether you wear it messenger or standard shoulder style, it is sure to give each outfit some unique style appeal. How will you wear yours? Please share using the hashtags #sewbags #sewbagsthebook #littlestitchstudio
For more bag patterns and sewing techniques, be sure to check out my new book! Sew Bags: The Practical Guide to Making Purses, Totes, Clutches & More; 13 Skill-Building Projects
XOXO, Hilarie

Tips and Tricks for Sewing with leather
There is just nothing like sewing or crafting with beautiful materials. Chief among them for me is leather.
One of the reasons that I was late to release a pattern that requires leather is that for many people, it is tricky to acquire. It is not like you can stop by your local fabric shop and pick up a yard or two. Additionally, while leather is not difficult to sew, you do have to have a few extras available to make it turn out looking fantastic.
There is just nothing like sewing or crafting with beautiful materials. Chief among them for me is leather.
One of the reasons that I was late to release a pattern that requires leather is that for many people, it is tricky to acquire. It is not like you can stop by your local fabric shop and pick up a yard or two. Additionally, while leather is not difficult to sew, you do have to have a few extras available to make it turn out looking fantastic. When I wrote my book, one thing that I really wanted to stress was to not feel the urge to go out and purchase everything that you think you “might” need. As it never really ends- I promise! 45 years in and each time I learn a new technique or take interest in some new esoteric path, the cash flow woes begin! Which brings me back to the point, “Do as I say, not as I do” :)
Life is funny sometimes! Through complete serendipity, and the power of Instagram, I have made a new friend, Faina, who happens to own a leather shop! Leather, Suede, Skins, Inc. in NYC. She so generously shared some of her gorgeous leather with me to make the Poppy Convertible Tote and tutorial. But more than that, you now have a place to shop for leather and an expert to consult! Our hope is that together, we can show you how easy and fun it is to sew with leather.
There are a few supplies that you will need to get started. While some are truly necessary to achieve the correct finished look and make the process so much more enjoyable! There are a few others that are more in the “nice to have” category. I’ll share both with you.
MY FAVORITE LEATHER SEWING TOOLS
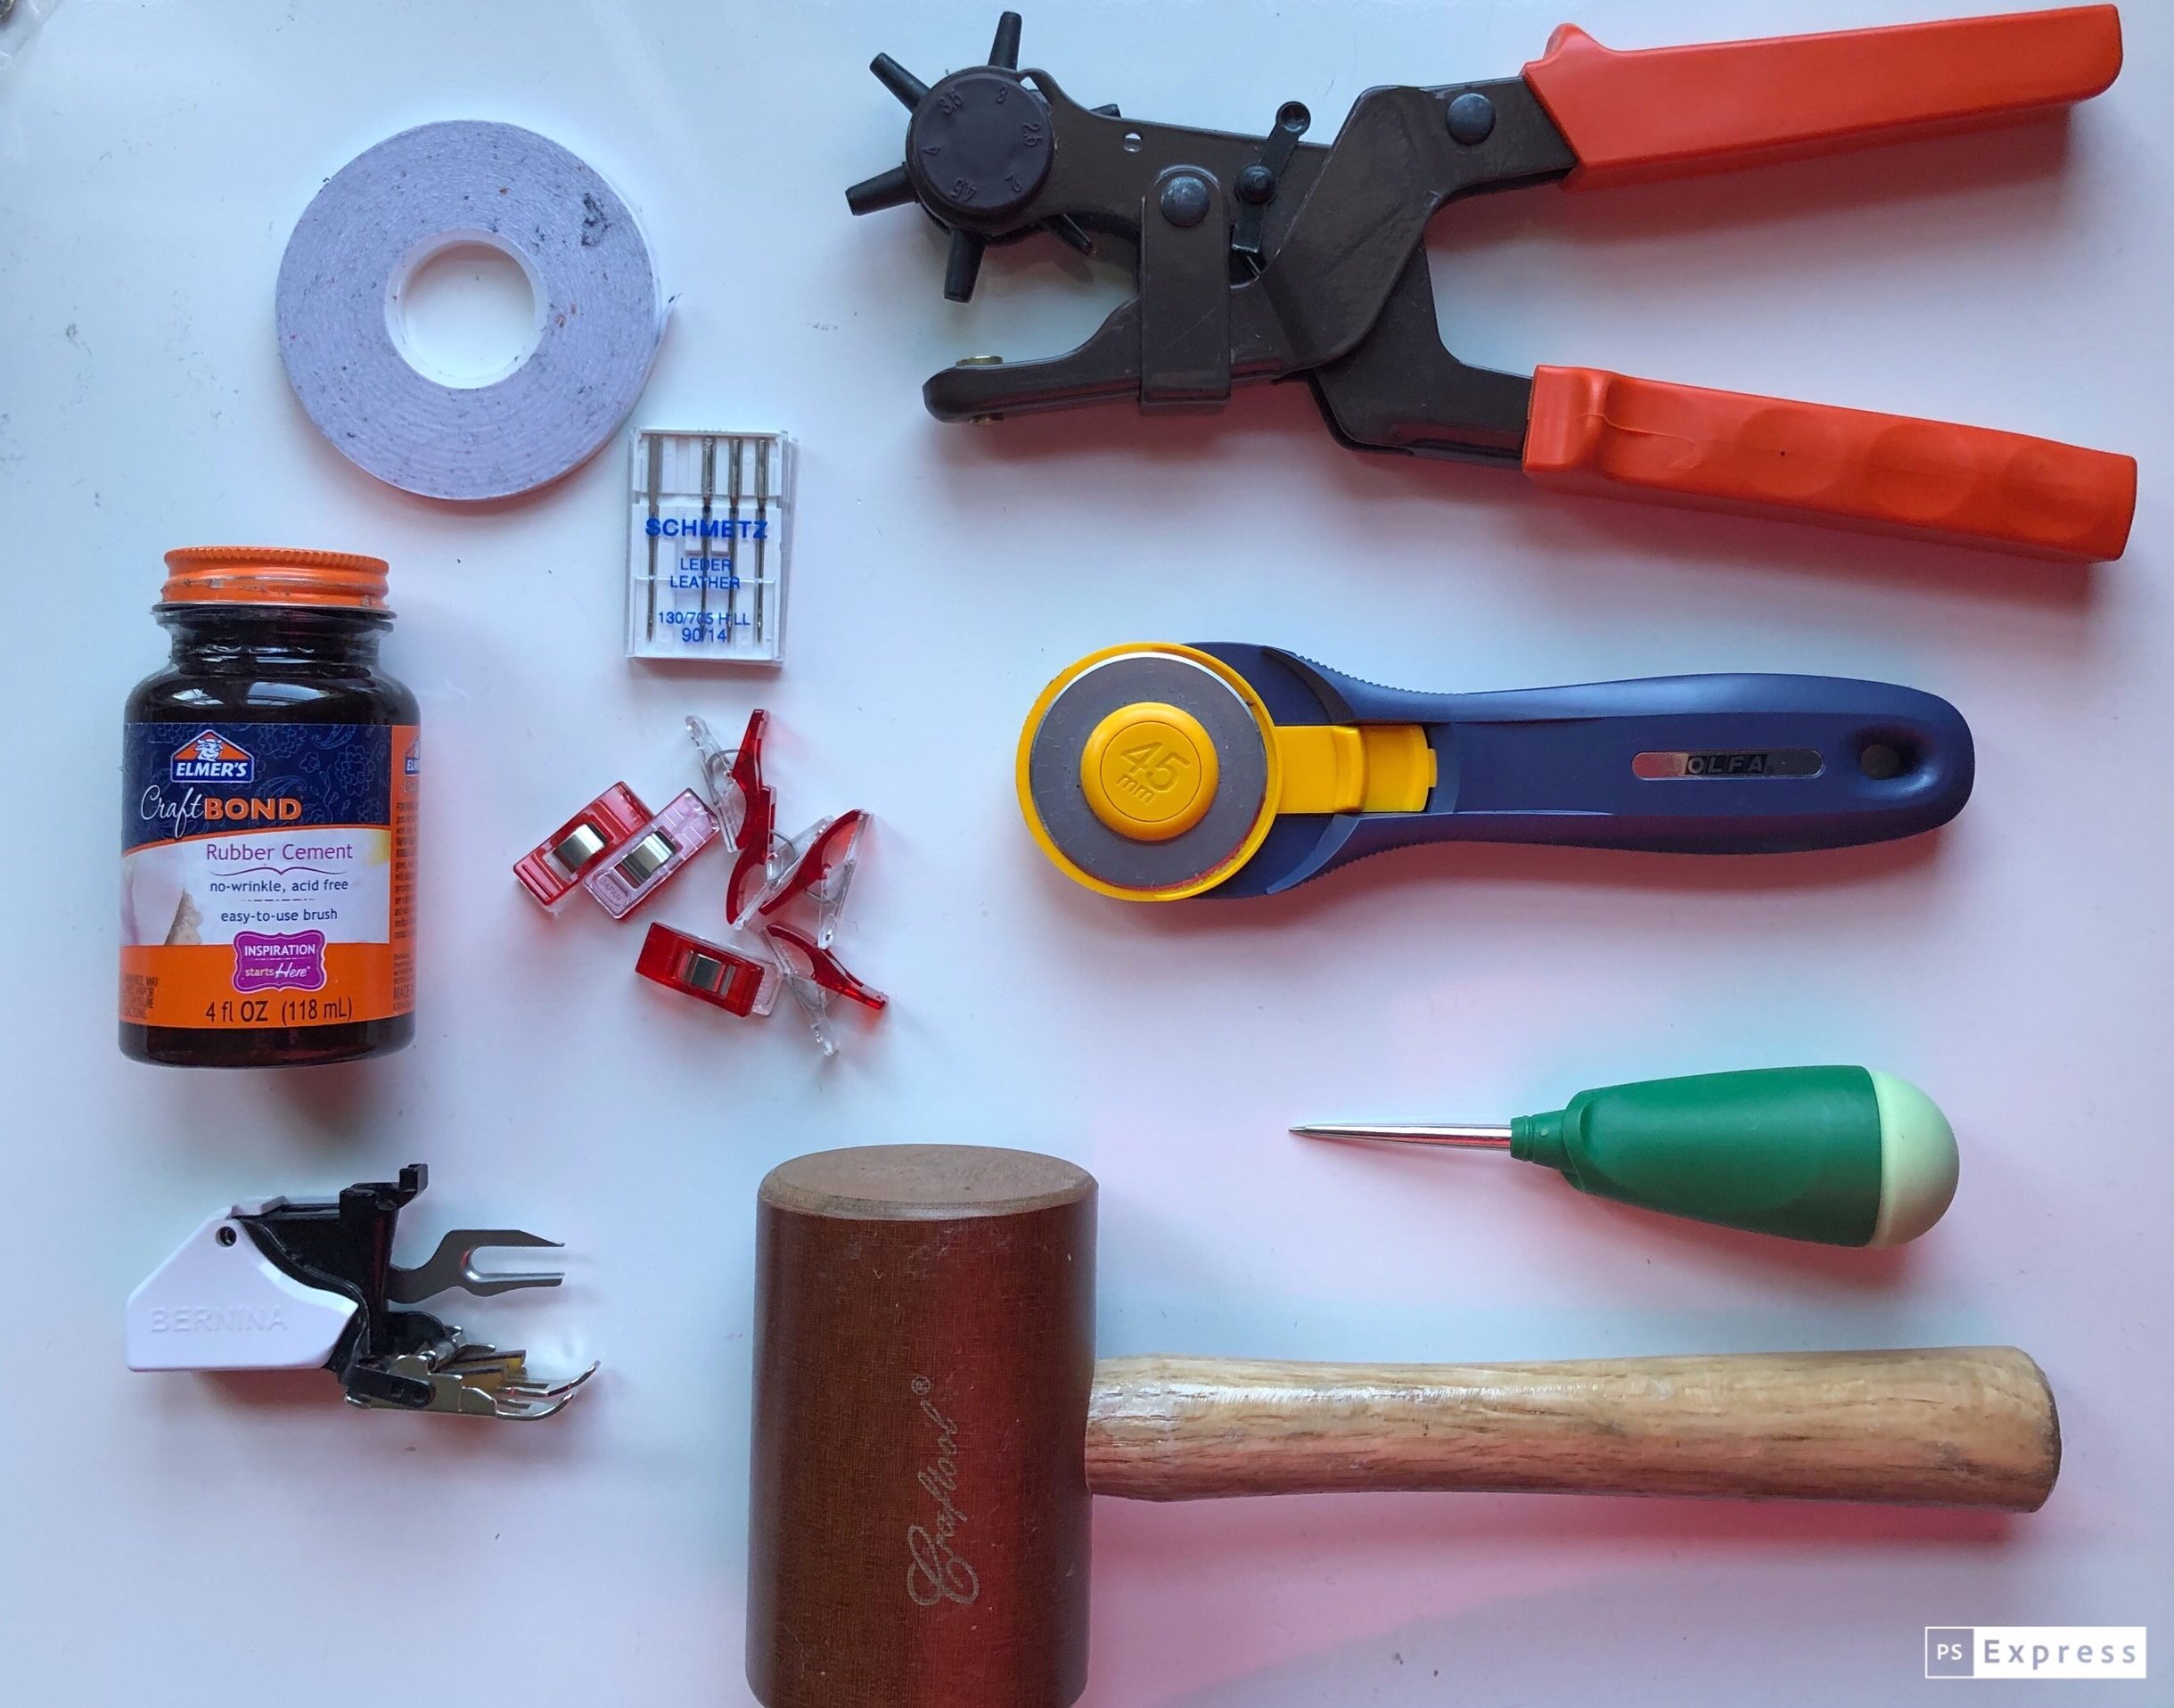
Walking Foot, or Even-Feed Foot Don’t be intimidated- the walking foot is your friend! This genius device will evenly feed multiple layers of fabric or leather through your machine. No shifting, dragging or puckering.
Silk or Polyester Thread- this is my favorite Additonally, topstitching thread or denim thread works too. Be sure that it is medium weight and made of silk or polyester. Cotton thread will fray and deteriorate over time due to the chemical reaction to the tannins in the leather.
Double Sided Tape Double-sided leather tape comes can hold layers of leather together for stitching and can also be used to hold seams flat. Please remember to test on scrap leather before trying on your project.
Wonder Clips (Medium sized binder clips work too.) Unlike fabric, pinning leather will leave holes. Instead try using clips.
Microtex or leather Sewing Machine Needles These needles have a special shape and point which is designed to pierce leather with little resistance.
Mallet A rubber or bakelite mallet is used to lightly tap seams in order to flatten them.
Rubber Cement Rubber cement works well for gluing seams flat.
Straight Awl My go-to tool to punch holes or enlarge existing holes in canvas and leather.
Rotary Cutter- This smaller one is great for detail work and the larger size can go through leather so easily.
Leather Hole Punch Punch neat and clean holes in leather and canvas. An essential for preparing straps for hardware.
While each of these tools is really helpful, the ones that you truly “need” to begin sewing with leather are the correct needle, thread, walking foot and clips or tape. The rest can be acquired over time. You do not have to have every notion, attachment and gadget. Instead, I encourage you to start small and build your supply stash as you build your skills.
Download your free PDF sewing pattern to make the Poppy Convertible Tote
When learning to sew- or to sew with a new techniques, please take your time and concentrate on accuracy. Unlike sewing with regular fabric, sewing with leather, the threads can't just be pulled out without leaving holes from the previous stitching. By slowing down and concentrating on learning a new skill, you're much more likely to achieve a result you're really proud of.
I hope these tips help you feel more confident about sewing with leather. If you have any questions please feel free to get in touch. And if you’re looking for a fun project to practice your leather sewing skills, the Poppy Convertible Tote is a great first project. It only requires sewing straight lines- no curves, and the pattern gives you detailed, fully photographed instructions to guide you step by step as you make your first leather bag.
XOXO, Hilarie
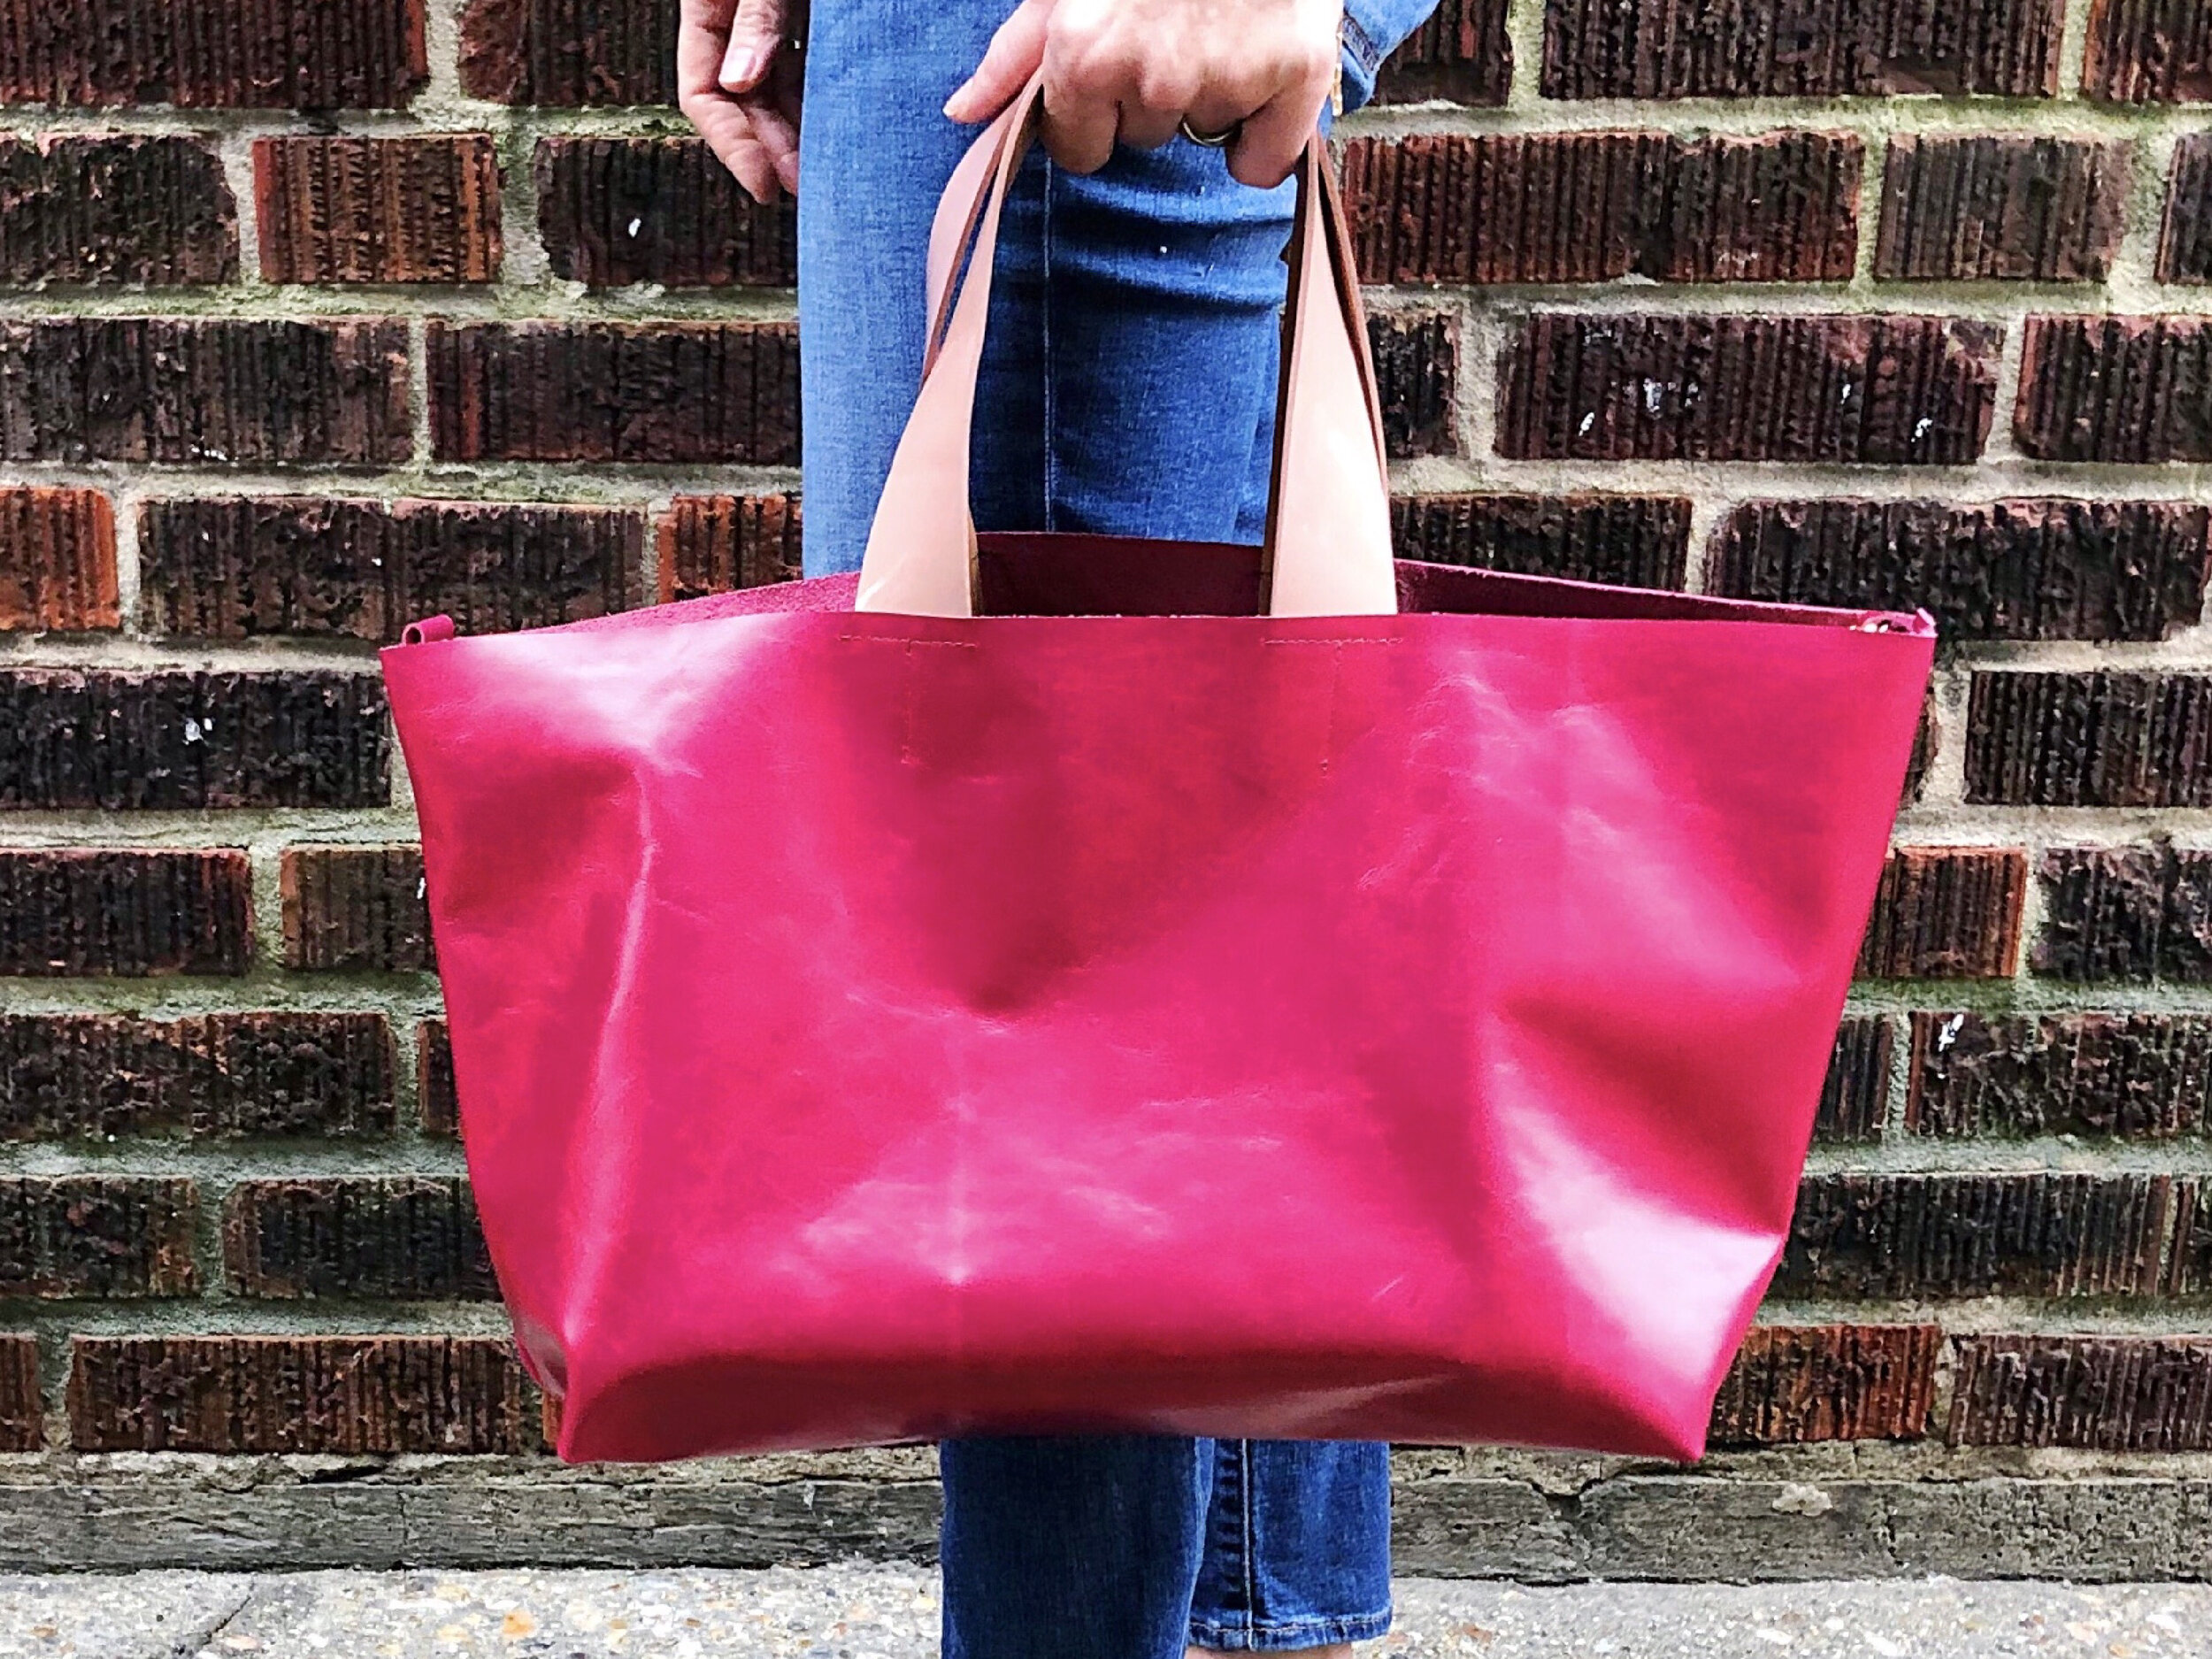


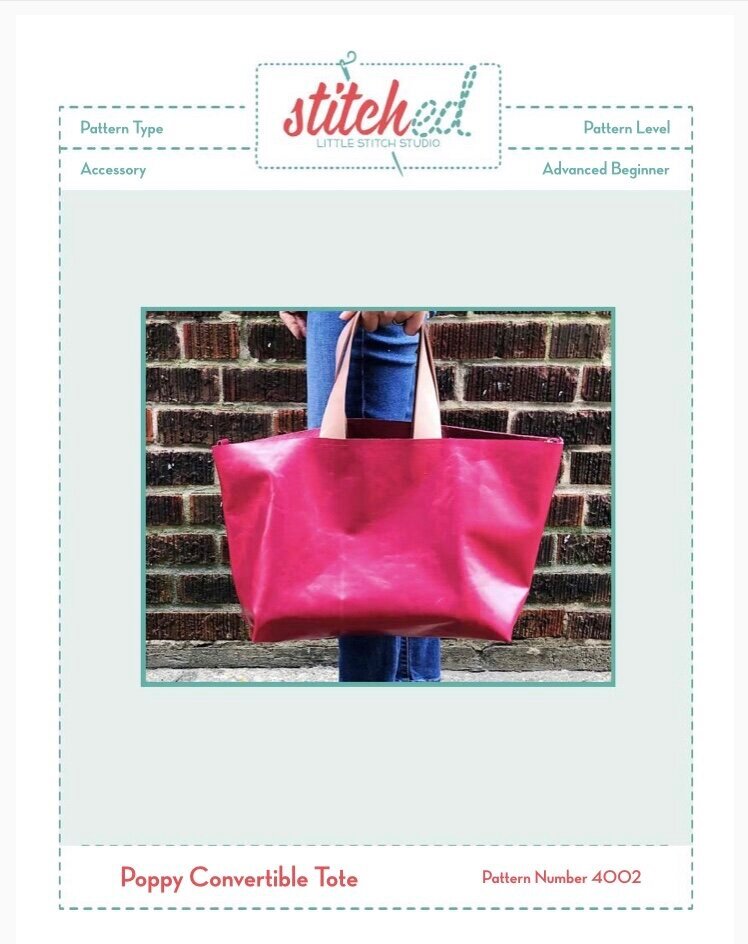
The Poppy Convertible Tote PDF Pattern and Tutorial
Welcome to my newest pattern, The Poppy Convertible Tote. Poppy is at once classic and modern. A beautiful leather tote that easily cinches to a classic shoulder bag. Featuring comfortable cotton webbing straps, an interior pocket plus hardware that functions as both clasp and optional cross-body strap holder.
Poppy is the perfect bag for learning to sew with leather. It has few seams and best of all- it doesn’t require fitting!

Introducing Poppy!
Welcome to my newest pattern, The Poppy Convertible Tote. Poppy is at once classic and modern. A beautiful leather tote that easily cinches to a classic shoulder bag. Featuring comfortable cotton webbing straps, an interior pocket plus hardware that functions as both clasp and optional cross-body strap holder.
LEARN TO SEW A LEATHER BAG
Poppy is the perfect bag for learning to sew with leather. It has few seams and best of all- it doesn’t require fitting! Speaking of leather, it is time that you start shopping so that you can get started on your bag. You will need about 7.5 square feet (0.7 m2) of cow hide with an approximate weight of 2-3 ounces for this bag. Cow hide is much stiffer than some other skins such as lamb or goat. That stiffness is needed to hold the shape. The leather for my bags is from Leather Suede Skins, Inc. in NYC. Call and ask for Faina. She will help you select the ideal leather for your bag. Alternately, you can find leather online or a local specialty store.
FREE PDF PATTERN DOWNLOAD AND TUTORIAL
The PDF Version of the Poppy Convertible Tote is available now for instant downloading. It is formatted for printing at home on standard 8.5 x 11” or A5 paper. The PDF is 31 pages, 9 of which include the pattern. The rest is all instruction, tips and techniques. This pattern was designed to be made along with my book, Sew Bags: The Practical Guide to Making Purses, Totes, Clutches & More; 13 Skill-Building Projects.

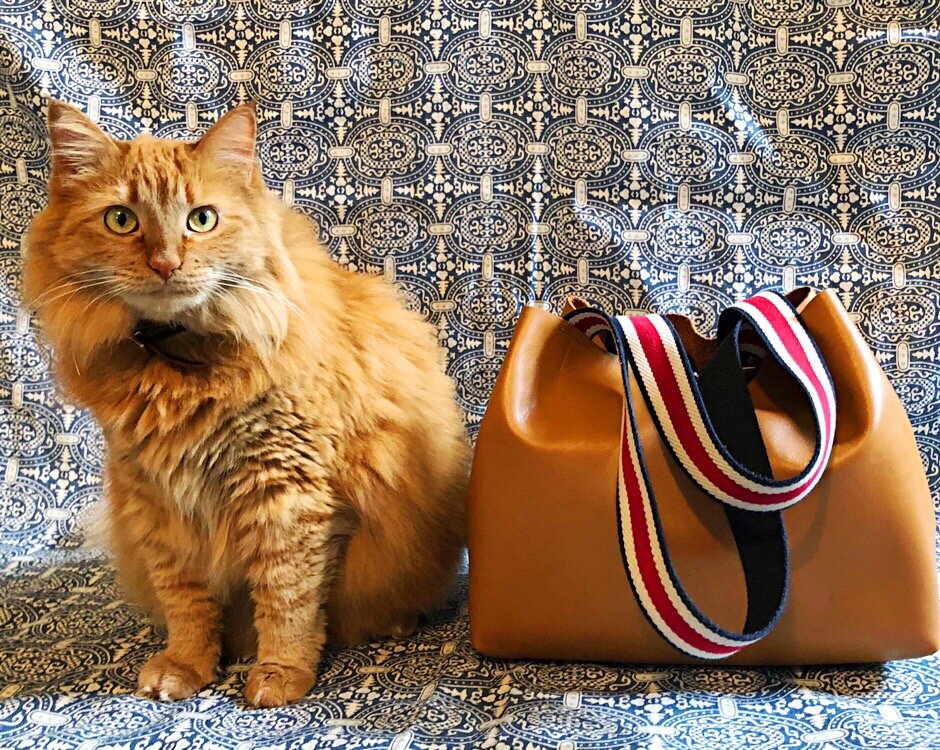
Poppy, my sweet kitty with her bag.
This pattern is a long time coming, and I am so happy to finally be launching it. You can look forward to a sew along in the coming weeks.
I hope that you enjoy this pattern and learn a new skill or two. Please share your pictures- I can’t wait to see your finished bag.
XOXO, Hilarie
#poppyconvertibletote #sewbags
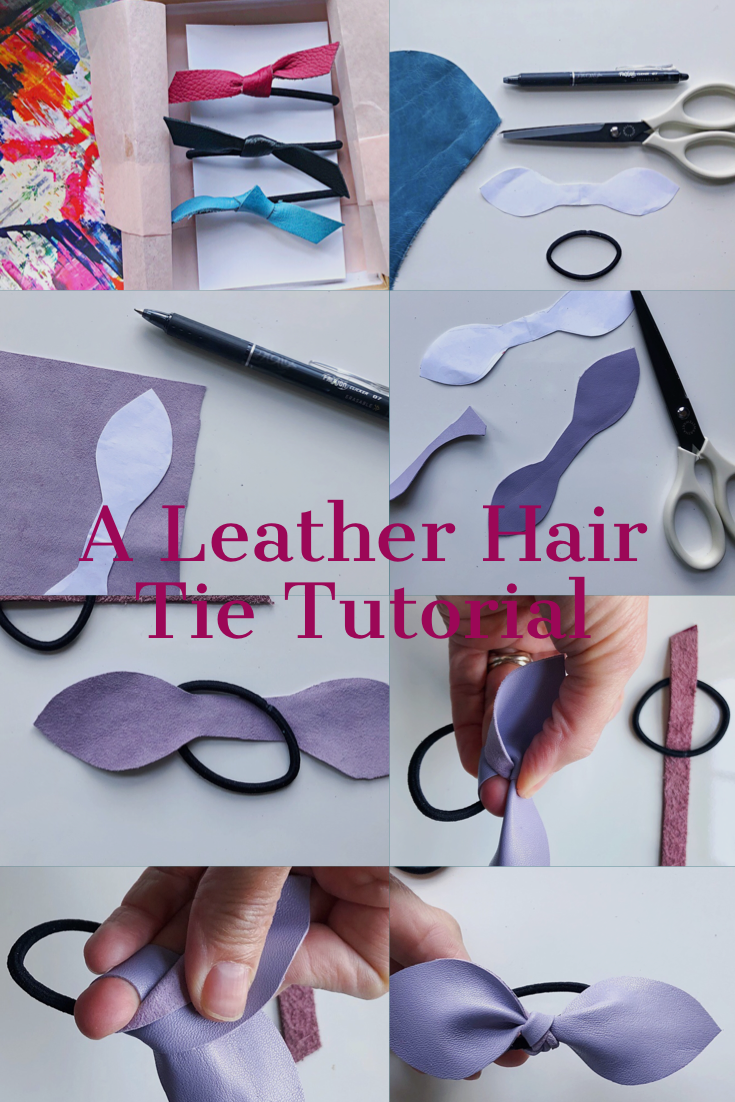
DIY Leather Hair Tie Tutorial
Have you ever tried sewing with leather? It isn’t nearly as tricky as it sounds. Later this month I will be releasing a free pattern for making a leather bag. Before that, I thought it might be fun to give you a small- and instantly gratifying project to get your mind thinking about all things leather.

Sewing With Leather, A Primer Series and Leather Hair Tie Tutorial
Have you ever tried sewing with leather? It isn’t nearly as tricky as it sounds. Later this month I will be releasing a free pattern for making a leather bag. Before that, I thought it might be fun to give you a small- and instantly gratifying project to get your mind thinking about all things leather.
Leather comes in many varieties, weights, textures and colors. It can be a bit intimidating to purchase and to cut into the first time. However, once you understand it- there is no turning back! Unlike fabric that is comes on a bolt, leather is sold in hides and pieces- and by weight. The weight though doesn’t refer to it’s actual weight. Instead it is a gauge of the leather’s thickness. Generally, each ounce of leather equals 1/64th of an inch or 0.4mm thickness.
Since leather comes from an animal, there will be some variation. As such, leather is generally listed for sale in a range of weight. For example 2-3 oz, 3-4 oz. Most home sewing machines will easily stitch leather up to about 3-3.5 ounces.
For the most part, the leather that I use is purchased from Abe’s Leather in Brooklyn, eBay, Etsy and Mood Fabrics. There is a new to me resource that I am excited to share, Leather Suede Skins, in NYC. Also- I tend to love to take apart old clothes and bags too. So keep the thrift store and your closet in mind as an alternative.
Price is based on quality, type of skin, country of origin, size and finish. It doesn’t have to be too expensive so shop around.
Once you have selected your leather, lay it out on a flat surface and examine the hide for imperfections, holes and variations in thickness. Leather does have a grain, but for bags and small accessories, it really isn’t necessary to place patterns along the grain line. Instead, arrange the pattern pieces to fit and to maximize the available leather.

When you have determined the optimal layout, you will want to place a pattern weight (or some close object that will function as a pattern weight and allow you to trace the pattern piece onto the leather. In working with leather, you do not want to use pins as they will leave permanent holes and marks.
Pattern weights holding pattern piece in place.

Non-standard pattern weights work well too!
Tracing a pattern on leather doesn’t really require anything special- a ruler and some kind of pencil. I tend to use a pen, pencil, chalk, marker or even a tracing wheel. It really depends on the color of the leather, how smooth or rough the hide is, and what is on my table at the time.

Leather is easily cut with sharp scissors or a rotary cutter. I generally use a rotary cutter for most things- but for this hair tie project, scissors work just fine.
Here are some of my favorite tools that I use for cutting leather:
Olfa Rotary Cutter I like both the 45 and the 28MM sizes.
Self-Healing Cutting Mat You will want a large mat to comfortably lay out your pieces to cut
Omnigrid Quilting Rulers These come in a variety of useful sizes. Because of their relative thickness, I prefer these rulers over others for guiding my rotary cutter. Fingers can get cut way too easily without the ruler.
In my next post I will share some tips on getting you started sewing with leather on the machine. Needles, feet, thread, interfacing and adhesives.
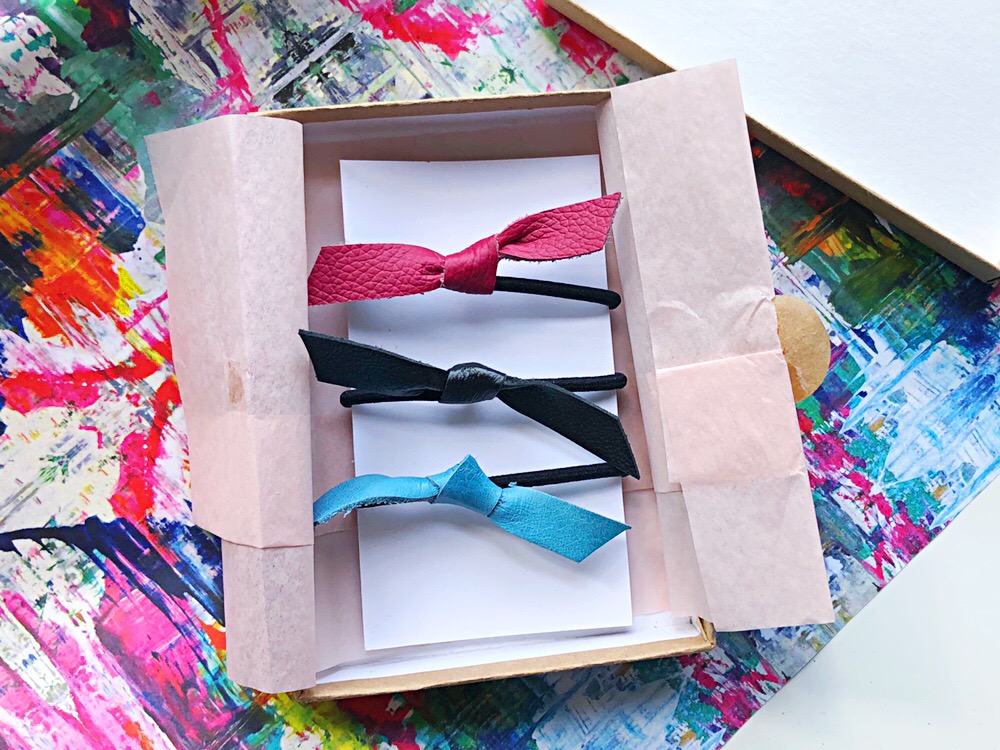
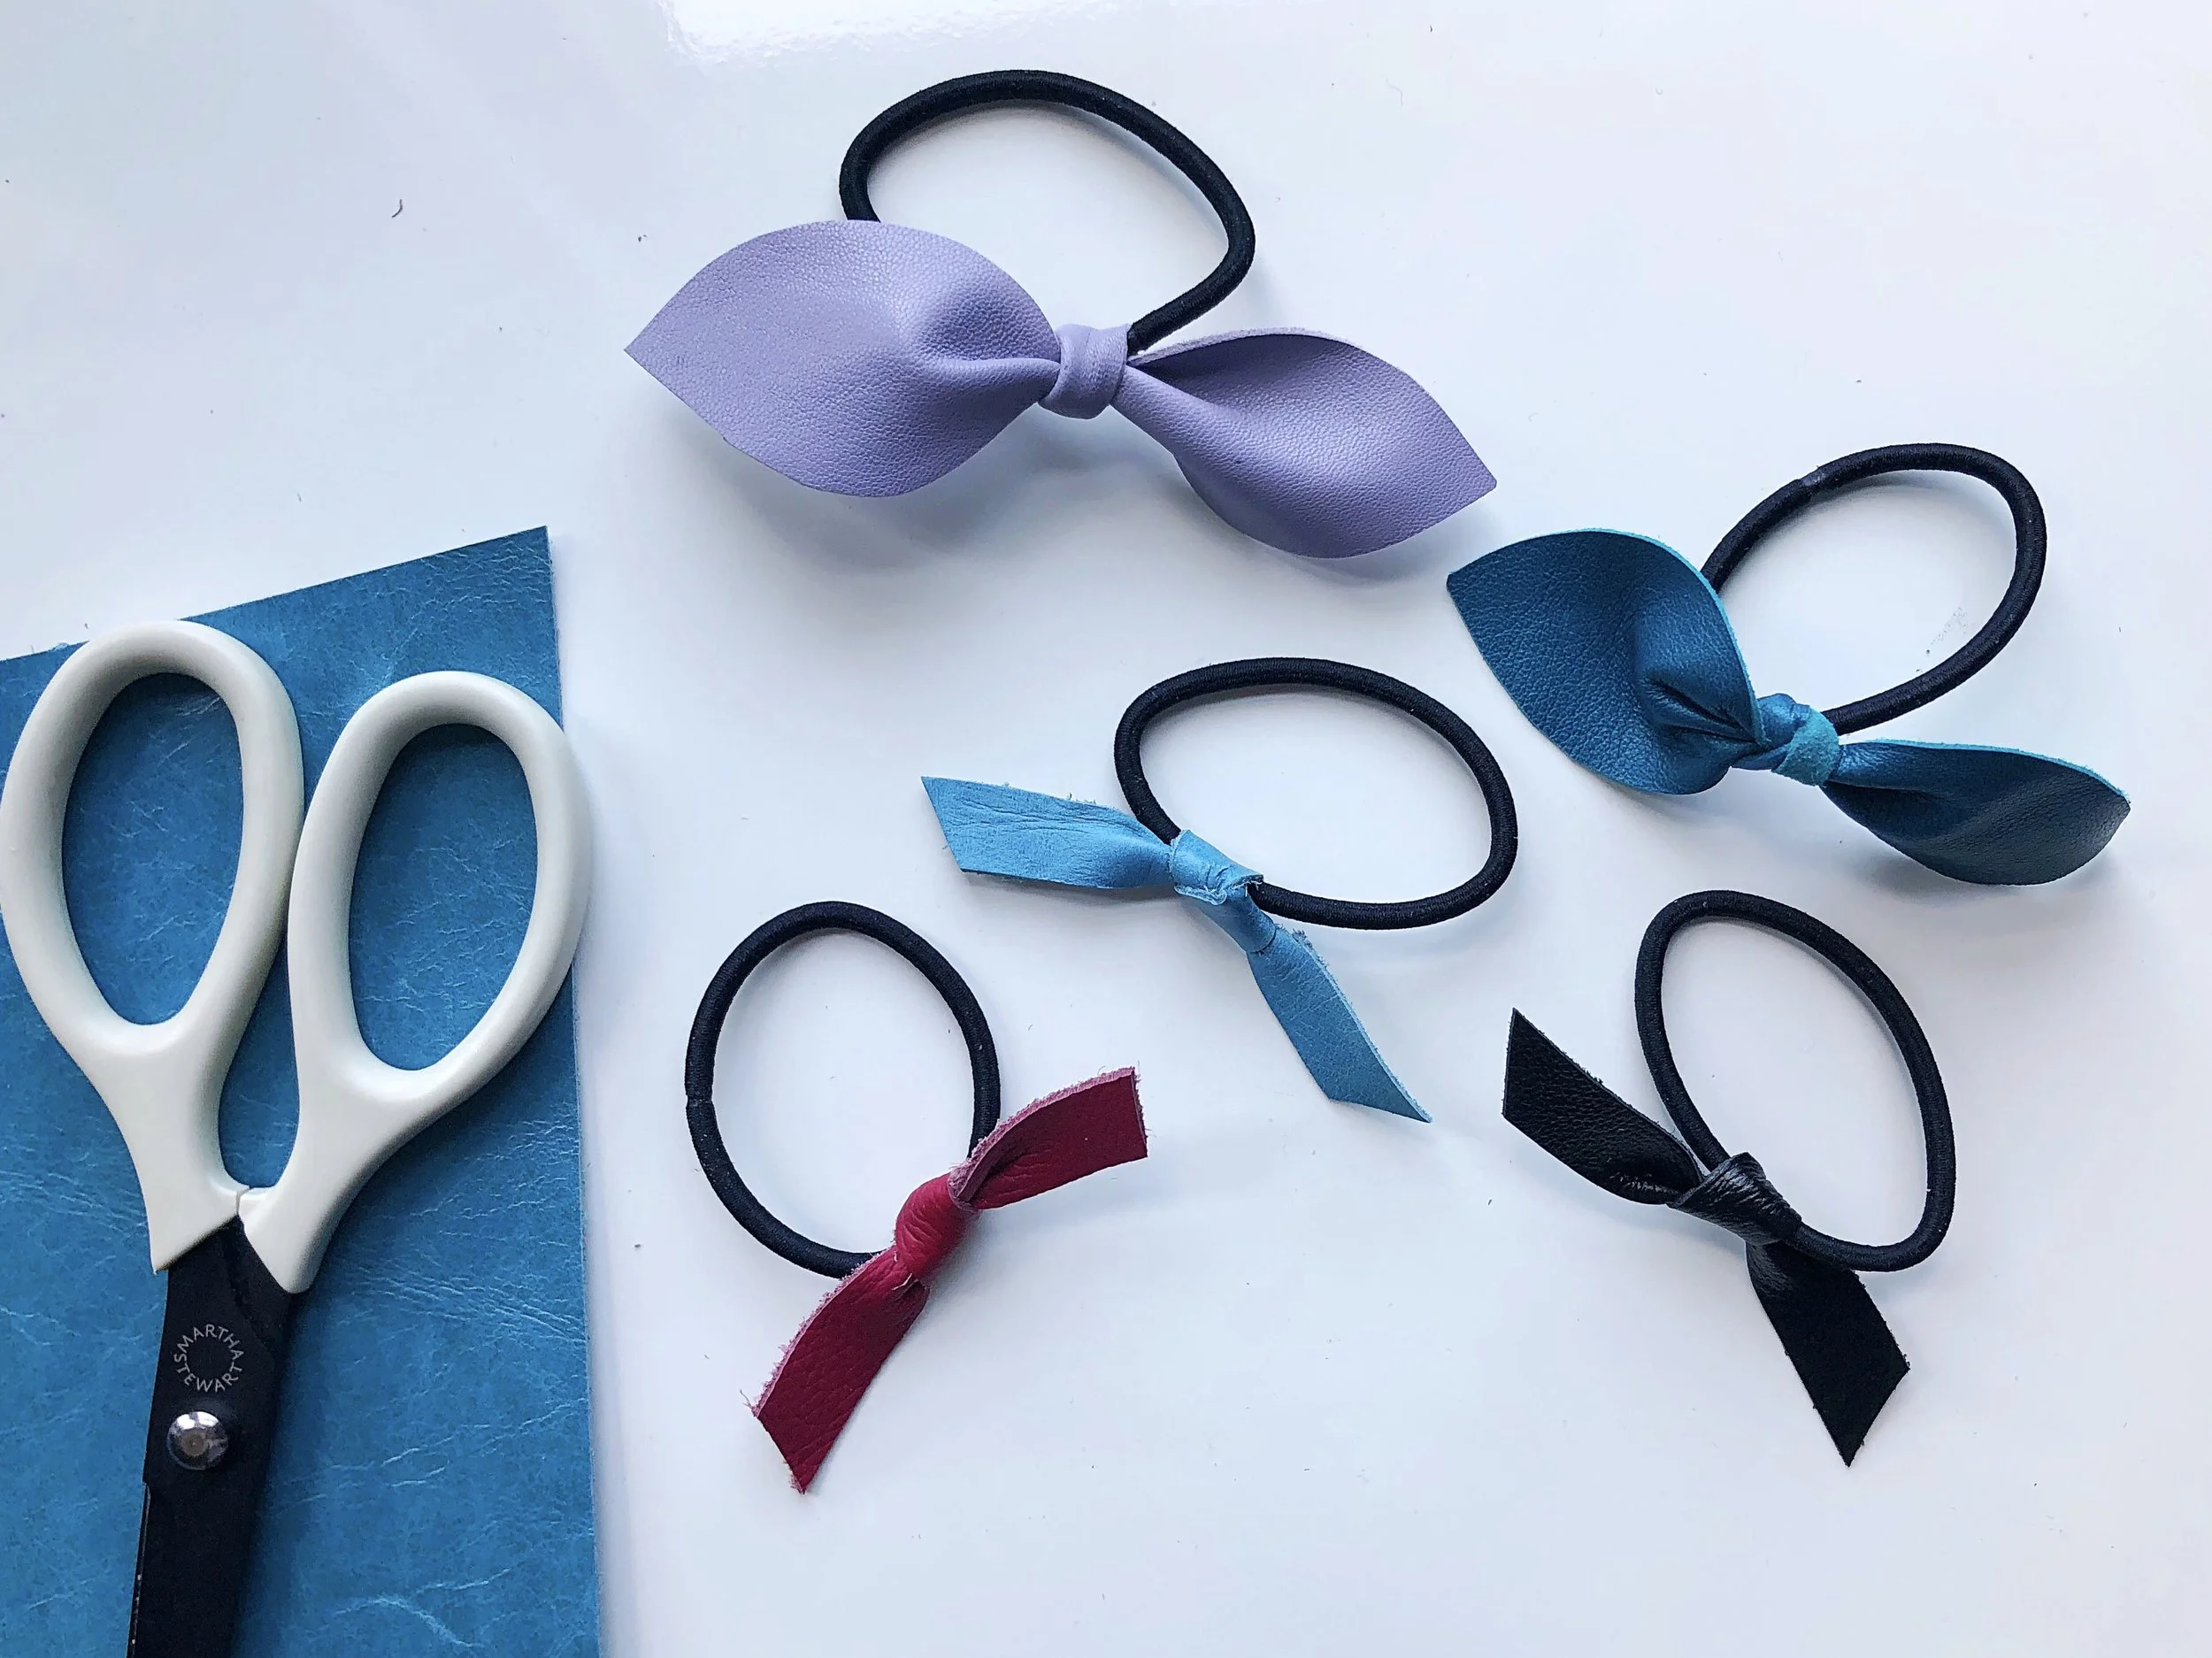
LEATHER HAIR TIE TUTORIAL
MATERIALS

Thin leather (vegan leather, Felt and Kraft-tex work great too!)
Scissors (or rotary cutter)
Pen, pencil or chalk
SIZE
Finished size for the bow is approximately 4 3/4” x 1.5”
Finished size for the tie is approximately 3”x 1/2”
PATTERN

TRACE
Trace the pattern onto the back side of the leather piece.
CUT
Cut along the traced line.

TIE
Place the leather tie right side facing down and slip into the elastic hair band.


Tie the leather into a knot around the elastic band. The object is to end up with the right side (pretty side) of the leather on the outside of each side of the bow and the center knot.

Before pulling the knot tight, twist the sides around a bit to make sure you are happy with the way the leather faces.

All done!

For this version, tie in the same manner as above making sure that the pretty side of the leather is facing up.

The pattern for the hair tie is just a rectangle. To give you a bit of wiggle room to make it symmetrical, I didn’t add the angled ends. Once your are satisfied with the way your leather is knotted, just cut the ends at an angle.
Aren’t they pretty? I would love to see what you make. Please tag me @littlestichstudio when you show off your fancy work.
