

Spread a little love this Valentine's Day.
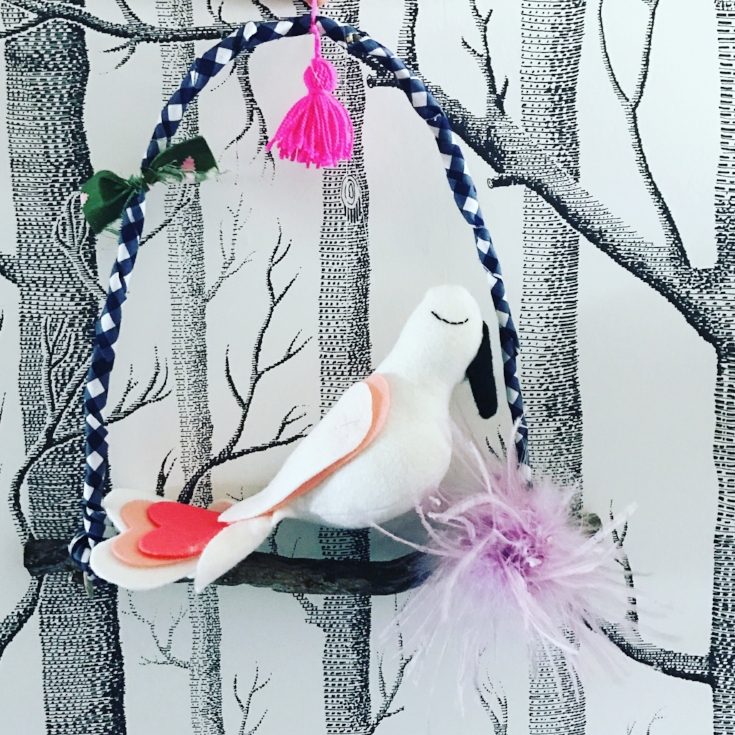
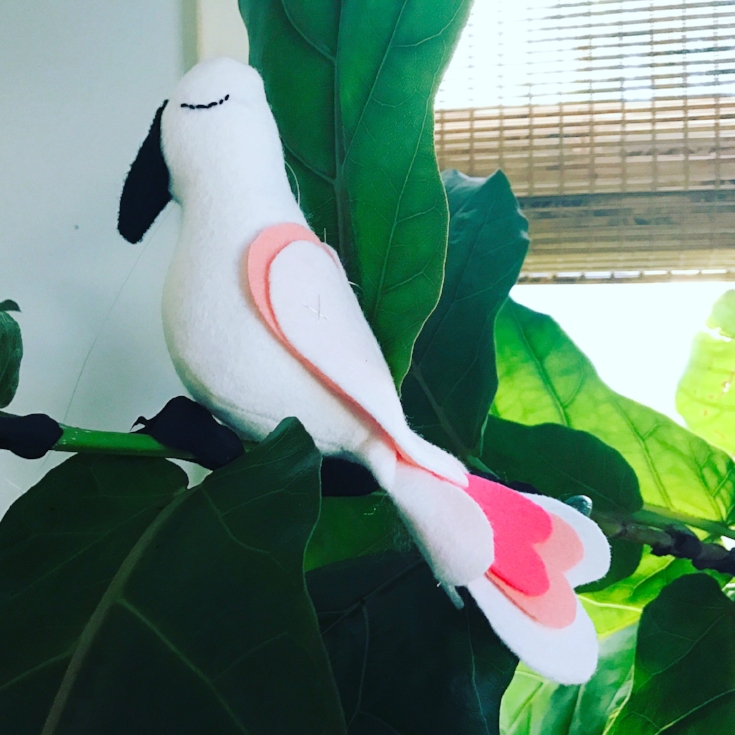
I'm really not a big fan of Valentine's Day. To me it's more of a marker that spring is coming. A few hyacinth are blooming in my yard and the camellia's look like they are draped in a pretty pink garland of pompom blooms. With that in mind, this lovebird and perch bring hope that spring is near.

I'm really not a big fan of Valentine's Day. To me it's more of a marker that spring is coming. A few hyacinth are blooming in my yard and the camellia's look like they are draped in a pretty pink garland of pompom blooms. With that in mind, this lovebird and perch bring hope that spring is near.
SCRAPPY PERCH
MATERIALS NEEDED
Fishing Line
Paper wrapped stem wire, 18 gauge
A stick, approximately 10-12" long
Fabric, 1 1/2" X 40", Folded in half width-wise and pressed.
Fabric Scrap, 1 x 5"
Tassel or pompom (I use the loome to make mine)
Misc. bits of feather, felt or fabric to embellish

ASSEMBLE THE PERCH

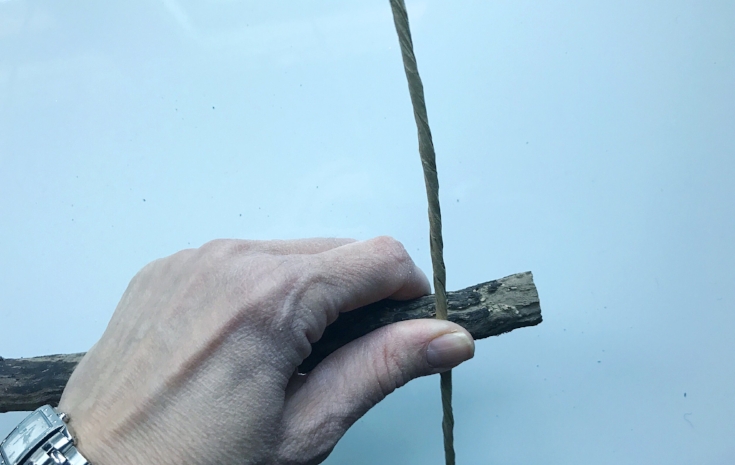
Take one of the paper wrapped stem wires and wrap around one end of the stick.

With the straight end, cross and wrap with the second stem wire at the top.

Bend the wires to make a nice arch. Wrap the end around the other side of the stick.
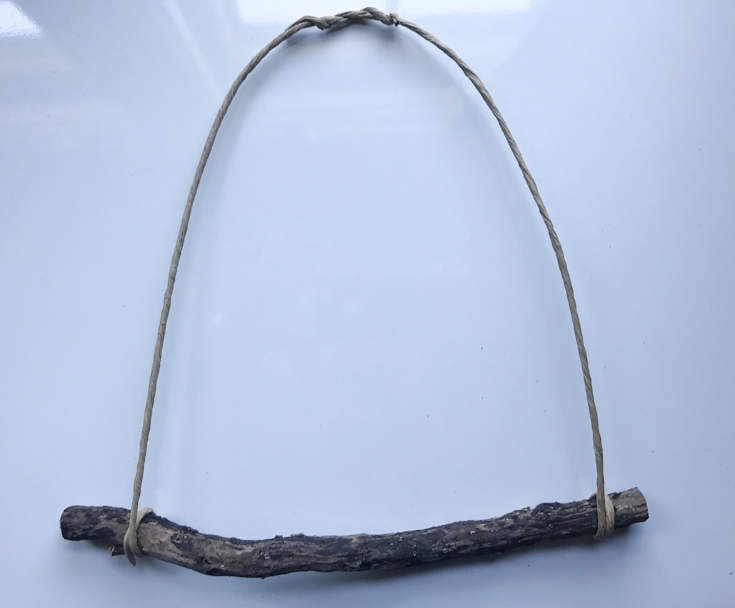
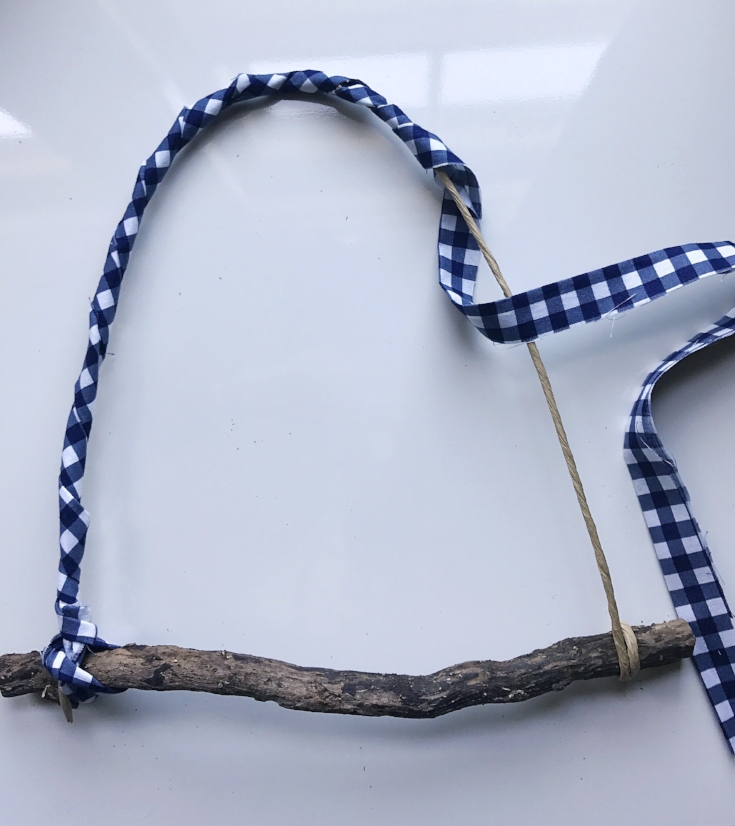
Take the long fabric scrap and tie one end of the stick and wire. Be sure to tuck the fabric tail into the fabric as you begin to wrap the wire.


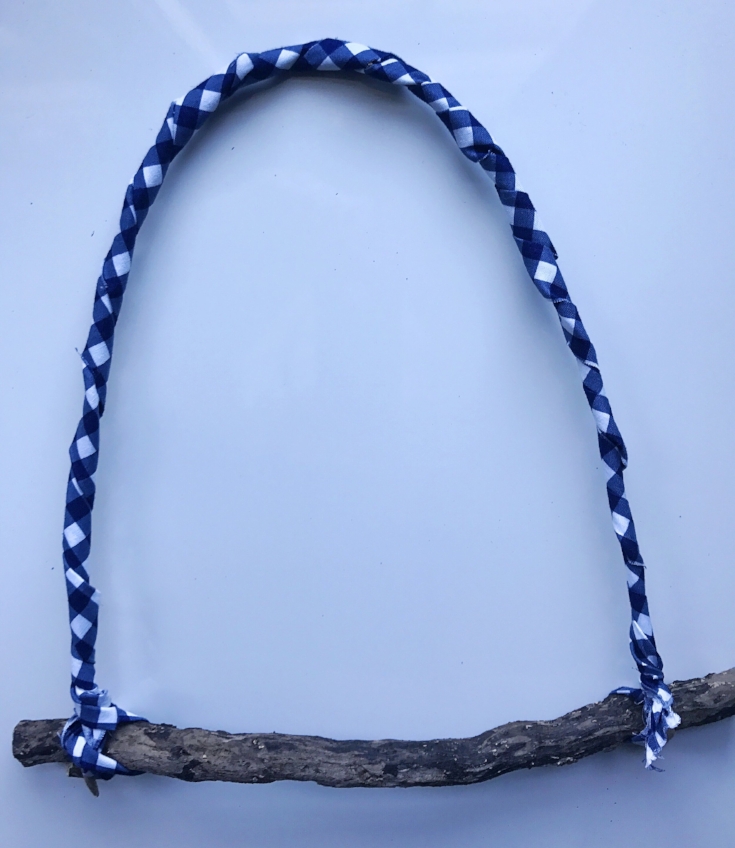
Continue wrapping around the entire length of the wire, smoothing the fabric so that it is evenly distributed as you go.
Tie to the opposite end of the stick and tuck in fabric tail.
EMBELLISH (FEATHER ITS NEST)

Tie a tassel or pompom to the top of the arch. Leave a tail that will be long enough for you to use to hang the perch.
Take the small fabric scrap and tie around one side of the perch. You could also use any type of fabric or trim here to further decorate here. A bit of ball trim, some lace, feathers, perhaps a felt flower? I used whatever I found on the floor of my sewing room. Literally scraps.

HANG THE BIRD
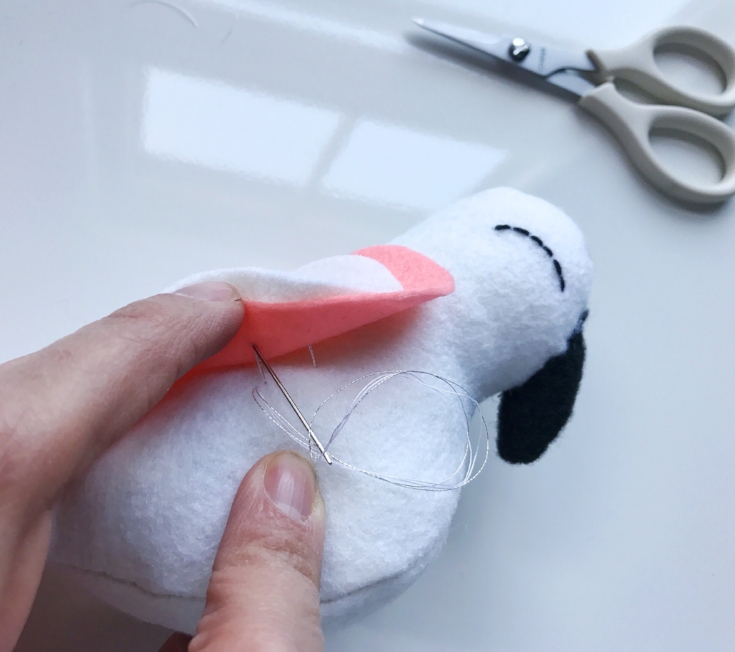
To hang the bird from the perch, cut a 18-20" length of fishing line. Thread a needle with the line and run it through the back and neck of the bird.
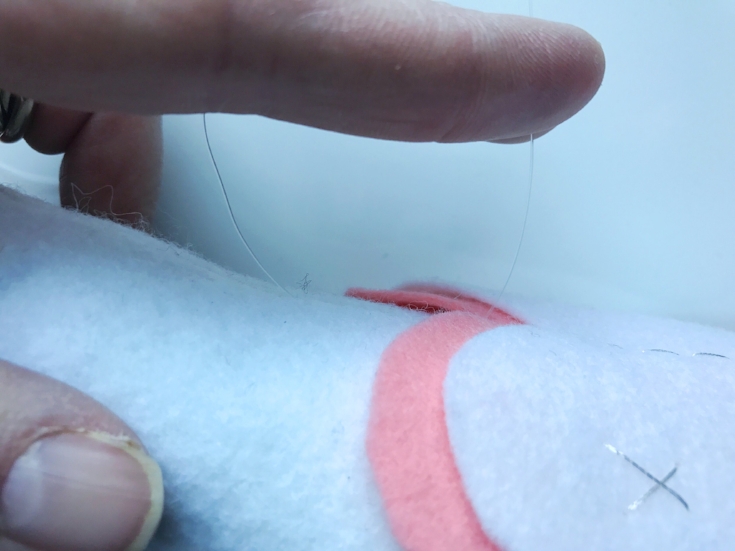
Place the bird in the perch and tie the fishing line to the top of the perch and around the yarn to secure.

If you missed yesterday's post, here is a link to the Lovebird pattern and tutorial:
Happy Valentine's Day!
Hilarie XO

Felt Lovebirds Pattern and Tutorial
Make these pretty felt love birds for Valentine's Day. With these sweet love birds you can show the one you love how much you care.

Make these pretty felt love birds for Valentine's Day. With these sweet love birds you can show the one you love how much you care.
MATERIALS FOR LOVEBIRD
White Felt
Pink Felt in two shades for feathers and wings
Small piece of Black Felt for beak
Handsewing needle
Thread
Black embroidery floss
Metallic thread (optional)
Poly-fil
A free Lovebird Template, printed and cut out (This pattern has a 1"/ 4CM test square. Measure the test square, and if it does not measure correctly, check your print scaling options.)

SIZE
8 1/2"x 4 1/2"
MAKE THE LOVEBIRD
CUT
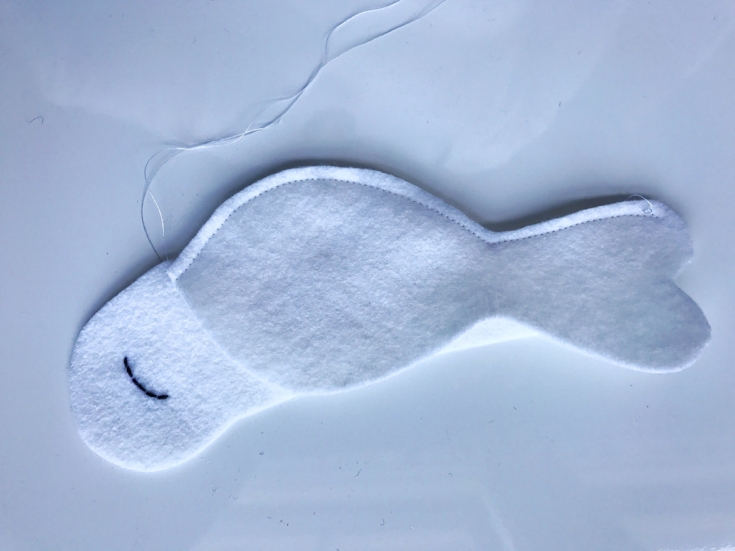
Using the Lovebird Template, cut 2 bird body pieces, 1 gusset, and 1 wing out of white felt. Cut the beak out of black felt and tail feathers from each of the pink. Cut one more set of wings from pink.
MARK
Using a water-soluble marking pen, Begin marking the fabric with the pattern piece still pinned to it. When you mark a pattern, you always want to begin at the pattern pieces outside edges and work toward the center. Easy, right? Let’s do it! Using a straight pin, pierce the pattern piece and fabric right through the center of the first dot. Carefully lift the pattern paper (while still holding the pinned fabric in place) and mark the fabric with the pen. Repeat on the underside of the next piece of felt so that the sides are mirror images of each other.

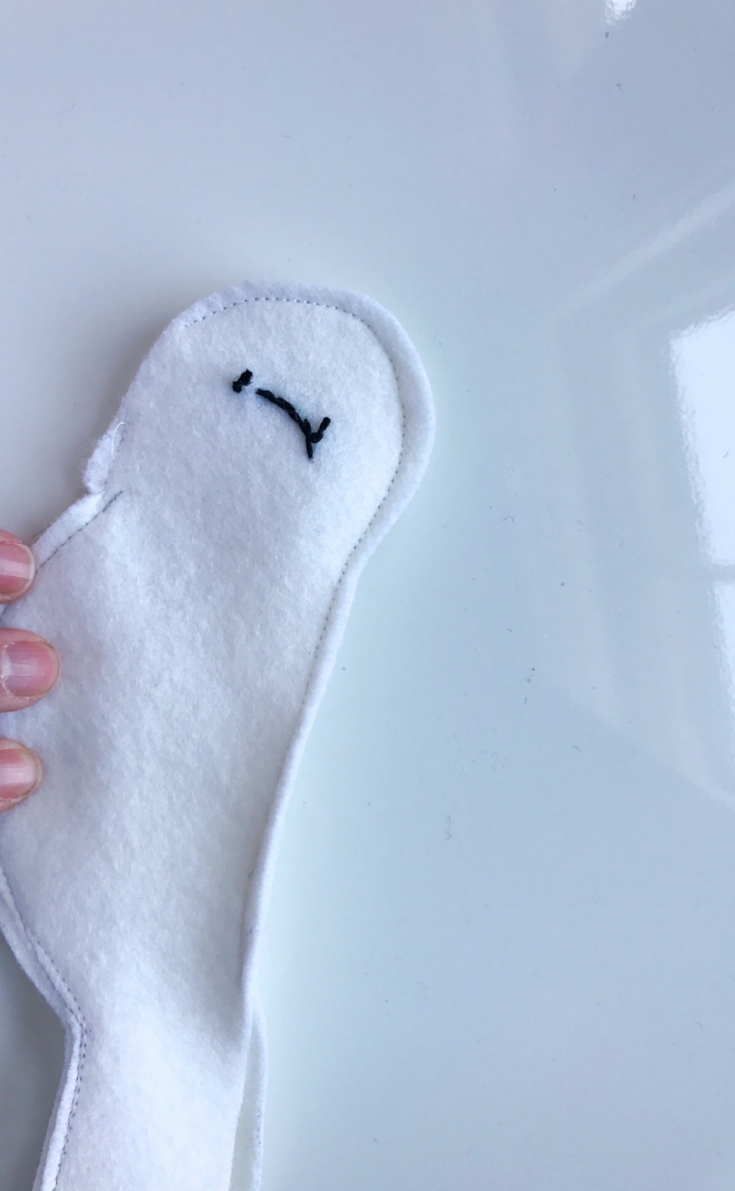
STITCH THE EYES
To sew the eyes, we are going to use a basic running stitch. It's beautiful in its simplicity, utility and function. Vary it with size and color and it adds such vitality and expression your projects.
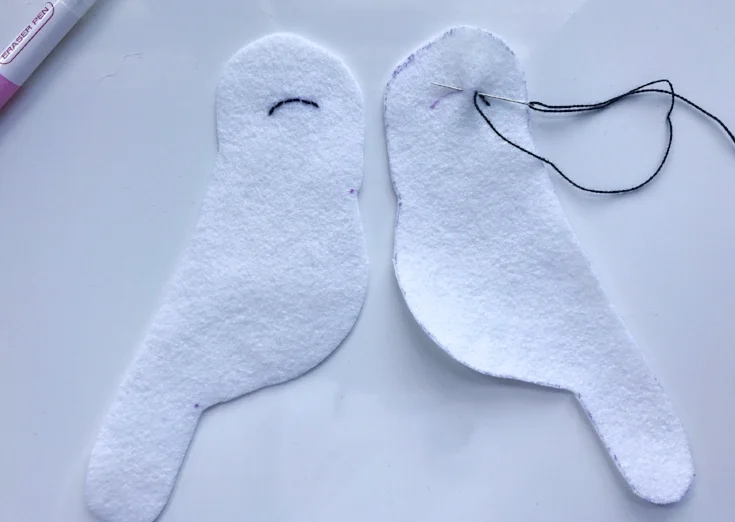
The pieces should be marked as to be mirror images.
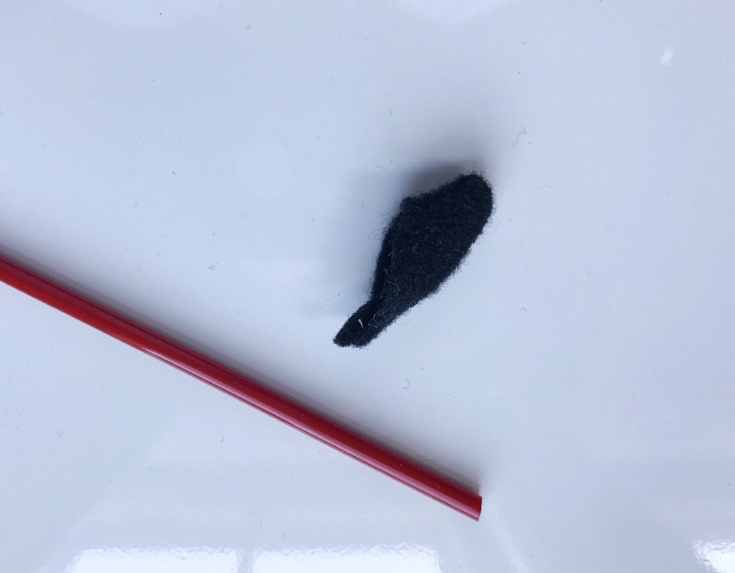
BEAK
Fold the beak along the center line and stitch along the long side using a 1/8" seam.

Turn right side out. It helps to use a tool to push the tiny end through. A chopstick or eraser end of a pencil work well for this.
MAKE THE LOVEBIRD
Take a bird body piece and the gusset, place them with the Right Sides Facing Together and match the markings. Pin and stitch around the outside edges of one side from tip to tail, using a 1/4" seam allowance.
Pin the other bird body to the opposite side of the gusset and stitch.
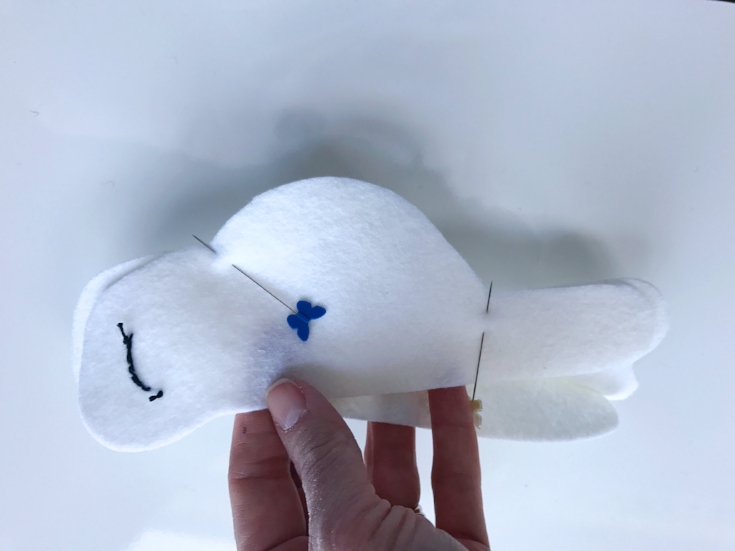
Pin and sew the bird body together at the center back seam beginning at the dot level to the eye around the head and to the top of the tail. Leave the area where the beak will be attached open.
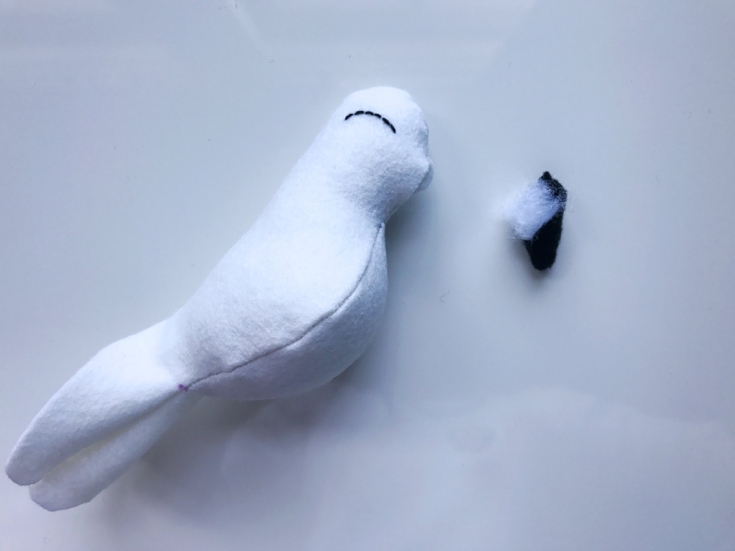
TURN AND STUFF
Turn the bird body right side out and stuff nice and firm with polyfil.
ATTACH THE BEAK
Add a tiny bit of stuffing to the beak. Pin the beak to the bird and whipstitch around the beak to attach it to the bird body.

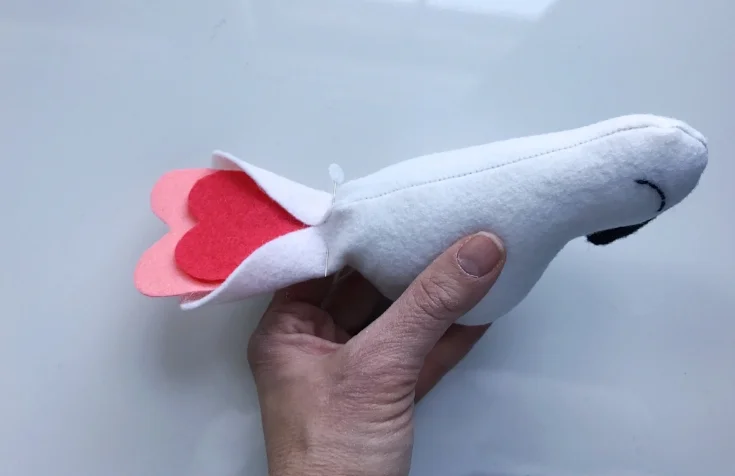
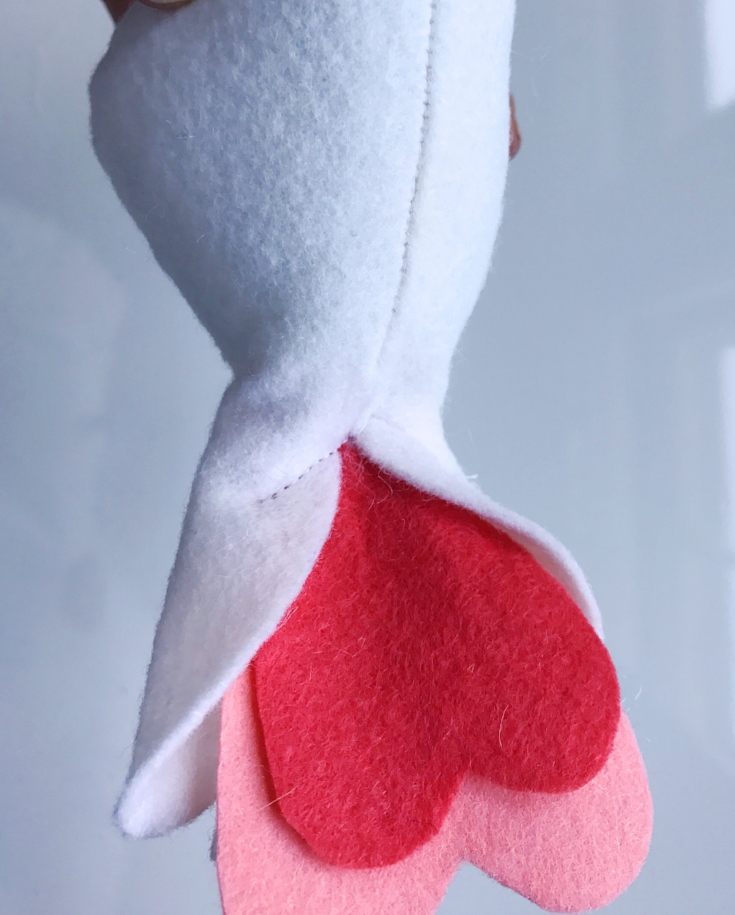
TAILFEATHERS
Insert the tail feathers into the body of the bird. I shifted the layers of feathers a bit to create some visual interest. Pin in place and stitch in an inverted V shape to secure.
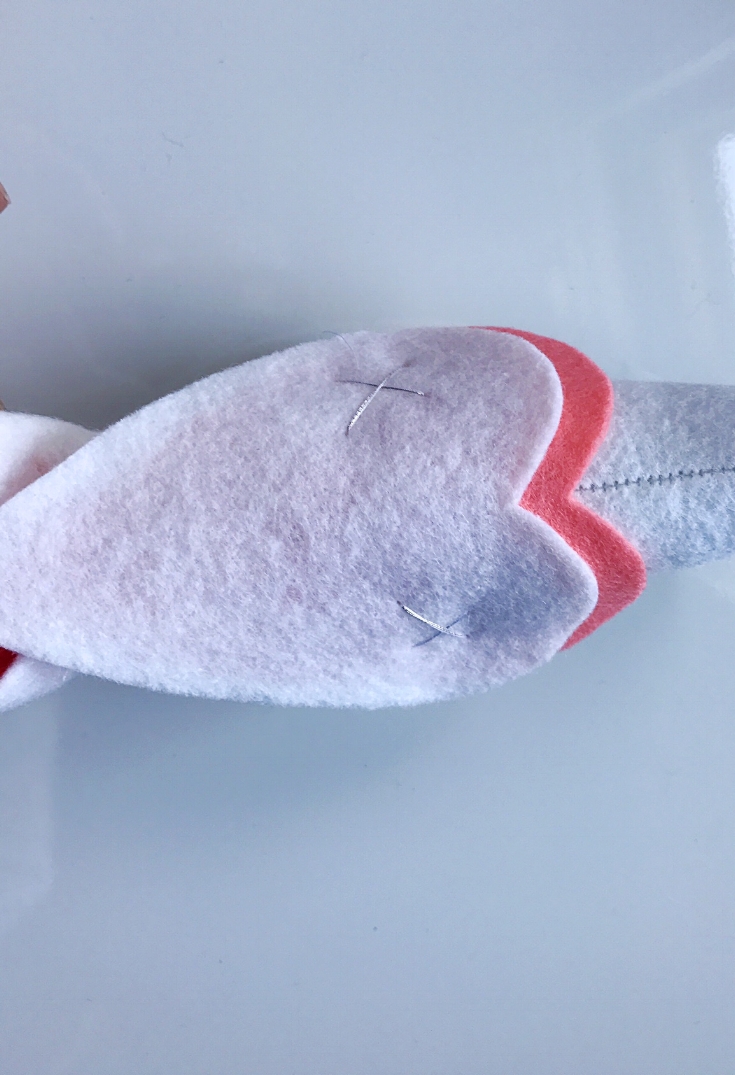
WINGS
Arrange the wings and pin to the bird. Again, I shifted the placement of the wings to overlap just a bit.
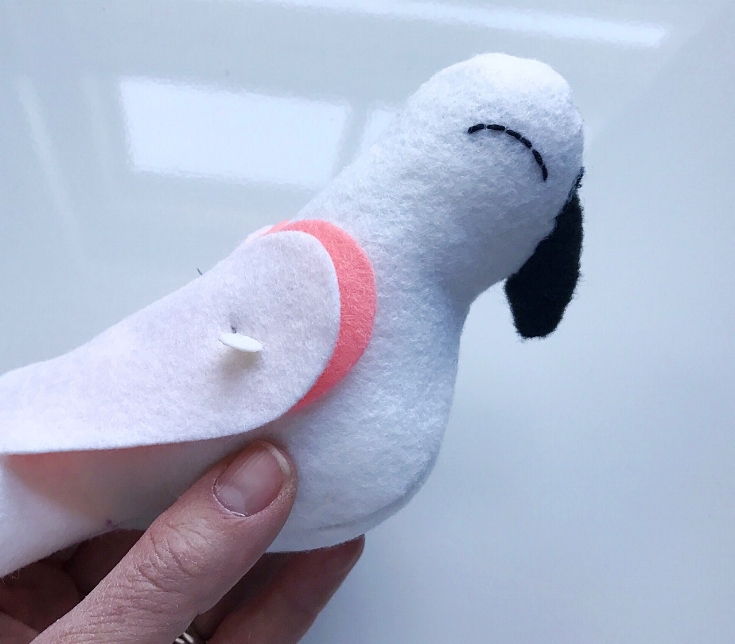
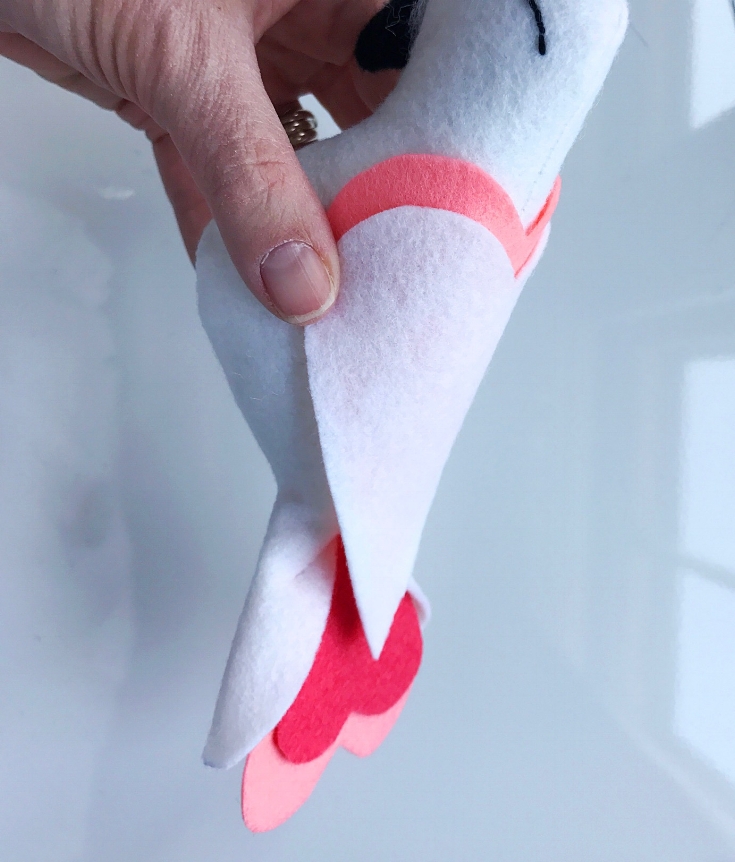
Stitch in place. I used some silver metallic thread to attach the wings and give them a bit of glam. Feel free to add your own touch!
Trim threads and use a quick bit of steam from the iron to get rid of your markings.

Would you like to learn how to make the perch? Come back tomorrow!
XO, Hilarie

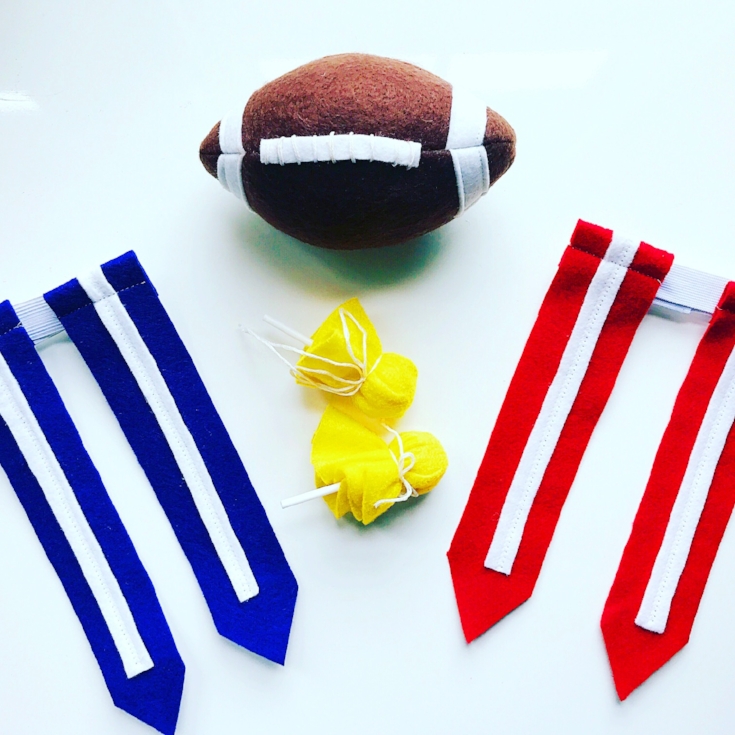
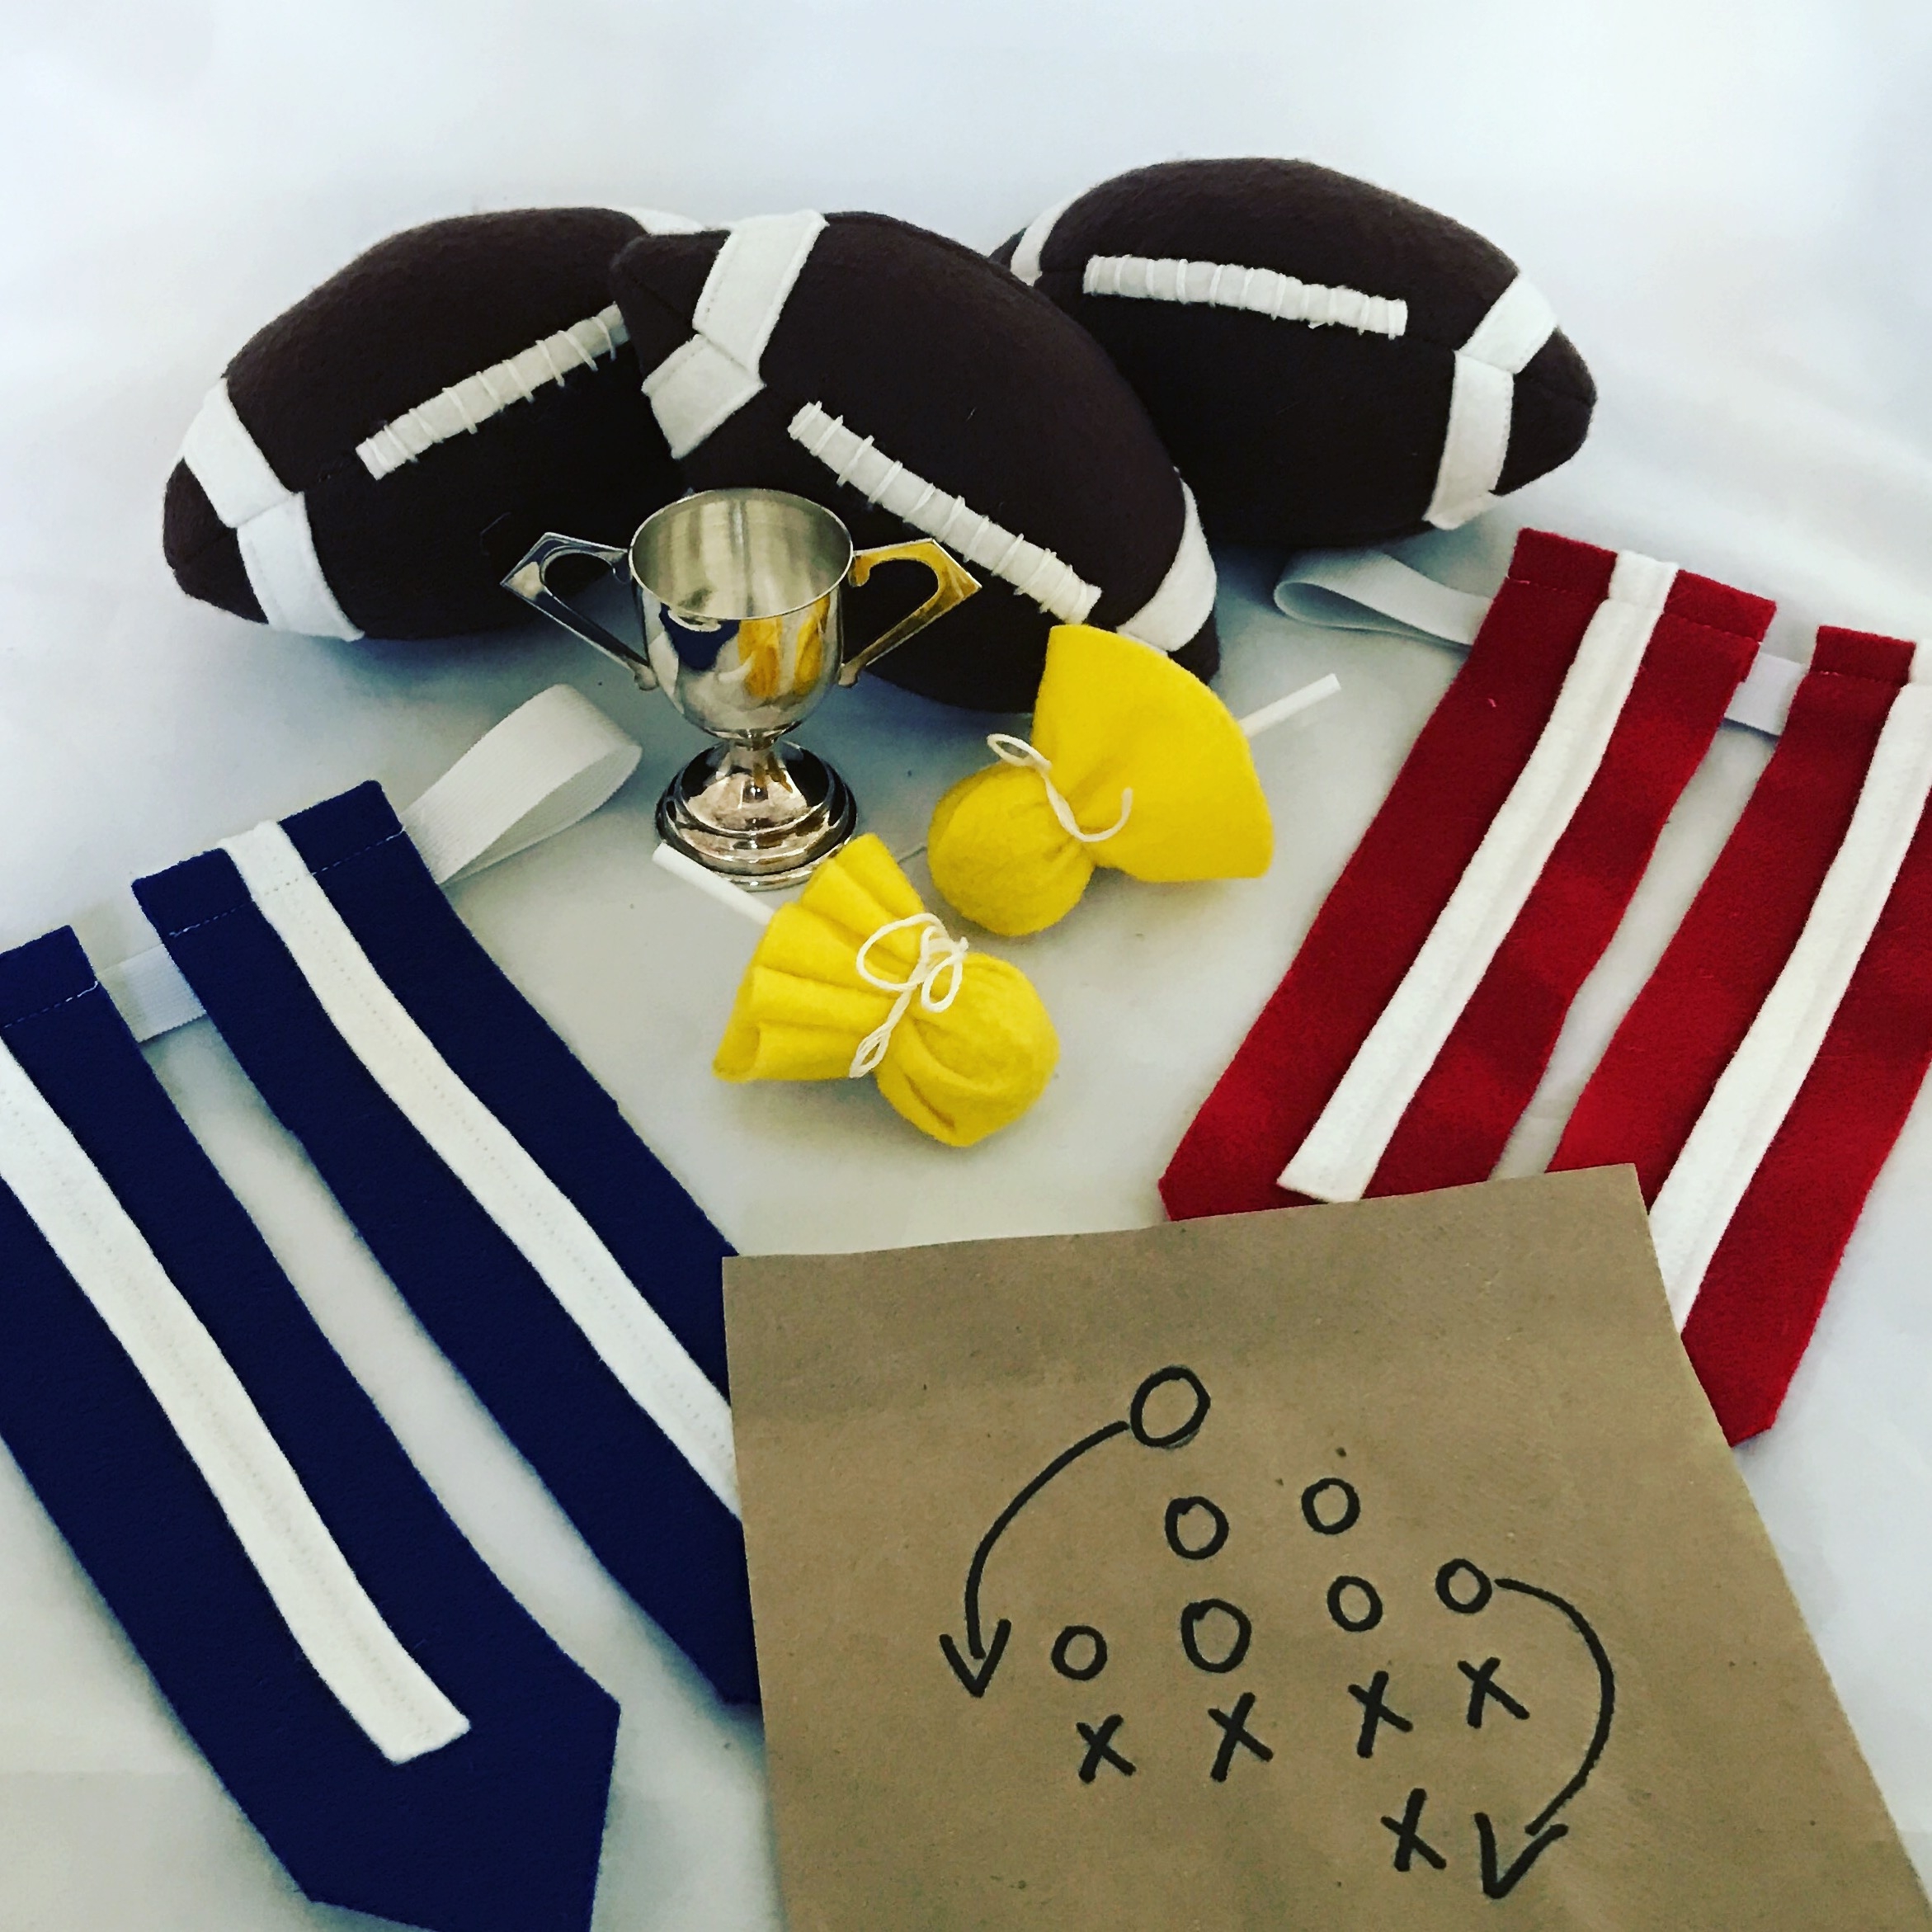
Score big with this kid-friendly flag football set!
You can help set the game mood for your kids by making this cute felt football, penalty flag and flag set. It will turn game day into family fun and your kids will feel like part of the team! Added bonus: this will keep you entertained even the game doesn't.
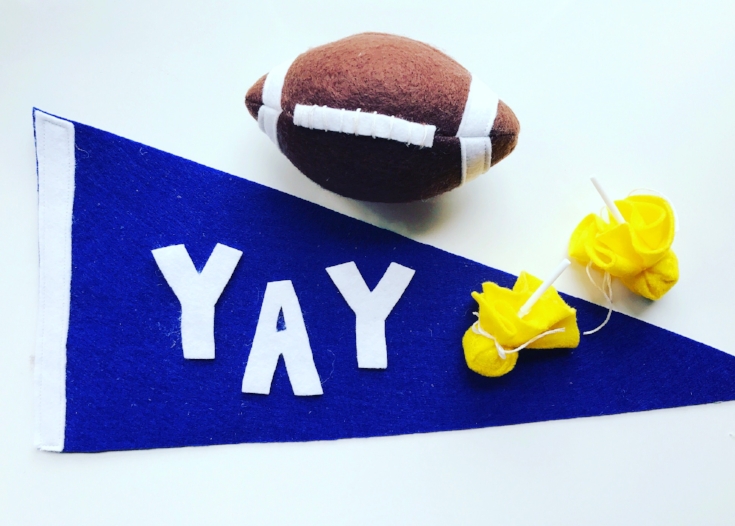
You can help set the game mood for your kids by making this cute flag football set. It will turn game day into family fun and your kids will feel like part of the team! Added bonus: this will keep you entertained even the game doesn't.
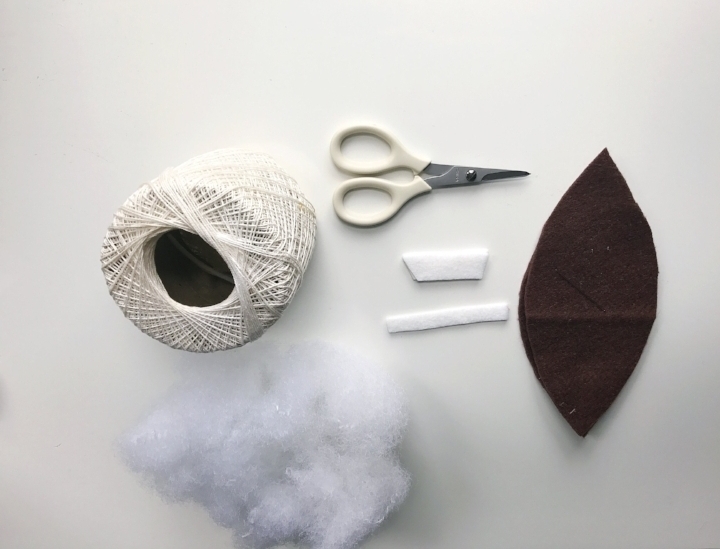
MATERIALS FOR FOOTBALL
2 sheets of Brown Felt
White Felt for trim on football
Handsewing needle
Thread
White Crochet or Embroidery Floss
Poly-fil
Glue Stick (Optional)
A free Felt Football and Flag Set Template, printed and cut out (This pattern has a 1"/ 4CM test square. Measure the test square, and if it does not measure correctly, check your print scaling options.)
SIZE
7 x 3"
MAKE THE FOOTBALL
CUT
Using the Mini Football Template, cut 4 ball pieces, 8 end stripes, and one center strip.
EDIT: It has been brought to my attention that only high school and college footballs have the white stripes. The NFL football does not. So for all of you purists out there, please omit the stripes!
EMBELLISH
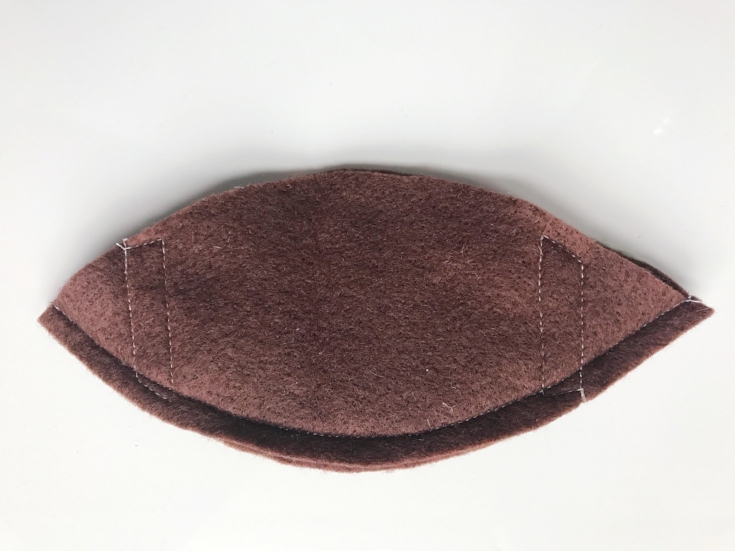
Following the pictures as a guide, pin and stitch a white stripe 1.25" from each tip of the football using a straight stitch and some white thread. Alternately, you could glue it.

MAKE THE FOOTBALL
Take two ball pieces and place them with the Right Sides Facing Together and align the stripes. Pin and stitch around the outside edges of one side from tip to tip, using a 1/4" seam allowance. Repeat with the remaining two pieces.
Take the two halves, and place them with the Right Sides Facing Together and again aligning the stripes. Pin and begin stitching just before the white stripe and continue stitching around the entire ball just past the bottom white stripe, leaving a 3 inch opening in-between the stripes.
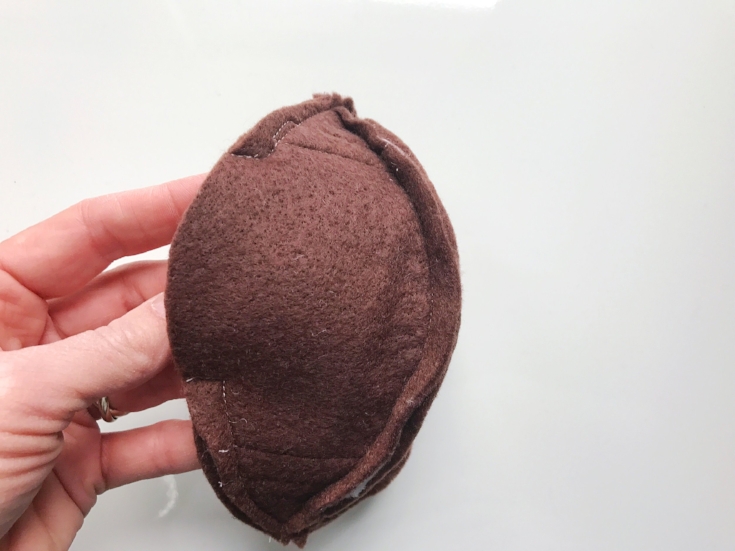
Turn the ball right side out and give it a tug to straighten the seams. Stuff the ball, beginning at each tip, until it is firm. (It helps to use just a little stuffing at a time, to keep it from looking lumpy). Handstitch the opening closed.
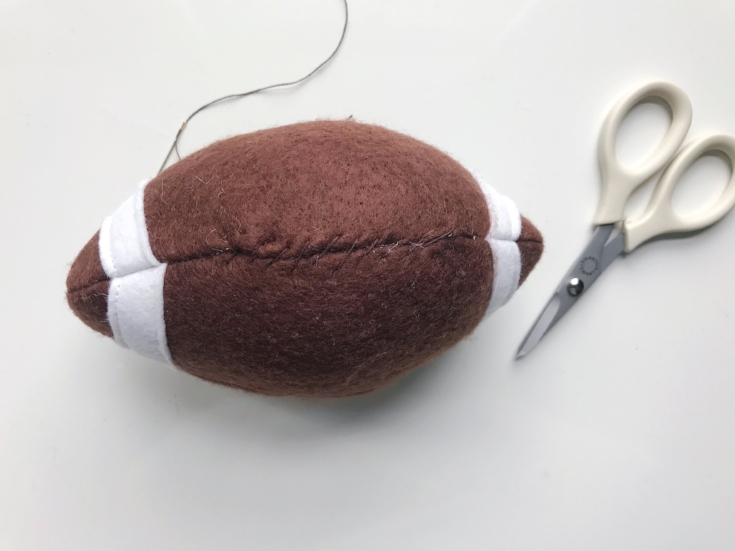
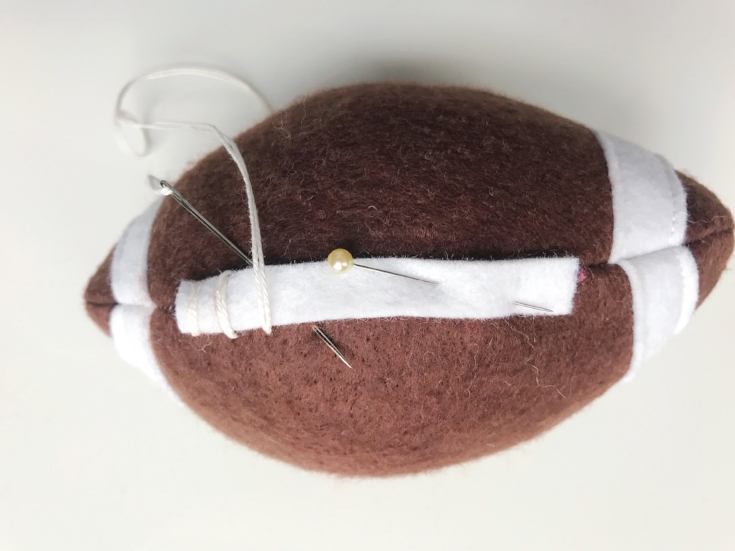
To finish, place the center strip along the hand-stitched closing. Sometimes when sewing with kids, I use a bit of glue to hold felt in place while stitching. Pins can be tricky for them to work with. Thread the needle with Crochet Thread or Embroidery Floss and knot both ends to form a double thread. We want these "laces" to look real!
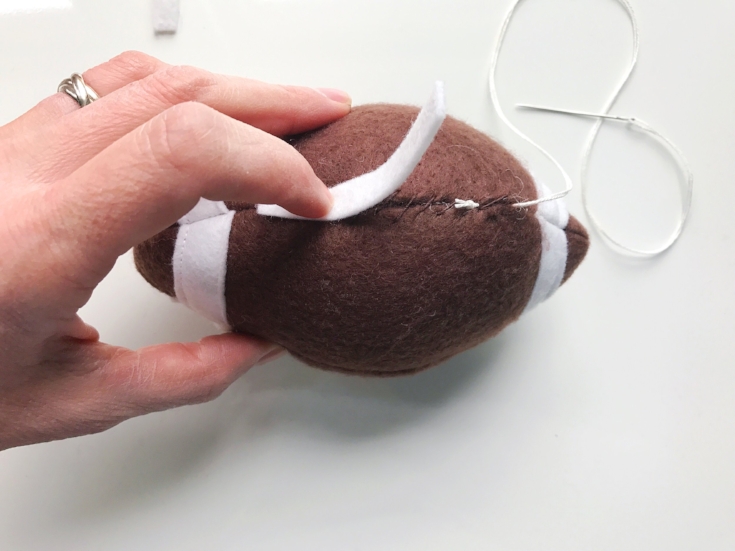
Begin stitching by piercing the football and tucking the knot under the center strip as shown in the picture above. Now stitch from side to side, down the length of the center strip. Knot the thread, bury it in the football and trim.
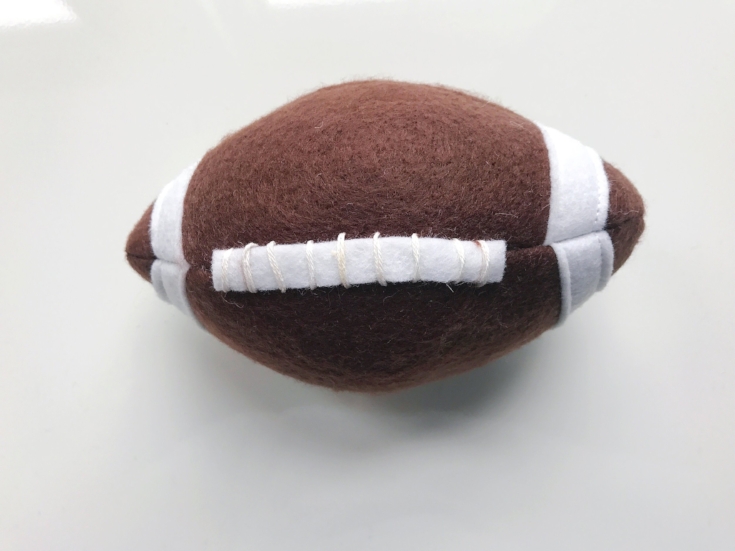
Warning: This ball will get tossed! You might want to do this project away from the TV, lamps, windows, or beer.
PENALTY FLAGS
MATERIALS FOR PENALTY FLAGS
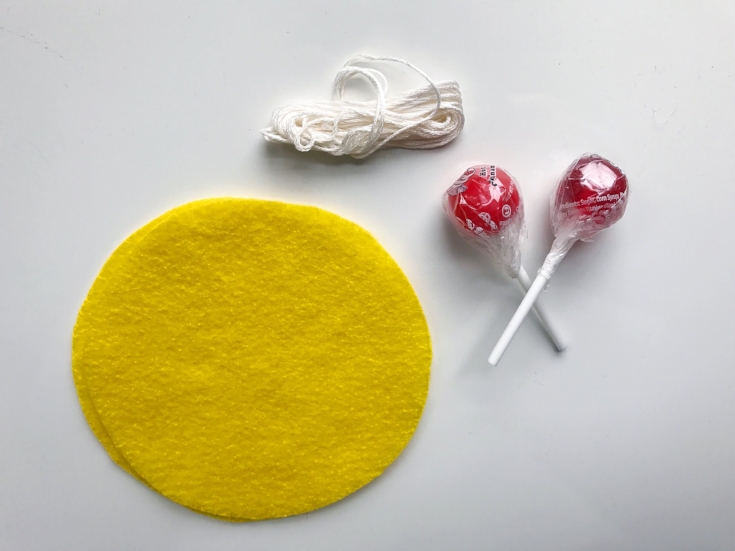
Yellow Felt or Fabric
String
Lollipops
MAKE THE PENALTY FLAGS
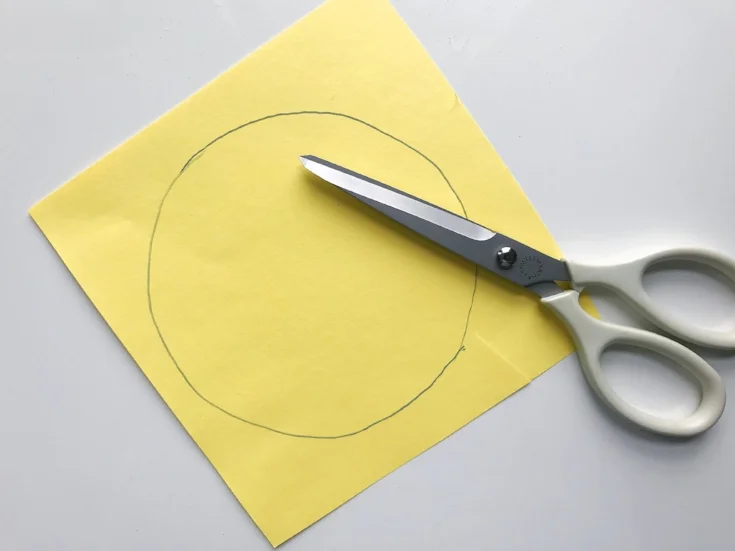
Cut a 5-6" circle out of felt. Cutting can be tricky for kids. It helps to have an adult draw the circle onto the felt and cut a square around it. Then try having the child do the "precision cutting".
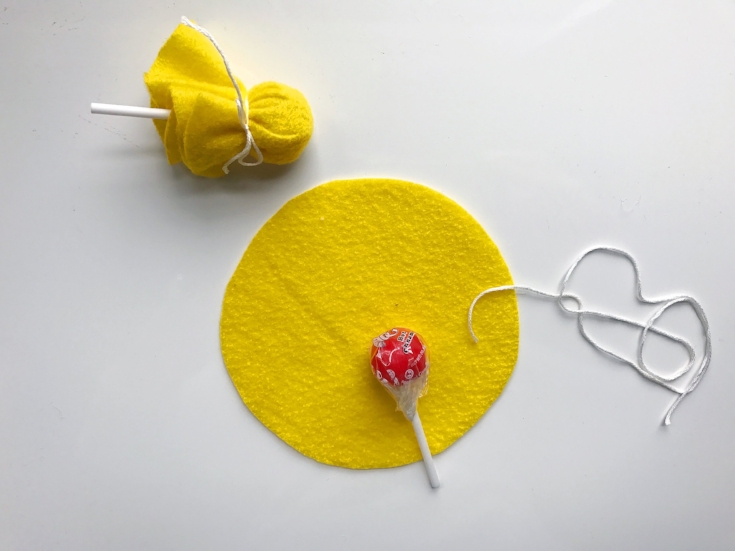
Place the lollipop in the center and wrap the felt around it and tie. SCORE!
FLAG AND BELT SET
FLAG AND BELT SET
This one can be made lots of different ways, depending on your (or your child's) skill level and what materials you may have available. I used elastic so that the belt wouldn't be tied around some smaller person's neck. You may have children that behave:) in that case you could use a sash or even a piece of fabric!
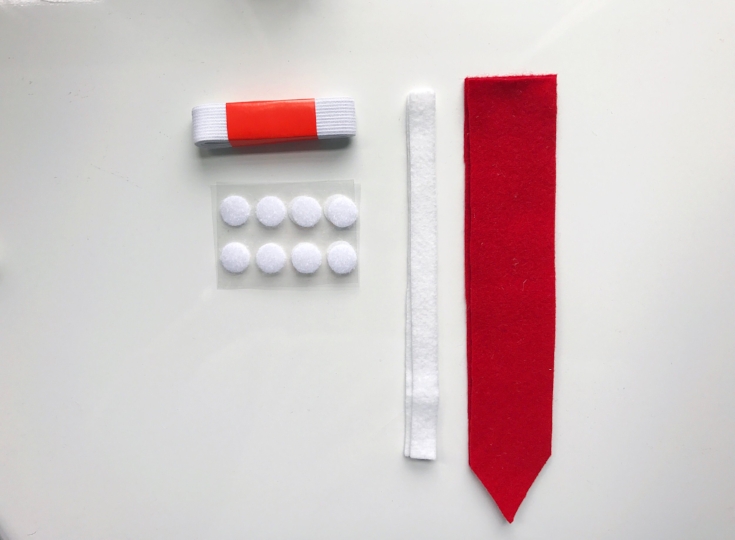
MATERIALS FOR FLAG SET
2 Sheets of Felt
Scrap Felt for embellishing
Needle
Thread
Velcro, either Sew on or Adhesive is fine
3/4" Elastic, 2 yards will make 2-3 belts, depending on the size of your child.
Glue Stick (optional)
A free Felt Football and Flag Set Template, printed and cut out, (This pattern has a 1"/ 4CM test square. Measure the test square, and if it does not measure correctly, check your print scaling options.)
CUT
Using the Flag Template, cut 2 flag pieces, and two long stripes out of felt.
EMBELLISH

Following the pictures as a guide, pin and stitch a white stripe from the top of each flag down the center using a straight stitch and some white thread. Alternately, you could glue the strip of felt. Repeat for the remaining flag.
MAKING THE FLAG AND BELT

Fold the top edge of the flag one inch toward the back side. Pin and stitch across. Repeat for the second flag.
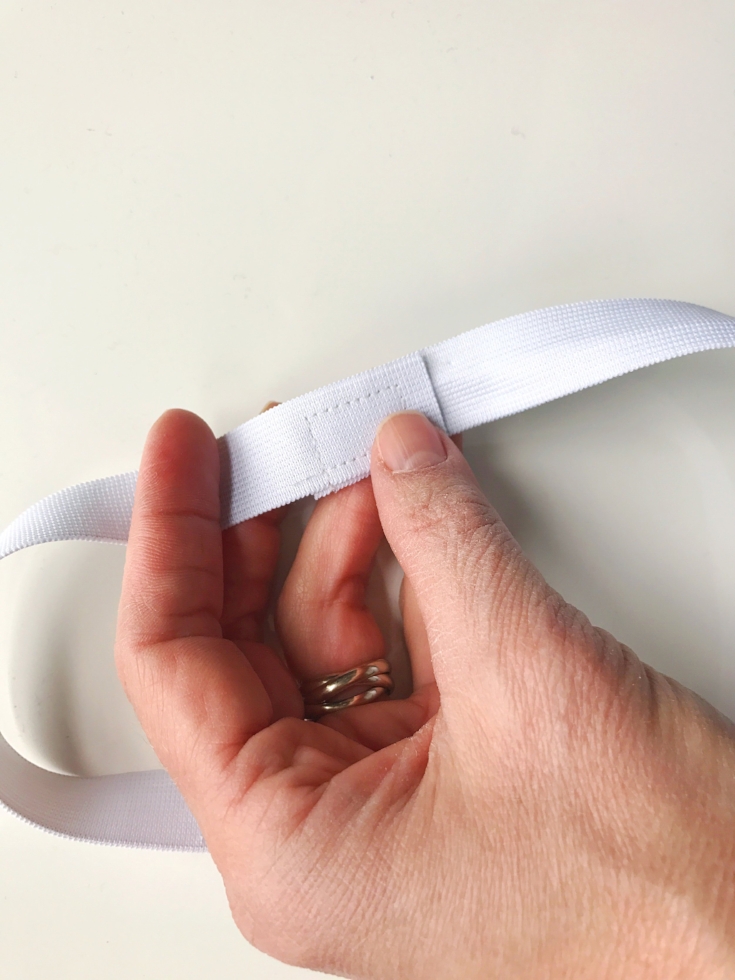
To make the elastic belt, measure your child's waist and add 2" inches. You will want this to fit comfortably over clothes and even a jacket. Following the picture as a guide, overlap the edges, pin and stitch. Now its time to place the velcro on the belt. Cut 2 pieces of velcro and using the loop side (the soft side) stitch or adhere each piece to the belt about 3" apart.
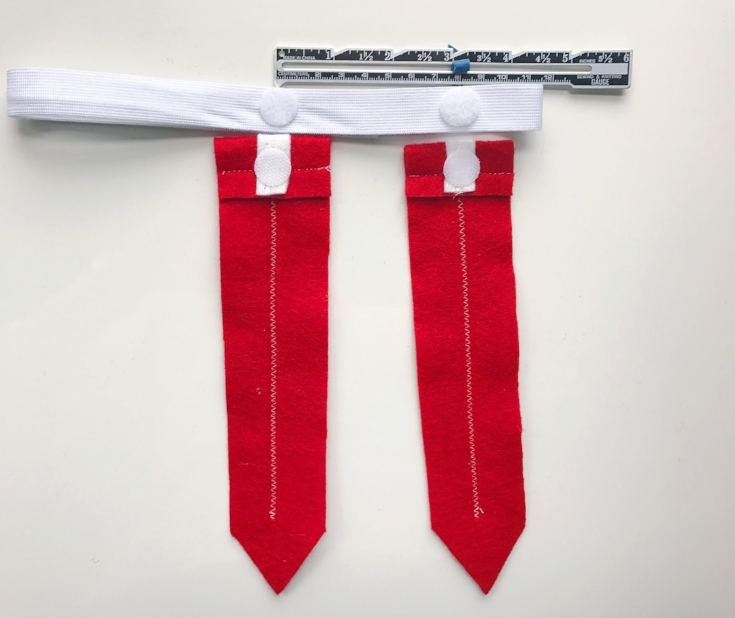
Stitch or adhere the hook side (the rough side) to the top back center of each flag. *If you are using the "glue type" velcro, allow the glue to set before using.
A very special thanks to Amy at A Lively Affair and WTKR Coast Live for featuring this on the "Big Game" segment. Thank you for letting me be part of the fun!
I hope that you have enjoyed this tutorial. Please be sure to tag me @hwakefielddayton on Instagram or use #stitchedmakers to show off your awesome skills.
XO,
Hilarie

Cue the confetti!
This New Year's Eve, I'm eschewing stuffy, shellacked looks in favor of elegant, easy styles that aren't just timeless, but a little bit cool, too. I have a fun and super easy DIY for girls and moms.
A couple of weeks ago I stopped into H&M to get a white shirt for my daughter's Christmas musical at school. In the checkout I saw these shiny gold bobby pins and immediately began thinking of ways that I could embellish them.
Fast forward two weeks to when I actually had the time to make them. New Year's Eve is the perfect occasion to add a little sparkle to your look.
This New Year's Eve, I'm eschewing stuffy, shellacked looks in favor of elegant, easy styles that aren't just timeless, but a little bit cool, too. In this spirit, I have a fun and super easy DIY for girls and moms.
A couple of weeks ago I stopped into H&M to get a white shirt for my daughter's Christmas musical at school. In the checkout I saw these shiny gold bobby pins and immediately began thinking of ways that I could embellish them.
Fast forward two weeks to when I actually had the time to make them. New Year's Eve is the perfect occasion to add a little sparkle to your look.
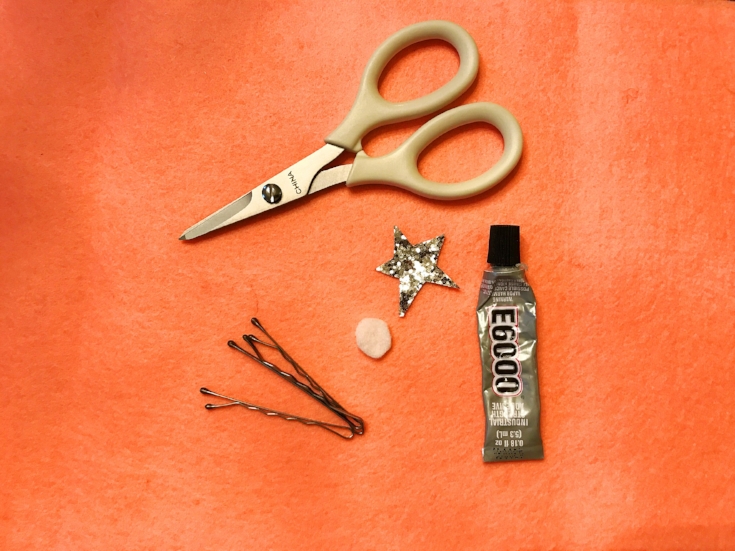
MATERIALS
Bobby Pins
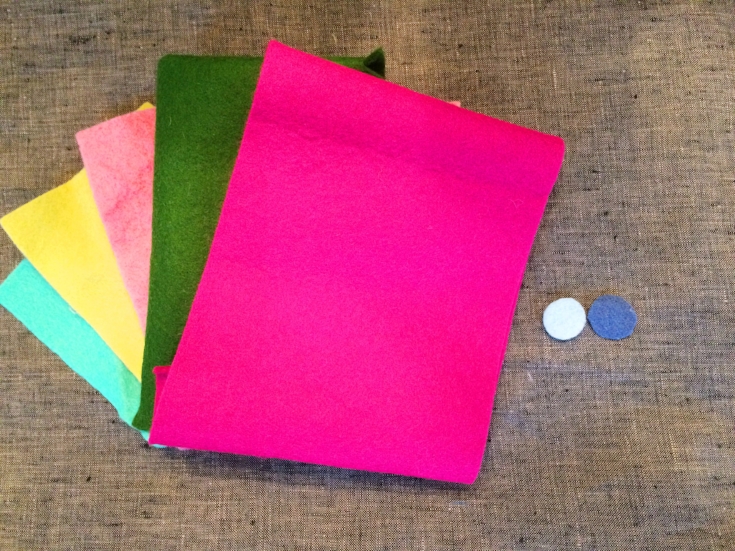
Scrap Felt
Glitter Sheets These can be purchased individually from craft stores like Michael's.
Scissors These are my absolute favorite precision scissors. They are perfect for detail cuts in felt.
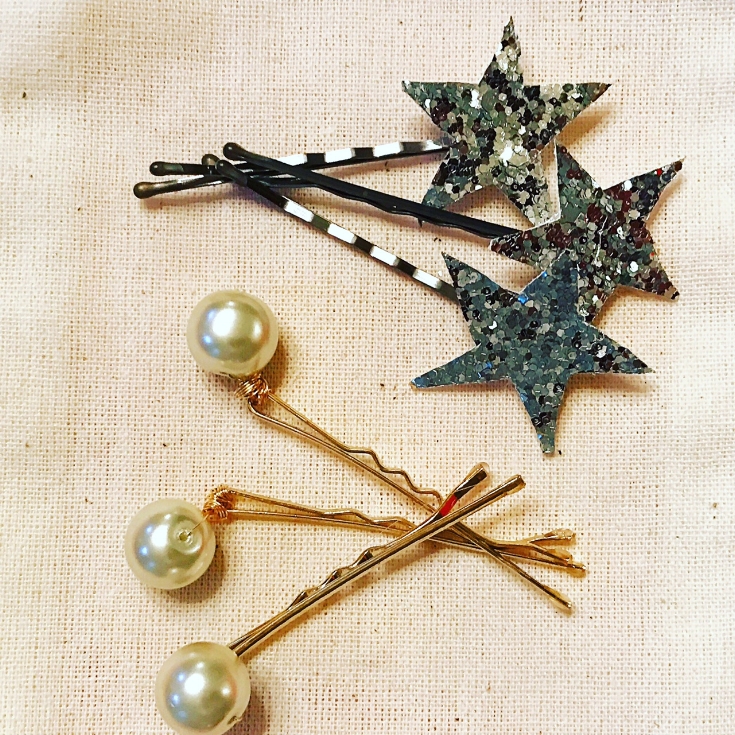
Cut out a star shape about one and a half inches in diameter out of a glitter sheet. I like to draw the shape on the back and cut out. Cut a one-half inch circle from felt.
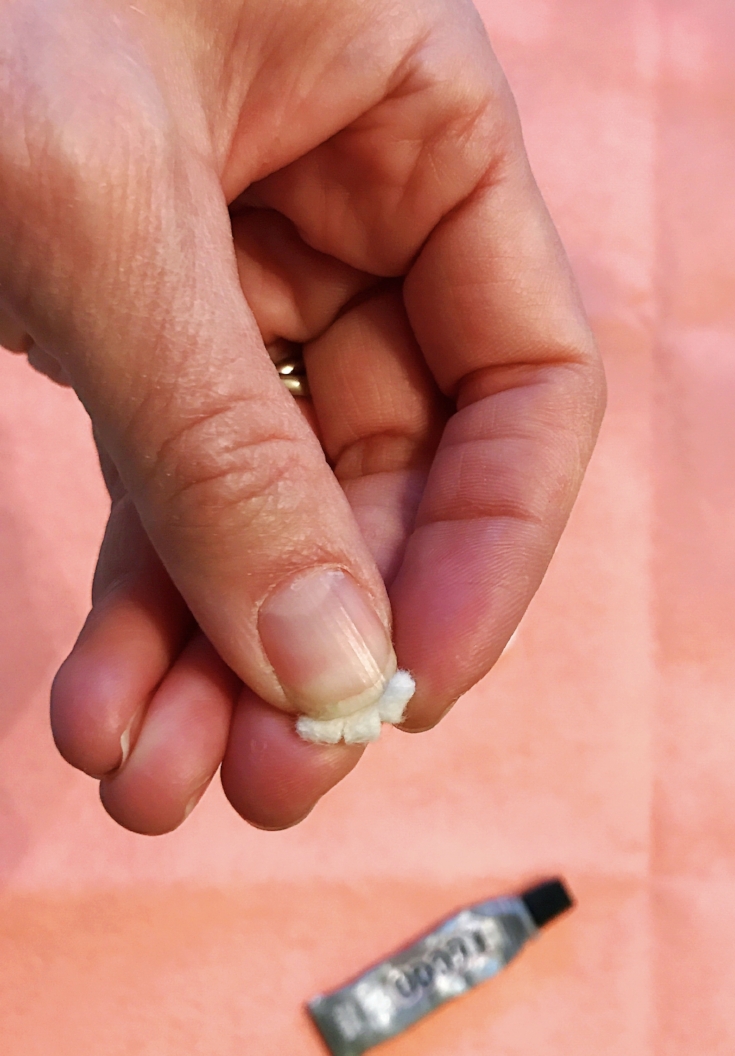
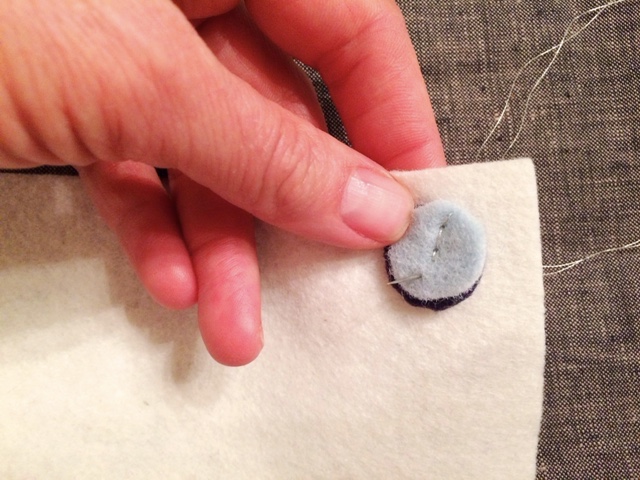
Fold the felt circle in half and make a small cut on each side of the center.
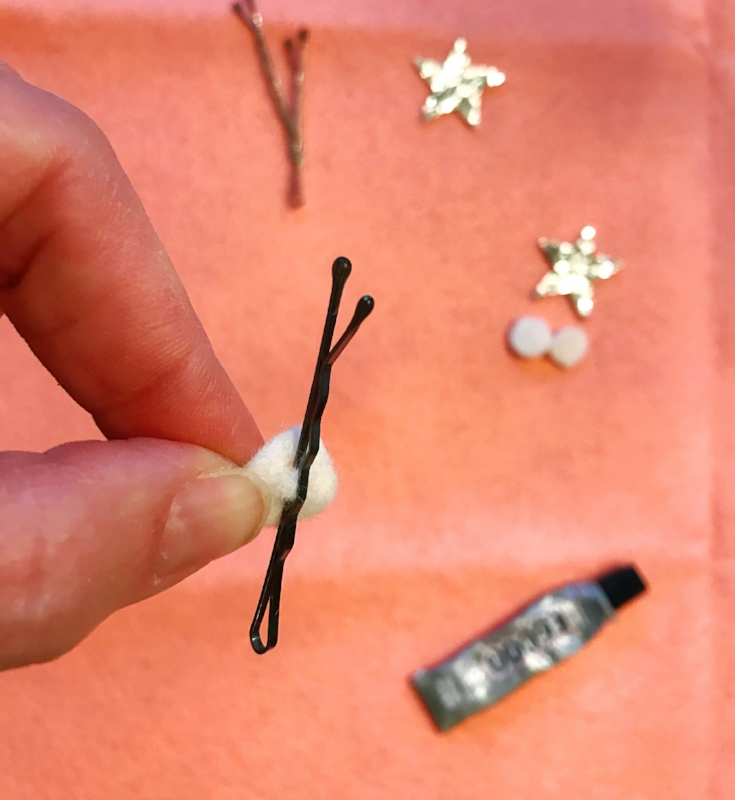
Thread the flat end of the bobby pin through the cuts of the felt circle.

Push felt circle to the end of the bobby pin.
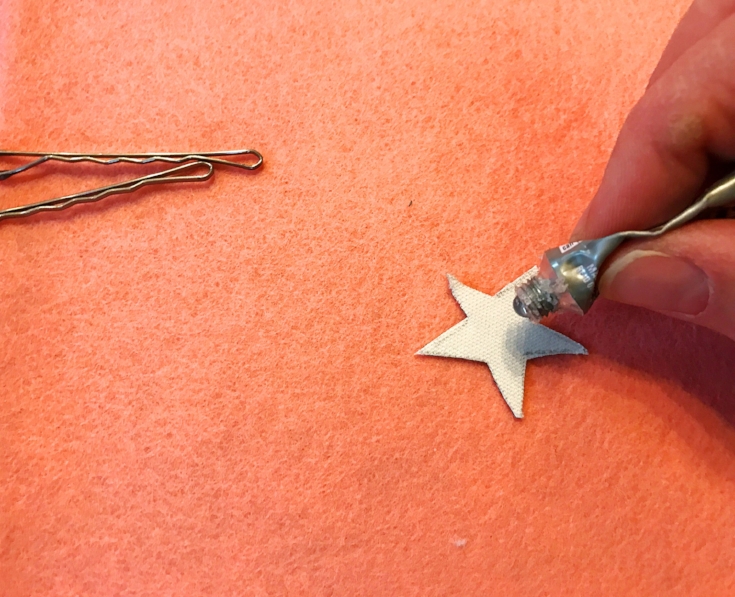
Put a dab of glue onto the center of the back of the star. Glue to the felt circle.
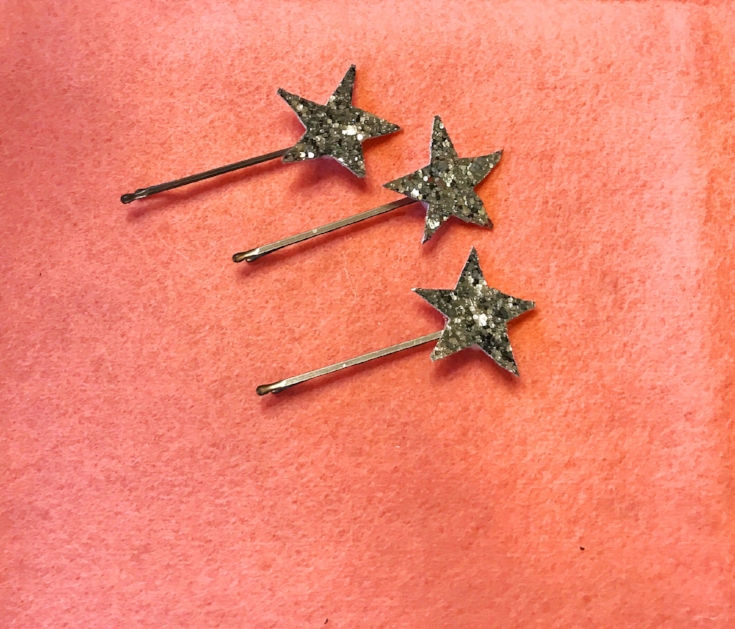
Done! How easy was that?! Now time for the pearls!
MATERIALS
Bobby Pins
28 Gauge Beading Wire (choose a color to coordinate with your bobby pins)
Needle nose pliers and crimping pliers (Optional)
*You can of course purchase these and similar items locally, I am sourcing Amazon because sometimes it is easier to get an idea of what to look for.

These bobby pins are so much prettier in real life. The light in my house is very dim today.
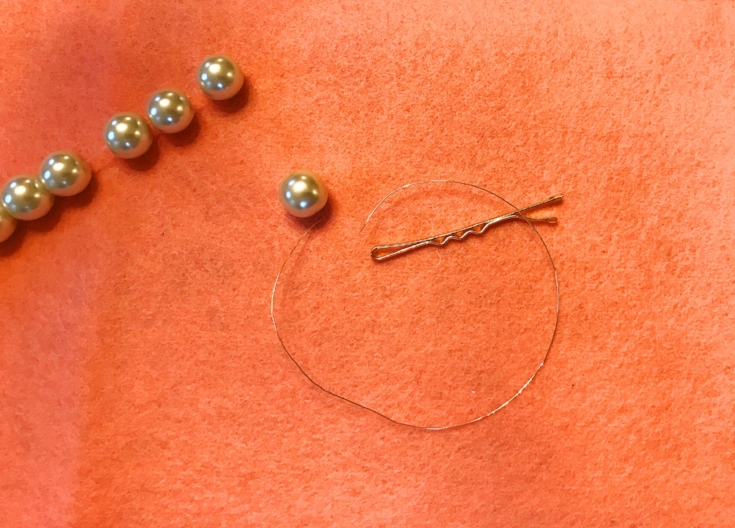
Cut a six inch length of beading wire and thread it through the center of one pearl.
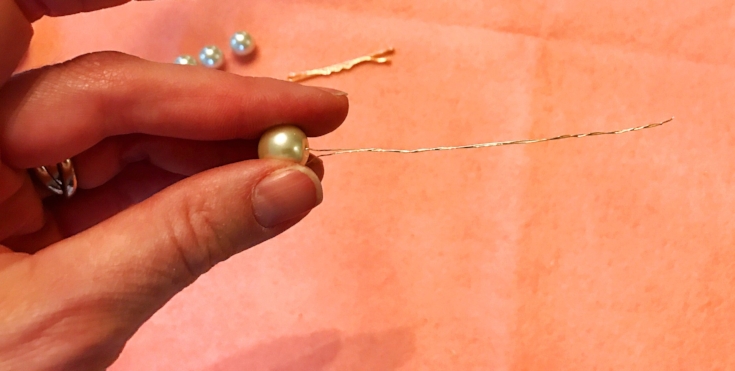
Pinch and twist the entire length of wire to tighten.
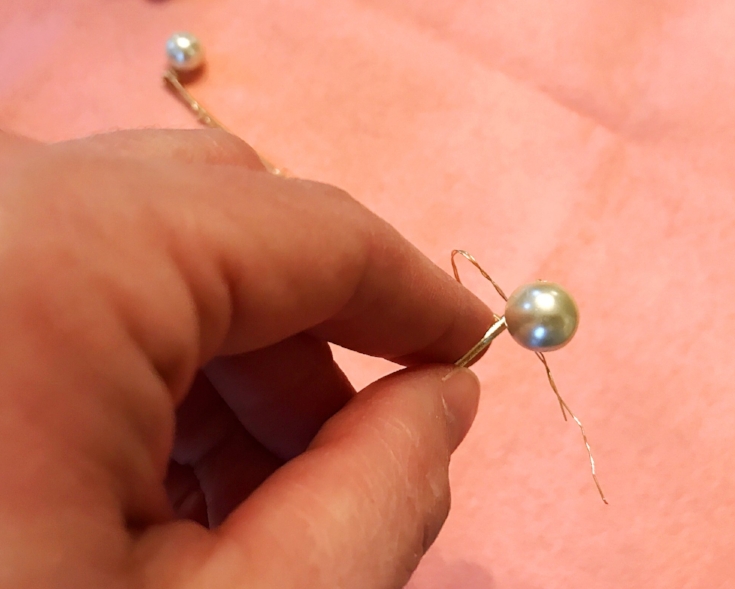
Thread the wire through the end of the bobby pin and twist to secure. Hold the pearl between your thumb and index finger while wrapping the wire tightly between the bobby pin and just beneath the pearl three times.
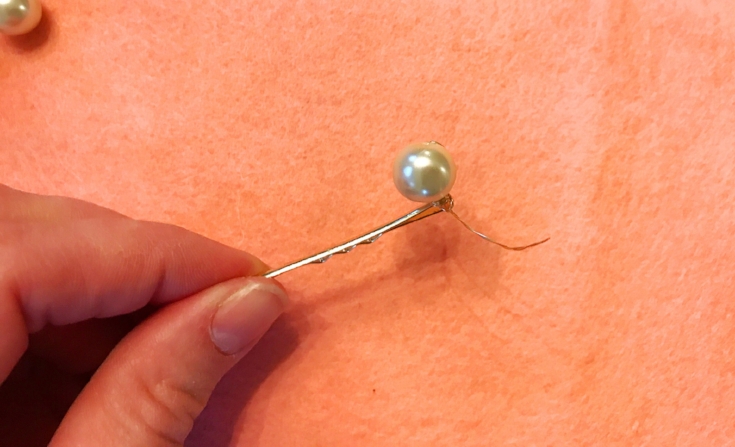
Now take the wire and wrap it around the top of the bobby pin three times to secure. You might want to use needle nose pliers for this. Trim wire ends once the pearl feels secured or if you have crimping pliers, just use those.
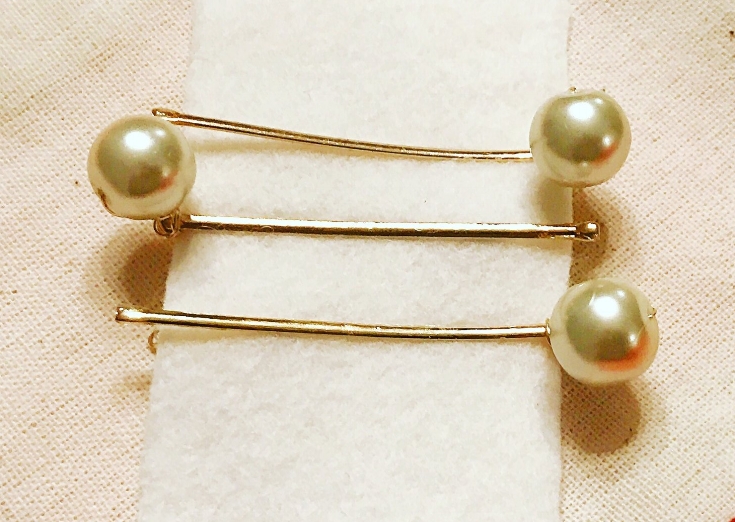
Pretty, right? I think next I am going to take apart some old glamorous sparkly jewelry and wire them to hair combs. Why should kids and brides get all of the hair fun?

On the Twelfth Day of Christmas.....Festive Stocking Holders
One of my favorite Christmas traditions is handmade gifts. For me, making something for a friend, sister or child, is what makes the holidays so special.
These mini stockings are sure to be a hit at your table. Their small size make them perfect to hold a treat, a gift card, or flatware. Additionally they can double as Christmas ornaments next year!
MATERIALS

White felt
Scrap felt in a variety of fun colors
Handsewing needle
White thread
Metallic Embroidery Floss in White Gold
A free Mini Christmas Stocking Template, printed and cut out
SIZE
3 x 5 3/4
MAKE THE STOCKING
CUT
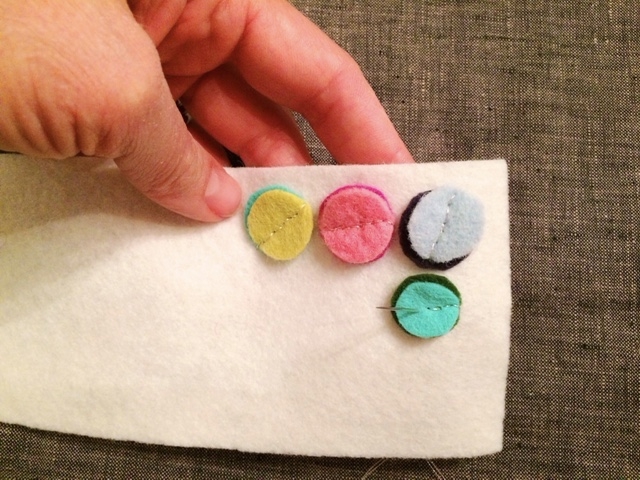
Using the Mini Stocking Template, cut 2 foot pieces, one cuff piece, one loop, and 18 felt circles.
EMBELLISH
Following the pictures as a guide, stitch two circles at a time to the stocking cuff using a straight stitch and some metallic thread. For added interest, I offset the direction that I stitched the felt circles to the cuff.
MAKE THE STOCKING
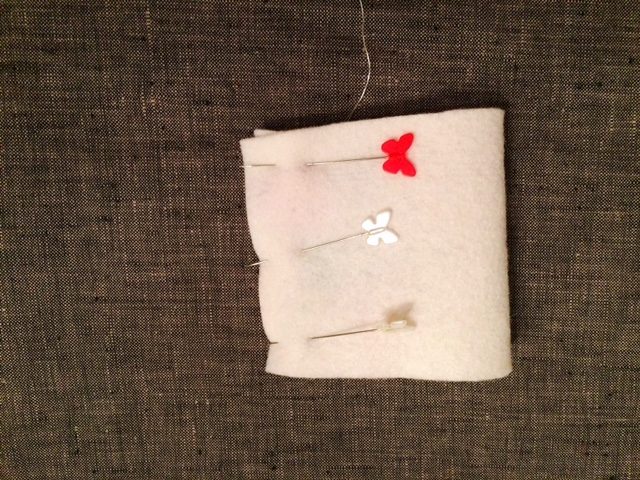
Fold the embellished stocking cuff inward with Right Sides Facing Together. Stitch the short side using a 1/4" seam allowance.
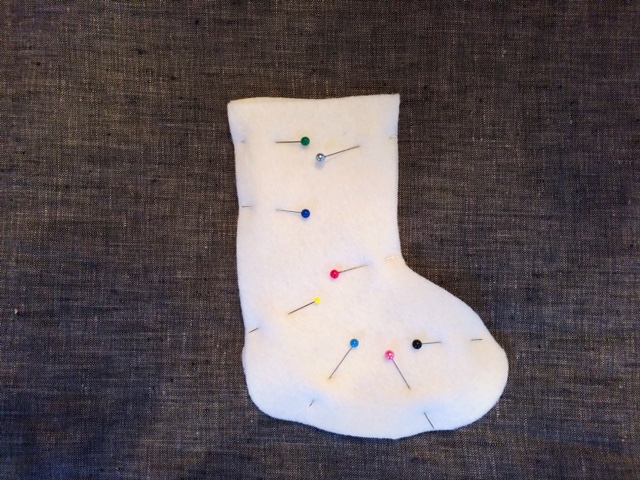
Place the stocking front and back on top of each other. Pin together along the outside edges (leave the top of the stocking open). Stitch around the foot of the stocking using a 1/4" seam allowance. Be sure to backstich at the beginning and end of each seam.
ASSEMBLE
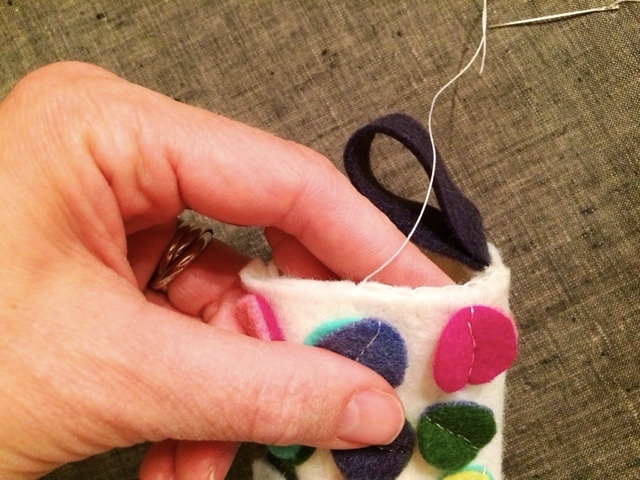
With both the stocking and the cuff turned Right Side Out, slide the cuff over the stocking. Push it all the way onto the stocking body so that it fits snuggly.

Pin the top pieces together around the inside of the opening, making sure that the side seams meet. Tuck the raw ends of the loop into the back right side of the cuff. Pin.
HEMMING THE TOP
Using the white thread, stitch the top together using a straight stitch or a blanket stitch. Make sure to reinforce the loop by sewing over it twice.
You are all done and ready for treats!

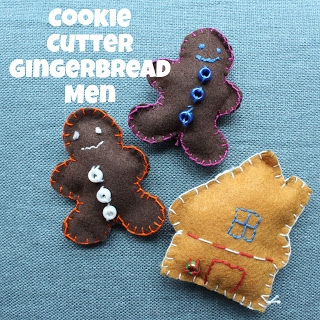
On the Tenth Day of Christmas.... Stocking Charms
Each year I like to make a new stocking charm for my kids to decorate their stocking. The idea is really simple and fun and jazzes up the stockings a little bit. Candy canes, initials, dolls, bears, whatever comes to mind. With kids out of school this week, this is a quick project that they would love and it might buy you a few minutes of peace.

Each year I like to make a new stocking charm for my kids to decorate their stocking. The idea is really simple and fun and jazzes up the stockings a little bit. Candy canes, initials, dolls, bears, whatever comes to mind. With kids out of school this week, this is a quick project that they would love and it might buy you a few minutes of peace.
I like to think of these as kitchen counter crafts. They require very little time and supplies that you probably already have.

Felt
Scissors
Embroidery floss
Needle
A bit of poly-fil stuffing
Begin by drawing a simple shape that is about 3-4 inches high and at least an inch wide. Cut it out and use it as a pattern. The simpler the shape, the easier it will be to sew. You can always embellish later.
Place it on the felt and cut around. You will need a back and a front. For this tutorial I am using the letter C and a star.

If you are sewing a shape that has an inside and an outside (like this letter C) begin sewing on the inside.
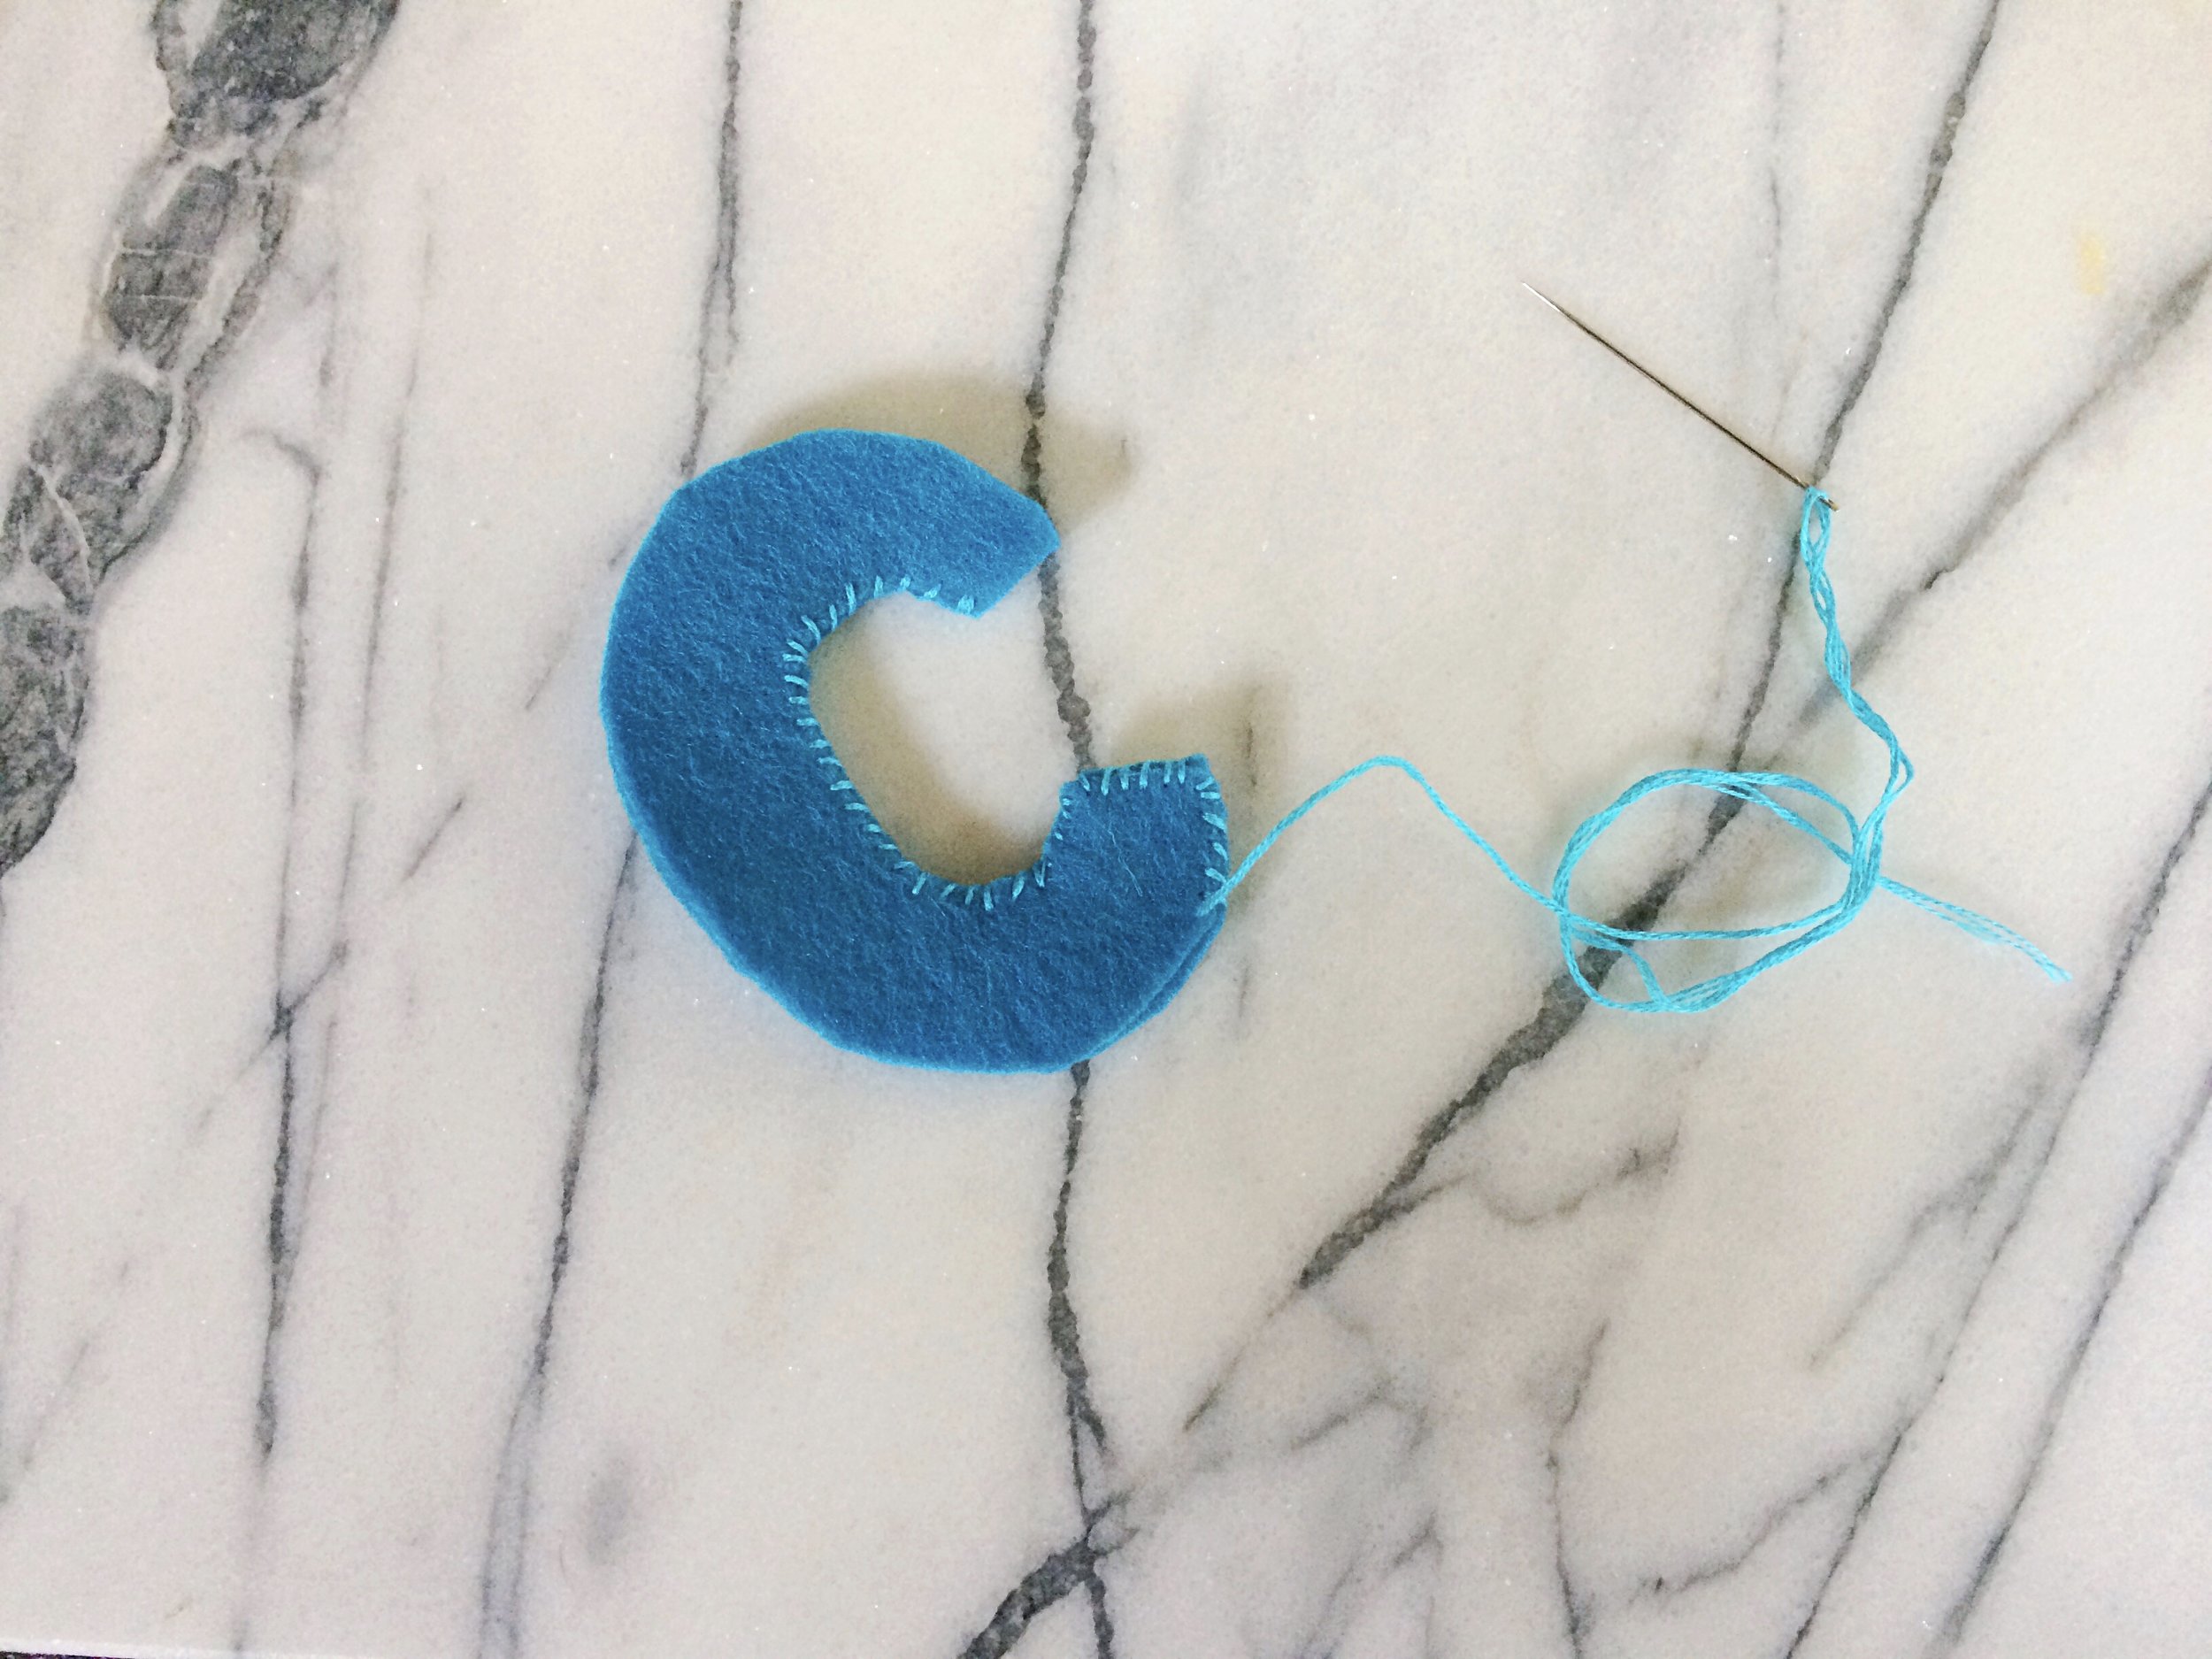
Continue to sew around the edge and a bit up the outside curve.

Once you have an inch or two stitched on both sides, you can begin to gently stuff. I like to take small tufts of poly-fill and push it through a little bit at a time. A chopstick works well for this, as does the eraser end of a pencil. Continue to stitch and stuff until complete. Tie off.
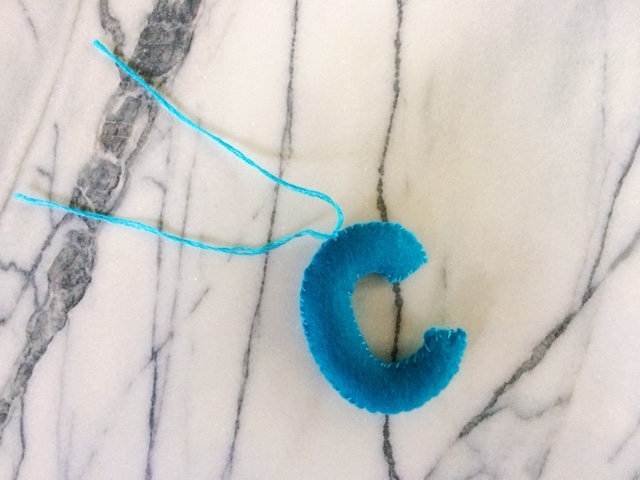
Cut a length of floss to thread through the top of your shape and hang!

The steps are pretty much the same for a shape such as a star. Begin by inserting the needle on the inside corner of one of your shape. (This way the knot will be hidden on the inside).
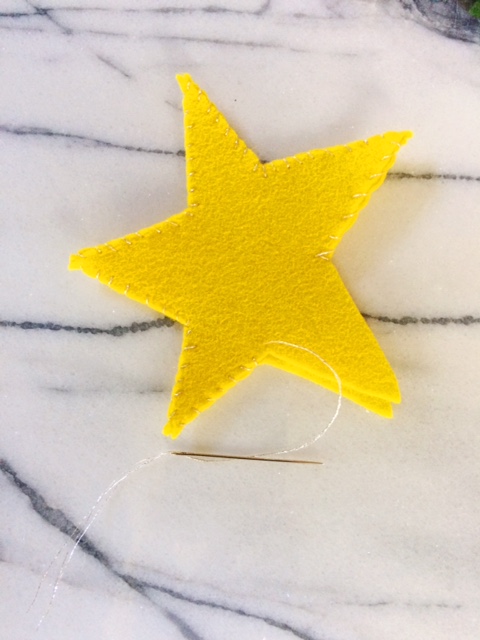
Continue sewing around the shape.

Once most of the shape is stitched, begin to stuff.

Stitch to close. Then either sew a ribbon from the top or a length of floss. Tie and hang with pride.
Which shape will you make first?

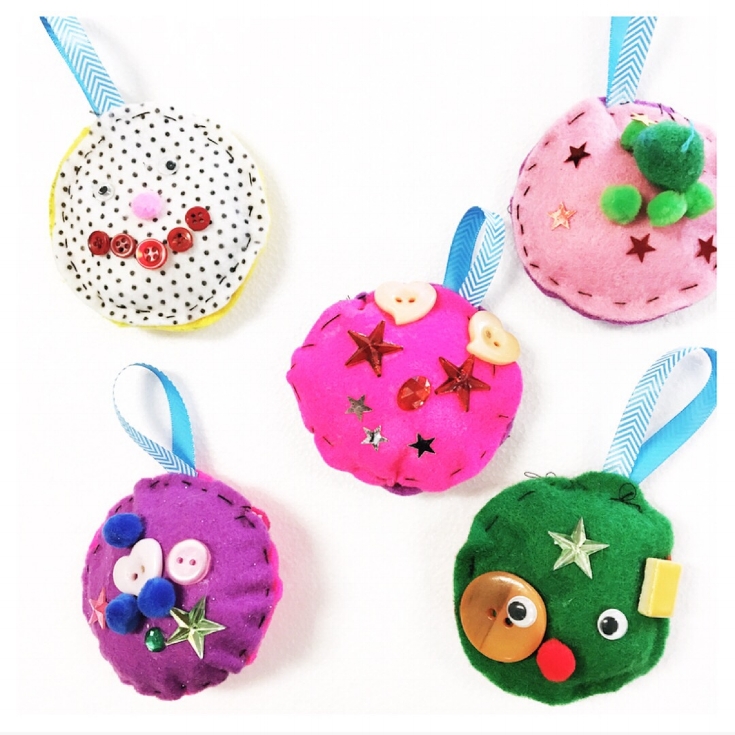
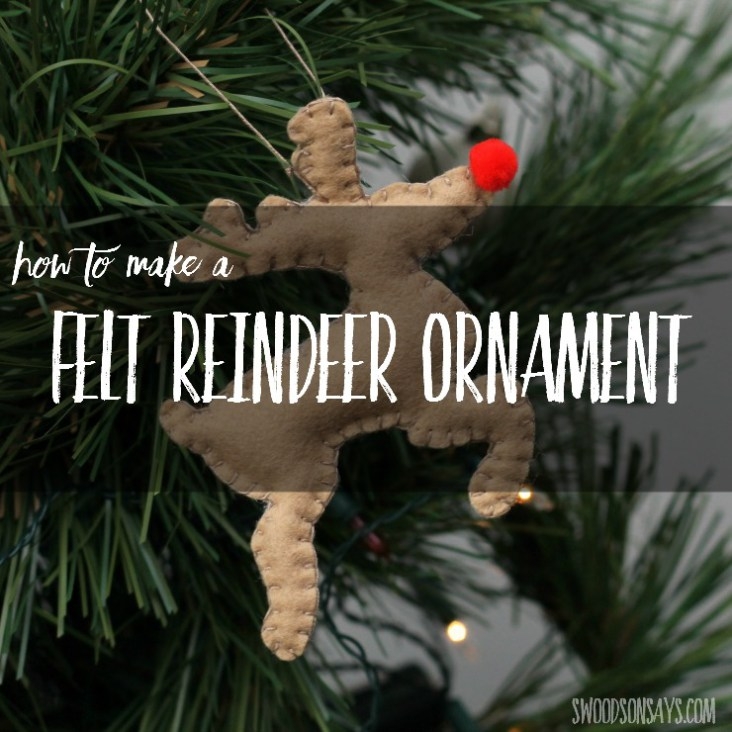
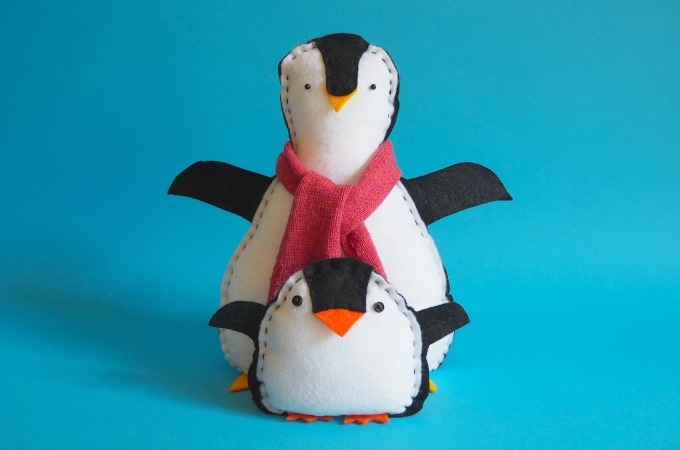
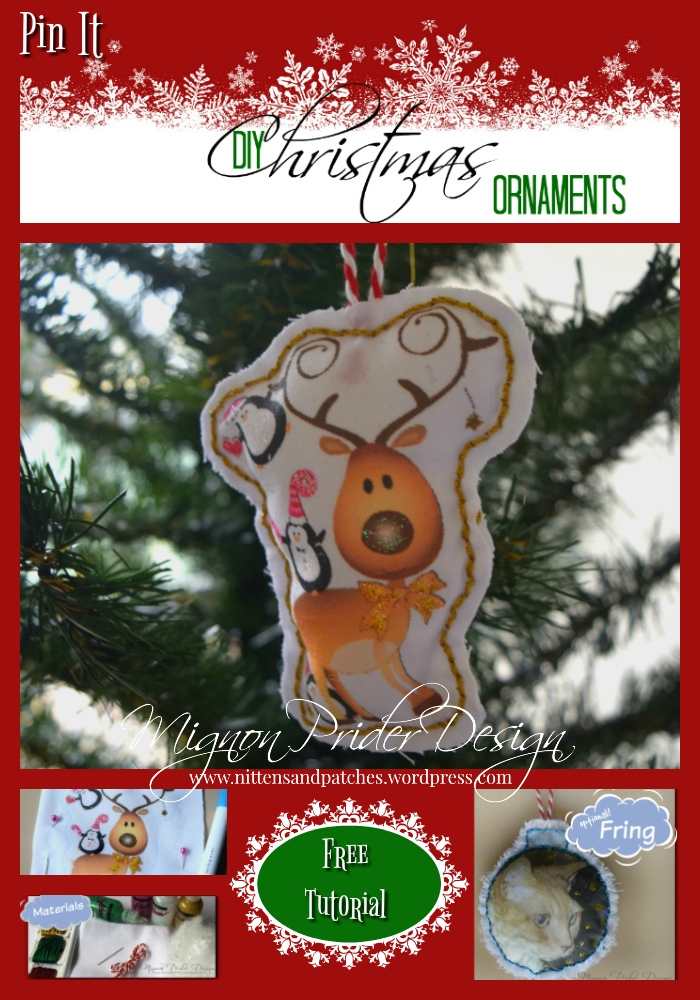
On the ninth day of Christmas... A Sew a Softie Round up
The last two weeks, we've celebrated everything hand-sewing and softie-related and it’s clear you love sewing with kids as much as we do. In this post you will find all of the inspiration you will need to sew an ornament or toy for Christmas.
But perhaps the best part of Sew a Softie for Christmas is the blog tour. These lovely ladies showed us their take on simple sewing projects with kids. So many of our blogger friends have posted darling sewing projects over the past few days, it's hard to know where to start!
Sew a softie for Christmas Round-up

This is the Christmas Treat Cone that I made.


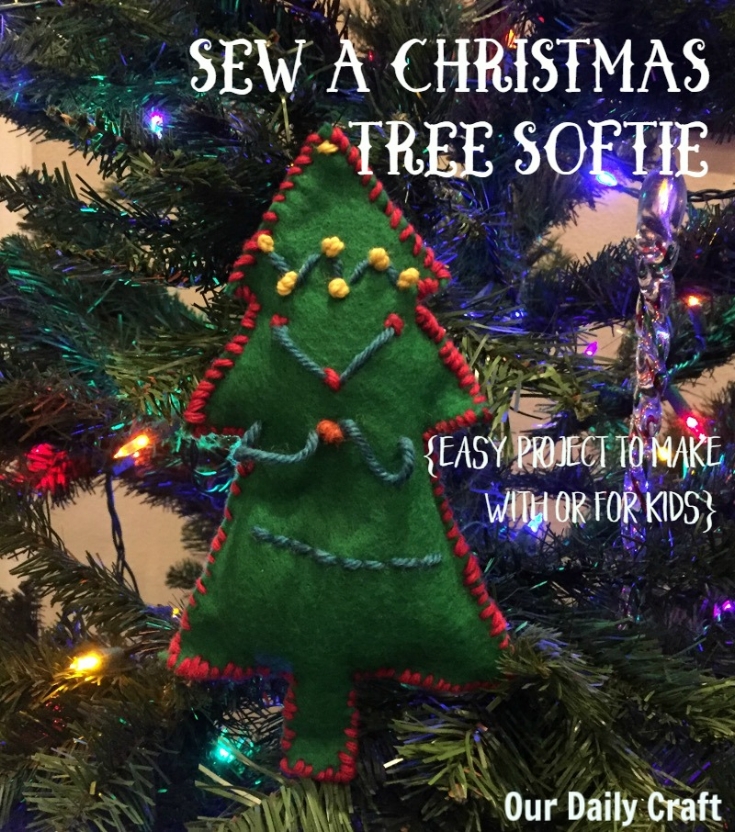
Christmas tree softie http://www.ourdailycraft.com/2016/12/02/sew-christmas-tree-softie/


Thank you so much to everyone who is included here. Such a lot of wonderful sewing you've done with this idea! What are you going to make first?
XO, Hilarie
On the Sixth Day of Christmas.....
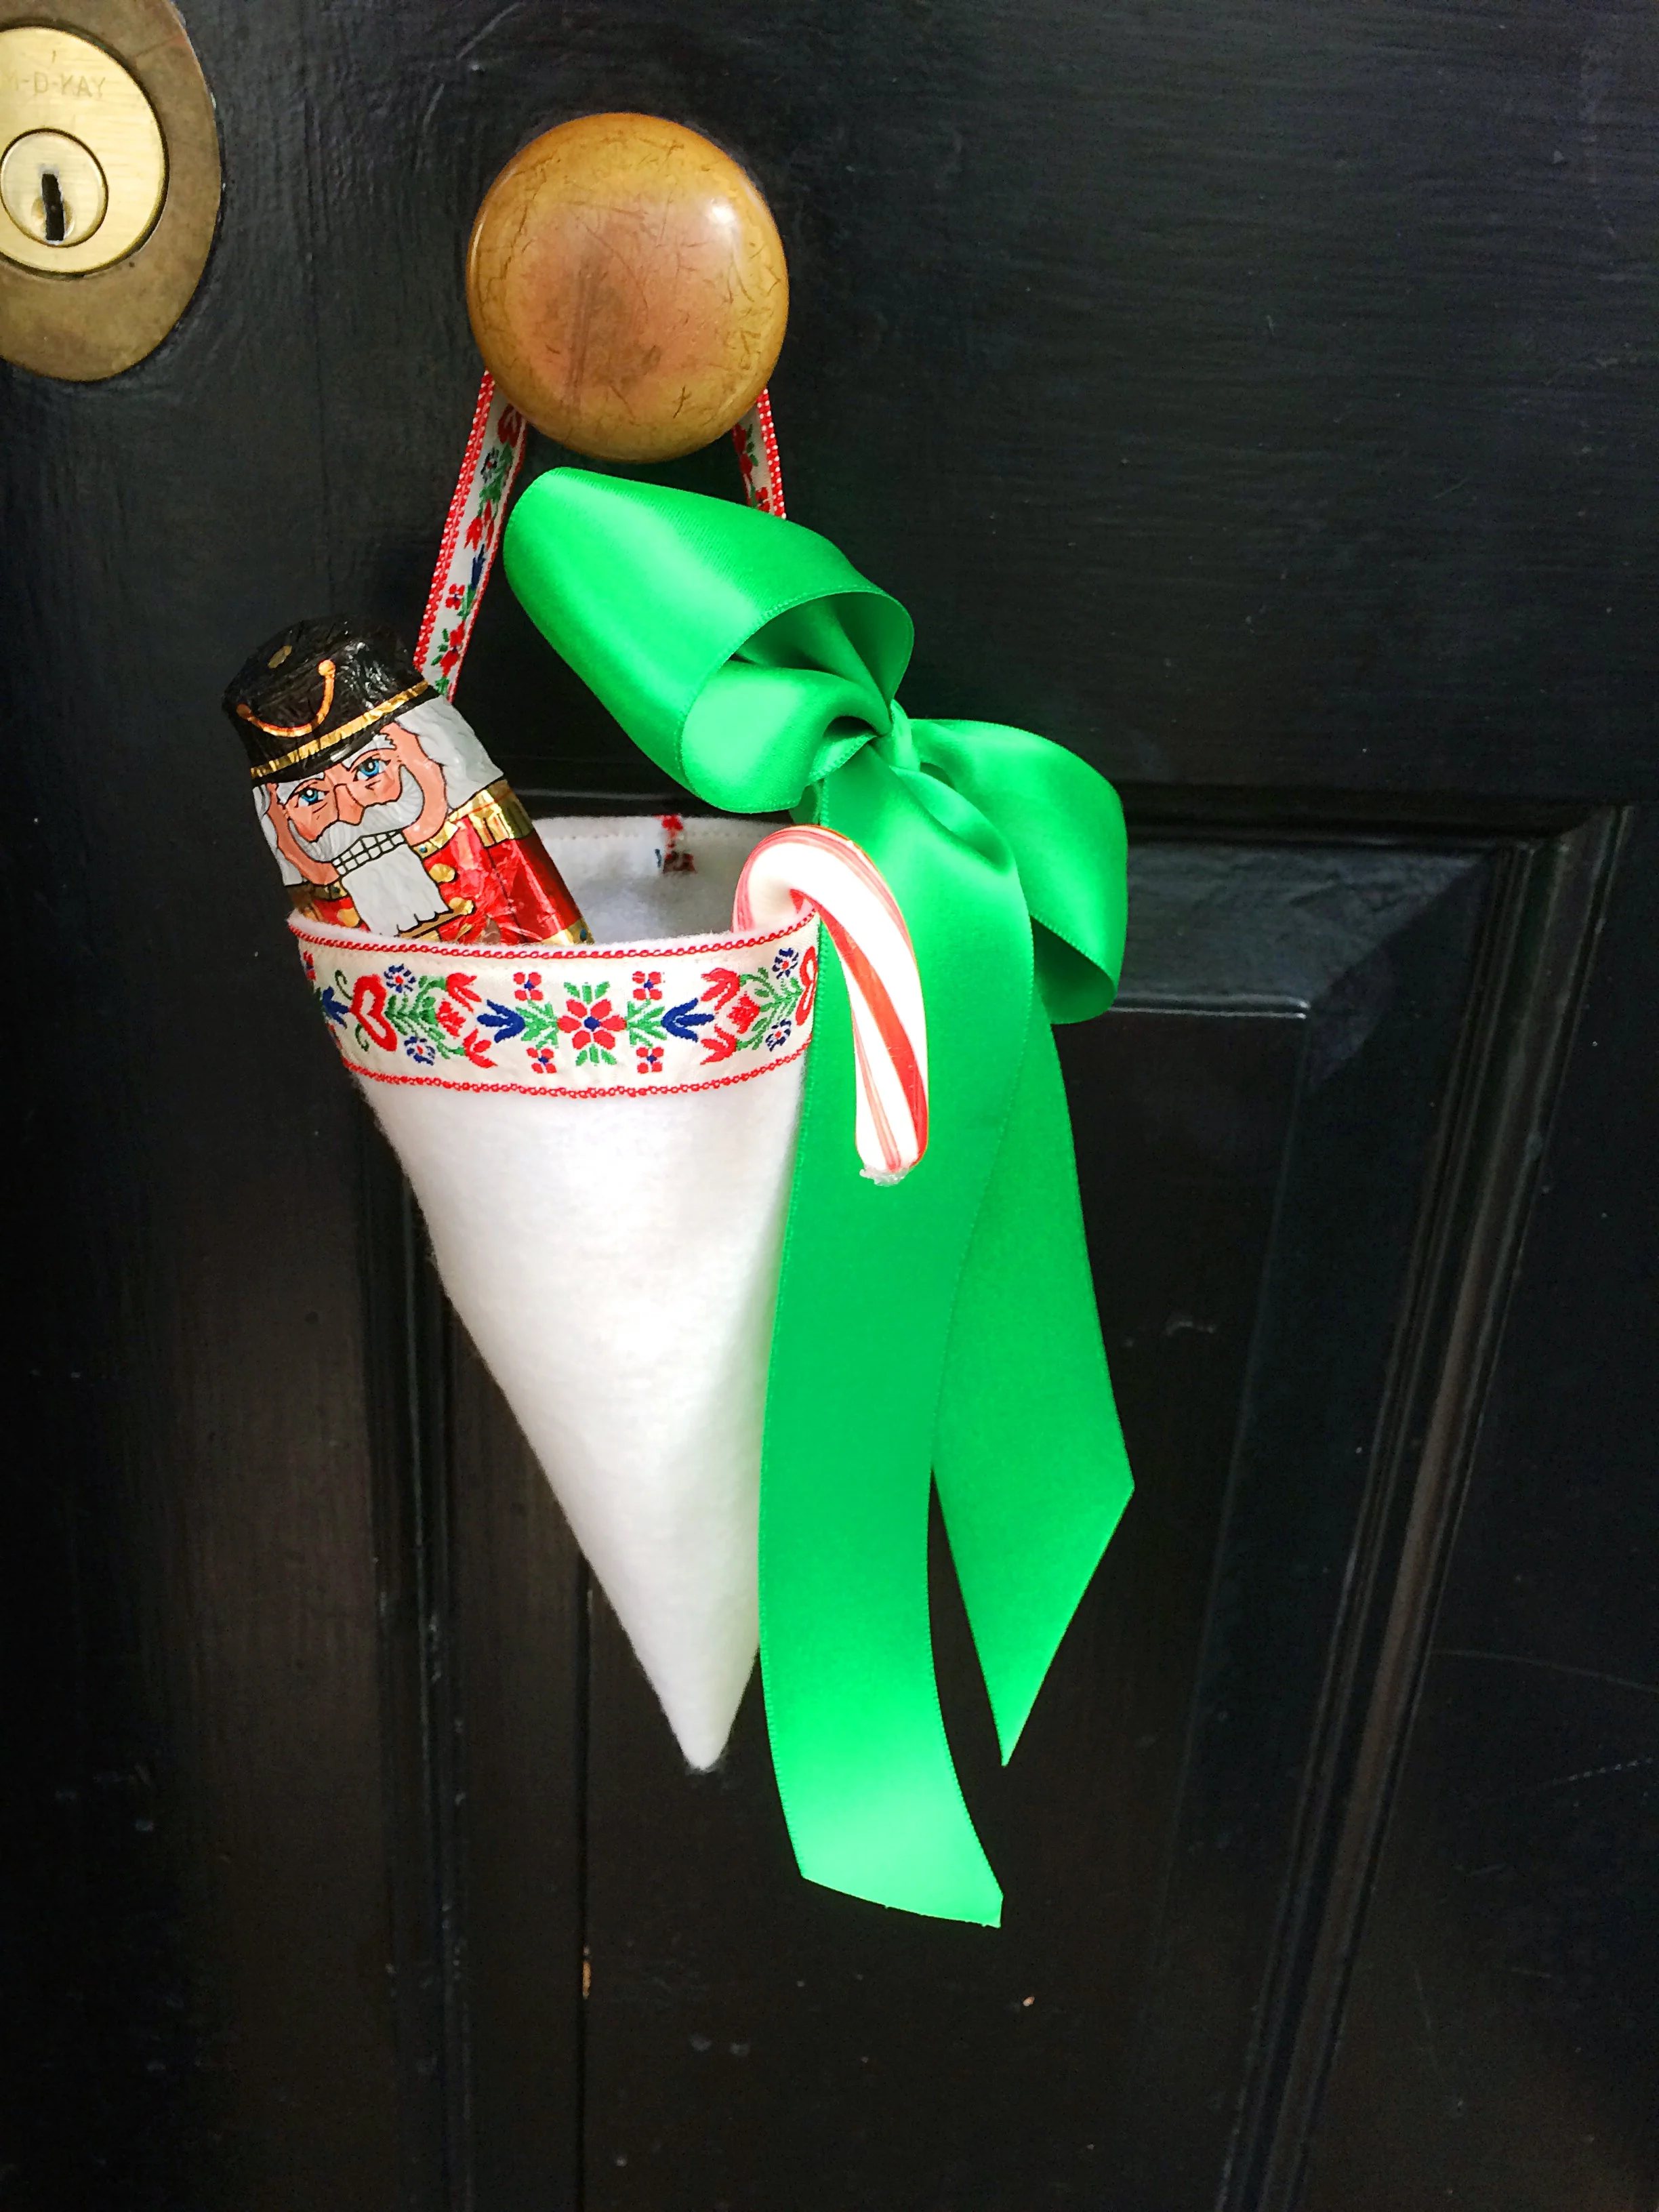
On the Sixth Day of Christmas my true love gave to me a Christmas Candy Cone. Inspired by Victorian candy cones and the German Schultüte, this cone will look equally beautiful hung from a door or your tree.

On the Sixth Day of Christmas my true love gave to me a Christmas Candy Cone. Inspired by Victorian candy cones and the German Schultüte, this cone will look equally beautiful hung from a door or your tree.
My mother grew up in Germany, so many of my Christmas holiday traditions, goodies and decorations have a strong German influence. This Cone beautifully synthesizes all things Christmas for me: classic and simple with a hint of nostalgia. I chose to make this project in wool felt. Felt is my favorite craft making material because it's soft, natural and so easy. It also lends itself effortlessly to a project that is easy enough for kids to make or to make with kids.
This post is part of the Sew a Softie for Christmas project held by Trixi Symonds, author of "Sew Together Grow Together" and Coloured Buttons. Thank you Trixi for inviting me to participate!
Materials needed:
One yard of ribbon
8 X 12 sheet of felt
Embroidery floss or Pearle Cotton
Needle
You can make this with a sewing machine as well, but they are super fun to sew by hand as well. I think the next one I make might just feature some fab embroidered details and a pompom or two.
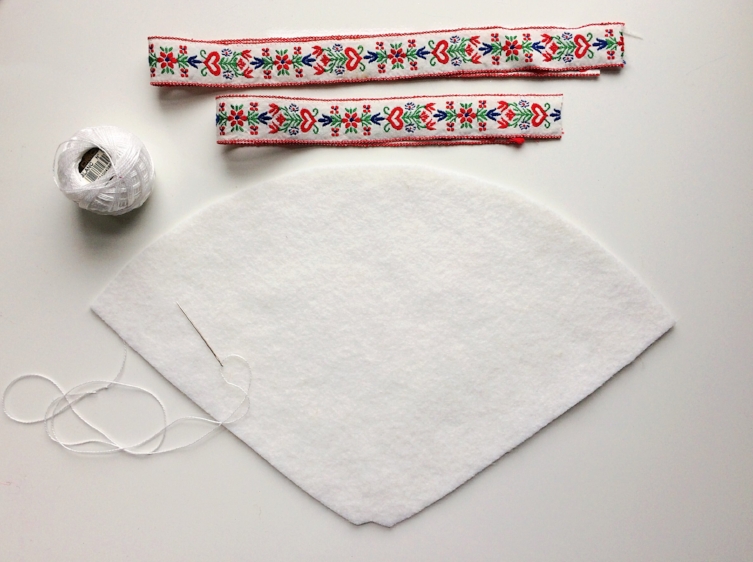
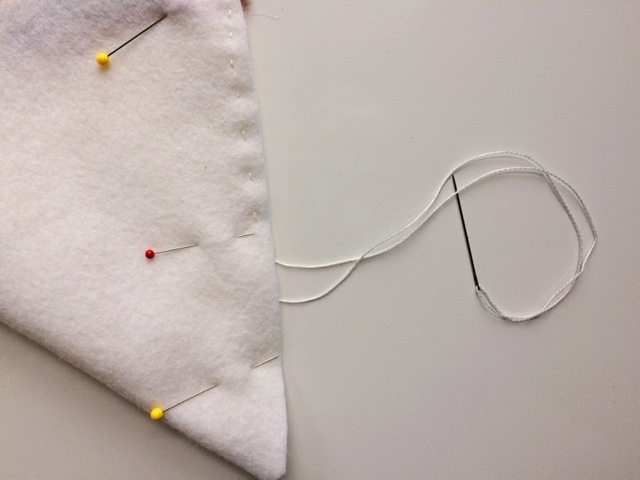
Cut one cone shape using the template. Cut ribbon into two lengths. 13" for the cone edge and 10" for the handle.
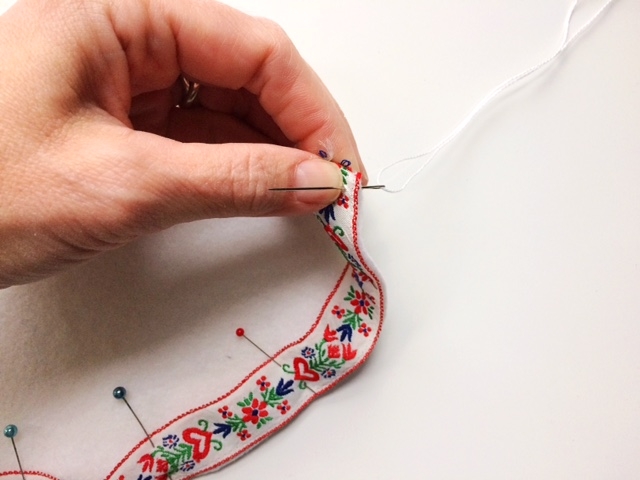
Take the 13" length of ribbon and pin along the curved edge of the felt. Stitch the top edge.

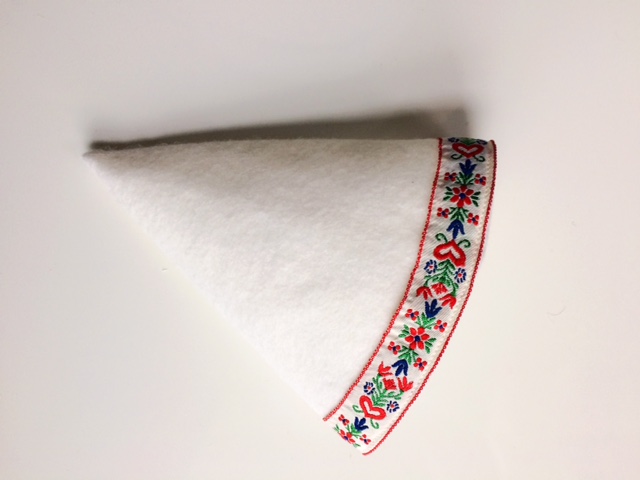
Fold the felt in half with the right sides facing together. Make sure that the ribbon is aligned too! Pin and sew from the top ribbon edge to the point.
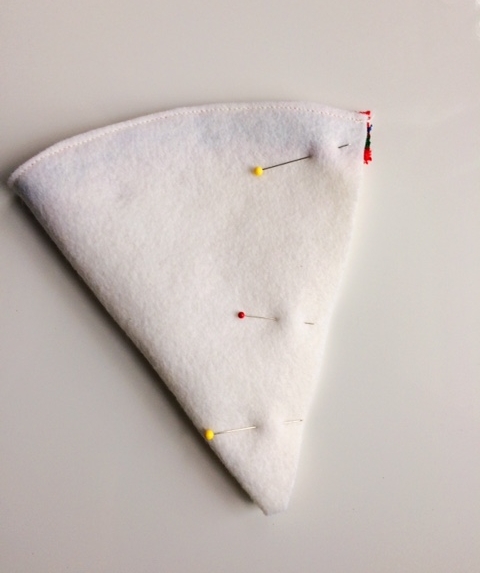
Turn right side out. You may want to use the eraser edge of a pencil to push the pointed end of the felt out.
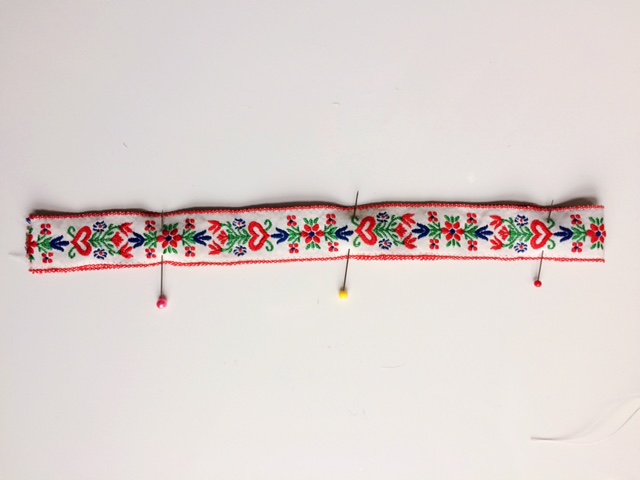
If your ribbon is single sided (meaning one side has a pattern and the other doesn't) you can cut two lengths and place them with the wrong sides facing together. Sew on each long side.
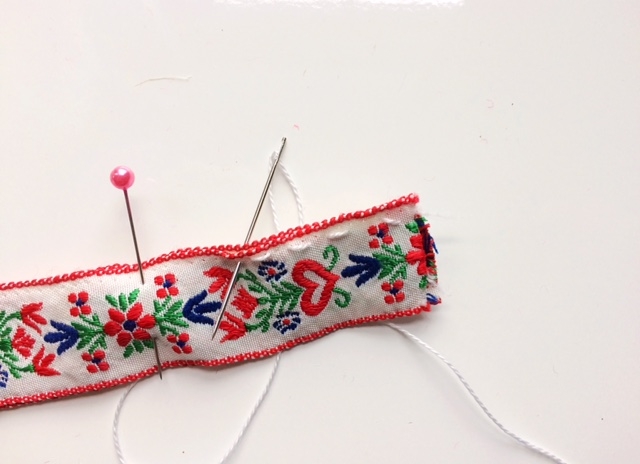
Pin the handle to each side of the cones top edge and sew to secure.

Give the felt a nice tug to help smooth its shape. Fill with goodies and display with pride!
Some thoughts on sewing with kids
When sewing with small kids, we begin by threading the needle and leaving a long “tail” beneath the know. With the threaded needle under the felt, I begin telling a story of a little mermaid that is just learning to dive and swim. She is going to practice by shooting up from underneath the water (underside of the fabric) then just as her tail reaches the surface (when they feel the knot reach the fabric) she turns and points herself right back in the water. Before she does that though, she needs to stop and plug her nose (I have the kids pinch the eye of the threaded needle and pierce the fabric through the other side of the line). Then we keep practicing. There are always lots of knots and loops but they get it.
I hope that you enjoy making this project!
Hilarie XO

On the Fifth Day of Christmas....
On the Fifth Day of Christmas, my true love gave to me..... a fun and easy DIY project for the littlest crafty ones!
It's so fun when children start learning new things. They are just thrilled and so proud of themselves. I have a fun DIY for you today that even a three year old will enjoy showing you how to do!
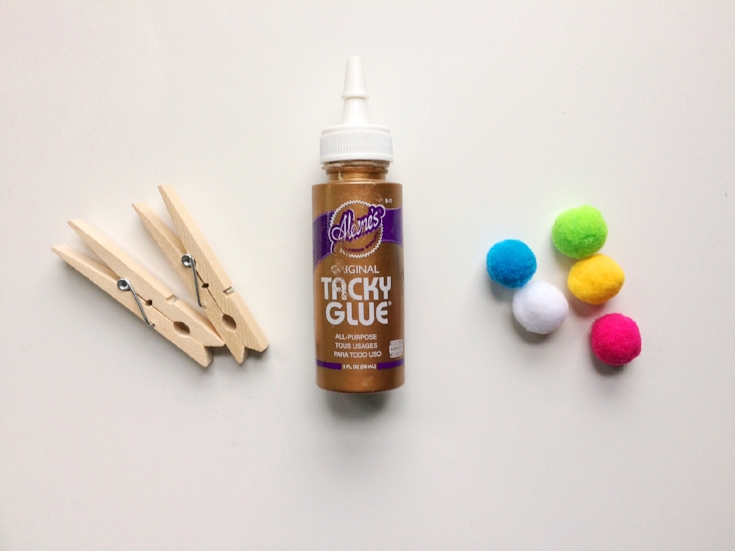
Materials needed
Pom-poms
Wooden clothespins
Glue
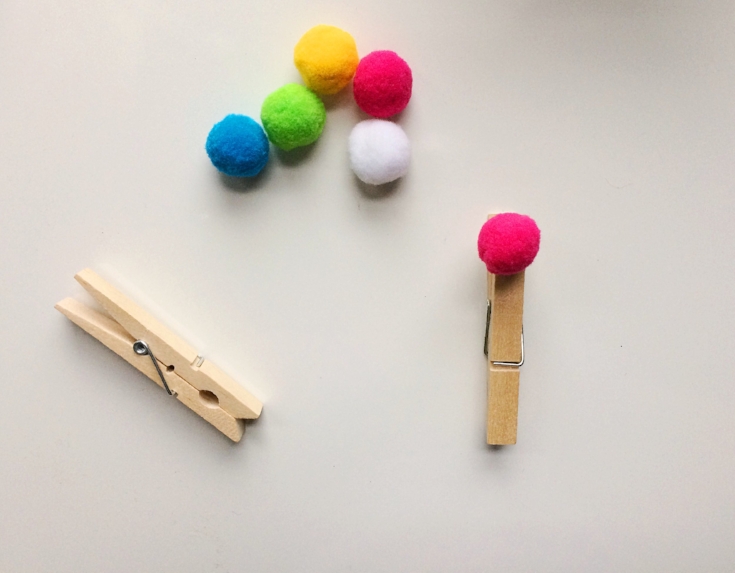
Squeeze a dab of glue onto the bottom of a wooden clothespin. Place the pompom. Hold for a second to allow the glue to set. Repeat and enjoy!
Wouldn't these be cute to pin holiday cards to a ribbon or card holder? These would also be easy and fun for a classroom craft project. Speaking of which, I think there is a third grade party that I should probably start to plan! XO
I'm stuffed! A Plush Pumpkin Pattern and Tutorial
To celebrate Thanksgiving, the girls in my sewing classes made some pumpkins. They enjoyed them so much that I thought they might help to get you in the holiday spirit! Bright and cheerful, they just make me smile.
To make your own, start by reading through this entire tutorial, print the pattern and begin!
Materials
1/4" of cotton fabric
Craft thread
Scissors
Needle
A stick about 4-6" long
Poly-fill stuffing
Green felt
Glue
Once you print the pattern, measure the scaling square to be sure that it measures 1".
You will need to cut six fabric pieces total to make each pumpkin. Lay the template on the fabric and trace with chalk. Cut on the drawn line.

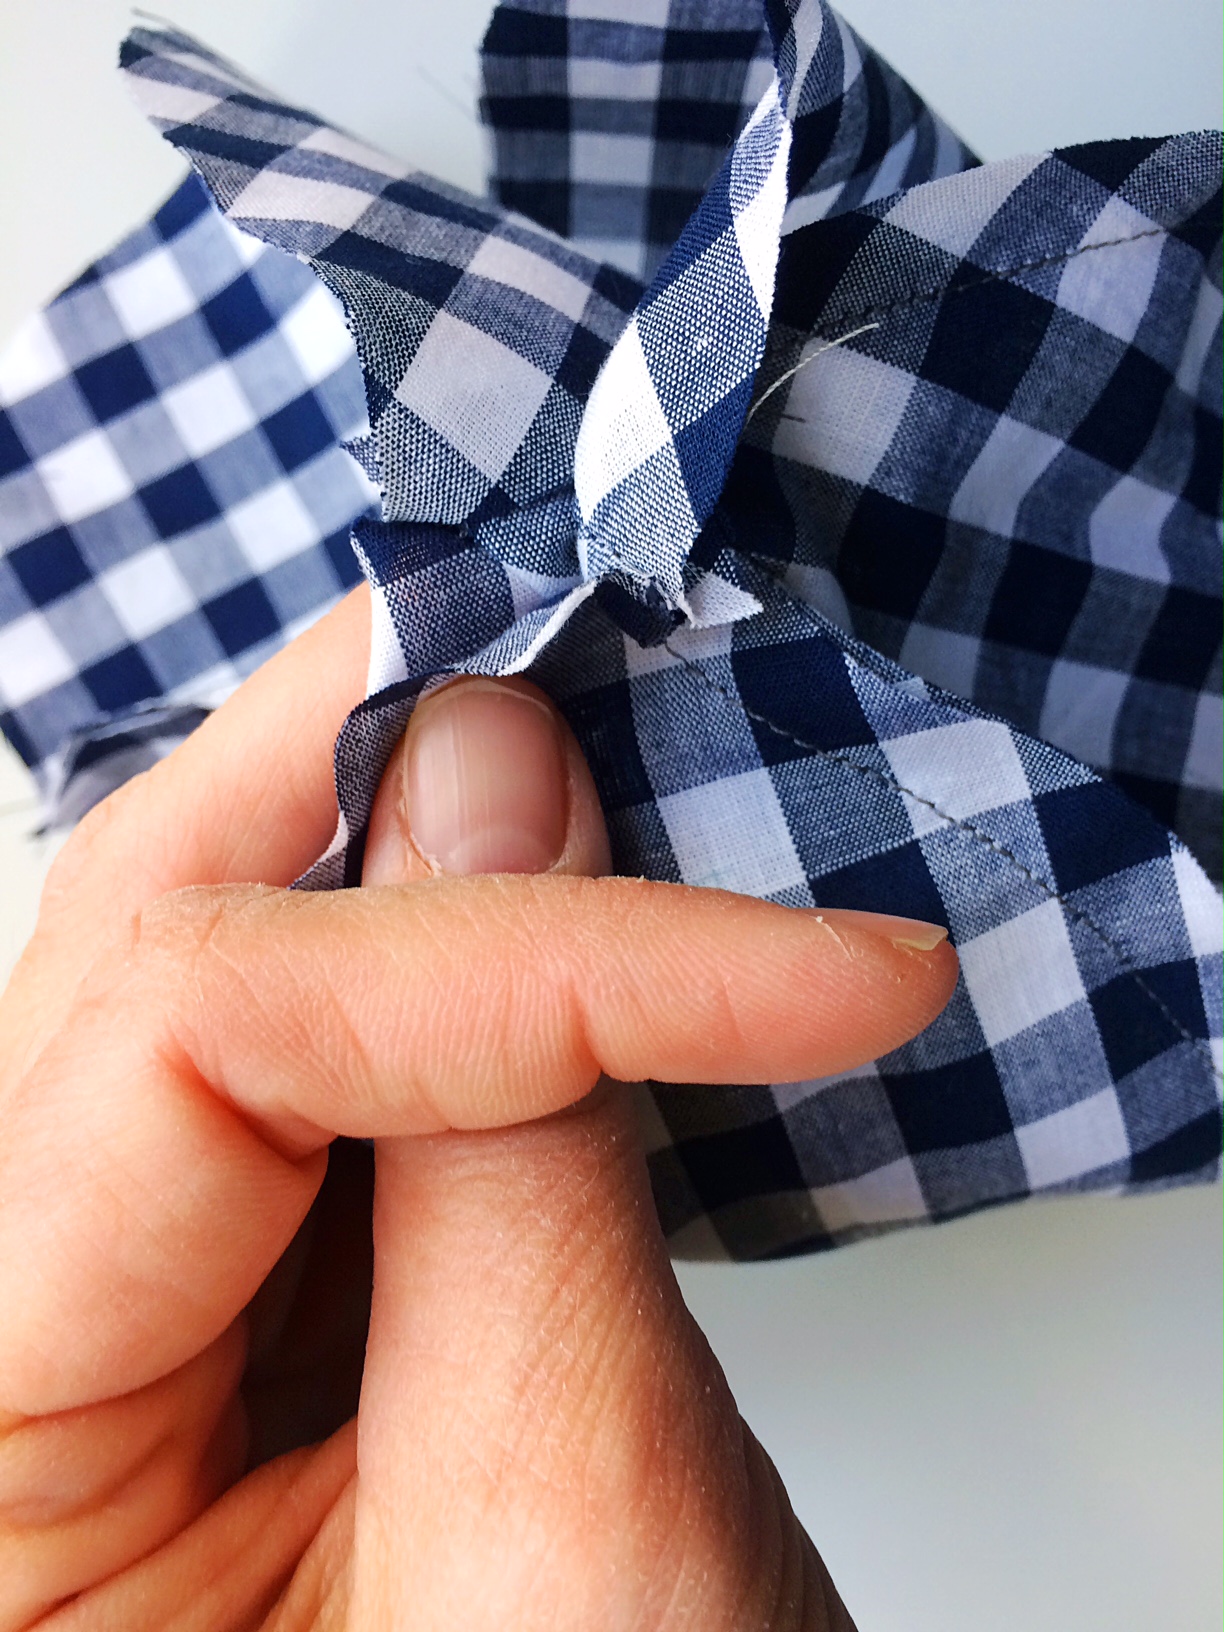
Pin the cut pieces, placing the right sides of two of the fabric pieces together carefully aligning the matching points and edges. Stitch from top to bottom on ONE side using a 3/8" seam allowance. Add a third wedge to the pair. Be sure that you are only sewing through two layers of fabric. You should end up with what looks like a shallow bowl. Repeat for the next three pieces. First sew two together, then add the third.
Reinforce the edges by backstitching when sewing together. Be sure to sew slowly around the curved edges to ensure that your pumpkin will be round and plump.

Pair these two sections together, aligning their cut edges and placing the pieces with the right sides facing together. To do this, turn one half-sphere (3 pieces sewn together) right side out and tuck it inside the other half sphere with the right sides facing together, aligning the points to match. Sew from the top of the straight edge to the opposite top straight edge around the sphere. Do not stitch the wide flat edge opening.
Do you see how the seams on the pointed side are matched on the inside? Pin carefully when you are sandwiching together.
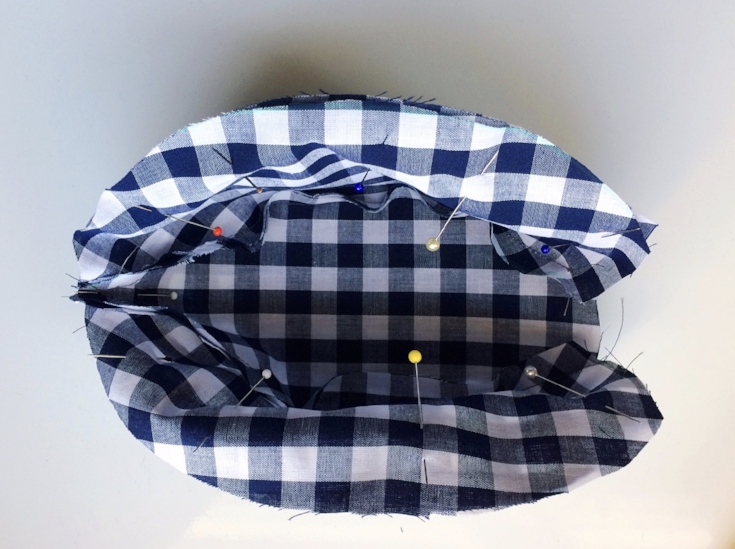
Do you see how the pointed edges are pinned and sewn together? The flat edges will remain open.
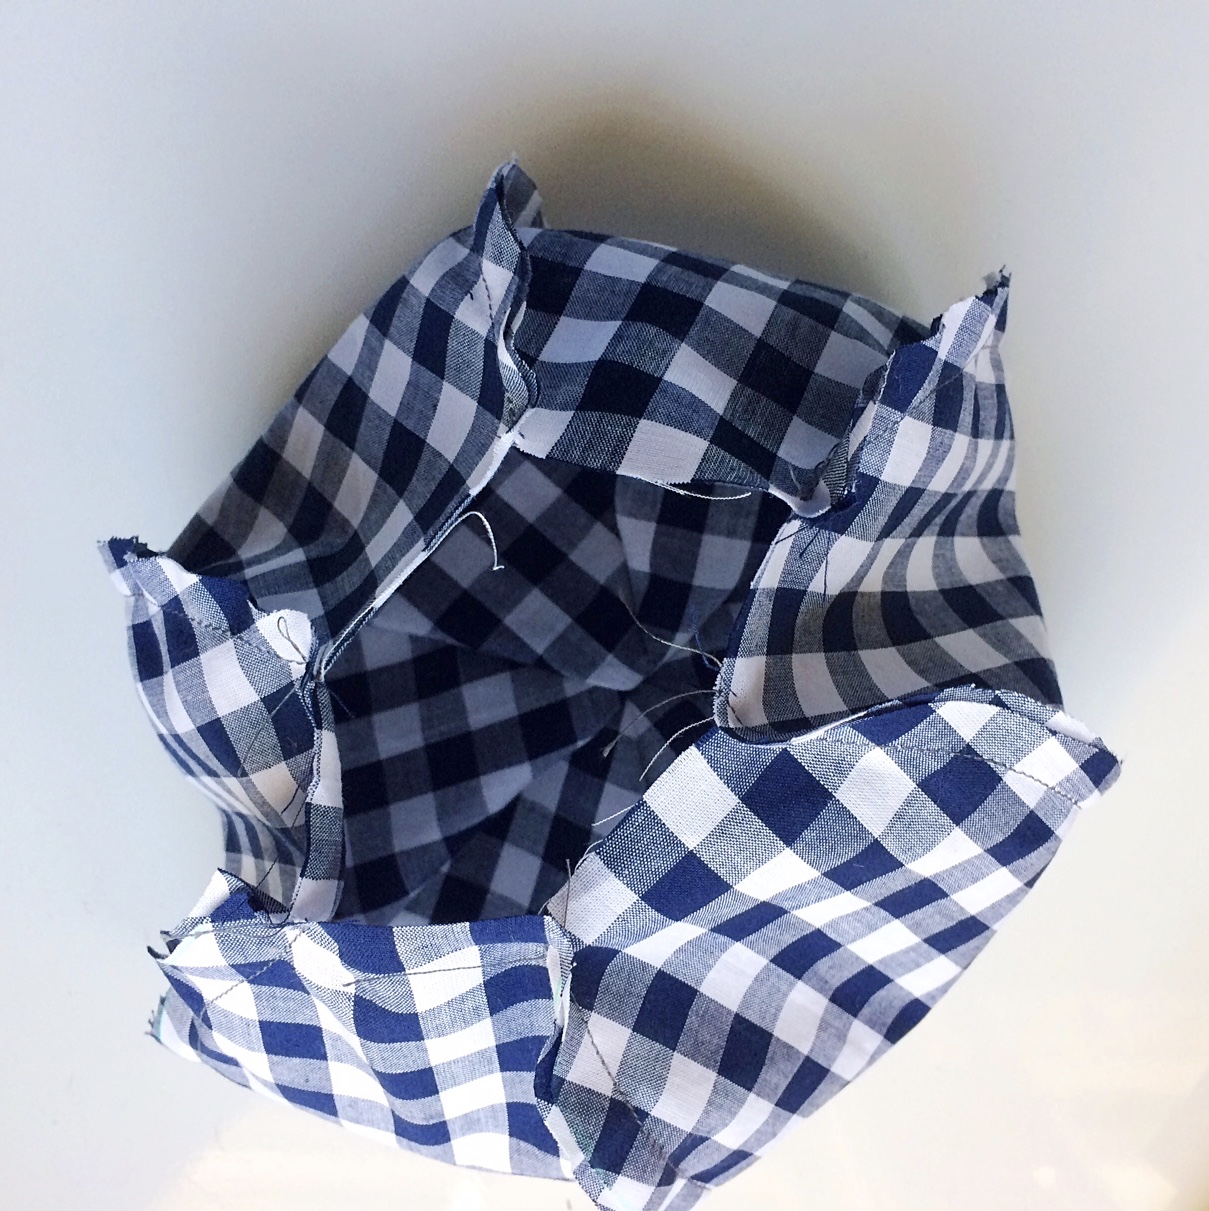
Does yours look like an inside out pumpkin bowl? Turn the sphere right side out through the opening then stuff it.
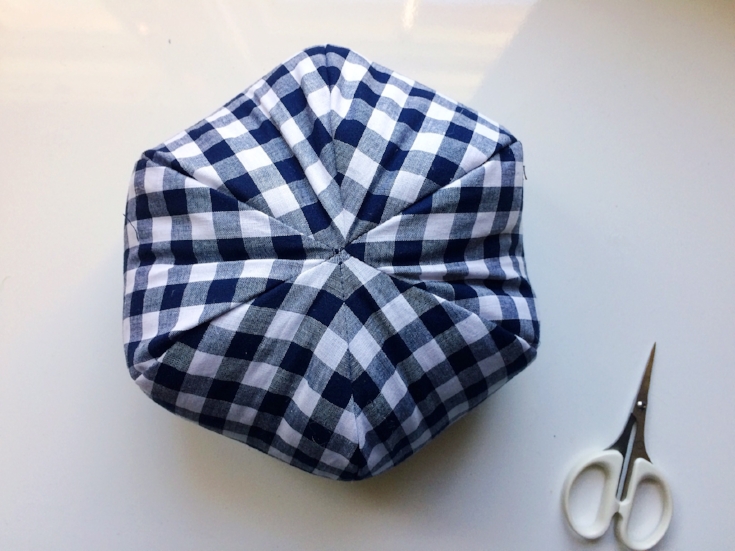
This is the what the bottom will look like.
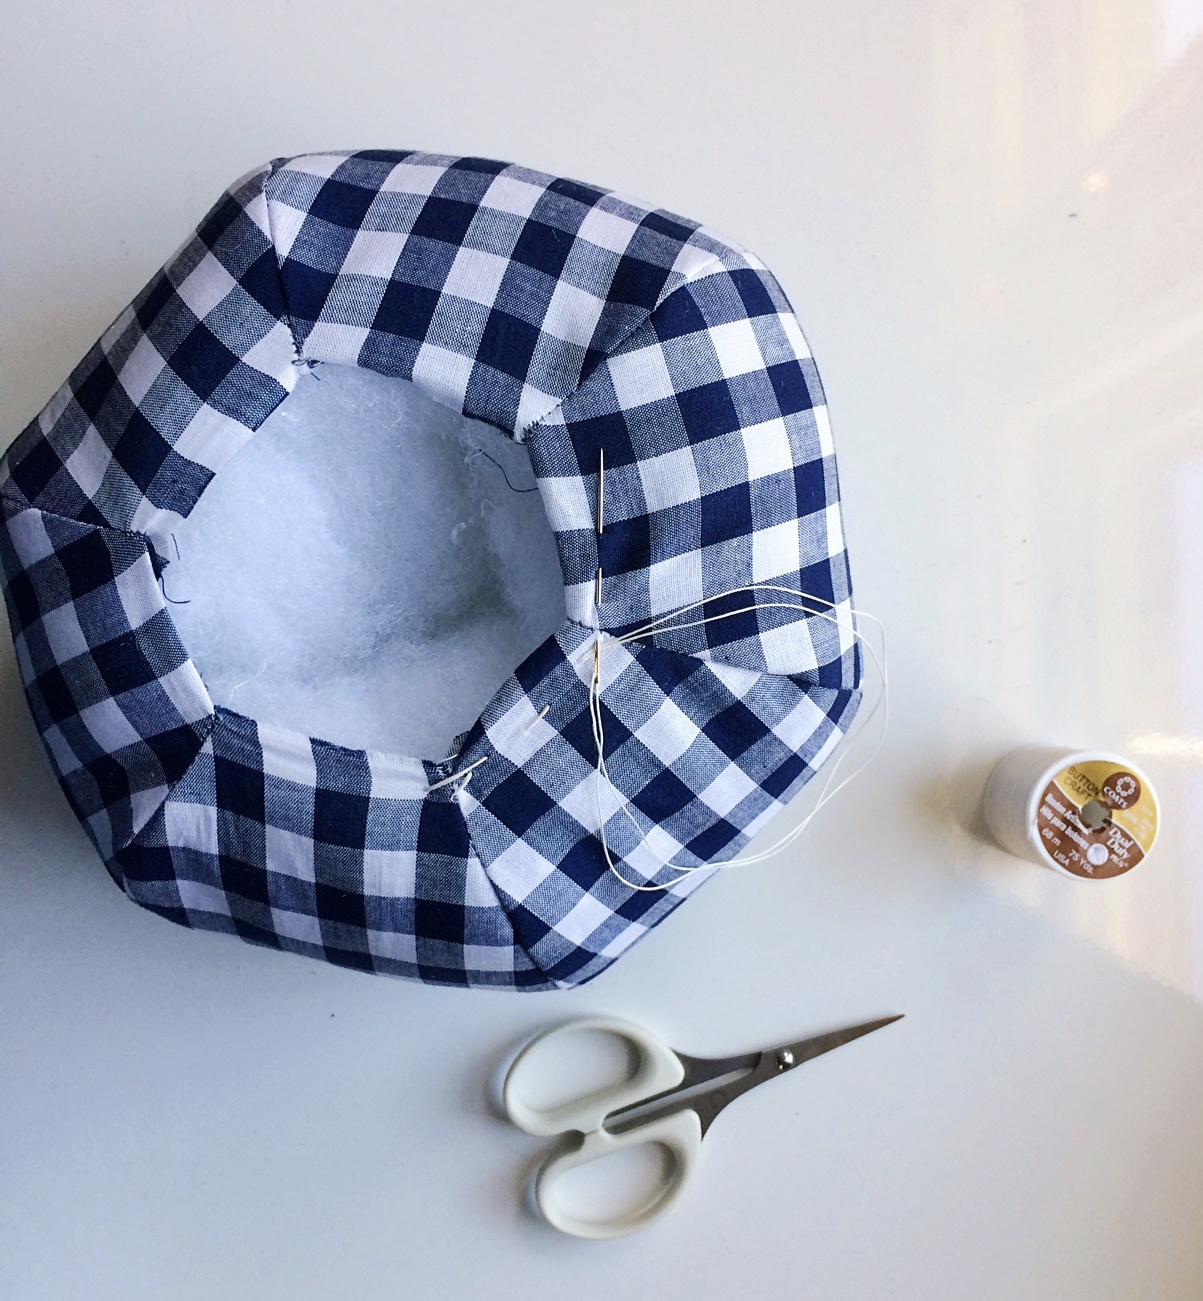
Secure a thread through the seam and knot. Finger press the raw edge under 1/4" and hand sew around the opening. Once you have sewn completely around, push the stick into the center and pull the thread to secure.

Continue to stitch around the stick once more. Knot.

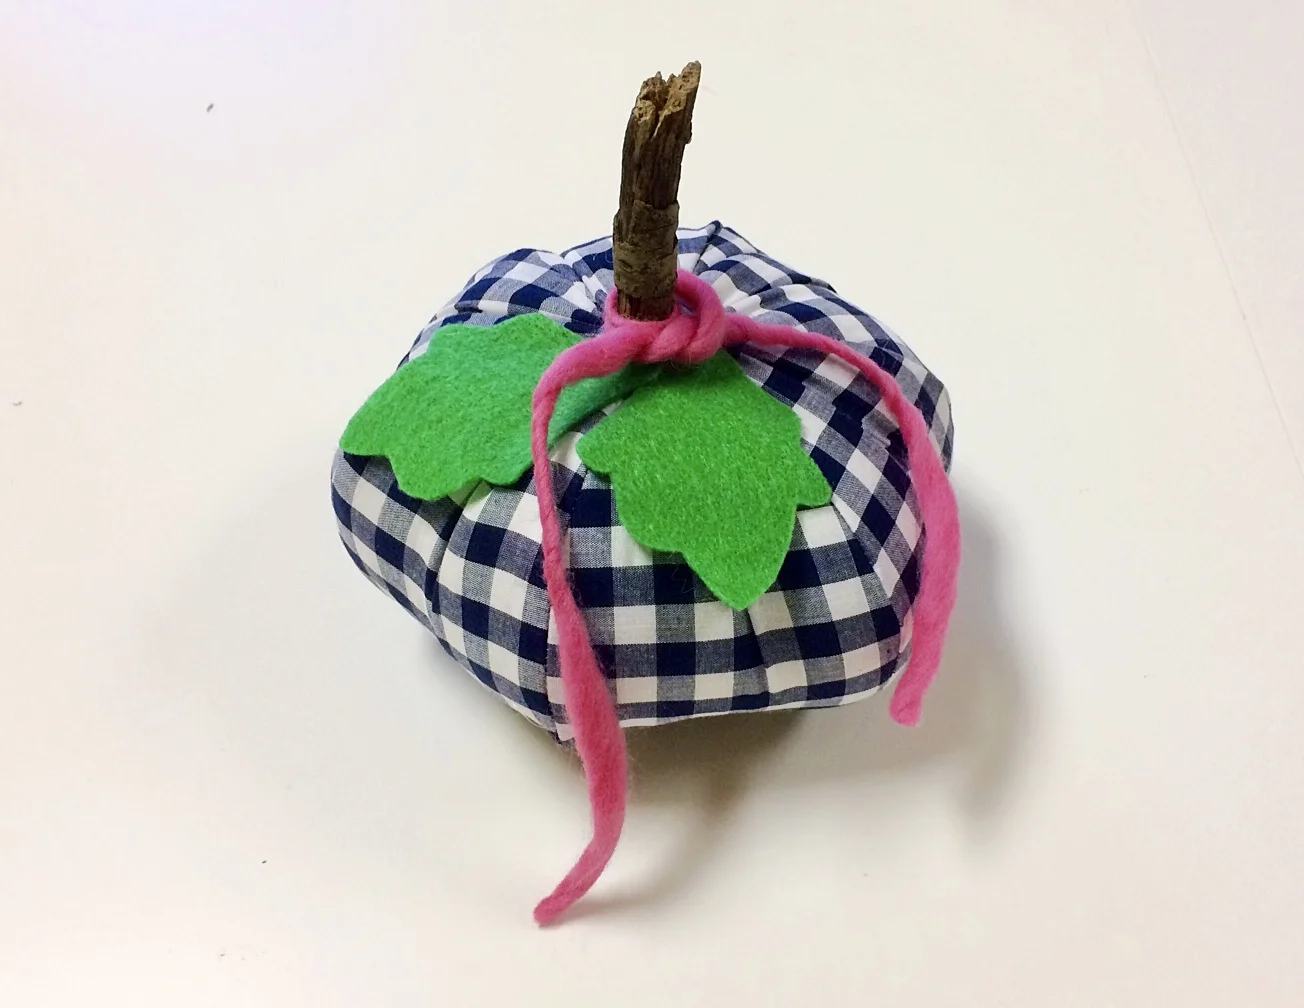
Glue the felt leaves.
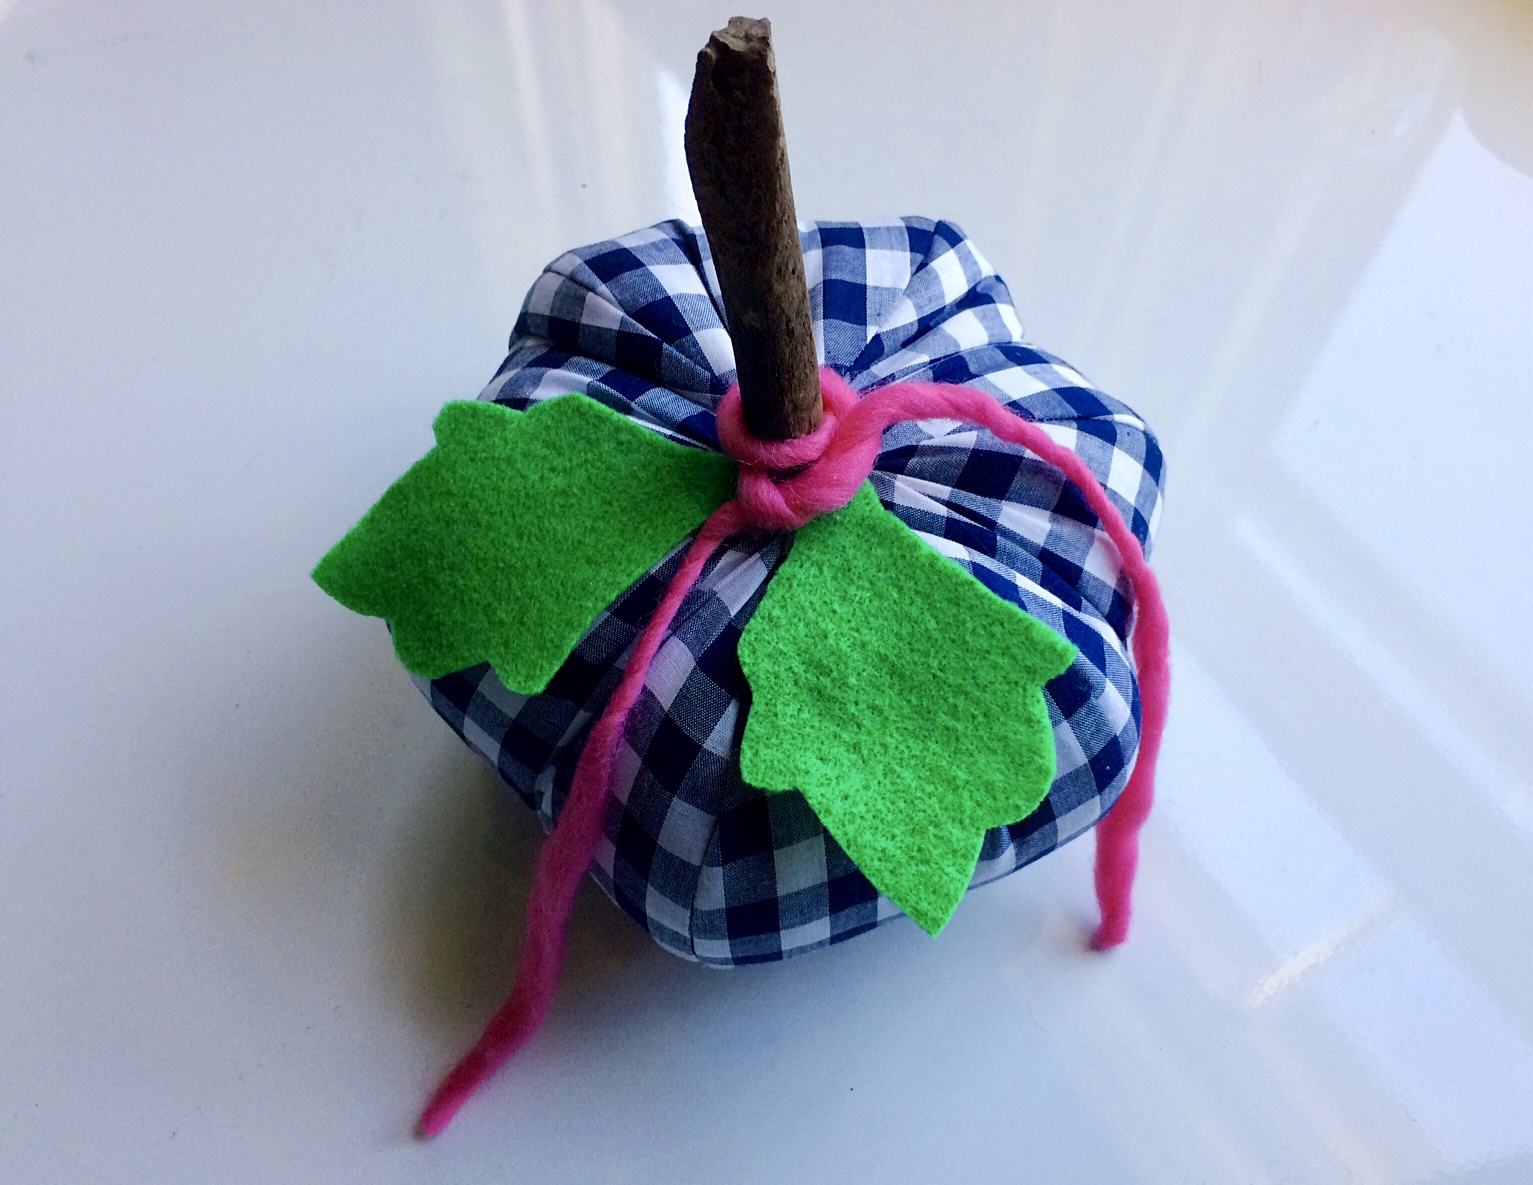
Finish by tying a ribbon or yarn around the stick.
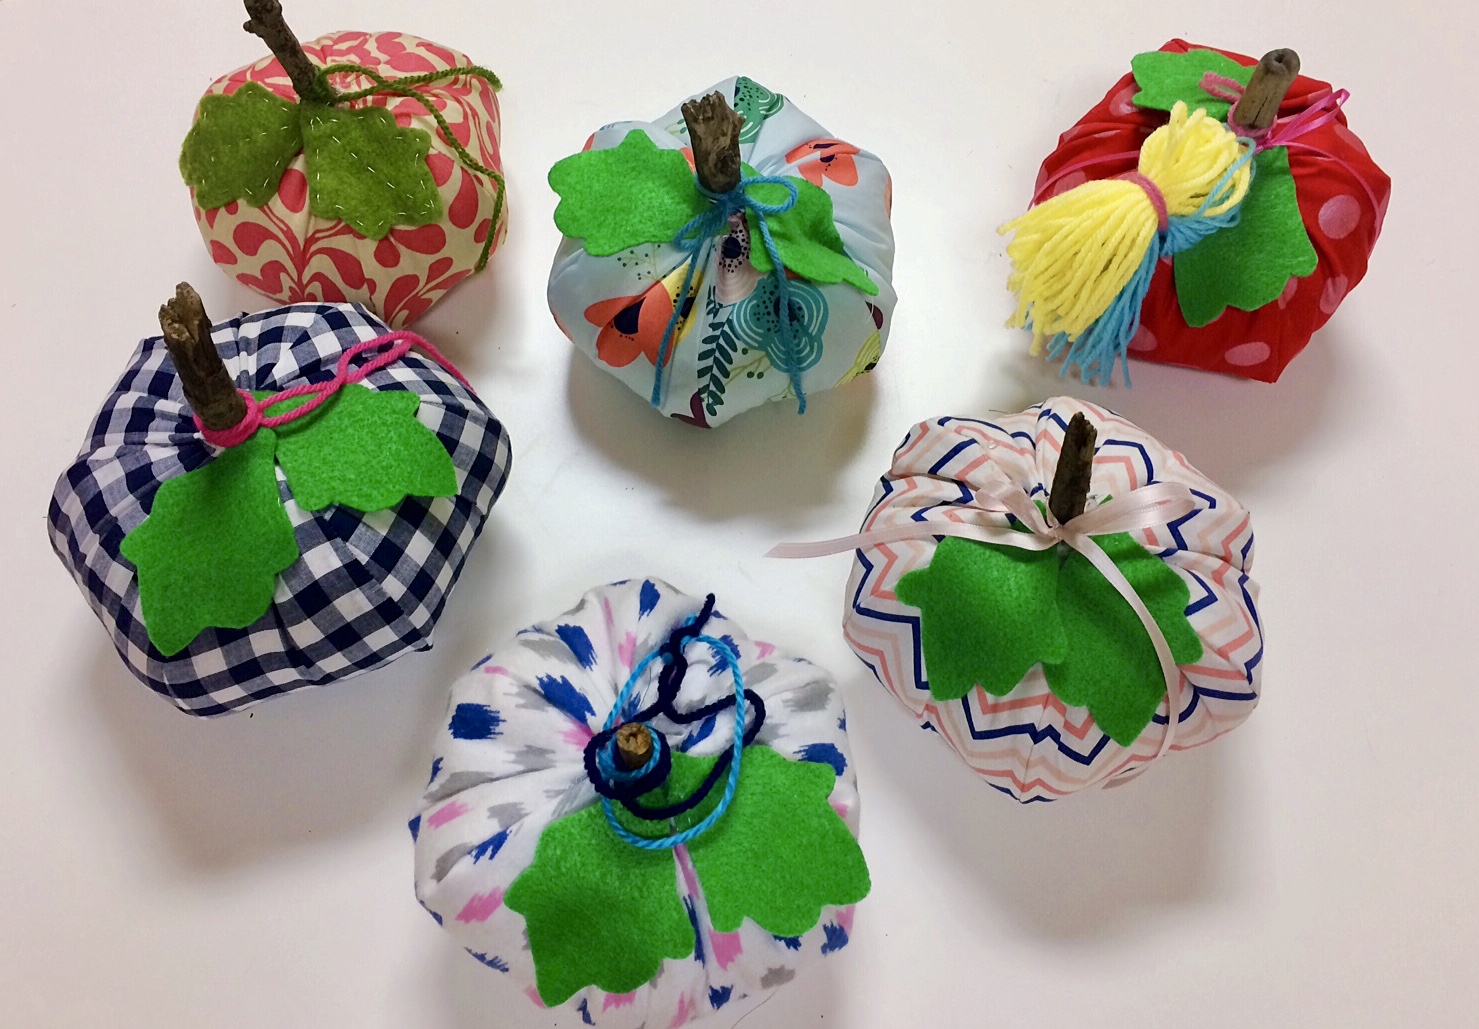
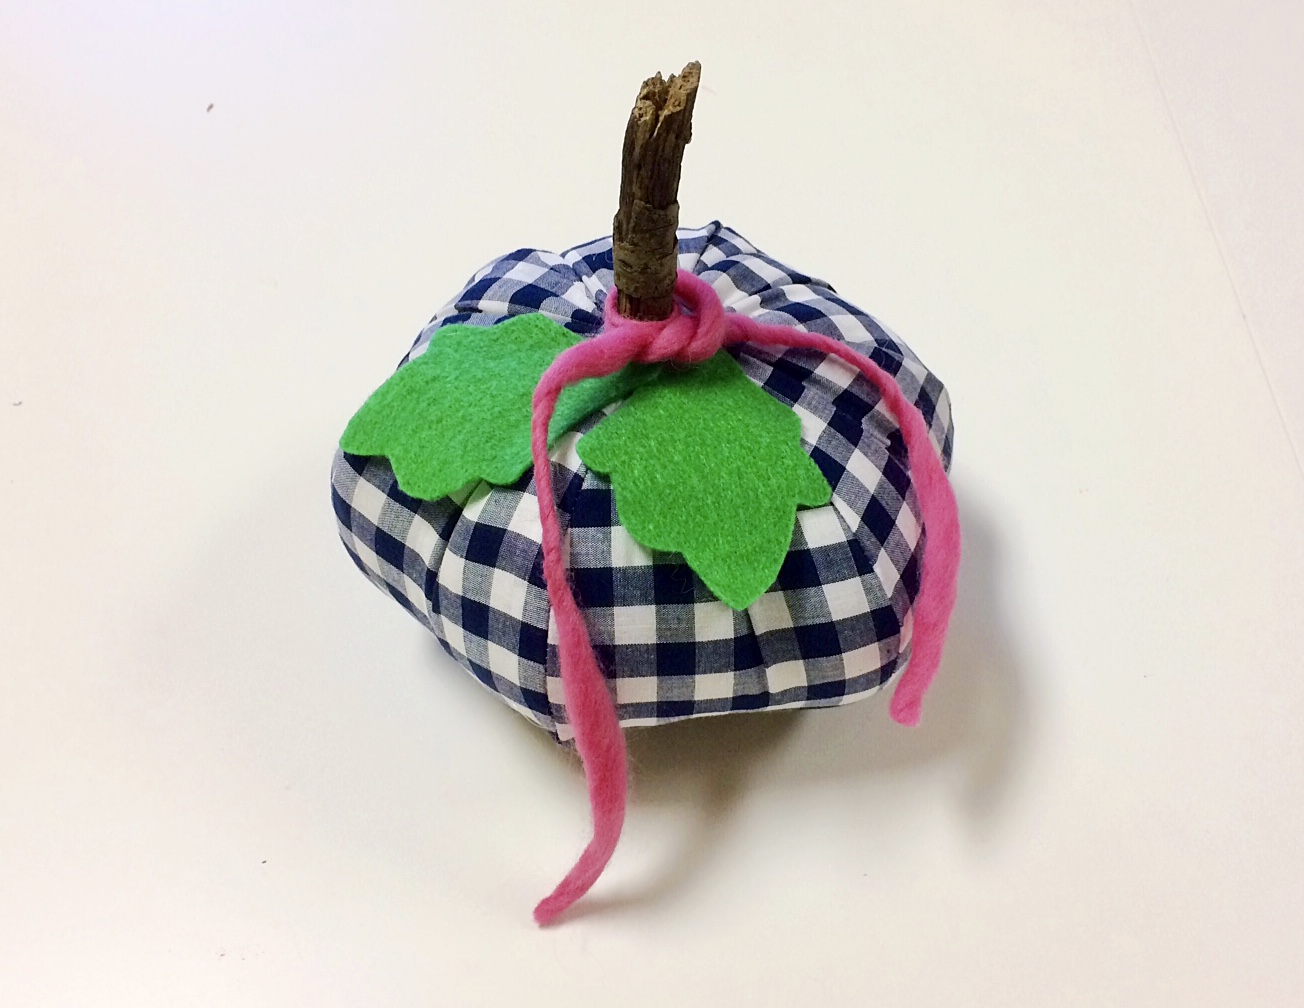
These pumpkins were made by the Fashionable Friday Class!
Happy Thanksgiving!
XO, Hilarie