

On the Second day of Christmas... Crafts for kids!
This is prime crafting time for your little creative one! Kids love to make things and have a natural gift for color, texture and pattern. The holiday season lends itself so well to kids more is more tendencies!

This is prime crafting time for your little creative one! Kids love to make things and have a natural gift for color, texture and pattern. The holiday season lends itself so well to kids more is more tendencies!
I have always believed that with fun, attractive, quality materials and time just to dream and create, kids can develop their natural talents. They often need some instruction, but after that, back off!
Today I present gifts for your crafty child.
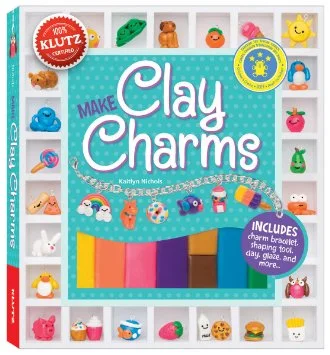
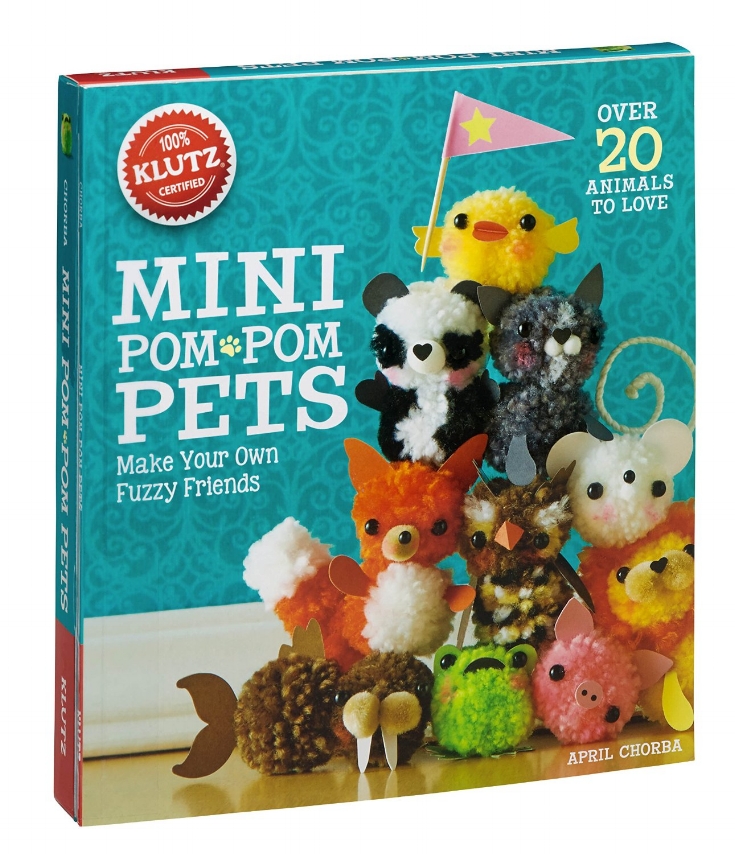
I love the crafty kits by Klutz. These kits are among our go-to kid gifts for kids. The colors and skills are on point and their step-by-step illustrated books make the techniques very accessible.
Handmade Charlotte, both the blog and the line are fun, trendy, made for DIT (do it together! in stead of do it yourself. Fun, right?) The projects are so satisfying and accessible.
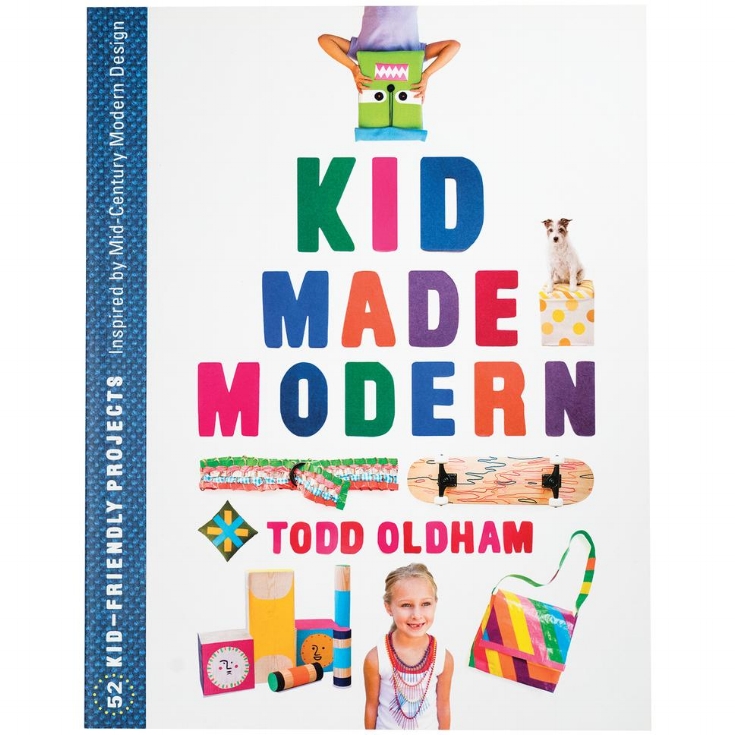
Kid Made Modern. I can't resist buying something from this line each time I go to Target. I love that they offer both projects and supplies. If I want to learn a new skill, there is nothing like a fashionable kit. If I have the skill down, the supplies are a bonus!

Of course, what's a blog post about kids crafts without mentioning Martha. The Martha Stewart's Favorite Crafts for Kids book is big around my house. On a rainy day with only popsicle sticks, drinking straws, buttons, and rubber bands I can keep my kids occupied.

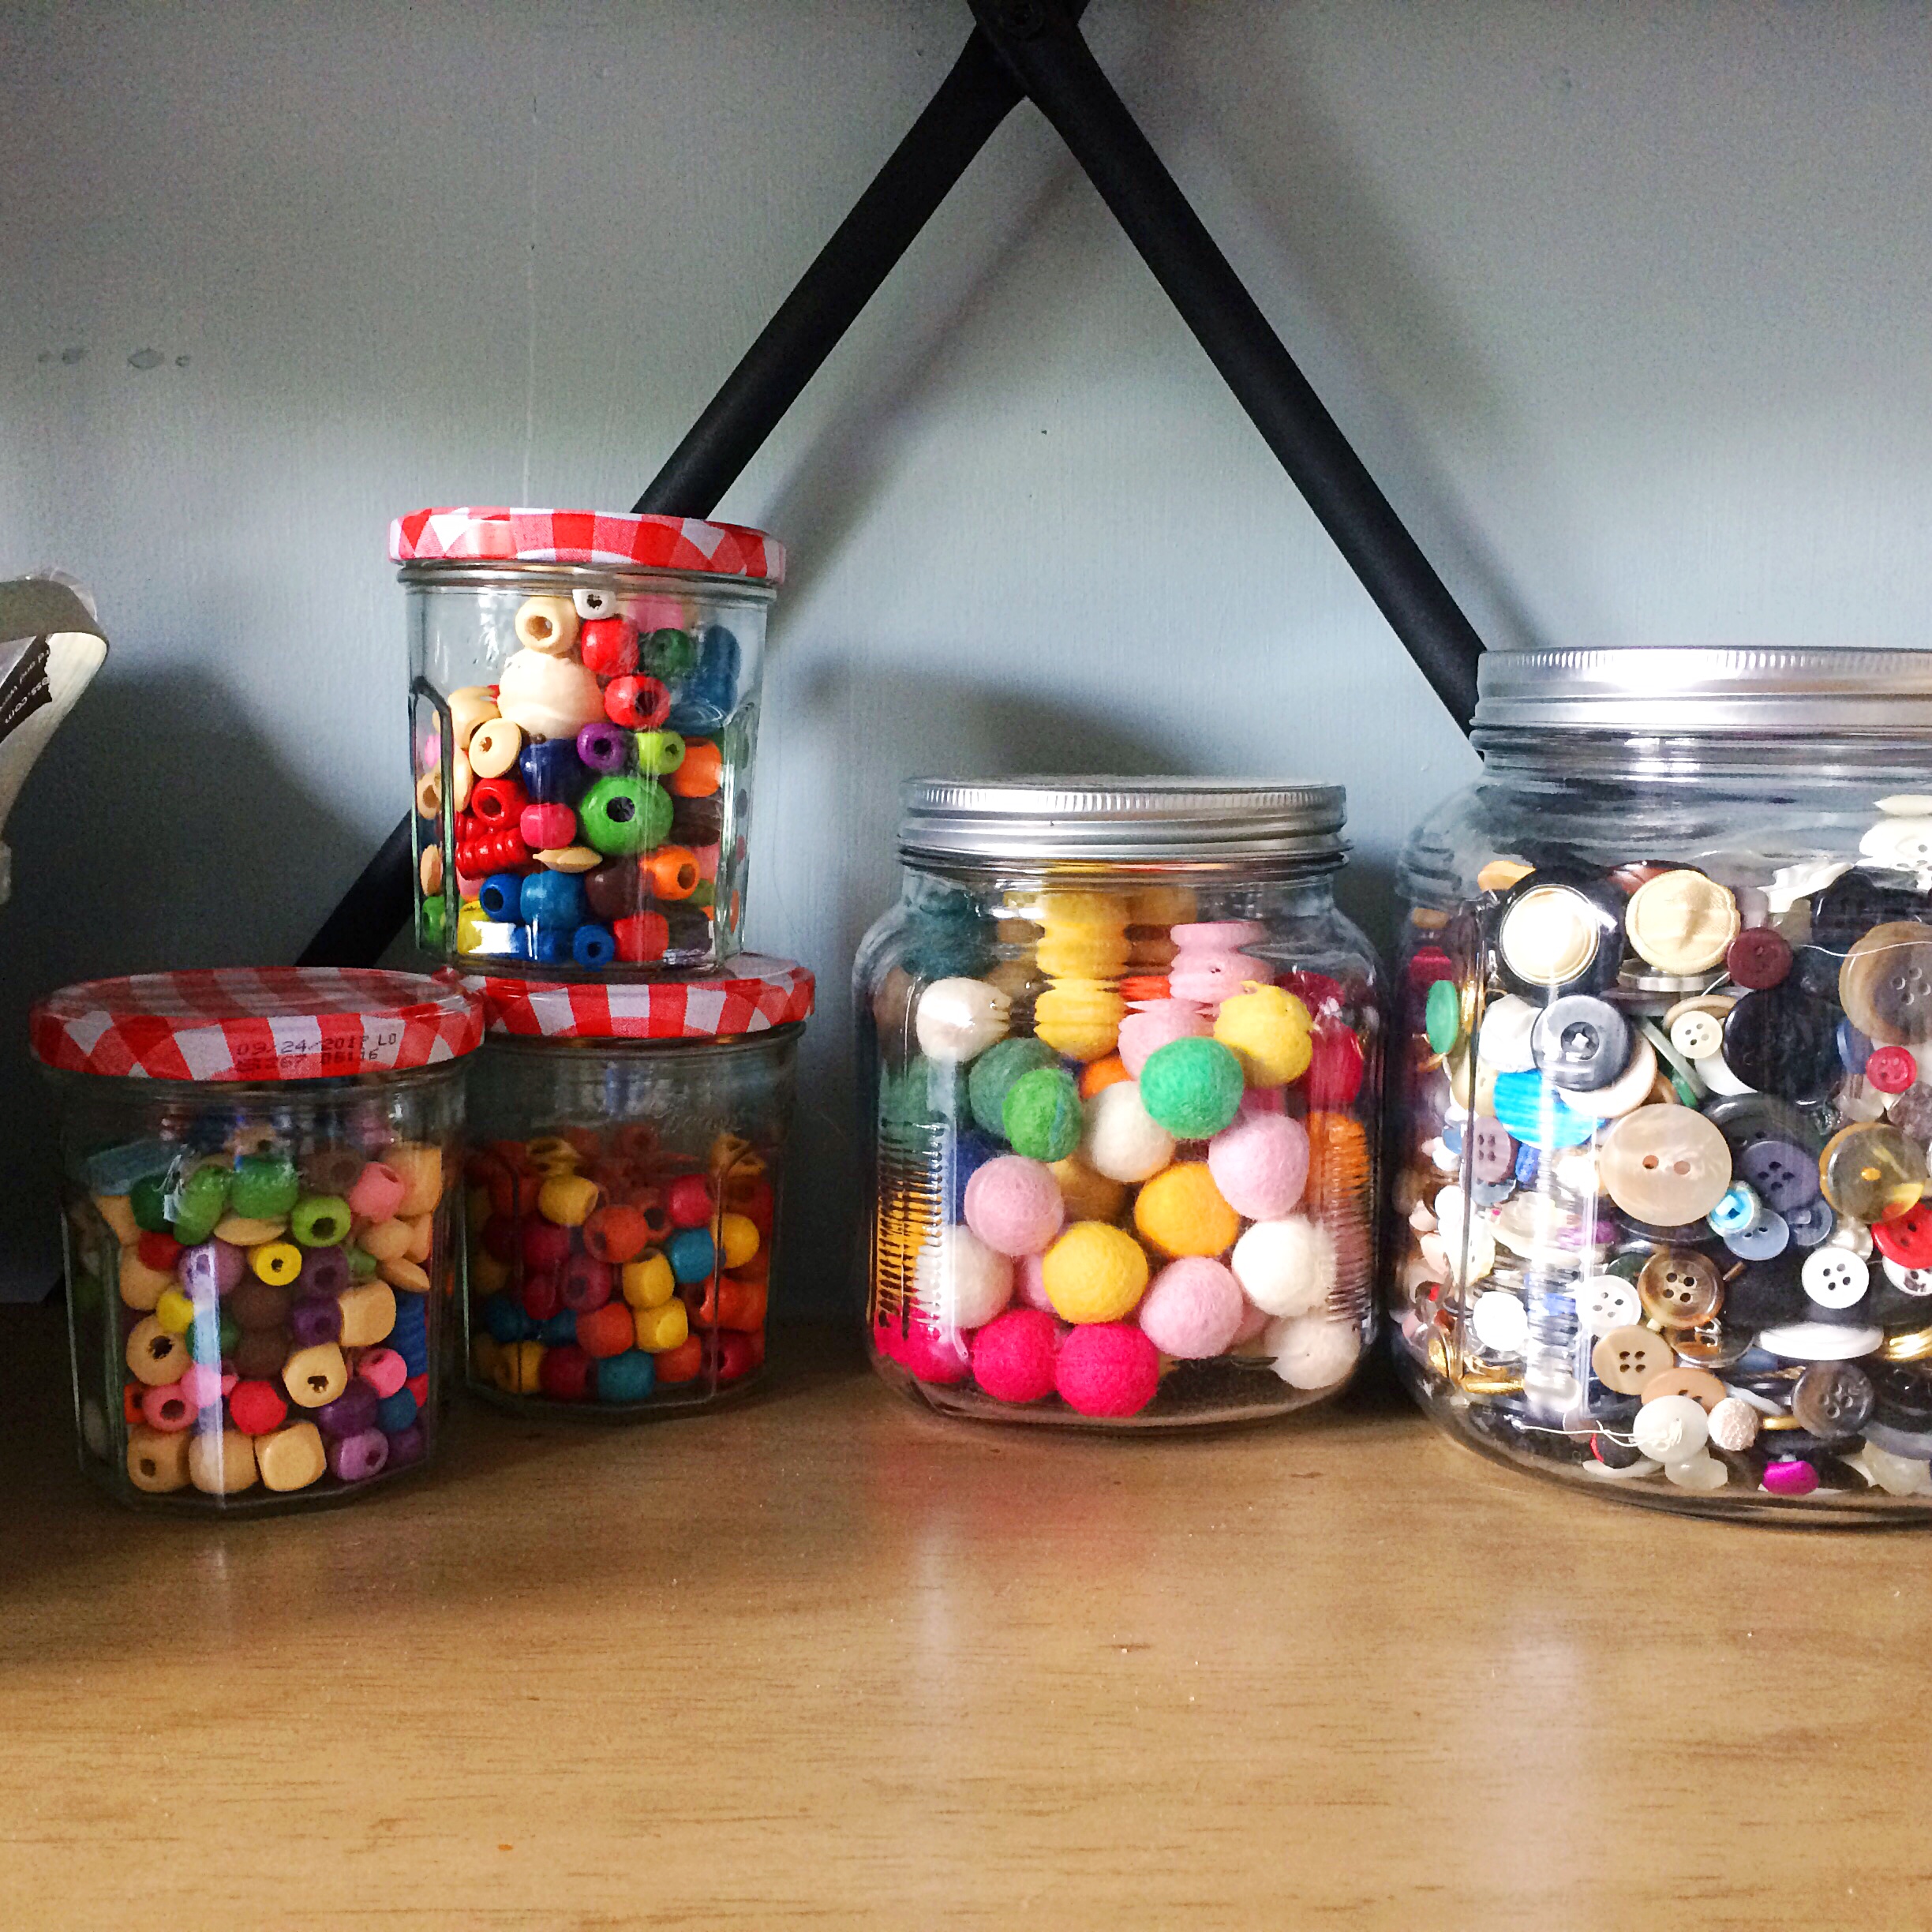
A DIY craft kit is always fun to put together too. Clay, molds or tools, colorful felt, pipe cleaners, ribbon, yarn, paper punch, paper, beads, pompoms, glue, a fun book about crafting, and a crafting book about fun! Your kids imagination can soar. You will be giving them the tools they need to spark imaginative play, foster independent thinking and build self-esteem.
Do you like this series?
XO, Hilarie

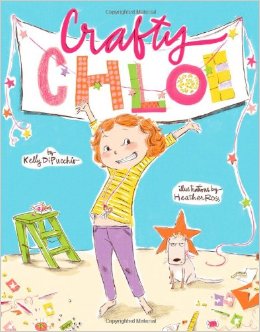
On the First Day of Christmas.......Fashion Design Edition!
It's here friends. December. Wow! This year my 12 Days of Christmas is going to be a bit easier than my 24 days of doll-outfit-making-fun like last year. (Please don't remind my kids:) For this first day of Christmas, I'm going to give you a gift list that any budding fashion designer would love.
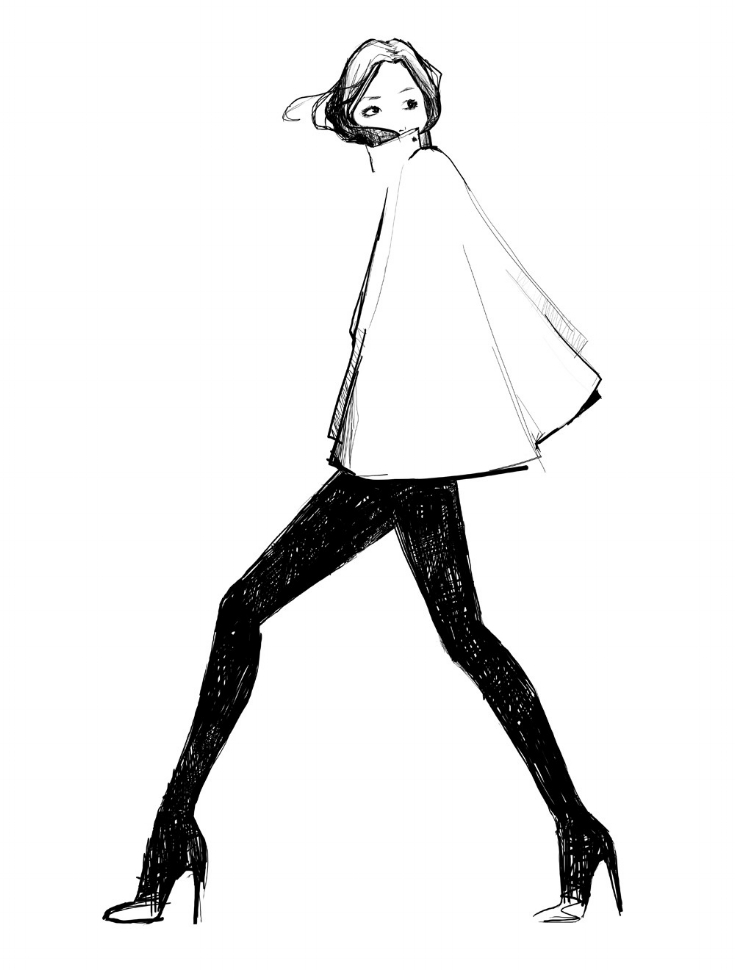
Illustration by Garance Dore
It's here friends. December. Wow! This year my 12 Days of Christmas is going to be a bit easier than my 24 days of doll-outfit-making-fun like last year. (Please don't remind my kids:) For this first day of Christmas, I'm going to give you a gift list that any budding fashion designer would love.
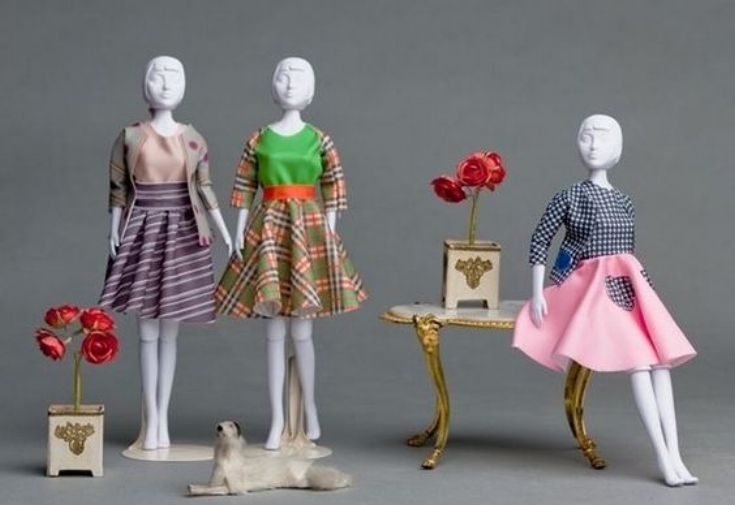
Dress your doll I'm not sure why this never seemed to catch on. They are easy to make and fun to play with. Now they are super inexpensive! I remember spending years designing clothes for Barbie. Even if she doesn't love the outfits, the templates and techniques are skills that will teach her to how flat patterns work.

Fashion Plates, either new or vintage. Did you play with these? I used to spend endless hours designing new outfits then add color and accessorizes. Trust me on this one, it will be a hit!
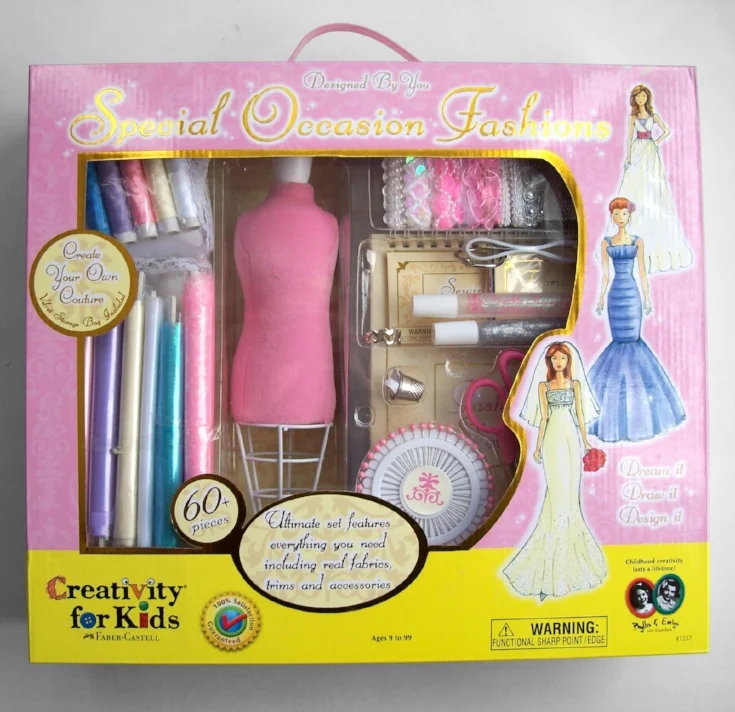
Creativity for kids I like the diminutive dress form and fun fabrics and trim. While there is nothing here that will actually fit a doll, she can learn to drape and dream about fabric, trim, color, pattern, texture, shine, glamour........ It's a fun set with big impact.

Design your own Artsy clutch, I like this line from Target. While its not sewing, who doesn't want some fab original accessories. Easy peasy. Done!

AG Crafts pom pom scarf kit Again with the pom poms. I know. Kids love them!
You could always consider a DIY fashion design kit: A roll of tracing and pattern making paper, pencils,(Ticonderoga brand pencils have the softest lead), a sketch book, colored pencils, an inspirational sewing book, muslin, a colorful assortment of thread, scissors, measuring tape and a sewing lesson with some colorful fashion fabric and time for them to go for it!
I'm stuffed! A Plush Pumpkin Pattern and Tutorial
To celebrate Thanksgiving, the girls in my sewing classes made some pumpkins. They enjoyed them so much that I thought they might help to get you in the holiday spirit! Bright and cheerful, they just make me smile.
To make your own, start by reading through this entire tutorial, print the pattern and begin!
Materials
1/4" of cotton fabric
Craft thread
Scissors
Needle
A stick about 4-6" long
Poly-fill stuffing
Green felt
Glue
Once you print the pattern, measure the scaling square to be sure that it measures 1".
You will need to cut six fabric pieces total to make each pumpkin. Lay the template on the fabric and trace with chalk. Cut on the drawn line.

Pin the cut pieces, placing the right sides of two of the fabric pieces together carefully aligning the matching points and edges. Stitch from top to bottom on ONE side using a 3/8" seam allowance. Add a third wedge to the pair. Be sure that you are only sewing through two layers of fabric. You should end up with what looks like a shallow bowl. Repeat for the next three pieces. First sew two together, then add the third.
Reinforce the edges by backstitching when sewing together. Be sure to sew slowly around the curved edges to ensure that your pumpkin will be round and plump.

Pair these two sections together, aligning their cut edges and placing the pieces with the right sides facing together. To do this, turn one half-sphere (3 pieces sewn together) right side out and tuck it inside the other half sphere with the right sides facing together, aligning the points to match. Sew from the top of the straight edge to the opposite top straight edge around the sphere. Do not stitch the wide flat edge opening.
Do you see how the seams on the pointed side are matched on the inside? Pin carefully when you are sandwiching together.
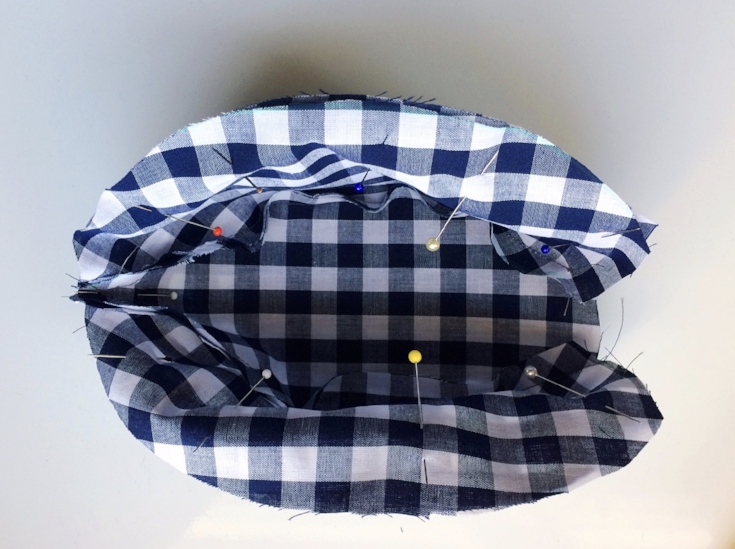
Do you see how the pointed edges are pinned and sewn together? The flat edges will remain open.
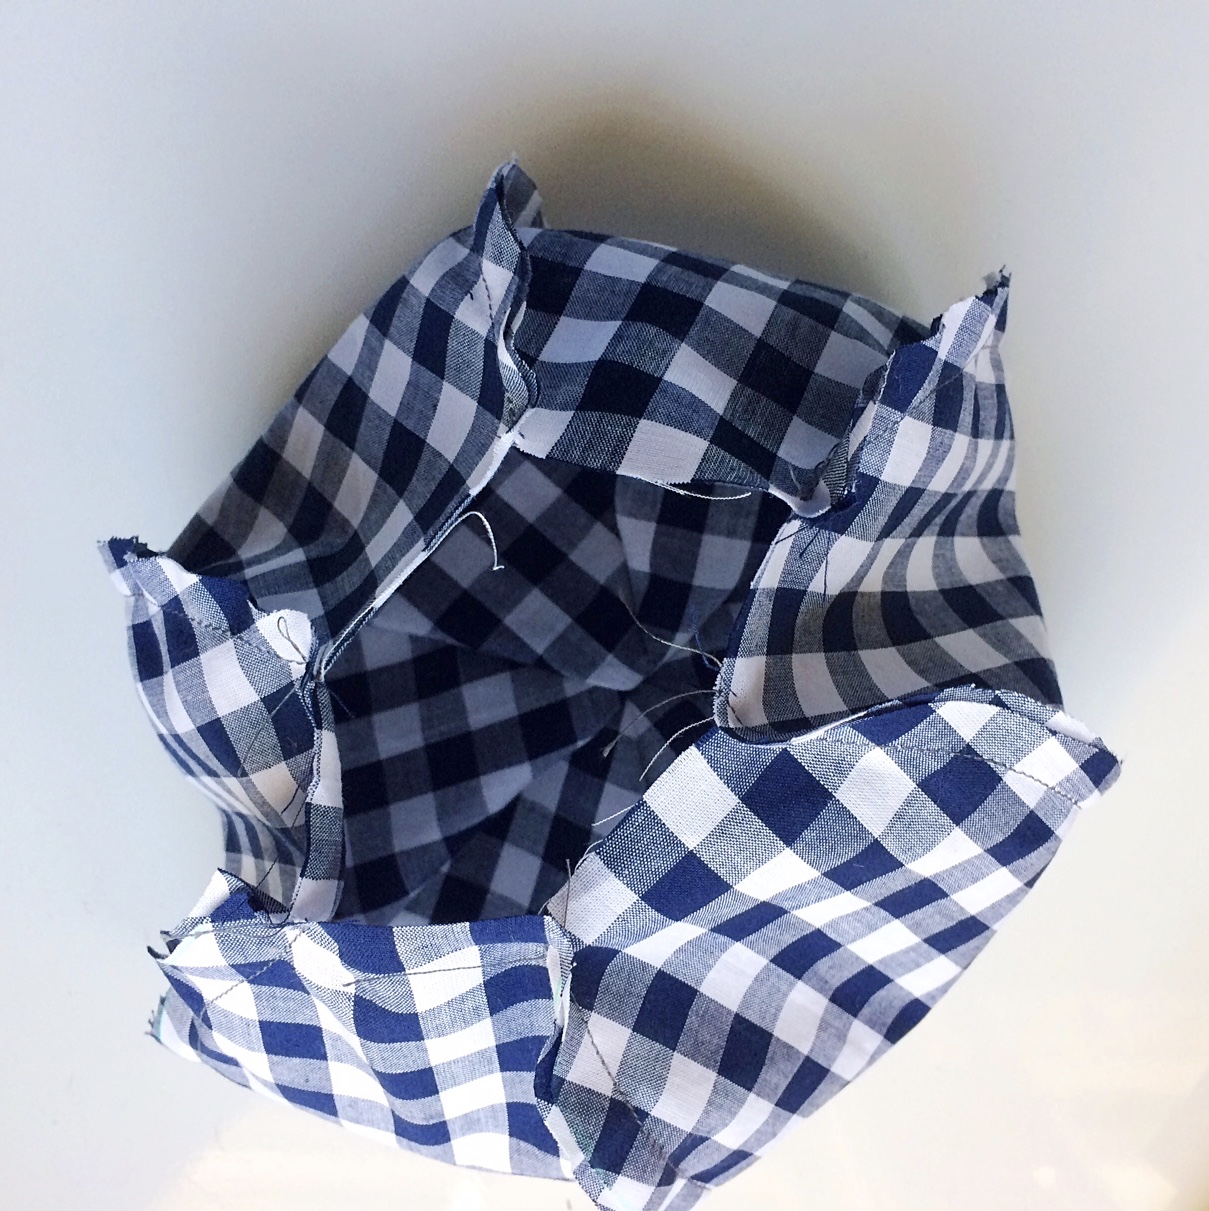
Does yours look like an inside out pumpkin bowl? Turn the sphere right side out through the opening then stuff it.
This is the what the bottom will look like.
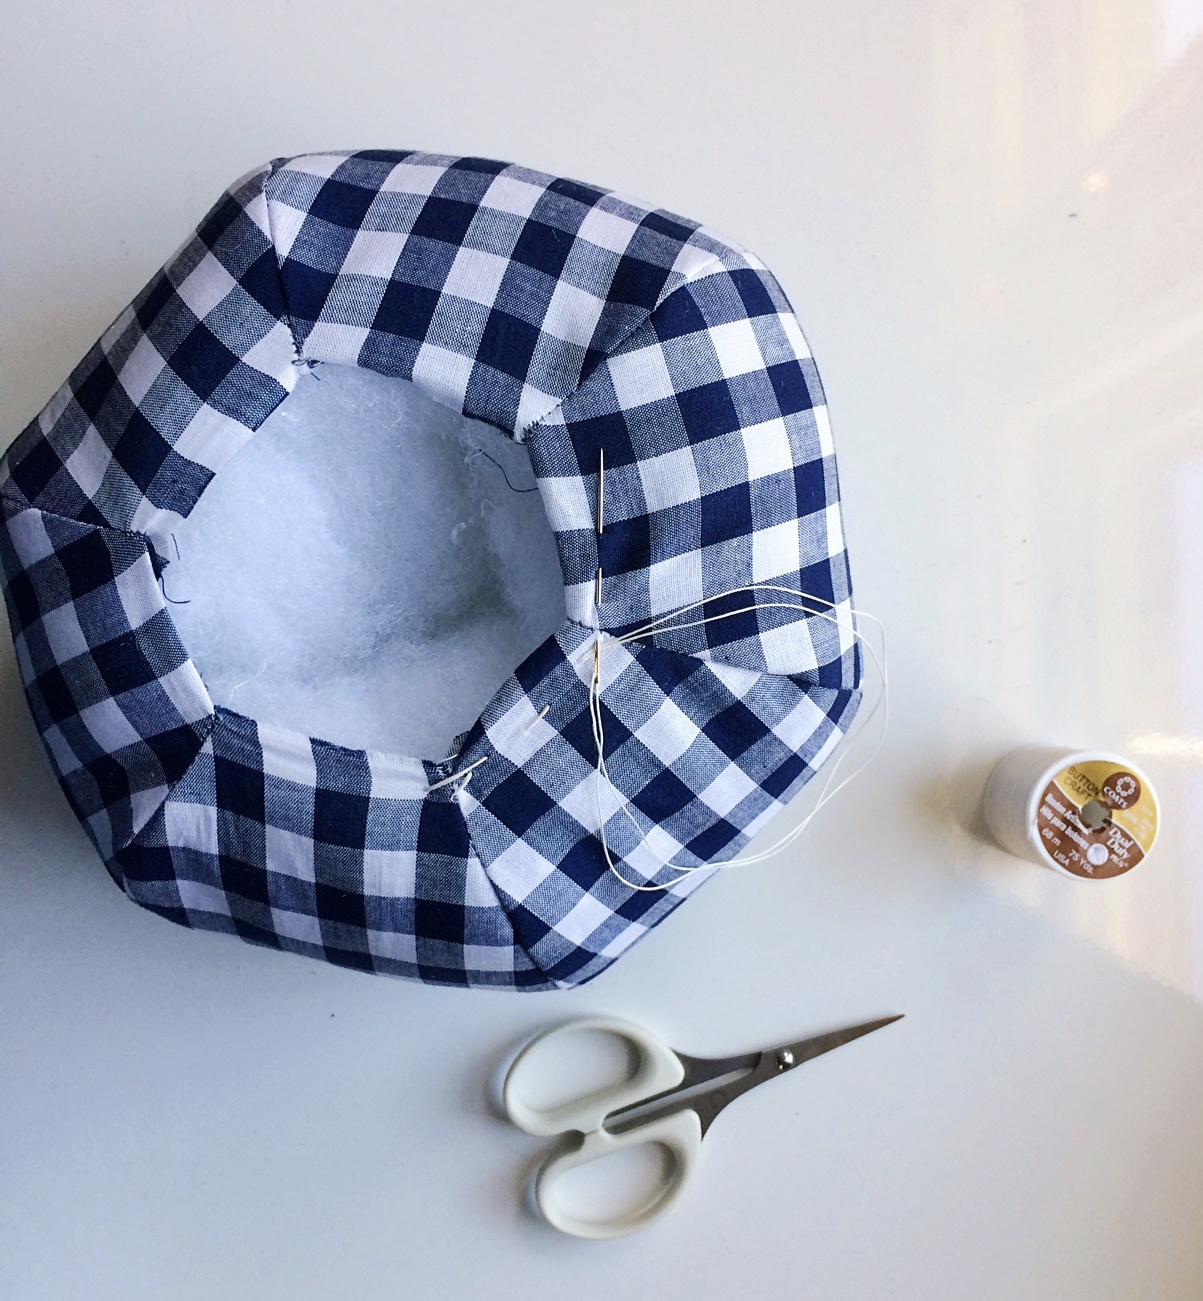
Secure a thread through the seam and knot. Finger press the raw edge under 1/4" and hand sew around the opening. Once you have sewn completely around, push the stick into the center and pull the thread to secure.

Continue to stitch around the stick once more. Knot.

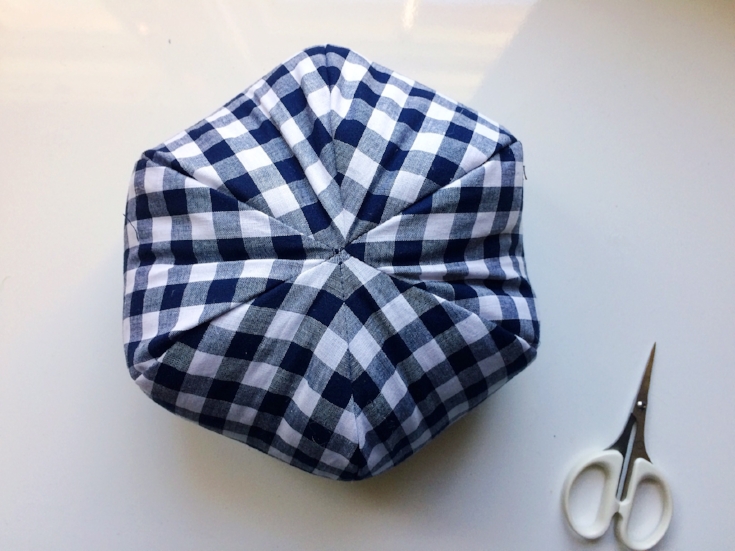
Glue the felt leaves.
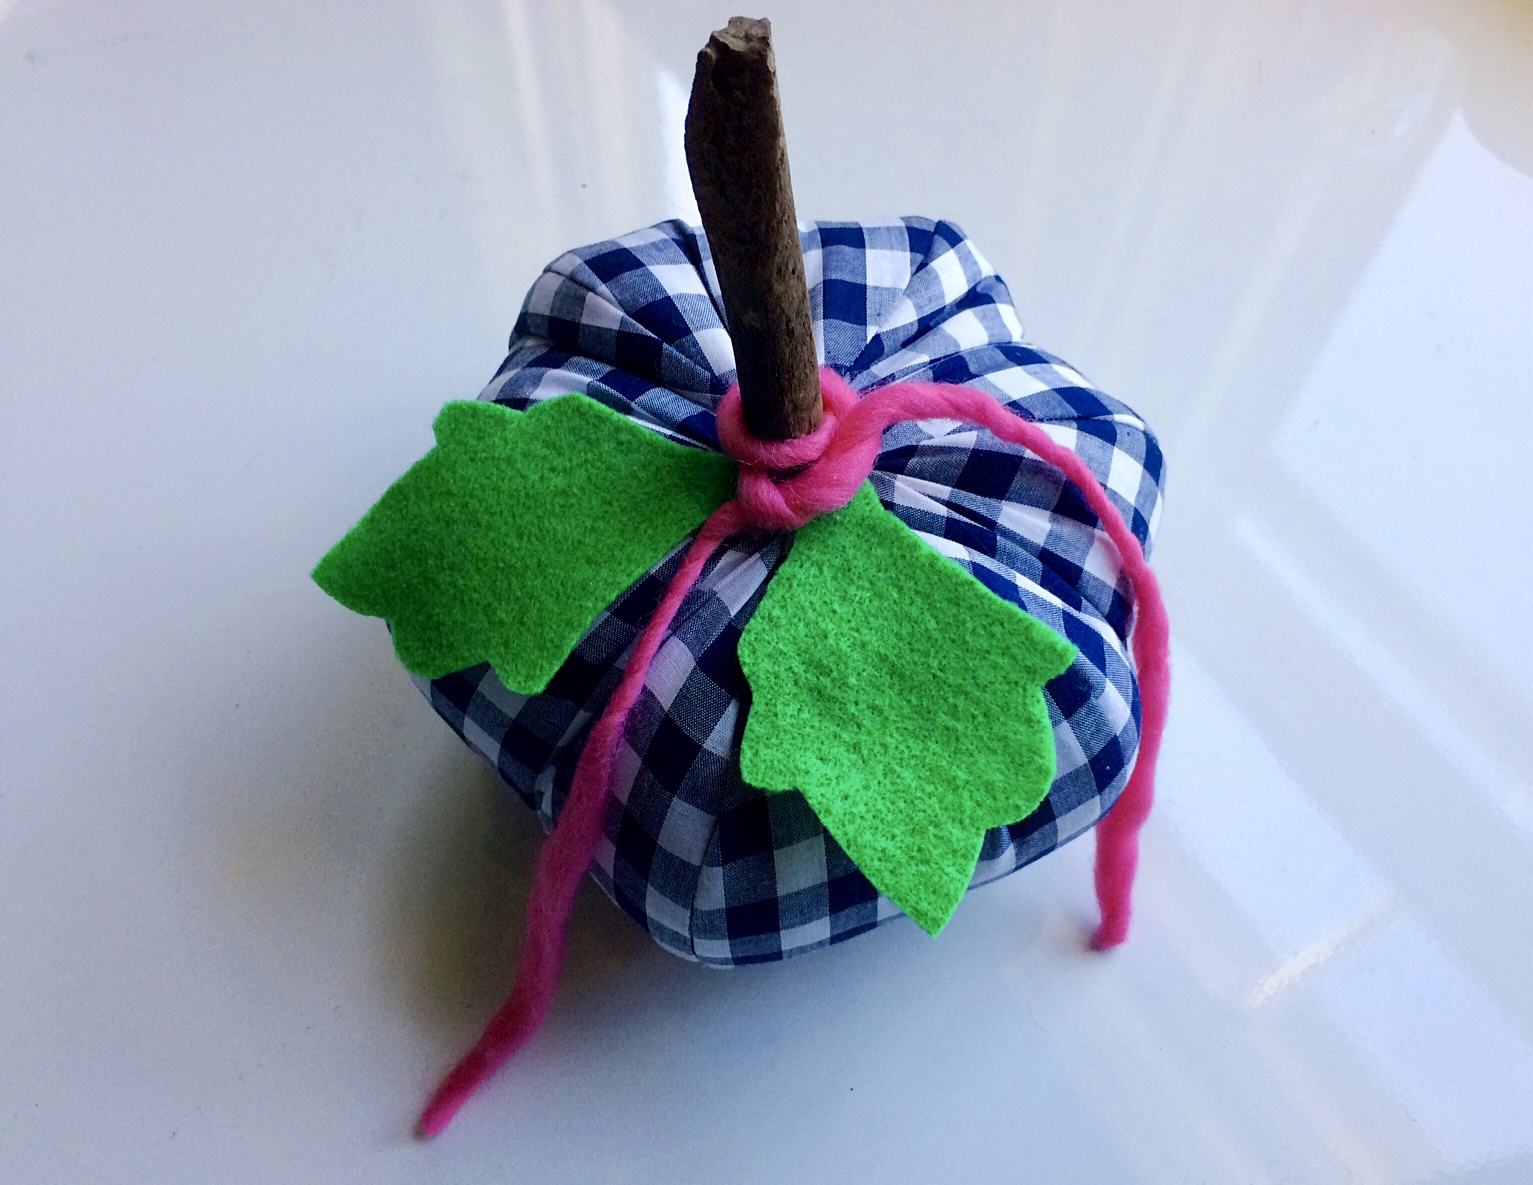
Finish by tying a ribbon or yarn around the stick.
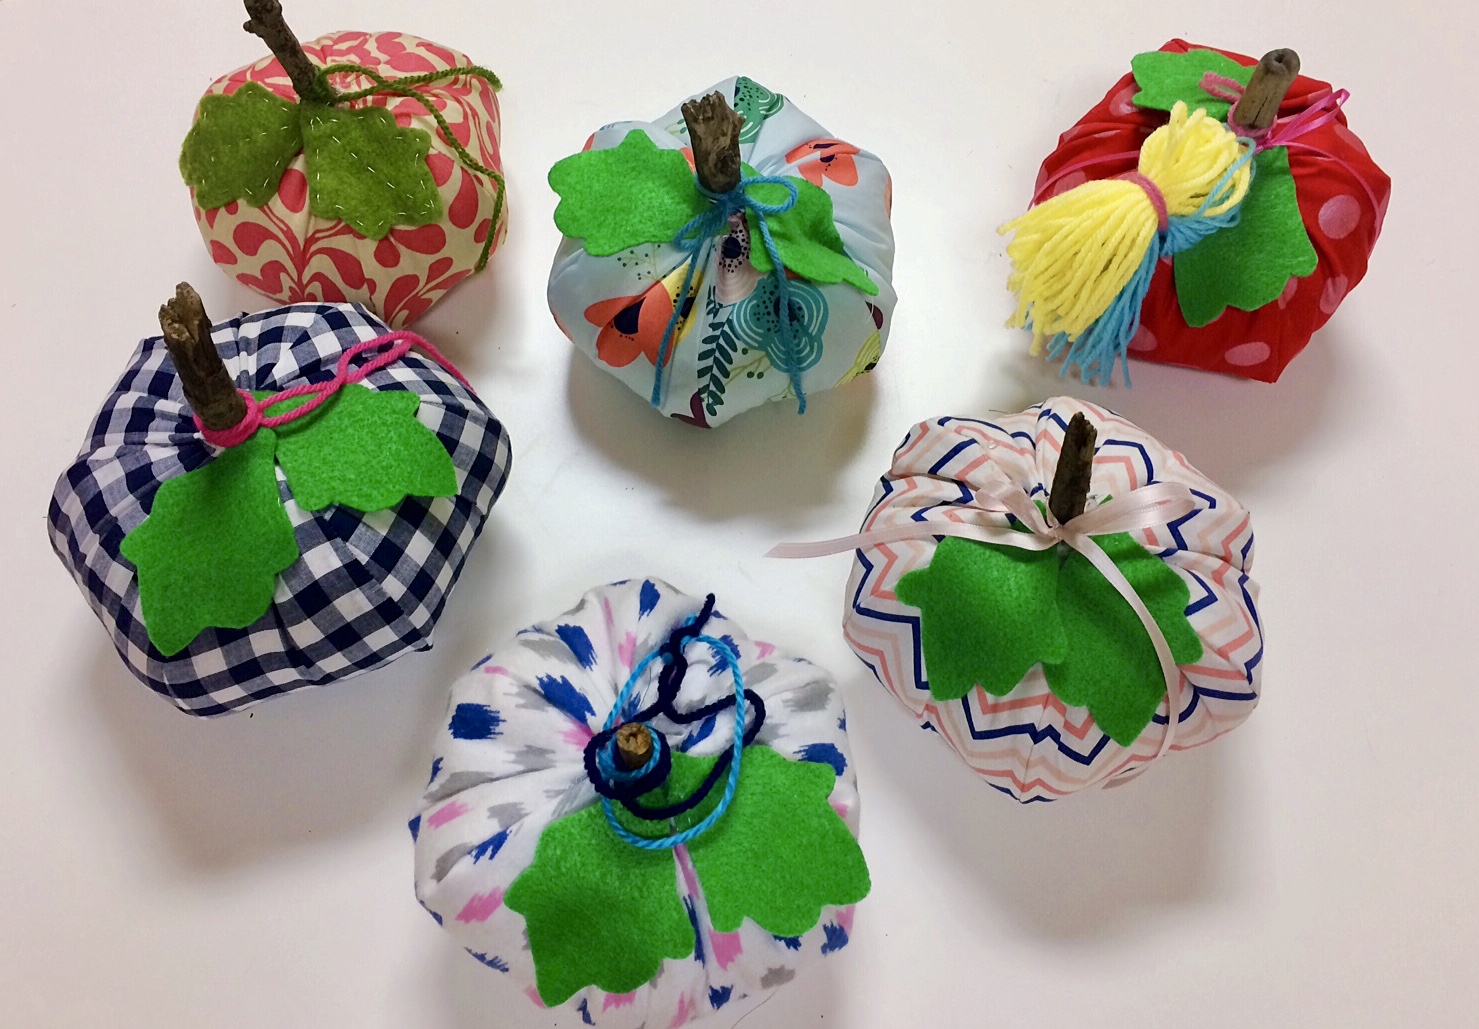
These pumpkins were made by the Fashionable Friday Class!
Happy Thanksgiving!
XO, Hilarie

The gift of time
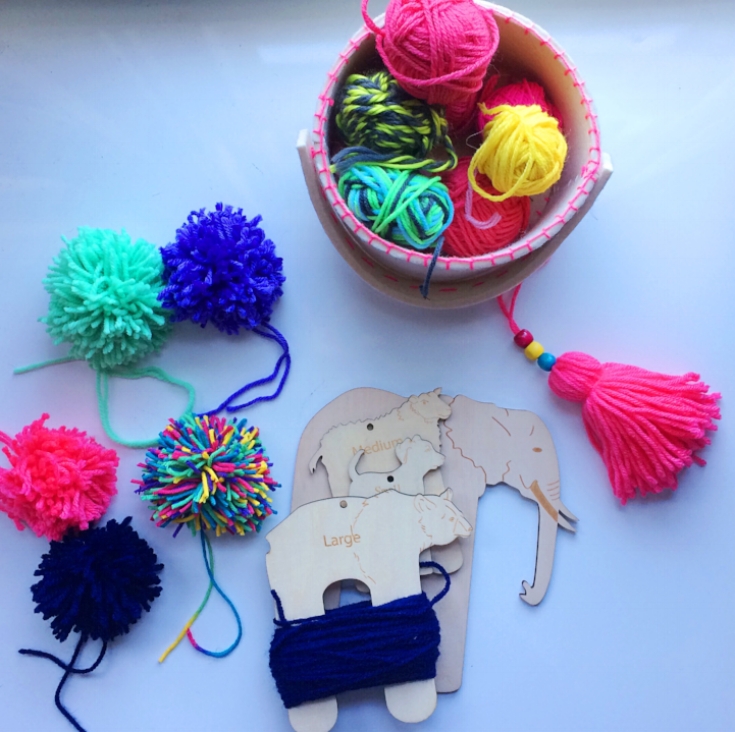
Need some ideas to keep little hands busy? Pompom and tassel makers from Target.
The month of November can be such a hard time to be still and reflect...
As the holiday season draws near, I want to pause and reflect on what I am most thankful for this year. What a year it has been. As I have gotten older I try to be intentional in how I spend my time. Starting a small business while raising children does present its challenges but it has also brought tremendous joy into my life. I get to spend time working with kids that love many of the same things that I do. Fabric, color, design, fashion, sewing! This is great stuff. I appreciate each little smiling face, hug and class that I get to teach. Thank you for your support.
You may have some time on your hands this week over Thanksgiving Break. I have a fun and easy activity for you to check out. (Though you just might want to save it as a gift for next month!)
The crafty kiddos that I know love to make pompoms and tassels. Everything is better with a pompom! Last week I was invited to participate in a Holiday Shop for Ghent United Methodist Church. I had a table set up to sell my clutch bags and patterns. To pass the time, I set up some space to show the shoppers how to make pompoms and tassels. You would have thought it was 1978 again. A basket of colorful yarn, scissors and these fun pompom makers, was all it took. We had a blast! You can get them in the craft aisle at Target. While there, check out some of their other Kids Made Modern craft items.
Look forward to my 12 days of Stitchmas posts beginning next week!
~ Gifts for Kids - Some wonderfully fun new kits and ideas for your youngest crafters
~ Stocking Stuffers - a list for sewers of every size
~ Quick gifts to make with your machine!
... and more! Stay tuned!
Hilarie XO

Aster Clutch Pattern Testing
The Aster Clutch is a PDF sewing pattern by Hilarie Dayton. This PDF sewing pattern makes a foldover clutch purse and a zipper pouch. The finished measurements are 12”x 12” for the large and 11”x 8” for the medium.
In the months between designing and releasing a pattern, there is a lot of work going on. Not just by me, but by a team of women that are incredibly talented and enormously patient. They are pattern testers. What is a pattern tester, you might ask? A pattern tester is essential to the process of pattern production. Long before a pattern emerges, these women check the pattern, fit and instruction. I send them a finished draft of the pattern and instructions and ask them to follow along to make the item. When you look at something that you have been drawing and writing for months, it's hard to see it objectively. Compound that with having dyslexia and you can imagine the gratitude I feel for them! They truly help me make my patterns the best that they can be. My sewing patterns would not be nearly as successful without the contribution of these incredible friends.
I want to highlight the work three of these friends did for the Aster Clutch Bag pattern. Perhaps it will inspire you to make your own. Their fabric choices and colors are such a treat!

This clutch was made by Patty, at MadebyPade, who is also a clinical psychologist by profession and makes gorgeous bags and accessories in her "off time". Look how she put that zipper in. Thats a pro job, there!
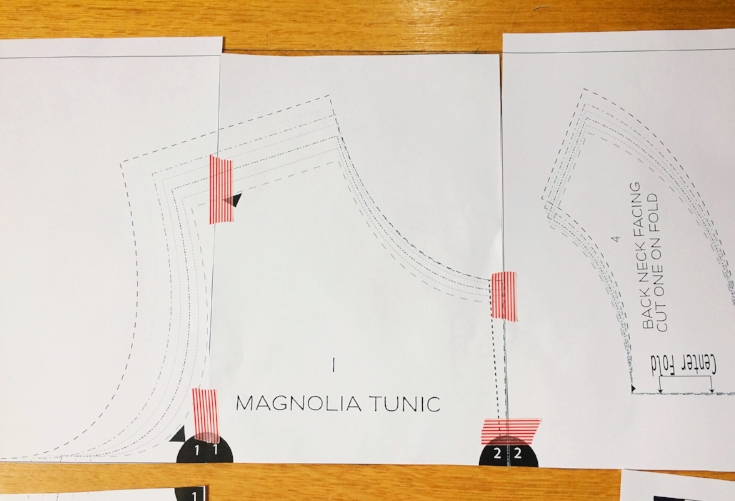
Nellie, made this bag with the stunning contrast piping, tie and lining. I love the tension of the muted pattern and the neon trim! Nellie also tested my Magnolia Tunic Pattern, the first pattern that I introduced this year. She is a brave and talented friend:)


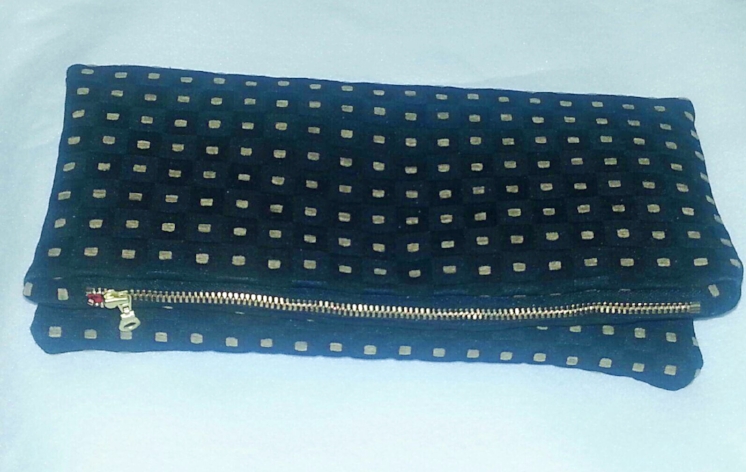
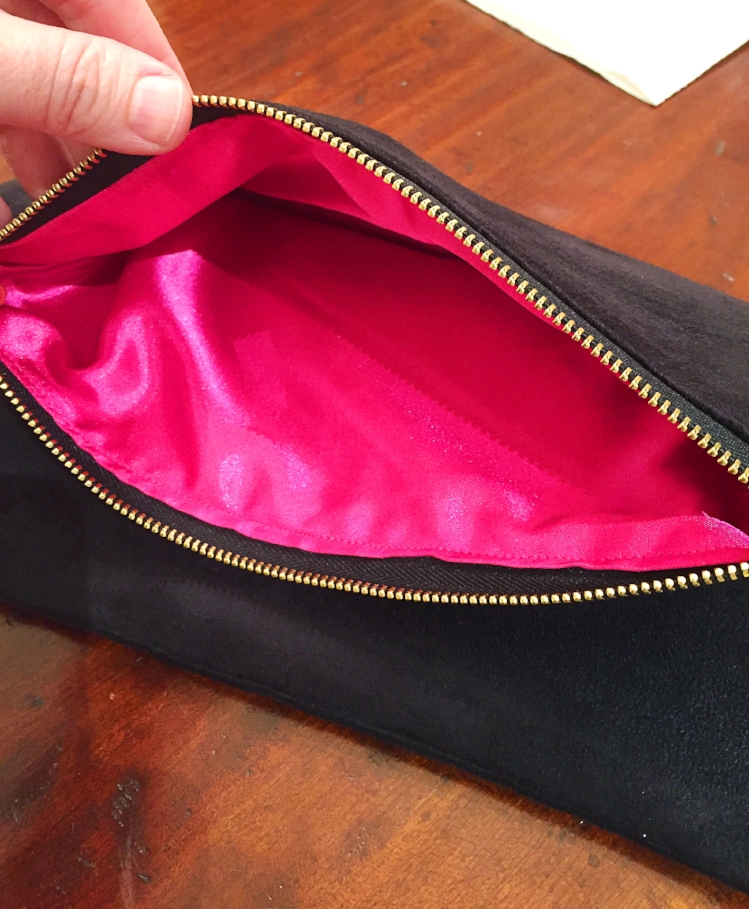
This one is in a beautiful black suede. Suede! Missy was awfully brave to attempt this pattern draft on this gorgeous leather. That Schiaparelli pink with the black suede is really something to talk about. Speaking of Elsa Schiaparelli, she is the one who began to design using exposed zippers. Don't you love that fashion in the 1940's is so relevant today? I think the exposed chunky metal zippers almost feel like jewelry.
Thank you ladies for your time, work and effort. You really are the best at telling me where I need to clarify my instructions, pattern and technique.
Are you are up for the challenge of test-driving some of my upcoming patterns, if so, let me know! I have a few new patterns in the works.
XO, Hilarie

Upcoming workshops and Winter Break Sewing Camp
November and December
Sewing Workshops and Winter Break Sewing Camp

November and December
Sewing Workshops and Winter Break Sewing Camp
November Sewing Workshop
When baking holiday cookies, little chefs stir up a merry mess. Let them have fun and keep their clothes clean with aprons just for the occasion. Saturday, November 19, 1-3pm, $55
December Sewing Workshops
Santa’s Workshop with Outside the Lines Young Artists Studio, Saturday, December 3, 3-5pm, $55
Holiday gift sewing workshop, No peeking! Saturday, December 10, 3-5pm, $55
Winter break sewing camp
Wednesday, December 28 - Friday, December 30, 9am-12pm, $155 Lot’s of fun sewing options for the beginner and returner alike! We will focus on making clothing and accessories.
Space is limited to six students. Please email me today to register. hilarie@littlestitchstudionorfolk.com
Say Hello + Follow Along!
www.littlestitchstudionorfolk.com
XO, Hilarie
Sewing Room Tour
Is your sewing room starting to become a mess? Don't fret, these sewing room DIY organization ideas will solve that. Get ready to be amazed when you see this transformation.
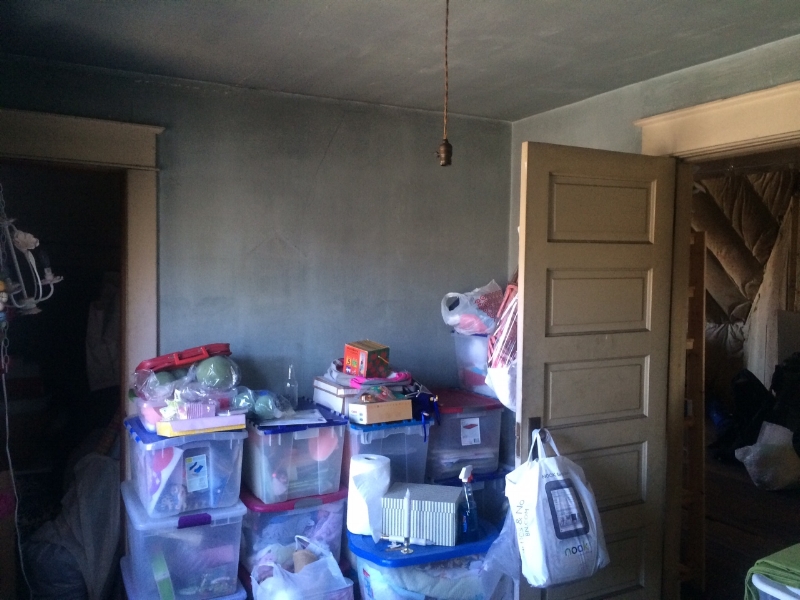
A few years ago after Christmas, when the kids went back to school, I set about storing holiday stuff and replacing all of my sewing/craft/wrapping supplies back to the guest room closet. We had out of town family stay with us for the holidays and one for 11 days. 11. Sit with that for a moment:)
As I hauled loads of holiday decorations to the third floor, I was thinking that in a house this size there had to be somewhere for me to put my sewing and wrapping stuff besides the guest room closet. So often, we have guests at holiday or birthdays and that is also prime time for sewing, crafting and wrapping. Clearing out the closet whenever we had guests just wasn't cutting it anymore. Surely there had to be some place other than a closet. Then it dawned on me. There was a "finished" room on the third floor that we used for storage. I wonder.....
At the time, the room was technically finished. Meaning the walls had plaster, it had a door, windows, a closet and a radiator. I know that the radiator hadn't worked since the early 70's. But if it did, I thought, this room may have some potential. So I ran down and called the HVAC people that we use and asked if they could please stop by. They did and the next day there was heat in that room. No electricity but heat- thats a start.
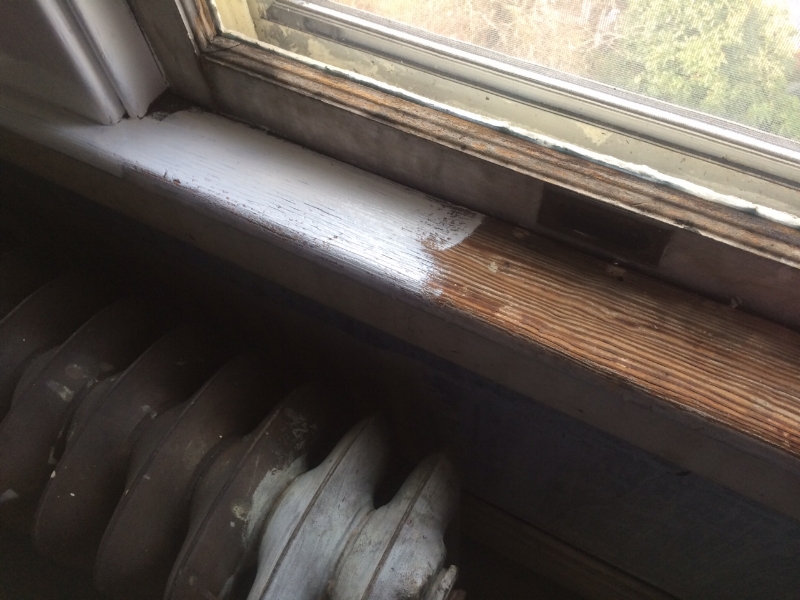
Now this room was in pretty bad shape. It was at one time, a "maid's room". The rest of the third floor was framed out and we had recently added insulation. But that was it. No other heat or AC source, loose boards in the floor, and 100 years worth of dust. I set out to begin cleaning. l scrubbed the floors, windows and baseboards, wiped down the walls and sanded the trim. I spent the next few days caulking, priming and painting.

Finally, I was getting close and applied the last coat of paint. Later that day, I was so excited to come upstairs to check on my new room. As I walked in I noticed that the paint was bubbling and peeling away. How could this have happened? I was so careful and really took my time prepping the walls. It took some time to figure out, but I found that my walls had previously been covered in calcimine. Calcimine? Calcimine is a mixture of crushed chalk, glue and water. Back in the early 20th C. calcimine was a cheap and easy way to cover walls and ceilings. It was especially useful to cover coal dust. Nice. The walls had to be scrubbed with scrub pads, stripped and primed once again with an oil based primer. Remember, this was in January. It was cold and wet. Not the best time to be painting with oil. It was slow going, but I did it. By February, the room was finally ready for me to move in.
At first, it was so hard to get any actual sewing done. All I wanted to do was decorate and dream away in this new space that was all mine. It took some time to organize it to maximize its space for efficiency. It continues to evolve as I take on more projects and broaden my scope of work.
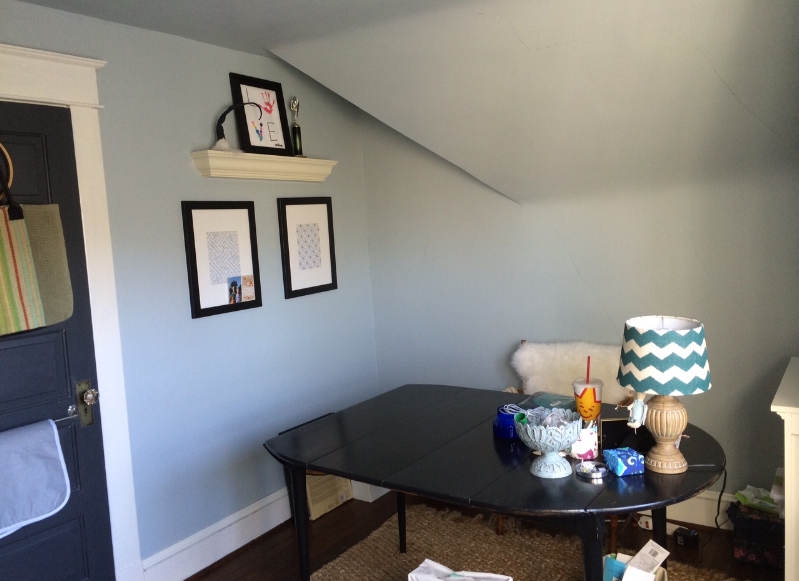
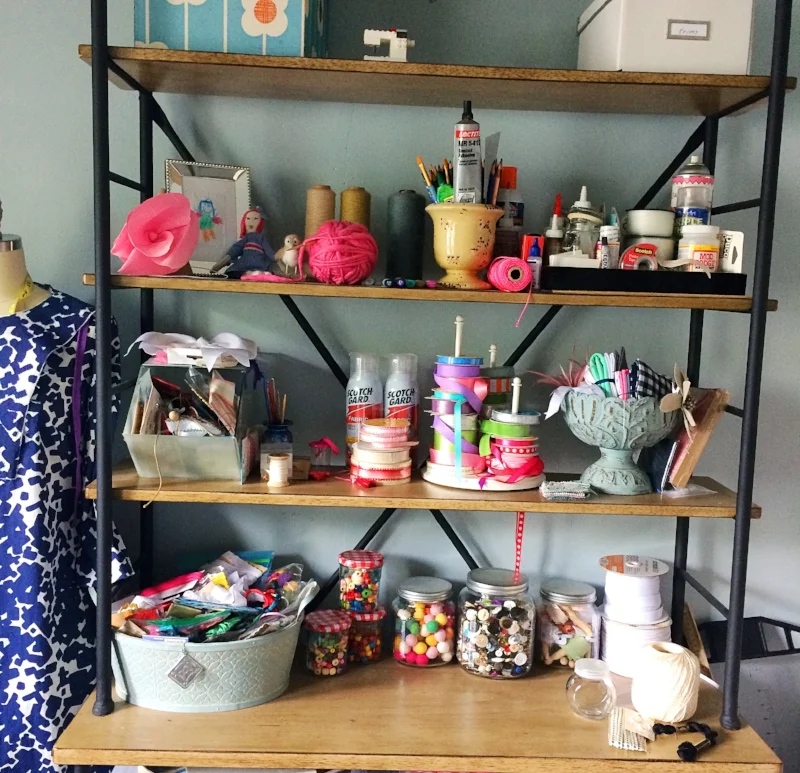
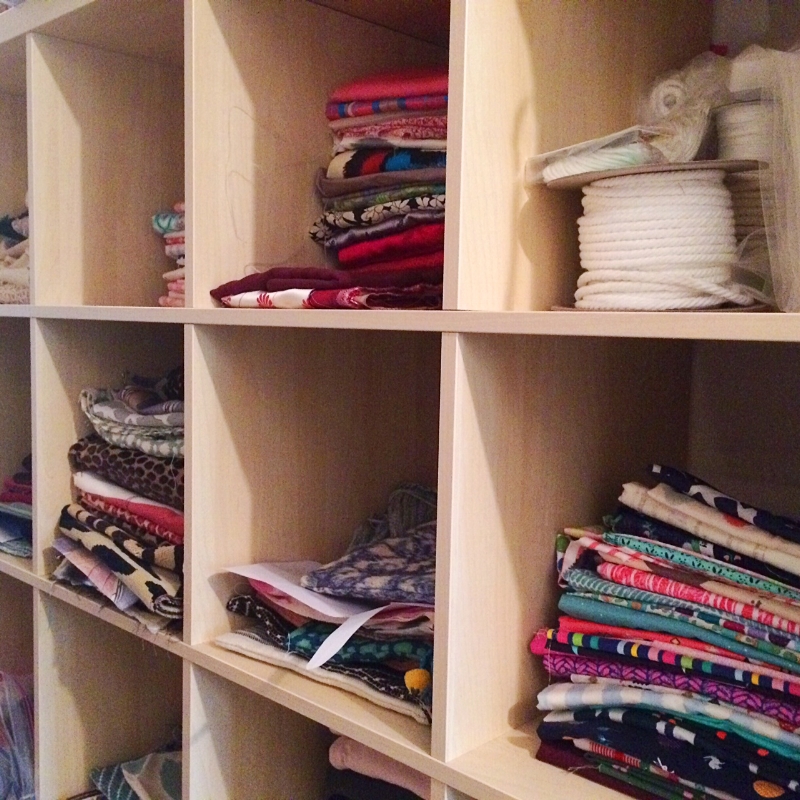
In the sewing room, I keep my supplies, notions, machines, books, patterns and trims. Just outside the room is a larger area that has my cutting table, fabric storage, and ironing board. It's nice to be able to spread out and not have to worry about little hands getting in the way.

I feel so fortunate to have this dedicated space. I no longer have to think ahead to what I might need over the holidays or a kids birthday and make sure that I get it out of the closet before guests arrive. Then have to put it all away again. It's all right here.

How to print and assemble a PDF sewing pattern
There are many benefits to buying and downloading a digital, or PDF sewing pattern. Instant gratification is one, and also storage. If you buy a lot of patterns, you will have to put them somewhere! The ability to endlessly print instead of tracing off a pattern or even worse- mistakingly cutting out the wrong size on a tissue pattern that you will have to repurchase and start over, whereas with a digital pattern, you can just re-print specific pages. Like with so many things, the internet has provided a way for independent designers offer their patterns without having huge overhead and a financial backing from a large pattern company.

There are many benefits to buying and downloading a digital, or PDF sewing pattern. Instant gratification is one, and also storage. If you buy a lot of patterns, you will have to put them somewhere! The ability to endlessly print instead of tracing off a pattern or even worse- mistakingly cutting out the wrong size on a tissue pattern that you will have to repurchase and start over, whereas with a digital pattern, you can just re-print specific pages. Like with so many things, the internet has provided a way for independent designers offer their patterns without having huge overhead and a financial backing from a large pattern company.
PDF sewing patterns are designed to be printed on a home printer using A4 or US Letter sized paper. To begin, you will need:
A printer
A4/US letter paper
Paper Scissors
Tape (scotch tape or washi work great)
Download your pattern and save it to your computer files. Open it in a PDF reader such as Adobe Reader, which you can download for free. There are other PDF readers available, but you may find that some scale the pattern to the wrong size. I offer my patterns through Etsy. To further assist, Etsy has provided a handy guide to downloading digital items.
Depending on the size of the pattern, you will likely be printing several pages that may look a little crazy. I promise that they will assemble with a little effort and look similar to a traditional tissue paper pattern- but much sturdier. And you will not suffer the added challenge of refolding the pattern and trying to stuff in back in the envelope.
Before you print, read through the pattern's printing instructions. In your Print Dialogue Box, set print scale at 100%. Do not check, "scale to fit". Identify the test square. If you don't see it, check your pattern printing instructions again. You will want to print the page with that scale square first. Measure the square to be sure that the scale is correct. If it is not, check your print settings. Additionally, you can change the print quality, opting for draft or fast printing to use less ink. Also, printing in black and white (even though all of those colors are so pretty!) It saves ink.


It is not necessary to print every page. Just print the pattern and view the instructions on your screen. It will save ink, time and paper. READ through the instructions first, they will guide you to which pages to print.
The pattern pages will need to be trimmed before being taped together. It can be a bit tedious to assemble the pattern and tape the entire thing together, but once you have done it a time or two, they come together pretty quickly.

Trim around the border of each page.

I find it easiest to work one row at a time. I begin by laying out each row, then trimming each page. Then I align the quarter circles and tape.
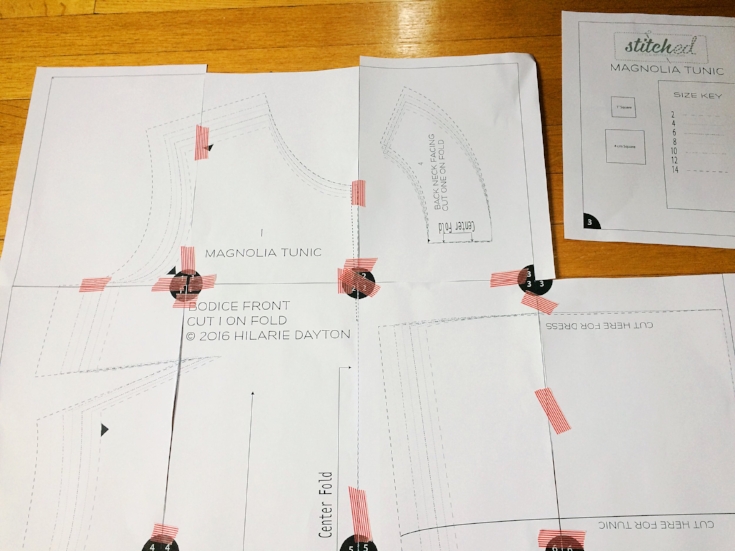
Continue to tape. It's starting to look like a real pattern!

Once I have the entire pattern assembled, I rough cut around each piece to separate.
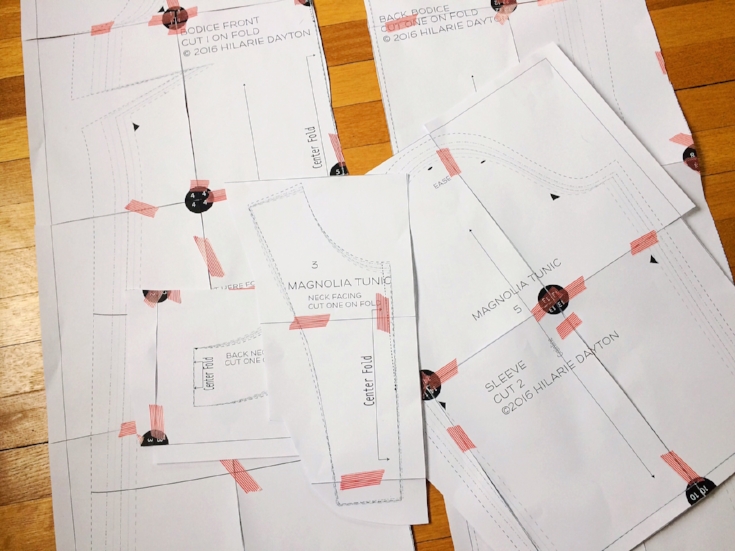
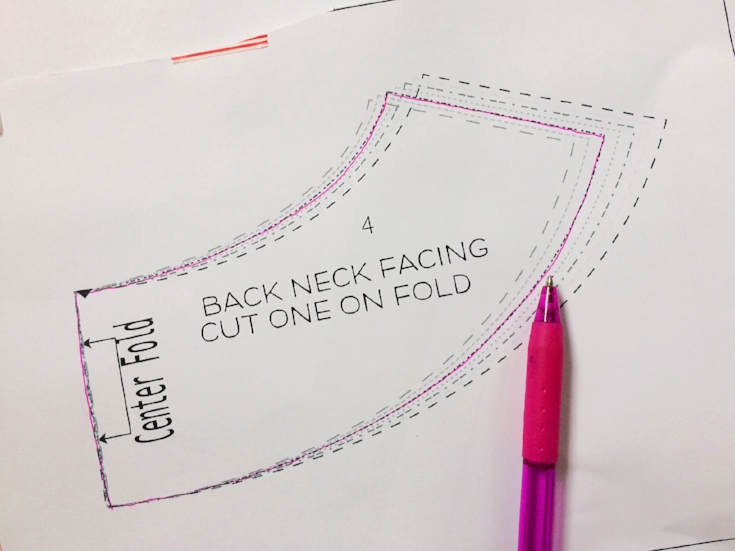
Since the patterns are multi-sized and you may not have printed in color, it may help to take a pen or marker and highlight your correct size. Do you see how each size has a coordinating line (stroke) design? Look at the pattern's size chart to determine your size then refer to the size key to find your size.
Cut out each piece and get your fabric ready! At this point you can lay the pieces directly on your fabric and following the layout and cutting instructions, begin pinning, tracing, transferring and cutting. I think that you will find this paper much easier and more durable than standard tissue paper.

Do you have any tips or tricks to add? Have you used a PDF sewing pattern yet?
Aster Fold Over Clutch Bag and Limited Edition Clutches
Photo Credit: Caty Gene Studio
You may have noticed that I updated my etsy shop. Besides PDF sewing patterns, I am offering a few handmade items. This past week I listed several clutch bags. They are fashioned in the classic zipper foldover style. Several months ago, a dear friend called and told me that she was moving to Washington, DC for a new job. And, would I like to buy her considerable inventory of high-end decorator fabric. (Well, of course I would! ) It took me a few trips back and forth to get it all home then a week or two to catalogue and organize it.
Months later, I am finally putting it to good use. These purses are just a sampling of the great fabrics that are in my collection. More styles and options to come.
I have been busy working on yet another sewing pattern. The Aster Foldover Clutch. Yes, the very same clutch that I am offering readymade. Next week, I hope to have an e-book, step-by-step sewing pattern ready for testing. The full pattern will be offered for sale as a PDF download in my etsy shop. Don't worry, the pattern is written as a teaching pattern with step-by-step colored pictures and text.
Would you be interested in being a pattern tester?

Obi sash Pattern and Tutorial
I was asked to make an Obi sash belt for Annabel Wrigley's debut fabric line, Maribel for Windham Fabrics. Pretty awesome, right?! I love how she styled it for the Lookbook. A pretty floral, Breton stripes, some faded denim? What's not to love!
I was asked to make an Obi sash belt for Annabel Wrigley's debut fabric line, Maribel for Windham Fabrics. Pretty awesome, right?! I love how she styled it for the Lookbook. A pretty floral, Breton stripes, some faded denim? What's not to love!

NOTE: I am also making an alternate version in a beautiful raw silk for you to more clearly understand my instructions. For the silk version, I have omitted interfacing.
Ready to make it?

Supplies:
2 yards of lightweight woven fabric (always wash and dry your fabric before cutting to allow for shrinkage)
Coordinating thread
Tailor's Chalk
Lightweight fusible interfacing (I like Pellon Shape Flex, SF101.)
Download Pattern (One size fits most)
Cut the pattern out and tape together aligning notches and page numbers. Each pattern page includes shaded circles with guide numbers to show how the pattern pieces should be organized. Be sure to match up all 4 quarter circles along the edges of the tile.
Fold your fabric lengthwise.
Lay the pattern on the fold line.
Pin the pattern to the fabric and cut.
Cut interfacing 1/4 inch smaller all around (this will help prevent bulky seams)
Mark the dots and notches with a chalk pencil.
Seam allowance for construction is 1/2".

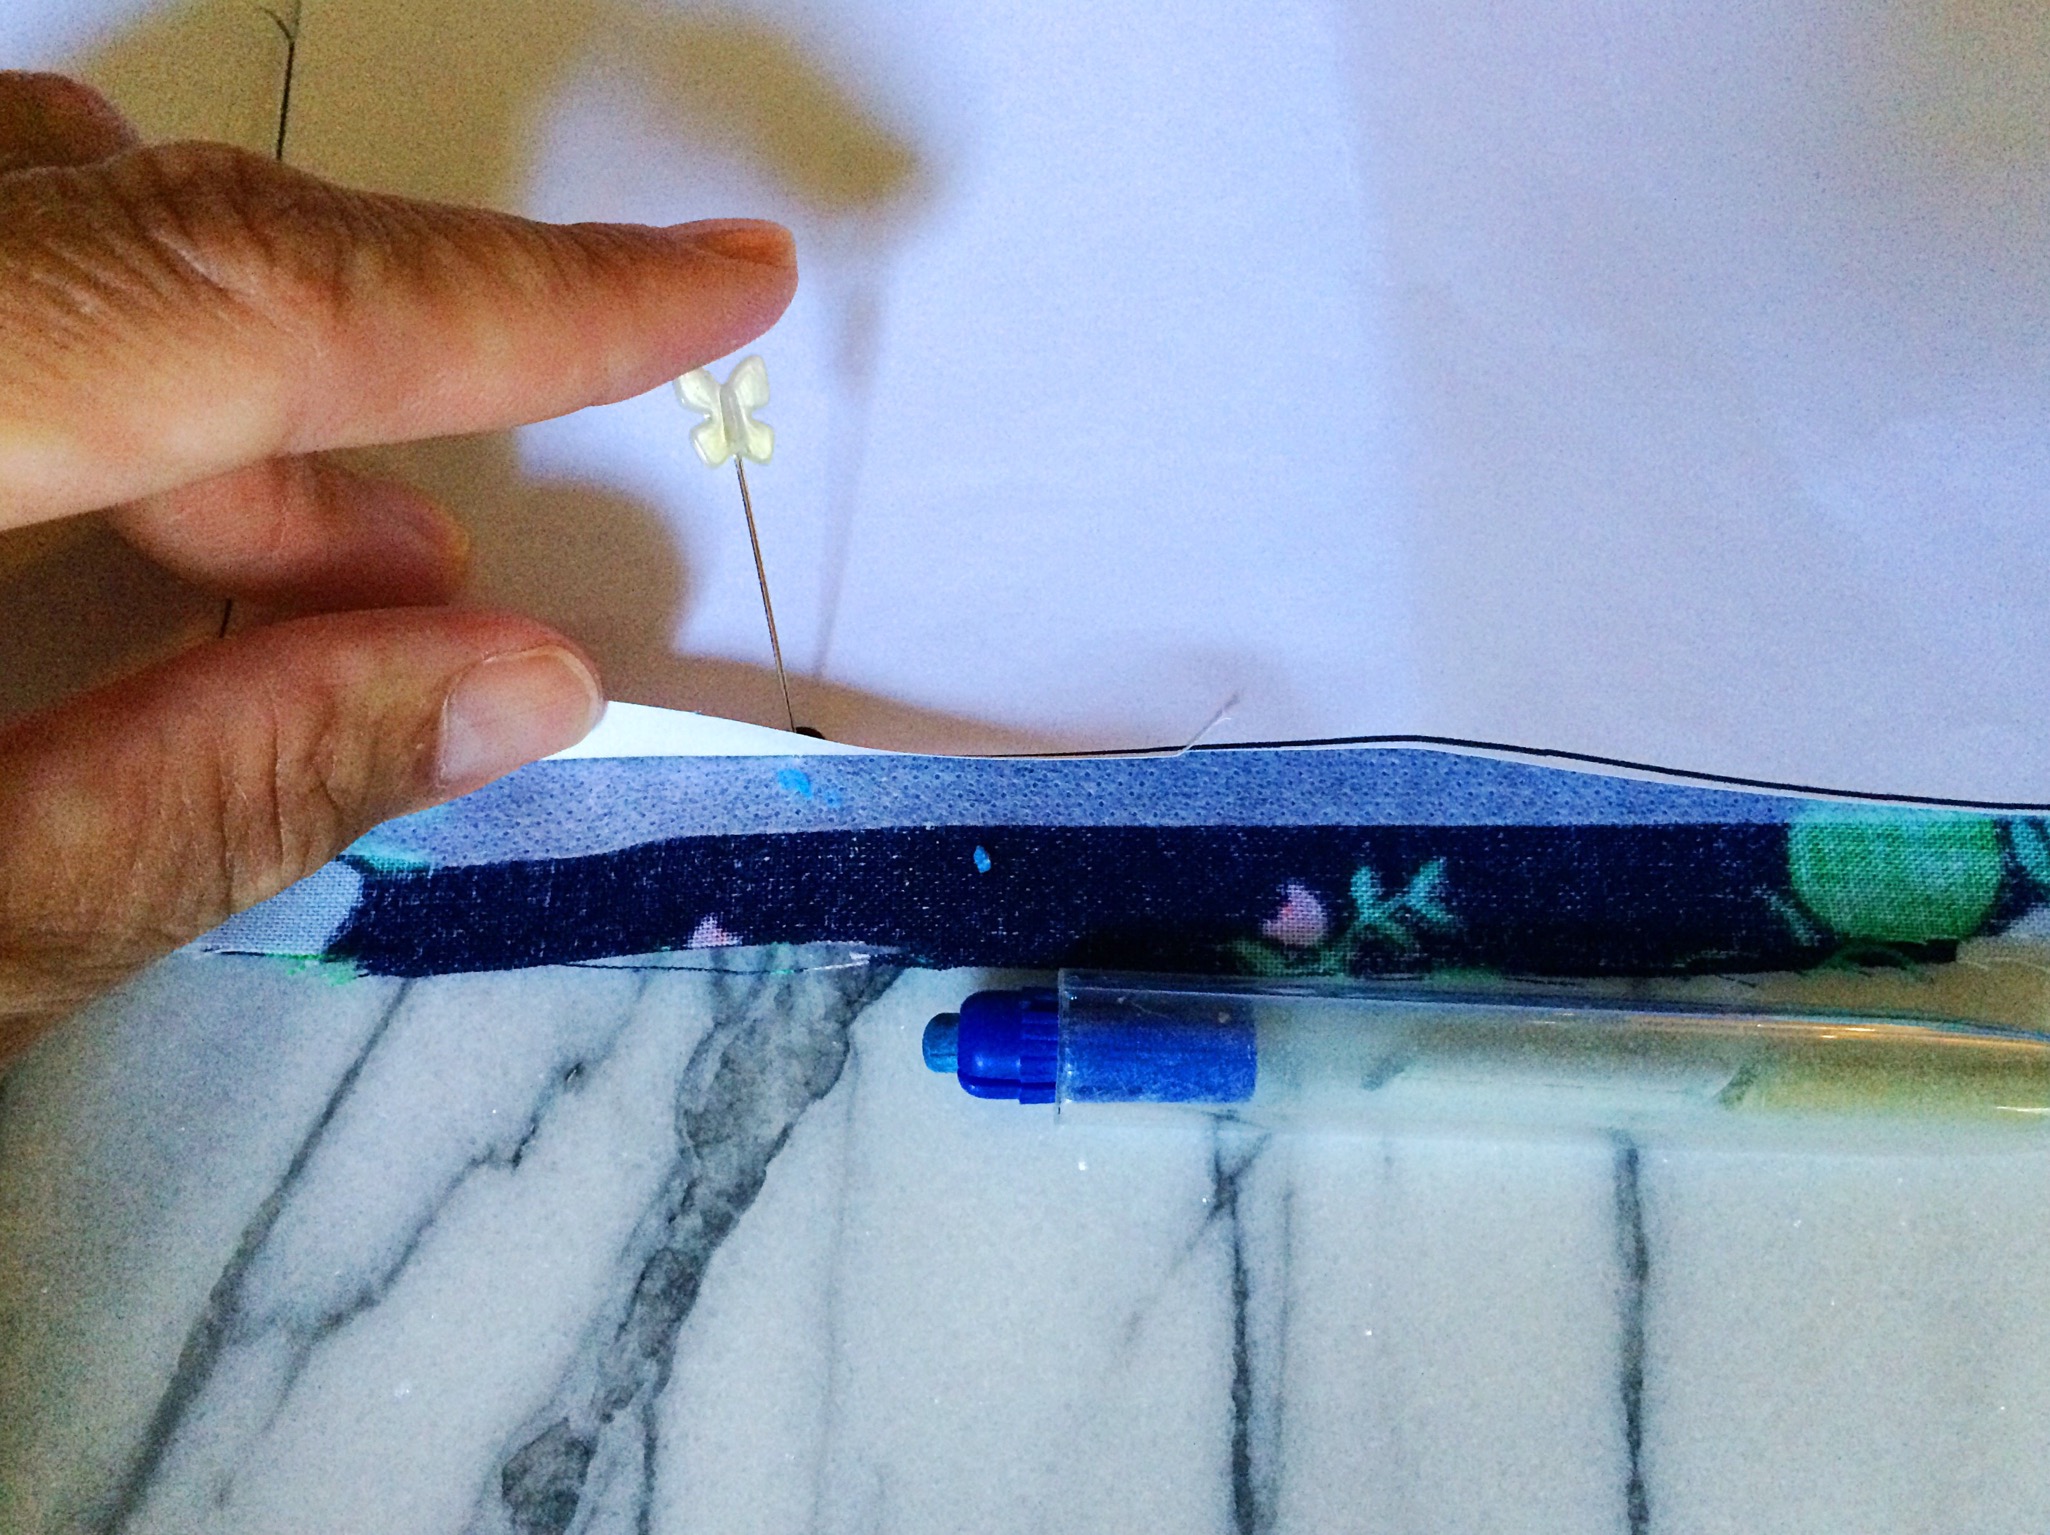
Fold the fabric with the right sides facing together and matching the notches, and pin. Begin stitching around the belt beginning at the point. Stitch the perimeter of the belt with a 1/2" seam, leaving an opening between the dots you marked for the pattern piece for turning the belt right side out. When you begin and end stitching at each dot, begin stitching at the selvage, stitch 1/2" and pivot. Stitch along the long side. By extending the stitch line, just a bit, it will help the fabric turn inside when it is time to finish.
Be sure not to stretch the fabric as you work toward the points on each end.
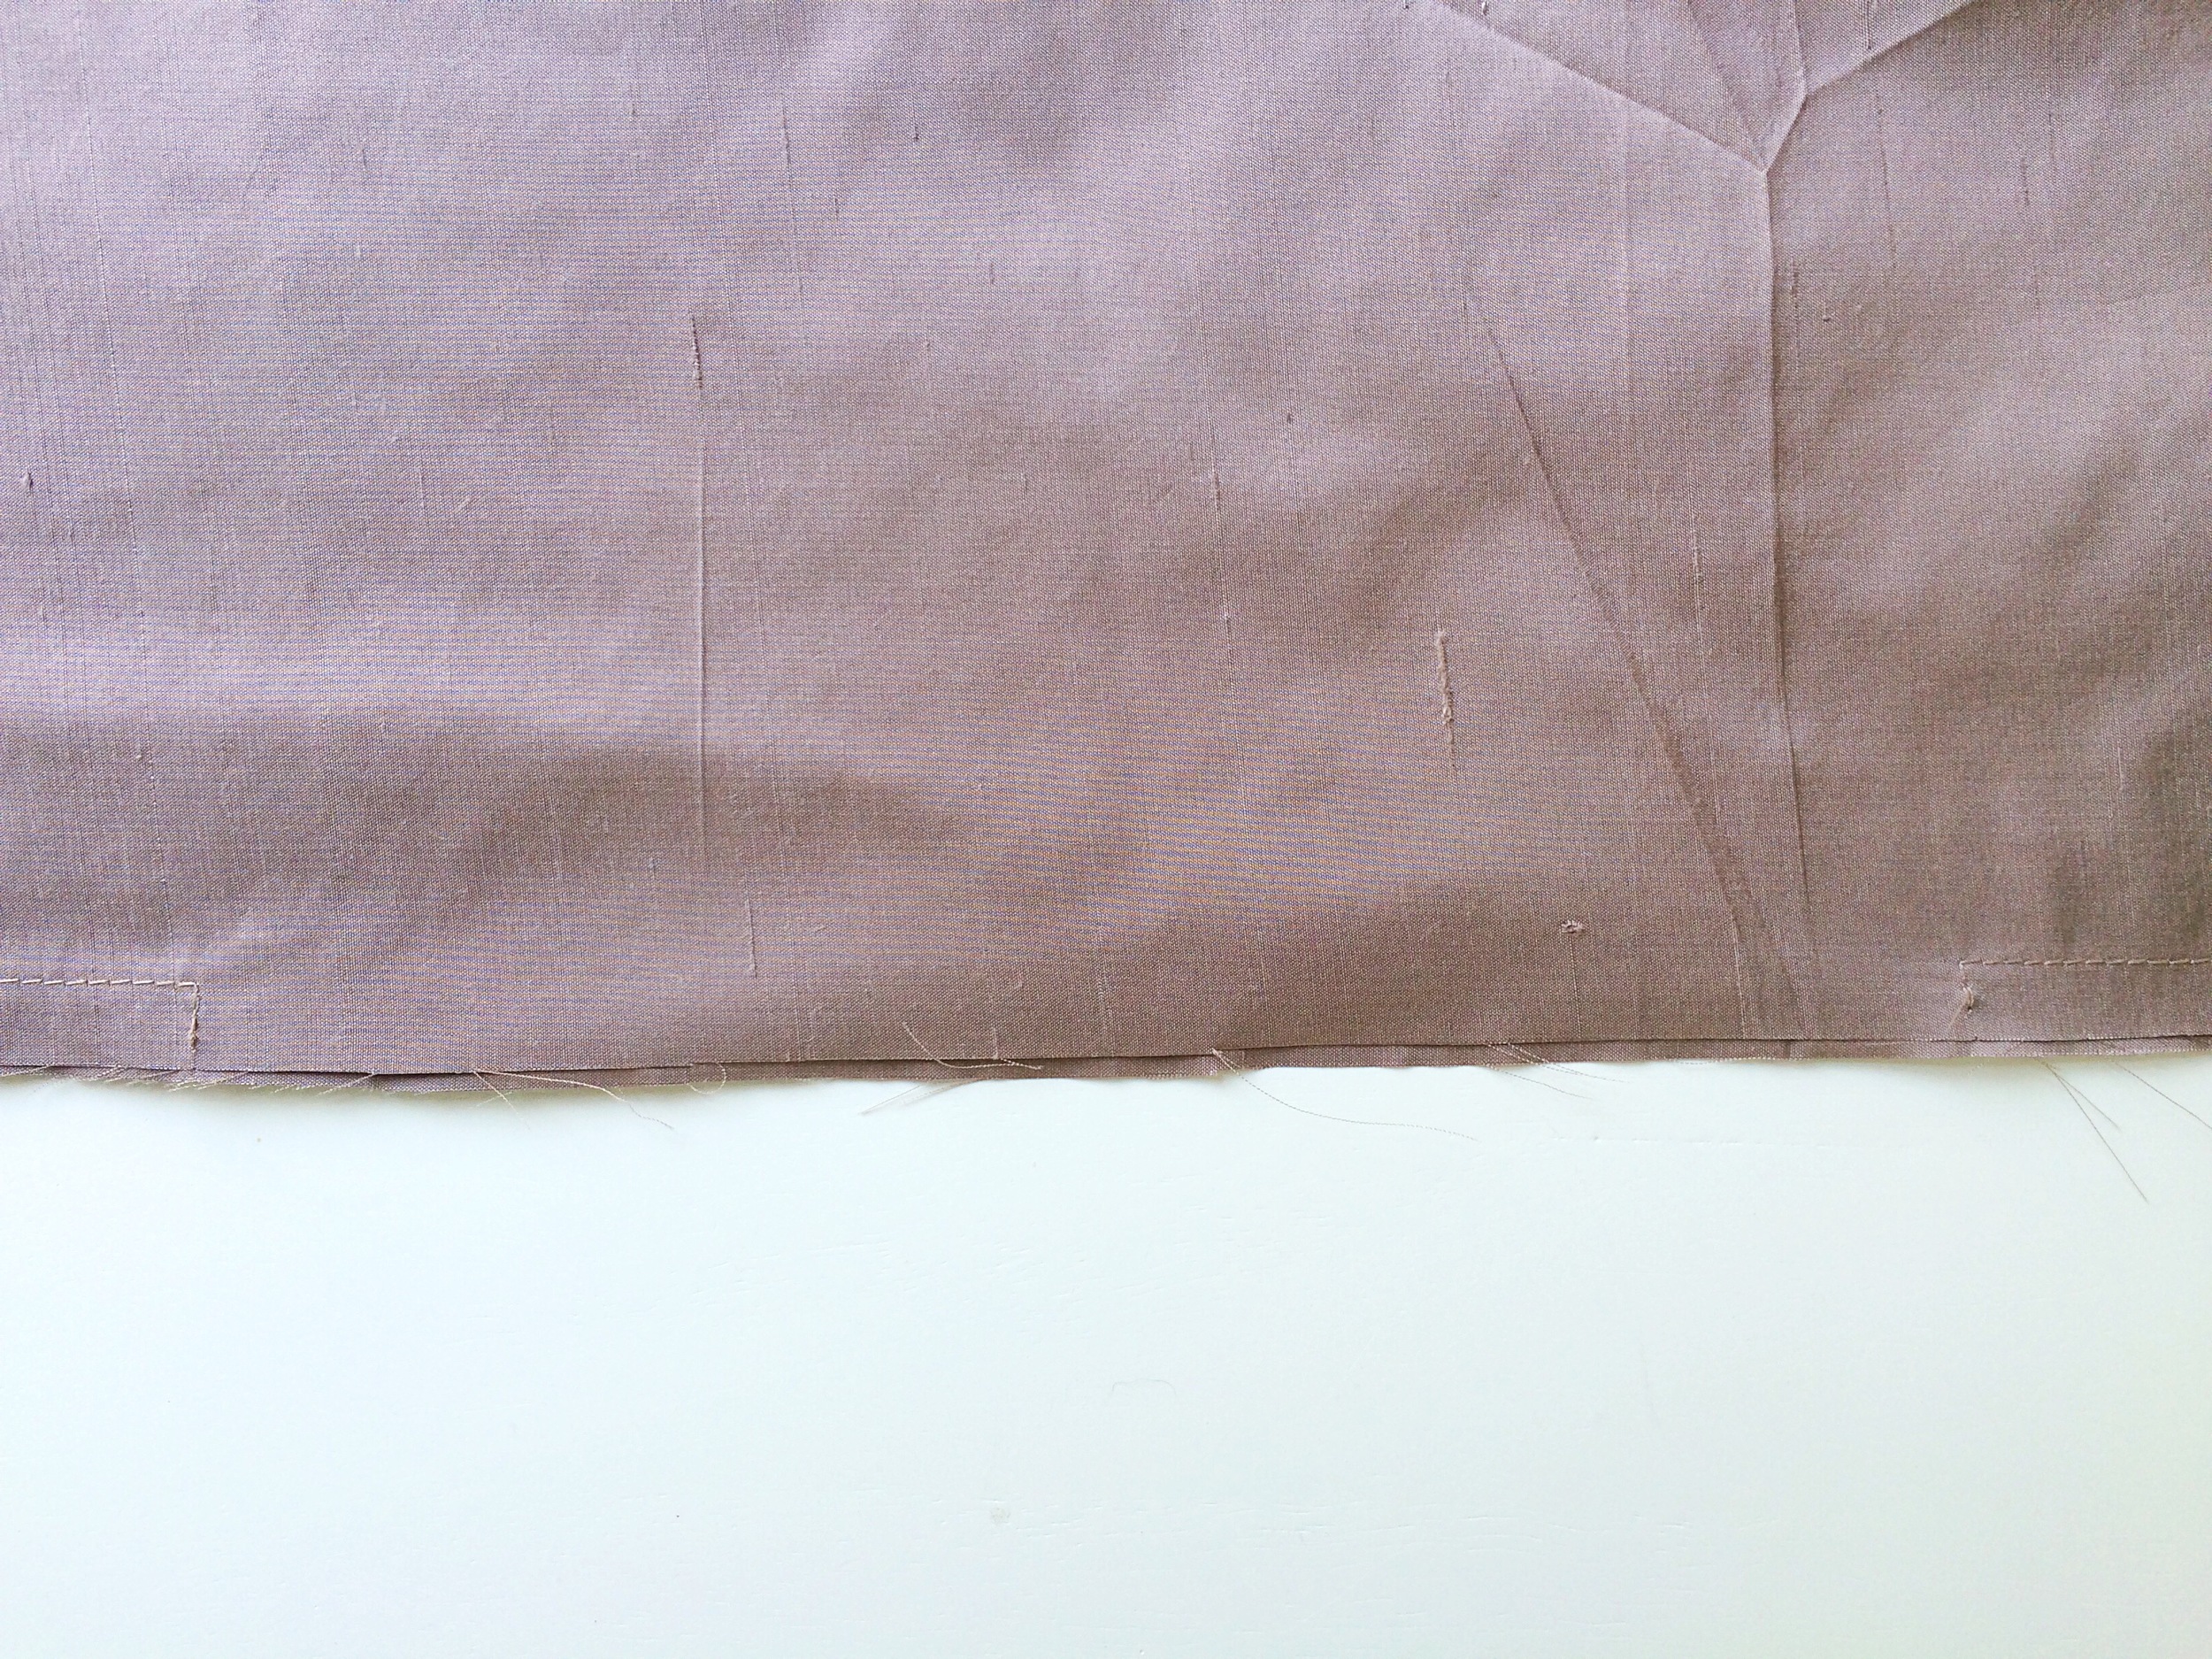
Trim the seam allowances (except for those in the opening) to about 1/8"; then turn the belt right side out. Finger press the edges to smooth the stitching, tuck the seam allowances inside the opening, and press with an iron to meld the seams.

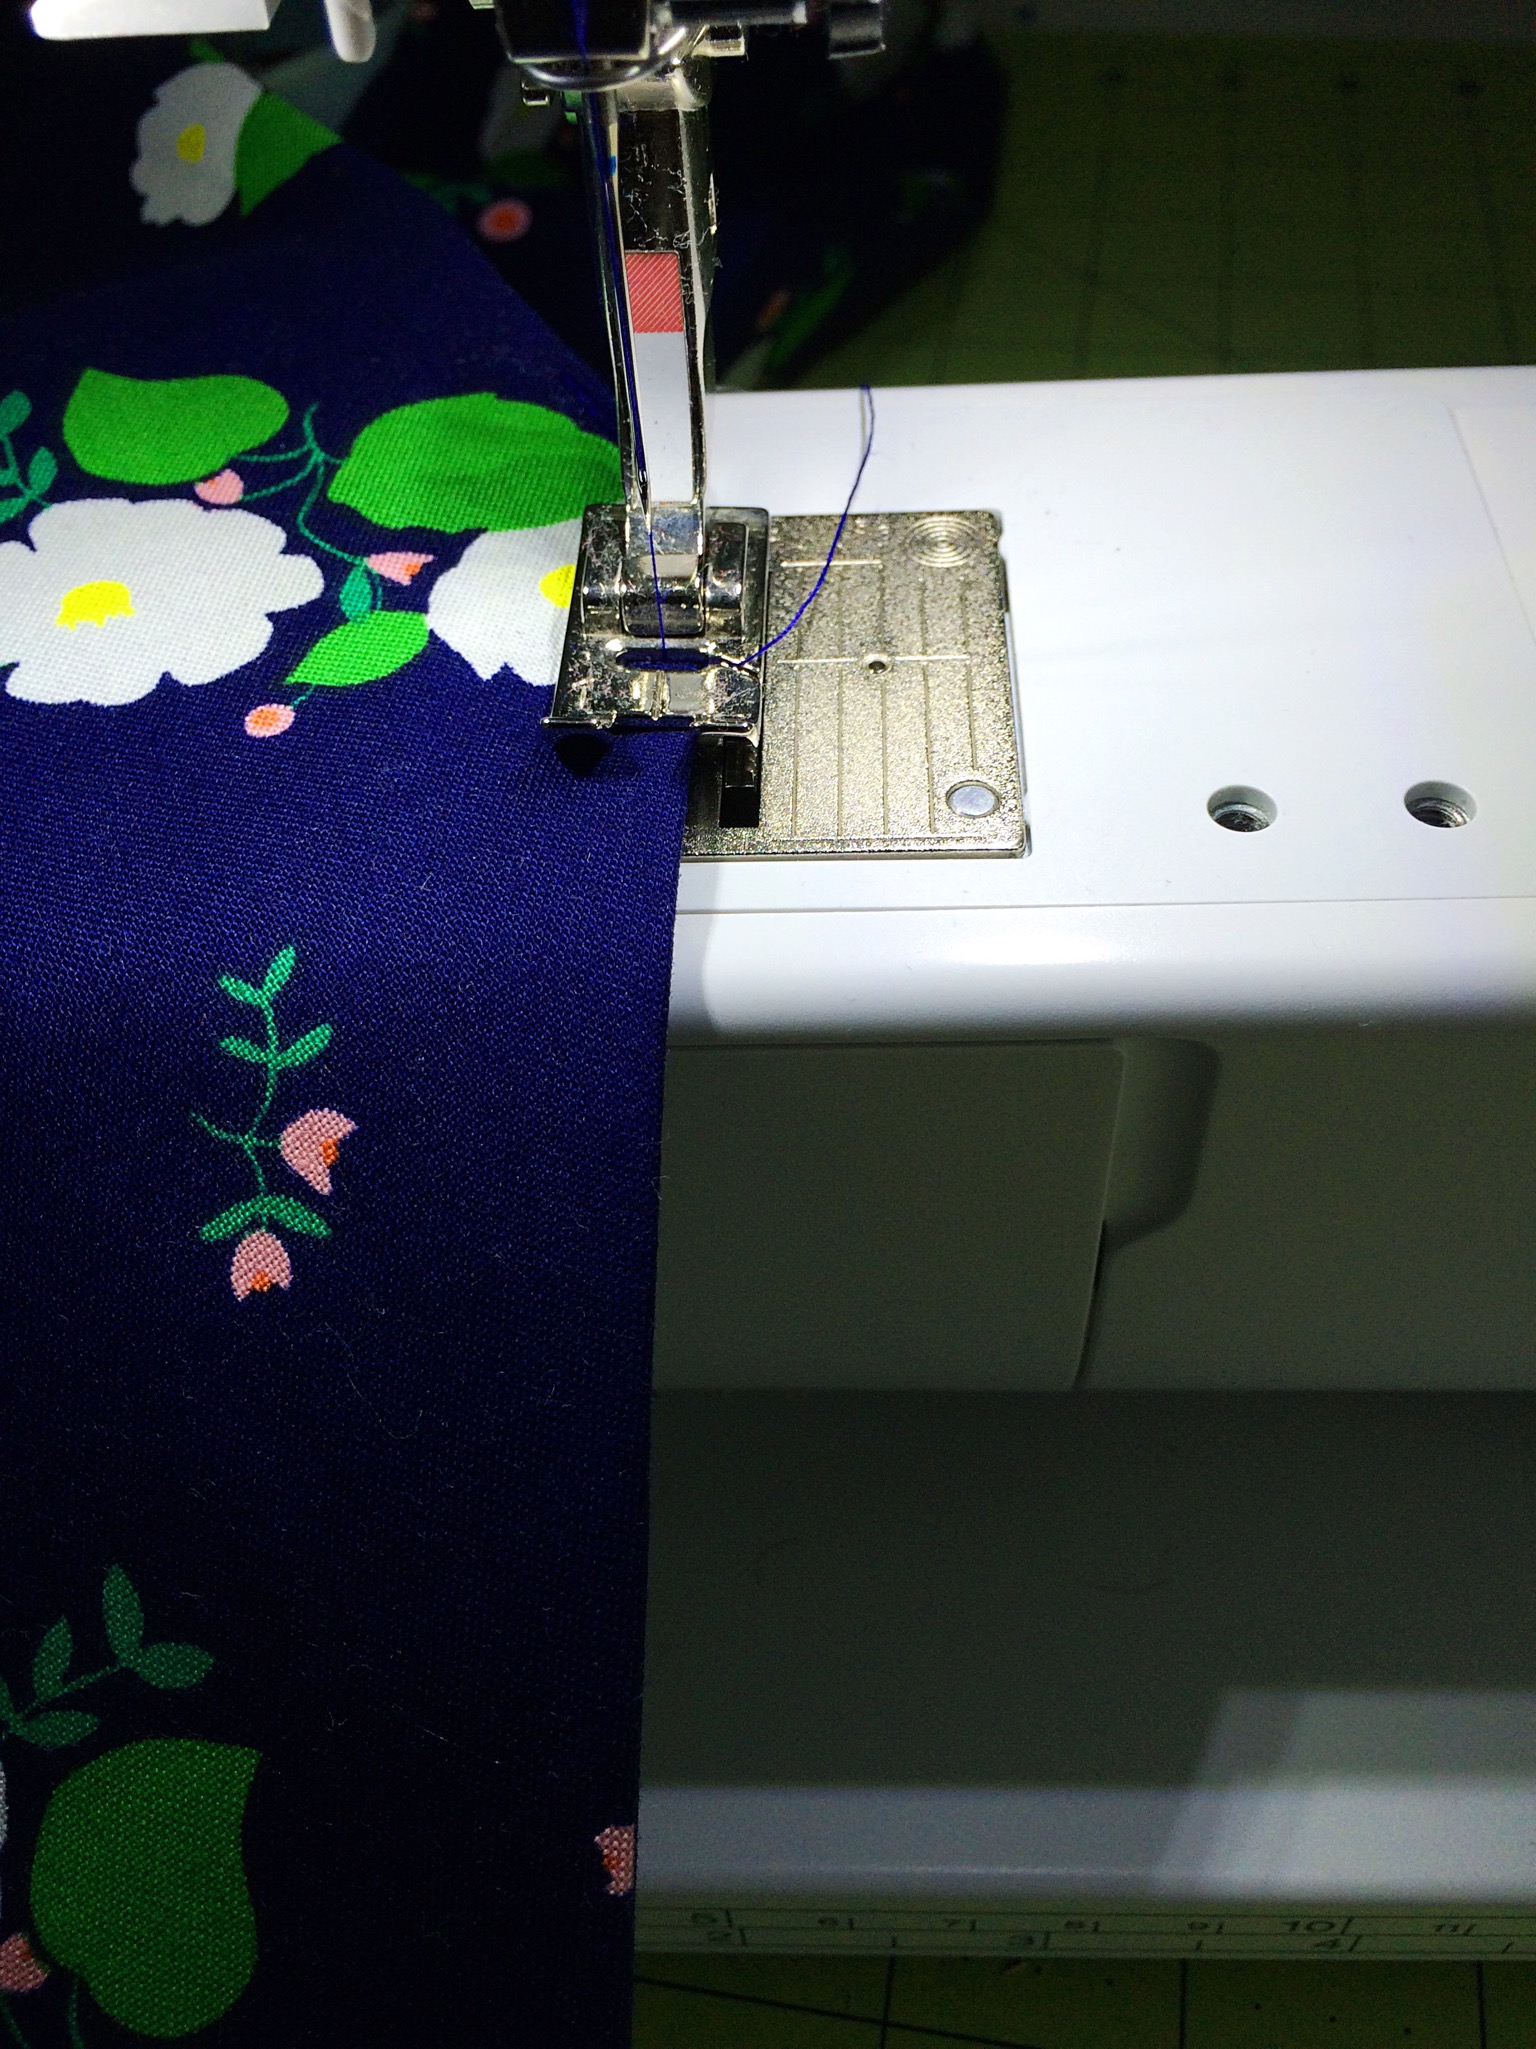
Topstitch 1/4" from the edge around the perimeter of the belt in one continuous seam, pivoting at the points and catching the folded inside edges that we used for turning. Be sure to backstitch to prevent all of those pretty stitches from unraveling! Press.
Your sash is done and ready to wear!