
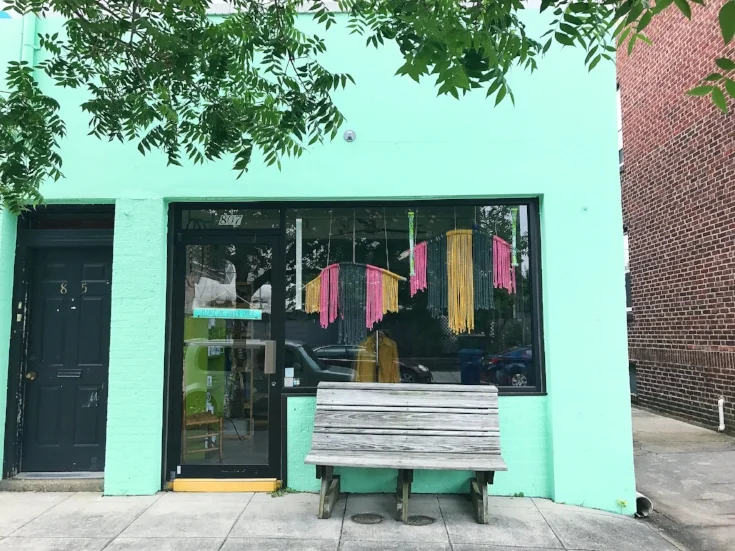
Little Stitch Studio is Moving!
I am beyond excited to share some big news with you. In August, Little Stitch Studio will be moving to 807 Shirley Avenue. I'll be right next door to Kitsch and a block from Starbucks. This larger space will allow me to offer more classes for kids and adults. There will also be a bit of space for retail. I cannot imagine a better space to move into. Between the girls at Kitsch and my studio, we will make this "handmade corner" of Colley Ave. a true destination.
I'm so excited about the new space and can't wait to for you to see it.

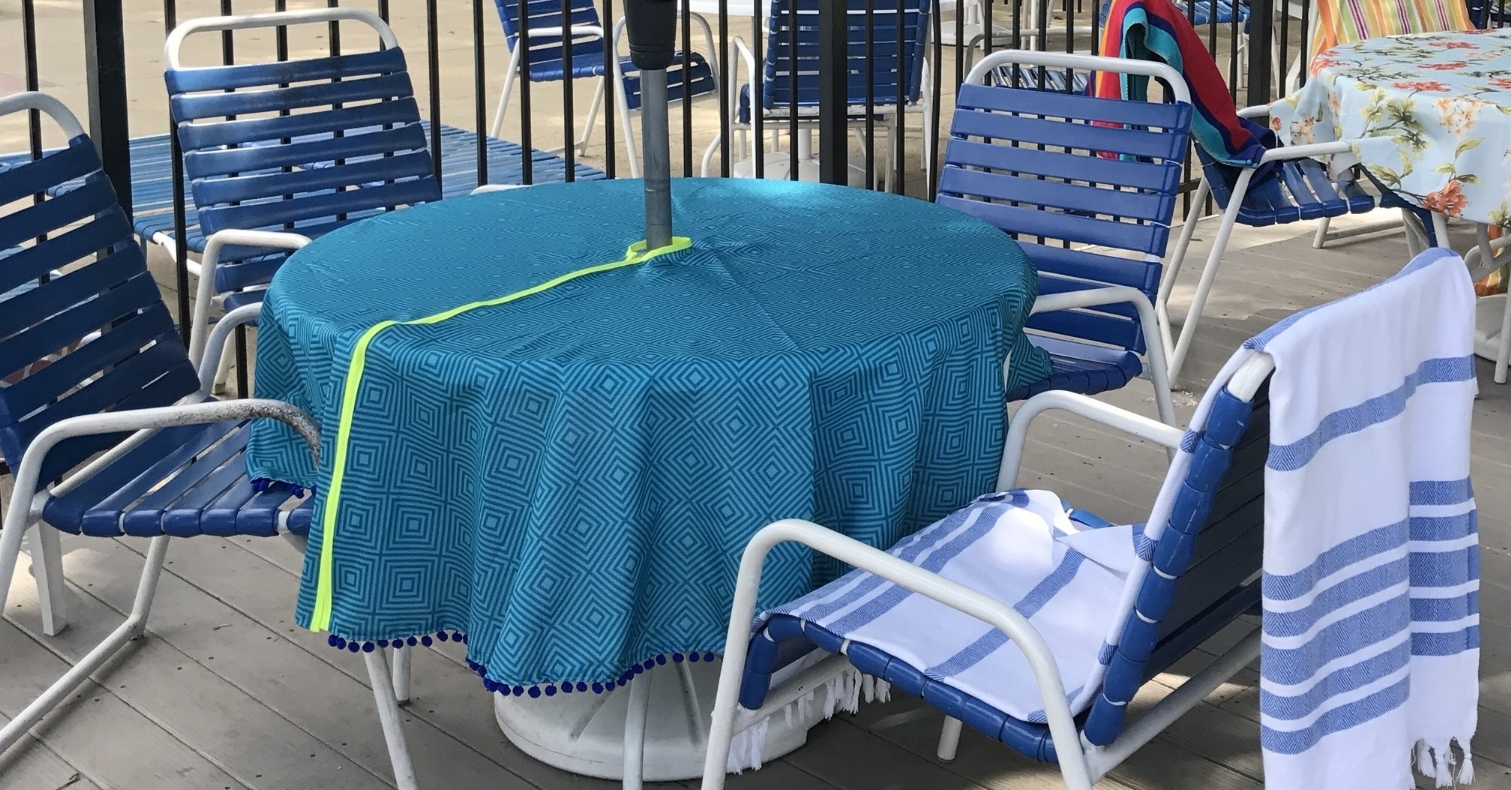
DIY umbrella hole tablecloth, a bias binding tutorial
Have you ever wondered how to make a umbrella hole tablecloth? I'm going to show you how to adapt a tablecloth to fit an umbrella pole- without adding a zipper. Bias binding and velcro will make a much nicer finish.
The problem with most outdoor tablecloths is that great ones are hard to find. You might remember to buy one as you wander through Target in March, but it will invariably lack what you really need it to-to accommodate the umbrella pole. Actually, you’ll probably be annoyed enough that you’ll just buy whatever they have. Who cares that 9 other families at the pool have the same one. That is, until you get to the pool and stand there with a cooler, 4 bags, a float and a few kids looking for the table that your spouse "saved" for you by putting that tablecloth on the table.
Go ahead and buy a regular round tablecloth in a fabric that you love, I'm going to show you how to adapt it to fit around an umbrella pole- without adding a zipper.
MATERIALS
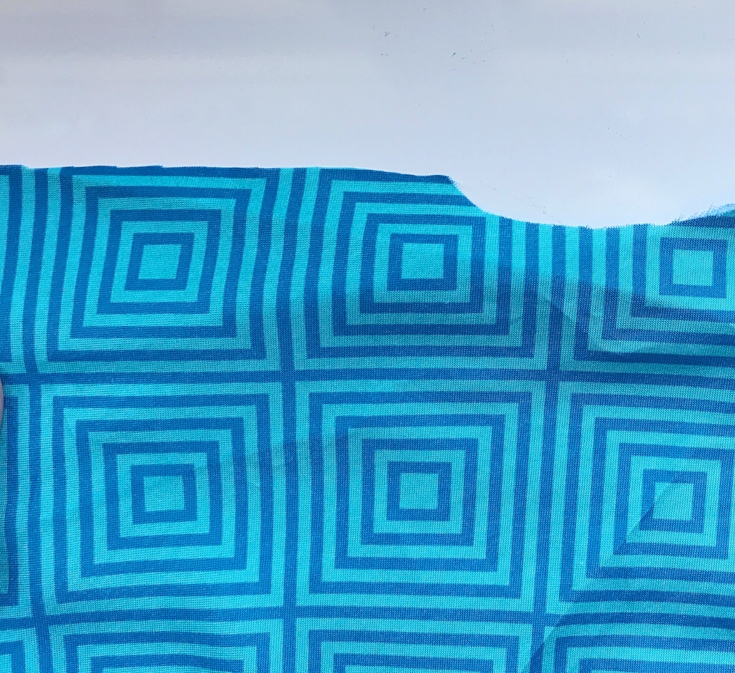
In this tutorial, I am using a 60" outdoor tablecloth purchased from Target 4 or 5 years ago.
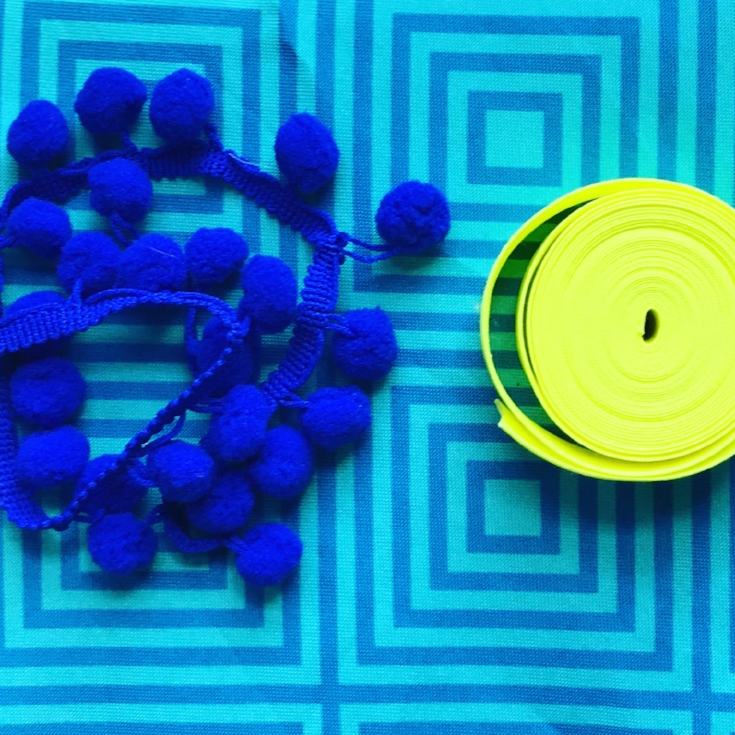
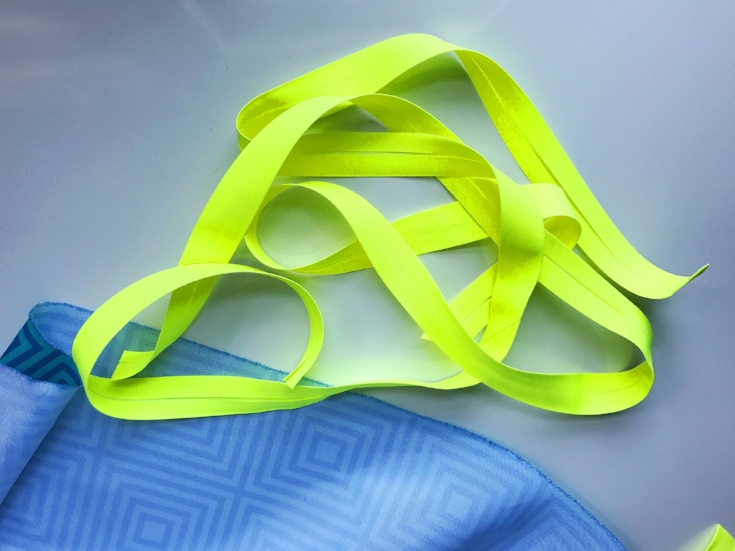
5 yards of pompom trim (measure the hemmed edge of your tablecloth to be sure of the exact yardage)
3 1/2 yards of single fold 3/4" bias tape
2 yards of 1/4" velcro
Coordinating polyester thread
Chalk
CUTTING THE TABLECLOTH

On a large flat surface, fold the tablecloth in half along the center, carefully aligning the edges.
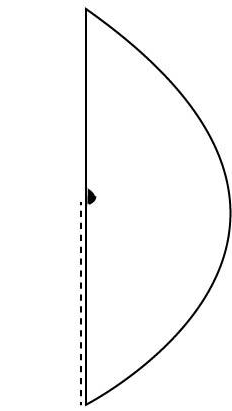
Find and mark the center point in the tablecloth. Mark the spot with a pen or a chalk line. Using this diagram as an example, cut through the fabric along the dotted line until you reach the center point. At the center point mark, cut a 3" half circle through both layers of fabric.
APPLYING THE BIAS TRIM
Bias binding, or trim can be purchased at the store or cut and pressed on your own. Either way, you apply it to curved or straight edges to make a pretty finish. To do this, you place the binding on the right side of the material matching the edge of the fabric to the edge of the binding. Stitch these together with a 1/4" seam allowance. Then turn the binding so that the right side and using the zipper foot on your machine, edgestitch flat.
Cut one 10" strip and 3- 36" strips of bias tape.
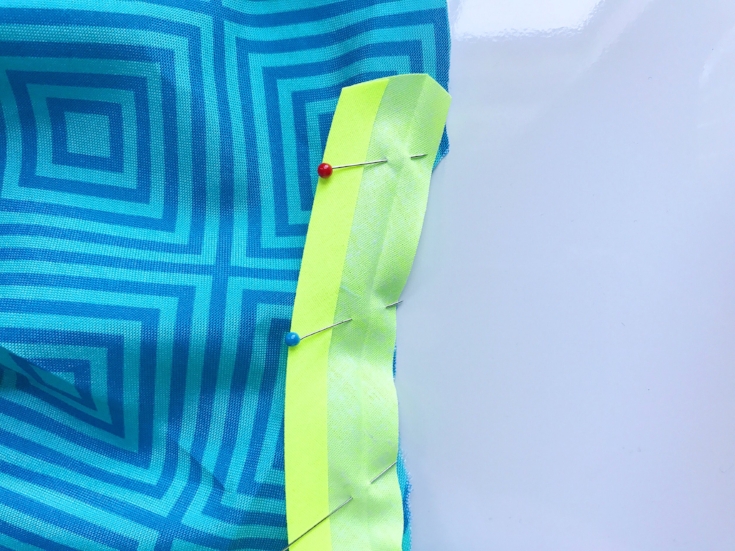
Beginning with the short curved center where we will make the umbrella hole, take the 10" piece of bias tape. Open up the fold on one long side of the bias tape. Starting at one corner, and with the wrong side of the bias tape facing up, pin the raw edge of the tape to the top raw edge of the fabric.
Sew the bias tape to the fabric with a 1/4-inch seam allowance, using the fold of the bias tape as a guide, or path. When sewing a curved seam, it helps to shorten your stitch length to improve accuracy. Then just stitch from pin to pin, removing each pin so that you don't stitch over it. Make sure that the machine needle is positioned correctly to stay along the path.

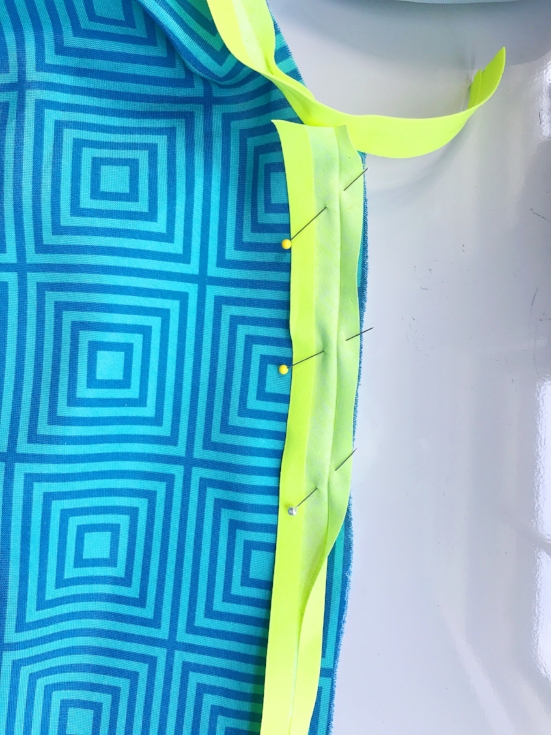
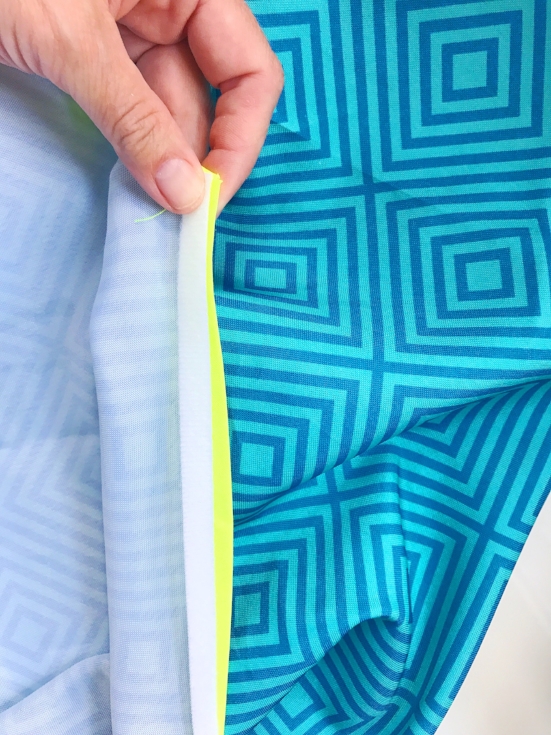
Next, the longer side pieces. Take one 36" length of bias tape and pin along one long side of the tablecloth beginning at the top edge of the fabric. Pin and sew with a 1/4-inch seam allowance, again using the fold of the bias tape as a guide. Make sure that the edges of the fabric and one edge of the bias tape are caught in the seam.

Now, flip the fabric piece so that its right side is facing up. Fold the bias tape over the raw edge of the fabric and pin in place.
Sew the bias tape to the fabric with an edgestitch.
Trim the edges of the bias tape on the long sides, so that they are flush with the edges of the fabric. Do not trim the 10" piece of bias trim yet.

Now for the curved center, fold the bias tape over the raw edge of the fabric and bias trimmed sides and pin in place. Sew the bias tape to the fabric with an edgestitch.


ADDING THE VELCRO EXTENSION
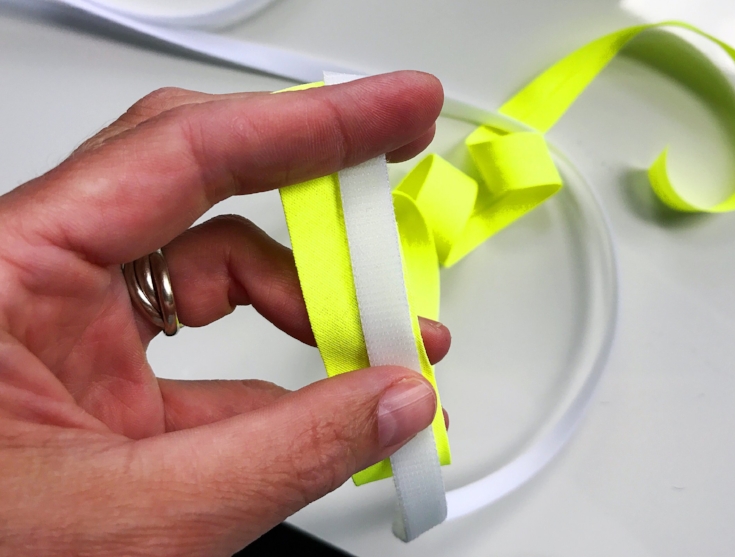
With the third length of bias tape, we are going to make an extension to add to the tablecloth. Take the third length of bias tape and one length of velcro. Velcro has two sides, a loop side (soft) and a hook side (rough).
Open the center fold of bias tape and iron flat. Align the velcro to the far right side of the bias tape and stitch from top to bottom. I used the loop side of the velcro and a zigzag stitch for this.
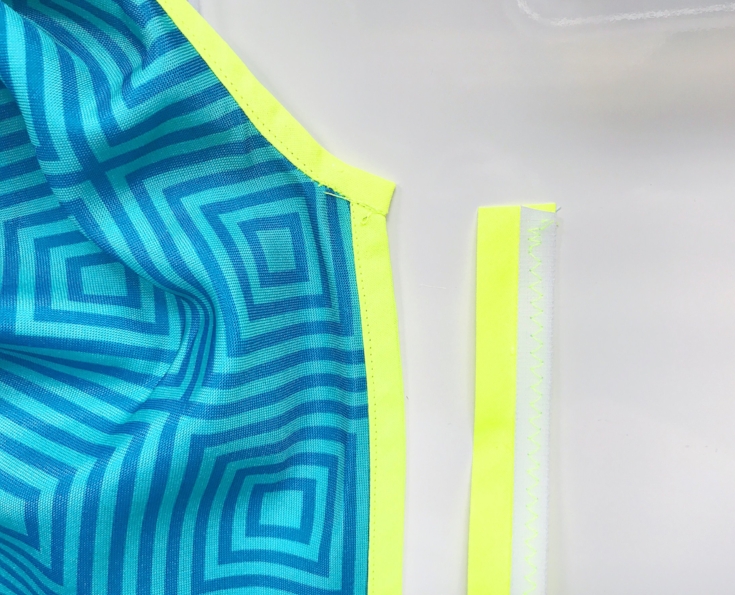

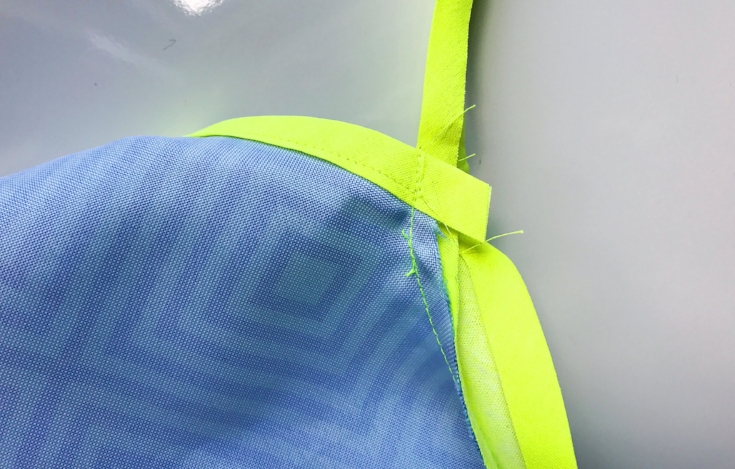
Now lay the left side of the binding under the long bound edge of the tablecloth. Stitch right over the previous edgestitch. This way the bound edge of the tablecloth and the velcro form one long strip.

Now, take the hook side of the velcro and pin and stitch it under the opposite side of the bound edge of the tablecloth. Stitch right over your previous stitches. You can see that I have used blue thread for this.


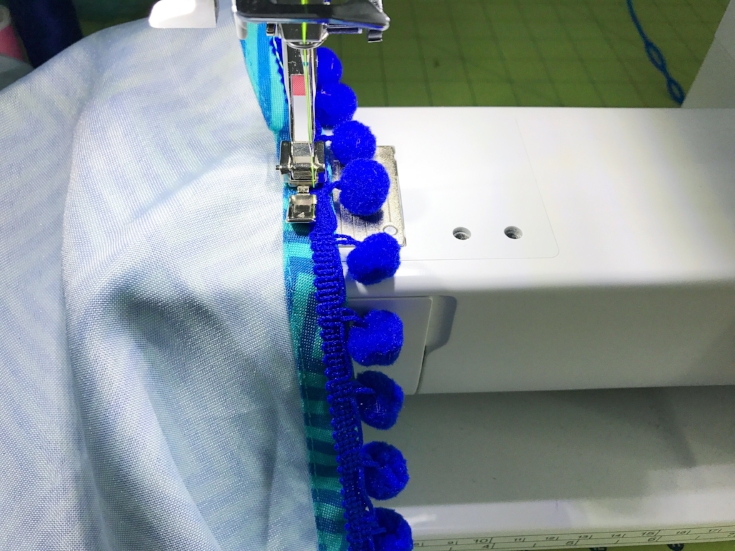
ADDING THE POMPOM TRIM
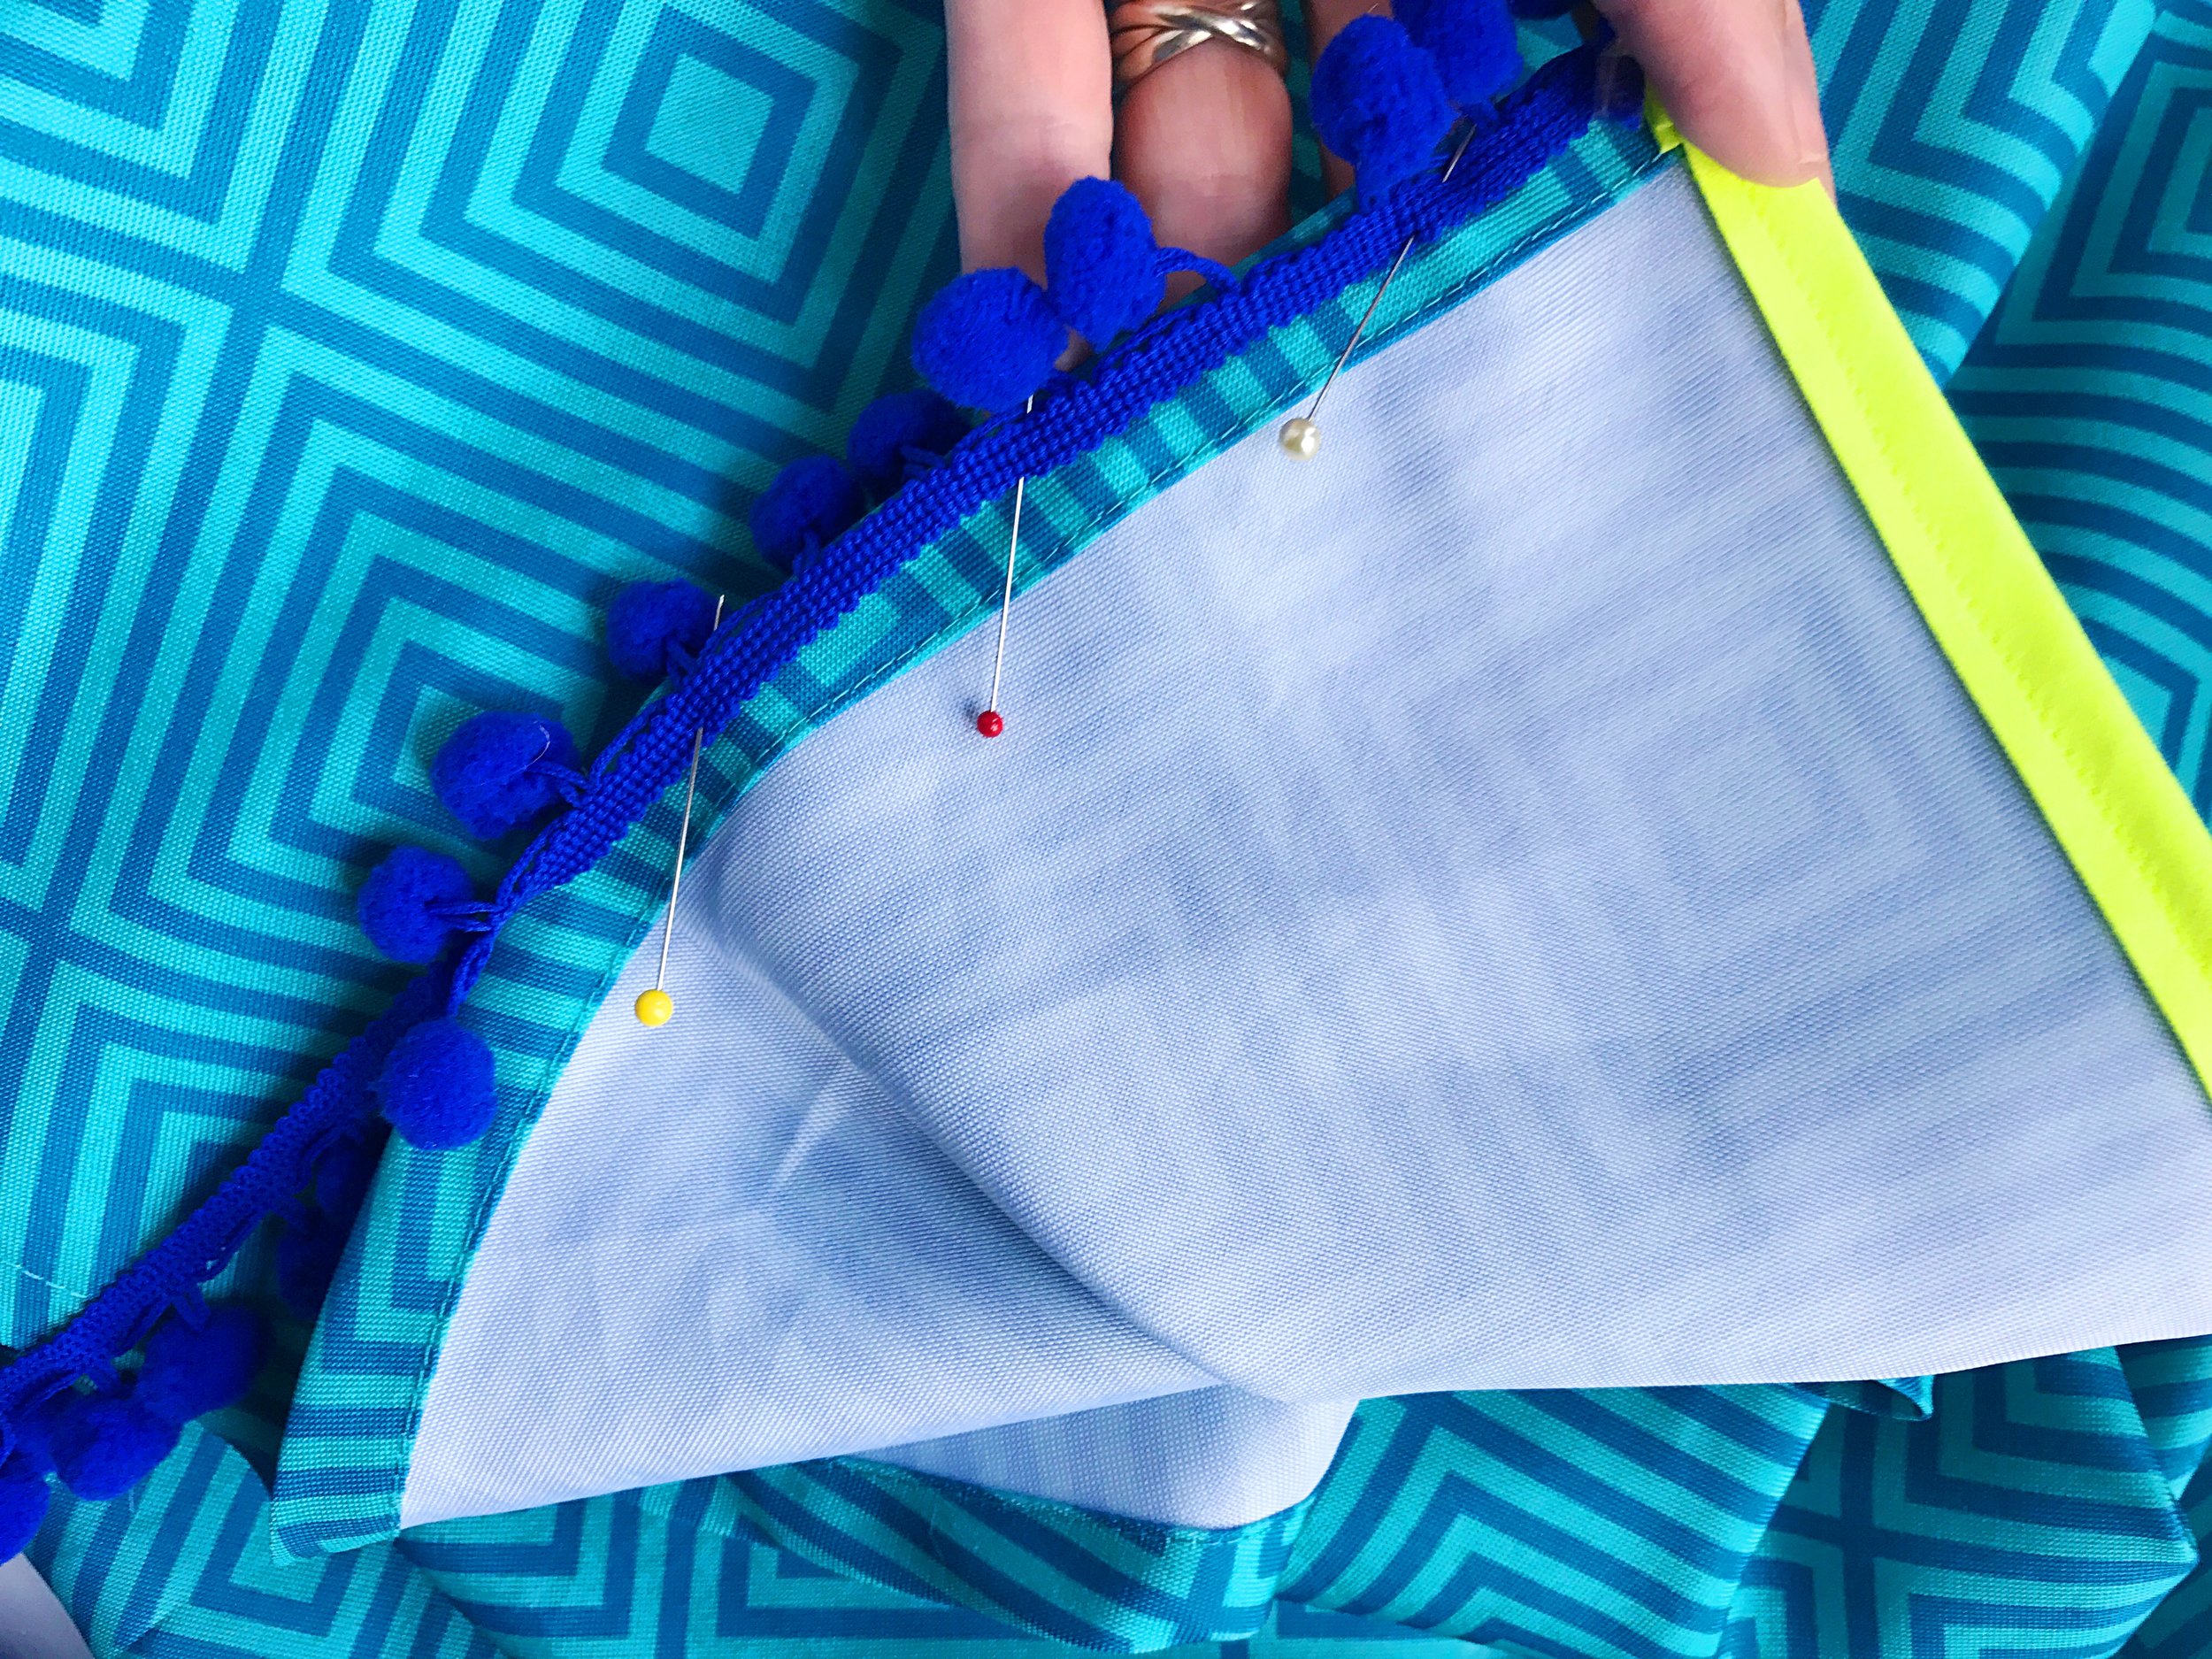
Pin the flat tape section of the pom pom trim along the tablecloth's inside bottom edge so the pom poms are facing outward.
Attach the zipper foot to your machine using the right side of the foot.
Sew through the middle of the tape side of the pom pom trim from one end of the tablecloth to the other. Backstitch at the beginning and end of this seam. Make sure you have caught all of the trim and that you haven’t sewn into any of the pom poms.
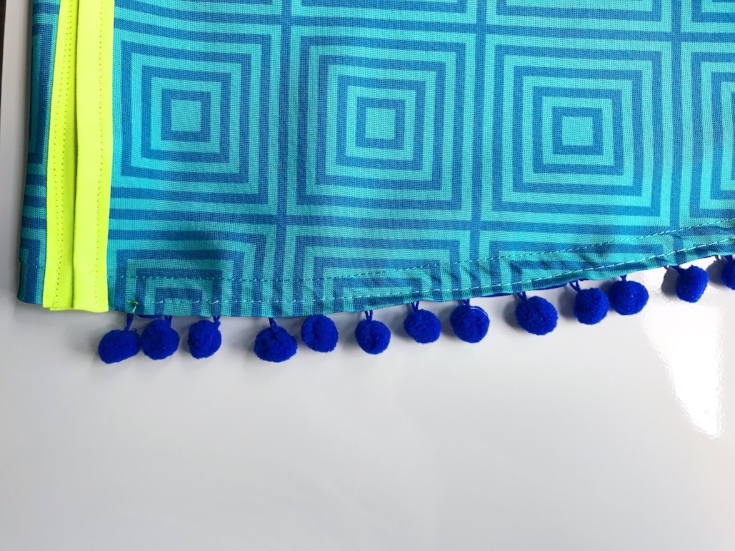
You may be wondering why I have two rows of stitching on my tablecloth. Good question! I didn't have quite enough pompom trim to complete this project. So my trim is just basted on until UPS arrives with the rest :)

I hope that you have enjoyed this tutorial. Please let me know if I need to clarify any steps.
XO, Hilarie

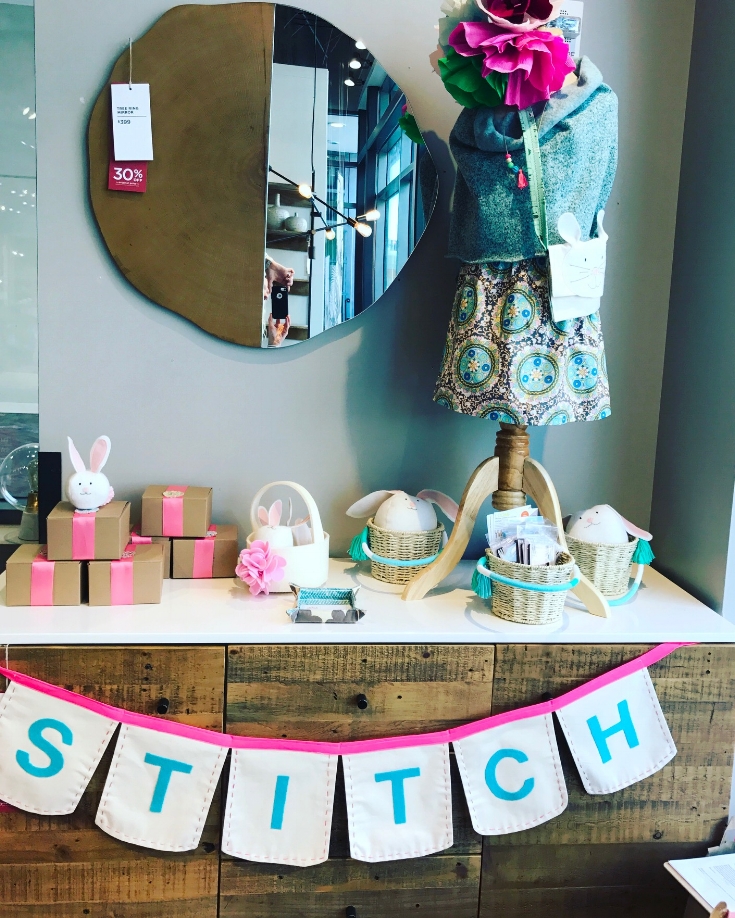
Pop-up Workshop at West Elm VB
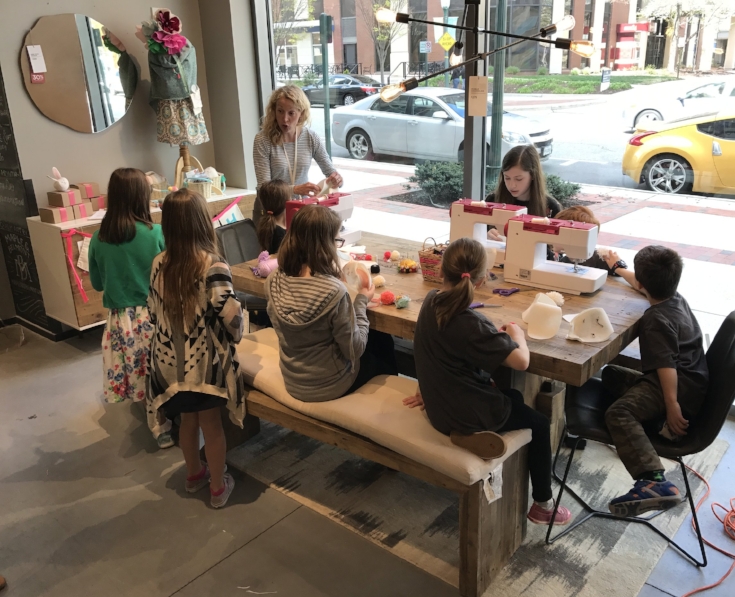
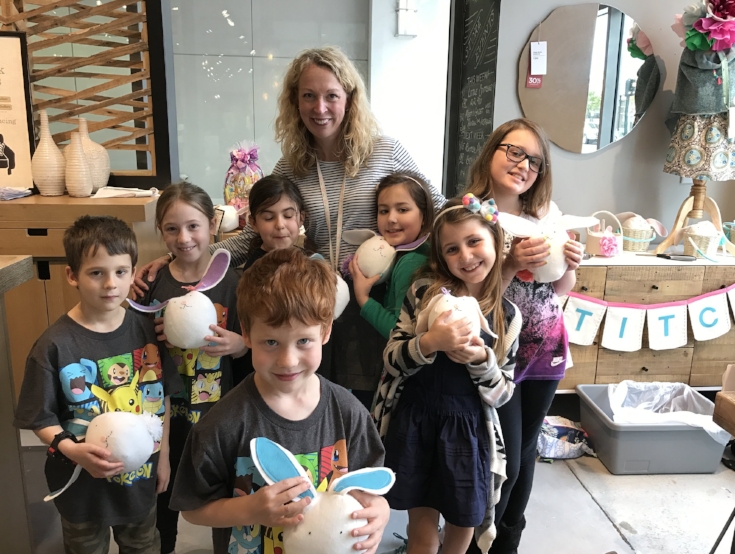
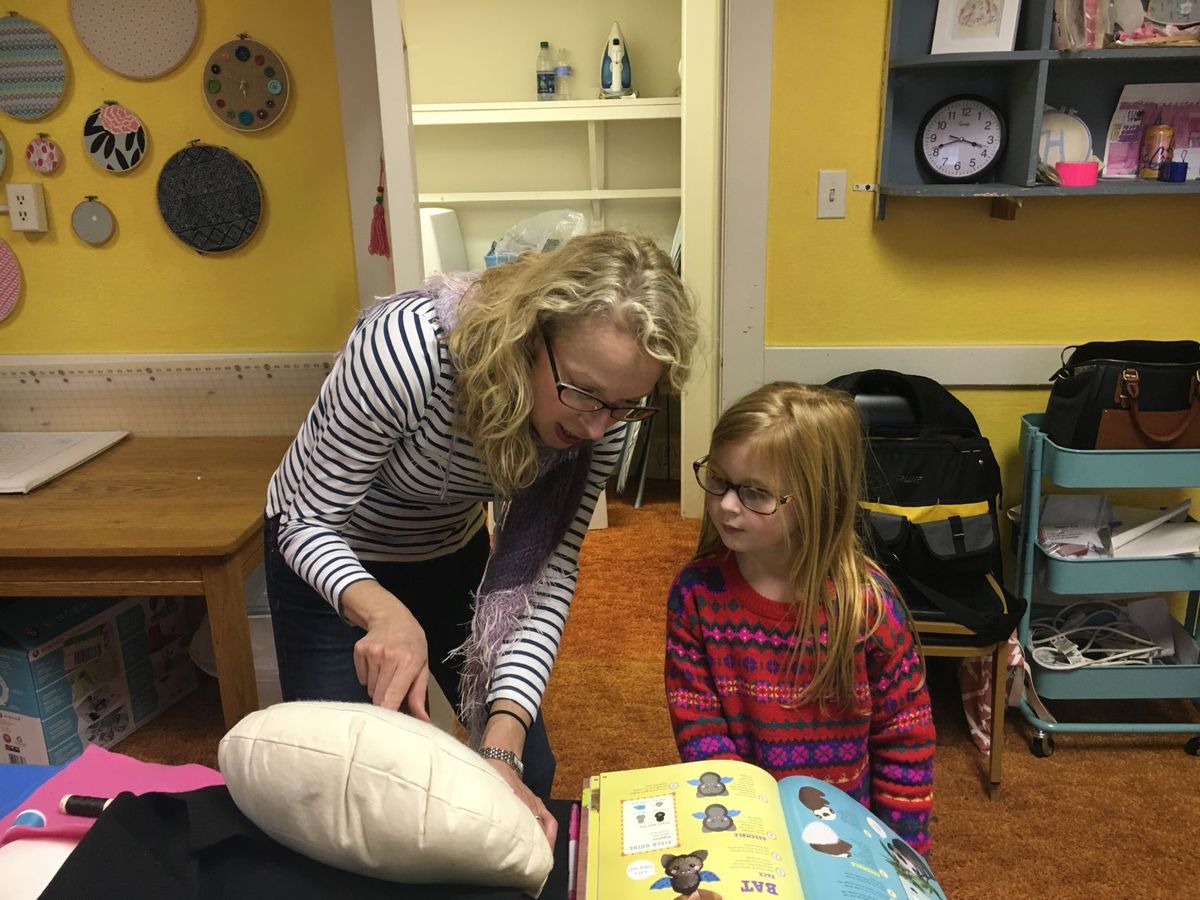
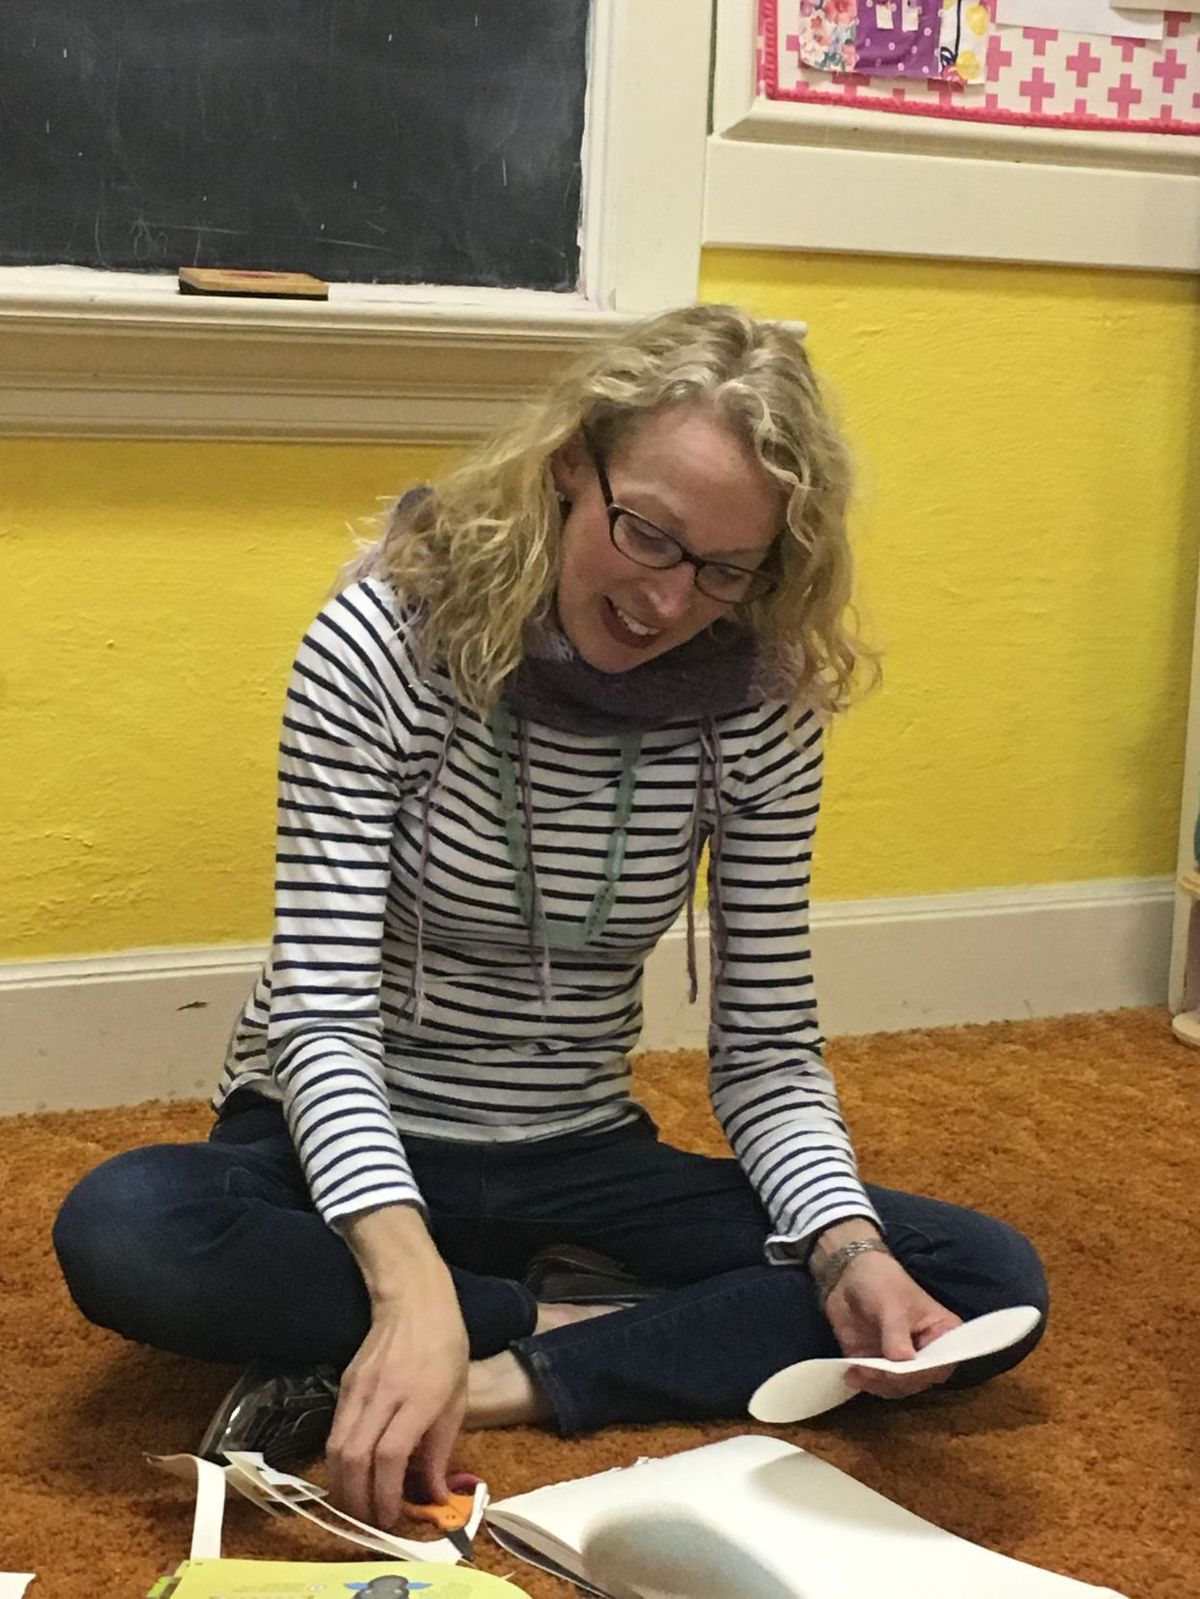
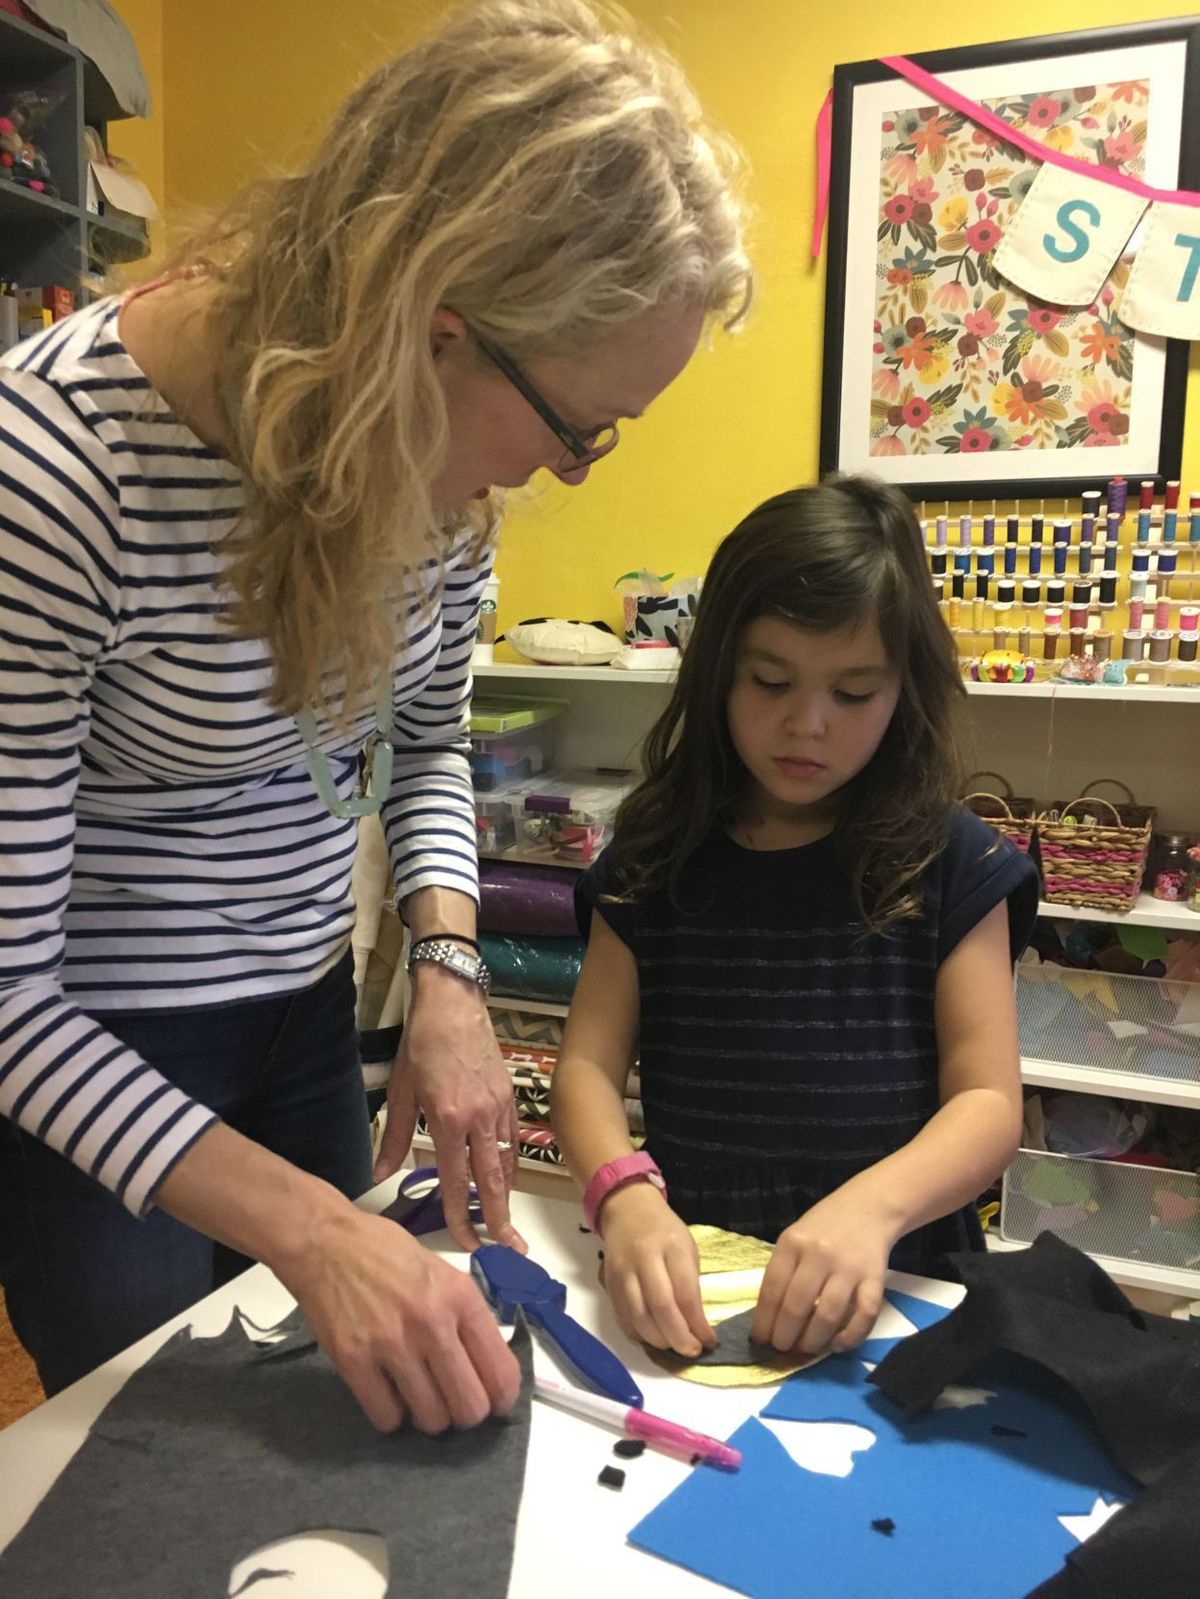
I'm excited to share a bit of the sewing workshop that I held at West Elm, VA Beach last weekend. Earlier this year, I heard that West Elm was looking for local crafters to feature. I sent an email introducing myself and telling a bit about what I do. The next thing I knew, we had a meeting and decided to schedule a Spring Sewing Workshop. Thrilled at the chance to collaborate, I went home and set to work designing a fun little project.
I'm excited to share a bit of the sewing workshop that I held at West Elm, VA Beach last weekend. Earlier this year, I had heard that West Elm was looking for local crafters to feature. I sent an email introducing myself and telling a bit about what I do. The next thing I knew, we had a meeting and decided to schedule a Spring Sewing Workshop. Thrilled at the chance to collaborate, I went home and set to work designing a fun little project.
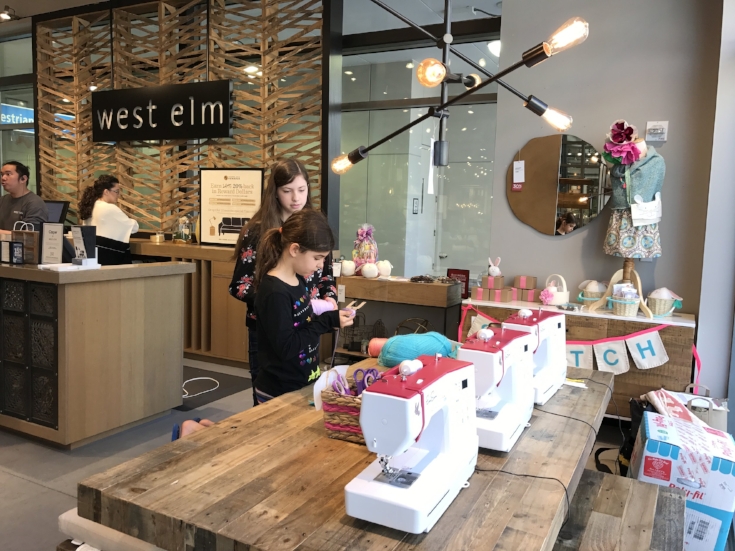
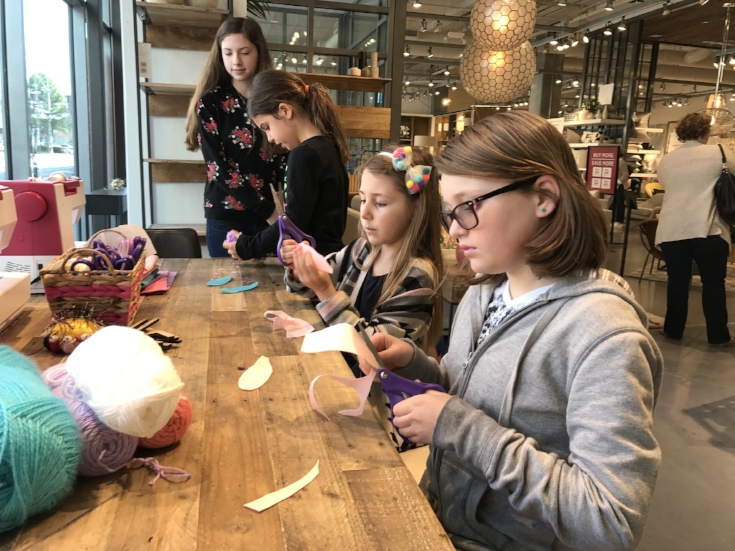

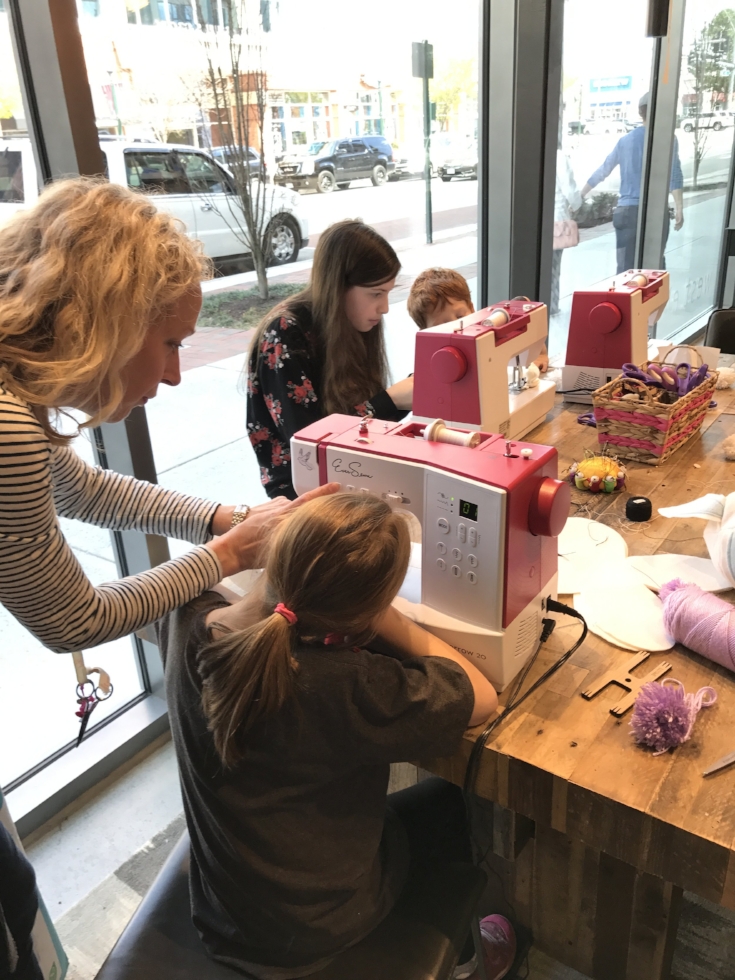
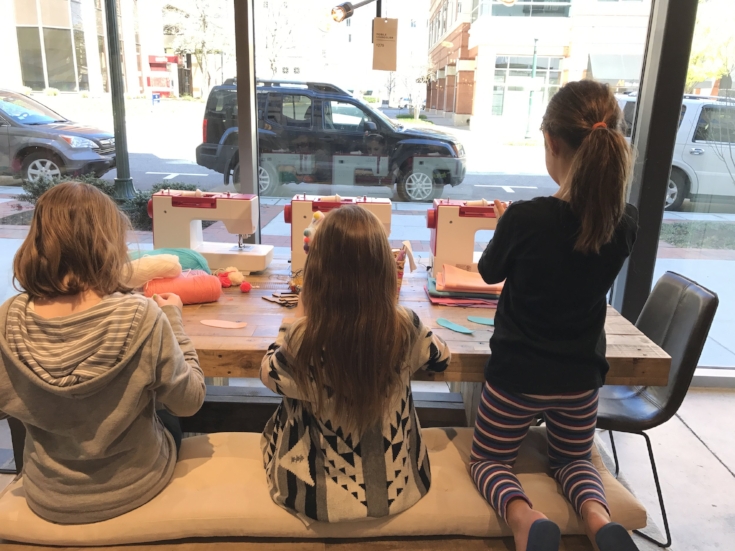
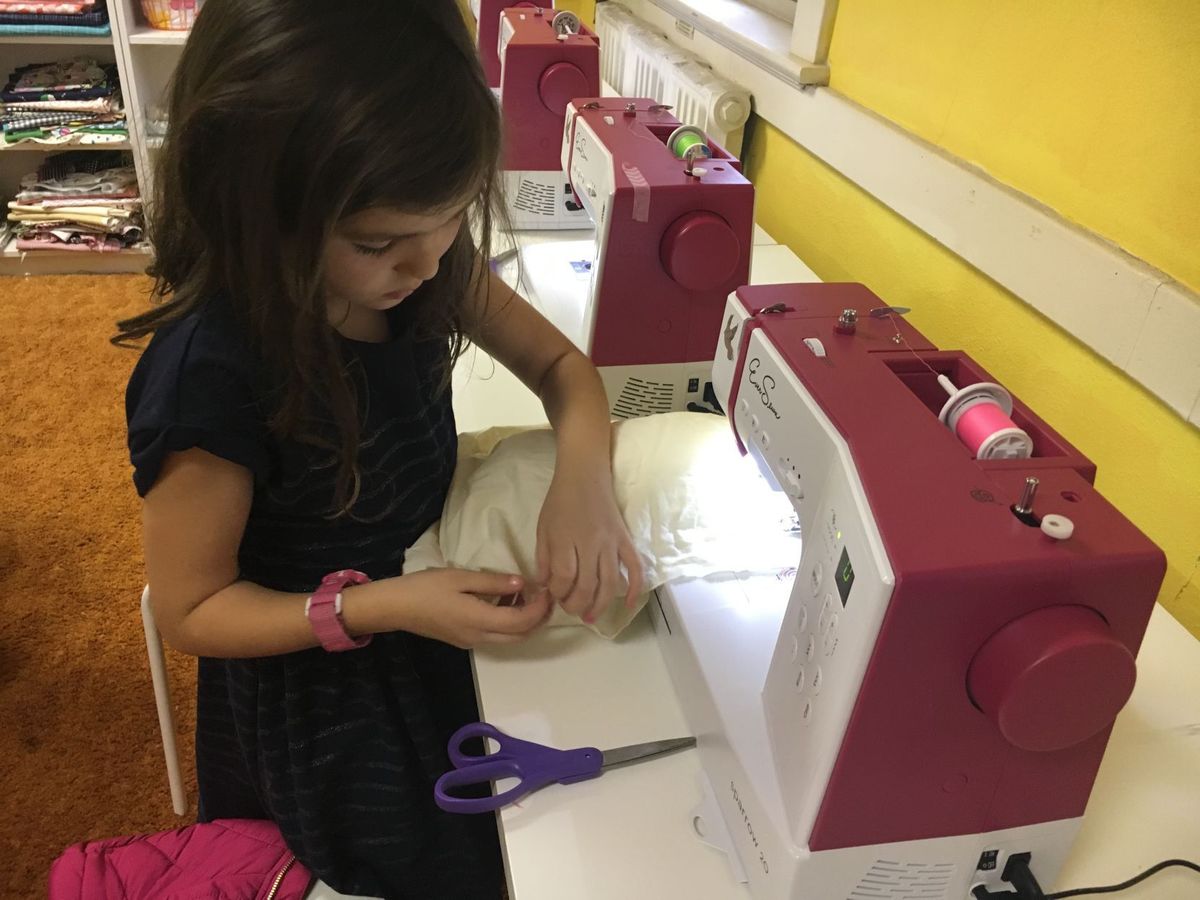
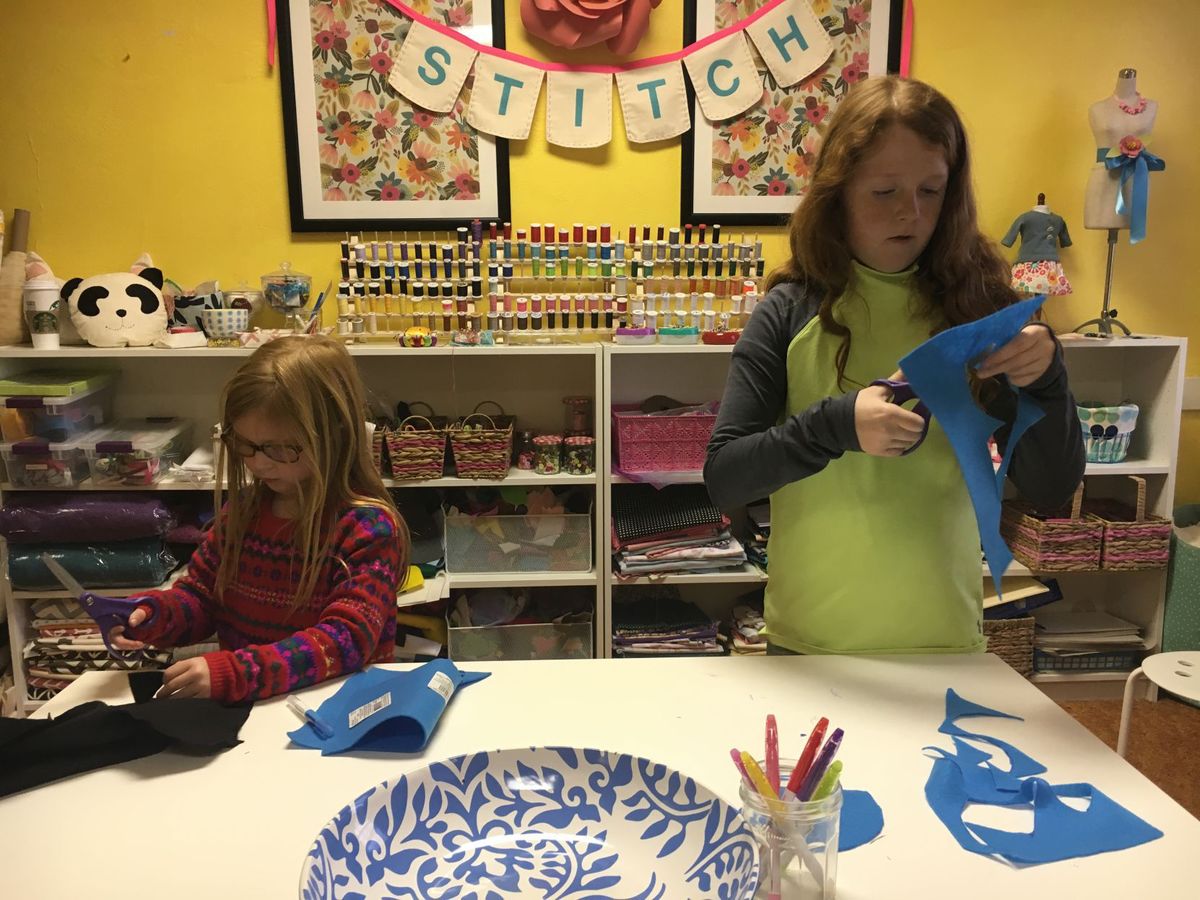
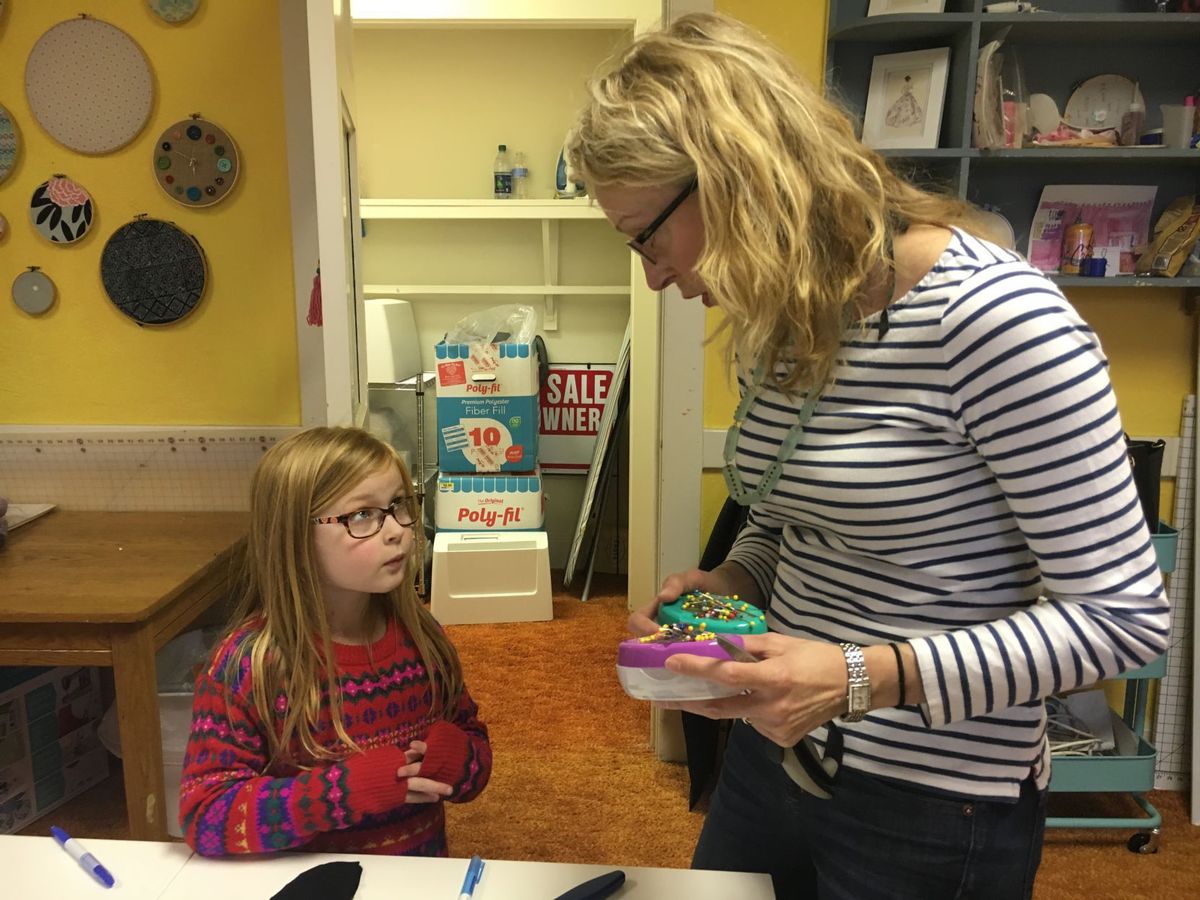
We set up shop at the West Elm, VB store for the workshop and exclusive DIY Bunny Kit. I brought machines, hand sewing needles, my favorite pompom tools and lots of felt. We divided the kids into groups and got to work.
I was so excited to have goodies from The Royal Chocolate. The candies were a hit! They were cut into fine little nuggets- just right for snacking.
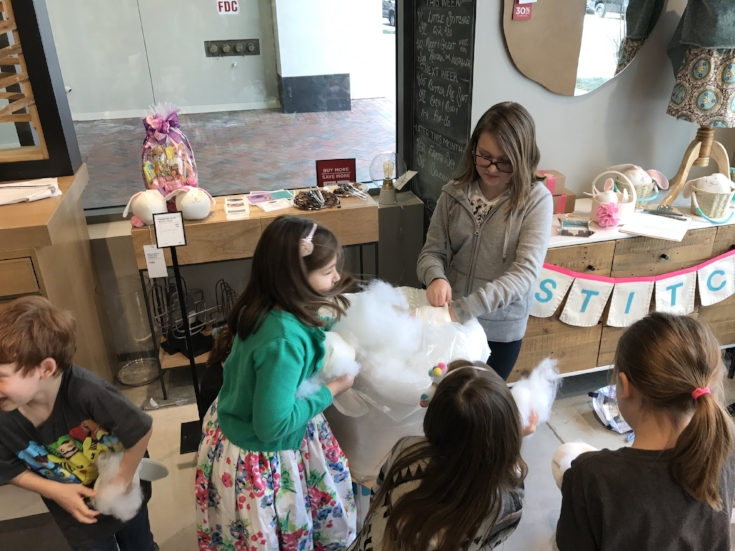
Of course, the real joy of sewing with kids begins when the kids start to stuff their softies to bring them to life.
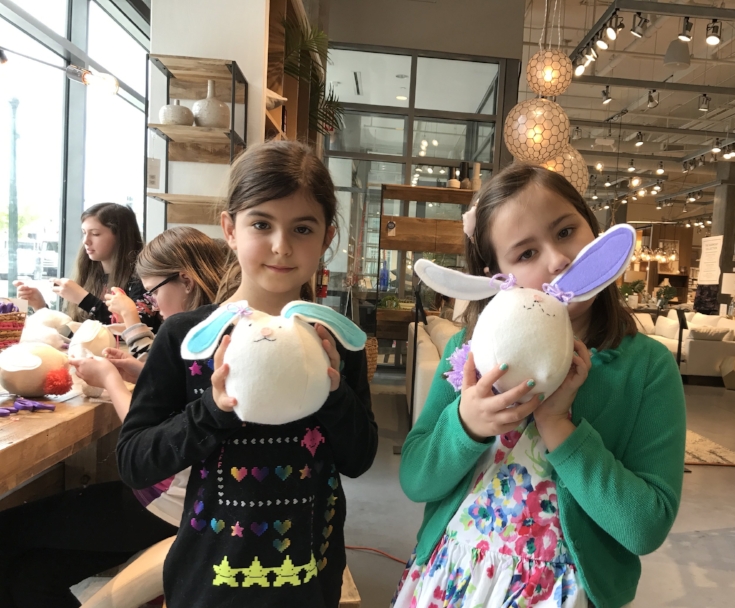
Thank you to the families who came to sew with us. It is such a joy to be able to share my passion for sewing (and making pompoms!). Thank you to the West Elm team for putting this together. We had a ball and look forward to popping-up again!

Wedding Veil Making Workshop
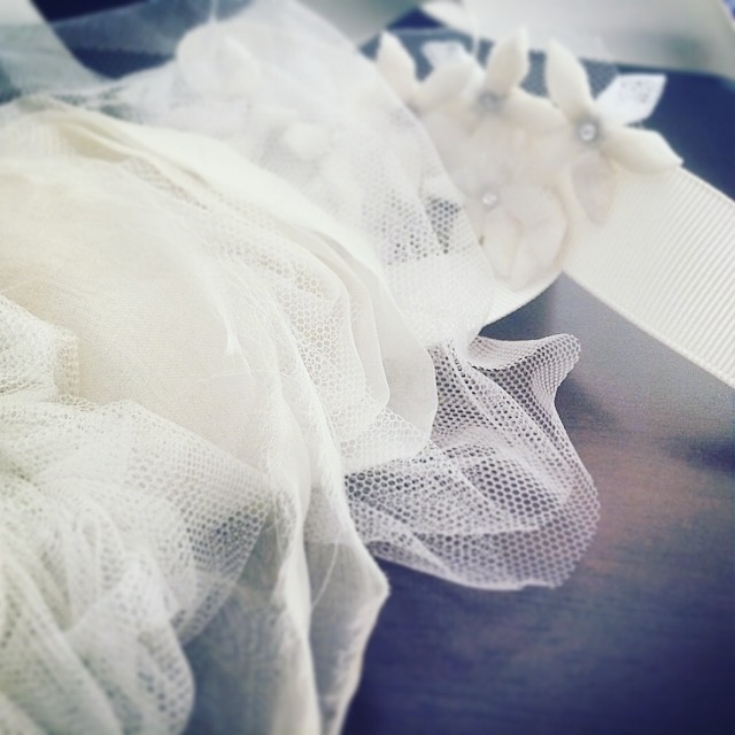
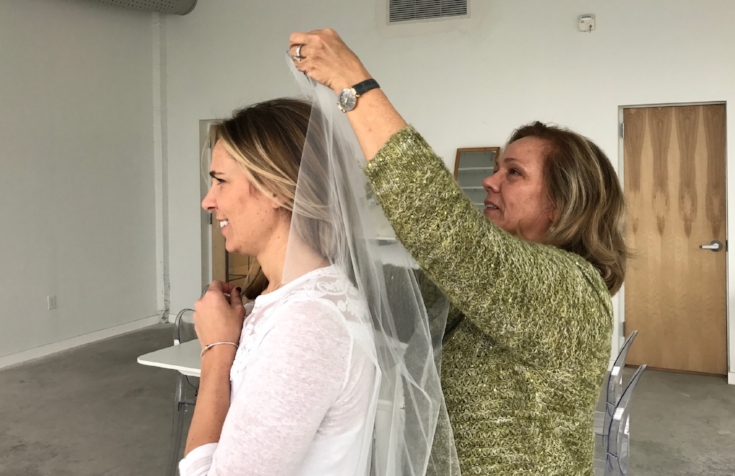
I think there was something magical in the snow on Sunday. As I began the Wedding Veil Making Workshop, the first of a series of DIY wedding workshop experiences, huge snowflakes began to fall, as if on cue.
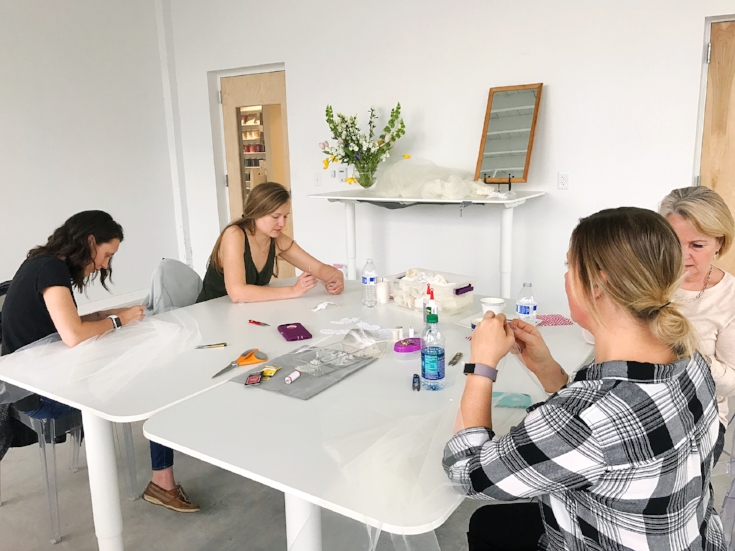
In this workshop, we made custom wedding veils. With the exception of one mother of the bride, none of these women had sewn before. Making a veil is a very simple hand-sewing project. Perhaps because of the cost associated with weddings and the dreams tied to it, very few people actually make their own veil. I'd like to change that.
I think there was something magical in the snow on Sunday. As I began the Wedding Veil Making Workshop, the first of a series of DIY wedding workshop experiences, huge snowflakes began to fall, as if on cue.
In this workshop, we made custom wedding veils. With the exception of one mother of the bride, none of these women had sewn before. Making a veil is a very simple hand-sewing project. Perhaps because of the stress associated with weddings and the dreams tied to it, very few people actually make their own veil. I'd like to change that.
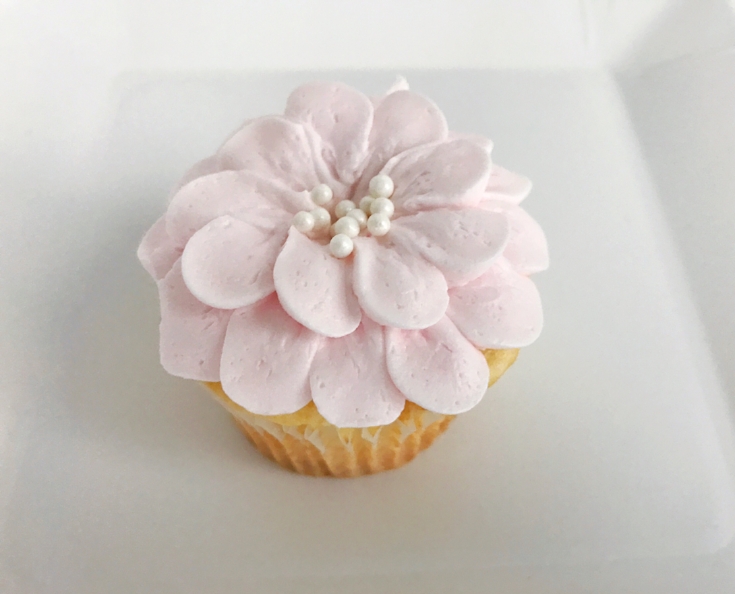
To set this workshop apart from my kid's sewing classes, I held the workshop at Jollity and Co. a new party supply store and space in Norfolk. It is in a freshly renovated, light-filled building in Norfolk. The attendees were served coffee, wine and dessert. My friend, José of Elite Custom Cakes, provided the cupcakes and petit fours. They were just as delicious as they were beautiful.
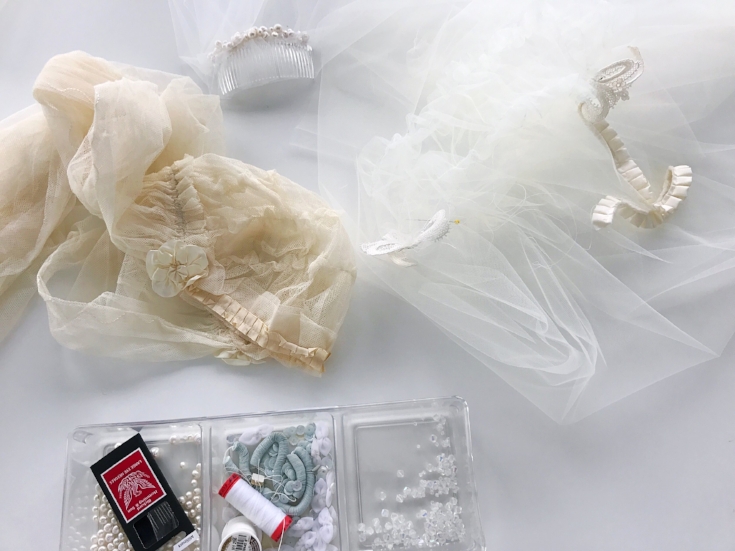
The guests brought a picture or sample of a veil that they wanted to recreate. We set to work. First question: Have you purchased your dress? The dress really determines the color and style of the veil. Once the dress is chosen, you can get down to the fun details. White or ivory? Length? Style? Tulle, English Netting, or Illusion?
Each woman choose an appropriate length and style, we cut it out and began sewing. As the guests immersed themselves in hand-stitching their veils, they seemed to relax and enjoy the camaraderie and conversation.
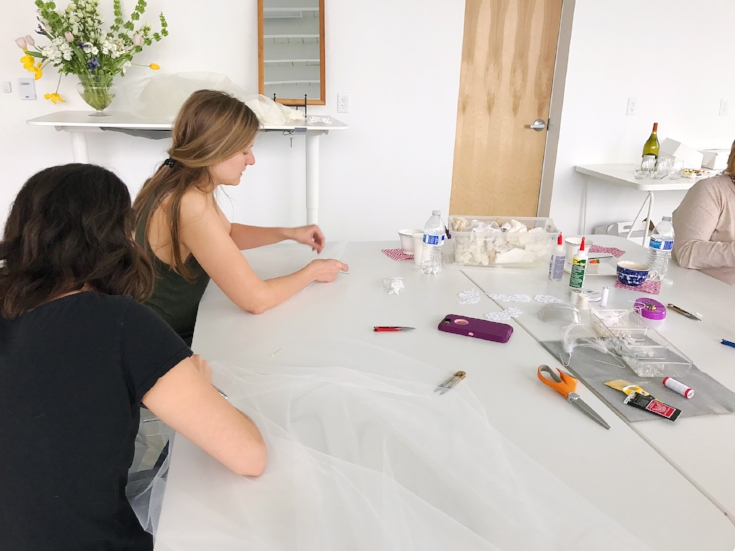
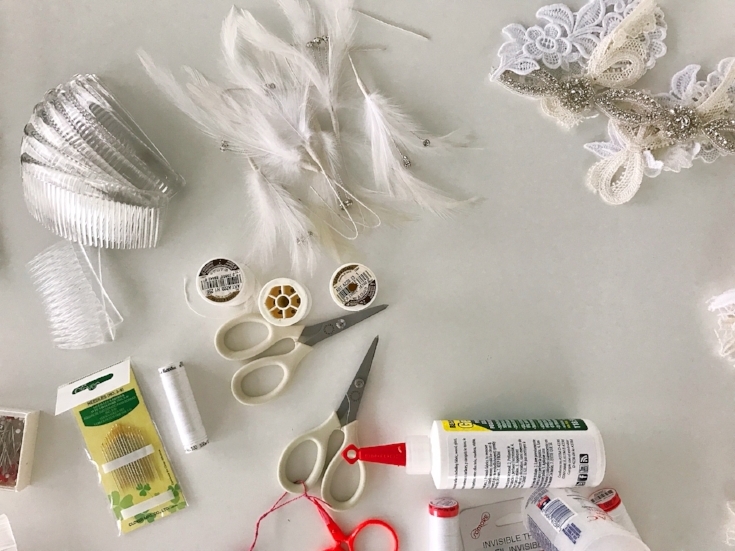
After attaching the veil to comb, the guests were invited to choose from the assortment of freshwater pearls, Swarovski crystals, rosettes, vintage lace bits, ribbon, beads and feathers to embellish their combs.
I hope that each woman that attended left with a new found skill and the confidence to consider making their own heirloom accessories. Perhaps you would like to join me in the next workshop: Bowties for boys and men.
XO, Hilarie

Spread a little love this Valentine's Day.
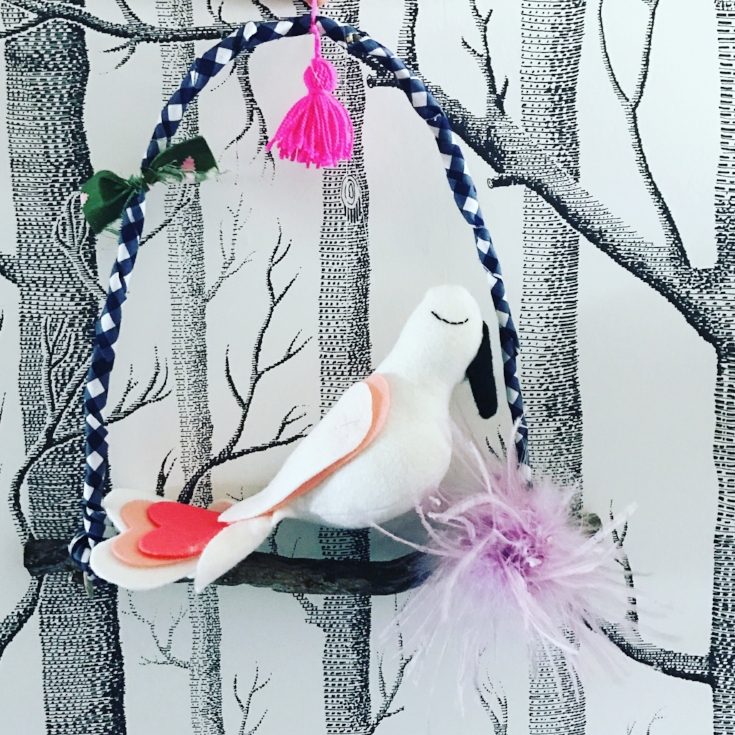
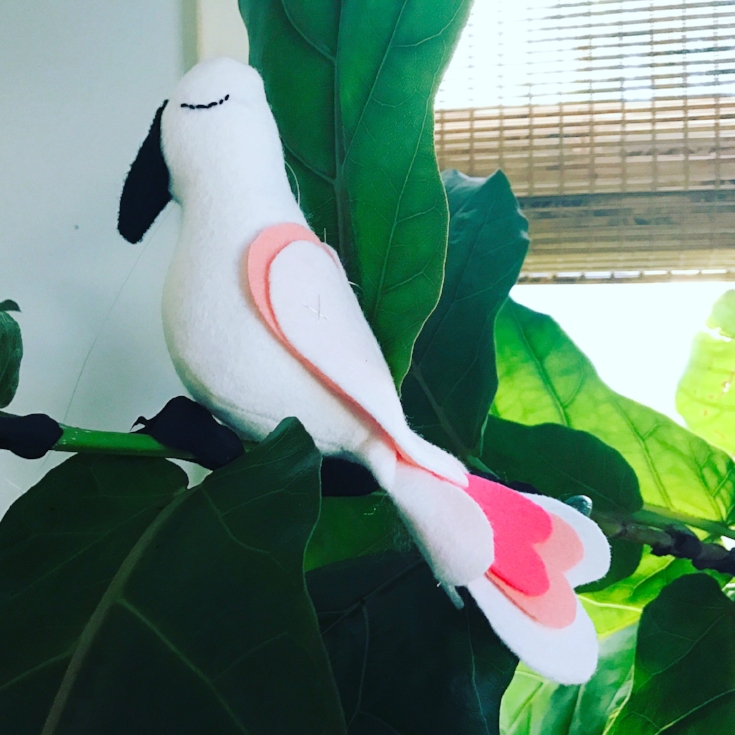
I'm really not a big fan of Valentine's Day. To me it's more of a marker that spring is coming. A few hyacinth are blooming in my yard and the camellia's look like they are draped in a pretty pink garland of pompom blooms. With that in mind, this lovebird and perch bring hope that spring is near.

I'm really not a big fan of Valentine's Day. To me it's more of a marker that spring is coming. A few hyacinth are blooming in my yard and the camellia's look like they are draped in a pretty pink garland of pompom blooms. With that in mind, this lovebird and perch bring hope that spring is near.
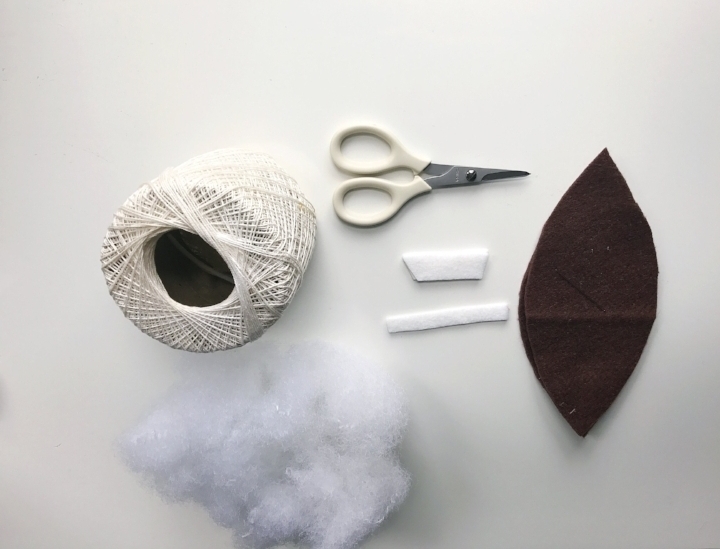
SCRAPPY PERCH
MATERIALS NEEDED
Fishing Line
Paper wrapped stem wire, 18 gauge
A stick, approximately 10-12" long
Fabric, 1 1/2" X 40", Folded in half width-wise and pressed.
Fabric Scrap, 1 x 5"
Tassel or pompom (I use the loome to make mine)
Misc. bits of feather, felt or fabric to embellish

ASSEMBLE THE PERCH

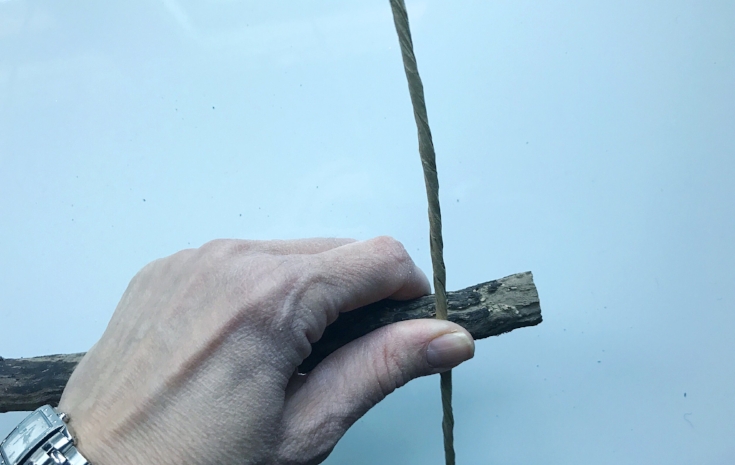
Take one of the paper wrapped stem wires and wrap around one end of the stick.

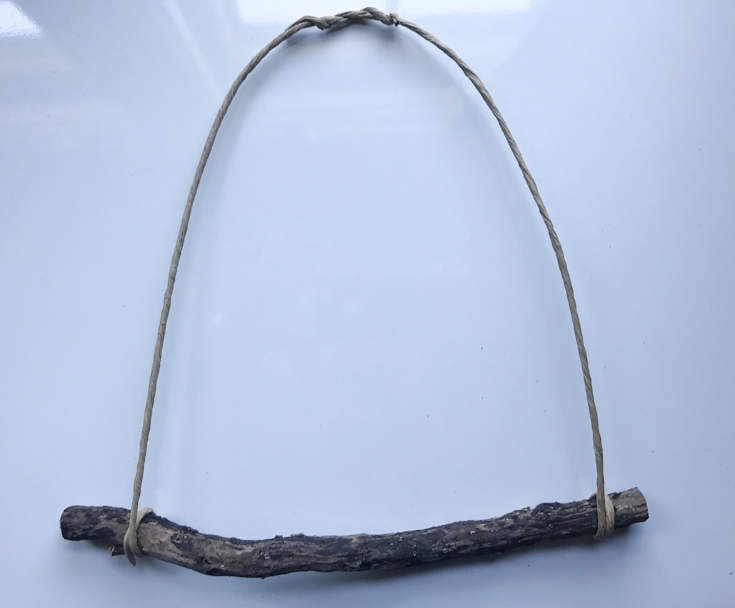
With the straight end, cross and wrap with the second stem wire at the top.

Bend the wires to make a nice arch. Wrap the end around the other side of the stick.
Take the long fabric scrap and tie one end of the stick and wire. Be sure to tuck the fabric tail into the fabric as you begin to wrap the wire.


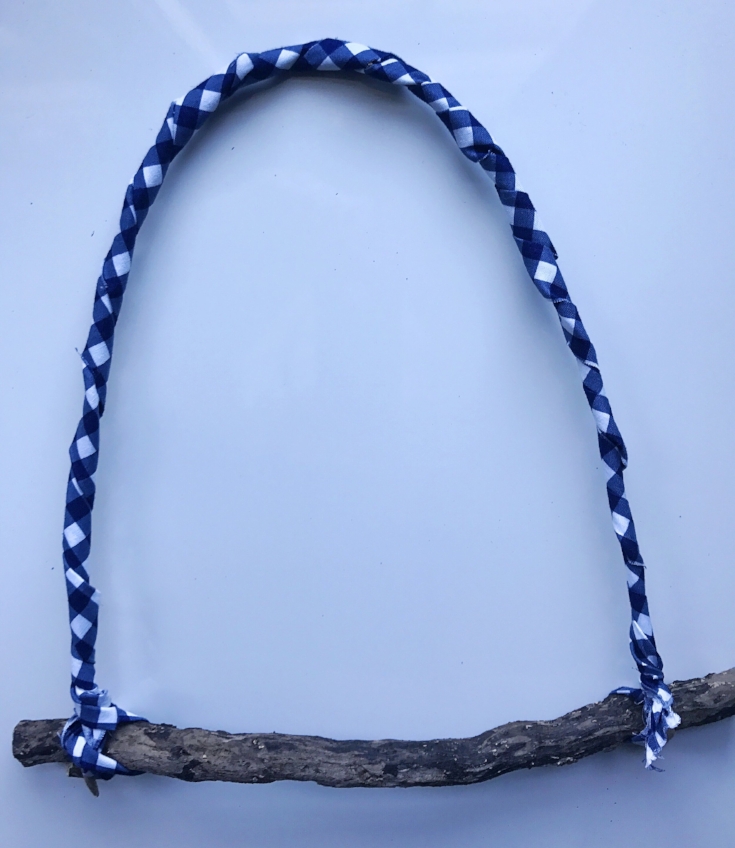
Continue wrapping around the entire length of the wire, smoothing the fabric so that it is evenly distributed as you go.
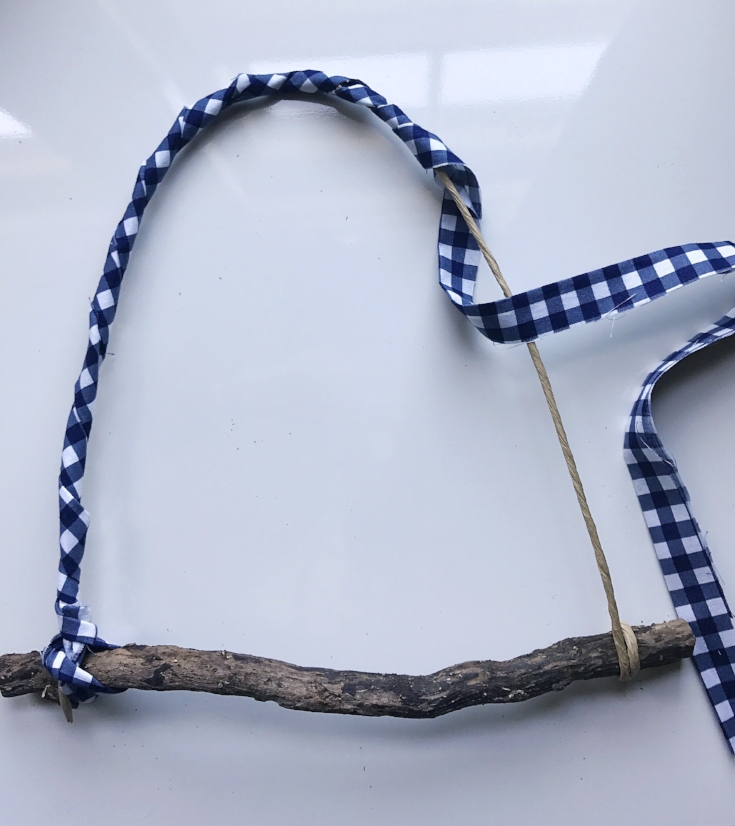
Tie to the opposite end of the stick and tuck in fabric tail.
EMBELLISH (FEATHER ITS NEST)

Tie a tassel or pompom to the top of the arch. Leave a tail that will be long enough for you to use to hang the perch.
Take the small fabric scrap and tie around one side of the perch. You could also use any type of fabric or trim here to further decorate here. A bit of ball trim, some lace, feathers, perhaps a felt flower? I used whatever I found on the floor of my sewing room. Literally scraps.

HANG THE BIRD
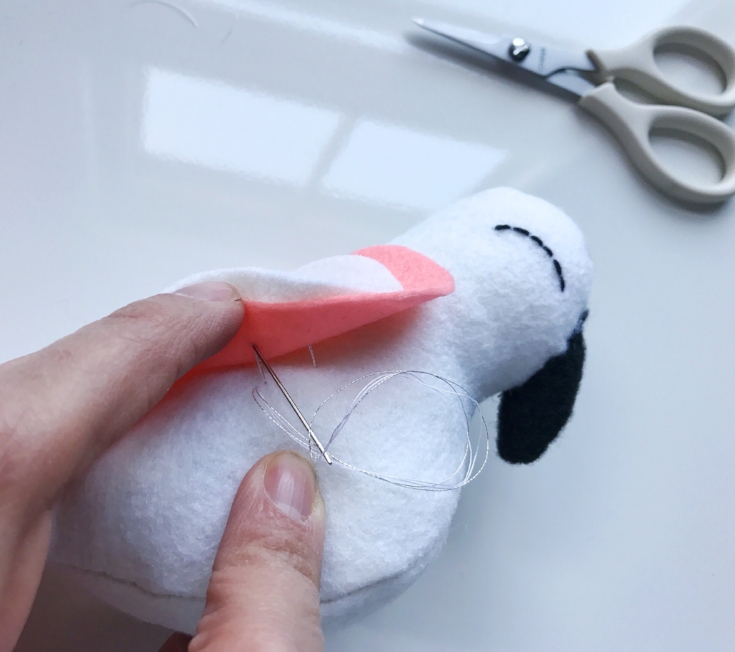
To hang the bird from the perch, cut a 18-20" length of fishing line. Thread a needle with the line and run it through the back and neck of the bird.
Place the bird in the perch and tie the fishing line to the top of the perch and around the yarn to secure.

If you missed yesterday's post, here is a link to the Lovebird pattern and tutorial:
Happy Valentine's Day!
Hilarie XO

Felt Lovebirds Pattern and Tutorial
Make these pretty felt love birds for Valentine's Day. With these sweet love birds you can show the one you love how much you care.

Make these pretty felt love birds for Valentine's Day. With these sweet love birds you can show the one you love how much you care.
MATERIALS FOR LOVEBIRD
White Felt
Pink Felt in two shades for feathers and wings
Small piece of Black Felt for beak
Handsewing needle
Thread
Black embroidery floss
Metallic thread (optional)
Poly-fil
A free Lovebird Template, printed and cut out (This pattern has a 1"/ 4CM test square. Measure the test square, and if it does not measure correctly, check your print scaling options.)

SIZE
8 1/2"x 4 1/2"
MAKE THE LOVEBIRD
CUT
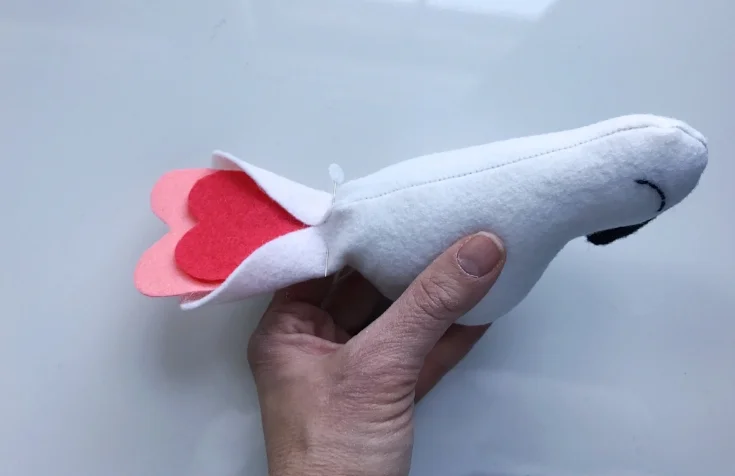
Using the Lovebird Template, cut 2 bird body pieces, 1 gusset, and 1 wing out of white felt. Cut the beak out of black felt and tail feathers from each of the pink. Cut one more set of wings from pink.
MARK
Using a water-soluble marking pen, Begin marking the fabric with the pattern piece still pinned to it. When you mark a pattern, you always want to begin at the pattern pieces outside edges and work toward the center. Easy, right? Let’s do it! Using a straight pin, pierce the pattern piece and fabric right through the center of the first dot. Carefully lift the pattern paper (while still holding the pinned fabric in place) and mark the fabric with the pen. Repeat on the underside of the next piece of felt so that the sides are mirror images of each other.

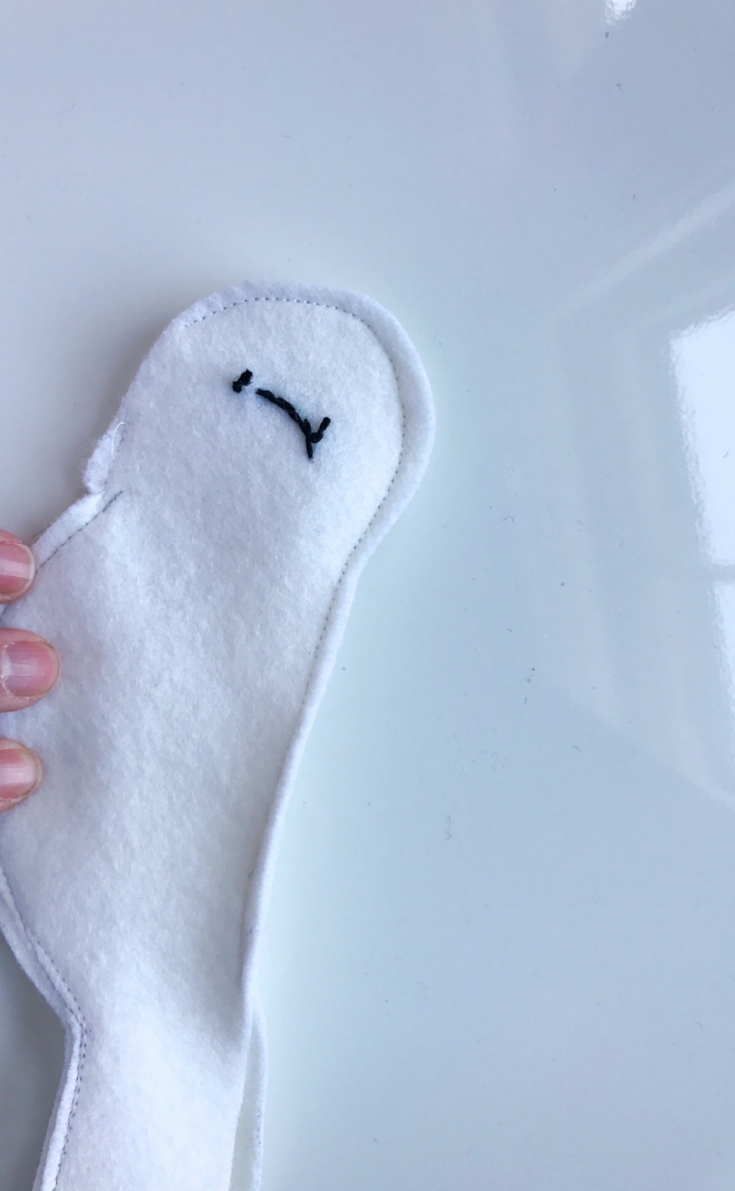
STITCH THE EYES
To sew the eyes, we are going to use a basic running stitch. It's beautiful in its simplicity, utility and function. Vary it with size and color and it adds such vitality and expression your projects.
The pieces should be marked as to be mirror images.
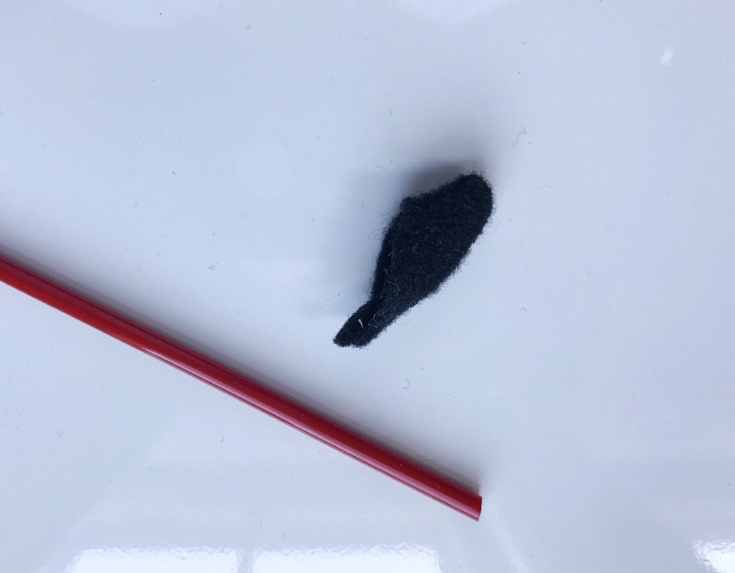
BEAK
Fold the beak along the center line and stitch along the long side using a 1/8" seam.

Turn right side out. It helps to use a tool to push the tiny end through. A chopstick or eraser end of a pencil work well for this.
MAKE THE LOVEBIRD
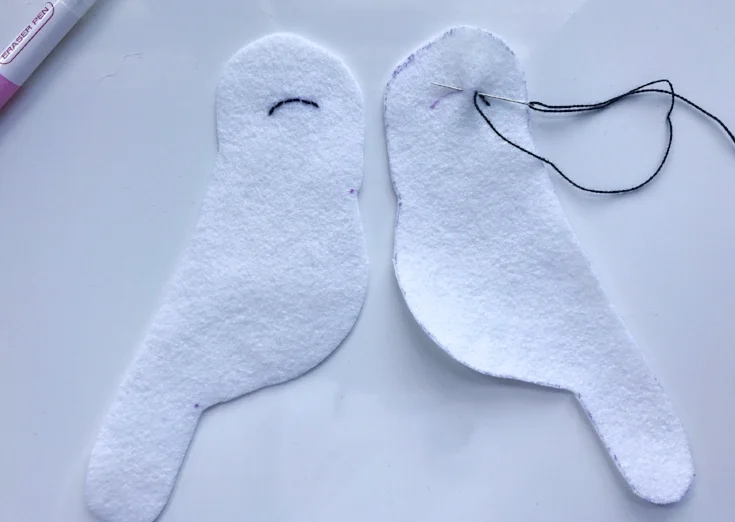
Take a bird body piece and the gusset, place them with the Right Sides Facing Together and match the markings. Pin and stitch around the outside edges of one side from tip to tail, using a 1/4" seam allowance.
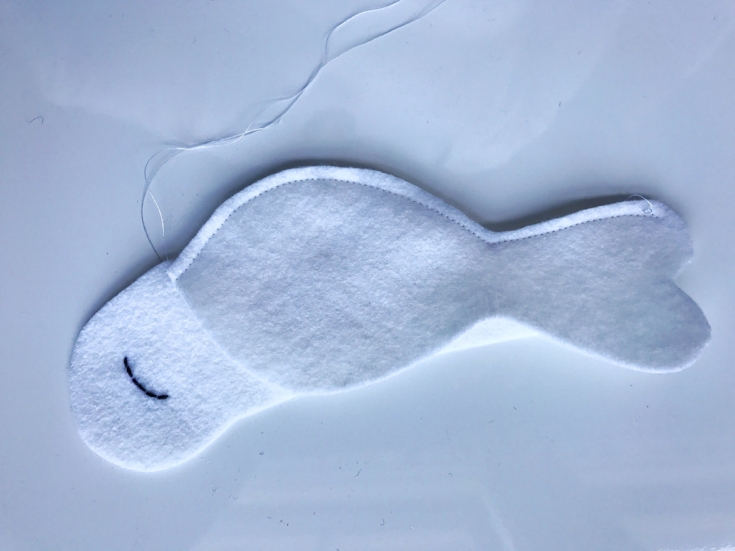
Pin the other bird body to the opposite side of the gusset and stitch.
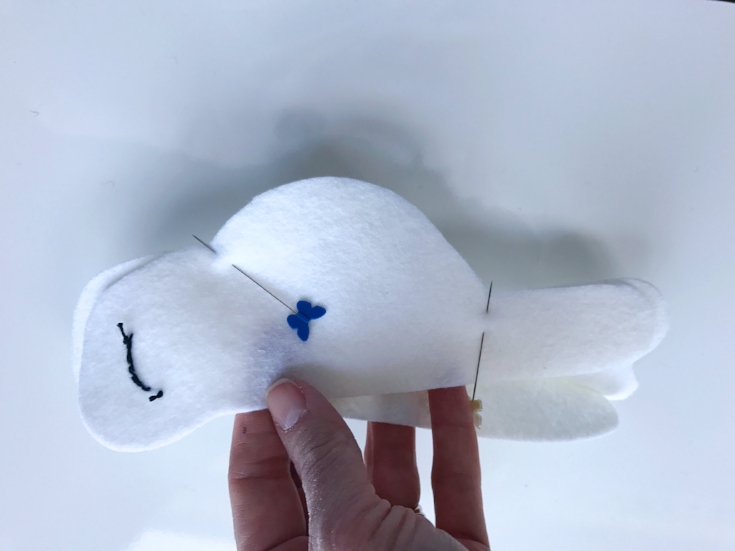
Pin and sew the bird body together at the center back seam beginning at the dot level to the eye around the head and to the top of the tail. Leave the area where the beak will be attached open.
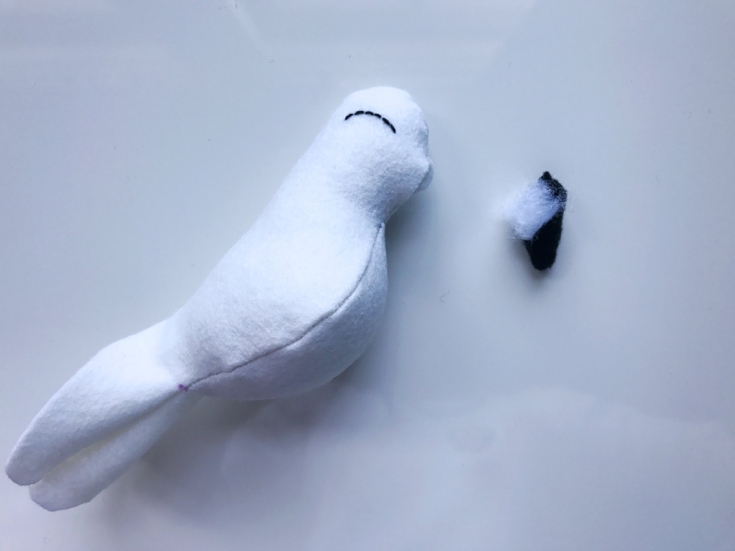
TURN AND STUFF
Turn the bird body right side out and stuff nice and firm with polyfil.
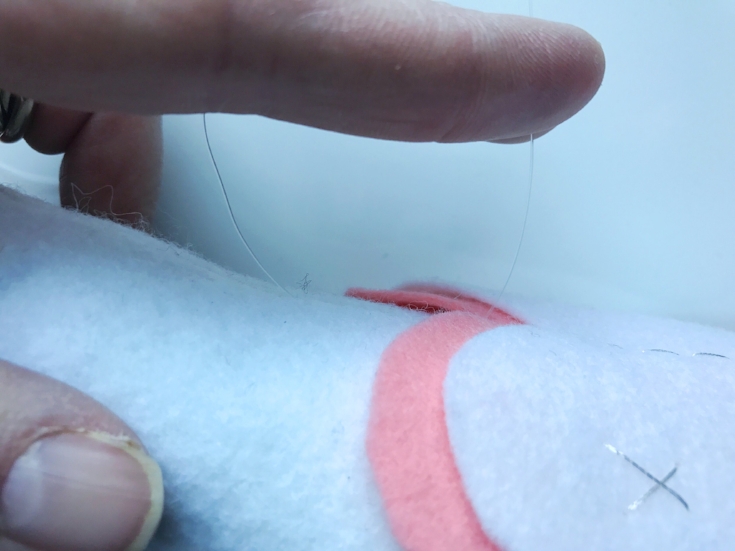
ATTACH THE BEAK
Add a tiny bit of stuffing to the beak. Pin the beak to the bird and whipstitch around the beak to attach it to the bird body.

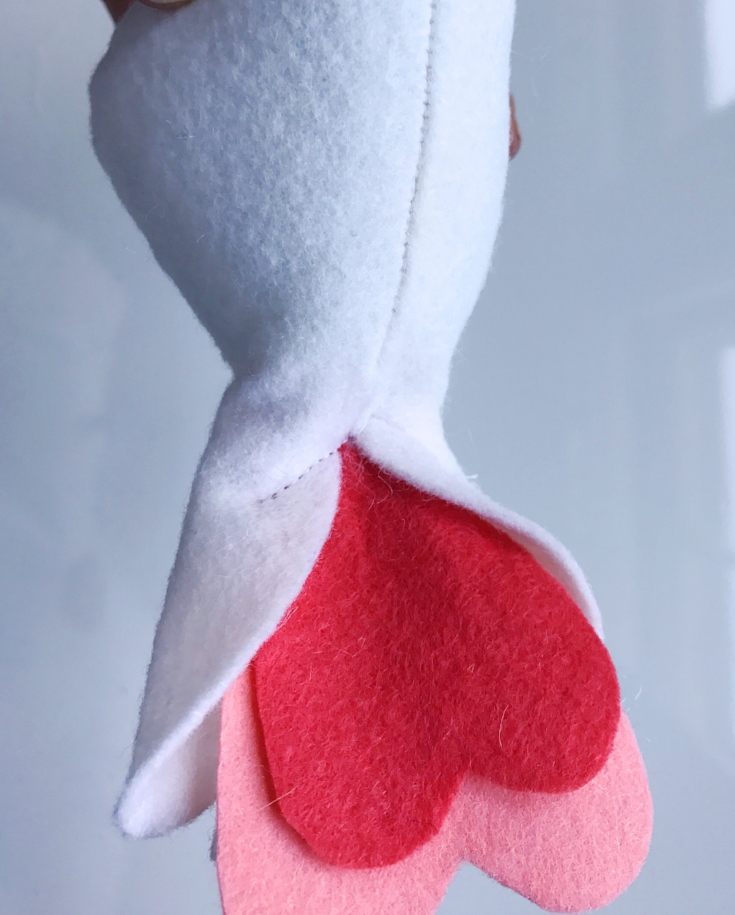
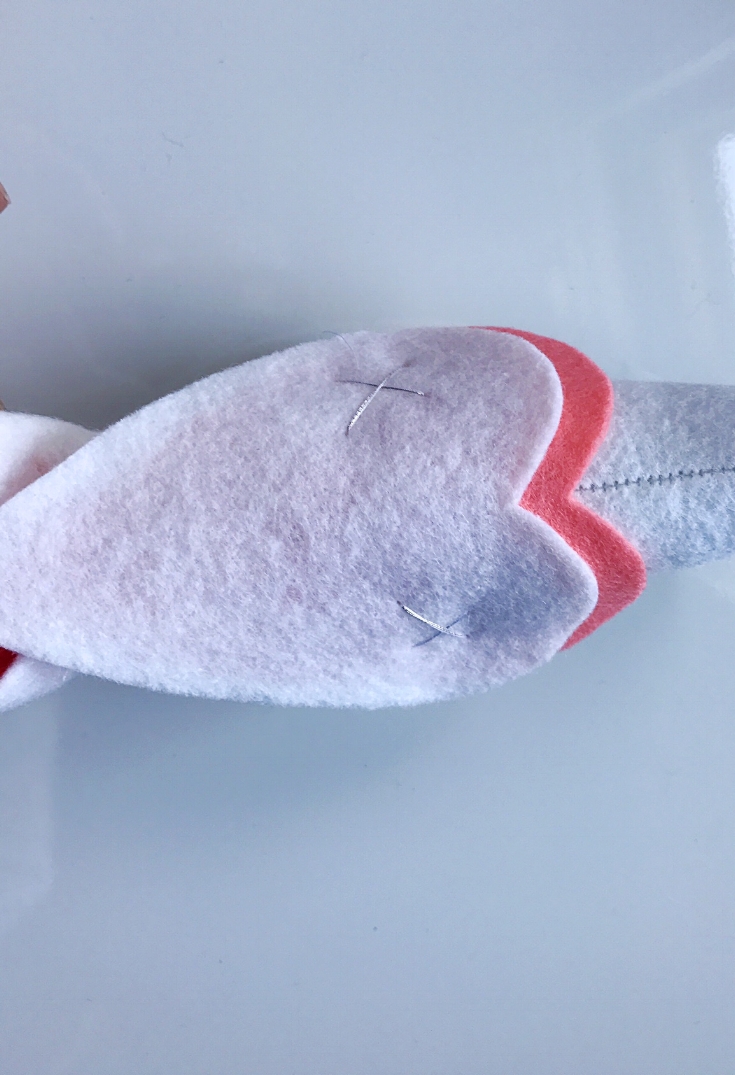
TAILFEATHERS
Insert the tail feathers into the body of the bird. I shifted the layers of feathers a bit to create some visual interest. Pin in place and stitch in an inverted V shape to secure.
WINGS
Arrange the wings and pin to the bird. Again, I shifted the placement of the wings to overlap just a bit.
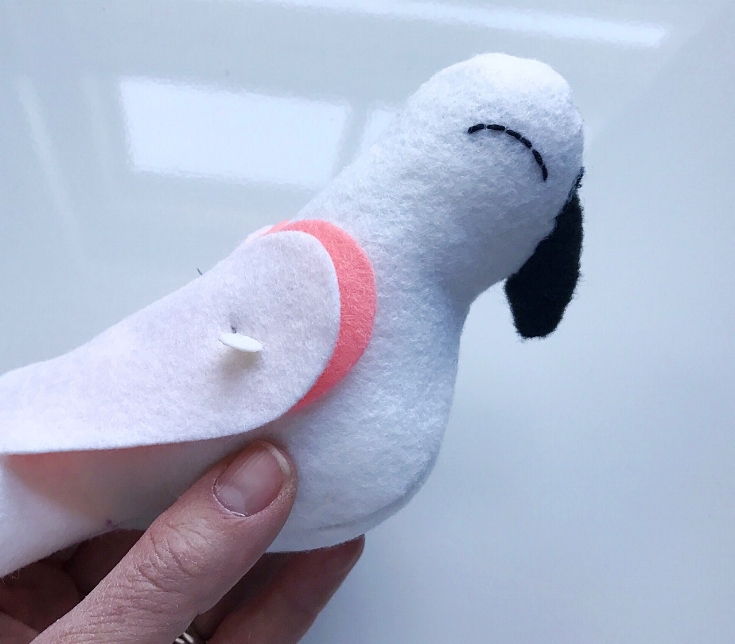
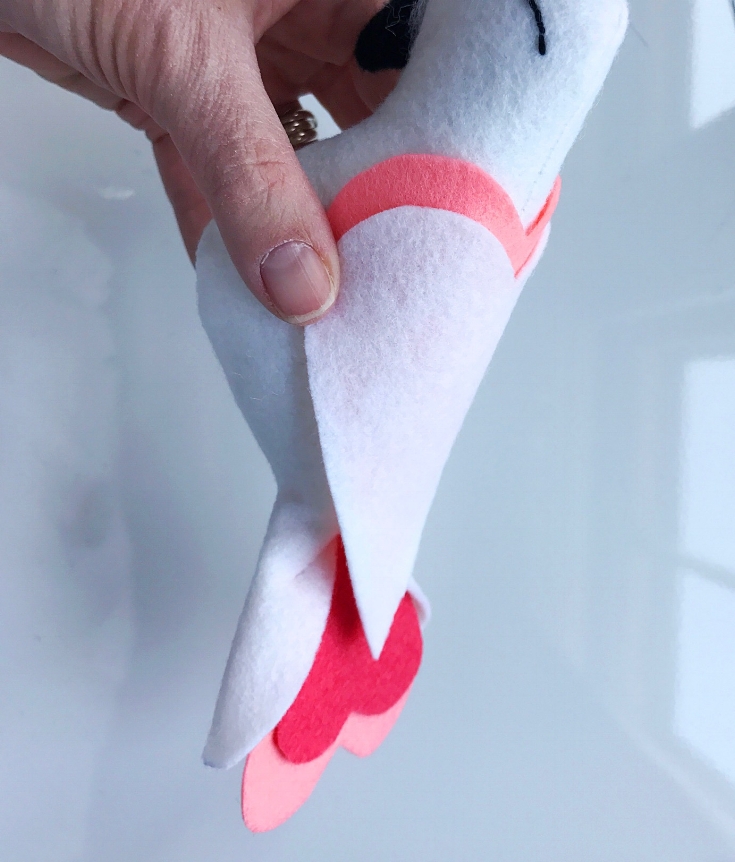
Stitch in place. I used some silver metallic thread to attach the wings and give them a bit of glam. Feel free to add your own touch!
Trim threads and use a quick bit of steam from the iron to get rid of your markings.

Would you like to learn how to make the perch? Come back tomorrow!
XO, Hilarie

In the news!
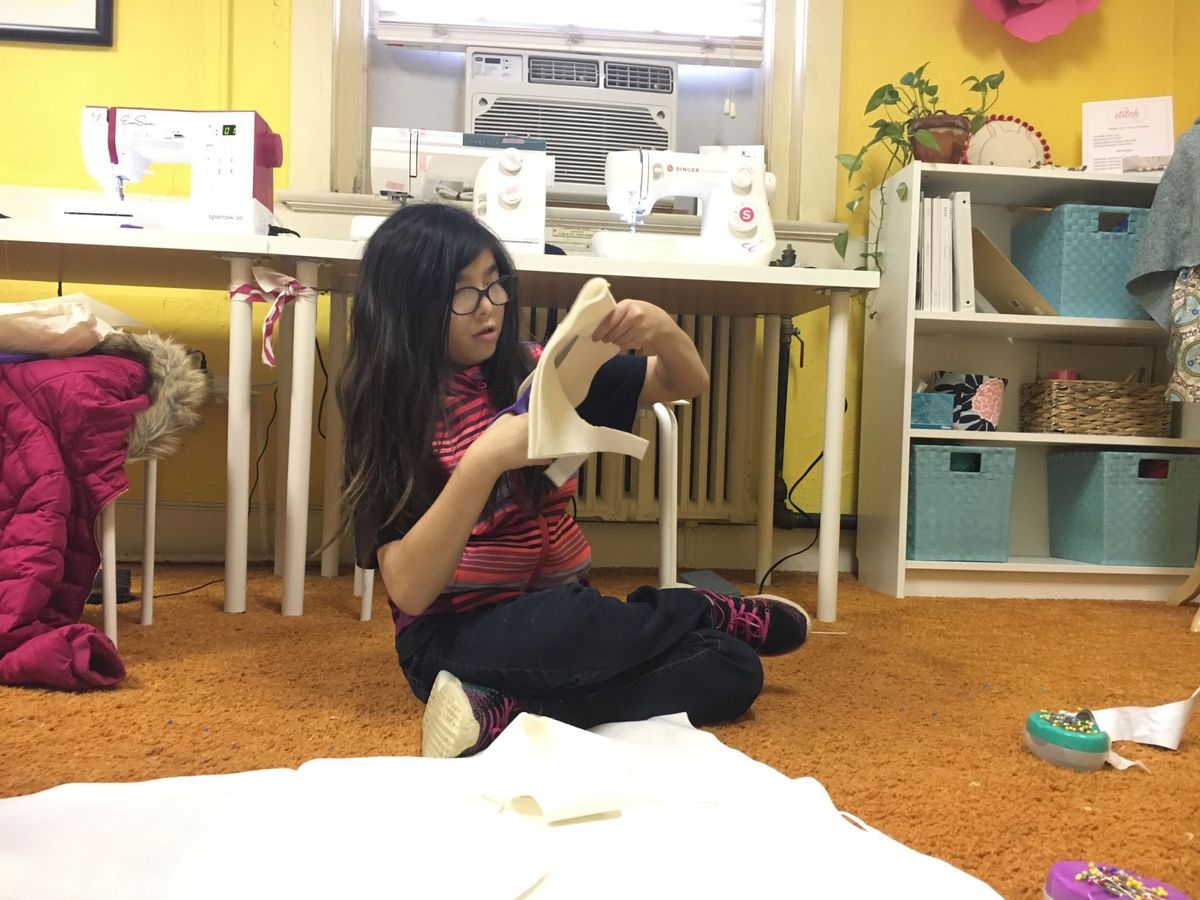
A couple of weeks ago I received a phone call from Arleen Spenceley, a correspondent at The Virginian-Pilot. She had seen something online about Little Stitch Studio and wanted to learn more. I was thrilled to chat with her about my work and your kids!
A couple of weeks ago I received a phone call from Arleen Spenceley, a correspondent at The Virginian-Pilot. She had seen something online about Little Stitch Studio and wanted to learn more. I was thrilled to chat with her about my work and your kids!
Sew Young Norfolk studio keeps students in stitches several times a week.
I am forever grateful to my friend Sarah for dropping her daughter off at my house one December afternoon with her new sewing machine that she wanted to learn to use and some cash. A couple of minutes into the lesson, I realized that I might just have something to share.
XOXO, Hilarie

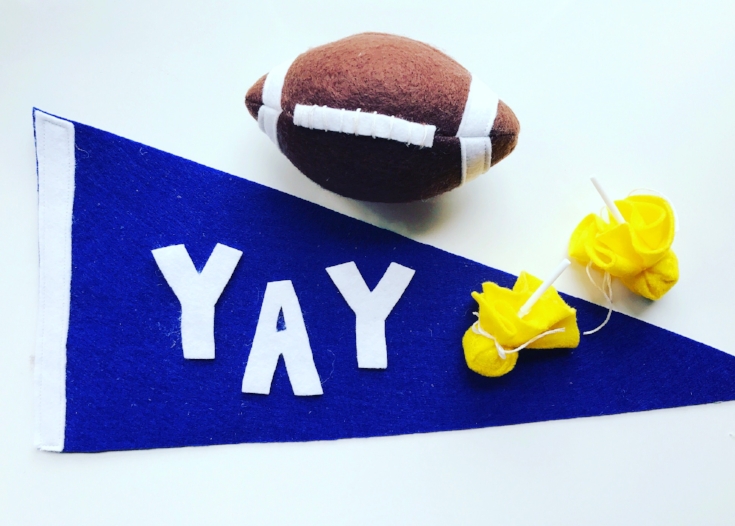
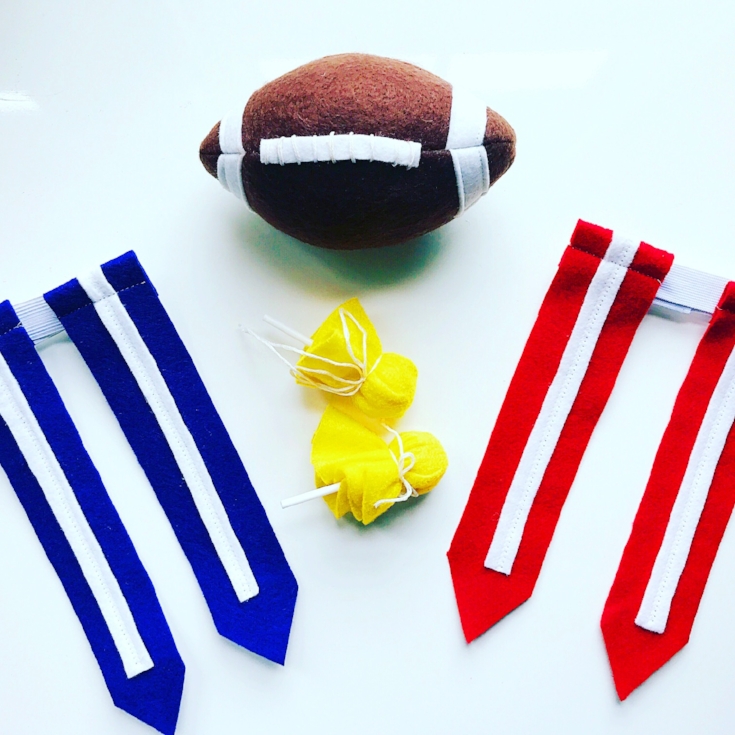
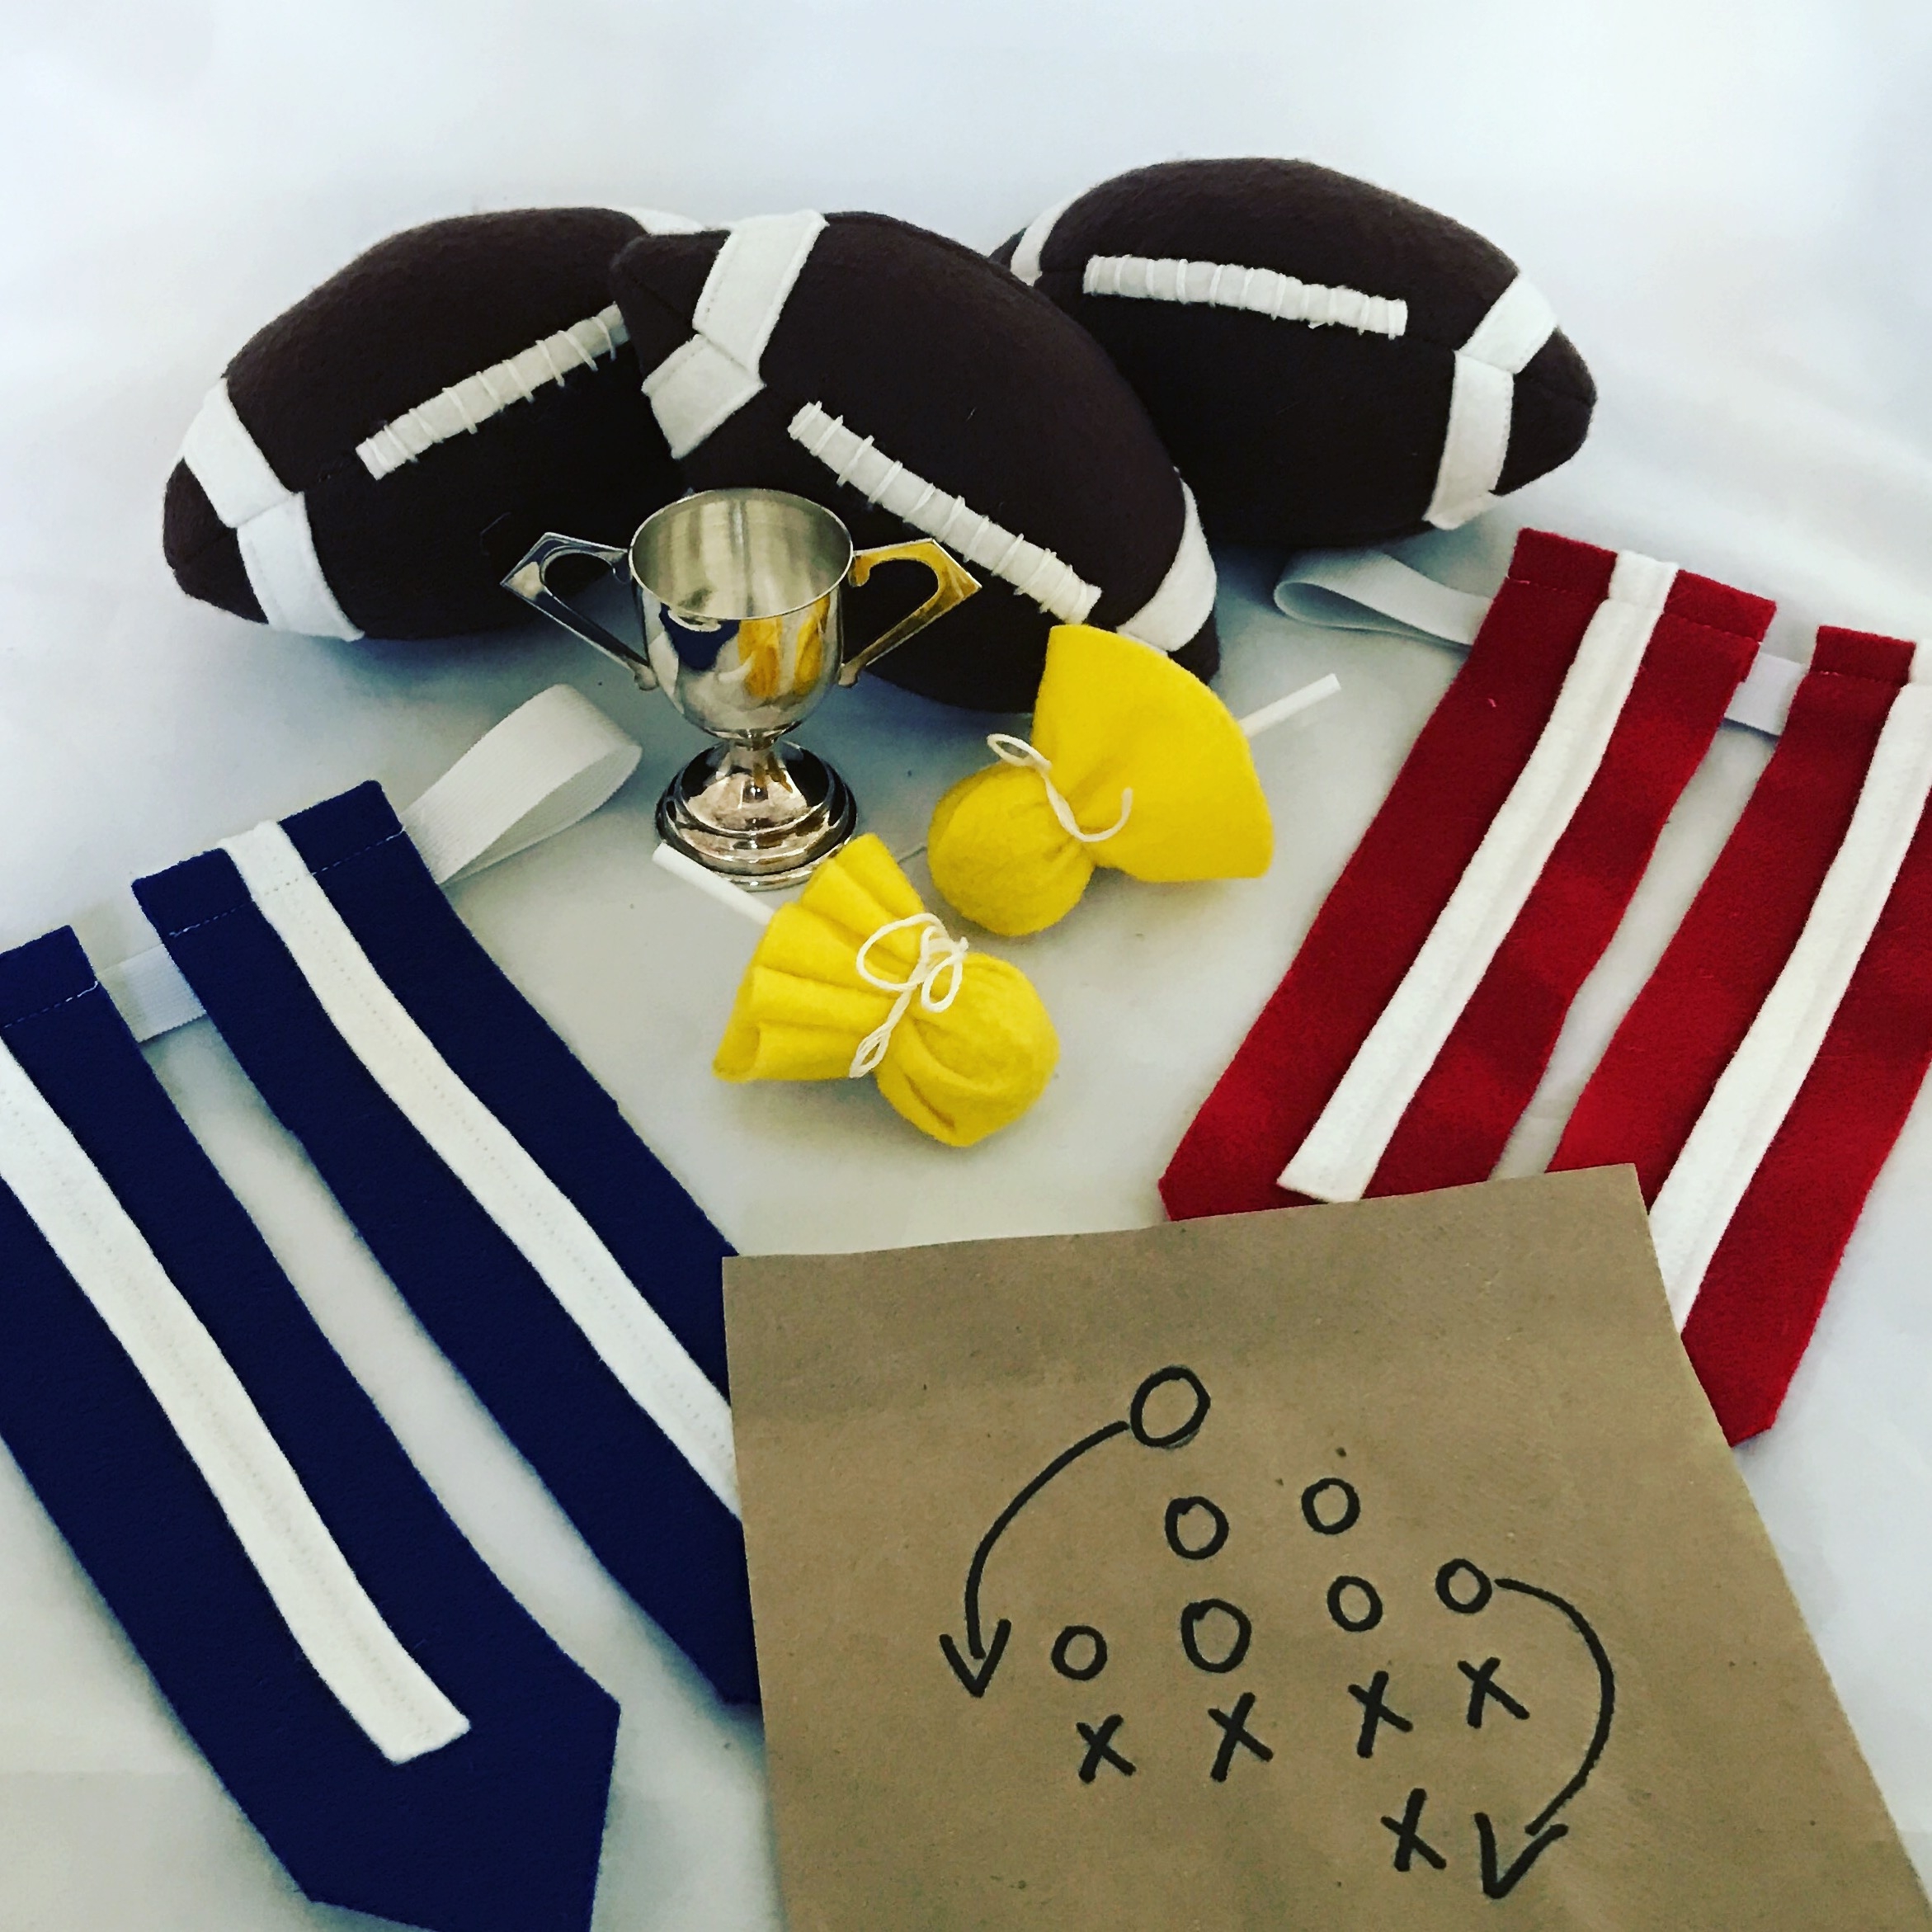
Score big with this kid-friendly flag football set!
You can help set the game mood for your kids by making this cute felt football, penalty flag and flag set. It will turn game day into family fun and your kids will feel like part of the team! Added bonus: this will keep you entertained even the game doesn't.
You can help set the game mood for your kids by making this cute flag football set. It will turn game day into family fun and your kids will feel like part of the team! Added bonus: this will keep you entertained even the game doesn't.
MATERIALS FOR FOOTBALL
2 sheets of Brown Felt
White Felt for trim on football
Handsewing needle
Thread
White Crochet or Embroidery Floss
Poly-fil
Glue Stick (Optional)
A free Felt Football and Flag Set Template, printed and cut out (This pattern has a 1"/ 4CM test square. Measure the test square, and if it does not measure correctly, check your print scaling options.)
SIZE
7 x 3"
MAKE THE FOOTBALL
CUT
Using the Mini Football Template, cut 4 ball pieces, 8 end stripes, and one center strip.
EDIT: It has been brought to my attention that only high school and college footballs have the white stripes. The NFL football does not. So for all of you purists out there, please omit the stripes!
EMBELLISH
Following the pictures as a guide, pin and stitch a white stripe 1.25" from each tip of the football using a straight stitch and some white thread. Alternately, you could glue it.

MAKE THE FOOTBALL
Take two ball pieces and place them with the Right Sides Facing Together and align the stripes. Pin and stitch around the outside edges of one side from tip to tip, using a 1/4" seam allowance. Repeat with the remaining two pieces.
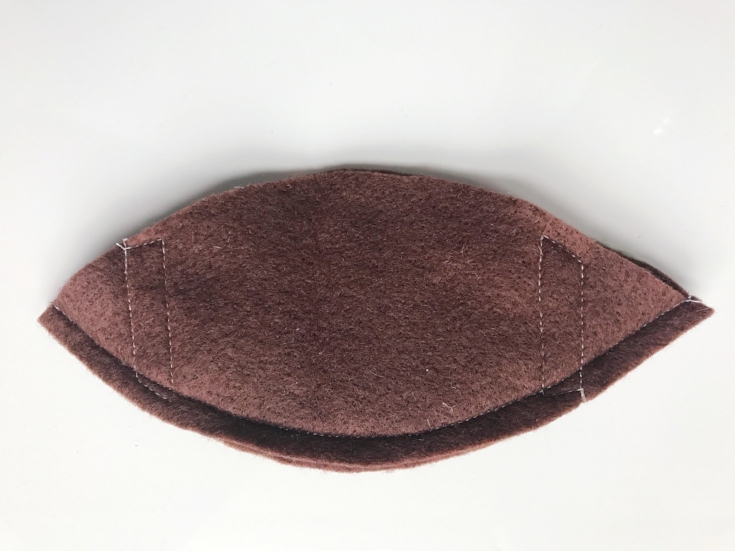
Take the two halves, and place them with the Right Sides Facing Together and again aligning the stripes. Pin and begin stitching just before the white stripe and continue stitching around the entire ball just past the bottom white stripe, leaving a 3 inch opening in-between the stripes.
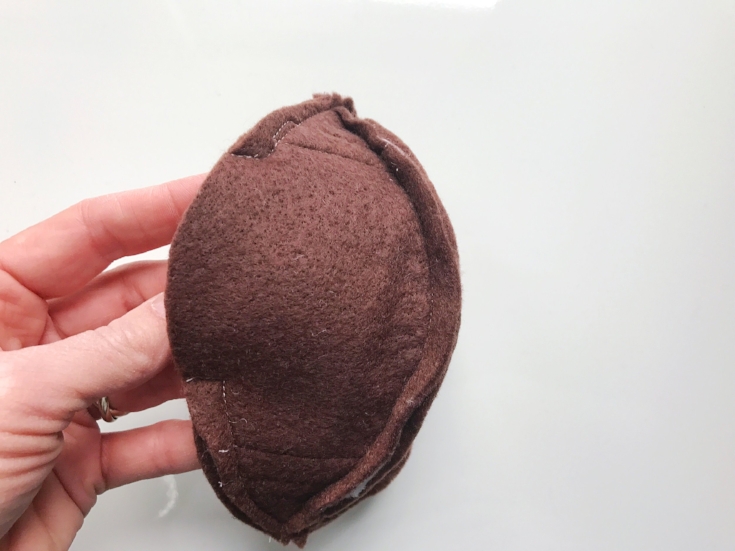
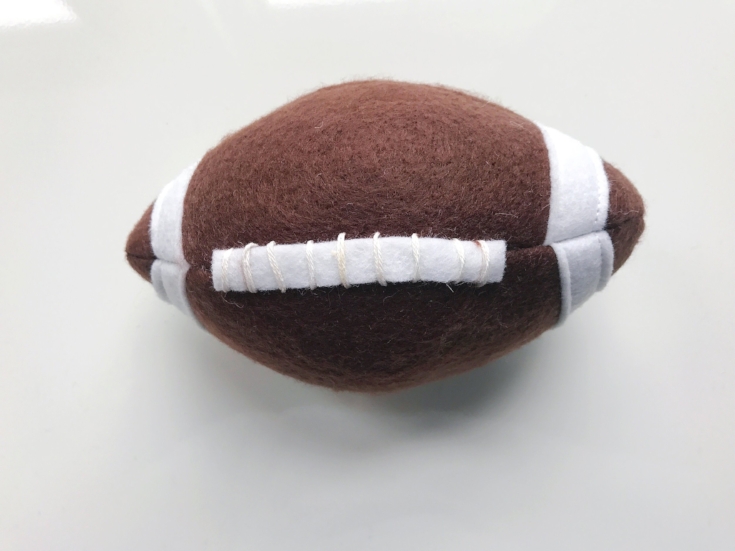
Turn the ball right side out and give it a tug to straighten the seams. Stuff the ball, beginning at each tip, until it is firm. (It helps to use just a little stuffing at a time, to keep it from looking lumpy). Handstitch the opening closed.
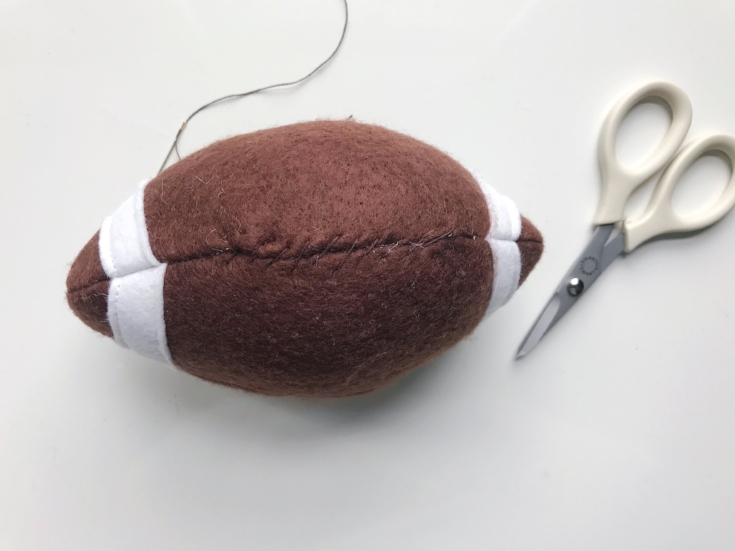
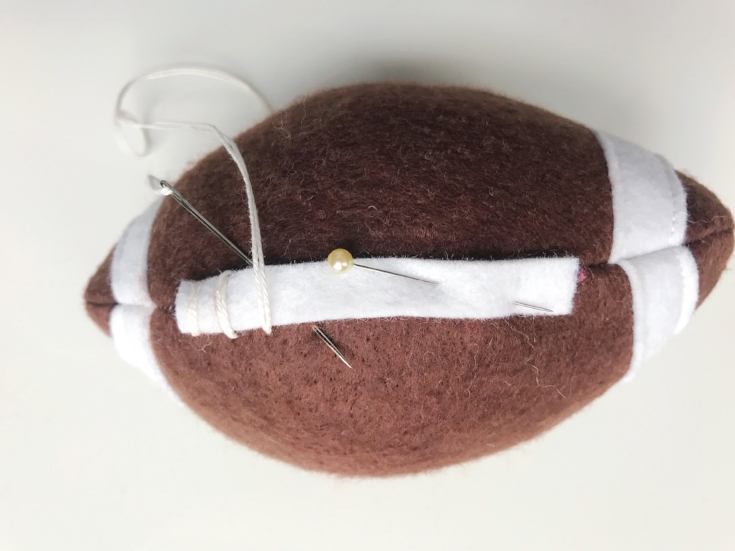
To finish, place the center strip along the hand-stitched closing. Sometimes when sewing with kids, I use a bit of glue to hold felt in place while stitching. Pins can be tricky for them to work with. Thread the needle with Crochet Thread or Embroidery Floss and knot both ends to form a double thread. We want these "laces" to look real!
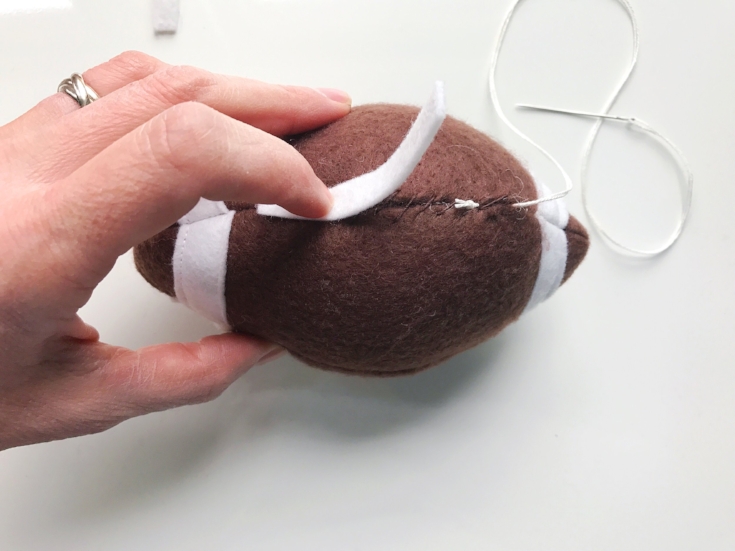
Begin stitching by piercing the football and tucking the knot under the center strip as shown in the picture above. Now stitch from side to side, down the length of the center strip. Knot the thread, bury it in the football and trim.
Warning: This ball will get tossed! You might want to do this project away from the TV, lamps, windows, or beer.
PENALTY FLAGS
MATERIALS FOR PENALTY FLAGS
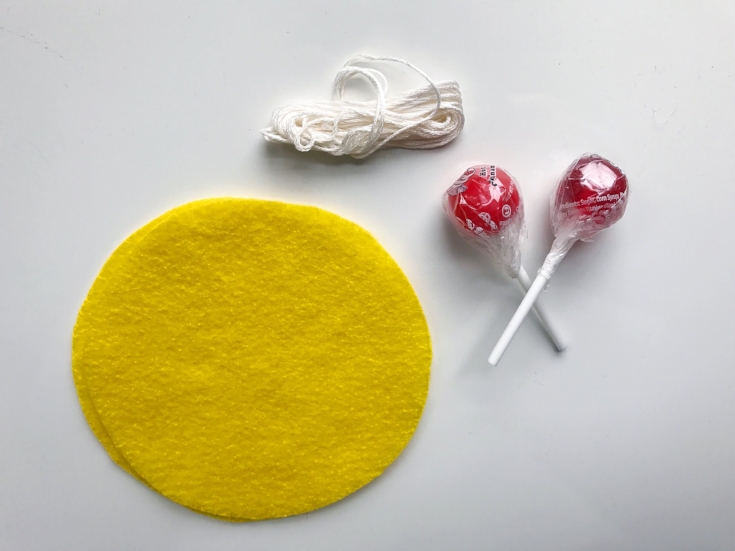
Yellow Felt or Fabric
String
Lollipops
MAKE THE PENALTY FLAGS
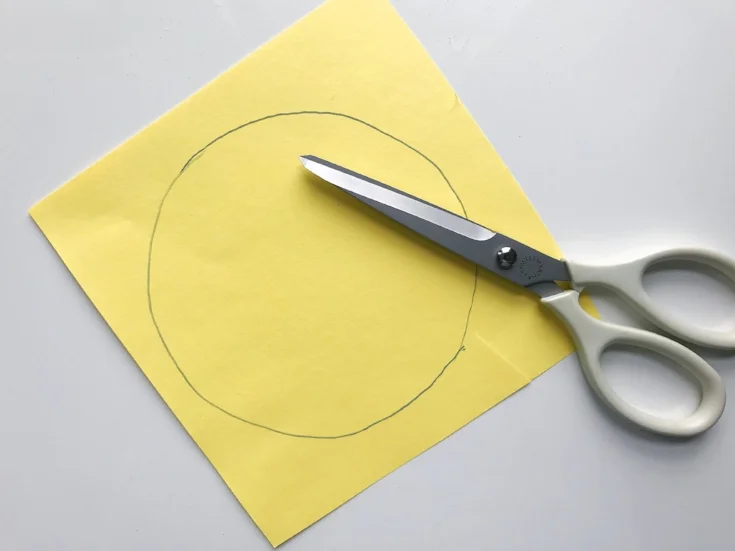
Cut a 5-6" circle out of felt. Cutting can be tricky for kids. It helps to have an adult draw the circle onto the felt and cut a square around it. Then try having the child do the "precision cutting".
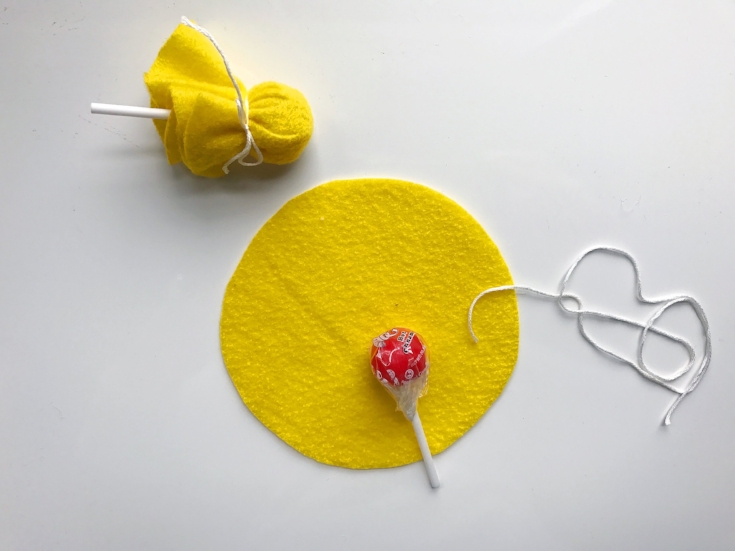
Place the lollipop in the center and wrap the felt around it and tie. SCORE!
FLAG AND BELT SET
FLAG AND BELT SET
This one can be made lots of different ways, depending on your (or your child's) skill level and what materials you may have available. I used elastic so that the belt wouldn't be tied around some smaller person's neck. You may have children that behave:) in that case you could use a sash or even a piece of fabric!
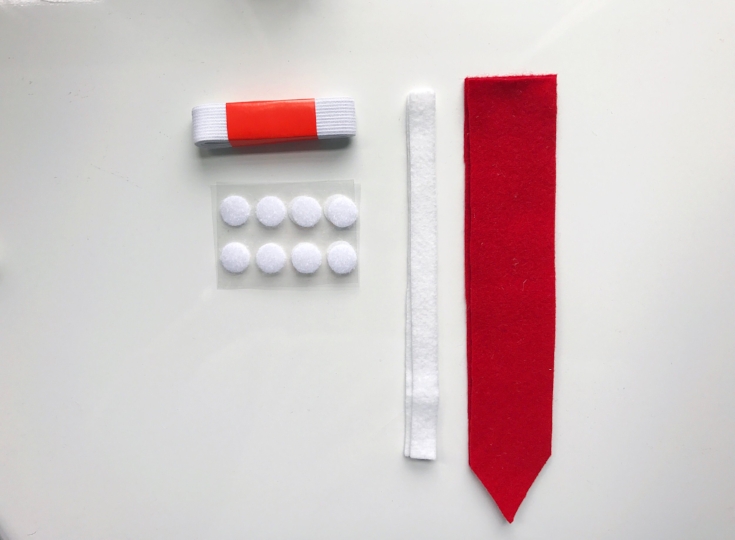
MATERIALS FOR FLAG SET
2 Sheets of Felt
Scrap Felt for embellishing
Needle
Thread
Velcro, either Sew on or Adhesive is fine
3/4" Elastic, 2 yards will make 2-3 belts, depending on the size of your child.
Glue Stick (optional)
A free Felt Football and Flag Set Template, printed and cut out, (This pattern has a 1"/ 4CM test square. Measure the test square, and if it does not measure correctly, check your print scaling options.)
CUT
Using the Flag Template, cut 2 flag pieces, and two long stripes out of felt.
EMBELLISH

Following the pictures as a guide, pin and stitch a white stripe from the top of each flag down the center using a straight stitch and some white thread. Alternately, you could glue the strip of felt. Repeat for the remaining flag.
MAKING THE FLAG AND BELT

Fold the top edge of the flag one inch toward the back side. Pin and stitch across. Repeat for the second flag.
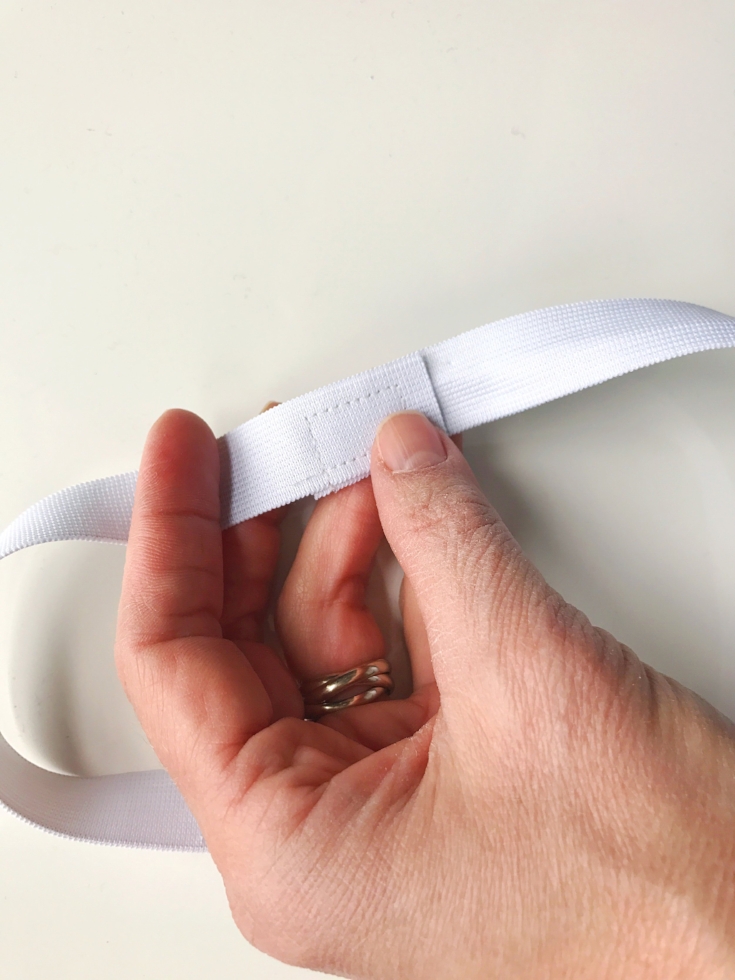
To make the elastic belt, measure your child's waist and add 2" inches. You will want this to fit comfortably over clothes and even a jacket. Following the picture as a guide, overlap the edges, pin and stitch. Now its time to place the velcro on the belt. Cut 2 pieces of velcro and using the loop side (the soft side) stitch or adhere each piece to the belt about 3" apart.
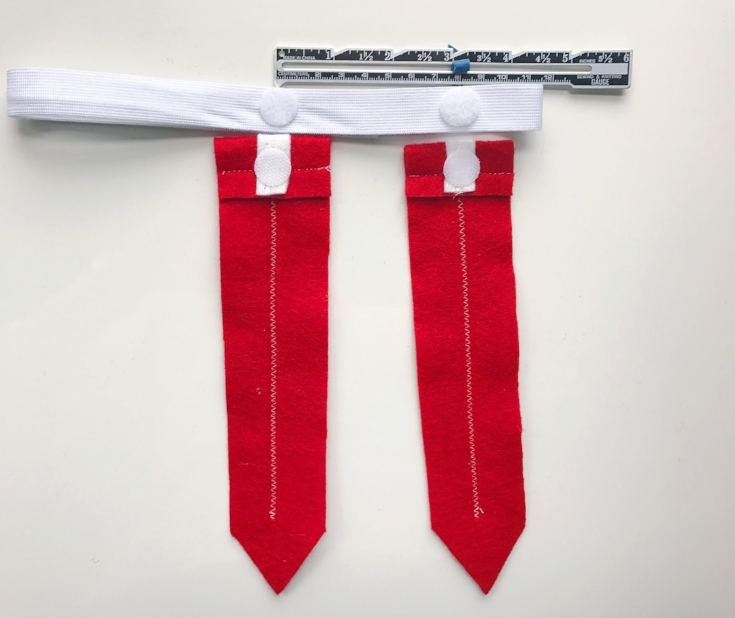
Stitch or adhere the hook side (the rough side) to the top back center of each flag. *If you are using the "glue type" velcro, allow the glue to set before using.
A very special thanks to Amy at A Lively Affair and WTKR Coast Live for featuring this on the "Big Game" segment. Thank you for letting me be part of the fun!
I hope that you have enjoyed this tutorial. Please be sure to tag me @hwakefielddayton on Instagram or use #stitchedmakers to show off your awesome skills.
XO,
Hilarie

The Ultimate Bridal Accessory
Are you ready to DIY the ultimate wedding accessory? I am teaching a bridal veil making class at Jollity & Co. to top anything you can learn on Pinterest! I spent years designing wedding gowns and veils and am ready to help you make the veil of your dreams.

Are you ready to DIY the ultimate wedding accessory? I am teaching a bridal veil making class at Jollity & Co. to top anything you can learn on Pinterest! I spent years designing wedding gowns and veils and am ready to help you make the veil of your dreams.
It would seem that custom veil combinations are endless — meaning you can create your very own one-of-a-kind veil for your big day! I will guide you through the process of creating a beautiful bridal veil that fits your style. Choose the length, color and finishing touches. Veiling tulle will be precut in a length you choose. Ribbon, a variety of combs, beads, embellishments, and hand-sewing materials will be provided for this hands-on workshop.
Sunday, March 19, 10-12 Noon at Jollity & Co., 2111 Granby Street, Norfolk VA
Join us for a bit of cake, drinks and ultimate DIY fun!
$55 per person
Please call (757-615-5802) or email Hilarie to reserve your spot today. (Classes are limited and fill up quickly!)
*Prices and timing stated allow for the creation of one veil per person, which is yours to keep. I will do my best to accommodate requests to make pieces for a specific theme, the materials are subject to availability. Please check at the time of booking.

Cue the confetti!
This New Year's Eve, I'm eschewing stuffy, shellacked looks in favor of elegant, easy styles that aren't just timeless, but a little bit cool, too. I have a fun and super easy DIY for girls and moms.
A couple of weeks ago I stopped into H&M to get a white shirt for my daughter's Christmas musical at school. In the checkout I saw these shiny gold bobby pins and immediately began thinking of ways that I could embellish them.
Fast forward two weeks to when I actually had the time to make them. New Year's Eve is the perfect occasion to add a little sparkle to your look.
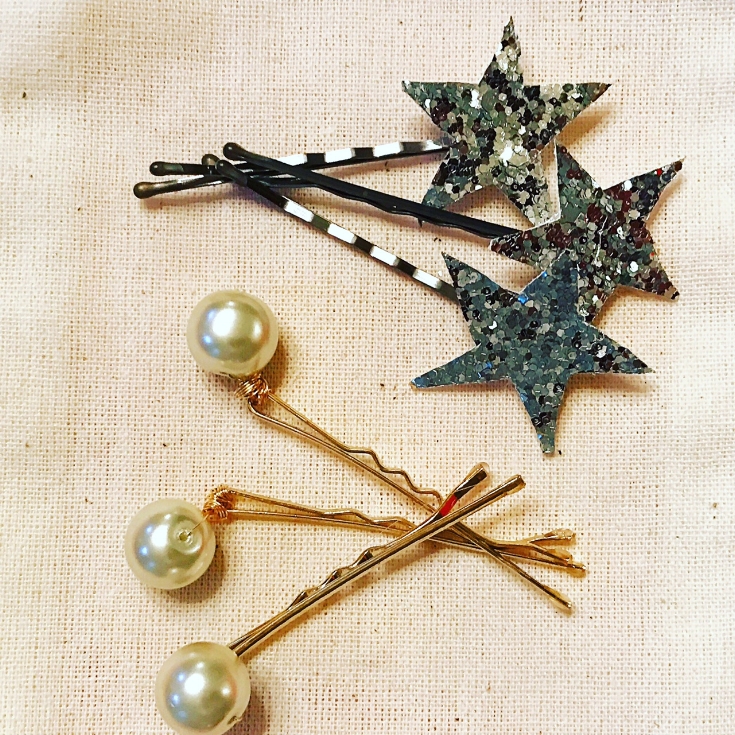
This New Year's Eve, I'm eschewing stuffy, shellacked looks in favor of elegant, easy styles that aren't just timeless, but a little bit cool, too. In this spirit, I have a fun and super easy DIY for girls and moms.
A couple of weeks ago I stopped into H&M to get a white shirt for my daughter's Christmas musical at school. In the checkout I saw these shiny gold bobby pins and immediately began thinking of ways that I could embellish them.
Fast forward two weeks to when I actually had the time to make them. New Year's Eve is the perfect occasion to add a little sparkle to your look.
MATERIALS
Bobby Pins
Scrap Felt
Glitter Sheets These can be purchased individually from craft stores like Michael's.
Scissors These are my absolute favorite precision scissors. They are perfect for detail cuts in felt.
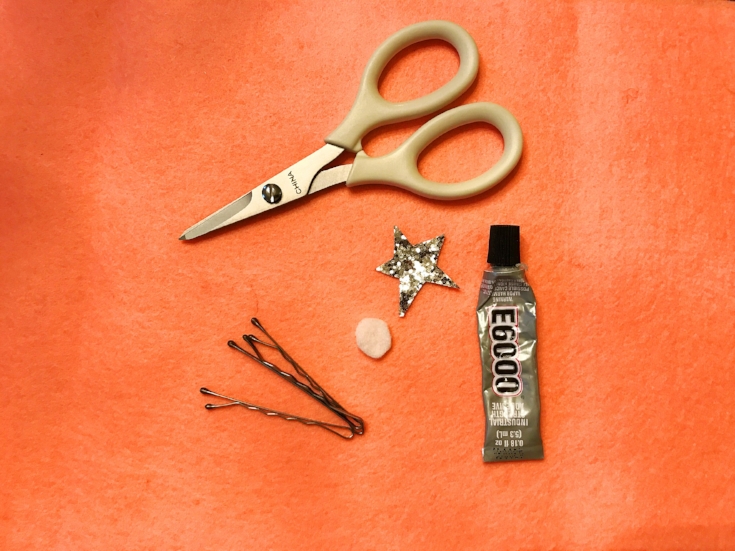
Cut out a star shape about one and a half inches in diameter out of a glitter sheet. I like to draw the shape on the back and cut out. Cut a one-half inch circle from felt.
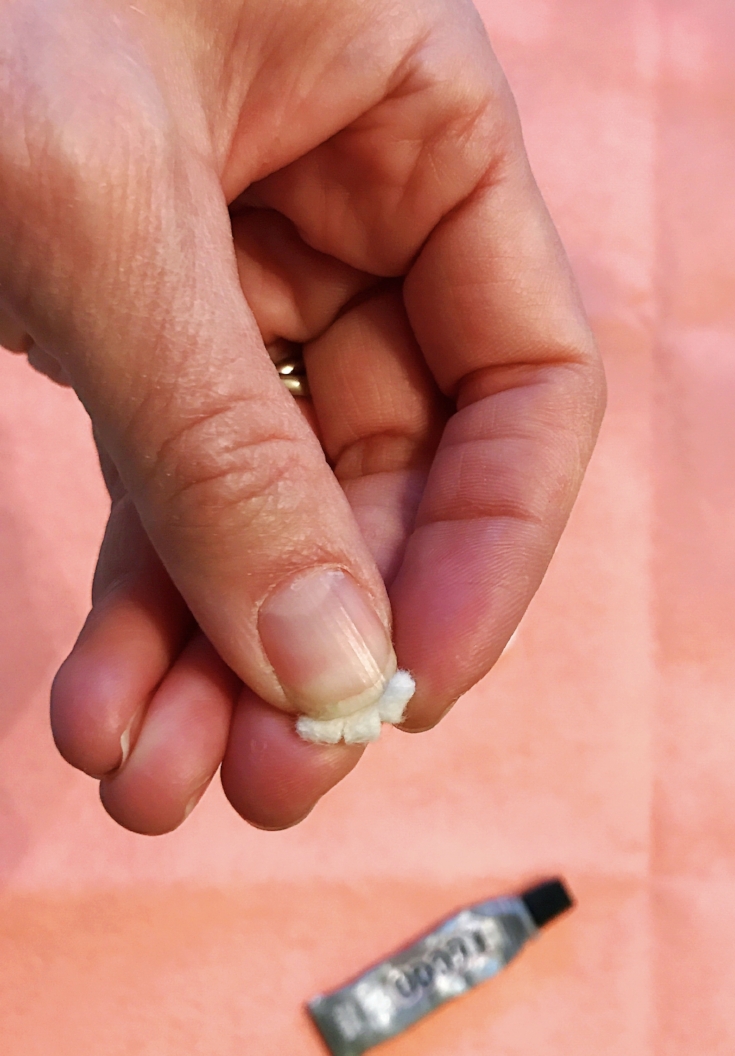
Fold the felt circle in half and make a small cut on each side of the center.
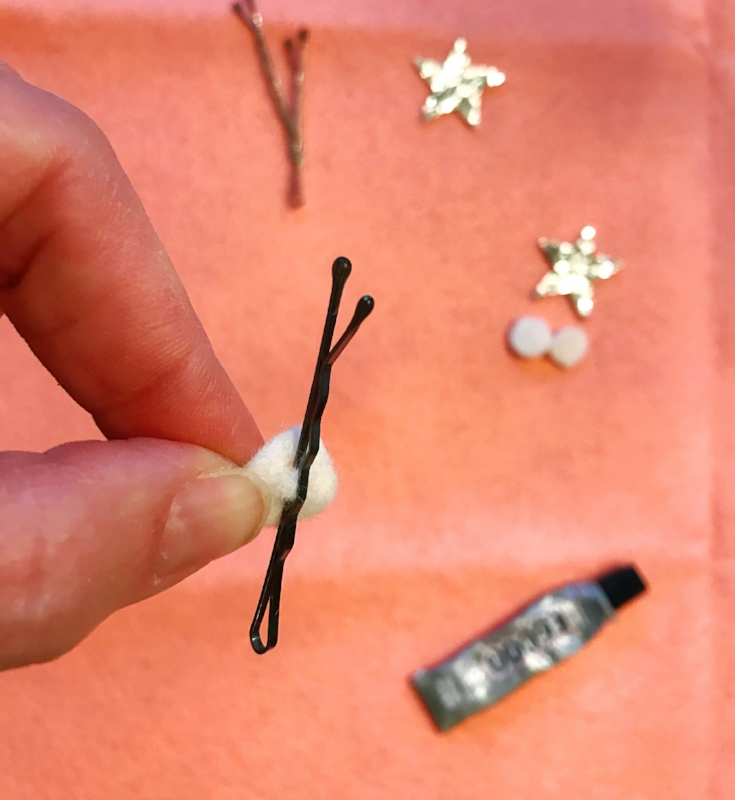
Thread the flat end of the bobby pin through the cuts of the felt circle.

Push felt circle to the end of the bobby pin.
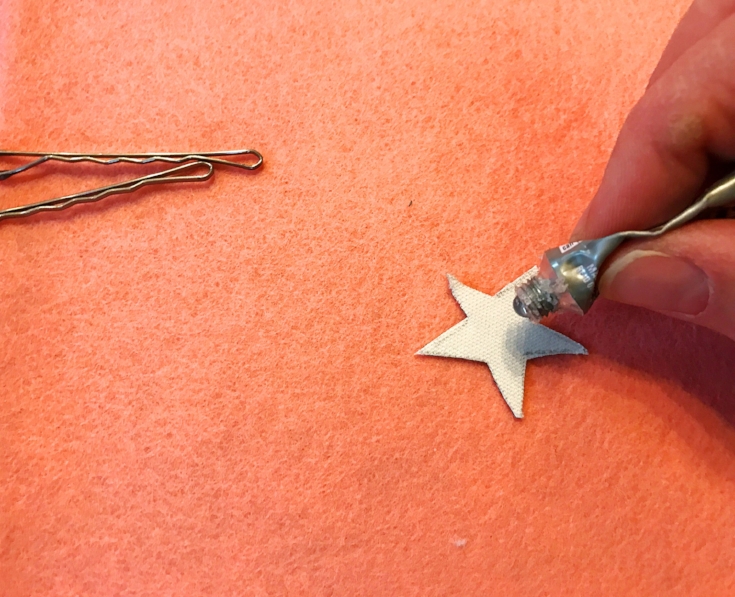
Put a dab of glue onto the center of the back of the star. Glue to the felt circle.
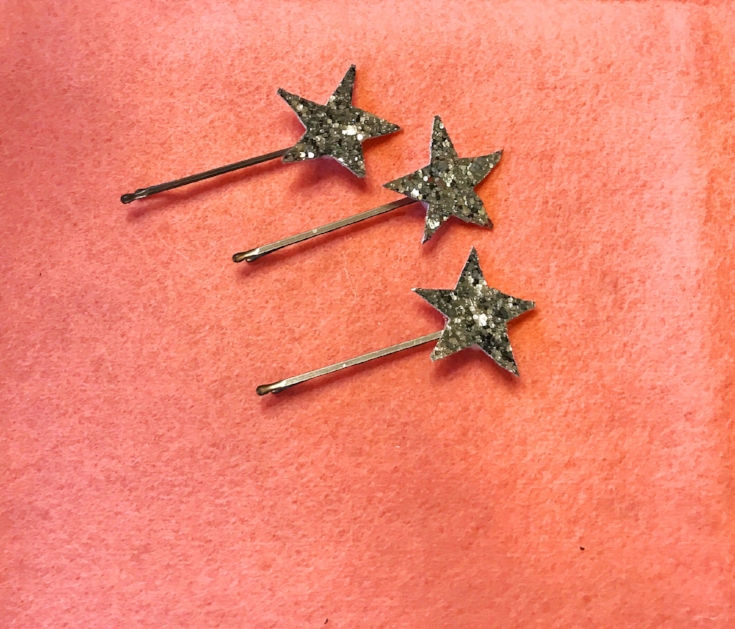
Done! How easy was that?! Now time for the pearls!
MATERIALS
Bobby Pins
28 Gauge Beading Wire (choose a color to coordinate with your bobby pins)
Needle nose pliers and crimping pliers (Optional)
*You can of course purchase these and similar items locally, I am sourcing Amazon because sometimes it is easier to get an idea of what to look for.

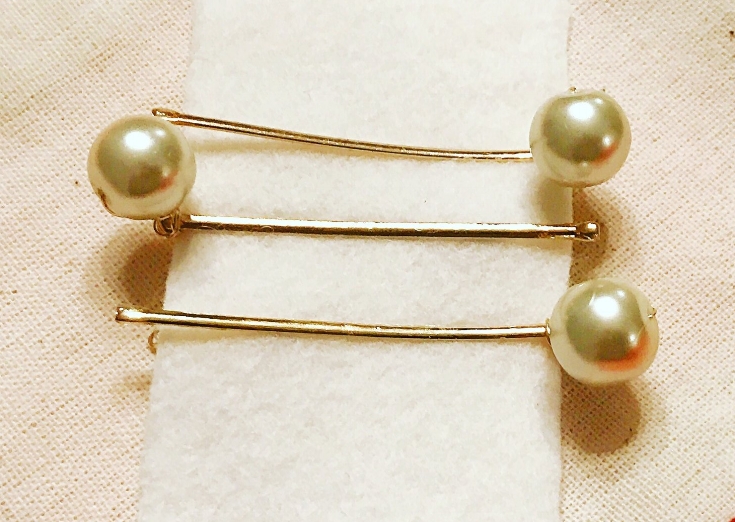
These bobby pins are so much prettier in real life. The light in my house is very dim today.
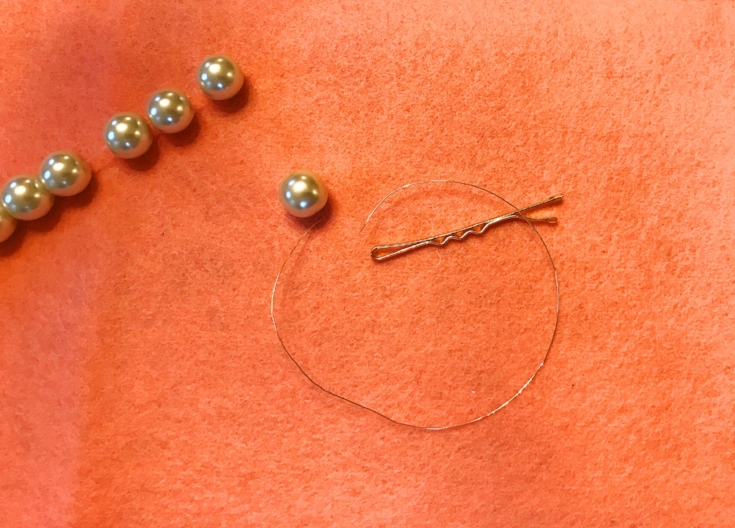
Cut a six inch length of beading wire and thread it through the center of one pearl.
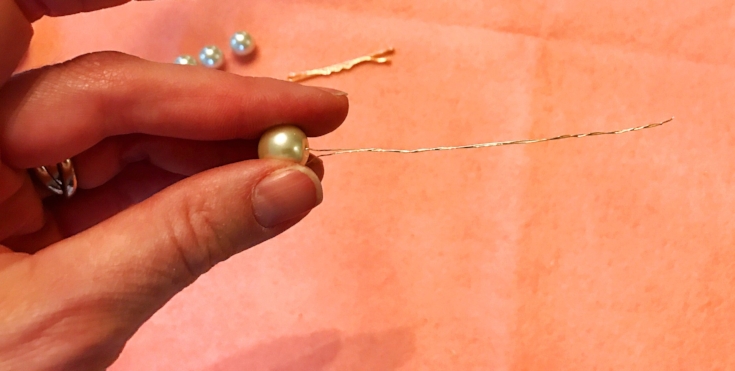
Pinch and twist the entire length of wire to tighten.
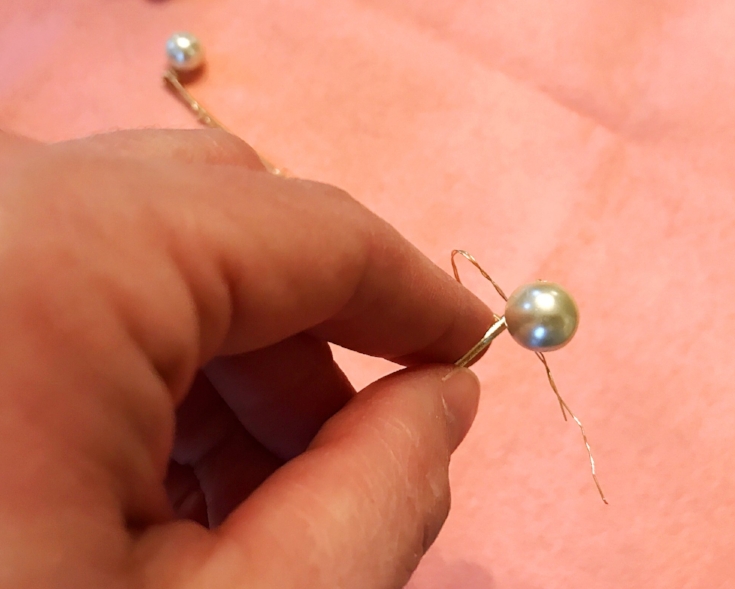
Thread the wire through the end of the bobby pin and twist to secure. Hold the pearl between your thumb and index finger while wrapping the wire tightly between the bobby pin and just beneath the pearl three times.
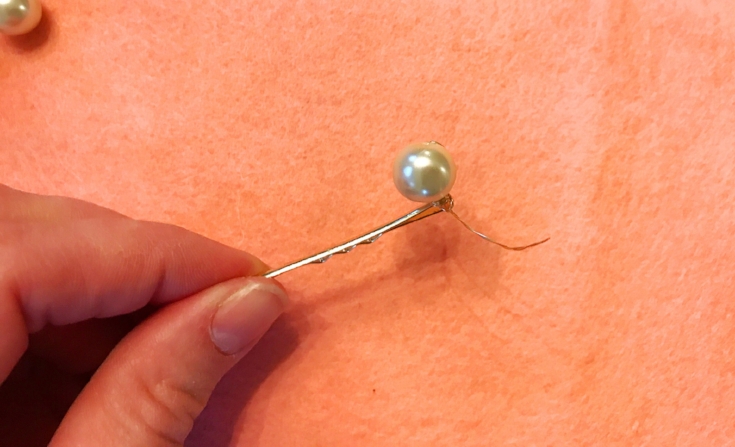
Now take the wire and wrap it around the top of the bobby pin three times to secure. You might want to use needle nose pliers for this. Trim wire ends once the pearl feels secured or if you have crimping pliers, just use those.
Pretty, right? I think next I am going to take apart some old glamorous sparkly jewelry and wire them to hair combs. Why should kids and brides get all of the hair fun?