HOW TO HAND SEW SEQUINS: A Course in Creating Custom Embellishments with Sequins
Recently I have been seeing a host of embellishments of all manner in fashion magazines and on the runways. Perhaps since clothing shapes and silhouettes are holding steady, embellishment is a way to make clothing new and enticing. Whether it’s just a sprinkling here and there or an all-over design, embellishment is a fun way to both personalize and dress up your wardrobe.
This winter I discovered that one of my favorite sweaters had been enjoyed by some moths. Uggh! However, instead of being upset, I decided that this presented the perfect opportunity to create a design that I had been playing around with in my mind and repair my beloved sweater.
The design that I had in mind was something between a leopard print and a paisley. Initially I wanted it to be more leopard, but the scale of the paisley seemed more fitting. Also, I really wanted the design to only be on the front of the sweater as beads and sequins- especially when sewn to a knit have the tendency to rub. Then there is the issue of of placement. A leopard or paisley print with unfortunate motif placement could look ridiculous very quickly. I did not want to draw any undue attention to my bustline.
In order to clear this hurdle, I made a few shapes to pin on the sweater to determine the best placement and repeat. Once I was pleased with the placement, I began to sew. It took probably 10-12 hours to complete, but I am quite happy with the result and even more pleased knowing that my once loved sweater may now last me another 15 years.
Want to try your hand at embellishing a sweater? The steps below outline how I did it, but they can be adapted to any sequins pattern you create.
You’ll Need:
Sequins, I used one ounce of 5mm
Thread, Ideally, fil a gant, or gloving thread.
Contrast or Basting Thread (all purpose is fine. Good time to use the odd ones:)
Pins and scissors
A sweater
HOW TO SEW SEQUINS BY HAND
Step 1. Create the design. You can follow mine or map out your own. Paper and pencil is a great place to begin. If you are in need of inspiration, look in your own wardrobe. Which motif’s do you seem to be drawn to? Polka dots? animal prints? stripes? Start there.
Step 2. Determine placement and design repeat. Do you want the design just on a specific part of your sweater? Or would you prefer an all-over design?
HOW TO HAND SEW OVERLAPPING SEQUINS
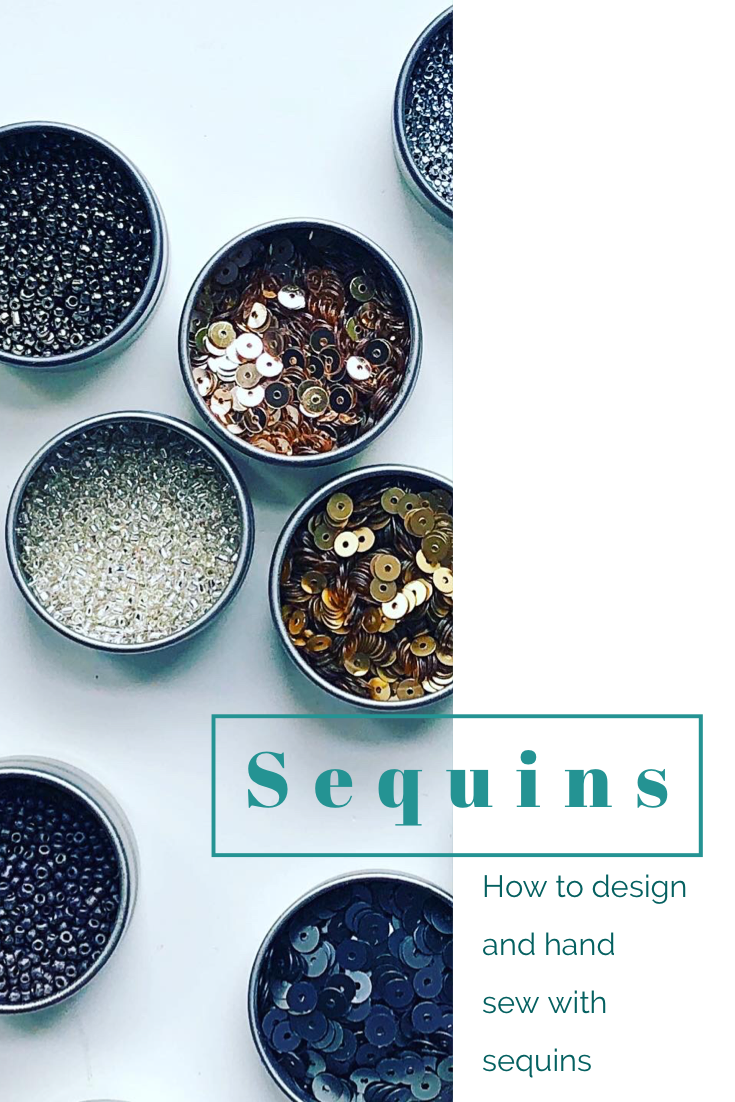
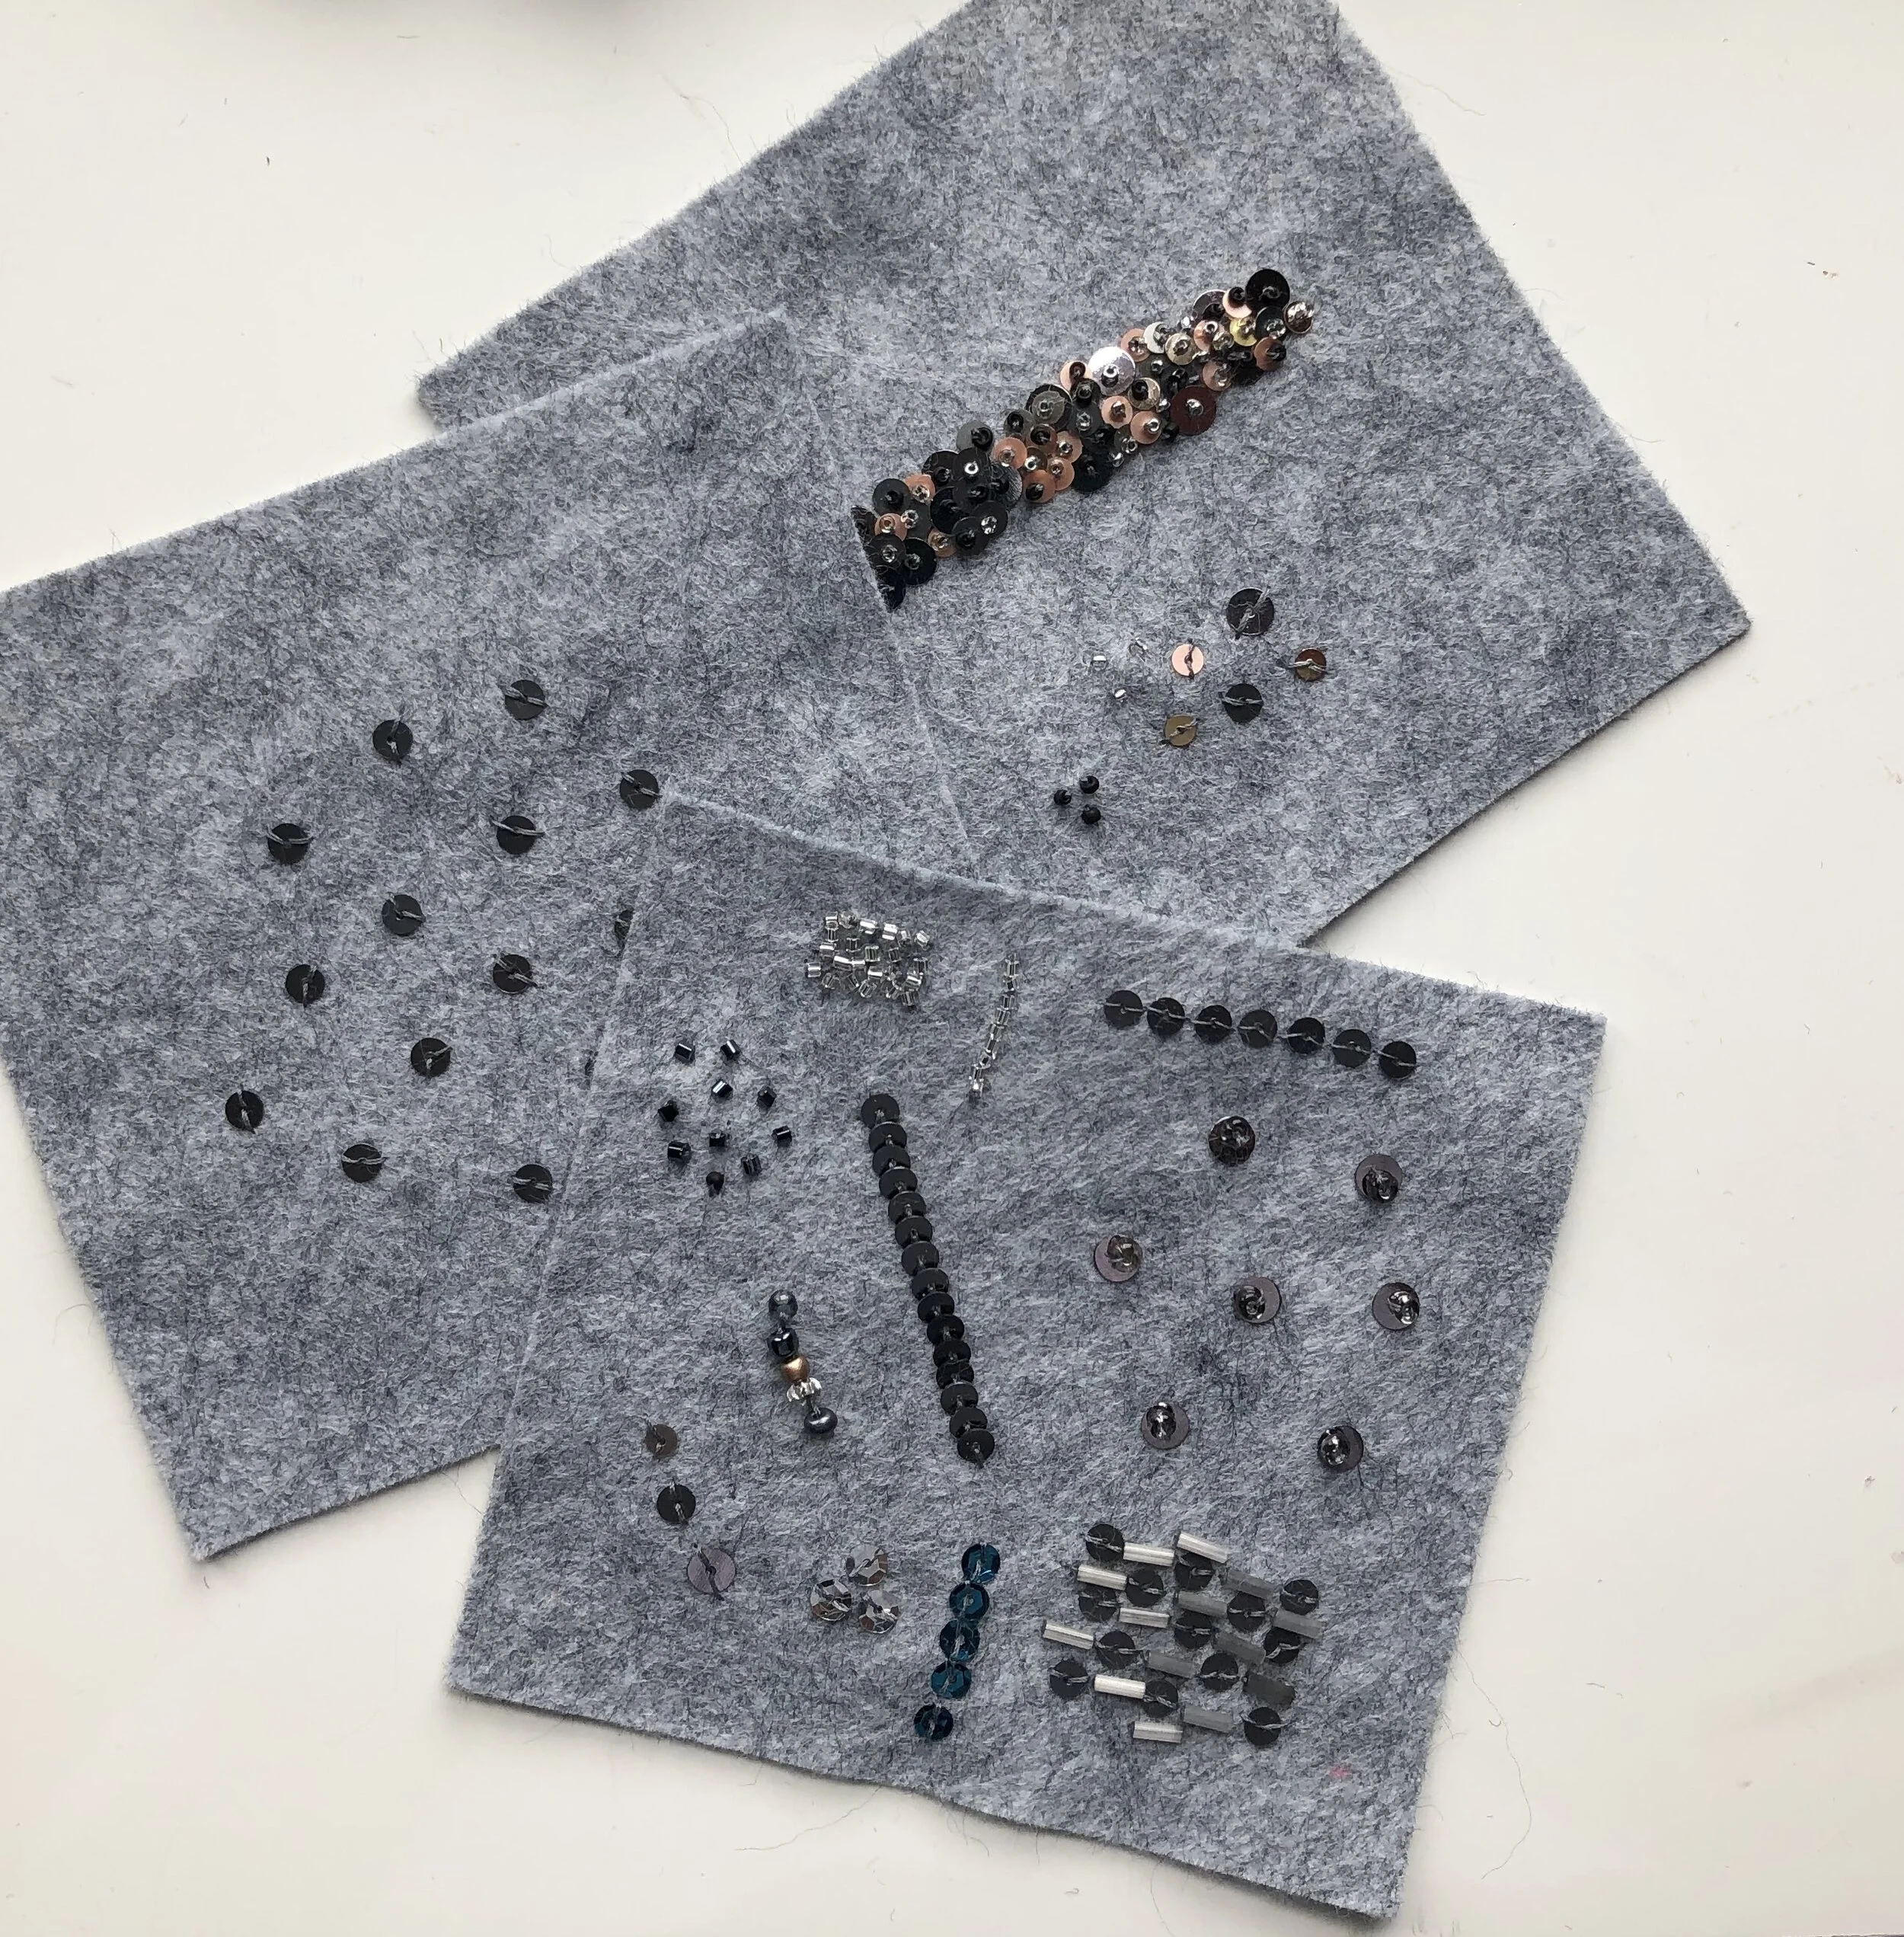
Sequins come in a variety of shapes and sizes. The ones that I chose are flat and matte rather than the sparkly cupped shaped ones. Sequins size range from 2mm all the way to 30mm. I tend to like the 3-15mm, as I can use an embroidery needle and thread to apply. While sequins can be applied by machine, I do enjoy hand sewing them. Though it does take some time, for speedier work, you can purchase pre-strung beads and sequins.
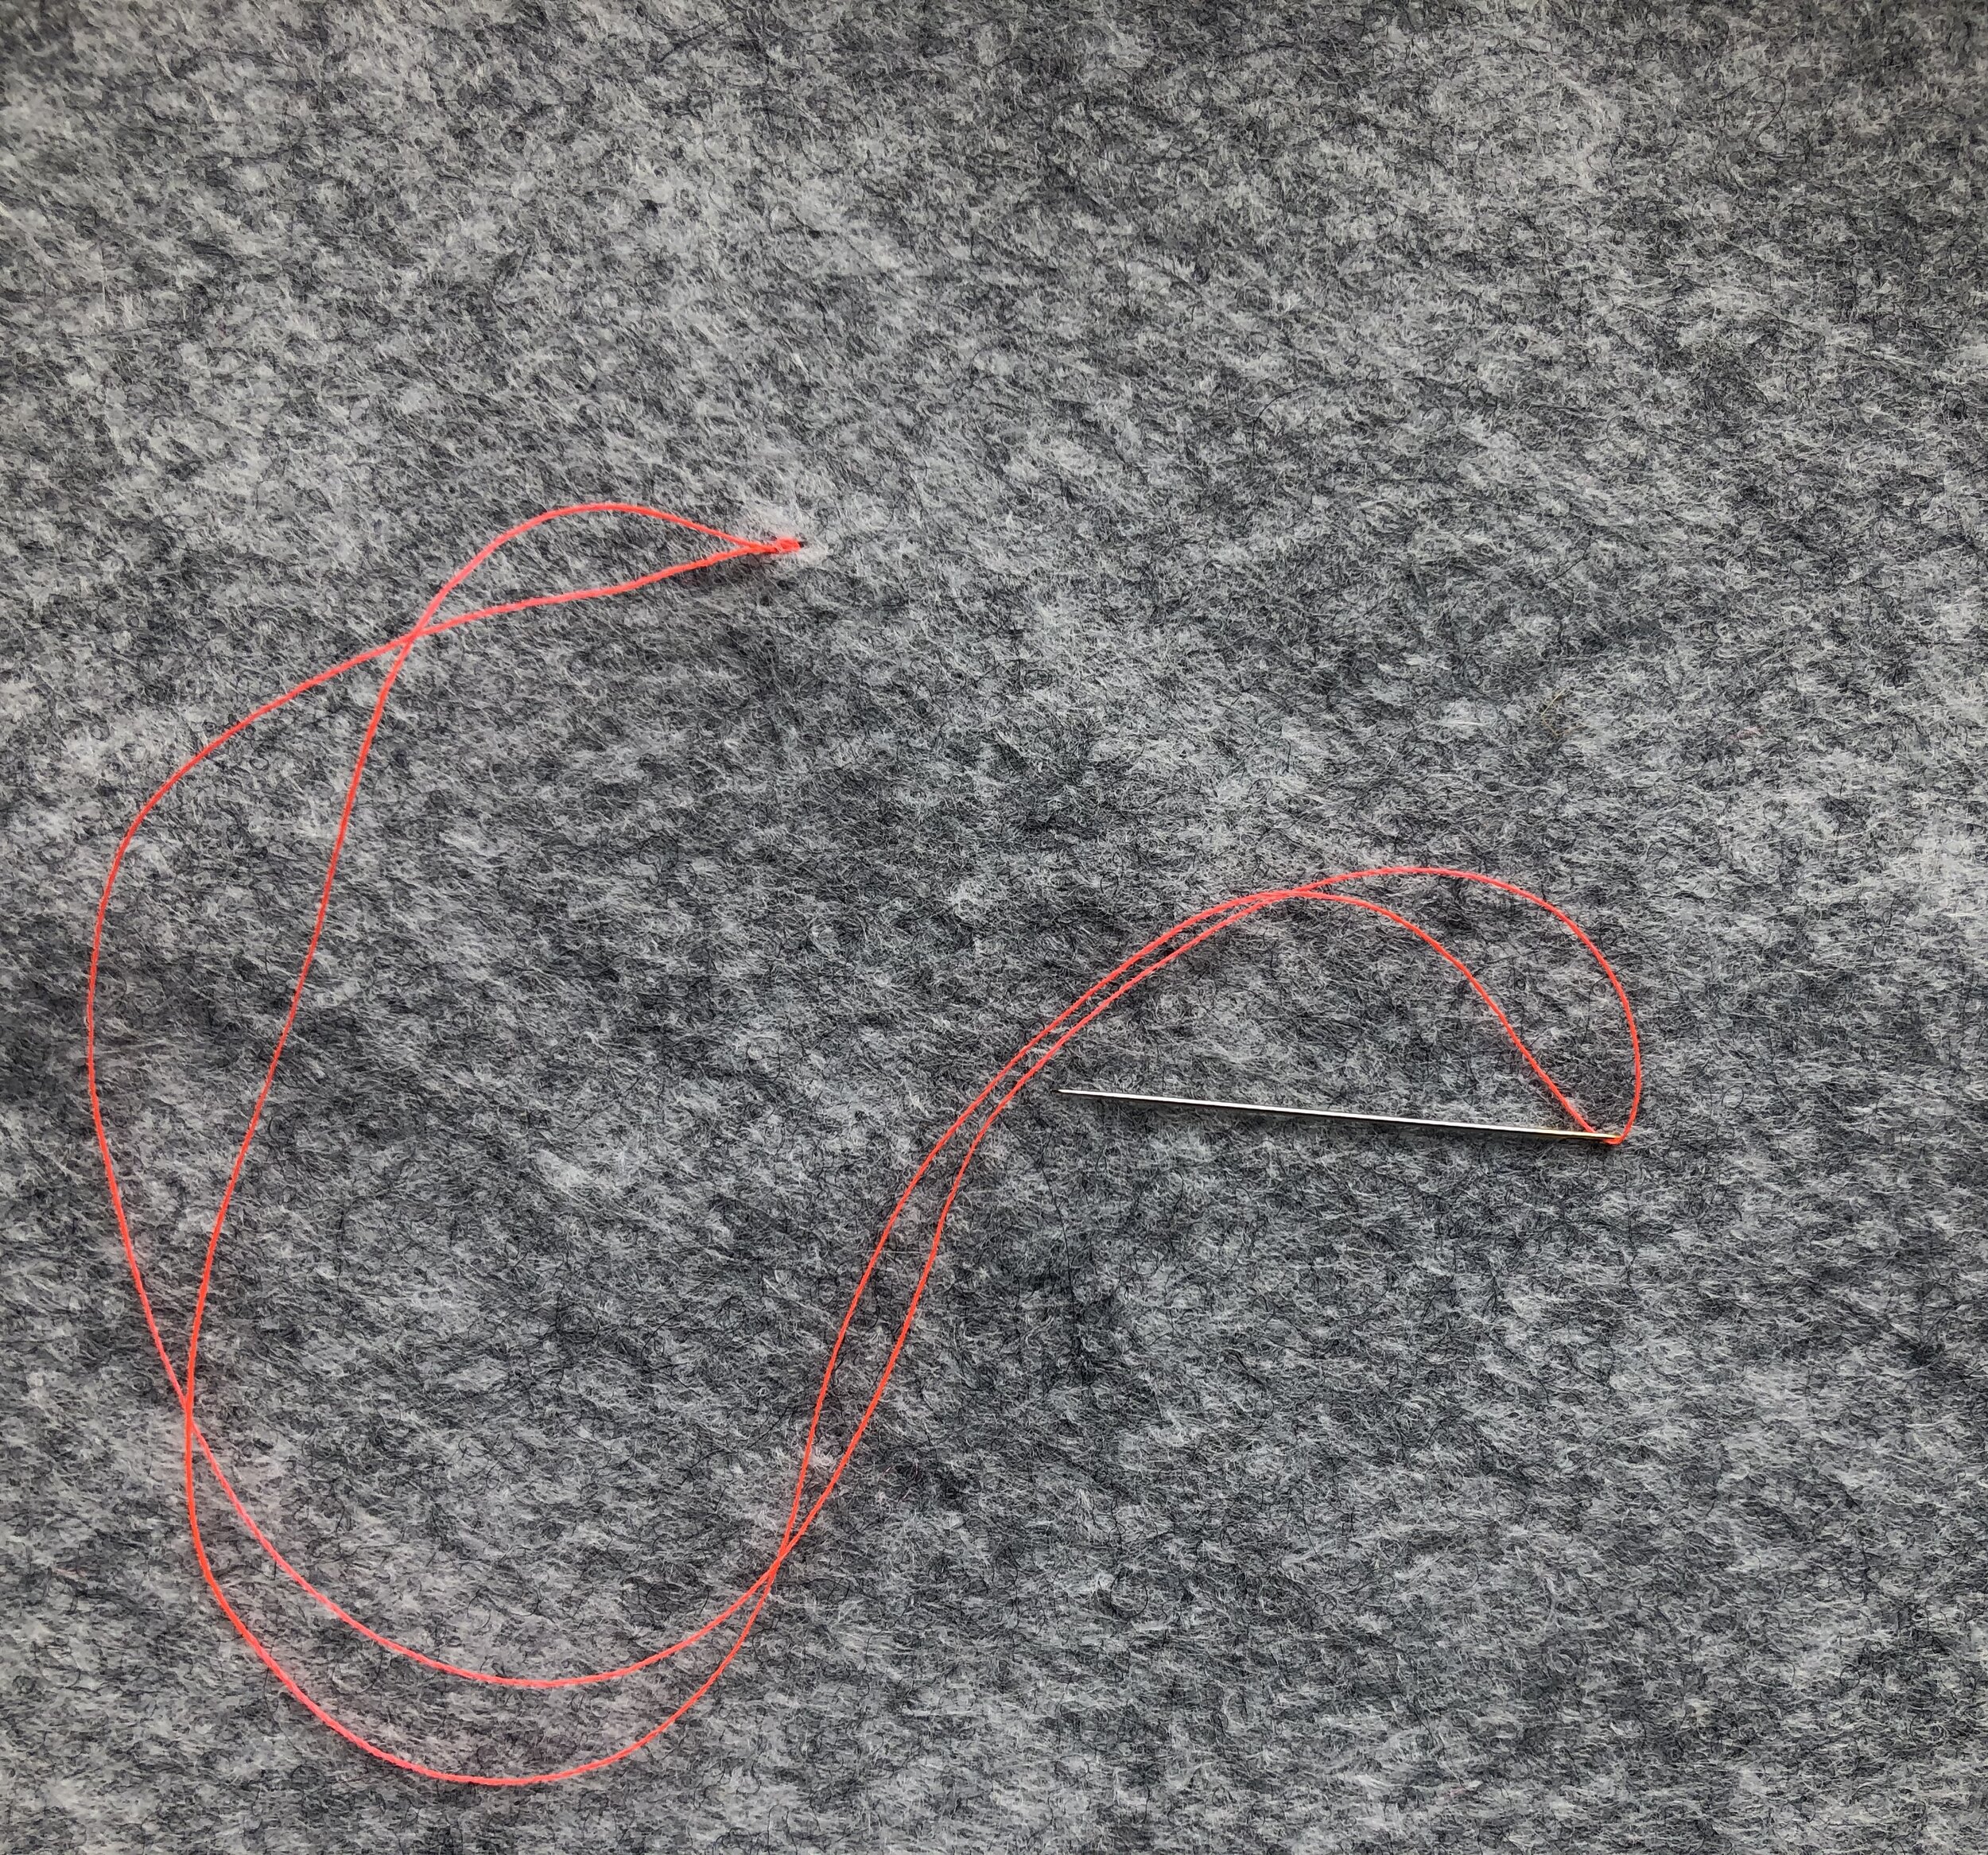
To hand sew sequins, the thread should be doubled and kept short to prevent twisting and knotting. Be sure to use a light hand as pulling stitches too tight, will create puckers in the fabric. Run your thread through the beeswax or thread magic.
Before adding the first sequin or bead in my pattern, I do like to make one small stitch in the fabric to secure.
To sew a line of overlapping sequin, begin by inserting your needle from underneath the fabric and pushing up.
Place a sequin on the needle and pull toward the fabric to place.
Bring the needle to the side of the sequin to stitch over the edge and coming back up through the center. Pick up a second sequin, place it so that it just overlaps the first and stitch over the edge to secure. When you pull the thread, it should pull the sequin in its place.
Another view with all of the steps together. Once you get the hang of it, it really does begin to go rather quickly.
HOW TO HAND SEWN SCATTERED SEQUINS
For an all-over effect, this scattered design really packs a punch. I have a skirt that I made years ago that is embellished with an all-over pattern of sequins with a seed bead secured in the center.
HOW TO HAND SEW INDIVIDUAL SEQUINS
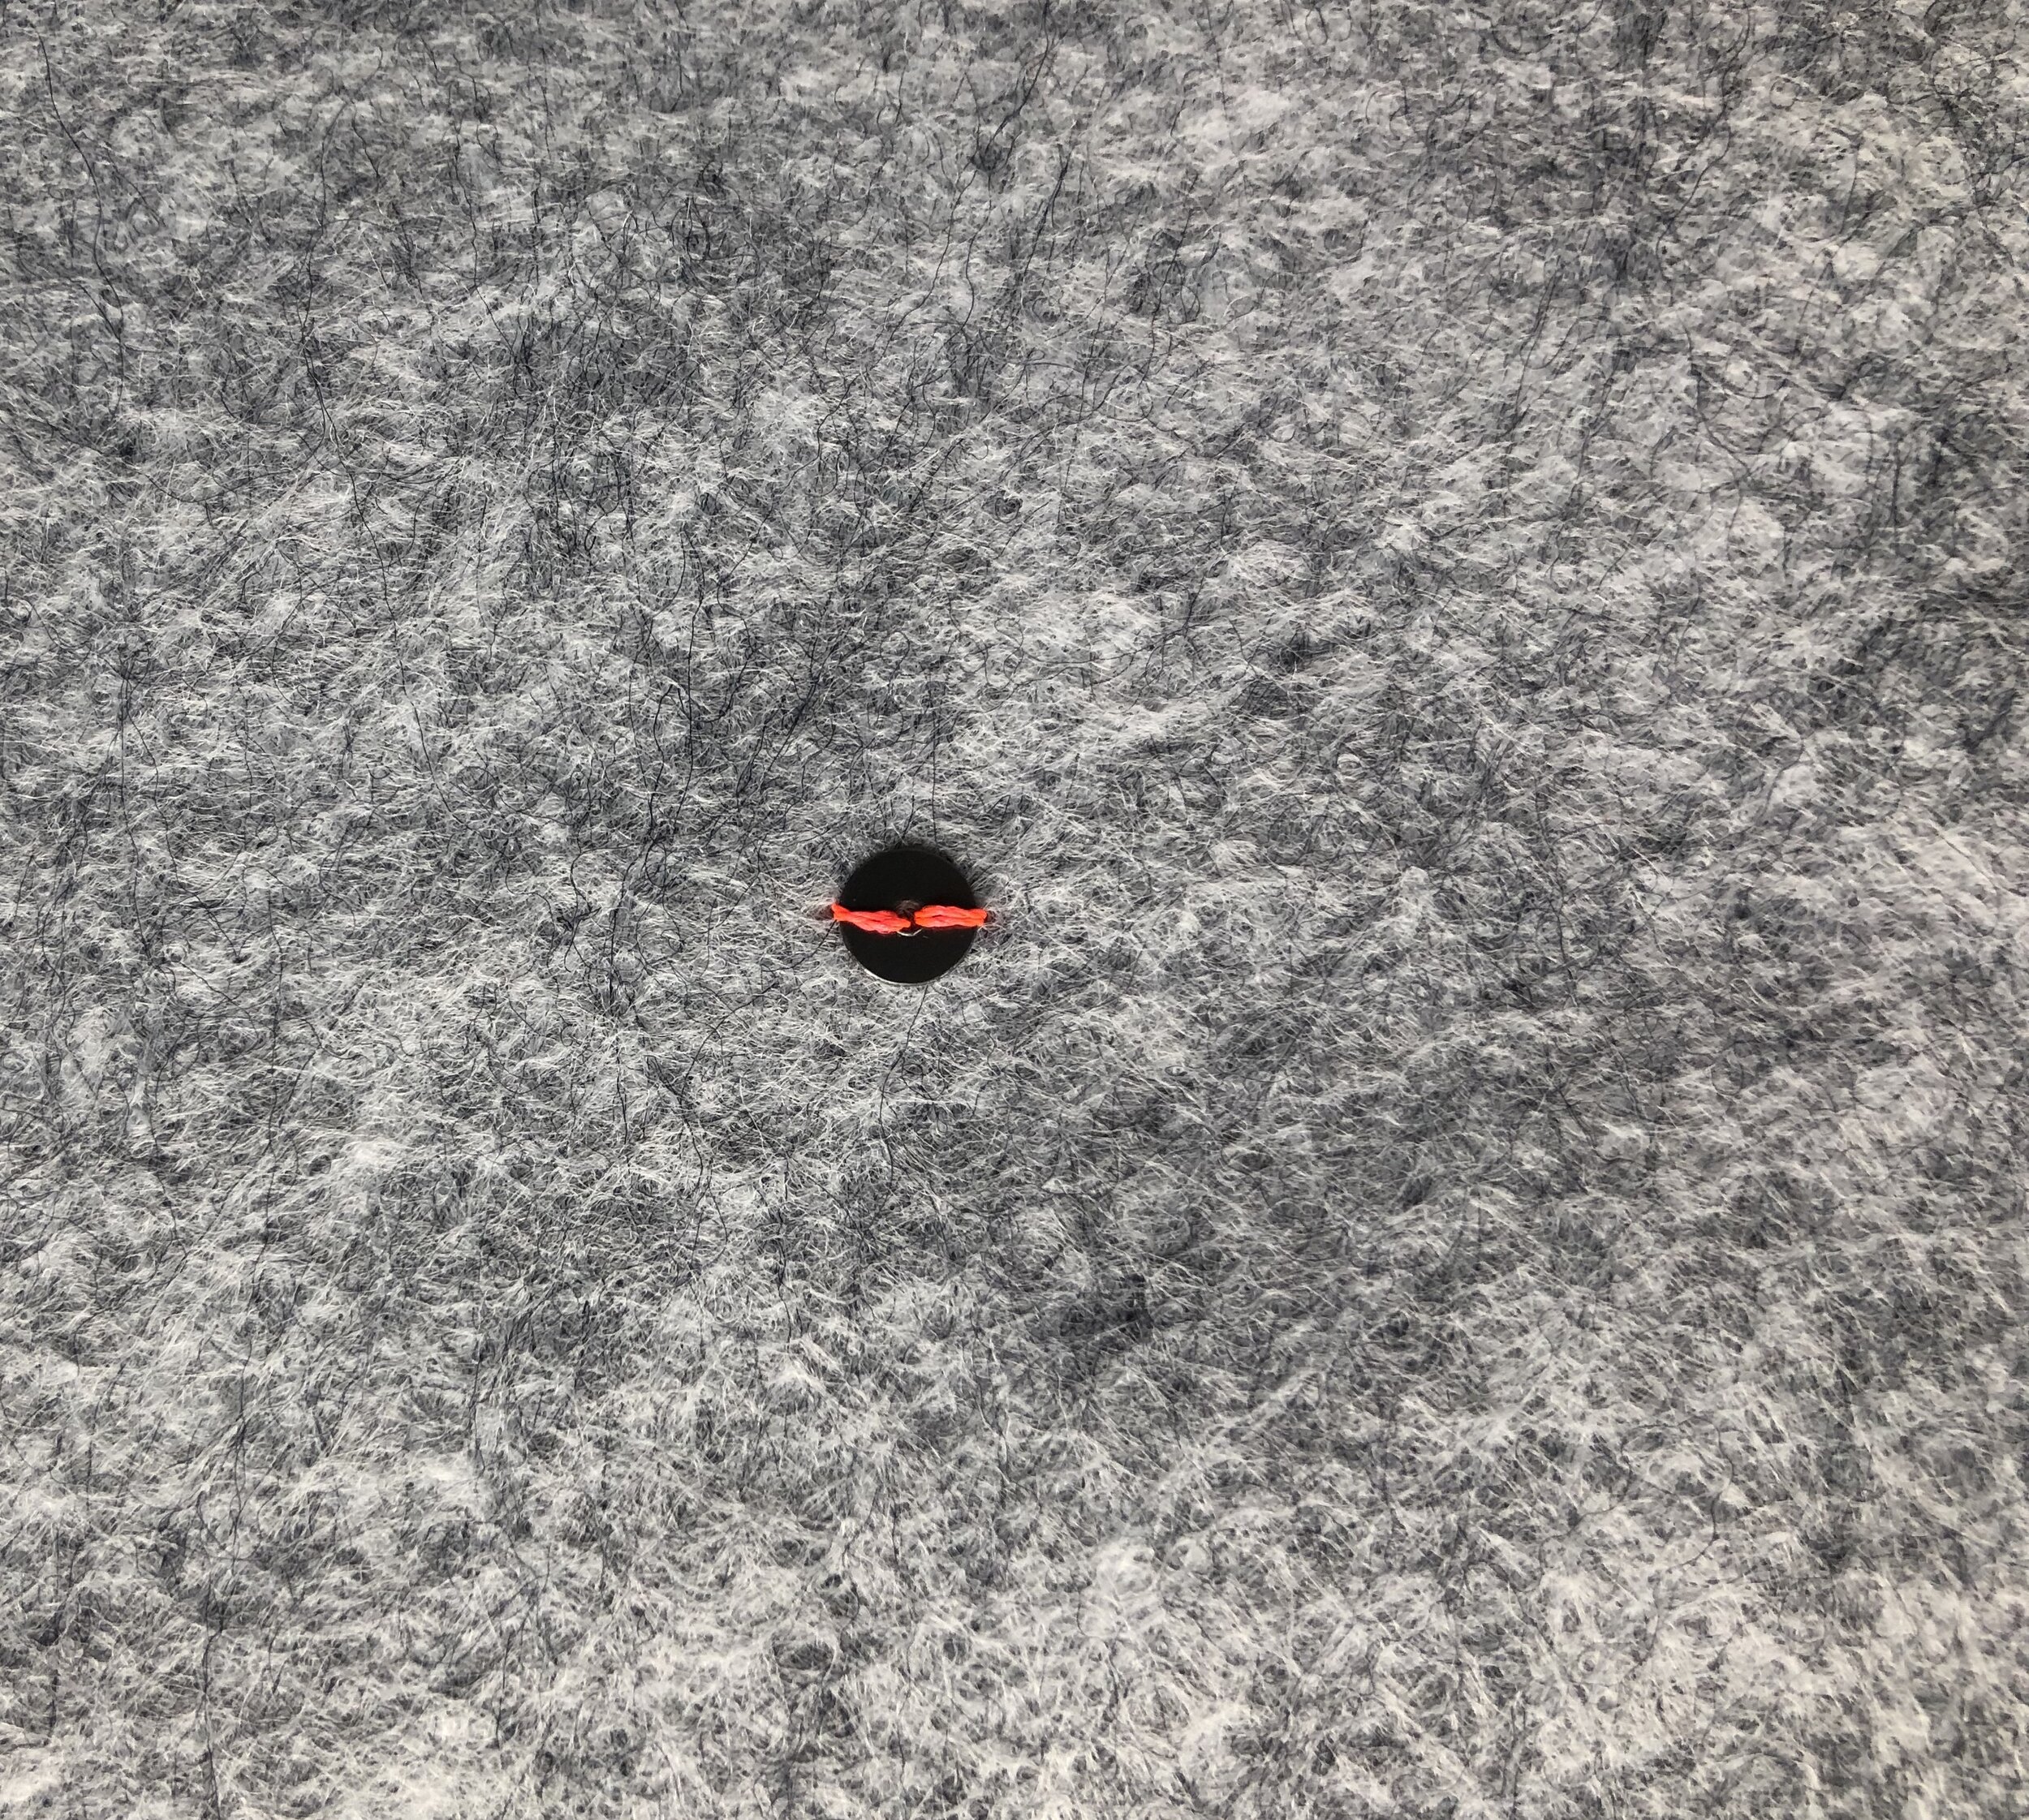
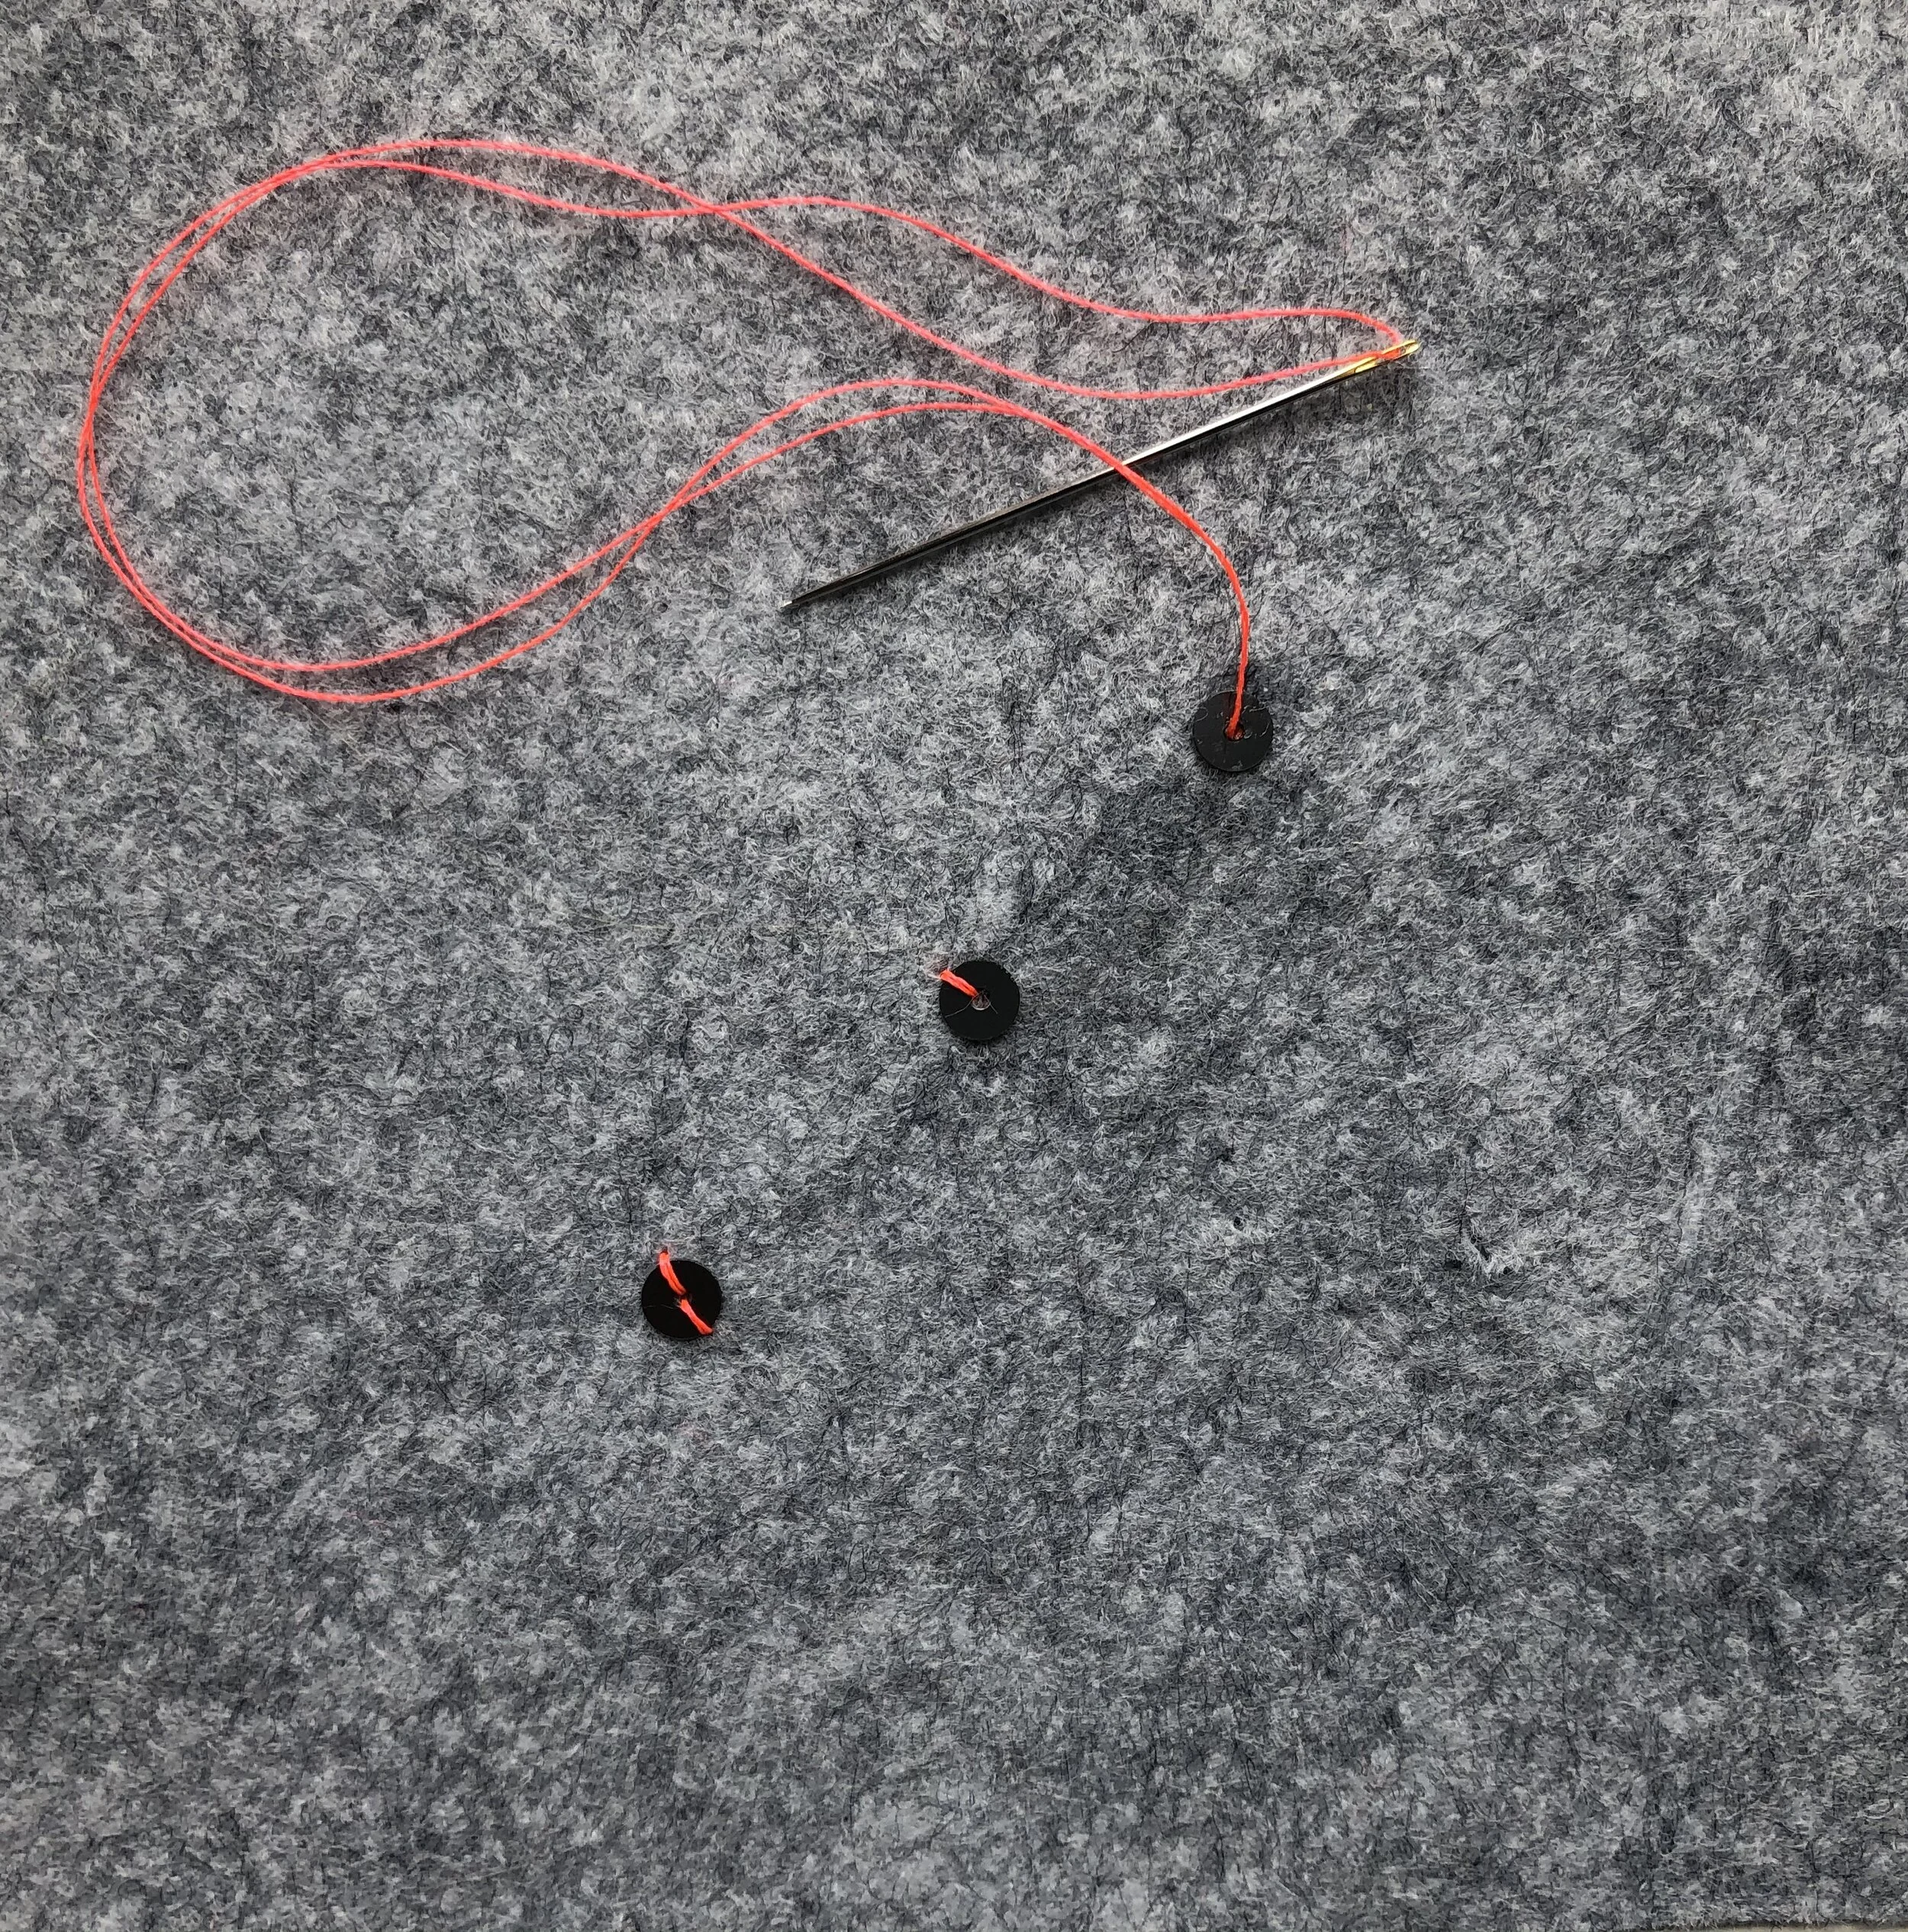
Begin in the same manner as before, with a small hand stitch to secure the thread to the fabric.
insert your needle from underneath the fabric and gently pull up. Thread the sequin to your needle and down the thread to place.
Insert your needle just over the edge of the sequin, through the back and try to come out just to the opposite side.
Push the needle back into the center of the sequin and pull toward the back.
Here are all of the steps again, in order.
As you complete each sequin, you can knot the thread off at the back of your work or just carry it over to the next sequin.
PUTTING IT ALL TOGETHER
My new/old sweater!
Before applying the sequins to my sweater, I outlined each shape with contrasting thread. Then I began to apply the sequins in an overlapping manner following the outline and filling in as I went along.
Remove basting thread and move onto second row of outlining.
Third row of following the outline.
A few more sequins to fill in the center and it is done!
This repair was to an old sweater and one that I have hand-washed many times. However, if you plan to embellish a garment that you might need to dry clean or that you would like to more easily remove the sequins, you could sew each motif separately onto a pieces of organza or tulle as individual appliqués and then stitch them onto your garment.
I have worn the sweater several times since this repair and I have to say, I do love the sparkly casual feel. While it is a bit dressier than many of my other sweaters, it is now a weekly favorite.
If you enjoyed this tutorial, I do have a Pinterest Board where I frequently pin ideas for refashioning and embroidery. Check them out!
XO, Hilarie
Reflections
Have you ever watched yourself on video? If you have, then you might describe it as an entirely shocking, altogether horrifying experience. Or at least cringe worthy. Growing up in the 70’s and 80’s, cameras were really only brought out on occasion, to document something that you wanted to remember. I can’t recall when my family got a video camera, but it was definitely later in life. Maybe in college? I do know that I was at least old enough to not have had to be on the recorded side of it. As I write this, a thought just struck me, I wonder if this new, young generation of kids will ever feel that way about seeing themselves on screen? Maybe since video has woven its way into the day to day experience, they have a wholly different attitude toward it? Perhaps they have grown accustom to seeing themselves in motion and they are more comfortable with their image as opposed to their reflection?
Have you ever watched yourself on video? If you have, then you might describe it as an entirely shocking, altogether horrifying experience. Or at least cringe worthy. Growing up in the 70’s and 80’s, cameras were really only brought out on occasion, to document something that you wanted to remember. I can’t recall when my family got a video camera, but it was definitely later in life. Maybe in college? I do know that I was at least old enough to not have had to be on the recorded side of it. As I write this, a thought just struck me, I wonder if this new, young generation of kids will ever feel that way about seeing themselves on screen? Maybe since video has woven its way into the day to day experience, they have a wholly different attitude toward it? Perhaps they have grown accustom to seeing themselves in motion and they are more comfortable with their image as opposed to their reflection?
This week, I received a blog post from C&T Publishing. Great, I thought, I wonder what it will be about. Imagine my surprise, upon opening, to be met with my picture and a video that we made at Quilt Market last fall to promote my book. To be honest, I was horrified. As of this moment, I still haven’t watched more than the first minute of it. I clicked on the link and immediately panicked when I saw it already had 12 likes and 3 thumbs down. Uggh. Thumbs down? That put my anxiety into an immediate whirlwind.
After thinking about it for the past few days, I asked myself what advice I would give to a friend or even to my own child when met with a similar situation. That change in perspective is a good reminder that growth does not come without challenges. If I want to write and sell books, I need an audience. People like video content- I get that. So, with the goal of growth in mind, I am putting aside my pride and thin skin and going to watch the video.
To be ever mindful that my work is a direct reflection of my own developing state. My intention in sharing with you is to get over the shock and horror and focus instead on how I can improve. To that end, how can I make it better? Is it content? More practice? Presentation skills? If you have a few minutes, I would truly value your thoughts.
Now, who is ready to learn how to modify purse straps with leather?
How to make a detachable shoulder strap for your bag
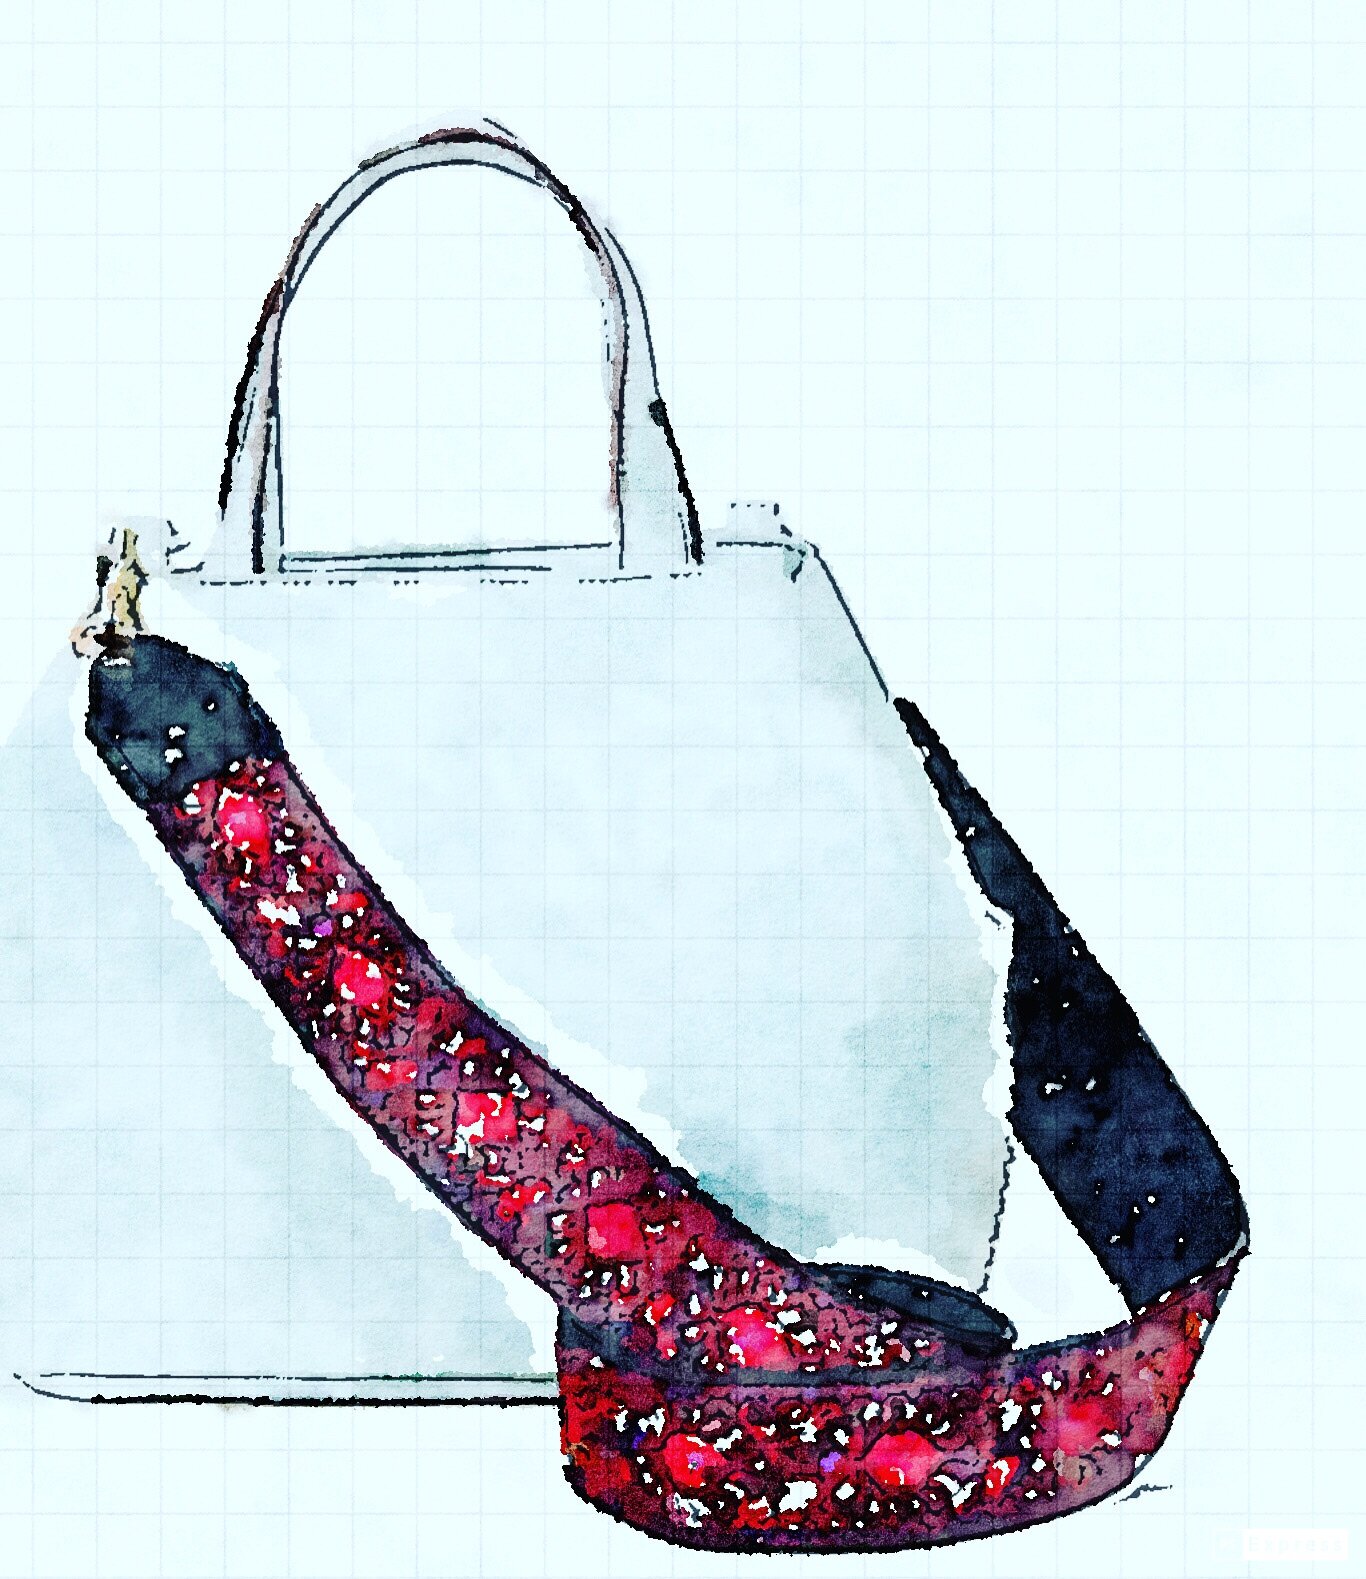
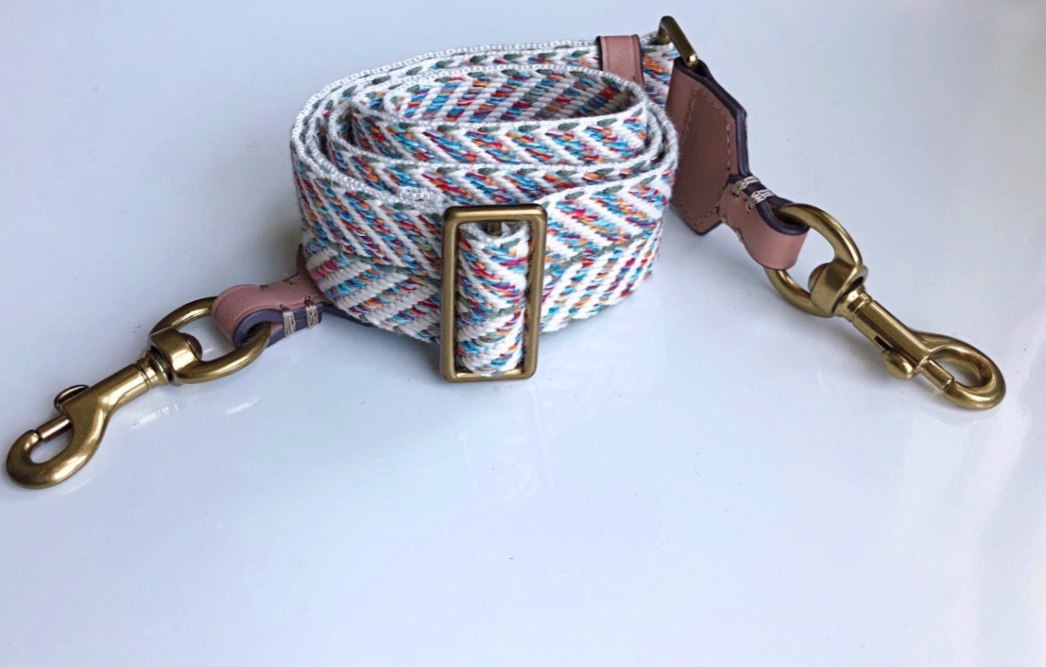
You have seen the new guitar type purse straps, right? While they weren’t really on my radar until early this year when I read an article in the NY Times. Since then, I haven’t been able to get this detachable strap out of my mind. I began to imagine the countless options and reinterpretations. Suddenly it seemed as if each bag I own needed to have its own wardrobe. And now, they do.
By now you have surely seen the new guitar type purse straps, right? They weren’t really on my radar until early this year when I read an article in the NY Times. Since then, I haven’t been able to get this detachable strap out of my mind. Suddenly it seemed as if each bag I own needed to have its own wardrobe. ( And now, they do. ) I began to imagine the countless options and reinterpretations.
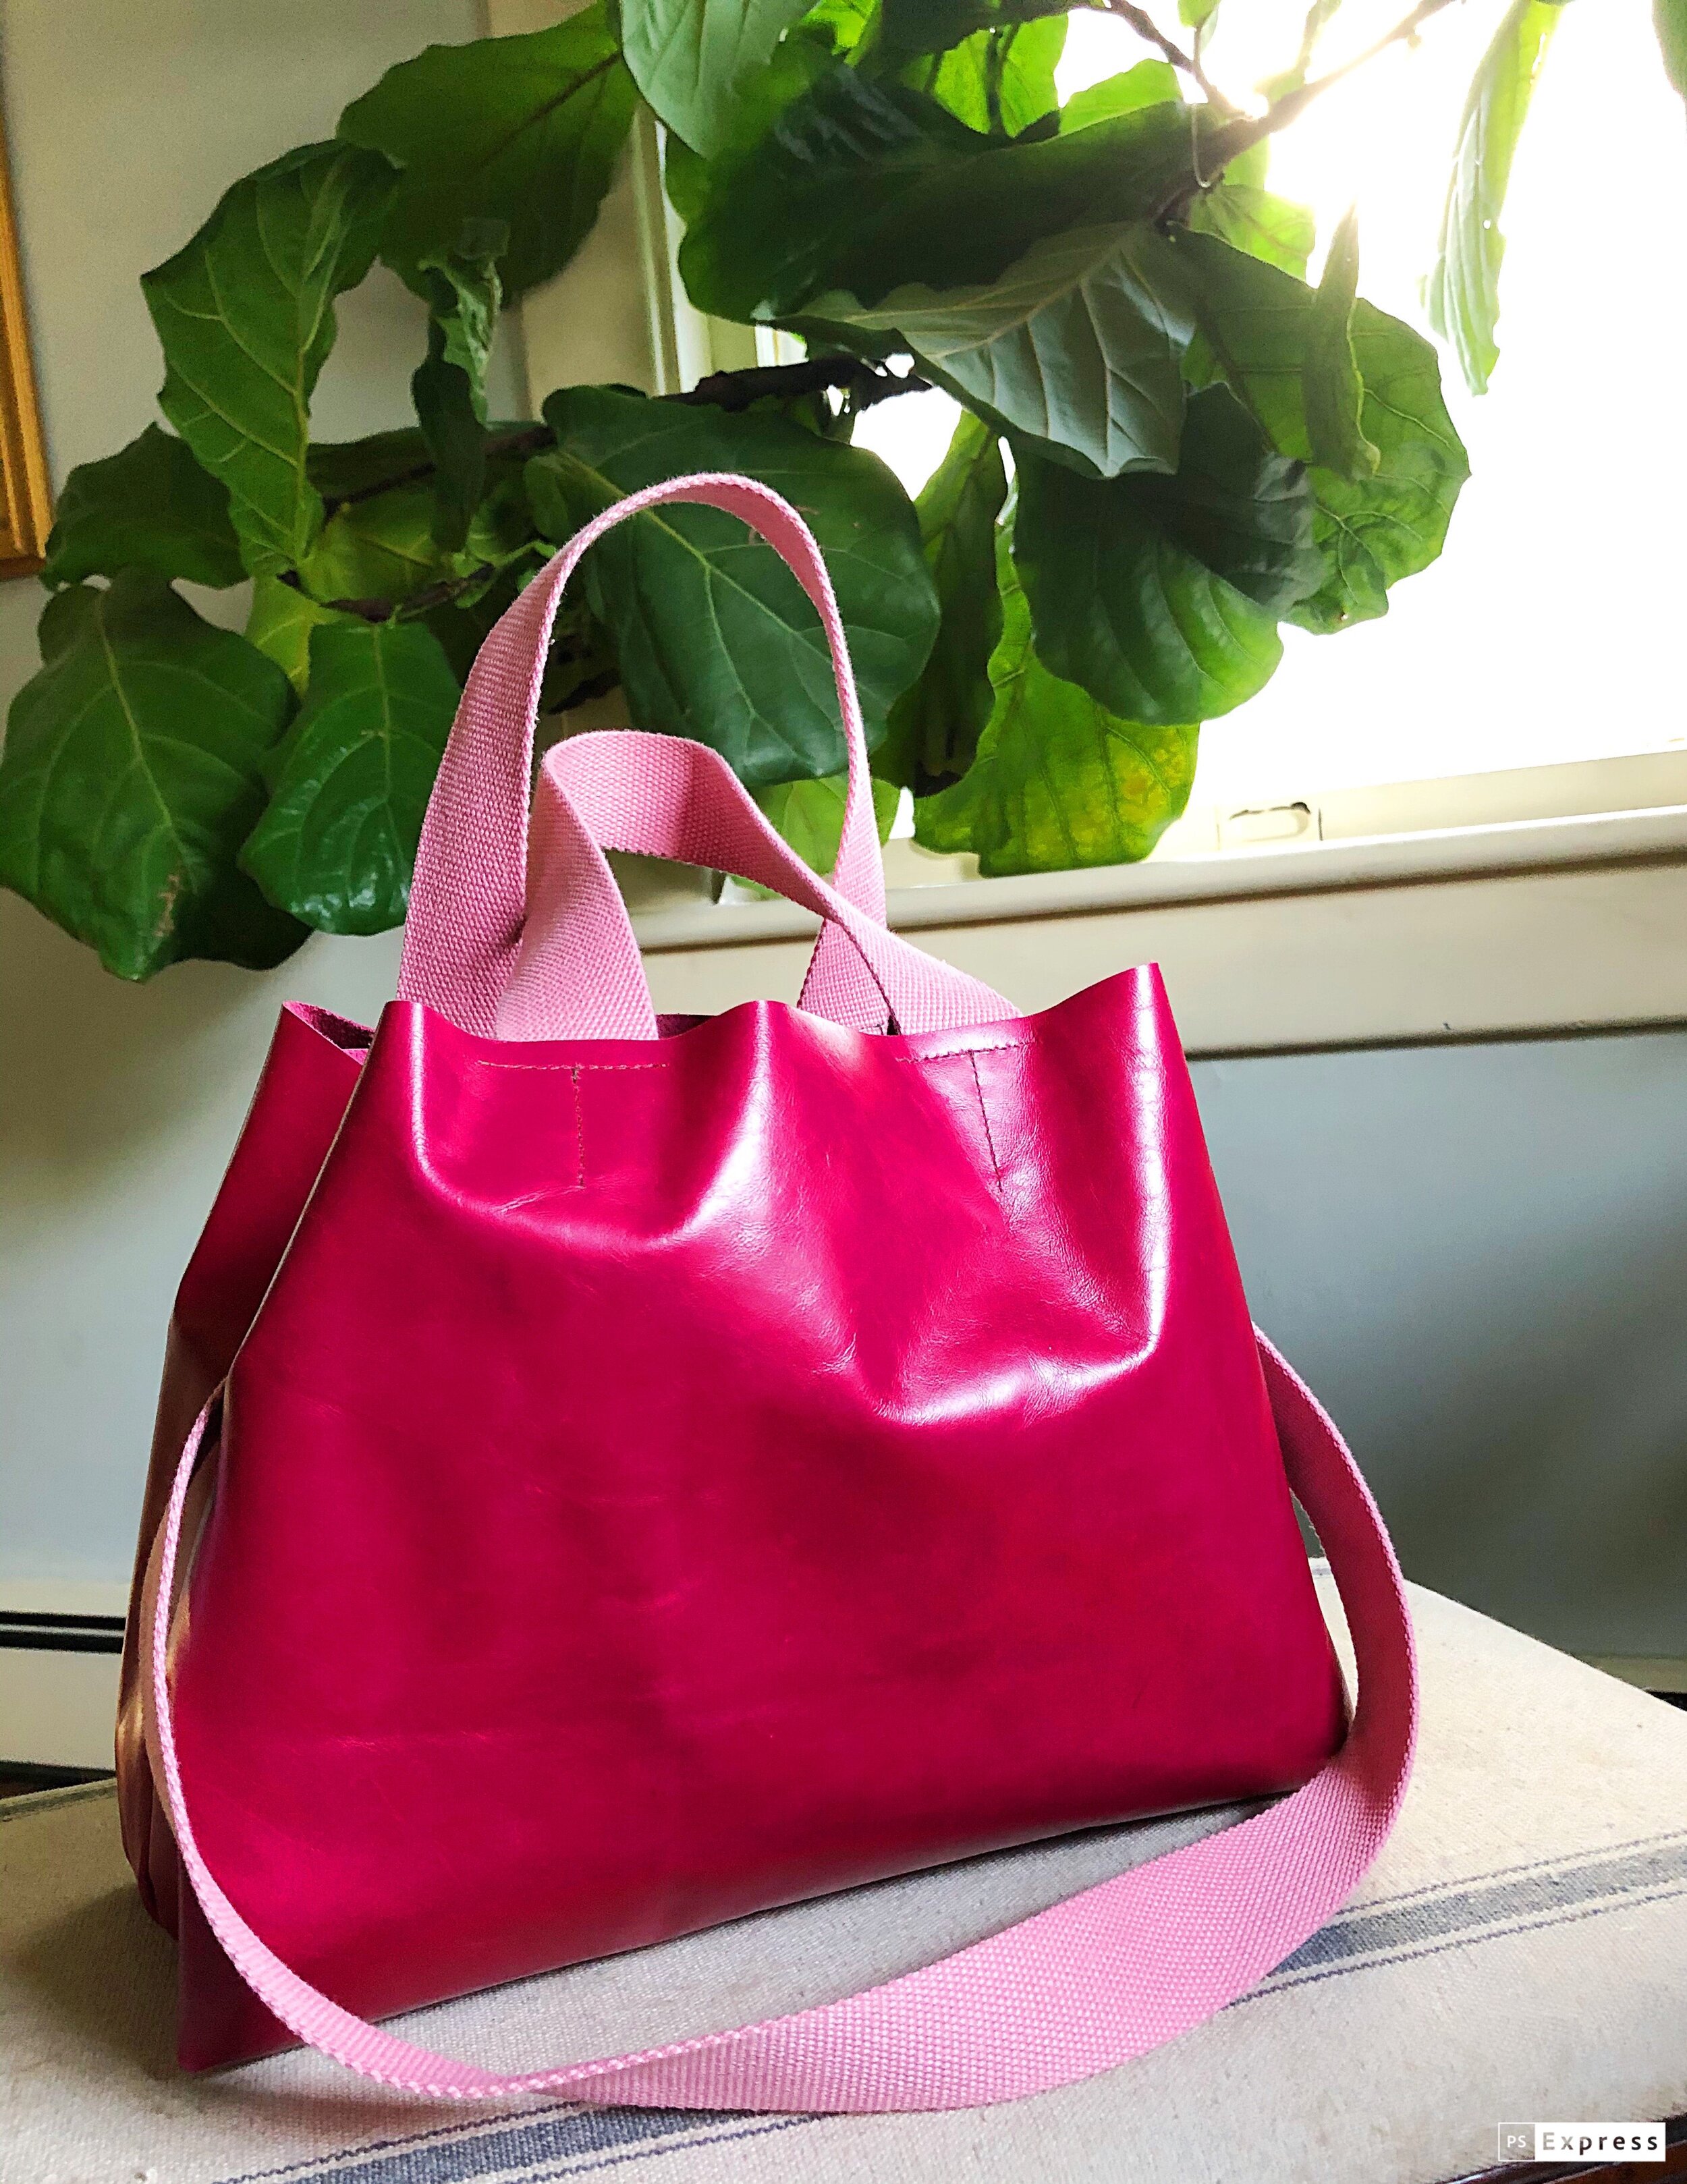
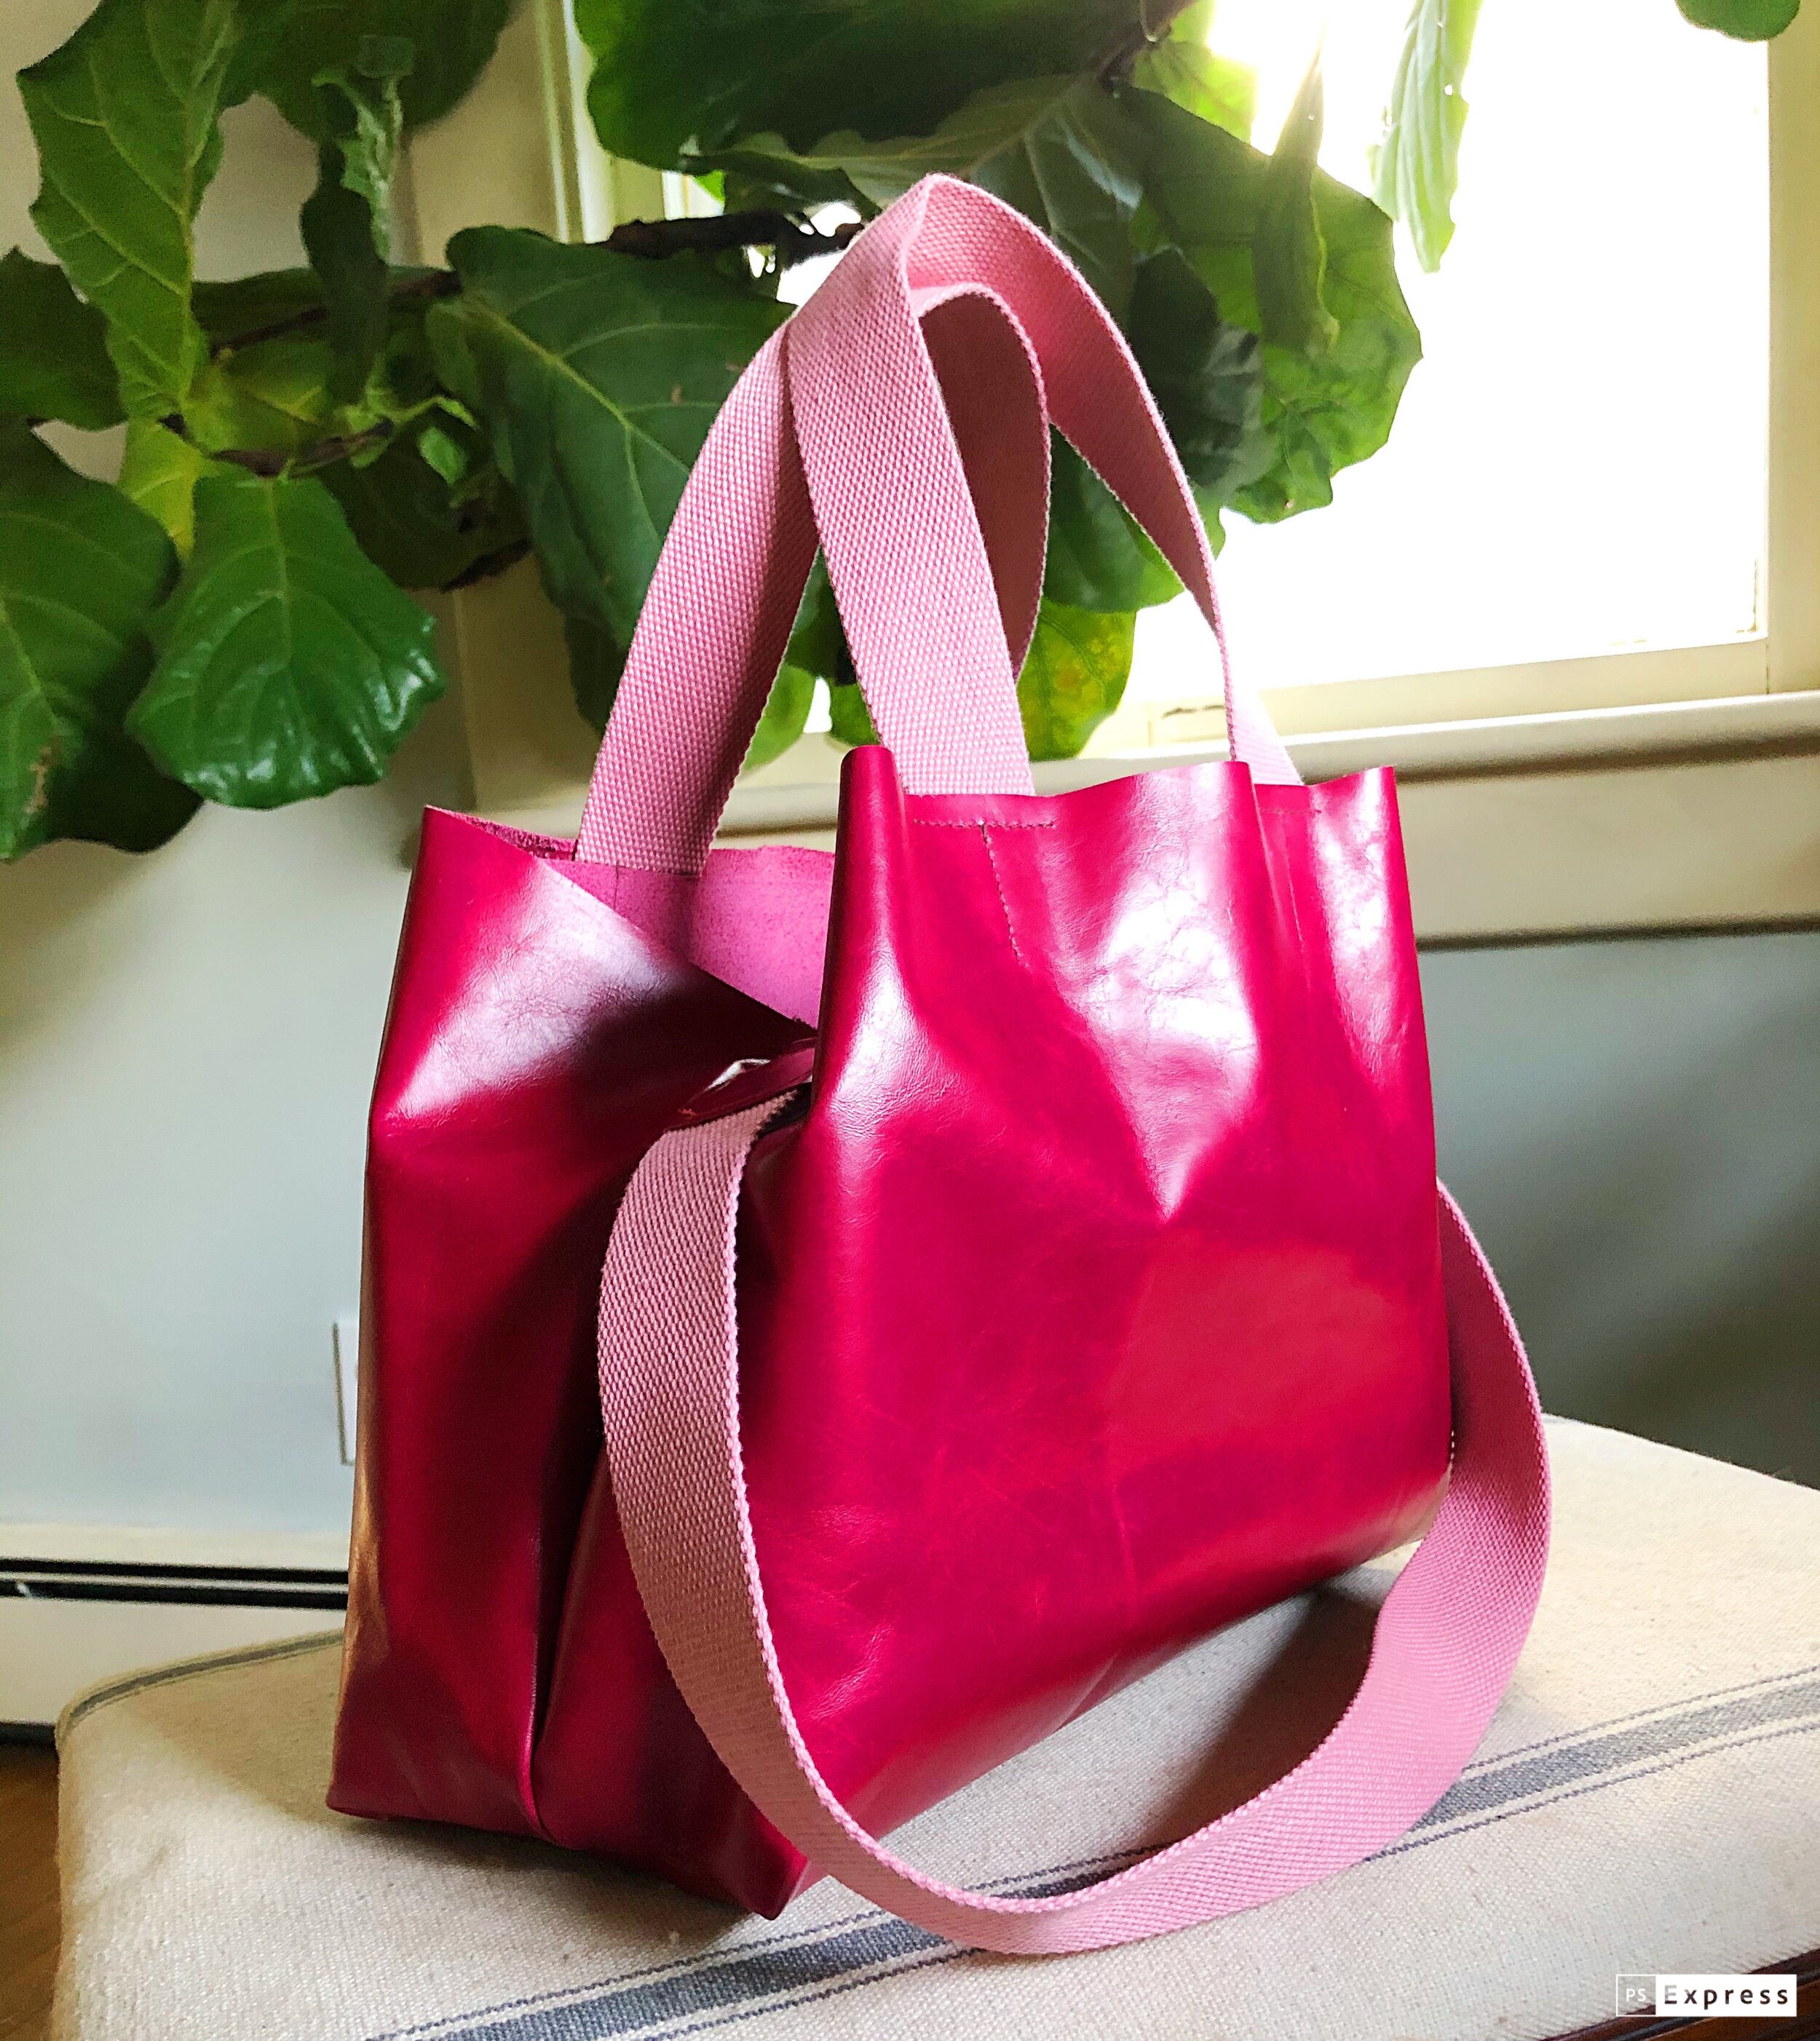
I love the fun of dressing up a bag with a different strap, and watching the transformation. These shoulder straps allows you to instantly add a personal touch to your bag. The first bag that I tried to pair it with was a crossbody style. The new contrasting strap made it so much more fun and interesting. Then I tried it with a belt bag- now that “belt” bag has three different options. It can be worn on the belt, with a crossbody strap and now, it has a new leather top handle. Same bag, three carrying options. Friends, isn’t that reason enough to pull out your sewing machine?
Today I am going to share with you at a shoulder strap tutorial so that you too can make a detachable shoulder strap that speaks to you, fits you and stands apart from the rest of your bag.
The Ultimate Hook-up: Make a detachable shoulder strap for your bag
HOW TO SEW A DETACHABLE PURSE STRAP
MATERIALS AND SUPPLIES
Sewing Machine with a walking foot
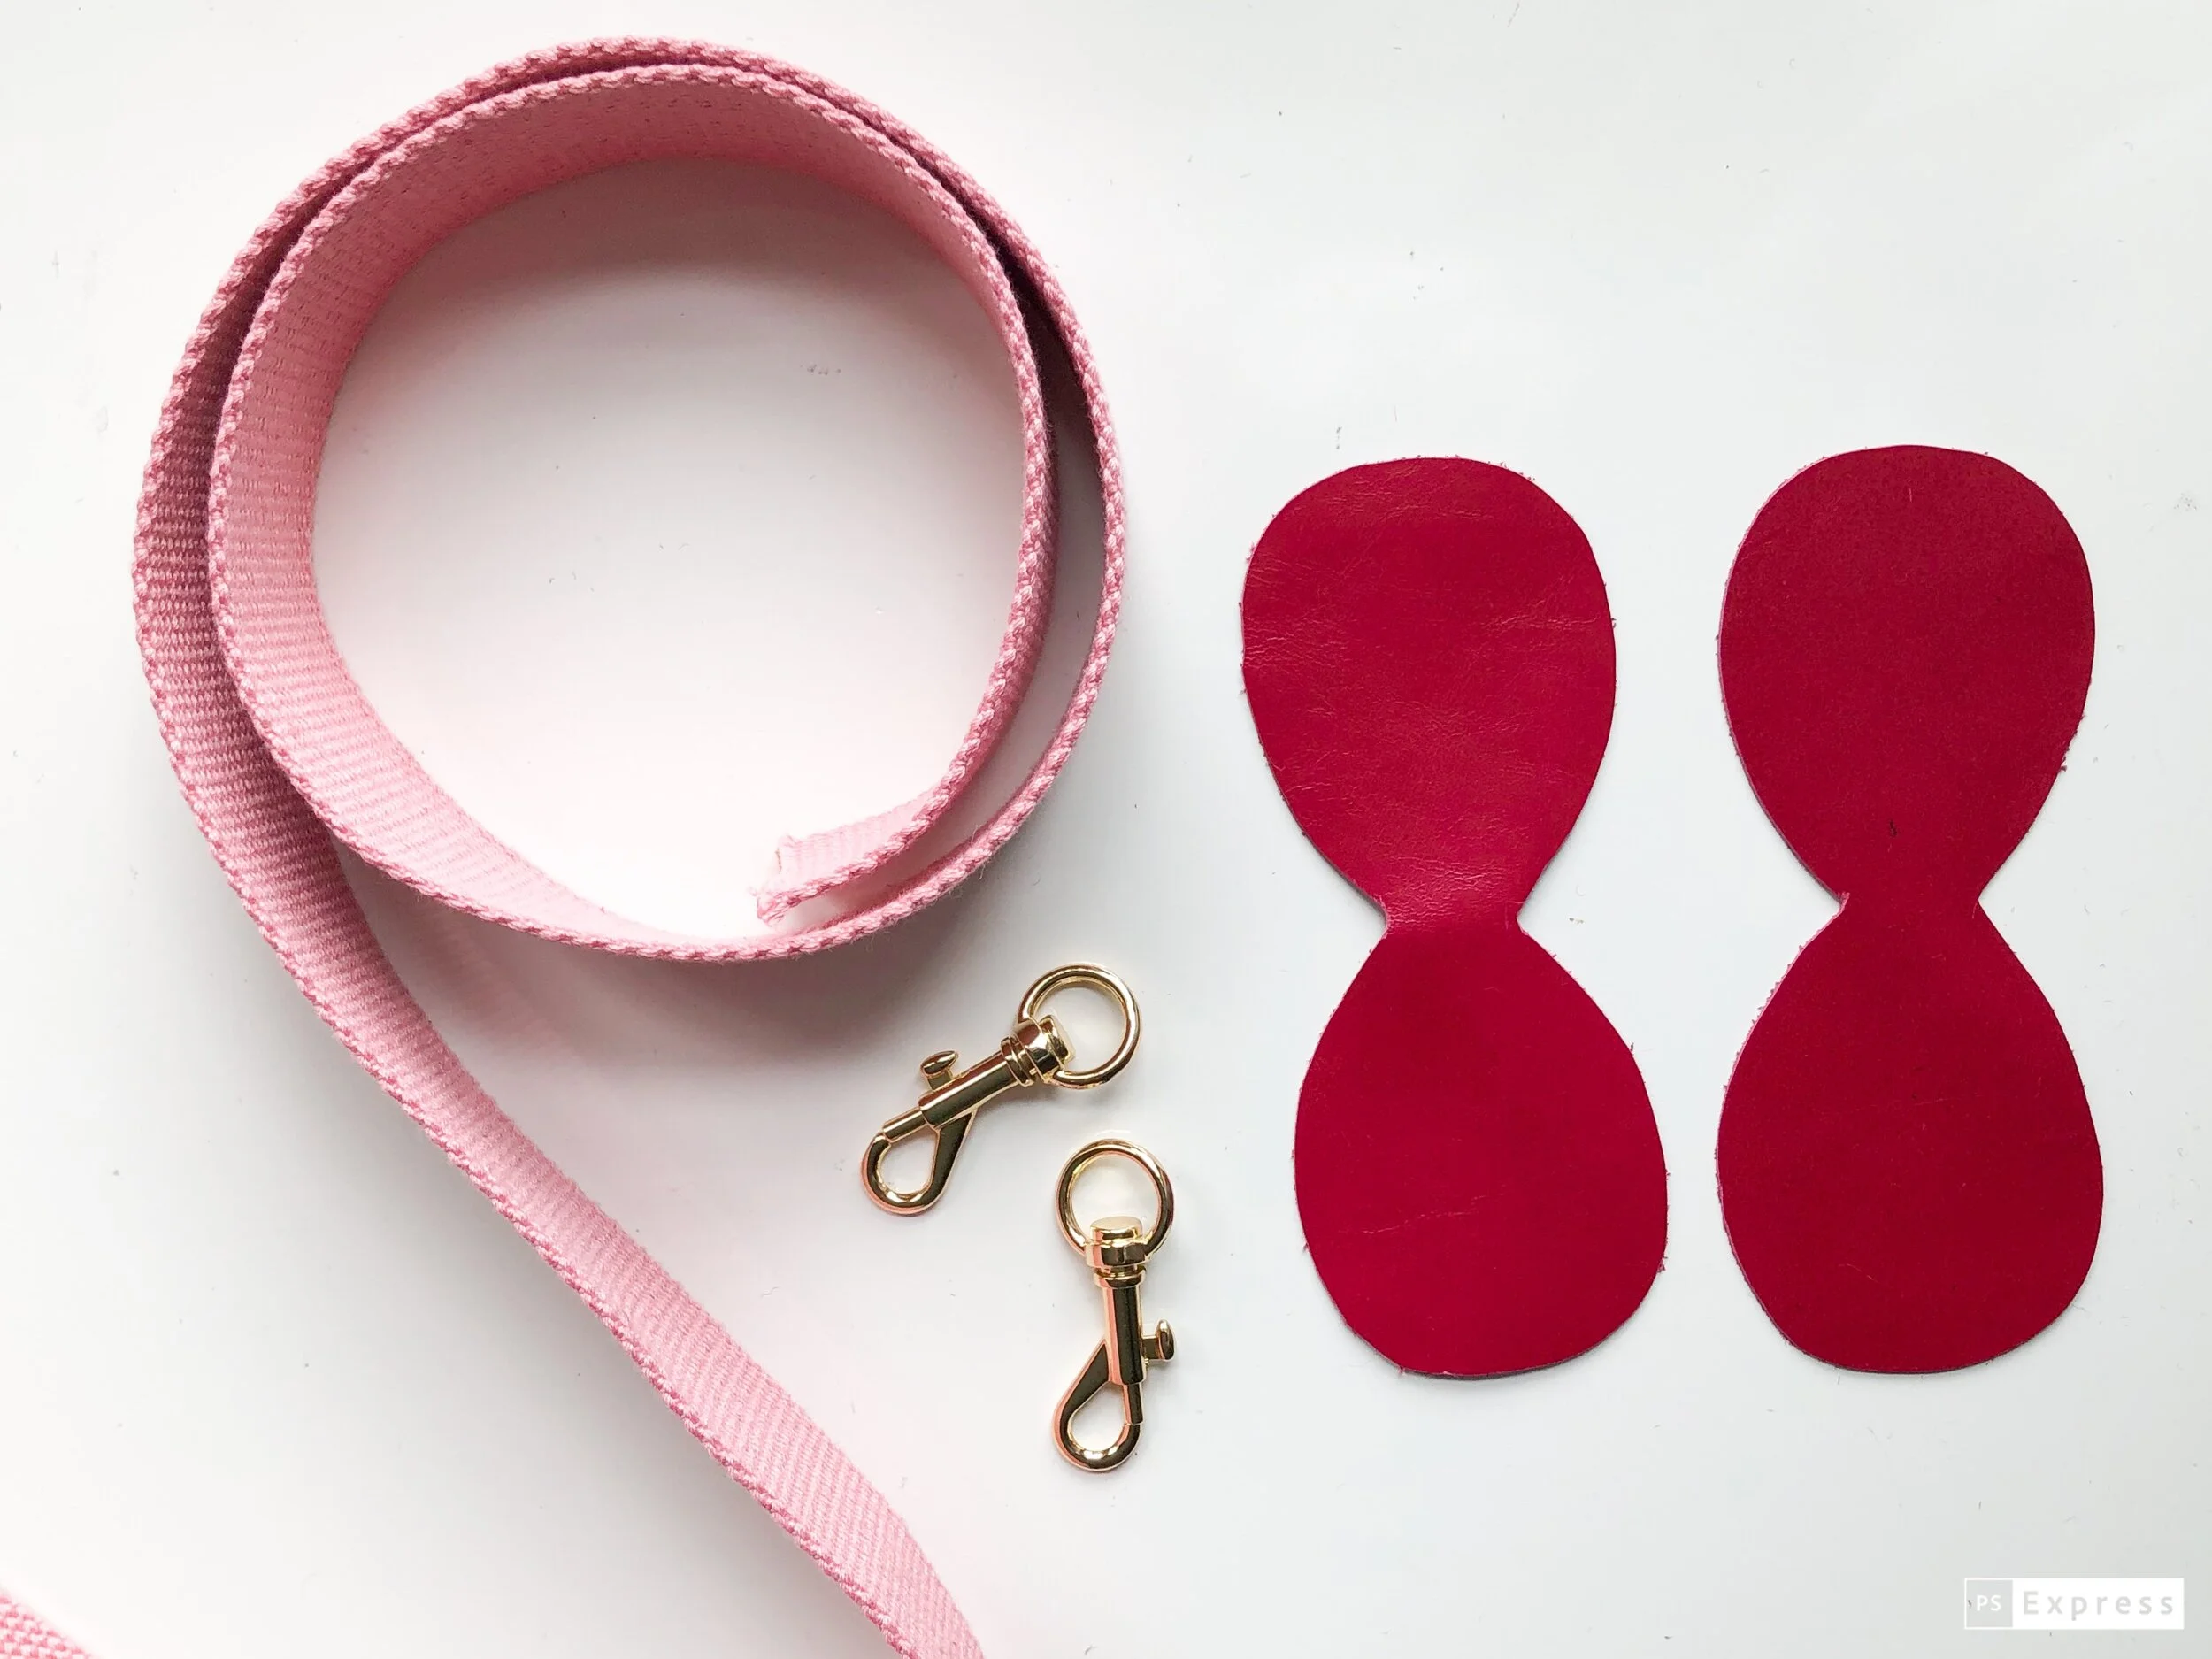
Leather scraps, (8 inch square should be enough)
Two 3/8” x 1 1/2” Swivel Snap Hook for the rounded cap; Two 1 1/2” x 1 3/4” for the squared off version.
1 1/4 Yards of Cotton Webbing Mine is 38mm (roughly 1.5”) wide and 44” long
Mid-weight polyester thread to match leather
Scissors or Rotary cutter
Rubber Cement
Chalk or water soluble fabric marking pen
SIZE
Finished dimensions are approximately: 2”x 47”
NOTES
See previous blog posts on sewing with leather, determining the best strap length and using an adjustable slider .
The leather used in this tutorial is from Leather, Suede, Skins, Inc. in NYC
For best results when sewing with leather, the stitch length should be set to about 7-10 stitches per inch depending on the thickness of the leather. Stitches that are too short make too many holes in the leather which decreases stability.
You can adjust the length of the stitch by testing on a scrap of leather. Does the leather feed evenly? Are there any skipped stitches? How is the tension? Are both the top and bottom threads flat and even?
PATTERN INSTRUCTIONS
Please read through the entire pattern before beginning your bag.
THE PATTERN
If you haven’t used a PDF Pattern before, here is a quick tutorial on printing and assembly: PDF Pattern
For more information on working with patterns, see pages 14-18 in my book, Sew Bags: The Practical
Guide to Making Purses, Totes, Clutches & More; 13 Skill-Building Projects C&T Publishing, 2019
PREPARE
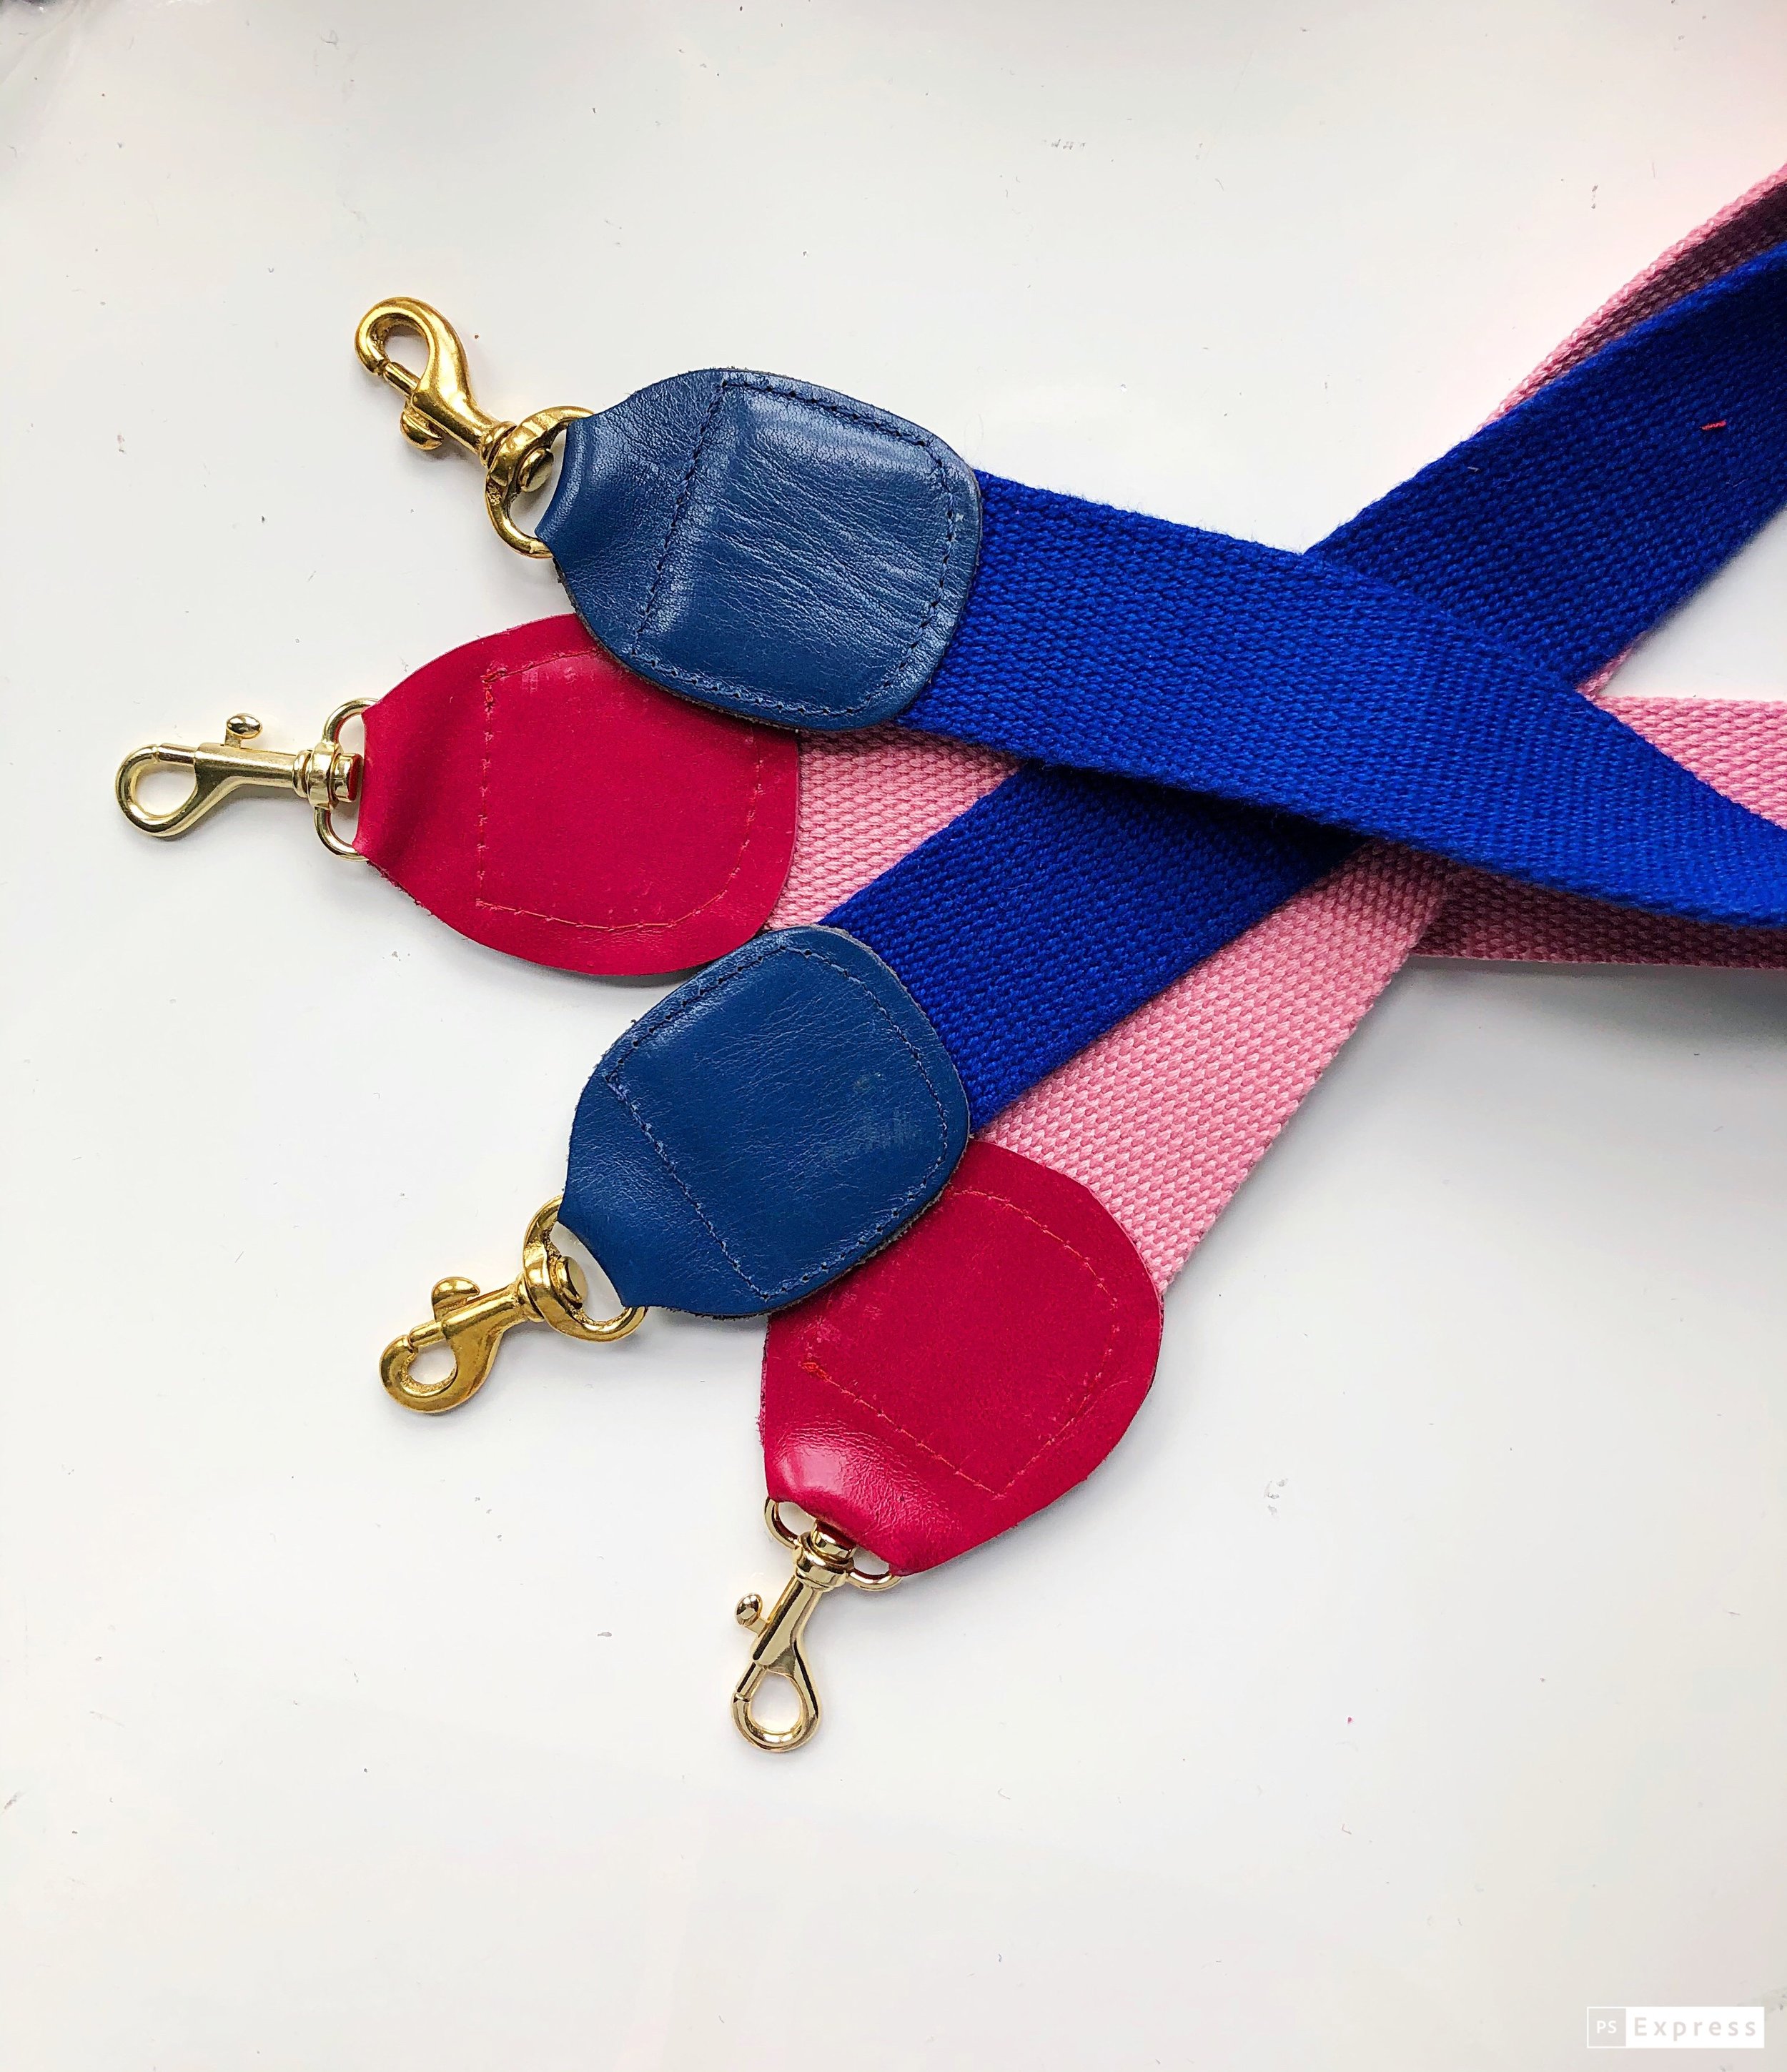
There are two end cap styles to choose from. Please be sure that you select the appropriate sized hardware and webbing to fit. For this tutorial, I am using the more rounded off shape to cap my strap.
Trace the End Cap pattern onto the back side of the leather piece. Repeat for the second piece.
CUT
Carefully cut around the traced line.
Measure and cut the webbing to your desired length. Here is a recent article that may help guide you- or you can just measure a strap that you already own and that fits comfortably.
HARDWARE
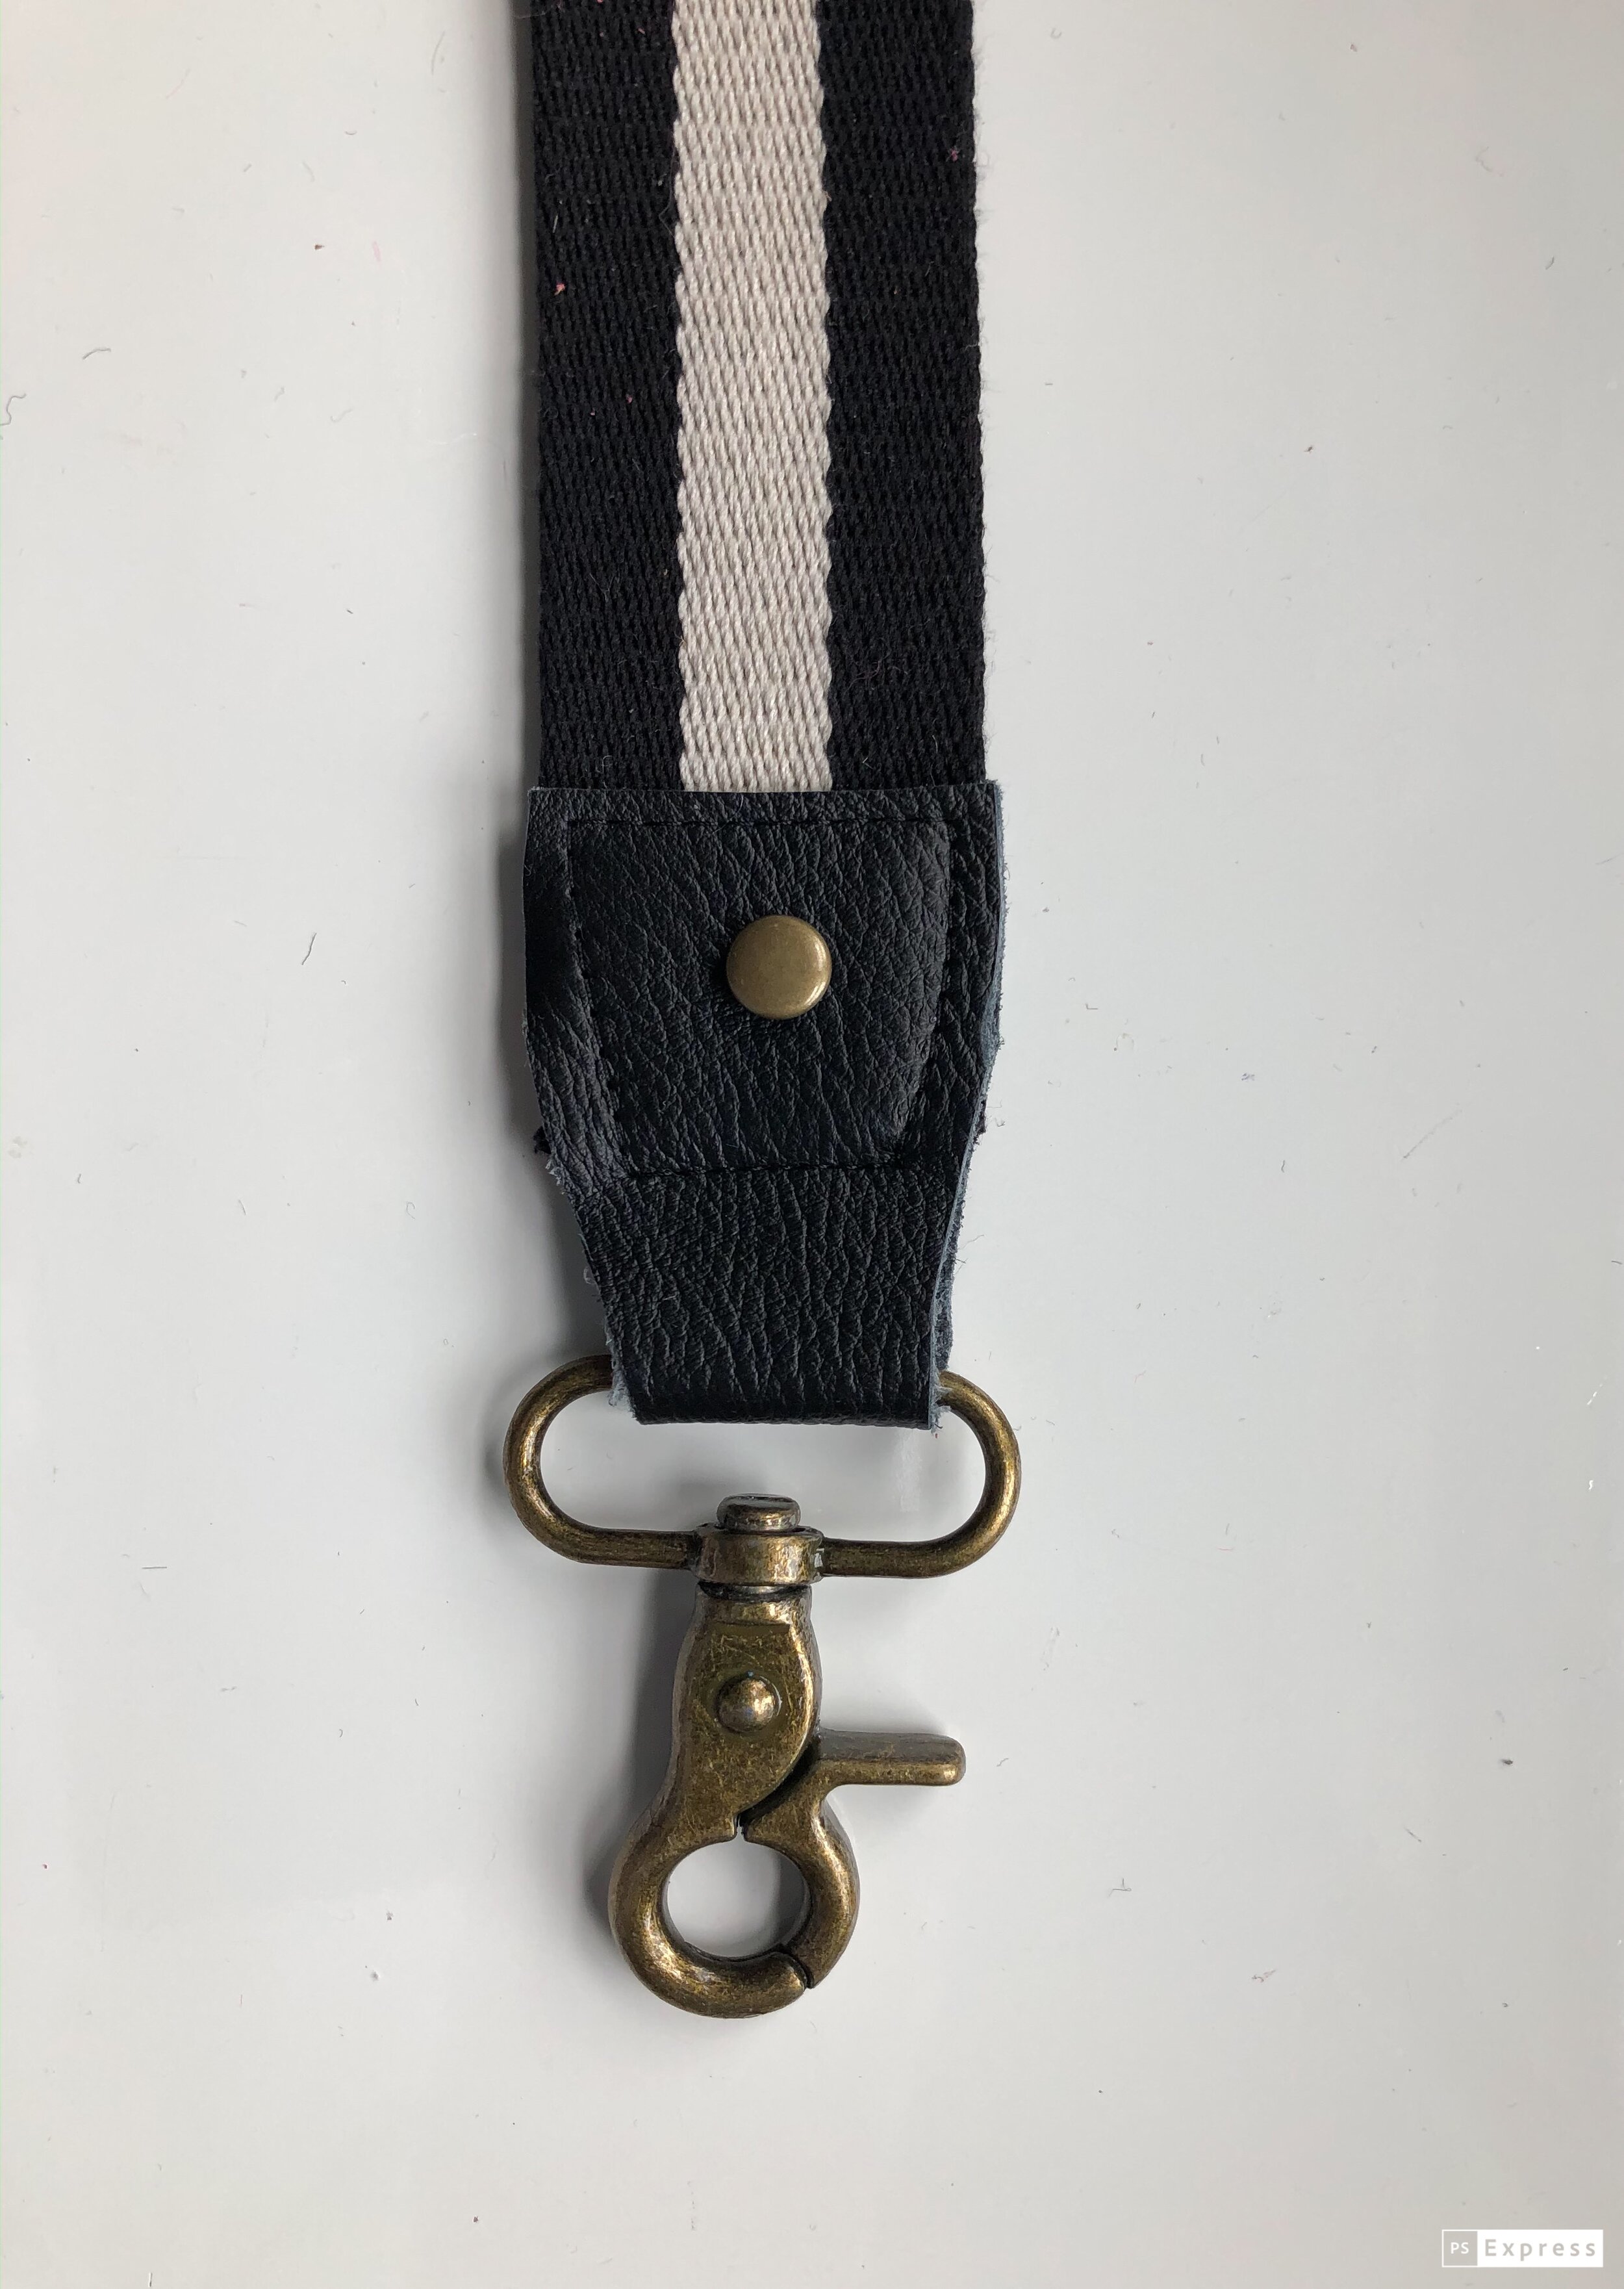
Slide the leather piece into the bottom ring of the snap hook. I find it is easier to fold the leather in half, lengthwise (like a hotdog) and thread it through the ring. Once it is centered, unfold and flatten.
In a well- ventilated area, apply a generous glop of rubber cement to the center of the inside of the leather. Let it sit a moment to get tacky. Place the end of the webbed strap centered on the leather- making sure that the webbing is completely inside the leather. Press to help the rubber cement to adhere.
Add another bit of rubber cement to the top of the strap and press the leather to seal. Allow to dry for a few minutes.
Repeat for the opposite side of the strap end.
MARK
Take a piece of chalk or a water soluble pen and mark the stitching line on the outside of the leather.
SEW
Edgestitch around the end cap. You will be sewing a box that is about one and a half inches square. If you would prefer, feel free to round out your stitching instead (like I did) by just sewing 1/4” from the edge of the leather. It is easier to sew a box shape and get it right the first time. Whichever shape you choose, just try to sew slowly. You can even “walk” your machine if you need to.
TRIM THREADS
Instead of back stitching, I generally recommend leaving long tails and hand knotting the ends, as backstitching can cut the leather. To hide the tails, tie in a double knot as close to the stitch as possible. Thread both ends of the thread onto a hand sewing needle. Insert the needle into the back of the strap of the underside of the seam. Pull through. Tie once again and snip.
Pictures of this method and more details are available here.
I added a rivet to this strap to both dress it up and to provide some additional reinforcement.
My next strap is all laid out and ready to go!
This accessory strap can be used with any bag that has a removable strap. Simply unhook the original, and swap it out for the new and improved.
With this fully customized option, you can breathe new life into old bags. Whether you wear it messenger or standard shoulder style, it is sure to give each outfit some unique style appeal. How will you wear yours? Please share using the hashtags #sewbags #sewbagsthebook #littlestitchstudio
For more bag patterns and sewing techniques, be sure to check out my new book! Sew Bags: The Practical Guide to Making Purses, Totes, Clutches & More; 13 Skill-Building Projects
XOXO, Hilarie
Tips and Tricks for Sewing with leather
There is just nothing like sewing or crafting with beautiful materials. Chief among them for me is leather.
One of the reasons that I was late to release a pattern that requires leather is that for many people, it is tricky to acquire. It is not like you can stop by your local fabric shop and pick up a yard or two. Additionally, while leather is not difficult to sew, you do have to have a few extras available to make it turn out looking fantastic.
There is just nothing like sewing or crafting with beautiful materials. Chief among them for me is leather.
One of the reasons that I was late to release a pattern that requires leather is that for many people, it is tricky to acquire. It is not like you can stop by your local fabric shop and pick up a yard or two. Additionally, while leather is not difficult to sew, you do have to have a few extras available to make it turn out looking fantastic. When I wrote my book, one thing that I really wanted to stress was to not feel the urge to go out and purchase everything that you think you “might” need. As it never really ends- I promise! 45 years in and each time I learn a new technique or take interest in some new esoteric path, the cash flow woes begin! Which brings me back to the point, “Do as I say, not as I do” :)
Life is funny sometimes! Through complete serendipity, and the power of Instagram, I have made a new friend, Faina, who happens to own a leather shop! Leather, Suede, Skins, Inc. in NYC. She so generously shared some of her gorgeous leather with me to make the Poppy Convertible Tote and tutorial. But more than that, you now have a place to shop for leather and an expert to consult! Our hope is that together, we can show you how easy and fun it is to sew with leather.
There are a few supplies that you will need to get started. While some are truly necessary to achieve the correct finished look and make the process so much more enjoyable! There are a few others that are more in the “nice to have” category. I’ll share both with you.
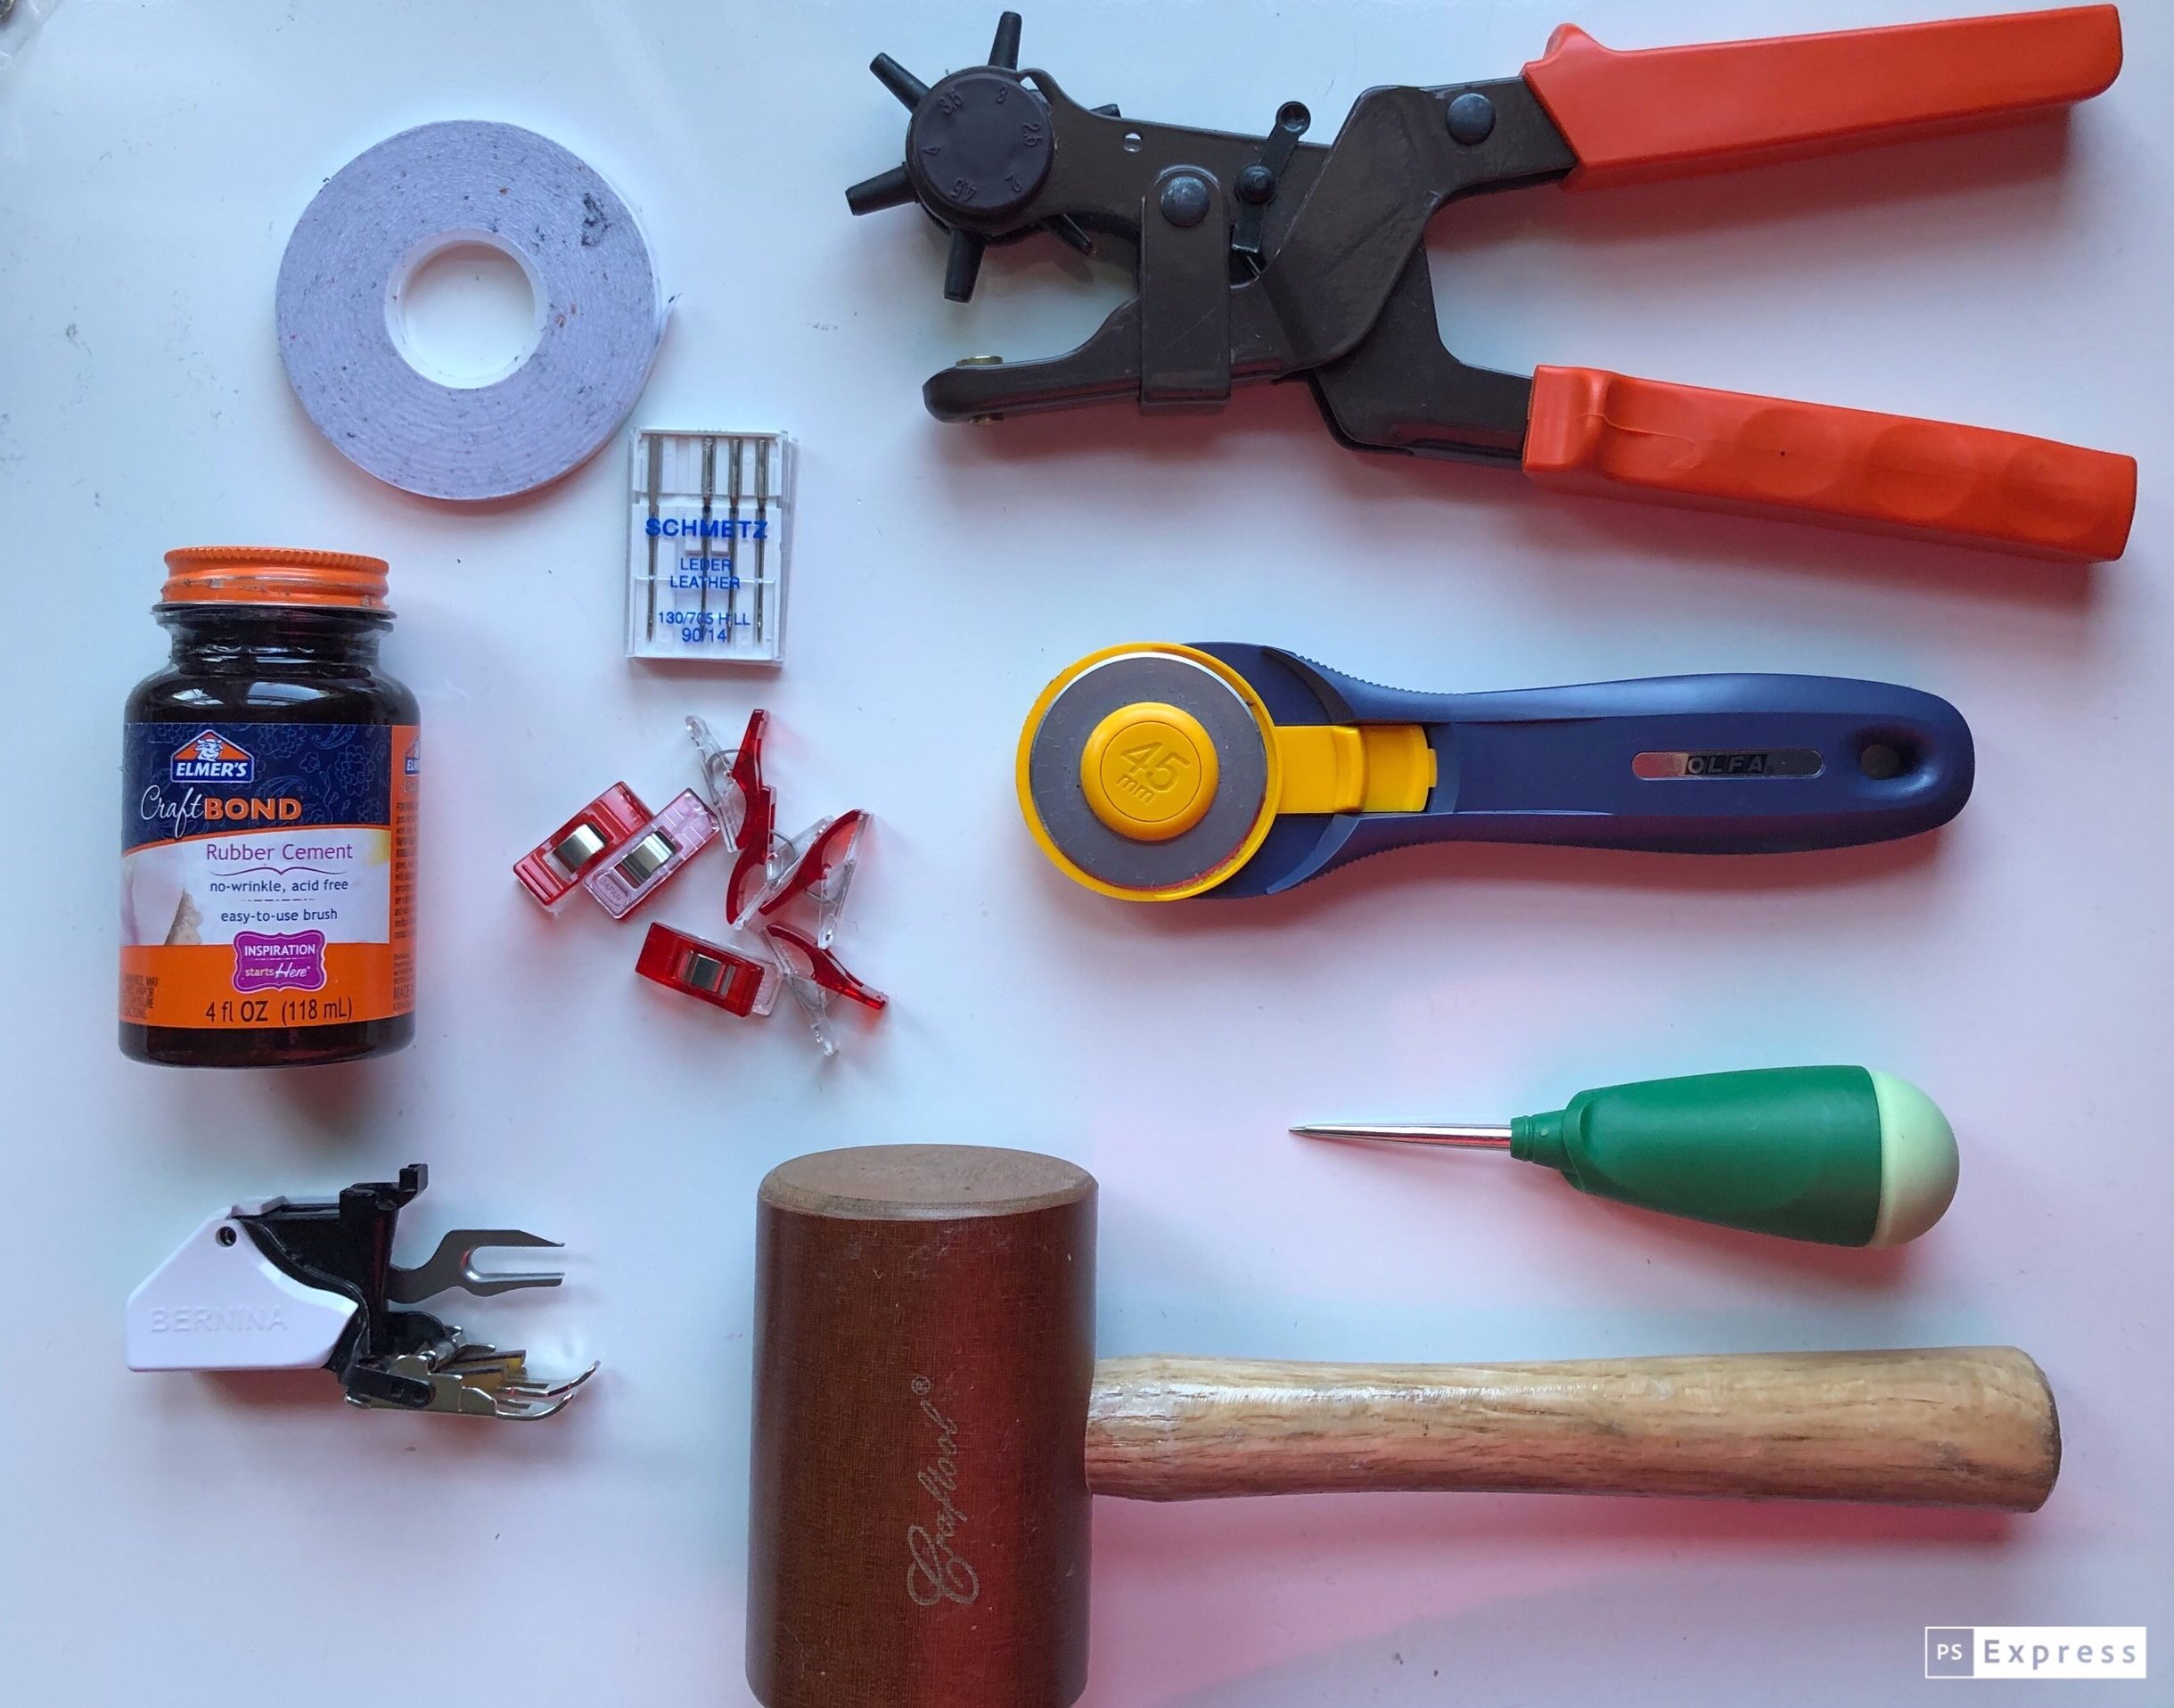
MY FAVORITE LEATHER SEWING TOOLS
Walking Foot, or Even-Feed Foot Don’t be intimidated- the walking foot is your friend! This genius device will evenly feed multiple layers of fabric or leather through your machine. No shifting, dragging or puckering.
Silk or Polyester Thread- this is my favorite Additonally, topstitching thread or denim thread works too. Be sure that it is medium weight and made of silk or polyester. Cotton thread will fray and deteriorate over time due to the chemical reaction to the tannins in the leather.
Double Sided Tape Double-sided leather tape comes can hold layers of leather together for stitching and can also be used to hold seams flat. Please remember to test on scrap leather before trying on your project.
Wonder Clips (Medium sized binder clips work too.) Unlike fabric, pinning leather will leave holes. Instead try using clips.
Microtex or leather Sewing Machine Needles These needles have a special shape and point which is designed to pierce leather with little resistance.
Mallet A rubber or bakelite mallet is used to lightly tap seams in order to flatten them.
Rubber Cement Rubber cement works well for gluing seams flat.
Straight Awl My go-to tool to punch holes or enlarge existing holes in canvas and leather.
Rotary Cutter- This smaller one is great for detail work and the larger size can go through leather so easily.
Leather Hole Punch Punch neat and clean holes in leather and canvas. An essential for preparing straps for hardware.
While each of these tools is really helpful, the ones that you truly “need” to begin sewing with leather are the correct needle, thread, walking foot and clips or tape. The rest can be acquired over time. You do not have to have every notion, attachment and gadget. Instead, I encourage you to start small and build your supply stash as you build your skills.
Download your free PDF sewing pattern to make the Poppy Convertible Tote
When learning to sew- or to sew with a new techniques, please take your time and concentrate on accuracy. Unlike sewing with regular fabric, sewing with leather, the threads can't just be pulled out without leaving holes from the previous stitching. By slowing down and concentrating on learning a new skill, you're much more likely to achieve a result you're really proud of.
I hope these tips help you feel more confident about sewing with leather. If you have any questions please feel free to get in touch. And if you’re looking for a fun project to practice your leather sewing skills, the Poppy Convertible Tote is a great first project. It only requires sewing straight lines- no curves, and the pattern gives you detailed, fully photographed instructions to guide you step by step as you make your first leather bag.
XOXO, Hilarie
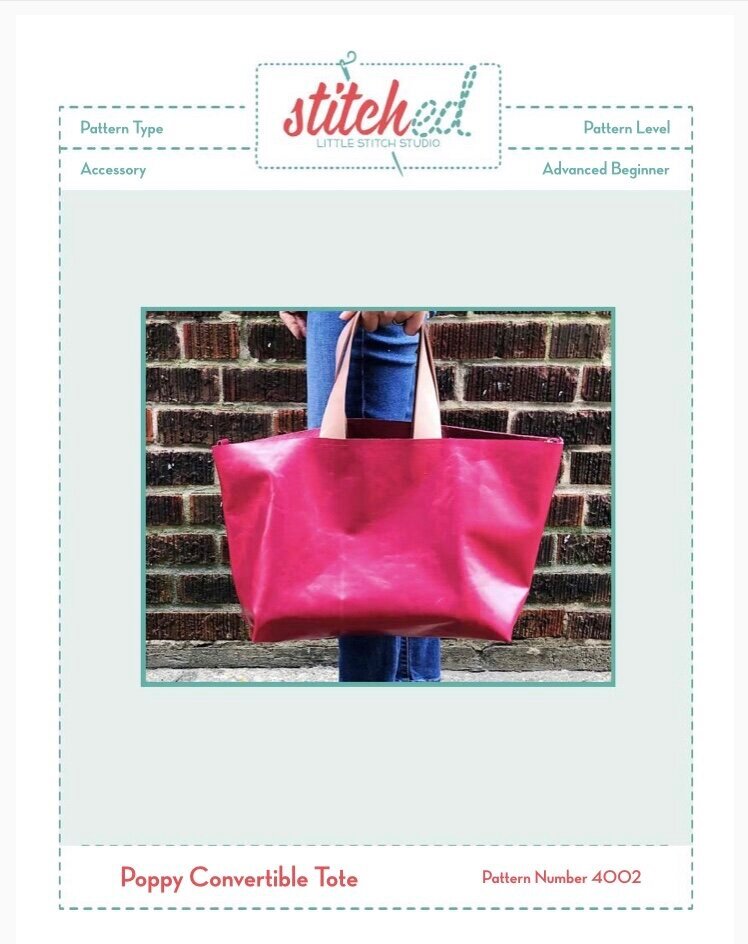
The Poppy Convertible Tote PDF Pattern and Tutorial
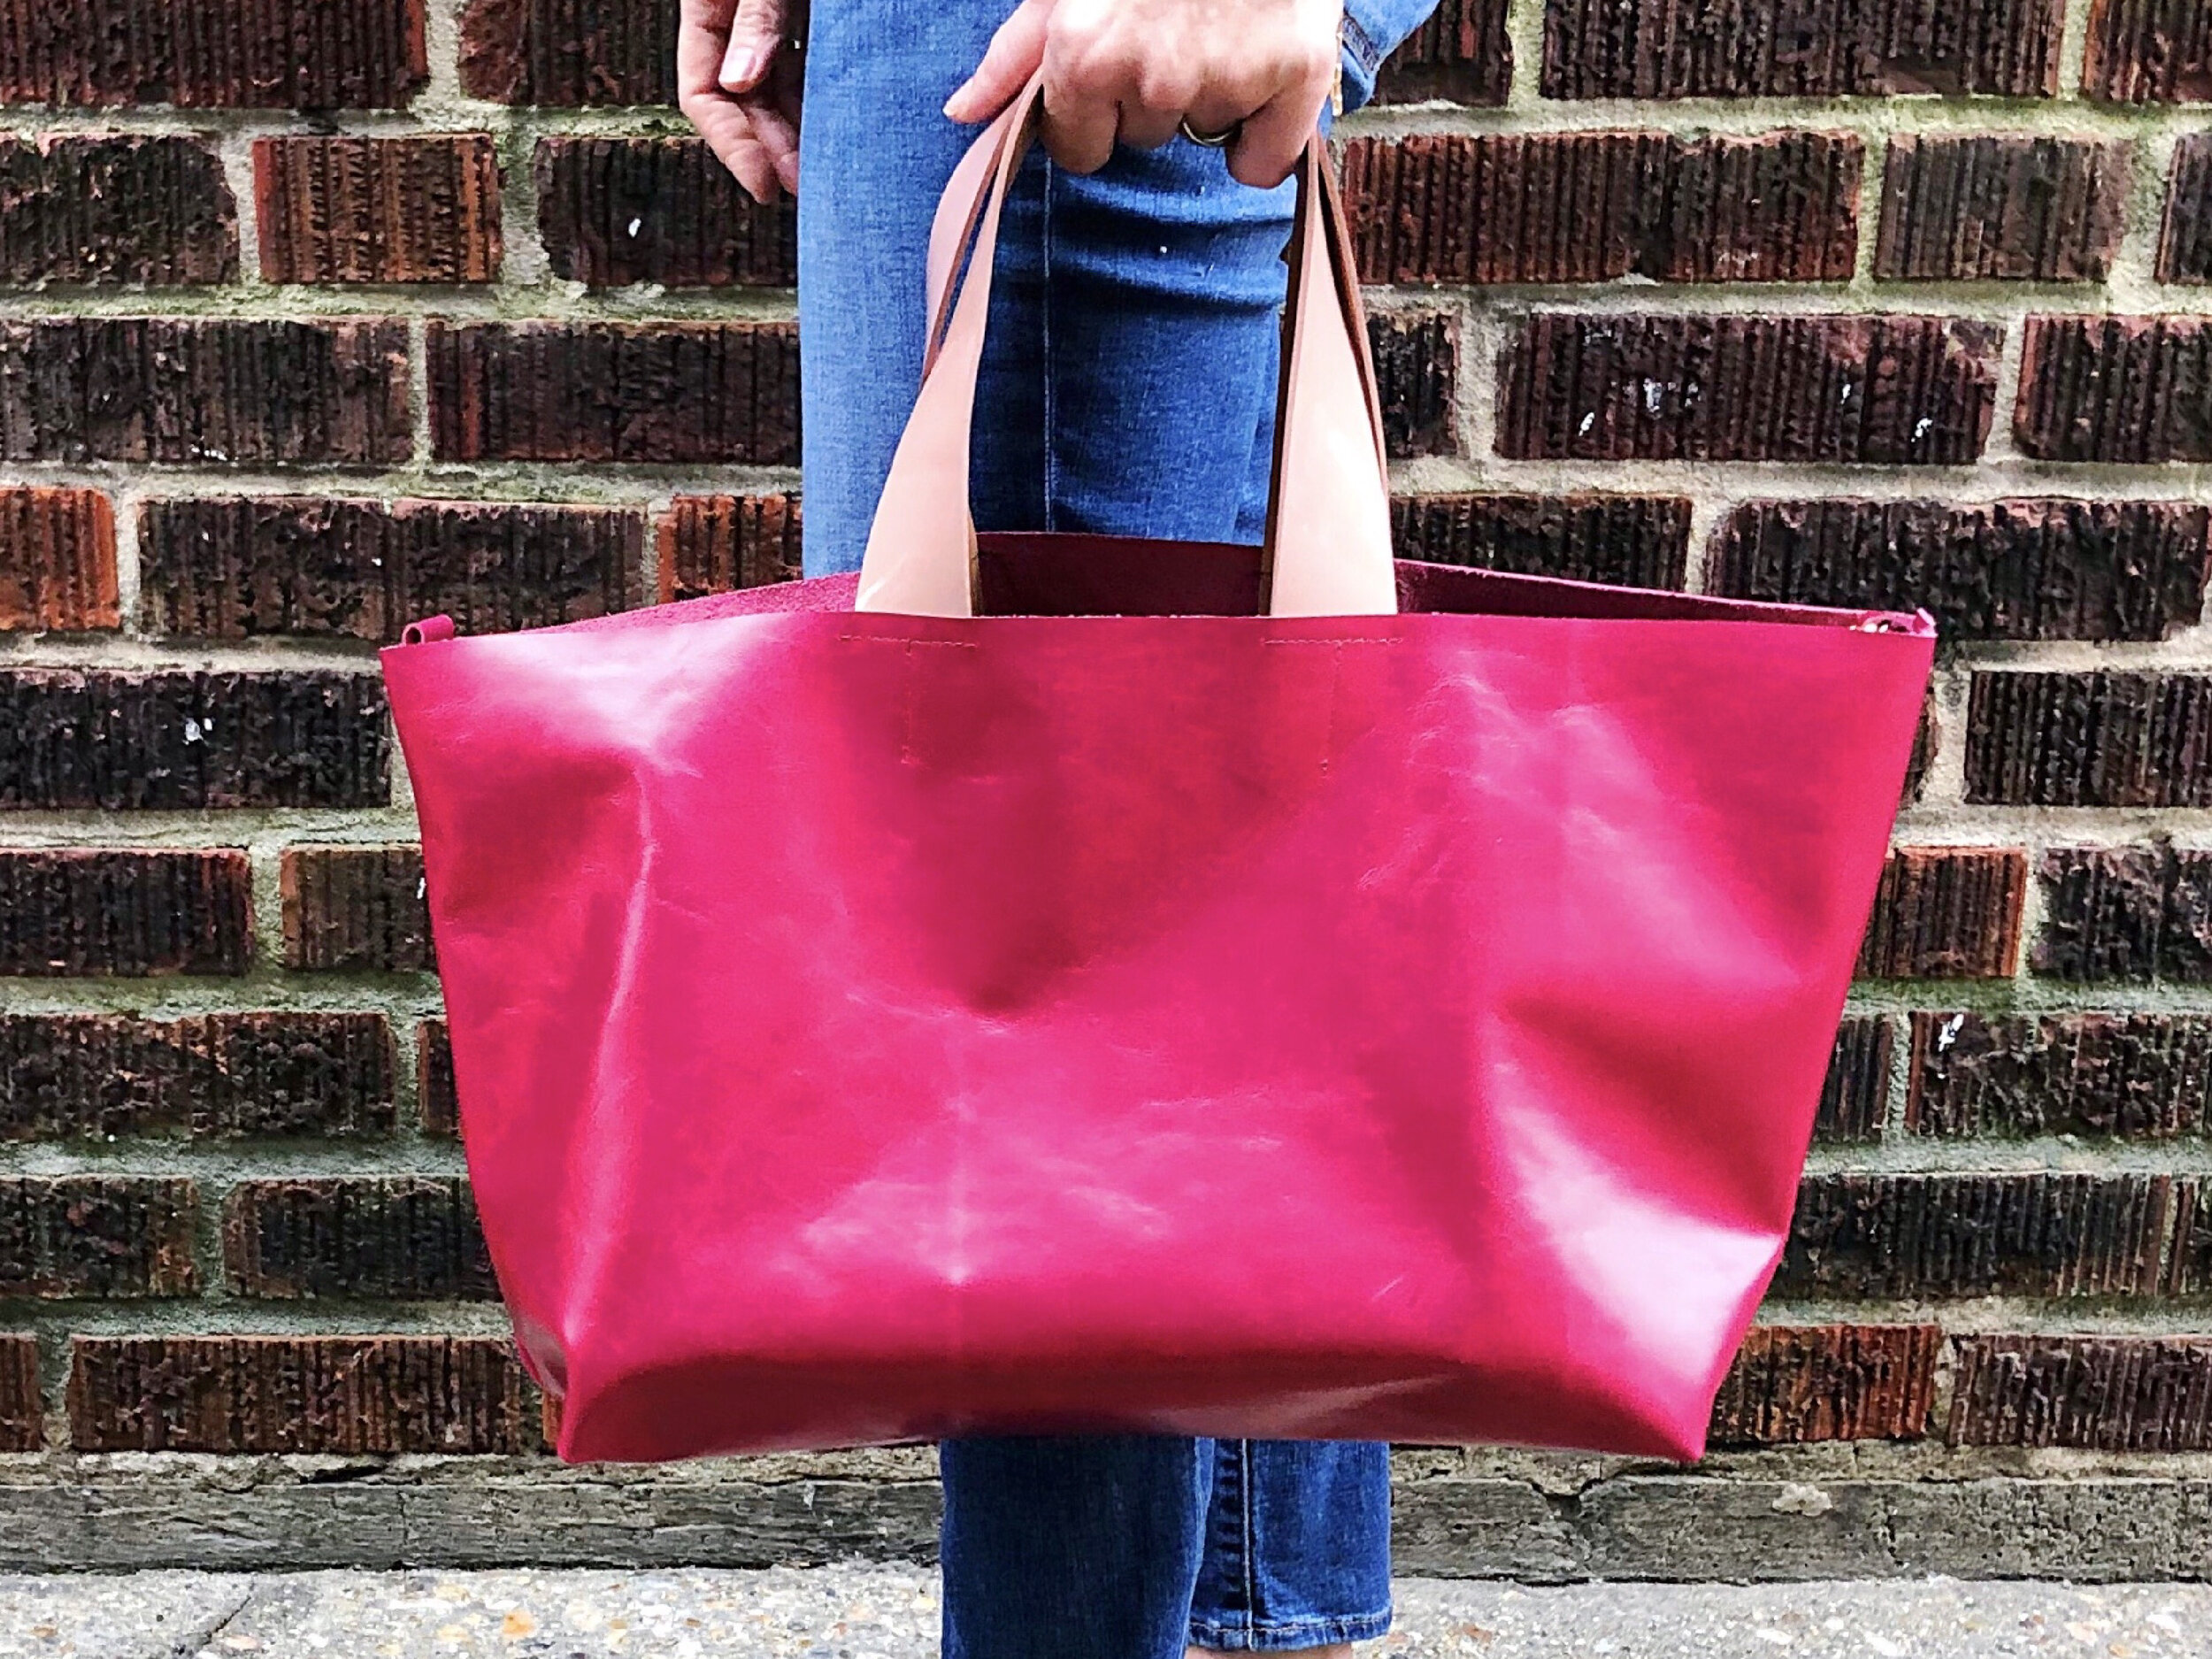
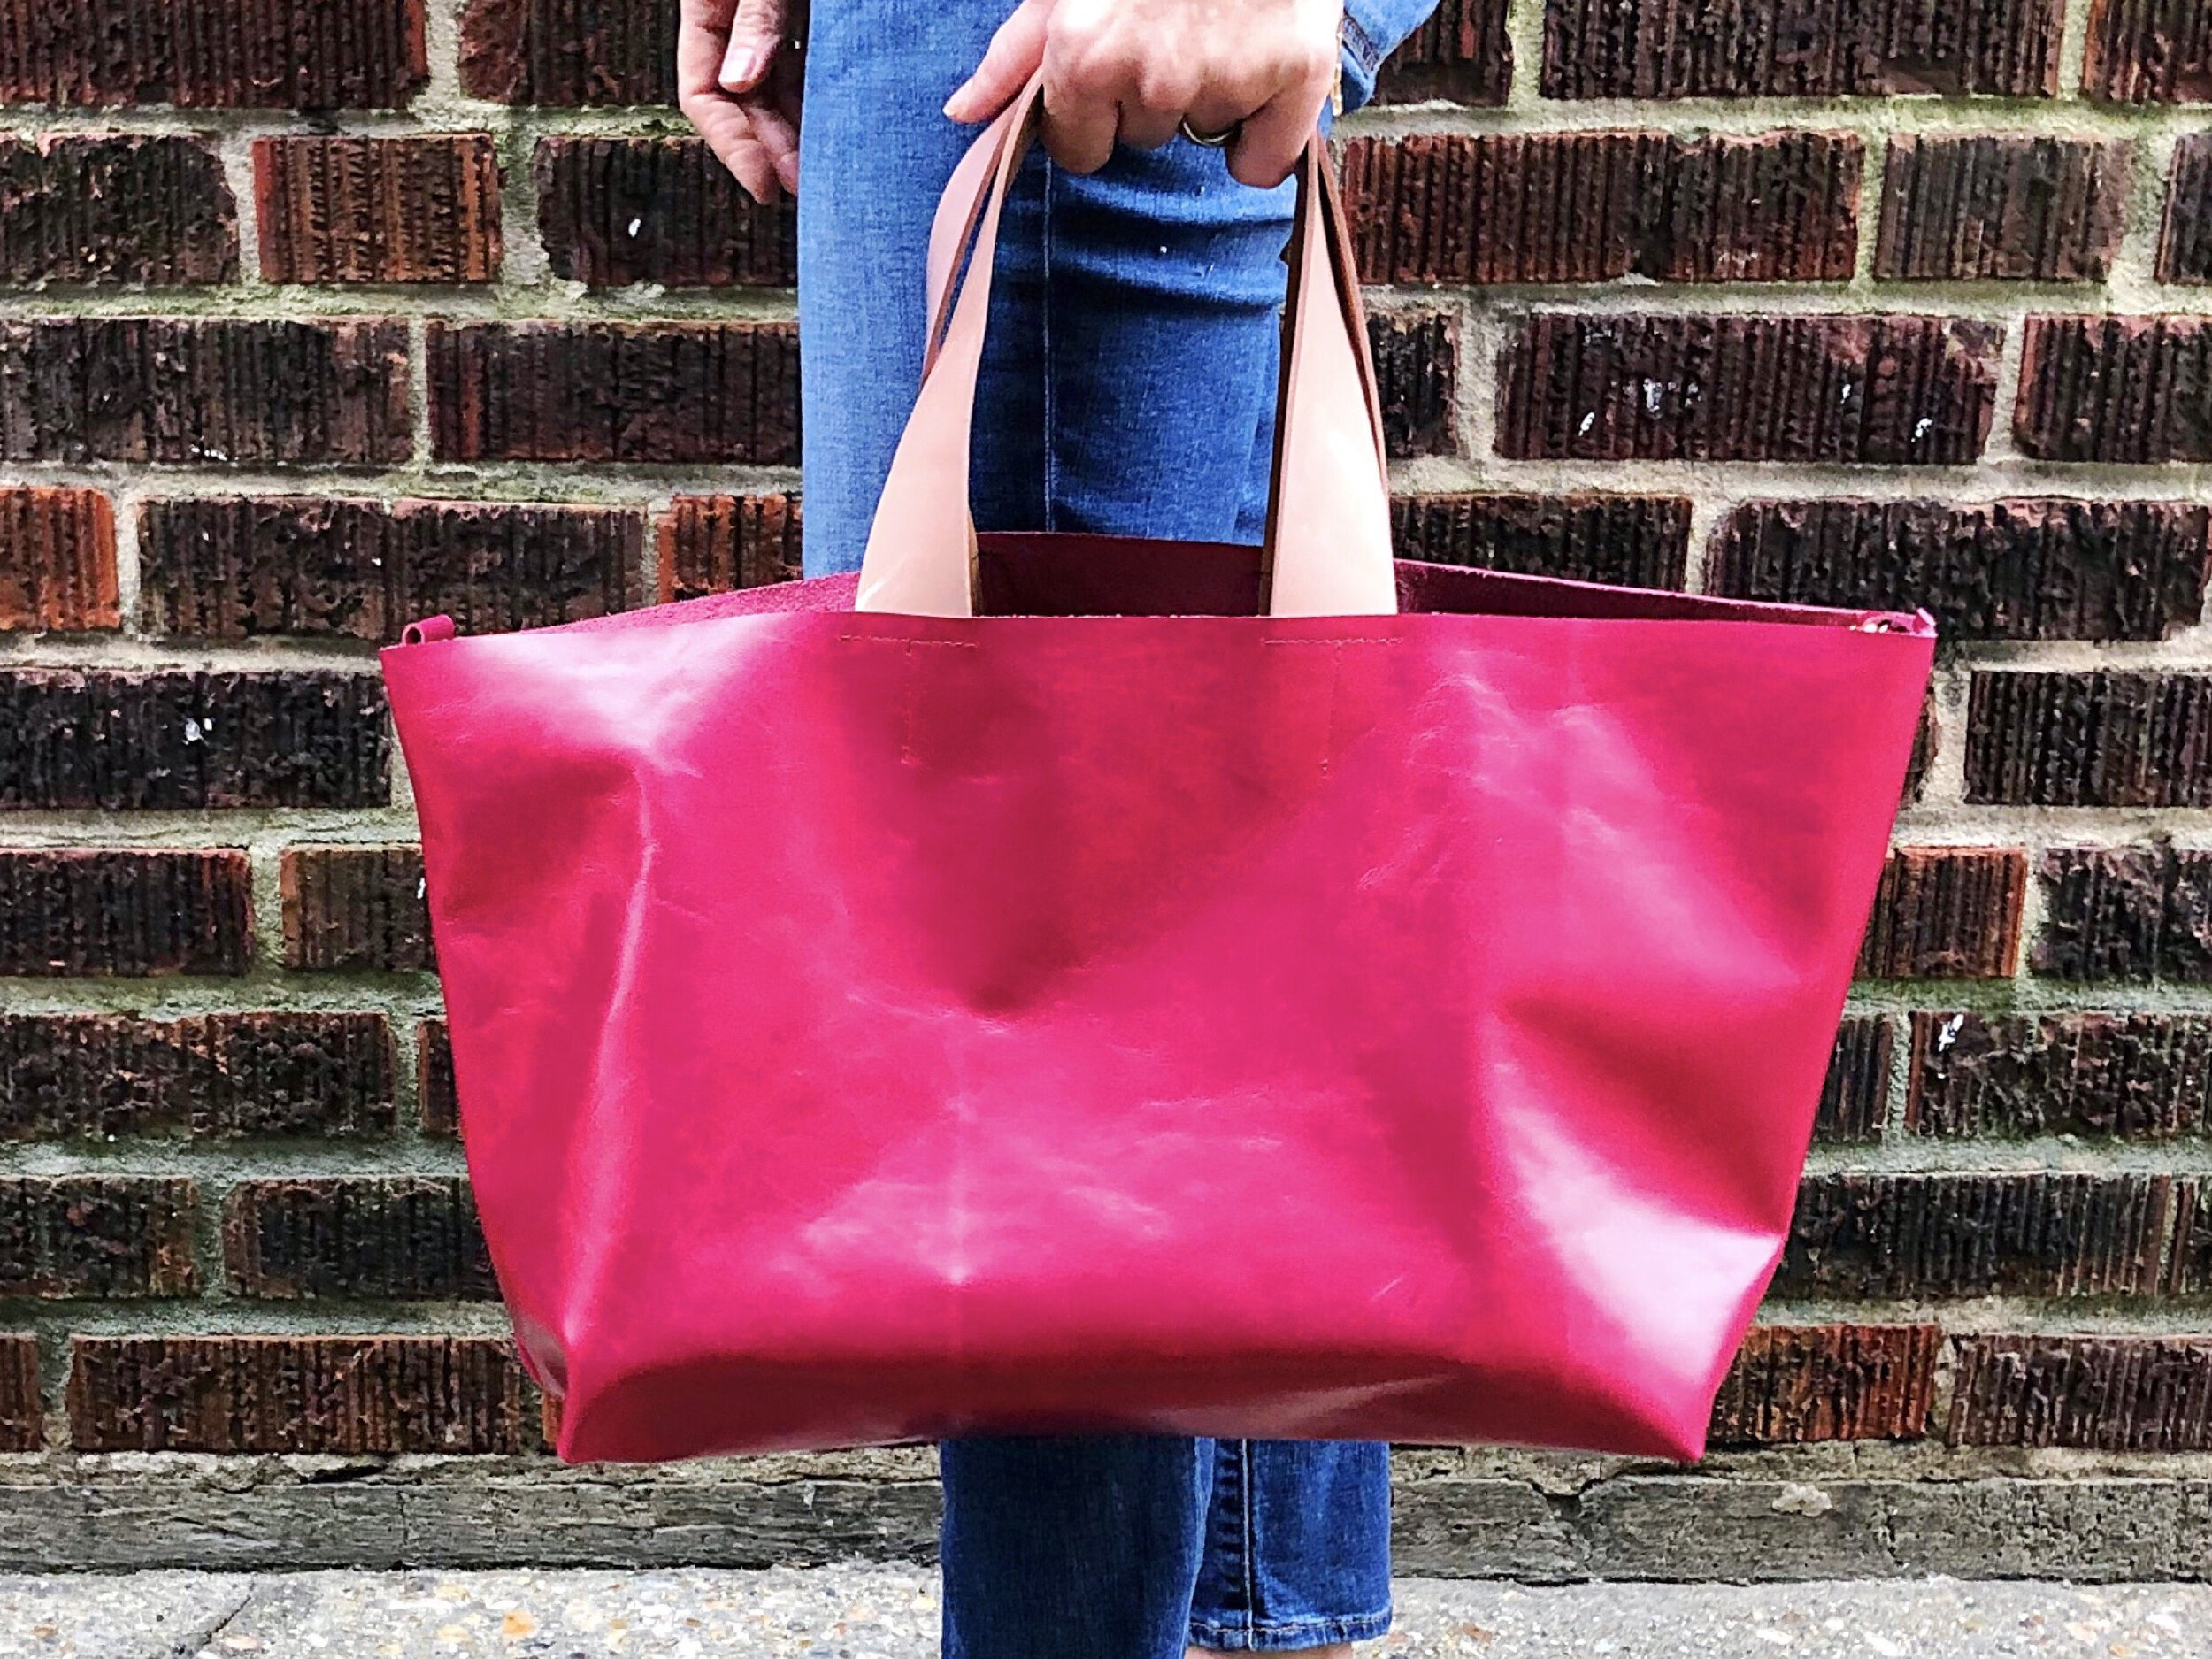
Welcome to my newest pattern, The Poppy Convertible Tote. Poppy is at once classic and modern. A beautiful leather tote that easily cinches to a classic shoulder bag. Featuring comfortable cotton webbing straps, an interior pocket plus hardware that functions as both clasp and optional cross-body strap holder.
Poppy is the perfect bag for learning to sew with leather. It has few seams and best of all- it doesn’t require fitting!
Introducing Poppy!
Welcome to my newest pattern, The Poppy Convertible Tote. Poppy is at once classic and modern. A beautiful leather tote that easily cinches to a classic shoulder bag. Featuring comfortable cotton webbing straps, an interior pocket plus hardware that functions as both clasp and optional cross-body strap holder.
LEARN TO SEW A LEATHER BAG
Poppy is the perfect bag for learning to sew with leather. It has few seams and best of all- it doesn’t require fitting! Speaking of leather, it is time that you start shopping so that you can get started on your bag. You will need about 7.5 square feet (0.7 m2) of cow hide with an approximate weight of 2-3 ounces for this bag. Cow hide is much stiffer than some other skins such as lamb or goat. That stiffness is needed to hold the shape. The leather for my bags is from Leather Suede Skins, Inc. in NYC. Call and ask for Faina. She will help you select the ideal leather for your bag. Alternately, you can find leather online or a local specialty store.
FREE PDF PATTERN DOWNLOAD AND TUTORIAL
The PDF Version of the Poppy Convertible Tote is available now for instant downloading. It is formatted for printing at home on standard 8.5 x 11” or A5 paper. The PDF is 31 pages, 9 of which include the pattern. The rest is all instruction, tips and techniques. This pattern was designed to be made along with my book, Sew Bags: The Practical Guide to Making Purses, Totes, Clutches & More; 13 Skill-Building Projects.
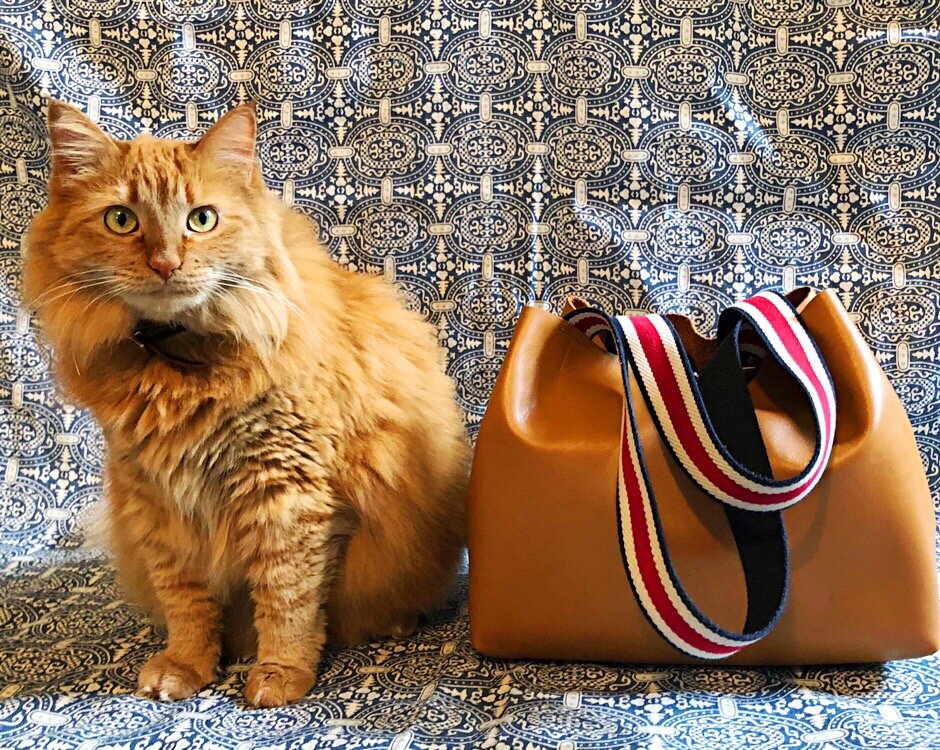
Poppy, my sweet kitty with her bag.
This pattern is a long time coming, and I am so happy to finally be launching it. You can look forward to a sew along in the coming weeks.
I hope that you enjoy this pattern and learn a new skill or two. Please share your pictures- I can’t wait to see your finished bag.
XOXO, Hilarie
#poppyconvertibletote #sewbags
DIY Leather Hair Tie Tutorial
Have you ever tried sewing with leather? It isn’t nearly as tricky as it sounds. Later this month I will be releasing a free pattern for making a leather bag. Before that, I thought it might be fun to give you a small- and instantly gratifying project to get your mind thinking about all things leather.
Sewing With Leather, A Primer Series and Leather Hair Tie Tutorial
Have you ever tried sewing with leather? It isn’t nearly as tricky as it sounds. Later this month I will be releasing a free pattern for making a leather bag. Before that, I thought it might be fun to give you a small- and instantly gratifying project to get your mind thinking about all things leather.
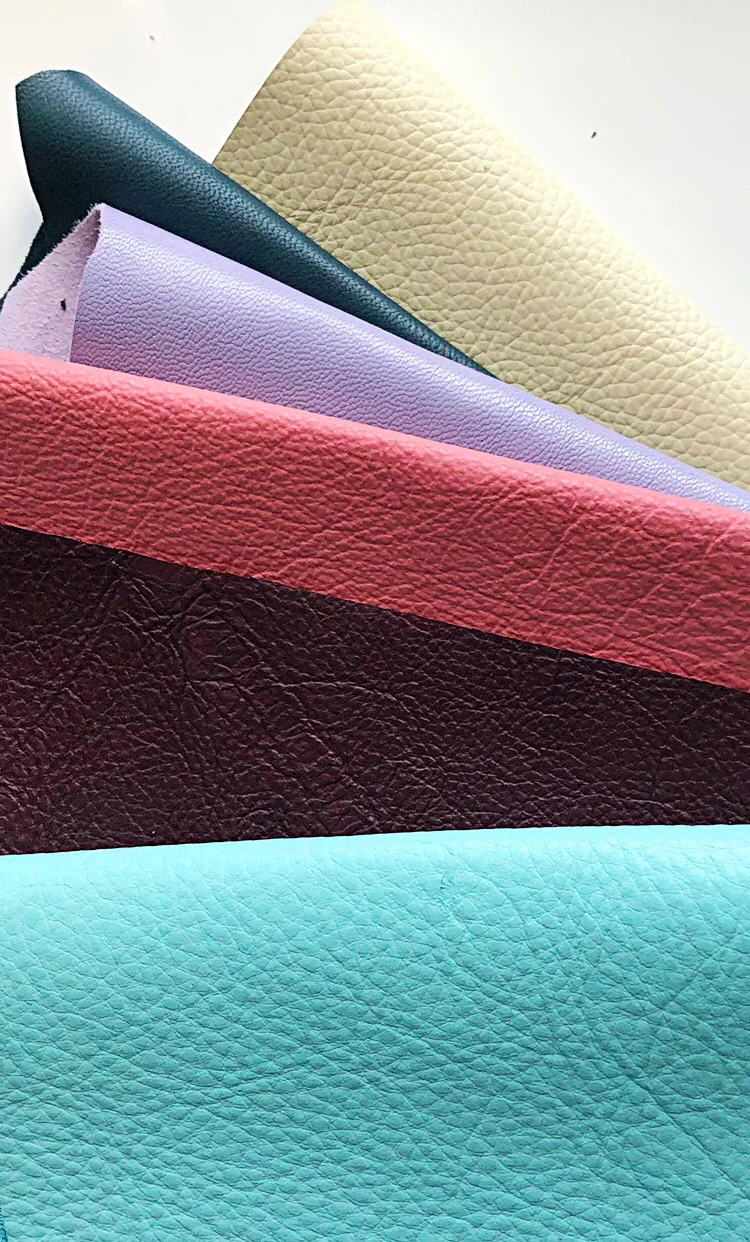
Leather comes in many varieties, weights, textures and colors. It can be a bit intimidating to purchase and to cut into the first time. However, once you understand it- there is no turning back! Unlike fabric that is comes on a bolt, leather is sold in hides and pieces- and by weight. The weight though doesn’t refer to it’s actual weight. Instead it is a gauge of the leather’s thickness. Generally, each ounce of leather equals 1/64th of an inch or 0.4mm thickness.
Since leather comes from an animal, there will be some variation. As such, leather is generally listed for sale in a range of weight. For example 2-3 oz, 3-4 oz. Most home sewing machines will easily stitch leather up to about 3-3.5 ounces.
For the most part, the leather that I use is purchased from Abe’s Leather in Brooklyn, eBay, Etsy and Mood Fabrics. There is a new to me resource that I am excited to share, Leather Suede Skins, in NYC. Also- I tend to love to take apart old clothes and bags too. So keep the thrift store and your closet in mind as an alternative.
Price is based on quality, type of skin, country of origin, size and finish. It doesn’t have to be too expensive so shop around.
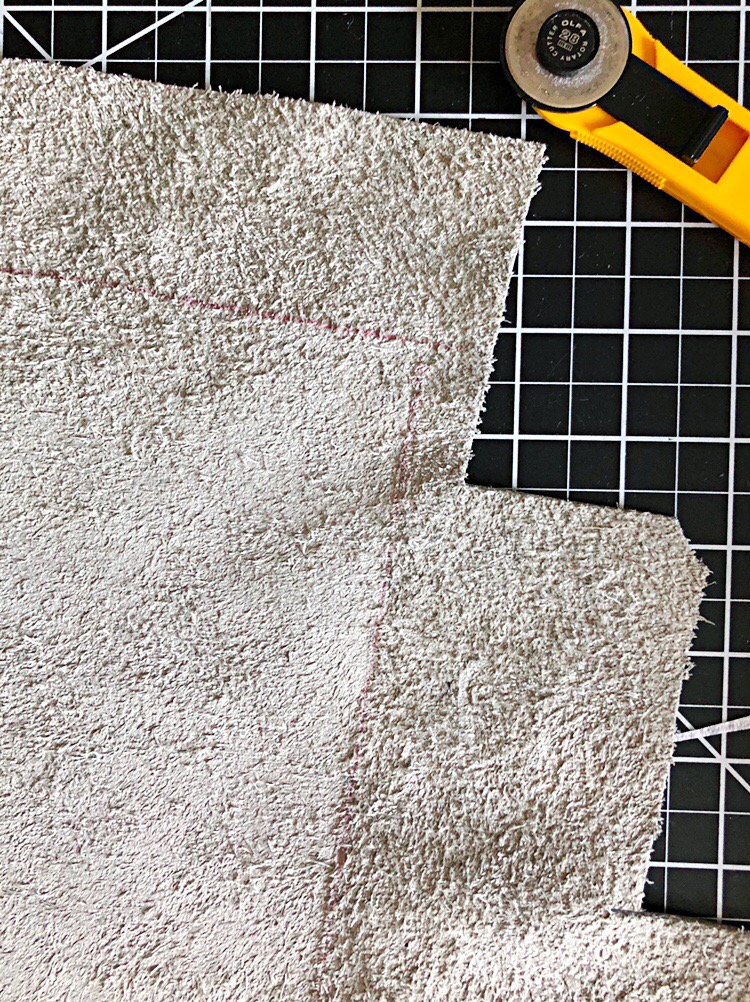
Once you have selected your leather, lay it out on a flat surface and examine the hide for imperfections, holes and variations in thickness. Leather does have a grain, but for bags and small accessories, it really isn’t necessary to place patterns along the grain line. Instead, arrange the pattern pieces to fit and to maximize the available leather.
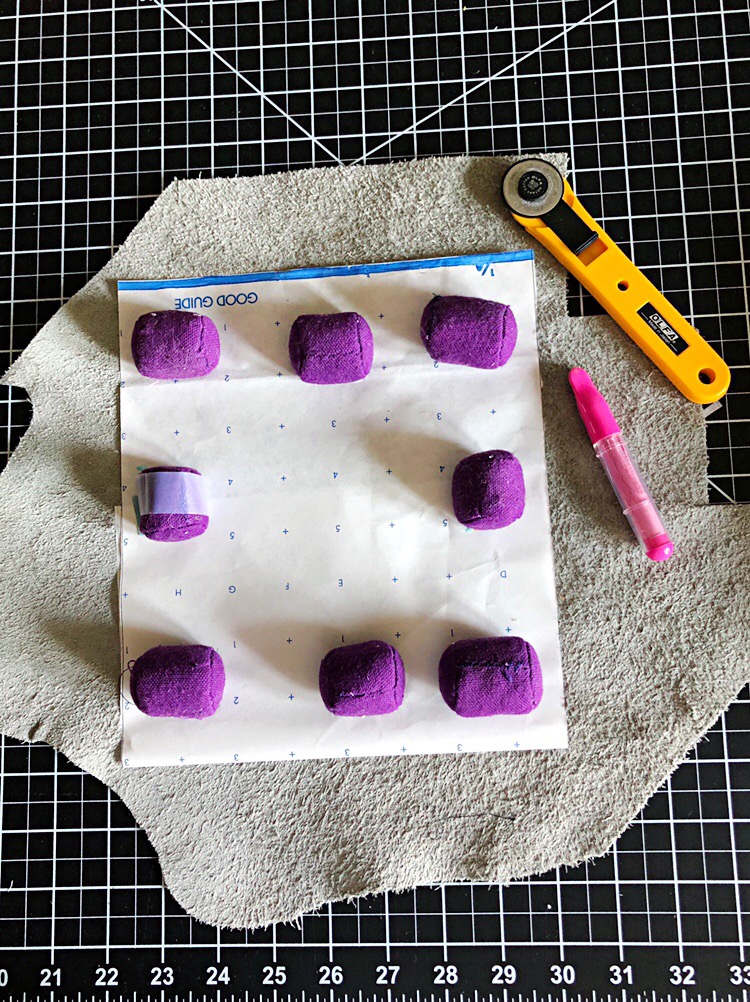
When you have determined the optimal layout, you will want to place a pattern weight (or some close object that will function as a pattern weight and allow you to trace the pattern piece onto the leather. In working with leather, you do not want to use pins as they will leave permanent holes and marks.
Pattern weights holding pattern piece in place.
Non-standard pattern weights work well too!
Tracing a pattern on leather doesn’t really require anything special- a ruler and some kind of pencil. I tend to use a pen, pencil, chalk, marker or even a tracing wheel. It really depends on the color of the leather, how smooth or rough the hide is, and what is on my table at the time.
Leather is easily cut with sharp scissors or a rotary cutter. I generally use a rotary cutter for most things- but for this hair tie project, scissors work just fine.
Here are some of my favorite tools that I use for cutting leather:
Olfa Rotary Cutter I like both the 45 and the 28MM sizes.
Self-Healing Cutting Mat You will want a large mat to comfortably lay out your pieces to cut
Omnigrid Quilting Rulers These come in a variety of useful sizes. Because of their relative thickness, I prefer these rulers over others for guiding my rotary cutter. Fingers can get cut way too easily without the ruler.
In my next post I will share some tips on getting you started sewing with leather on the machine. Needles, feet, thread, interfacing and adhesives.
LEATHER HAIR TIE TUTORIAL
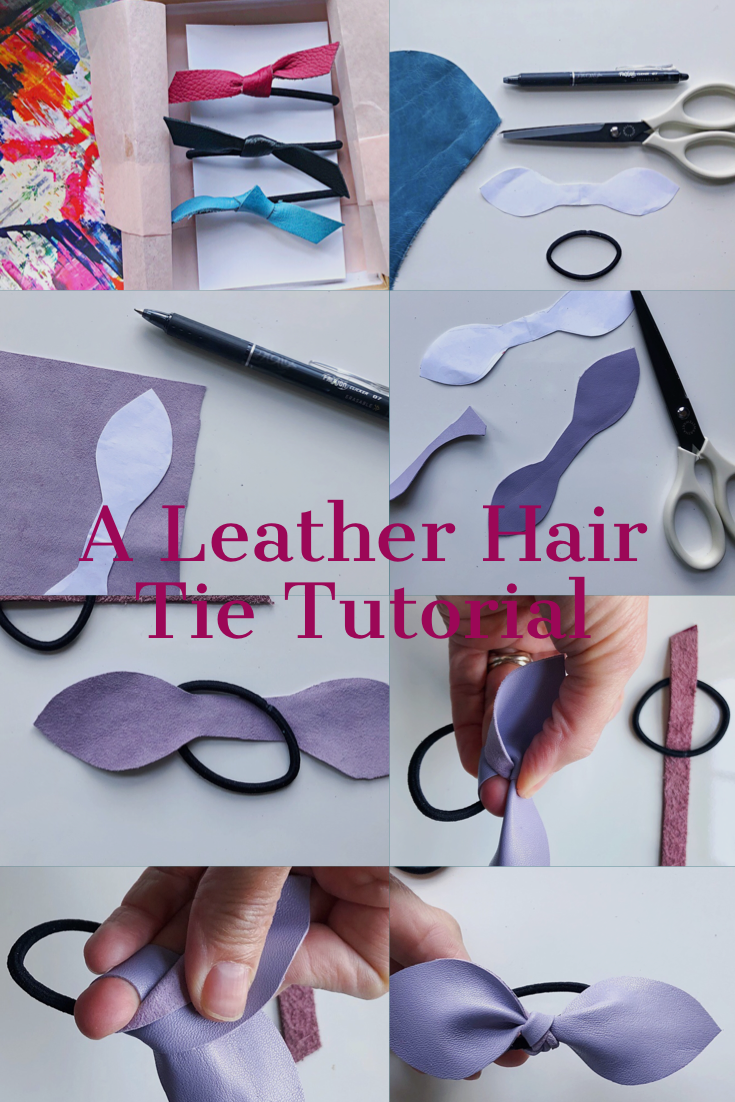
MATERIALS
Thin leather (vegan leather, Felt and Kraft-tex work great too!)
Scissors (or rotary cutter)
Pen, pencil or chalk
SIZE
Finished size for the bow is approximately 4 3/4” x 1.5”
Finished size for the tie is approximately 3”x 1/2”
PATTERN
TRACE
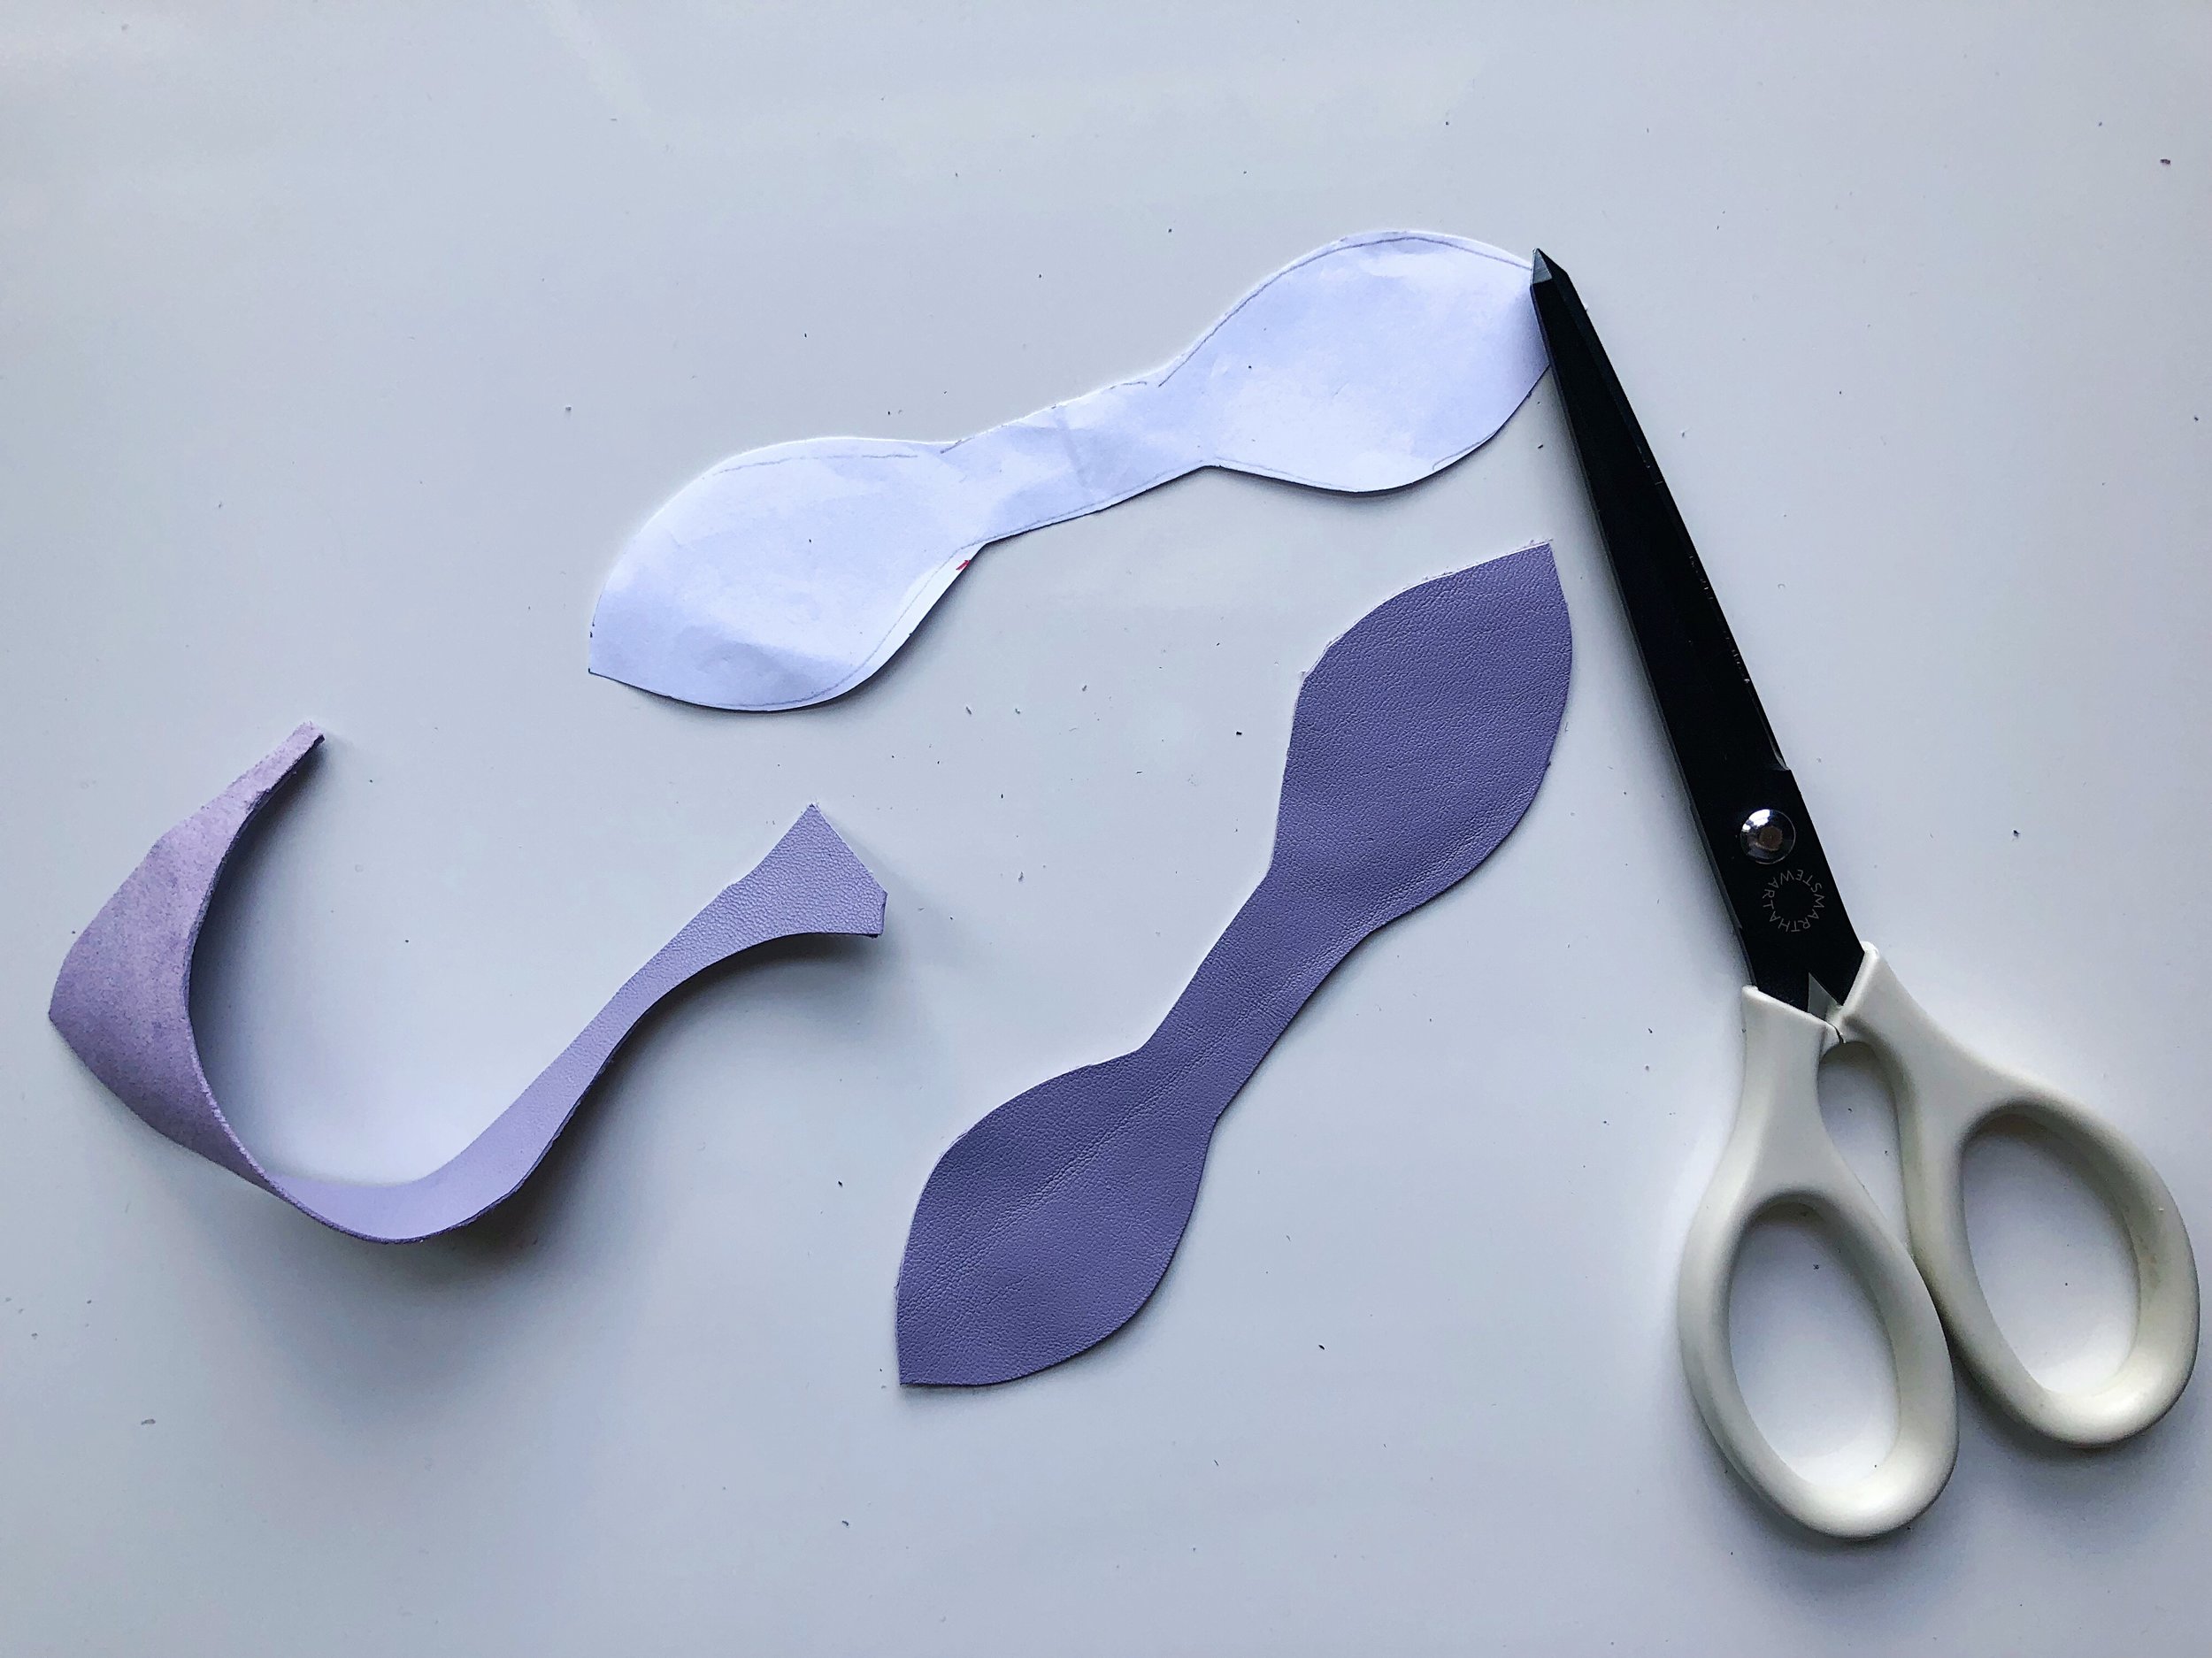
Trace the pattern onto the back side of the leather piece.
CUT
Cut along the traced line.
TIE
Place the leather tie right side facing down and slip into the elastic hair band.
Tie the leather into a knot around the elastic band. The object is to end up with the right side (pretty side) of the leather on the outside of each side of the bow and the center knot.
Before pulling the knot tight, twist the sides around a bit to make sure you are happy with the way the leather faces.
All done!
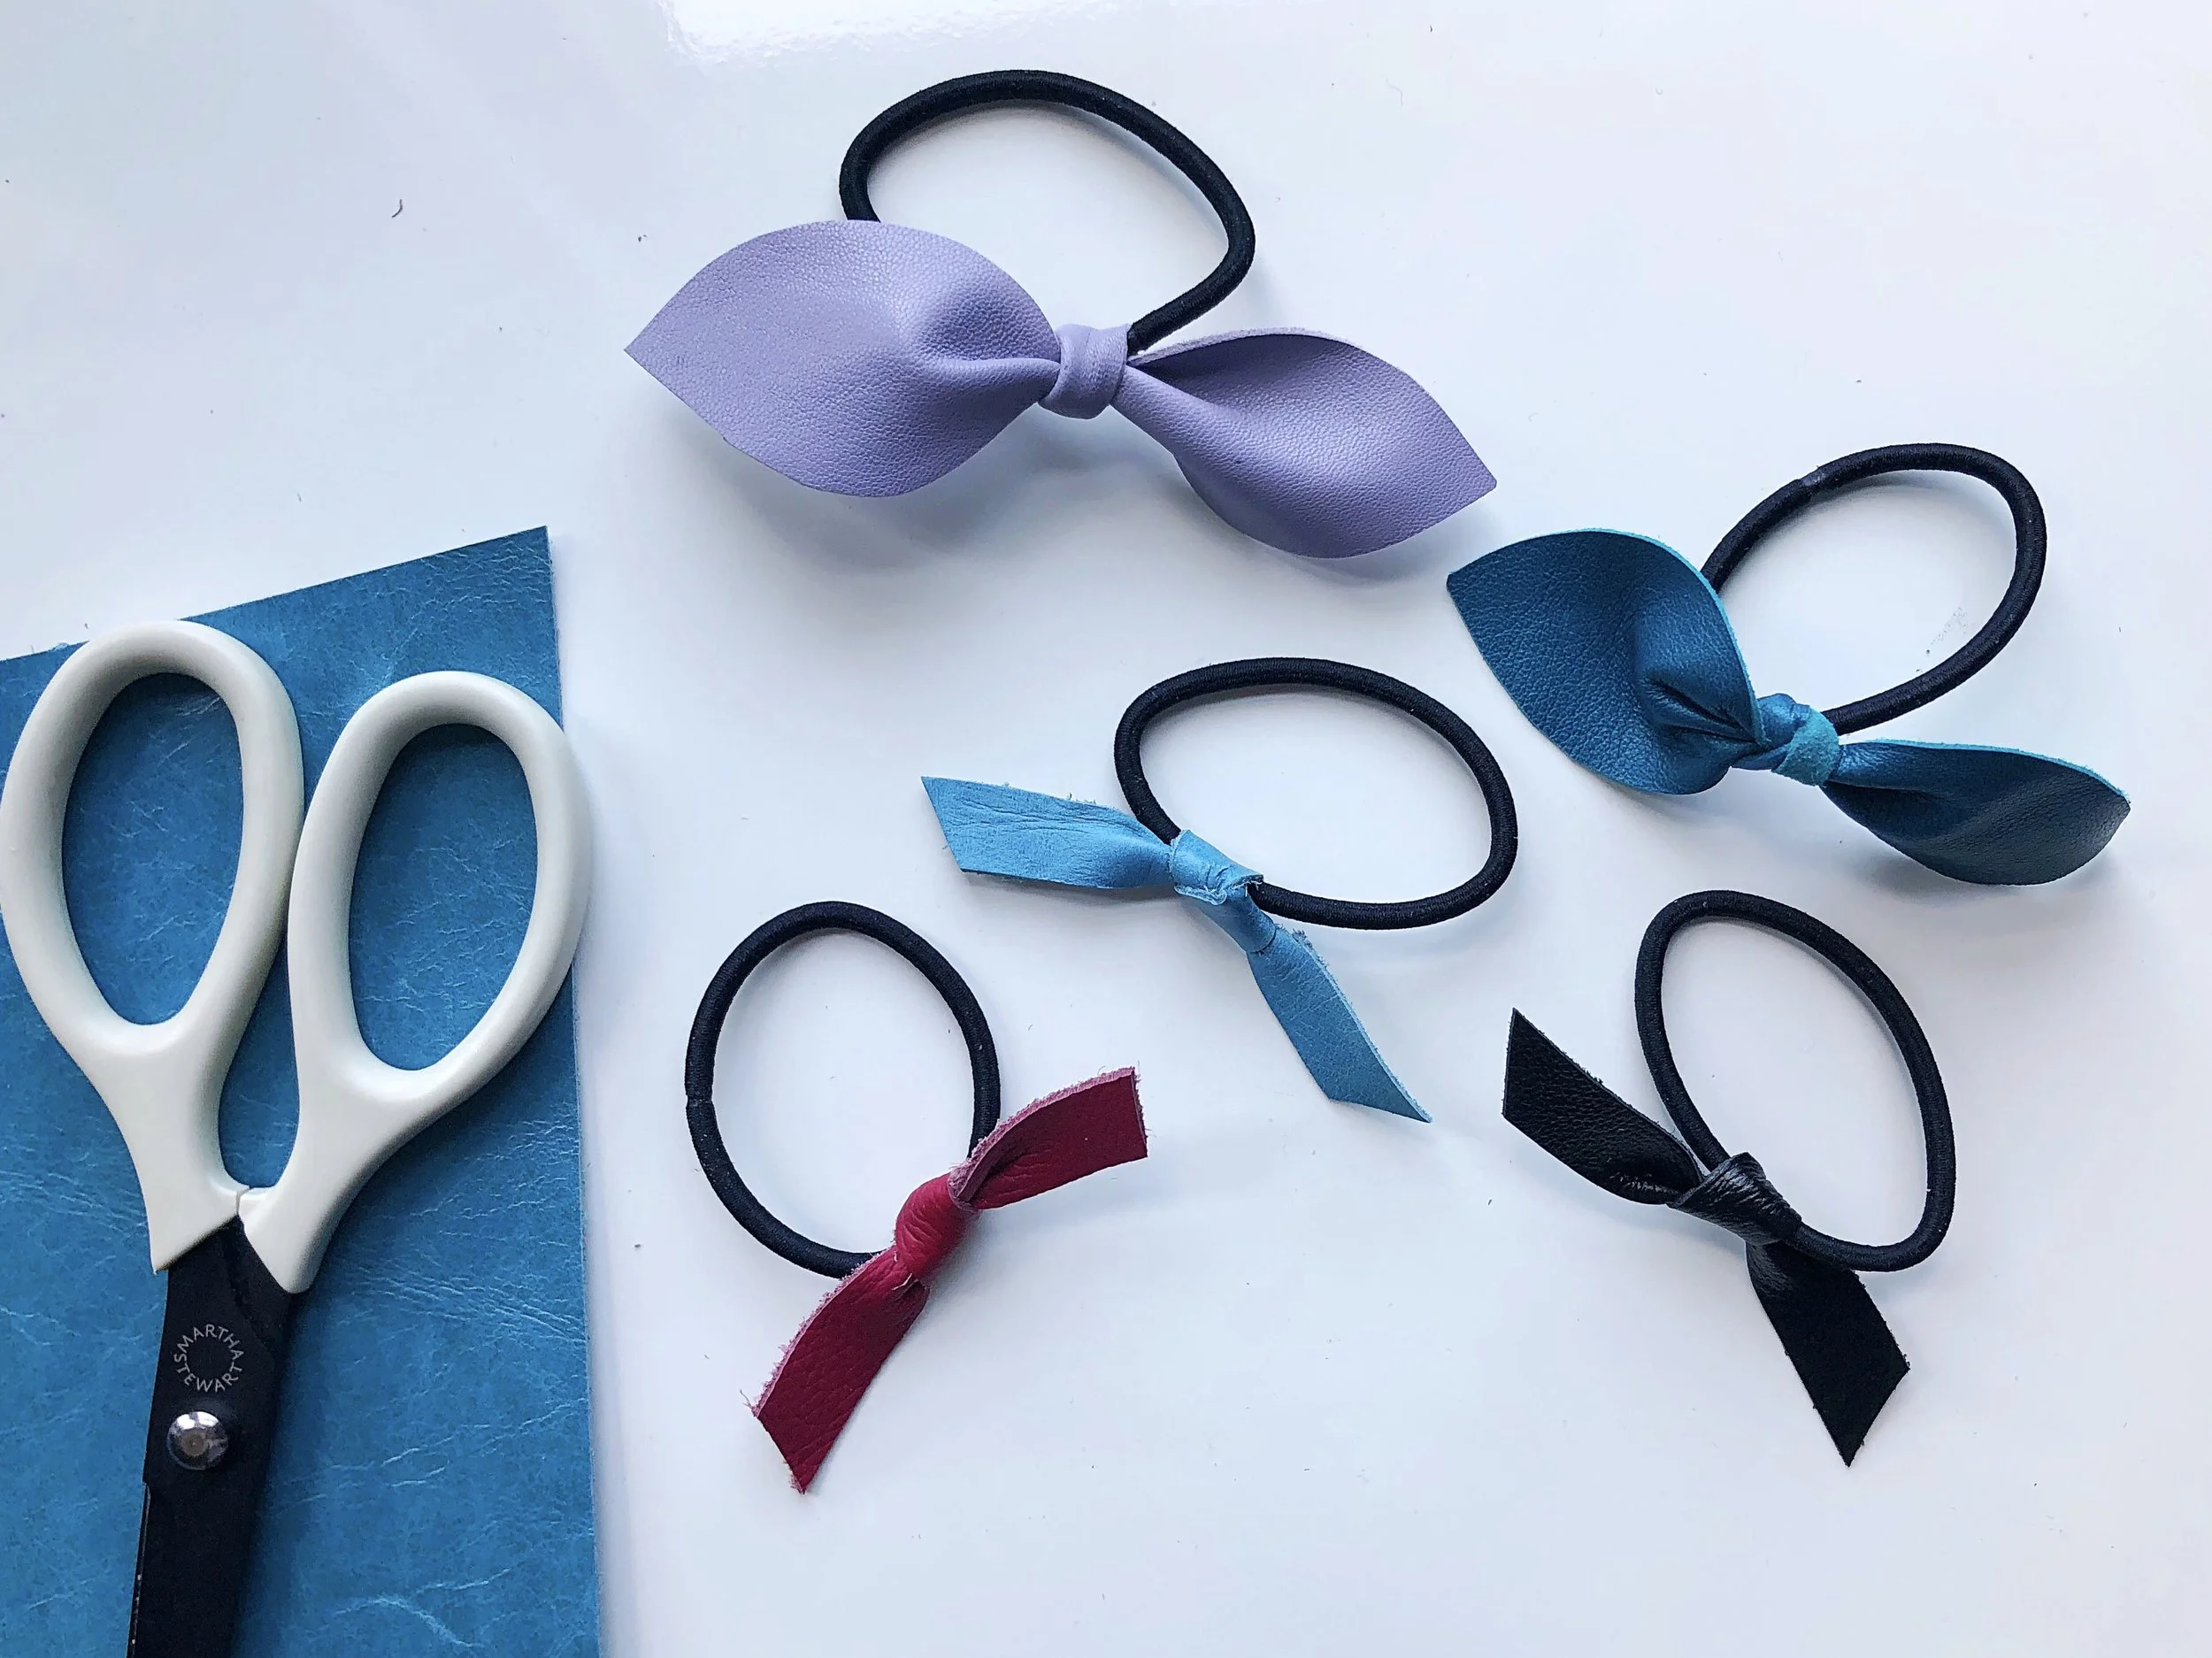
For this version, tie in the same manner as above making sure that the pretty side of the leather is facing up.
The pattern for the hair tie is just a rectangle. To give you a bit of wiggle room to make it symmetrical, I didn’t add the angled ends. Once your are satisfied with the way your leather is knotted, just cut the ends at an angle.
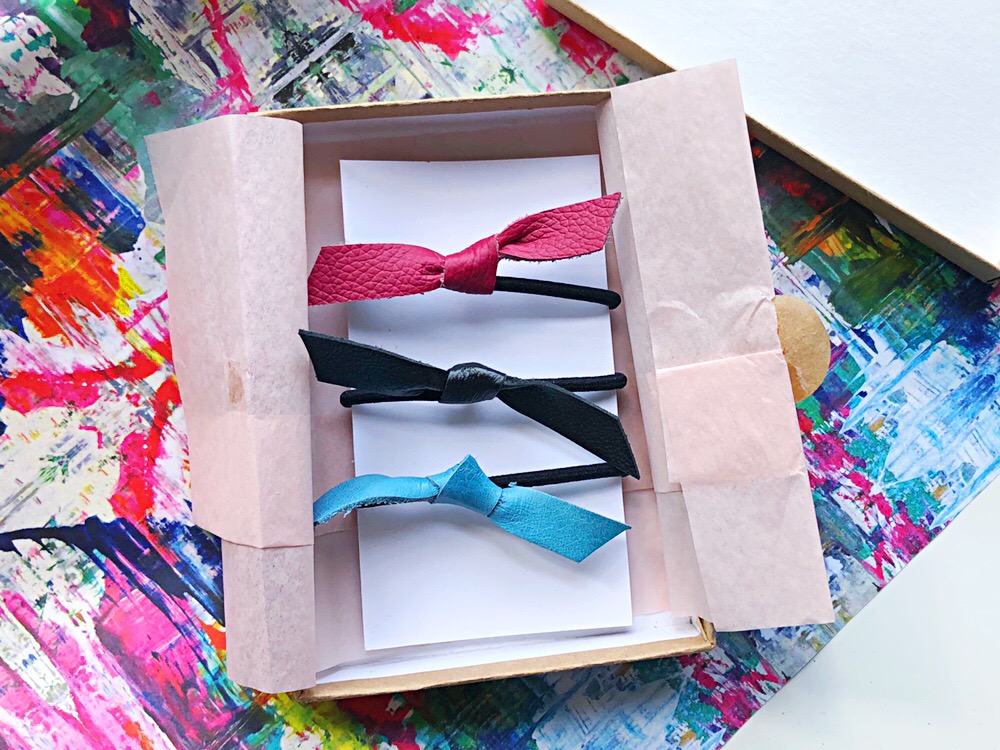
Aren’t they pretty? I would love to see what you make. Please tag me @littlestichstudio when you show off your fancy work.
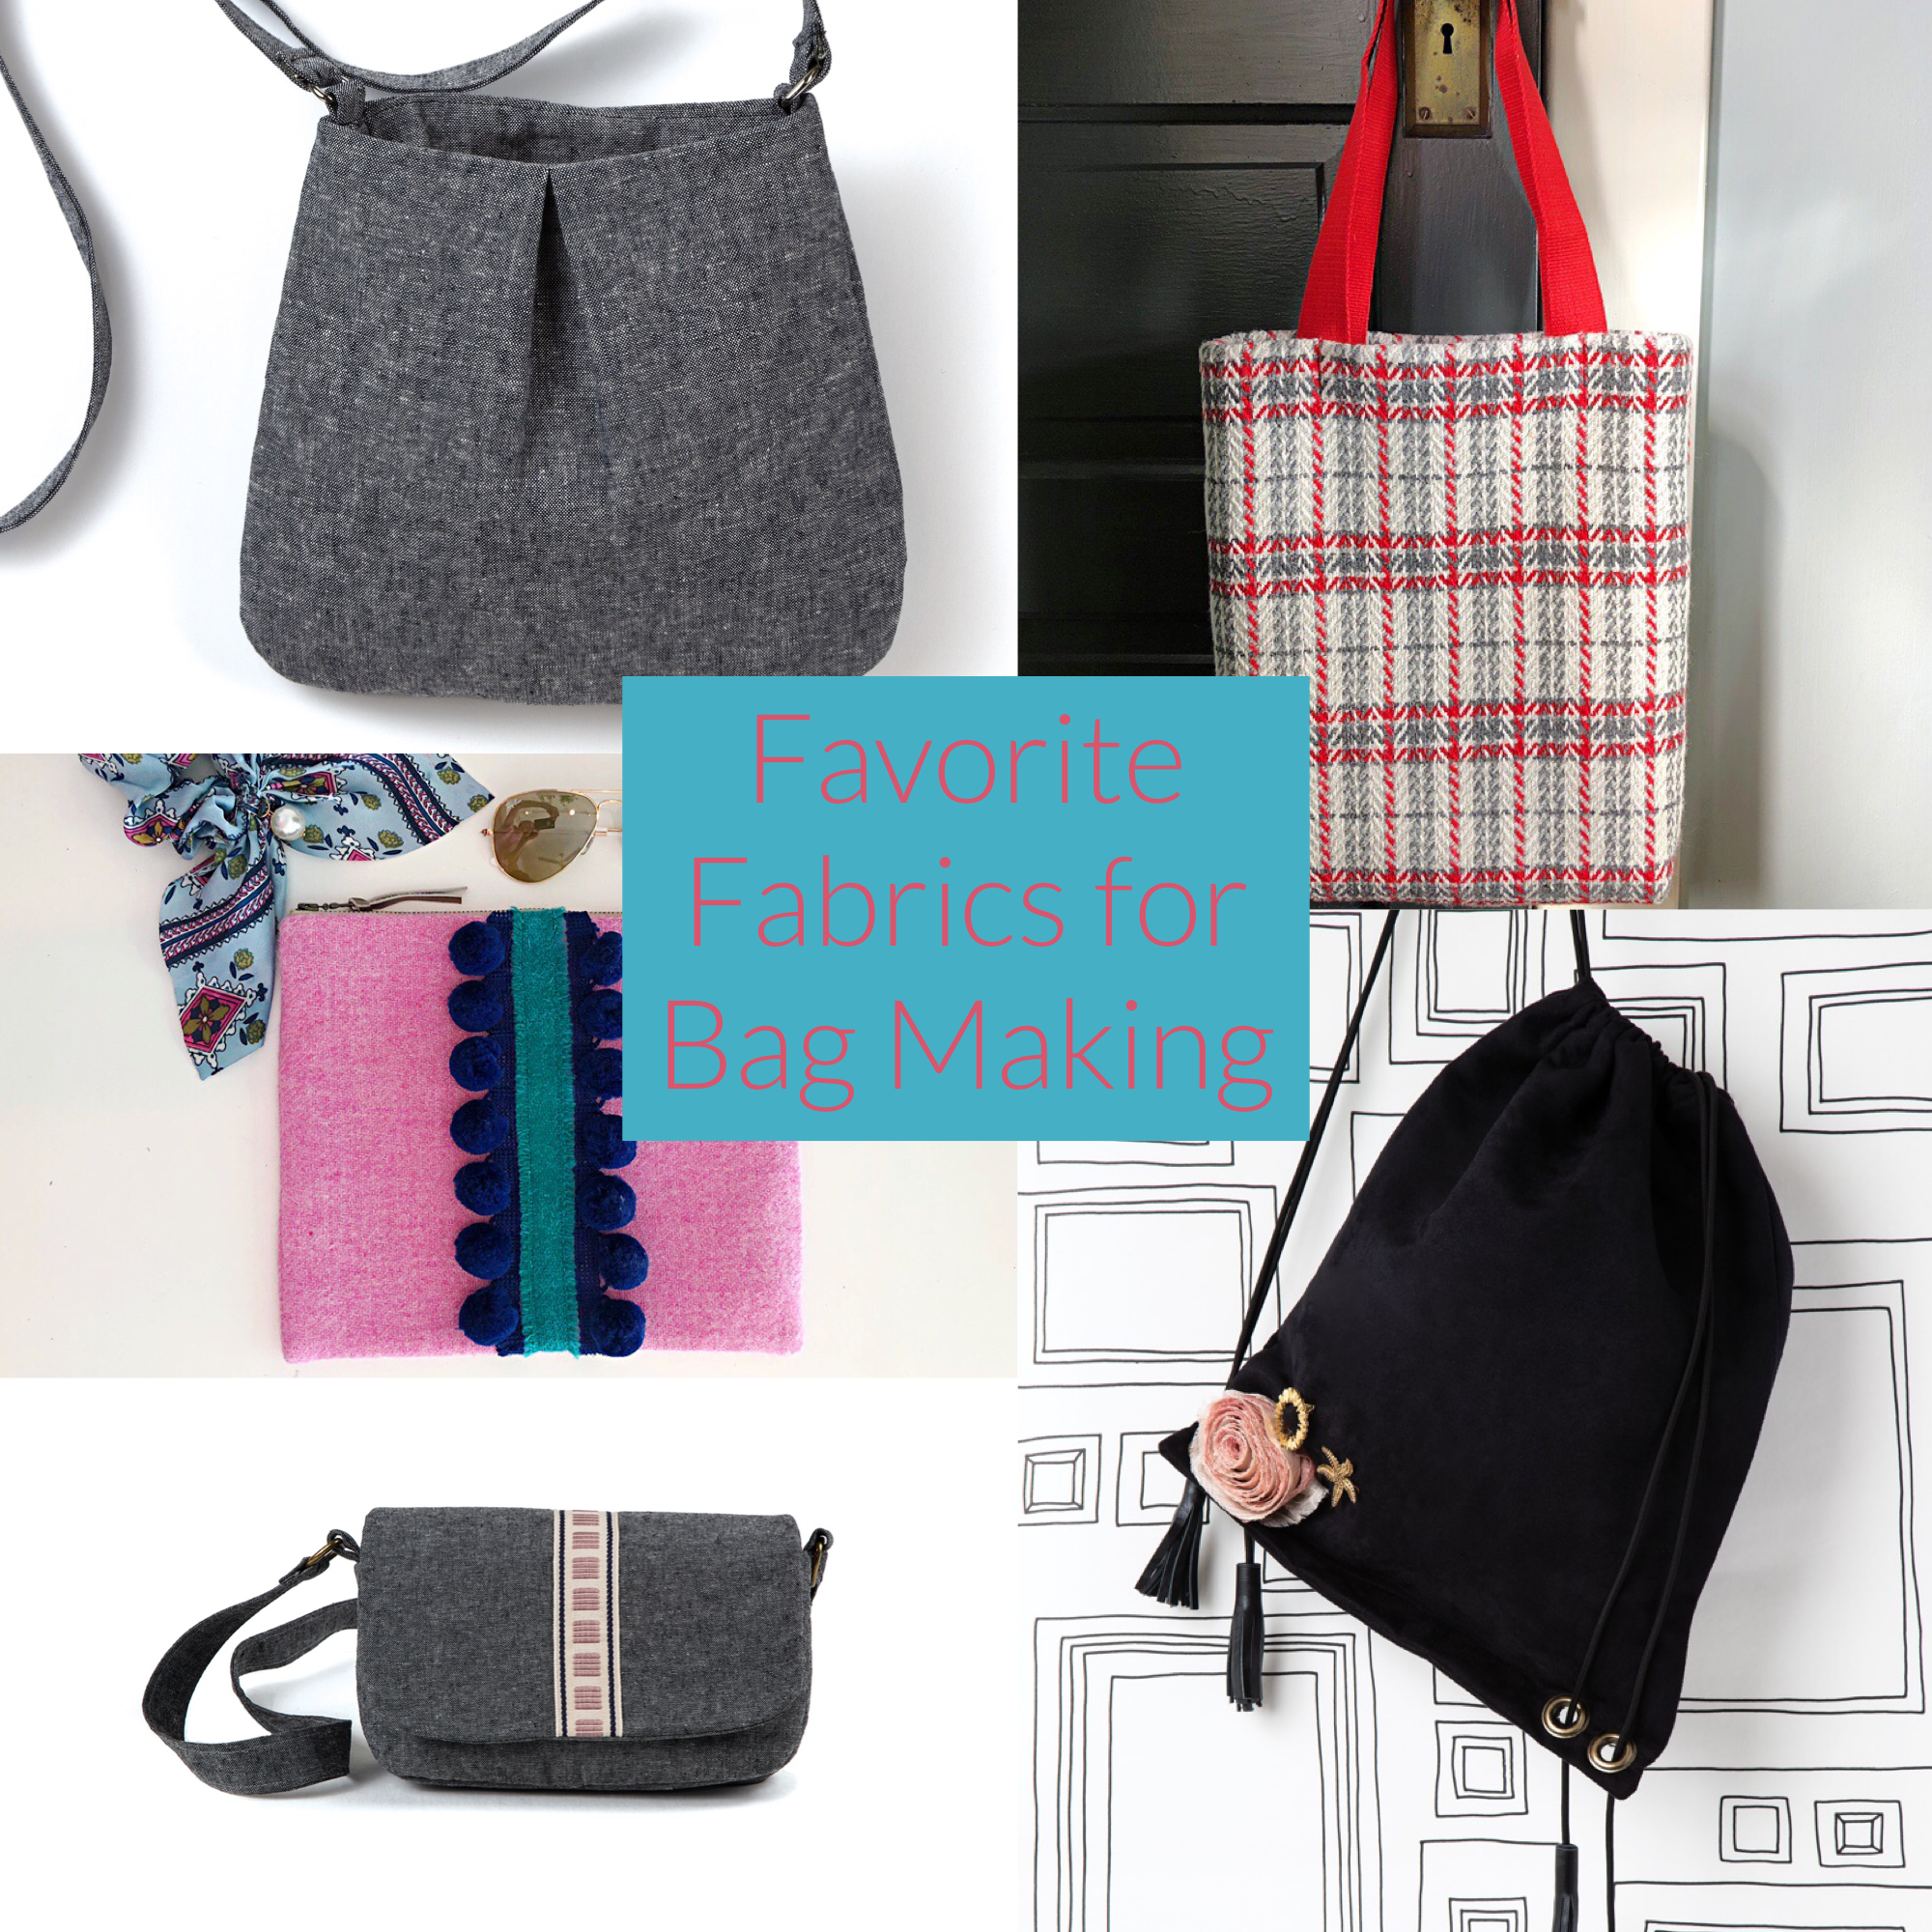
5 Best Fabrics for Sewing Bags and Purses
Choosing fabric for a bag is always a balance between form and function. Functionality is key! Assessing the level of use the bag will endure over its lifetime is critical in determining the right type of fabric. You can begin by asking yourself, when will the bag be used? What will it carry? Is it for day or evening? Is it for a child? Once the functionality question is answered, then it is time to consider weight.
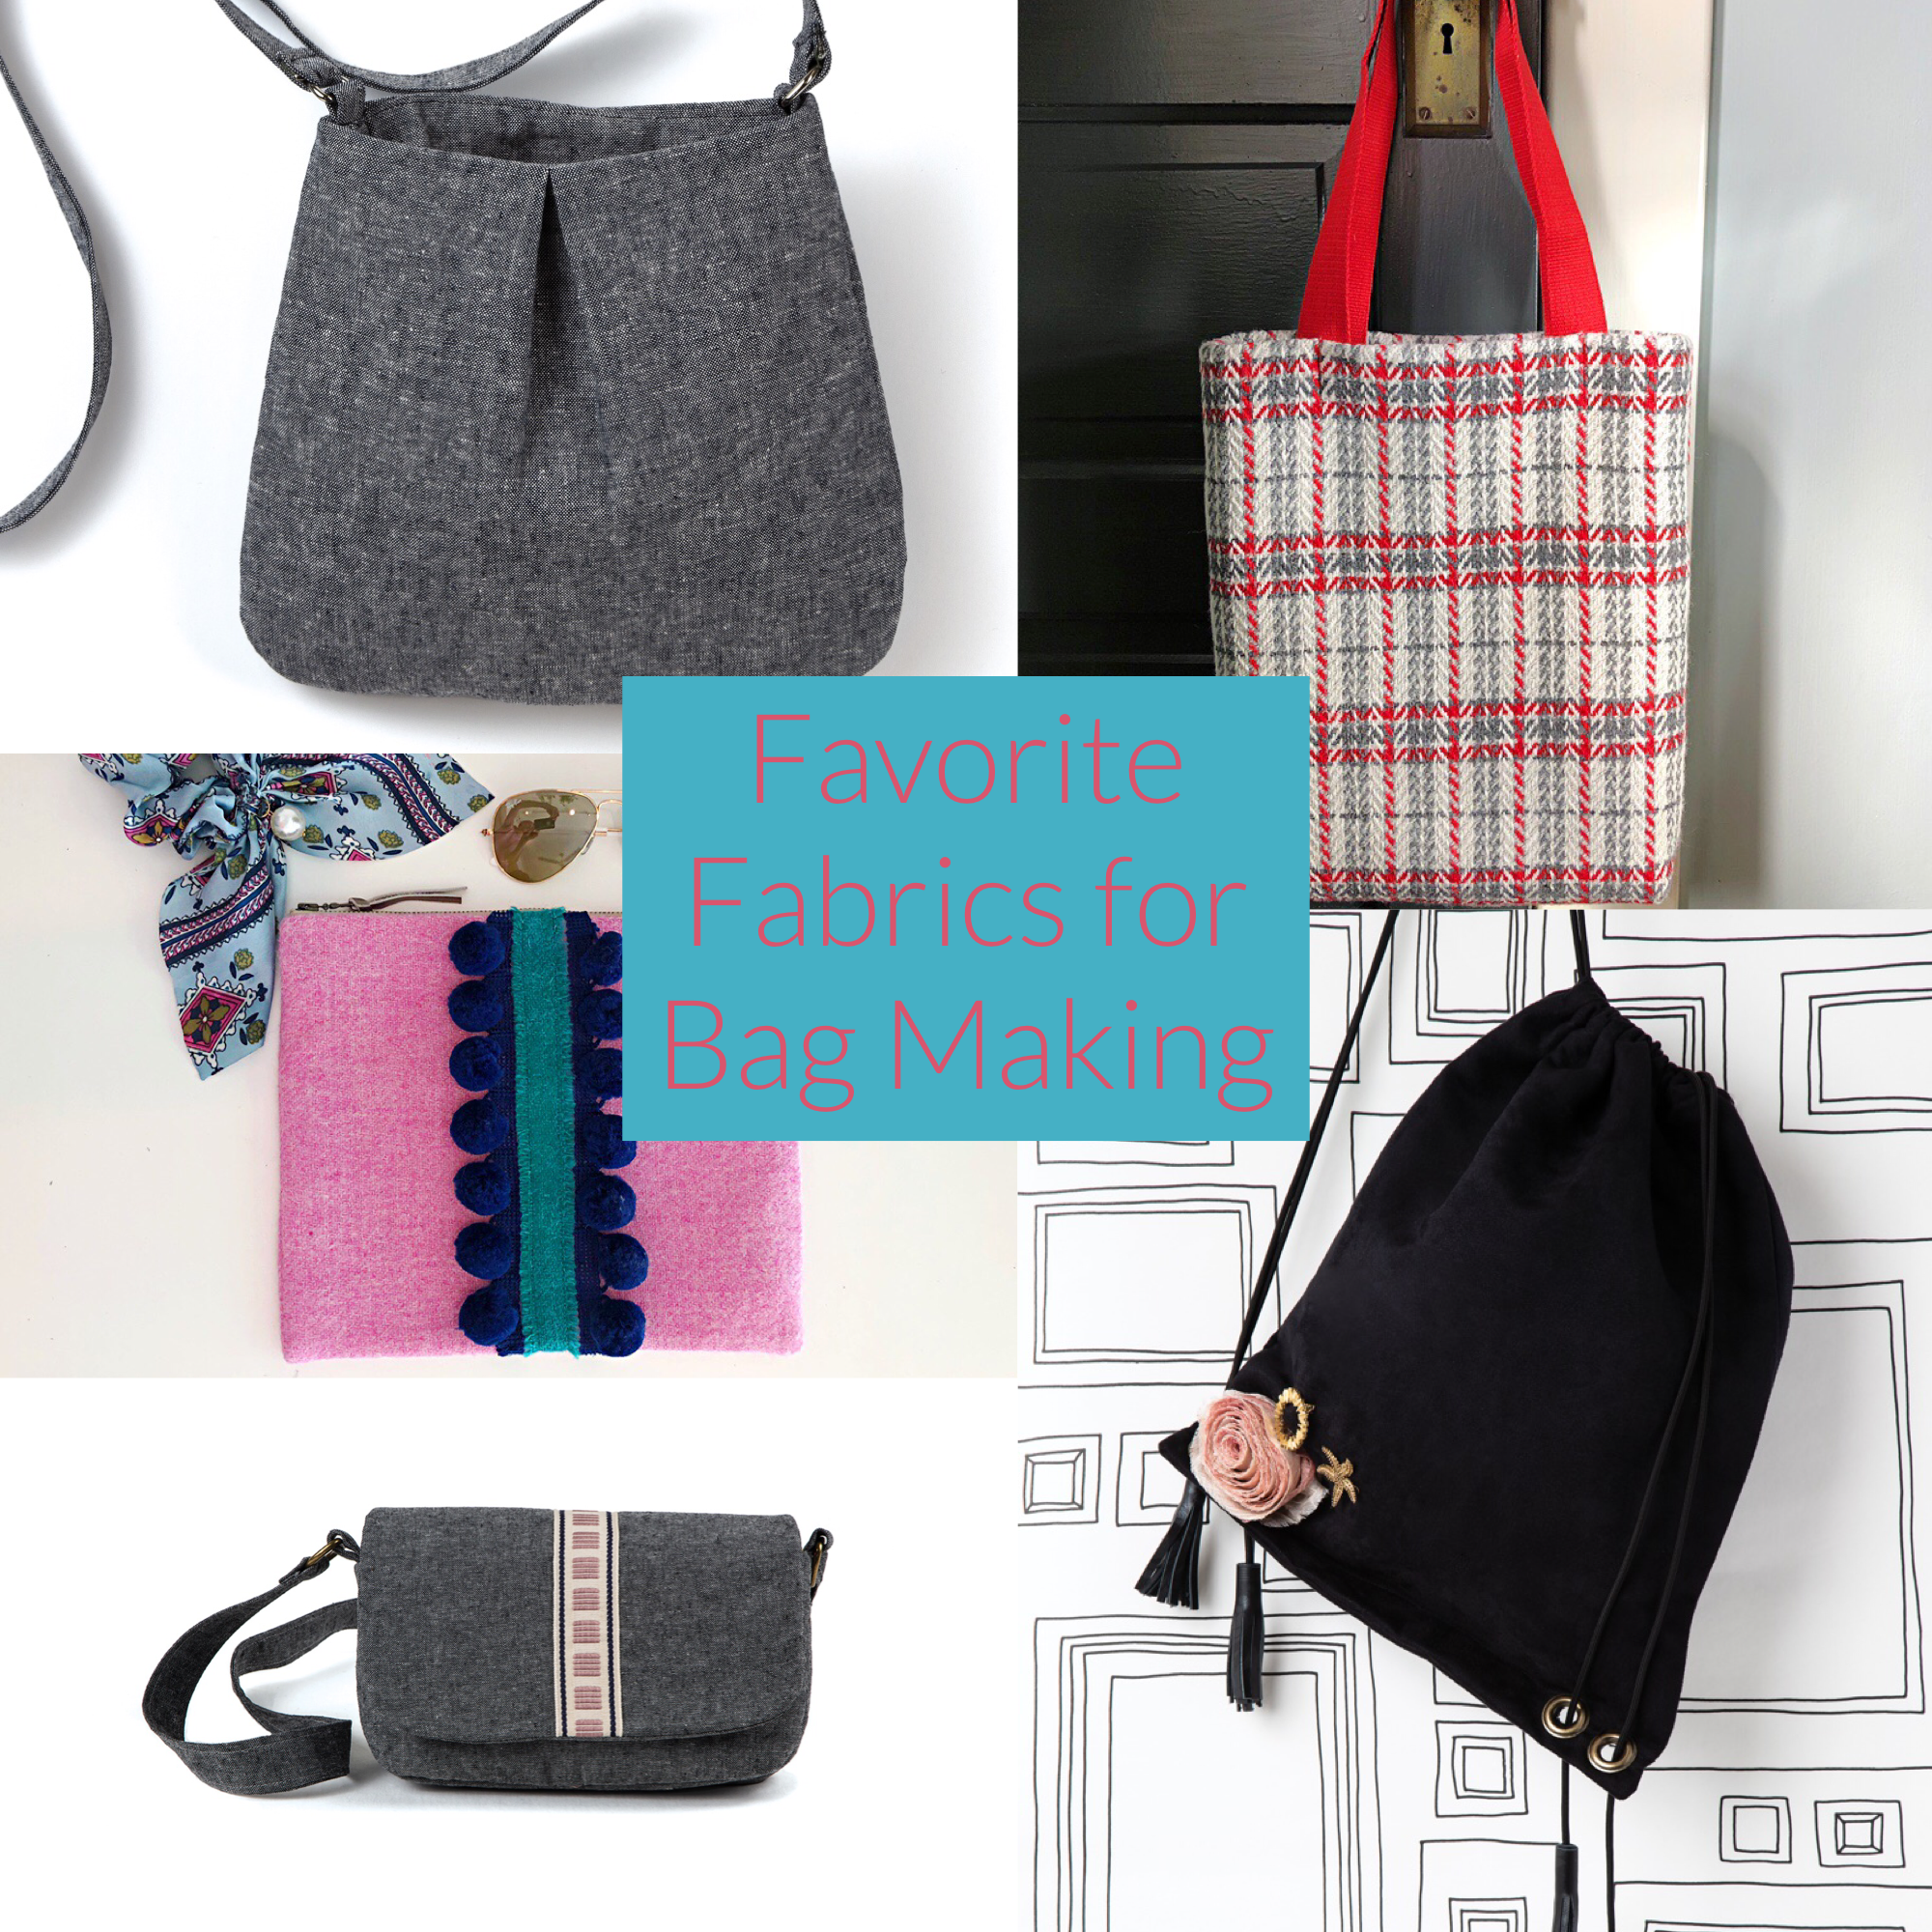
5 Best Fabrics for Sewing Bags and Purses
Choosing fabric for a bag is always a careful balance between form and function. With functionality being key! Assessing the level of use the bag will endure over its lifetime is critical in determining the right type of fabric. You can begin to determine this by asking yourself, when will the bag be used? What will it carry? Is it for day or evening? Is it for a grownup, teenager or child? Once the functionality question is answered, then it is time to consider weight.
Generally speaking, fabric falls into a couple of main categories, apparel weight, quilt weight and home décor or upholstery weight. Bags are unlike clothes though, and as such, you can mix and match weights from various categories, keeping in mind of course overall function.
Most of the bags that I make are for day and evening use. As such, I do layer interfacing and linings for structure and try to find a mid-weight fabric that will support all that I am carrying around. To that end, it is time for the fun stuff: color, texture and pattern!
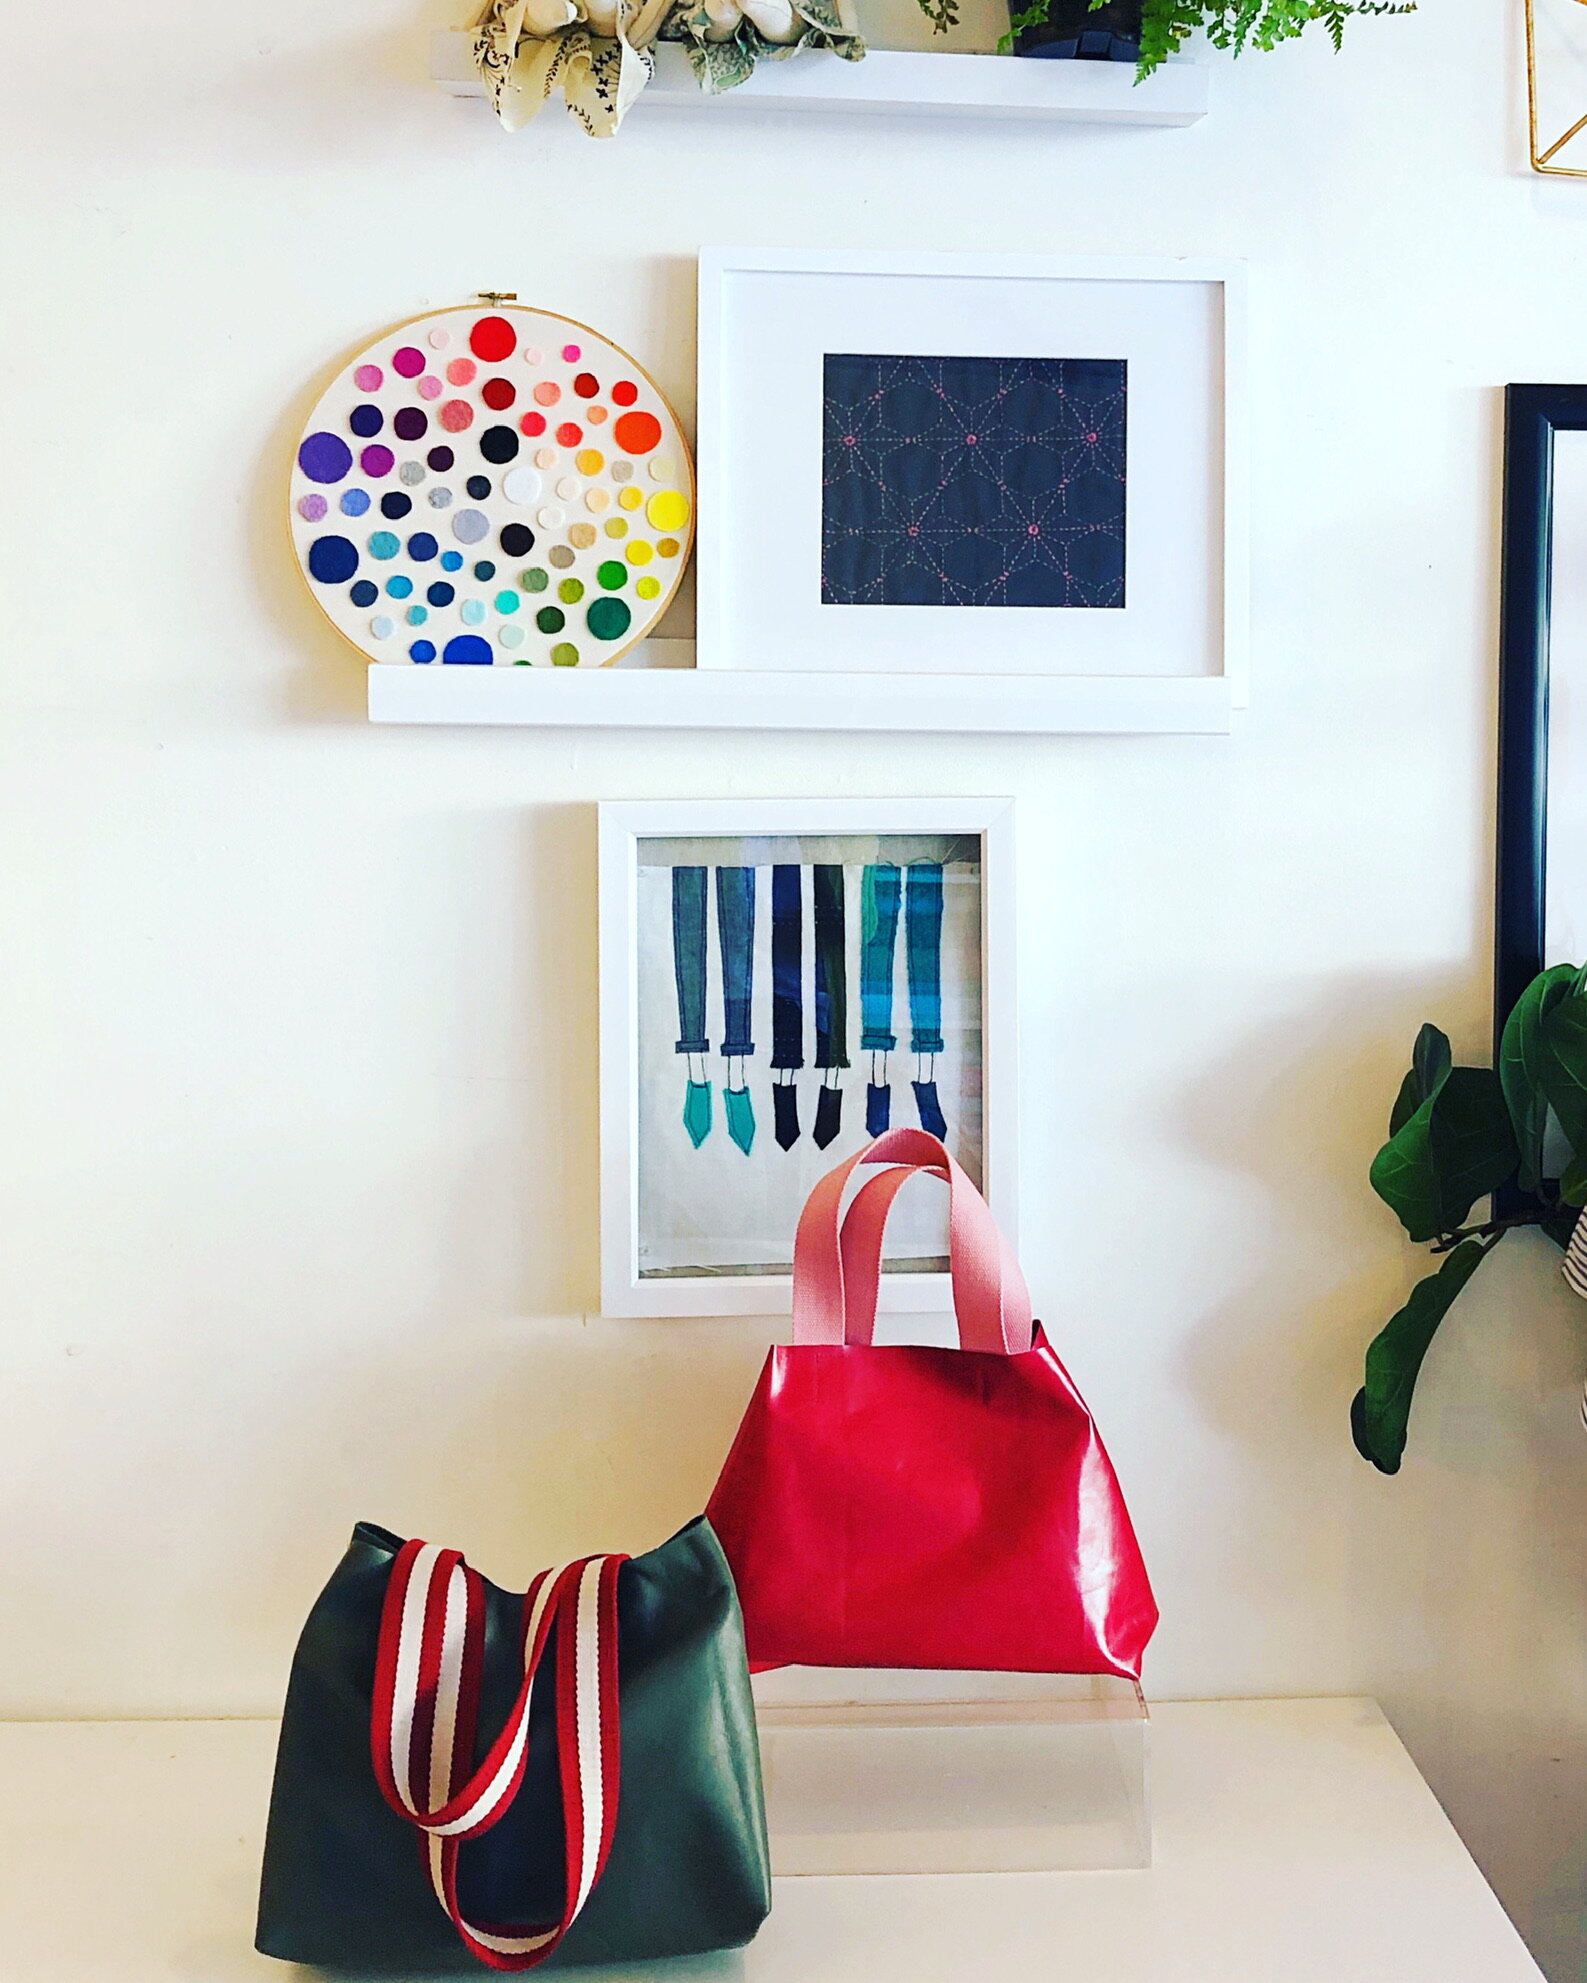
Pattern or solid? Bold color or neutral? Fabric or leather? What about mixing it up and combining leather with fabric or a print and solid with a neon strap? Just consider the possibilities……..
MY FAVORITE BAG-MAKING FABRICS
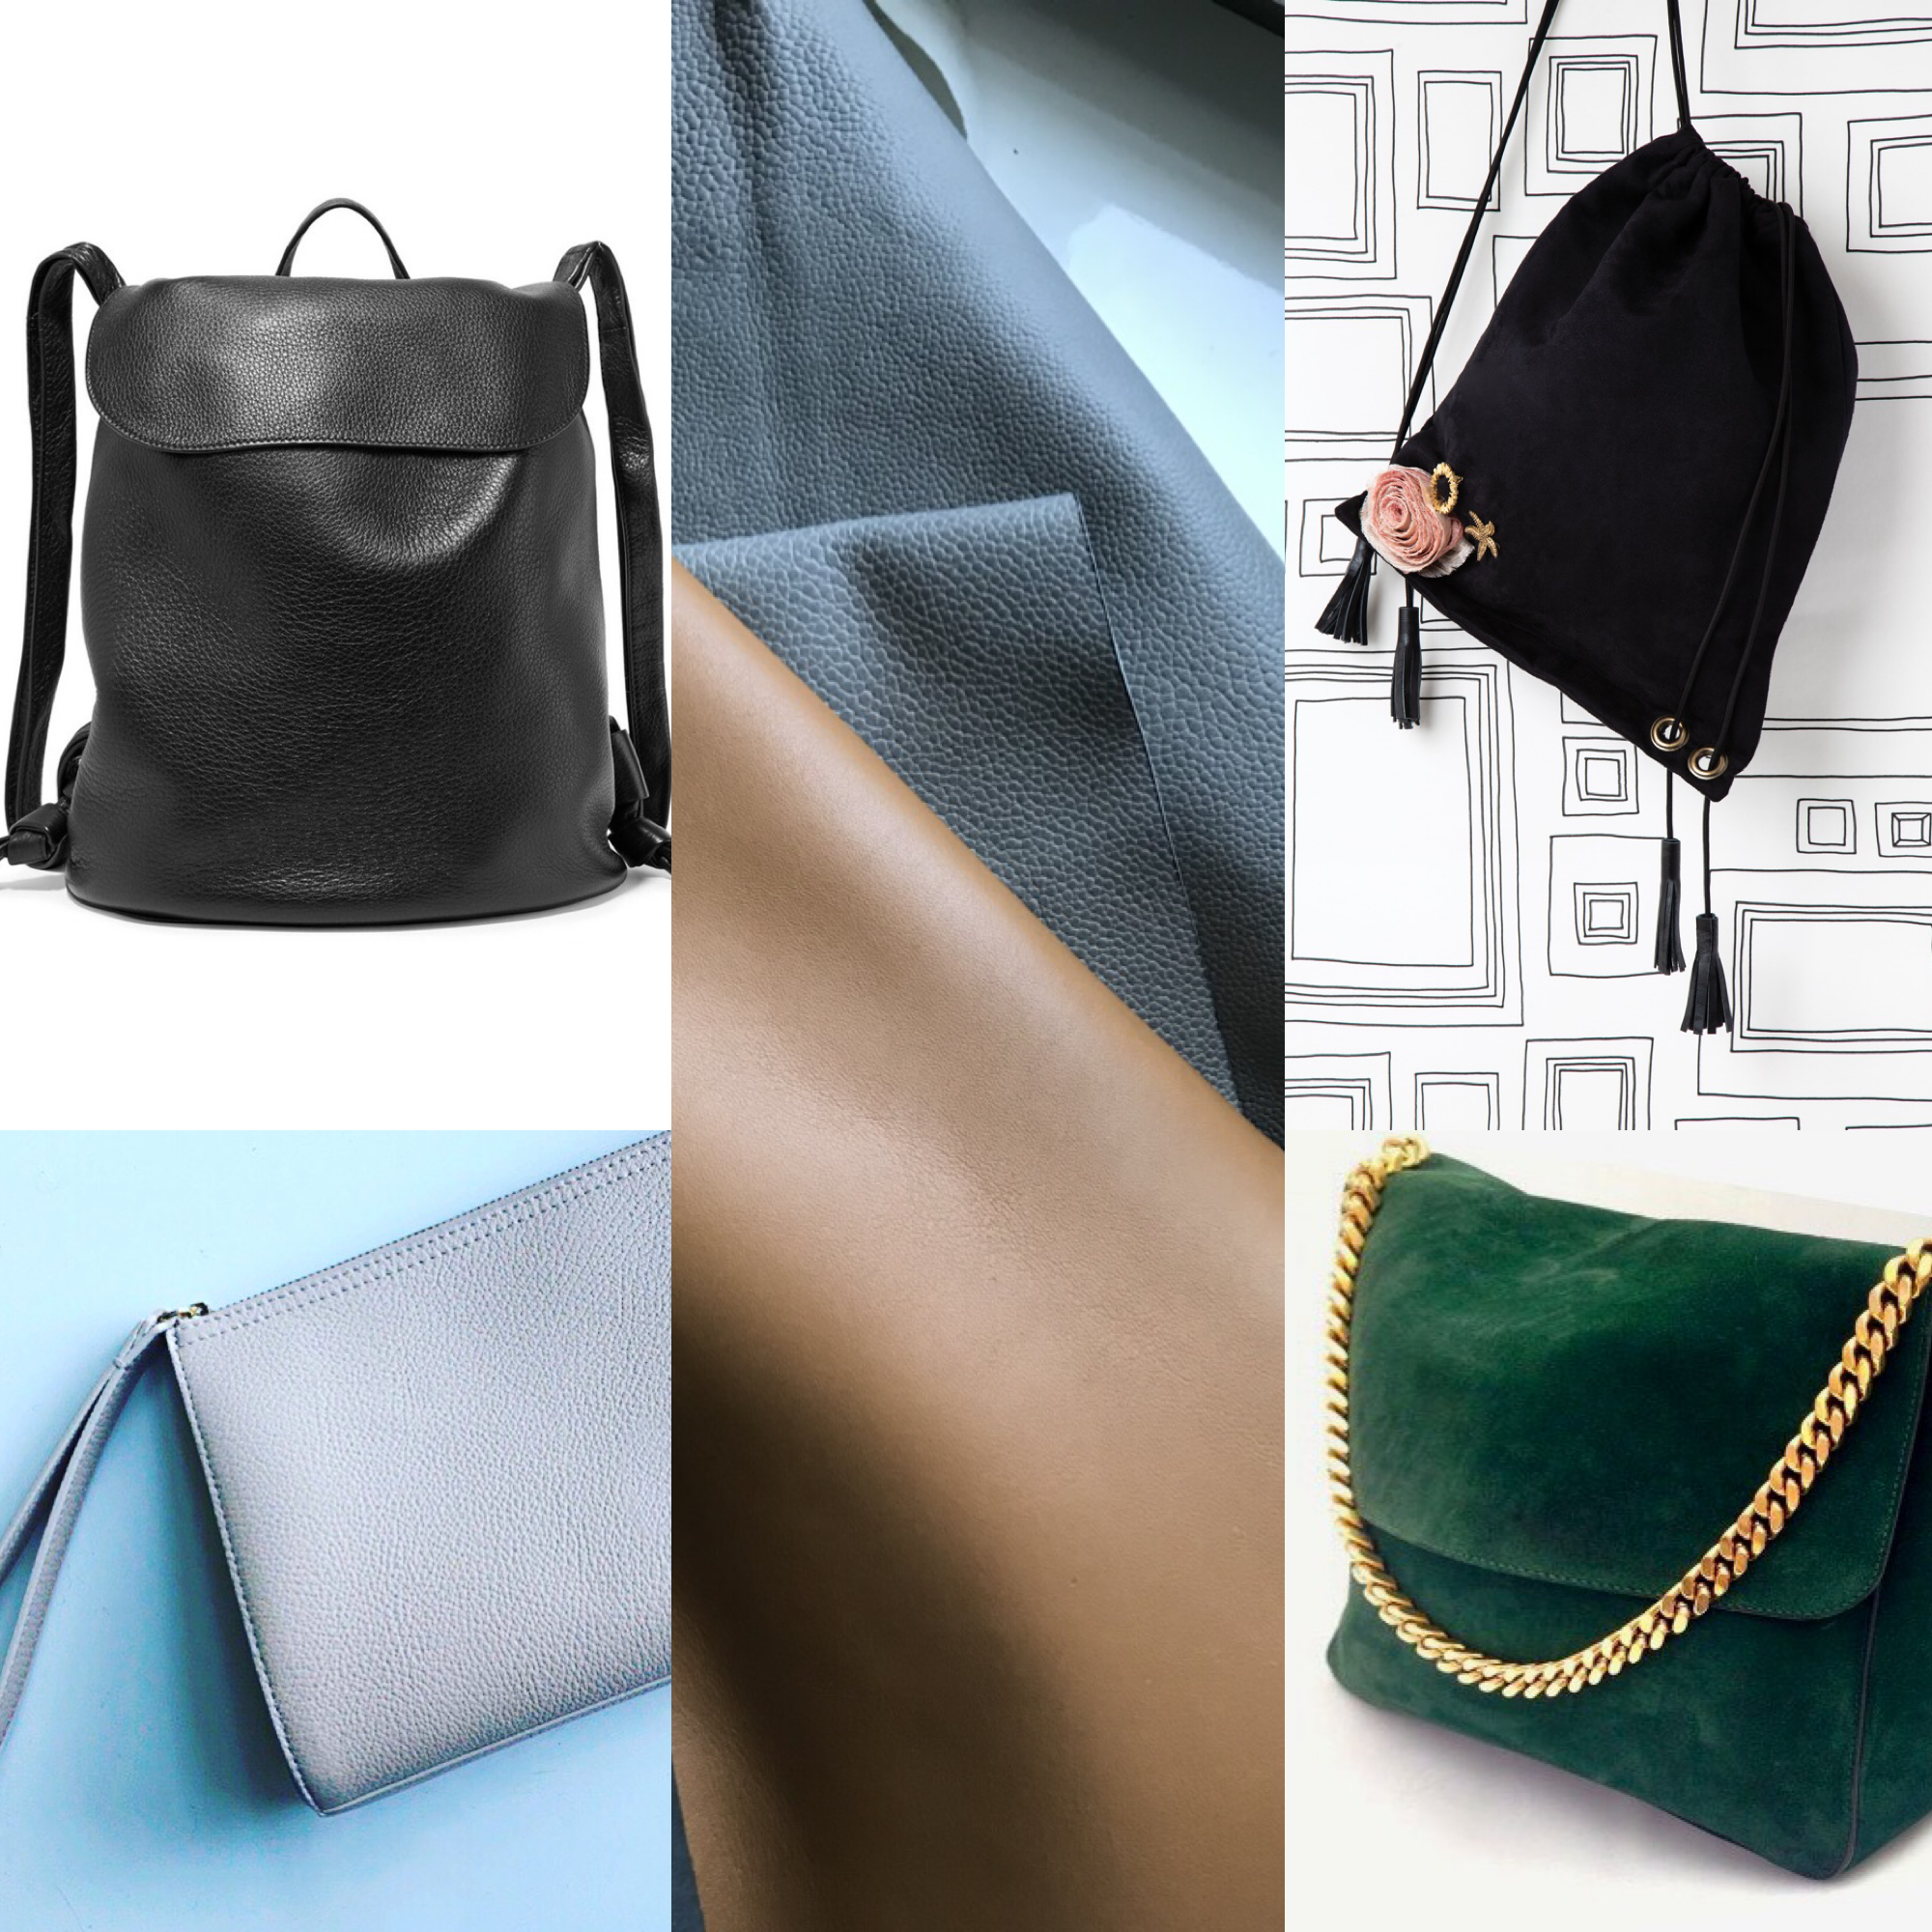
LEATHER
Nothing beats the durability of a genuine leather bag. The leather doesn’t even have to be new. Thrift stores, eBay, even your own closet likely offer a plethora of options. Most conventional home sewing machines, fitted with a leather needle and a teflon foot can handle leather up to about 3-ounce weight. Thrift stores and eBay are my go-to sources for purchasing leather.
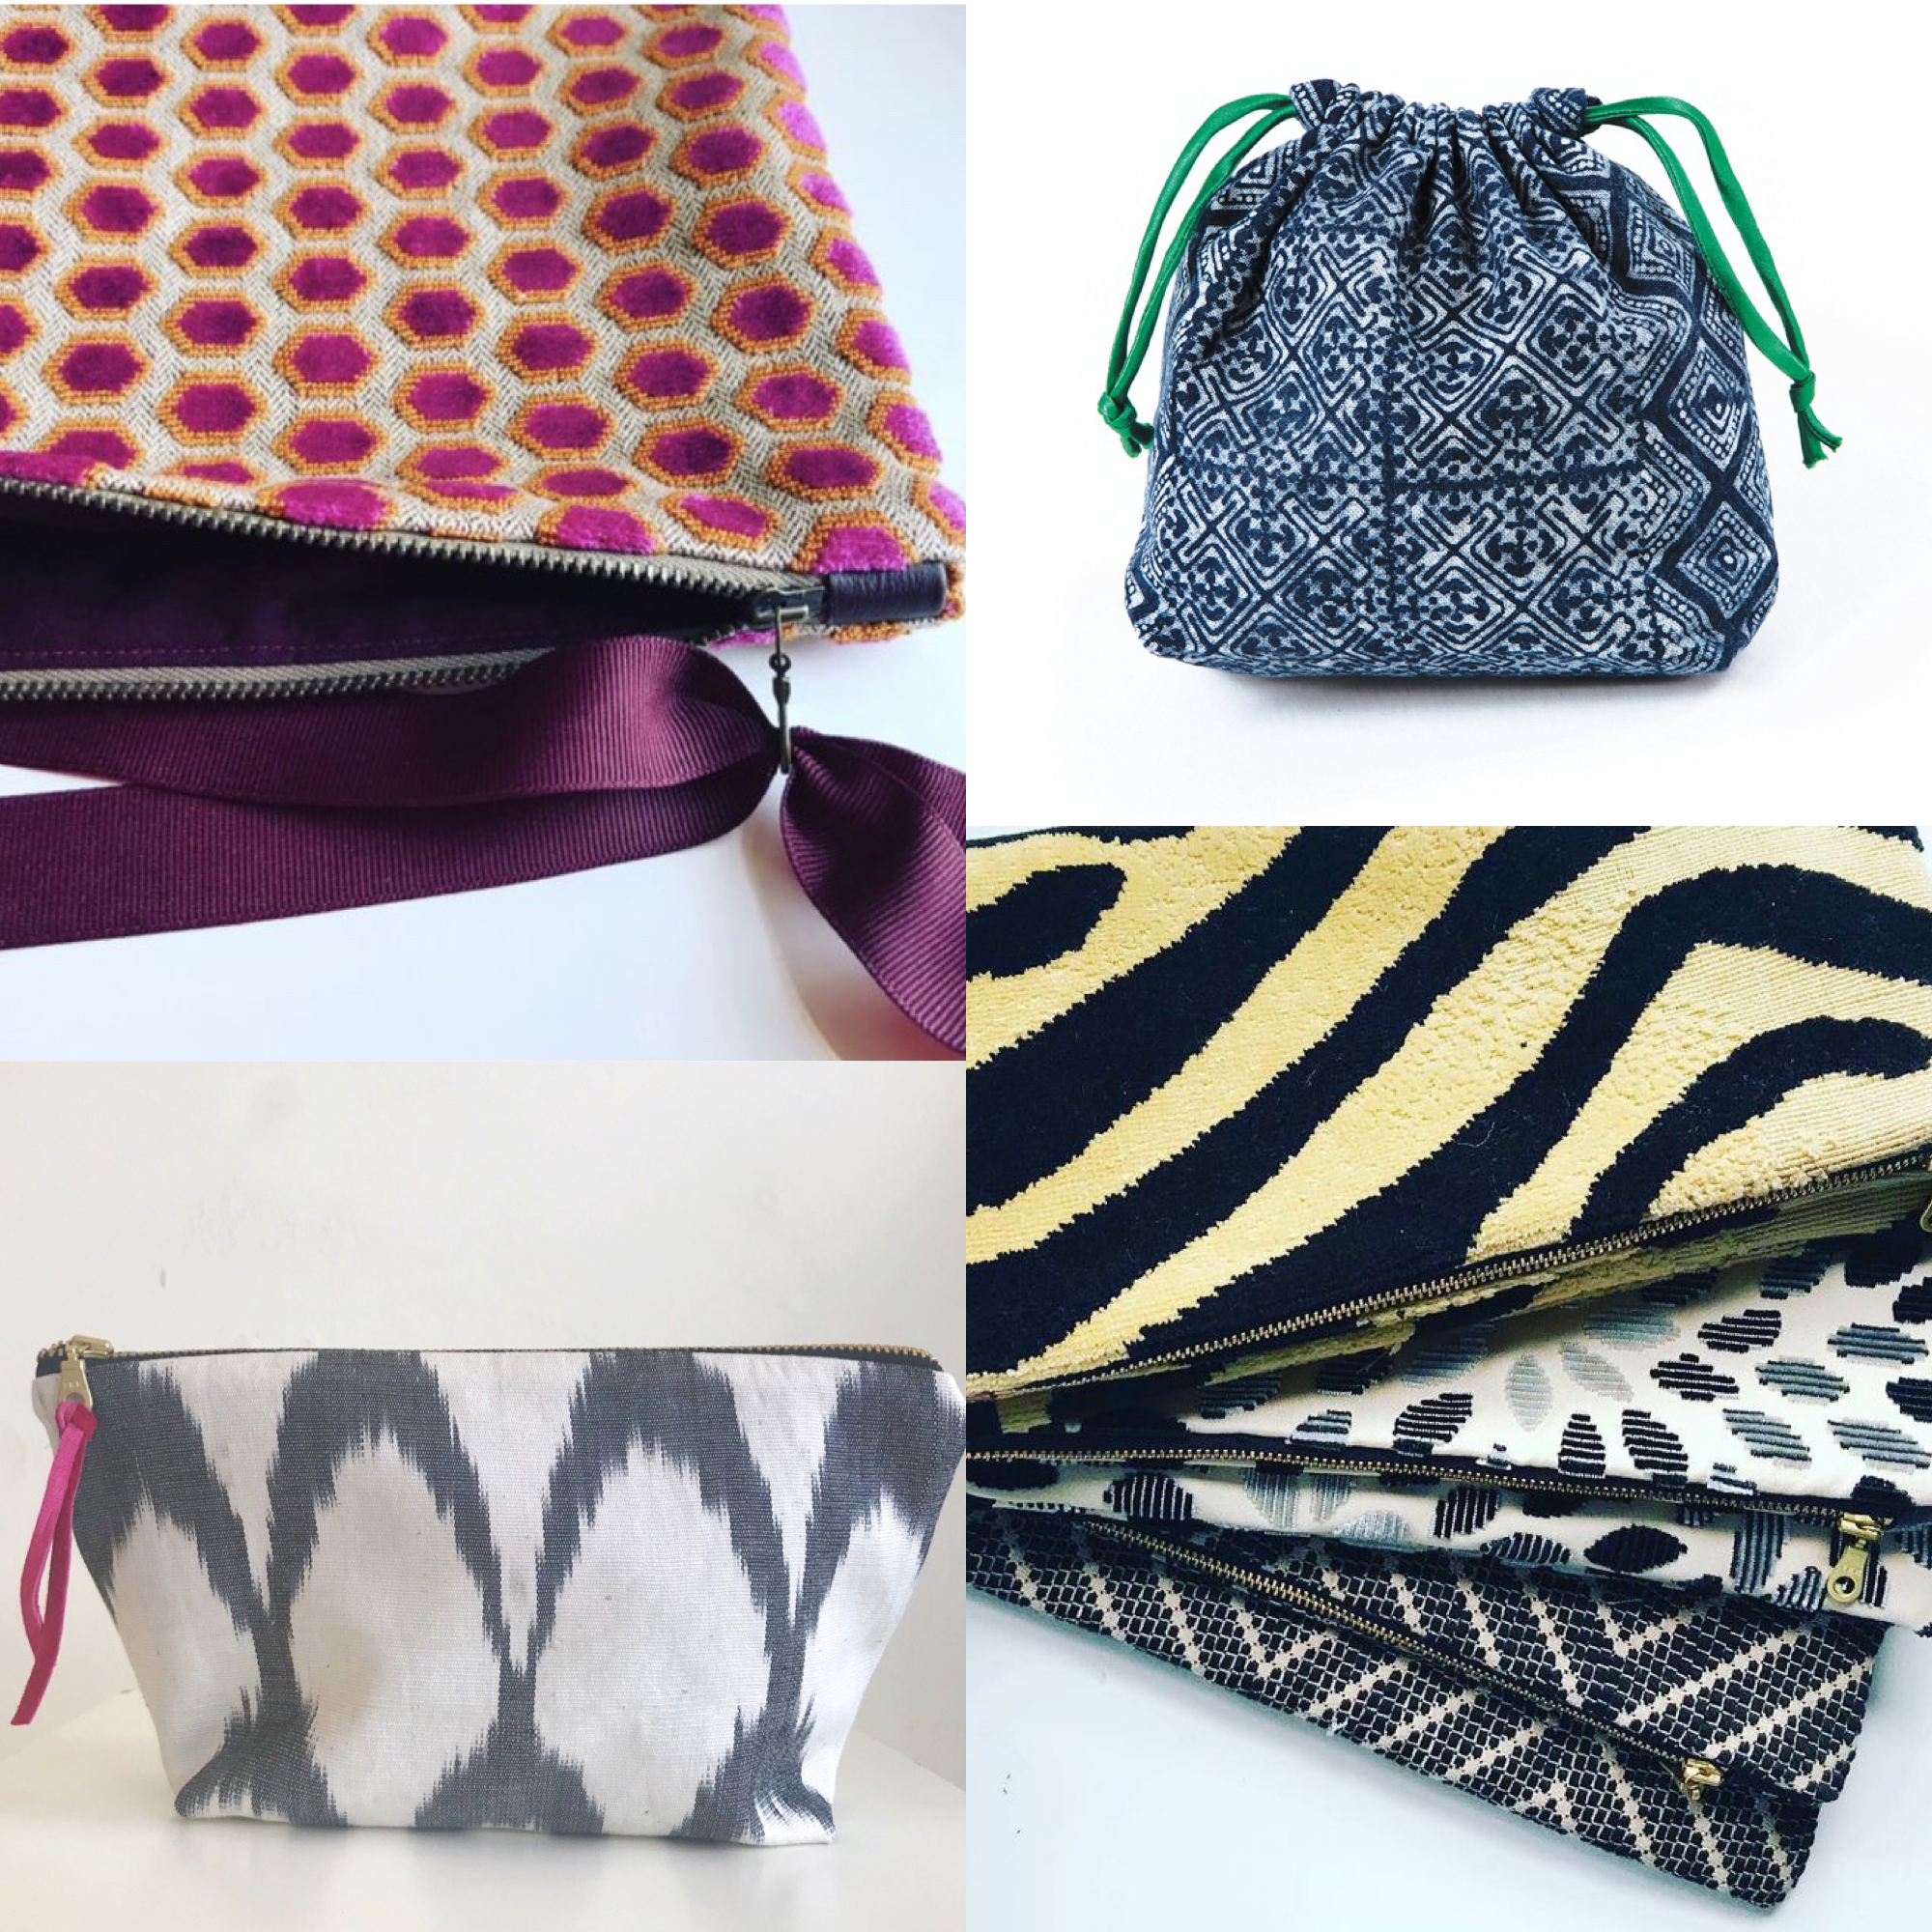
DECORATOR WEIGHT
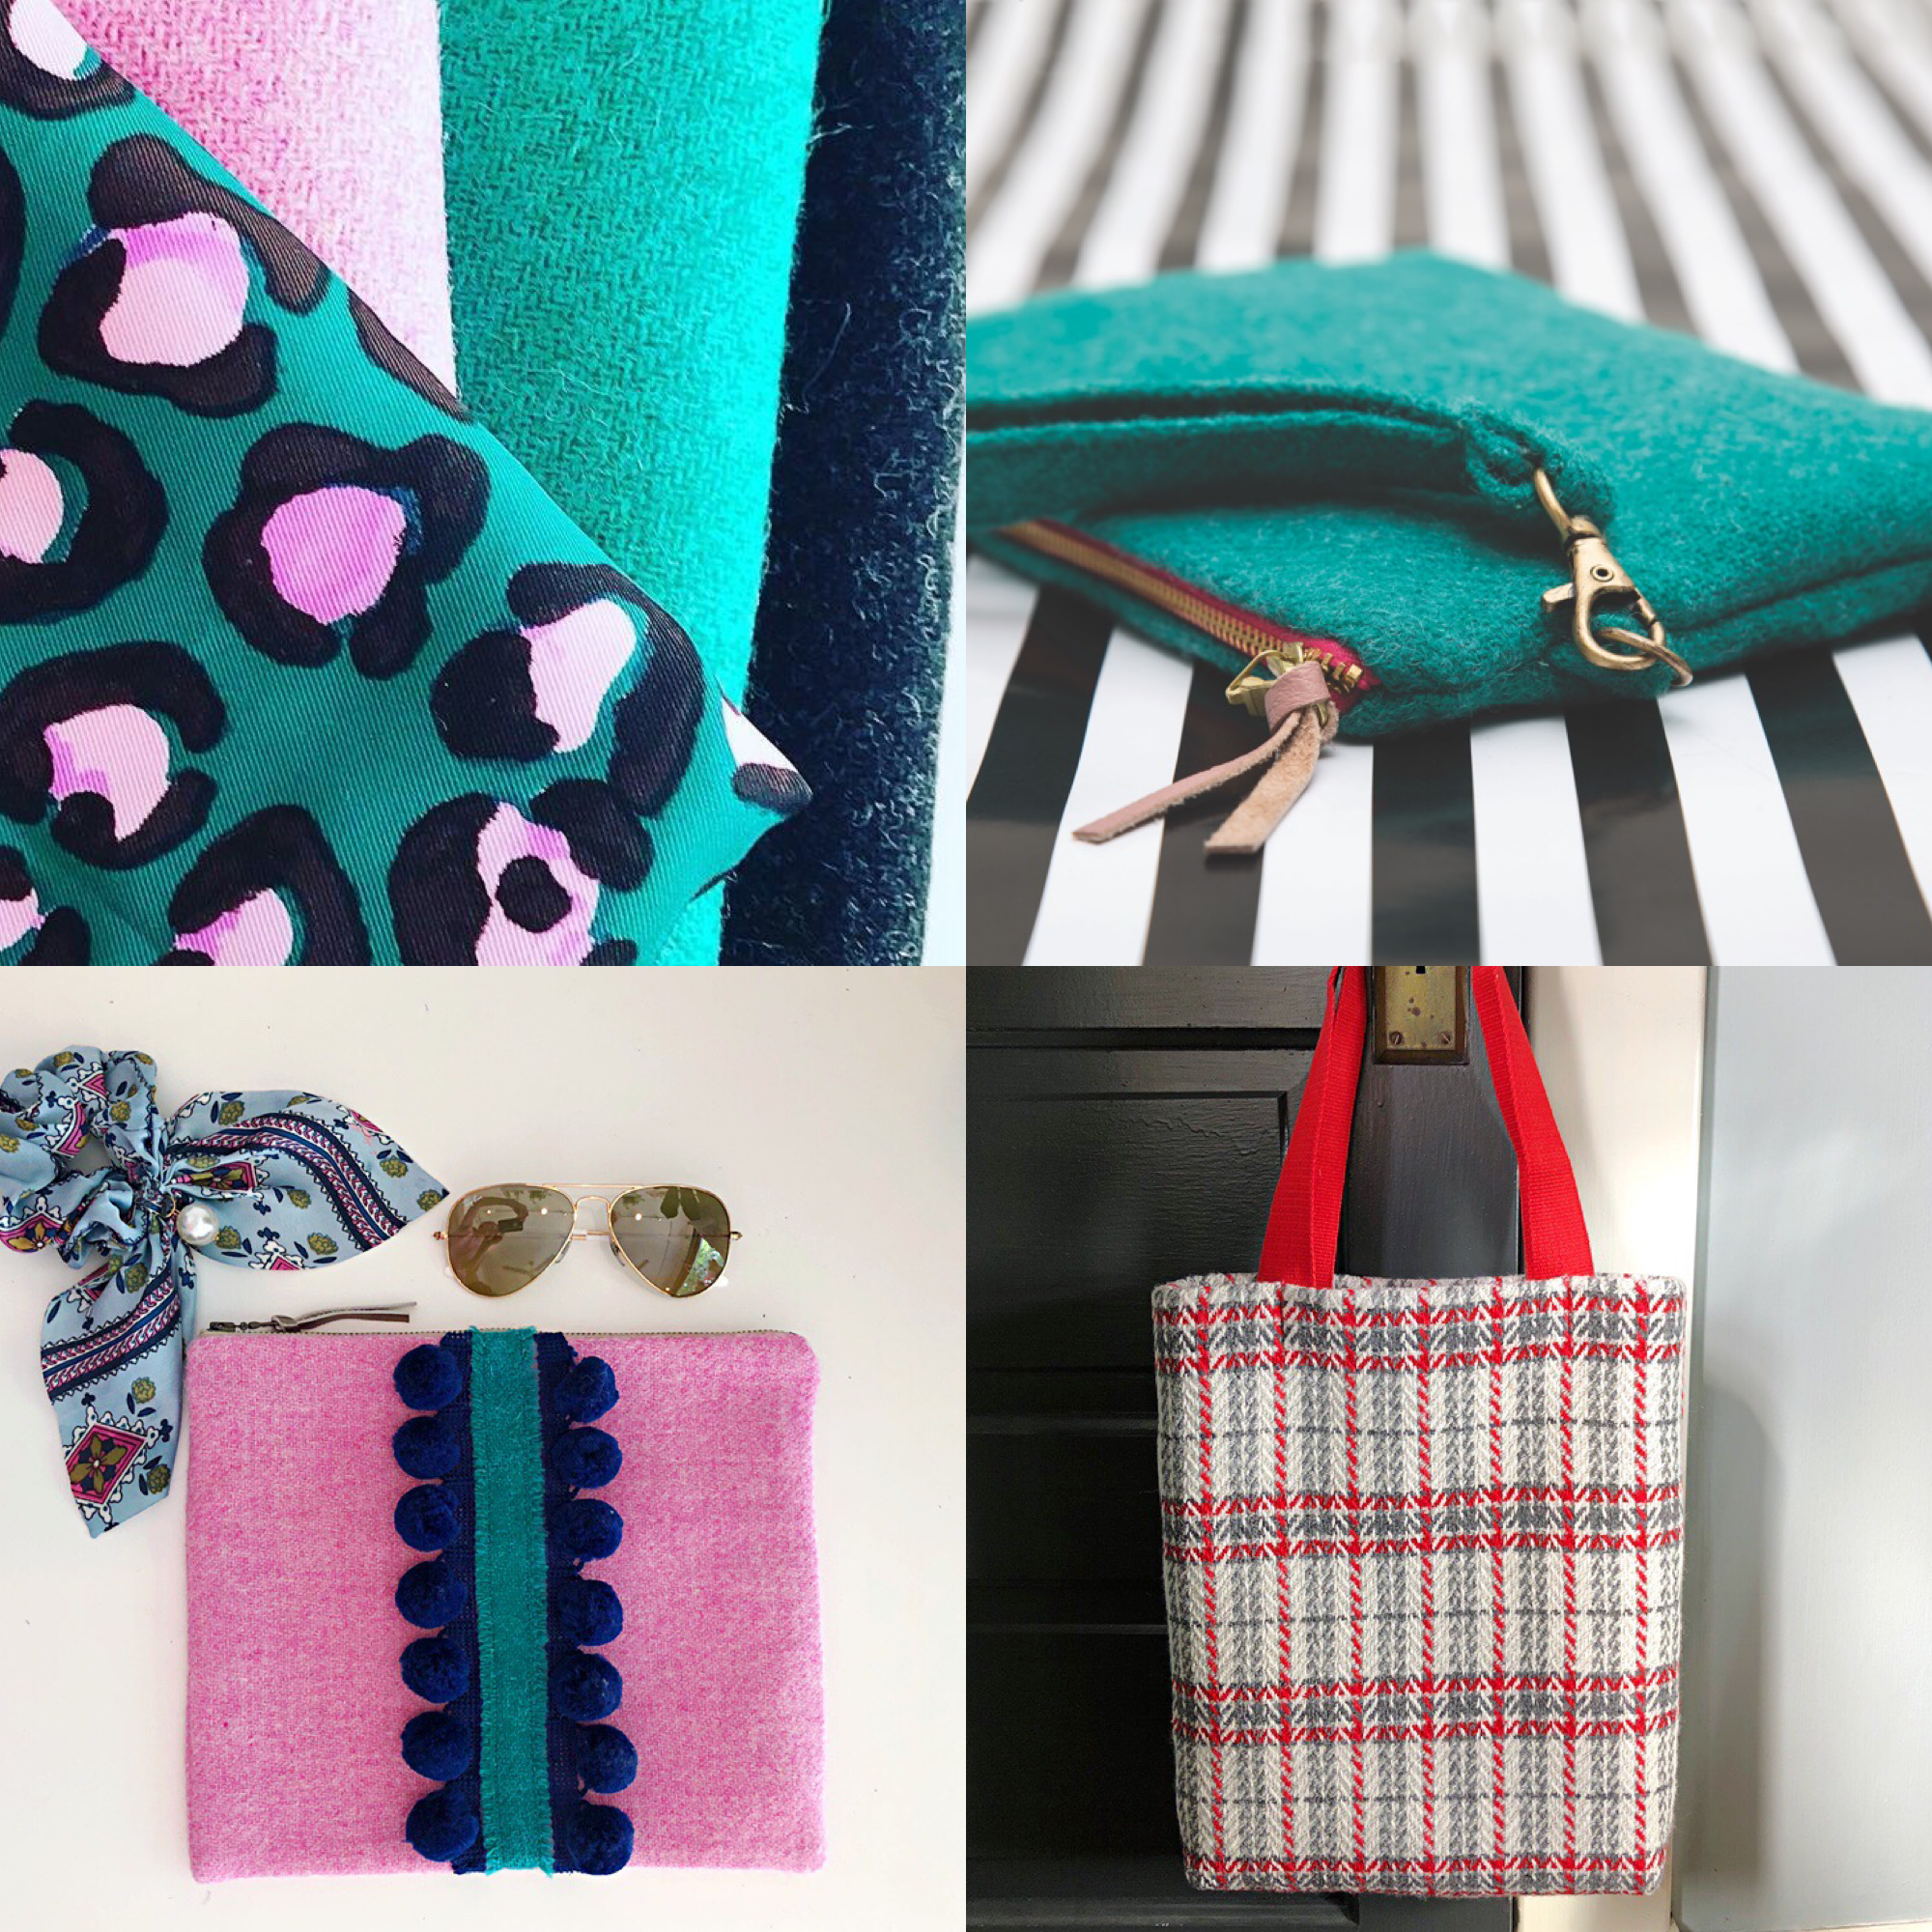
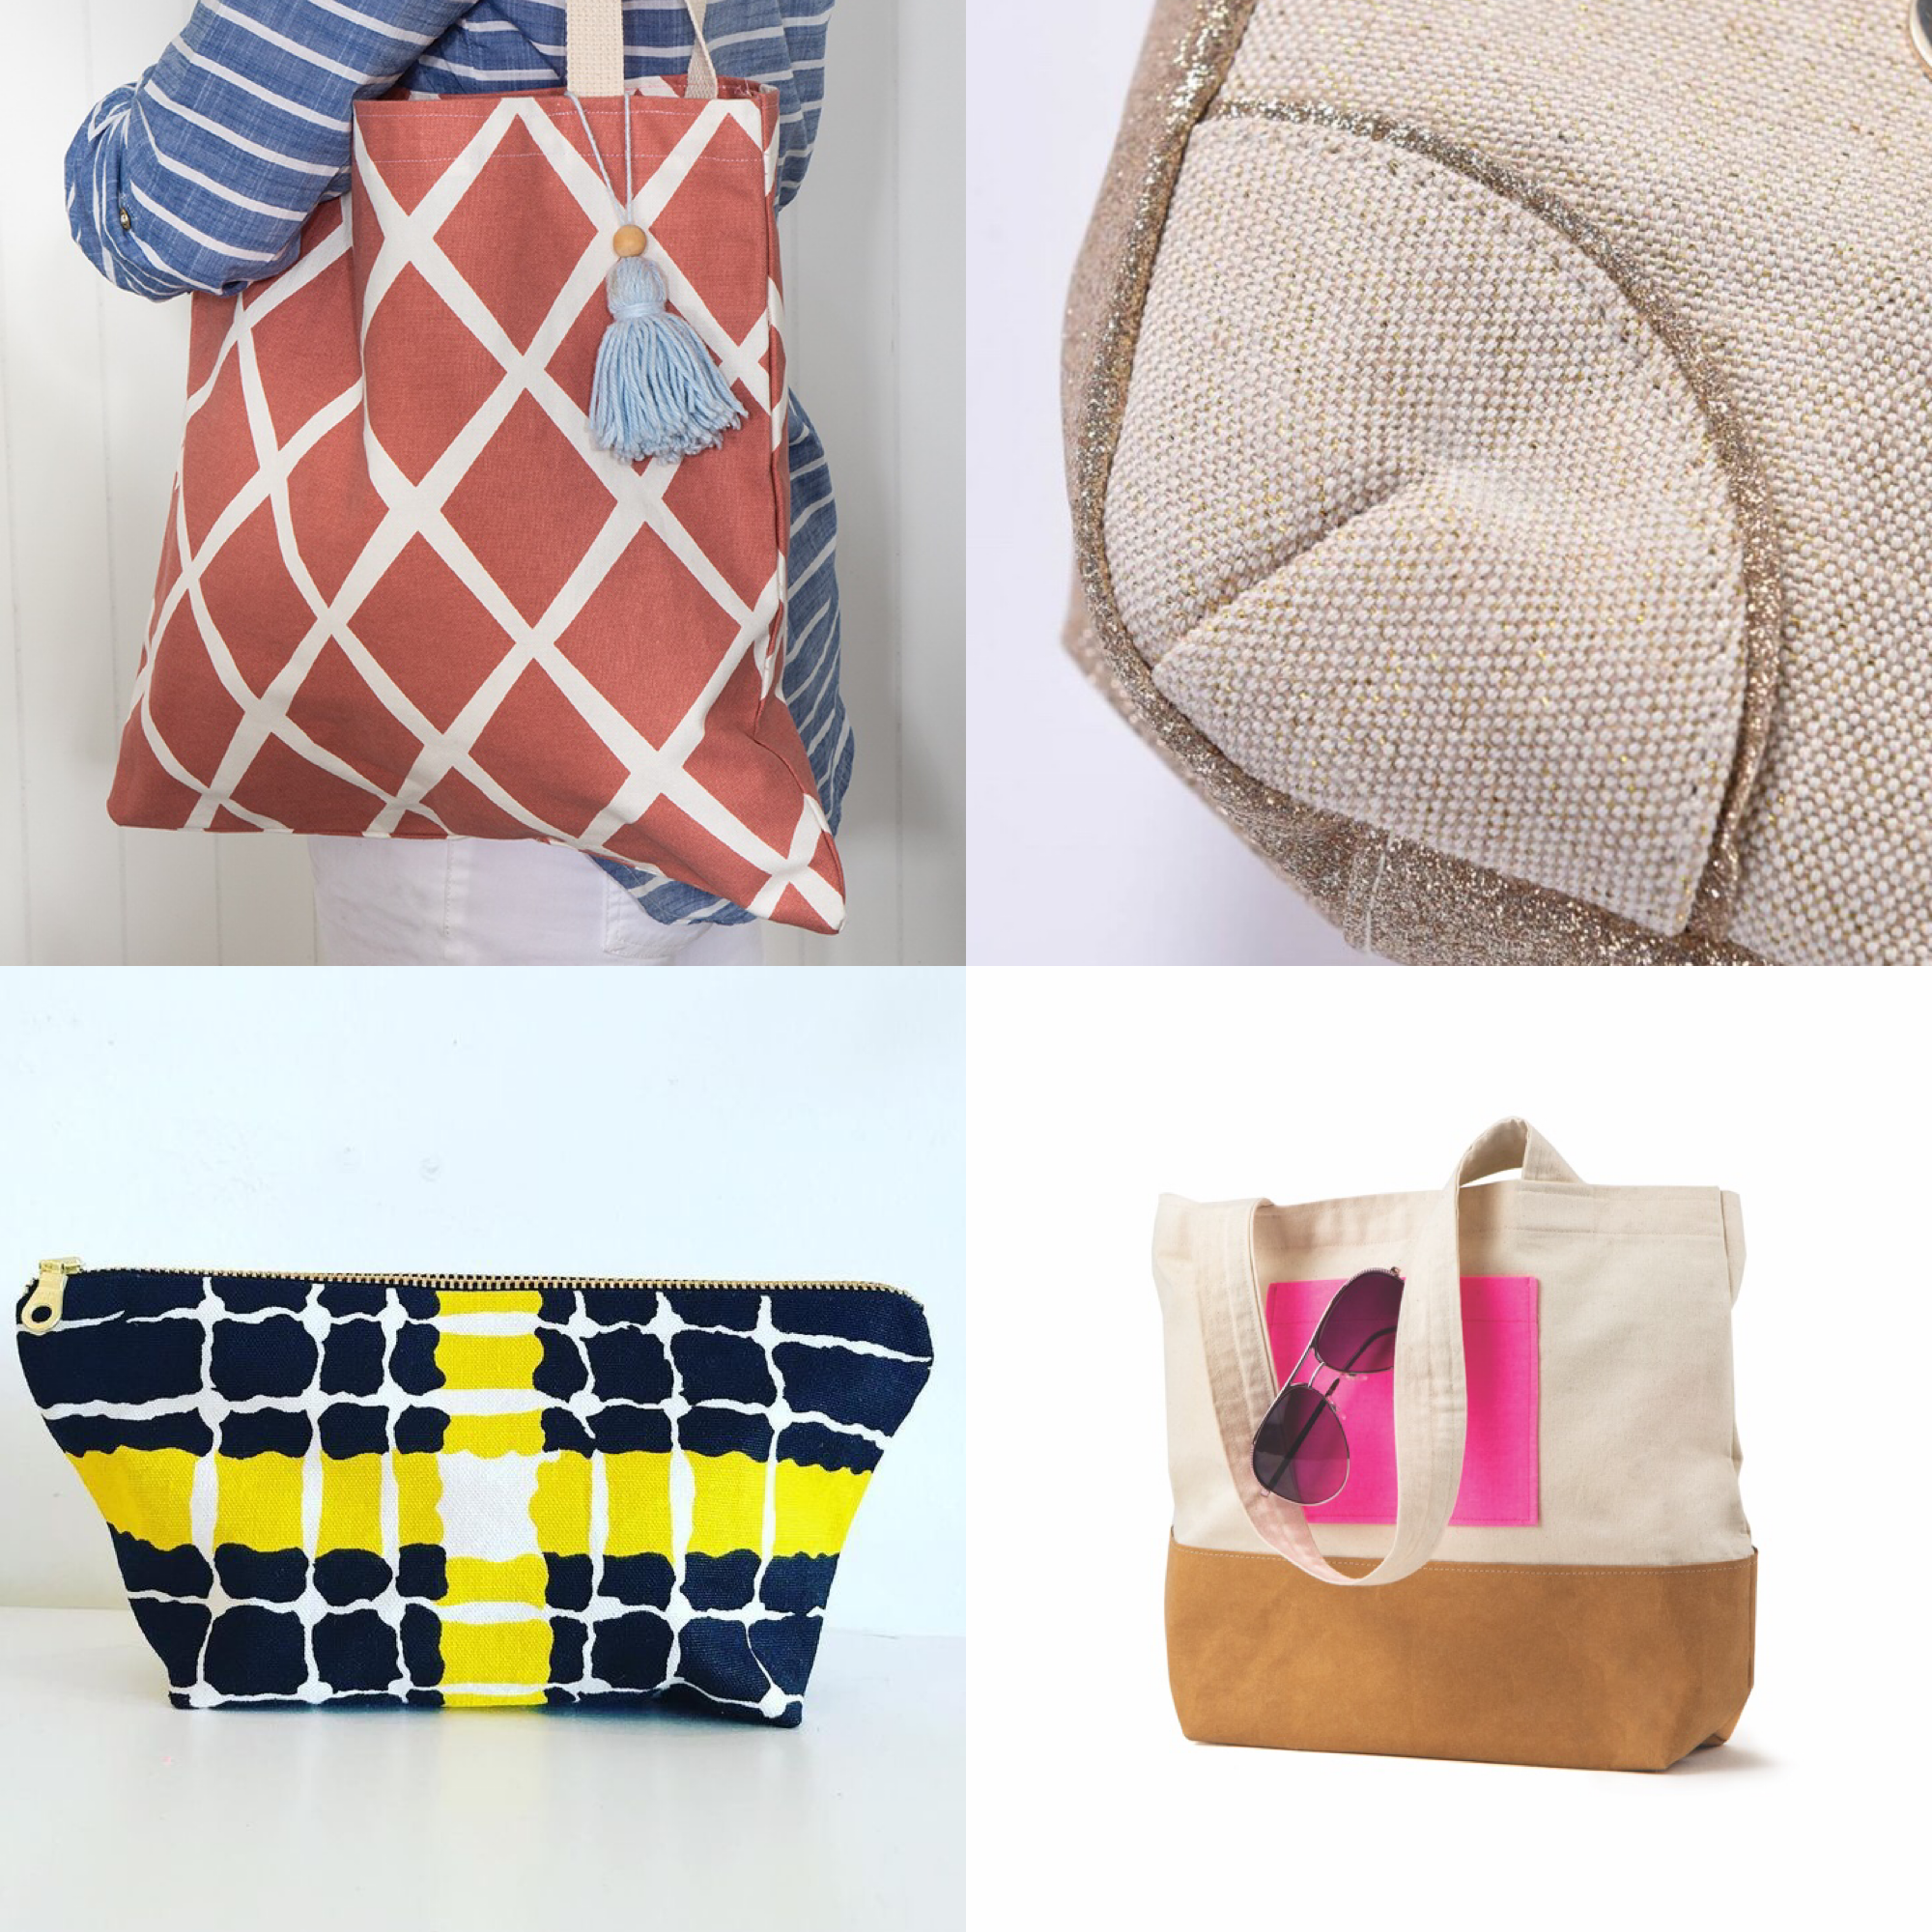
Decorator Weight, or home decor fabric is a bit of a deceptive term as it encompasses fabric that is suitable for upholstery as well as drapery and pillow weight fabric. So, there are as many options here as there are fabrics. Somewhere in the mid-weight is likely best. What can your machine handle? The bags above were created from a variety of weights. The heavier weight fabric would be great for bags that have fewer seam lines and therefore fewer bulky layers to stitch through.
TWEED
To me, Harris Tweed is the standard of bag making fabric. It is gorgeous, drapes beautifully, feels sumptuous and the depth of color is unparralled. However, true Harris Tweed is expensive- and if that isn’t enough, the shipping (from the UK) adds even more. So, a conventional tweed looks pretty great in comparison. Fortunately, tweed is found in all sorts of fabric stores at any price point and in old clothes too. (Carbon footprint reminder!)
CANVAS
Canvas Fabric is generally inexpensive, sturdy, easy to find and available in color and pattern. It is truly ideal and such a great substrate with which to create a durable and stylish bag. Like with so many other fabrics, there is a range of weights available. You will want to look for a medium weight canvas, in the range of 5-10 ounces per yard.
Here are a few cotton canvas fabric that I like to use when making bags.
Rifle Paper Co makes some really dreamy floral patterns.
MID-WEIGHT WOVEN
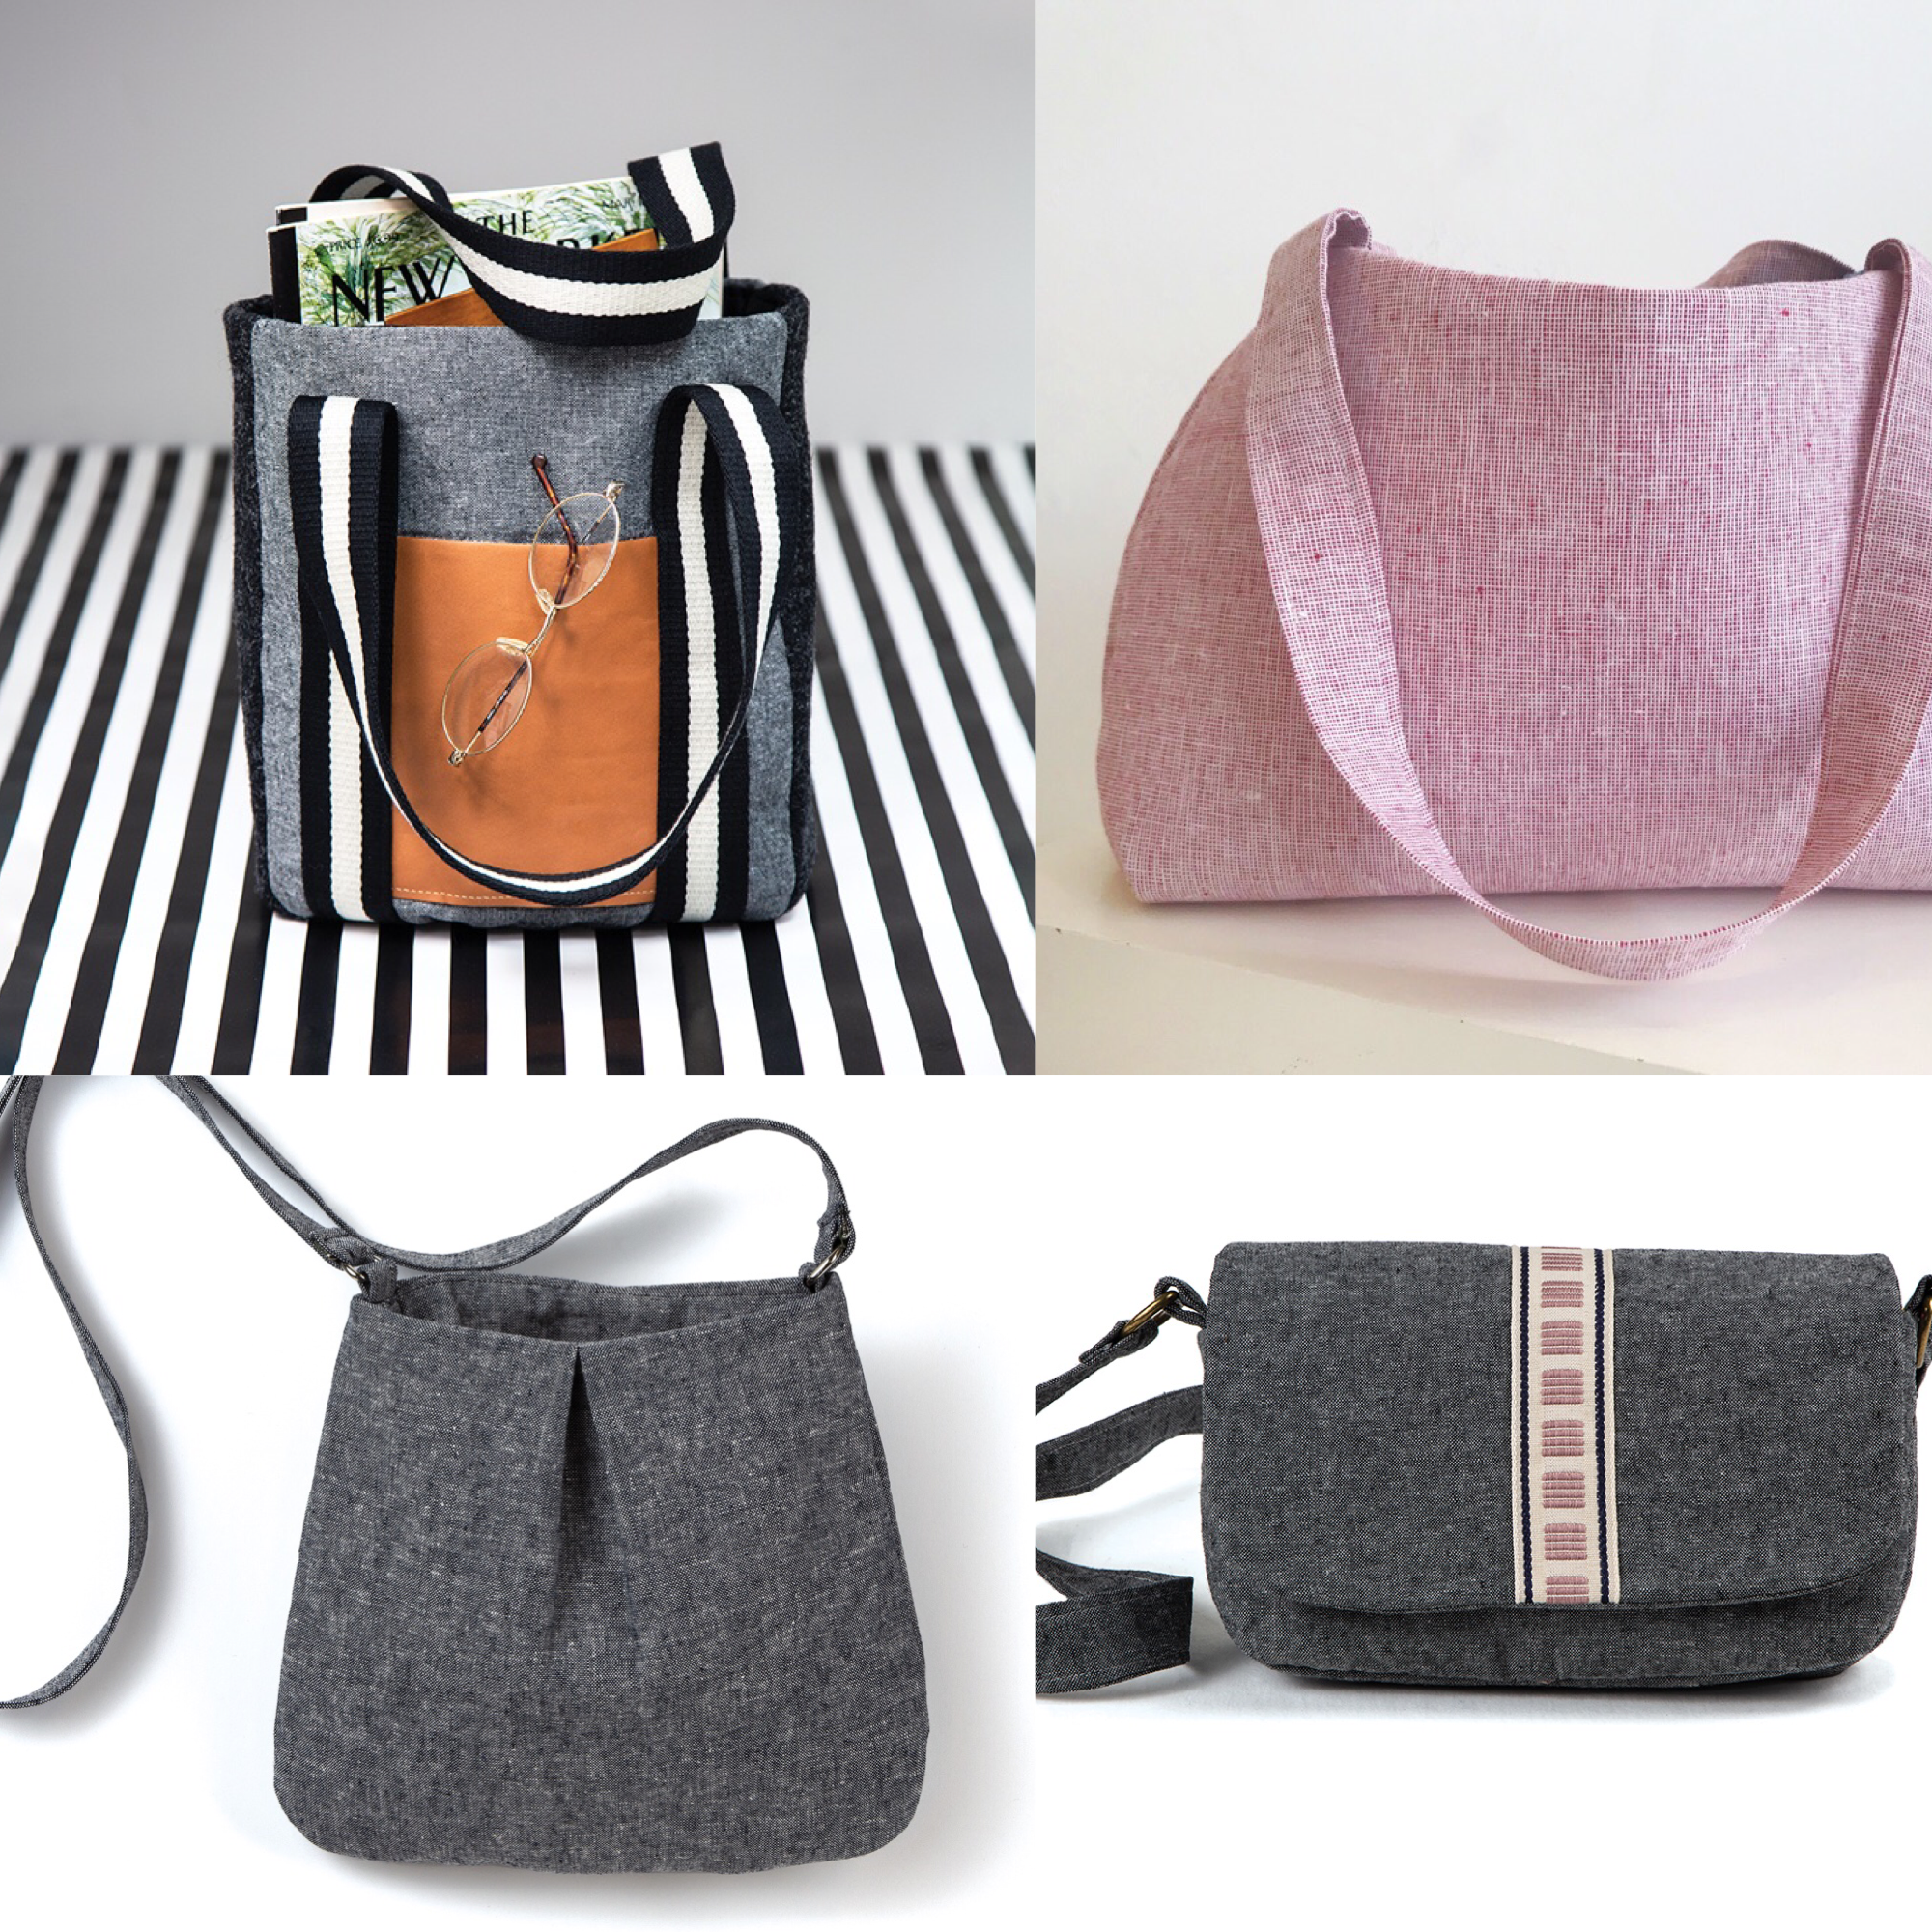
Hands down, Robert Kaufman Essex Linen is one of my favorite bag making fabrics. It is truly beautiful and available in so many colors. Though at the lighter weight for bag making, adding layers of interfacing and/or interlining or even quilting goes a long way toward adding shape and body.
If you would like to gain a deeper understanding of fabric and fibers, I’ve written a guide to help you. You can get it by clicking the link below.
The featured bags are projects from my new book, Sew Bags: The Practical Guide to Making Purses, Totes, Clutches & More; 13 Skill-Building Projects, available at book stores nationwide.
What are your favorite fabrics to make bags out of?
XOXO, Hilarie
How to make an adjustable purse strap
An over-the-shoulder bag doesn’t always work so great when you have kids or say, you need your hands to hold something else- or nothing. Years ago, the cross-body bag made a strong comeback as has the more recent resurgence of the “belt bag” (formally known as the fanny pack). What makes these bags so great is the ability to adjust the length of the strap. Whether you want to adjust it to fit your outing, outfit or just personal strap length preference, with a quick slide of the hardware, you are ready to turn any silhouette into a cross-body and reinvigorate your bag carrying game.
An over-the-shoulder bag doesn’t always work so great when you have kids or say, you need your hands to hold something else- or nothing. Years ago, the cross-body bag made a strong comeback as has the more recent resurgence of the “belt bag” (formally known as the fanny pack). What makes these bags so great is the ability to adjust the length of the strap. Whether you want to adjust it to fit your outing, outfit or just personal strap-length preference, with a quick slide of the hardware, you are ready to turn any silhouette into a cross-body style and reinvigorate your bag-carrying game.
Here’s a quick tutorial to show you how to make an adjustable purse strap!
How to make an adjustable purse strap
Commitment-free straps, for when you can't decide.
The double-fold strap and Savannah Cross-body bag used in this tutorial are projects from my book, Sew Bags: The Practical Guide to Making Purses, Totes, Clutches & More.
Supplies needed:
Strapping plus two 3” long tabs of strapping (to connect a D ring to each side of the bag) I’ll explain:) You can always use leather or cotton webbing straps in the same length and width as an alternative to fabric straps.
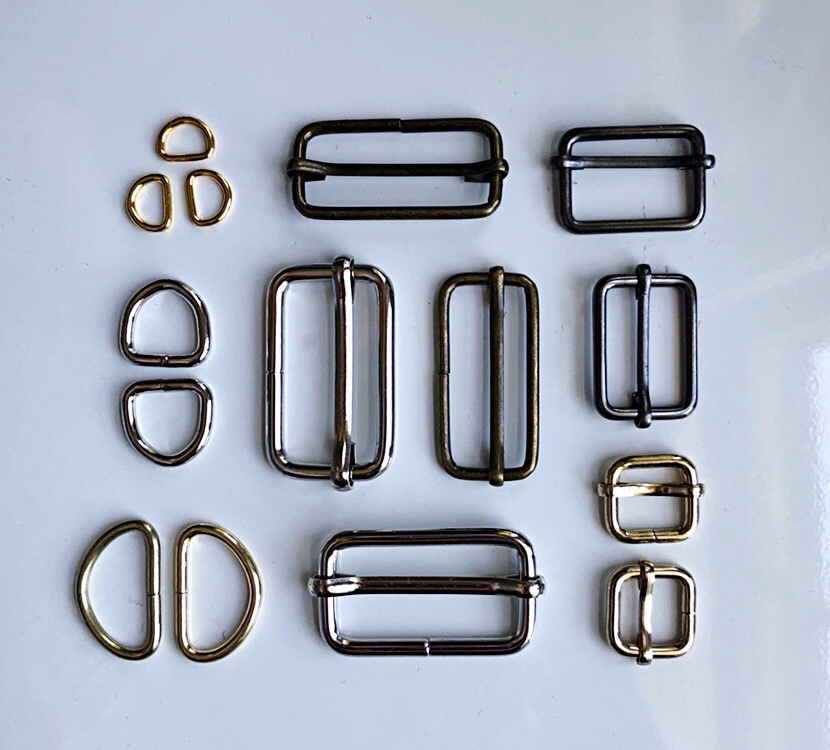
2 D-Rings *
1 Strap slider adjuster
The strap, tabs, D-rings and Slider all need to be the same width. In this tutorial, mine are 1/2”.
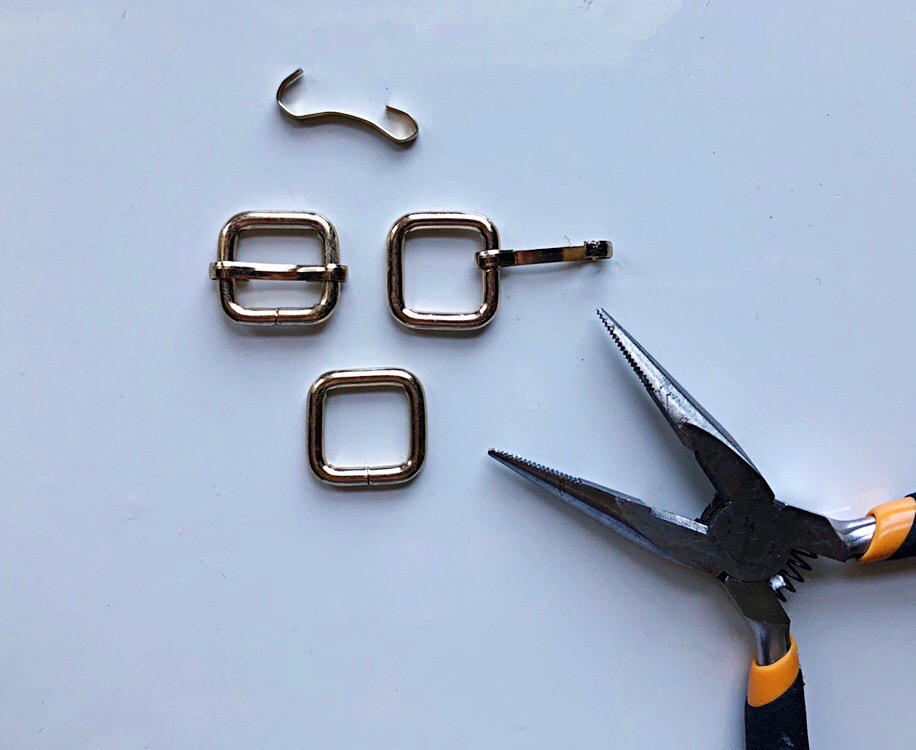
*If you are unable to find a D-ring the same size and color as your slider, you can always make some after-market improvements. For this tutorial, I used a pair of pliers to remove the center slide and made a set of D-ish (square, actually!) rings. Let’s call them a D+ pair.
Adjustable Straps
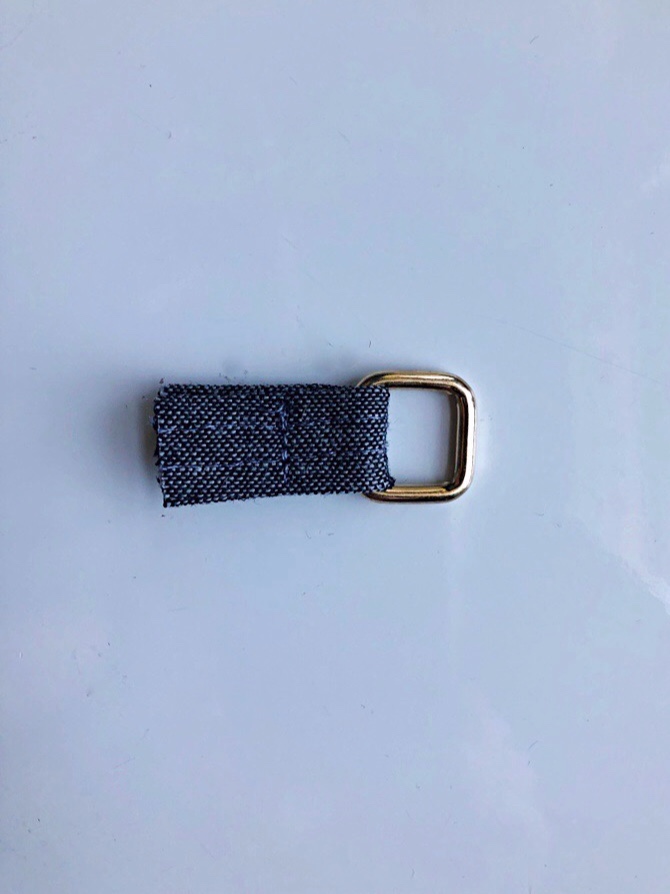
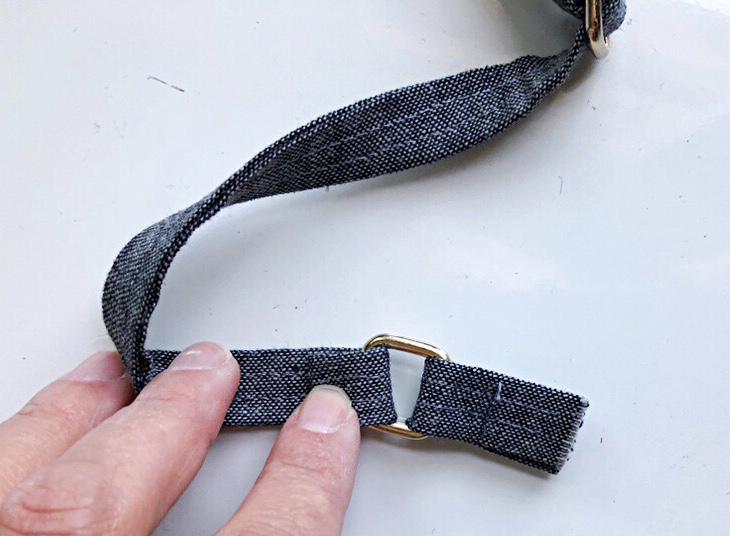
Take one of the 3” tabs and slide over the D-ring, folding in half so that the raw edges align. Pin and stitch in place about 3/4- 1” below the hardware. Repeat for the second tab.
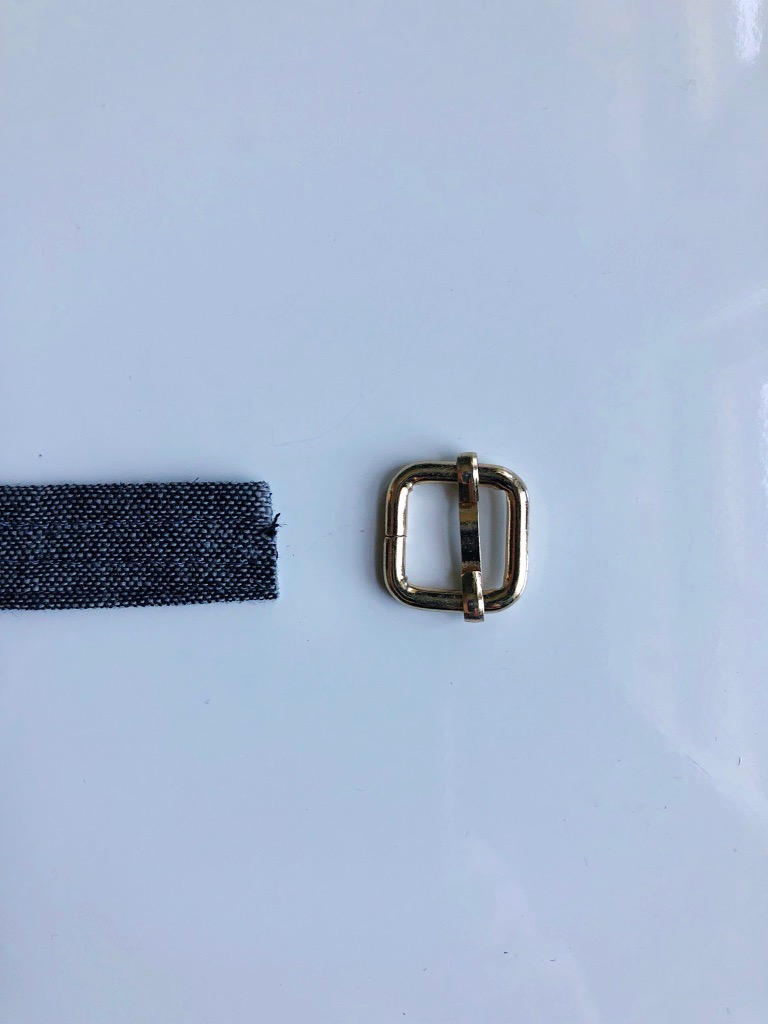
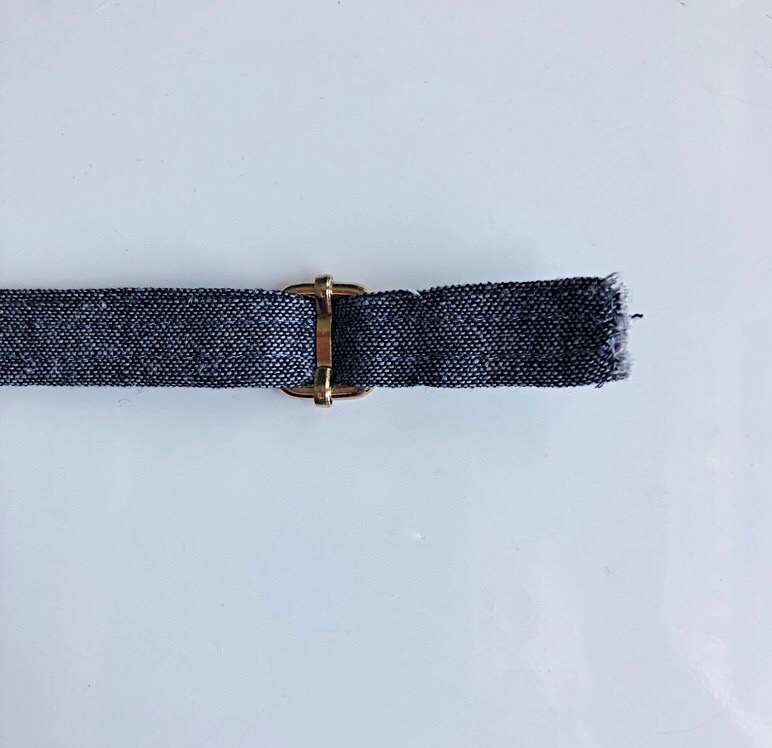
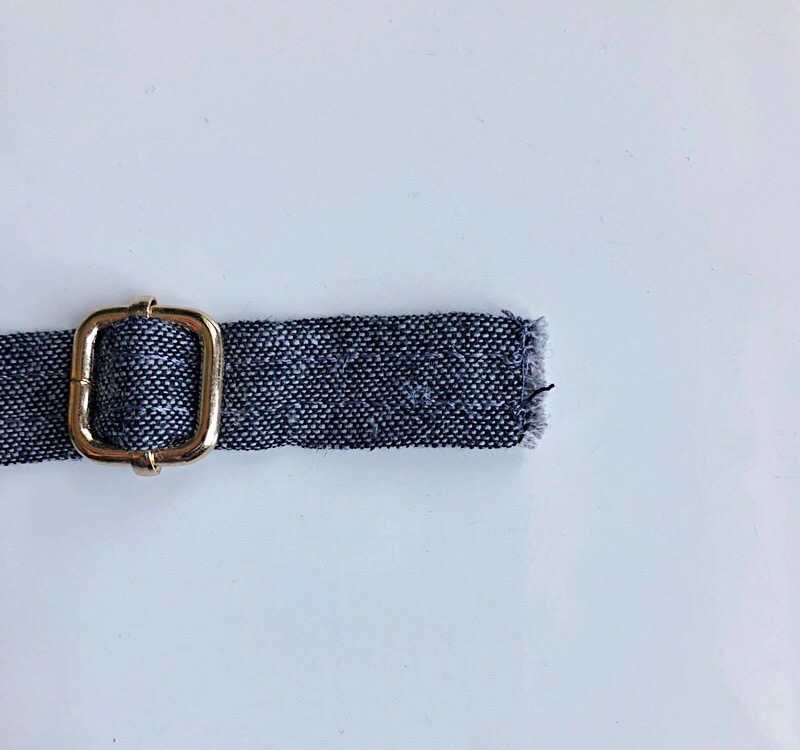
Place the slide adjuster right side down, with the strap placed with the outer side facing down, too. Thread the long piece of strap (the tail) through the slide adjuster’s center bar.
Set your sewing machine to a narrow stitch, (around the 2.0 range). Stitch across the raw edge. Before you do this, grab both your top and bobbin thread and wrap around your finger while sewing to guide your machine and ensure that it sews smoothly along the strap’s end and you won’t get a “birds nest”.
Do you see how the edge of the strap is just slightly narrower than the rest of the strap? Depending on your choice of fabric, you could use an iron to spot shrink it, but that is another lesson. By shrinking the end just a bit, it will allow the tab to fold in and the edges to be concealed within the fold.
Fold the end of the strap under about 1” and tuck the raw edge inside that fold about 1/2” and pin.
Stitch in place. Make sure to reinforce with a back stitch to secure.
For a wider strap, I would likely stitch the width of the strap in a rectangular box but for a 1/2” width, one line of stitching should do.
The raw edges are completely concealed. No visible threads!
Threading the Slide Bar
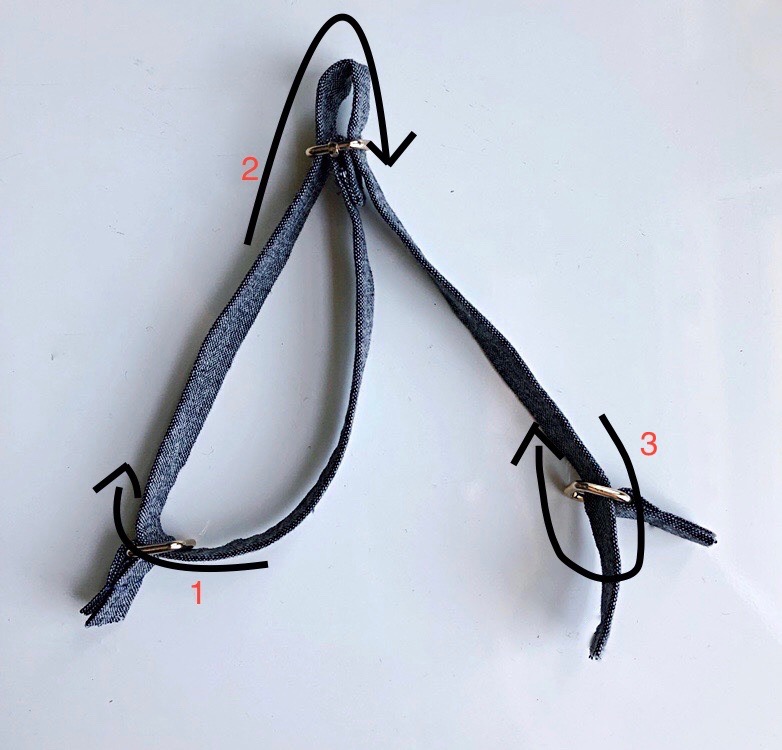
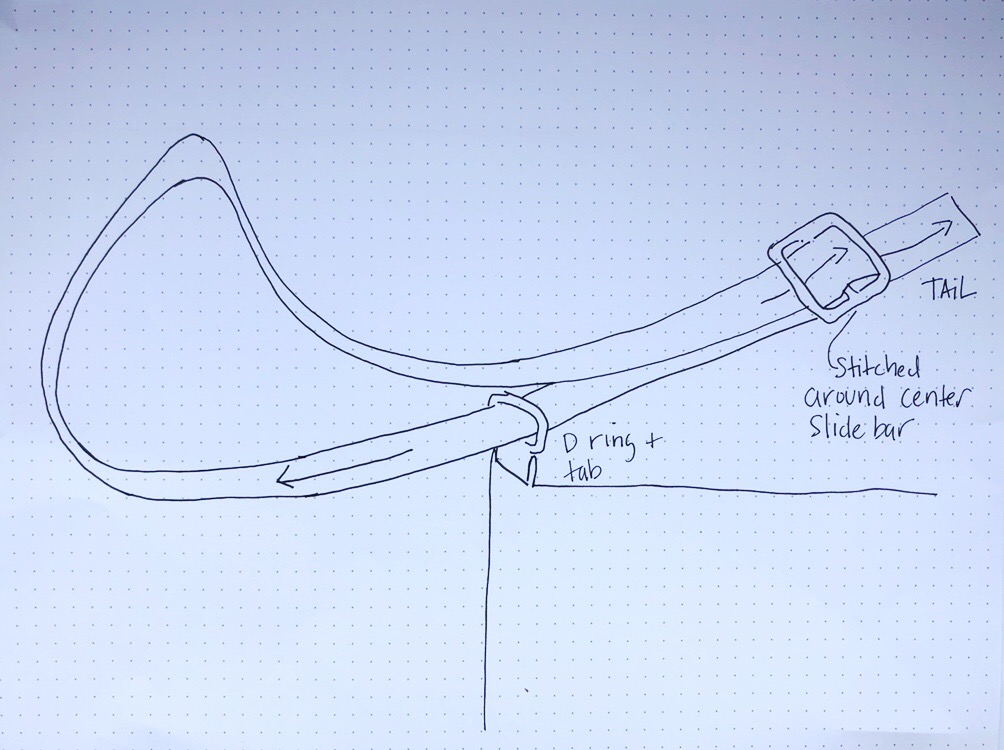
This part is a little bit tricky the first time. Here is a picture and a drawing to help you visualize the steps. First, locate the slider with the center bar. We are going to take the “tail” of the strap and thread it through D-ring (number 1), over the center slide (number 2) and through the opposite D-ring (number 3).
Tabs one and three will be sewn into the side seams of the bag.
This picture is to illustrate the strap in relation to the bag.
In any bag making venture, (generally!) this strap will be added way before the bag is complete. This picture is to give you the general idea (and for you to go get my book:) for a more complete lesson.
Feed the “tail” through the other D-ring tab on the opposite side of the bag. Before you sew - make sure that the strap is facing the correct way and has not twisted in the threading process. Fold and stitch the raw edge of the “tail” to the second side tab.
An adjustable strap can be used with any bag that has a removable strap. Imagine for a moment how this might change your bag carrying experience. One bag, thoughtfully designed with the right hardware and removable straps- could at once be a handbag, crossbody bag, clutch, tote or shoulder bag with the quick switch of a strap. Think about it.
Consider adding an additional “guitar style” strap to elevate your everyday bag.
Straps are such a fun way to introduce an individual approach to a handbag, distinguishing it as its own distinctive piece. I am so excited to see the bags that you are going to make. Please use the hashtag #sewbags on social media- and be sure to tag me @littlestitchstudio.
Are there any specific techniques that you would like to learn? In my next post, I am going to share my favorite bag making fabrics.
XO, Hilarie
Fashion education has never been more fashionable.
From basic block cutting to the smallest finishing details on a garment, this course will lead the way through the essential stages of garment concept and construction. I will introduce the students to the world of pattern cutting, draping on a dress form as well as ways to breathe life into a flat design drawing in order to achieve a three-dimensional garment. Basic sewing techniques will be used to create darts, sleeves, necklines and pockets to add style and variation to a design. The breadth of the subject will be punctuated by some historic costume lessons and an introduction to haute couture.
I hope this class will awaken your child’s interests and inspire them to create the perfect silhouette and a beautiful, final piece.
This class is designed for teens and tweens that already know how to sew but want a more in-depth experience. This pilot program is scheduled for Thursday evenings in August from 6-9PM. ( August 8, 15, 22 and 29) $300; all supplies included.
New Fashion Studies Course for Teens and Tweens!
From basic block cutting to the smallest finishing details on a garment, this course will lead the way through the essential stages of garment concept and construction. I will introduce the students to the world of pattern cutting, draping on a dress form as well as ways to breathe life into a flat design drawing in order to achieve a three-dimensional garment. Basic sewing techniques will be used to create darts, sleeves, necklines and pockets to add style and variation to a design. The breadth of the subject will be punctuated by some historic costume lessons and an introduction to haute couture.
I hope this class will awaken your child’s interests and inspire them to create the perfect silhouette and a beautiful, final piece.
This class is designed for teens and tweens that already know how to sew but want a more comprehensive experience. This pilot program is scheduled for Thursday evenings in August from 6-9PM. ( August 8, 15, 22 and 29) $300; all supplies included.
This is an overview of what I plan to cover:
• Fashion Illustration Techniques; Including Fashion Flats, Mood Boards and Croqui Development
• Beginning Conceptual Design
• Collection Development
• Apparel Sewing Techniques
• Garment Construction
• Beginning Flat Pattern & Garment Draping on a half-scale form
• Introduction to Textile Identification and Design
Your child will leave with:
Portfolio of Seam and Seam Finish Samples
A working Textile Identification Book complete with swatches
Portfolio of Sketch and Designs including Flat sketches, illustrations, repeat designs and mood boards
Plus a finished garment with process photos
A Conversation with Cathy Lewis
Recently I was invited to sit down with Cathy Lewis of WHRV’s Hearsay With Cathy Lewis to talk about my work, my new book, Sew Bags: The Practical Guide to Making Purses, Totes, Clutches and More and what it is like teaching kids (and adults!) how to sew. Here is the podcast link for you to listen and join in the conversation.
Recently I was invited to sit down with Cathy Lewis of WHRV’s Hearsay With Cathy Lewis to talk about my work, my new book, Sew Bags: The Practical Guide to Making Purses, Totes, Clutches and More and what it is like teaching kids (and adults!) how to sew. Here is the podcast link for you to listen and join in the conversation.
https://podcasts.apple.com/us/podcast/hearsay-with-cathy-lewis/id218834565
XO, Hilarie

