

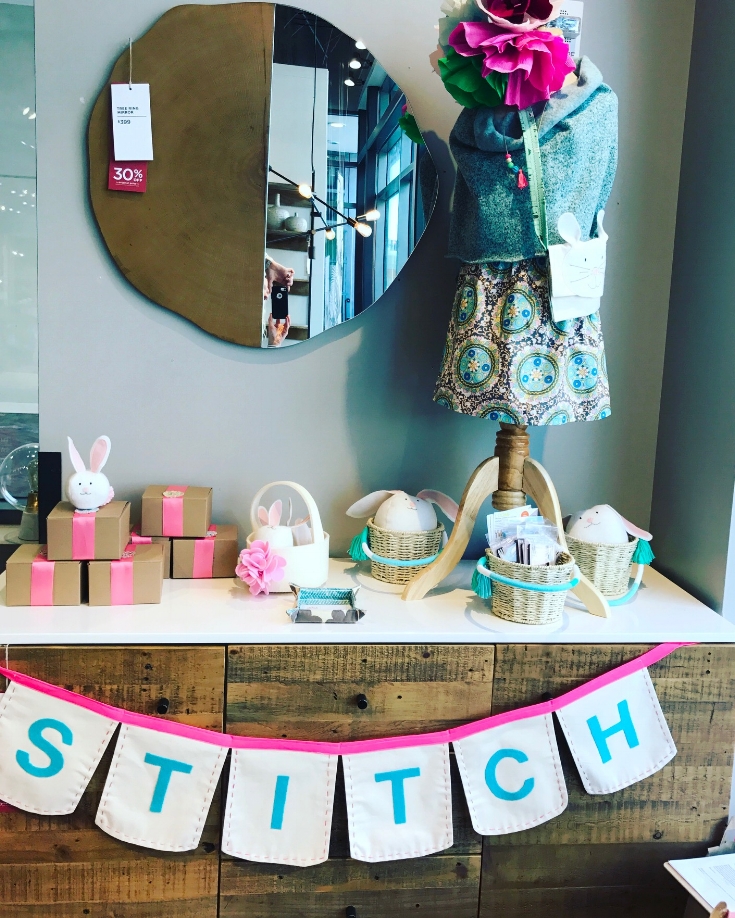
Pop-up Workshop at West Elm VB
I'm excited to share a bit of the sewing workshop that I held at West Elm, VA Beach last weekend. Earlier this year, I heard that West Elm was looking for local crafters to feature. I sent an email introducing myself and telling a bit about what I do. The next thing I knew, we had a meeting and decided to schedule a Spring Sewing Workshop. Thrilled at the chance to collaborate, I went home and set to work designing a fun little project.
I'm excited to share a bit of the sewing workshop that I held at West Elm, VA Beach last weekend. Earlier this year, I had heard that West Elm was looking for local crafters to feature. I sent an email introducing myself and telling a bit about what I do. The next thing I knew, we had a meeting and decided to schedule a Spring Sewing Workshop. Thrilled at the chance to collaborate, I went home and set to work designing a fun little project.
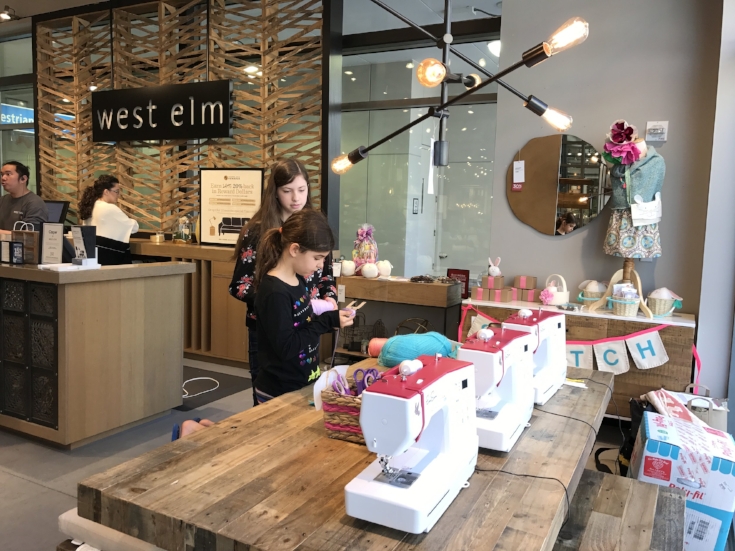

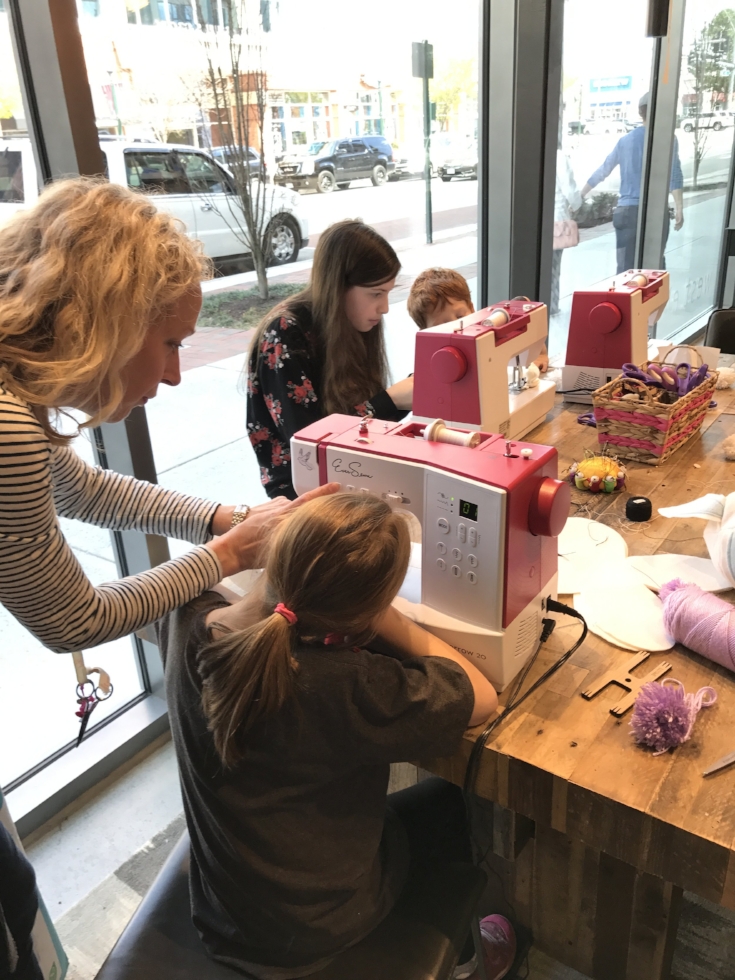
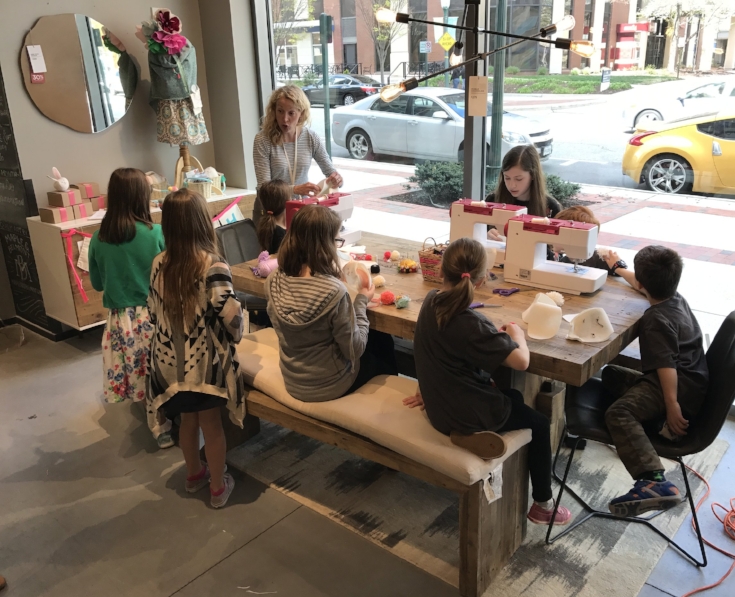
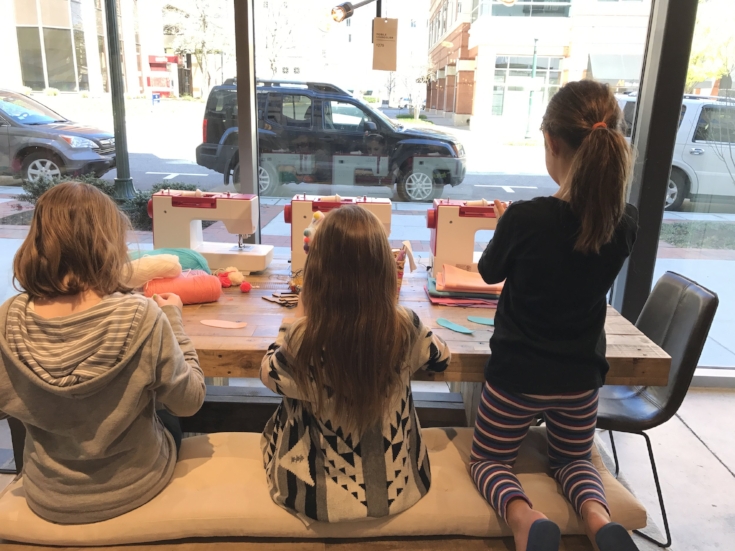
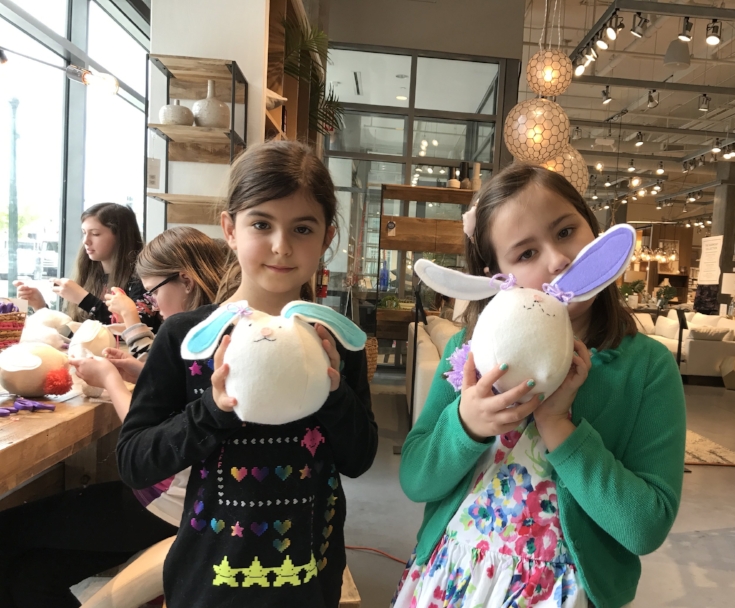
We set up shop at the West Elm, VB store for the workshop and exclusive DIY Bunny Kit. I brought machines, hand sewing needles, my favorite pompom tools and lots of felt. We divided the kids into groups and got to work.
I was so excited to have goodies from The Royal Chocolate. The candies were a hit! They were cut into fine little nuggets- just right for snacking.
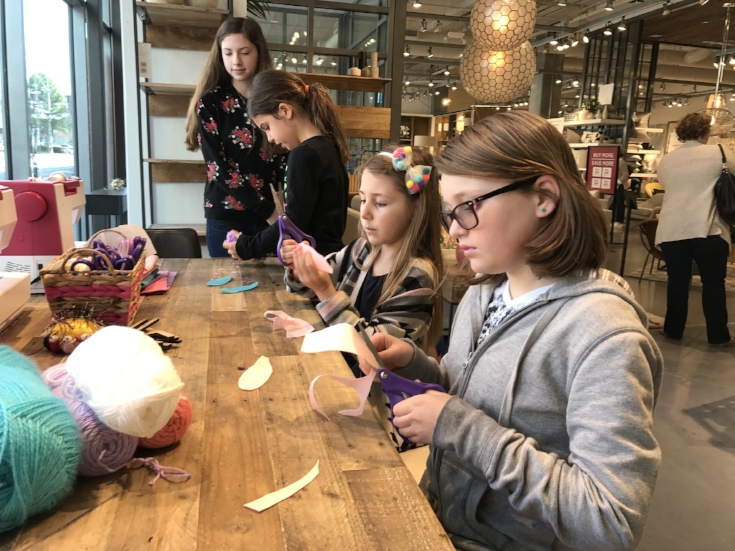
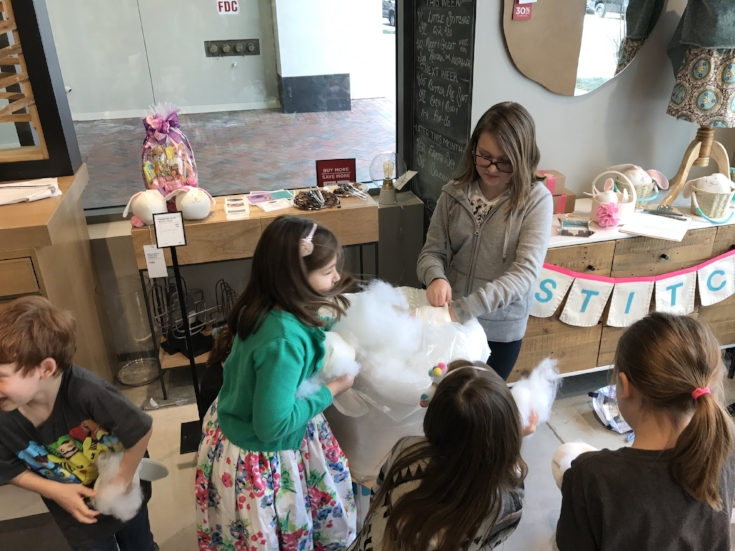
Of course, the real joy of sewing with kids begins when the kids start to stuff their softies to bring them to life.
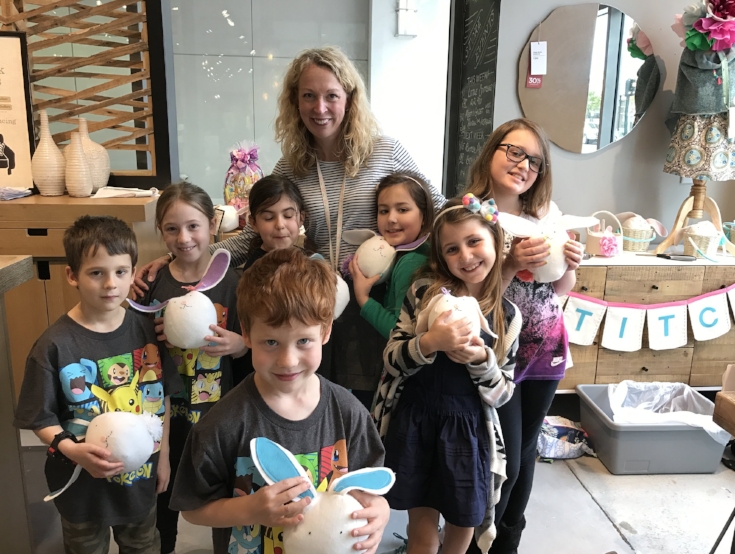
Thank you to the families who came to sew with us. It is such a joy to be able to share my passion for sewing (and making pompoms!). Thank you to the West Elm team for putting this together. We had a ball and look forward to popping-up again!

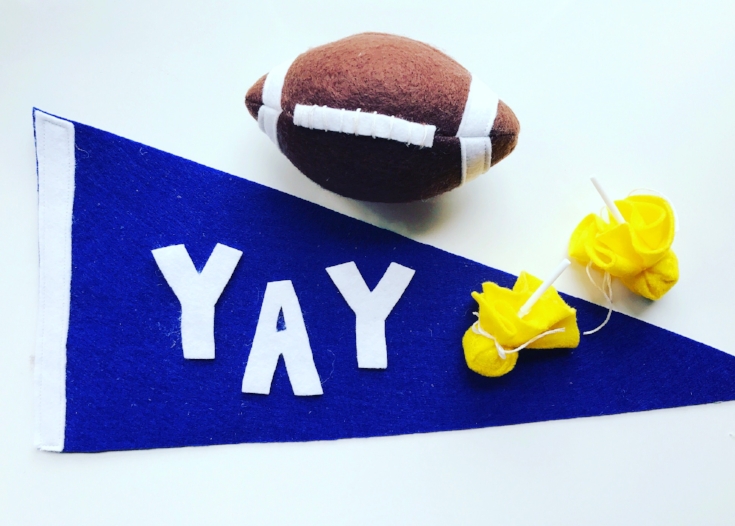
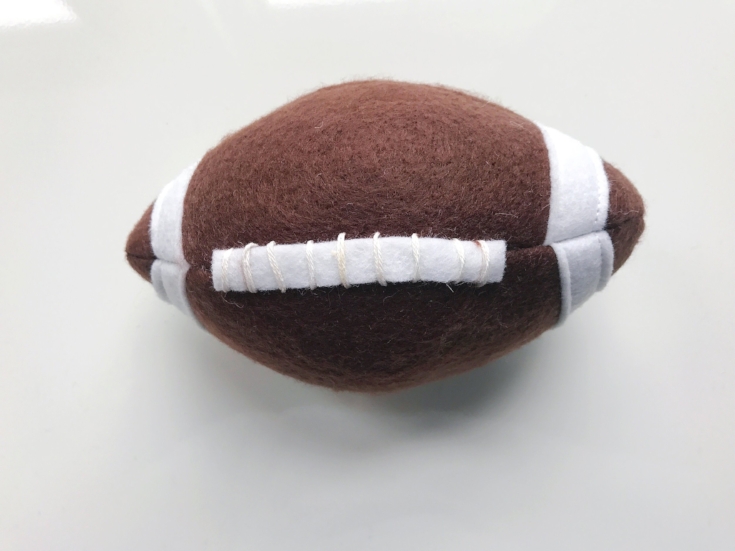
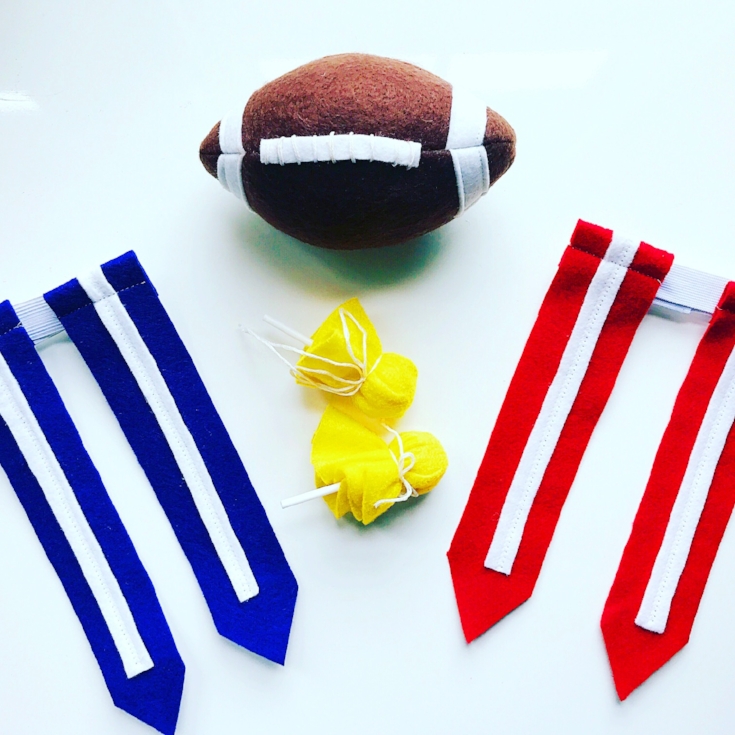
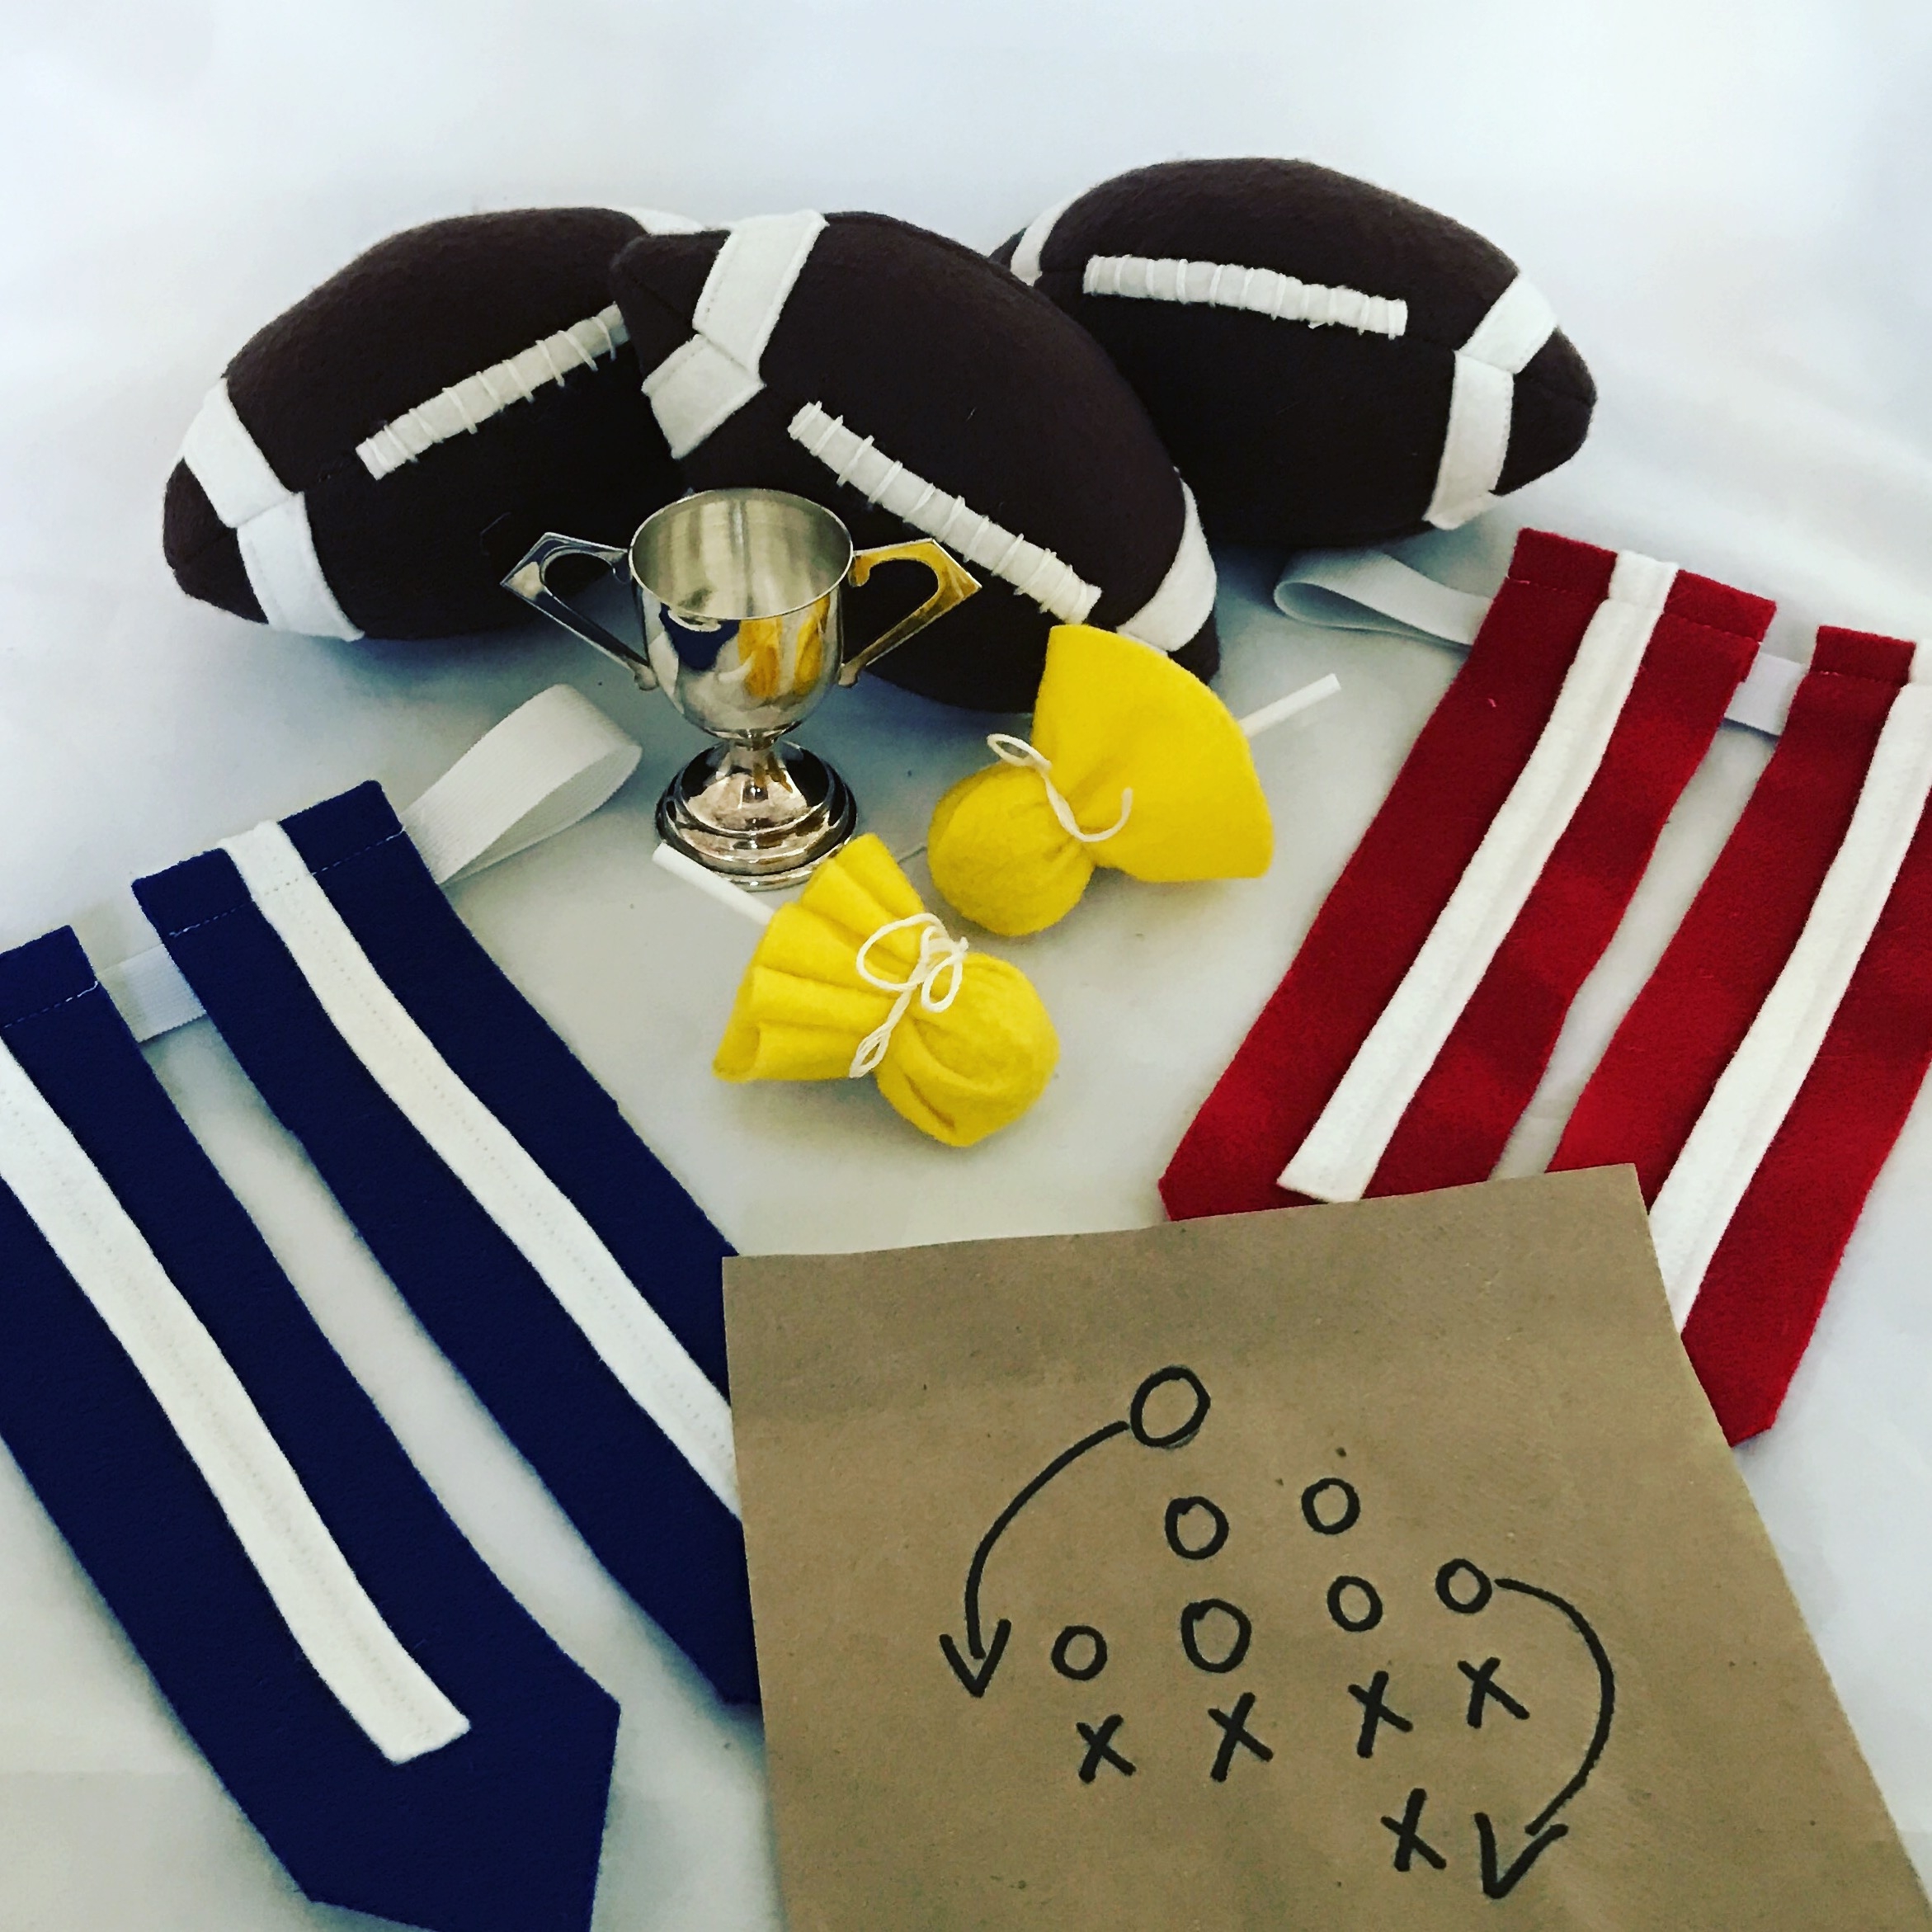
Score big with this kid-friendly flag football set!
You can help set the game mood for your kids by making this cute felt football, penalty flag and flag set. It will turn game day into family fun and your kids will feel like part of the team! Added bonus: this will keep you entertained even the game doesn't.
You can help set the game mood for your kids by making this cute flag football set. It will turn game day into family fun and your kids will feel like part of the team! Added bonus: this will keep you entertained even the game doesn't.
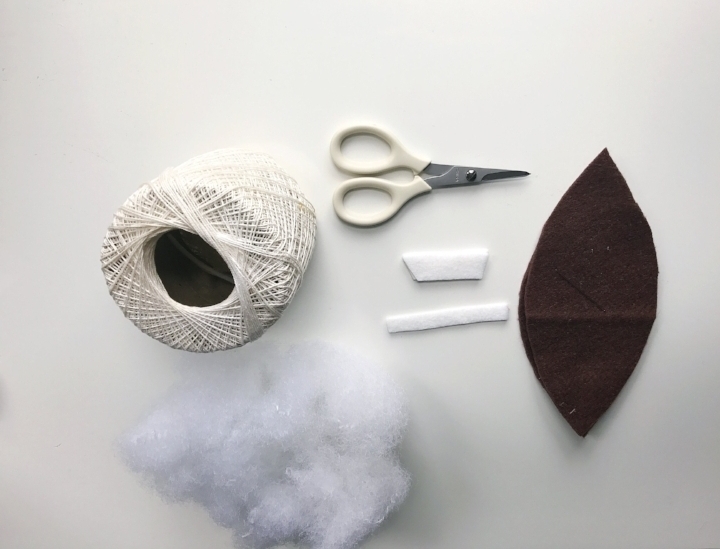
MATERIALS FOR FOOTBALL
2 sheets of Brown Felt
White Felt for trim on football
Handsewing needle
Thread
White Crochet or Embroidery Floss
Poly-fil
Glue Stick (Optional)
A free Felt Football and Flag Set Template, printed and cut out (This pattern has a 1"/ 4CM test square. Measure the test square, and if it does not measure correctly, check your print scaling options.)
SIZE
7 x 3"
MAKE THE FOOTBALL
CUT
Using the Mini Football Template, cut 4 ball pieces, 8 end stripes, and one center strip.
EDIT: It has been brought to my attention that only high school and college footballs have the white stripes. The NFL football does not. So for all of you purists out there, please omit the stripes!
EMBELLISH
Following the pictures as a guide, pin and stitch a white stripe 1.25" from each tip of the football using a straight stitch and some white thread. Alternately, you could glue it.

MAKE THE FOOTBALL
Take two ball pieces and place them with the Right Sides Facing Together and align the stripes. Pin and stitch around the outside edges of one side from tip to tip, using a 1/4" seam allowance. Repeat with the remaining two pieces.
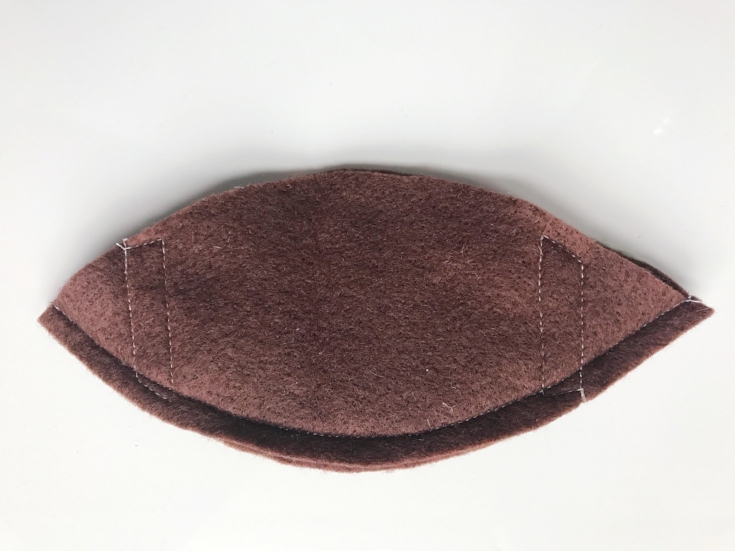
Take the two halves, and place them with the Right Sides Facing Together and again aligning the stripes. Pin and begin stitching just before the white stripe and continue stitching around the entire ball just past the bottom white stripe, leaving a 3 inch opening in-between the stripes.
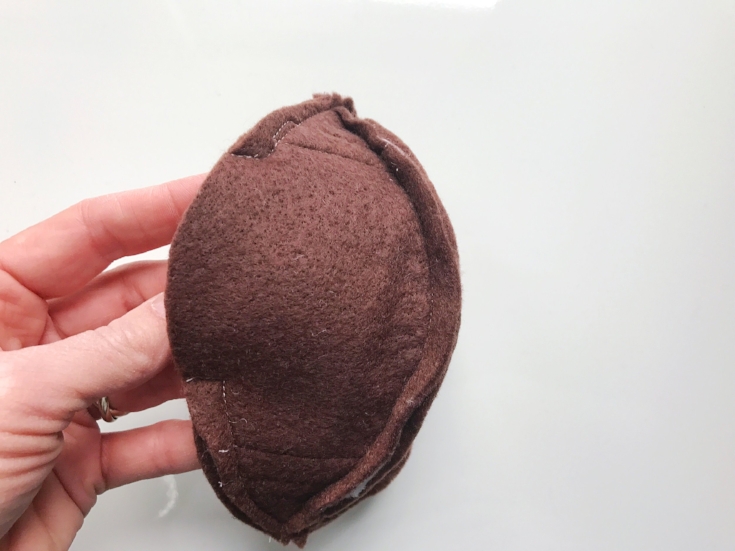
Turn the ball right side out and give it a tug to straighten the seams. Stuff the ball, beginning at each tip, until it is firm. (It helps to use just a little stuffing at a time, to keep it from looking lumpy). Handstitch the opening closed.
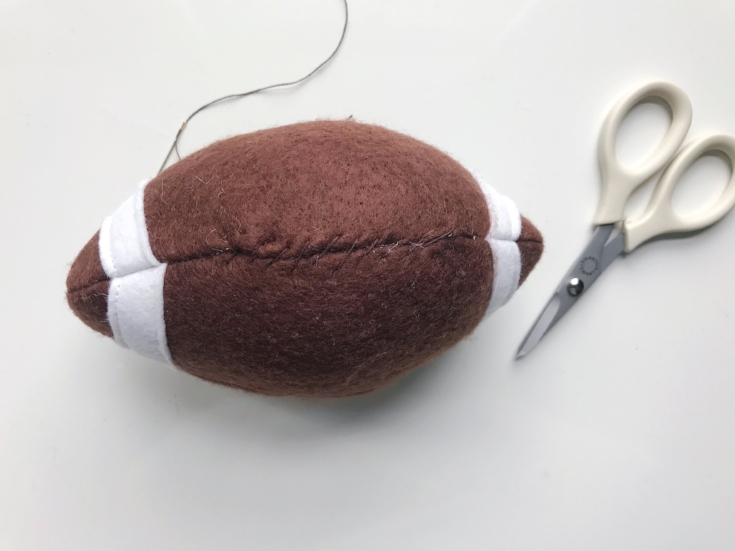
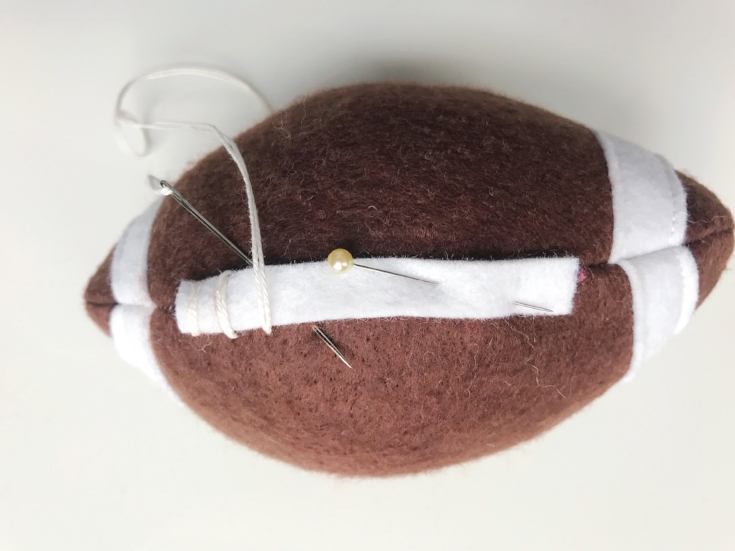
To finish, place the center strip along the hand-stitched closing. Sometimes when sewing with kids, I use a bit of glue to hold felt in place while stitching. Pins can be tricky for them to work with. Thread the needle with Crochet Thread or Embroidery Floss and knot both ends to form a double thread. We want these "laces" to look real!
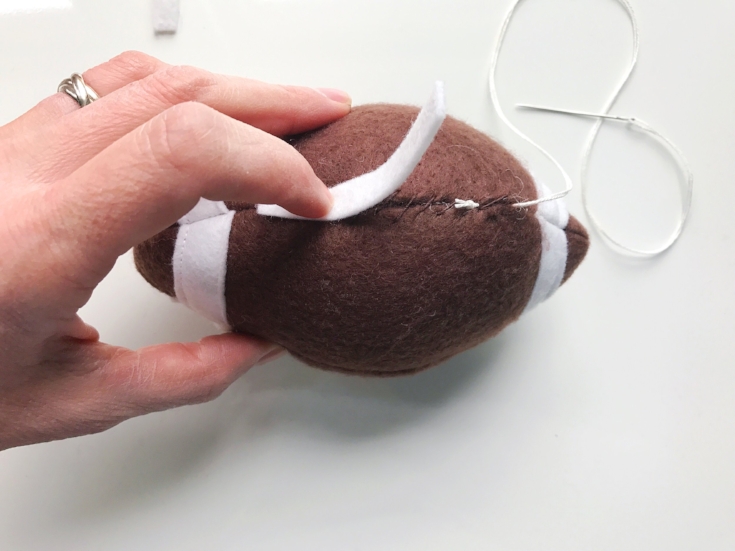
Begin stitching by piercing the football and tucking the knot under the center strip as shown in the picture above. Now stitch from side to side, down the length of the center strip. Knot the thread, bury it in the football and trim.
Warning: This ball will get tossed! You might want to do this project away from the TV, lamps, windows, or beer.
PENALTY FLAGS
MATERIALS FOR PENALTY FLAGS
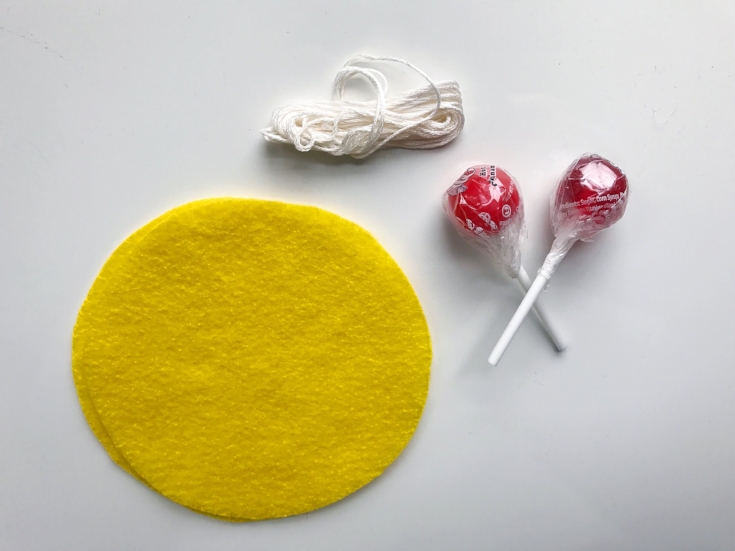
Yellow Felt or Fabric
String
Lollipops
MAKE THE PENALTY FLAGS
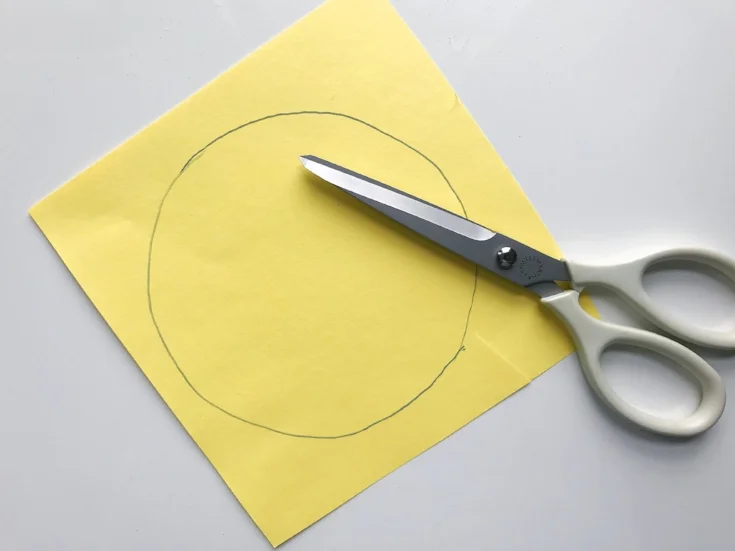
Cut a 5-6" circle out of felt. Cutting can be tricky for kids. It helps to have an adult draw the circle onto the felt and cut a square around it. Then try having the child do the "precision cutting".
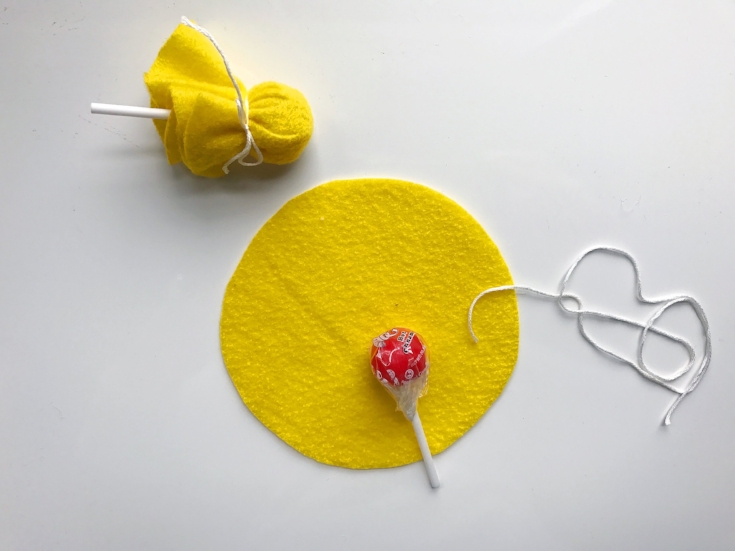
Place the lollipop in the center and wrap the felt around it and tie. SCORE!
FLAG AND BELT SET
FLAG AND BELT SET
This one can be made lots of different ways, depending on your (or your child's) skill level and what materials you may have available. I used elastic so that the belt wouldn't be tied around some smaller person's neck. You may have children that behave:) in that case you could use a sash or even a piece of fabric!
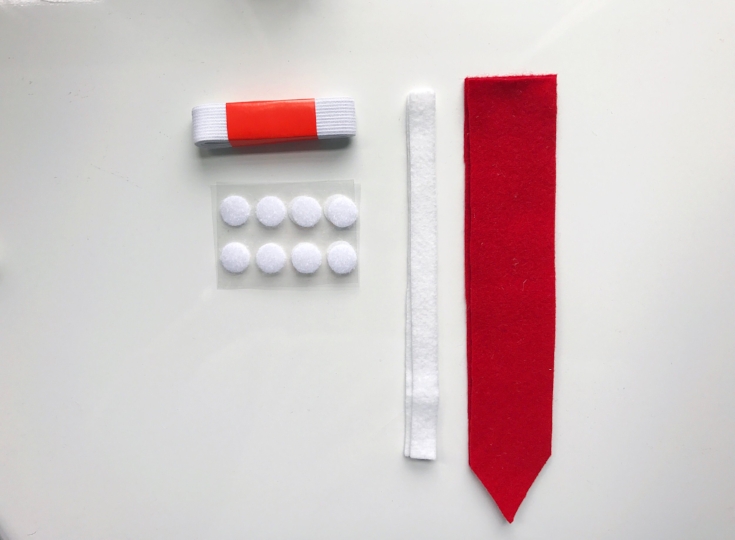
MATERIALS FOR FLAG SET
2 Sheets of Felt
Scrap Felt for embellishing
Needle
Thread
Velcro, either Sew on or Adhesive is fine
3/4" Elastic, 2 yards will make 2-3 belts, depending on the size of your child.
Glue Stick (optional)
A free Felt Football and Flag Set Template, printed and cut out, (This pattern has a 1"/ 4CM test square. Measure the test square, and if it does not measure correctly, check your print scaling options.)
CUT
Using the Flag Template, cut 2 flag pieces, and two long stripes out of felt.
EMBELLISH

Following the pictures as a guide, pin and stitch a white stripe from the top of each flag down the center using a straight stitch and some white thread. Alternately, you could glue the strip of felt. Repeat for the remaining flag.
MAKING THE FLAG AND BELT

Fold the top edge of the flag one inch toward the back side. Pin and stitch across. Repeat for the second flag.
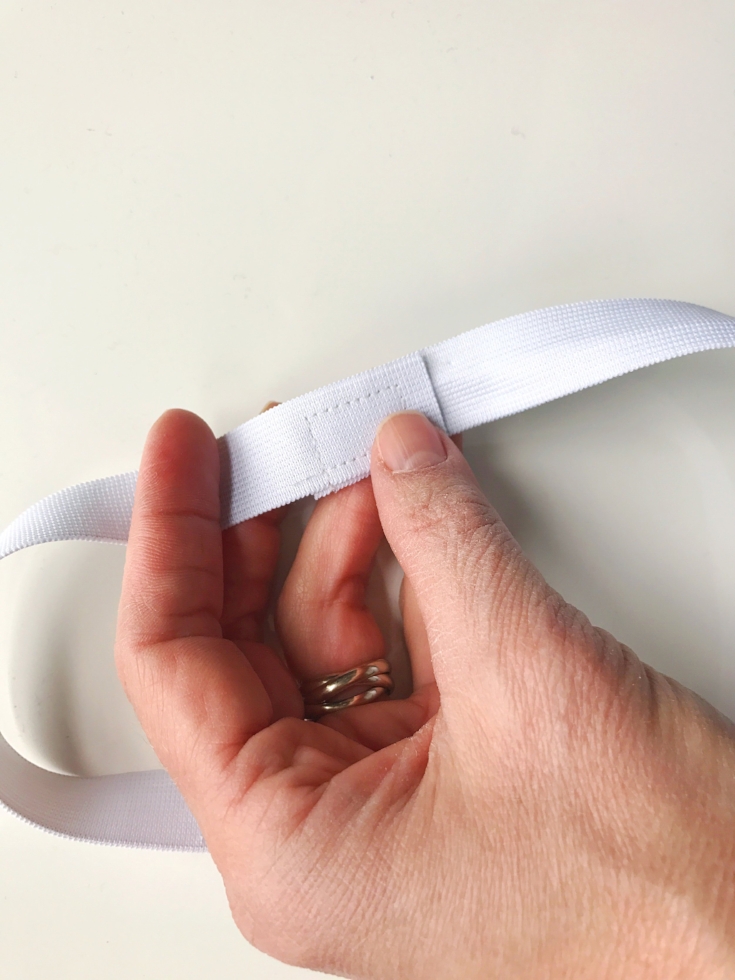
To make the elastic belt, measure your child's waist and add 2" inches. You will want this to fit comfortably over clothes and even a jacket. Following the picture as a guide, overlap the edges, pin and stitch. Now its time to place the velcro on the belt. Cut 2 pieces of velcro and using the loop side (the soft side) stitch or adhere each piece to the belt about 3" apart.
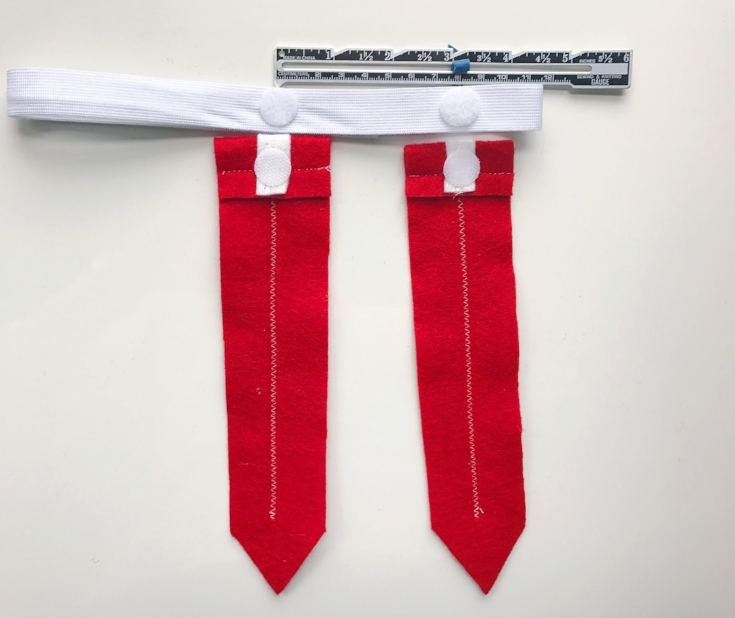
Stitch or adhere the hook side (the rough side) to the top back center of each flag. *If you are using the "glue type" velcro, allow the glue to set before using.
A very special thanks to Amy at A Lively Affair and WTKR Coast Live for featuring this on the "Big Game" segment. Thank you for letting me be part of the fun!
I hope that you have enjoyed this tutorial. Please be sure to tag me @hwakefielddayton on Instagram or use #stitchedmakers to show off your awesome skills.
XO,
Hilarie

Cue the confetti!
This New Year's Eve, I'm eschewing stuffy, shellacked looks in favor of elegant, easy styles that aren't just timeless, but a little bit cool, too. I have a fun and super easy DIY for girls and moms.
A couple of weeks ago I stopped into H&M to get a white shirt for my daughter's Christmas musical at school. In the checkout I saw these shiny gold bobby pins and immediately began thinking of ways that I could embellish them.
Fast forward two weeks to when I actually had the time to make them. New Year's Eve is the perfect occasion to add a little sparkle to your look.
This New Year's Eve, I'm eschewing stuffy, shellacked looks in favor of elegant, easy styles that aren't just timeless, but a little bit cool, too. In this spirit, I have a fun and super easy DIY for girls and moms.
A couple of weeks ago I stopped into H&M to get a white shirt for my daughter's Christmas musical at school. In the checkout I saw these shiny gold bobby pins and immediately began thinking of ways that I could embellish them.
Fast forward two weeks to when I actually had the time to make them. New Year's Eve is the perfect occasion to add a little sparkle to your look.
MATERIALS
Bobby Pins
Scrap Felt
Glitter Sheets These can be purchased individually from craft stores like Michael's.
Scissors These are my absolute favorite precision scissors. They are perfect for detail cuts in felt.
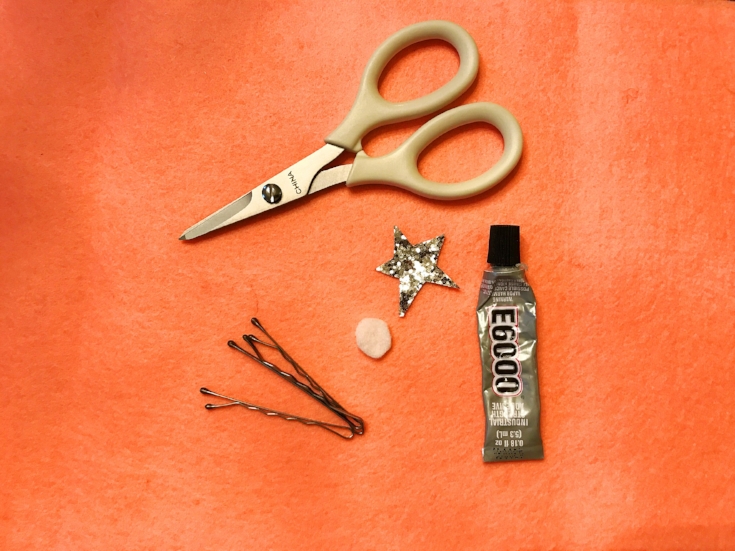
Cut out a star shape about one and a half inches in diameter out of a glitter sheet. I like to draw the shape on the back and cut out. Cut a one-half inch circle from felt.
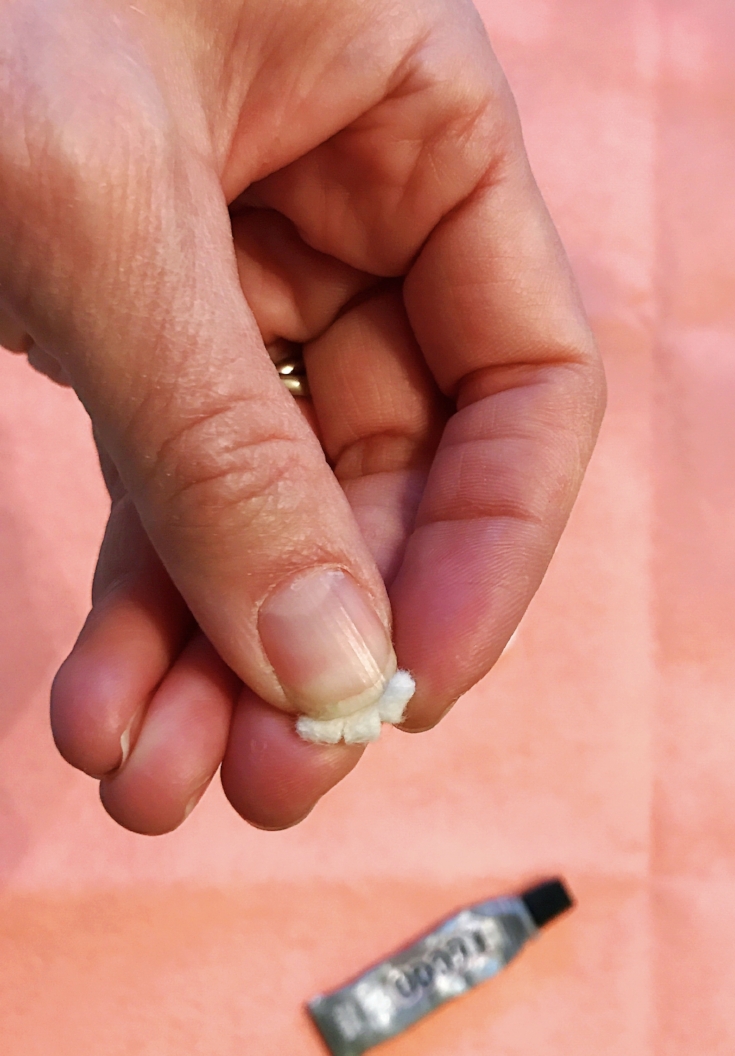
Fold the felt circle in half and make a small cut on each side of the center.
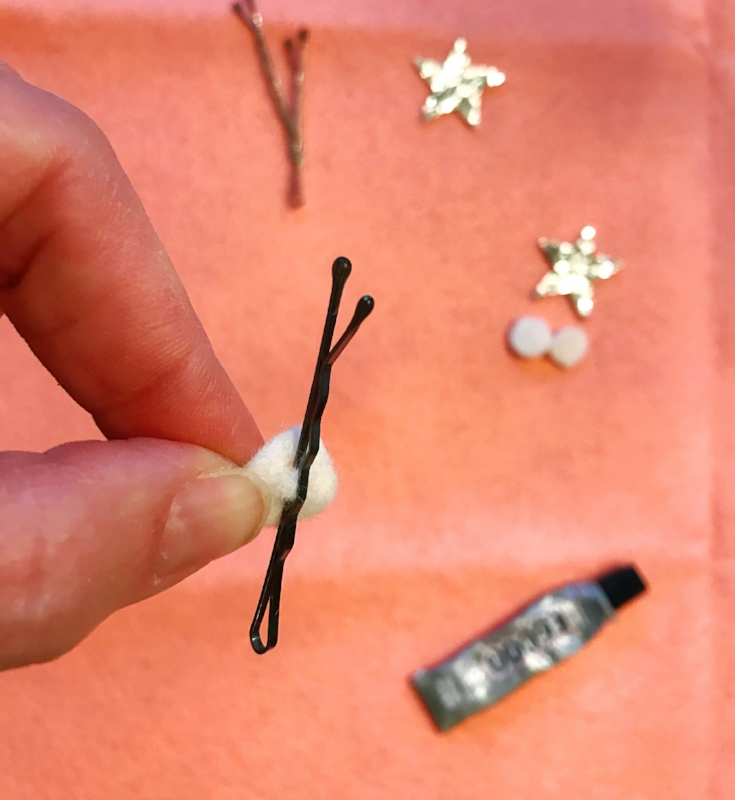
Thread the flat end of the bobby pin through the cuts of the felt circle.

Push felt circle to the end of the bobby pin.
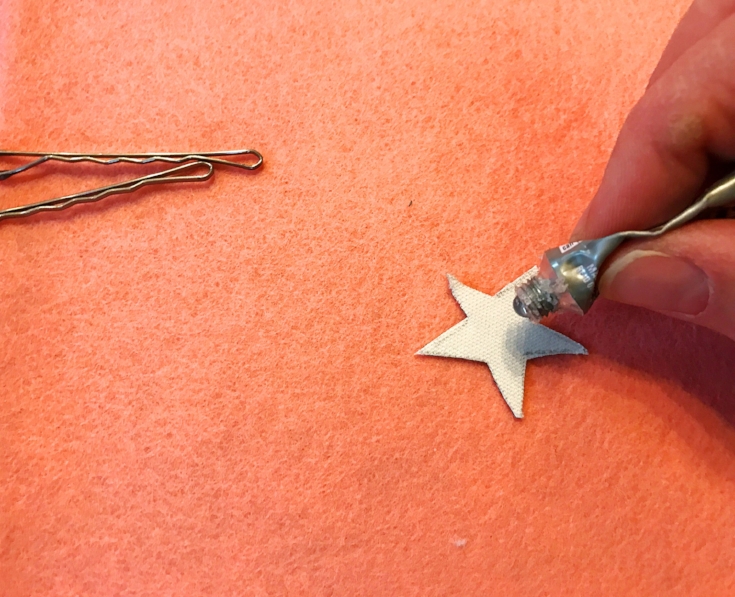
Put a dab of glue onto the center of the back of the star. Glue to the felt circle.
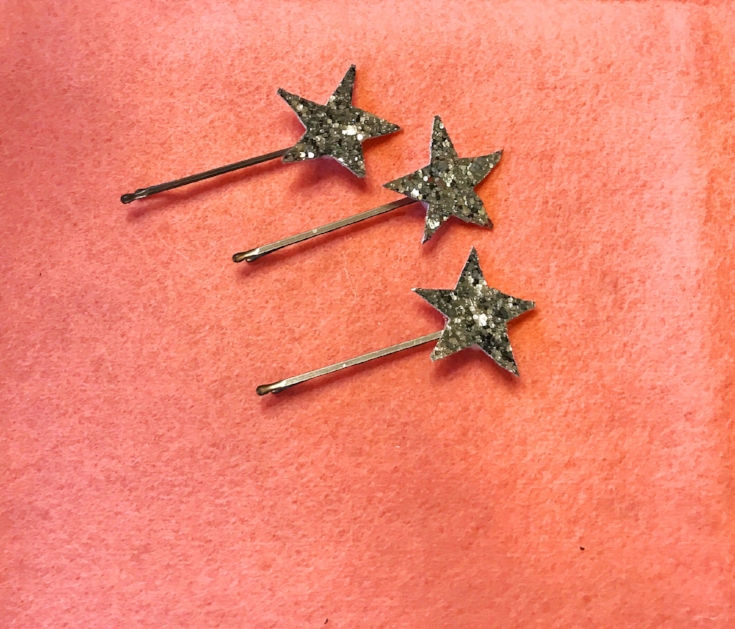
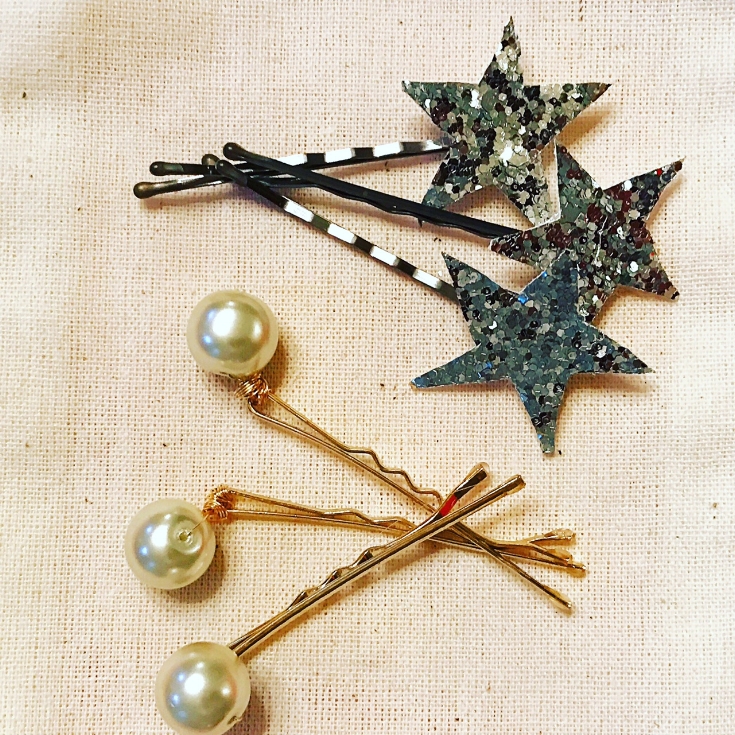
Done! How easy was that?! Now time for the pearls!
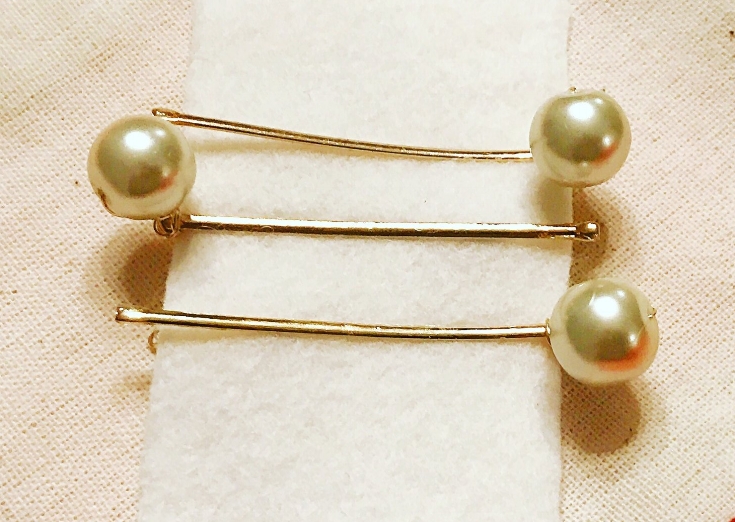
MATERIALS
Bobby Pins
28 Gauge Beading Wire (choose a color to coordinate with your bobby pins)
Needle nose pliers and crimping pliers (Optional)
*You can of course purchase these and similar items locally, I am sourcing Amazon because sometimes it is easier to get an idea of what to look for.

These bobby pins are so much prettier in real life. The light in my house is very dim today.
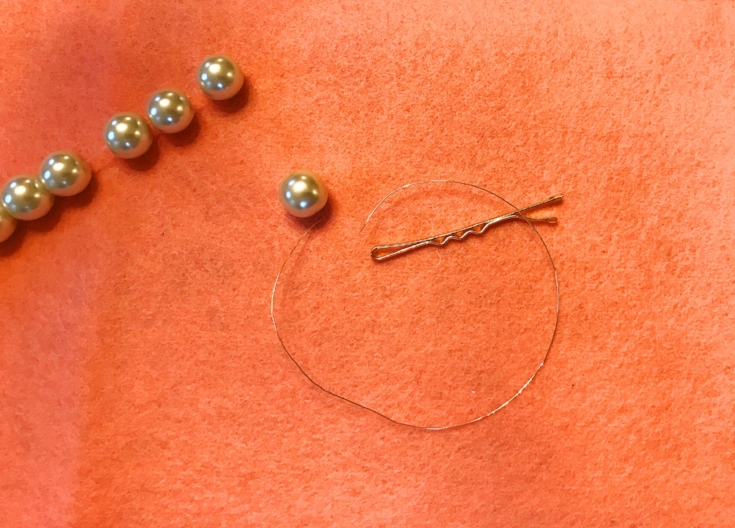
Cut a six inch length of beading wire and thread it through the center of one pearl.
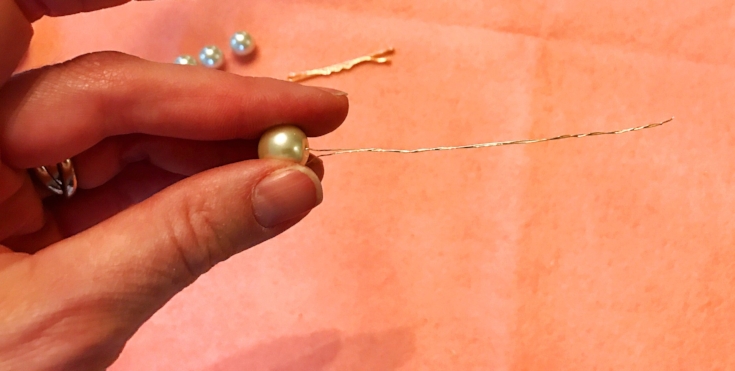
Pinch and twist the entire length of wire to tighten.
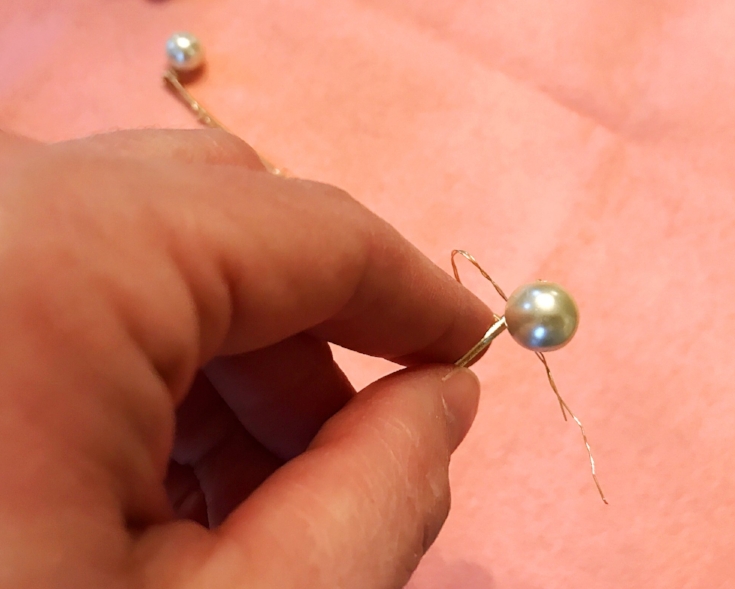
Thread the wire through the end of the bobby pin and twist to secure. Hold the pearl between your thumb and index finger while wrapping the wire tightly between the bobby pin and just beneath the pearl three times.
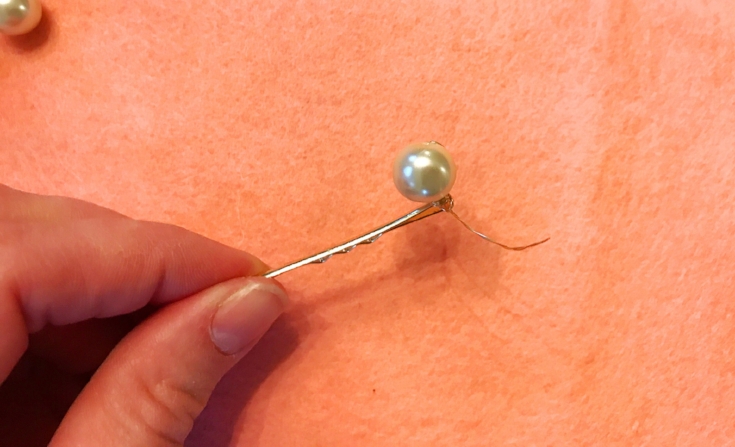
Now take the wire and wrap it around the top of the bobby pin three times to secure. You might want to use needle nose pliers for this. Trim wire ends once the pearl feels secured or if you have crimping pliers, just use those.
Pretty, right? I think next I am going to take apart some old glamorous sparkly jewelry and wire them to hair combs. Why should kids and brides get all of the hair fun?

On the Eleventh Day of Christmas, Weaving Edition.
The fun thing with buying gifts for 8 and 9 year olds and “tweens” is using their interests as cues to get gifts that support those interests – or you can introduce that 12 year old to something new and they may discover a lifelong love.

The fun thing with buying gifts for 8 and 9 year olds and “tweens” is using their interests as cues to get gifts that both encourage and develop those interests – or you can introduce a 12 year old to something new and they may discover a lifelong love.
In this 12 Days of Christmas Series, I have tried to choose gift themes that will bring lasting enjoyment to your home. They’re the kinds of gifts that are fun when they’re opened, and then continue to be played and explored with for years.
As with so many crafts now, weaving is having a bit of a comeback. I think of this time as a sort of crafter's renaissance. If you are going to learn one new craft this season, let it be weaving. Weaving is a type of textile construction where two sets of threads, the warp and the weft, cross at right angles to create cloth. Weaving is done on a loom, which holds the warp threads under tension allowing them to be intersected by the weft.
Weaving is a tactile medium. Beyond composition, there is a structural element that has dimension and engages many senses. It is an art form that you can appreciate by looking, touching, and using. Wall hangings are a great introduction to weaving and will add instant design cred to a room!
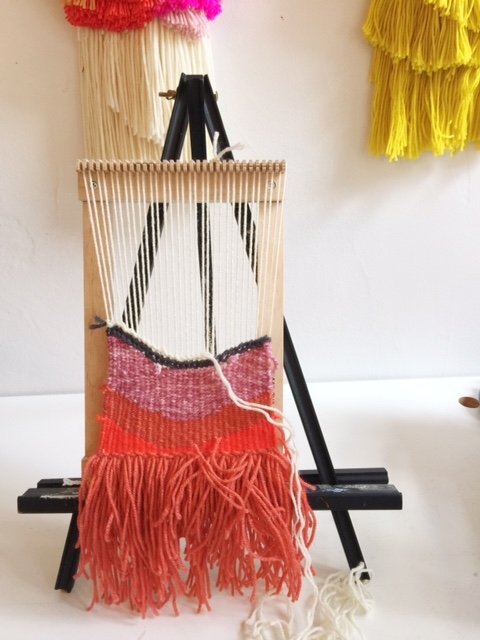
Photograph used with permission. Annabel Wrigley, Little Pincushion Studio.
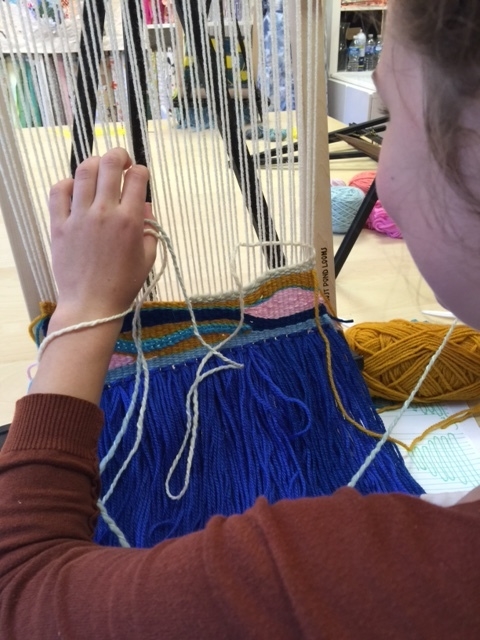
Photograph used with permission. Annabel Wrigley, Little Pincushion Studio.
There are so many ways to introduce weaving to kids. First of all they will need a loom and some yarn. There are many DIY looms out there but if you are looking for a gift here are a few to consider.

Melissa and Doug weaving loom This is an all-in-one kit at a price you can't beat. A bit of yarn, step by step instructions and a sturdy wood frame.
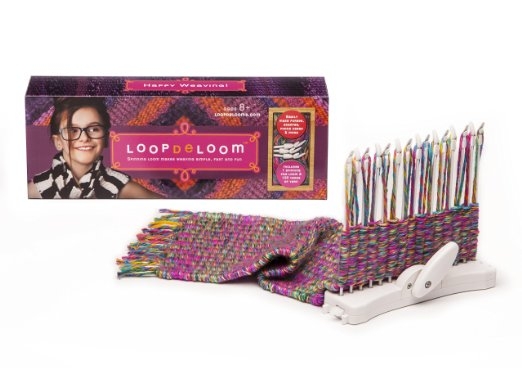
LoopdeLoom I see this one everywhere. Target, Amazon, Michaels, Barnes and Noble. It is based on traditional weaving methods but speeds the process up a bit.
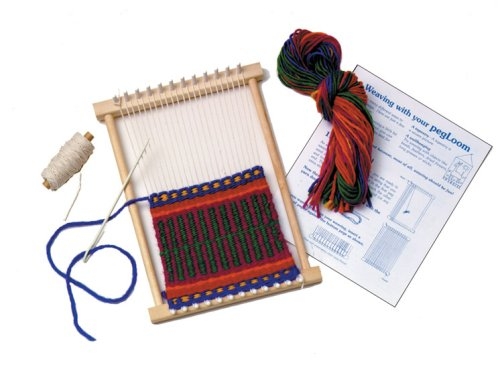
Harrisville Designs Pegloom This is the traditional peg loom that I learned to weave on. This hardwood loom will give your child years of enjoyment.
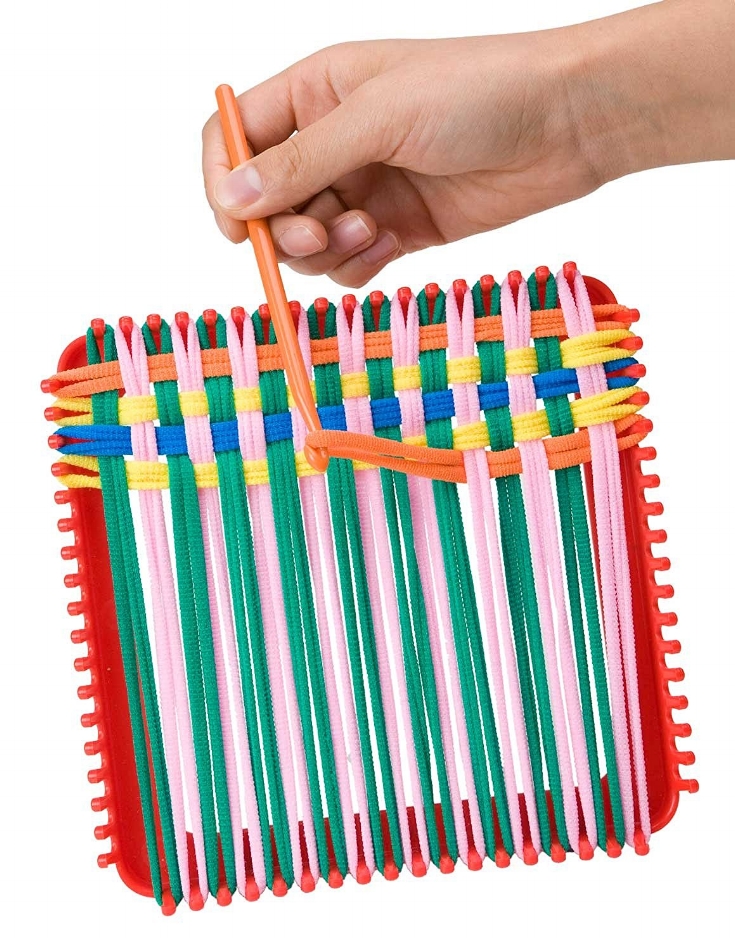
There is always the quintessential potholder loom that I'll bet you had as a child. This is a great way to introduce weaving to the youngest kids.
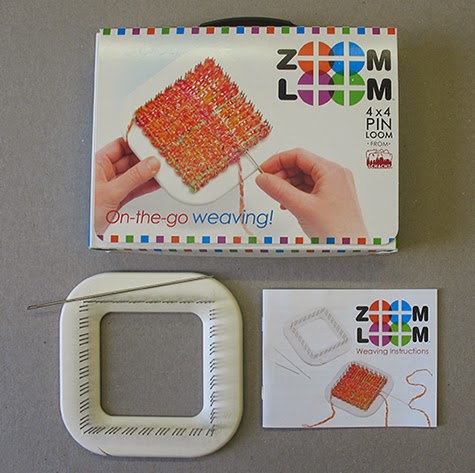
This Zoom Loom Pin Loom would make a really great gift for adults too. I bought this a few years ago and have made dozens of colorful coasters.
All of this talk about weaving has me ready to dust off my loom. Do I have the time to squeeze one more project in by Christmas Eve?
We're set for a busy week here in chez Stitch, so in case I don't pop back here before the weekend, have a wonderful Christmas, everyone, and safe travels for those leaving town.
XO, Hilarie

On the Tenth Day of Christmas.... Stocking Charms
Each year I like to make a new stocking charm for my kids to decorate their stocking. The idea is really simple and fun and jazzes up the stockings a little bit. Candy canes, initials, dolls, bears, whatever comes to mind. With kids out of school this week, this is a quick project that they would love and it might buy you a few minutes of peace.

Each year I like to make a new stocking charm for my kids to decorate their stocking. The idea is really simple and fun and jazzes up the stockings a little bit. Candy canes, initials, dolls, bears, whatever comes to mind. With kids out of school this week, this is a quick project that they would love and it might buy you a few minutes of peace.
I like to think of these as kitchen counter crafts. They require very little time and supplies that you probably already have.

Felt
Scissors
Embroidery floss
Needle
A bit of poly-fil stuffing
Begin by drawing a simple shape that is about 3-4 inches high and at least an inch wide. Cut it out and use it as a pattern. The simpler the shape, the easier it will be to sew. You can always embellish later.
Place it on the felt and cut around. You will need a back and a front. For this tutorial I am using the letter C and a star.

If you are sewing a shape that has an inside and an outside (like this letter C) begin sewing on the inside.
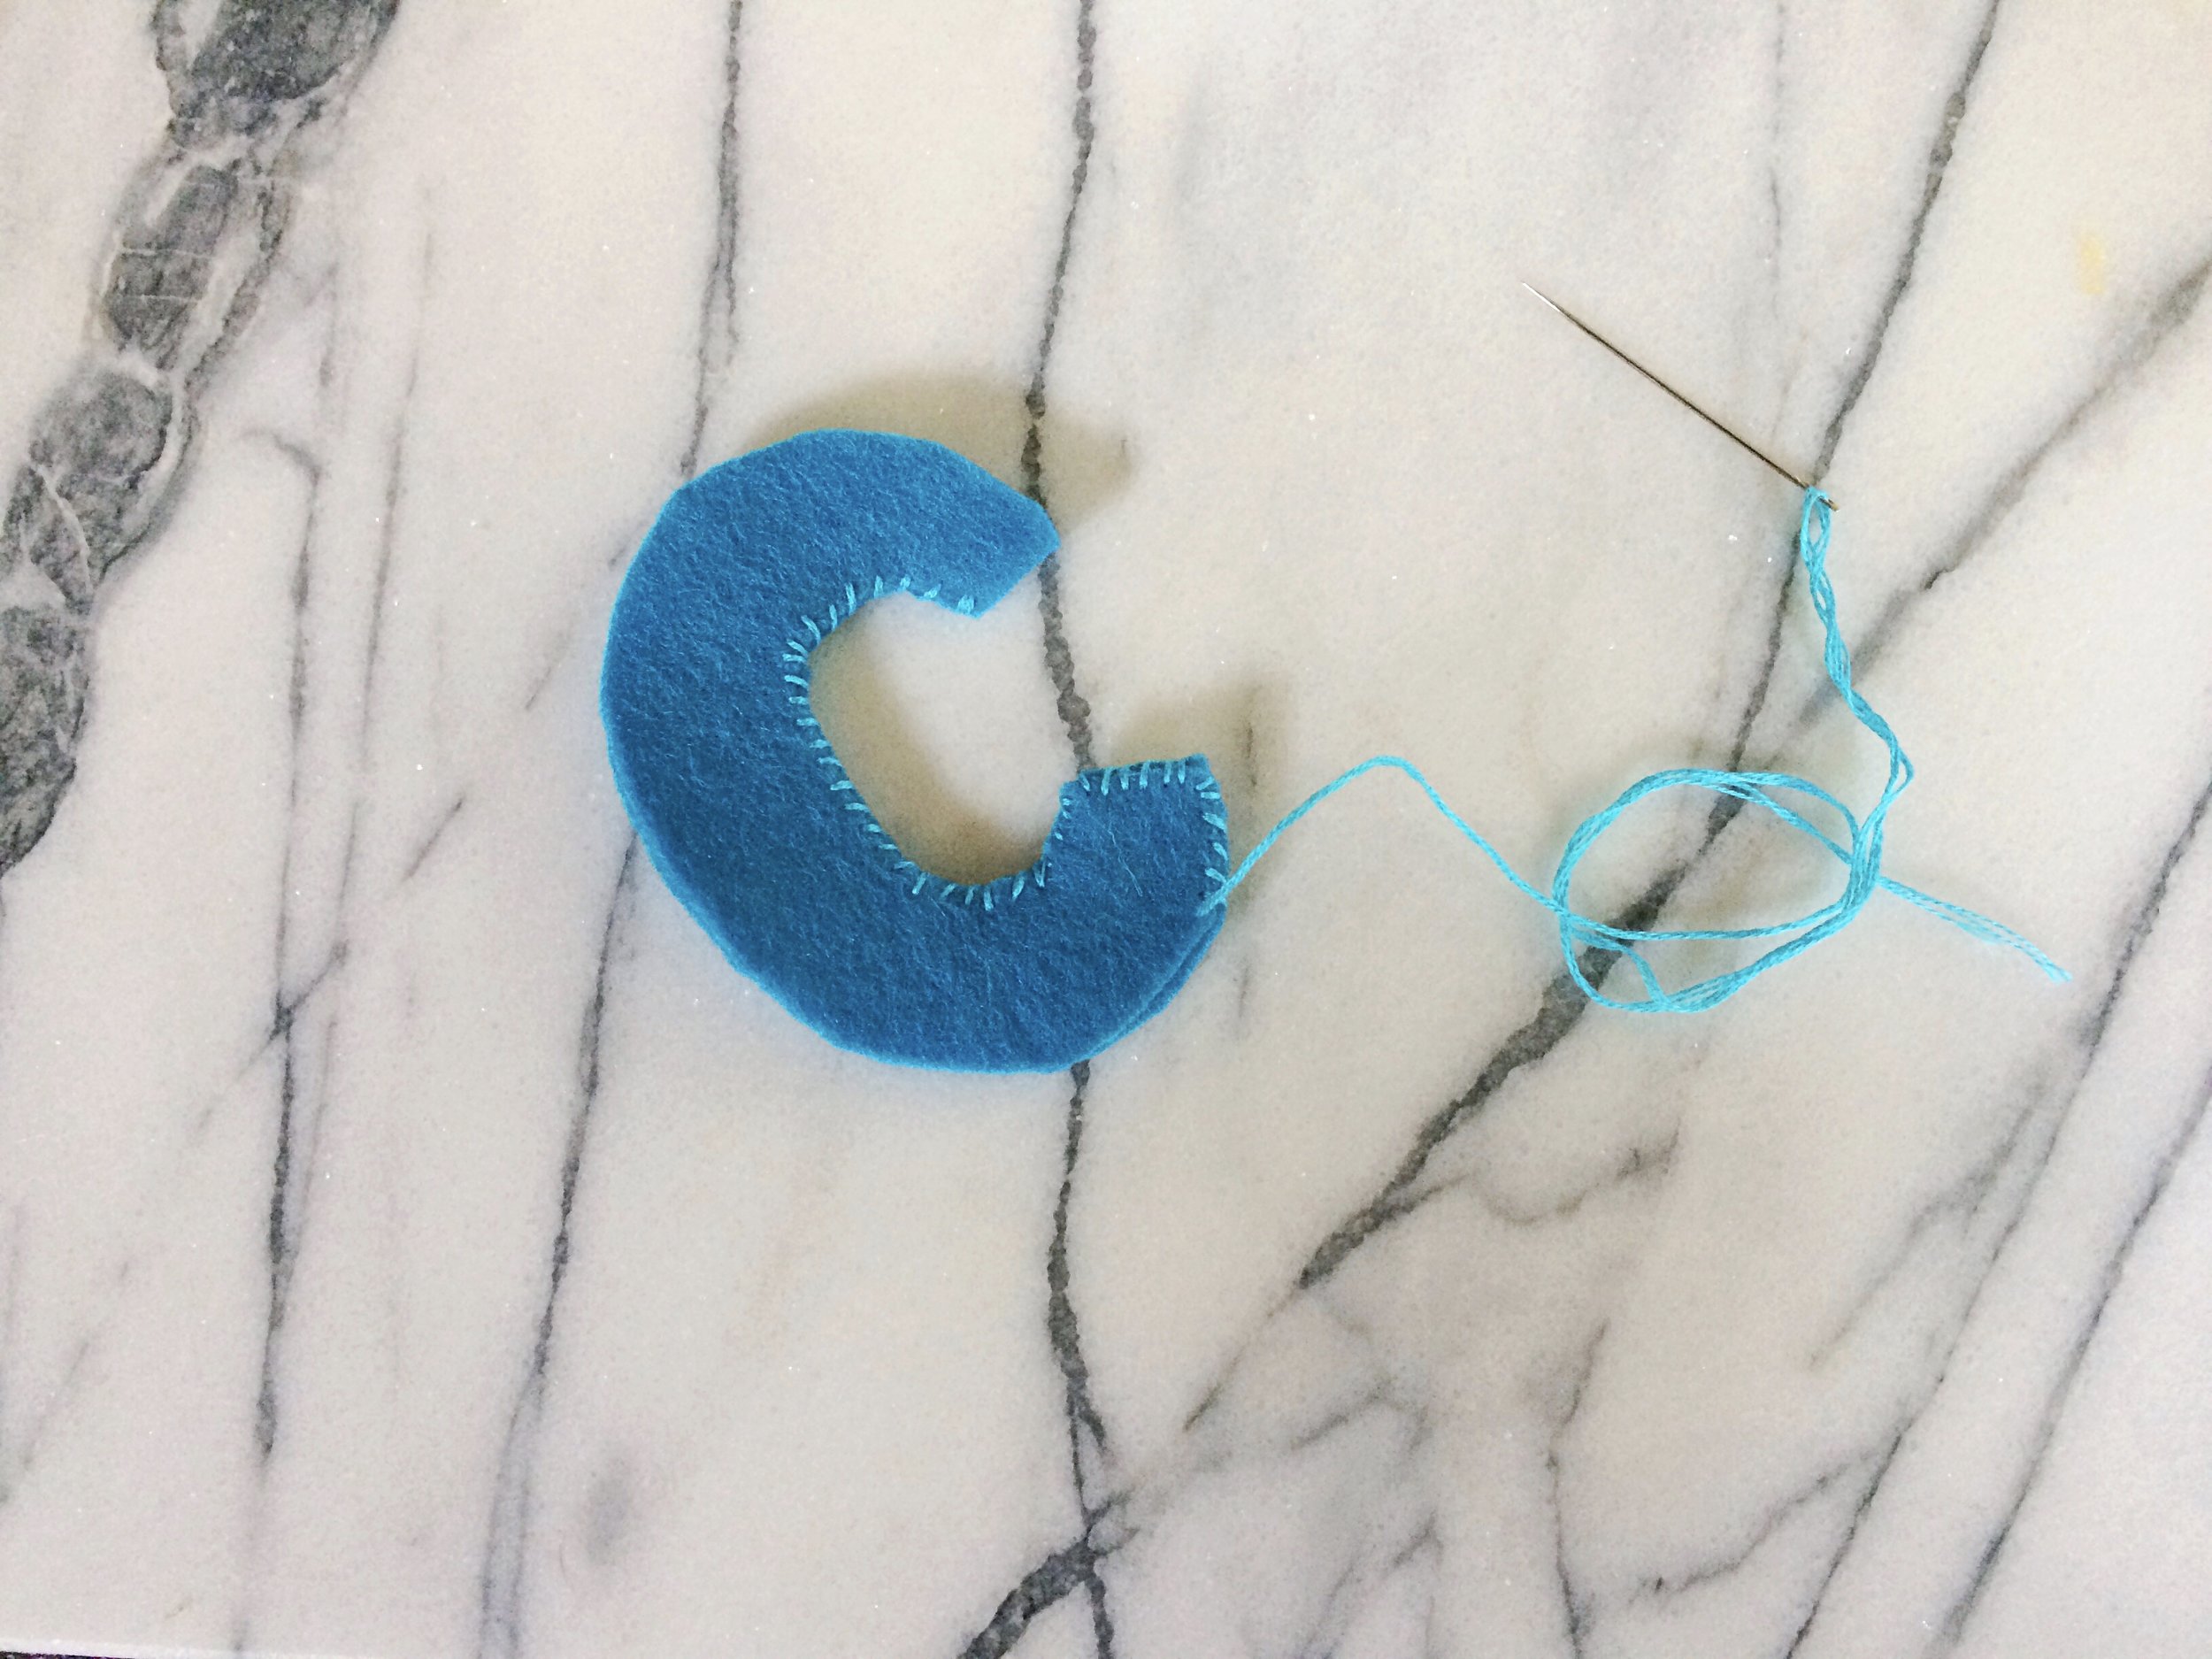
Continue to sew around the edge and a bit up the outside curve.

Once you have an inch or two stitched on both sides, you can begin to gently stuff. I like to take small tufts of poly-fill and push it through a little bit at a time. A chopstick works well for this, as does the eraser end of a pencil. Continue to stitch and stuff until complete. Tie off.
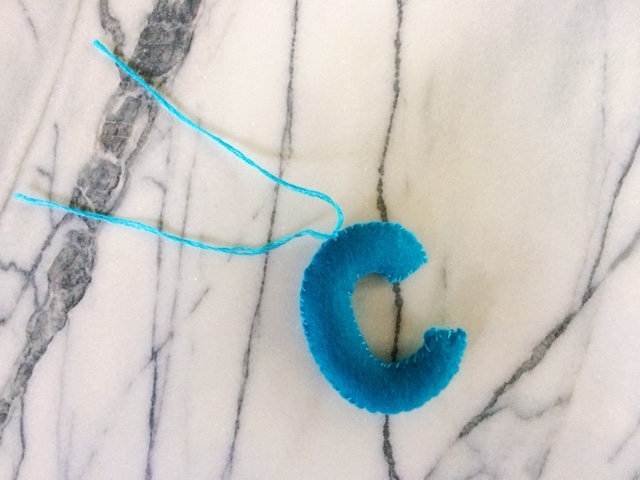
Cut a length of floss to thread through the top of your shape and hang!

The steps are pretty much the same for a shape such as a star. Begin by inserting the needle on the inside corner of one of your shape. (This way the knot will be hidden on the inside).
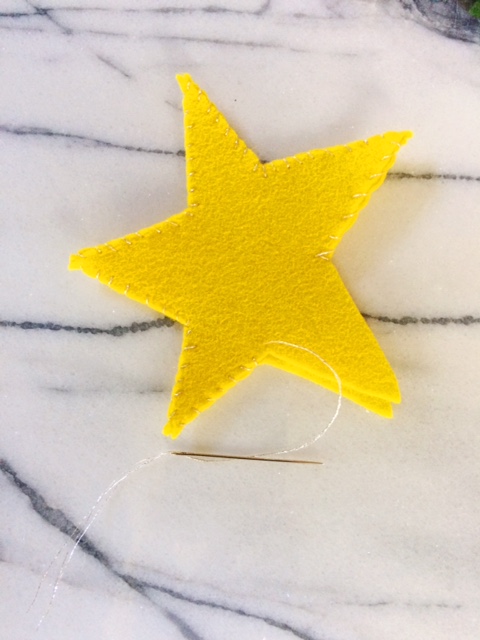
Continue sewing around the shape.

Once most of the shape is stitched, begin to stuff.

Stitch to close. Then either sew a ribbon from the top or a length of floss. Tie and hang with pride.
Which shape will you make first?

On the Fifth Day of Christmas....
On the Fifth Day of Christmas, my true love gave to me..... a fun and easy DIY project for the littlest crafty ones!
It's so fun when children start learning new things. They are just thrilled and so proud of themselves. I have a fun DIY for you today that even a three year old will enjoy showing you how to do!
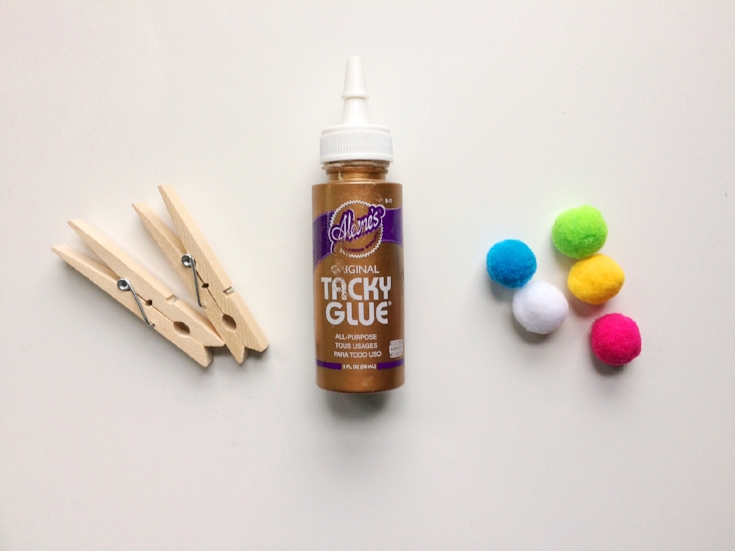
Materials needed
Pom-poms
Wooden clothespins
Glue
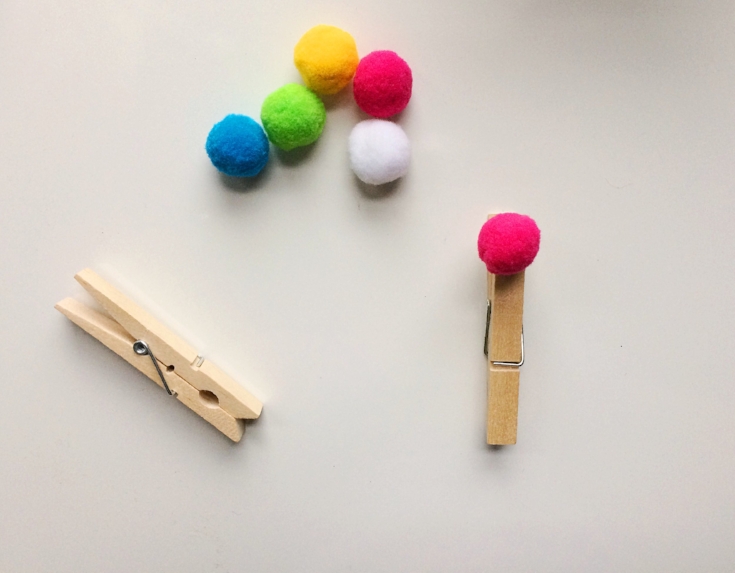
Squeeze a dab of glue onto the bottom of a wooden clothespin. Place the pompom. Hold for a second to allow the glue to set. Repeat and enjoy!
Wouldn't these be cute to pin holiday cards to a ribbon or card holder? These would also be easy and fun for a classroom craft project. Speaking of which, I think there is a third grade party that I should probably start to plan! XO

On the Second day of Christmas... Crafts for kids!
This is prime crafting time for your little creative one! Kids love to make things and have a natural gift for color, texture and pattern. The holiday season lends itself so well to kids more is more tendencies!

This is prime crafting time for your little creative one! Kids love to make things and have a natural gift for color, texture and pattern. The holiday season lends itself so well to kids more is more tendencies!
I have always believed that with fun, attractive, quality materials and time just to dream and create, kids can develop their natural talents. They often need some instruction, but after that, back off!
Today I present gifts for your crafty child.
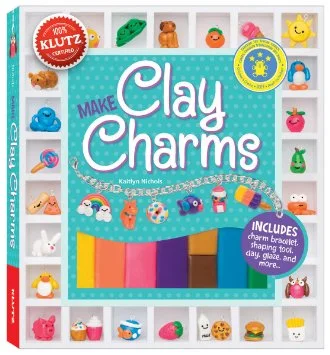
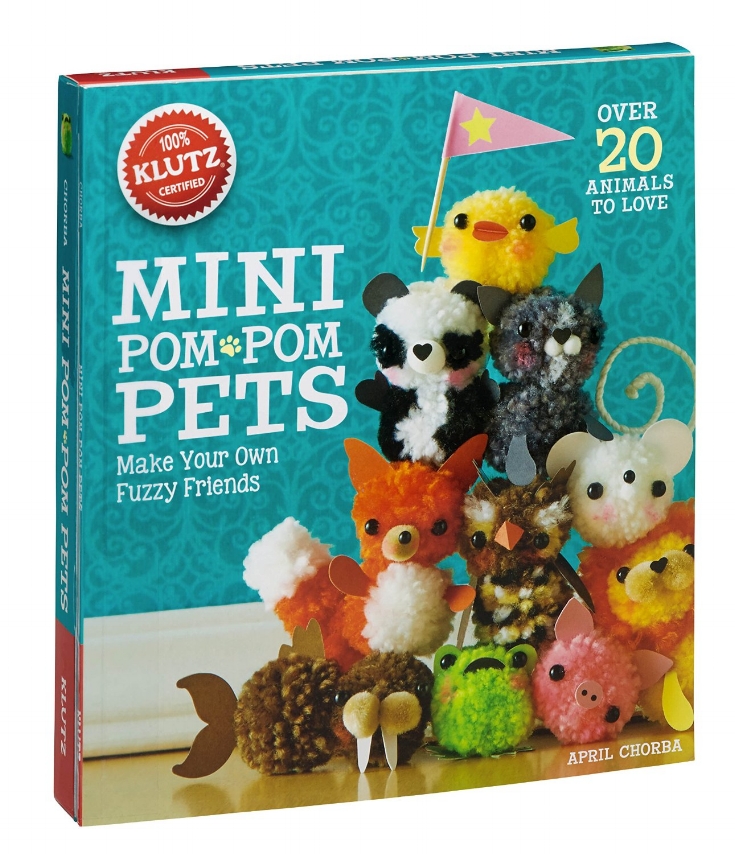
I love the crafty kits by Klutz. These kits are among our go-to kid gifts for kids. The colors and skills are on point and their step-by-step illustrated books make the techniques very accessible.
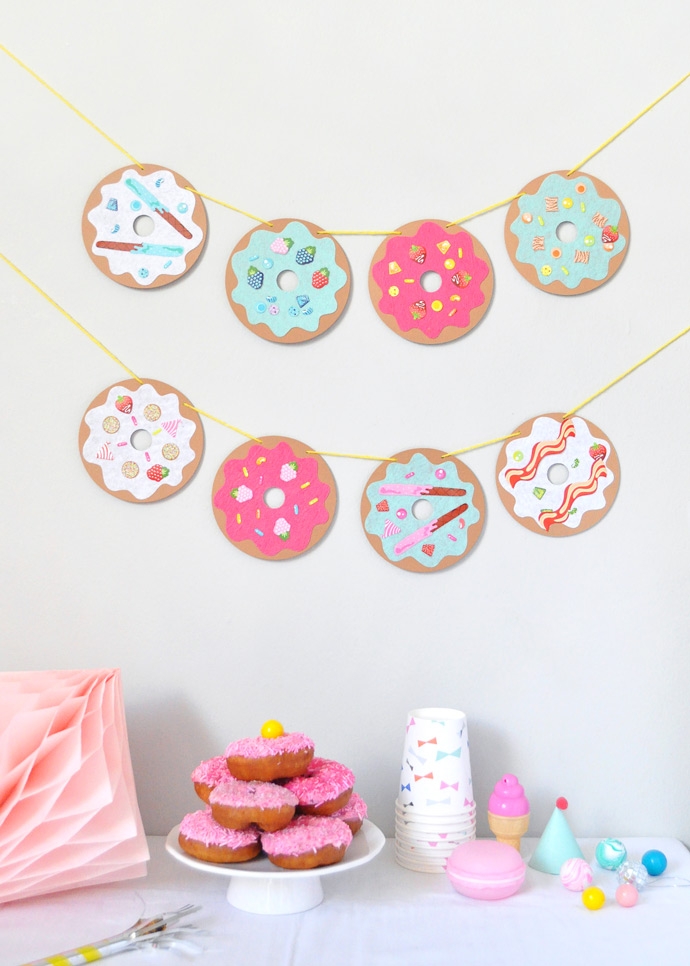
Handmade Charlotte, both the blog and the line are fun, trendy, made for DIT (do it together! in stead of do it yourself. Fun, right?) The projects are so satisfying and accessible.
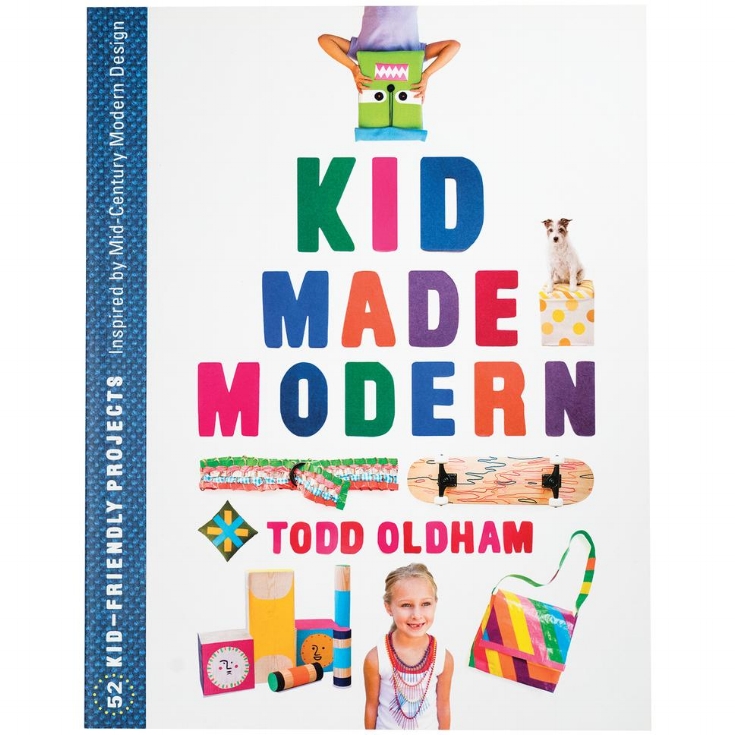
Kid Made Modern. I can't resist buying something from this line each time I go to Target. I love that they offer both projects and supplies. If I want to learn a new skill, there is nothing like a fashionable kit. If I have the skill down, the supplies are a bonus!

Of course, what's a blog post about kids crafts without mentioning Martha. The Martha Stewart's Favorite Crafts for Kids book is big around my house. On a rainy day with only popsicle sticks, drinking straws, buttons, and rubber bands I can keep my kids occupied.

A DIY craft kit is always fun to put together too. Clay, molds or tools, colorful felt, pipe cleaners, ribbon, yarn, paper punch, paper, beads, pompoms, glue, a fun book about crafting, and a crafting book about fun! Your kids imagination can soar. You will be giving them the tools they need to spark imaginative play, foster independent thinking and build self-esteem.
Do you like this series?
XO, Hilarie

The gift of time
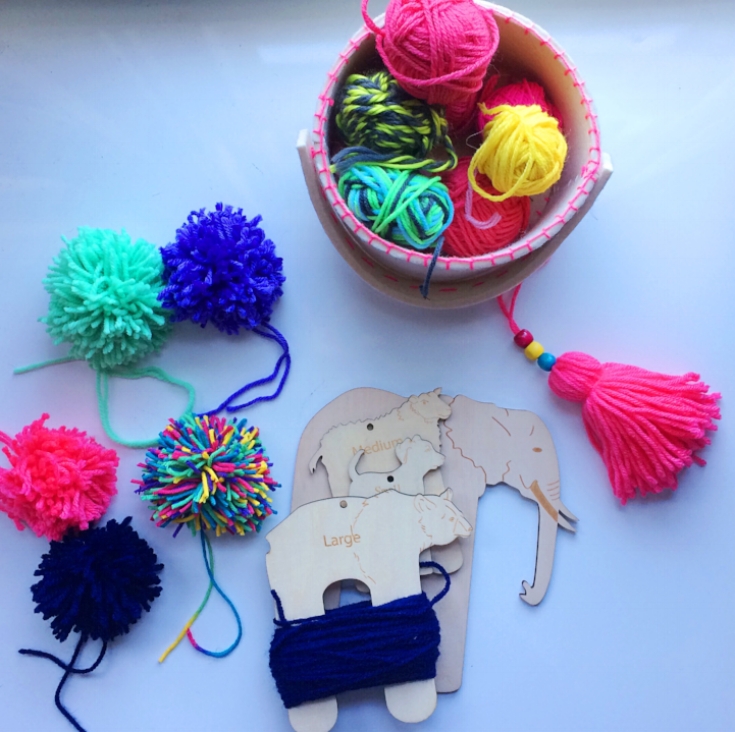
Need some ideas to keep little hands busy? Pompom and tassel makers from Target.
The month of November can be such a hard time to be still and reflect...
As the holiday season draws near, I want to pause and reflect on what I am most thankful for this year. What a year it has been. As I have gotten older I try to be intentional in how I spend my time. Starting a small business while raising children does present its challenges but it has also brought tremendous joy into my life. I get to spend time working with kids that love many of the same things that I do. Fabric, color, design, fashion, sewing! This is great stuff. I appreciate each little smiling face, hug and class that I get to teach. Thank you for your support.
You may have some time on your hands this week over Thanksgiving Break. I have a fun and easy activity for you to check out. (Though you just might want to save it as a gift for next month!)
The crafty kiddos that I know love to make pompoms and tassels. Everything is better with a pompom! Last week I was invited to participate in a Holiday Shop for Ghent United Methodist Church. I had a table set up to sell my clutch bags and patterns. To pass the time, I set up some space to show the shoppers how to make pompoms and tassels. You would have thought it was 1978 again. A basket of colorful yarn, scissors and these fun pompom makers, was all it took. We had a blast! You can get them in the craft aisle at Target. While there, check out some of their other Kids Made Modern craft items.
Look forward to my 12 days of Stitchmas posts beginning next week!
~ Gifts for Kids - Some wonderfully fun new kits and ideas for your youngest crafters
~ Stocking Stuffers - a list for sewers of every size
~ Quick gifts to make with your machine!
... and more! Stay tuned!
Hilarie XO