

How to Sew A Detachable Statement Collar- Part Two
Learn to sew a detachable statement collar with perfect collar points.
Welcome to part two of the series, How to Sew a Detachable Collar. Detachable Statement Collars are such quick and satisfying sewing projects. There is so much mix and match potential in the variations that you might find yourself amassing quite a collection. Throughout this series, we will begin with a basic collar pattern and learn how to change the design to create a look that is uniquely you.
In my introductory post, I showed you how to make a Peter Pan-style rounded collar with additional tips for sewing curves. For this installment, we are going to learn a bit about the structure of woven fabric and how it relates to creating sharp points to sew a Pilgrim-Esque maxi collar.
If you missed the first post, catch up here: How to Sew a Detachable Statement Collar, Part One

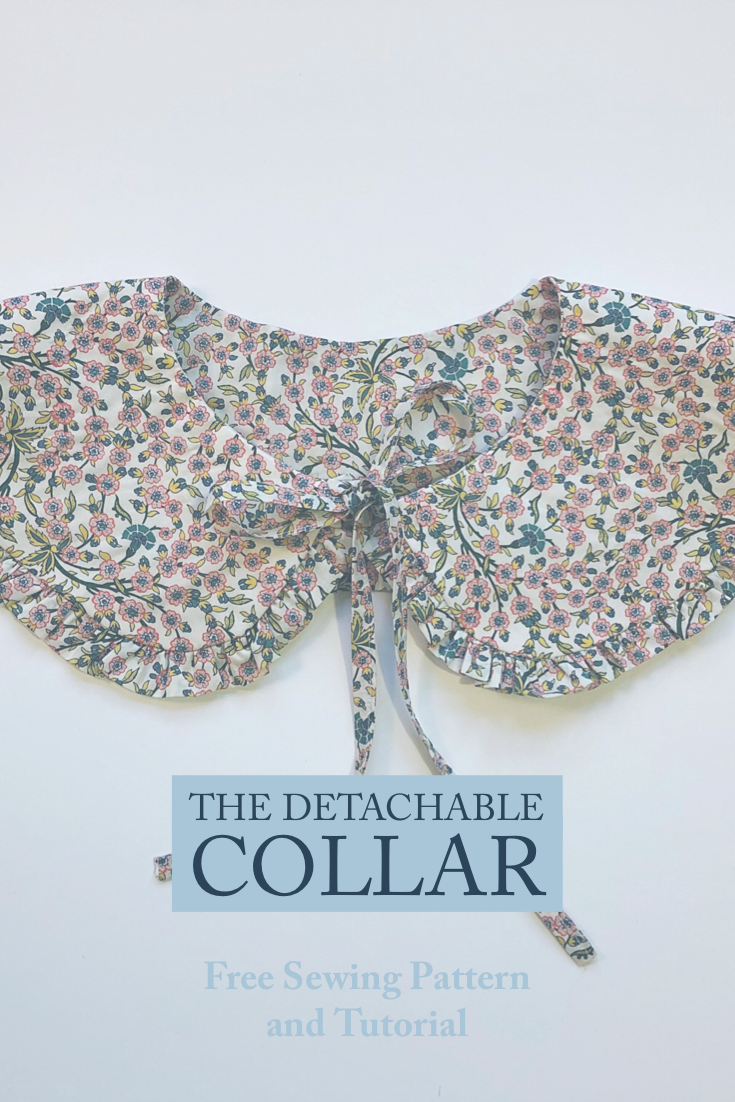
These are two of the many variations that you can create with this pattern. The chambray collar looks great with a mock-neck top worn with a stack of chains and pearls. The plaid taffeta collar has a bit of a softened point and I added a self fabric gathered ruffle to amp up the fun. The possibilities to add your own touch are only limited by your imagination. Have some fun with it!

The pattern is available for download here and also at weallsew where you will find the step by step tutorial. I can’t wait to see what you make!
New to using PDF sewing patterns? Check out this link for tips on assembly.
Head over to weallsew to download and get the tutorial.
Happy Sewing!
XOXO, Hilarie


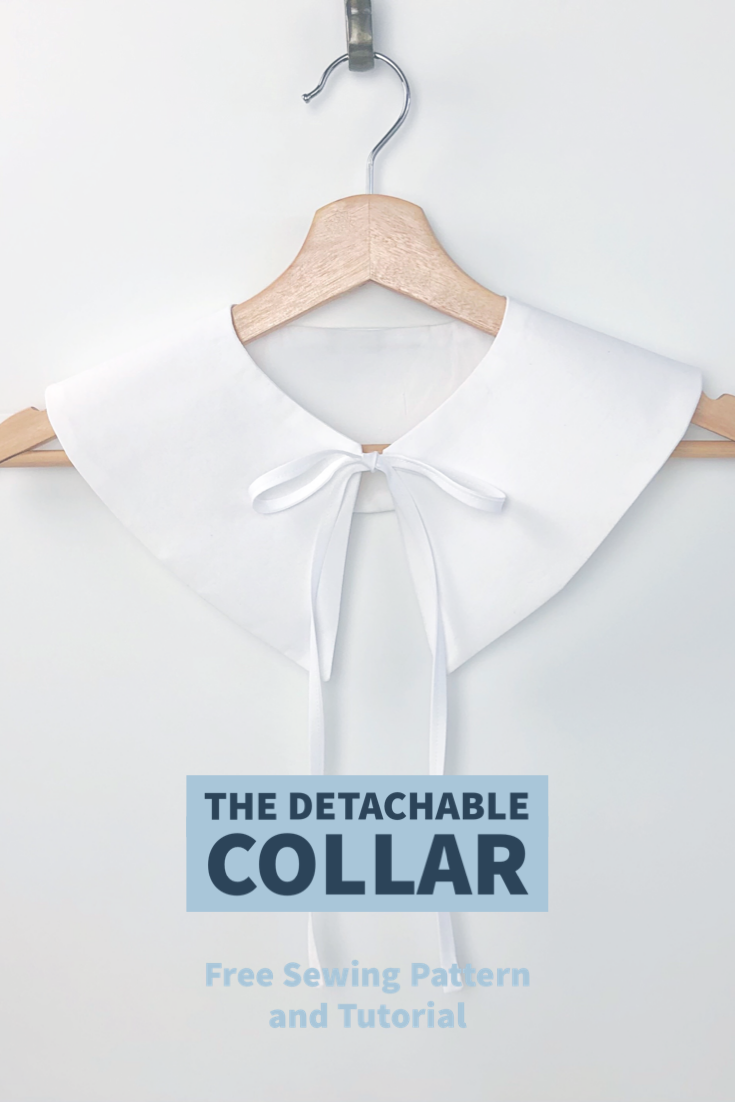
The Detachable Statement Collar Free Sewing Pattern and Tutorial
Statement collars are everywhere right now- and with good reason. They can be easily tied on over tees, coats, sweaters and even dresses for an instant outfit upgrade. The collars are really easy to make and to give as gifts too!
Detachable Statement Collar Free PDF Sewing Pattern and Tutorial
Statement collars are everywhere right now- and with good reason. They can be easily tied on over tees, coats, sweaters and even dresses for an instant outfit upgrade. The collars are really easy to make and to give as gifts too!
From pristine white collars with lace trim to knitted capelets and quilted denim, there are collars for every occasion and outfit. Beaded collars, fur collars, collars with plumes, collars with lace, collars with piping, and tiers of ruffles. For someone who loves fashion and sewing, these collars offer a sewist a chance to pull out all of the stops and finally try an embellishing technique that perhaps has seemed too daunting for a larger project.
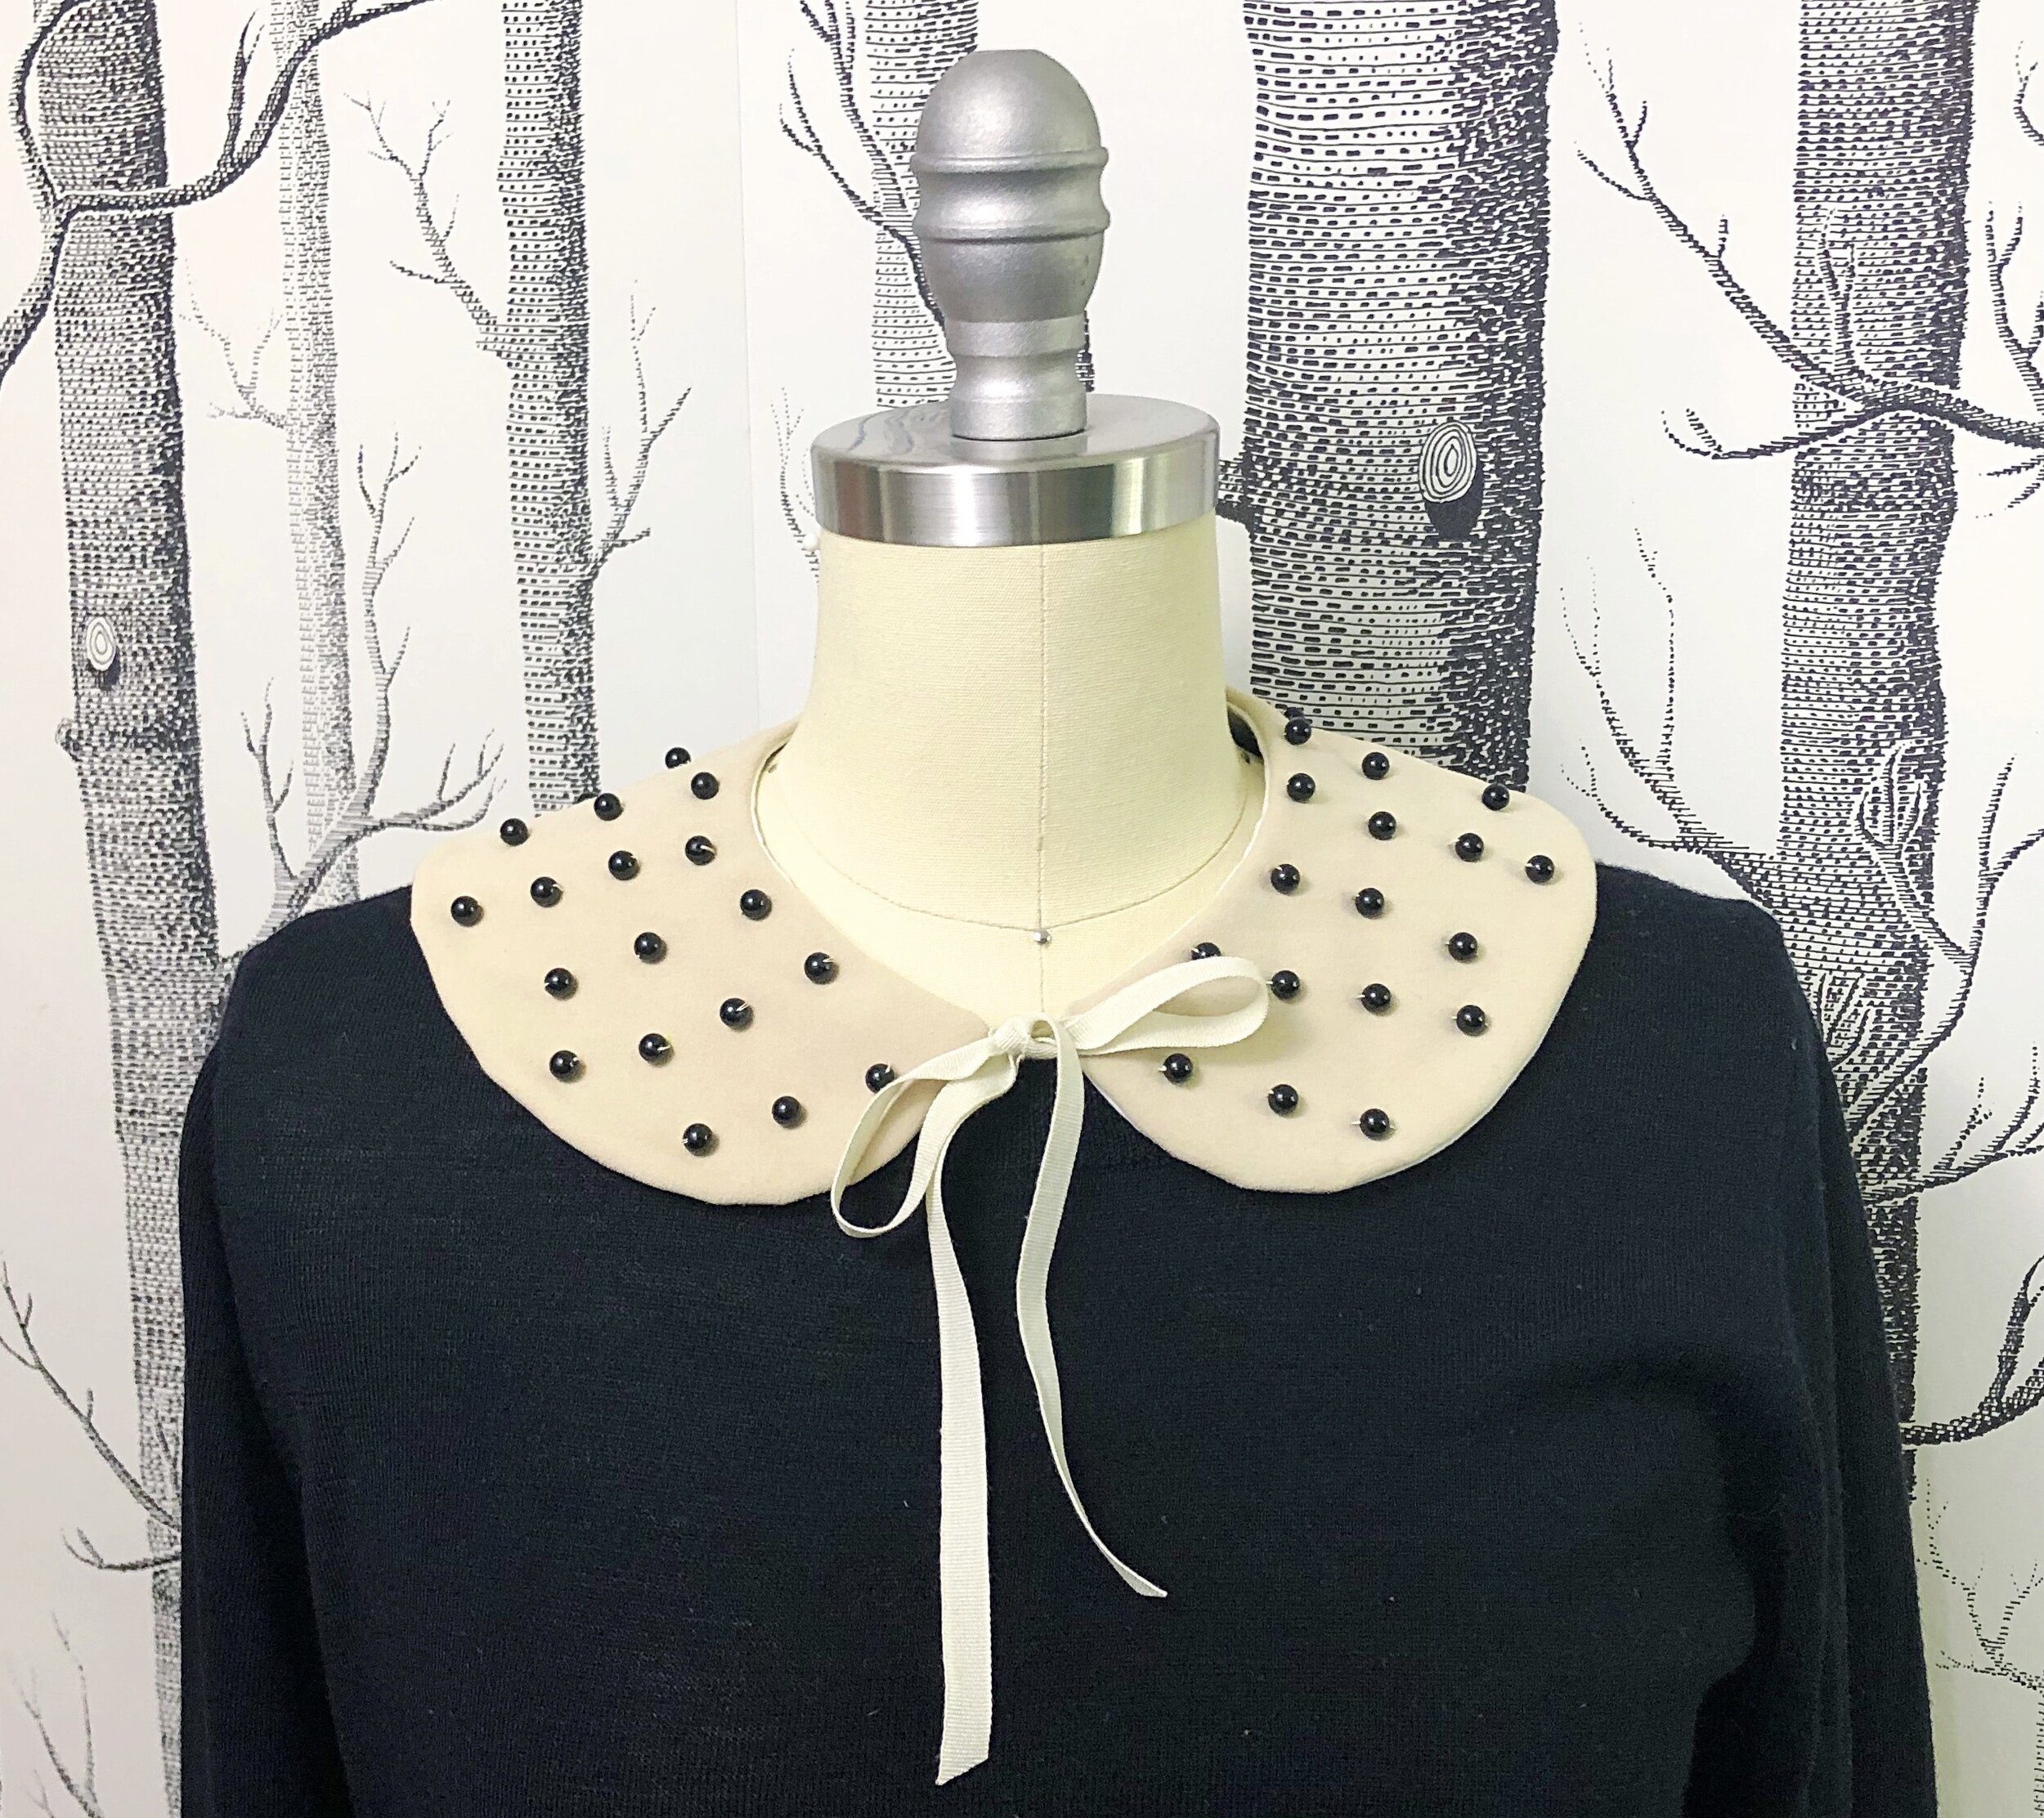
Detachable statement collars are really easy to make- the hard part is choosing a style as there are so many new and fun options. Mini, maxi, round and pointed. Lace, ruffles, trimmed and beaded- the variations are endless. I thought you might enjoy learning all about collars in general and how to make and customize them. To that end, I have designed a group of patterns that I will share with you over the coming lessons. To that end, you can think of this as a sort of mini-course in collars.
The pattern is available for download here and also at weallsew where you will find the step by step tutorial. I can’t wait to see what you make!
New to using PDF sewing patterns? Check out this link for tips on assembly.
Head over to weallsew to download and get the tutorial.
Happy Sewing!
XOXO, Hilarie
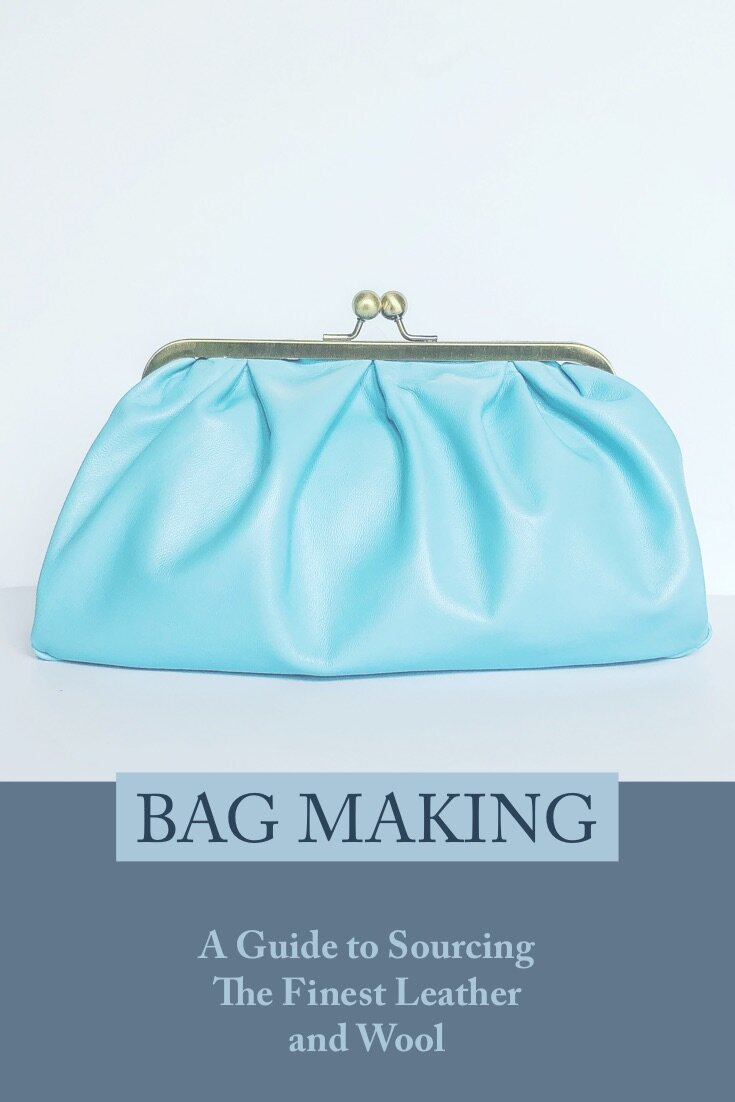
A Guide to Sourcing the Finest Bag Making Materials: Leather and Wool Felt
It’s hard for me to think about designing bags and not consider fabric as one of their defining features. There is color, shape, pattern and hardware, of course, but then, it’s the fabric. I am using the term fabric loosely as some of the textiles used to make the finest bags aren’t actually fabric at all. Leather and Wool Felt are two that come to mind. Both are natural resources, of course and offer exceptional durability, color fastness and a sculptural quality that fabric can’t really match.

It’s hard for me to think about designing bags and not consider fabric as one of their defining features. There is color, shape, pattern and hardware, of course, but then, it’s the fabric. I am using the term fabric loosely as some of the textiles used to make the finest bags aren’t actually fabric at all. Leather and Wool Felt are two that come to mind. Both are natural resources, of course and offer exceptional durability, color fastness and a sculptural quality that fabric can’t really match.
These materials are sumptuous on their own but in combination, they are a tactile delight. If you want to take your bags up a notch, you will want to try sewing with leather and wool felt.
Shopping for Bag Making Materials: Leather and Wool Felt
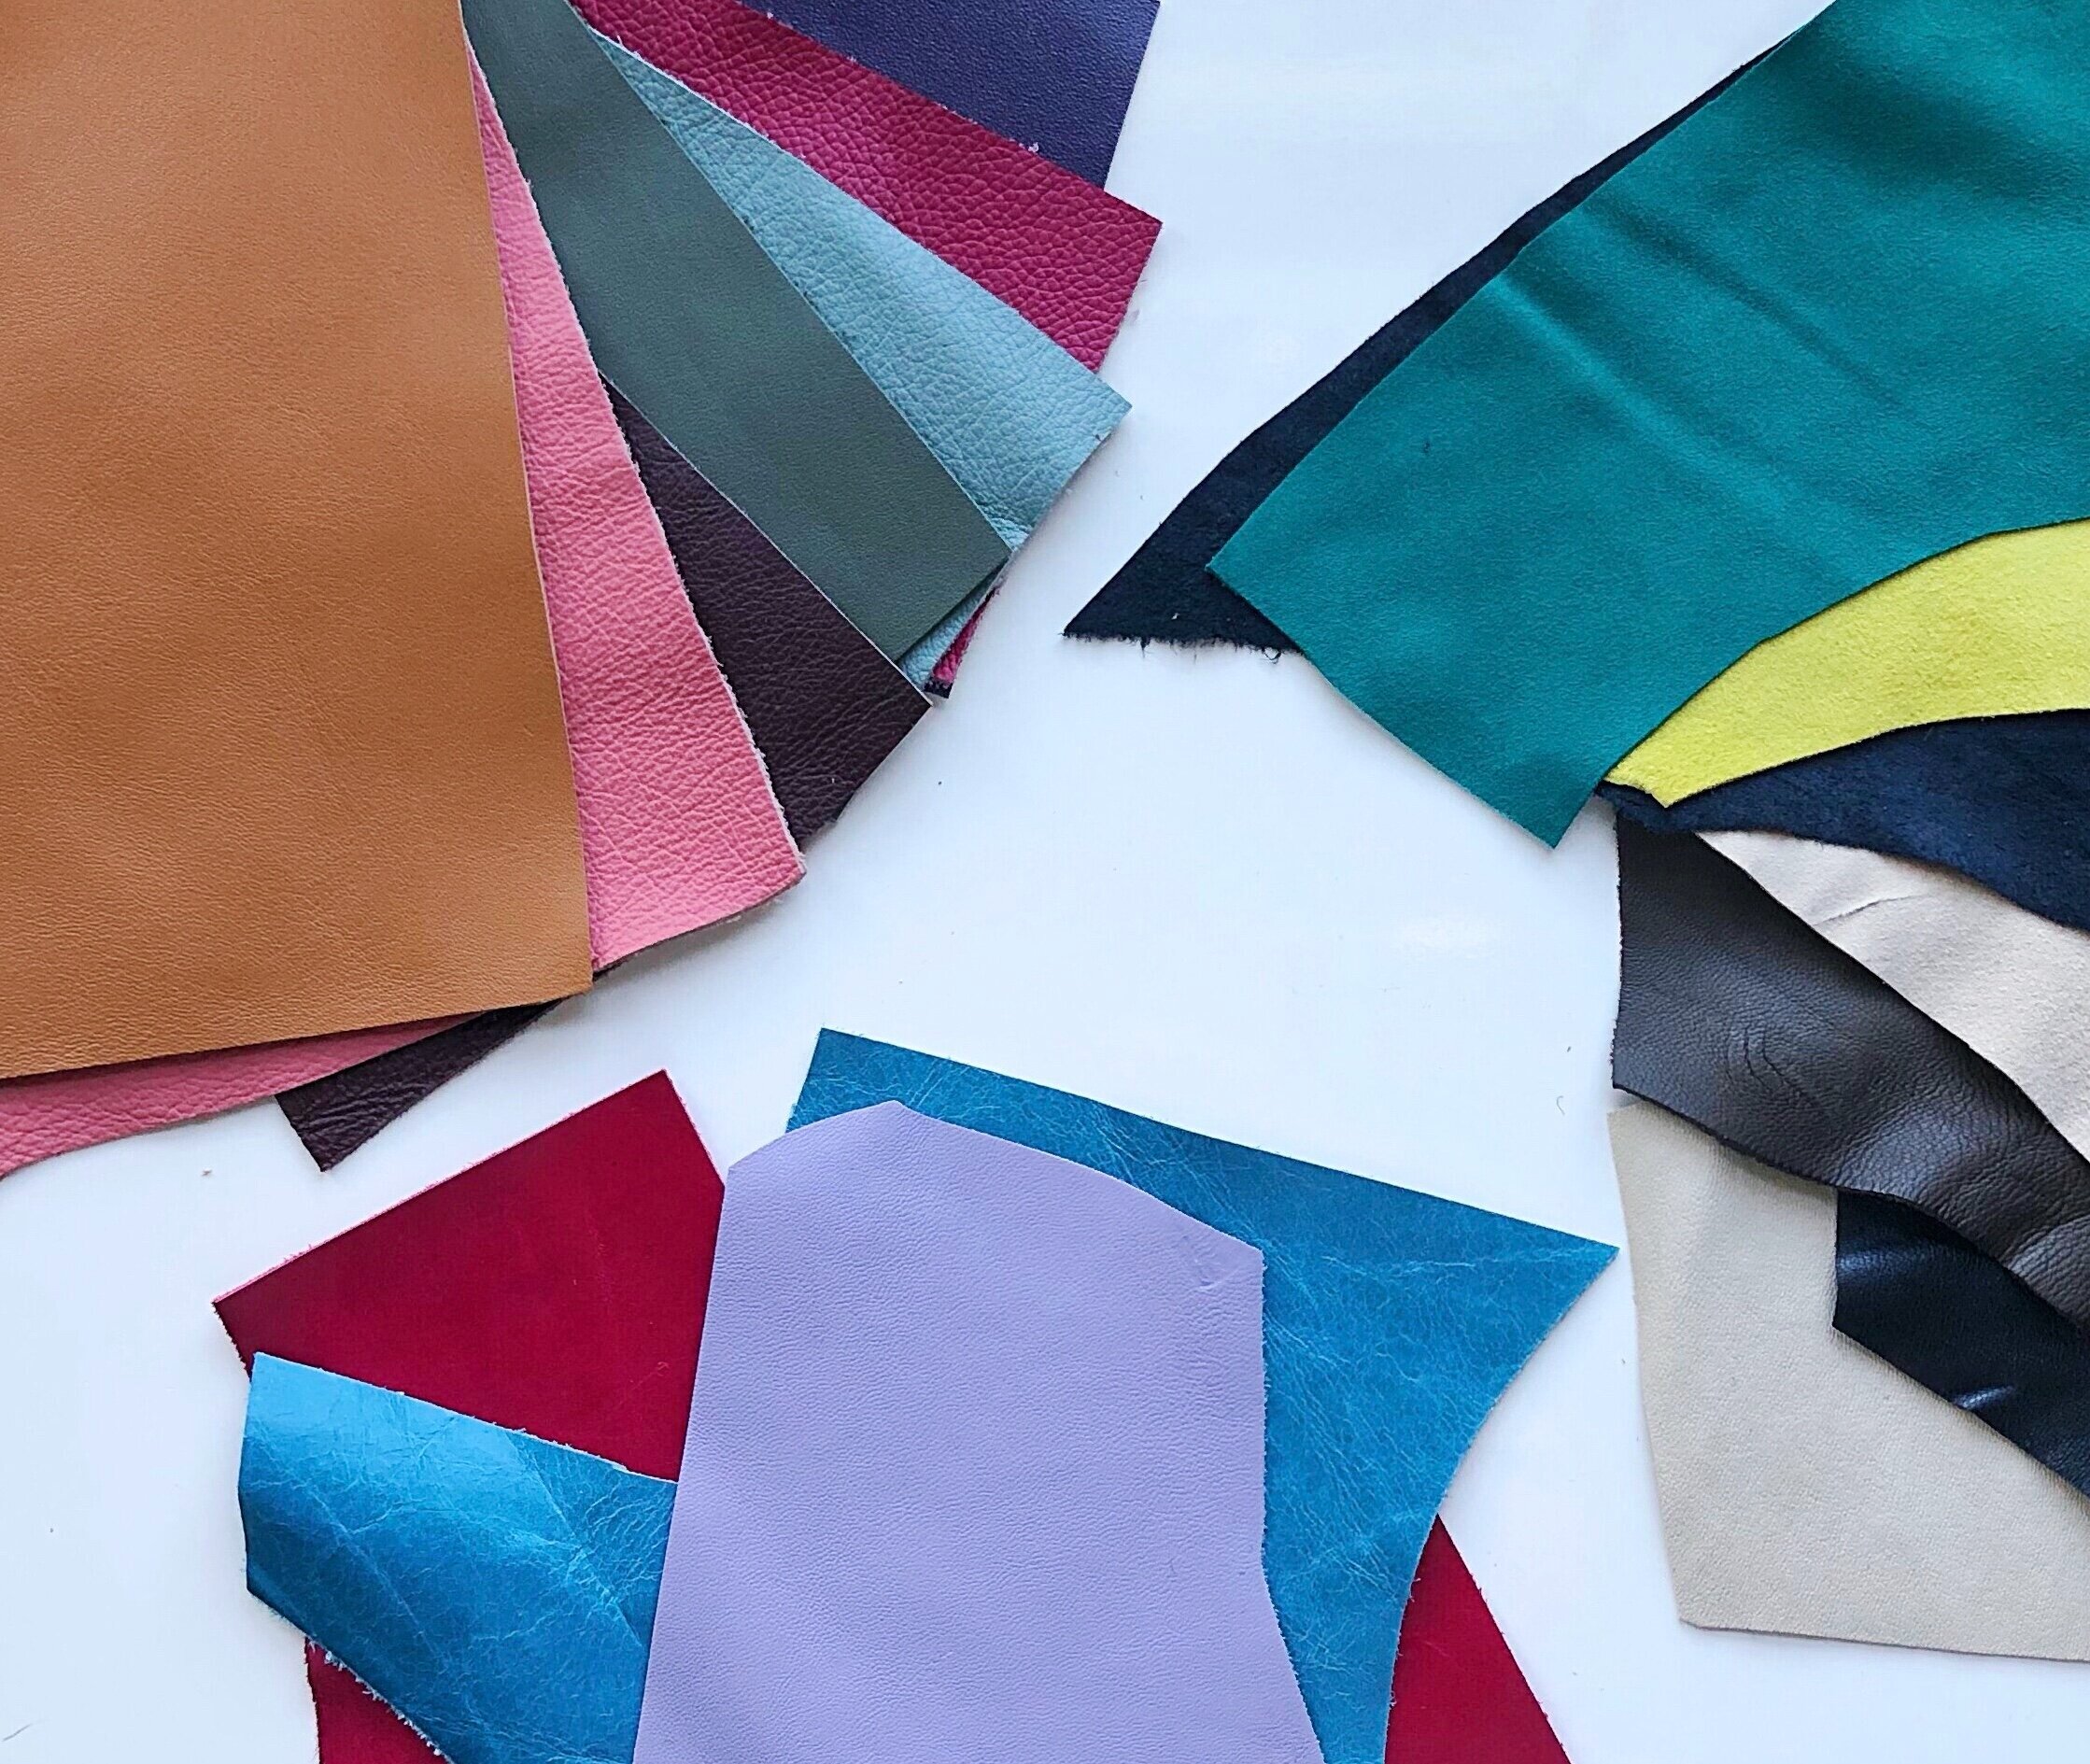
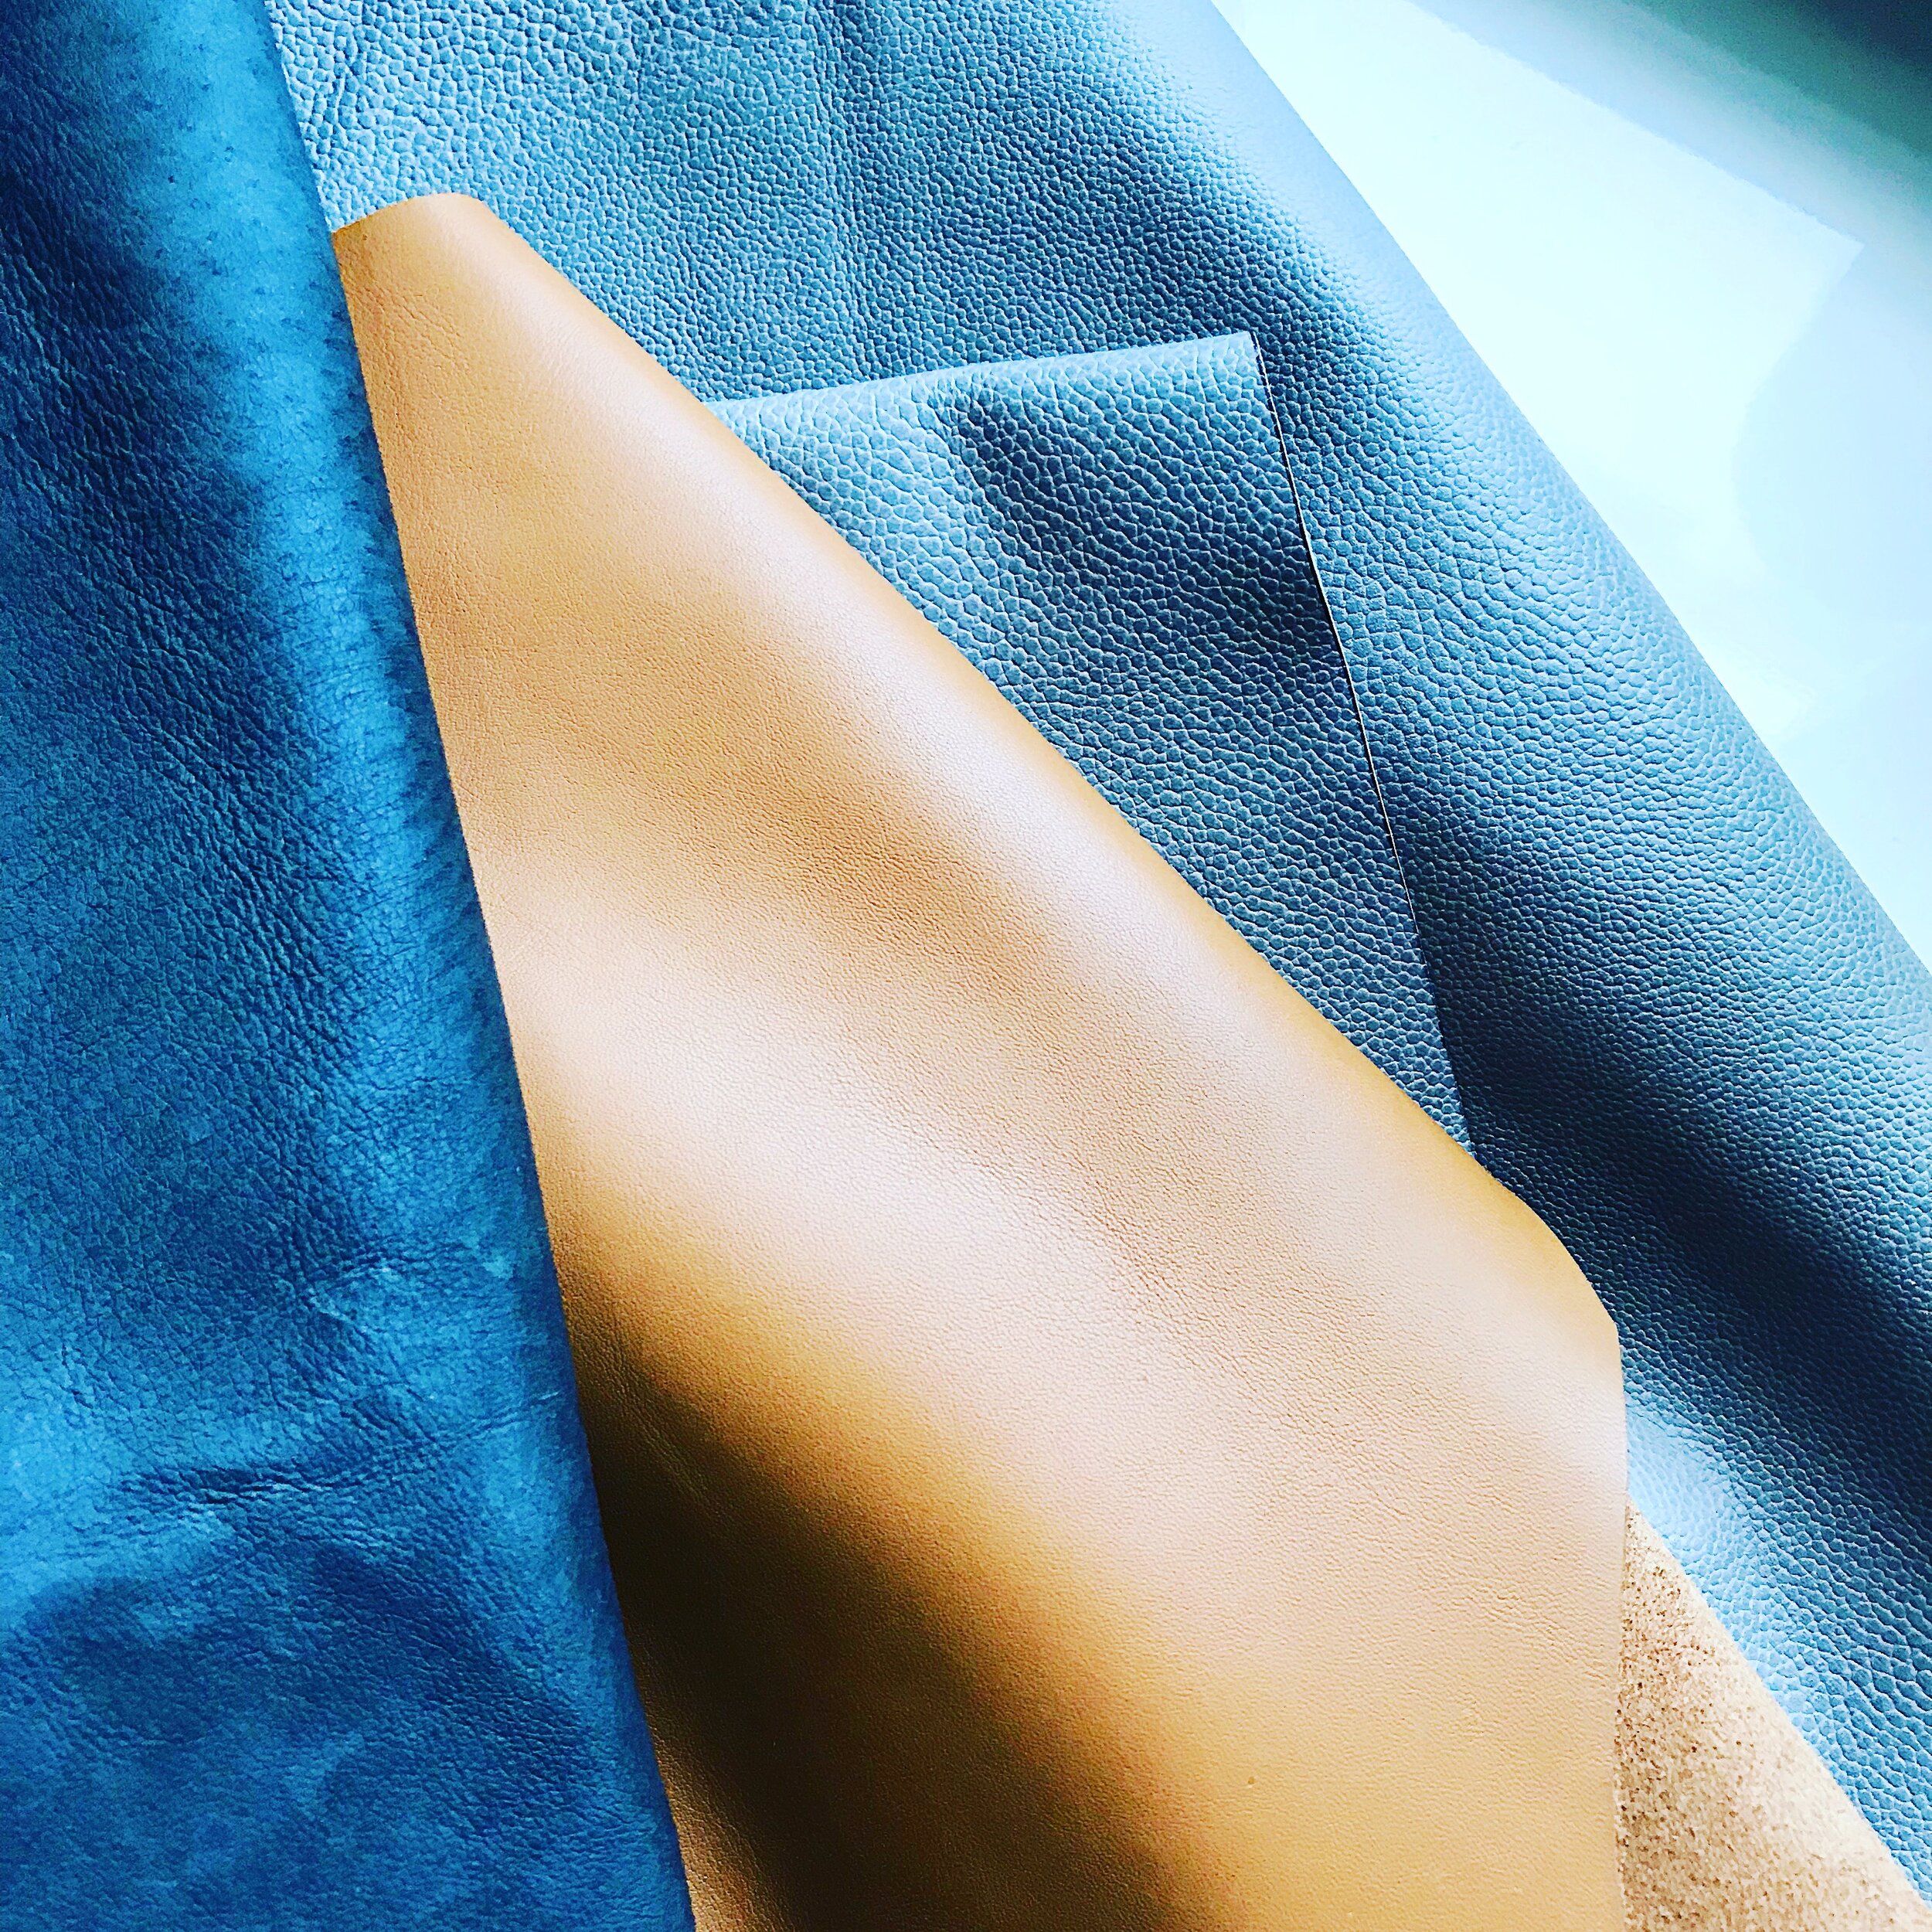
Leather
Before purchasing leather for sewing a bag or garment, it is always good to know a bit about how it is sold. This will help you to better select a leather that will work with you and your sewing machine.
Leather is measured in terms of ounces which refers to liner thickness rather than weight. One- ounce of leather, equals 1/64 of an inch thickness. This means with a weight of 7 to 8 ounces, the leather is about 7/64 to 8/64 of an inch thick.
1 oz. is about .4 mm thick
2 oz. is about .8 mm thick
3 oz. is about 1.2 mm thick, etc.
Leather comes from animals and like humans, each one is unique. So is our skin. Some have beautiful flawless skin, while others have lived life to its fullest and have the scars to prove it. During the splitting and tanning process, the variations in the thickness and character of the individual hide are revealed. To account for the variation, leathers are generally sold in a range of thickness, such as 2 to 3 ounces or 4 to 5 ounces.
Lighter weight leathers, up to about 4 ounces can be sewn on a domestic sewing machine. Anything heavier it is really best to use an industrial machine or even punch and hand stitch. More Tips and Tricks for Sewing with Leather here:
This chart by Tandy Leather can help guide you to selecting the ideal type and weight of leather for your next project.

These are some of my favorite sources for purchasing leather.
Leather, Suede, Skins is my go-to source for leather. Call and ask for Faina. She is exceptionally knowledgeable and will guide you to finding the ideal leather for your project.
Mood Fabrics Mood has a small but very fashionable selection of garment weight leather and trim.
Tandy Leather The granddaddy of all things leather. The website is full of great educational links and tutorials as well as a dizzying selection of hardware, paint, tools and accessories.
Don’t forget all of the leather that is readily available in thrift stores, ebay and in your own closet.
Wool Felt for Bag Making
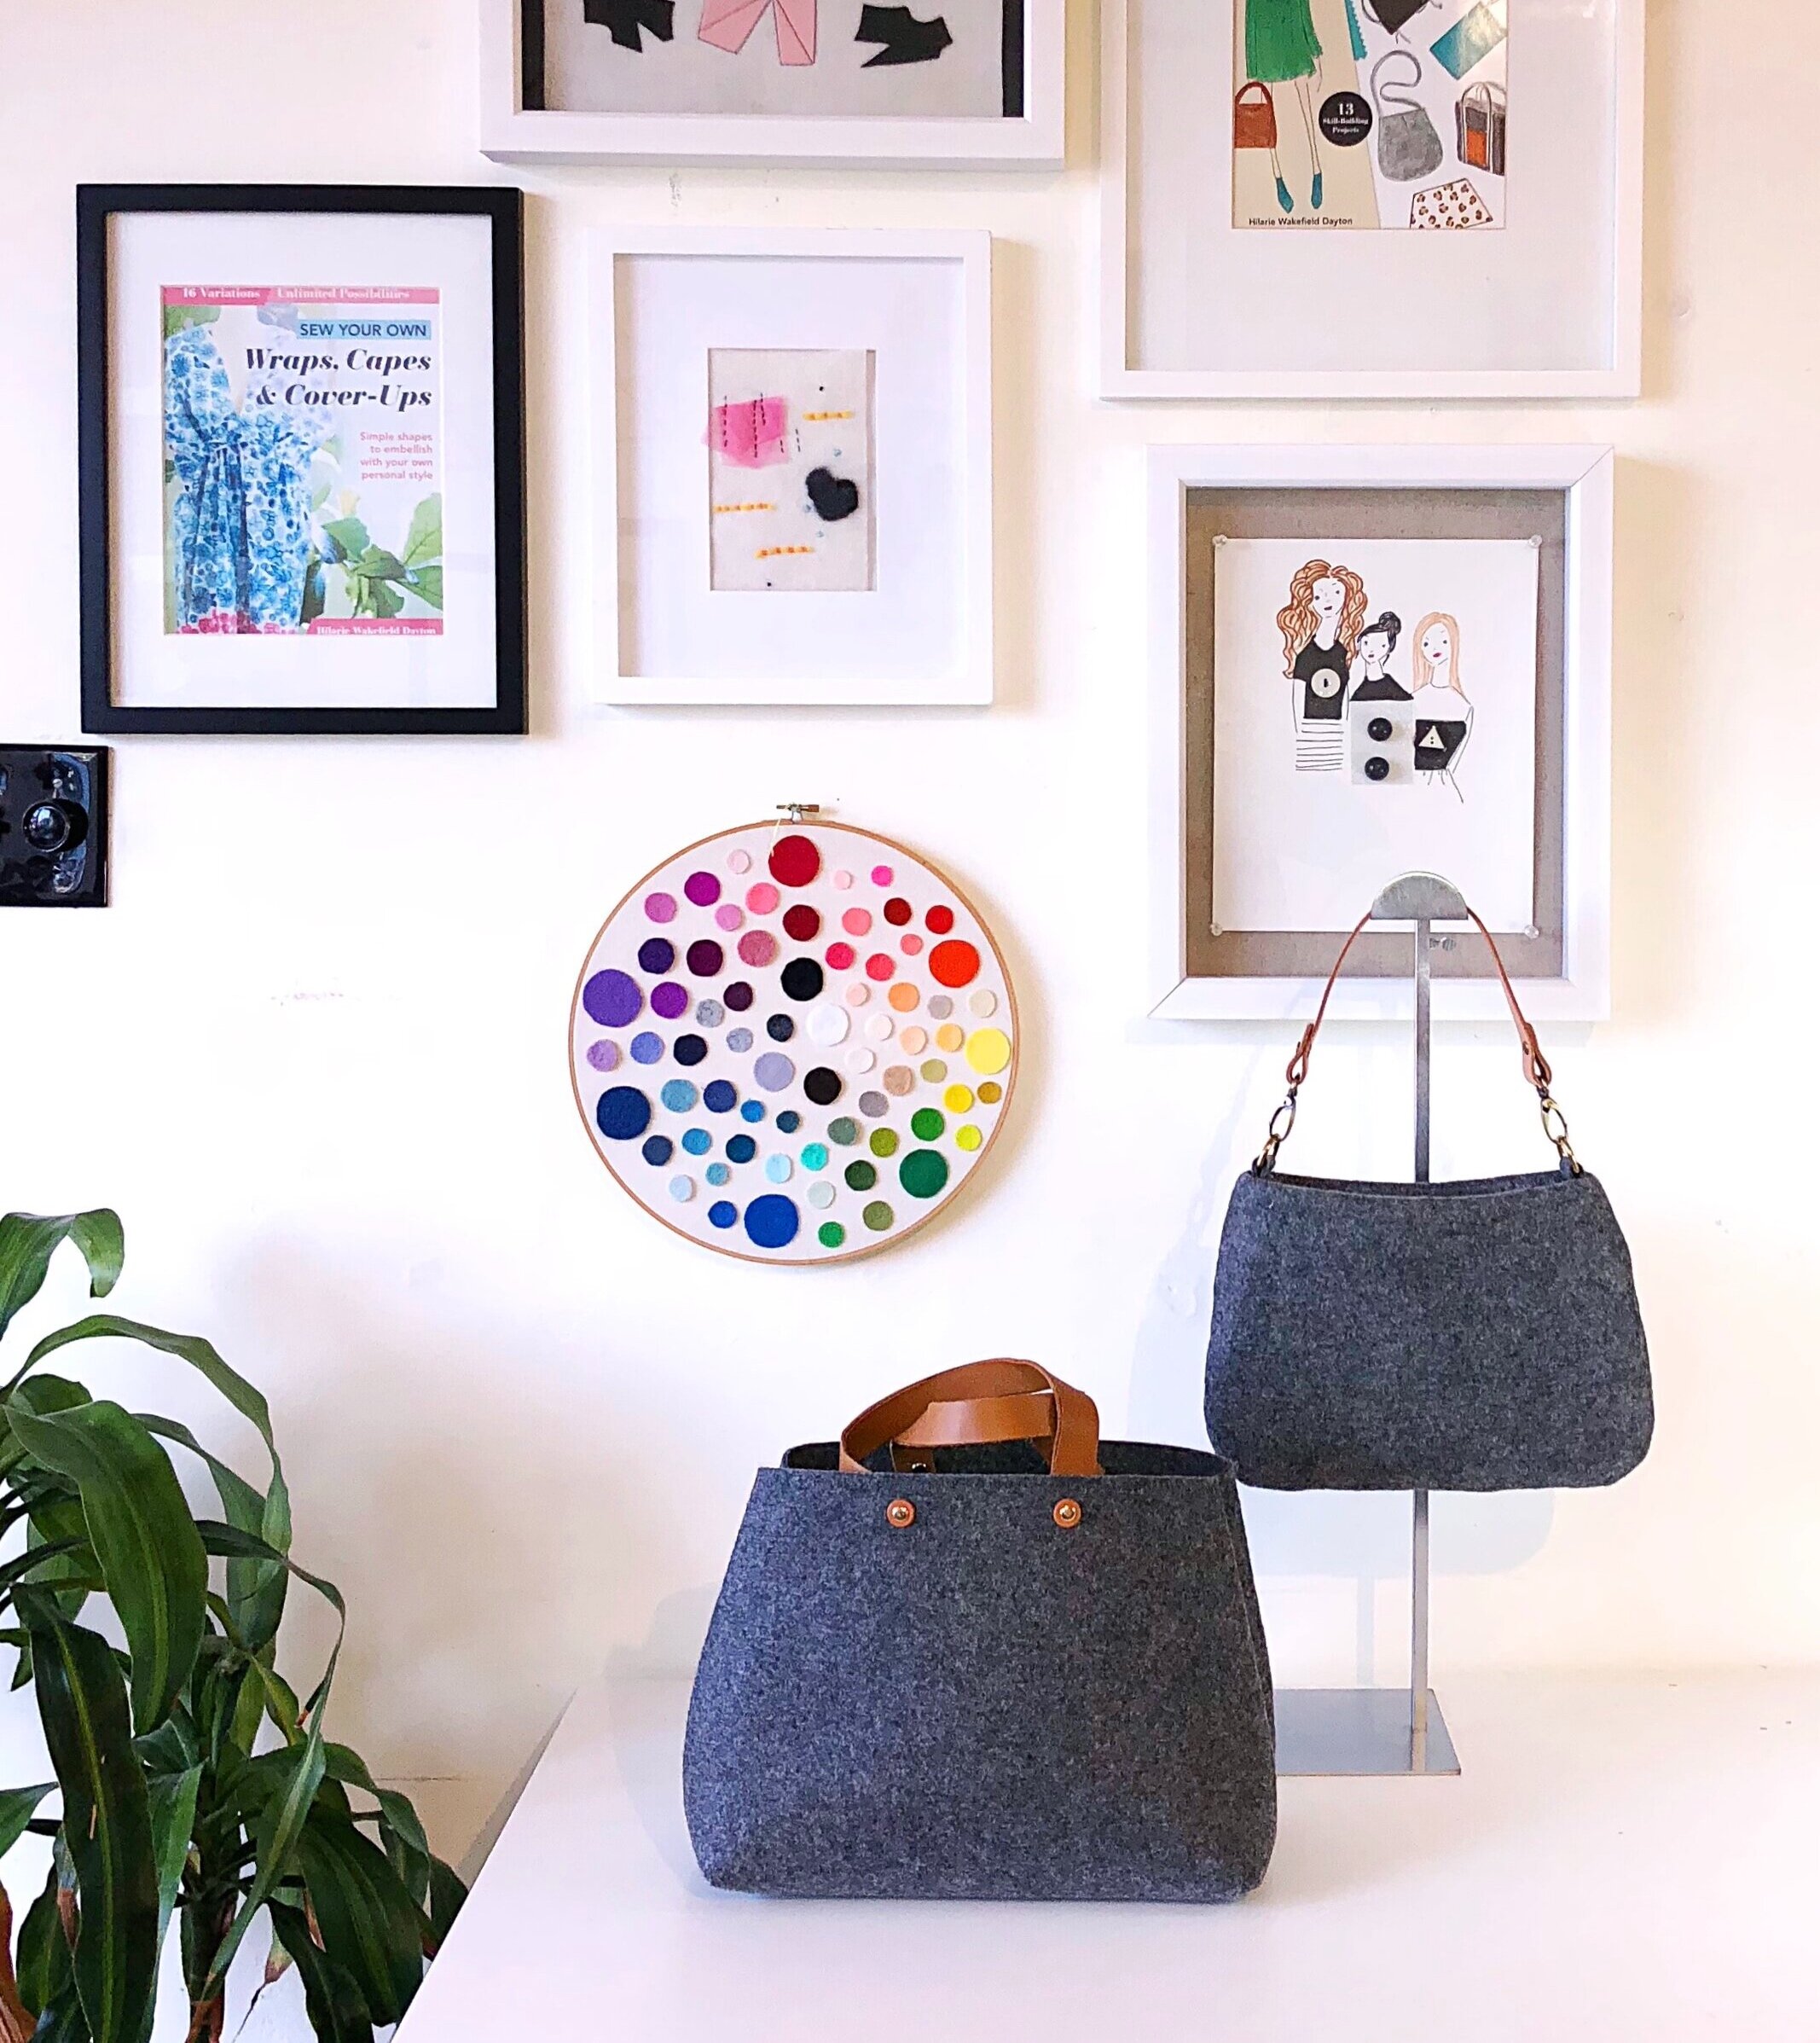
Merino Wool Felt
Wool felt is gorgeous for making bags and other small accessories. Merino wool felt has a beautiful and soft feel, it is available in nearly any color imaginable, is naturally water repellant, renewable and sustainable. Merino wool felt is a non-woven textile that is produced by densely matting fine wool fibers. As such, it does not fray or unravel and has no wrong side and doesn’t pill. Bags made of felt are able to withstand weight without losing their shape due to the inherent tensile strength or the fiber.
Wool felt is not always easy to find at your local fabric shop, but is readily available online. When shopping, look for a felt that is more of an industrial weight (2-4mm about 1/8”) and mostly wool.
When making bags, you will be working with multiple layers of felt. To help keep your seams smooth, a Walking Foot and clips are essential. Also, you will want to increase the length of your stitch. You may need to cut a test swatch and practice to determine the ideal machine settings.
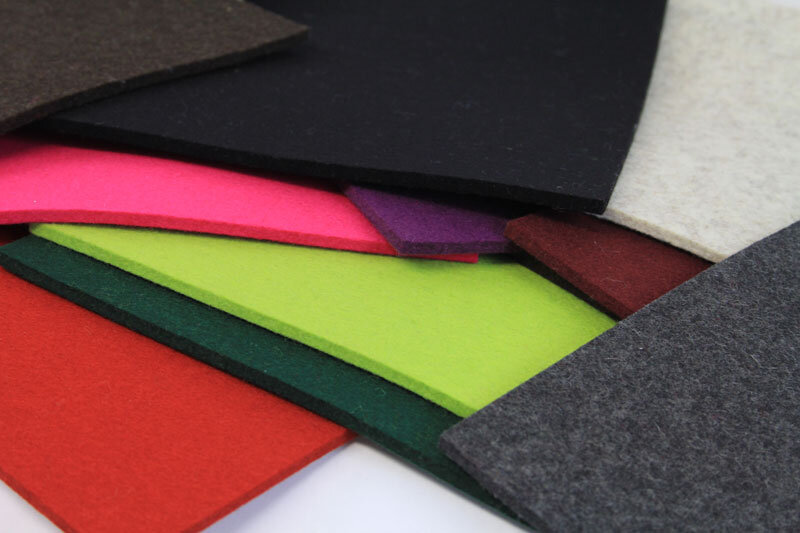
Synthetic Industrial Felt
These are fairly inexpensive options that are ideal for small accessories, making bag bases, adding structure and to create bag organizers.
Are you curious to read more about The Best Fabrics for Bag Making? In this article I discuss sewing with leather, wool, decorators weight fabric and canvas.

The perfect handbag is elusive- I hope to change that by giving you the tools you need to design and make the bag of your dreams. For more about bag making, check out my blog posts under the tag “Bags” and of course, my book; Sew Bags: The Practical Guide to Making Purses, Totes, Clutches & More
XO, Hilarie

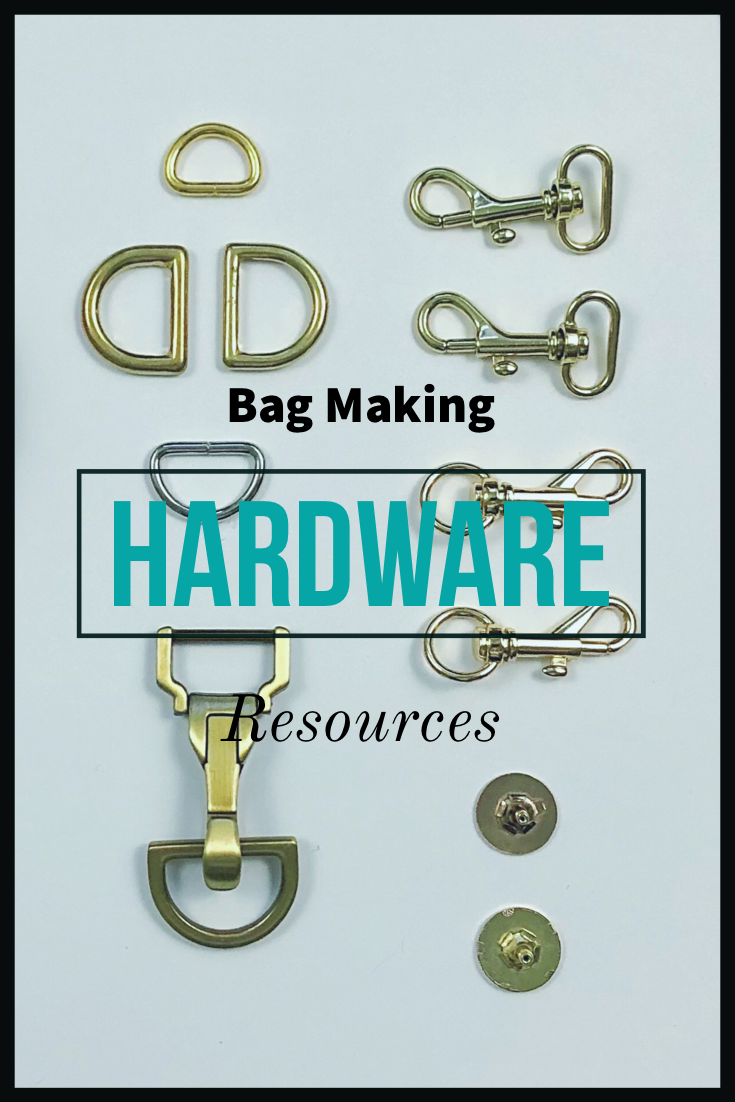
Resources for Bag Making Hardware
When people I meet tell me that they want to learn to sew, and ask for project ideas, I always suggest making a bag. Bags offer so many opportunities to build foundational skills and learn to manipulate fabric without having to worrying about fit. In fact, the very first project that I ever made was a bag! It was a yellow 70’s coarse weave fabric- very much like burlap. The strap was fashioned out of bright pink yarn and of course I had to add more than a few embellishments. While my style has changed since then, my love for accessories has only grown!
Sewing bags and fashionable accessories is still among my very favorite things to do. The time investment is rather small, and the rewards are huge. Plus, at the end of the project, you have a new bag to carry around. To begin making bags or anything really, you won’t need much more than a basic sewing kit. However, if you find you love bag making (and I hope that you do!) It may be helpful to begin adding a few more specialized tools and supplies to your stash.
Resources for Bag Making Hardware
When people that I meet tell me that they want to learn to sew, and ask for project ideas, I always suggest making a bag. Bags offer so many opportunities to build foundational skills and learn to manipulate fabric without having to worrying about fit. In fact, the very first project that I ever made was a bag! It was a yellow 70’s coarse weave fabric- very much like burlap. The strap was fashioned out of bright pink yarn and of course I had to add more than a few embellishments. While my style has changed since then, my love for accessories has only grown!
Sewing bags and fashionable accessories is still among my very favorite things to do. The time investment is rather small, and the rewards are huge. Plus, at the end of the project, you have a new bag to carry around. To begin making bags or anything really, you won’t need much more than a basic sewing kit. However, if you find you love bag making (and I hope that you do!) It may be helpful to begin adding a few more specialized tools and supplies to your stash.
Finding hardware that looks (and felt!) as good or even better than a designer bag at retail can be tricky-unless you know where to shop. Fortunately, I’ve got you covered. Here is a list of my most used hardware and the retailers that sell them.
Bag Making Hardware
Magnetic snaps come in a range of colors and sizes. They are easy to insert.
Cap rivets are used for finishing and reinforcing leather and bag details.
D-rings are D-shaped metal rings used for fastening handles to bags.
Adjustable sliders are used to thread a strap and to adjust the length.
Swivel snap hooks are used with D-rings to clip straps to a bag.
Eyelets are small round pieces of metal used for finishing and reinforcing fabric holes.
Grommets are like eyelets, only larger.
Metal Purse Frame for snap lock and structured purse openings.
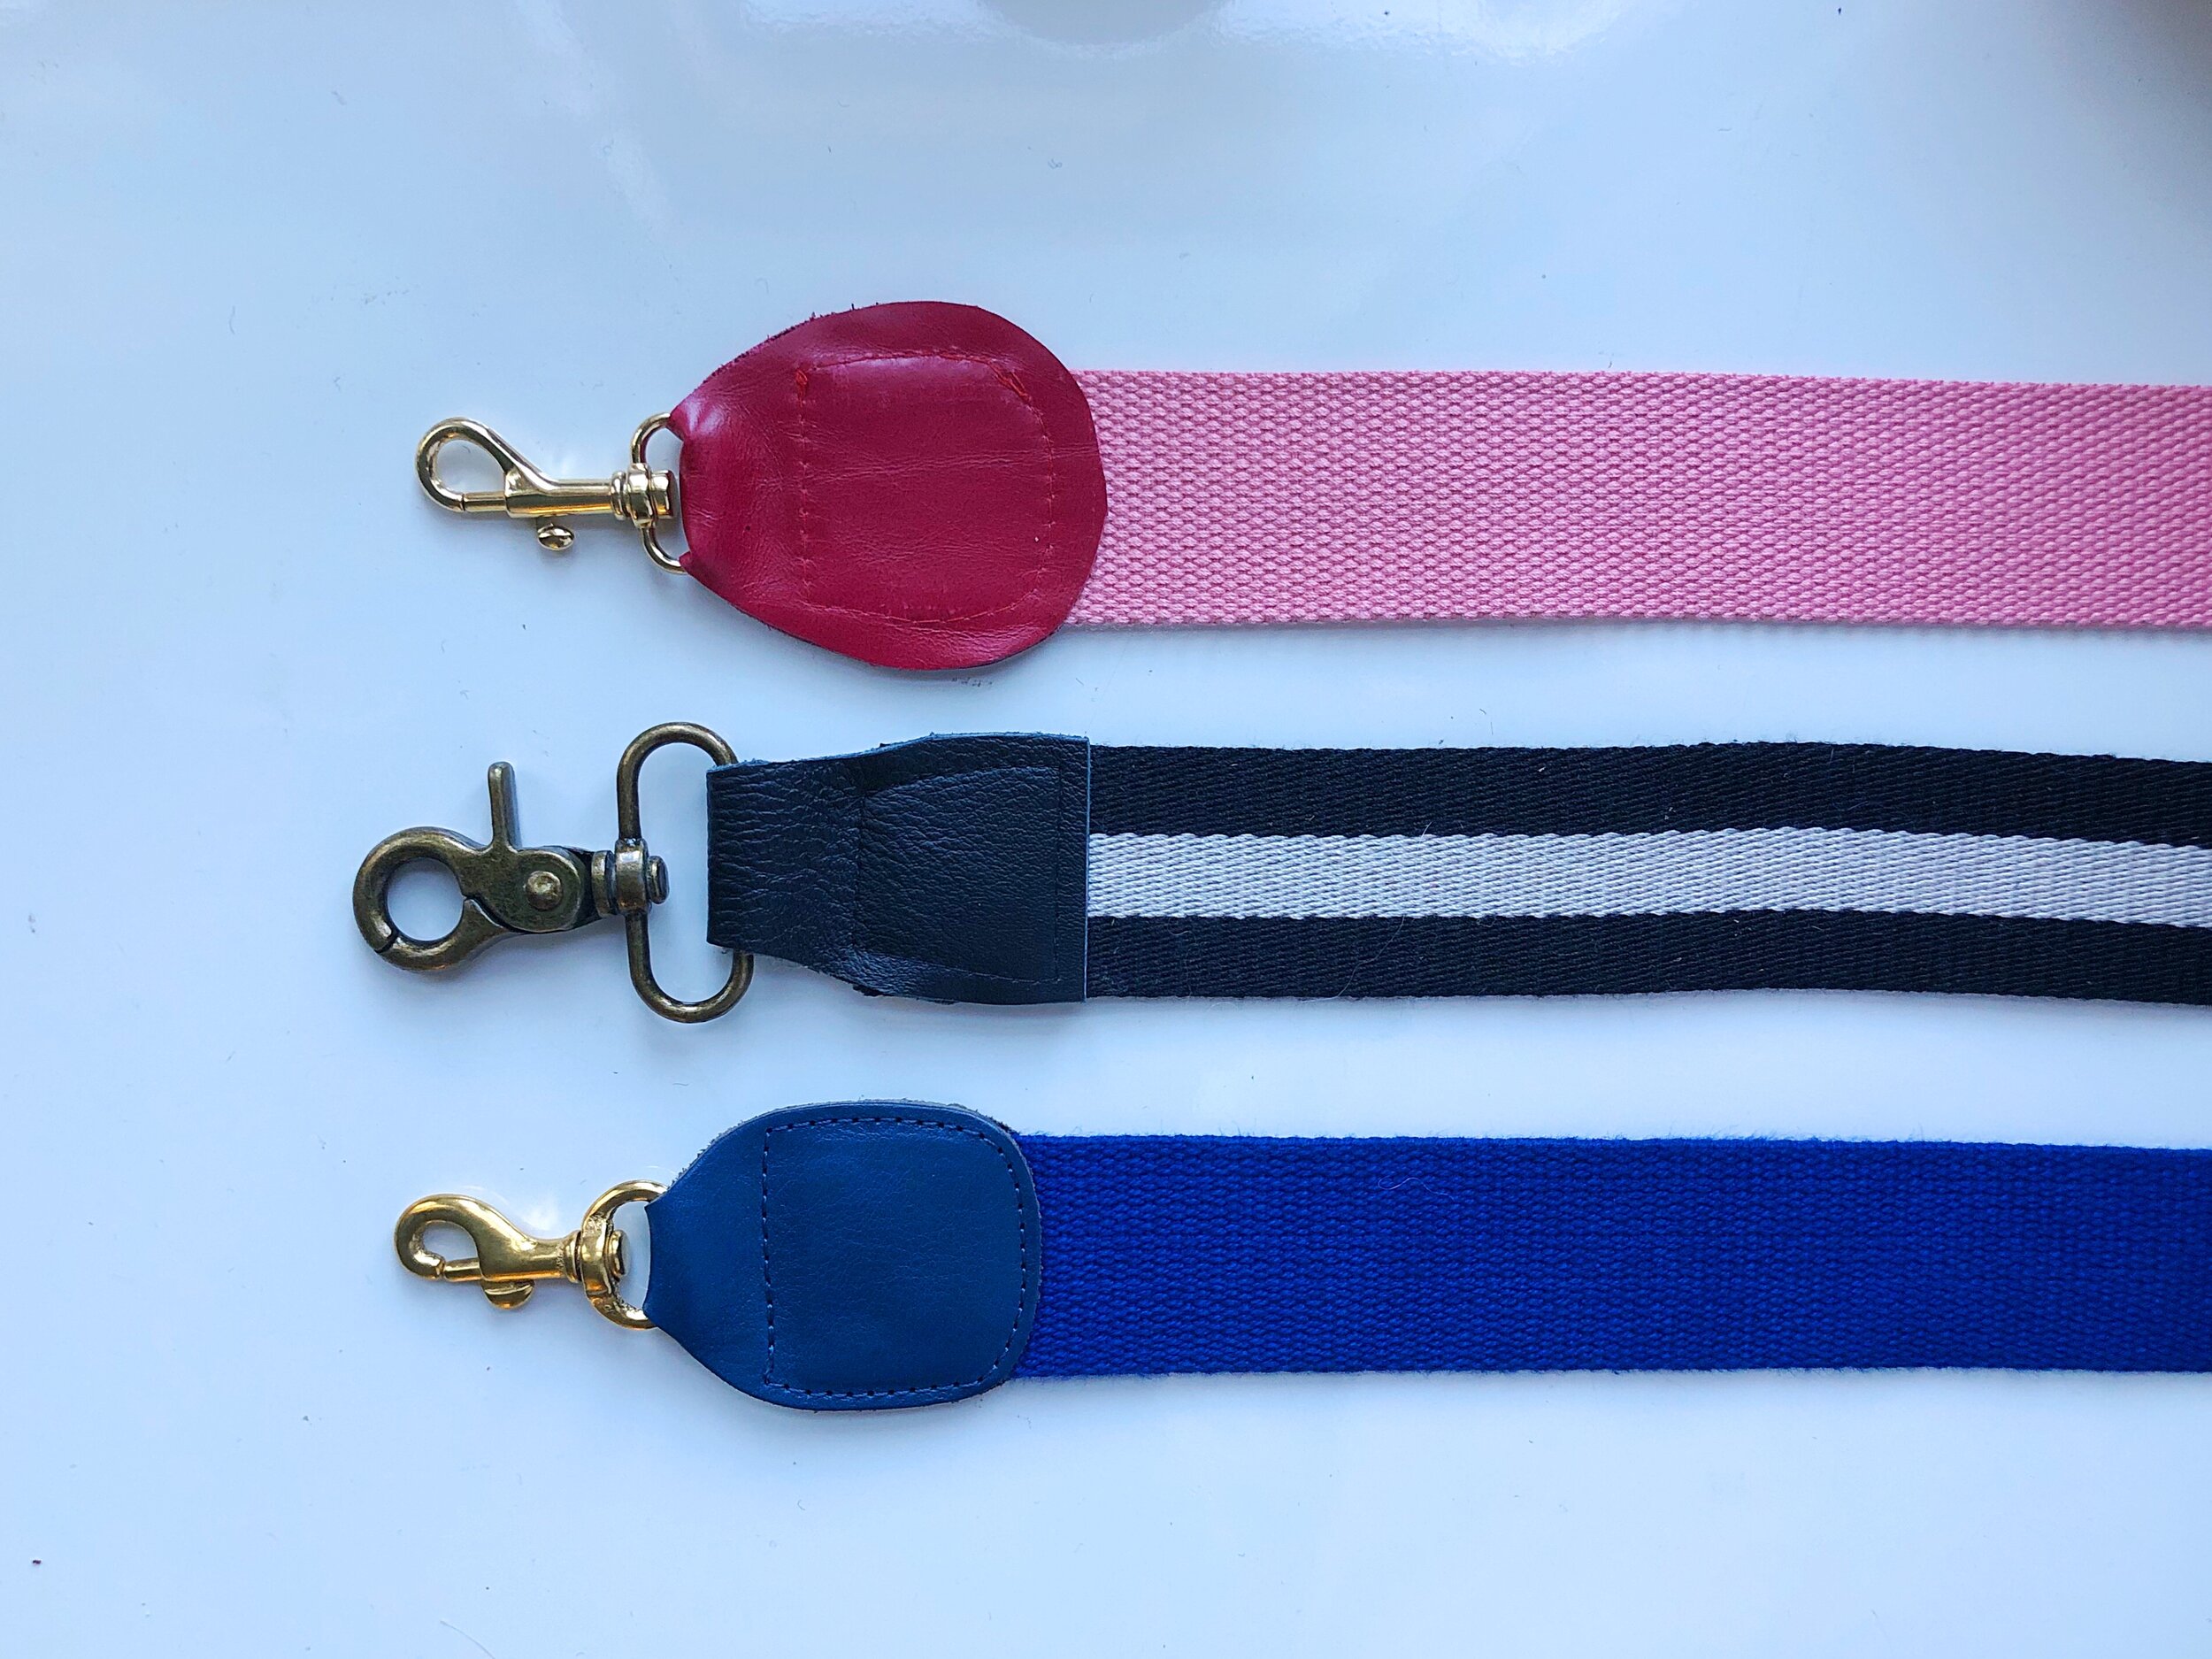
Strapping and Trim
When creating your own bag, you get to select every detail. After determining the style, silhouette and function, it is time to choose the strap. Options for bag straps and handles are seemingly endless. Straps can be fashioned out of leather, fabric, webbing, chain, cord, metal and wood. Remember- you don’t have to limit yourself to one strap or handle. With the addition of hardware, swapping out a purse strap has never been easier.
Webbing Tape is a durable option for bag handles. It is commonly made of cotton, nylon or jute.
Leather strapping is generally sold by the yard in a variety of widths and is used for making purse straps, belts and other accessories.
Chain used on its own or laced with ribbon or leather cord adds instant “fancy” to a bag.
Here are some of my personal favorite stores for hardware, strapping and trim that cater to both the individual sewer as well as those in the trade.
Zippers
If the zipper selection at your local fabric store leaves you feeling rather uninspired- wait until you see these! Zippers are available in a wide range of materials, colors and lengths. They can be purchased individually or in bulk in standard lengths as well as on a continuous roll so that you can customize the length and select your slider.
Zipper Types
Zippers are classified into two types: closed-end and open. The easiest way to tell which type the zipper is by looking at the zipper stop. If the zipper can be fully opened and separated like one on a jacket, it is considered an open zipper. If the zipper cannot be separated when fully opened, it is a closed-end zipper.
Open end zippers are generally used for coats, jackets, sweaters and sweatshirts. Whereas you will see closed-end zippers on pants, jeans, skirts, shoes, pockets and bags.
Both open and close end zippers can be further grouped into the following categories, which are based on function.
· One-way open-end zippers
· Two-way open-end zippers (2 way separating zippers/dual separating zipper): including two sliders. The zipper halves can be completely detached from each other, just like the one-way open-end zippers. This type of zipper is commonly seen on heavy coats and overcoats.
· One-way close end zippers
· Two-way close-end zippers: including O shape with two bottom stops and the X shape that has two top stops. Both types have two sliders and are frequently seen on large bags and luggage.
These are some of my favorite sources to shop for all types of zippers.
And don’t forget the treasure trove of miscellaneous hardware from your own old bags and belts. They can easily be removed and updated.
The perfect handbag is elusive- I hope to change that by giving you the tools you need to design and make the bag of your dreams. For more about bag making, check out my book; Sew Bags: The Practical Guide to Making Purses, Totes, Clutches & More
Happy Holidays!
XO, Hilarie

Top 10 Favorite Sewing Tools
The right sewing tools make sewing easier and so much more enjoyable. Often time I am asked about what tools someone needs to begin sewing. That can be a tricky question as it really depends on what types of things you are sewing. Garment sewing? Bags? Home decor? While all of these categories have some overlap, many require specialty notions. So as not to get overwhelmed, I suggest that you get what you need for the project you are working on and build from there.
To that end, there are some tools you may find helpful no matter what type of sewing you plan to do.
Hello friends! It’s a full week for many of us, with Christmas next Friday. I am certain that you are busy making plans and crossing off that gift list. For those like me, who maybe haven’t finished shopping yet, here is a list of some of my favorite sewing tools. Perhaps you know someone who would love to wake up Christmas morning with a stocking full of sewing fun!
The right sewing tools make sewing easier and so much more enjoyable. Often time I am asked about what tools someone needs to begin sewing. That can be a tricky question as it really depends on what types of things you are sewing. Garment sewing? Bags? Home decor? While all of these categories have some overlap, many require specialty notions. So as not to get overwhelmed, I suggest that you get what you need for the project you are working on and build from there.
To that end, there are some tools you may find helpful no matter what type of sewing you plan to do.
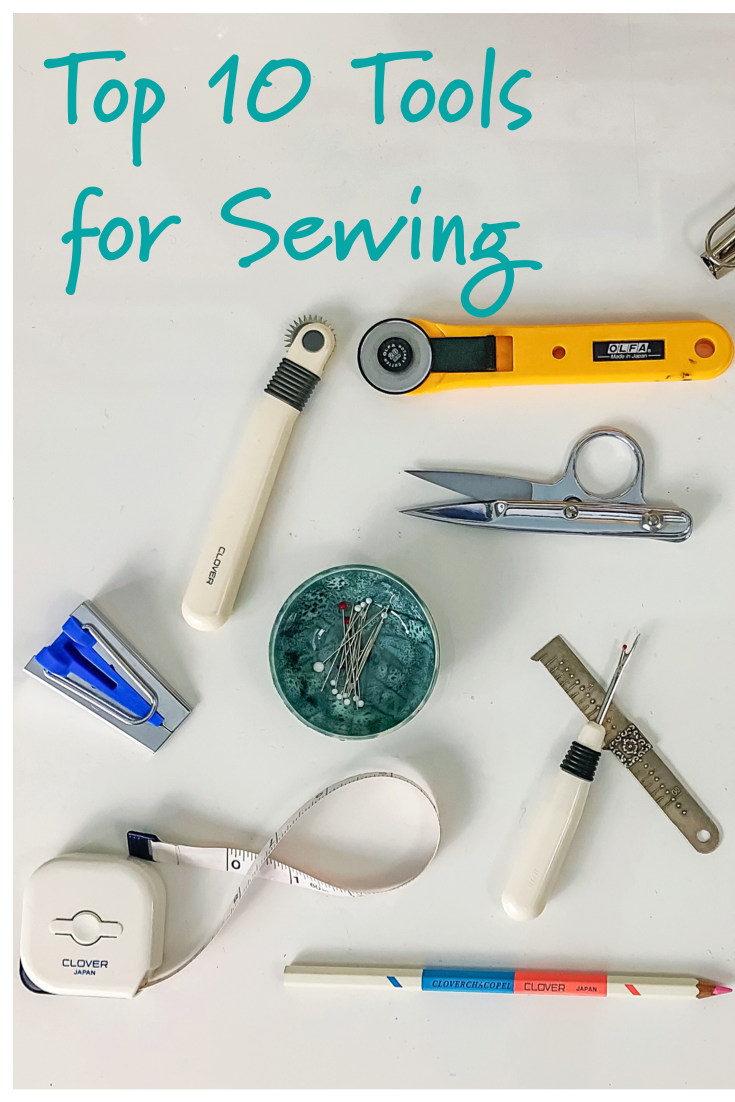
These needles come in an assortment of sizes that suit the lightest to more heavier weight thread- and the gold eye makes them that much easier to thread.
Lots of cutting can lead to tired hands. The spring in these scissors make cutting a breeze.
For a truly straight cut, there is noting like a rotary cutter.
This ruler has a bit of depth to it and works well as a guide for the rotary cutter. It also makes an ideal marker for making bag straps and bias cuts.
These chalk pencils are great for transferring small pattern details.
Idea for tracing seam lines and darts. The blunt edge is great for transferring markings onto paper or fabric; and it won’t damage the materials themselves.
Indispensable. Clover makes the sharpest and the best around. If you find a 3 pack- buy it. You will thank yourself later.
Among my collection of rulers, this small one seems to be used most often. It helps with pattern grading, tracing lines and darts and measuring hems.
Perfect for a quick sharp cut to thread a needle. Keep a pair right next to your sewing machine and one in your sewing box.
Essential for making yards of nice crisp bias tape.
What are your favorite sewing essentials? You can look forward to an upcoming post on some more specialized tools for pattern making, marking, pressing as well as tools for making bags. Perhaps it is time for a new bag pattern too?
XO, Hilarie

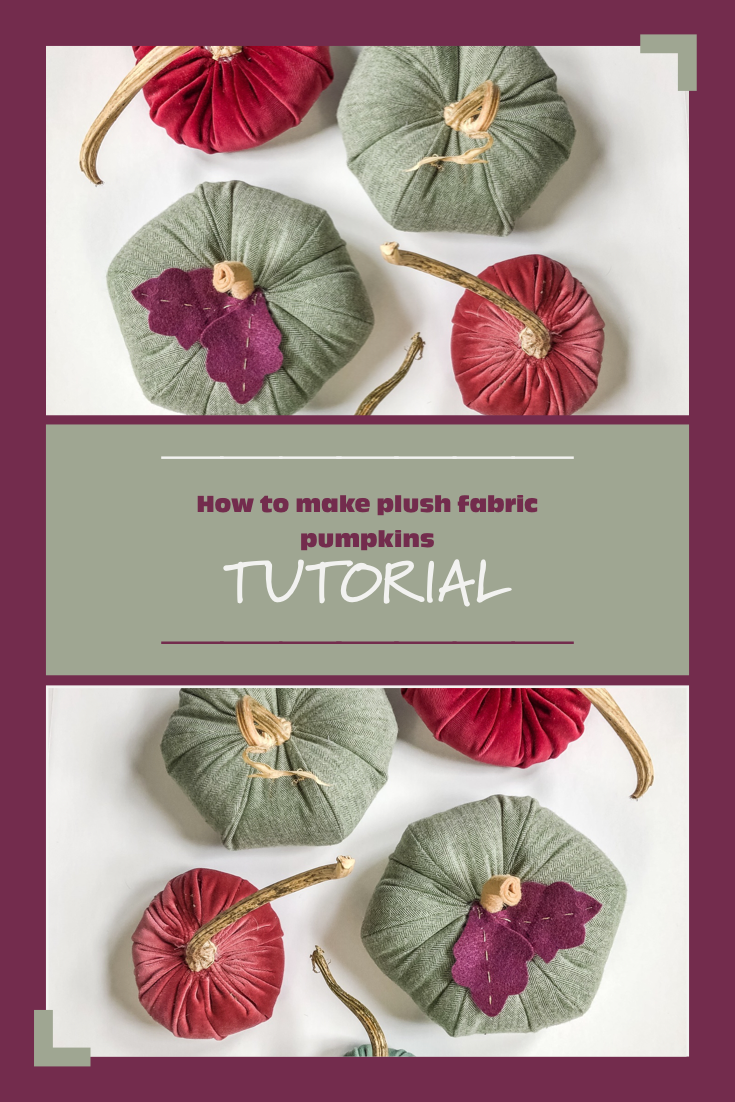
How to Make Plush Fabric Pumpkins Free PDF Pattern and Tutorial
Happy Thanksgiving! Since most of us will be home this year to celebrate, and needing some festive decor, I’ve got a fun DIY for you. This tutorial is a bit of an update from one that I wrote a few years back. The construction and pattern are the same, but I’ll walk you through a few other options for stems. Plus, like the velvet pumpkins that I love to make and gift each year- we can tuft these to give them a more organic pumpkin-y shape.
How to Make a Plush Fabric Pumpkin

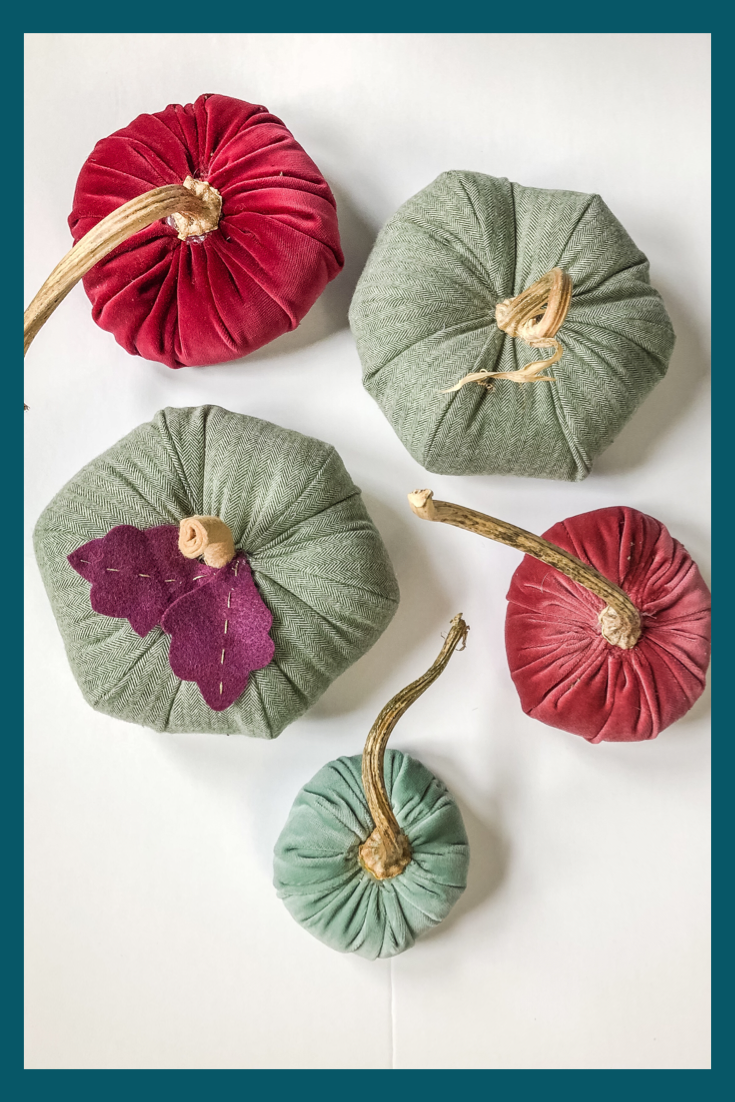
Happy Thanksgiving! Since most of us will be home this year to celebrate, and needing some festive decor, I’ve got a fun DIY for you. This tutorial is a bit of an update from one that I wrote a few years back. The construction and pattern are the same, but I’ll walk you through a few other options for stems. Plus, like the velvet pumpkins that I love to make and gift each year- we can tuft these to give them a more organic pumpkin-y shape.
How to Make a Plush Fabric Pumpkins Free PDF Pattern and Tutorial
Materials to Make a Plush Fabric Pumpkin
1/4" of mid-weight fabric (I have used velvet, flannel, silk and cotton.)
Scissors
Thimble (Trust me on this one!)
A pumpkin stem that has been dried OR a small piece of tan felt and a pipe cleaner.
Poly-fill stuffing
Optional: Felt for leaves to add a bit of embellishment
Hot Glue Gun and Glue Sticks
I’m Stuffed Plush Pumpkin PDF Pattern
Notes:
Once you print the pattern, measure the scaling square to be sure that it measures 1".
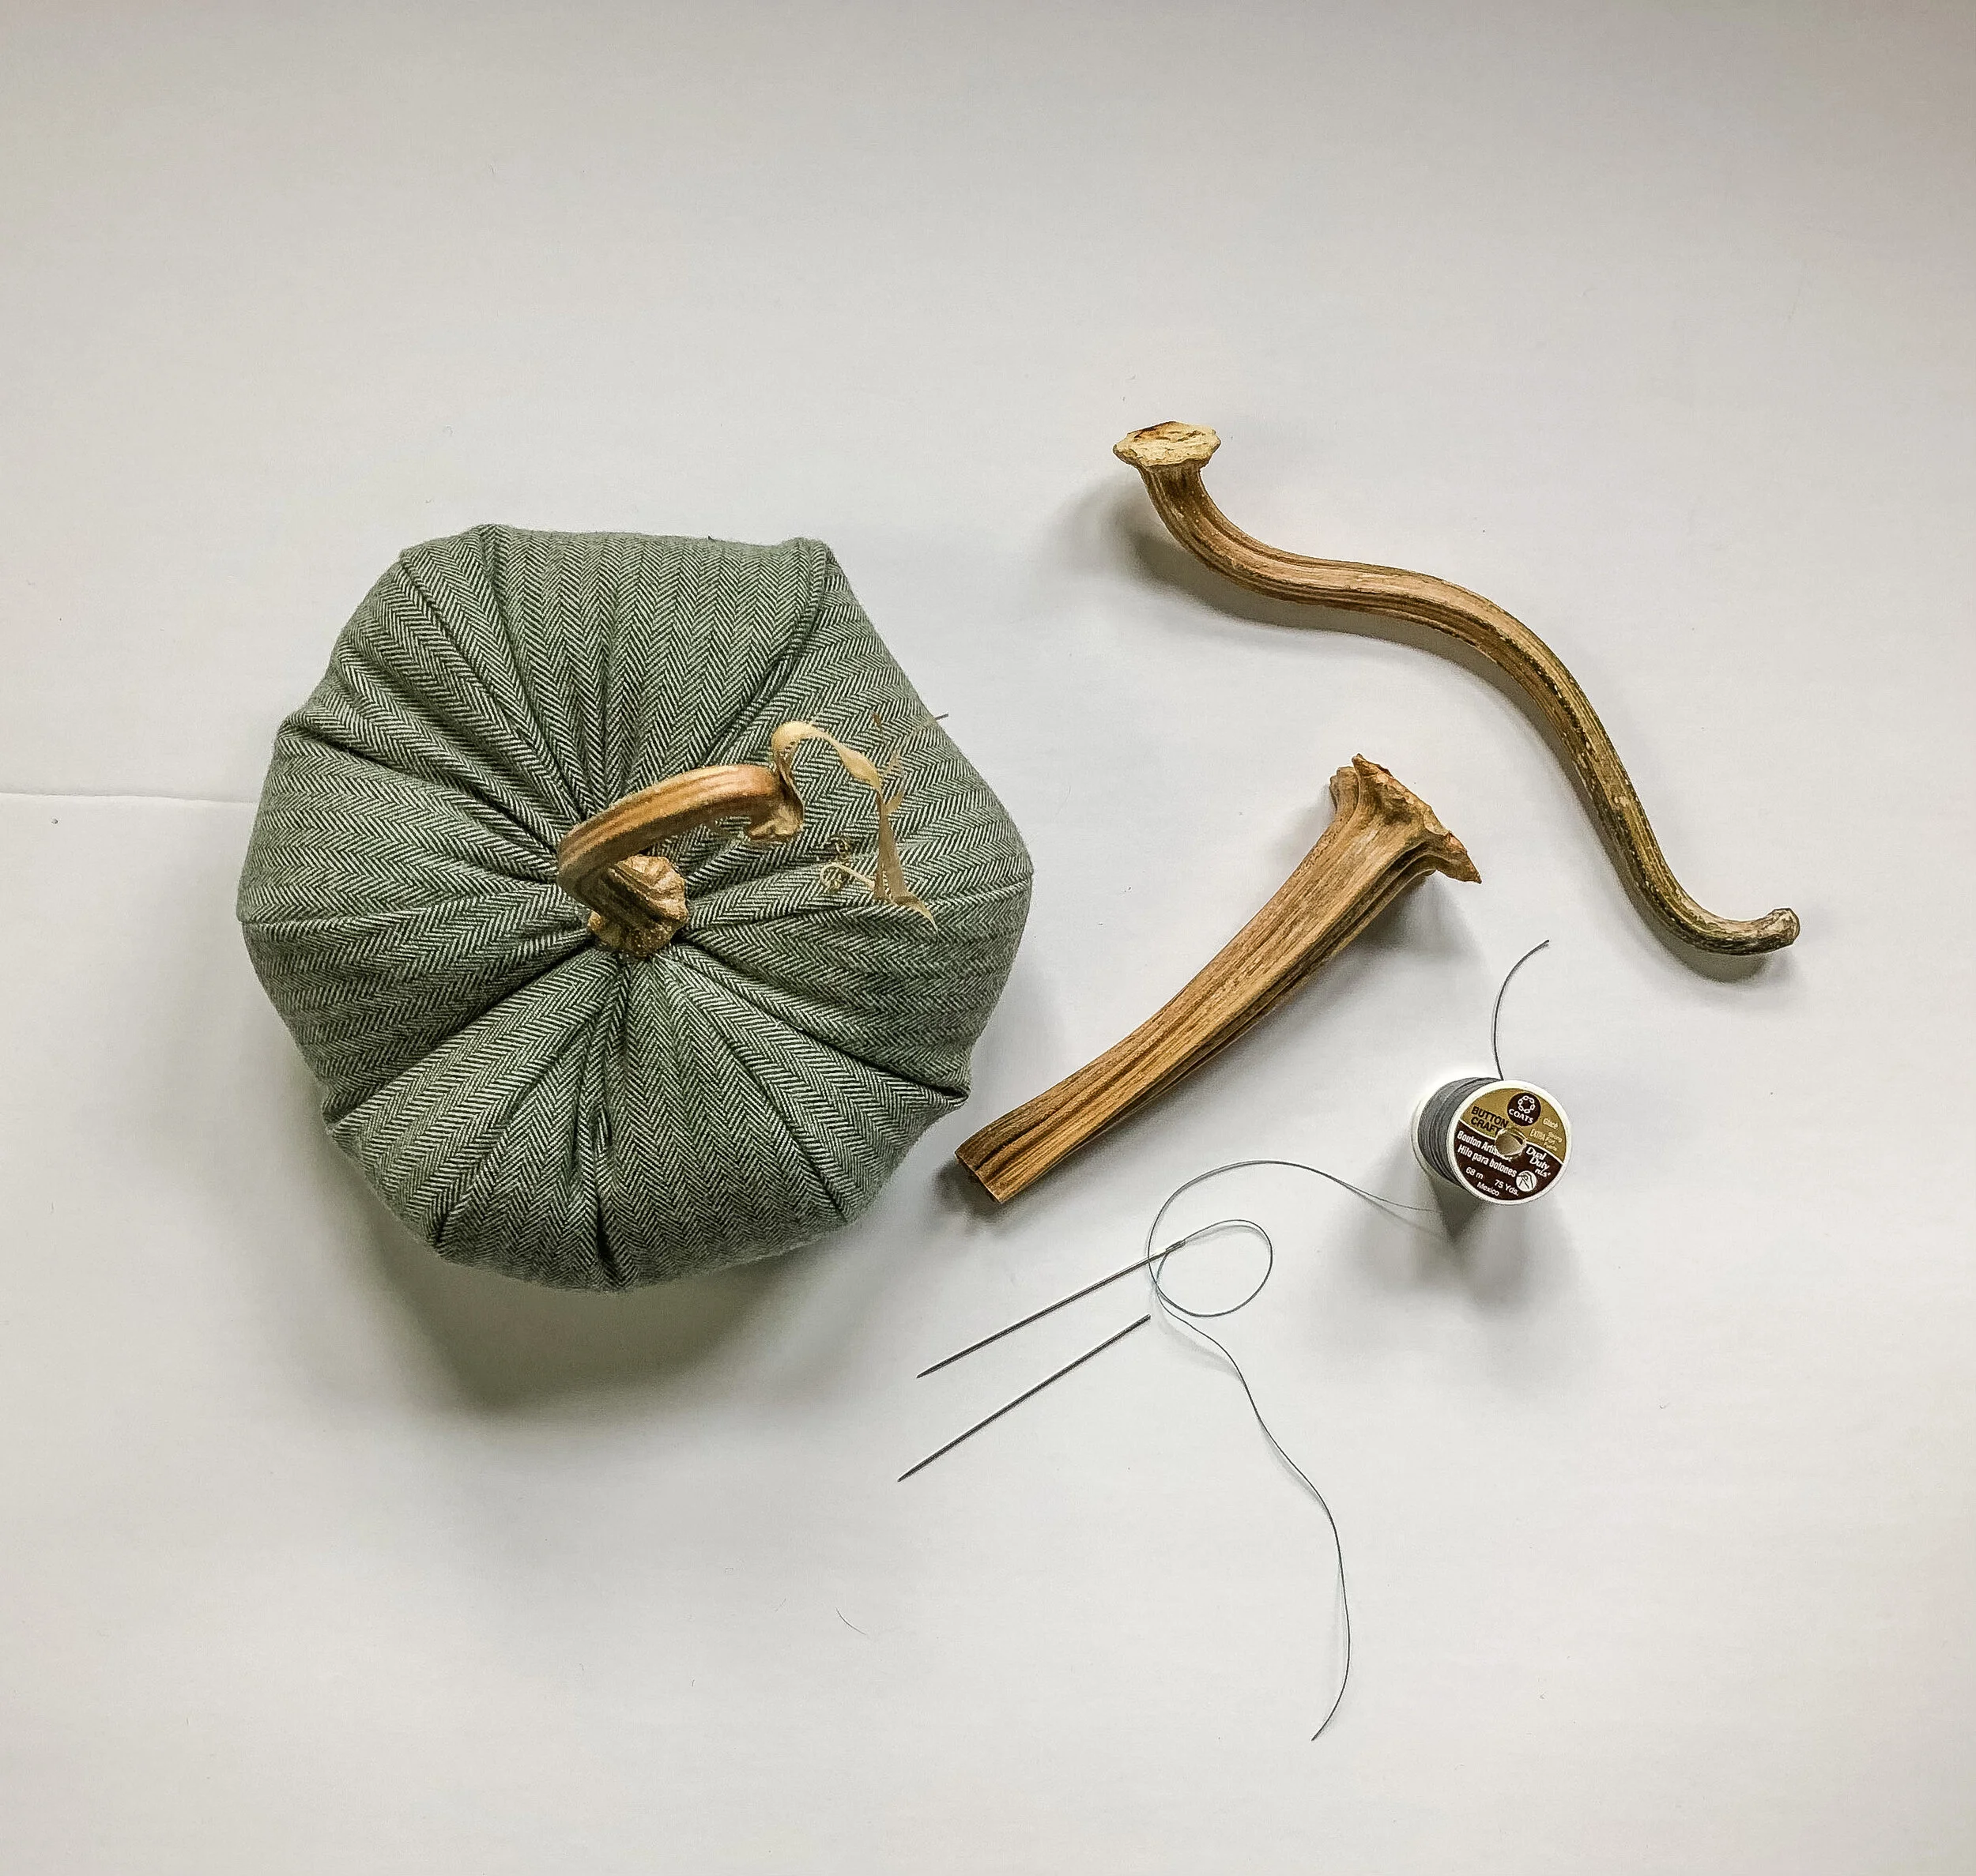
Follow the original tutorial until you get to the step where you insert the stem (stick).

Picture order Left to right, top to bottom.
Cut a 45” length of thread.
Thread needle, doubling over and tie ends into a double knot..
To begin stitching, try to Insert the needle into a seam allowance just inside the pumpkin. Make a small stitch or two to secure.
Using a running stitch about 1/4”-1/2” long, stitch around the opening of the pumpkin.
Pull threads to cinch and tie.
Restitch through each gather of fabric around opening.. Tie and knot to secure.
Do not cut the thread!

Tufting time!
Take the needle and pushit through the center of the pumpkin directing it to come out at center of the bottom. If you don’t already have a thimble on- get one STAT.
Put needle through the center bottom, and turn to sew back up through the center top opening. To help anchor the thread, I take a small stitch just over the lip of the opening each time I pull the needle up. Then when I turn the needle and stitch straight back down, this little step helps to neaten the draw of the fabric.. Pulling the thread taut. Repeat a few times until the pumpkin is the size and shape that you desire.
Knot to secure. Trim thread and tuck inside pumpkin.
Stems
How to dry a natural pumpkin stem
Each Autumn, I prowl pumpkin stands for beautiful stems that beckon to be preserved, After the pumpkin has sat on my porch for weeks, I carefully cut around the stem, remove it and get as much pumpkin flesh off as possible. Then I let them air dry for several days. Once they seem light and dry, I put them on a cookie sheet and bake in the oven at a really low temperature (about 225 degrees) for about an hour. This dries out the stem and kills the bugs.
*I encourage you to do a web search to discover other methods of drying.

Take a dry (and baked!) pumpkin stem. Check the bottom to make sure it is somewhat smooth and even. If not, lightly sand with sand paper.

Add bit of glue to the center of opening. Set stem and hold until dry.
How to make a stem from felt and a pipecleaner
Materials
Small piece of felt
Pipe cleaner
Glue
Old Scissors
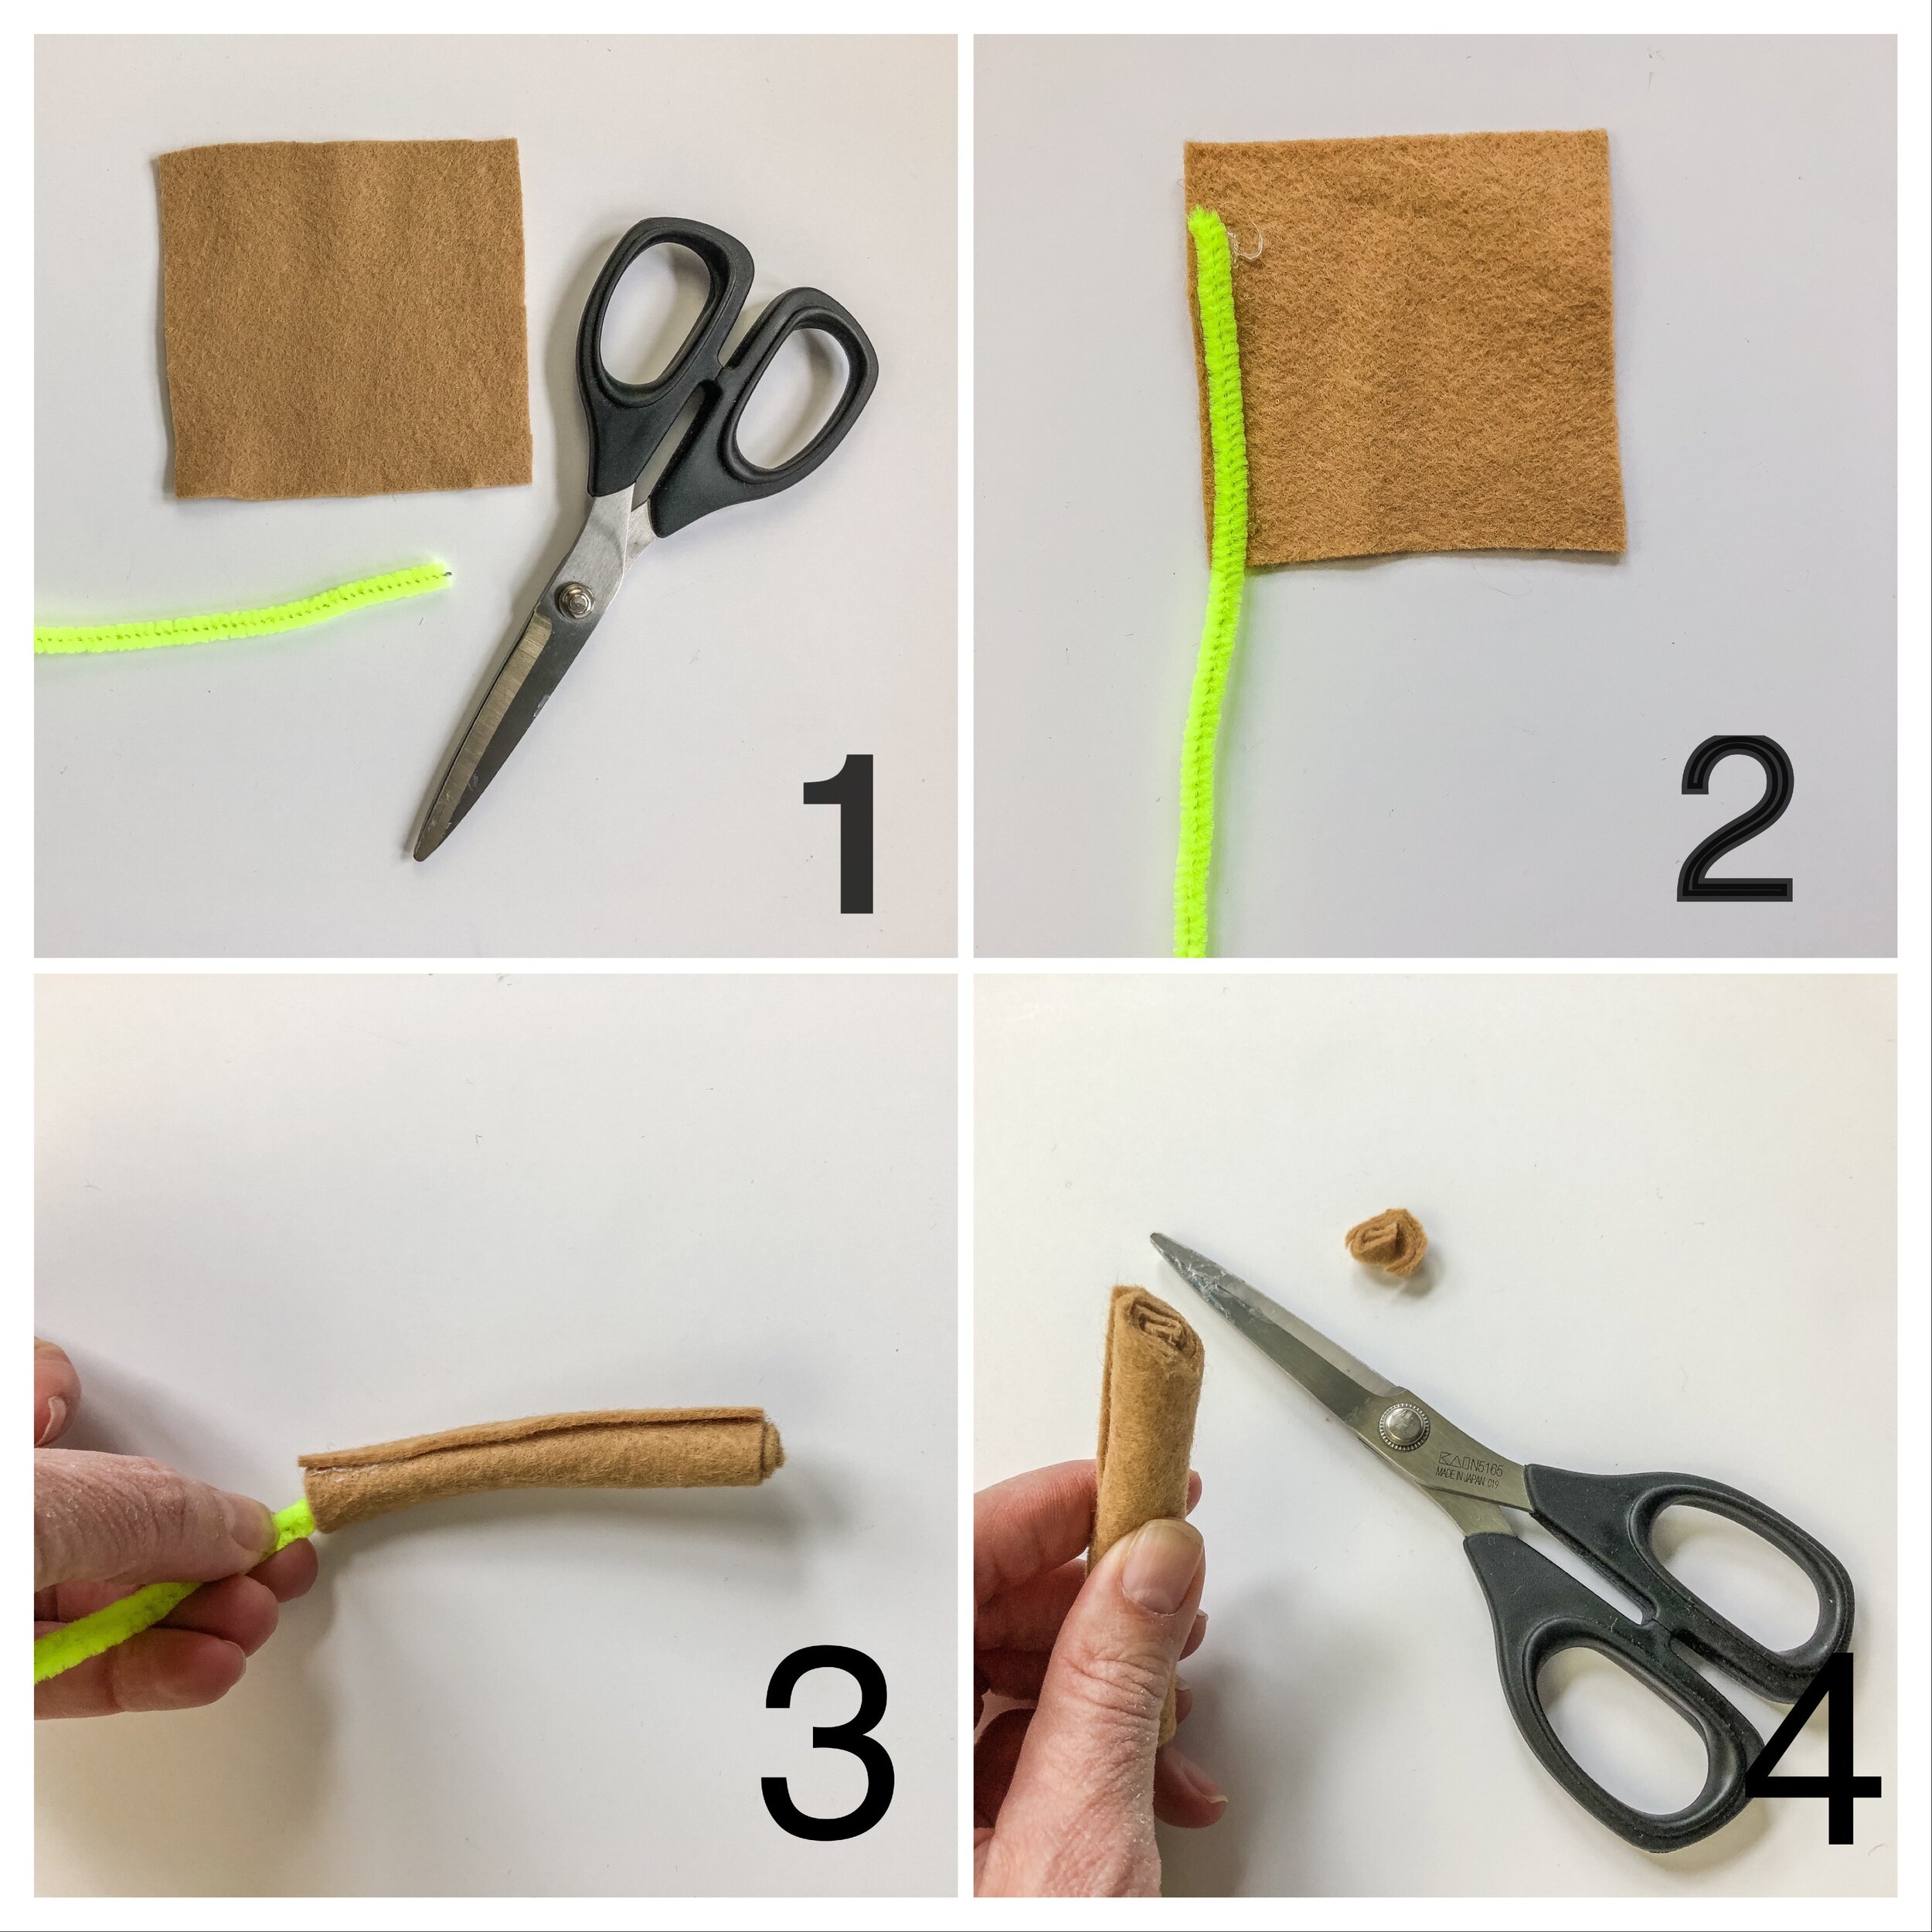
1. Cut felt into a 4” X 4” square
2. Align and glue pipe cleaner along one side of the felt square.
3. Hold onto the pipecleaner while tightly rolling the felt.
Apply glue to secure.
4. Cut the stem at a 45-degree angle.

To help anchor the stem into the pumpkin, bend the part of pipe cleaner that sticks out in half before inserting.

Insert into pumpkin. Add a bit of glue to secure.
Bend the felt stem to a pleasing shape..
Please be gentle with yourself and those that you love. Find some space and time to rest and don’t forget to call your mom.
Happy Thanksgiving!
XO, Hilarie


Last year’s harvest.

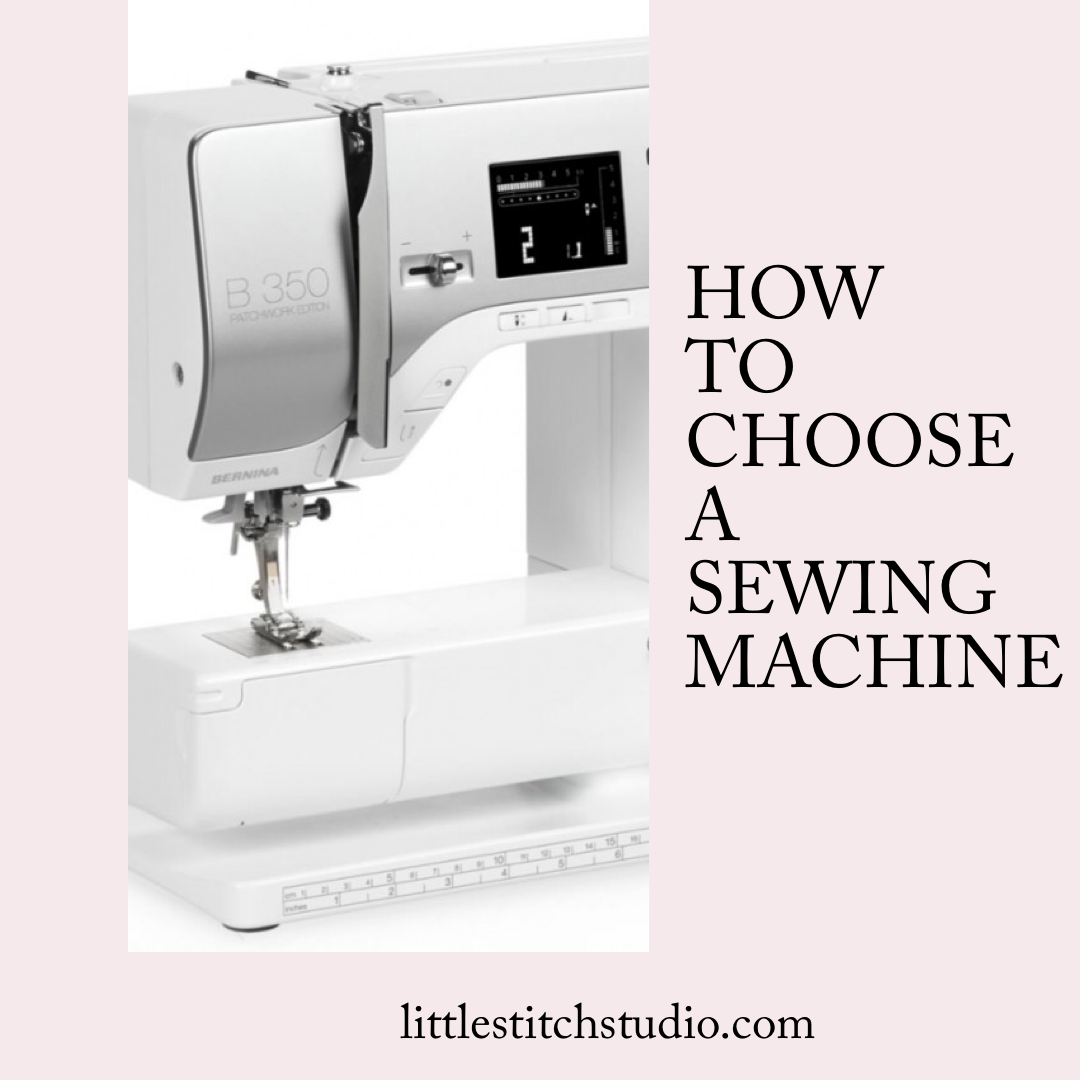
What Should I Look For When Buying a Sewing Machine? A Guide to Selecting the "Right" Machine for You
Shopping for a sewing machine can seem a bit of an overwhelming task- especially if you don’t have a lot of sewing experience. I’m guessing that if you are reading this article, you might fall into that category. Welcome! I’m so pleased that you stopped by.
There is no doubt about it, 2020 has brought sewing back! A telling sign for me is that instead of the rush of November requests for advice or recommendations for sewing machine, I ‘ve been getting a steady stream for months.
No matter who calls, my advice is always begins with the same question. What are you planning to make? You see, sewing machines are designed for utility and also for specific sewing needs. It helps to know what types of projects you will be making as well as the kind of fabric you plan to use.
You see, sewing machines are designed for both utility but also for specific sewing needs. It helps to know what types of projects you will be making and what kind of fabric you plan to use.
When considering the purchase of a new sewing machine, whether for yourself or as a gift, there are several things that you need to think about.
Shopping for a sewing machine can seem a bit of an overwhelming task- especially if you don’t have a lot of sewing experience. I’m guessing that if you are reading this article, you might fall into that category. Welcome! I’m so pleased that you stopped by.
There is no doubt about it, 2020 has brought sewing back! A telling sign for me is that instead of the rush of November requests for advice or recommendations for sewing machine, I ‘ve been getting a steady stream for months.
No matter who calls, my advice is always begins with the same question. What are you planning to make? You see, sewing machines are designed for utility and also for specific sewing needs. It helps to know what types of projects you will be making as well as the kind of fabric you plan to use.
When considering the purchase of a new sewing machine, whether for yourself or as a gift, there are several things that you need to think about. For starters, what type of sewing machine you actually need. To determine this, spend a few minutes writing down what kind of projects you plan to make. Are you sewing for kids? Making quilts? Clothing? Will you be sewing some home decor items like pillows, draperies and slipcovers? Perhaps you will be making handbags and other fashion accessories. What type of fabric will you be sewing with? Mostly cottons and linens or do you plan to use denim and leather?
Choosing a well-designed sewing machine makes learning to sew a much more enjoyable process. A sewing machine is an investment and something that you will likely be using for a very long time. Even if you don’t use it every day, when you sit down to sew, you want to have one that is dependable. Sewing machines can also be very expensive. While you do need to keep a budget in mind, you do not have to break the bank to get a really good sewing machine.
Once you have these questions answered, you will be able to narrow the options down a bit. If you can, go to a sewing machine dealer or local fabric shop and spend some time looking at sewing machines. There are salespeople there that will be happy to help you select a machine that fits your sewing goals as well as your budget.
When I shop for a machine, I like to bring my own thread and a few different types of fabric to sew with and try the machines out. This way I can see how it sounds, feels and stitches. Since I primarily sew clothing and accessories, the following features are really important to me.
Variable Stitch Width and Length This allows me to customize the length and width each stitch.
Needle down feature The Needle down feature works as an extra hand. It is terrific when sewing corners and points so that your actual hands are free to guide the fabric.
A bright light. Essential- especially for aging eyes.
The ability to adjust the presser foot pressure. Not all fabrics feed through the sewing machine with the standard pressure. Some will drag and others are thick causing the machine to leave marks. The ability to adjust the pressure can improve the quality of your stitching.
Auxiliary spool pin I’m impatient and frequently too short on time. An auxiliary spool pin allows me to wind a new bobbin without having to unthread the sewing machine. While I can do without a lot of features, this one is very important to me.
A good stretch stitch for sewing knits. When sewing, you want the stitches to sit flat and embed only slightly in the fabrics surface. Knit fabric can be tricky to sew with because it stretches. While you can sew knits with a zig zag stitch, the stretch stitch looks and lasts better. If you plan on sewing with knits, take a sample sized fabric with you and try the stitch out.
Walking Foot For me, a walking foot is essential. A walking foot allows each layer of fabric to feed evenly without shifting and sliding. It is also fantastic for sewing leather, matching plaids and stripes as well as for really thick fabric. Some machines may come with the walking foot already attached, others sell it as an optional accessory.
Optional feet and accessories Sewing machines come with a variety of sewing feet attachments. The ability to just purchase a specialty tool or foot for my machine means that I will use it for more projects and when something new comes out- instead of upgrading my machine, I can just get a new foot or plate and experiment.
This is just my list of must-haves. You will likely have a list of your own that will meet your specific sewing needs.
Different Types of Sewing Machines
Sewing machines are broadly categorized by motor type: Mechanical, Electronic and Computerized.
Mechanical sewing machines are the most basic and reliable sewing machines available. They come equipped with a pedal that controls the sewing speed and knobs that you turn to control the stitch selection, width, length and tension. Everything is controlled by the user.
Electronic sewing machines are a bit of a hybrid between mechanical and computerized. They generally offer several convenience features and settings. These machines often have a display and lots of programmed stitches, patterns and designs. While electronic machines do have a foot control, many also sew with the press of a button. Some additional features that many offer are a speed control function, automatic needle threader, needle down button and a thread cutter.
Computerized sewing machines the fanciest of all and they are also the most expensive. Computerized machines are pretty much as the name suggests. A computer runs each motor function of the machine. They are precise, loaded with features and truly amazing to use. If you continue on your sewing journey, I do recommend that you look at these- one day, but not in the beginning.
For a beginner, I almost always recommend a mechanical sewing machine. There are already so many things to learn when sewing, having a machine that you don’t quite understand will just add to the frustration. A mechanical machine is really very straightforward and easy to troubleshoot and fix when something goes wrong. And it will. Don’t worry, there are some mechanical machines that come with a variety of convenience features too.
An electronic machine is my second recommendation, as they do offer more features. Often, electronic machines have many decorative stitches, several styles of buttonholes, some embroidery capability, the ability to control the speed of the machine and lots of accessories. As long as the manual is available or you have someone knowledgeable around, they are fairly easy to learn to sew with. While they will need more maintenance and care than the mechanical machines, they offer plenty of room for growth. The decision really comes back to what you plan to sew, what features you need and how much your budget allows. If you purchase a mechanical machine now and discover down the road you are continuing to sew, maybe consider upgrading. Then you will always have your mechanical machine as a backup to travel with or to use when your electronic of computerized machine is in the shop, as they need routine maintenance.
So which sewing machines do I recommend? The following are machines that I have or have sewn on. This list is not comprehensive, and I do not receive anything from these companies if you click on the link or purchase. These are just the machines that I prefer and trust. (Full disclosure, I am a BERNINA brand ambassador. Which means that I am a representative of the company and get to learn all about the exciting new machines and accessories. If you are in the market for a BERNINA Sewing Machine, please contact me and I will be happy to discuss with you.)
One more bit of advice, you will get much better service by going to a sewing machine dealer or fabric store than if you were to purchase from a big box store. The staff at a dealer are quite knowledgable and want to help you find the best machine for your needs. Plus, many offer free classes with the purchase of a machine as well as on site repairs. That being said, many of you may be under shelter in place orders or wanting to purchase as a gift for an out of town friend or family member and need to purchase online. In the presence of that, I have included some links to Amazon.
If you happen to be searching for a sewing machine for a child, you may want to read this post too. It has a few additional thoughts specific to sewing with children.
Best Sewing Machines for Beginners As Well as those With Some Experience
Bernette
The Bernette B38 is the newest addition to my shop. I have several of these machines and I have to say they are quite impressive.

Other models to consider:
https://www.bernette.com/en-US/3-Series/Bernette-35.htm l
The B38 is the style that I use at my shop, Little Stitch Studio.
https://www.bernette.com/en-US/3-Series/Bernette-38.html
This Sew & Go is particularly good for a child.

You can learn more about the sew & go here and find a local dealer.
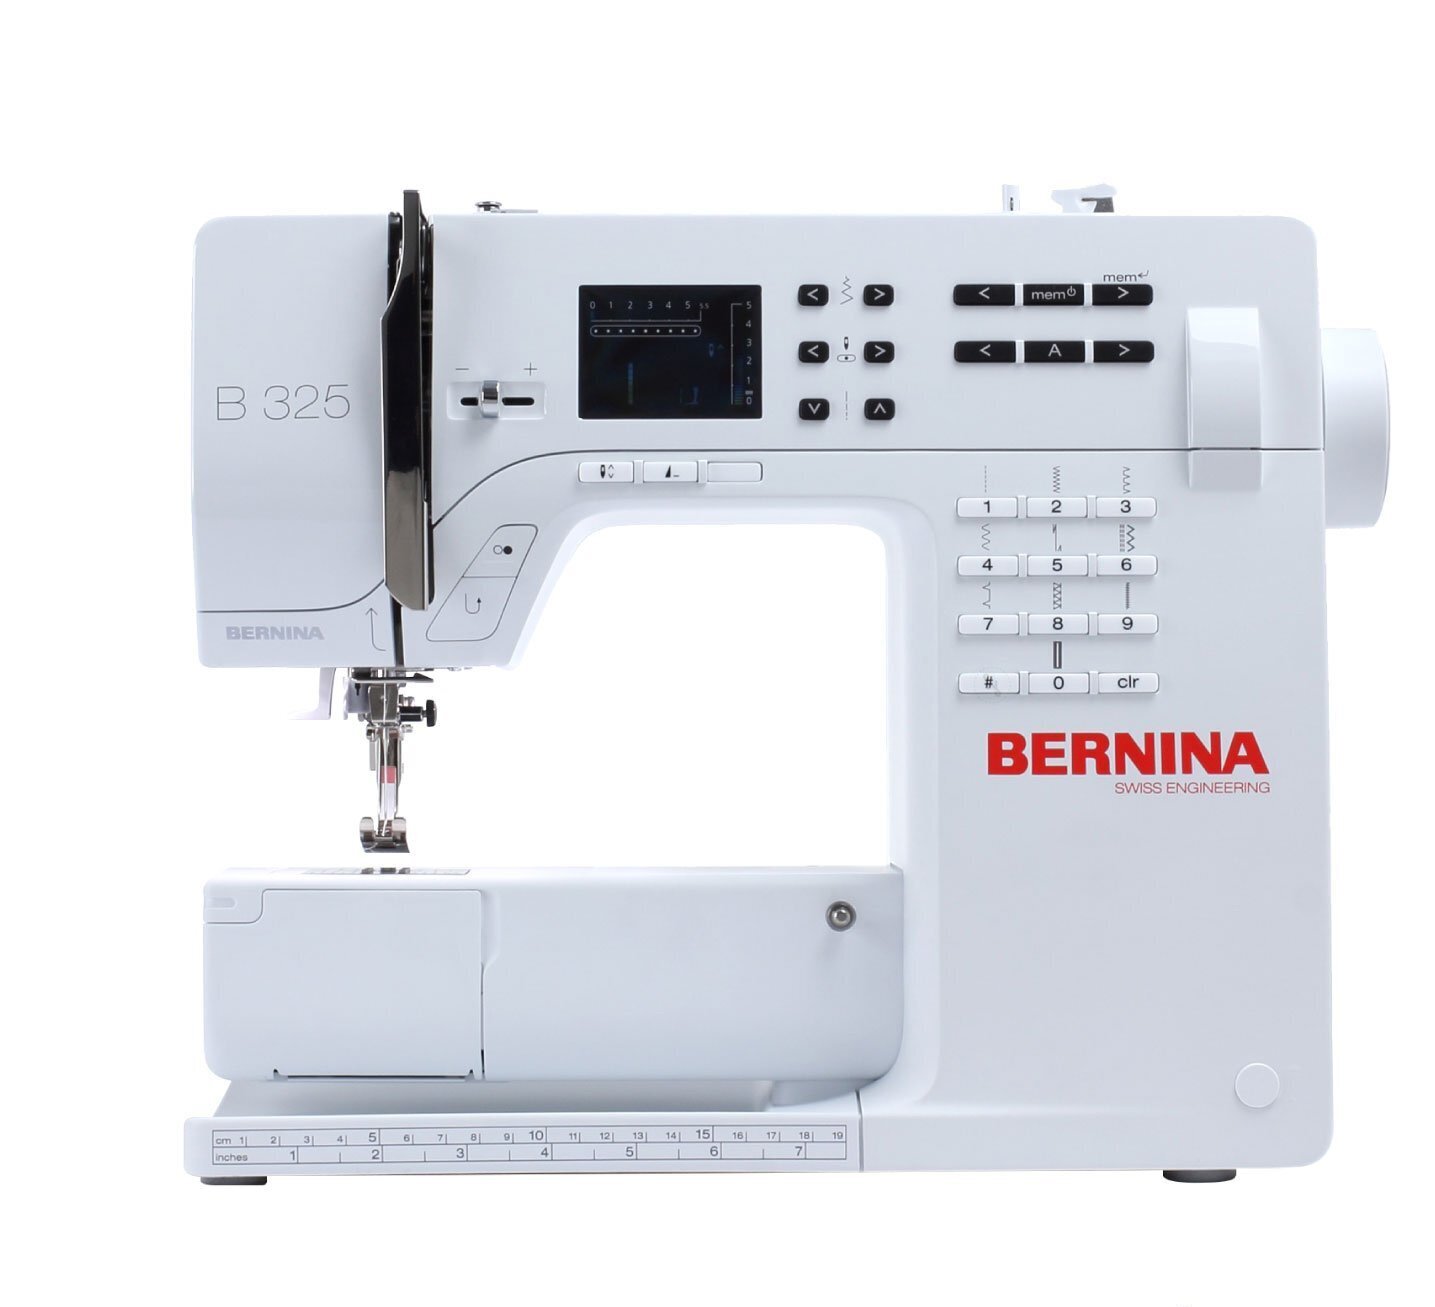
BERNINA
This is one of the 300 Series BERNINA machines that are fantastic- and built to last a lifetime. At home, I sew on a BERNINA 350PE and a 570QE.
Eversewn
I have used this machine in my shop for years!
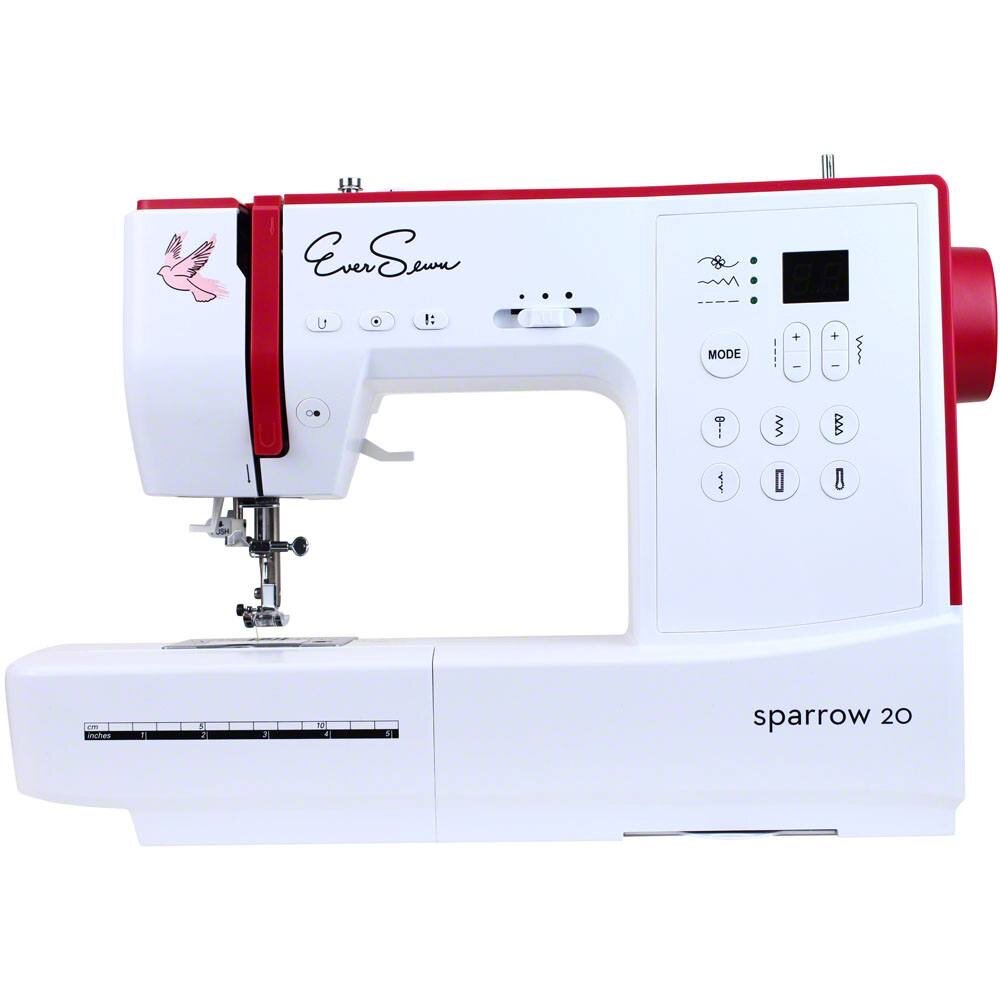
Also see this Mechanical option:
https://www.eversewn.com/maker-100
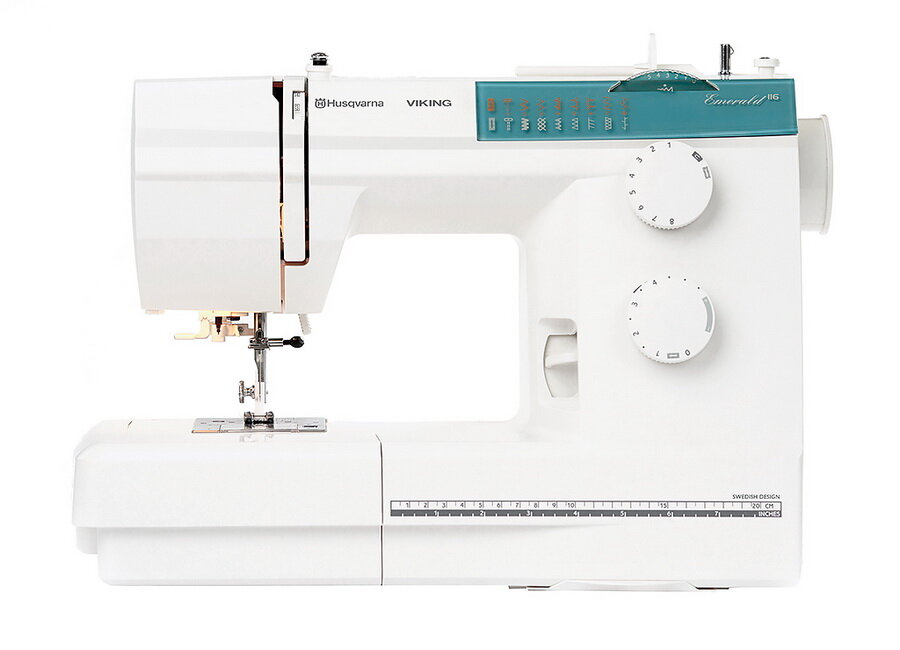
Viking
The Viking 116 and 117 were the first machines that I used when I began teaching sewing. The 116 is my back-up machine. It packs a lot of power and will sew through anything! Also, the low shank fits most universal feet and accessories.
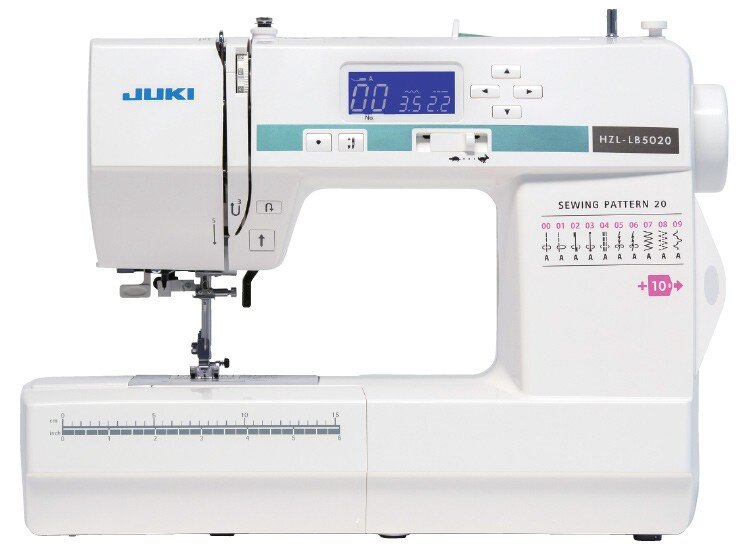
Juki
I own a single model of this machine but have recommended it for years. Each person who has purchased it seems to really enjoy it.
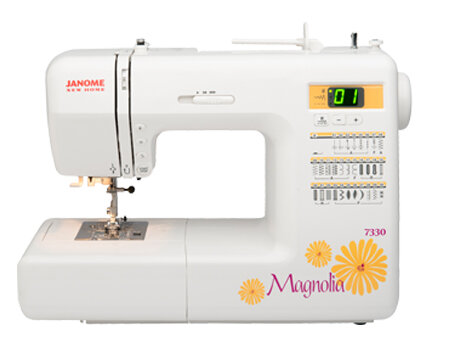
Janome
I do not own this machine, but have sewn on it many times and have lots of students that are happy with it. Like all of the other brands that I am recommending, Janome is reliable.
Also consider:
https://www.amazon.com/Janome-Magnolia-7318-Sewing-Machine/dp/B001I1D1VA
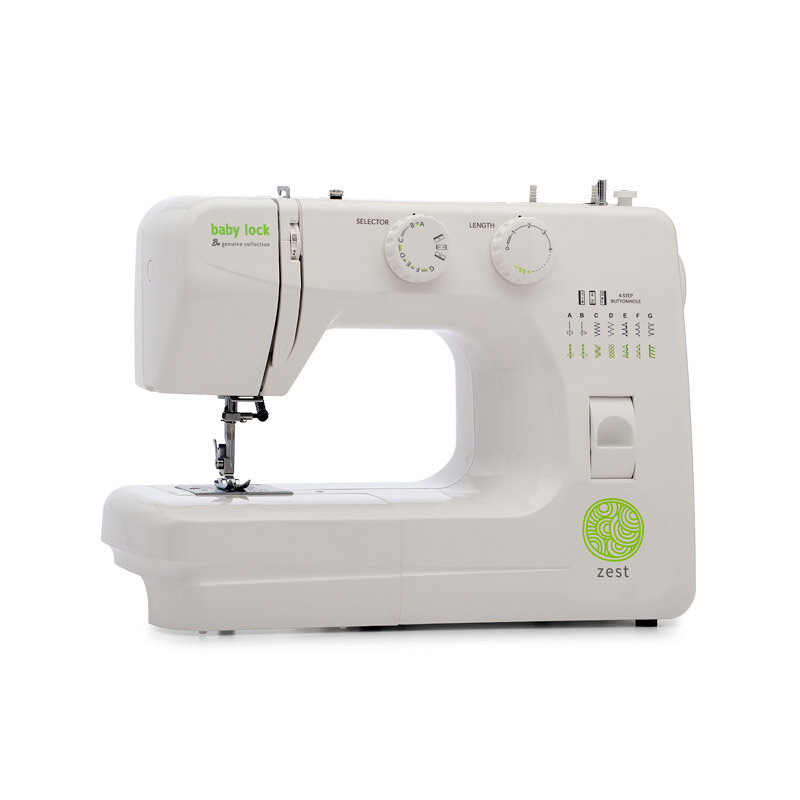
Babylock
This particular machine will make up for the lack of features for its stitch quality and reliable performance.
Also consider:
I hope that this post will help you to select a sewing machine that will bring you years of joy. Please let me know in the comments, which one you choose- as well as the features that are most important to you.
Happy Sewing!
XO, Hilarie

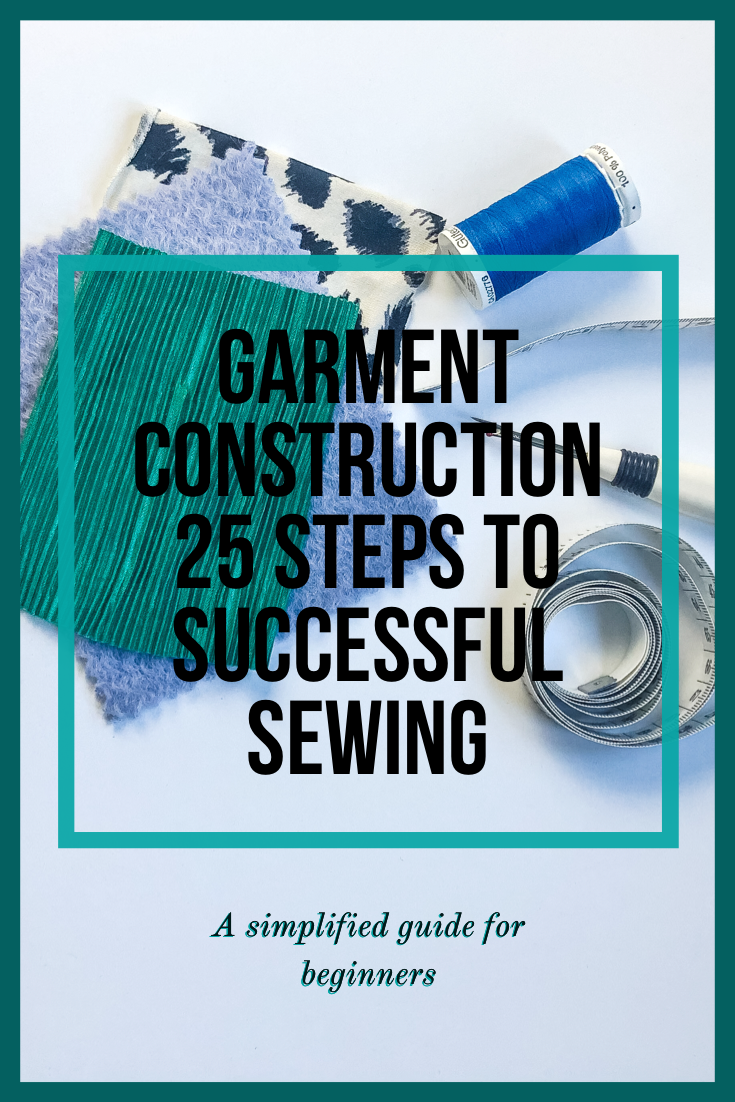
A Garment Construction Plan; 25 Steps to Successful Sewing
I’ve always loved the excitement and sheer certainty that comes with starting an ambitious new project. Once the fabric is in hand, it feels like it is only hours until I get to wear this dream de jour. Each moment spent preparing, is filled with thoughts such as, “what shoes should I wear with it?” “What kind of bag goes with awesome?” Oh and – “where will I wear it?” Of course, as a mom, I quickly realize that time slips away and those mere hours from concept to ‘all decked out’ turn into weeks or months. When I was much younger, it was nothing to stay up all night and sew a new outfit for school the next day, or for some dance or occasion. I can still picture myself sitting on the floor in my room, sketching, cutting, sewing and dreaming the days away. I’ve managed to hold onto a few of those pieces that I made early on. When I look at them now, part of me is appalled by the lack of skill and obvious haste in which these clothes were made- but the other is touched with the charming memories and joy of the sheer zeal and passion of my younger self.
I’ve always loved the excitement and sheer certainty that comes with starting an ambitious new project. Once the fabric is in hand, it feels like it is only hours until I get to wear this dream de jour. Each moment spent preparing, is filled with thoughts such as, “what shoes should I wear with it?” “What kind of bag goes with awesome?” Oh and – “where will I wear it?” Of course, as a mom, I quickly realize that time slips away and those mere hours from concept to ‘all decked out’ turn into weeks or months. When I was much younger, it was nothing to stay up all night and sew a new outfit for school the next day, or for some dance or occasion. I can still picture myself sitting on the floor in my room, sketching, cutting, sewing and dreaming the days away. I’ve managed to hold onto a few of those pieces that I made early on. When I look at them now, part of me is appalled by the lack of skill and obvious haste in which these clothes were made- but the other is touched with the charming memories and joy of the sheer zeal and passion of my younger self.
In the decades that have passed, I’ve refined my skills. While some of my training has been formal, much has been learned through trial and error. It takes time to learn to sew well. Part of it is being able to execute a set of individual skills, but so many aspects of sewing are interdependent. Fabric, fit, structure, design; if any one of these is less than ideally balanced then the project is a flop.
There are as many methods and ways to sew as there are people who sew. Some of my favorite projects for beginners- and anyone who is enthusiastic about sewing, are purses and other wearable fashion accessories. They are fairly quick, a great opportunity to try out new techniques and don’t always require lots of fabric and experience. In fact, if you are ready to jump in right now, I have written a lots of blog posts with tutorials and a couple of books on sewing fashion accessories. (Shameless plug!)
Cutting, marking, pinning, basting, stitching, seam finishing, trimming, pressing, stabilizing- all of these techniques are used in sewing over and over no matter what it is you are making. While there is a general order of construction to follow, and some guidelines, there happen to be a lot of exceptions too. This can lead to unnecessary frustration for beginners!
When you buy a pattern, whether indie or from one of the big commercial companies, you will find several pages of directions for constructing the project. The instructions begin with a few line drawings and a list of pattern pieces that will need to be cut out, marked and sewn together. Most beginner – Intermediate patterns will rely on the method of unit construction. Unit construction means that you will work on a single piece, completing as much as possible before moving on to the next. This method offers many advantages to the beginner. By keeping the work flat, it reduces handling of the fabric which could lead to stretching and distortion in inexperienced hands. The straightforward finishing and construction is mostly completed on the machine, which speeds up the sewing process. When you are learning how to sew, there are so many details that you need to consider, that projects calling for very basic techniques and few pattern pieces are a great place to begin.
As you gain more sewing experience, you will begin to anticipate the sewing instruction order. The easier patterns will use basic construction methods, but as you move on to more advanced styles, you will be working on multiple steps at once. Pattern instructions are often minimal and presuppose some type of working knowledge. This is where books, sewing classes, and articles about specific techniques come in handy- they help to fill in the knowledge gap.
No matter how simple or advanced a project you are making, the steps will be outlined with a plan. With this plan, even complicated construction can be simplified. A sewing project begins with preparing the fabric and pattern before moving on to fitting, shaping and finishing. Some patterns have more information and are more detailed than others. I have found that those new to sewing are often apprehensive to work bit out of order from the pattern for fear of ruining their project. Additionally, many patterns that my students bring in are written without much emphasis on fitting and finer finishes.
With this in mind, I have written a plan for garment construction with an eye toward fitting and design. Of course, this list is not exhaustive and will not apply to every project. Some of your garments you make may not have every detail that I’ve mentioned- and some will have more. I encourage you to use this as more of a companion to your pattern instructions so that you can begin to make connections to the steps and to discover how to integrate new techniques.
Over the course of the next few weeks, we can take a deeper look into the organization of this plan. My goal is to help you to not only understand what you are doing, but why. Once you understand that, sewing will become so much easier.
Garment Construction Plan
25 Steps to Success
Preparation
Study the pattern.
Compare your body measurements to the pattern and make any necessary pattern adjustments.
Prepare the fabric by straightening the grainline.
Layout the fabric and pattern pieces. Pin (or use weights) fabric to pattern when you are pleased with the layout.
Once you have determined that you have all of the necessary pieces laid out correctly on the grain, double check again to confirm before cutting.
Mark all of the construction details.
Staystitch each garment section.
Interface each area as suggested in your pattern.
Stitch and press all darts, tucks, pleats or gathers.
Shaping
Prepare all lining or underlining.
If there are any style lines such as a yoke or princess seams, pin and stitch.
Stitch the center front and center back seams.
Prepare and apply style details such as tabs and pockets.
Baste the shoulder seams.
Baste the side seams and inseam.
Try on for fit. If you are pleased with the fit, go ahead and stitch the shoulder, side seams and inseam. Remove basting.
When the design calls for a waistband, prepare and attach it to the seam.
When the style features a collar, make it.
When the design calls for sleeves, set and stitch the sleeves
If a neckline or armhole needs a facing, prepare and attach the facing.
Finishing
If a zipper is needed, insert it.
Finish the inside seams.
Set and sew the hems
Add the closures-buttons, buttonhole and snaps..
Complete any other hand finishing.
*Throughout each step, have your iron and pressing cloth ready.
Here is a handy PDF of versions this plan for you to print and keep with your sewing books and patterns.

The Basic Principles of Garment Construction: Functional, Structural and Decorative Design
The Design Process
Fashion is all about illusions, line, color, space and texture. These concepts are based on the Principles and Elements of Design. It doesn’t matter if we are talking about designing couture gowns, tailoring, fashion accessories, kids wear or pet clothes. These foundational art principles become primary considerations in construction. Sewing is an art, that of making beautiful clothes. It takes time, thought and practice.
Why Construction Should Matter
Clothing construction refers to the stitching of garments and all the sewing techniques involved in the process. Every choice and detail: pockets, seams, seam finishes, zippers, facings, linings, interfacings, closures and hems, as well as a good understanding of fabric are all intertwined.
Having a strong understanding of construction will help you to become more confident in handling your sewing projects. You will no longer be beholden to the pattern as written. Understanding construction will allow you to confidently move a dart or eliminate an unwanted detail. You will begin to understand how and why pattern pieces are joined in a particular way and order.

Fashion is all about illusions, line, color, space and texture. These concepts are based on the Principles and Elements of Design. It doesn’t matter if we are talking about designing couture gowns, tailoring, fashion accessories, kids wear or pet clothes. These foundational art principles become primary considerations throughout the construction process. Sewing is an art, that of making beautiful clothes. It takes time, thought and practice, plus lots of experimentation.
Why Construction Should Matter
Clothing construction refers to the stitching of garments and all the sewing techniques involved in the process. Every choice and detail: pockets, seams, seam finishes, zippers, facings, linings, interfacings, closures and hems, as well as a good understanding of fabric are all intertwined.
Having a strong understanding of construction will help you to become more confident in handling your sewing projects. You will no longer be beholden to the pattern as written. Having savvy construction skills will allow you to confidently move a dart or eliminate an unwanted detail. You will begin to recognize how and why pattern pieces are joined in a particular way and order.

Function, Structural and Decorative Design
As with other types of applied design, fashion design is a process of seeking a match between a set of requirements and clever ways of meeting them. The success of any design depends on the designer’s ability to combine aesthetic sensibility with a strong technical knowledge. Clothing as a wearable art needs to be, well, wearable. Which means that it needs to fit and flatter, to be taken off, cleaned and worn again. The age old dilemma of form vs. function.
Functional Design
With clothing, it is impossible to separate design and fit. The garment needs to feel comfortable. It needs to provide adequate room to move, while still maintaining its shape, or form. The selected fabric needs to be a suitable weight and appropriate for the garment.
What type of garment are you making? Is it intended for a specific season? How will you care for it? Does it need to provide protection? What kind of activity will you be engaged in while wearing? Swimming? Running? Sleeping?
You see, there is a symbiotic relationship between the materials chosen and the approach to construction. Functional design is really about appropriateness. How the garment physically works and preforms.
Some may be quite obvious, for example, uniforms for police, firefighters and physicians. They all need specific protection for their unique job. Of course, all clothing, with the exception of a concept piece, needs to be functional to actually be worn. A t-shirt or sweater needs to pull over the head to get it on and again to remove. Pants and skirts need to be held up at the waist or hip and have some sort of way to anchor to the body. It is in this way that you can see how fashion and function go hand in hand.
Structural Design
The structure of a garment is everything that holds the garment together. The fabric, the seams, shaping and everything that goes on between the outer fabric and the inside. It incorporates a number of different elements depending on the desired look that you want to achieve.
A garment which has been nicely made and neatly finished will wear better over time, it will also sit better on the body. Sometimes when a garment is not finished correctly small details will not seem to hang nicely on the body – a collar won’t roll quite the right way, a neckline won’t sit quite flat or a lining will bunch up in the wrong areas. A large part of the ability to control the shape of the garment is in giving the correct structure to support the silhouette.
Decorative Design
After the functional and structural details have been carefully considered, decorative design is next! What is Decorative Design? Decorative Design refers to the decorative surface finish, but it is often what catches your eye and draws you to a garment. Details such as buttons, bows, trim, embroidery, prints, pattern and color. These embellishments can be paired to enhance a design or to subvert it. Their purpose may be completely decorative, but is always carefully considered.
As is often the case, the beauty of a garment isn’t in the “decorative element” but in the lack of embellishment. Working within a minimalist framework, a mix of clever pattern cutting, strong construction skills and correct structure can sometimes be just as innovative and modern as any surface design.
In fashion sewing, you can see how a broad appreciation of function, structure and decorative design is necessary. Not one of these is exclusive, as each needs to be considered on individual merits as well as how they relate to the whole garment. Some designers start with their end product in mind and experiment endlessly until they can turn their mental images into a physical form. Others start from a point of experimentation and allow for happy accidents. The beauty of great design is less about strict rules and more about the consideration of balance and innovation.
Next week’s lesson:
Order of Operations in Garment Sewing

Introducing: The Basic Principles of Garment Construction, A New Blog Series
So many of you are discovering the possibilities that open up when you learn to sew. With even a basic set of skills, you can begin to make simple clothing, fashionable accessories and home decor projects. Soon you may find yourself searching for patterns, fabric and fancy new sewing machines. Suddenly a whole new world opens up- it really is an exciting time.
Well, that is until it isn’t.
There are so many frustrating moments that you will encounter when learning to sew. Tangled threads, broken needles, machine malfunctions. All normal stuff- I promise. You see, there is a difference between knowing how to sew and how to sew well. Learning to sew well takes time and patience. Yes, you will continue to make mistakes, I still do! But it is through these mistakes that you can begin to really learn why things need to be done in a certain order or way – and what happens when you don’t.
To truly master anything, it is not enough to know how to do something- you also need to know why.
Introduction to Garment Construction
In this series, my intention is to guide you step by step through a variety of methods and techniques to help you to gain a true understanding of the fundamentals of sewing. Through hands on practice, I hope that you will begin to notice the underlying construction principles and techniques that come up in sewing again and again.
Cutting, marking, pinning, basting, stitching, seam finishing, trimming, stabilizing- all of these techniques are used in sewing over and over no matter what it is you are making. It really helps to understand why each step is necessary and how it will relate to your final project. Though there are many ways approach a single technique, I will share with you what works best for me. Please don’t expect any shortcuts, as that is not what I do. Instead, I believe in spending time to develop a very special set of skills that will set your work apart and help you to create the pieces that you dream of.
Get your scissors ready!