

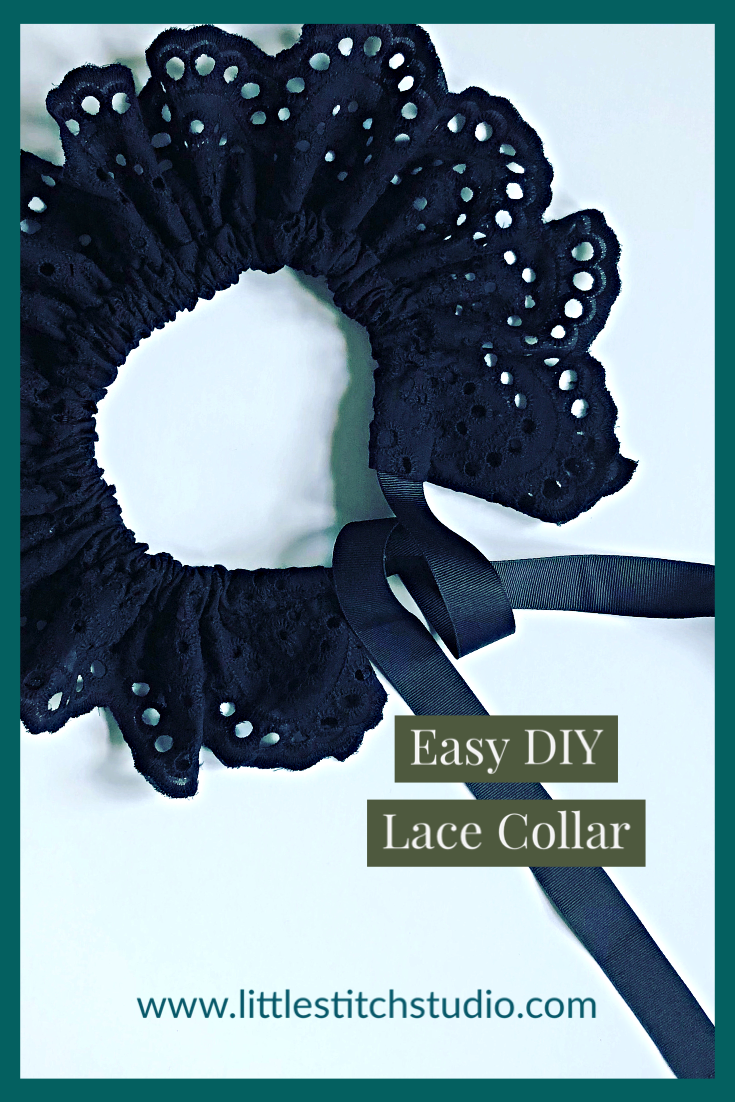
Easy DIY Lace Collar Necklace
Have you gotten used to dressing too comfortable while working from home? Like many of you, I have been looking forward to the change of season wardrobe and some fun experimentation with color and layering. This DIY lace collar necklace is an easy update that can instantly elevate an everyday cardigan or sweater top. The idea is reminiscent of lace detachable collars of the 80’s but so much less stuffy. Gone are the Laura Ashley floral prints and fussy ruffles. These collars are designed to make a statement and bring a bit of contrast to up your look. Ready to sew?
I voted today!
This is the eighth presidential election that I have had the privilege to exercise my right to vote- but it feels like it might be one of the most significant. After getting my kids fed, dressed and started on their virtual school day, I went to get myself ready.
To mark the occasion, I wanted to dress up a bit- to show respect for the women who have come before me and to all of the young girls coming up. Our voice counts- we matter. Looking down at my T-shirt, I saw the illustration of Ruth Bader Ginsburg in her dissent collar. Her “notorious” dissent collar. I need a lace collar! This occasion calls for a lace collar.
I ran upstairs to survey my lace options and decided to use some black cotton eyelet. Since I only had a small window of time to both vote and sew- this had to be quick.
Part collar, part necklace. It turned out perfect!
Scroll down to create your own lace collar necklace.

Sewing with Eyelet Fabric and Lace
Have you sewn with cotton eyelet before?
Eyelet is a fabric with an embroidered, open-work pattern. Though generally made of woven cotton, modern interpretations can be found in wool, leather, jersey, silk and even neoprene.
Like other types of lace, whether delicate or sturdy, special handling is required to ensure the beauty of the finished garment.
Successfully sewing with lace depends in large part on the placement of the motifs of the fabric in relationship to the garment design. This is more easily accomplished than you might think! It just takes a little more time and thought.
Thread:
The ideal weight of the thread is fully dependent on the content of the fiber and type of weave rather than the “lace” design. If you are sewing with cotton or linen eyelet, use cotton or polyester thread, size 50.
Needle:
For lightweight cotton, linen or wool eyelet: Universal-H Point, jeans (HJ) 70/10
More about needle sizes and application.
Seam Finish:
There are as many types of seam finishes as there are functions, fabrics and preferences. Like other laces, eyelet has little holes incorporated throughout the design. Construction methods are determined by the sheerness or opacity of the lace. This should be kept in mind as you consider seam finishes and lining options, as they will be somewhat visible on the right side of the finished garment. Seam finishes such as a bound seam (using a strip of silk organza), French seam, whipped French seam and serged edges look best- and don’t add bulk.
Pressing:
You should press eyelet fabrics face down on a soft pad- a terry cloth towel is good, to avoid flattening the embroidery. Generally, the thread used to embroider most eyelet fabrics is synthetic, and could flatten, burn or pick up some unwanted shine when ironed. Use a pressing cloth and test a small swatch to see how it reacts.
Hem:
When finishing a garment made of lace, there are several important construction details that you will need to keep in mind. The ideal type of hem will allow the fabric to drape and hang in a flattering manner. To achieve this, you will need to consider the overall weight of the fabric as well as the garment design to select an appropriate hem technique. Some garments and fabrics will require a much deeper hem than others.
Generally, the hem is formed by folding under and pressing the raw edge twice before stitching the inside the fold. Depending on the design of your eyelet, the fabric’s selvage might have a beautiful lace border which you can cut to use as the hem of your garment.
Opaque, backed, or underlined laces may have hem edges finished in any of the traditional ways; rolled hems, turned-up bound hems and facings. I do suggest looking at high end garments for ideas at finishing techniques as well as practicing a few for yourself and see what you think works best.
Fabric Preparation:
Lace can be used for an entire garment, or for only a bodice or skirt or even just as trim. Let the weight, density, width and cost of the fabric assist you in determining the look you create.
Lace motifs should be advantageously placed whenever possible, to serve as decorative edges or trim your garment. If your lace is one which has a scalloped edge, pattern pieces can be positioned so that this forms a decorative finish alone a straight neck edge or hemline.
Lace should be laid out flat, in a single layer on a table or other flat surface. Cutting should be taken with care.

Scalloped lace borders.
The Lace Collar Necklace
Free Pattern and Tutorial
The Lace Collar Necklace
Free Pattern and Tutorial
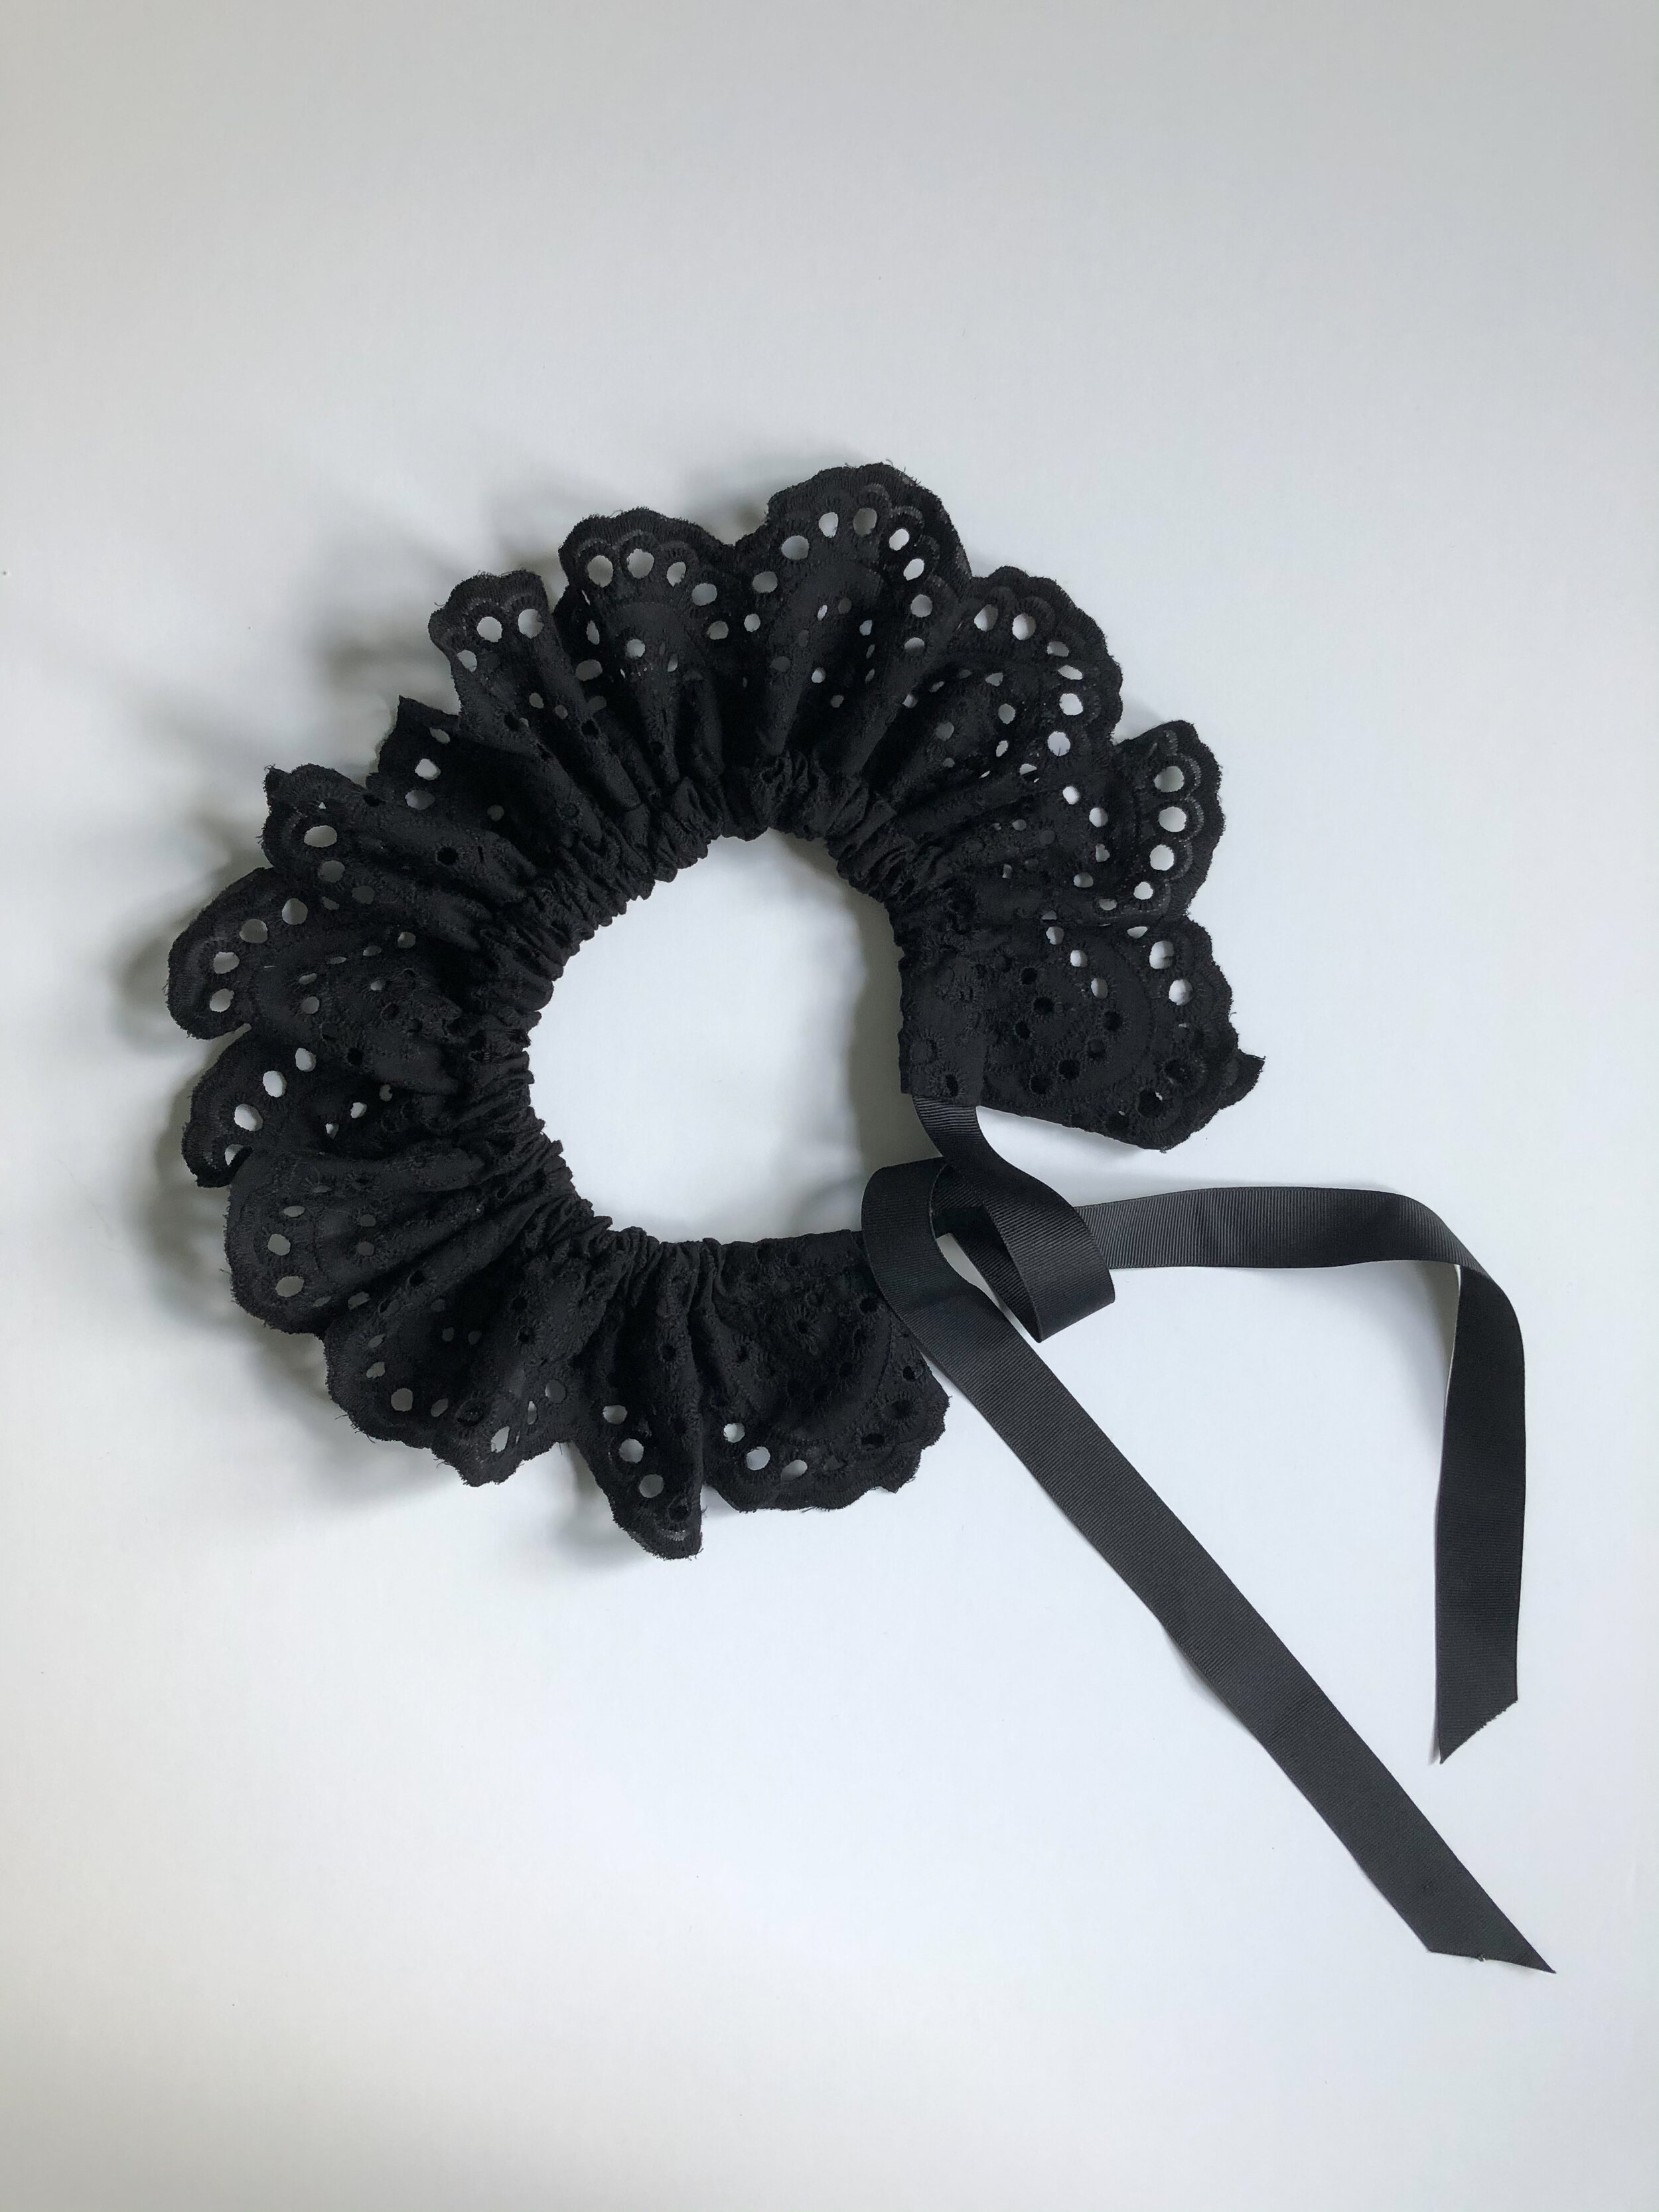
Finished Size: 42” x 4”
One size fits all
Supplies:
1 yard of Black Cotton Eyelet Lace (similar to this)
1 1/3 Yards of 7/8” Grosgrain Ribbon

Prepare:
Layout the entire piece of fabric, in a single layer on a table or other flat surface. Scallops along the edge of a hem need planning. Check the scalloped border to determine the ideal place to begin and end cutting your collar.
For this project, there is a turned casing at the neckline.. The bottom of the collar was cut to feature the beautiful selvedge border.
If you look closely at mine, I began and ended my cut in the center of a lace motif. This way, when I go to turn the opening for the casing, the lace will fold back in and mirror the shape of the motif next to it. This will help to make a pretty opening.
Cut:
Measure and cut lace 44” X 5.5”.

Press:
To prepare the center front casing, layout the cut lace and fold one short end of the lace in the center of a scallop inward matching the scallop shape along the edge. Press. Repeat for the opposite side.

Sew:
Finish the raw edge of the lace. (I used a serger for mine.)

Fold cut edge of fabric 2” toward the inside of the collar.
Pin through both layers of lace across the collar.
Since my ribbon was 7/8” of an inch wide, I made my seam opening, 1 1/8” wide to allow for the ribbon to draw through plus a bit of ease for gathering.
Stitch. Clip threads.
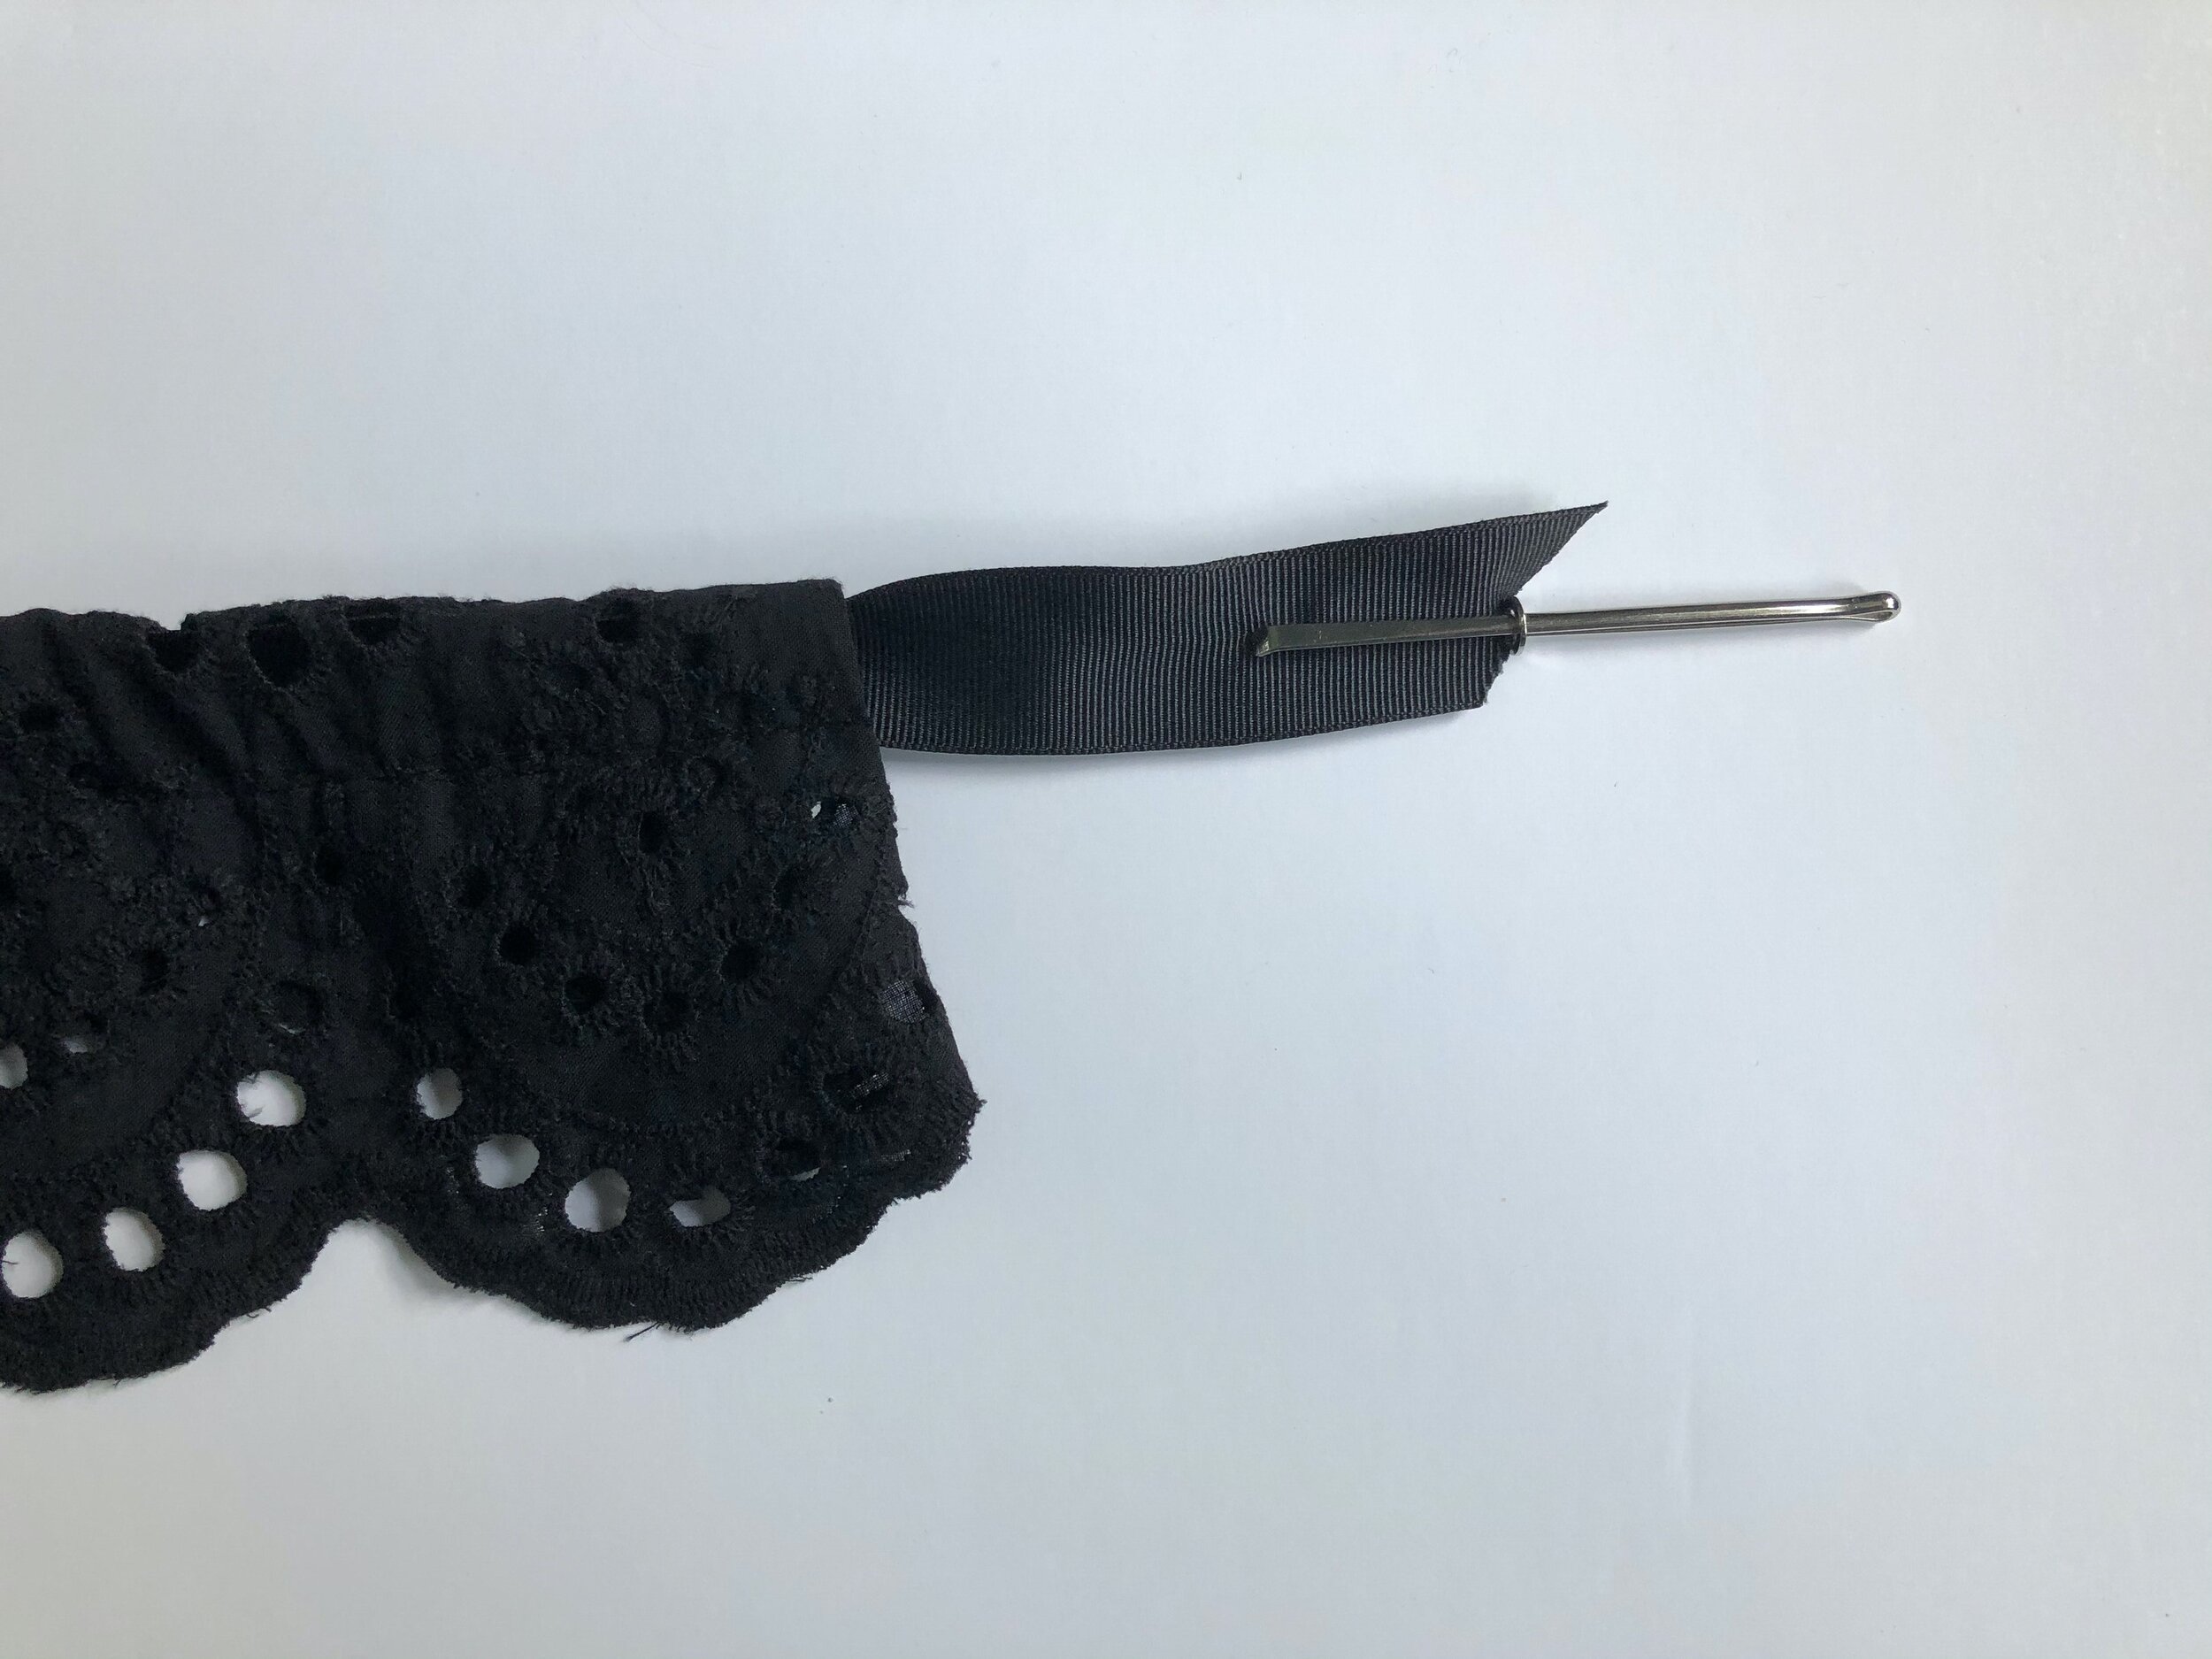
Take the ribbon and thread it through a safety pin or bodkin and draw through the casing. Once the ribbon is pulled through, cinch the collar to encourage it to ruffle a bit.
The ribbon should be just a few inches longer than the entire length of the collar before cinching.
Try it on and adjust the gathers and ruffle so that they form an attractive collar.
Clip each loose ribbon end at an angle to prevent fraying.

The collar can be tied at the center front for a rounded, ruffled collar.

Try playing with the length and width of the collar. This would be really flattering on a v-neck sweater or cardigan. It reminds me of the dainty Eileen West and Laura Ashley collars from the 80’s- but so much bolder and way more stylish!

The collar would be equally as lovely tied in the back. I could see wearing this out one evening with a halter cut sweater top, jeans and heels- and a great bag of course, too.

XO, Hilarie
Remember to Vote! For more information on voting in the US Election, go to vote.org

Room Rater Gave Me a 9/10!
You are familiar with Room Rater, right? Throughout the pandemic, Rate my Skype Room has been a fun Twitter follow into the snark and fun of rating home decor. Imagine how pleased (and surprised!) I was when I was featured. They gave me a 9/10 for my FB Live for C&T Publishing to kick off National Sewing Month.
You are familiar with Room Rater, right? Throughout the pandemic, Rate my Skype Room has been a fun Twitter follow into the snark and fun of rating home decor. Imagine how pleased (and surprised!) I was when I was featured. They gave me a 9/10 for my FB Live for C&T Publishing to kick off National Sewing Month.
And since I got a 9/10. That just means I need to do it again for the win. Stay tuned.

Introducing: Sew your own Wraps, Capes & Cover-ups. A Garment Sewing Primer.
I wrote this book to get you excited about making clothing that you will love wearing. The projects are all loose fitting so that you can concentrate on sewing and design and not get too focused on fitting. I show you how to manipulate fabric to make a wardrobe of timeless fashion accessories. Though it is really in the fabrication and finish of each garment where the true test of quality lies. The finish is exceptionally important. Clothing should be as beautiful on the inside as it is on the outside. The sewing techniques and projects in this book emphasize this principle of quality construction. Beyond the projects, the book is about craftsmanship. It explains in text and photos how to finish seams, embellish garments, and some pattern manipulation techniques that I hope will inspire you to expand your sewing skills.

It is hard for me to believe that I’ve nearly finished my second book, Sew Your Own Wraps, Capes & Cover-ups. As I work on the last of the illustrations, I am left feeling both exhausted and invigorated. Writing a book feels a whole lot like having a baby. From proposal to publication It takes about a year and a half of nearly everything you’ve got. Then it is submitted to the publishing team to take over and suddenly- is no longer “yours”.
The editing process is tough-and it can feel so personal. The manuscript and patterns get passed along to a variety of editors to comb through, question, mark up and pass back. Of course, without their skillful consideration- there would be no book! Since this was my second time writing a book, I thought- “I’ve got this! “– and was convinced that it was going to so much easier than the first one. Then 2020 began.
The manuscript and projects were due at the end of March- only a few weeks after the Governor of Virginia issued Stay at Home orders. At first the initial 2 -week shelter in place, seemed like a dream. More time to write and think! But, my kids were home too and those early days were filled with so much anxiety. Over time, we began to feel our way through it, and find a quiet, slower pace. The book provided a much-needed distraction. A distraction from politics, from Covid-19, from anxiety, from life really.
From March- July my business was closed. I was afraid. Besides not bringing in any income, I was issuing refunds each week as more classes, workshops, parties and camps were cancelled. Fortunately, I was able to rearrange my workspace and come up with a plan to return to teaching the day the restrictions were lifted and Virginia went into Phase 3.
A silver lining of the 2020 doomsday cloud is that so many more people are now sewing. At first it was for the animals injured and abandoned from the fires in Australia, and then Covid hit and we needed masks. Suddenly sewing machines were sold out everywhere and thread and elastic were scarce. People were sewing again! Now that masks are readily available, the new to the sewing crowd folks want to learn more. I cannot tell you the number of emails and calls I get each day with people eager to sharpen their new-found skills.
The book feels perfectly timed to help fulfill that burgeoning curiosity in those that are new to sewing as well as an invitation to explore pattern making and garment sewing to those already well on their path to mastery. As a way of introducing the book concepts and to educate a larger audience, you can look forward to lots of posts about garment sewing, pattern making and fashion design.
About the Book
Sew Your Own Wraps, Capes & Cover-Ups: 16 Variations; Unlimited Possibilities
Fashion made easy
Take your wardrobe from drab to fab with modern wraps, capes, and coverups. Start with the basic sewing patterns, and then customize your unique look with 16 variations and tons of embellishment options. Each pattern comes with variation and design options making it easy to alter looks for any season so you can be fashionable all year round. Learn how to pick the right fabrics to flatter your shape as well as how to best place pockets, details, and embellishments for a truly trendsetting look.
Elevate your wardrobe with stylish women's clothing patterns and designs
No detailed sewing! Simple garments made elegant with guidance on how to cut and drape the fabric into a flattering fit
Customize your unique look with endless embellishment choices
I can’t wait to share the book with you!
XO, Hilarie
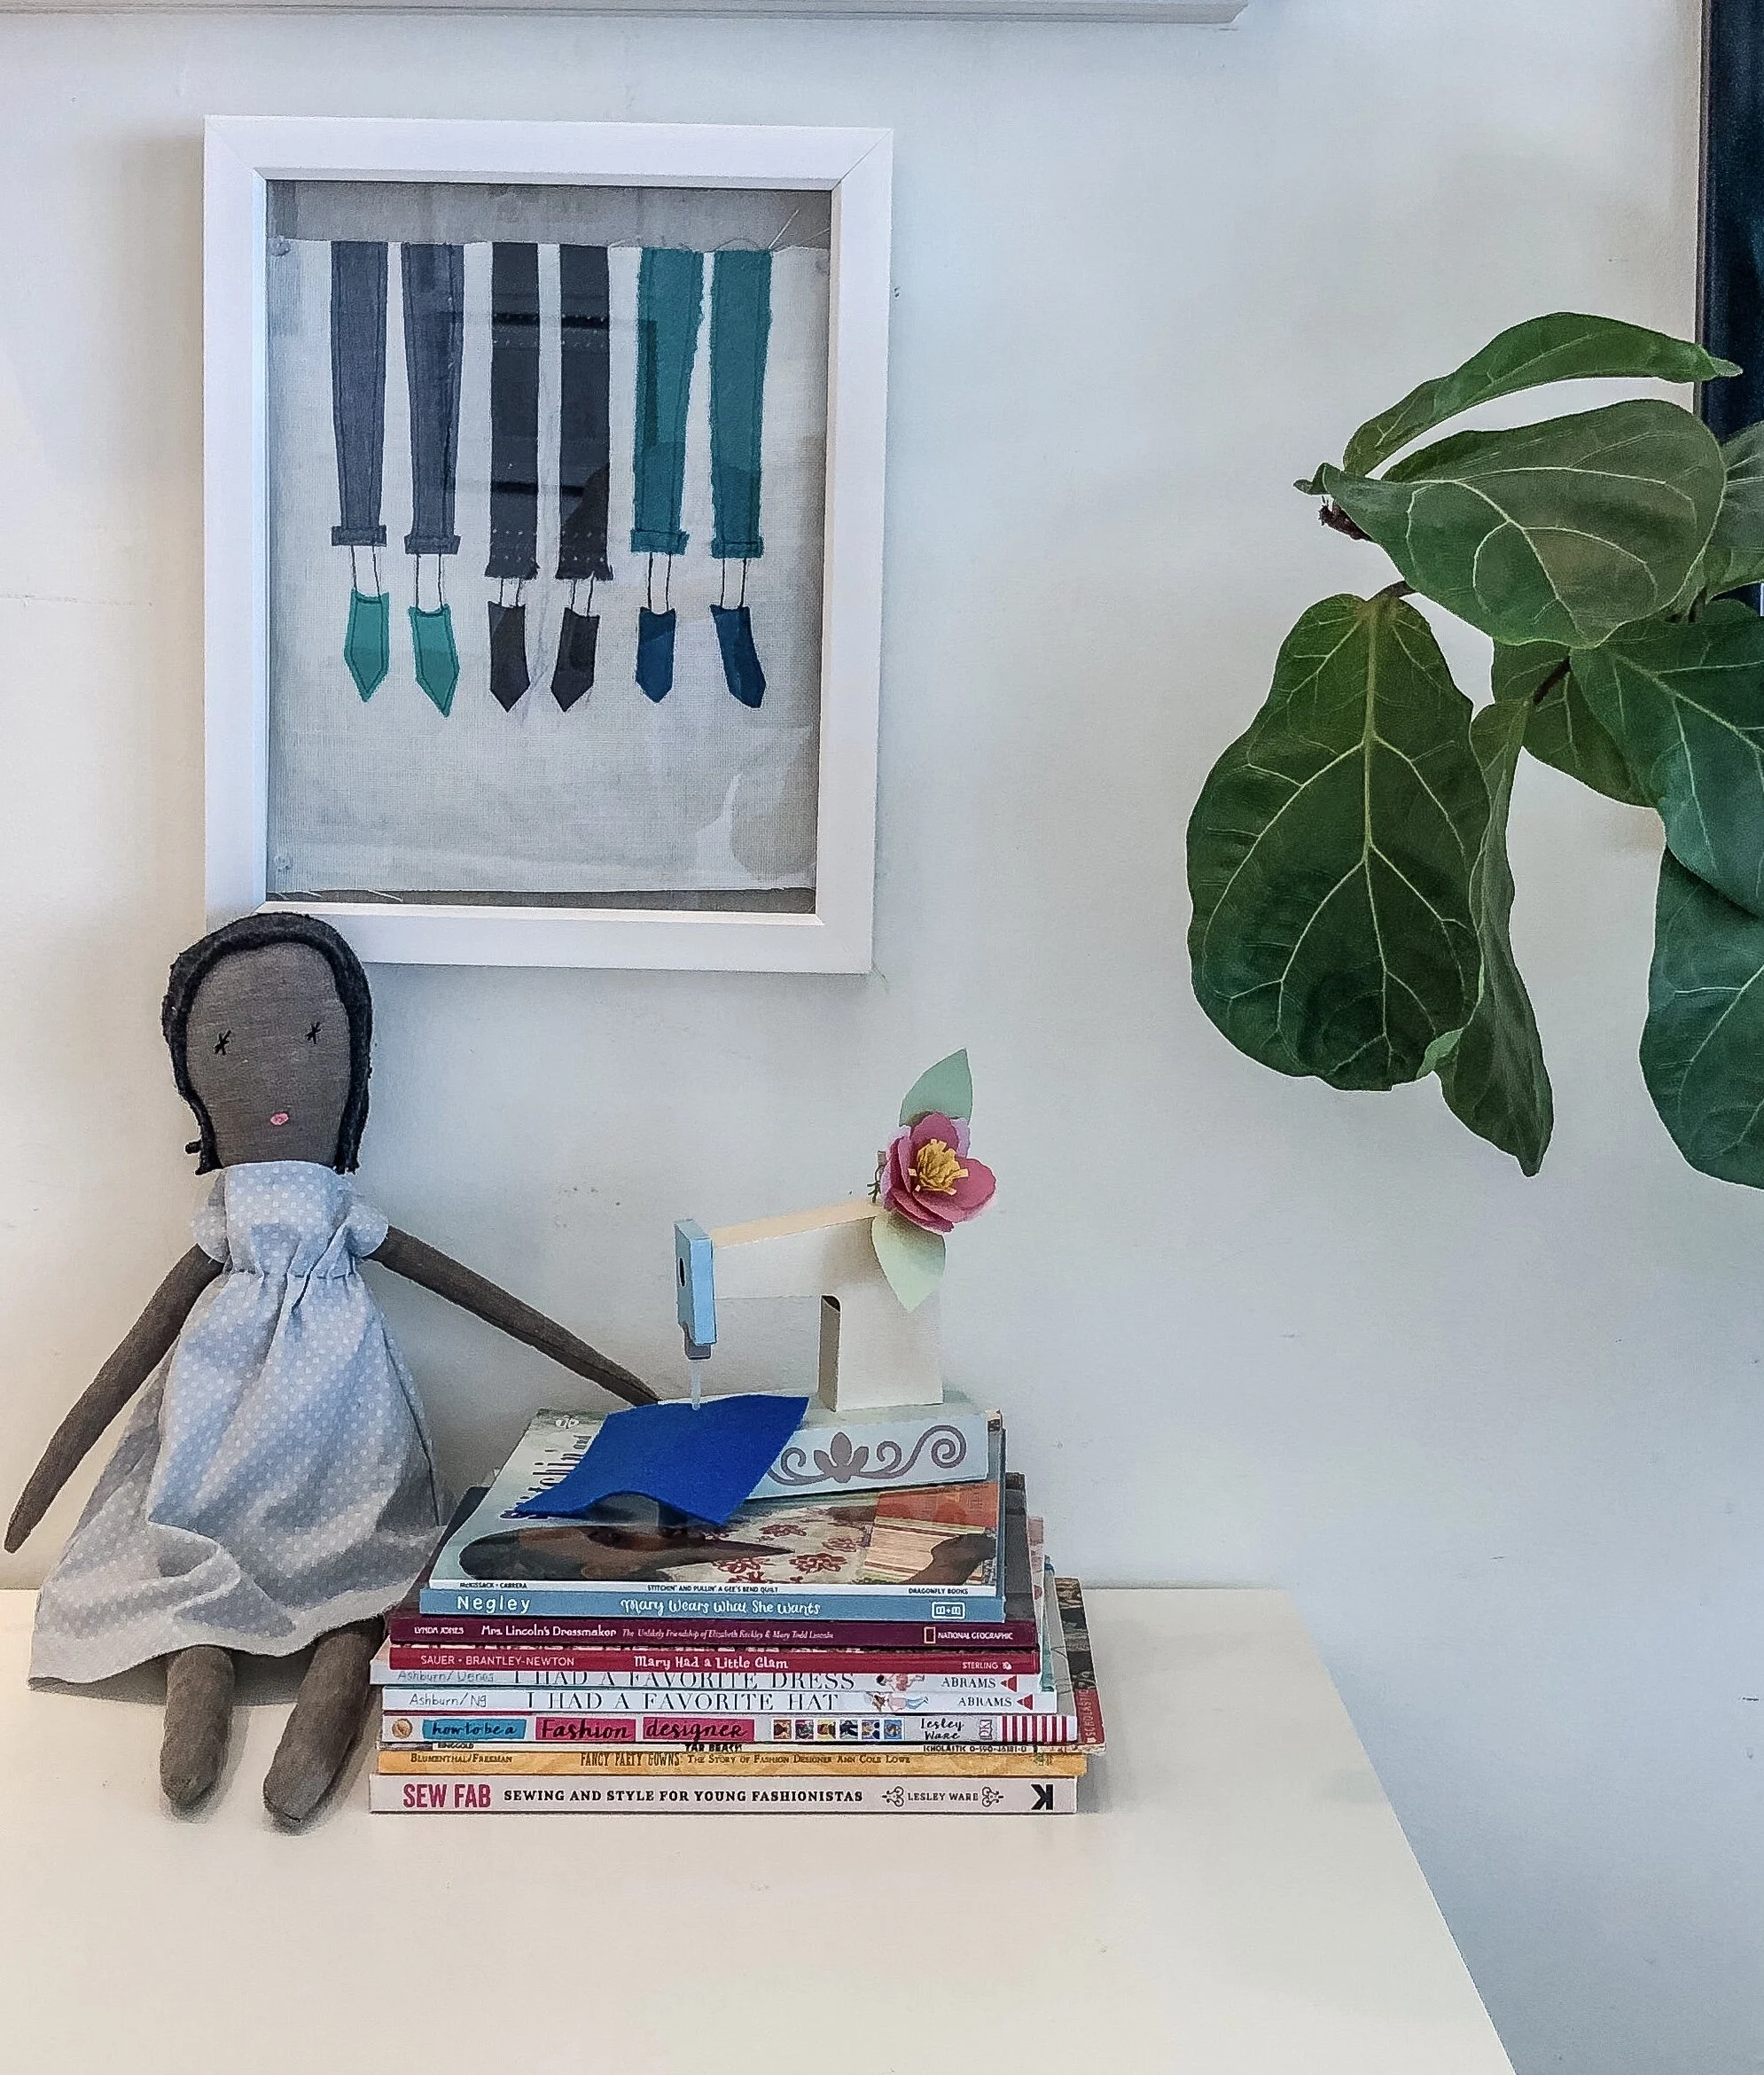
10 Children's Books About Fashion and Sewing that Feature Black Characters
In recent years, I have found an increase in the number of books that are both fashion and sewing related that feature kids with black and brown skin. This expanded diversity not only allows kids the opportunity to see themselves in these stories but also helps broaden the perspective of all children by fostering their sense of empathy and connection with characters who might look different from themselves.

Children love seeing faces like theirs within the pages of their books. For many years it was often challenging to find books starring kids of color, Ezra Jack Keats comes to mind, but few others. In recent years, I have found an increase in the number of books that are both fashion and sewing related that feature kids with black and brown skin. This expanded diversity not only allows kids the opportunity to see themselves in these stories but also helps broaden the perspective of all children by fostering their sense of empathy and connection with characters who might look different from themselves.
To help you discover a few new titles perfect for reading with your kids, I’m sharing a few of my favorite books for elementary school readers. Whether they're sewing quilts or navigating friendships, designing gowns or standing their ground, these characters exude confidence, happiness — and individuality.
Elementary School Readers
Fancy Party Gowns, Blumenthal, A Story about Ann Cole Lowe
Mary Had a Little Glam, Sauer
I had a Favorite Dress, Ashburn
I had a Favorite Hat, Ashburn
Stitchin’ and Pullin’: A Gee’s Bend Quilt, Patricia McKissack
Mary Wears What She Wants, Negley
Tar Beach , Faith Ringold
Later Elementary and Middle School Readers
Mrs. Lincoln’s Dressmaker, Lynda Jones The story of Elizabeth Keckley
How to be a Fashion Designer, Leslie Ware
Sew Fab, Leslie Ware

DIY Easy Mini Felt Bunny Ornaments
Easter is on Sunday! Since quarantine began, I am never really quite sure what day it is anymore. Somehow in all of this uncertainty, I hadn’t gotten around to putting out any type of seasonal decoration. With a daughter called Bunny, we generally take Easter decorating pretty seriously around here. So, in an effort to jump start on all things Bunny, here is a quick hand-sewing project for you to make and enjoy.
DIY Easy Mini Felt Bunny Ornaments

Easter is on Sunday! Since quarantine began, I am never really quite sure what day it is anymore. Somehow in all of this uncertainty, I hadn’t gotten around to putting out any type of seasonal decoration. With a daughter called Bunny, we generally take Easter decorating pretty seriously around here. So, in an effort to jump start on all things Bunny, here is a quick hand-sewing project for you to make and enjoy.
DIY Easy Mini Felt Bunny Ornaments Free Pattern and Tutorial

MATERIALS

These mini felt bunnies sew together pretty quickly and it is likely that you already have the supplies on hand.
To make an assortment 2 1/2-inch bunny place ornaments:
9 X 12-inch sheets of felt in assorted colors; each sheet will make one bunny plus a little felt left over.
Embroidery Floss or Pearle Cotton (if you don’t have either, thread is fine.)
A Felt Mini Bunny Ornament template available for free download here, printed and cut out.
Craft glue
Embroidery needle
Scissors
PATTERN
FINISHED SIZE
About 2.5” inches high, plus ears
CUTTING

Cut eight circles from the felt and two ears

Press each of the cut circles in half, making a crease along the center. Place the ears aside for now.
SEWING

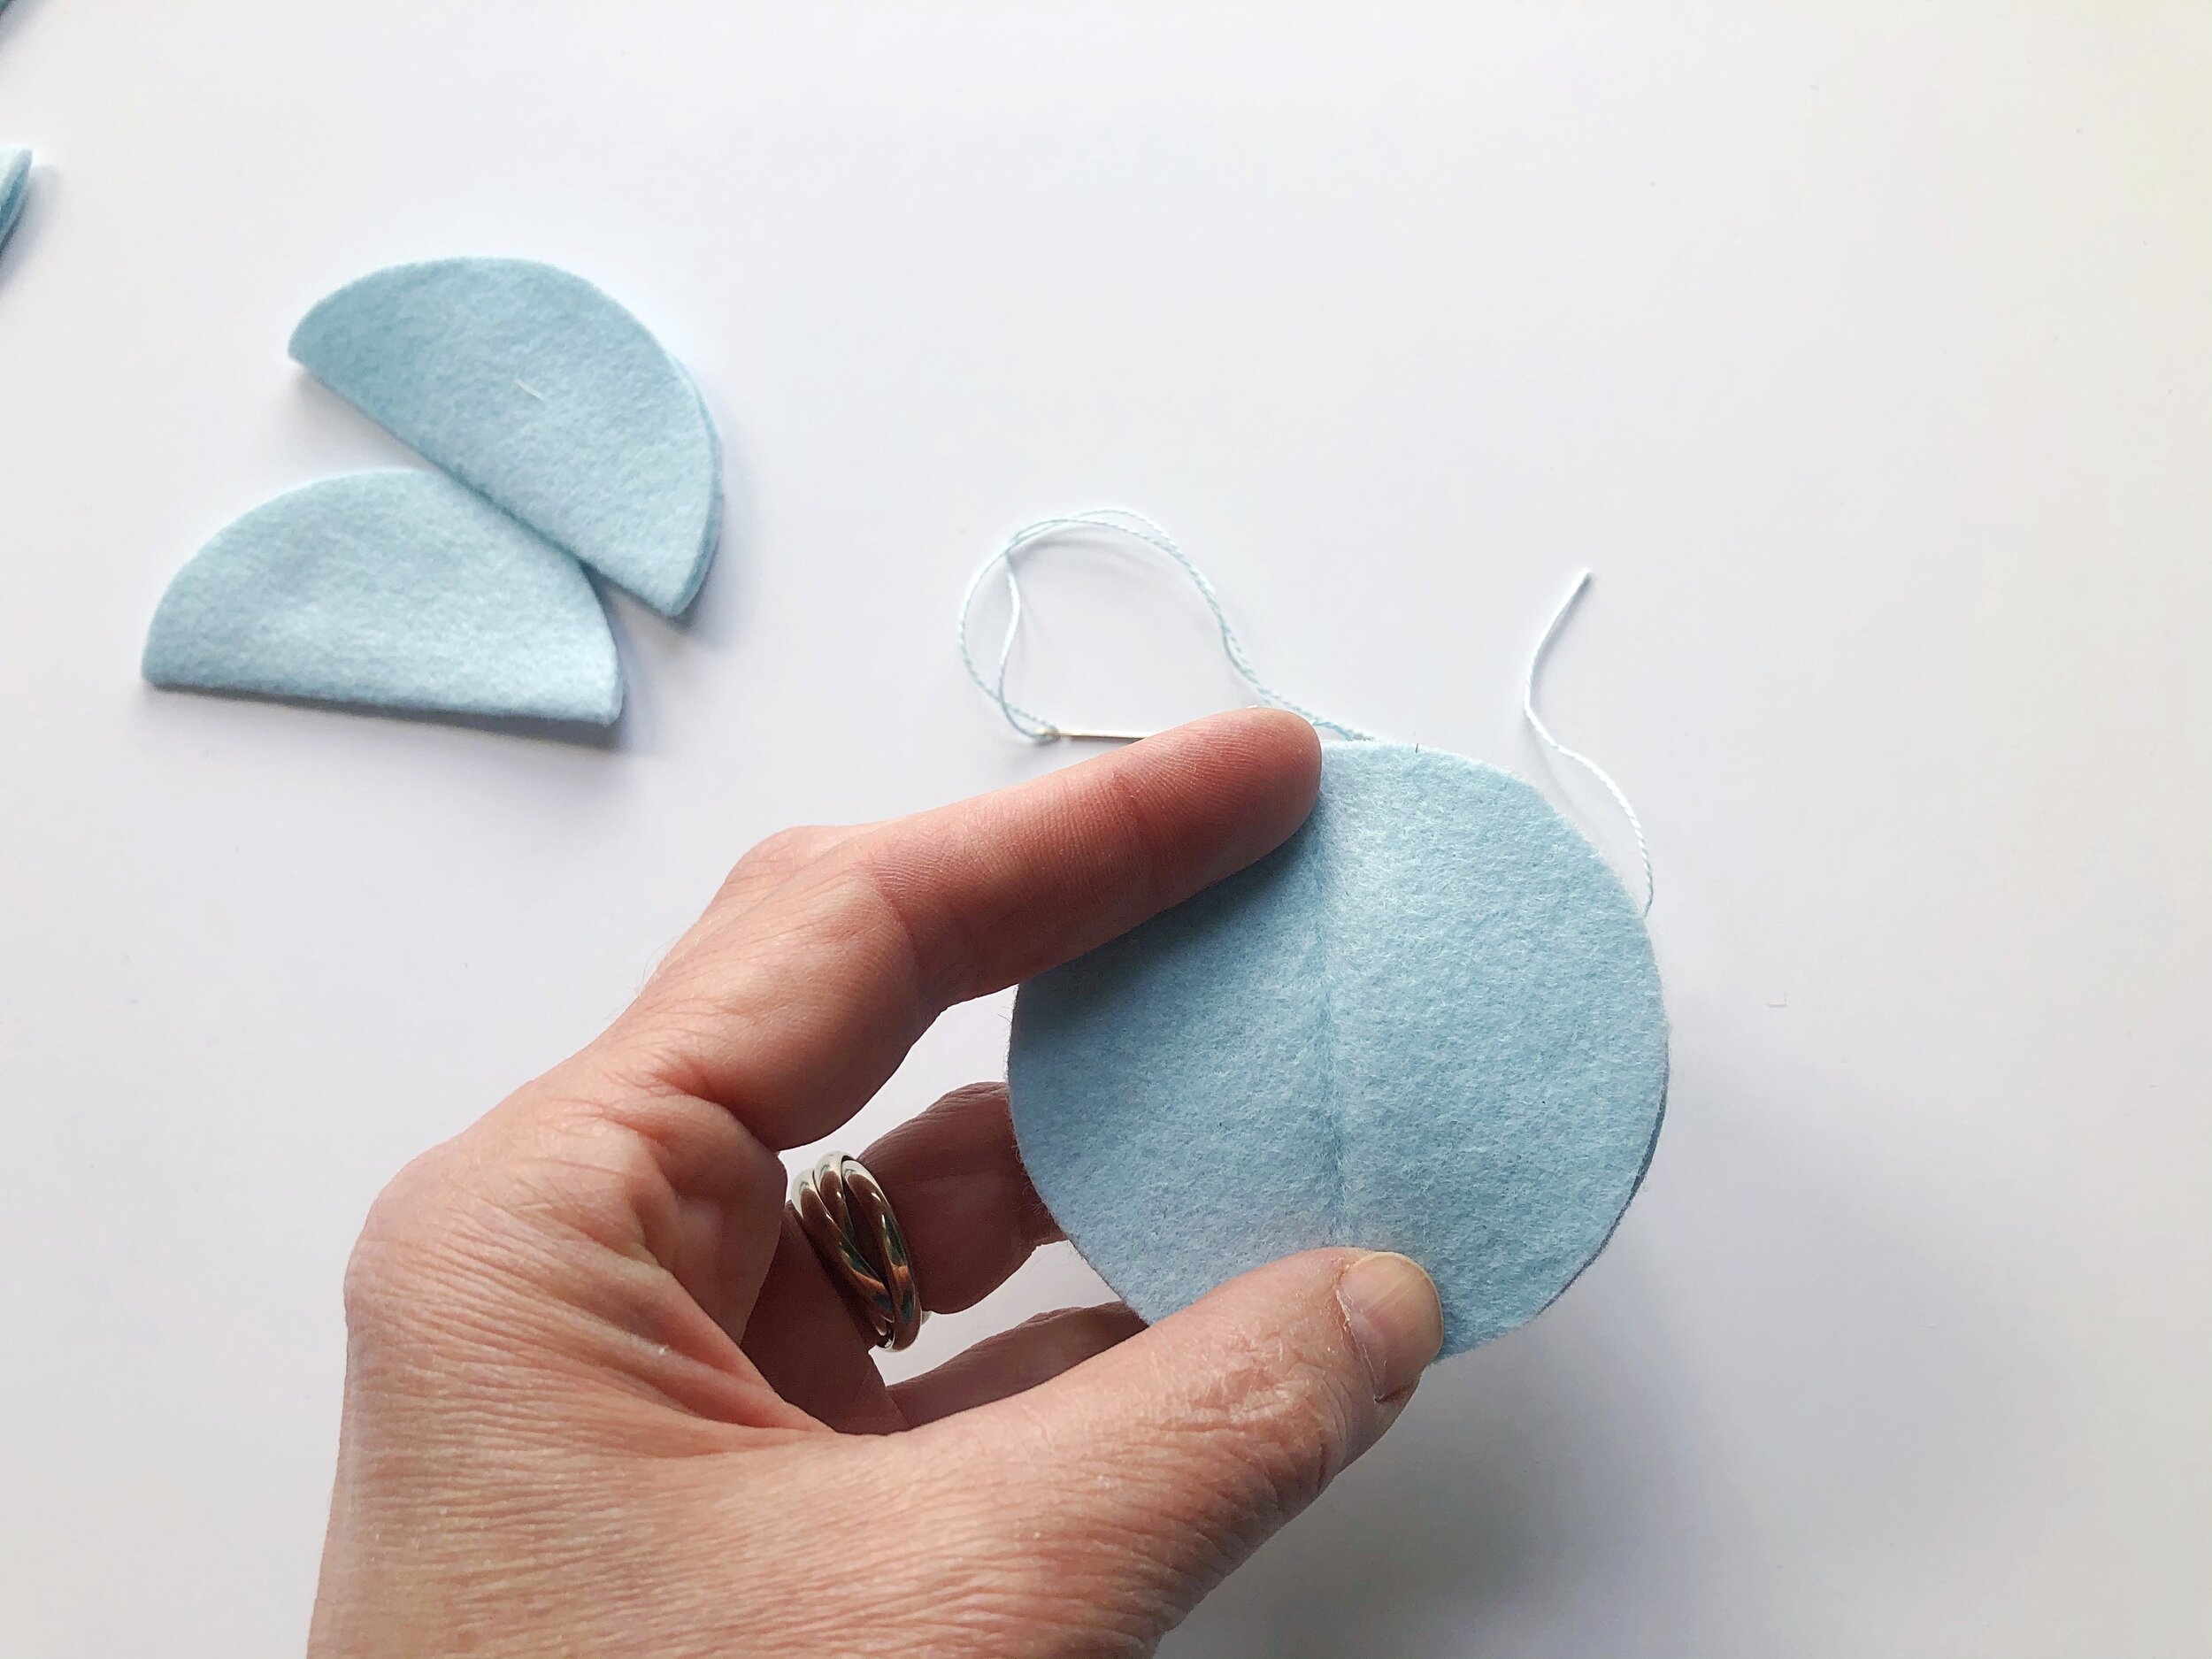
Cut a piece of thread about 20” long. Thread a needle and knot the end to tie. Insert the needle from the back of one of the circles and make a small stitch to secure.
*This thread should be long enough to complete one bunny. The idea is to keep sewing with the same strand of thread between all layers. If you run out- no worries. Just tie off the end and rethread another strand.

Fold the circle in half. Grab a second circle, keeping it folded in half as well, and align both so that the straight fold of each piece mirrors the fold of the other.
You might find it helpful to think of each piece as a folded tortilla.


Stitch the two pieces together along their crease lines with a small hand stitch.

Try to keep your stitches even and be sure that both circles are aligned. Sew across the entire fold and stop. Keep your working thread- do not cut.

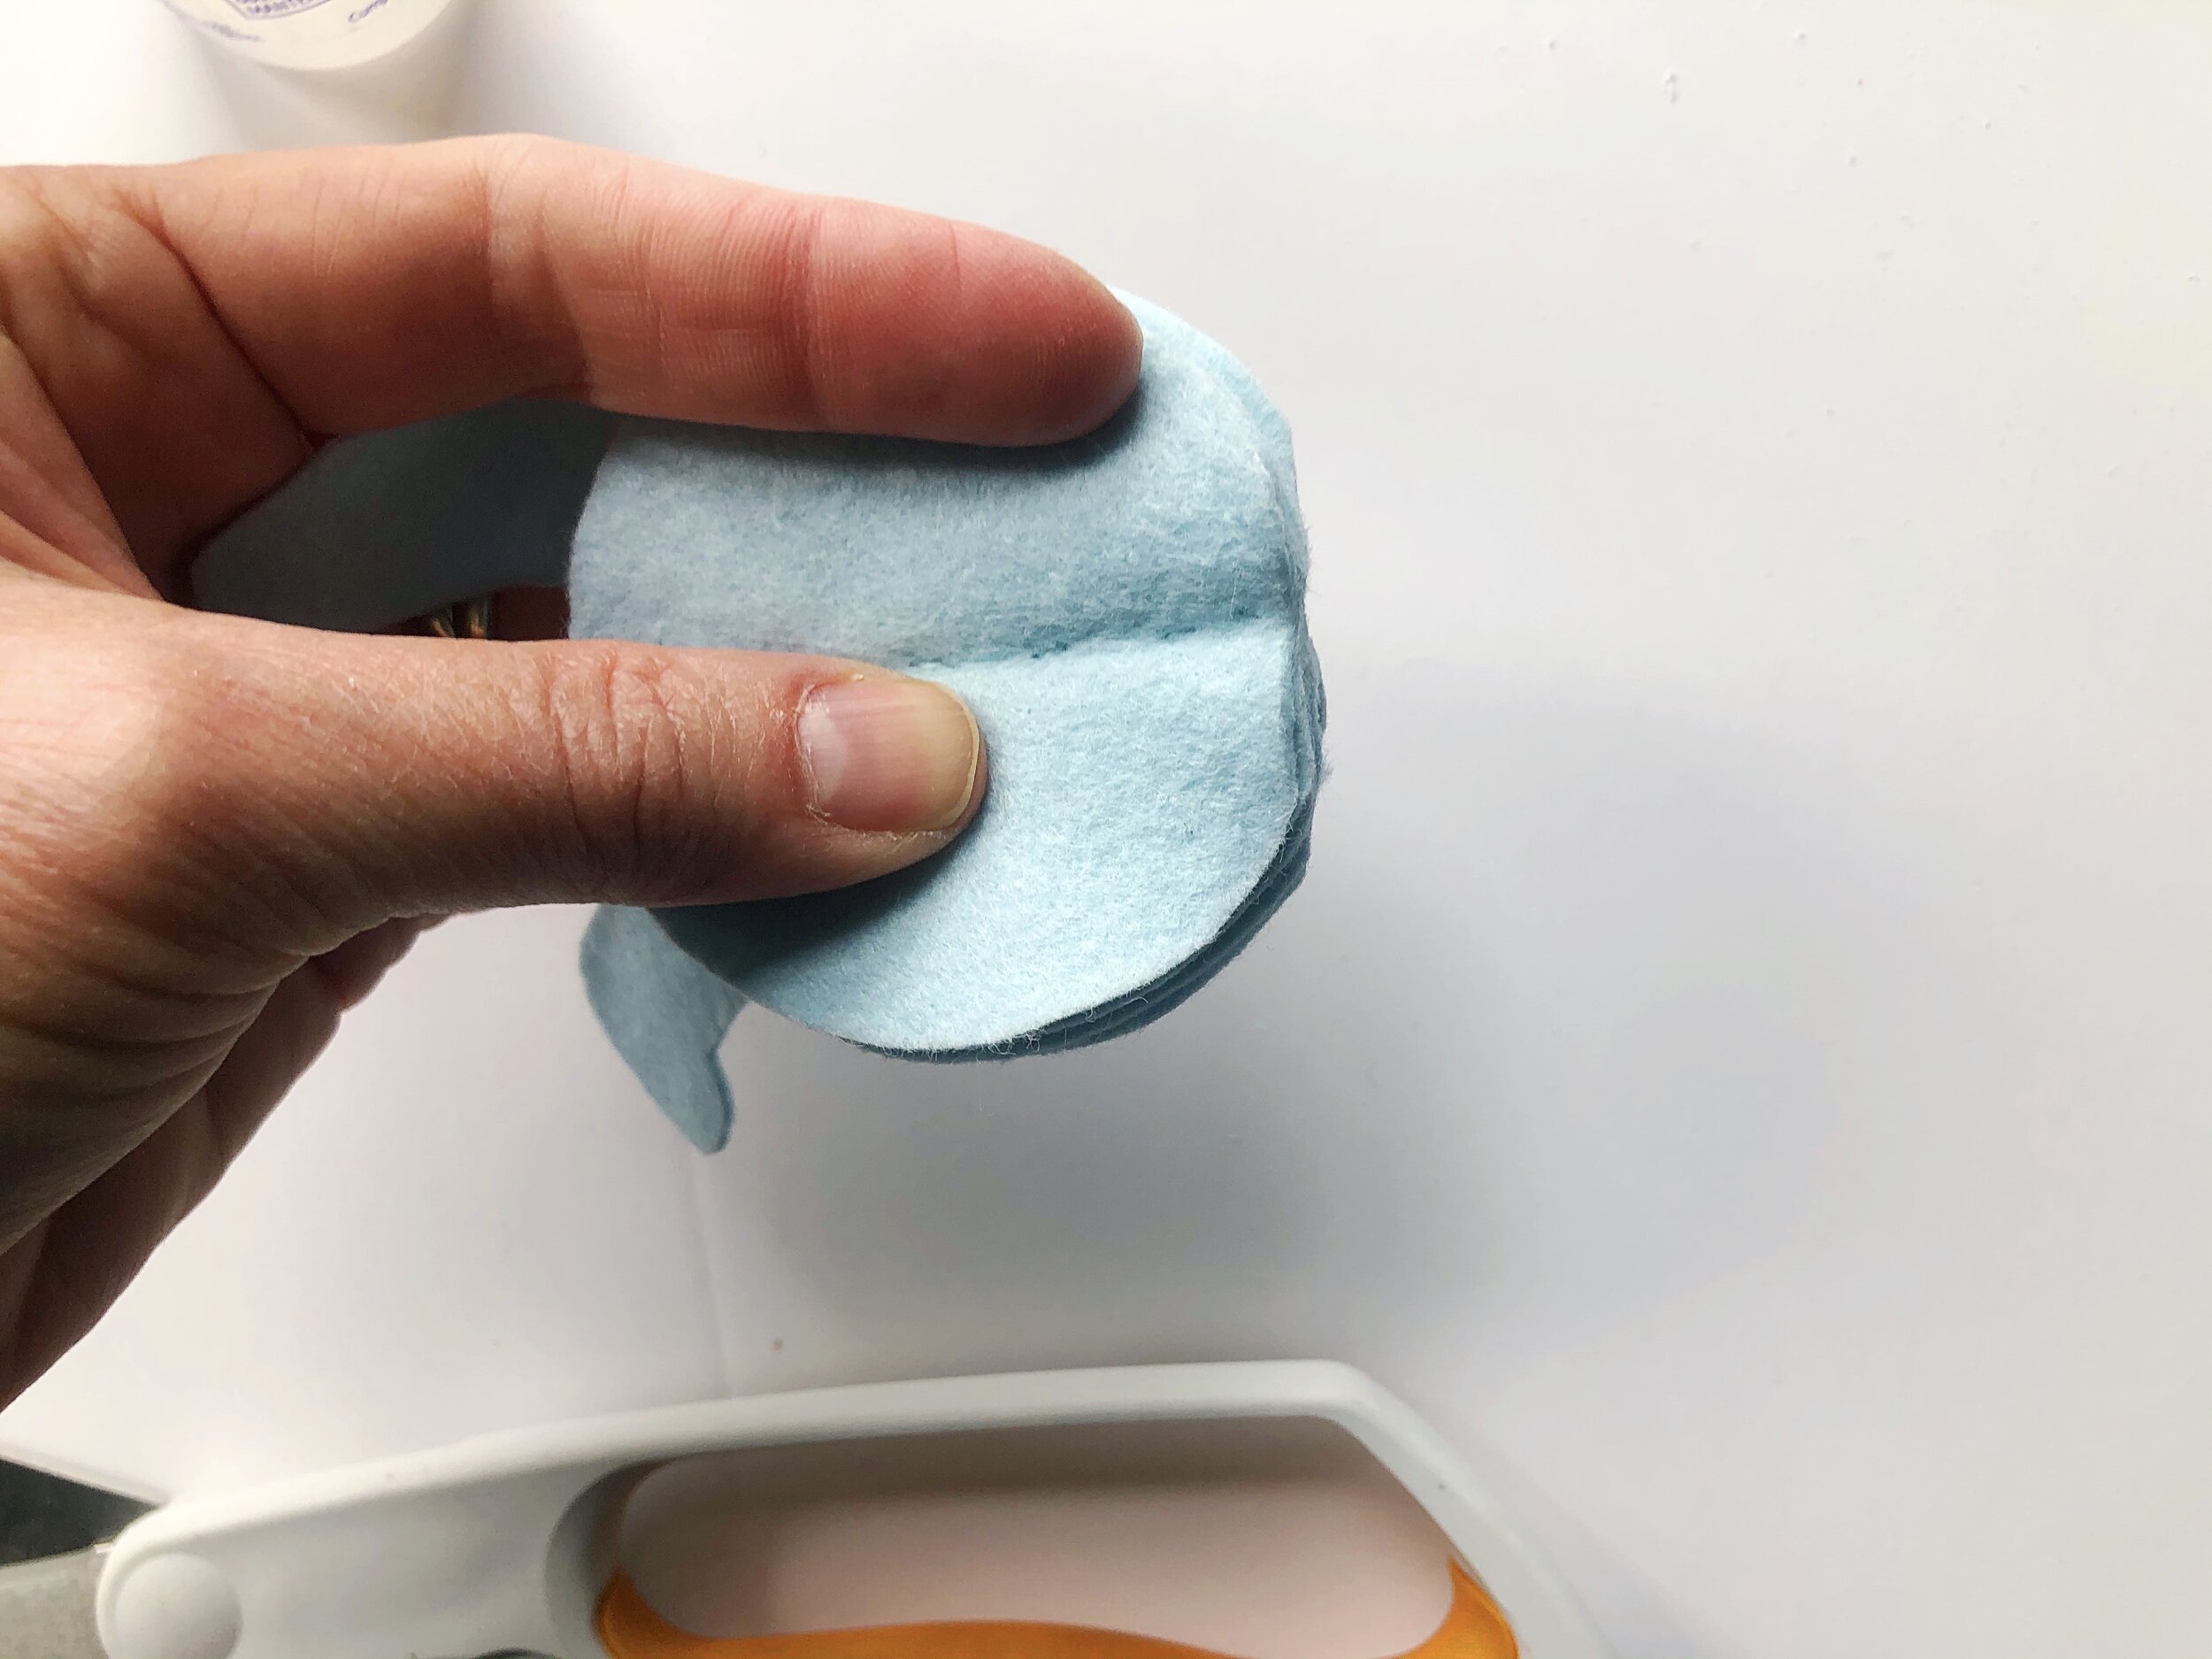
Fold the pieces that have just been sewn in half, like two tortillas.
Grab two more felt circles and layer them with the just sewn pieces in between.

Doesn’t it look like a tortilla sandwich? Make sure that the center fold creases remain aligned with the center seam of the inner layer


With the working thread, sew these two new pieces together along their center fold lines in the same manner as before.
Sew to the end of the folded crease. Remember-don’t cut your thread.

Now we are going to repeat that same step again, by folding all of the circles closed and placing the two more felt circles on the top and bottom. Be sure to align the creases.
Sew these two pieces together through the center as before. At this point the felt is getting a bit bulky to sew through. Just be patient- you are almost finished.


Repeat this process for the final two creased circles, layering them opposite to one another through the center and stitch.

Sewing is complete!
FINISHING

Give each section a little tug to straighten, then divide the circle in half to place the ears.

For the ears, I dabbed a bit of glue on each side and placed the ear. You may need to pinch it for a minute or two to set.
If you plan to have your bunny sit, you may need to flatten the bottom just a bit. To do this, I pinched the circle in half and gave it a bit of a trim. Just watch your stitching. If you happen to cut through- add a bit of glue and pretend it never happened.
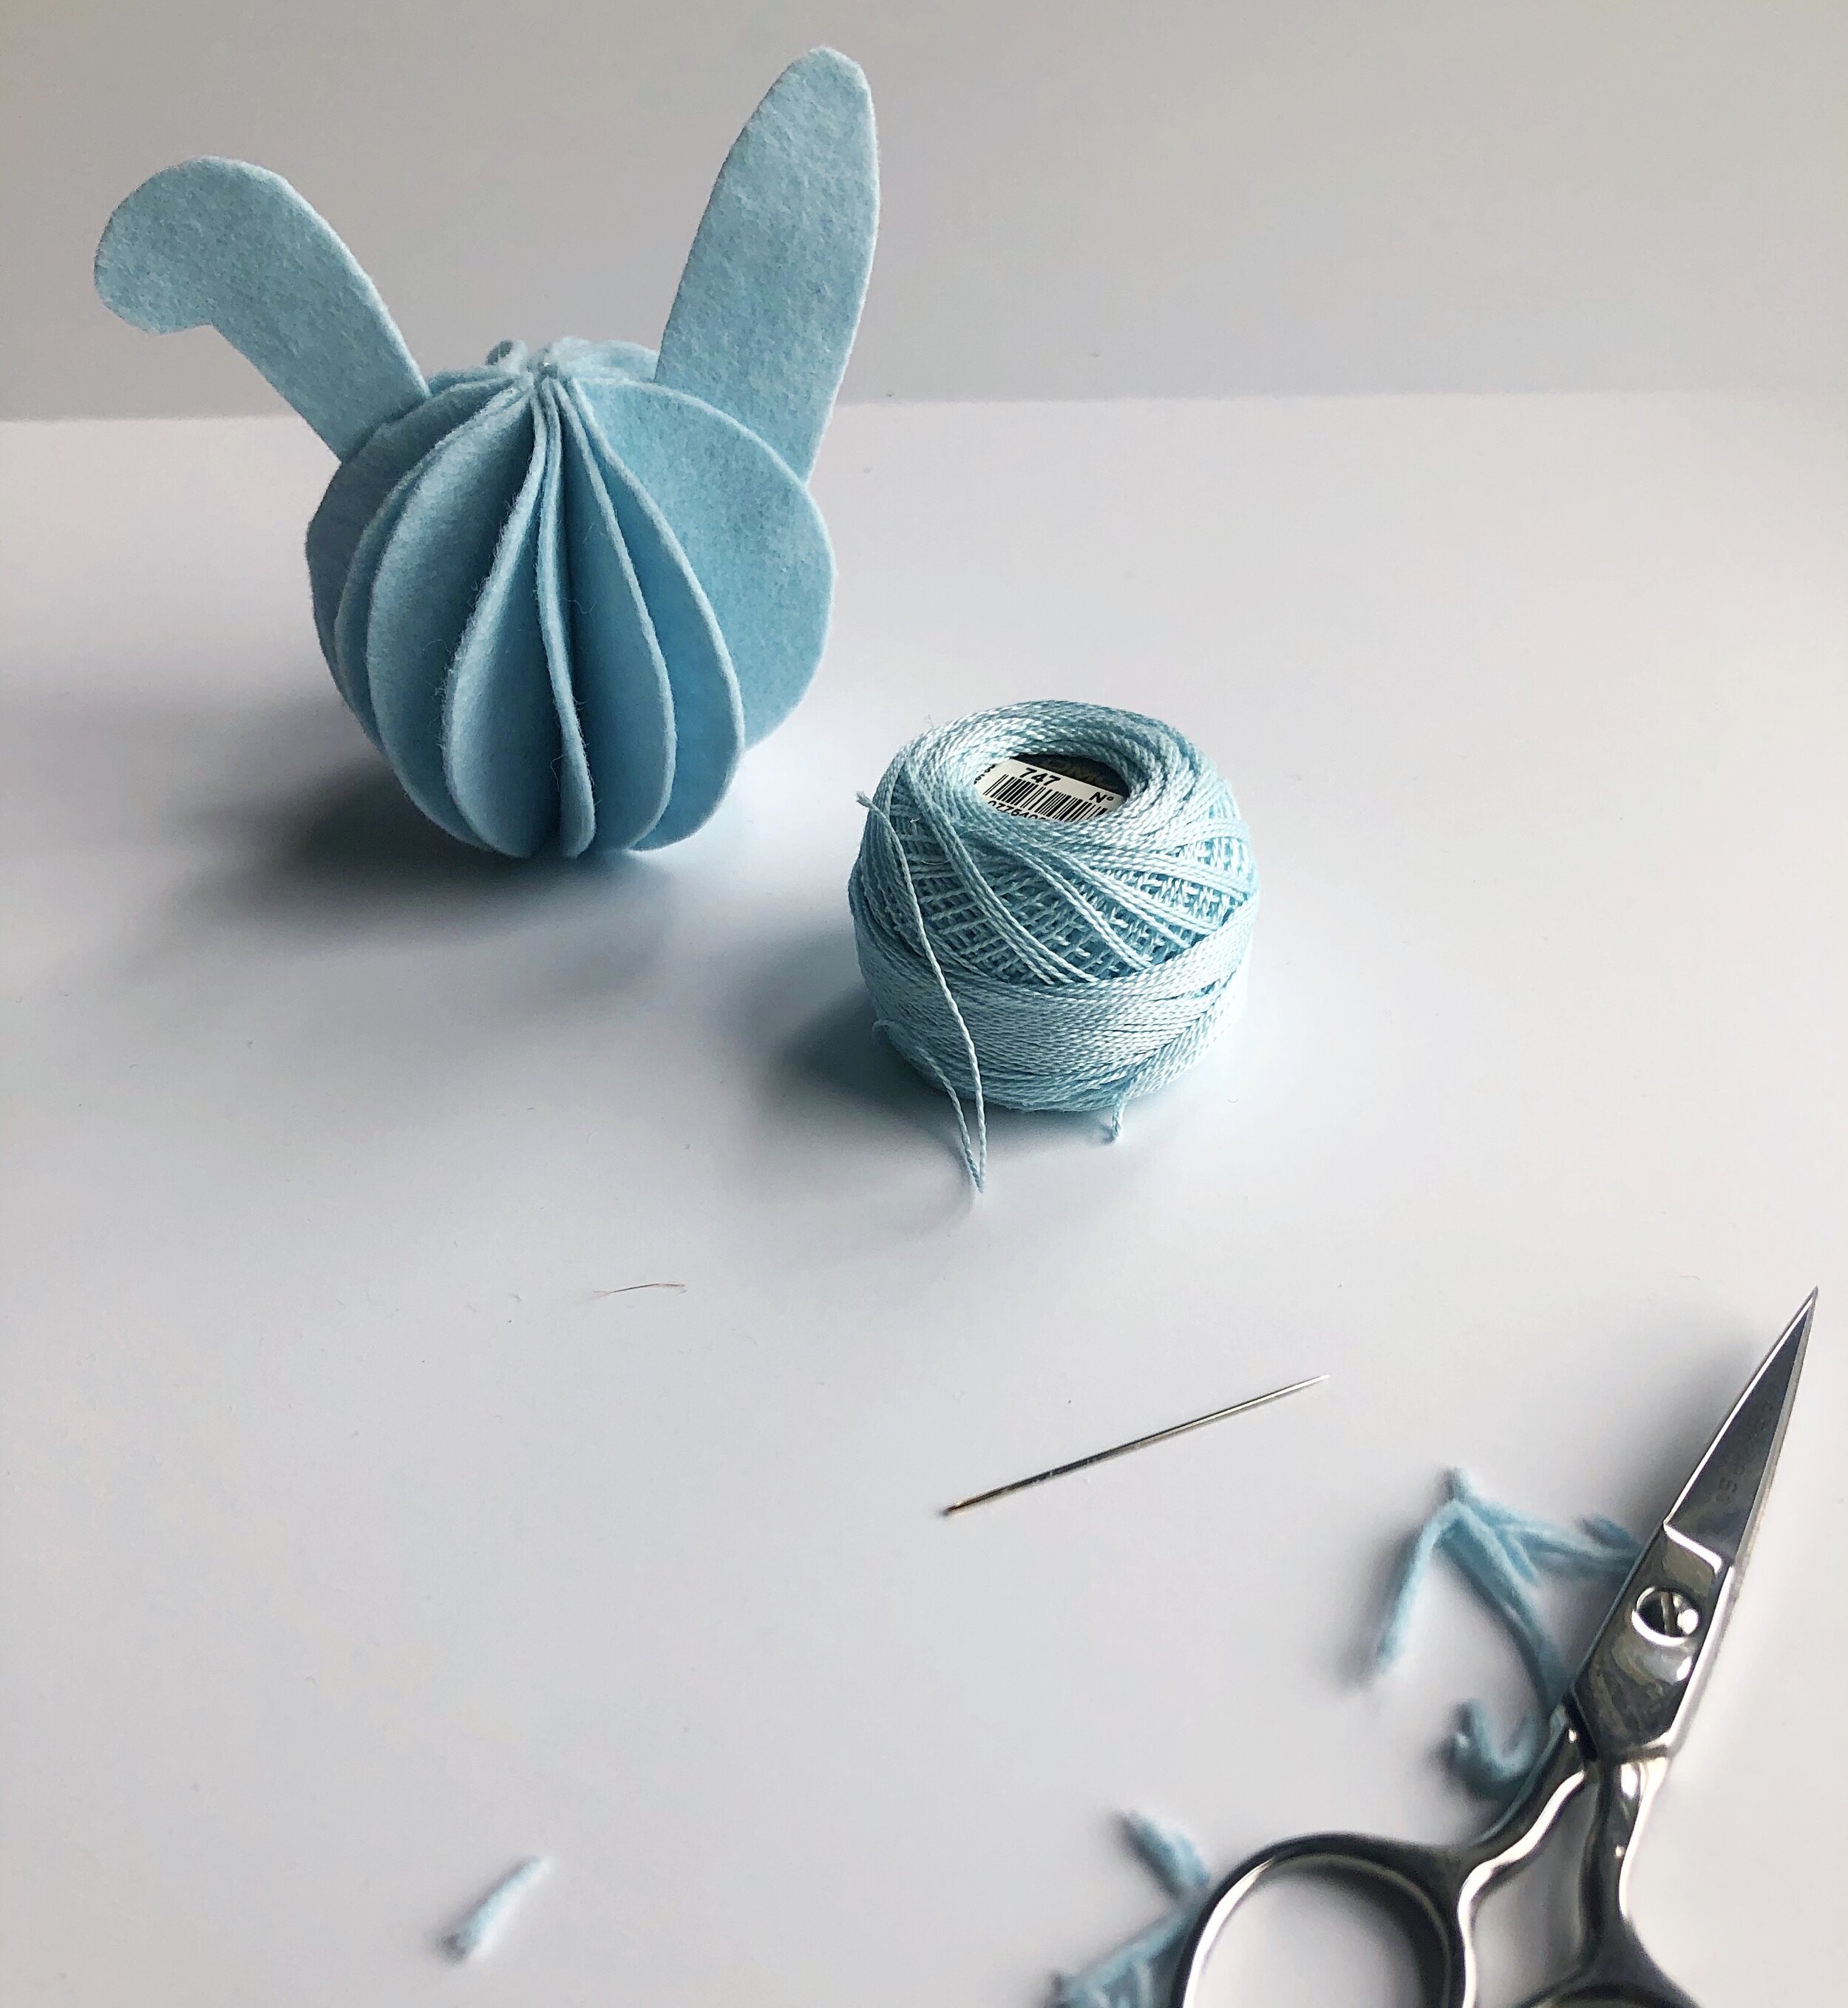
All done! Doesn’t it remind you a bit of a weeble?

Wouldn’t these look adorable strung as an Easter bunny garland?


I made one into a chick by cutting two hearts for wings and one tiny heart for a beak.
This Easter may be the perfect opportunity to focus on renewal. Let it serve as a reminder that life goes on and that love is greater than fear. With that sentimant in mind, I wish you all a lovely Easter holiday.
XO, Hilarie

Face Mask Making FAQ's
So many of the questions that I receive through comments, emails and phone calls, tend to focus around a few topics. In the presence of that, I present to you a Face Mask Making FAQ.
Thank you all for your comments, I am trying to keep up with as many as I can. My screen time is very limited as I have significant light sensitivity caused by migraines. As such, there are days when I cannot tolerate being in front of a screen.
So many of the questions that I receive through comments, emails and phone calls, tend to focus around a few topics. In the presence of that, I present to you a Face Mask Making FAQ.
Face Mask Making FAQ
What are the best filter options?
Since my degree is in Art and not medicine, I do not feel qualified to recommend filters. However, I am using kleenex, unbleached coffee filters and sew-in interfacing. Please refer to the CDC or a medical professional though.
Recommendations for washing masks.
I have had great success washing and drying masks by putting them in a lingerie bag and washing in hot water. If the sun is out, I hang them to dry, if not, I put them in the dryer set to high heat. After, it just takes a quick press and a small adjustment to realign the nose wire.
What can I use for elastic and wire?
The pattern calls for thin elastic, however, wider elastic can be trimmed and still be effective. For instance, you might have a 2” strip of elastic. That can be cut into several smaller strips and used.
Cotton jersey is an excellent option as well. Among the many properties of jersey that I find attractive is that when cut, it rolls toward the right side. Why not use that to your advantage next time you plan a hem- instant design detail!

To create jersey “rope” cut one-inch strips across the width of the grain. Pull gently to encourage it to roll.

Grossgrain ribbon.
For the masks that I am making for the Children’s Hospital of the King’s Daughters, we are using grossgrain ribbon and elastic. The picture below, is the Children’s Hospital Sample that I was given. On the right there is a piece of 6.5” elastic and on the left, a 36” piece of 3/8” grosgrain ribbon. Placing ribbon on both sides will work just as well. (For those of you who are very observant, you will notice that this mask is a bit different than my pattern and that the pleats are facing downward in this picture. This is a picture of the mask that I make for the Children’s Hospital of the King’s Daughters and is a different pattern from mine. Additionally, this is a picture of the “inside” of the mask. The pleats face up on the reverse.)

As for wire, twisty ties, paper clips, pipe cleaners, floral wire and even the metal inserts in file folders will all work. Now that I am writing this, I am looking at the stack of my kids school work scattered across the kitchen table- perhaps the wire from a spiral notebook could be clipped and pulled straight with pliers? (I will assign that task to my children today!)
What are some other (easier, quicker) mask options?
While I saw a gorgeous one made from a silk prada shoe bag here:, bandanas, t-shirts and scarves work too.
Again, I will refer you to the CDC.
How do I apply binding?
Binding can be tricky, but is so useful and beautiful. Here is another tutorial that I have written that might help you- and give you another project to work on.
The bias is applied to each side of the mask in the following manner:
Unfold the bias tape. With right sides together, pin the bias tape to the fabric aligning the raw edges of both the tape and the fabric. Stitch together with a 1/4" seam allowance.
Trim the seam allowance.
Fold the bias tape over the raw edge of the fabric to fully encase the seam allowance. Pin and press.
Recommendations for sizing for children?
The mask is based on an average adult sized face. To make a child’s size, I would recommend cutting one inch smaller. Instead of cutting 7.5” square, make it 6.5” and adjust the fit with ties or elastic.
It really comes down to the vertical measurement from the bridge of the nose to just under the chin and then the horizontal measument from ear to ear, adding enough volume to ease over the nose. Take those measurements, add seam allowance to all four sides of the pattern and you have a custom template.
Orientation of the pleats.
Pleats seem to be the biggest question of all. I was going to list this one first, but since it ties into volume as described in sizing, I think it fits better here. First of all, a bit about flat pattern making and volume.
A pattern is made of paper. It is flat. A pleat is one of many tools that turn that flat pattern (and later cloth) into a three-dimensional form which will fit the contours of the body. Within the body there are a series of curves and bulges, in this case we are discussing a human face, so we have a nose and mouth, and secondary curves (cheeks and breathing expansion). The mask needs to accommodate these shapes.
Darts (a pleat is a form of a dart) are shaping devices which allow enough fabric to cover the body where it is fullest while at the same time providing a means of taking in the excess fullness in a adjoining smaller area. You will find darts in your clothing where you need to allow for a curve or bulge. For example, at the bust, waist and hip of a garment.
Darts are not the only way to control shaping. Shaped seams, pleats, shirring, tucks, smocking and gathers accomplish the same purpose.
To be effective, the dart must be located in the area where the high point of any curve occurs. In the case of a mask, it is the nose. The dart is then controlled at each side with the bias encased pleats. Since the pleats are quite shallow and the mask is designed to be pulled from the bridge of the nose to under the chin, it really does not matter which way you orient the pleats, as the only place that you will see the pleat is just along the side casing.
There seems to be much debate about the orientation of the pleat. So many of you have written to me telling me that you understand the pleats need to be turned down so as not to catch particles. While I do understand that thought process, if that were the case, we need to rethink the side casings too as particles are just as likely to settle there too.
This pattern was created from a mask that was given to me at a recent doctor’s appointment. Since the pleats were facing in an upward manner on the front of that mask, that is how I created the pattern. When the mask is turned the opposite way, the pleats turn down.
This pattern was written to guide you through the face mask construction process. My goal as a sewing educator, is to explain to you, the reader how to cut and handle the fabric and to begin to understand the reasoning behind the methods used. Interest, motivation and enthusiasm are all essential to sewing. I hope that once this current pandemic is behind all of us, (and that we recover!) that many of you will continue to advance your sewing journey. It gets a whole lot more fun- I promise!

How to Maximize Your Time Sewing Cloth Face Masks With These Tips and Tricks
Learn how to save time and maximize the number of face masks that you can sew. How to sew a double-layer face mask with wire and pocket for filter or shield. Step by step cloth face mask tutorial and free pattern. Face masks are hard to come by and it seems that hospitals will be facing a shortage.
Thank you all so much for your lovely comments and kind word about my cloth face mask sewing pattern and tutorial. Like many of you, I am making masks daily and have discovered a couple of tricks to speed up the process a bit. Here is a video I made to share my tips with you. Enjoy!

THIS WEBSITE IS NOT INTENDED FOR THE PURPOSE OF PROVIDING MEDICAL ADVICE
All information, content, and material of this website is for informational purposes only and is not intended to serve as a substitute of a qualified physician or healthcare provider.
“In settings where facemasks are not available, HCP might use homemade masks (e.g., bandana, scarf) for care of patients with COVID-19 as a last resort. However, homemade masks are not considered PPE, since their capability to protect HCP is unknown. Caution should be exercised when considering this option. Homemade masks should ideally be used in combination with a face shield that covers the entire front (that extends to the chin or below) and sides of the face.”
Article from Courier & Press, Evansville, IND “Citing shortages, Deaconess Health System, including Henderson's Methodist Health, has asked the public to sew face masks for staff fighting coronavirus”.

Face Mask Sewing Pattern and Tutorial
Across the world, we are all discovering just how unprepared we are for the COVID-19 situation. Face masks are hard to come by and it seems that hospitals will be facing a shortage in the near future. After reading this article I decided that I needed to put my skills to use make a mask pattern.
Across the world, we are all discovering just how unprepared we are for the COVID-19 situation. Face masks are hard to come by and it seems that hospitals will be facing a shortage in the near future. After reading this article I decided that I needed to put my skills to use make a mask pattern.
THIS WEBSITE IS NOT INTENDED FOR THE PURPOSE OF PROVIDING MEDICAL ADVICE
All information, content, and material of this website is for informational purposes only and is not intended to serve as a substitute of a qualified physician or healthcare provider.
“In settings where facemasks are not available, HCP might use homemade masks (e.g., bandana, scarf) for care of patients with COVID-19 as a last resort. However, homemade masks are not considered PPE, since their capability to protect HCP is unknown. Caution should be exercised when considering this option. Homemade masks should ideally be used in combination with a face shield that covers the entire front (that extends to the chin or below) and sides of the face.”
Article from Courier & Press, Evansville, IND “Citing shortages, Deaconess Health System, including Henderson's Methodist Health, has asked the public to sew face masks for staff fighting coronavirus”.
EDIT 9/2/2021: PDF Face Mask Sewing Pattern Free Download
Download Free PDF Pattern Here
EDIT 4/9/2020: I have written a Mask Making FAQ to address some of the more frequent questions. I hope you find it helpful.
HOW TO SEW A FACE MASK
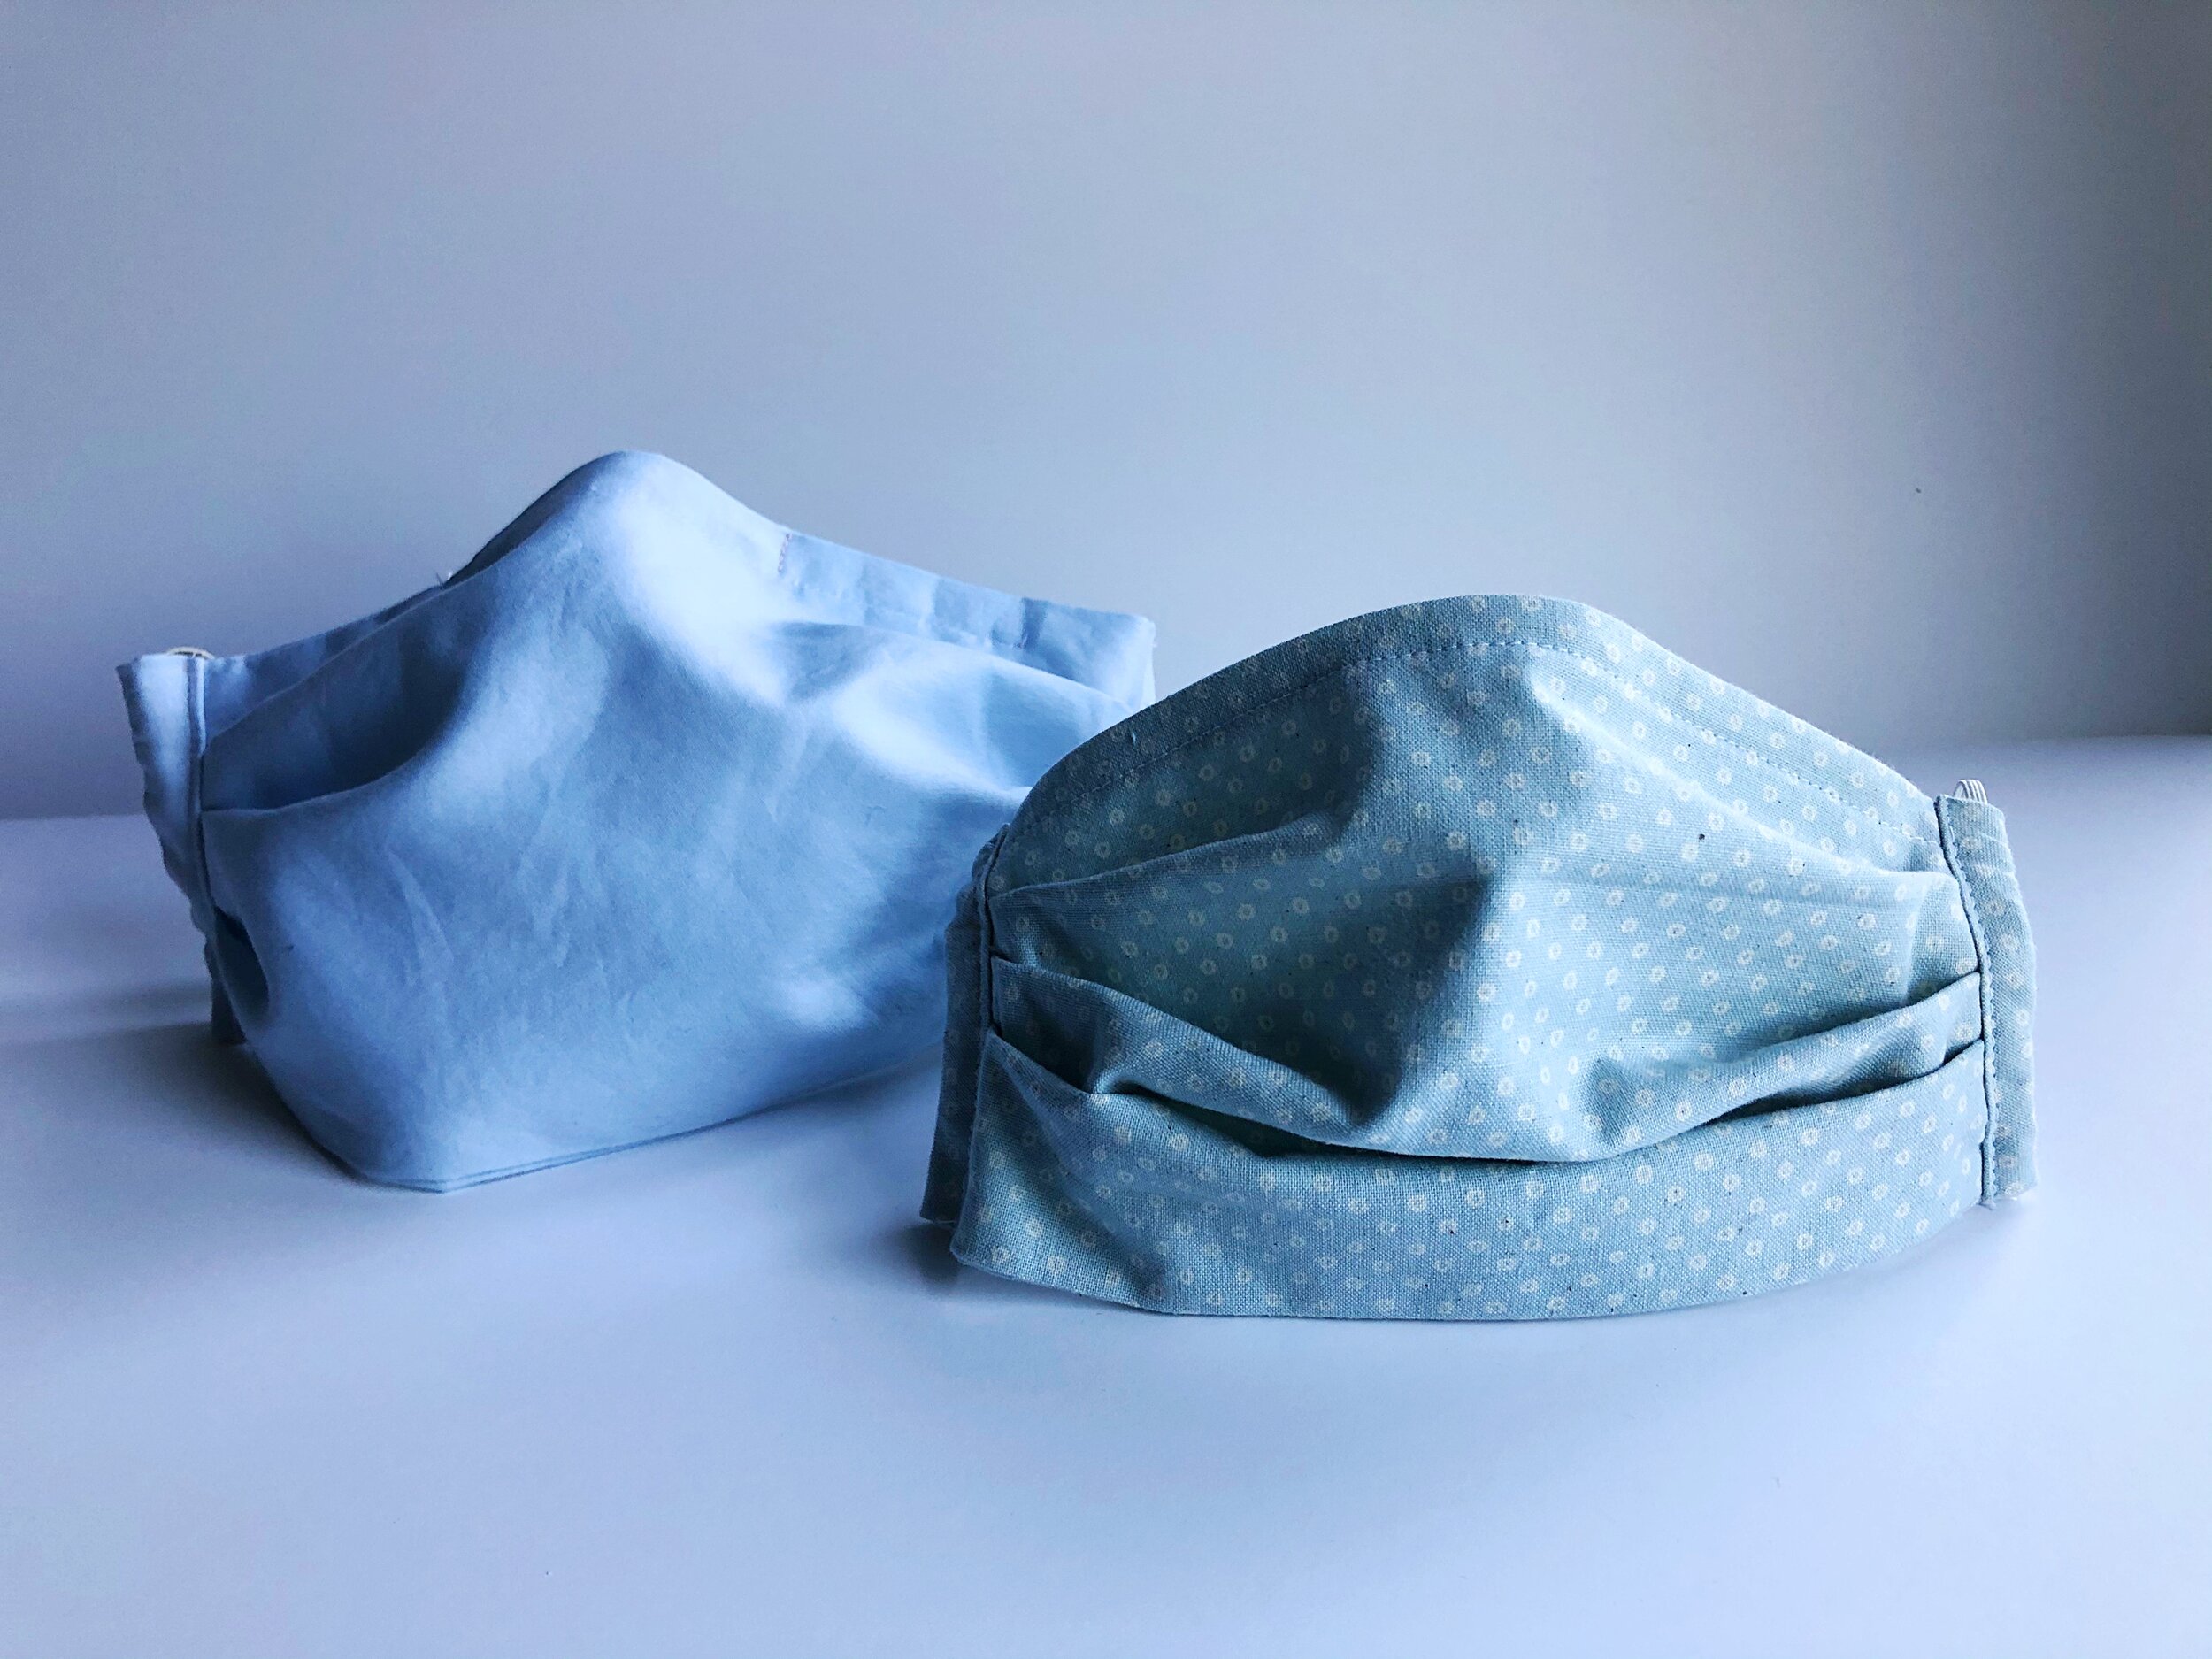
This mask is made of two layers of cotton and can be fastened with elastic or ribbon and tied around your head. After wearing it around for a bit, it is surprisingly breathable.
Instead of recommending fabric to you, I have linked to a couple of articles above. Please read and decide for yourself which fabric you feel is best to use.
This mask pattern and tutorial has three variations. The first is a standard two layer mask with elastic to fit around your ears.
The second variation is to add ties to the mask so that it loops and ties around the head.
The final variation is to adapt the mask to allow it to hold a shield or filter.
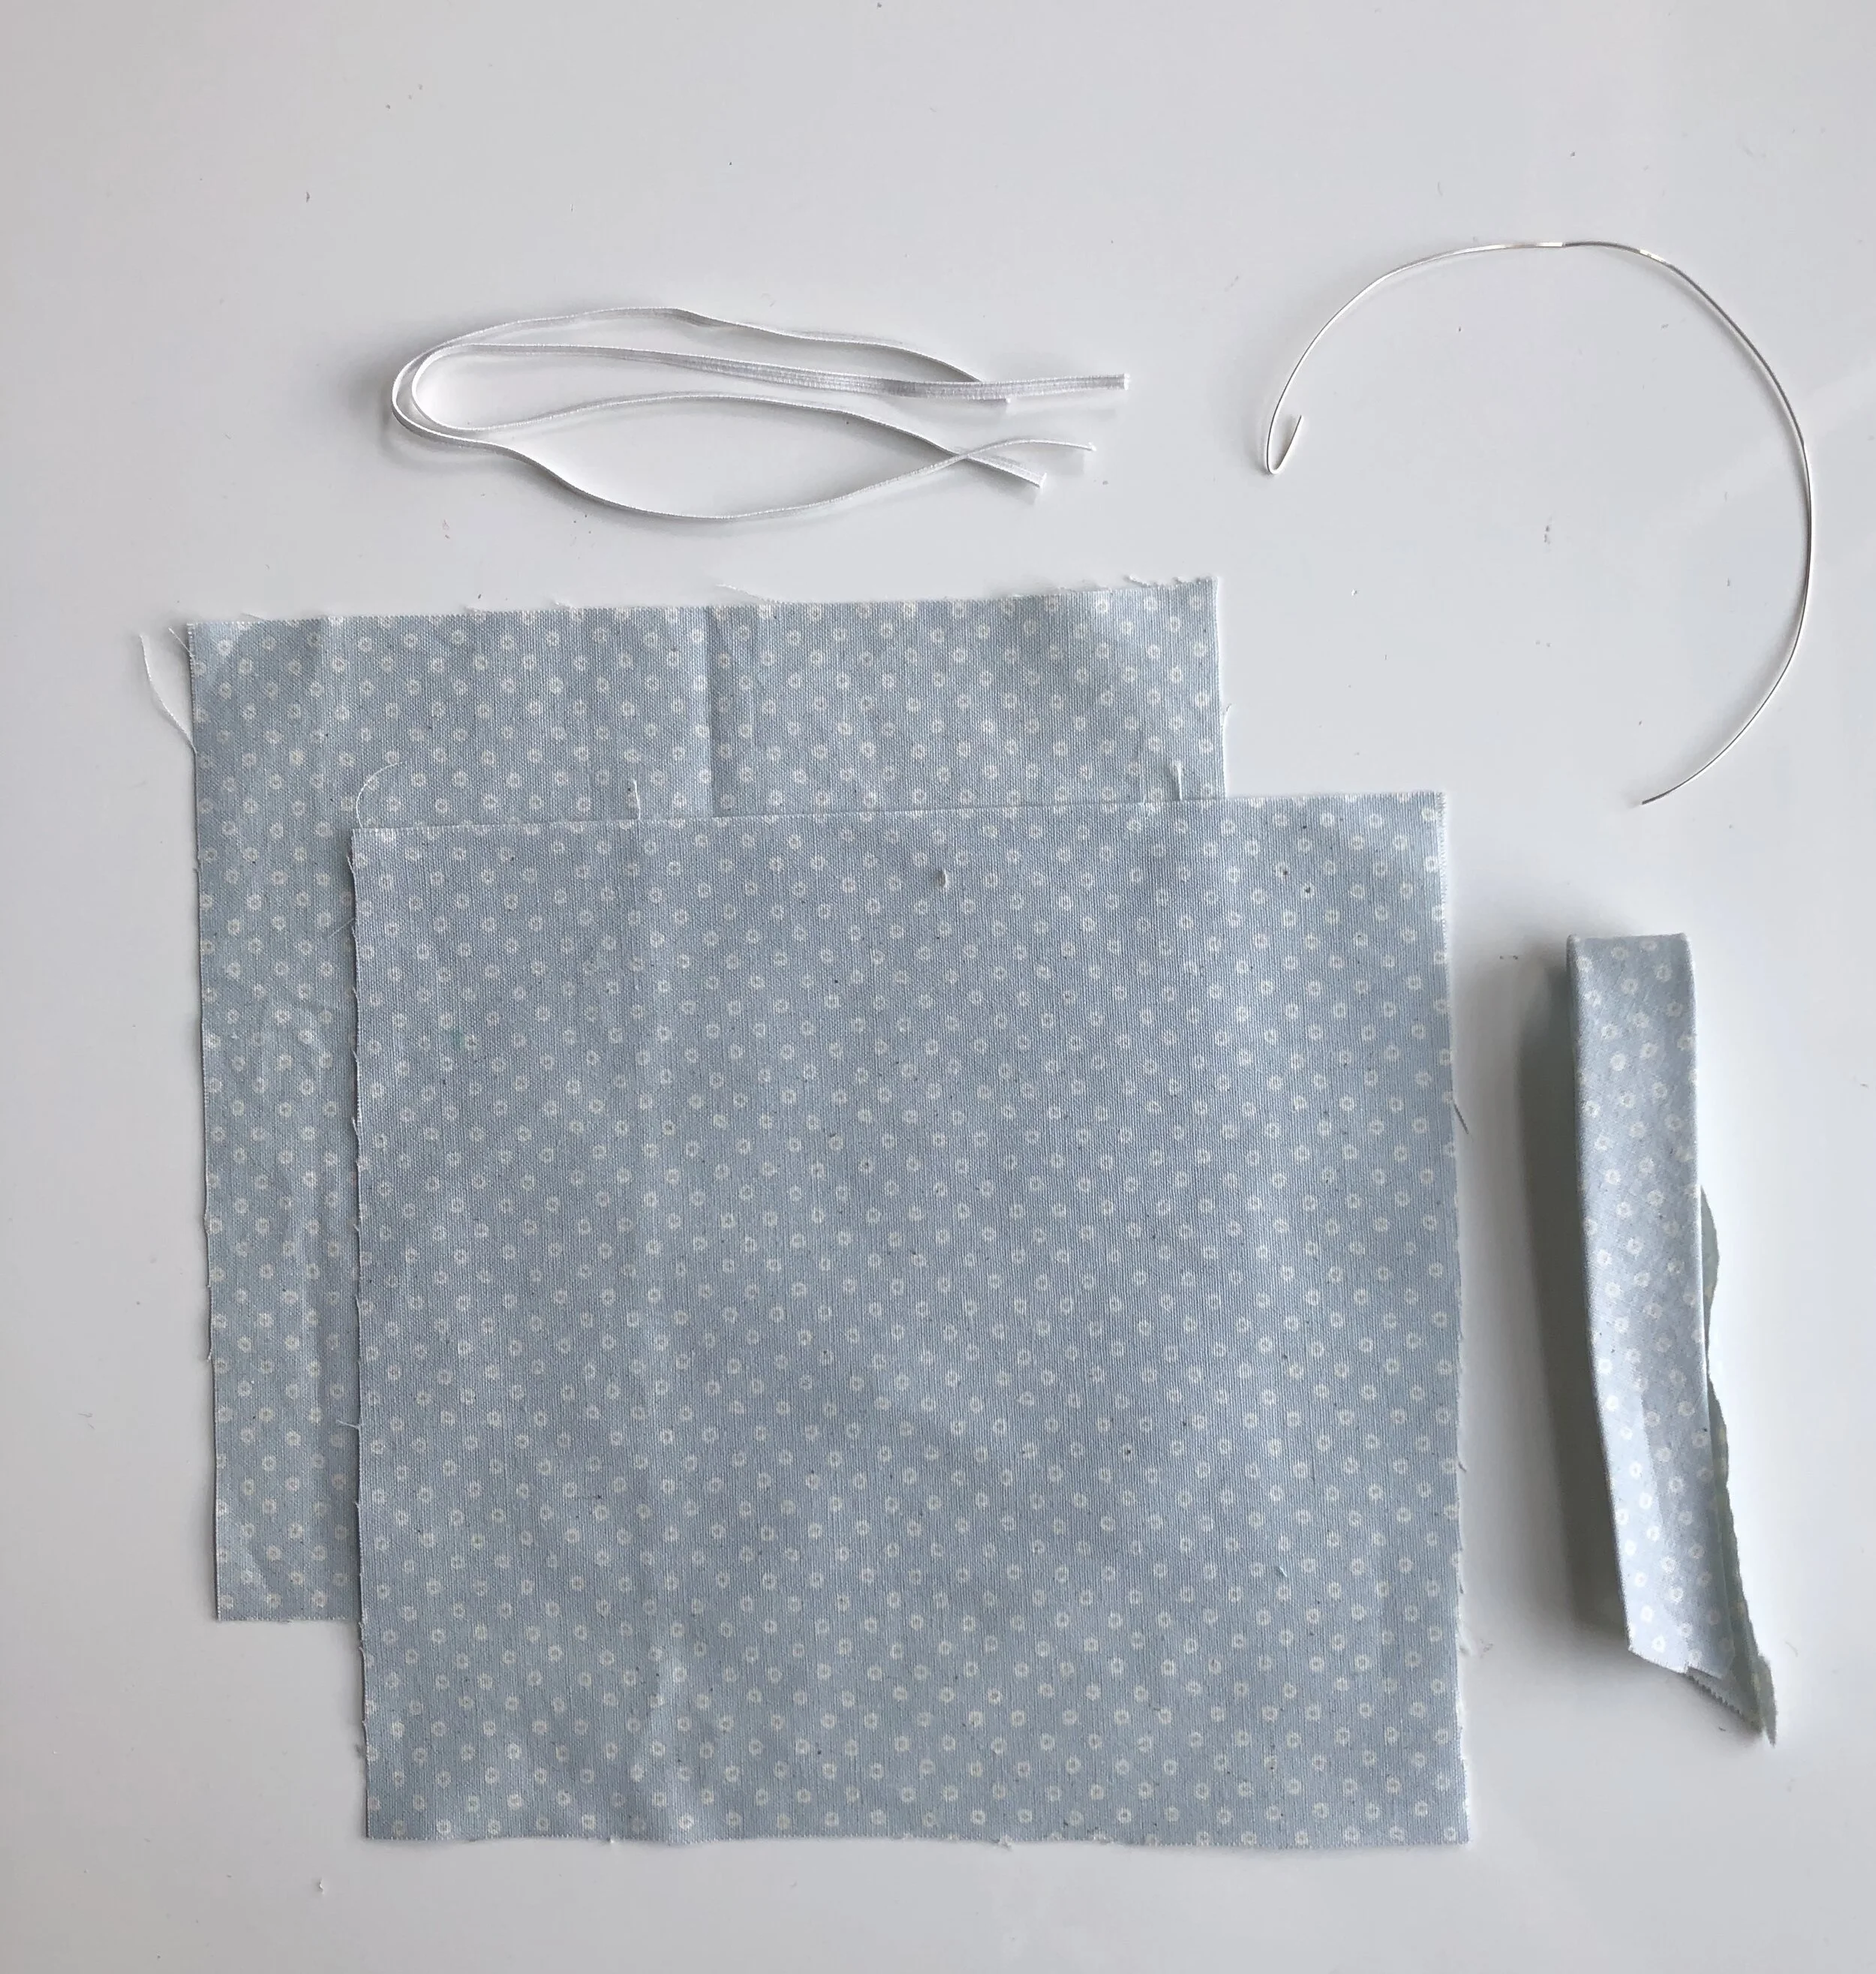
SUPPLIES
Fabric, Refer to CDC Guidelines *Instead of recommending fabric to you, please read this article and decide for yourself which fabric you feel is best to use.
2 - 10” pieces of 1/4” -1/2” flat elastic or 2 yards of 1/2” ribbon
7.5” of metal wire , I used 16 gauge wire, but would image that a straightened out paper clip would likely work in a pinch.
8” of Bias tape OR 2 rectangles of fabric 3 x 4.5”
Filter for pocket option
SIZE
Finished Dimensions: Approximately 3.5” x 7”
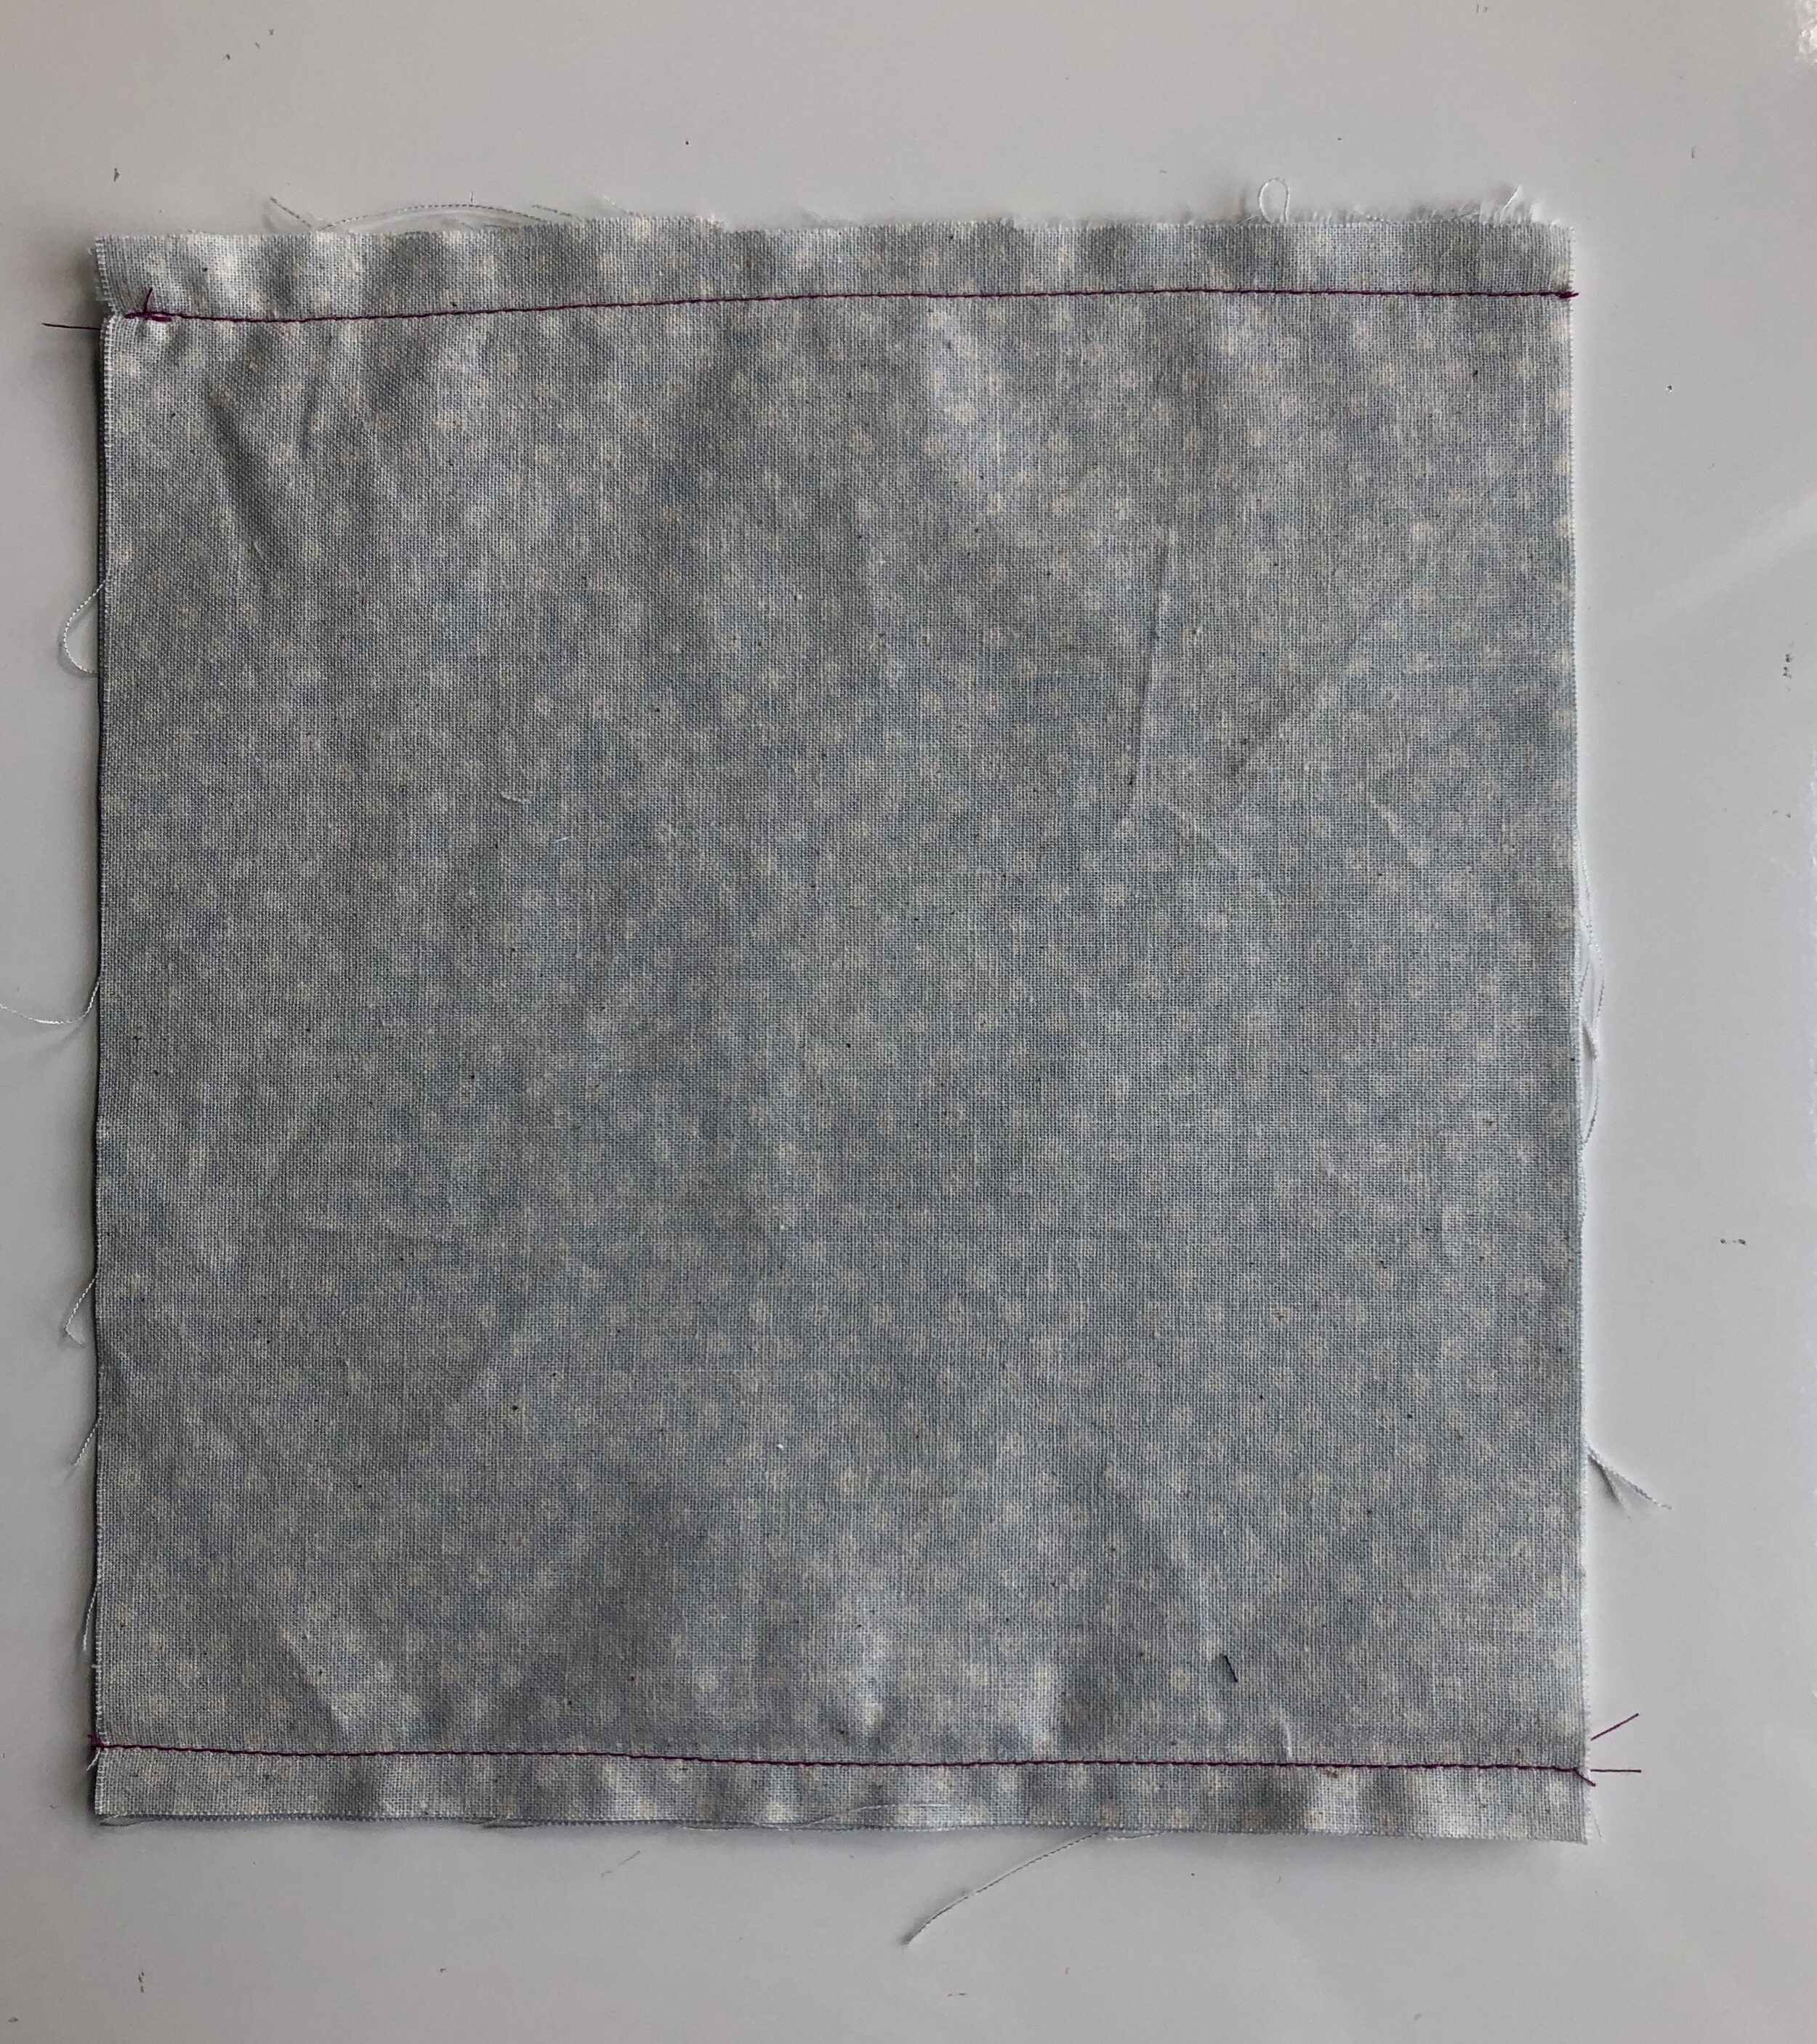
PREPARE
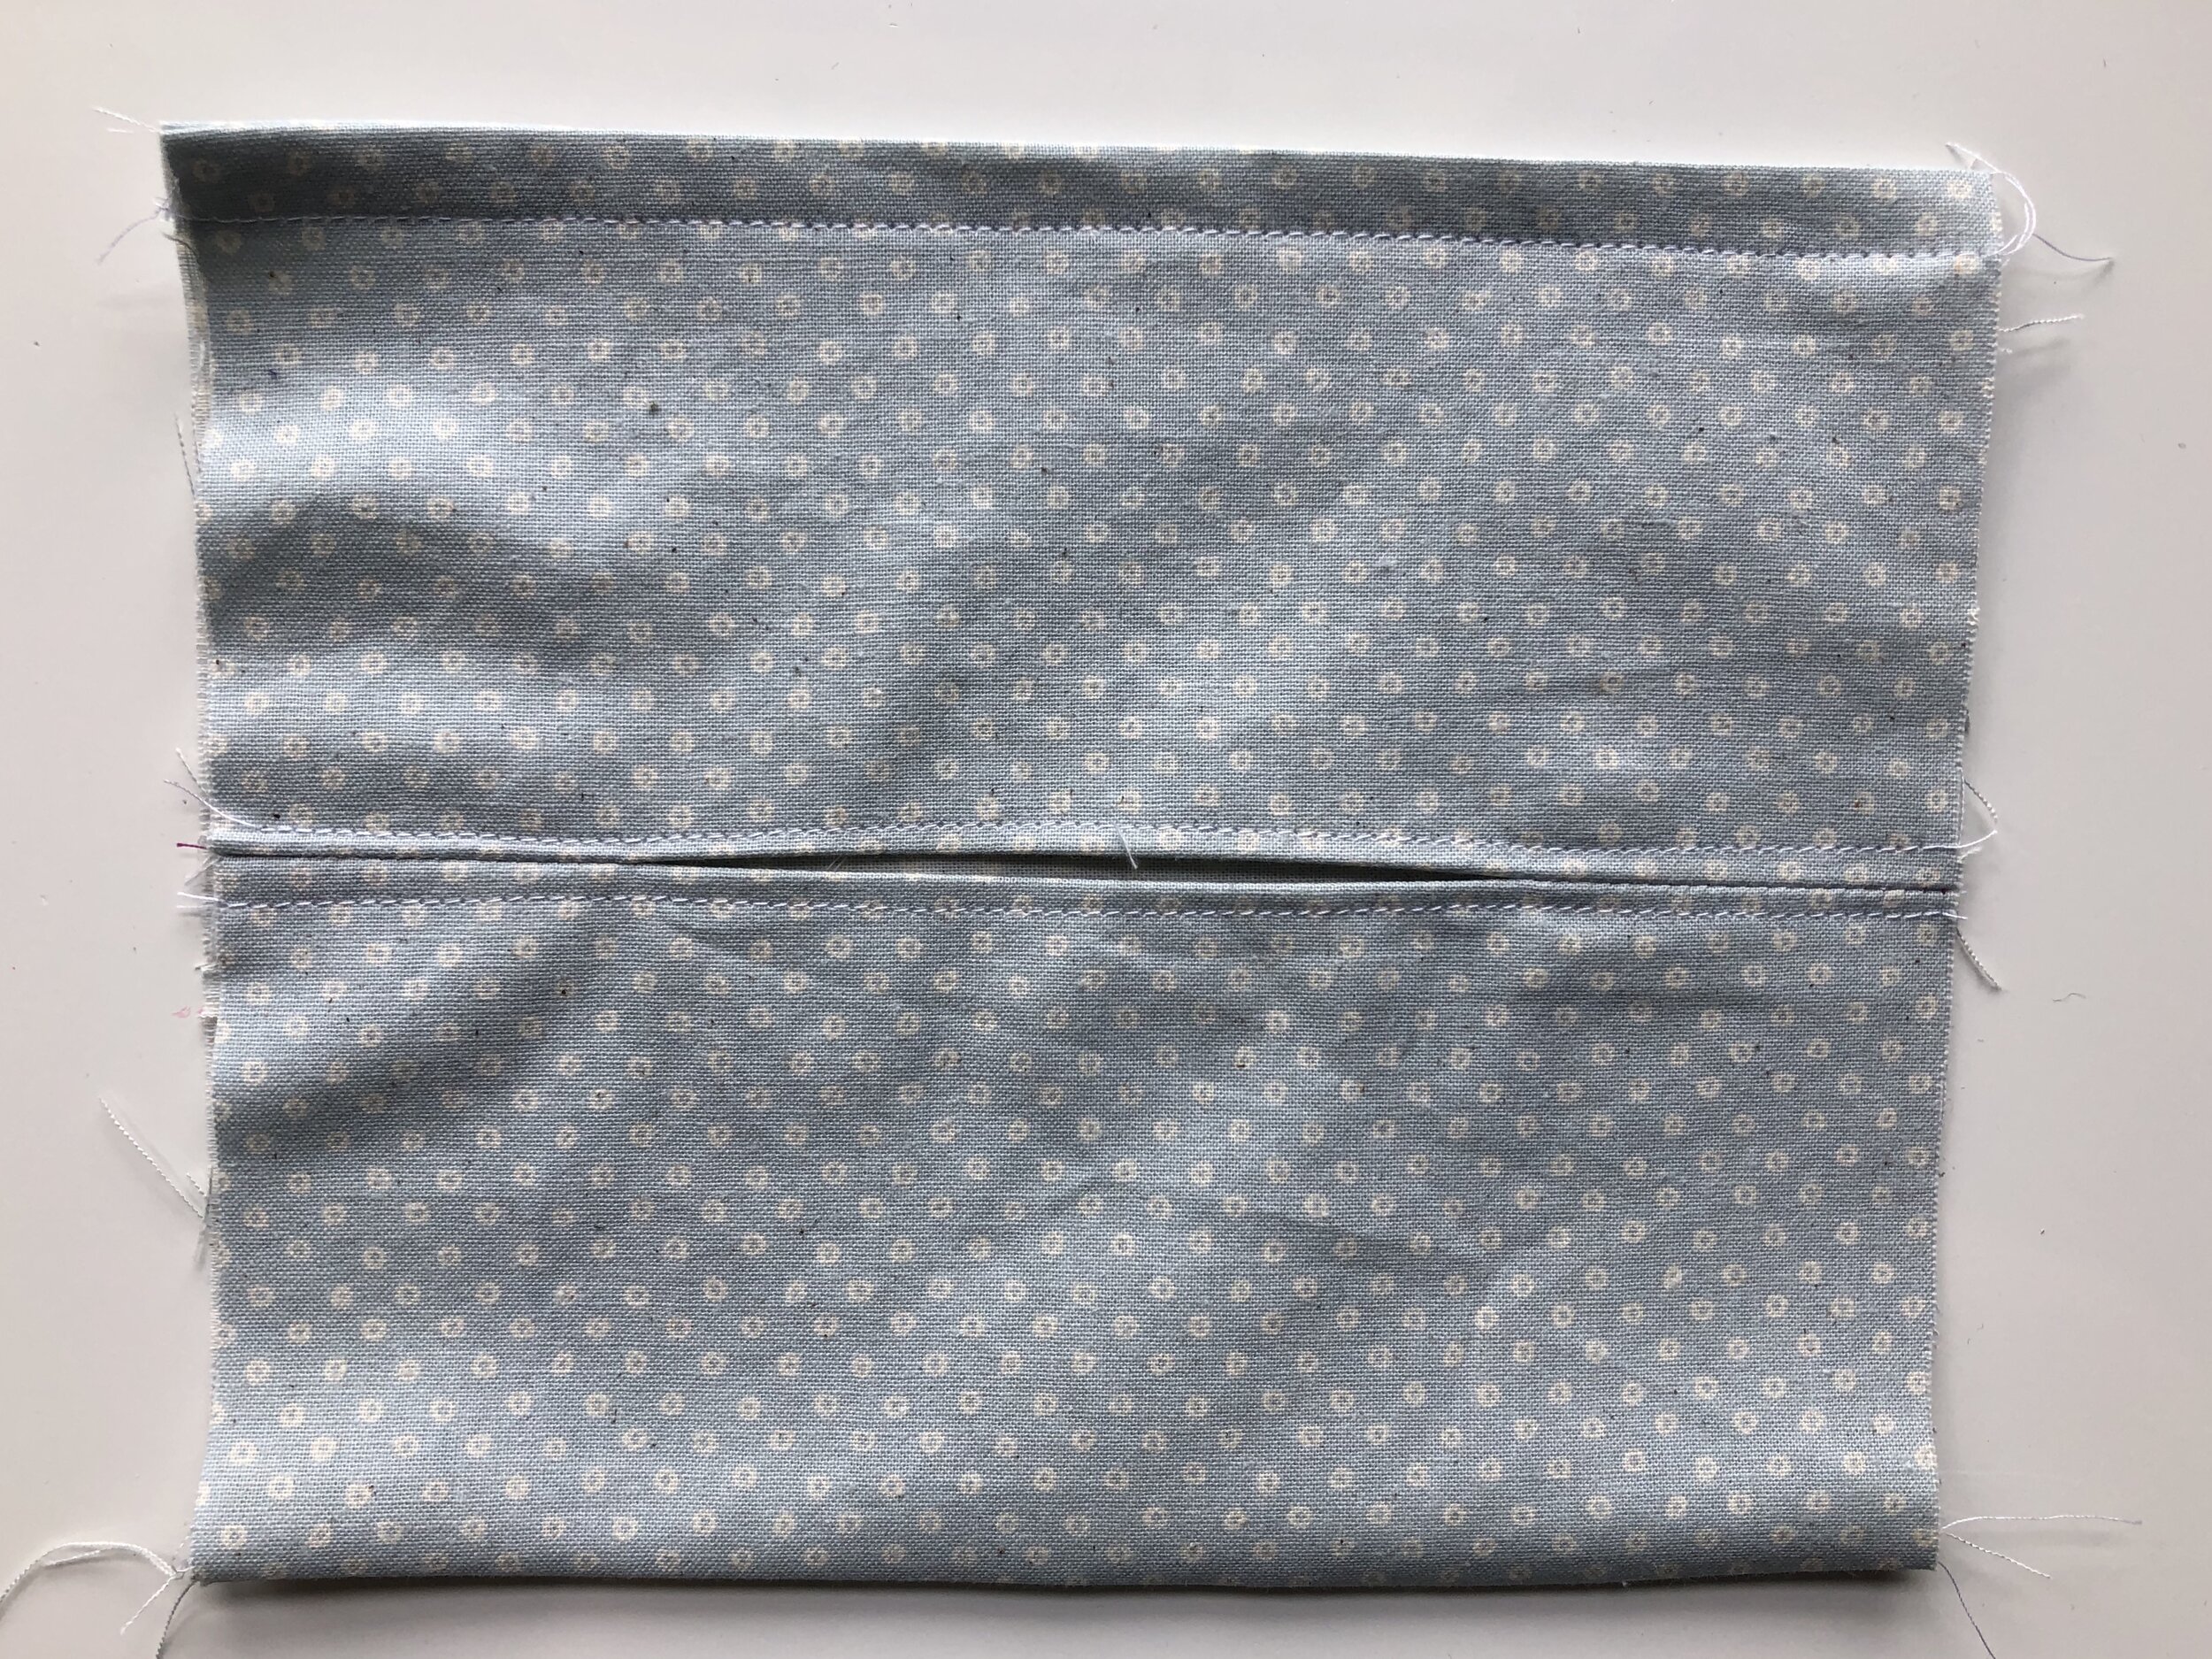
Cut 2 pieces of fabric in a 7.5” square. Pin and sew across the top and the bottom using a 1/2” seam allowance.
How to Sew a double layered face mask with elastic
Trim the seam allowance, turn to the right side and press.
CASING
To form a casing, stitch through both layers along the top edge, again with a 1/2” seam allowance.

Fold the leading edge of the wire in just a bit so the it doesn’t poke through the fabric. Insert into the casing. Bend the opposite side.


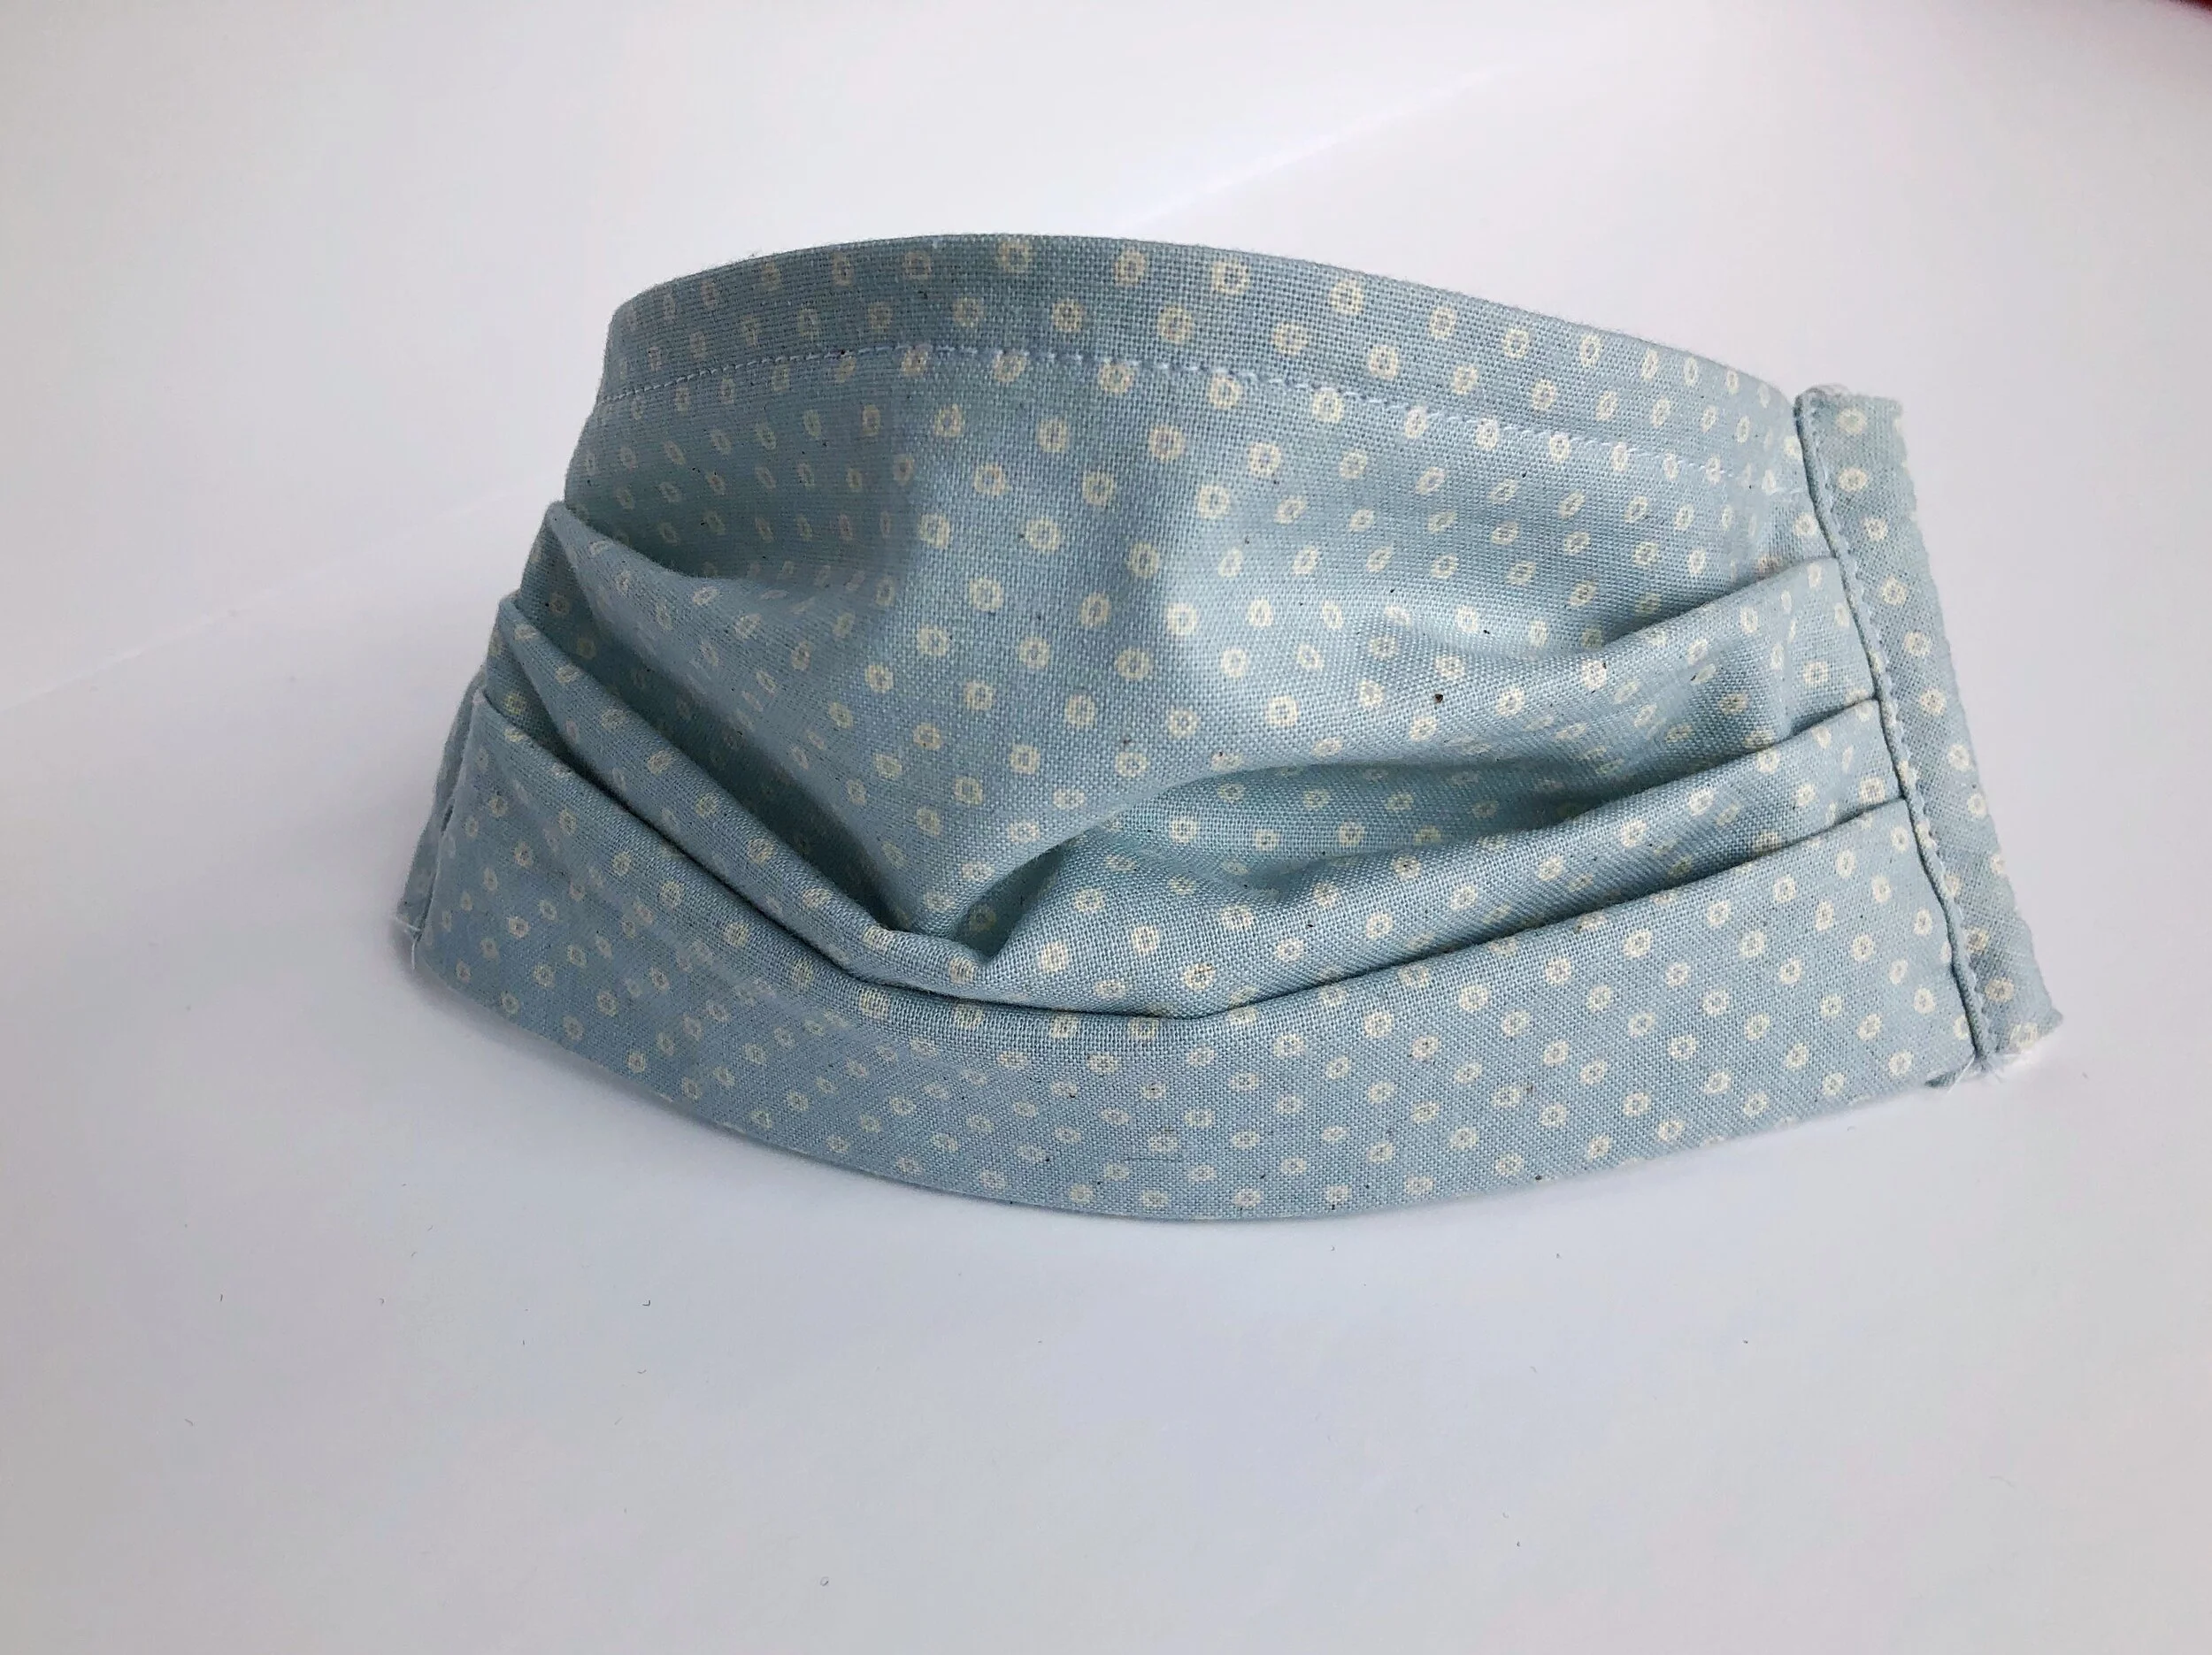
PLEATING THE MASK
To form the pleats, mark your mask at the 1 3/4”, 3 1/2” and 5 1/4” points from the top. This will be your guide to fold the pleats. If you aren’t the exacting type of person, just wing it. The mask needs to be pleated so that it is 3.5” tall.
The image below is not sewn, however, it is cut to the same dimensions as if it were sewn with a 1/2” seam allowance at top and bottom.
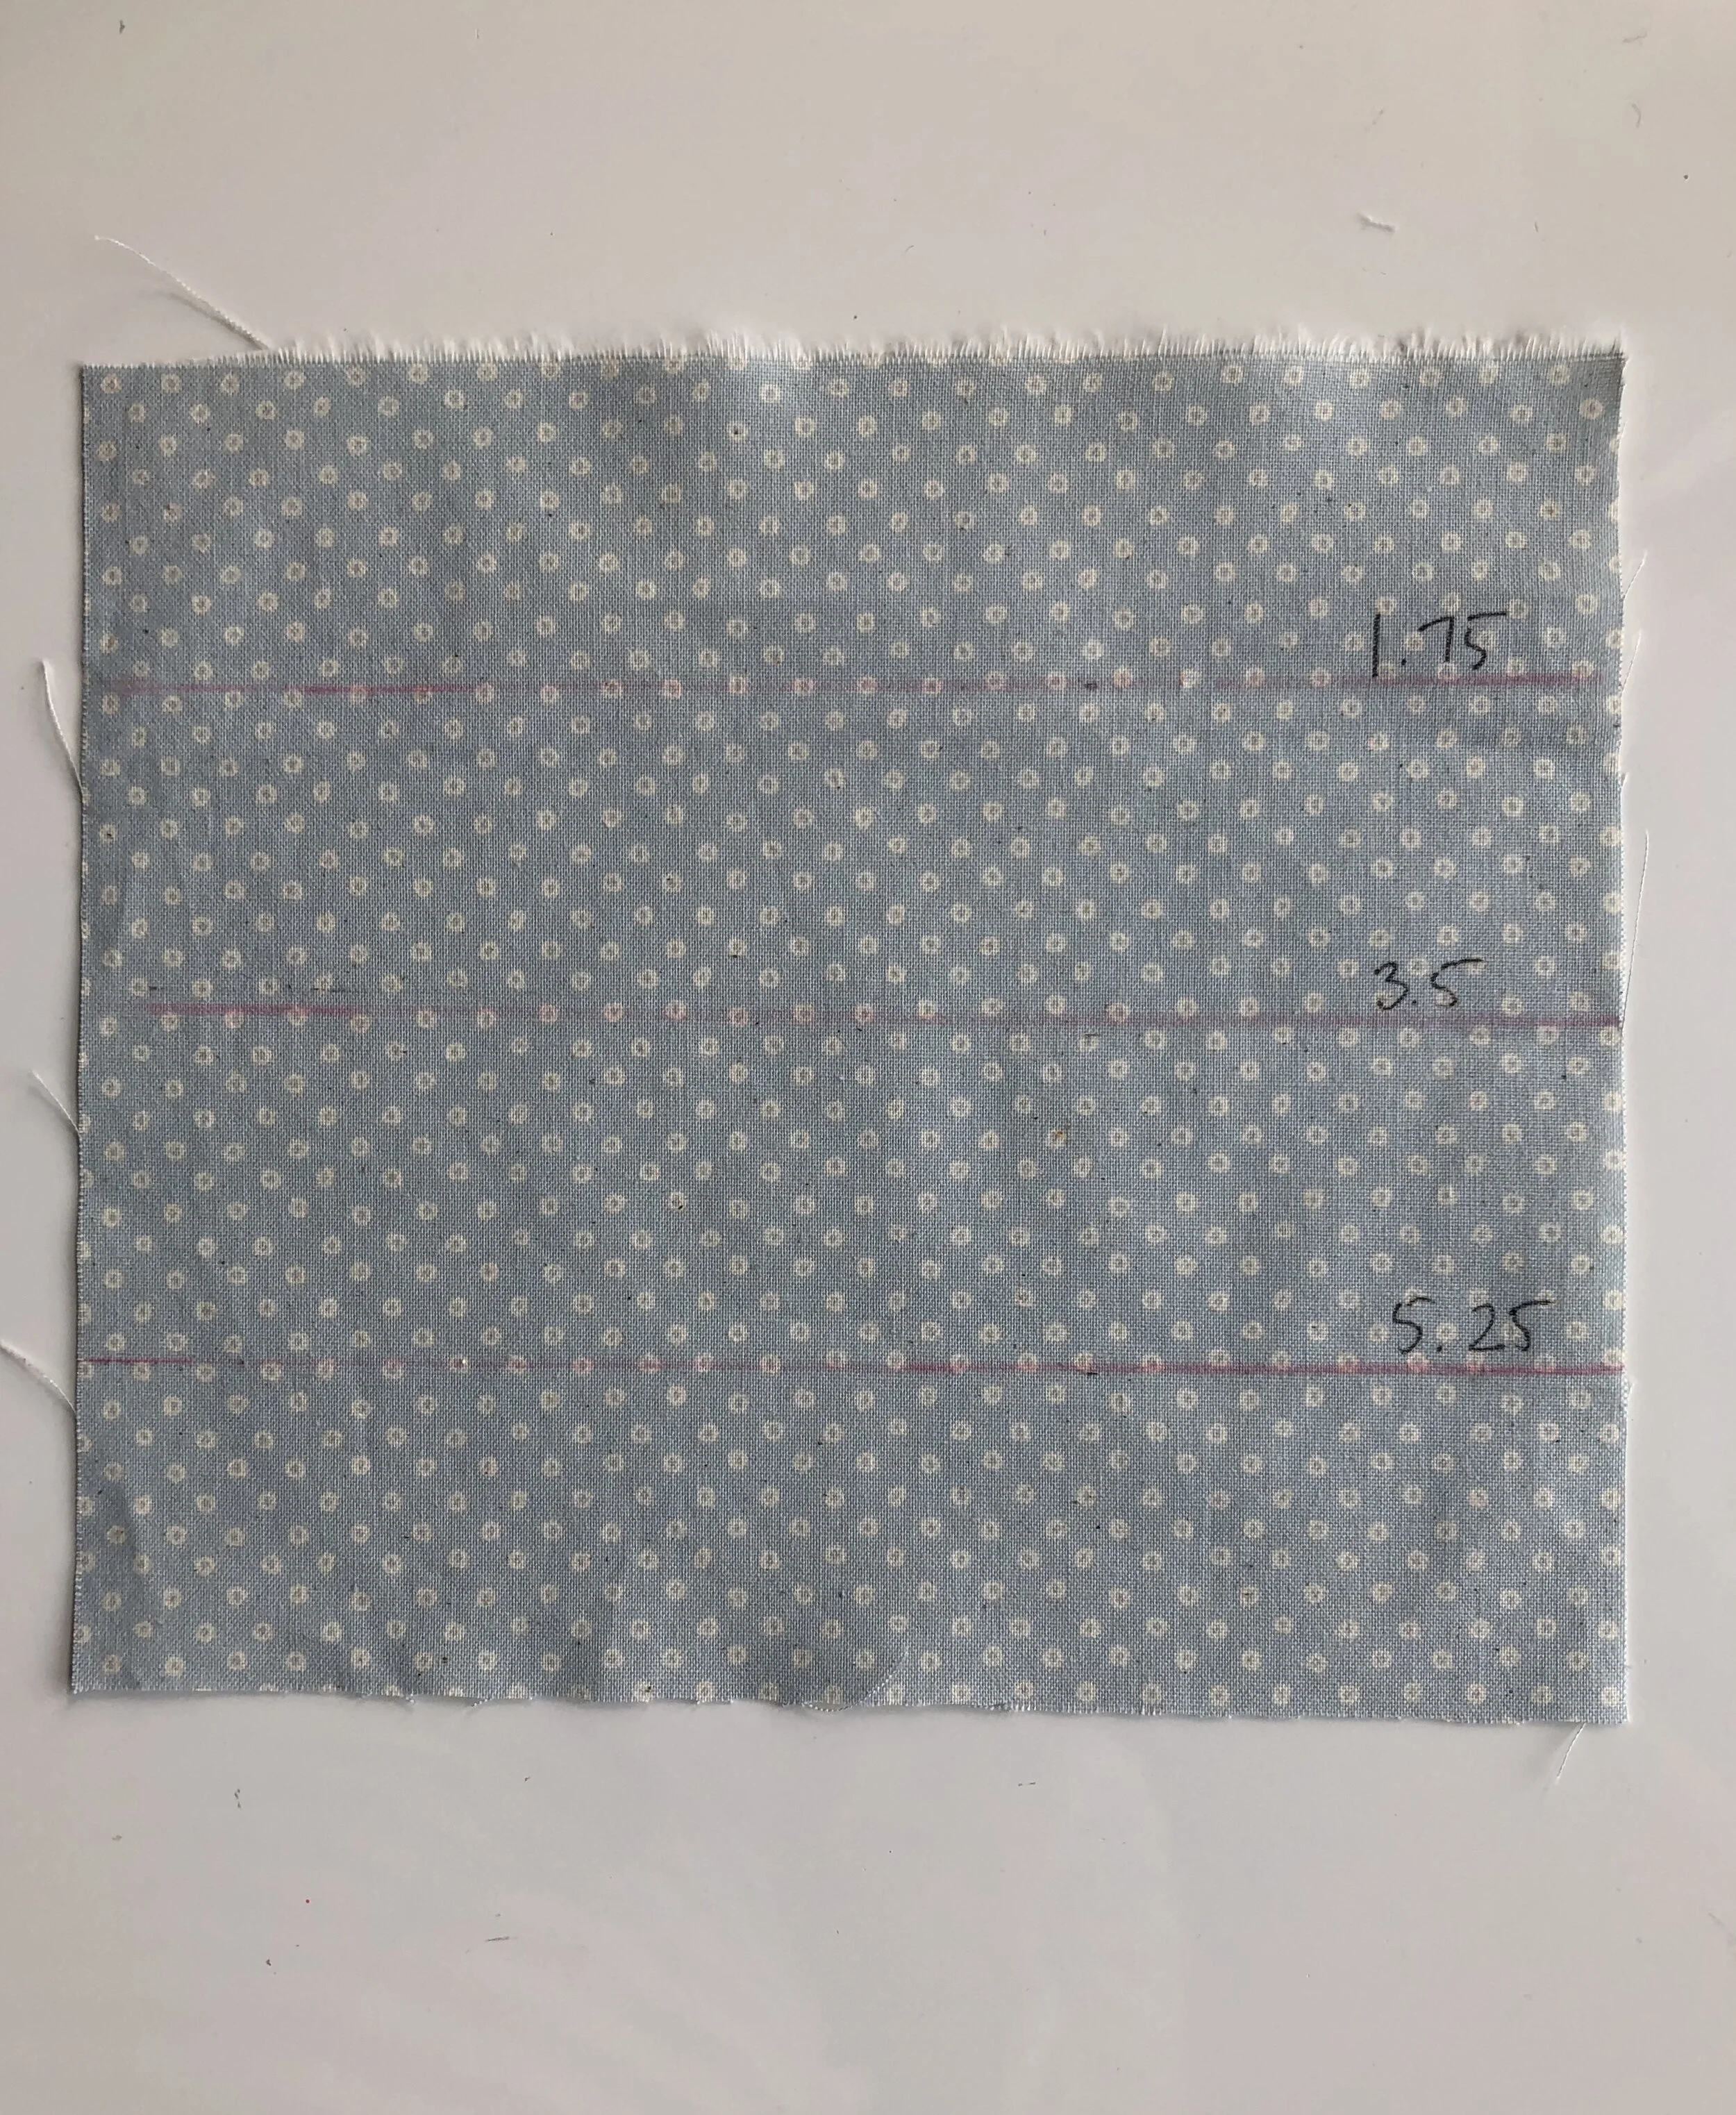
Each pleat is 1/2” deep. Fold pleats up, toward the top of the mask and pin.

Stitch along pleats using a 1/2” seam allowance. Repeat for opposite side.


APPLYING BIAS
Align folded edge of bias tape along the line of stitching. Trim tape to 1” longer than the side of your mask. Fold and press edge of top and bottom of bias 1/2” toward the inside. Repeat for opposite side.

Pin and stitch right over the previous row of stitching. (If you do not want to make bias tape, keep reading. I have another option for you.)

Fold bias inward along the fold line. Pin in place. Topstitch the edge of the bias.

FINISHING
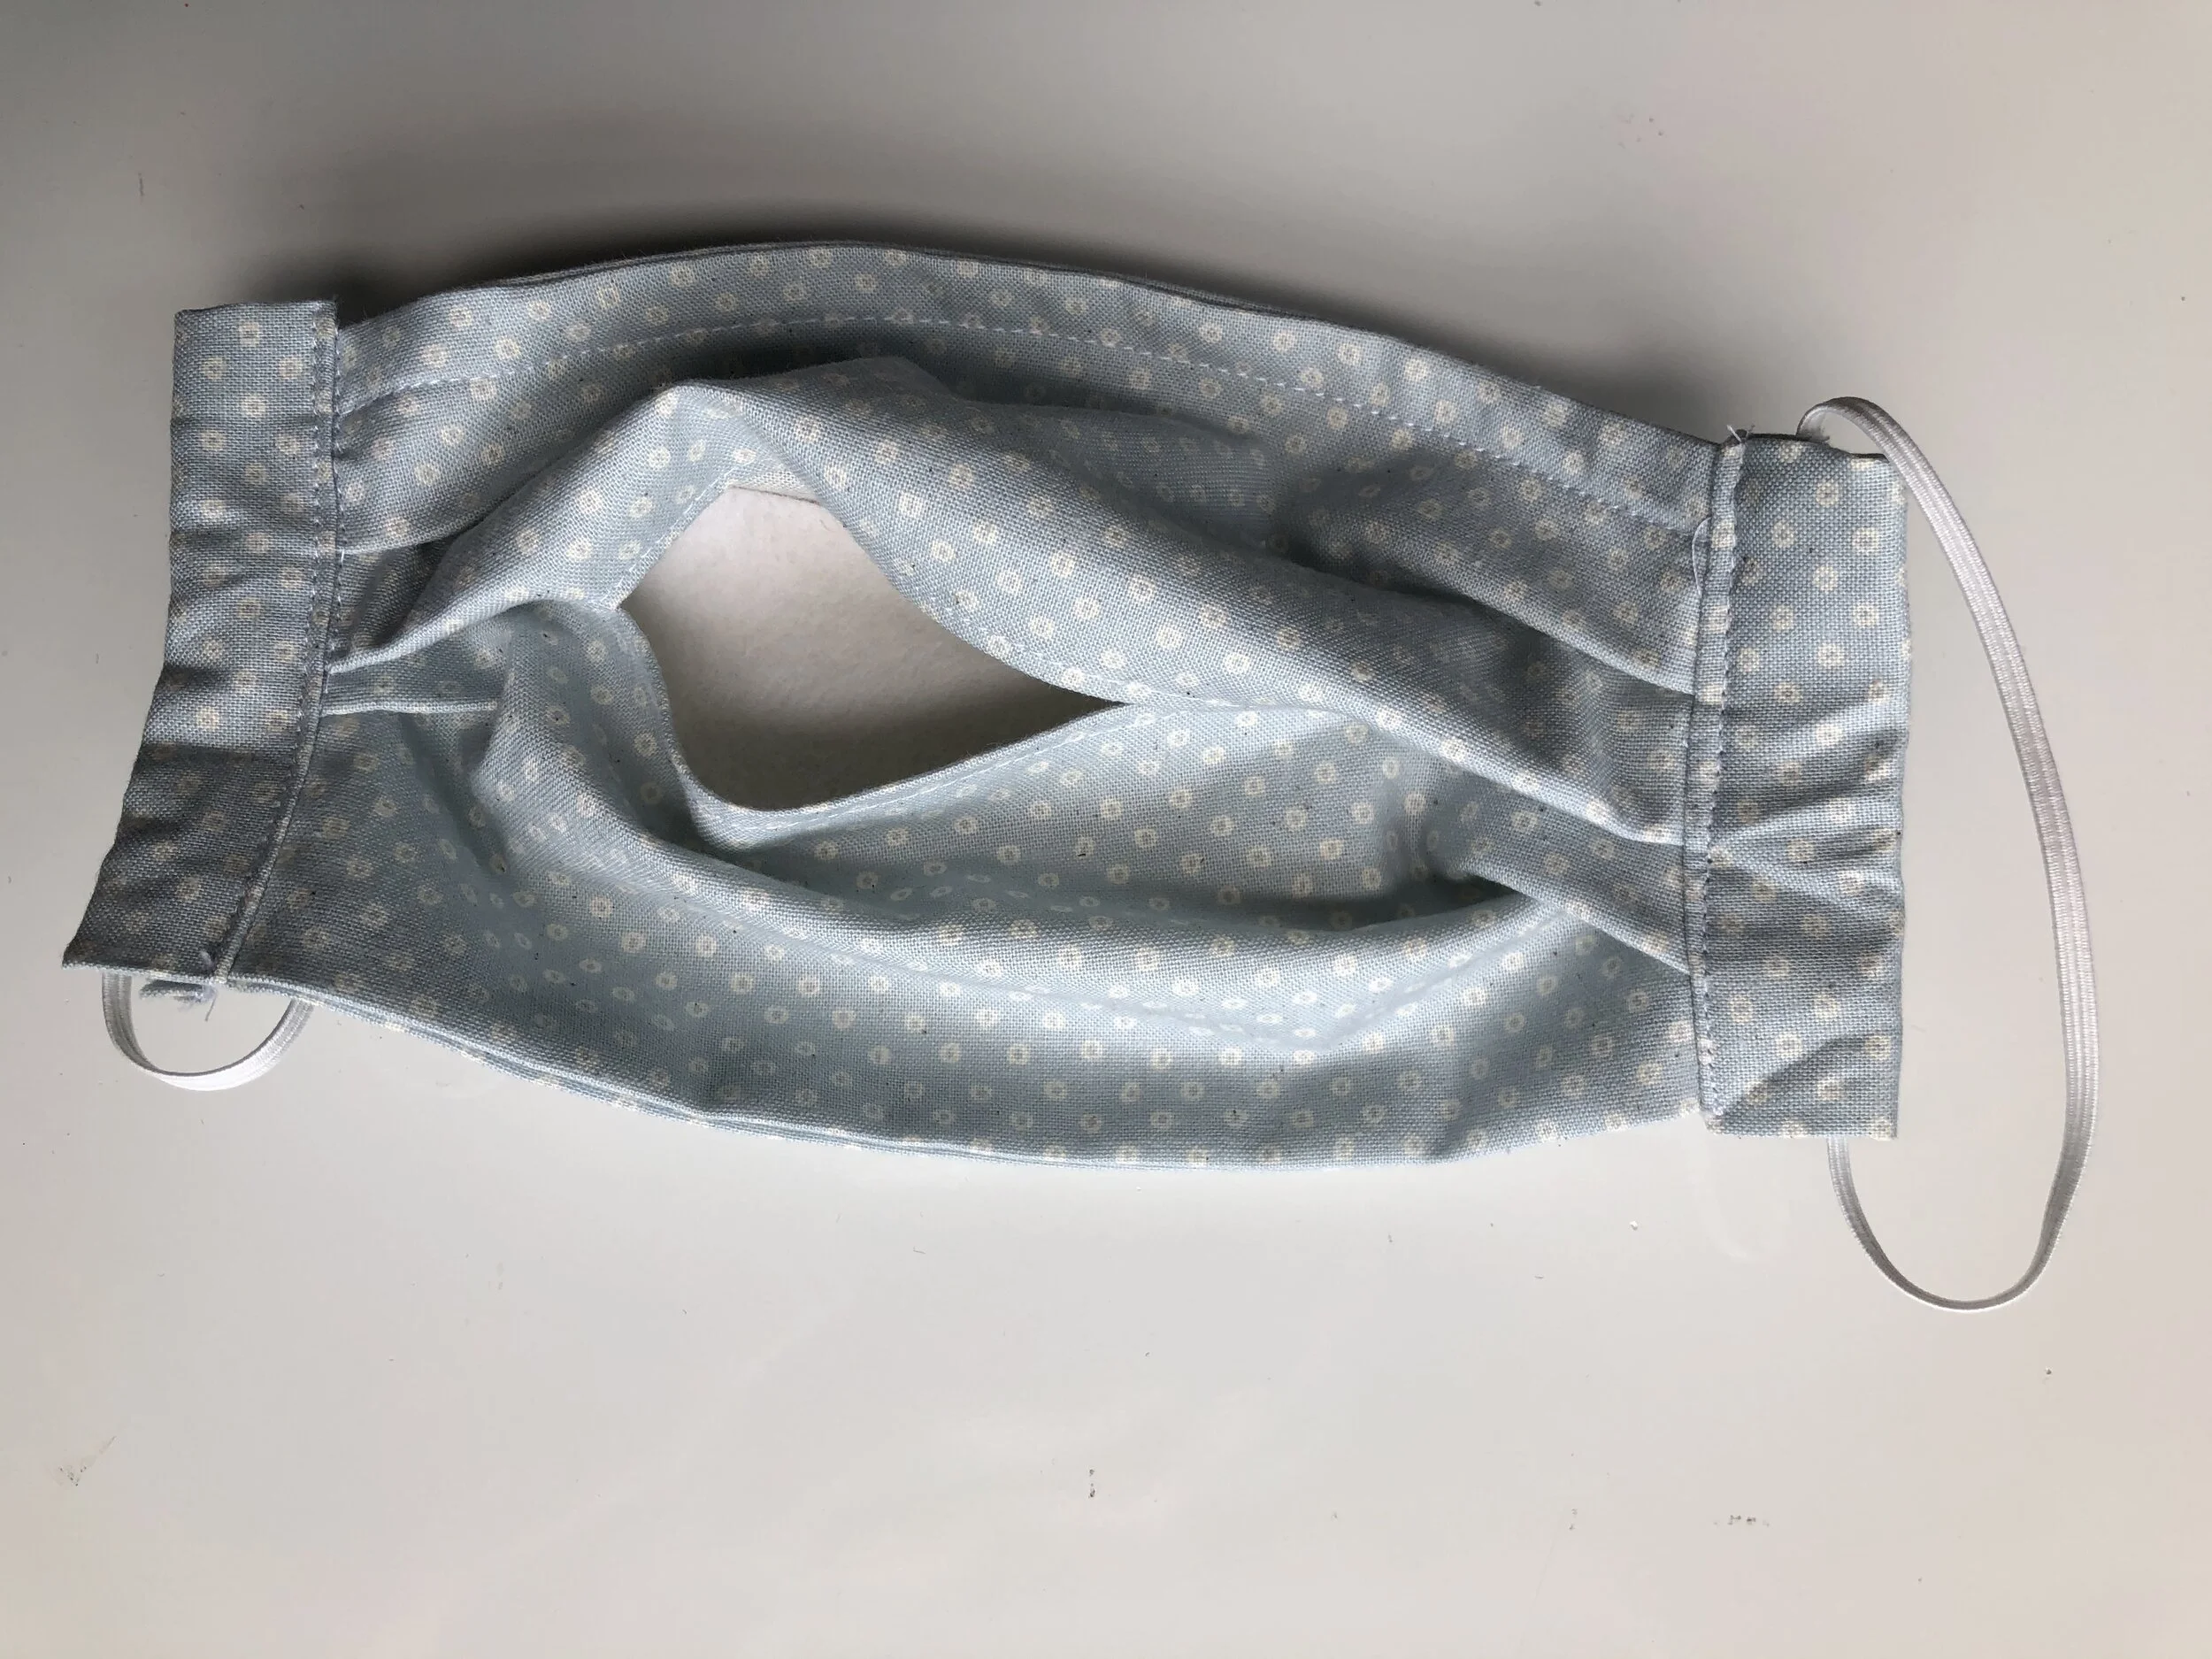
Take one piece of elastic and using a safety pin, draw it through the mask side casing. Tie in a slip knot. Repeat for the opposite side.

Trim knot ends and pull through the casing to conceal. Repeat for the opposite side.
Your mask is complete! Try it on and bend the wire for a comfortable fit.
HOW TO SEW A FACE MASK WITH TIES
This pattern has a lot of flexibility as far as supplies and technique go.
The second variation involves just making the side edge casing a little wider to allow for ribbon to be drawn through.

SUPPLIES
Fabric, Refer to CDC Guidelines *Instead of recommending fabric to you, please read this article and decide for yourself which fabric you feel is best to use.
2 yards of 1/2” ribbon
7.5” of metal wire , I used 16 gauge wire, but would image that a straightened out paper clip would likely work in a pinch.
2 rectangles of fabric 3 x 4.5”
Filter for pocket option
SIZE
Finished Dimensions: Approximately 3.5” x 7”
Follow directions up until the bias tape application. Instead of bias tape, cut 2 rectangles of fabric 3” x 4.5”. Press the long sides in 1/2”. Press shorter sides in 1/2”.

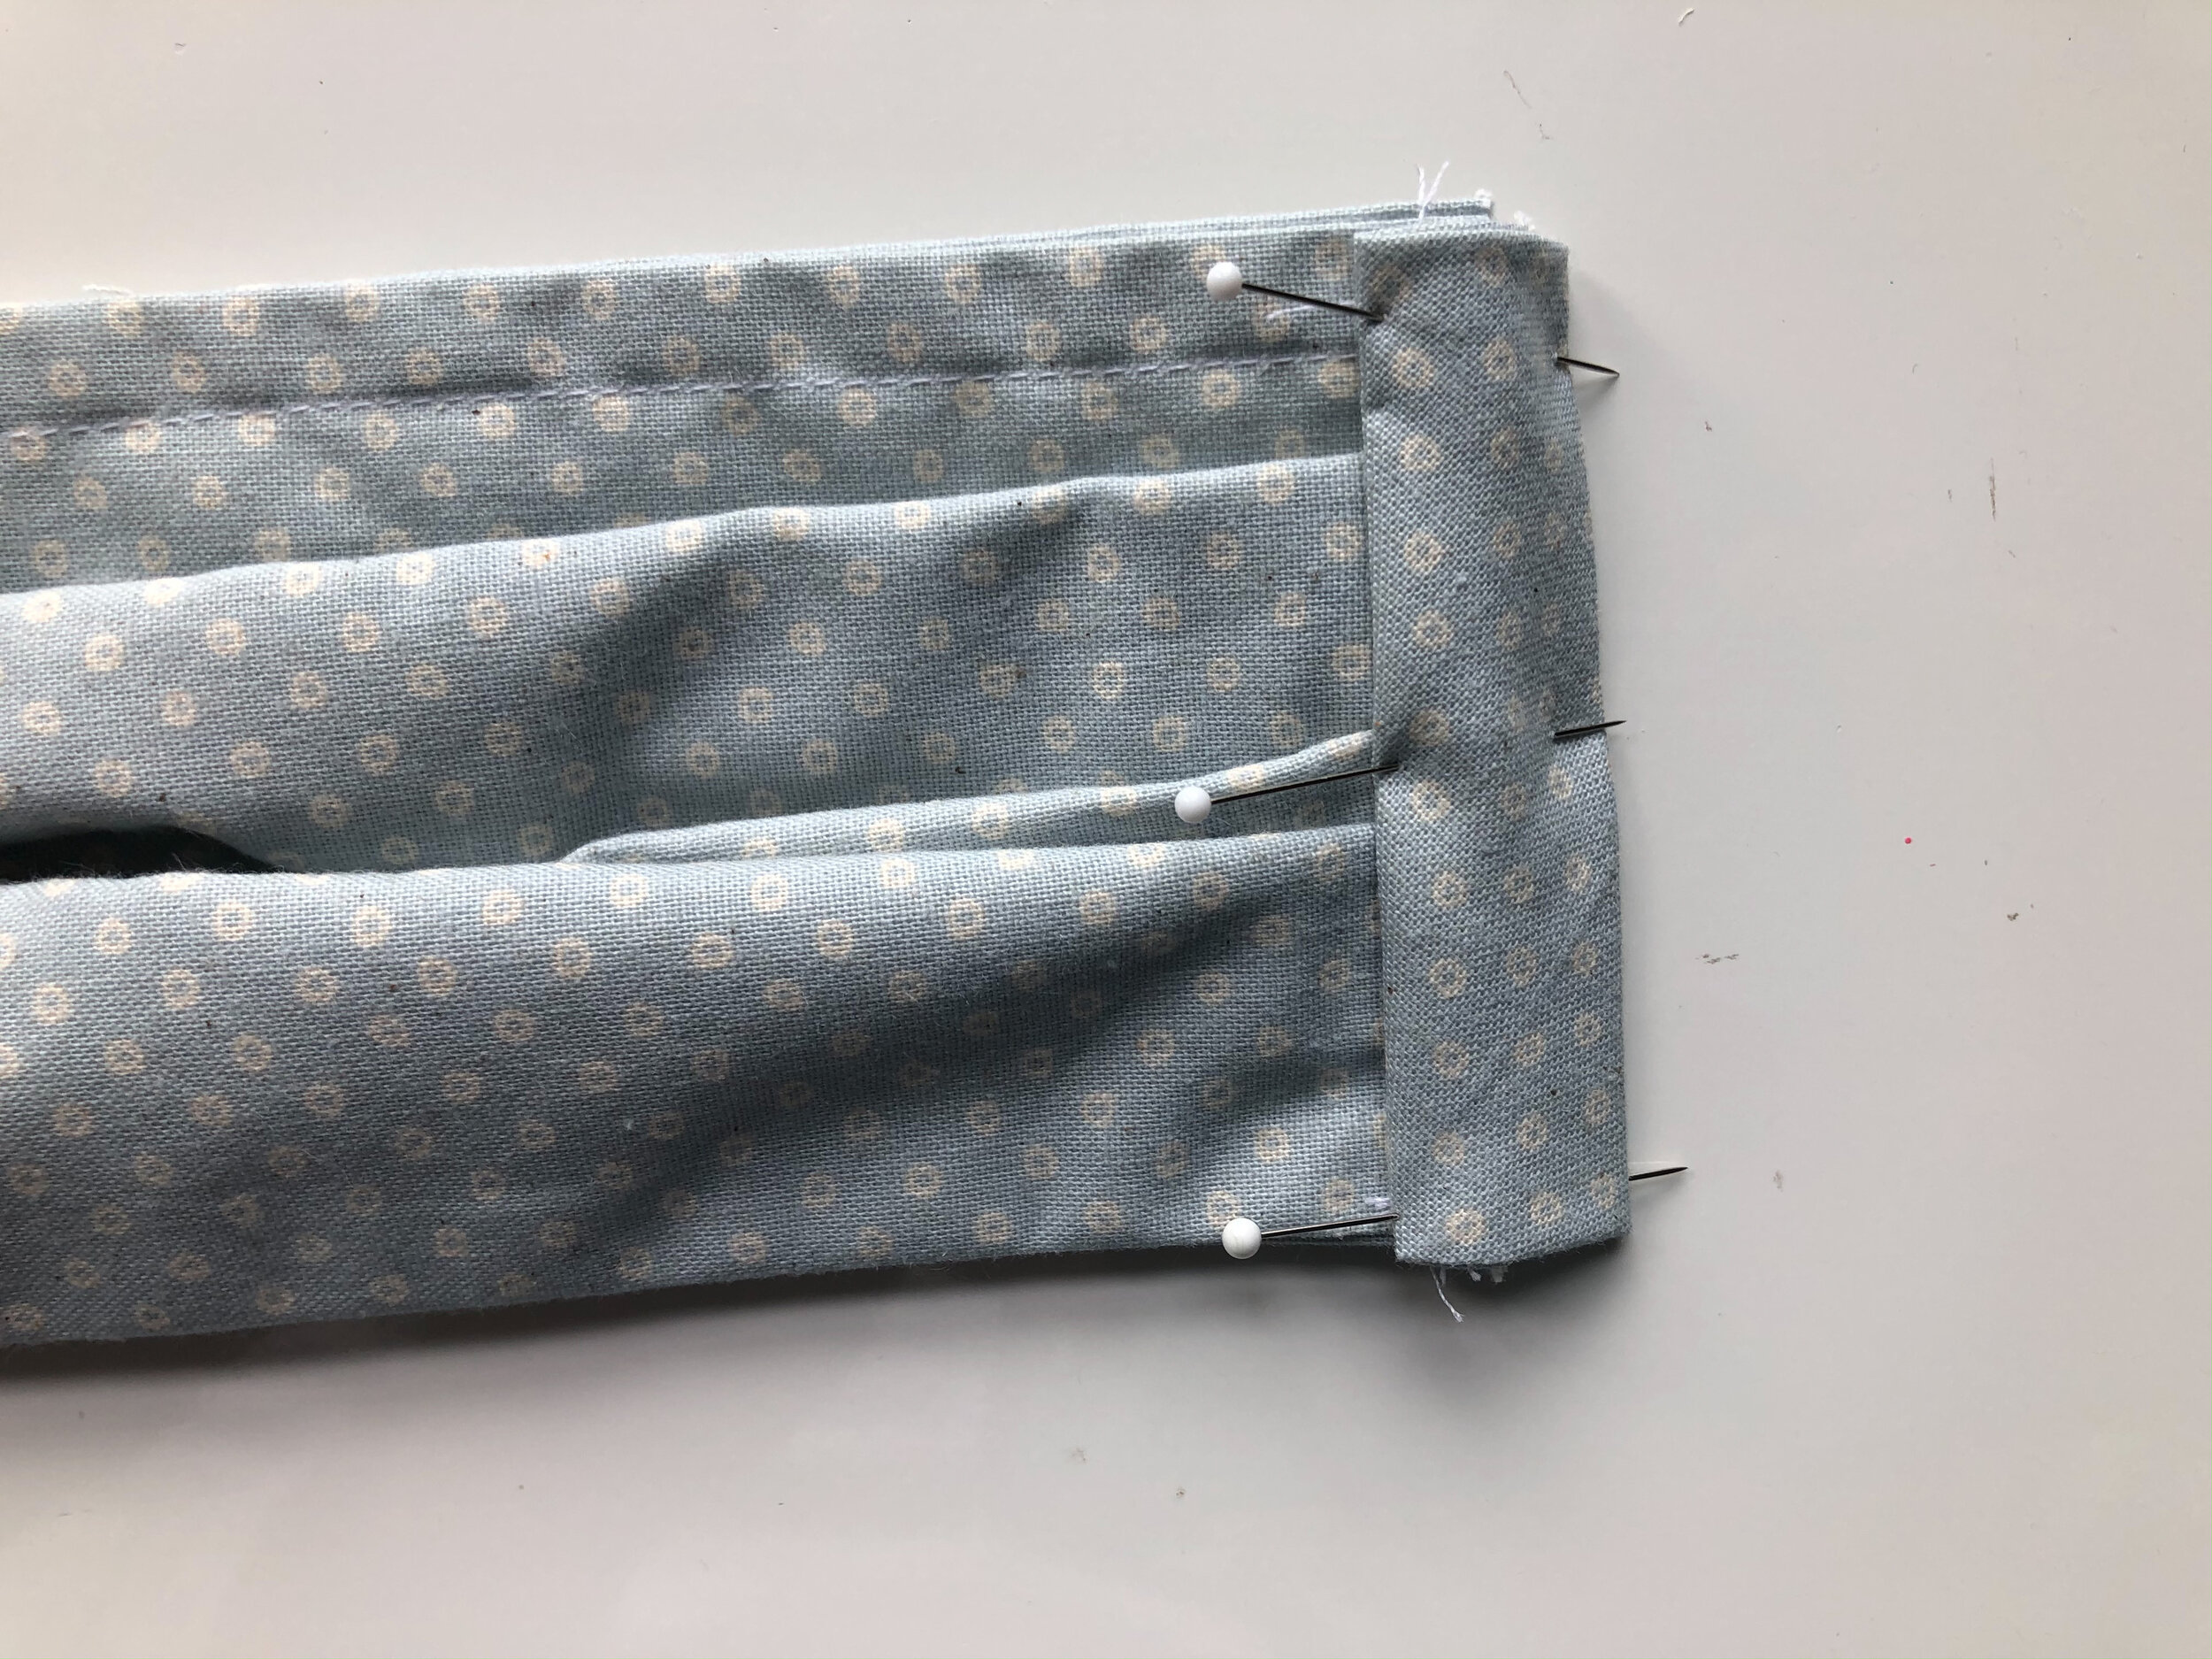
Align the folded edge of the fabric along the line of stitching in the same manner as the bias tape application. Folding and press the edges of the top and bottom 1/2” toward the inside to conceal raw edges. Repeat for opposite side.
See section Applying Bias for step by step pictures. The fabric squares are applied exactly like the bias tape- just wider and a bit easier to handle for beginners.
Topstitch along the edge of the casing.
This casing is nice and wide and should easily accommodate a 1/2” wide ribbon or twill tape.

Pin the edge of a 36” long piece of ribbon or twill tape to a safety pin and pull through casing. Repeat for opposite side.
Try on and tie for fit. Feel free to use a longer or shorter length of ribbon.


UPDATE- HOW TO MAKE A FACE MASK WITH A POCKET FOR A FILTER OR SHIELD
For those of you who would like to make a mask with a pocket for a filter, here are the steps to create that variation.
Cut one square 7 1/2”
Cut 2 rectangles 7 1/2 x 4 1/4
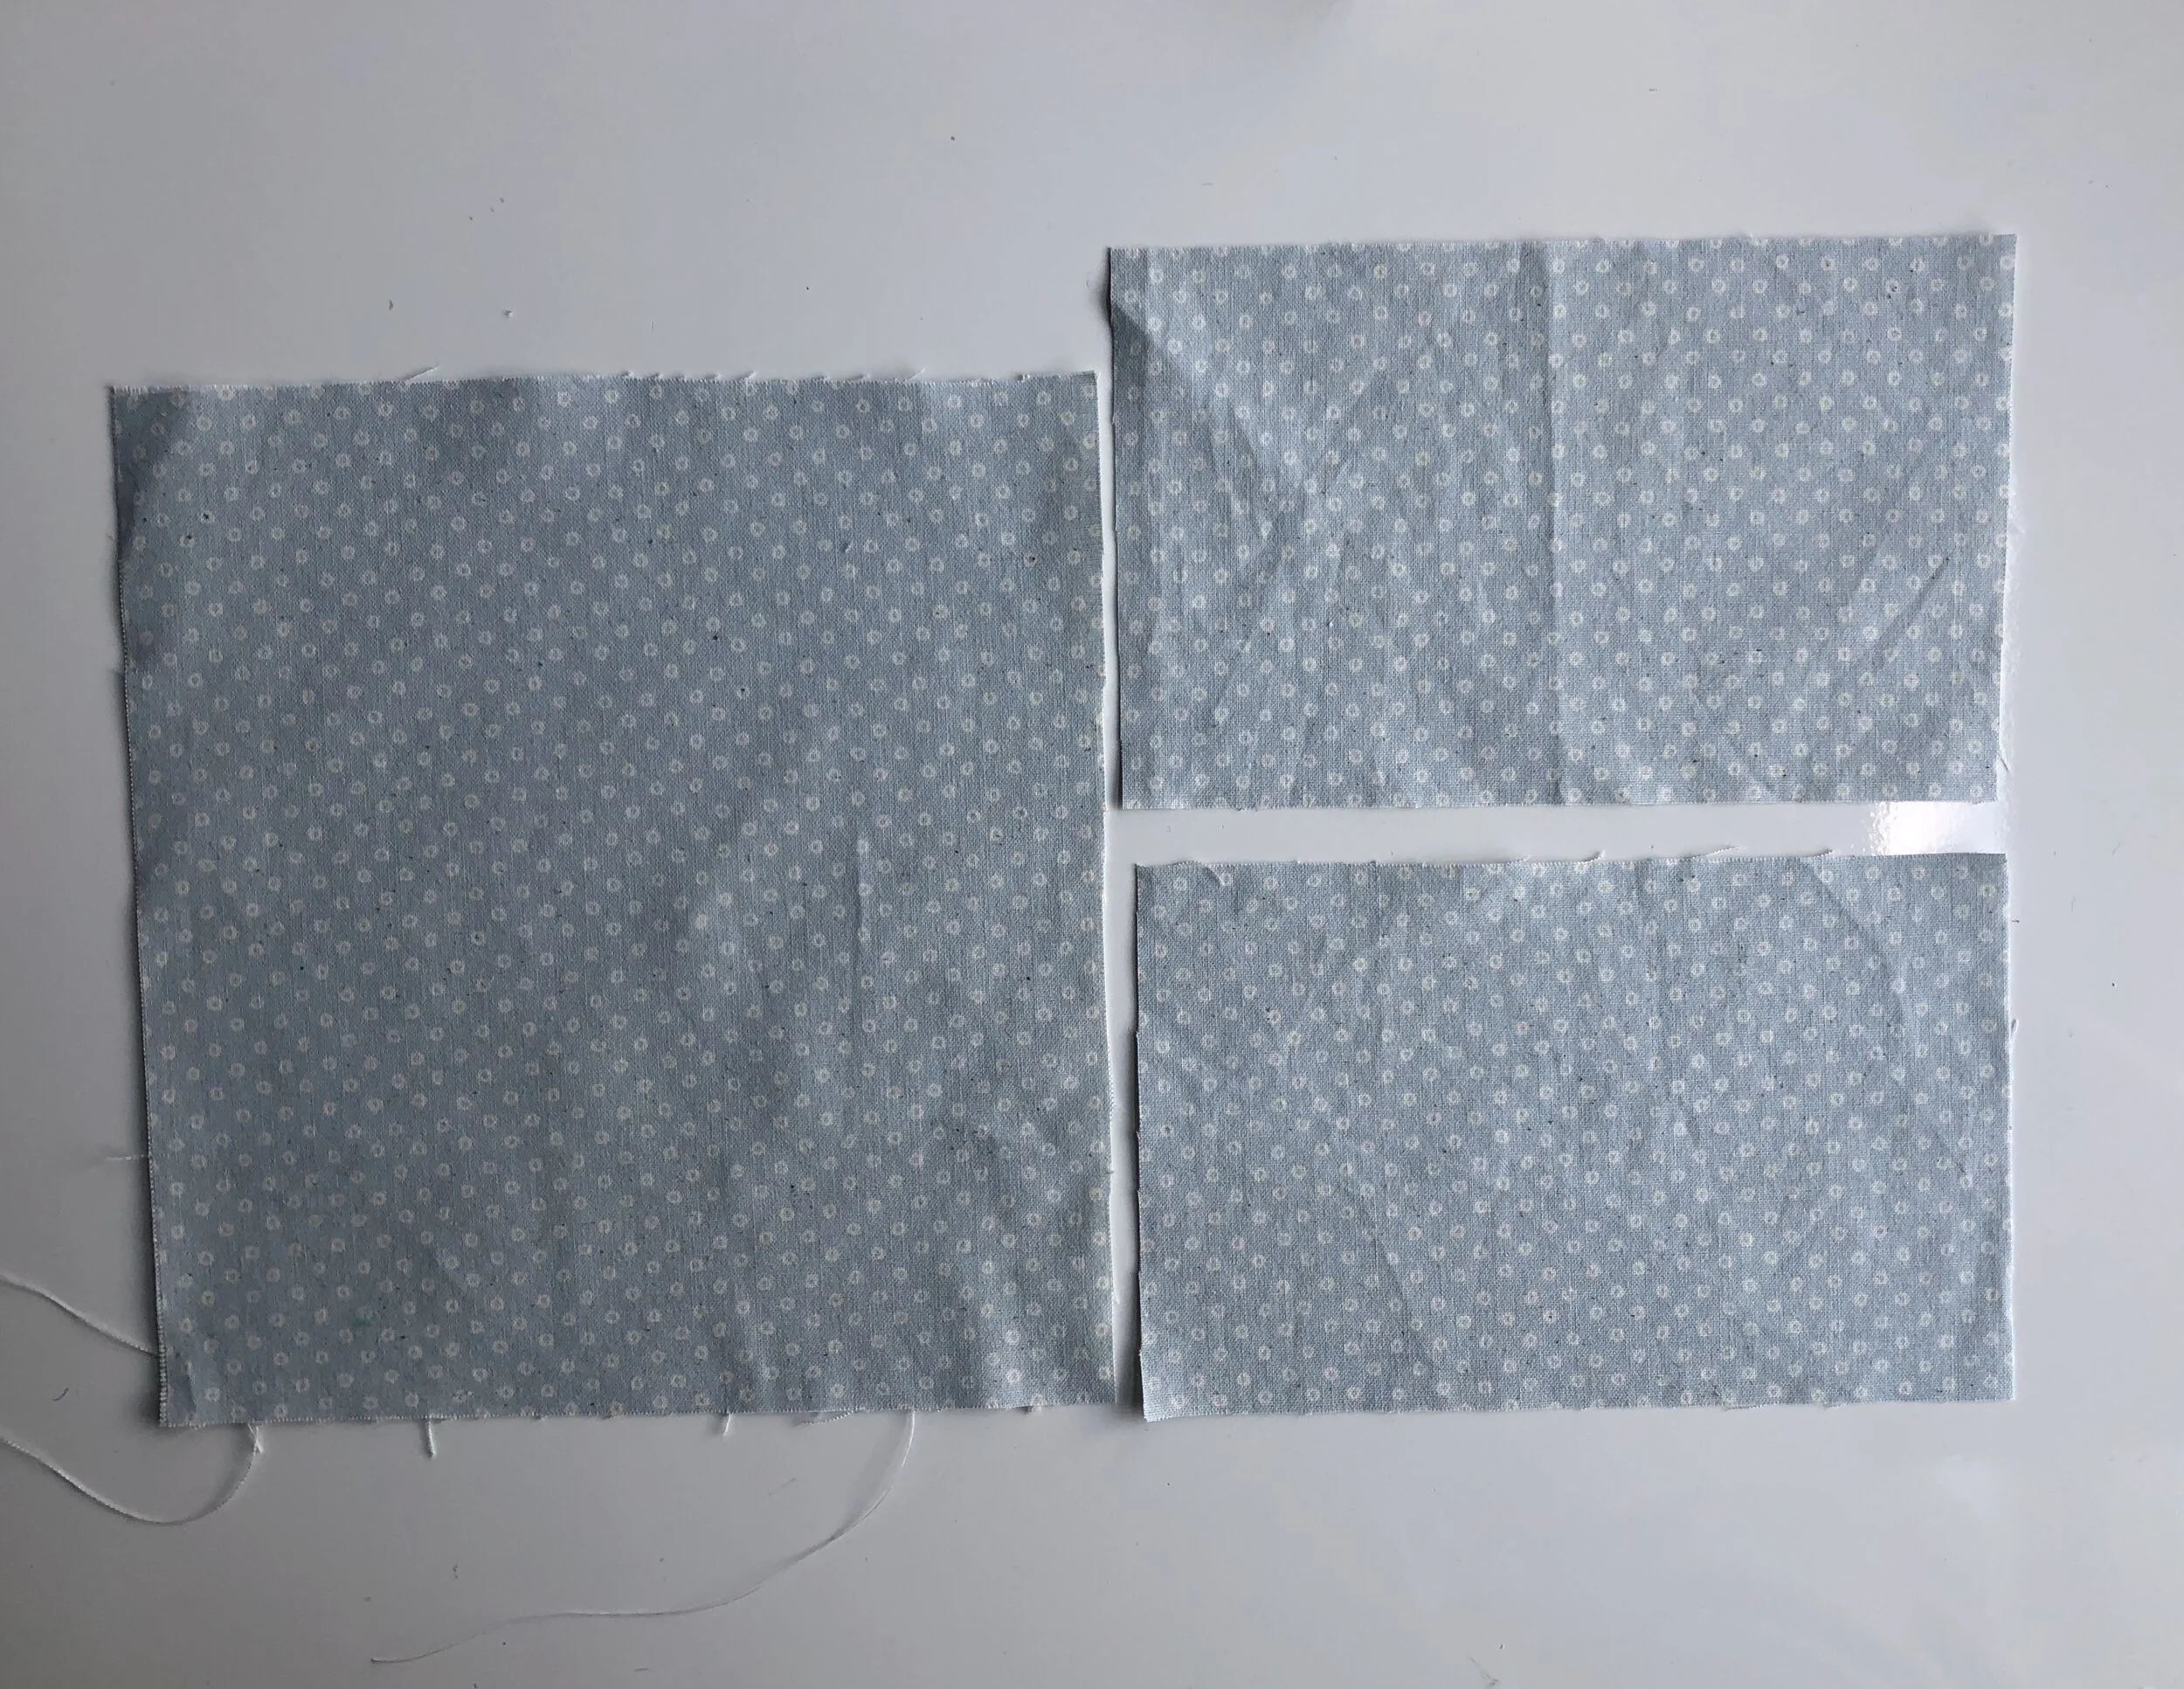
Take the two smaller rectangles and place them with their RIGHT sides facingtogether. Pin inward 1.5” in from each outside edge.

Stitch with a 1/2” seam allowance, leaving the center open.

Press the seams flat.
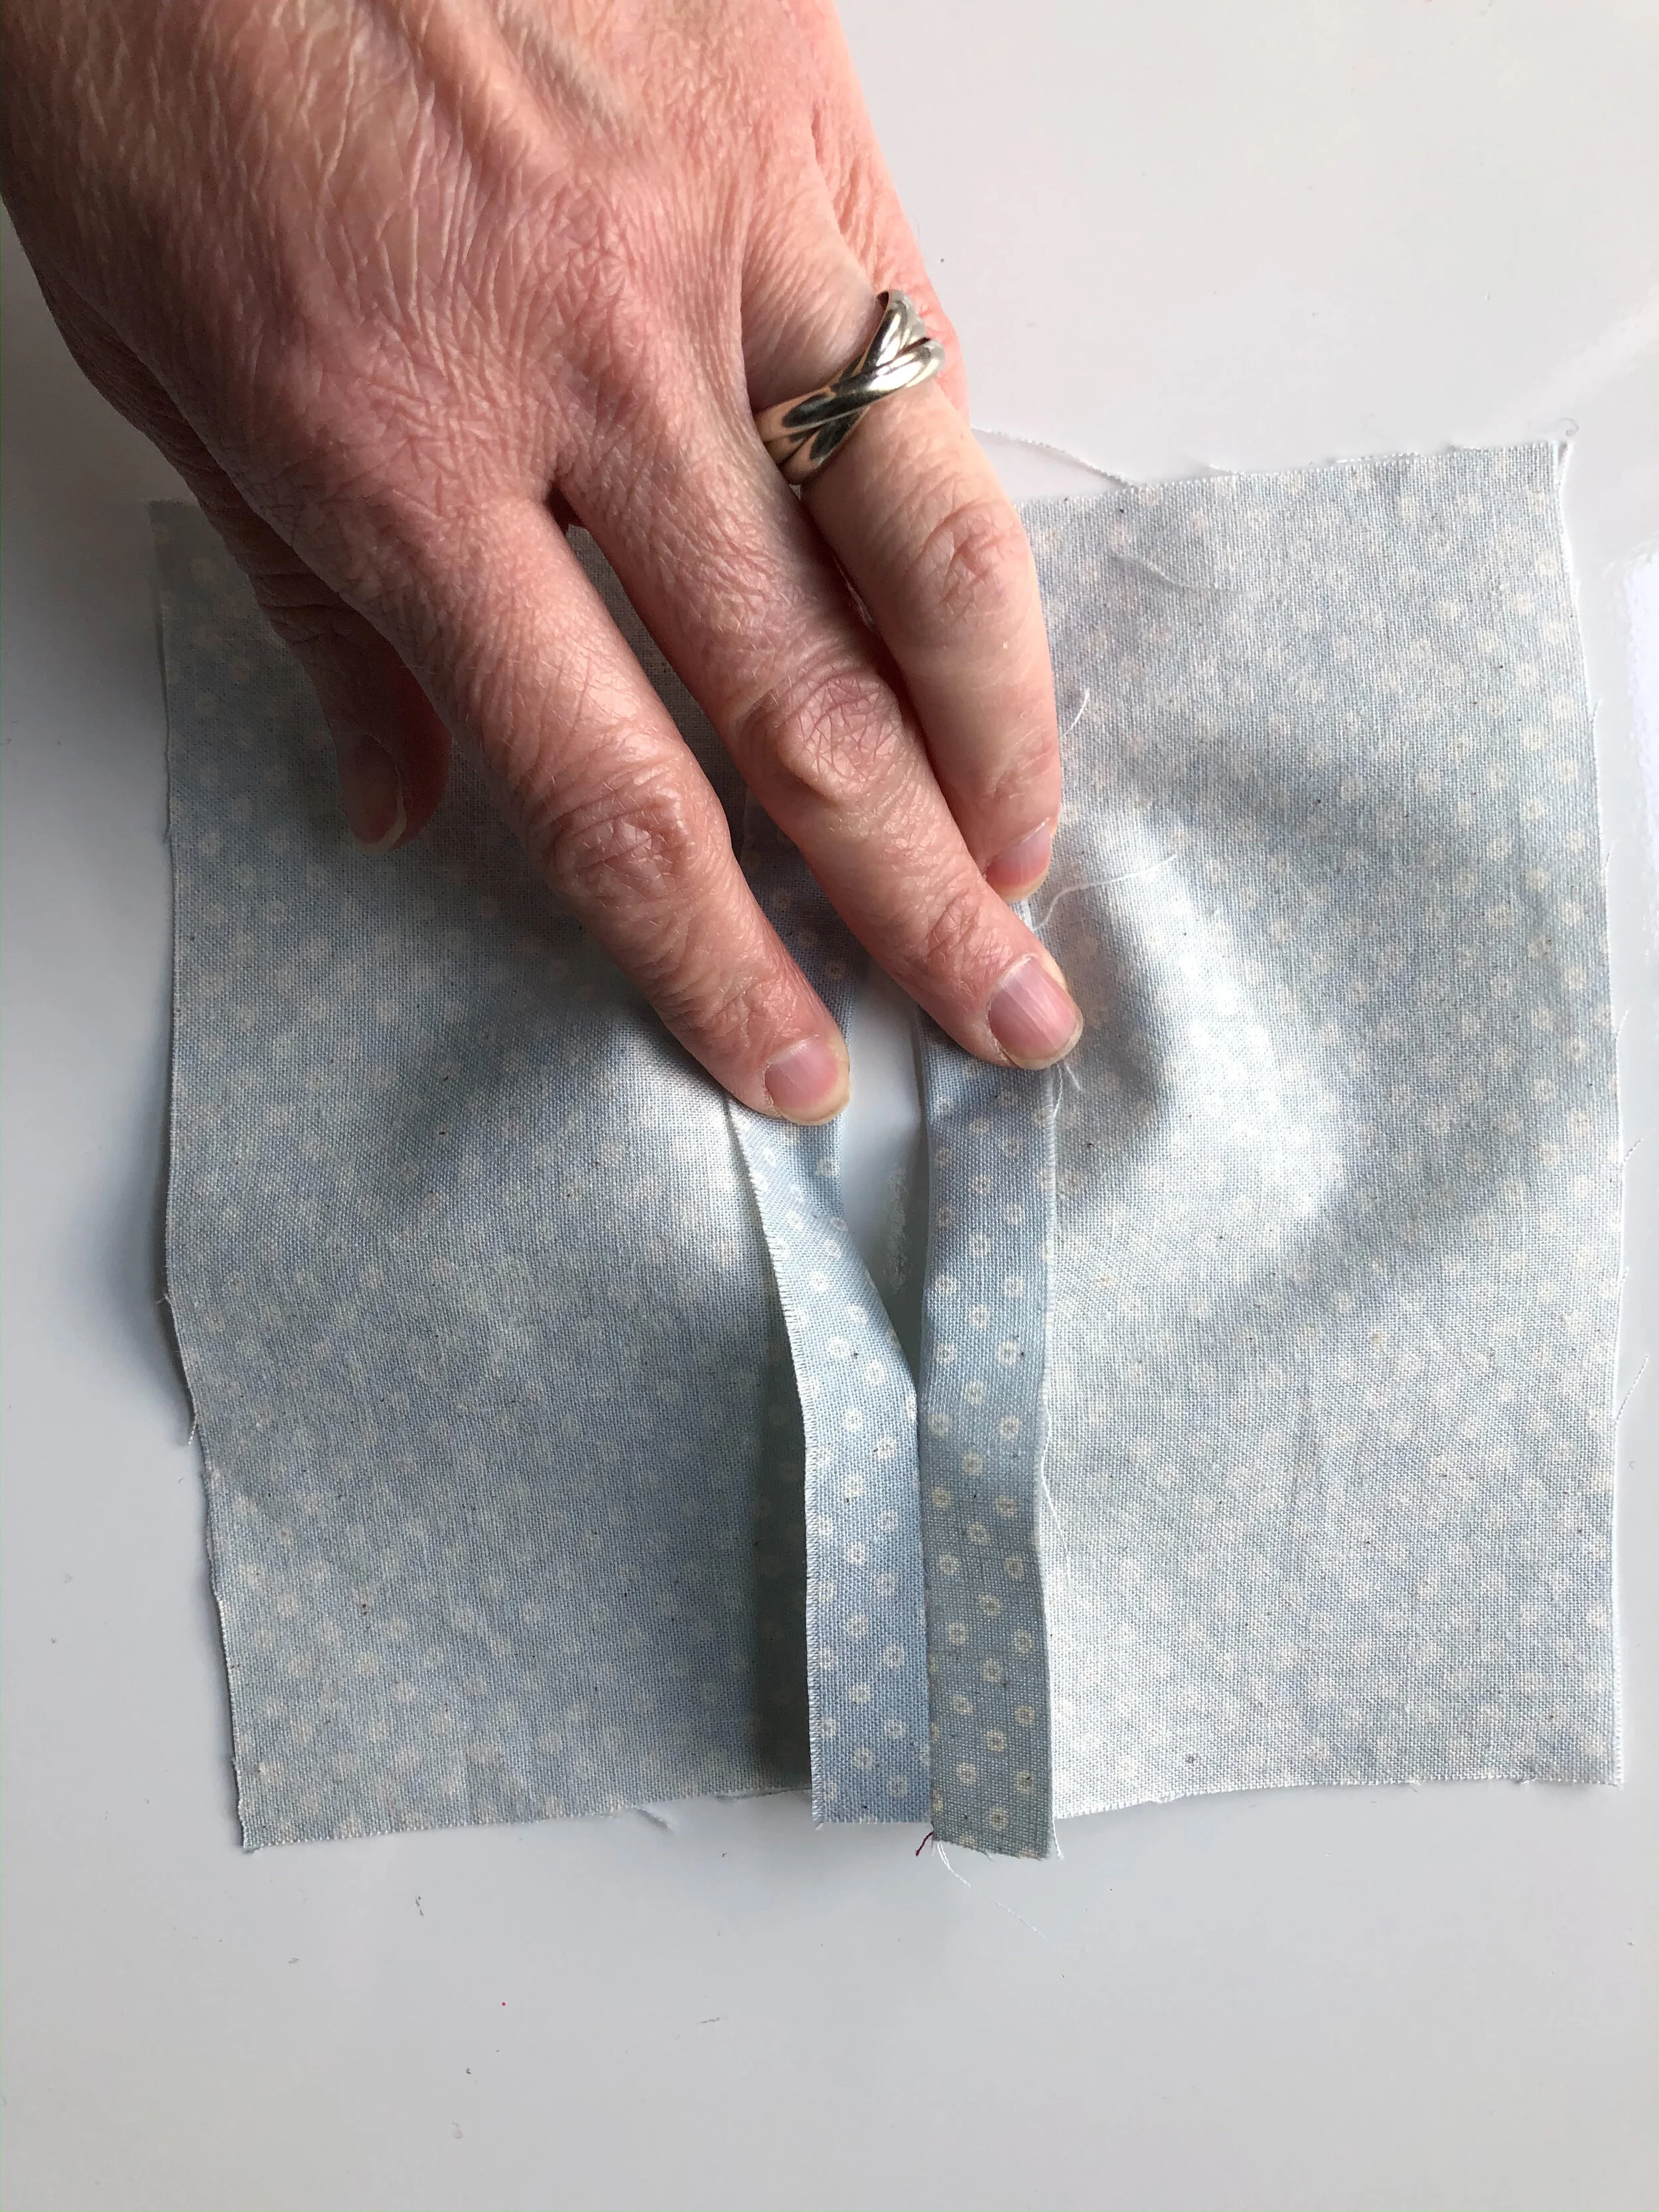
Top stitch along the seam line. This will help the fabric to lay flat.
Once you have pieced the fabric to make the pocket opening, if it is larger than 7 1/2”, trim to size.

Place the stitched piece with the split opening and the 7 1/2” square with their RIGHT sides facing together and continue as explained in step one of first tutorial.
The following picture is what it will look like after the casing is stitched.
Once complete, the opening should allow for a filter to be place inside. The split opening should fold nicely between the pleats.
If you look closely, this mask has a filter inside. Once the sides are pulled, the center pleat pulls tight so that the wearer does not feel the filter.
I hope that this tutorial is helpful. Please feel free to email with any questions.
Wash your hands, hug your kids and stay home and sew.
XOXO, Hilarie

Form, Function and Culture
In Pattern Making, there are three types of sleeves; set-in, raglan and kimono. All other sleeve styles are developed from one of these three blocks.
However, in this era of globalization, it no longer feels correct to refer to this as a “kimono sleeve”. What then, is an appropriate name for a bodice where the sleeve is integrated into the design instead of a separate piece? “T-shape? Extended sleeve? Robe?

In Pattern Making, there are three basic types of sleeves; set-in, raglan and kimono. All other sleeve styles are developed from one of these three blocks.
However, in this era of globalization, it no longer feels correct to refer to a style as a “kimono sleeve”. What then, is an appropriate name for a bodice where the sleeve is integrated into the design instead of a separate piece? “T-shape? Extended sleeve? Robe?
I have been giving a lot of thought to the intersection of cultural appropriation, pattern making and fashion. Currently, I am working on a new pattern, one that is loose fitting and has a kimono-style sleeve. But I am at a loss of how to describe it. This simple shape, once cut and constructed, no longer looks like the rectangle that is was essentially developed from. The straight grain of the fabric will run up and down the body, and the cross grain across the shoulders. Different than batwing, not dolman, not tunic.
A respectful interpretation of the world’s cultures can allow all cultures to mutually enrich themselves and bring about genuine benefits to society. A diversity of cultural influences is what makes fashion, like art and music evolve and thrive. Additionally, as a sewing and fashion educator, I have a classroom of kids that come from all manner of background and identity. They look to me to guide them and to set an example. To foster a truly global society, it is imperative to teach inclusivity, appreciation and respect. If these students leave my class, and future fashion studies unversed, then we as educators are part of the problem.
Traditional clothing is not simply functional or ornamental. It is infused with meaning and is woven into the very identity of a people, geographic area or a period in history. That is why designing clothing without consideration for the underlying cultural significance can lead to ignorance of the history of entire communities For a much more eloquent and thoughtful explanation, read this post, My Kimono is Not Your Couture, by Emi Oto.
So what is appropriate and respectful? Is it enough to describe the top as having a “kimono sleeve”, but then include a sentence that invites conversation and states that that is the technical name of the sleeve type? Could it be described as having a kimono style influence- even though it bears little resemblance to an actual kimono? If we go forward and “ignore” traditional influences, we lose the opportunity to learn and appreciate. The preservation of culture and cultural diversity gives voice to each and every person in this global community and can affect real and lasting change.
With that sentiment, I am asking you, my readers and friends, to please share your thoughts with me. How do you recognize and appreciate global fashion while still being intentional and sensitive? What do you make of “technical” terms that have no clear replacement? I do look forward to your comments.
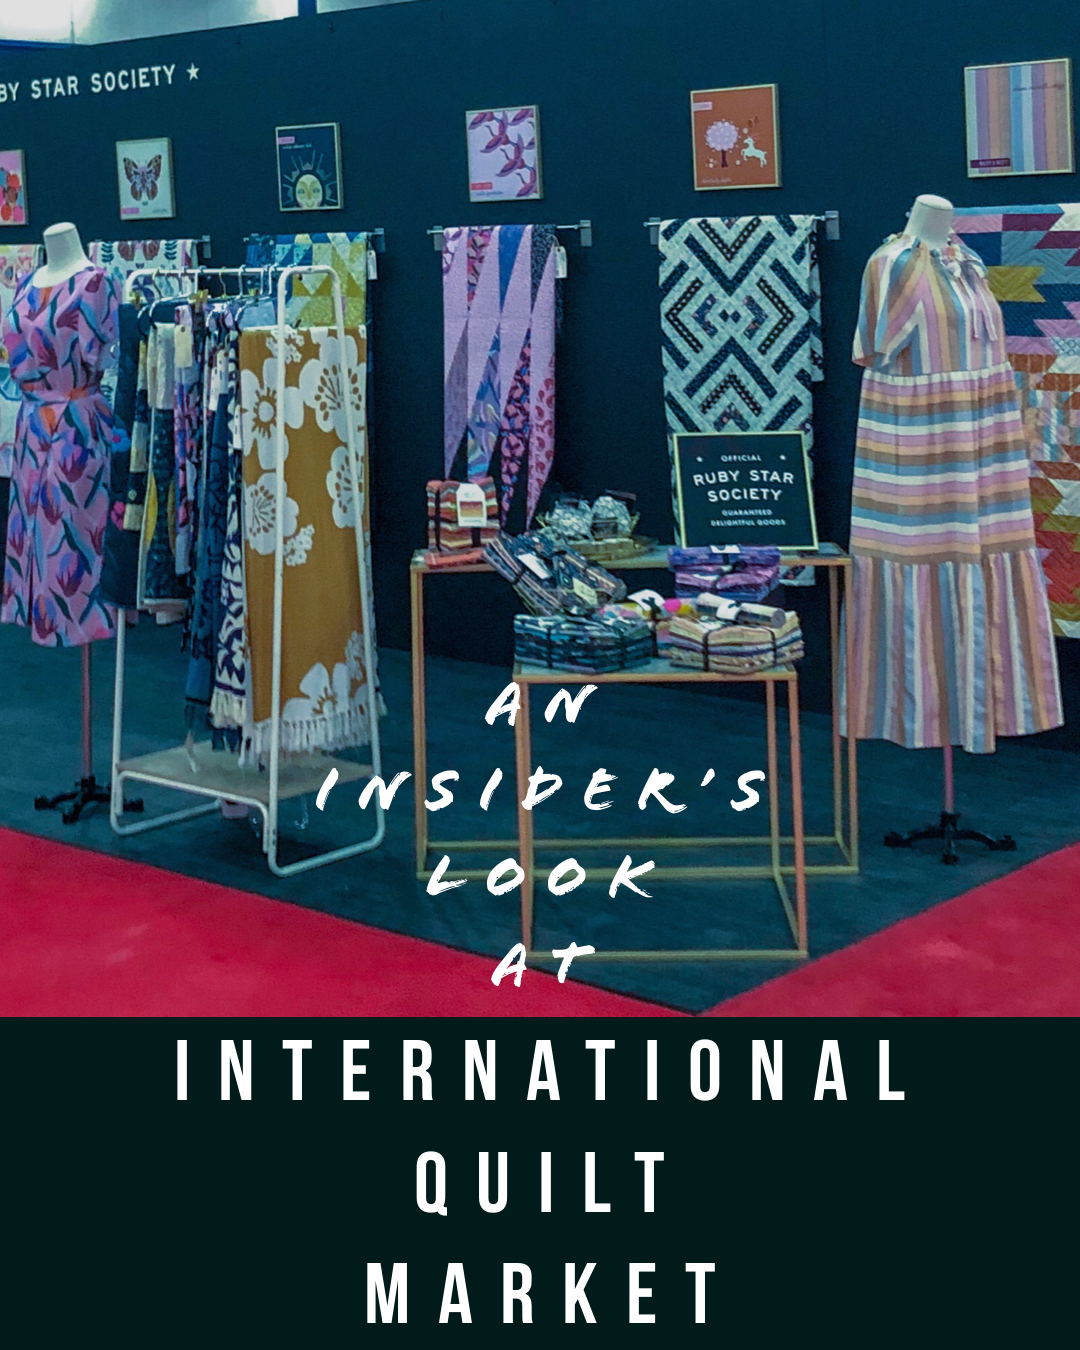
An Insider’s Look at International Quilt Market
I was so fortunate to be able to attend the Fall International Quilt Market. Why Quilt Market, you may ask? A reasonable question. It is a curious name, but don’t let that fool you. The International Quilt Market is the premiere trade show for the sewing industry. All manner of fabric, patterns, notions, sewing machines, tools, books and accessories are represented.

I was so fortunate to be able to attend the Fall International Quilt Market. Why Quilt Market, you may ask? A reasonable question. It is a curious name, but don’t let that fool you. The International Quilt Market is the premiere trade show for the sewing industry. All manner of fabric, patterns, notions, sewing machines, tools, books and accessories are represented.
It is held each year in the George R. Brown Convention Center in Houston, Texas.

The show, which is held twice each year, is a gathering place for store owners, buyers, representatives, authors, editors, magazines, designers and a few sewing studio owners too. It really encompasses the entire spectrum of industry insiders. My perspective as a first-time attendee was rather unique, as I was there with a badge as an author with a well-established and respected publishing company and as a small business owner. This outsider disguised with an “insider’s badge” gave me the ability to both stand out and fade into the background at once.

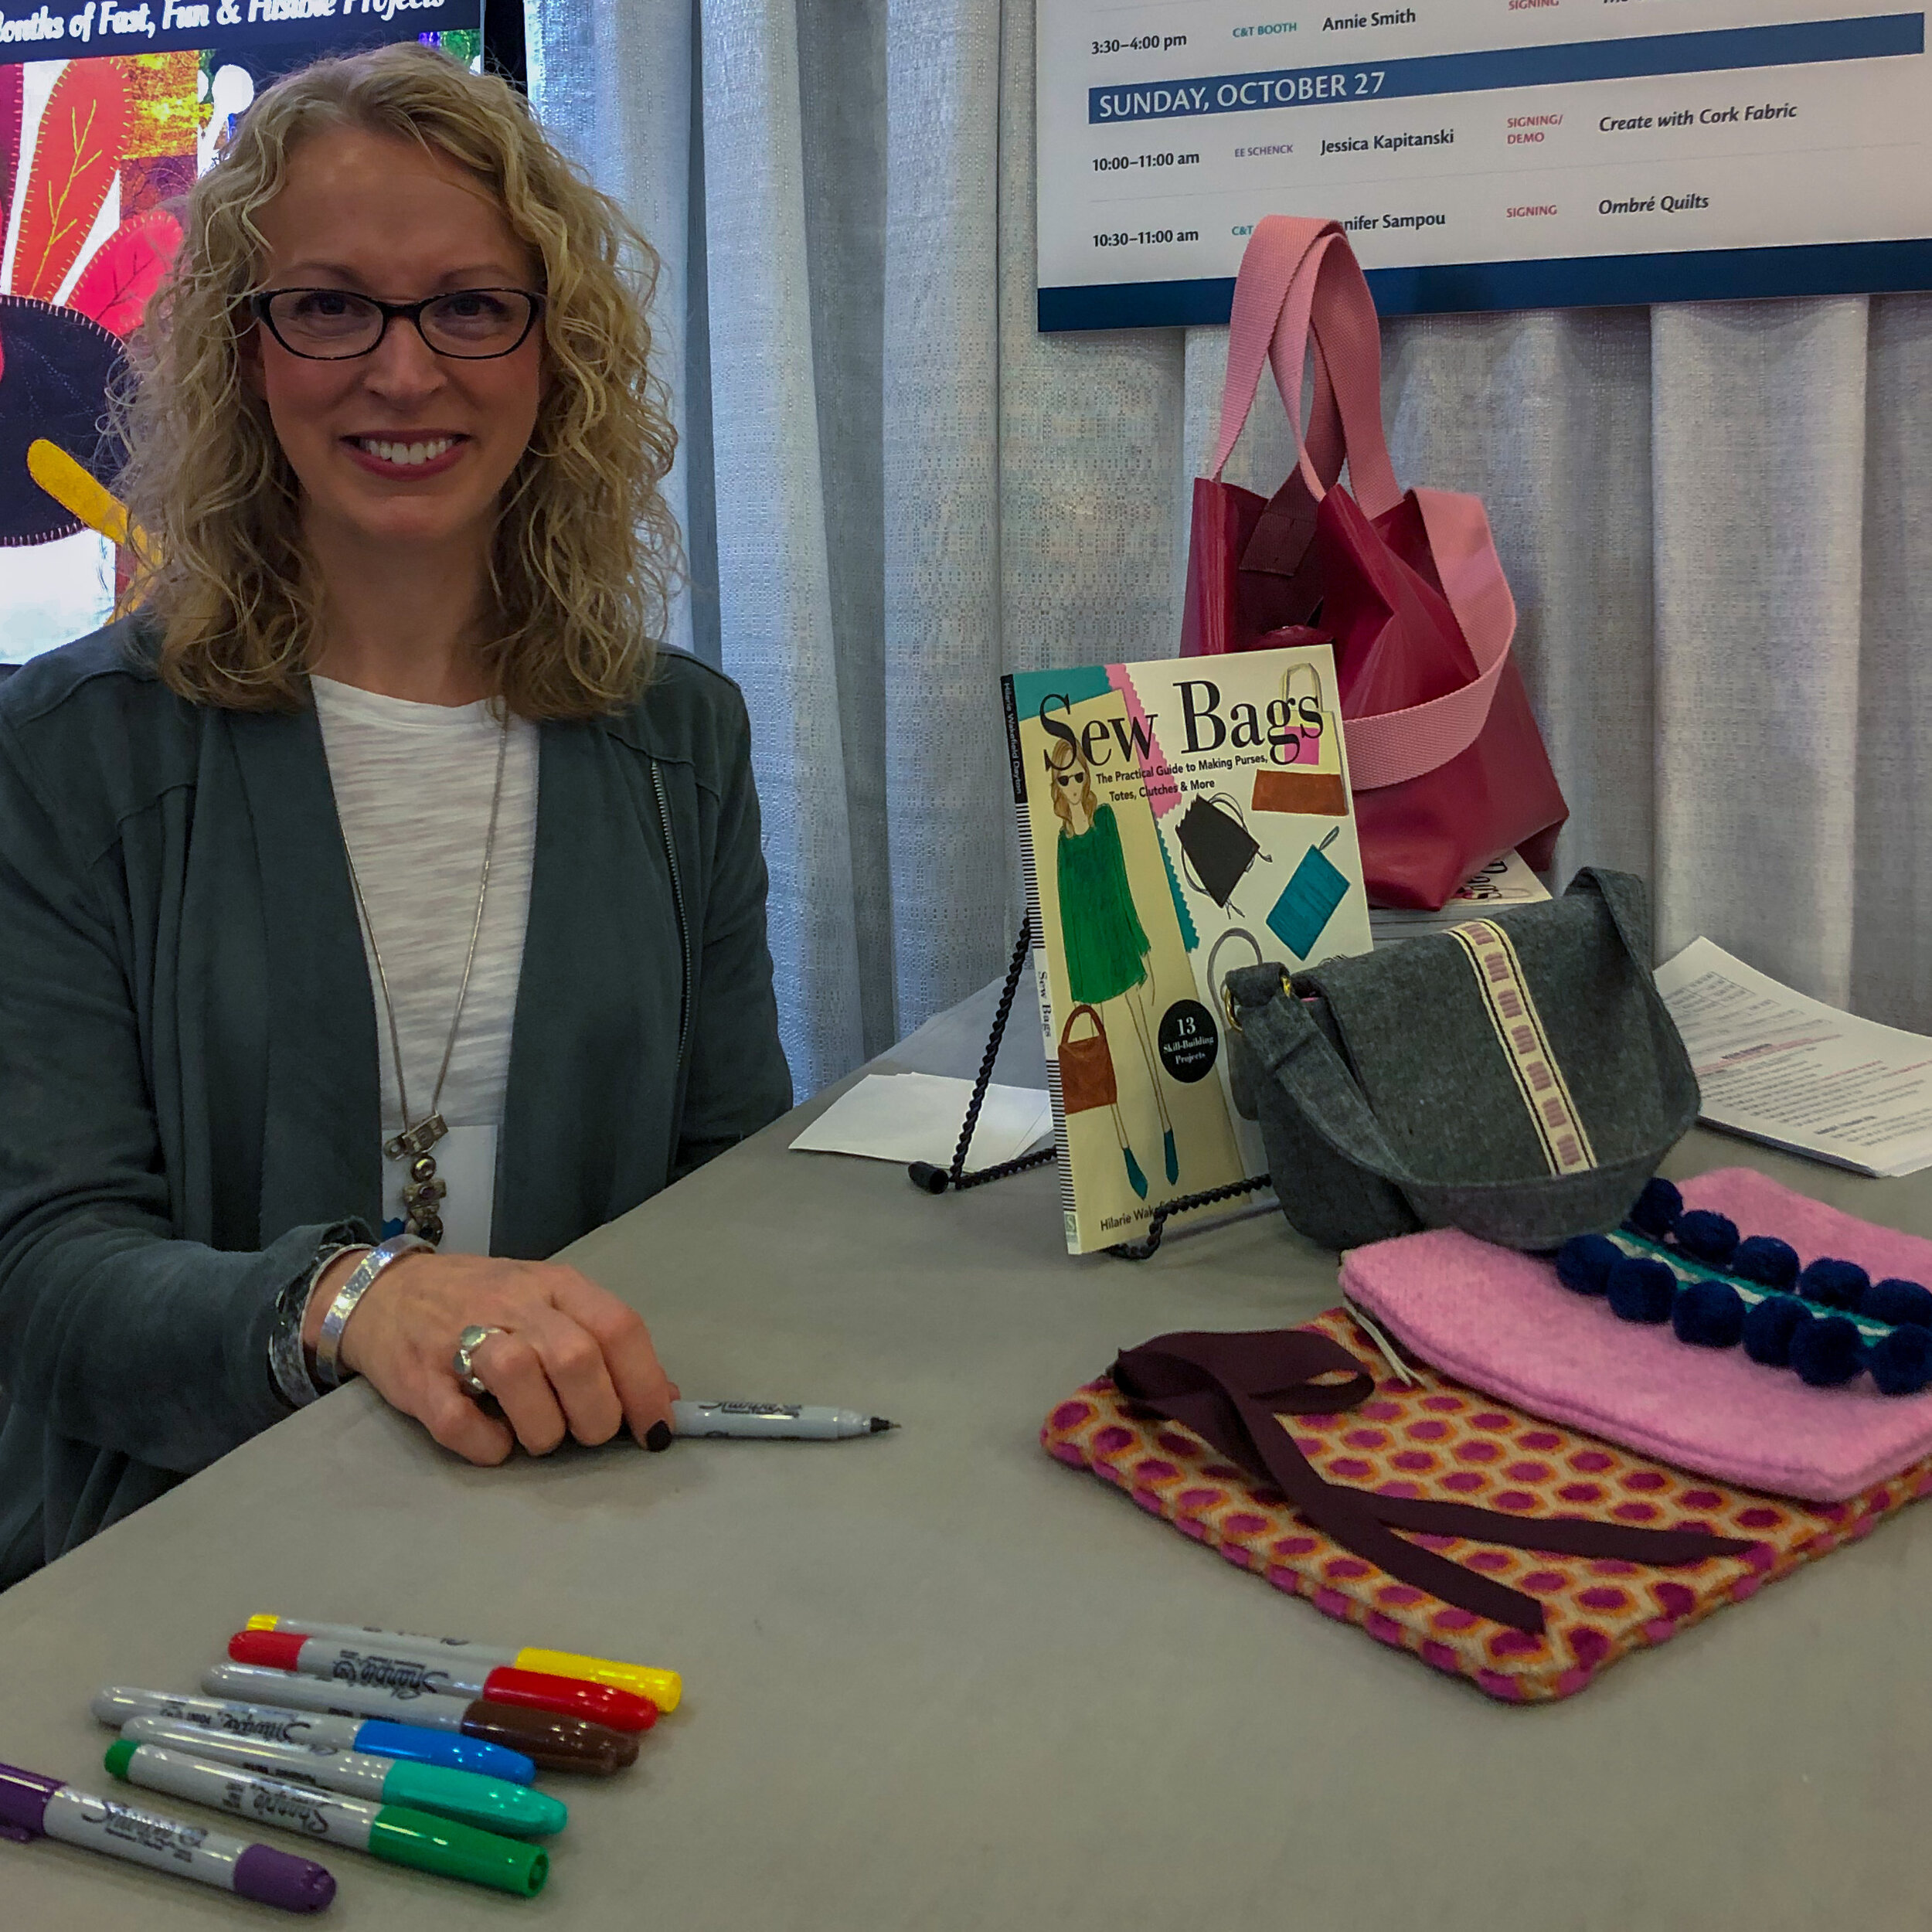
As an author, I was given some time at my publisher, C&T’s booth to have a book signing. Shop owners and representatives stopped by my table at the C&T booth to chat and have their book signed. This was such a fantastic opportunity to meet them and to hear about their work, their customers and what projects they are interested in making.
After the book signing wrapped up, I had a few minutes to change and refuel on coffee before filming a how-to tutorial. The tutorial, which will be coming soon, will be used as a promotional video for my book.
Once that was complete, I was free to explore the Quilt Market.

It truly was a fantastic experience for me to meet with representatives of magazines, sewing machines and fabric companies, distributors and suppliers. I learned a lot and made some valuable new contacts.
For example, while visiting the Kai Scissors booth, I mentioned that I personally love their scissors but don’t use them in my shop because I teach kids and the scissors are so sharp they could be a safety hazard. The representative informed me that they would be happy to blunt the tips of the scissors for me as a precautionary measure. Well, let’s just say that order was a no-brainer. Now the kids use beautiful and very sharp- but very safe scissors in class.

I spy my book on the shelf!

Testing new Eversewn sewing machines.

Each booth was an explosion of color, pattern and inspiration. The designers and team did an extraordinary job of not only designing the patterns for their fabric collections but in planning and designing their booths.
It did take a bit of restraint, but I managed not to go all fan-girl on some of the designers and authors I had the pleasure of meeting.


By closing, I was exhausted but exhilarated. Fortunately, my hotel was connected to the Convention Center, so it was just a short walk back. The hotel was gorgeous and lucky for me had some exceptional restaurants inside.


Check out the edible gold leaf. This dessert at Xochi was worth the price of the flight and hotel combined.
The fabric and supplies that I ordered just a few months ago are beginning to ship. Each time I pull a bolt off of the shelf, I will be reminded of my first time at Quilt Market.
XO, Hilarie