

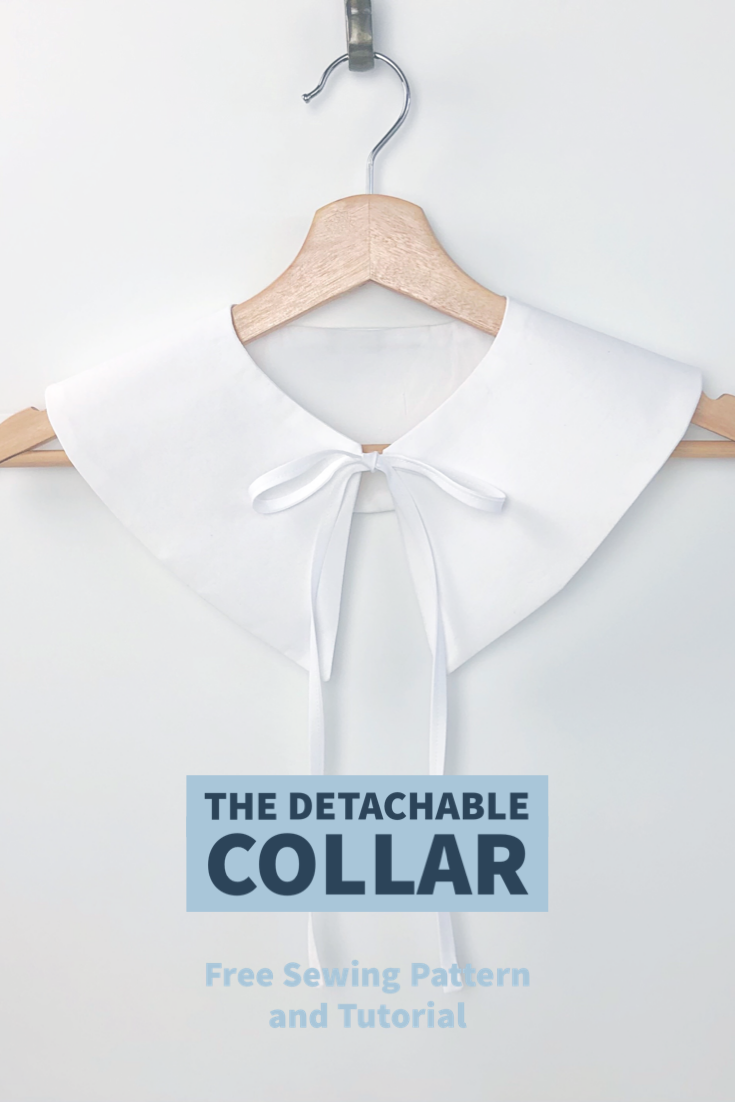
How to Sew A Detachable Statement Collar- Part Two
Learn to sew a detachable statement collar with perfect collar points.
Welcome to part two of the series, How to Sew a Detachable Collar. Detachable Statement Collars are such quick and satisfying sewing projects. There is so much mix and match potential in the variations that you might find yourself amassing quite a collection. Throughout this series, we will begin with a basic collar pattern and learn how to change the design to create a look that is uniquely you.
In my introductory post, I showed you how to make a Peter Pan-style rounded collar with additional tips for sewing curves. For this installment, we are going to learn a bit about the structure of woven fabric and how it relates to creating sharp points to sew a Pilgrim-Esque maxi collar.
If you missed the first post, catch up here: How to Sew a Detachable Statement Collar, Part One

These are two of the many variations that you can create with this pattern. The chambray collar looks great with a mock-neck top worn with a stack of chains and pearls. The plaid taffeta collar has a bit of a softened point and I added a self fabric gathered ruffle to amp up the fun. The possibilities to add your own touch are only limited by your imagination. Have some fun with it!

The pattern is available for download here and also at weallsew where you will find the step by step tutorial. I can’t wait to see what you make!
New to using PDF sewing patterns? Check out this link for tips on assembly.
Head over to weallsew to download and get the tutorial.
Happy Sewing!
XOXO, Hilarie


How to make an adjustable purse strap
An over-the-shoulder bag doesn’t always work so great when you have kids or say, you need your hands to hold something else- or nothing. Years ago, the cross-body bag made a strong comeback as has the more recent resurgence of the “belt bag” (formally known as the fanny pack). What makes these bags so great is the ability to adjust the length of the strap. Whether you want to adjust it to fit your outing, outfit or just personal strap length preference, with a quick slide of the hardware, you are ready to turn any silhouette into a cross-body and reinvigorate your bag carrying game.
An over-the-shoulder bag doesn’t always work so great when you have kids or say, you need your hands to hold something else- or nothing. Years ago, the cross-body bag made a strong comeback as has the more recent resurgence of the “belt bag” (formally known as the fanny pack). What makes these bags so great is the ability to adjust the length of the strap. Whether you want to adjust it to fit your outing, outfit or just personal strap-length preference, with a quick slide of the hardware, you are ready to turn any silhouette into a cross-body style and reinvigorate your bag-carrying game.
Here’s a quick tutorial to show you how to make an adjustable purse strap!
How to make an adjustable purse strap
Commitment-free straps, for when you can't decide.
The double-fold strap and Savannah Cross-body bag used in this tutorial are projects from my book, Sew Bags: The Practical Guide to Making Purses, Totes, Clutches & More.
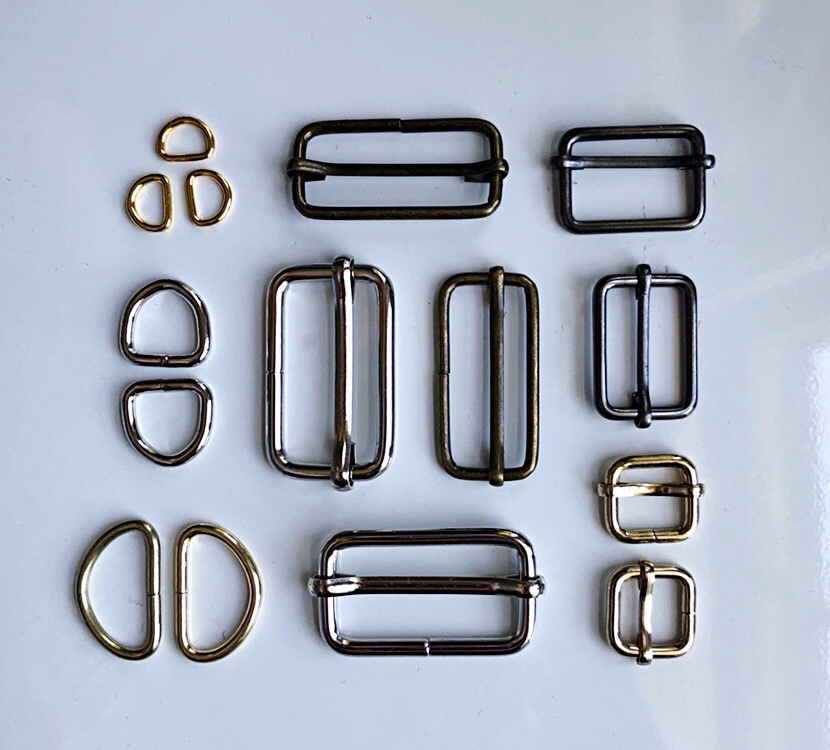
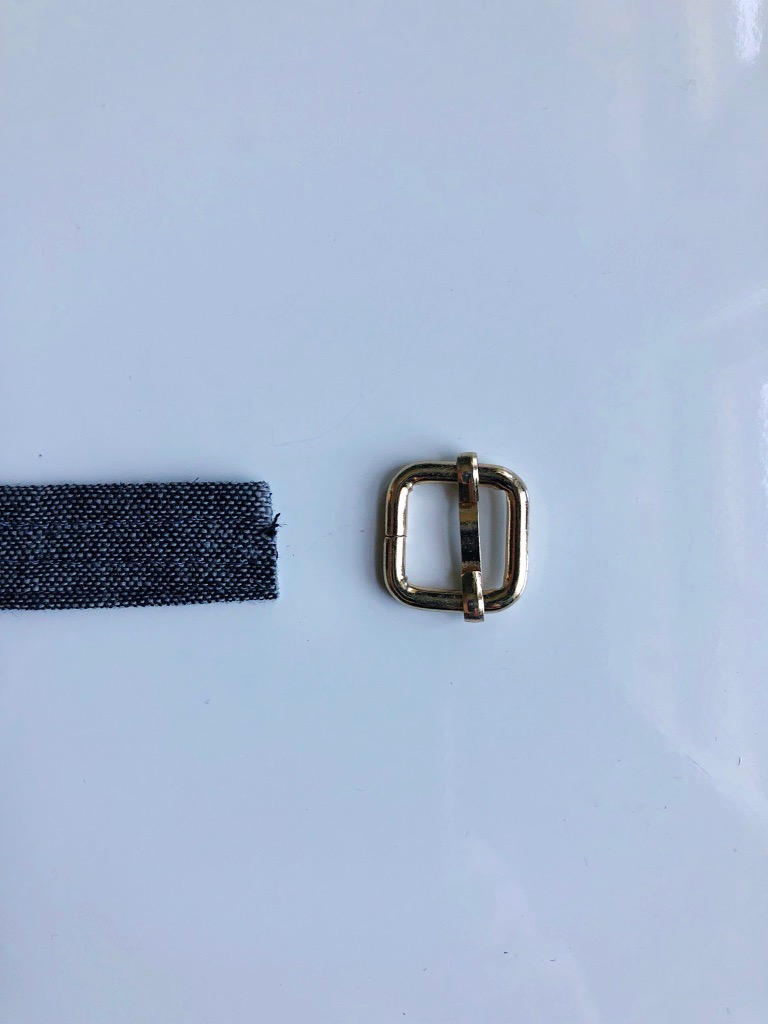
Supplies needed:
Strapping plus two 3” long tabs of strapping (to connect a D ring to each side of the bag) I’ll explain:) You can always use leather or cotton webbing straps in the same length and width as an alternative to fabric straps.
2 D-Rings *
1 Strap slider adjuster
The strap, tabs, D-rings and Slider all need to be the same width. In this tutorial, mine are 1/2”.
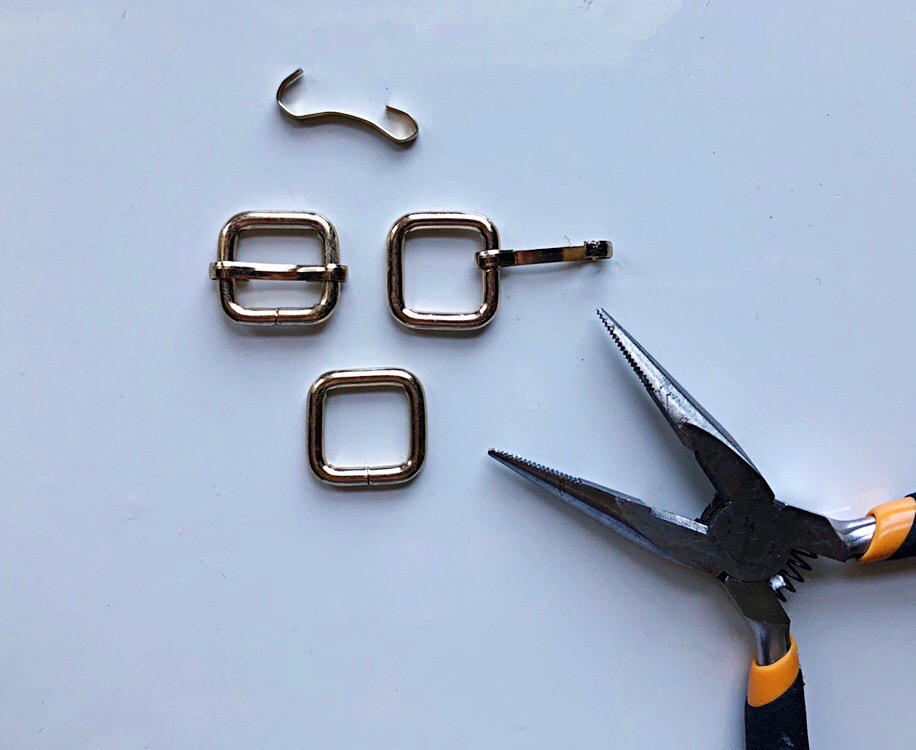
*If you are unable to find a D-ring the same size and color as your slider, you can always make some after-market improvements. For this tutorial, I used a pair of pliers to remove the center slide and made a set of D-ish (square, actually!) rings. Let’s call them a D+ pair.
Adjustable Straps
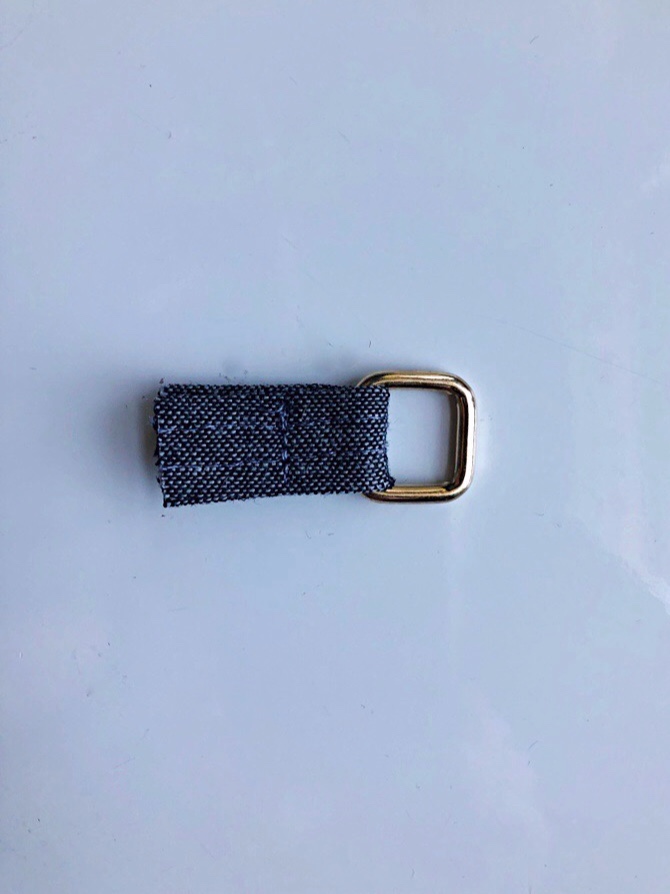
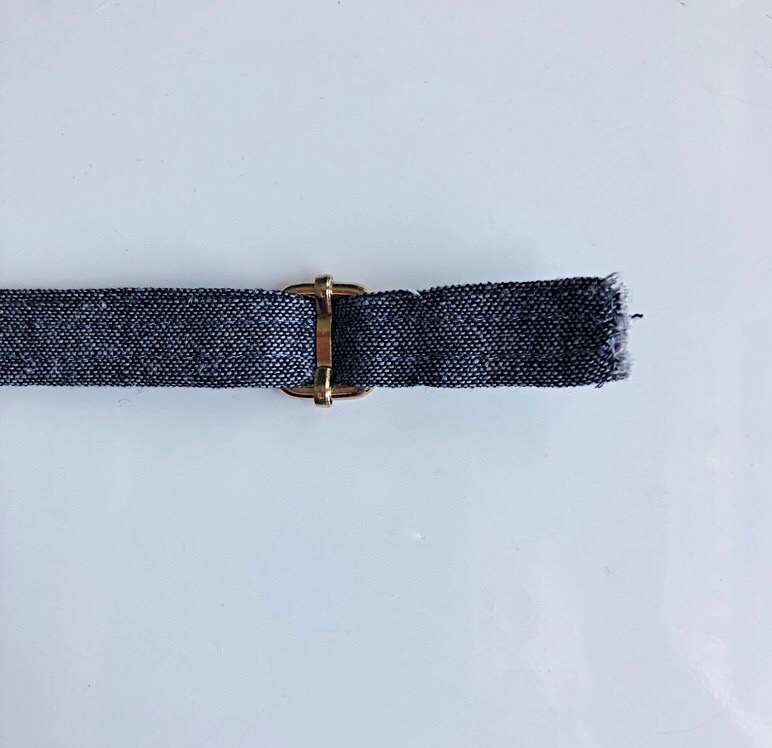
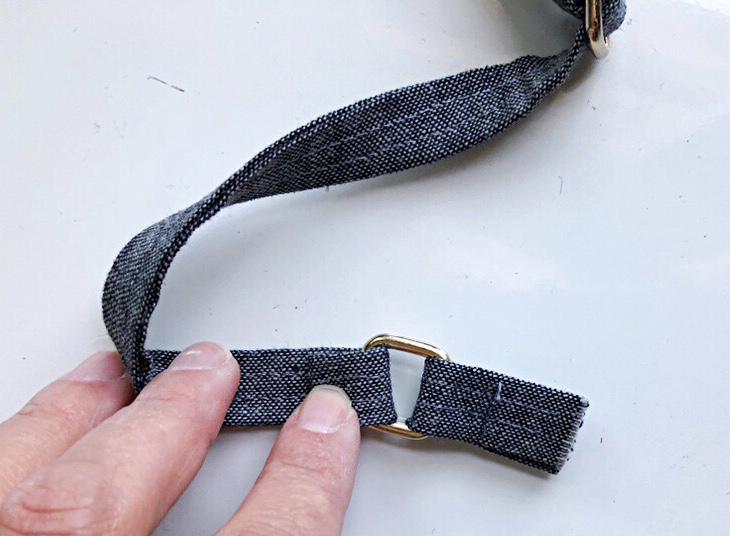
Take one of the 3” tabs and slide over the D-ring, folding in half so that the raw edges align. Pin and stitch in place about 3/4- 1” below the hardware. Repeat for the second tab.
Place the slide adjuster right side down, with the strap placed with the outer side facing down, too. Thread the long piece of strap (the tail) through the slide adjuster’s center bar.
Set your sewing machine to a narrow stitch, (around the 2.0 range). Stitch across the raw edge. Before you do this, grab both your top and bobbin thread and wrap around your finger while sewing to guide your machine and ensure that it sews smoothly along the strap’s end and you won’t get a “birds nest”.
Do you see how the edge of the strap is just slightly narrower than the rest of the strap? Depending on your choice of fabric, you could use an iron to spot shrink it, but that is another lesson. By shrinking the end just a bit, it will allow the tab to fold in and the edges to be concealed within the fold.
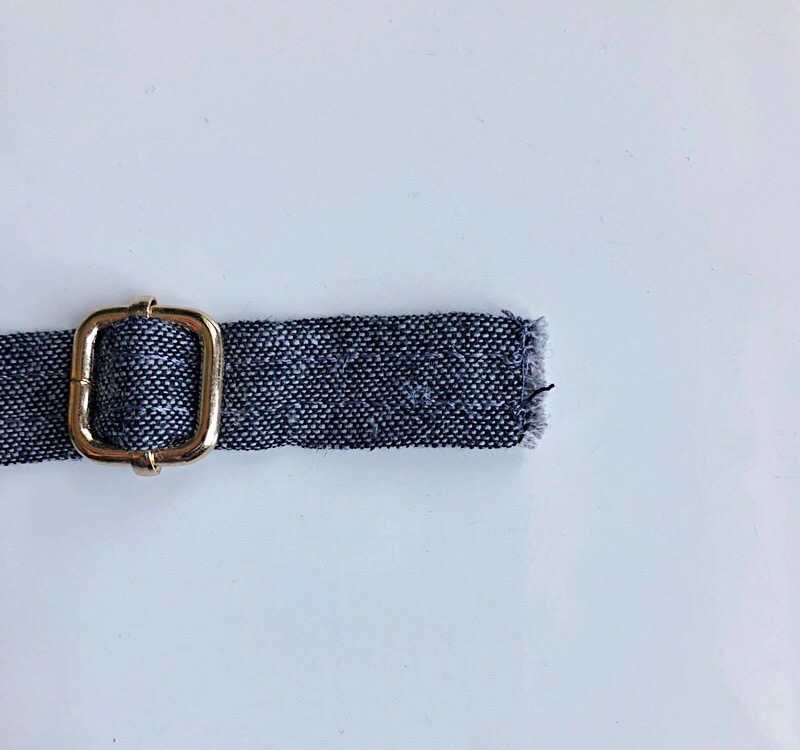
Fold the end of the strap under about 1” and tuck the raw edge inside that fold about 1/2” and pin.
Stitch in place. Make sure to reinforce with a back stitch to secure.
For a wider strap, I would likely stitch the width of the strap in a rectangular box but for a 1/2” width, one line of stitching should do.

The raw edges are completely concealed. No visible threads!
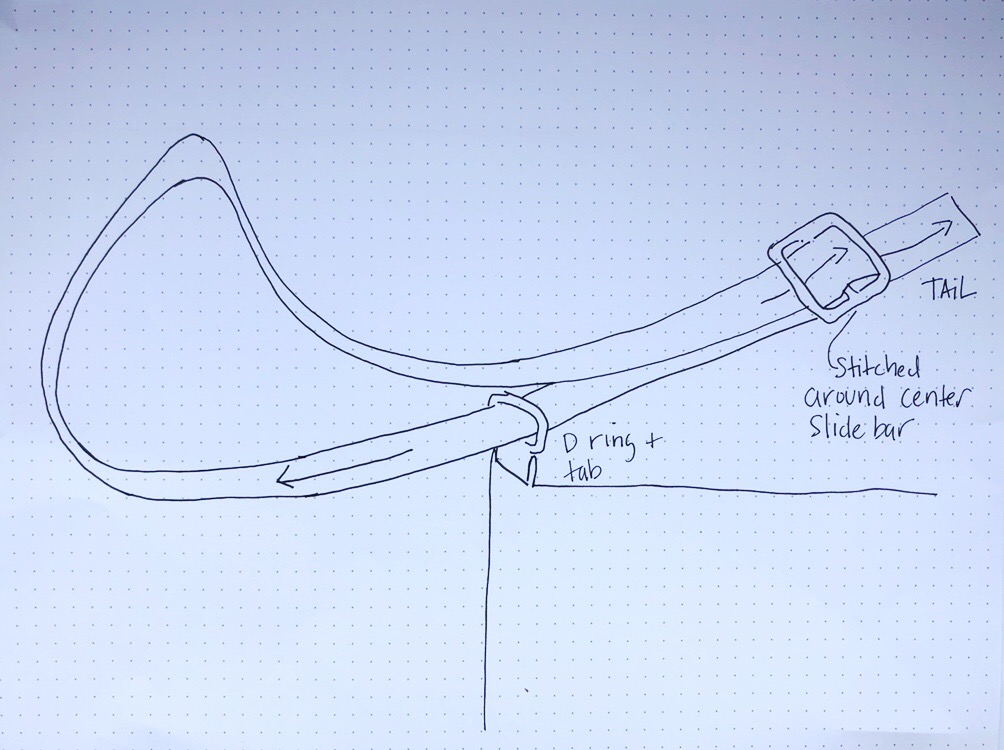
Threading the Slide Bar
This part is a little bit tricky the first time. Here is a picture and a drawing to help you visualize the steps. First, locate the slider with the center bar. We are going to take the “tail” of the strap and thread it through D-ring (number 1), over the center slide (number 2) and through the opposite D-ring (number 3).
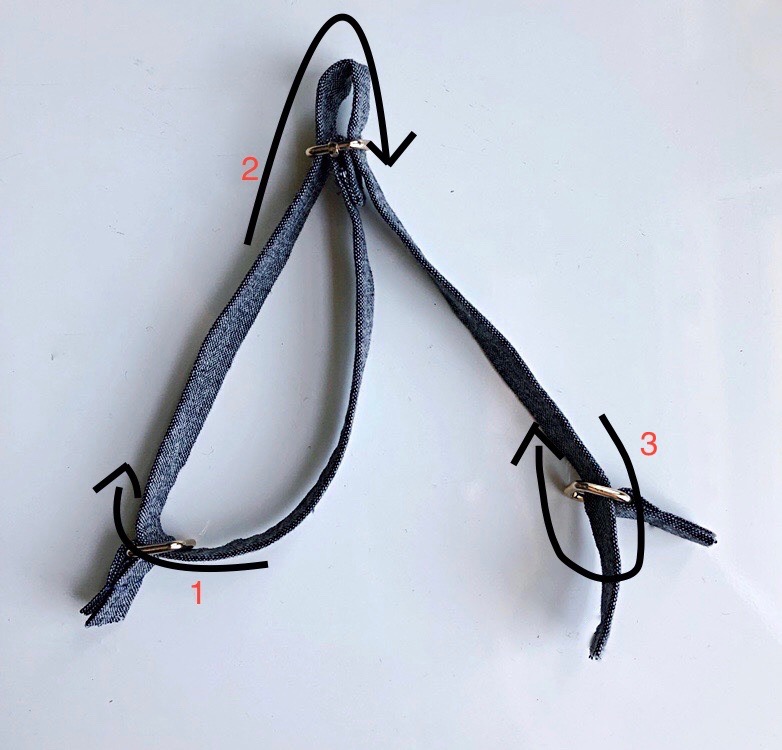
Tabs one and three will be sewn into the side seams of the bag.
This picture is to illustrate the strap in relation to the bag.
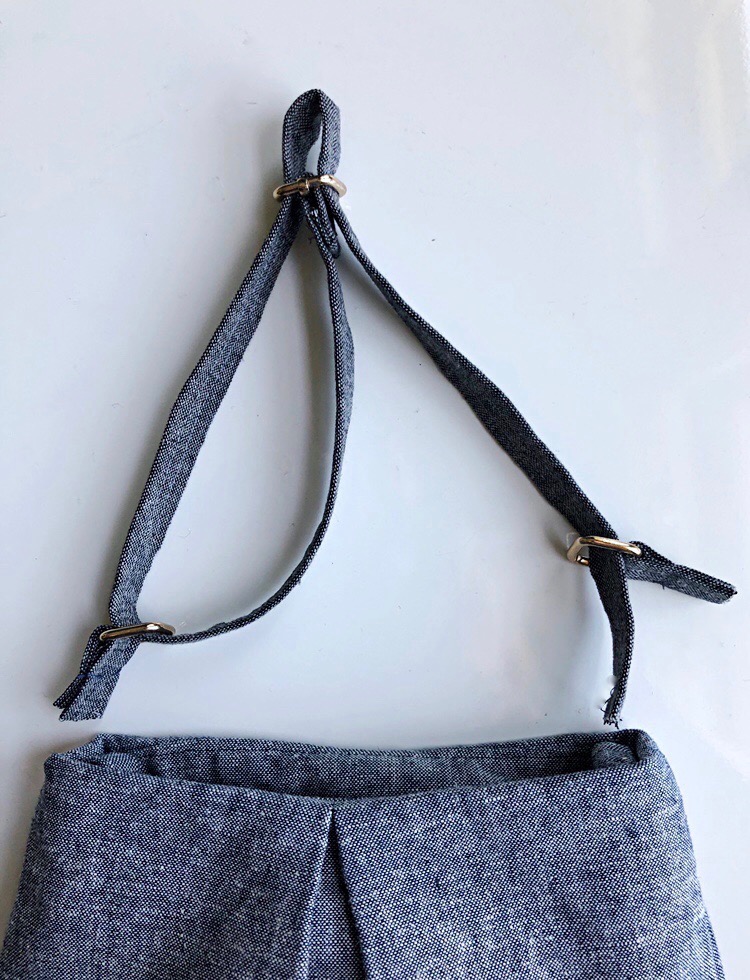
In any bag making venture, (generally!) this strap will be added way before the bag is complete. This picture is to give you the general idea (and for you to go get my book:) for a more complete lesson.
Feed the “tail” through the other D-ring tab on the opposite side of the bag. Before you sew - make sure that the strap is facing the correct way and has not twisted in the threading process. Fold and stitch the raw edge of the “tail” to the second side tab.
An adjustable strap can be used with any bag that has a removable strap. Imagine for a moment how this might change your bag carrying experience. One bag, thoughtfully designed with the right hardware and removable straps- could at once be a handbag, crossbody bag, clutch, tote or shoulder bag with the quick switch of a strap. Think about it.
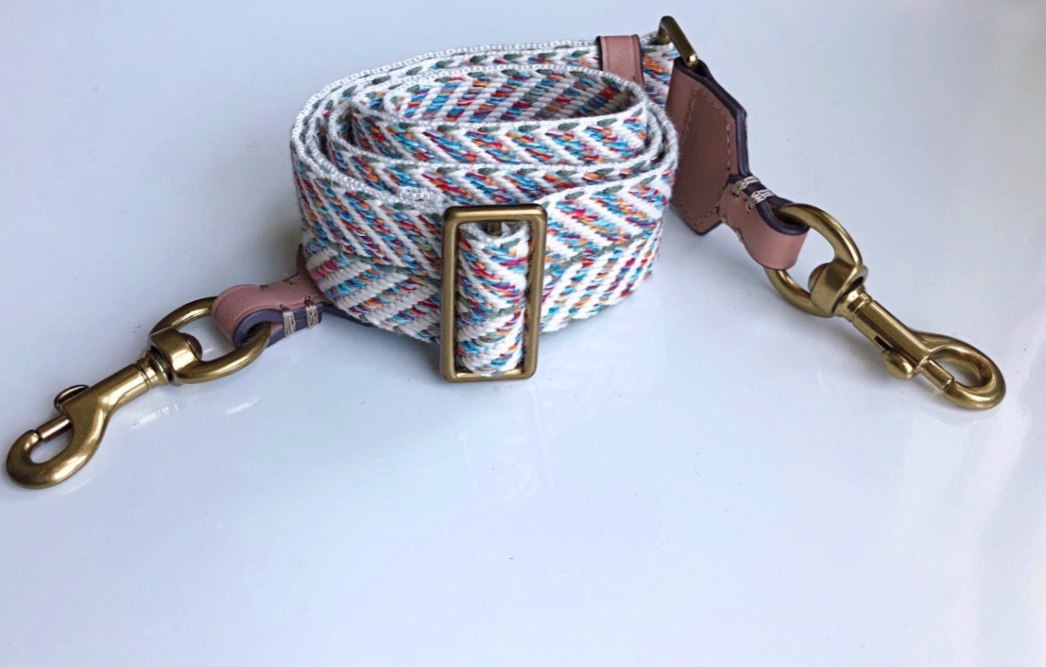
Consider adding an additional “guitar style” strap to elevate your everyday bag.
Straps are such a fun way to introduce an individual approach to a handbag, distinguishing it as its own distinctive piece. I am so excited to see the bags that you are going to make. Please use the hashtag #sewbags on social media- and be sure to tag me @littlestitchstudio.
Are there any specific techniques that you would like to learn? In my next post, I am going to share my favorite bag making fabrics.
XO, Hilarie